

NEC AP300, AP300E Installation Manual

AP300 All Types
Installation Manual
Issue: 03-03-2010

A publication of
NEC Unified Solutions
HILVERSUM, THE NETHERLANDS
Part No ................ : 3522 009 12842
Order number ..... : 9600 069 42002
Date .................... : March 2010
Great care has been taken to ensure that the information contained in this
handbook is accurate and complete. Should any errors or omissions be
discovered or should any user wish to make a suggestion for improving this
handbook, he is invited to send the relevant details to:
NEC Unified Solutions
P.O. BOX 32
1200 JD HILVERSUM
THE NETHERLANDS
NEC Unified Solutions, 2010
All rights are reserved. Reproduction in whole or in part is prohibited without written consent of the copyright owner.

Important
The equipment described in this manual should be installed and maintained only
by professional and qualified engineers in accordance with the procedures and
instructions described in this manual.
Regulatory information European Union
Declaration of Conformity
Hereby, “NEC Unified Solutions”, declares that this “AP300” is in compliance with
the essential requirements and other relevant provisions of Directive 1999/5/EC.
http://www.nec-unified.com/doc
Product disposal information
In order to facilitate separate disposal and environmentally sound recycling
arrangements have been made for local collection and recycling. In case your
electrical and electronic products need to be disposed of please refer to your
supplier or the contractual agreements that your company has made upon
acquisition of these products.
For countries outside the European Union
Disposal of electrical and electronic products in countries outside the European
Union should be done in line with the local regulations. If no arrangement has
been made with your supplier, please contact the local authorities for further
information.
The symbol depicted here has been affixed to your product in
order to inform you that electrical and electronic products
should not be disposed of as municipal waste.
Electrical and electronic products including the cables, plugs and
accessories should be disposed of separately in order to allow proper
treatment, recovery and recycling. These products should be taken to
a designated facility where the best available treatment, recovery and
recycling techniques are available. Separate disposal has significant
advantages: valuable materials can be re-used and it prevents the
dispersion of unwanted substances into the municipal waste stream.
This contributes to the protection of human health and the
environment.
Please be informed that a fine may be imposed for illegal disposal of
electrical and electronic products via the general municipal waste
stream.

Regulatory information United States
This device contains functions which are not operational in US territories
This device complies with part 15 of the FCC rules. Operation is subject to the
following two conditions: (1) This device may not cause harmful interference, and
(2) this device must accept any interference received, including interference that
may cause undesired operation.
Modifications not expressly approved by the manufacturer could void the user’s
authority to operate the equipment.
Note: This equipment has been tested and found to comply with the limits for a
Class B digital device, pursuant to Part 15 of the FCC Rules. These limits are
designed to provide reasonable protection against harmful interference in a
residential installation. This equipment generates uses and can radiate radio
frequency energy and, if not installed and used in accordance with the instructions,
may cause harmful interference to radio communications. However, there is no
guarantee that interference will not occur in a particular installation. If this
equipment does cause harmful interference to radio or television reception, which
can be determined by turning the equipment off and on, the user is encouraged to
try to correct the interference by one or more of the following measures:
• Reorient or relocate the equipment.
• Increase the separation between the equipment and receiver.
• Consult the dealer or an experienced radio/TV technician for help.”
Privacy of communications may not be ensured when using this equipment.

Exposure to Radio Frequency (RF) Signals:
This base station is a radio transmitter and receiver. It is designed and
manufactured not to exceed the emission limits for exposure to radio frequency
(RF) energy set by the OET Bulletin 65 Supplement C. These limits are part of
comprehensive guidelines and establish permitted levels of RF energy for the
general population. The guidelines are based on the safety standards previously
set by international standards bodies. These standards include a substantial
safety margin designed to assure the safety of all persons, regardless of age and
health.
This device with internal antennas must provide a separation distance of at least
20 cm from all persons and must not be co-located or operating in conjunction with
any other antenna or transmitter.
Regulatory information Canada
Operation of this device is subject to the following two conditions: (1) this device
may not cause any interference and (2) this device must accept any interference,
including interference that may cause undesired operation of the device.
Exposure to Radio Frequency (RF) Signals:
This wireless device is a radio transmitter and receiver. It is designed and
manufactured not to exceed the emission limit for exposure to radio frequency
(RF) energy set by the Ministry of Health (Canada), Safety Code 6. These limits
are part of comprehensive guidelines and established permitted levels of RF
energy for the general population. These guidelines are based on the safety
standards previously set by international standards bodies. These standards
include a substantial safety margin designed to assure the safety of all persons,
regardless of age and health. This device and its antenna must not be co-located
or operating in conjunction with any other antenna or transmitter.
Privacy of communications may not be ensured when using this equipment.

CONTENTS
1. AP300 GENERAL ............................................................................................... 3
1.1. GENERAL ........................................................................................................... 3
1.2. COUNTRY SELECTION ..................................................................................... 3
1.3. SITE REQUIREMENTS ...................................................................................... 4
1.4. TEMPERATURE RANGES ................................................................................. 4
1.5. CABLE SPECIFICATIONS FOR AP300 T
1.6. G.729 DAUGHTER BOARD ................................................................................ 4
1.7. VISUAL CHECK .................................................................................................. 5
1.8. HORIZONTAL OR VERTICAL MOUNTING ........................................................ 5
1.9. INSTALLATION PROCEDURES ......................................................................... 6
2. UNPACKING ....................................................................................................... 6
3. ADJUSTING THE ANTENNA POSITION ........................................................... 7
4. MOUNTING THE G.729 DAUGHTERBOARD .................................................. 10
5. MOUNTING THE AP300 AGAINST A WALL ................................................... 12
6. LEDS ................................................................................................................. 14
6.1. LED S
6.2. LED C
TATUS
....................................................................................................... 14
OLOURS
.................................................................................................... 15
7. WIRE COLOUR CODING FOR CATEGORY 5 CABLES ................................. 16
YPES
................................................... 4
8. SPECIFICATIONS ............................................................................................ 17
March 2010 AP300 Customer Engineer Manual 1
All rights reserved. Reproduction in whole or in part is prohibited without the written consent of the copyright owner

PREFACE
This manual is applicable for the AP300, DECT Transceiver.
Please note that some product models or features described in this manual may not be
available in all world regions.”
No legal rights can be obtained from information in this manual.
2 AP300 Customer Engineer Manual March 2010
All rights reserved. Reproduction in whole or in part is prohibited without the written consent of the copyright owner

1. AP300 GENERAL
1.1. GENERAL
This installation Manual is valid for installing a DECT transceiver (AP300) to a wall in
horizontal or vertical position. The AP300 is designed for indoor use. When installing an
AP300 outdoors, please use the dedicated Outdoor Cabinet:
Note that there are two types of DECT Tranceivers::
AP300 (with internal antennas).
AP300E with directional antenna.
Note: The AP300E must always be installed/used in the outdoor cabinet! For more
information consult the manual for the Outdoor Cabinet for AP300.
1.2. COUNTRY SELECTION
The AP300 is equipped for EMEA, Latin America and North America. However, the DAP
Controller determines the frequency used and the power level. The DAP Controller is the
software that runs on a PC to control the AP300.
There are three types of DAP Controllers available for the AP300:
− DAP Controller – International.
This version is used in EMEA countries and countries that use the European
frequencies and power levels.
− DAP Controller - North America
This version is used in North America.
− DAP Controller - Selective Countries.
This version is used in countries with other frequency ranges than EMEA or North
America
Note: In North America, only the “DAP Controller - North America” will be delivered, so no
other frequencies than the North America frequencies and power levels are possible
in North America.
Note: In Europe, only the “DAP Controller - International” will be delivered, so no other
frequencies than the European frequencies and power levels are possible in
Europe.
March 2010 AP300 Customer Engineer Manual 3
All rights reserved. Reproduction in whole or in part is prohibited without the written consent of the copyright owner

1.3. SITE REQUIREMENTS
Usually the Cabinets will be fixed to existing walls in the positions determined by the Site
Survey.
Do not mount the AP300 to a metal wall!
1.4. TEMPERATURE RANGES
The temperature range of the AP300 is:
- 0° to 45° C.
The outside temperature range for the AP300 (all types) mounted in the Outdoor Cabinet is
as follows:
Minimum outside temperature: -20° C
Maximum outside temperature: 45° C
1.5. CABLE SPECIFICATIONS FOR AP300 Types
The cabling to the AP300(E) is “Category 5” Ethernet cabling. The interface is defined as
an SELV interface according EN60950-1. For this reason the following safety restriction is
applicable:
Caution: The cabling and/or the AP300(E) may never be exposed to over-voltages (e.g.
lightning). Therefore, the AP300(E) and cabling associated with it may never
be installed outdoors! However there is an exception: if installed in the Outdoor
Cabinet, and the Outdoor Cabinet is mounted against a wall and the cable is
led directly indoors, it is permitted. For details about this specific installation
refer to the installation manual of the Outdoor Cabinet.
The power for the AP300(E) must be supplied via the Ethernet cable, PoE (IEEE 802.3af).
There is no room for a Mains Power adaptor inside the Outdoor Cabinet.
1.6. G.729 DAUGHTER BOARD
The AP300 does support the G.729 codec, but only if the G.729 Daughter Board is
installed.
4 AP300 Customer Engineer Manual March 2010
All rights reserved. Reproduction in whole or in part is prohibited without the written consent of the copyright owner
If the G.729 Daughter Board is not installed, the AP300 supports only G.711u law or
G.711a law.
Installation of the Daughter Board is described in chapter 4. MOUNTING THE G.729
DAUGHTERBOARD.
1.7. VISUAL CHECK
The equipment must be carefully unpacked and examined for any visible sign of damage.
Anything not in order should be reported back to the supplier, as soon as possible, to avoid
delays during installing due to missing equipment.
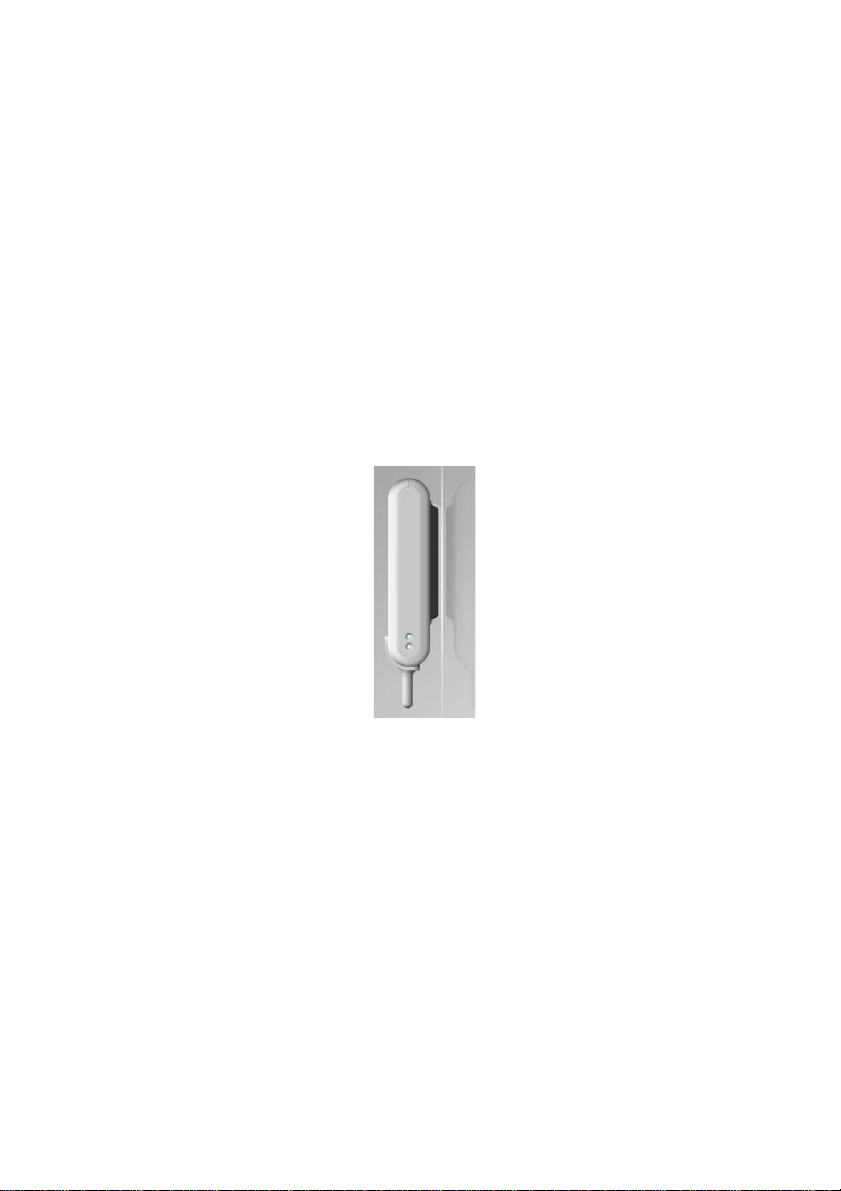
1.8. HORIZONTAL OR VERTICAL MOUNTING
The AP300 can be mounted horizontally or vertically. When mounting vertically, you don’t
need top change the antenna position.
Figure 1. AP300 in vertical position.
When the AP300 must be mounted horizontally, the antenna position must be changed.
March 2010 AP300 Customer Engineer Manual 5
All rights reserved. Reproduction in whole or in part is prohibited without the written consent of the copyright owner

Figure 2. AP300 mounted horizontally
1.9. INSTALLATION PROCEDURES
The installation of an Outdoor Cabinet comprises the installation of:
- Adjusting the Antenna position (if necessary).
- Mounting the G.729 Daughter Board (if applicable)
- Mounting the AP300 against the wall.
- Connecting directional antennas.
2. UNPACKING
Procedure for unpacking.
1. Open the card board box and take the AP300 out.
2. Check the AP300 on any damages.
3. Continue with one of the following Chapters:
− When you mount the AP300 vertically, the antenna position will normally be OK,
and when you do not need to install the G.729 Daughter Board, continue with
Chapter 5 MOUNTING THE AP300 AGAINST A WALL.
− When you mount the AP300 horizontally, you probably need to change the
antenna position. Consult Chapter 3. ADJUSTING THE ANTENNA POSITION.
− When you require G.729 codec support, you will have to install the G.729
Daughter Board. Consult Chapter 4. MOUNTING THE G.729 DAUGHTERBOARD
6 AP300 Customer Engineer Manual March 2010
All rights reserved. Reproduction in whole or in part is prohibited without the written consent of the copyright owner
3. ADJUSTING THE ANTENNA POSITION
Note: You only need to change the antenna position when you mount the AP300
horizontally! In all other cases you don’t need to change the antenna position.
Figure 3. AP300 mounted horizontally
Procedure for Adjusting the Antenna position.
Note: Antenna position can be changed once. You should not change it back!
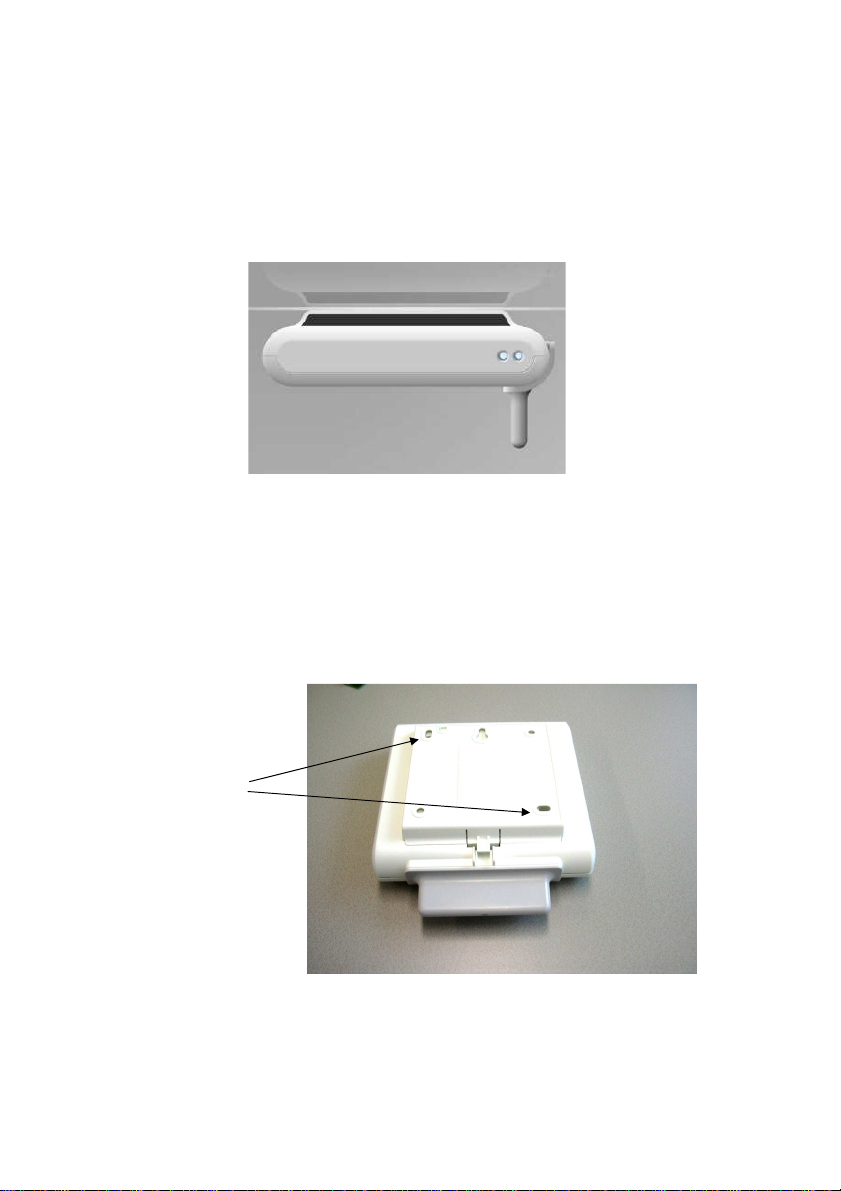
1. Remove the two screws from the rear side of the cabinet
Screws are
inside these
holes
Figure 4. Rear side of Cabinet.
March 2010 AP300 Customer Engineer Manual 7
All rights reserved. Reproduction in whole or in part is prohibited without the written consent of the copyright owner
2. Open the cabinet CAREFULLY! Make sure that you shift the cover of the antenna’s
carefully from the antenna’s.
3. Take the antenna cover from the AP300 cover.
4. To put the antennas in vertical position, bend them carefully as shown in Figure 5.
Bend Antennas carefully into vertical position.
Figure 5. Bend Antennas carefully into vertical position.
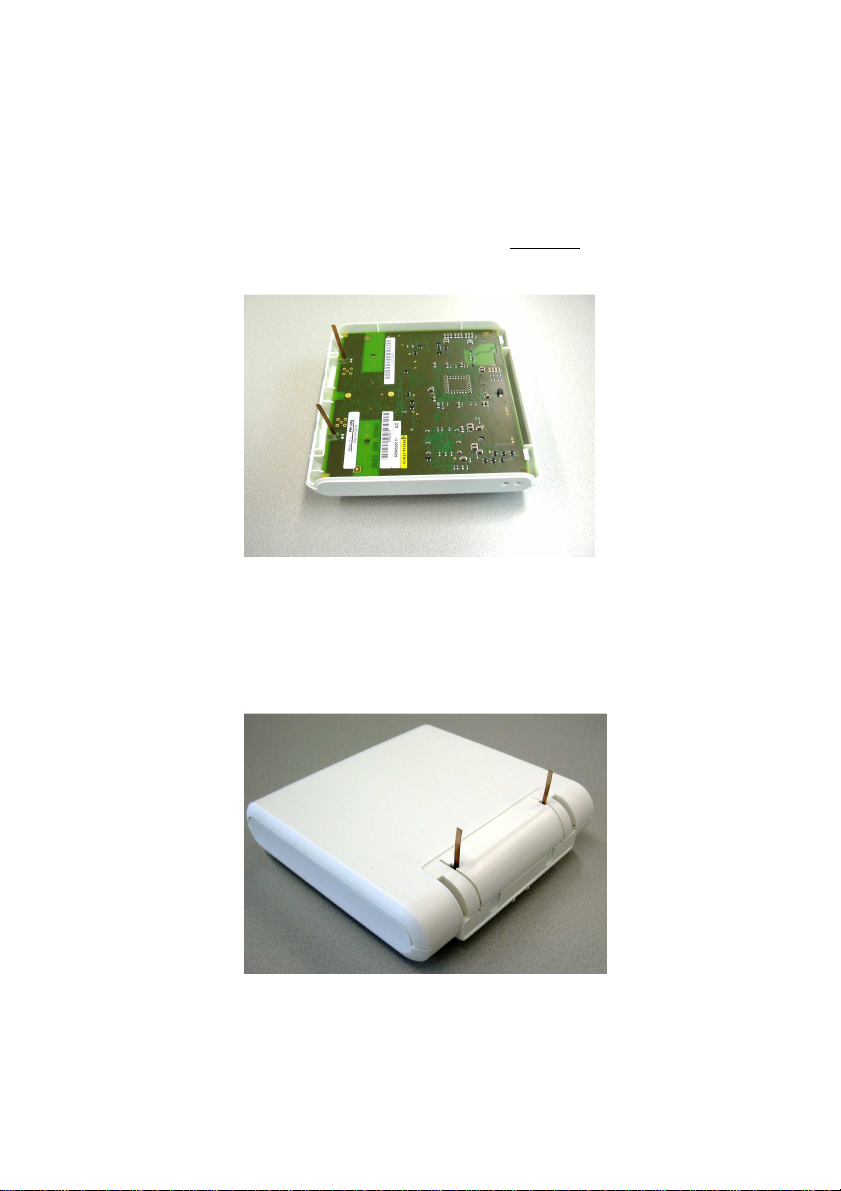
5. After the antennas are put in the vertical position, close the AP300 cabinet again. In
other words, put the AP300 cover back into position and secure the screws at the rear
side of the cabinet. See Figure 6. Antennas locked into Cover.
Figure 6. Antennas locked into Cover.
8 AP300 Customer Engineer Manual March 2010
All rights reserved. Reproduction in whole or in part is prohibited without the written consent of the copyright owner
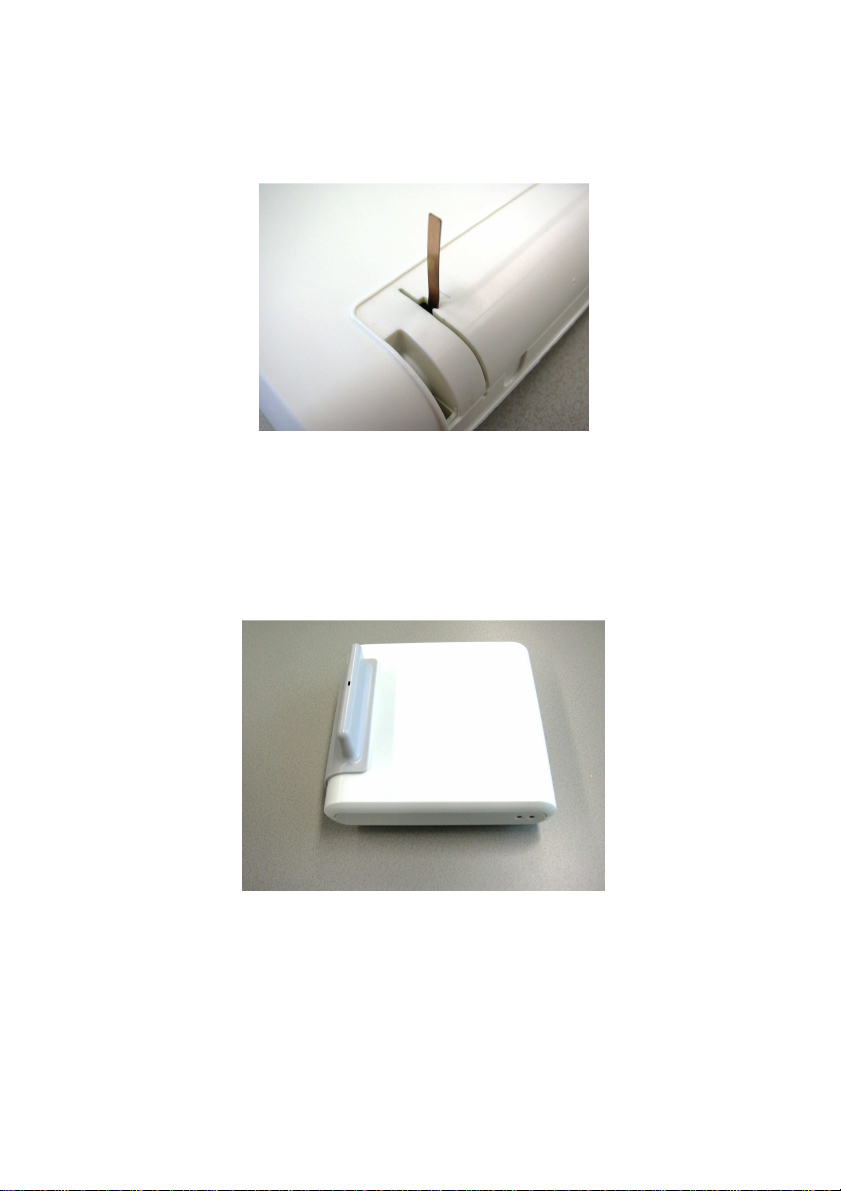
6. Make sure that the antennas are properly locked into the locks in the AP300 cover.
Figure 7. Detail of antenna in lock.
7. Move the antenna cover carefully over the antennas in the vertical position and make
sure that the antennas do not bend. When the antenna cover is in its position, push it
further into its position in the AP300 cabinet to fix it.
Figure 8. Cover installed.
8. Now your AP300 is ready to be installed.
March 2010 AP300 Customer Engineer Manual 9
All rights reserved. Reproduction in whole or in part is prohibited without the written consent of the copyright owner
 Loading...