

MSI MS-16D3, P600 Assembly Manual

P600 (MS-16D3) Assembly Guide
■ 1、LCD MODULE ASSY
■ 2、UPPER CASE ASSY
■ 3、LOWER CASE ASSY
■ 4、SEPARATE UPPER CASE AND LOWER CASE
■ 5、THERMAL-KIT AND RAM
■ 6、ODD MODULE
■ 7、HDD MODULE
■ 8、BOTTOM DOOR ASSY
■ 9、BATTERY PACK
P600(MS-16D3)Assembly Guide
1、 LCD MODULE ASSY
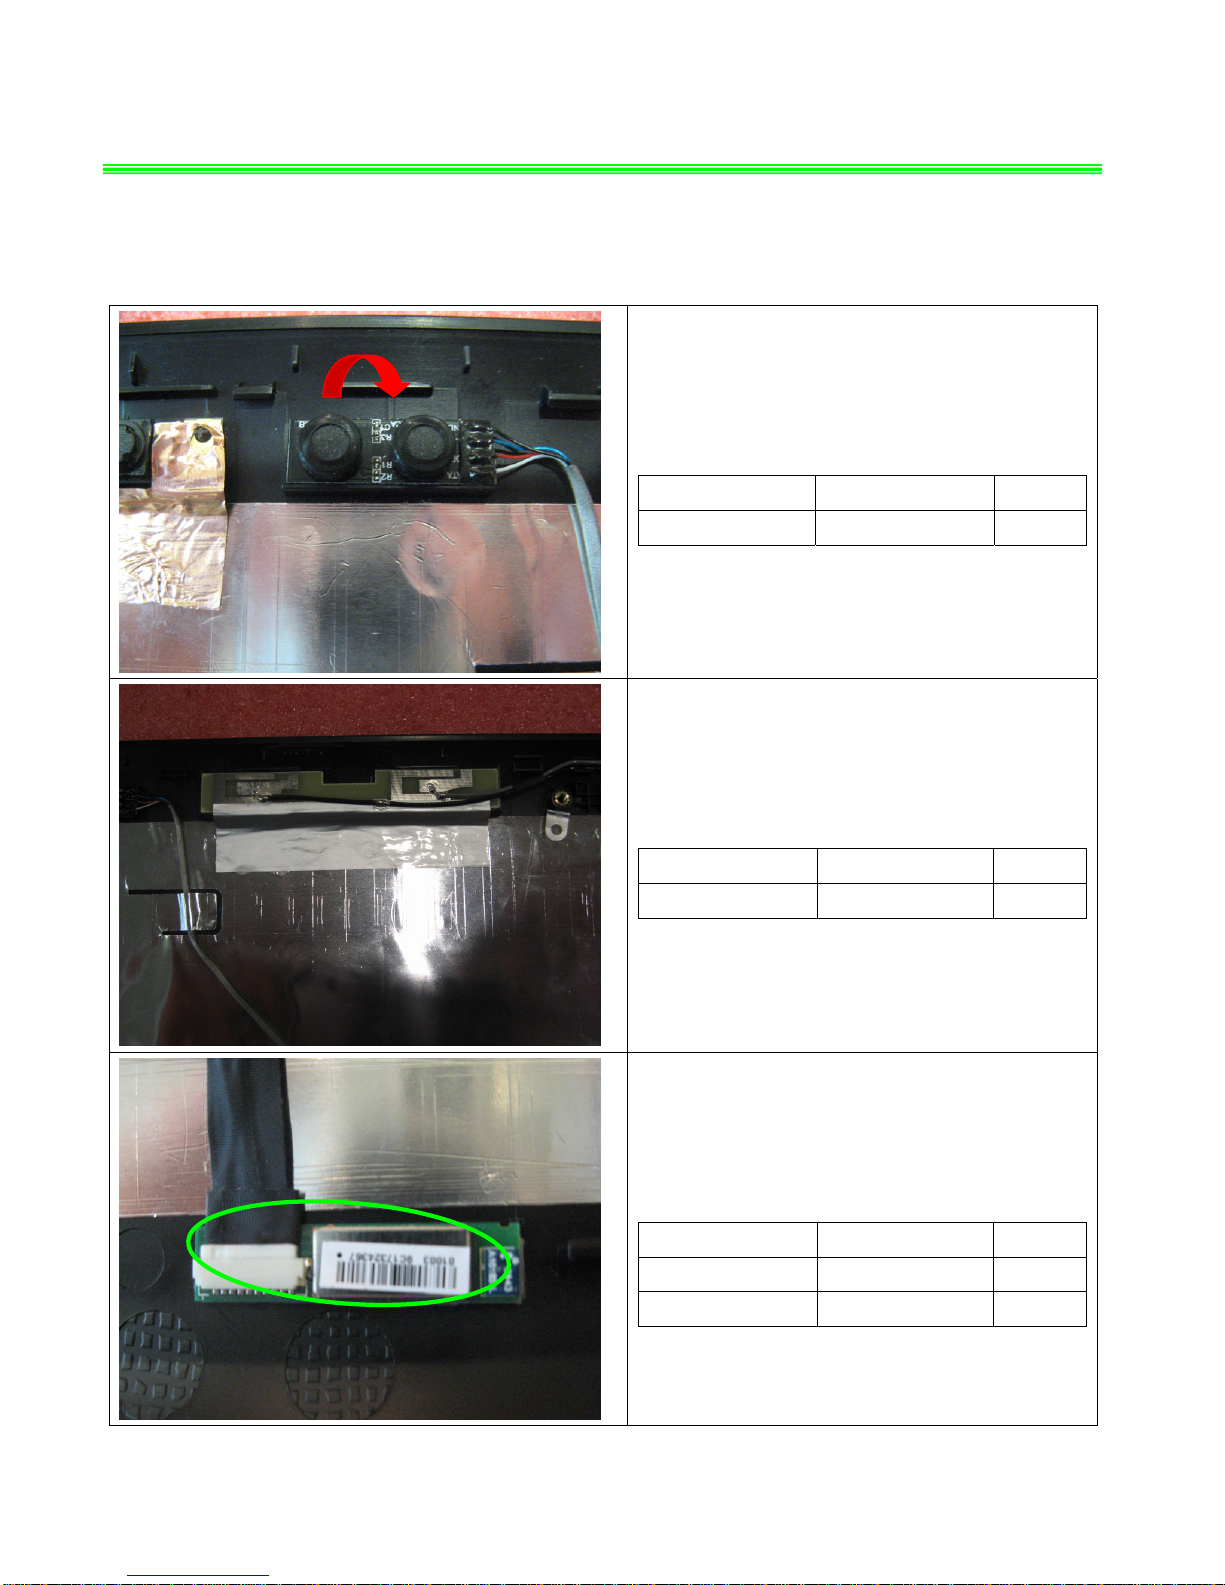
1.1:Assemble the MIC Module as left picture show
Component P/N Qty
MIC Module S34-2101070-K03 1
1.2:Assemble the WIRELESS board to LCD
Cover.
Component P/N Qty
Antenna S79-1800U40-J51 1
1.3:Assemble the
Bluetooth board to the LCD cover
fixed position as left picture shows.
Component P/N Qty
Bluetooth 605-3801-010 1
LCD Cover 307-691A713-SE0 1
P600(MS-16D3)Assembly Guide
1、 LCD MODULE ASSY
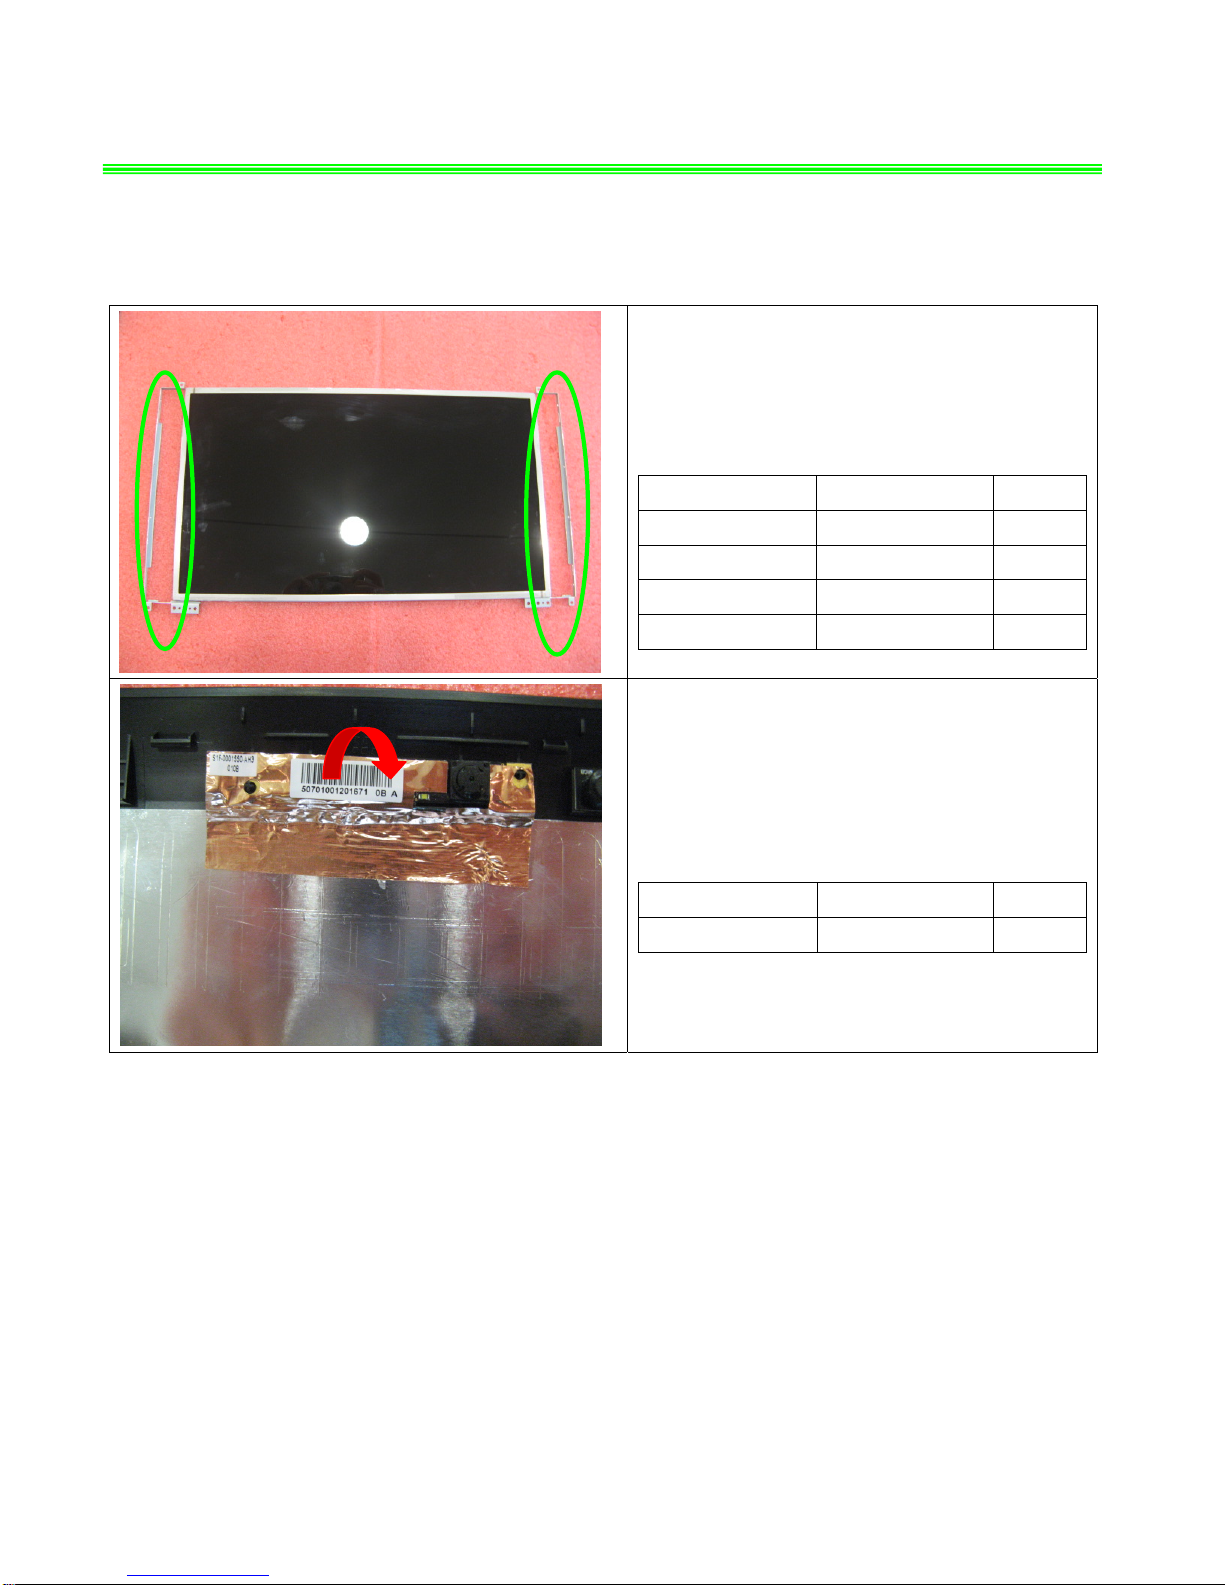
1.4:Assemble the 8 screws (M2*3mm)
Attention: the screw driver torque is 1.5-2.0Kgf-cm
Component P/N Qty
Display Module S1J-642G004-CG1 1
LCD BRACKET-L E2M-6910211-A89 1
LCD BRACKET-R E2M-6910311-A89 1
Screw E43-1203003-H29 8
1.5:Assemble CMOS Camera Module follow the
instruction as left picture shows;
Component P/N Qty
Camera Module S1F-0001550-AH3 1
P600(MS-16D3)Assembly Guide
1、 LCD MODULE ASSY
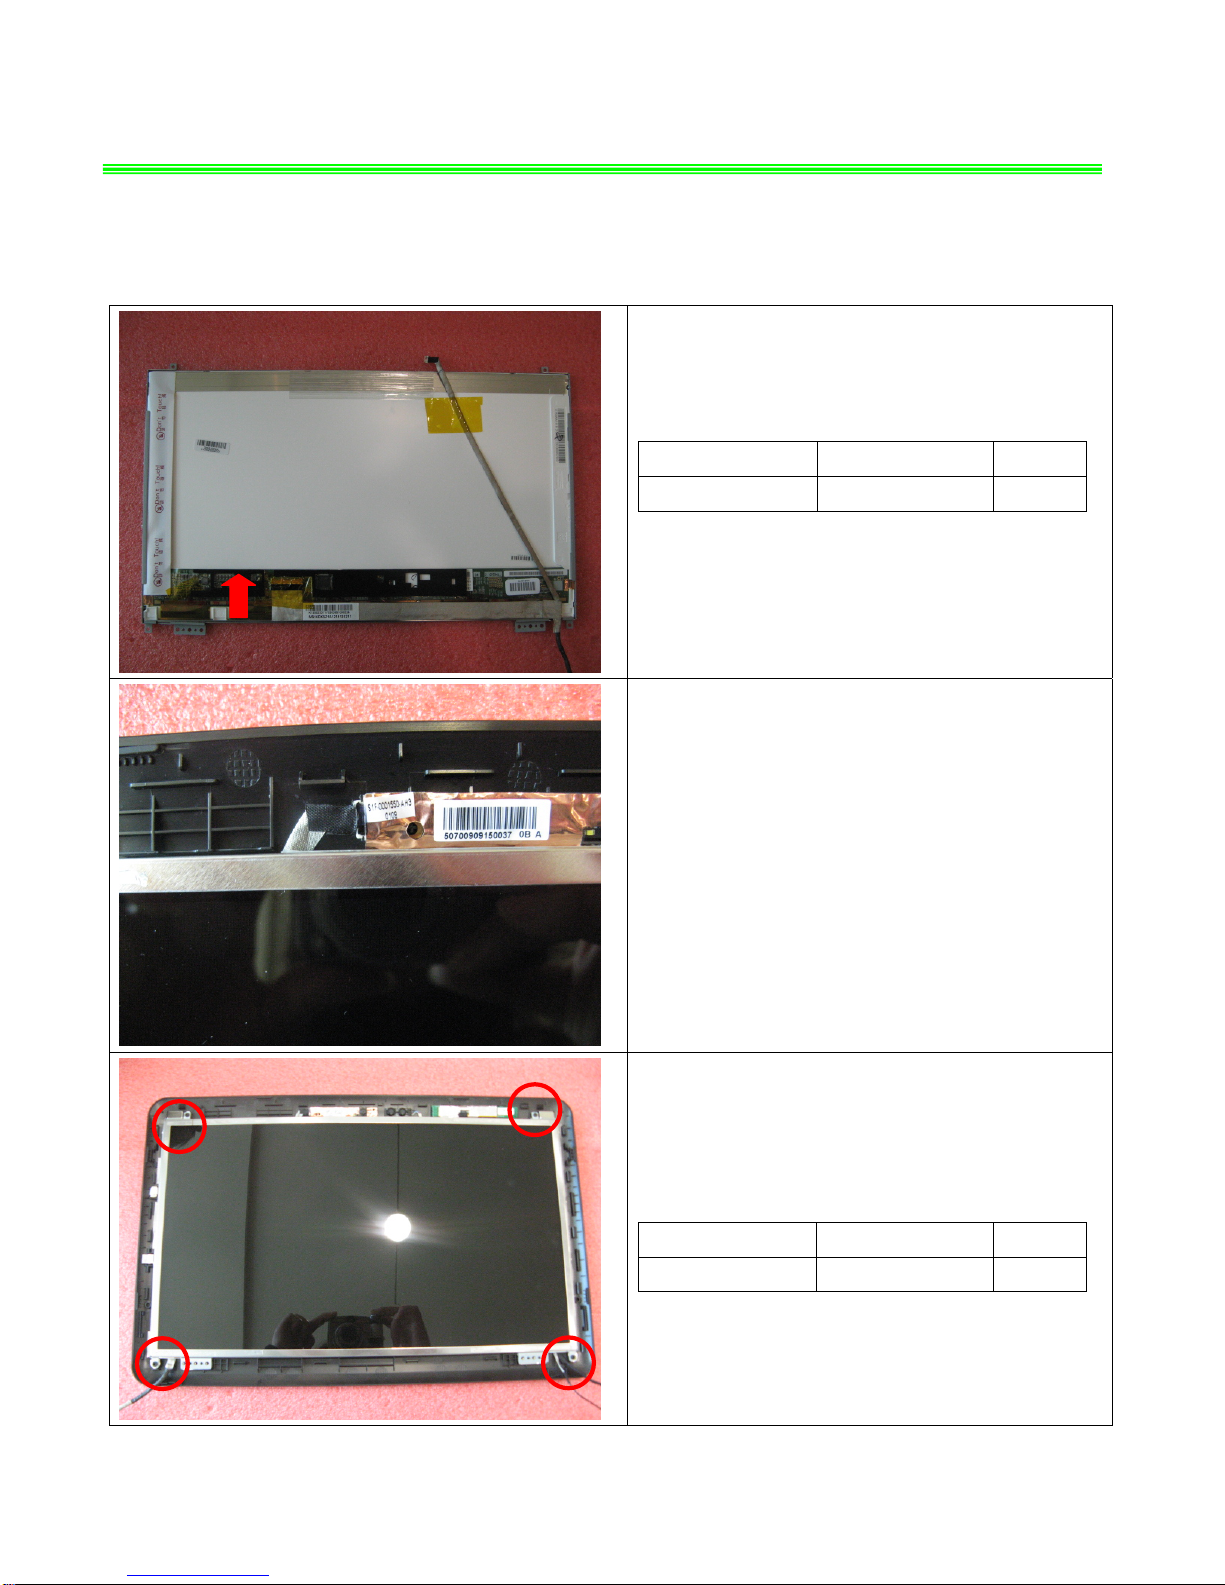
1.6:Connect LVDS Cable to Display Module;
Component P/N Qty
LVDS Cable K19-3023011-V03 1
1.7: Assemble the display module to LCD cover
then assemble the Camera Cable;
1.8:Assemble the 4 screws (M2.5*4mm)
Attention: the screw driver torque is 2.0-2.5Kgf-cm
Component P/N Qty
Screw E43-1254002-H29 4

P600(MS-16D3)Assembly Guide
1、 LCD MODULE ASSY
1.9:Assemble right LCD hinge; Lock the 3 screws
(M2.5*5mm).
Attention: the screw driver torque is 3.0-3.5Kgf-cm
Component P/N Qty
Screw E43-1255002-H29 3
Hinge R E2M-6D10811-G60 1
1.10:Assemble left LCD hinge; Lock the 3 screws
(M2.5*5mm).
Attention: the screw driver torque is 3.0-3.5Kgf-cm
Component P/N Qty
Screw E43-1255002-H29 3
Hinge L E2M-6D10911-G60 1
1.11: Fix three magnets to the position as left
picture shows.
Component P/N Qty
LCD Cover Magnet E2M-6910511-SF7 2
LCD Cover Magnet E2M-6910411-SF7 1

P600(MS-16D3)Assembly Guide
1、 LCD MODULE ASSY
1.12:Assemble the LCD bezel.
Component P/N Qty
LCD Bezel 307-692B211-U22 1
1.13:Assemble the two sides LCD HINGE-CAP.
Component P/N Qty
Hinge cap-L E2P-6910151-H76 1
Hinge cap-R E2P-6910251-H76 1
1.14:Assemble the 6 LCD rubbers.
Component P/N Qty
LCD Rubber E2Y-6911711-Y40 6

P600(MS-16D3)Assembly Guide
2、UPPER CASE ASSY
2.1:Assemble the T/P module and insert the T/P
cable according to direction of pic shows.
Component P/N Qty
T/P module
S78-3700440-E47 1
UPPER CASE 307-6D1C221-SE0 1
FFC Cable (To MB) K1C-1012057-J36 1
2.2:Assemble the F/P, then lock the 2 screws
(M2*3mm).
Attention: the screw driver torque is 1.5-2.0Kgf-cm
Component P/N Qty
F/P OS1-16D3001 1
Screw E43-1203003-H29 2
2.3:Cover the T/P bracket, then lock the 2 screws
(M2*3mm).
Attention: the screw driver torque is 1.5-2.0Kgf-cm
Component P/N Qty
T/P bracket E2M-6D10511-A89 1
Screw E43-1203003-H29 2
P600(MS-16D3)Assembly Guide
3、LOWER CASE ASSY
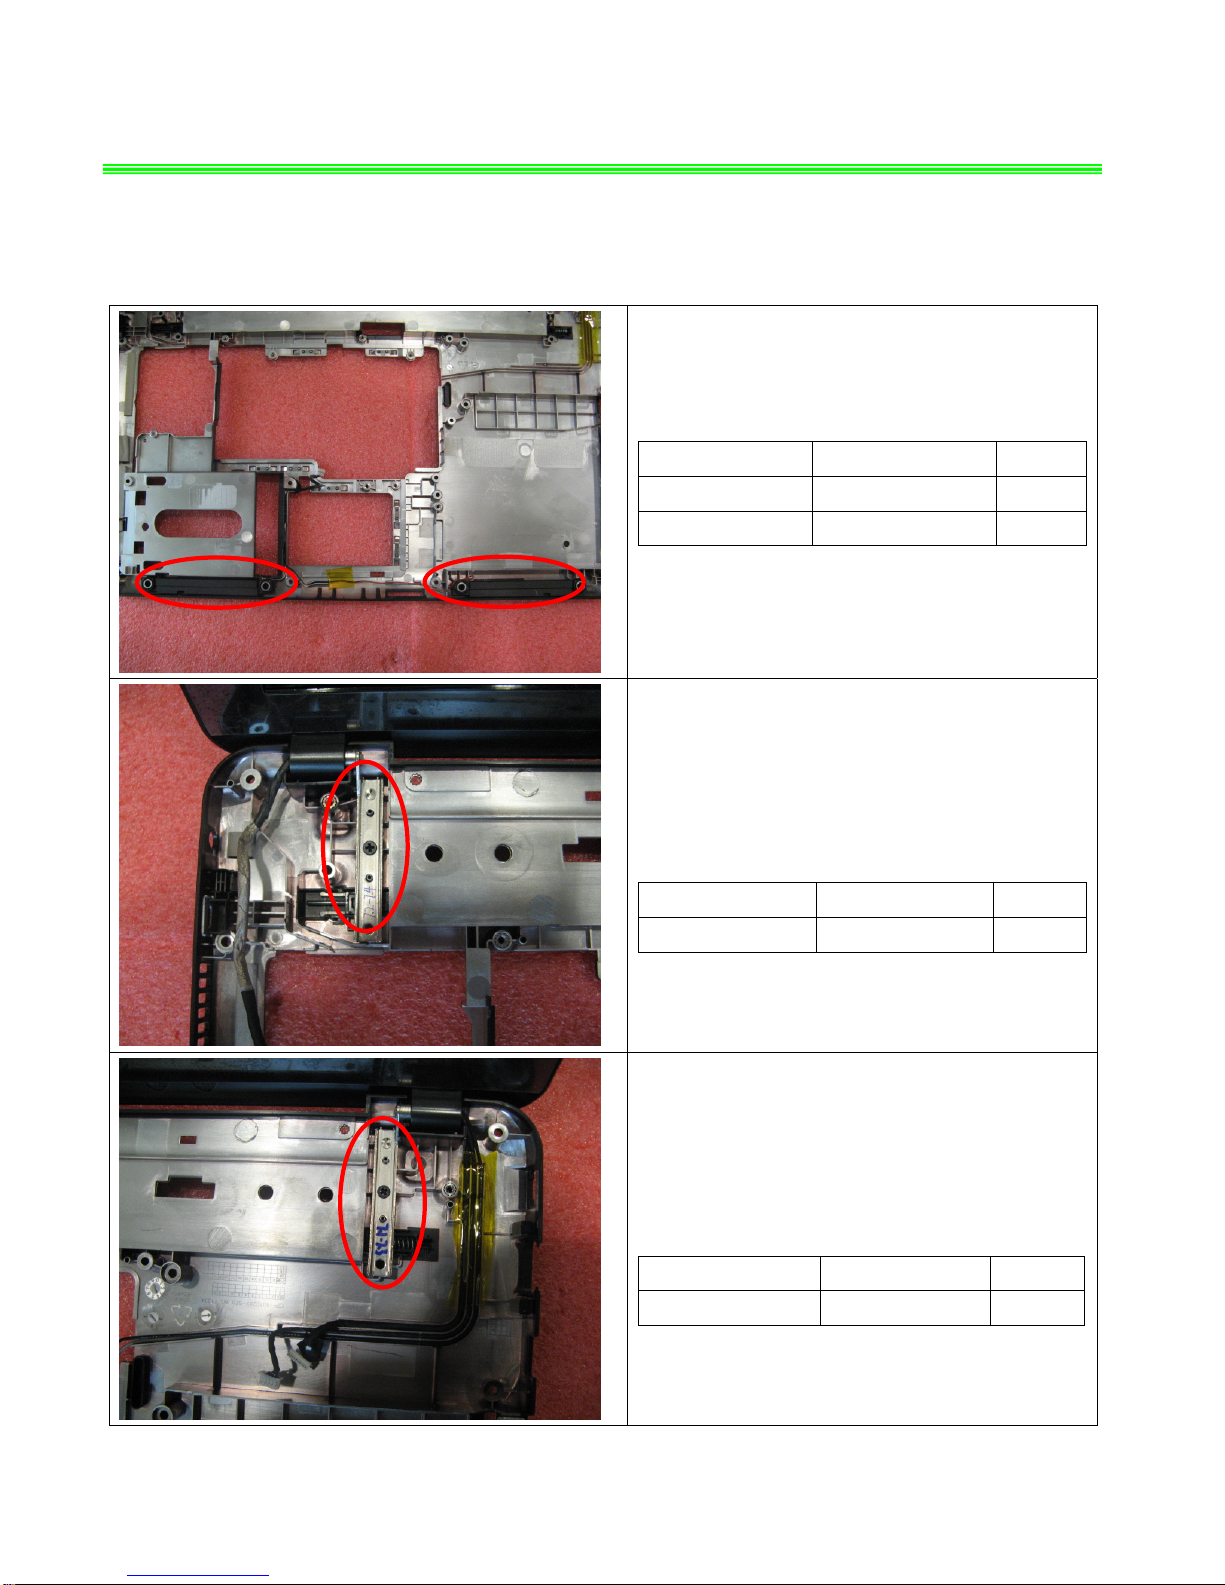
3.1:Assemble the Speaker module to lower case.
Component P/N Qty
Speaker Module S33-A000150-F33 1
Lower Case 307-6D1D211-SE0 1
3.2: Assemble the 1 screw (M2.5*4mm) that
stabilize the left LCD hinge.
Attention: the screw driver torque is 2.5-3.0Kgf-cm
Component P/N Qty
Screw E43-1254002-H29 1
3.3: Assemble the 1 screw (M2.5*4mm) that
stabilize the right LCD hinge.
Attention: the screw driver torque is 2.5-3.0Kgf-cm
Component P/N Qty
Screw E43-1254002-H29 1
 Loading...