

Page 1
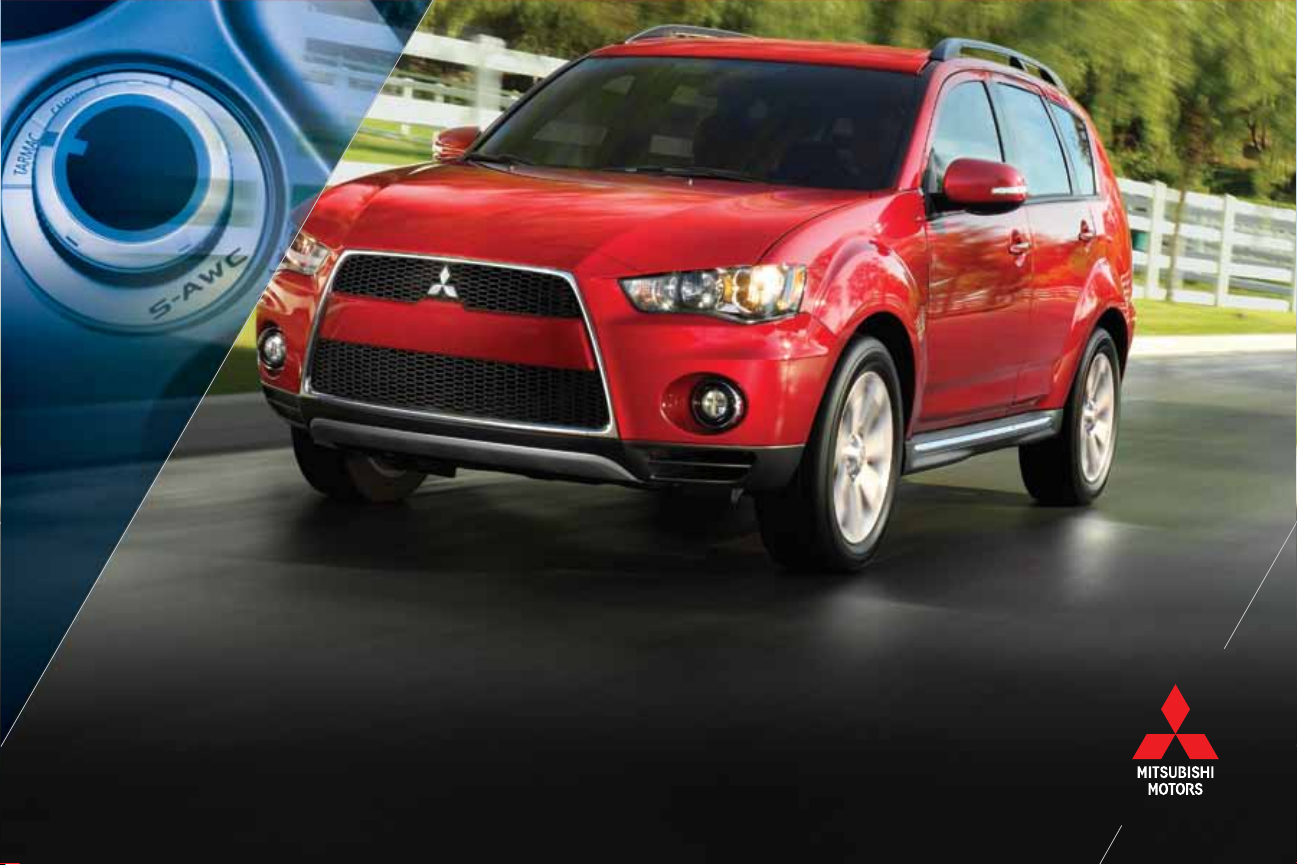
Quick Tips & Fun Facts
Owner’s Handbook
OUTLANDER
Page 2
PLEASE PLACE COPIES OF THE FOLLOWING ITEMS IN THE POCKET BELOW:
1. Pre-Delivery Inspection Form (Customer Copy)
2. Triple Diamond Delivery Checklist (Customer Copy)
3. Sales Person or Key Dealership Contact’s Business Card
Page 3

Thank you for buying your Outlander. There’s no doubt you’ve already realized how well your
car drives on the open road. What you may not know is all the cool features that help your
car perform the way it does. In the pages ahead we’re going to run through some quick tips
about your Outlander and some fun facts about Mitsubishi.
Take a look through this book and get to know your Outlander. If you forget anything, just
reach back into your glove box, grab this book and give yourself a refresher.
Another great place to stay up to date on the latest Mitsubishi news and special oers is at
the Mitsubishi Owner’s Site. Here you can keep track of your car’s warranty and servicing
needs and access a wide range of useful information exclusively for Mitsubishi owners. Just
log on to www.mitsubishicars.com/ownersonly.
On the owner’s site you can also find information about Mitsubishi’s Roadside Assistance for
5 years and unlimited miles. It’s 24/7 coverage you can count on. For Roadside Assistance,
call 1-888-648-7820.
1
Page 4
2
3
1
2
4
6
5
Page 5
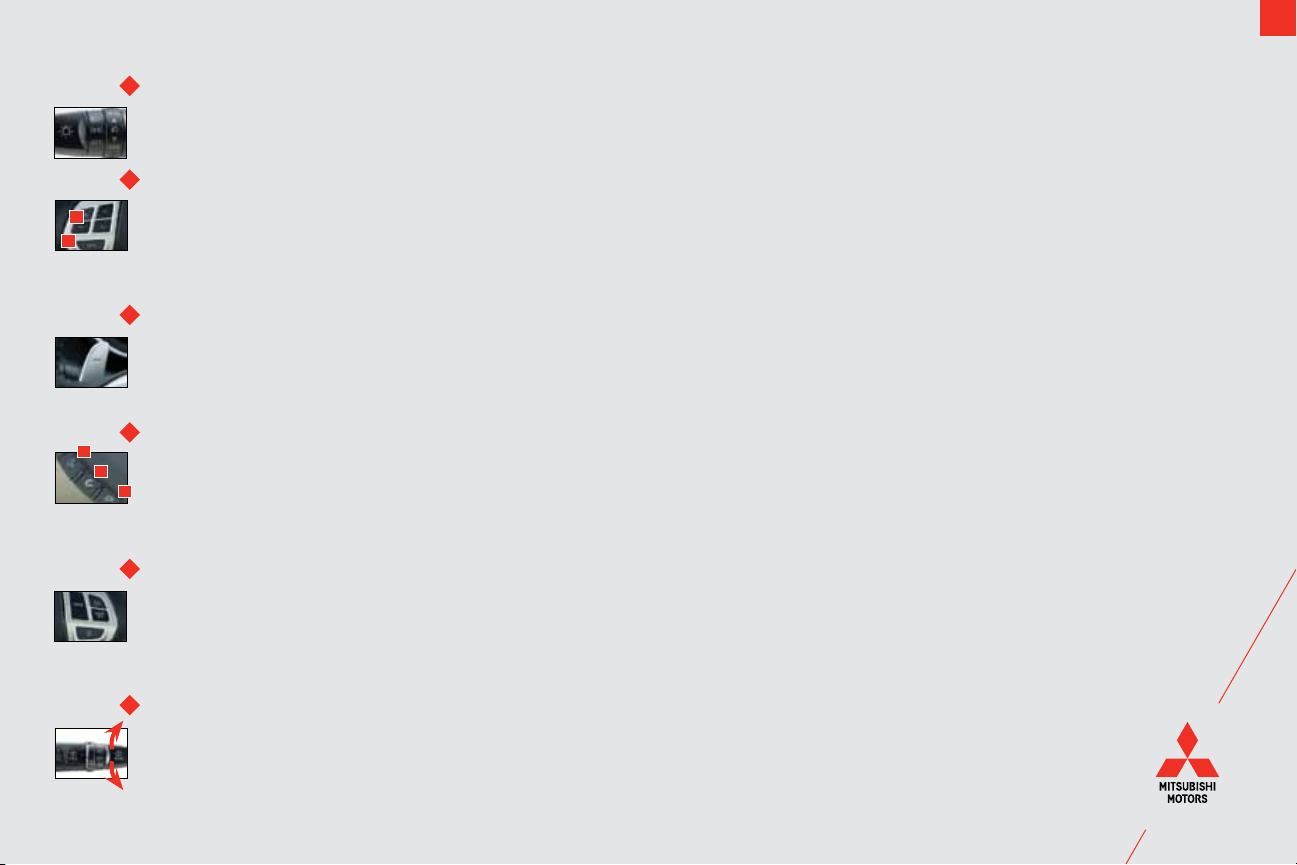
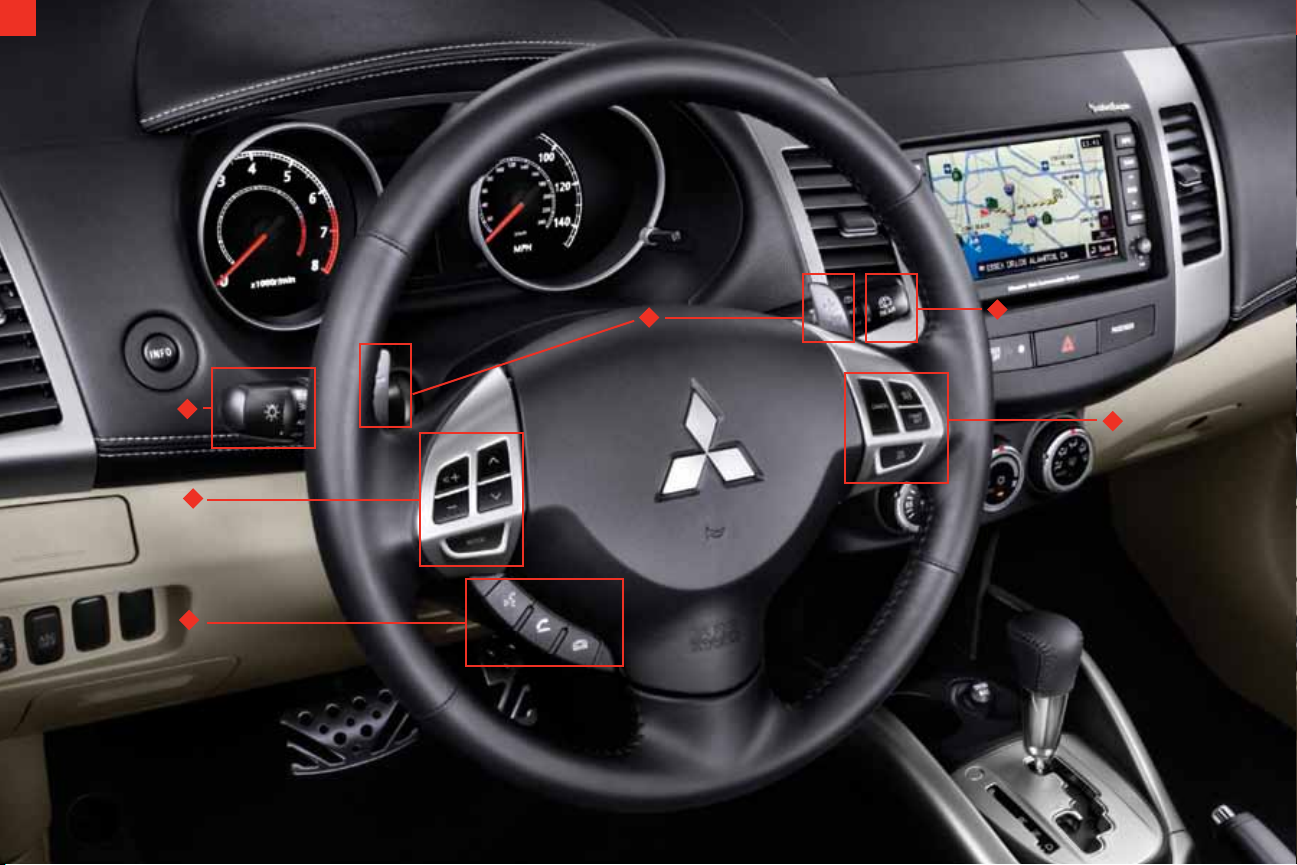
At Your Fingertips
1
Headlights Switch
Rotate the outer knob to the first position to turn on the tail, parking and dash lights. Rotate the outer knob to the second position to turn
on the headlights. Pull the lever towards you to activate or flash the high beams.
Steering wheel audio remote control switch
2
1
2
1
The switch can be operated when the ignition switch is in either the ON or ACC position.
TO INCREASE VOLUME: While the button [1] is pressed, the volume will continue to increase.
TO DECREASE VOLUME: While the button [2] is pressed, the volume will continue to decrease.
Do not press multiple buttons at the same time when using the steering wheel audio remote control switch.
3
Sportronic steering wheel paddle shifters (if equipped)
Rapid gear shifting is possible simply by operating the sportronic steering wheel paddle shifters. Pull the right (+) sportronic steering wheel
paddle shifter once to shift up one gear. Pull the left (-) sportronic steering wheel paddle shifter once to shift down one gear.
To default back to the automatic mode, pull and hold the right (+) paddle shifter for about three seconds.
Hands-Free Bluetooth® cellular phone interface system with voice recognition (if equipped) (Additional equipment may be required)
4
You should first connect (pair) your Bluetooth compatible cellular phone to the system. For instructions on pairing your phone, see page 9.
2
TO PICK UP: Press the button [2] when an incoming call is received to answer the phone. TO HANG UP: Press the button [3] during a call to
3
end the current call. MAKING A CALL BY USING THE TELEPHONE NUMBER: 1. Press the button [1]. 2. Say DIAL. 3. After the voice guide
says NUMBER PLEASE, say the telephone number. The system, using voice recognition, will then make the call.
5
Cruise control switch
TO ACTIVATE: Press the ON OFF switch. Press the COAST SET switch while driving at the desired speed.
TO INCREASE THE SET SPEED: Use one of the following options: 1. ACC RES switch: If you press and hold down the ACC RES switch,
the speed will gradually increase. When you reach your desired speed, release the switch. Your cruising speed is now set.
2. ACCELERATOR PEDAL: Use the accelerator pedal to reach your desired speed. Press the COAST SET switch.
3
6
Front window wiper and washer switch
Make sure the ignition switch is in the ON or ACC position. Pull down the wiper lever to move the front window wiper.
To activate windshield washers, pull the lever toward you.
Rear window wiper and washer switch (if equipped)
Make sure the ignition switch is in the ON or ACC position. Turn the knob to operate the switch.
For more details, see page 11.
Page 6

4
1
2
3
4
5
6
1716
1514
1312
11
10
9
8
7
Page 7

Audio System
NAVIGATION SYSTEM (IF EQUIPPED) – PRESSING THE PANEL KEYS OR TOUCHING THE SCREEN BUTTONS CAN PERFORM VARIOUS
FUNCTIONS. OPERATE THE SCREEN BY TOUCHING LIGHTLY WITH A FINGERTIP. FOR AUDIO SYSTEM OPERATING INSTRUCTIONS IN
OUTLANDERS WITHOUT A NAVIGATION SYSTEM, PLEASE REFER TO YOUR OWNER’S MANUAL.
Panel Operation Buttons:
MODE – displays the AV mode selection screen
1
2
AUDIO – switches between the selected AV mode and Navigation screen
3
VOL – adjust the volume
4
PWR – turns ON and OFF the audio functions
5
SET – displays the settings screen
6
OPEN – opens and closes the monitor panel
7
ENT with Joystick – implements the selected item, scrolls the maps and implements item selection.
8
MENU – displays the Navigation menu screen
9
SCALE – changes the map scale
10
NAVI – displays the current location screen
11
INFO – displays the info screen
External Audio Input Function (if equipped)
You can listen to your portable audio
equipment, through your vehicle’s speakers
by connecting the audio equipment to the
RCA input connectors found in the center
arm rest. To activate the RCA input mode,
press and hold the CD button for more than
2 seconds.
Auxiliary Audio connector (RCA)
Climate Control System
12
Temperature Control Dial – Turn the temperature control dial clockwise to make the air warmer. Turn it counterclockwise to make the air cooler.
While the engine coolant temperature is low, the temperature of the air from the heater will be cool/cold until the engine warms up, even if you
have selected warm air with the dial.
13
Air Selection Switch – Select the outside airflow position to keep the windshield and side windows clear and to quickly remove fog or frost from
the windshield. To change the air selection, simply press the air selection switch. When the air conditioning turns on, the air selection is controlled
automatically.
Blower Speed Selection Dial – When the ignition switch is in the ON position, turn the blower speed selection dial to set speed. When the blower
14
speed selection dial is set to the OFF position, all fan-driven airflow will stop.
15
Air Conditioning Switch – Push the switch and the air conditioning compressor and indicator light will come on.
Mode Selection Dial – This dial controls the direction of airflow, not the amount of airflow. The amount of airflow is controlled by the blower
16
selection dial. To change the direction of air flowing from the vents, turn the mode selection dial to the desired airflow position. If equipped
with Auto Temperature Control, select AUTO for automatic air direction and blower fan speed. In AUTO mode, the system will adjust fan
speed, mode selection and temperature automatically.
17
Electric Rear Window Defogger Switch – When the engine is running, the indicator light will come on when you push the electric rear
window defogger switch helping clear away moisture or light frost.
TIP: For Quick Defrosting
1. Set the mode selection dial to the
2. Set blower dial to the maximum speed.
3. Set the temperature to the highest position.
position.
5
Page 8

6
What does all this stu do?
1) Digital Clock
Time is displayed when the ignition key is in the ON or ACC position. To set the time, press and hold the CLOCK [1] button until the display
flashes. To change the hour, press the H [2] button. To change the minutes, press the M [3] button.
Once you have made your adjustments to the hours and minutes, then press the [1] button once more to lock in the time.
2) Multi-Information Meter (INFO) Button
The INFO button changes display information for warnings, odometer/tripmeter, service reminder, engine coolant temperature, average
and momentary fuel consumption, driving range and average speed. It is also possible to change elements such as the language and units
used on the multi-information display by pushing the multi-information meter (INFO) button.
3) Active Stability Control (ASC) OFF Button
This system automatically turns on when the ignition switch is turned to the ON position. To deactivate the ASC, press the ASC OFF button
for 3 seconds or longer. To reactivate the ASC, press the ASC OFF button again. Mitsubishi Motors recommends that the ASC normally be
kept in the ON position. For more information, refer to your Owner’s Manual.
4) Rheostat Meter Illumination Button
The brightness of the instrument panel can be adjusted by pressing the button.
5) Power Seat Adjustment (if equipped)
The power seat controls are located on the bottom left side of the driver’s seat.
2
TO ADJUST THE SET FORWARD OR BACKWARD: Push the switch in the desired direction [1].
1
1
TO ADJUST THE SEAT BACK: Push the switch in the desired direction [2].
TO RAISE OR LOWER THE FRONT END OF SEAT: Raise or lower the front part of the switch.
TO RAISE OR LOWER THE REAR END OF SEAT: Raise or lower the rear part of the switch.
TO RAISE OR LOWER THE ENTIRE SEAT: Raise or lower the center of the switch.
1 2 3
Page 9

6) Power Outlet (if equipped)
12 V POWER OUTLETS:
TYPE 1: Located in the floor console and the luggage compartment. Accessories can be operated when the ignition switch is in either
the ON or ACC position.
TYPE 2: Located in the floor console box. Accessories can be operated in all ignition switch positions.
7) Sunroof (if equipped)
TO OPEN: Push the switch in the desired direction [1]
TO CLOSE: Push the switch in the desired direction [3]
TO TILT UP: Push the switch [2]
1
2
3
TO TILT DOWN: Push the switch to the direction [3]
8) Heated Seats (if equipped)
The heated seat controls are located at the side of each front seat. The heated seats can be operated by pushing the switch when the
ignition switch is in the ON position. The indicator light will illuminate while the heater is on.
9) Drive Mode Selector (if equipped)
The drive mode can be switched by turning the dial while the ignition switch is in the ON position. The following drive modes are
available:
2WD: This mode is for economical driving on normal dry roads and freeways.
4WD AUTO: The default mode. This mode is for all driving conditions on various roads.
4WD LOCK: This mode is for driving in slippery conditions such as on snow-covered roads or sand.
7
10) Multi-Information Display (if equipped)
The multi-information display shows fuel remaining, outside temperature, selector lever position, all-wheel drive operation
status, etc. It is also possible to change elements such as the language and units by using the multi-information meter (INFO)
button. The display screen is dierent depending on whether the ignition switch is in the OFF or ON position.
Page 10

8
Navigation Tip Sheet (if equipped)
To find a Point of Interest (POI):
1) Display the NAVI menu and touch Point of Interest
2) Input the State and City
3) Touch the Category button
4) Touch the desired POI category and follow the prompts to your desired
Mitsubishi dealer, Gas Station, Parking area, Restaurant or Hotel
If you already know the POI name, follow these steps:
1) Display the NAVI menu and touch Point of Interest
2) Input the State and City
3) Touch the Category button
4) Touch “All POI’s”
5) Input the POI name
6) Touch “SET”
Searching for a Location by Address/Intersection
1) Display the NAVI menu and touch “Address/Intersection”
2) Touch the “State” button
3) Input the State name
4) Touch the “City” button
5) Input the City name, touch “List” to select a city from the list
6) Touch the “Street” button
7) Input the Street name, touch “List” to select a street from the list.
8) Touch House # or intersection
Here are some tips on how to maximize your Navigation experience:
• For your safety, you are only able to enter information into the Navigation
system when the vehicle is at a complete stop.
• To save you time, the Navigation system begins to populate possible
destinations as you start typing. Choose your location when it appears on
the screen.
• To help you reduce your time spent on the road your Navigation system
displays trac conditions on its screen using Real Time Trac via RDS. This
service is included at no charge for the life of your vehicle.
• Information included in your Navigation system is current at time of
delivery. Check with your Mitsubishi dealer for future updates.
Points of Interest
(POI) Name
Searching for a Location by
Address/Intersection
Page 11

FUSE Tip Sheet
THE MITSUBISHI FUSE HANDS-FREE LINK SYSTEM™ IS AT THE CENTER
OF YOUR IN CAR MULTI-MEDIA EXPERIENCE. IT COMBINES AN ALL-NEW
VOICE-RECOGNITION SYSTEM AND BLUETOOTH® INTERFACE WITH USB
PORT TO PROVIDE HANDS-FREE SAFETY AND ENTERTAINMENT WHILE
DRIVING.
USB Connect (if equipped):
Located in the center arm rest and can be used
to run compatible personal audio players through
your audio system. Please note that it may
take some time for the system to engage as it
processes information from your device.
9
To pair* your Bluetooth® enabled device:
1) Park your vehicle in a safe location.
2) Press the SPEECH button
3) Say “Setup”
4) Say “Pairing Options”
5) The voice guide will say “Select one of the following:
pair, edit, delete, or list.” Say “Pair”
Note: If your vehicle is equipped with a navigation system,
you can pair a device using the prompts on the HDD
Navigation Screen.
TIP: For best results always speak loudly and at a normal
pace.
With FUSE*, you can:
• Stream audio from a personal audio player
• Play music stored on an audio player by holding the CD
button for two seconds which turns on the AUX mode
(if equipped)
• Display song information (if supported by phone)
• Play music stored on most USB memory sticks/devices
• Use voice recognition to select music
• Charge USB compatible portable devices
• Automatically sync your telephone’s phone book
• Recognize up to 7 phones
• Select songs by files or playlists
*For a list of compatible Bluetooth® devices and/or more information on FUSE, please go to www.mitsubishihandsfree.com
If you are having diculties operating your phone or connecting to the system, please call Mitsubishi Handsfree at (888) 702-4100
Page 12

10
Look at this . . .
1) FAST-Key (if equipped) - with FAST-Key, you do not need to use the key to open the door or start the car. You can leave the key in your pocket or
purse.
LOCK the doors and tailgate by pressing either the lock button on the key fob or pressing the black button to the right of the door handle or under
the liftgate handle.
UNLOCK the doors by pressing either the unlock button on the key fob or by pressing the black button to the right of the door handle. Listen for the
beep and then open the door.
UNLOCK TAILGATE by grasping the liftgate handle.
FAST-Key Tip:
In the event the key fob loses power, remove the emergency key from the fob, turn it around and insert the head of the key into the slot in the fob
and use it as a traditional key to unlock the doors and start the car. It is not a valet key. If you leave the FAST-Key in the vehicle and try to lock the
doors, you will hear a series of beeps.
2) Fuel Door Release – to open the fuel door, pull up on the fuel door lever located on the floor to the left of the driver’s seat.
3) Seatbelts – in order to help with securing child safety seats and other cargo, Mitsubishi’s seat belts have an Auto Locking Restraint (ALR) system.
When the seat belt is pulled all the way out, it engages the ALR which restricts it from pulling out. To release the ALR, simply allow the seat belt to
retract to its original position.
4) Tire Pressure Monitoring System (TPMS) – illuminates a warning light when your tire pressure is too low. Please note that changes in the outside
temperature may decrease tire pressure causing the TPMS light to turn on. If the TPMS light stays illuminated, check your tire pressure. For more
information on TPMS, refer to your Owner’s Manual.
Page 13

5) Anti-Lock Braking System (ABS) – each time your vehicle is started and driven a short distance, you will hear the sound of the ABS motor operating
from the right front engine compartment. This is the normal sound the Anti-Lock Braking System makes when performing a self check.
6) Windshield Wiper Lever - the wiper control lever is located on the right hand side of the steering column.
• Push the wiper lever down:
o One position to INT for intermittent wiping
Vehicles equipped with Rain Sensing Wipers will display AUTO rather than INT. When selected and moisture is
detected on the windshield, the wipers will automatically make a swipe across the glass.
o Two positions for LOW wiping speed
o Three positions for HIGH speed
Shown with rain sensing
feature if equipped, otherwise
AUTO = intermittent feature.
• Pull the lever towards you to dispense windshield washer fluid and wipers will automatically make several passes across the windshield
• Push the lever up to have the wipers complete a single pass
7) Rear Windshield Wiper Knob (if equipped) – the wiper control knob is located on the right hand side of the wiper control lever. The Rear Window
Wiper/Washer is activated using the outer knob of the windshield wiper controls.
• Twist the wiper knob clockwise:
o ONE position down to INT for intermittent wiping
o TWO positions down to ON for normal speed
o Push the end of the lever towards the steering column to spray the rear glass
11
Page 14

12
Outlander Quick Tips and Fun Facts
1) Not sure which side of your Outlander the gas tank is on? Take a look at the gas gauge next to your speedometer - a triangle points to the side
where your Outlander gas tank is.
2) Here’s a little surprise. Tap the turn signal lever up or down quickly when changing lanes and the turn signal indicator light will automatically flash
three times.
3) You can actually set your power doors lock function to unlock automatically when the shift lever is moved into the “P” position.
4) If equipped, the Navigation System includes Real-Time Trac (RTT). This system shows trac conditions on your navigation screen, yellow for
slowing and red for stop and go trac. Real-Time Trac is free for the life of your Outlander if purchased with a Navigation System.
5) With a range of dog-friendly features and benefits, including a split tailgate, ultra-low floor and large cargo area, it’s no surprise that Outlander
was awarded five paws out of five and named Dog Car of the Year in its category by DogCars.com.
6) Some Outlanders are equipped with a 3rd row seat. There is a seat operation guide on the back of the 3rd row seat to help guide you through the
process.
Page 15

Mitsubishi Fun Facts
1) The word “Mitsubishi” is Japanese for “three diamonds”.
2) Mitsubishi’s first motor car was produced in 1917 and included room for 7 passengers.
3) Mitsubishi was the first company in the world to design a Traction Control System, commonly referred to today as simply “TCS”.
4) A world record was set by Mitsubishi in 1999 when its electric car was the first to cover 1,000 kilometers (over 620 miles) in 24 hours.
5) 2007 saw Mitsubishi become the first company to score 7 straight Dakar Rally wins.
6) In 2009 Mitsubishi began producing and selling the i-MiEV electric vehicle.
7) Stay in touch with Mitsubishi on the following social media sites:
facebook.com/Mitsubishi YouTube.com/mitsubishicars
twitter.com/mitsucars flickr.com/mitsucars
Page 16

www.mitsubishicars.com
Owner’s Handbook
ACAD-P08000 (10/10)
 Loading...