

Miele S179i User Manual
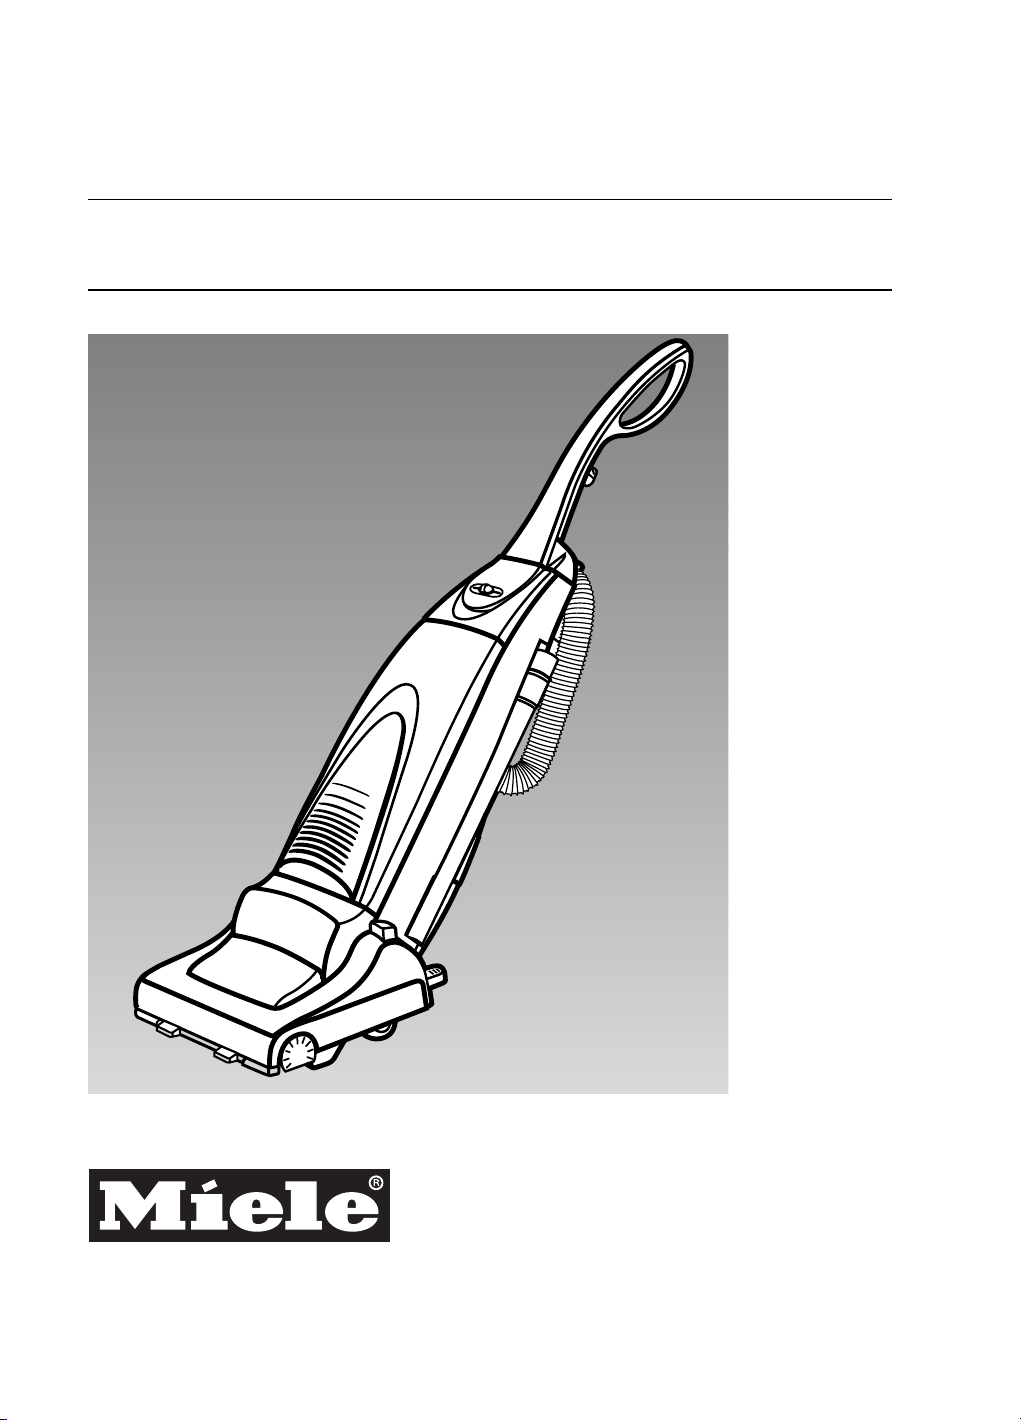
Operating Instructions
Vacuum Cleaner
S179i
Please carefully study these Operating Instructions before attempting to operate the unit
and note the listed Important Safety Instructions.

IMPORTANT SAFETY INSTRUCTIONS
When using this vacuum cleaner, basic precautions should always be followed, including the following:
READ ALL INSTRUCTIONS BEFORE USING THIS VACUUM CLEANER
WARNINGTo reduce the risk of fire, electric shock, or injury:
Do not leave the vacuum cleaner unattended when it is plugged in. Unplug from the outlet when not in
•
use and before servicing.
Electric shocks can occur if used outdoors or on wet surfaces.
•
Do not allow to be used as a toy. Close attention is necessary when used by or near children.
•
Use only as described in this manual. Use only manufacturer’s recommended attachments.
•
Do not use with damaged cord or plug. If vacuum cleaner is not working as it should, has been dropped,
•
damaged, left outdoors or dropped into water, bring it to a service center.
Do not pull or carry by cord, use cord as a handle, close a door on cord, or pull cord around sharp edges
•
or corners. Do not run vacuum cleaner over cord. Keep cord away from heated surfaces.
Do not unplug by pulling on cord. To unplug, grasp the plug not the cord.
•
Do not handle plug or vacuum cleaner with wet hands.
•
Do not put any object into openings. Do not use with any opening blocked; keep free of dust, lint, hair and
•
anything that may block or reduce air flow.
Keep hair, loose clothing, fingers, and all parts of body away from openings and moving parts.
•
Do not pick up anything that is burning or smoking, such as cigarettes, matches or hot ashes.
•
Do not use without dust bag and/or filters in place.
•
Turn off all controls before unplugging.
•
Use extra care when cleaning on stairs.
•
Do not use to pick up flammable or combustible liquids such as gasoline or use in areas where they may
•
be present.
SAVE THESE INSTRUCTIONS
THIS VACUUM CLEANER IS INTENDED FOR HOUSEHOLD USE ONLY
Notice- Before you plug in your Vacuum Cleaner, make sure that the voltage indicated on the rating plate
located at the rear of the vacuum cleaner is the same as your local supply.
– 2 –
O
N
BEATE
B
AR
STO
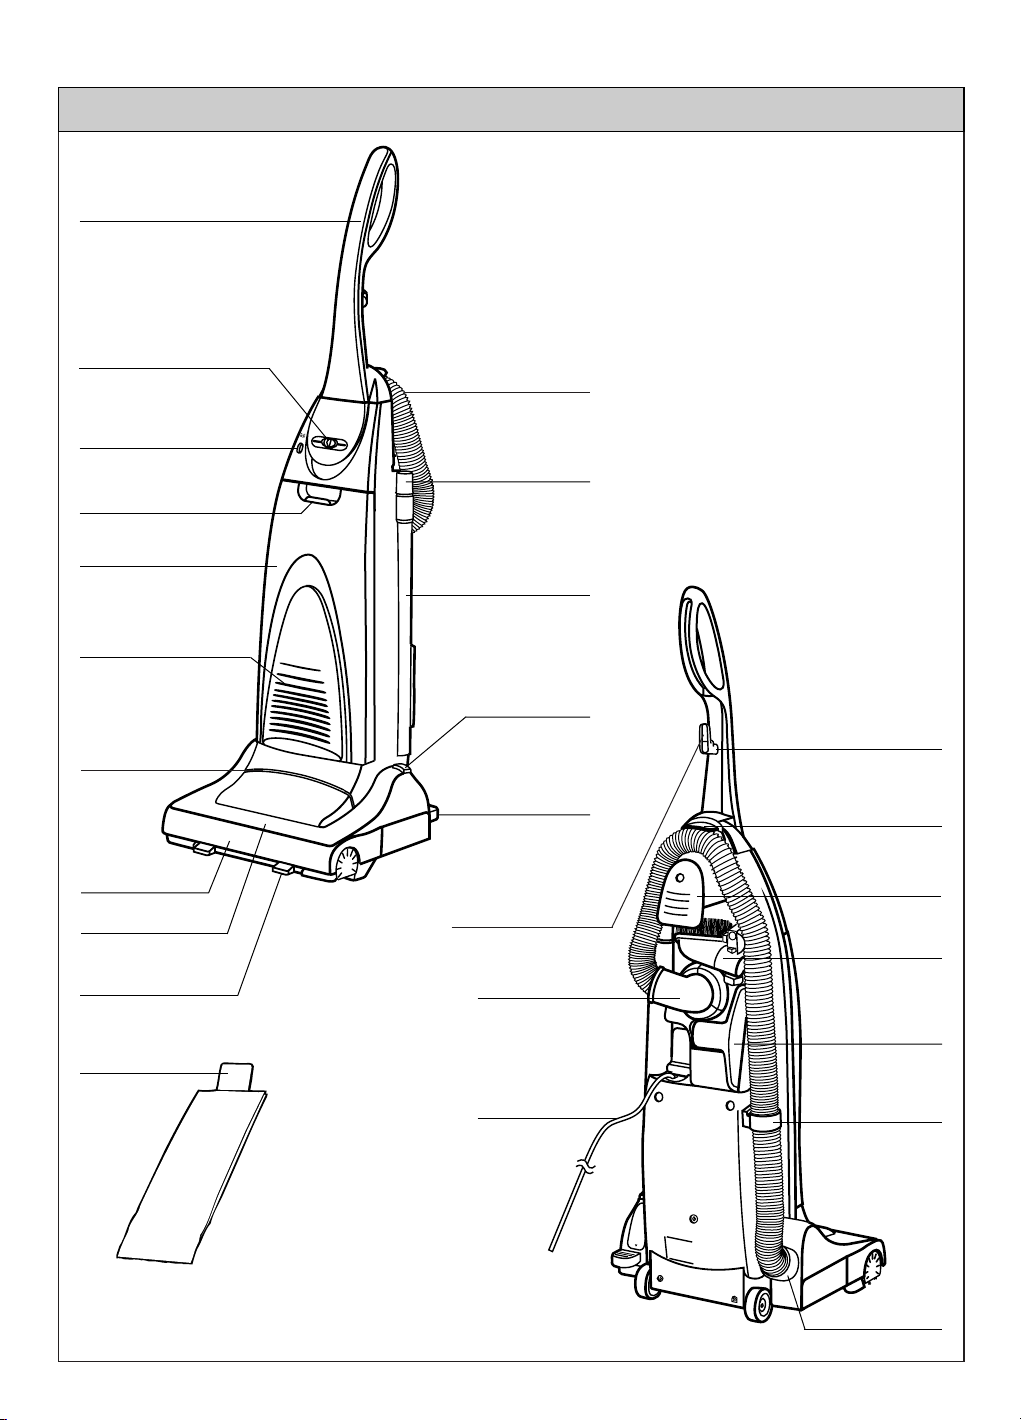
IDENTIFICATION OF MAIN PARTS
A-1) Handle
C) ON/OFF Switch and
variable power control
I) Bag check indicator
Release button
Dust bag cover
Extension wand
Exhaust cover /
Advanced Micron
Filtration
Head light
Hose
Crevice nozzle
E) Beater bar
selector
B-2) Cord clip
Bumper
Cleaning head
D) Front edge
cleaning
Paper bag
E) Foot pedal
A-3) Hose clip
B-1) Lower cord hook /
Carrying handle
B-1) Upper cord hook
Dusting brush
Suction inlet
Upholstery nozzle
B) Power cord
Hose support
Connection pipe
– 3 –
HOW TO ASSEMBLE / OPERATE YOUR CLEANER
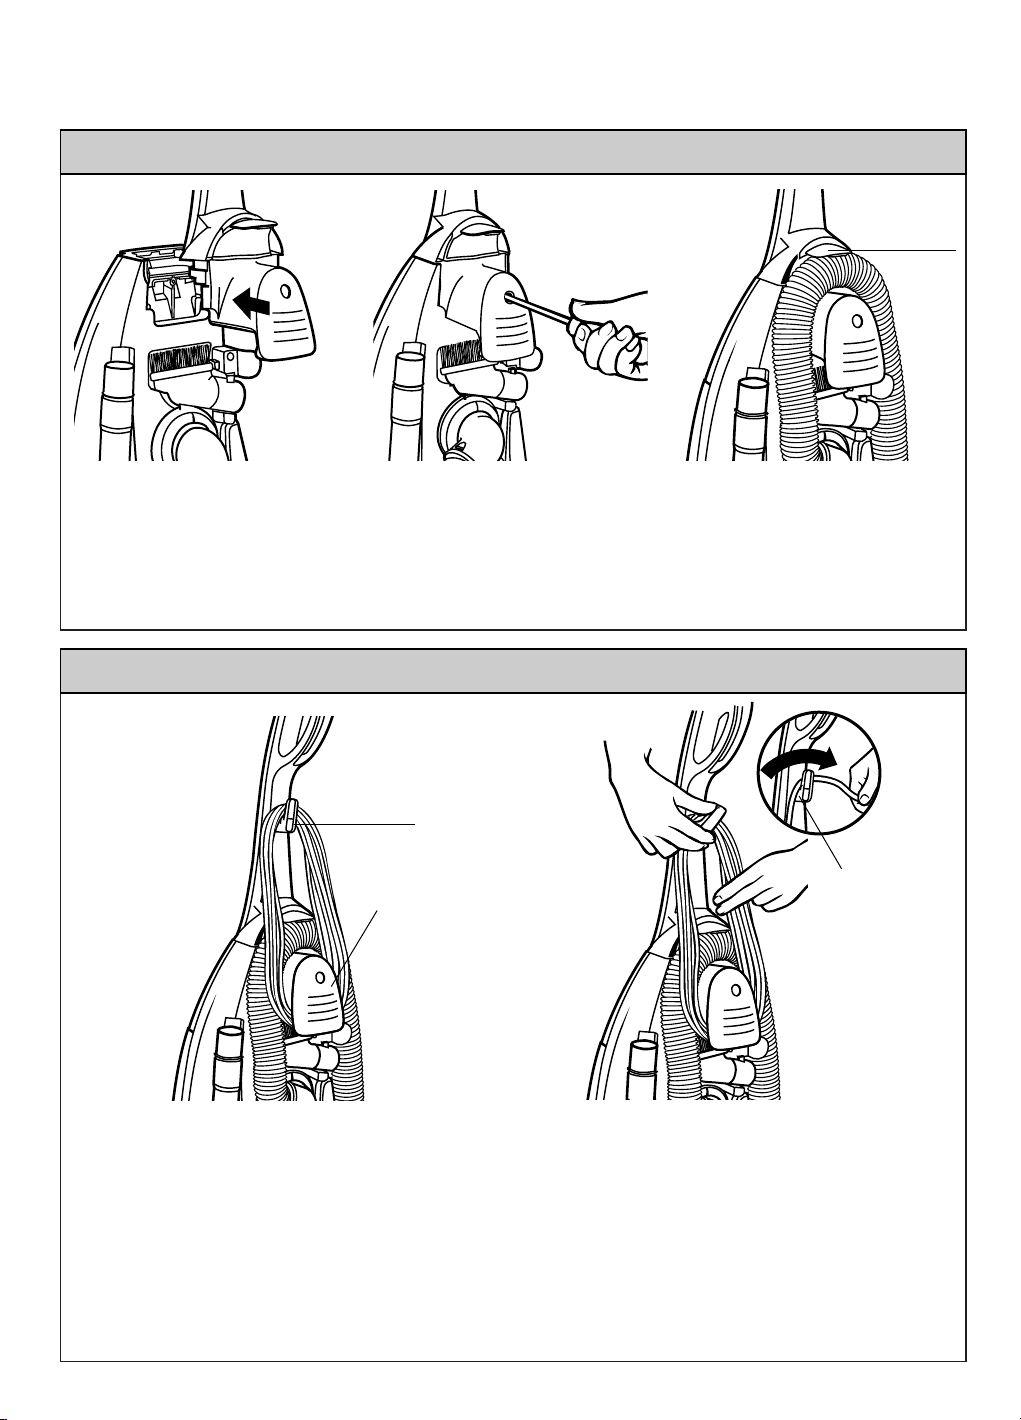
A) HANDLE ASSEMBLY
Hose clip
1) Align the handle with the
body of the cleaner as shown
in the illustration.
2) Insert the base of the handle into
the top of the body of the machine.
Push in handle and tighten the screw.
The screw can be found in the
bag with these operating instructions.
IMPORTANT: Do not over tighten
the screw.
B) POWER CORD RELEASE / STORAGE
Upper
cord hook
Lower
cord hook
3) Place the hose under the
hose clip. Push in to secure.
NOTE: Always store the
hose in the clockwise
direction.
Cord clip
1) Turn the upper cord hook to the upright position
and wind the power cord around the upper and lower
cord hooks.
NOTE: To reduce the risk of electric shock, this appliance has a polarized plug (one blade is wider than the
other). This plug will fit in a polarized outlet in only one way. If the plug does not fit in the outlet, reverse the
plug. If it still does not fit, contact a qualified electrician to install the proper outlet. Do not change the plug in
any way.
To avoid any possible damage to the power cord, never run over the cord or allow it to become caught in the
beater bar.
1) To release the power cord, turn the upper hook.
Then set the power cord into the cord clip to help
secure it during use.
– 4 –
C) ON / OFF SWITCH AND VARIABLE POWER CONTROL
O
N
B
E
A
T
E
R
B
A
R
S
T
O
P
MIN
MAX
O
N
BE
A
TE
R
B
A
R
S
T
O
P
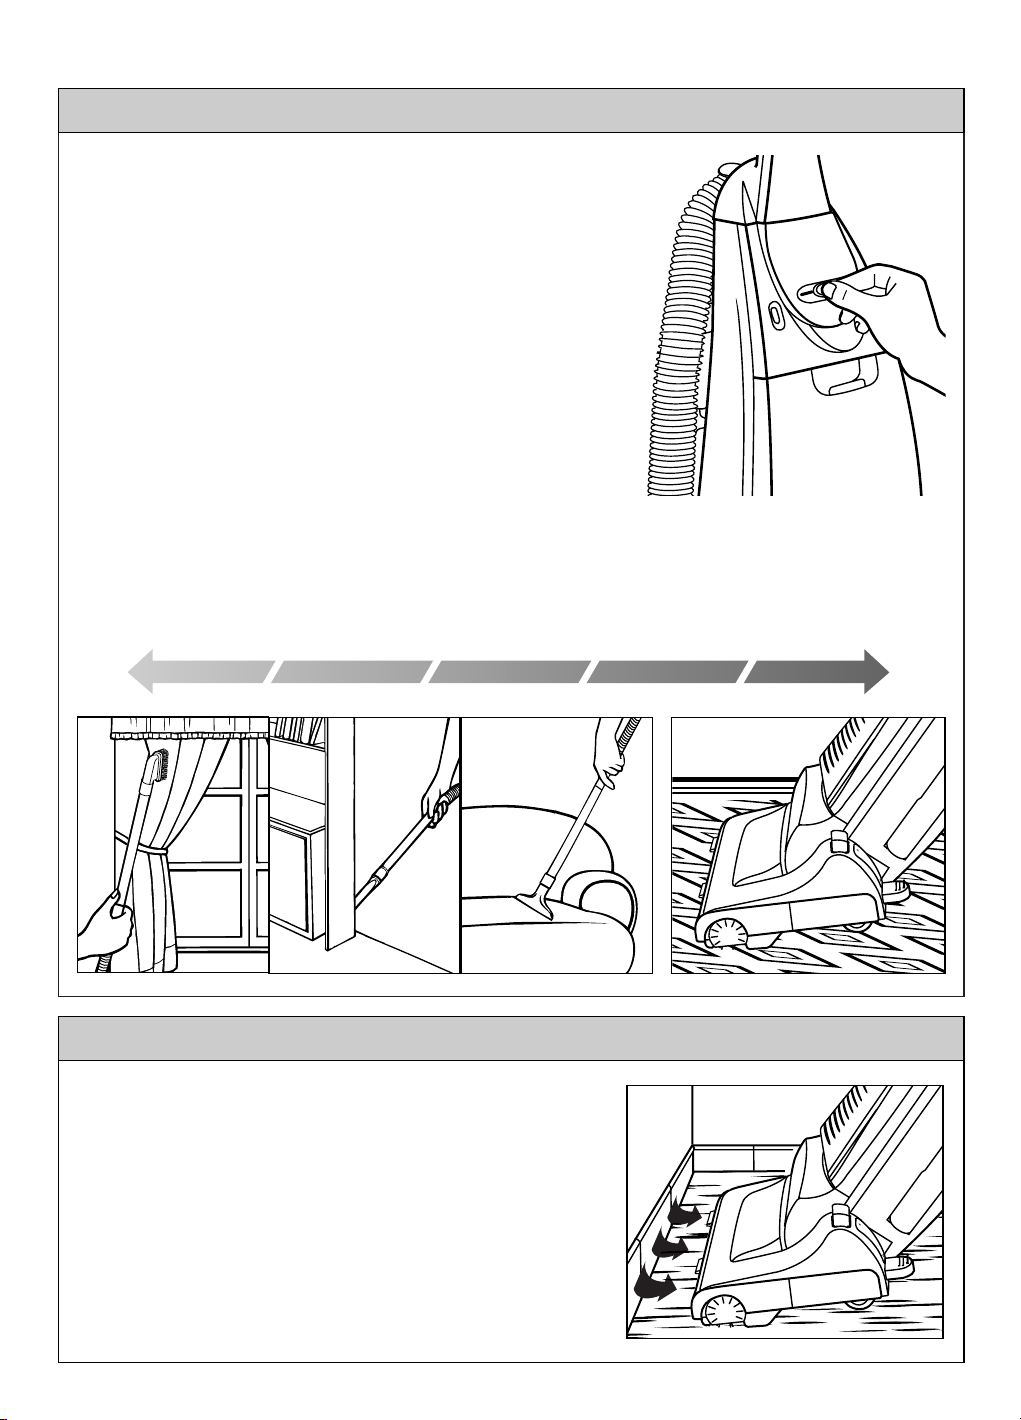
The sliding button - located on the control panel - is used to switch
the vacuum cleaner ON/OFF and vary the motor speed depending
on the suction required.
To switch ON, slide the button sideways. By sliding the button
further sideways, the power will gradually be increased.
To switch OFF, slide the button back until it clicks back into the “0” position.
VARIABLE POWER CONTROL
This vacuum cleaner has a variable power control to select the most
suitable power, according to your cleaning needs.
MIN.: To clean curtains and soft furnishing’s etc., with tool attached.
MAX.: To clean continuously with high suction.
D) FRONT EDGE CLEANING
Front Edge Cleaning System
This cleaner features a Front Edge Cleaning System which
automatically operates when the front of the cleaning head
makes contact with a wall, furniture or a similar object.
– 5–

E) HANDLE HEIGHT AND BEATER BAR ADJUSTMENT
ON
B
E
A
T
E
R
B
A
R
STOP
O
N
B
E
A
T
E
R
B
A
R
STOP
;
;;;
;;;
;
;
;
;;;;
;
;;
;;;;;
;;
;
;
;;
;;
;;;;
;
;;;
;
;;
;
;
;;;
Q
QQQ
QQQ
Q
Q
Q
QQQQ
Q
QQ
QQQQQ
QQ
Q
Q
QQ
QQ
QQQQ
Q
QQQ
Q
QQ
Q
Q
QQQ
¢
¢¢¢
¢¢¢
¢
¢
¢
¢¢¢¢
¢
¢¢
¢¢¢¢¢
¢¢
¢
¢
¢¢
¢¢
¢¢¢¢
¢
¢¢¢
¢
¢¢
¢
¢
¢¢¢
O
N
B
E
A
T
E
R
B
A
R
STOP
ON
B
E
A
T
E
R
B
A
R
STOP
To lower the body of the cleaner, step on the foot pedal at the bottom left corner of the vacuum cleaner.
Once the body is reclined, the brush will automatically start to rotate.
If you wish to stop the beater bar, simple return the cleaner into the upright position. In case you want to
stop the beater bar while the cleaner is in the reclined position, push the beater bar stop pedal located on
the left side of the cleaning head, just above the foot pedal.
1. Upright position
The body should be in an
upright position when cleaning
tools are used.
2. Middle position
For normal cleaning, press the
foot pedal and pull back the
handle to a comfortable angle.
Release the pedal to lower the
3. Low position
For cleaning under furniture,
press the pedal a second time
and lower the handle down to
the floor as shown.
cleaning head.
F) AUTOMATIC HEIGHT ADJUSTMENT
Your Miele vacuum cleaner has an
Automatic Height Adjustment, feature
which adjusts the cleaning head to the proper
height of any carpet pile.
This system allows you to move from one
carpeted area to another, without having to
make manual adjustments.
G) FLOOR SCRATCH PREVENTION
To prevent scratching floors while using the vacuum cleaner on tiled or polished floors, two small wheels
are built into the base plate.
These two wheels also make it easy to slide the vacuum cleaner across carpeted floors.
Tiled floor
– 6–
Carpeted floor
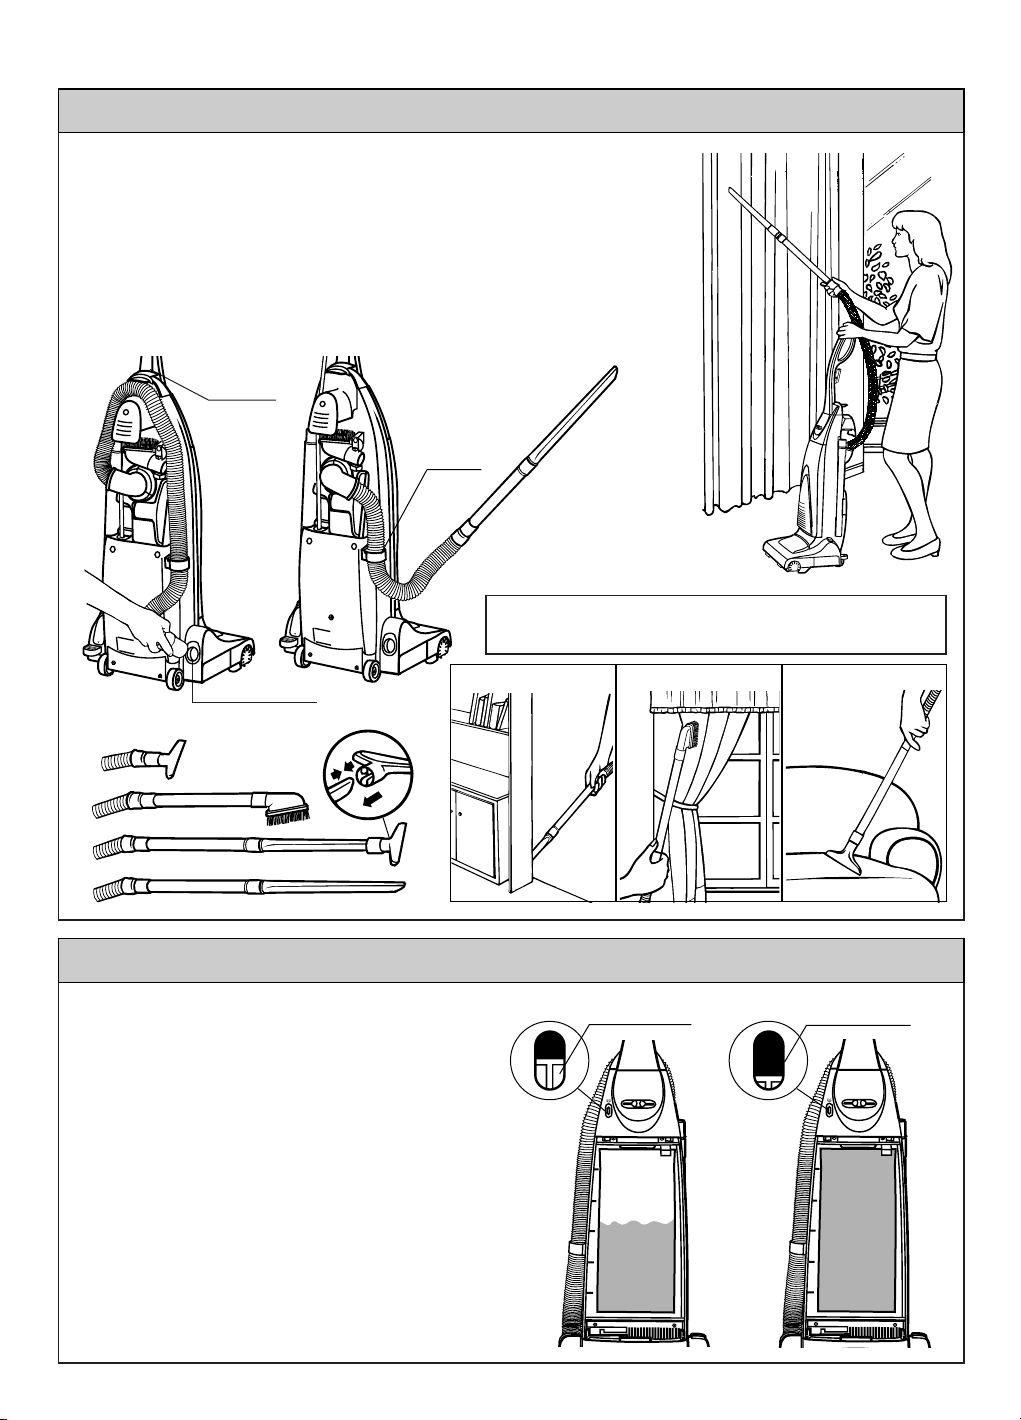
H) HOW TO USE THE ACCESSORIES
1) To use the accessories always keep the vacuum cleaner in the
upright position.
2) Pull out the hose from the suction pipe inlet and remove it from the hose
clip. Then slide the hose through the hose support and connect any
accessory as illustrated bellow.
Important: For a longer reach, remove the hose support from its fastening and
hold the handle of the cleaner with one hand to avoid pulling the cleaner over.
NOTE:After finishing with the accessories, re-insert the hose in the suction
pipe inlet and place it into the hose clip and hose support.
Hose clip
Hose
support
S
T
O
S
T
O
B
E
A
T
E
B
A
R
O
N
B
E
A
T
E
B
A
R
O
N
CAUTION
of the cleaner with one hand, as shown above, to avoid
pulling the cleaner over.
While using the accessories, hold the handle
Suction pipe inlet
I) BAG CHECK INDICATOR
The bag change indicator is a visual aid to
advise you of the condition of the dust bag.
The GREEN mark indicates that the dust bag is
still empty.
The RED mark will appear when airflow through
the bag is insufficient. When this happens, check
the dust bag, it may be full or blocked with fine
dust and needs replacing.
NOTE: If after replacing the bag, the RED
indicate still appears in the window, check
to see if the hose or suction inlet is clogged.
(see BLOCKAGES).
When using the crevice nozzle the red mark may
appear. This is due to reduced air flow and not an
indication that the bag is full.
Crevice nozzle
Dusting brush
Green mark
Upholstery nozzle
Red mark
– 7 –
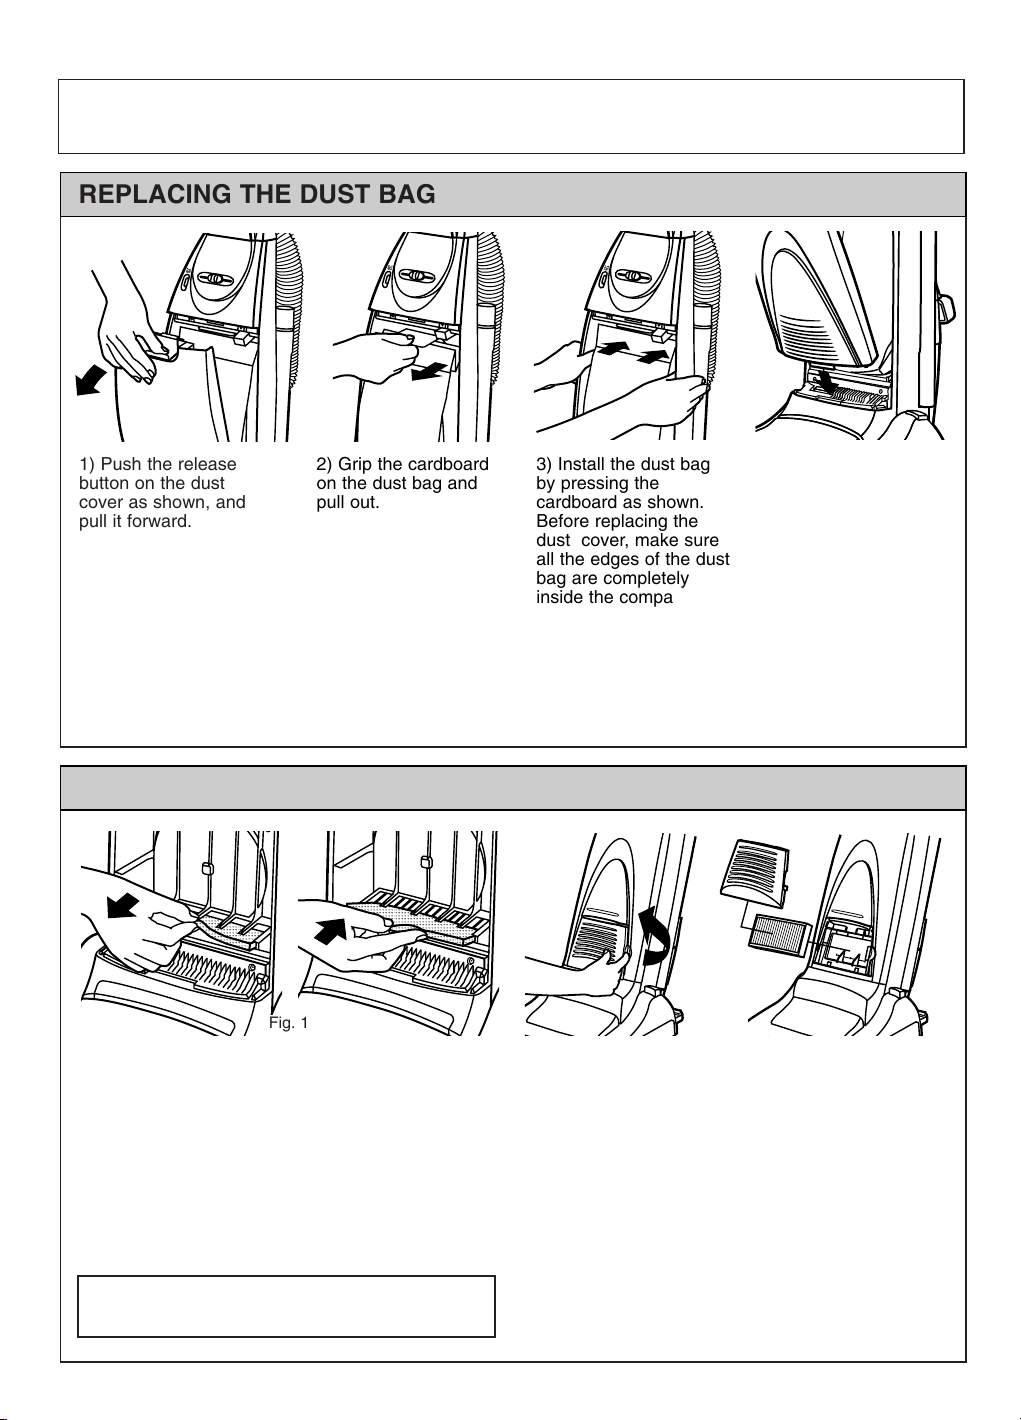
CAUTION: DISCONNECT THE CLEANER FROM THE OUTLET
BEFORE PERFORMING THE OPERATIONS BELOW
REPLACING THE DUST BAG
1) Push the release
button on the dust
cover as shown, and
pull it forward.
NOTE: If the dust bag is not installed correctly, the dust cover will not close.
2) Grip the cardboard
on the dust bag and
pull out.
3) Install the dust bag
by pressing the
cardboard as shown.
Before replacing the
dust cover, make sure
all the edges of the dust
bag are completely
inside the compartment.
4) Replace the dust
cover by inserting the
tab into the body slot
then push the top of
the cover into place.
We recommend the use of genuine Miele paper bags only; Part # 5294740 Type Z
FILTER CARE
Fig. 1
Fig. 2
In addition to the dust bag, the vacuum cleaner
contains two filters; a central filter that protects the
motor (Fig.1) and an Advanced Micron Filter, "Clean
air filter" that removes particles from the exhausted
air (Fig. 2).
The Advanced Micron Filter should be changed
every six months or whenever it becomes dirty.
The central filter should be changed or rinsed out
whenever the Advanced Micron Filter is replaced.
IMPORTANT: Do not forget to re-install the
filters before use.
CENTRAL FILTER (Fig. 1)
Part # F03M1000
To remove, slide the central filter forward out of this
housing.
IMPORTANT: If the central filter has been rinsed
out, make sure it is dry before re-installing it.
ADVANCED MICRON FILTER (Fig. 2)
Part # S02R5000
To change the Advanced Micron Filter, simply
remove the exhaust cover as shown and replace
the filter.
– 8 –
 Loading...