

Page 1
Operating instructions
Washer-Extractor
PW 6107
PW 6137
PW 6167
PW 6207
To avoid the risk of accidents or damage to the machine it is
essential to read these instructions before installing,
commissioning and using it for the first time.
en, nl - GB, NL
M.-Nr. 09 105 050
Page 2

Gas-heated appliances
Safety precautions to take if you smell gas
Turn off the gas emergency control valve immediately.
^
This is usually located near the gas meter.
Eliminate all sources of ignition in a safe manner.
^
Do not smoke, light cigarette lighters or matches.
Do not operate electrical lights or switches, i.e. do not switch them "On" or "Off".
^
Open all doors and windows to ventilate the area.
^
If the smell of gas persists, evacuate the building.
^
In the UK you must now:
Call the Gas Emergency Contact Centre (Tel: 0 800 111 999)
^
For any gas work in the UK always use a Gas Safe registered engineer.
In other countries please follow relevant country specific procedures on gas.
2
Page 3

Contents
Warning and Safety instructions...............................................................4
Caring for the environment ...................................................................7
Description of the machine ...................................................................8
Control elements.............................................................................9
How to wash correctly ......................................................................11
Sort the laundry.............................................................................11
Maximum loads for the standard programmes.......................................................11
Add detergent..............................................................................12
Detergent dispensing ........................................................................13
Select a programme .........................................................................13
Open the door at the end of the programme ......................................................15
Card operation ............................................................................16
Card access operation .......................................................................16
Additional options .........................................................................17
Language selection .........................................................................17
Start date and time ..........................................................................17
Programme stop ............................................................................18
Programme cancellation......................................................................18
Changing the programme order................................................................19
Optional modules ..........................................................................20
Liquid dispensers ...........................................................................20
Peak load cut-out ...........................................................................22
Communication module ......................................................................22
Operating data .............................................................................22
Weighing system ...........................................................................24
Problem solving guide ......................................................................25
The door will not open .......................................................................25
Power cut during a wash programme - Emergency door release ......................................25
Error messages.............................................................................27
After sales service ..........................................................................28
Cleaning and care ..........................................................................29
Installation and connection ..................................................................32
Transit fittings ..............................................................................33
On-site connections .........................................................................34
Plumbing connections on the machine ..........................................................34
Liquid agent dispensing mixing box connections ..................................................35
Electrical connection ........................................................................36
Connecting the dispenser pumps ..............................................................37
Steam connection ...........................................................................37
Gas connection.............................................................................37
Technical data .............................................................................38
3
Page 4
Warning and Safety instructions
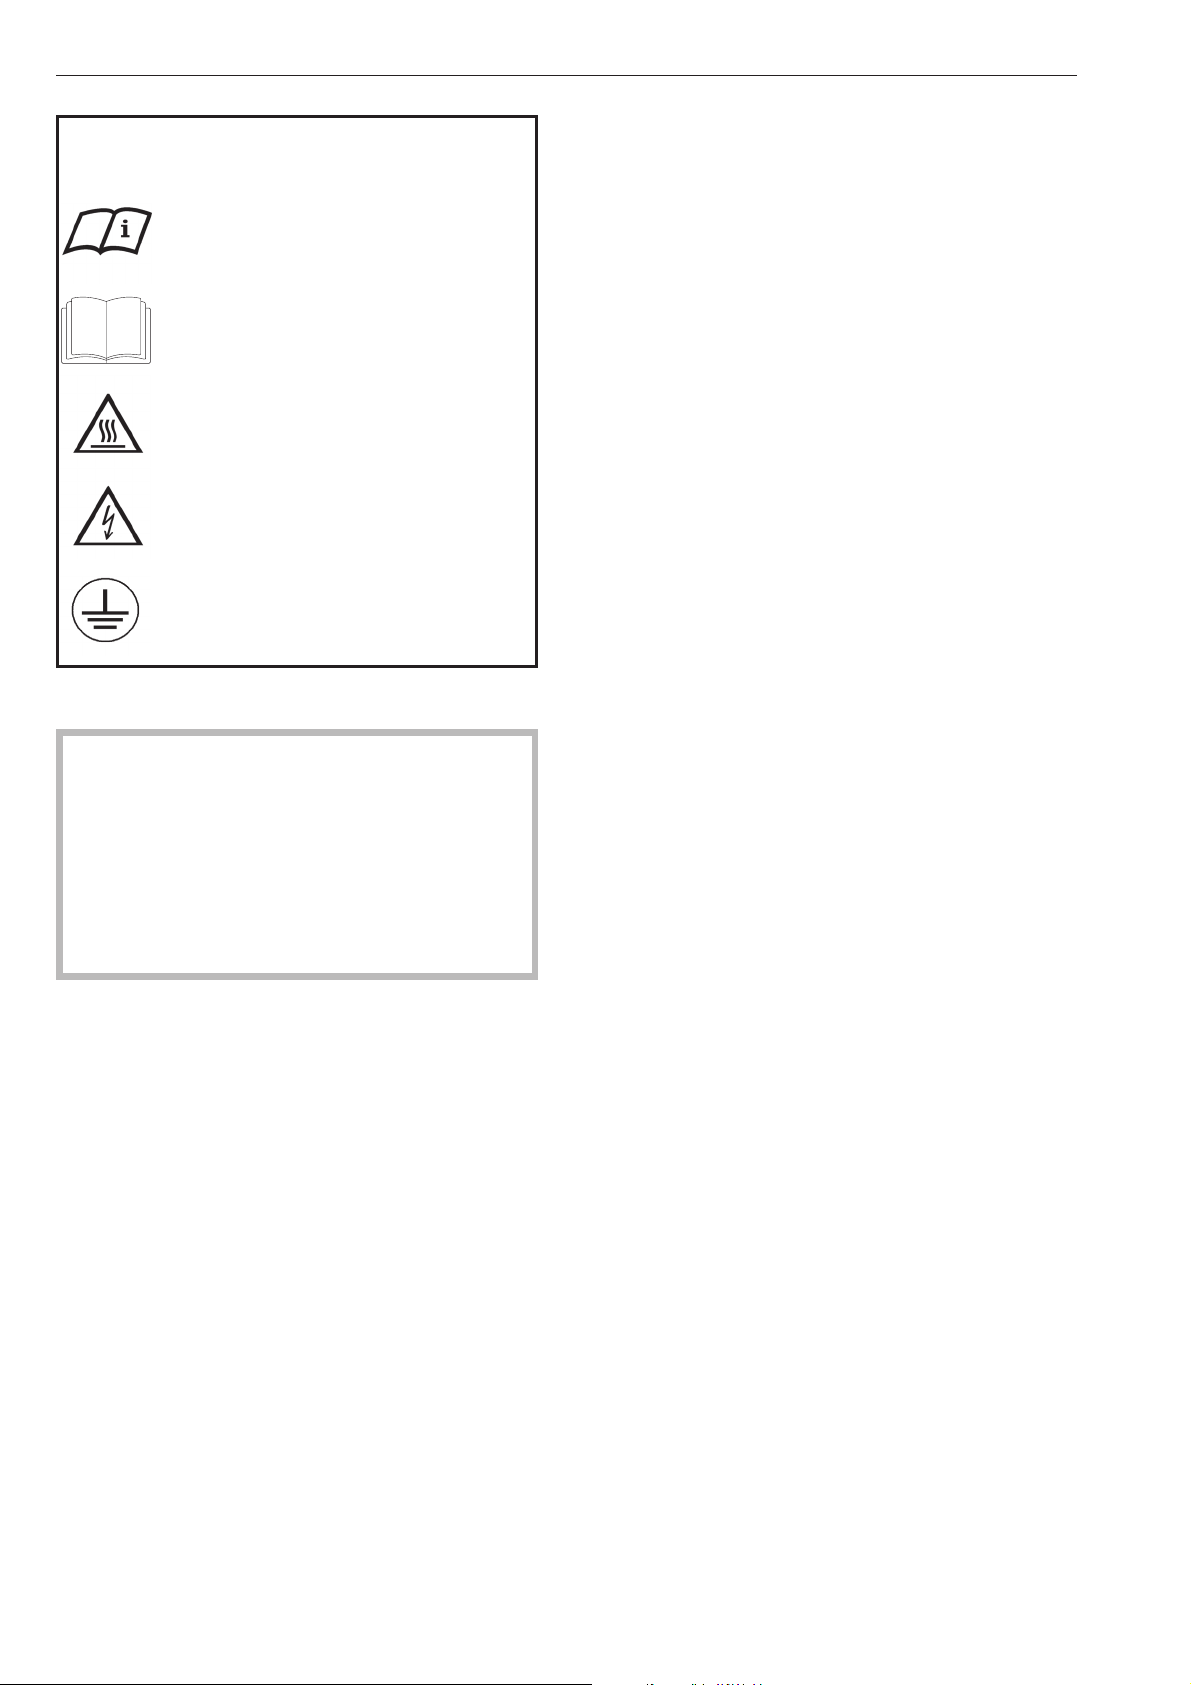
Explanation of the Warning and Safety
symbols on the machine
It is essential to read these operating
instructions.
When used in a commercial environment ensure
~
that all operators are trained to use the machine
correctly.
If the machine is used in a publically accessible
room, please ensure that operators are able to use it
safely.
This machine is not intended for outdoor use.
~
Please refer to specific instructions, e.g.
Installation instructions
Caution, hot surfaces.
Caution, voltage up to 1000 volts.
Earthing
To avoid the risk of accidents and damage to the
machine read the operating instructions carefully
before using it for the first time. They contain
important information about the installation, safety,
use and maintenance of the machine. Keep these
operating instructions in a safe place and ensure
that new users are familiar with the content. Pass
them on to any future owner of the machine.
Correct application
This machine is not designed for washing items
~
which have been treated with dangerous or
flammable substances.
Only use the machine to wash items which are
~
specified by the manufacturer to be
machine-washable on the wash-care label.
Any other applications may be dangerous. The
manufacturer is not liable for damage resulting from
improper use or operation.
Chemical dry cleaning agents must not be used in
~
this machine. Most dry cleaning agents, e.g. benzine,
pose a fire and explosion hazard.
Petrol, paraffin, or any easily flammable liquid
~
must not be stored or used near the machine. Do not
use the machine lid as a storage shelf.
Fire and explosion hazard.
Do not store any chemicals on the machine lid
~
(liquid detergent, fabric conditioners etc). They could
discolour the lid and also damage the surface finish.
If any chemicals should come in contact with the
surface, wipe them away immediately with clean
water. Then dry with a soft cloth.
Technical and electrical safety
The electrical safety of this machine can only be
~
guaranteed if connected to a correctly installed
earthing system on site. It is most important that this
basic safety requirement is present and tested
regularly, and where there is any doubt, the on-site
electrical wiring should be inspected by a qualified
electrician. The manufacturer cannot be held liable
for the consequences of an inadequate earthing
system (e.g. electric shock).
Do not damage, remove or bypass the safety
~
features, fixtures and control elements of this
machine.
Do not use a machine with damaged controls or
~
cables. These must be repaired before it is used
again.
Any removable outer panels must be back in
~
place, and all moving or electrical parts shielded
before the machine is switched on.
Connection should be made via a suitable isolator
~
which complies with local and national safety
regulations and which is easily accessible for
disconnecting the machine from the electricity
supply. Provision must be made on site to switch off
all poles.
The machine is only completely isolated from the
~
electricity supply either when it is switched off at the
isolator switch or the mains fuse has been withdrawn.
Repairs to electrical, gas or steam operated
~
machines may only be carried out by a suitably
qualified person in accordance with national and
local safety regulations, e.g. a Gas Safe registered
service technician in the U.K for gas-heated
machines.
Repairs and other work by unqualified persons could
be dangerous.
The manufacturer cannot be held liable for
unauthorised work.
Do not force the drum door open. The door handle
~
is fitted with an safety device to ensure that the door
lock functions correctly.
Faulty components must only be replaced by
~
genuine Miele original spare parts. Only when these
parts are fitted can the safety standards of the
machine be guaranteed.
4
Page 5

Warning and Safety instructions
The best materials are used in the manufacture of
~
this machine, and every care is taken to check all
parts. However, with time, deterioration of parts can
occur, especially with such components as hoses,
giving rise to leaks. Check the inlet hoses regularly
for signs of wear and tear. Change in good time to
avoid the risk of leaks and subsequent damage.
Local regulations regarding regular inspection and
~
maintenance of this machine must be observed. A
log book should be kept with the machine.
Gas-heated washer-extractors
Important After installation, maintenance, conversion,
repairs and before using for the first time it is
essential that a test for possible leakages is carried
out. All components which carry gas must be
checked, including the gas valve and burner jets.
Particular attention must be paid to the test nipple on
the gas valve.
Testing must be carried out with the burner switched
on and switched off.
Using the washer-extractor
This machine is not intended for use by people
~
reduced physical, sensory or mental capabilities, or
lack of experience and knowledge, unless they are
supervised whilst using it or have been shown how to
use it correctly by a person responsible for their
safety.
This machine is not a toy! To avoid the risk of
~
injury never allow children to play on or near the
machine, or to operate it themselves.
Remember that the porthole glass will be hot when
~
washing at very high temperatures. Do not let
children touch it.
Always close the door after use. This way you will
~
avoid the danger of:
–
children climbing onto or into the washer-extractor
or hiding things in it.
–
pets or other small animals climbing into it.
Always make sure that the drum is stationary
~
before reaching into the machine to remove laundry.
Reaching into a moving drum is extremely
dangerous.
If the washer-extractor is switched off and the
~
drum door is closed, you need to switch the machine
on before you can open the door.
If water comes out of the suds container when the
door is opened, close the door and switch the
washer-extractor on. Drain the water away before you
try and open the door.
It is the operator's responsiblity to ensure that the
~
standard of disinfection in thermal as well as chemo
thermal procedures is maintained (in accordance
with § 18 IFSG and national health and safety
regulations) by carrying out suitable validation tests.
These procedures should be checked on a regular
basis, either thermo-electrically using loggers, or
bacteriologically with bio indicators. The operator
must pay particular attention to maintaining the
correct parameters in the procedure, including
temperature and with chemo thermal programmes,
the chemical concentration used. Disinfection
programmes must not be interrupted, as this can
have a limiting effect on the disinfection result.
It is particularly important to observe
~
manufacturer's instructions when using a combination
of cleaning agents and special application products.
Only use the product for the application described by
the manufacturer, to avoid any material damage or
the occurrence of strong chemical reactions.
Confirm with the detergent manufacturer that their
product can be used in combination with another
type of product.
Only use dyes, colour run and dye removers
~
specified as being suitable for use in washing
machines. Always observe the manufacturer's
instructions carefully.
Laundry that was soiled with biological oils or fat
~
should be washed using a suitable detergent and /or
wash programme. It must also be inspected after
washing. If oils or fat are not sufficiently removed they
could cause the laundry to self ignite during the
drying process. This type of soiling should be
removed using specialist detergents and/or
programmes.
Do not use a pressure washer or hose to clean the
~
machine.
Take care in the area of the hinges of the drum
~
door. Danger of injury.
The drum door must be able to be opened to its
~
fullest extent. This area must not be restricted by
doors or structural features.
The water used for washing is a suds solution and
~
is not drinking water.
The suds solution must be drained away via an
appropriate drainage system.
The washer-extractor may only be operated
~
without supervision if there is a floor drain (gully) in
the immediate vacinity.
5
Page 6

Warning and Safety instructions
Further notes
Cleaning and disinfecting agents often contain
~
chlorine-based substances. Do not let such agents
dry out on stainless steel surfaces, as the chlorine
can have a corrosive effect. Use chlorine-free agents
for washing and disinfecting and also for cleaning
stainless steel surfaces to protect them from
corrosion.
If in doubt, confirm with the manufacturer that their
product is suitable. If any agent containing chlorine
comes into contact with the stainless steel surfaces,
wipe it away immediately with clean water. Then dry
with a soft cloth.
The manufacturer cannot be held liable for the
~
effect of a chemical cleaning agent on laundry or the
machine, even when the use of such agents is
recommended.
Please note that changes to the product which have
not been made known by the manufacturer can affect
the quality of the wash result.
Using accessories
Accessory parts may only be fitted when
~
expressly approved by Miele. Using spare parts or
accessories from other manufacturers will invalidate
the guarantee, and Miele cannot accept liability.
Anti-chlorine treatment
Anti-chlorine treatment has to be carried out
immediately after chlorine bleach has been used. The
use of hydrogen peroxide or an oxygen based
cleaning or bleaching agent is recommended and the
laundry should not be drained in between.
With thiosulfate, especially when used with hard
water, gypsum can form, which can lead to
incrustations on laundry or deposits in the machine.
The use of hydrogen peroxide is preferable as it aids
the chorline neutralising process.
The exact quantity of additives and the treatment
temperatures required must be set and tested on site
in accordance with the dosage recommendations of
the detergent and additive manufacturers. The
laundry must also be tested to check whether it
contains any active chlorine residues.
Disposing of your old machine
Before disposing of an old machine, first make the
~
door lock unusable. This way you will prevent
children from accidentally locking themselves in and
endangering their lives.
Any additional components used, e.g. suction
~
devices for liquid agents, electronic water meters or
dispenser monitors, must conform to Safety Class II.
If connected to an external PC, this must conform to
EN 60950-1:2001 (IEC 60950-1:2001).
Chlorine and component damage
Notes on using chlorine bleach and
perchlorethylene
Frequent use of chlorine increases the risk of
~
component damage.
The use of agents containing chlorine, such as
sodium hypochlorite and chlorine bleach in powder
form, can damage the protective upper surface of
stainless steel and cause corrosion to components.
Factors affecting this are chlorine concentration
levels, contact time and temperature. It is therefore
advisable to avoid the use of such agents. Oxygen
based bleaching agents should be used instead.
If, however, chlorine based bleaching agents have to
be used for particular types of soiling, then
anti-chlorine measures must also be carried out. If
this is not done irreparable damage can occur to
components in the machine and to laundry.
All personnel working with this machine must be
fully trained in all aspects of its use and safety.
Keep these instructions in a safe and accessible
place.
6
Page 7
Caring for the environment
Disposing of the packing material
The packaging is designed to protect the machine
during transportation. The materials used are
environmentally friendly for disposal.
Rather than just throwing these materials away,
please ensure that they are recycled.
Packaging materials such as plastic film and
,
bags must be kept out of the reach of babies and
children. Danger of suffocation.
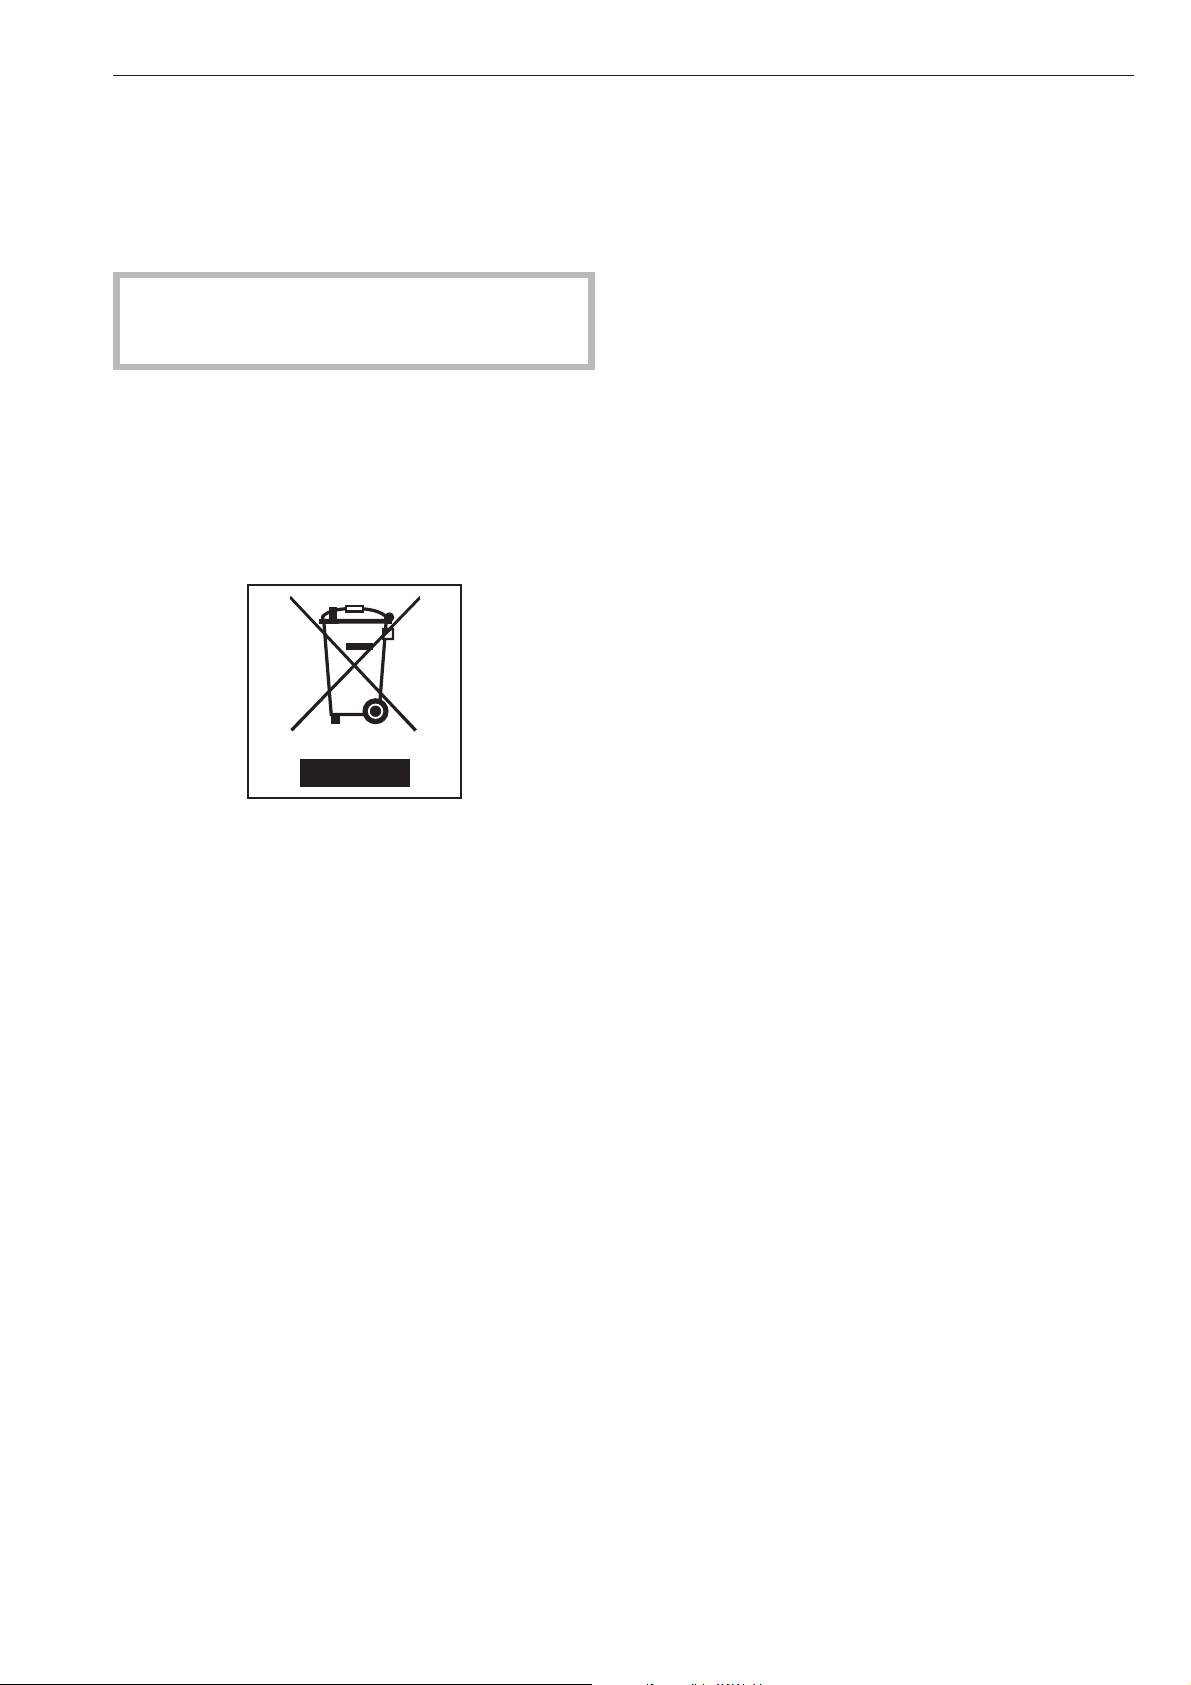
Disposing of your old machine
Electrical and electronic machines often contain
materials which, if handled or disposed of incorrectly
could be potentially hazardous to human health and
to the environment. They are, however, essential for
the correct functioning of your machine. Please do
not dispose of your old it with your general waste.
Tips on saving energy
To save energy and water, try to load the maximum
for the programme selected. Underloading is
uneconomical. Overloading gives a poorer quality of
wash result and may cause unnecessary creasing.
Make sure that your laundry is thoroughly spun
before drying. This saves time and energy.
Carrying out the final rinse with hot water helps to
reduce the residual moisture level, and the residual
heat in the laundry will help keep processing time
down in the dryer, thus saving energy.
Follow detergent manufacturer's advice regarding the
right amount of detergent to use.
This will depend on the size of the load, the water
hardness level and the amount of soiling in the
laundry.
Chose the correct programme (with pre-wash or
intensive options selected) and the correct
temperature.
Please dispose of it at your local community waste
collection/recycling centre.
Please contact your dealer, your local waste
collection centre or scrap merchant about recycling
schemes.
Please store it out of the reach of children whilst
awaiting disposal.
7
Page 8
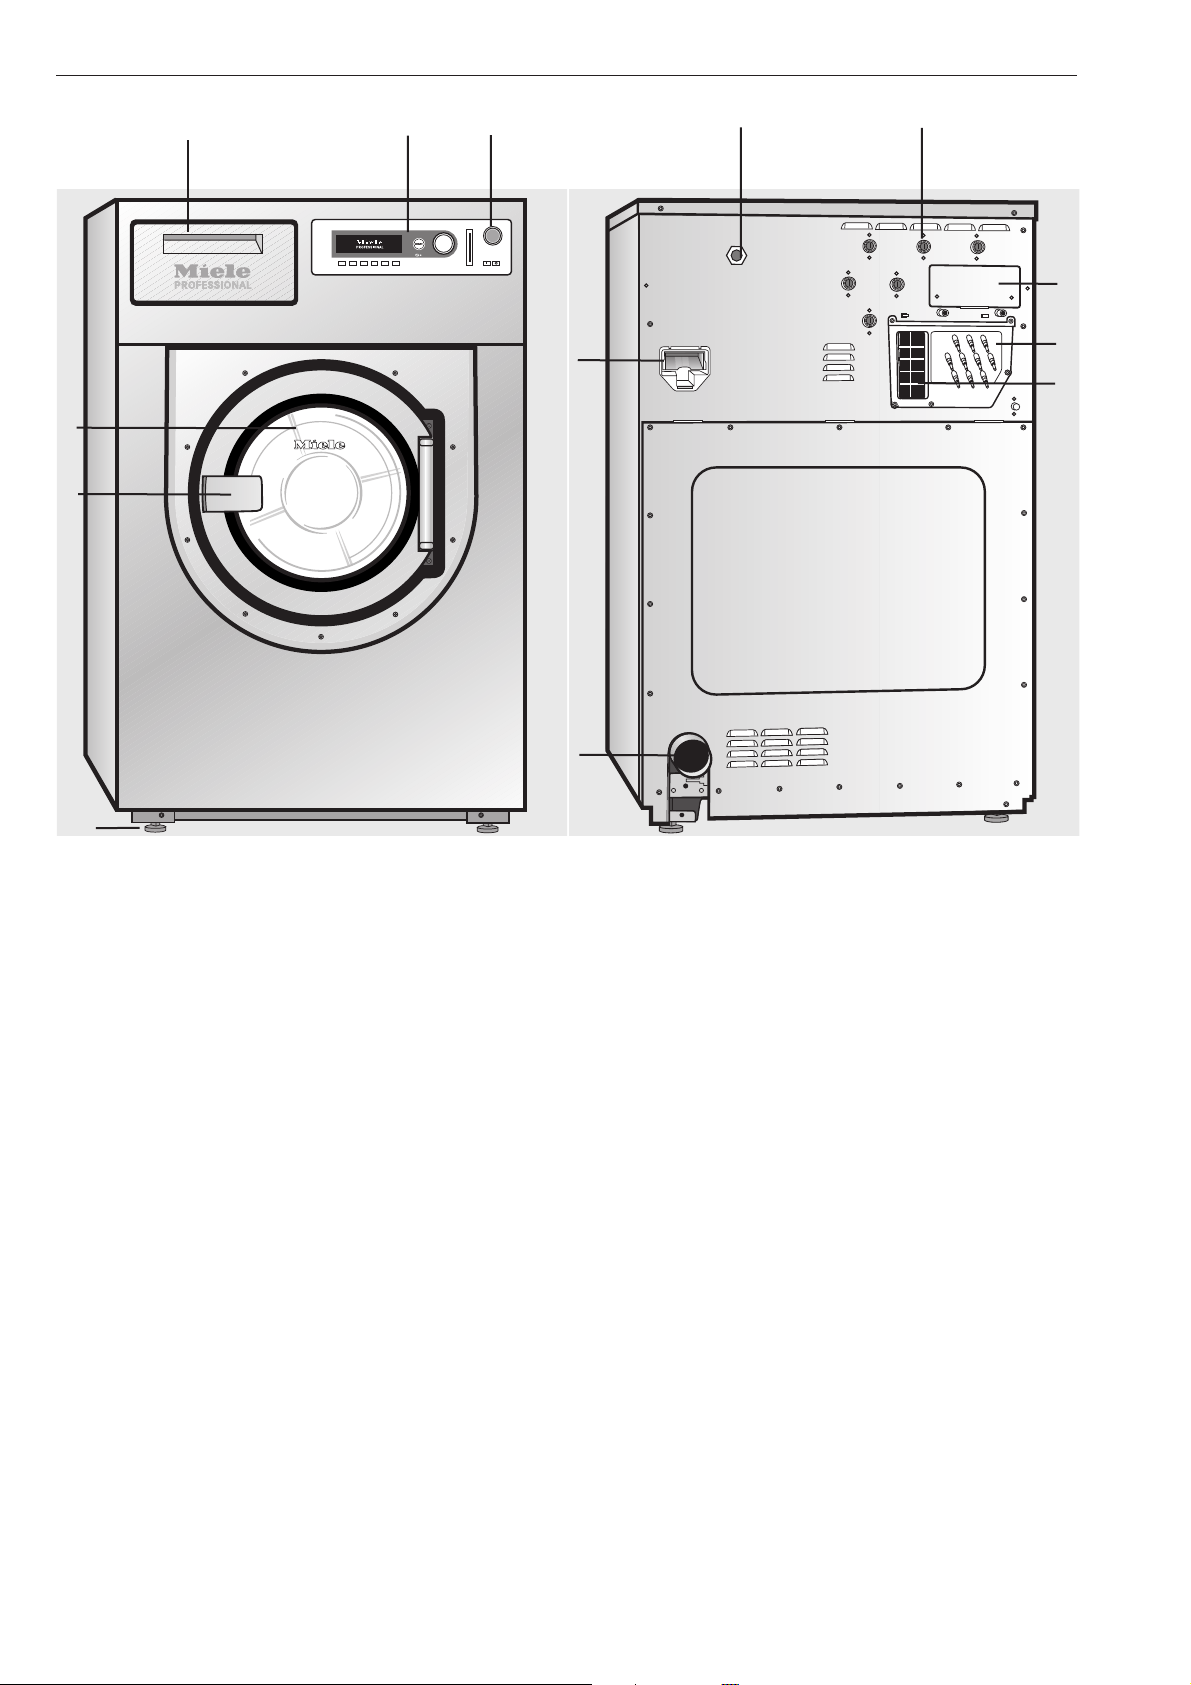
Description of the machine
d
e
c
b
a
j
g
h
i
l
m
f
a Emergency stop switch
Press the red button to switch the machine off.
b Control panel
c Detergent dispenser drawer
Pull the handle to open the compartment.
d Drum door
Pull the door handle to open the drum door. Do not
use force to open it.
e Door handle
The door handle is fitted with a safety device to
ensure that the door lock functions correctly (see
"Problem solving guide").
k
g Electrical connection
h Water inlet connections
i Water recycling connections
j Communication slot
k Water drainage
l Liquid agent dispensing connections
m Vapour extraction
See "Installation and connection"
f 4 adjustable screw feet
8
Page 9
Description of the machine
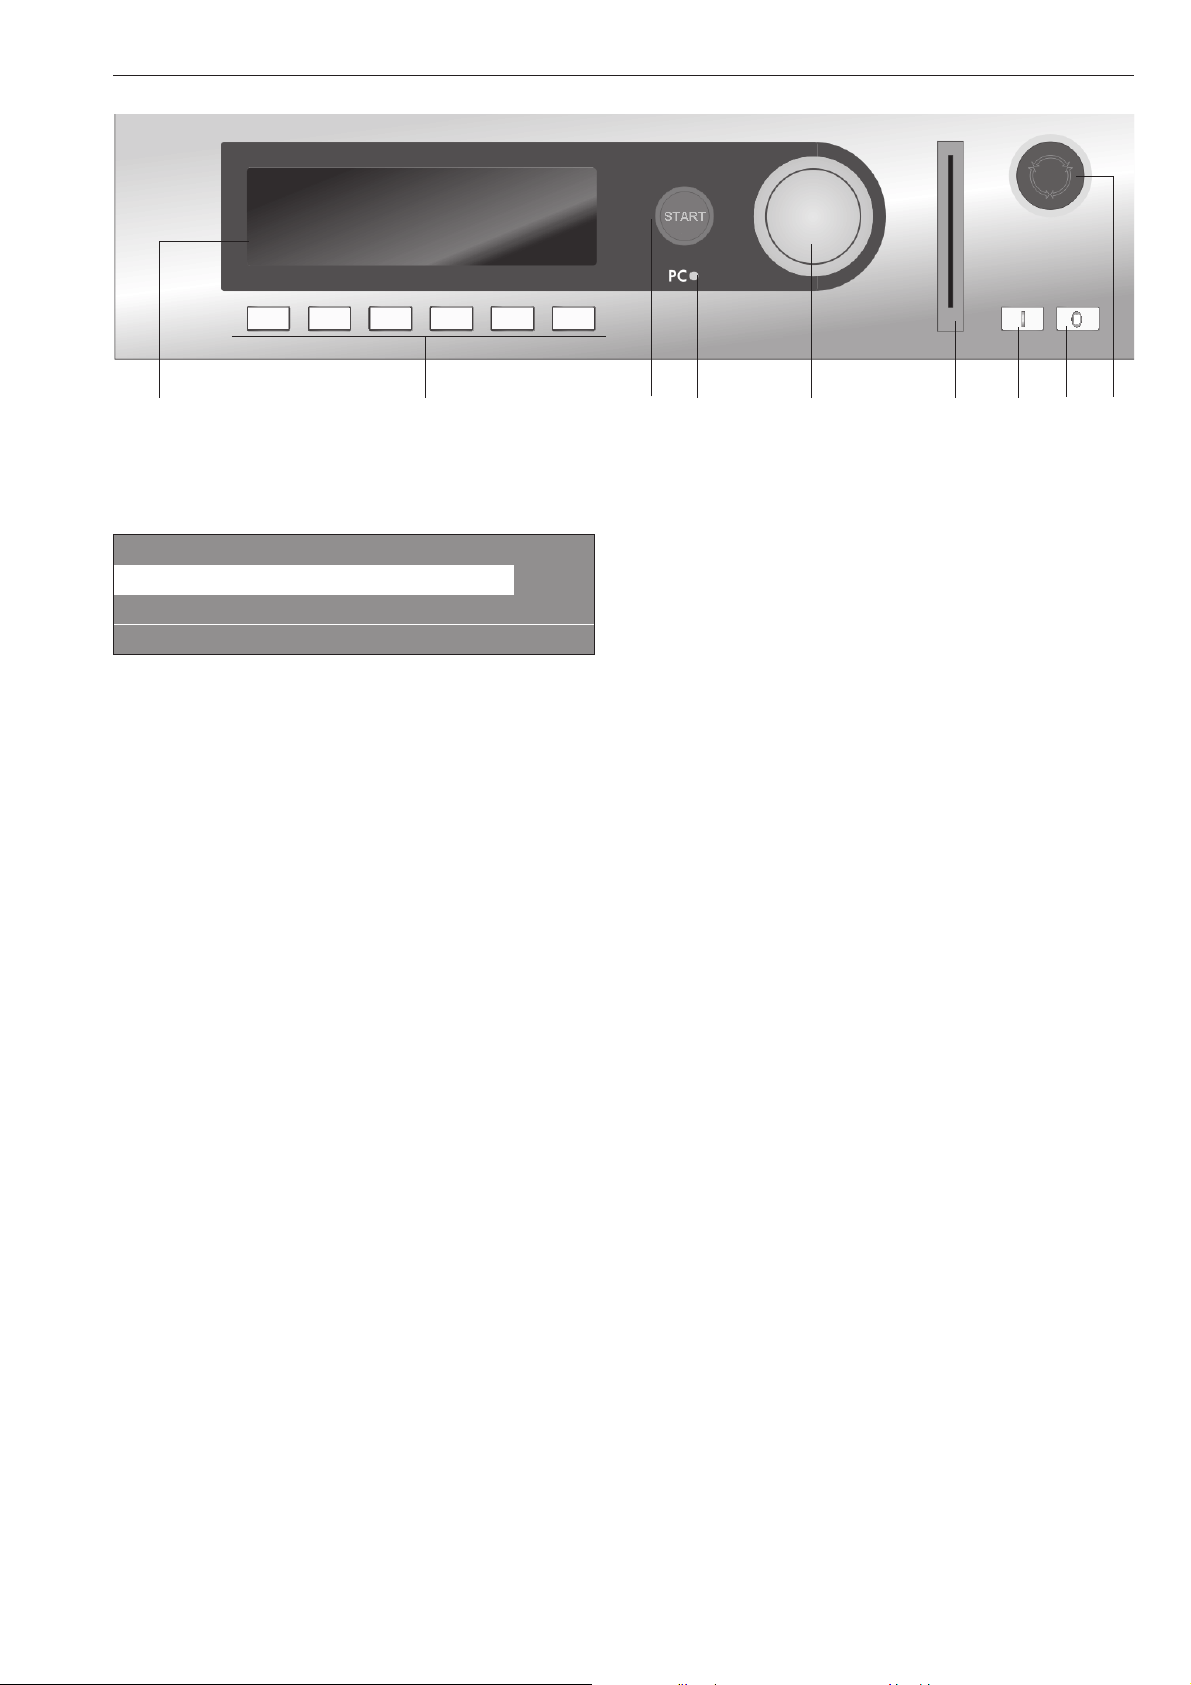
a b c d e f g h i
Control elements
a Display
1 Cottons 90 °C
2 Cottons 60 °C
3 Cottons intensive 60 °C
i FC A
After switching on the "Welcome" display will appear
for a short time followed by the programme list. The
most recently used programme is highlighted.
b Function buttons
The six buttons underneath the display are the
function buttons. These buttons have specific
functions depending on the status of the machine.
These functions will be listed in the display above the
buttons and will be highlighted once selected.
If the machine is reprogrammed to "Direct button
allocation" the first 6 programmes listed in the display
can be selected directly via these buttons.
c START button
The lightring will flash when a selected programme
can be started. Pressing the Start button will start the
programme. After a programme has started, pressing
this button will show the display as it was before the
start of the programme.
d PC / Optical interface
This interface is used for transferring data to the
control unit from a PC and vice versa.
e Rotary selector
Turning the selector brings up options and menus in
the display.
Pressing the selector confirms your selection.
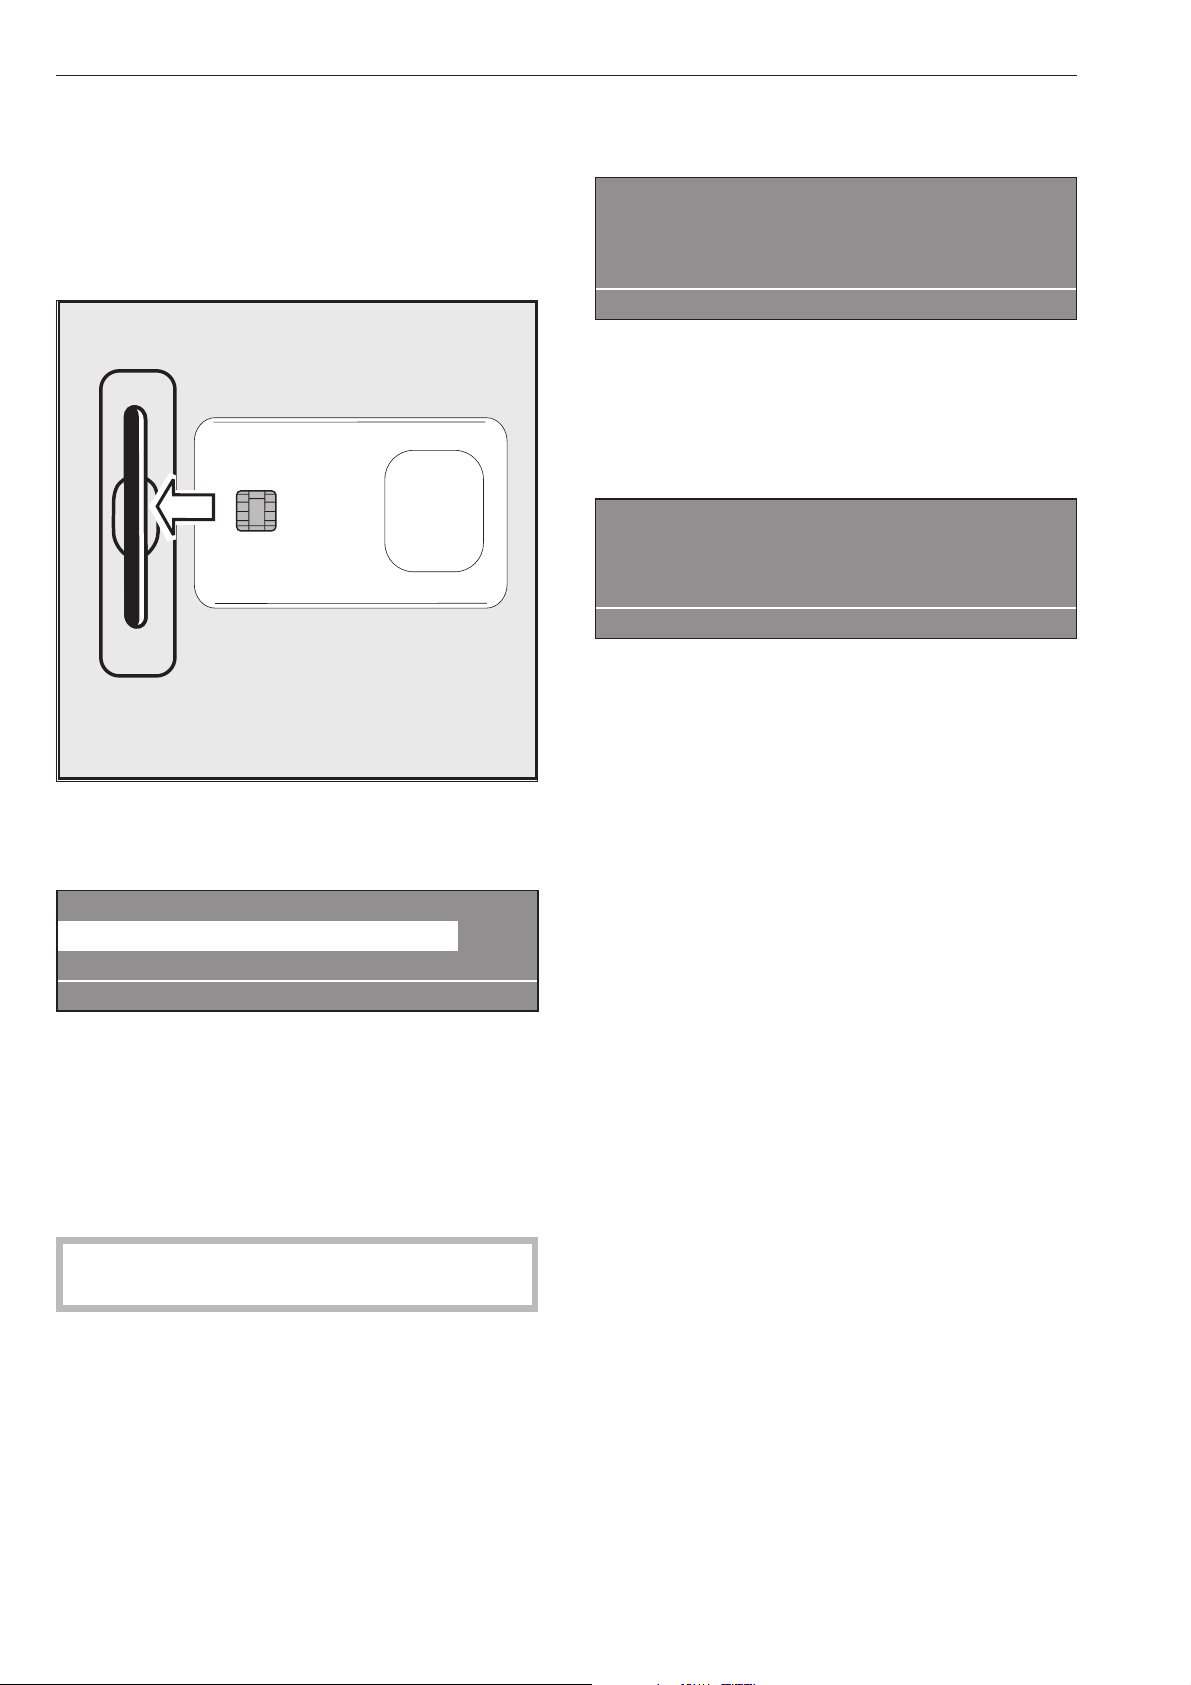
f Chip card reader
When a chip card is inserted, the programmes on the
chip card can be used.
Insert the card in the direction of the arrow (on the
card).
g I Mains on switch
Switches the machine on.
h 0 Mains off switch
Switches the machine off.
i Emergency stop switch
Only for use in an emergency.
Press the red button to switch the machine off. After
the problem has been resolved, turn the red dial
clockwise to release it. Then press the Start button to
continue the interrupted programme.
9
Page 10
Description of the machine
Function buttons
Pressing the button activates the function and
pressing the button again deactivates it.
f Stop/End
The function button on the right-hand side is used to
stop a programme after it has started.
Pressing it again finishes the programme.
+i Block plus
The relevant programme block (e.g. Pre-wash) is
added to the programme.
m Starch stop
Press this button if you wish to laundry to be
starched.
k Without spin
Press this button if you do not want the laundry to be
spun after being rinsed.
FC Settings
Press this button to switch to another language
temporarily.
m Start time
Press this button before the start of a programme to
display the message that a start time can be
selected.
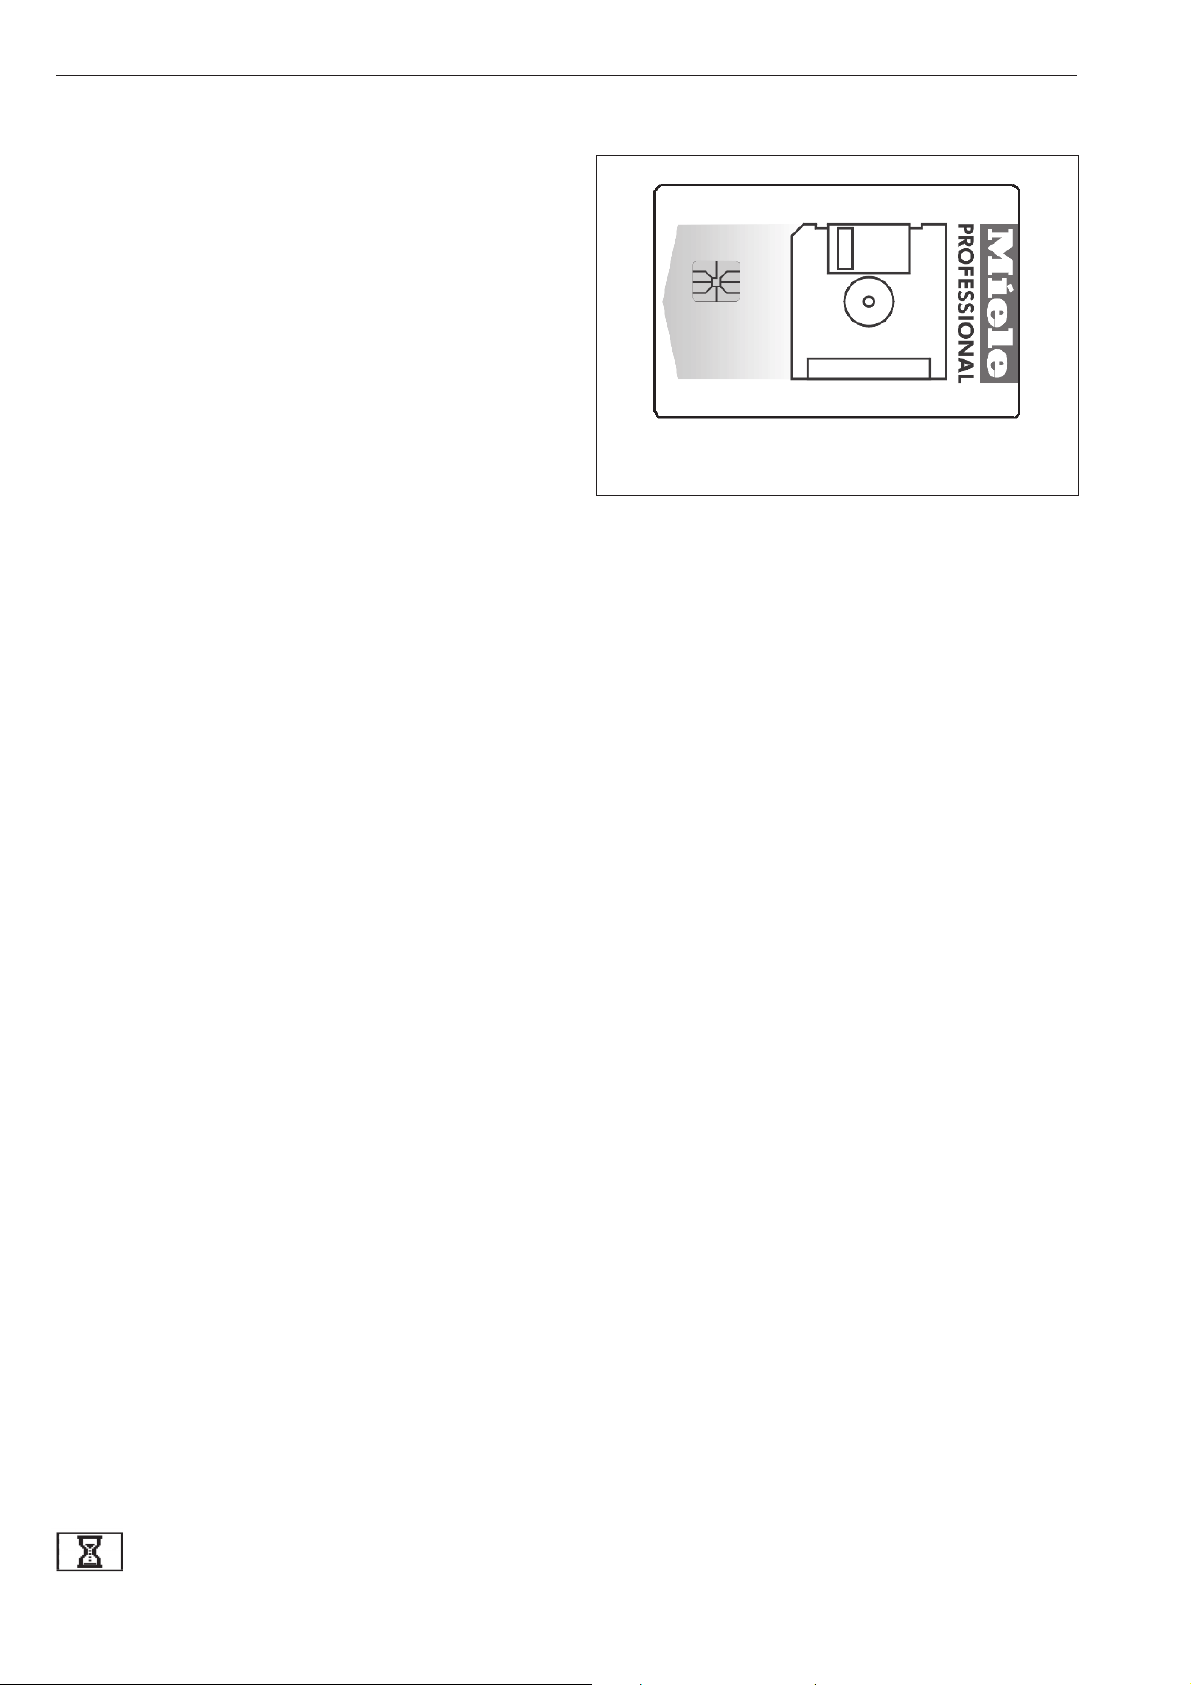
Chip card operation
A chip card is available to order as an optional extra.
It is supplied without any programmes.
See the programming instruction booklet for
information on transferring data from the control unit
to the chip card and vice versa.
The chip card can store a maximum of 30
programmes, each with 6 blocks. The back of the
chip card can be labelled.
K Information
Press this button to call up programme information in
the display.
q Water drainage
i Manual control
See the programming instruction booklet.
ü Change order
The order of the programme in progress can be
changed or programme blocks can be repeated.
A Back
Takes you back to the previous display.
e/- Indicates more information on the
next / previous line
S Save
See the programming instruction booklet.
$ Programme locked
Once a locked programme has been started, the End
button can only be used to stop and cancel it during
the first minute.
) Programme unlocked
ß Dispensing
ä Dispensing switched off
\ Operating data
I < 0- Setting (calibration)
If the display does not show 00.0 when the drum is
empty press this button to reset it.
Data transfer
10
Page 11
How to wash correctly
The machine must be commissioned by a Miele
service technician or a dealer authorised by the
manufacturer before it is used for the first time. For
gas heated machines in the U.K. this must be
carried out by a Gas Safe registered technician.
Open the on-site stopcocks for water and
^
depending on the type of heating, gas or steam.
Switch on the on-site mains switch.
^
Press the "On" I switch to switch the machine on.
^
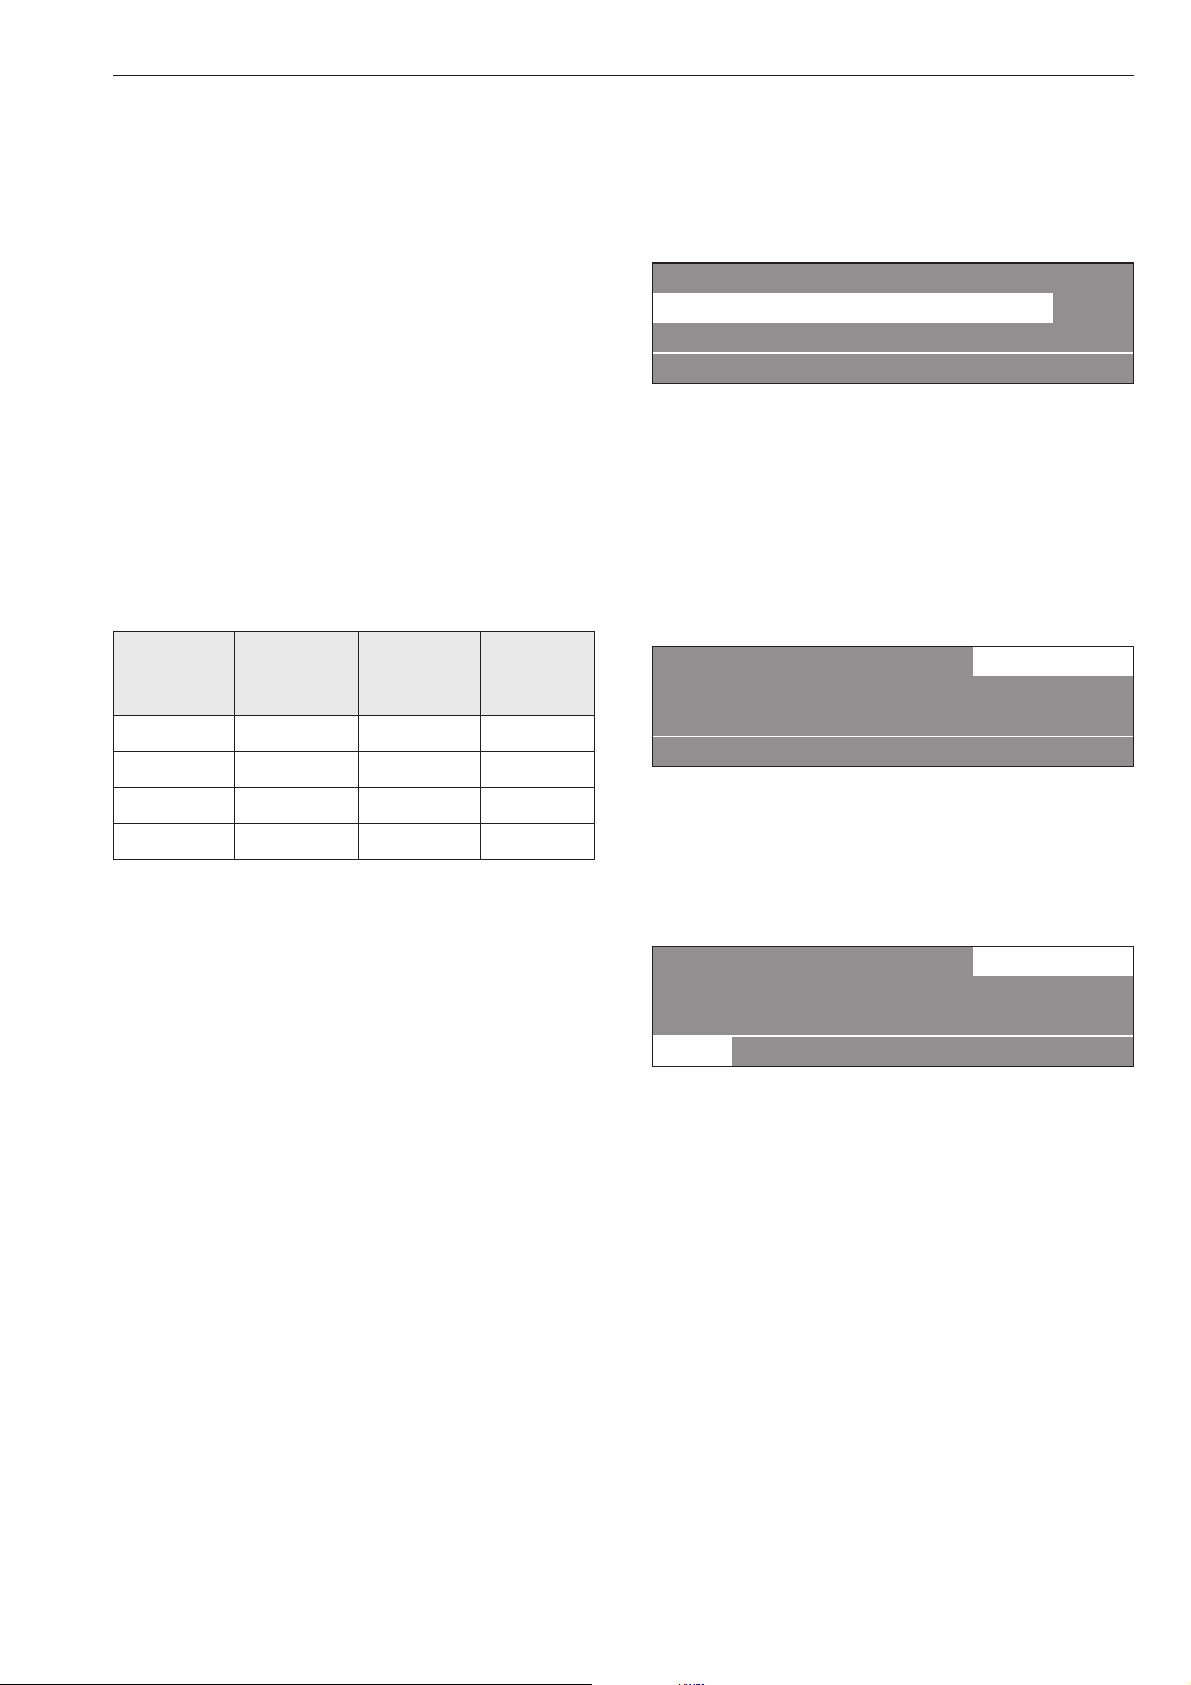
PROFESSIONAL
PW 6xx7
Welcome
A "Welcome" message will appear in the display.
1 Cottons 90 °C
2 Cottons 60 °C
3 Cottons intensive 60 °C
i äFC A
This is followed by the programme list (with the most
recently used programme highlighted).
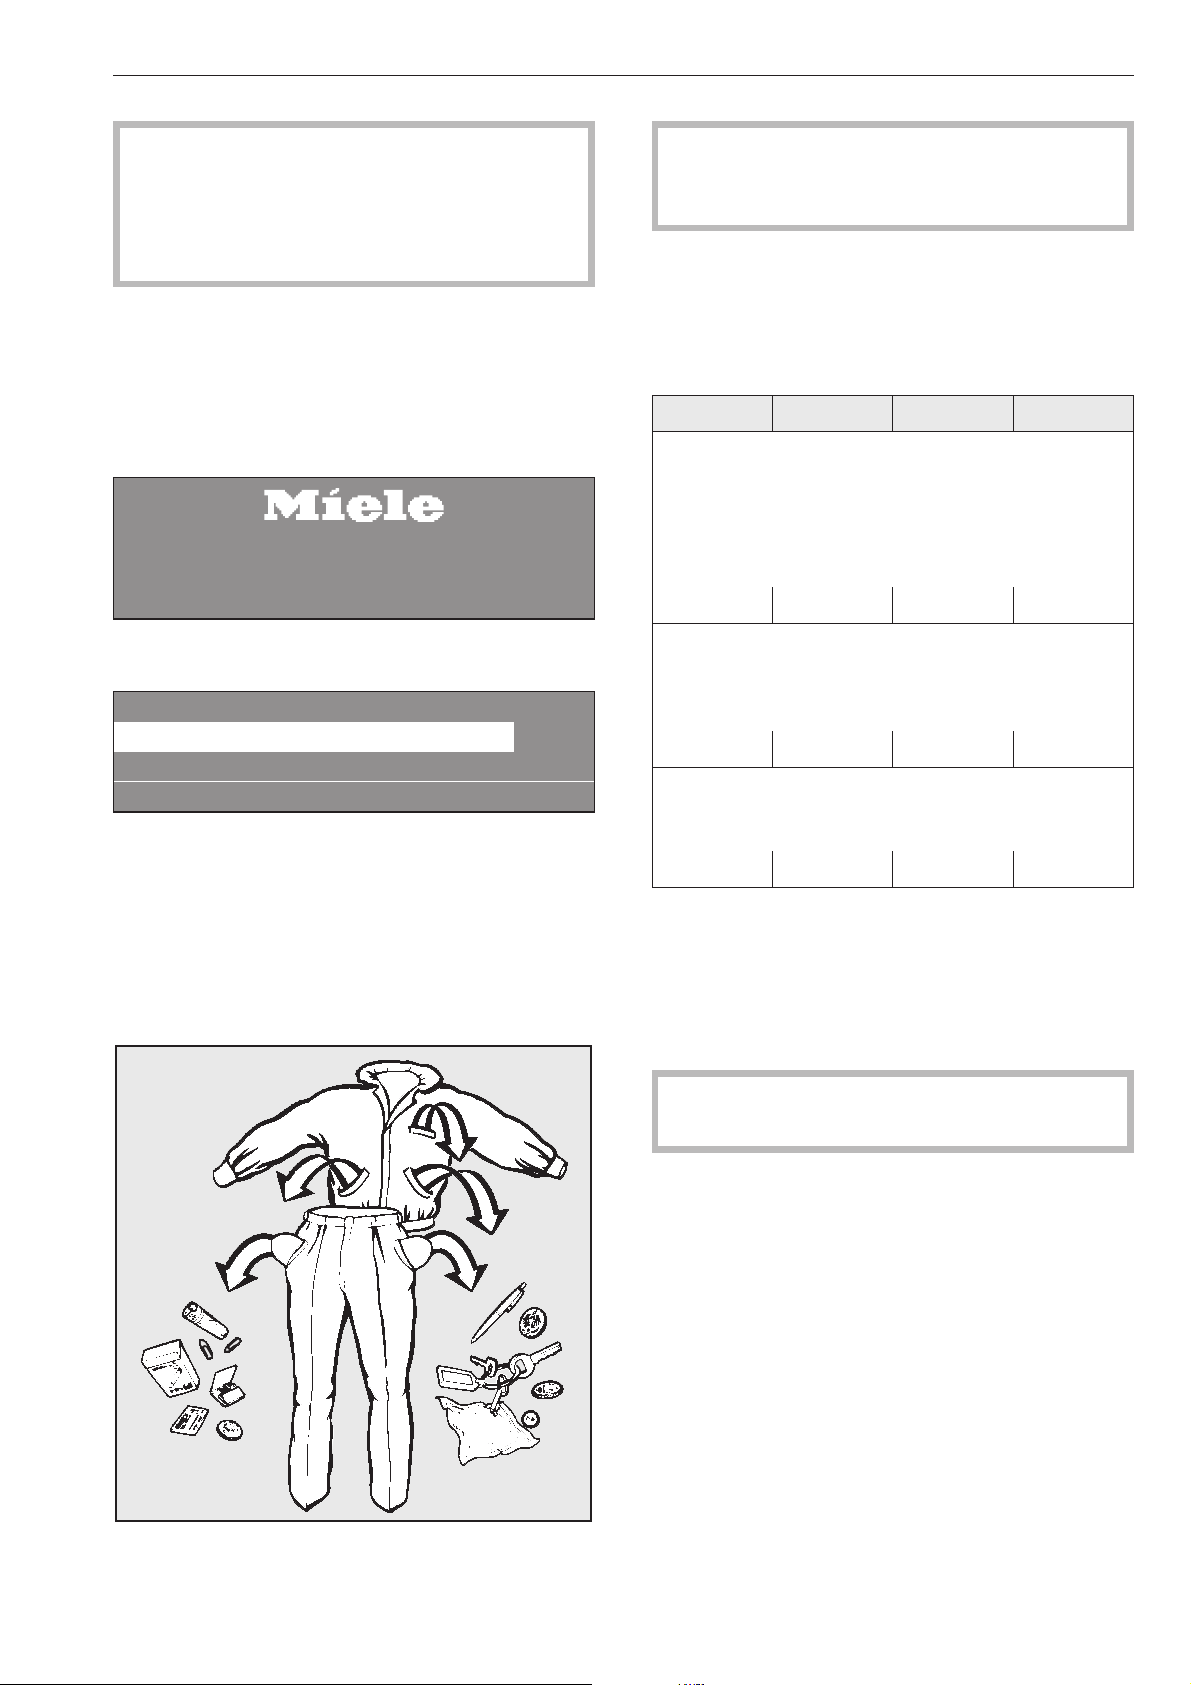
Foreign objects (e.g. nails, coins, paper clips, etc.)
can cause damage to garments and components
in the machine.
Maximum loads for the standard
programmes
(Dry weight of laundry)
PW 6107 PW 6137 PW 6167 PW 6207
1 Cottons 90°C
2 Cottons 60°C
3 Cottons intensive 60°C
4 Cottons 30°C
5 Cottons intensive 30°C
6 Cottons Eco short
max. 10 kg max. 13 kg max. 16 kg max. 20 kg
7 Minimum iron 60°C
8 Minimum iron intensive 60°C
9 Minimum iron 30°C
10 Minimum iron intensive 30°C
max. 5 kg max. 6.6 kg max. 8 kg max. 10 kg
11 Delicates
12 Woollens 30°C
13 Handwashable woollens 30°C
max. 4 kg max. 5.2 kg max. 6.4 kg max. 8 kg
Turn the selector dial to highlight the programme you
want. The programme can be then started by simply
pressing the START button.
Sort the laundry
The maximum load for other programmes is given in
the relevant programme overview.
^
Load the laundry
^
Close the drum door with the door handle. Do not
slam it shut.
Make sure that no garments are caught between
the drum door and the drum opening.
^
Empty any pockets.
11
Page 12
How to wash correctly
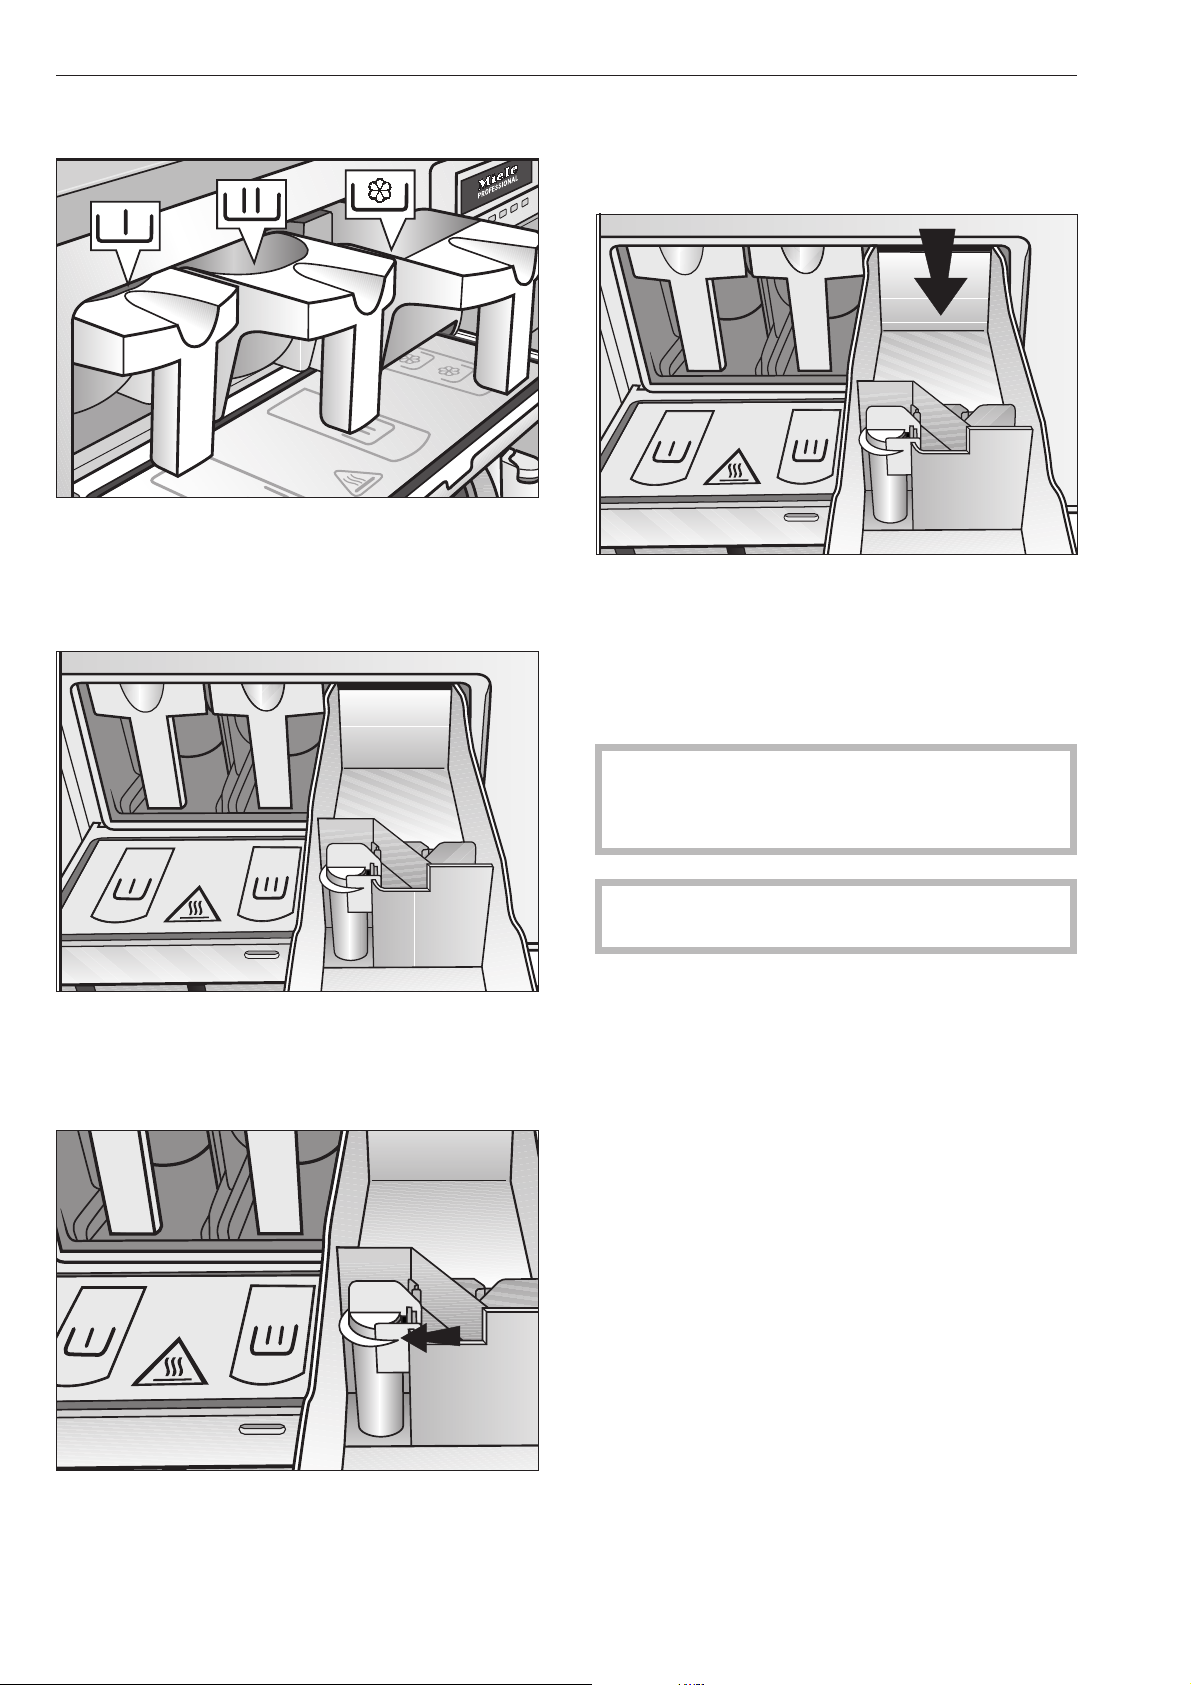
Add detergent
With the standard programmes, place detergent for
^
the main wash in compartment j and if wished,
detergent for the Pre-wash in compartment i.
Place fabric conditioner in the front section of
compartment p
Bleaching agents
Only use bleaching agents on textiles with the x
symbol on the wash care label.
Liquid bleaching agents may only be placed in the
compartment designated for them. This is to ensure
that the agent is added automatically at the second
rinse. Liquid bleaching agents should only be used
with coloureds if the textile manufacturer's wash care
label states that the textile is colour fast and suitable
for bleaching.
^
Place other liquid washing additives, e.g. liquid
starch, in the rear section of the compartment p
(only if the machine has been programmed for this
function).
A 3rd rinse cycle must be programmed in if bleach
is to be used (see Profitronic programming
manual).
,
Frequent use of chlorine increases the risk of
component damage.
Only use dyes, colour run, dye removers and
descaling agents which are specified as being
suitable for use in washing machines. Always
observe the manufacturer's instructions carefully.
^
Do not exceed the level marker in compartment
p. Otherwise the agent will run through the siphon
into the suds container.
12
Page 13
How to wash correctly
Detergent dispensing
It is important to avoid adding too much detergent as
this causes excessive foam.
Do not use detergents which create a lot of foam.
–
Follow the detergent manufacturer's instructions for
–
use.
The right amount to dispense will depend on the
following:
The amount of laundry
–
The water hardness level
–
The soiling level of the laundry
–
The amount to dispense
Take the water hardness into account and follow the
detergent manufacturer's instructions on the
packaging.
Water hardness levels
Hardness
range
I soft 0 - 1.3 0 - 7
II medium 1.3 - 2.5 7 - 14
Water
properties
Hardness
level in
mmol/l
German
scale
°d
Select a programme
Turn the rotary dial to select a programme (e.g.
^
Programme 1 Cottons).
For this example, the following will appear in the
display:
16 Separate drain
1 Cottons 90 °C
2 Cottons 60 °C
i äFC A
Select the Pre-wash, Starch stop or Without spin
additional option
Confirm the selection of the programme by
^
pressing the rotary selector.
For this example, the following will appear in the
display:
1 Cottons 10.0 / 10.0 kg
90 °C Main wash
Rinses 1100 rpm
+im k m A
III hard 2.5 - 3.8 14 - 21
IV very hard above 3.8 above 21
Check with your local water supplier if you do not
know the hardness level in your area.
Gas heated machines
On gas heated machines the suds solution is
pumped around the heater elements. This additional
agitation of the suds solution creates foam. It is
therefore important to use a low-foaming detergent
and not to use too much detergent.
If over-foaming occurs use a reduced foam detergent
or call in a detergent application specialist.
^ If wished you can now select the Pre-wash
programme block, by pressing the +i function
button.
When the +i function button is pressed, the
following will appear in the display:
1 Cottons 10.0 / 10.0 kg
40 °C Pre-wash
90 °C Main wash 1100 rpm
+i mk m A
"+i" is highlighted.
Press the function button again to deselect the
function.
Press the m Starch stop button if the laundry is to
be starched.
Press the k Without spin button if you do not want
the laundry to be spun after being rinsed.
If you do not wish to make any further alterations to
the programme:
^
Press the START button. The programme will start.
13
Page 14

How to wash correctly
If you wish to make alterations before the start of
the programme, e.g. to the load size, temperature
or spin speed:
Load weight
You can enter the weight of the load manually before
the start of the programme.
1 Cottons 10.0 10.0 kg
40 °C Pre-wash
90 °C Main wash e
+im k m A
Turn the rotary dial until "Load" is highlighted. Press
^
the dial to confirm your selection. Turn the dial to
alter the weight and confirm your selection by
pressing it.
Temperature in 1 °C increments from cold, 15 to
max. 95 °C .
Turn the rotary dial to select the "Temperature" field
^
(40°C for pre-wash) and press it to confirm your
selection.
Once a programme has started the programme
sequence will appear in the display.
1 Cottons
40 °C Pre-wash 20 °C
Main wash Ready at 12:35
+im k mKf
In the 2nd line of the display, pre-wash in this
example, the actual suds temperature will also be
shown.
1 Cottons
90 °C Main wash 60 °C
Rinse 1 Cold Ready at 12:35
+im k mKf
Once the pre-wash programme block has finished
the programme block for the main wash will appear in
the 2nd line of the display together with the actual
suds temperature. Under that the following
programme block will be listed. Rinse 1 in this
example.
1 Cottons 10.0 / 10.0 kg
40 °C Pre-wash
90 °C Main wash e
+im k m A
^ Turn the rotary dial to alter the temperature value
and then press it to confirm your selection.
Spin speed in 25 rpm increments from 0, 300 to
maximum spin speed.
^
Turn the rotary dial to select the "Spin speed" field
(1100 rpm for the final spin) and press it to confirm
your selection.
1 Cottons 10.0 / 10.0 kg
90 °C Main wash
Rinses 1100 rpm
+im k m A
^
Turn the rotary dial to alter the spin speed and then
press it to confirm your selection.
Maximum spin speeds
PW 6107 PW 6137 PW 6167 PW 6207
The time that the programme will finish is shown on
the right hand side of the display.
1 Cottons
90 °C Main wash 60 °C
Rinse 1 Cold Ready at 12:35
+im k m K f
Pressing the K "Information" button will call up further
information about the programme e.g.:
1 Cottons
Start date and time: 10.7.2010
Start time: 9:47 e
A
Time after start: 0h 23 min
Time left: 0h 11min
Time after start: 0h 23 min e
Time left: 0h 11min
Repeat: No
Area 3: rinse e
1200 rpm 1100 rpm 1150 rpm 1100 rpm
^
Press the START button. The programme will start.
14
Page 15

Block 2: Rinse 2
Block step: Wash time 1
Actual level: 22 mm e
Rqrd. level: 60 mm
Actual temperature: 35 °C
Rqrd. temperature: 60 °C e
How to wash correctly
The machine door is locked. Never use force
,
to try and open the door.
Press the q "Water drainage" function button or
^
select the Separate spin programme and press the
START button.
Open the door at the end of the programme.
1 Cottons
Spin speed: 40 rpm
Rhythm: 12 / 3 -
A
Press the A "Back" button to return to the
^
programme sequence display.
Open the door at the end of the
programme
The following message will appear in the display at
the end of the programme as long as there is no
water in the machine and the drum is stationary:
1 Cottons
Programme finished
The door can be opened.
m FC A
At the same time an acoustic buzzer will sound for 5
seconds to let you know that the programme has
finished.
If no more laundry is to be processed:
Switch the machine off by pressing the "Off" 0
^
button and then switch off at the on-site mains
switch.
Close all stopcocks for water, gas and steam as
^
applicable.
^
Pull the door handle to open the drum door.
Important: If the door will not open press against it
and then pull on the handle again. Do not use force
to open it.
^
Unload the drum.
If the programme was interrupted with water in the
drum, or if the programme was stopped, for example,
during the spin the following message will appear in
the display:
1 Cottons
Programme finished. Water in the drum.
qmFC A
or
1 Cottons
Programme finished. Drum still rotating.
m FC A
15
Page 16
Card operation
Cards on which a programme has been saved can
only be used on the machine type for which they
have been written. Unwritten cards can be used
universally.
Press the "On" I button to switch the machine on.
^
The Welcome screen will appear.
If the card is inserted the wrong way round the
following message will appear in the display:
Card fault
§
Insert the card the right way round in the card
^
reader.
If the card is not the right one for the machine it is
being used in the following message will appear in
the display:
Card contents
Programmes on the card are
only suitable for machine type PW 6161.
Insert the correct card for the machine in the card
^
reader.
Card incorrectly inserted in card reader.
A
A
^ Insert the card in the reader.
The programmes listed on the card will appear in the
display.
Card operation
17 Masks 45 °C
18 Minimum iron 60 °C
i ßFC A
^
Use the rotary dial to highlight the programme you
want to use. Press the rotary dial to select the
programme you have highlighted.
^
Press the START button. The programme will start.
After pressing the START button you can remove the
card from the reader. The programme is deleted from
the machine's memory once it has finished.
,
Never insert any other type of card or object
into the card reader!
Card access operation
Programmes requiring special procedures are written
on to a card which is then used to run the
programme.
"Card access" has to be activated via the supervisor
level in the machine.
The machine will then only run programmes by using
a card (on which one programme has been saved).
Programmes in the machine's control unit cannot then
be accessed.
16
Page 17

Additional options
Language selection
The language shown in the display can be changed
briefly before starting a programme if you wish. To do
so use the button underneath the flag symbol.
The language will revert back to the default setting 5
minutes after the end of a programme with the door
open.
1 Cottons 90 °C
2 Cottons 60 °C
3 Cottons intensive 60 °C
i FC A
If you press the FC button the following will appear
in the display:
Settings Back <Main menu Language
Supervisor level
FC A
Press the rotary dial to confirm your selection of the
^
"Language" menu.
Settings deutsch
Language F english (GB)
español
FC A
^ Turn the rotary dial to highlight the language you
want and then press the dial to confirm your
selection.
Start date and time
If you want a programme to start at a later time use
the m button for "Start date and time".
The actual time and date will then appear. The input
field for hours will be highlighted.
Press the rotary dial to change the hour.
^
Turn the rotary dial to alter the hour and then press
it to confirm your selection.
Then turn the rotary dial to select the "Minutes" field
^
and press it to confirm your selection.
Turn the dial to alter the minutes and then press it
to confirm your selection.
Then turn the rotary dial to select the "Start date"
^
field and press it to confirm your selection.
Turn the dial to alter the date and then press it to
confirm your selection.
Do the same for the month and the year.
^
After setting the required start date and time:
Press the START button and the programme
^
selected will commence at the time specified.
The display will now contain the following information:
1 Cottons 10.0 / 16.0 kg
90 °C Main wash
16:15 -2.4.2010 Start 6:00 -3.4.2010
+im k m A
The current time and date as well as the start time will
be displayed.
^ If the door is opened again you will have to press
the START button again.
To cancel the start time and date function
Press the m "Start date and time" button again or
press the A"Back", and any changes will be
rejected.
With pre-wash
To set a date and time
After selecting your programme, e.g. Cottons in the
example here, the following will appear in the display:
1 Cottons 10.0 / 16.0 kg
90 °C Main wash
Rinses 1000 rpm
+im k m A
^
Press the m "Start date and time" button.
The following (example) will appear in the display:
1 Cottons 10.0 /16.0 kg
Start time: 16 : 10 Start date: 2.4.2010
After selection press the start button
A
For heavily soiled laundry the standard programmes
1 to 10, can have a pre-wash added. To do so press
the "Block+" button i.
Pressing the button again deselects the option.
When the "Blockplus" + i button is pressed, the
following will appear in the display:
1 Cottons 14.0 / 16.0 kg
40 °C Pre-wash
Main wash e
+i mk m A
The "+i" field will be highlighted in the display.
17
Page 18

Additional options
Starch
Starching via the dispenser drawer
Starch can be selected with all the standard
programmes (except for Separate spin and Separate
drain) before starting a programme by selecting the
m "Starch stop" option.
The m field will be highlighted in the display.
Pressing the button again deselects the option.
1 Cottons
Prog. stopped. Starch stop pressed.
The door can be opened.
i ü f
Once the "Starch stop" programme stage is reached
the words "Starch stop" will start flashing in the
display.
Make up the starch solution following the
manufacturer's instructions on the packaging and
then add it to the front section of compartment p.If
necessary dilute the starch with water. The wash time
is automatically increased by 4 minutes.
Press the START button to continue the programme.
m
Once the "Without spin" programme stage is reached
the words "Without spin" will start flashing in the
display.
To finish the programme without spinning and with
water left in the drum press the f button.
To continue with a spin press the START button.
Programme stop
To halt the programme press the f button.
The programme remains stationary.
1 Cottons
Programme stop
i ü f
To continue the programme press the START button.
Programme cancellation
Press the f button twice in succession to cancel a
programme.
If there is still water in the machine or if it was
cancelled during spinning the following (example) will
appear in the display:
Dispensing directly into the drum
Make the starch up following the manufacturer's
instructions on the packaging. Once the "Starch stop"
programme stage has been reached open the door
and add the starch. Close the drum door
The following message will appear in the display
again:
1 Cottons
Prog. stopped. Starch stop pressed.
The door can be opened.
i ü f
Press the START button and the programme selected
will commence
m
Without spin
"Without spin" can be selected with all the standard
programmes (except for Separate spin) before
starting a programme by selecting the k "Without
spin" option.
The k field will be highlighted in the display.
1 Cottons
Programme finished. Water in the drum.
i ü f
or:
1 Cottons
Programme stopped. Drum rotating.
i ü f
To open the door press the q "Water drainage"
button or select the Separate spin programme and
press the START button.
Pressing the button again deselects the option.
1 Cottons
Prog. stopped. Without spin pressed.
i ü f
18
k
Page 19

Additional options
Programme cancelled with a locked
programme
It is not possible to stop or cancel a programme if the
programme is locked.
1 Cottons
90 °C Main wash
Locked Ready at 12:35
)f
The display will show that the machine is locked if
you try to cancel the programme with the f button.
To cancel the programme you will first have to select
the ) "Unlocked" function and then enter a
password to unlock the programme.
After entering the password the following will show in
the display:
Unlock programme?
S A
Press the S "Save" button to return to the normal
display and the programme can now be cancelled.
Changing the programme order
The order of the programme in progress can be
changed or programme blocks can be repeated.
Press the f button and the programme will stop.
^
1 Cottons
Programme stop
i ü f
After pressing the ü button the current area,
^
block or step will appear in the display.
See also "Programme structure" in the Progamming
Manual.
Reorganise -> Cottons
Area 2: Main wash e
S A
Area: 2 Main wash
Block 1: Main wash
Step: Wash time 2 -
S A
1 Cottons
90 °C Main wash 60 °C
Rinse 1 Ready at 12:35
mKf
^ Turn the rotary dial to alter the area and then press
it to confirm your selection. Area: Select 1
Pre-wash, 2 Main wash or 3 Rinses and confirm
your selection.
^ Turn the rotary dial to alter the block and then
press it to confirm your selection. Block: Select
Pre-wash 1-10, Main wash 1-10 or Rinses 1-10 and
confirm your selection.
^
Turn the rotary dial to alter the step and then press
it to confirm your selection. Select the required
programme step and confirm your selection.
^
Press the S "Save" button and then press START to
reorganise the programme order or press the A
"Back" button to override the programme stop and
not change the programme order.
19
Page 20
Optional modules
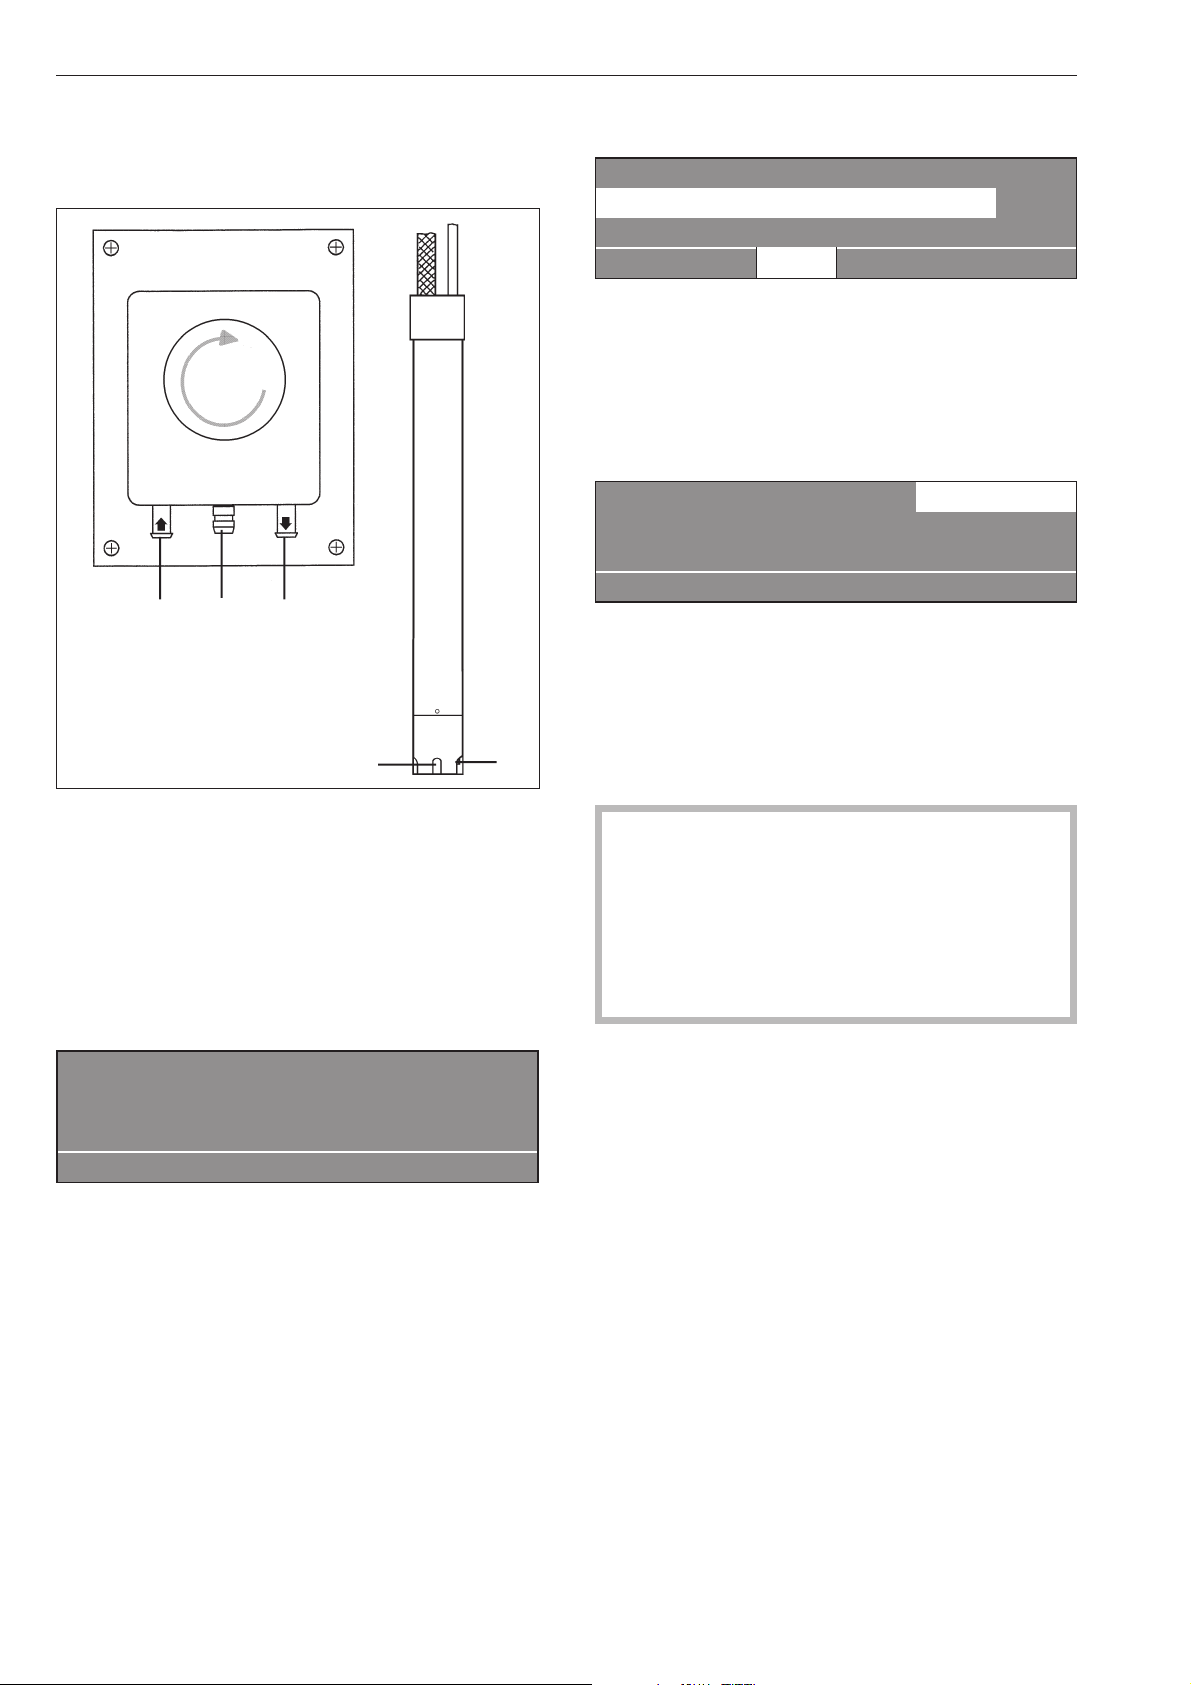
Liquid dispensers
Dispenser pump Suction pipe
a
c
b
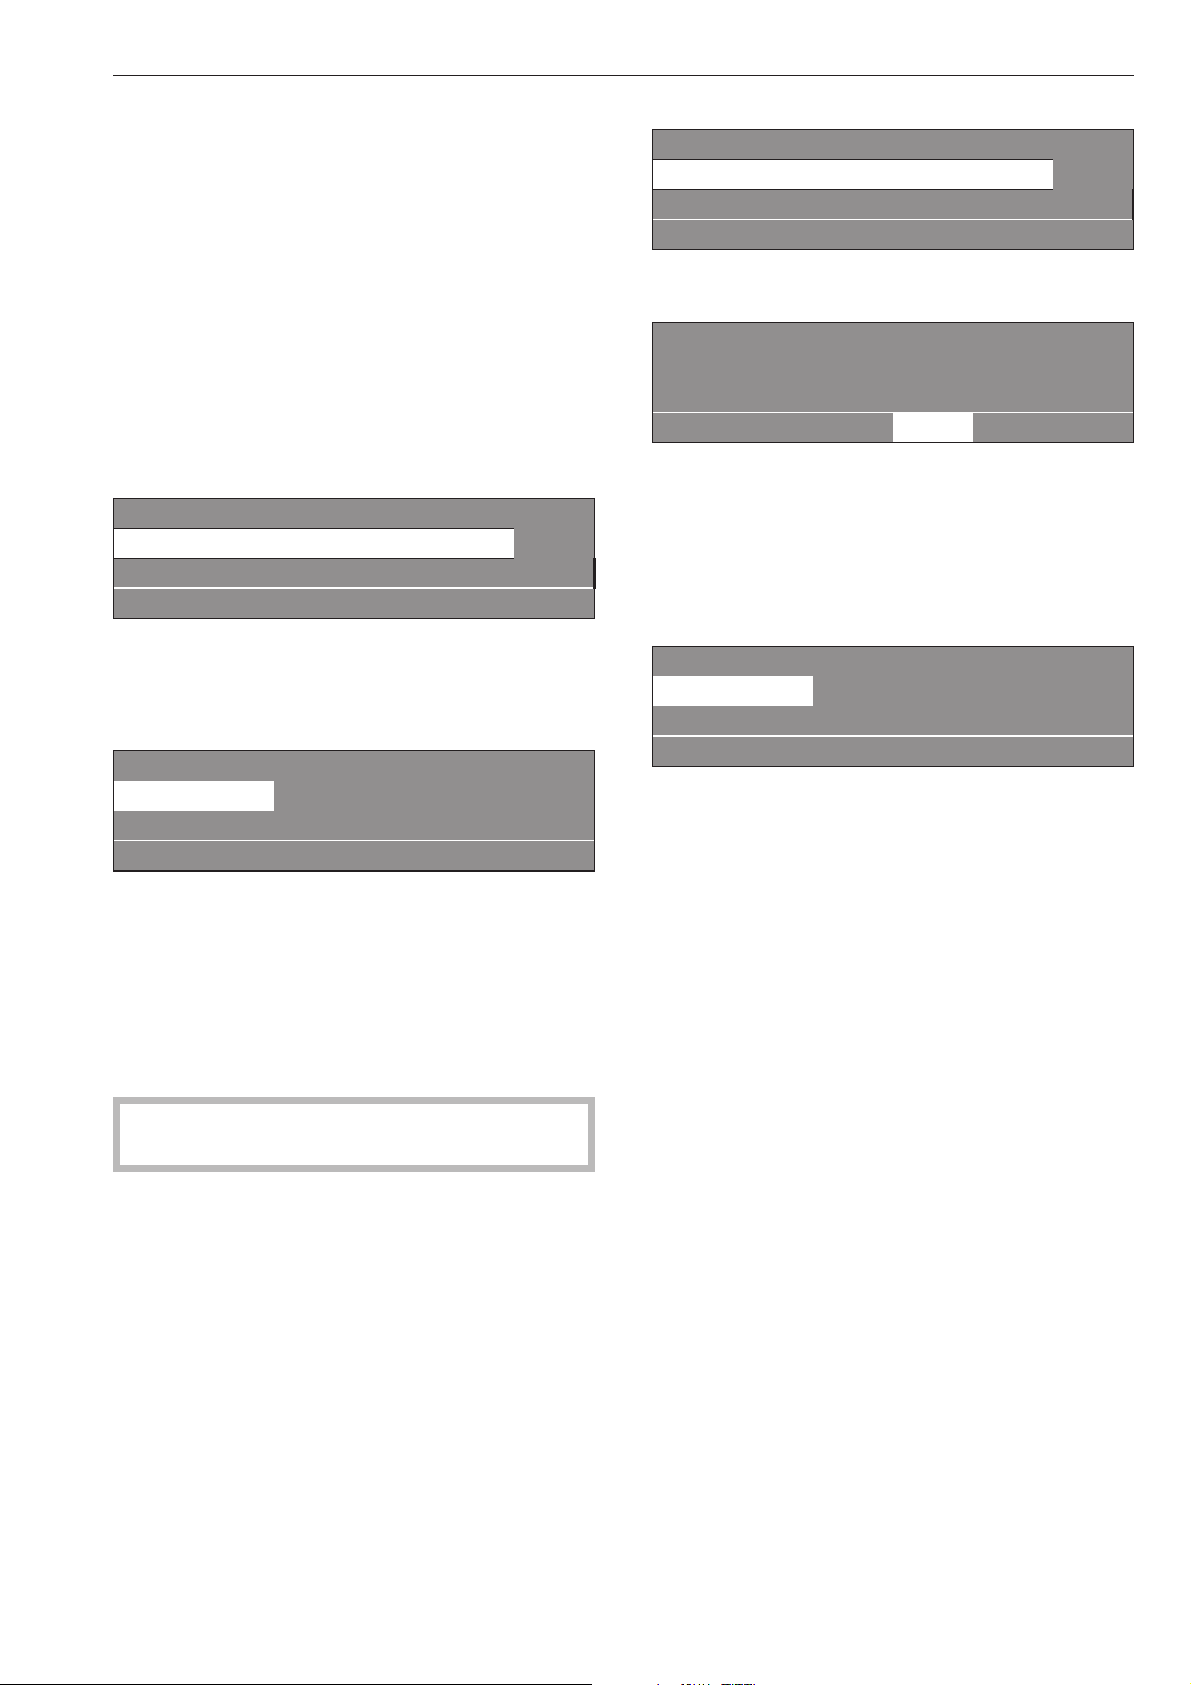
To deselect the liquid dispensing system
1 Cottons 90 °C
2 Cottons 60 °C
3 Cottons intensive 60 °C
i ä FC A
You can switch off the liquid dispensing system
manually before starting a programme by setting the
ä "Dispensing" system to off.
Once the programme has started dispensing will not
take place via the dispenser pumps and the following
will appear in the display:
1 Cottons 10.0/10.0 kg ä
90 °C Main wash
Rinses 1000 rpm
+im k m A
Dispensing amount
d
a Hose connection socket (suction side)
b Hose connection socket (pressure side)
c Leakage outlet (in case of damaged hose)
d Suction inlet
e Level checker for empty indicator. The pump and
the machine will switch off automatically if a liquid
agent container is empty.
e
Dispensing system fault
ö
The machine will warn you that the liquid dispensing
agent level is insufficient.
The programme can be restarted after refilling the
liquid agent container by pressing the START button.
Fill dispenser 1
Press the start button
if
Please follow the manufacturer's instructions on the
packaging for dispensing requirements.
,This is particularly important when using a
combination of cleaning agents and special
application products. Only use the product for the
application described by the manufacturer, to
avoid any material damage or the occurrence of
strong chemical reactions. Confirm with the
detergent manufacturer that their product can be
used in combination with another type of product.
Liquid agents should be allowed to settle to room
temperature before use to ensure that their viscosity
level is correct and thus ensure the correct amount is
dispensed.
20
Page 21
Commissioning the dispensing pumps
Before the liquid dispensing pumps can be used the
liquid agent must be drawn up into the system and
the amount to be dispensed set.
Dispenser calibration
Optional modules
Dispenser calibration ~ Main menu
Dispenser pump 1
Dispenser pump 2 e
A
The dispensers need to be calibrated to ensure the
dispenser pumps supply the correct amount of liquid
agent.
To calibrate the dispensers with the machine
switched off:
Press and hold the rotary dial in.
^
Then switch the machine on with the "On" switch.
^
Dispenser calibration ~ Main menu
Dispenser pump 1
Dispenser pump 2 e
A
Selection choice: Dispenser pumps 1 to 13
After selecting a dispenser pump the following
message will appear in the display:
Dispenser calibration ~ Dispenser pump 1
V: 100ml t: 0s P: no
0/1 S A
The amount to dispense can be set between 0 and
9999 ml in 1 ml increments.
Select dispenser pump.
^
Dispenser calibration ~ Dispenser pump 1
V: 100ml t: 0s P: no
0/1 S A
Press multi-function button 0/1.
^
To stop the pump press the 0/1 button again, or it
will switch off automatically after a period of 60
seconds.
Measure the amount collected in the measuring
^
flask.
Dispenser calibration ~ Dispenser pump 1
V: 100ml t: 30s P: 200.0 ml/min
0/1 S A
^ Enter this value in field "V:". Flow rate P in ml/min
will be calculated electronically.
^ Press the S "Save" button to save the values
measured in memory.
^ Reconnect the hose.
^
Press the 0/1 multi-function button and the
dispenser hose will start to fill. Press the 0/1 button
again to stop filling the hose.
^
Direct the hose of the dispenser pump being
calibrated into a suitable measuring flask.
,
Avoid contact with the skin and eyes, and
wear suitable protective clothing.
^
Press the A "Back" button to return to the main
menu.
Cleaning and maintaining the dispensing system
The dispensing system should be flushed through
with clean warm water every two weeks and before
any longer down-times to prevent the risk of
blockages and corrosion.
^
The suction pipes should be cleaned through with
water.
^
Place the suction pipes in a container of hot water
(40 - 50°C).
^
Then use the dispenser calibration system to
operate each pump until the dispensing system is
thoroughly flushed through.
^
After reconnecting all parts check all connections,
hoses, dispensers and seals for leakages.
21
Page 22

Optional modules
Peak load cut-out
If the peak-load cut out function is activated the
heating will switch itself off and any programme
running will be stopped. The following message will
appear in the display:
- Total data (only delete total data)
- Programme data (only delete programme data)
Pressing the button again deselects the \
"Operating data" option.
If there is no more memory available in the operating
1 Cottons
Prog. stopped. Peak load cut-out.
Programme will continue
if
data module a message will appear after pressing
the START button to say that the operating data will
be overwritten.
If you press the A "Back" button or do not press the
START button within 30 seconds the display will
Once the peak load has finished the programme will
continue automatically as before.
revert to the way it was before starting the
programme.
Total data
Communication module
This machine can be linked to a PC via a
communication module.
The shaft for the communication module is located at
Operating data module
Total data
Programme data e
\ A
the rear of the machine.
After selecting Total data the following (example) will
appear in the display:
An editor programme is available from Miele.
Operating data module ~ Total data
Total time power on: 200,987 h
Operating data
By pressing the \ "Operating data" button the
Operating hours: 123456 h e
\ A
operating data module can be used to read or delete
operating data either before the start of a
Other options:
programme, or after it has finished.
Total time power on: 200,987 h
Operating hours: 123,456 h
Duration heating active: 123,456 h
1 Cottons 90 °C
2 Cottons 60 °C
3 Cottons intensive 60 °C
i \ FC A
Duration drive motor active: 93,456 h
Programme starts: 23,456
Programme stops: 567
Programme cancellations: 67
Water volume: 1,234,567 l
Amount of laundry: 1,234,567 kg
After pressing the \ button the following will appear
in the display:
Liquid agent: 2,345 l
Energy: 12,345,678 kWh
Operating data module
Total data
Programme data e
\ A
Selection choice:
–
Total data
In this option all programme data is collated and
summarised.
–
Programme data
Programme data contains all the data called up
during a programme.
–
Delete data
- Module (Total data including programme data)
22
Page 23

Optional modules
Programme data
Operating data module -
Programme data
Delete data e
\ A
After selecting Programme data the following
(example) will appear in the display:
Operating data module~ Programme data
1 Cottons 90 °C
2 Cottons 60 °C e
\ A
Select the programme you want from the list and
press the rotary dial to call up a list of all programme
starts including date and start time for that
programme.
Programme data ~ 1 Cottons
Date: 21.05.2010 Start time: 11:30
Date: 21.05.2010 Start time: 12:30 e
\ A
Select the required programme start from the list for
programme 1 Cottons and confirm your choice by
pressing the rotary dial.
Programme data ~ 1 Cottons
Date: 21.05.2010
Name: Smith e
\ A
Other options:
Town: Abingdon
Serial number: 12345678
Machine type: PW 6107
Amount of laundry: 13 kg
+ Button: Activated
Starch stop button: Activated
Without spin button: Not activated
Programme start: 11:30
Programme finished: 12:05
Total operating time:0h35min
Electrical energy: 12.5 kWh
Gas energy: 0 kWh
Steam energy: 0 kWh
Total volume of water: 140 l
Max. water temperature: 95 °C
Max. drain temperature: 45 °C
Programme change: 2
pressing the rotary dial only the last 3 stops and starts will
be displayed.)
(after making your selection and
Programme fault: None (only the last 3 faults are saved.)
Area 1: Pre-wash (after making your selection and
pressing the rotary dial you can display the area or the
block.)
Operating time: 6 min
Water volume: 20 l
Dispensing phase 1: Amount ml
selection and pressing the rotary dial 6 dispensings are
displayed.)
(after making your
Max. temperature: 12 °C
Holding time: 6 min
Dispensing phase 2: No
Delete data
Operating data module
Programme data
Delete data e
\ A
After selecting Delete data the following message will
appear in the display:
Operating data module~ Delete data
Module: 21.02.2010
Total data: 12.07.2010 e
\ A
The module menu option can be used to delete the
total data and programme data from the operating
data memory.
The total data option can only be used to delete the
total data from the operating data.
The programme data option can only be used to
delete programme data from the operating data.
After making your selection and pressing the rotary
dial you will be prompted to enter your password.
Password:____
ABCDEFGHIJKLMNOPQRSTUVWXYZ
0123456789
KSA
After keying in your password or inserting your
supervisor level key card in the reader the following
security prompt will appear in the display:
Delete operating data?
S A
After pressing the S button the data will be deleted!
23
Page 24

Optional modules
Weighing system
If the machine has been equipped with a weighing
system module the weight of the laundry in the
machine will be displayed in 0.2 kg increments. The
maximum load for the programme selected will show
next to the actual weight in the drum.
If when the drum is empty the load display is not
showing "00,0", you will need to press the ->I<-"to
reset it
1 Cottons 00,0/ 16.0 kg
60 °C Main wash
Rinses e
+im k m ->I<- A
If after calibrating the sensor to 0 there was still
laundry in the drum the following will appear in the
display:
1 Cottons - -,- / 16.0 kg
60 °C Main wash
Rinses e
+im k m ->I<- A
Press the ->I<-button again to set it to 0.
If there is too much laundry in the drum, e.g. because
it is wet, a nominal load will be calculated after
starting the programme and this value will also be
saved by the operating data module.
At the end of the programme when the drum has
stopped rotating the display will show the residual
moisture content of the laundry.
1 Cottons
Programme finished Residual moisture 60 %
The door can be opened
m FC A
24
Page 25

Problem solving guide
The door will not open
Press against the door handle and at the same time
^
switch the machine off and then on again. Then try
to open the door again.
If you still cannot open the door:
The door handle safety mechanism has disingaged
itself. The door handle cannot be opened or closed.
The safety mechanism is designed to protect the
handle and the lock from damage, for instance, if
too much force is being used in an attempt to
open the door.
With an extended power cut:
Switch the machine off.
^
Switch off the mains supply at the on-site mains
^
switch.
Close all stopcocks for water, gas and steam as
^
applicable.
To remove the laundry the drain valve will need to be
opened manually and the drum door unlocked
manually.
^ Open the drain valve by partially opening the
venting screw (spanner size 17 mm) at the rear of
the machine. Do not unscrew it completely. Drain
off the suds. Take care as some water will seep out
of the screw opening (approx. 100 mm). This
should be collected in a suitable container.
^
Press firmly against the door handle until you
clearly hear the safety mechanism engage.
You will now be able to open and close the door
again (as long as there is no water in the machine).
Power cut during a wash programme Emergency door release
With a short power cut:
The programme remains in the last position, and
when power is restored the following message
appears in the display:
Power cut
y
Programme stop
Press the start button.
i ü f
^ Tighten up the venting screw again and check that
there is no leak.
^
Insert a screwdriver (head approx. 4 mm) into the
opening beside the door lock so that the head
engages with the notch of the door release
mechanism. Turning the screwdriver slightly
anti-clockwise will unlock the door.
Never use force to open the door!
^
Remove the laundry
^
Press the START button and the programme
selected will continue.
25
Page 26

Problem solving guide
Possible reasons for increased levels of
foaming
Detergent type
–
Only use detergents formulated for commercial
^
washer-extractors. Domestic laundry detergents
are not suitable.
Using too much detergent
–
Follow the manufacturer's dosage
^
recommendations on the packaging and take local
water hardness levels into account.
Heavy foaming detergent
–
Use a low foaming detergent or contact your
^
detergent supplier for advice.
Very soft water
–
In areas with very soft water (hardness level 1)
^
dispense less detergent as specified by the
detergent manufacturer.
Soiling level of the laundry
–
For lightly soiled laundry dispense less detergent in
^
accordance with the detergent manufacturer's
instructions.
Large articles of laundry stretching
during the spin cycle
Large articles of laundry (e.g. table cloths) can
stretch during the spin cycle. This can generally be
prevented by reprogramming the machine.
Please contact the Miele Service Department.
Service interval
If after switching the machine on the following
message appears in the display the machine will
need to be serviced by the Miele Service
Department.
Service interval 1
§
The display will go out after 5 minutes.
Call the Service Department
A
– Residues e.g. detergent on the laundry
^ Run a pre-wash without detergent and without
selecting a temperature.
Laundry which has been soaked before washing
must be thoroughly rinsed before running a wash
programme.
– Small loads
^ Reduce the amount of detergent dispensed
according to the size of the load.
–
Drum speed too high during the wash
(Profitronic controls)
^
Reduce the drum speed and the wash rhythm.
–
Gas-heated washer-extractors
On gas heated machines the suds solution is
pumped around the heater elements. This additional
movement of the suds can produce extra foam.
^
Follow the dispensing instructions given above.
^
Use a low lather detergent.
^
On Profitronic controlled machines and in special
circumstances it is possible to reduce the drum
speed and the wash rhythm during the heating-up
phase.
26
Page 27

Error messages
Repairs to electrical, gas or steam operated
,
machines may only be carried out by a suitably
qualified person in accordance with national and
local safety regulations. In the U.K. repairs to gas
heated machines must only be carried out by a
Gas Safe registered technician.
A message will appear in the display if there is a
problem either before starting a programme or once it
has started:
The display remains dark.
There is no power to the machine.
Check the mains switch and the on-site fuses.
^
Problem solving guide
Heating system fault
§
Programme stopped. Press start.
Programme will continue without heat.
if
To continue the programme with heating press the
^
START button. If a disinfection programme was
running the programme will be cancelled if this
message appears.
Call the Service Department.
Drive motor fault
m
Allow the motor to cool down.
^
Programme stopped. Press the start button.
Motor overheating.
if
Power cut
y
Programme stop
Press the start button.
f
^ Once power has been restored press the START
button.
This error message can also indicate that the winding
on the motor has overheated.
^
Allow the motor to cool down.
§
The imbalance is too great and the imbalance switch
has been activated.
^ Switch the machine off and on again. Then press
the START button.
Imbalance fault
Call the Service Department
if restart does not work.
i A
Gas system fault
Water inlet fault
M
Call the Service Department
if restart does not work.
if
^
Check the stopcock and then press the START
button.
§
If this message appears before a programme has
been started:
^
Open the gas tap and then press the START
button.
Open the gas tap.
Press the start button.
if
Door lock fault
a
Call the Service Department
if restart does not work.
if
^
Push firmly on the door handle until you hear the
lock engaging. Confirm by pressing START.
If this message appears during a programme the
pressure in the gas supply has dropped because of
other gas heated appliances operating at the same
time.
^
Press the START button.
27
Page 28

Problem solving guide
After sales service
Gas system fault
§
Call the Service Department
if restart does not work.
if
If the programme still will not start please call the
^
Service Department.
Gas system fault
§
Clean the lint filter as described in "Cleaning and
care" and then press the START button.
On gas heated machines heavy foaming can lead to
a fault.
Clean the lint filter.
Press the start button.
if
In the event of any faults please contact your Dealer
or the nearest Service Department.
When contacting the Service Department, please
quote the Model, Serial number (SN) and Material
number (M.Nr) of your machine. These are shown on
the data plate.
This is visible above the door aperture or at the back
of the machine.
Please let the Service Department know any error
message that has appeared in the display.
Should you require spare parts ensure that you only
use original Miele Spare Parts (and remember to let
the Spare Parts Department know the model, serial
number and material number of your machine).
Drain valve fault
q
Call the Service Department
if restart does not work.
if
^ Check the on-site drainage system and then press
the START button.
A defective drain valve must be repaired by a Miele
Service technician only.
Dispensing system fault
ö
Replace the empty container with a full one.
§
Fill dispenser 1
Press the start button
if
Card fault
Card incorrectly inserted in card reader.
if
^
Insert the card the right way round in the card
reader.
28
Page 29

The machine should be cleaned and checked over
immediately after use where possible.
Do not use a pressure washer or hose to clean
,
the machine.
The housing, control panel and any plastic
components should be cleaned using a suitable mild
cleaning agent, applied with a soft damp cloth. Rub
dry with a soft cloth after cleaning.
Do not use abrasive cleaning agents as they will
damage the surface material.
Parts of the housing made from stainless steel can be
cleaned using a suitable proprietary stainless steel
cleaning agent.
Any deposits on the door seals should be wiped off
using a damp cloth.
Cleaning and care
Pull the detergent dispenser flap out to a 45° angle to
allow cleaning of the drip channel and the siphons. If
a siphon is blocked a bottle brush can be used.
The grille over the cooling fan at the back of the
machine should be checked for soiling from time to
time and cleaned if necessary.
Clean the detergent dispenser, dispenser
compartments and siphons
The detergent dispenser, dispenser compartments
and siphons must be cleaned after each use with
warm water to thoroughly remove any residues of
detergents or other agents. If the machine is not
going to be used for a while the detergent dispenser
should be left open to air the compartment. The
siphon in the dispenser compartment for fabric
conditioner should also be cleaned.
Remove the siphon and clean with hot water. Then
put it back in place.
Superficial rust
The drum and suds container are manufactured from
rust free stainless steel.
Water with a very high iron content, or foreign objects
such as paper clips, metal buttons etc. which get into
the drum with the laundry can cause superficial
rusting in the drum and suds container.
To prevent this happening the drum and suds
container should be checked and cleaned regularly
and if rusting does occur it should be removed using
a proprietary cleaning agent for stainless steel.
The door seals should be checked for foreign objects
regularly and cleaned as described above.
Leave the door ajar after cleaning to allow the
machine to dry.
29
Page 30

Cleaning and care
The filters in the water inlet valve (1) and in the inlet
hoses (2) should be checked from time to time for
soiling and cleaned if necessary.
Clean the filter as follows:
Place a suitable 2 litre capacity container below the
^
filter.
Turn the lid a half to a full turn anti-clockwise to
^
open the filter.
Any water in the filter housing will then drain out.
Warning - the water may be hot.
When the machine is not in use
If the machine is not going to be used for a longer
period of time (4 weeks or more) the drum should be
rotated several times after the last use. The drum
should then be rotated every 4 weeks to prevent
damage to the bearings.
Cleaning the filter
This only applies to gas heated machines
The filter should be checked regularly for and
cleaned when necessary.
,
Carry out this check only after a programme
has finished and the suds container has been
emptied.
A blocked filter is indicated by a flashing fault
message in the display.
Gas system fault
§
Clean the filter.
Press the start button.
if
^ Empty the dish and repeat as many times as is
necessary.
^
When no more water runs out, unscrew the lid
completely. The filter is attached to the lid.
^
Clean the filter and the inner housing of the filter
compartment.
^
Replace the filter and tighten the lid making sure it
is secure.
30
Page 31

Cleaning and care
Drum bearings (PW 6167, PW 6207)
Once the service interval has been reached the
following message will appear in the display:
Lubricate drum bearings
§
Press the A"Back" button to get rid of the message
in the display. This message will appear in the
display each time you switch the machine on until the
service work has been carried out by the Miele
service technician.
,
Call the Service Department.
A
Disconnect the machine from the mains.
When the machine is not in use
If the machine is not going to be used for a longer
period of time (4 weeks or more) the drum bearings
should be lubricated (PW 6167, PW 6207) as
described above and the drum rotated a few turns.
The drum should then be rotated again every 4
weeks to prevent damage to the bearings.
The grease nipples on the drum bearings need to be
lubricated after approx. 1000 operating hours with
Arcanol L 100.
Gas-heated washer-extractors.
31
Page 32

Installation and connection
This machine must be installed by an authorised
technician only. In the UK any gas heated
machines must be installed by a Gas Safe
registered engineer.
This machine is not designed for washing
,
items which have been treated with dangerous or
flammable substances.
To avoid the risk of frost damage do not install this
machine in a room where there is a risk of frost
occurring.
Use a pallet lifter to move the machine around the
room.
Transport packaging must be carefully removed
using suitable tools.
Use a suitable lifting mechanism to lift the machine off
the transport pallet.
Do not install the machine on carpeted flooring as the
carpet pile can hinder the free flow of air into the
ventilation gaps at the bottom of the machine.
Securing the machine
Gas heated washer-extractors must be secured to
the floor. Fixings are supplied with the machine.
Installation on a plinth
The washer-extractor can be installed on a plinth or a
raised concrete plinth.
The plinth must be secured to the floor.
Concrete plinth / Floor Miele plinth
To ensure suitable access for future maintenance and
service work, please ensure that the minimum
distances between the machine and the wall
specified on the installation diagram are strictly
observed.
Minimum distance to wall for maintenance and
service work: approx. 400 mm
The washer-extractor must be perfectly level to
ensure that it functions correctly.
The screw feet can be adjusted to align it.
The machine must not be moved without all the
outer panels in place.
32
Page 33

Transit fittings
The transit fittings, 2 at the front and 2 at the back are
each secured in position with 3 hex screws. These
have to be removed on-site before the machine can
be commissioned.
Installation and connection
To do so the front panel and the rear panel of the
machine have to be removed. Unscrew the screws
from the bottom edge of the front panel and then take
the front panel off.
Unscrew the screws from the back panel and then
take the back panel off.
Store the transit fittings in a safe place for future
use. They will need to be refitted should the
machine ever be moved to another location.
33
Page 34

Installation and connection
On-site connections
WW Hot water
KW Cold water
KWHHot and cold hard water
EL Electrical connection
AG Exhaust gas (gas heated machines)
G Gas connection (gas heated machines)
AV Drain
D Steam connection (steam heated machines)
K Condensate drain (steam heated machines)
Plumbing connections on the machine
Cold water Hot water Cold water
Hard water Liquid dispensers Hard water
Plumbing
Connection must be made to the water supply via a
stopcock which conforms to local and national
regulations. This work must be carried out by an
authorised person in strict accordance with local and
national regulations.
Water inlet / drainage
To ensure trouble free operation of the machine, the
flow pressure must be at least 100 kPa (1 bar) and
not exceed 1000 kPa (10 bar).
The inlet pressure tested hoses supplied with the
machine must be used for connection to the water
supply.
If replacing an inlet hose only use a hose tested to at
least 7000 kPa (70 bar) pressure, and for a water
temperature of at least 90 °C.
This also applies to all fittings. Genuine Miele original
parts fulfil these requirements.
Water taken into the machine must not exceed a
temperature of 70°C.
34
Page 35

Installation and connection
Cold water supply
1"
3/4"
A Y-piece connnector is supplied with the machine.
Liquid agent dispensing mixing box
connections
Connections 1 and 2 are for viscous agents only.
These connections are sealed and have to be drilled
open with an 8 mm drill bit.
Be careful to only drill through the first wall (1). There
is a second one located 10 mm behind it (2) to
deflect the agent and this must not be drilled into.
Any connections that have been drilled open must be
resealed if they are subsequently not required.
Connections 3 to 12 are for liquid agents only. These
connections are also sealed and have to trimmed to
the correct diameter for the hoses being used with a
suitable small saw.
Any connections that have been opened must be
resealed if they are subsequently not required.
35
Page 36

Installation and connection
Water drainage
Drainage AV DN 70 on the machine side, DN 70
socket on-site. Transient flow rate 200 l/min.
Foam compensator SK
Increased foaming can lead to foam being
discharged from the vapour vent. A drain with siphon
(commercial off-the-shelf pipe material) can be
retro-fitted to dispose of the foam.
Installation examples
Electrical connection
The electrical connection must only be carried out by
a suitably qualified electrician in accordance with
local and national safety regulations (BS 7671 in the
UK).
When installing a residual current device (RCD), this
must be a Type B RCD (suitable to detect high
frequency AC and DC earth leakage current).
The electrical components of machine PW 6xx7
comply with EN 60335-1 and EN 60335-2-7.
Open the machine cover. The connection points are
located on the carrier plate.
The machine is supplied ex-works for 3N AC 50-60
Hz. See data plate for details.
It is also available in the following versions:
3 N AC 380-415 V 50-60 Hz
3 AC 220-240 V 50-60 Hz
Connection should be made via a suitable isolator
which complies with local and national safety
regulations and which is easily accesible for
disconnecting the machine from the electricity
supply. Provision must be made on site to switch off
all poles. Switches with a minimum all-pole contact
gap greater than 3 mm are suitable for isolating the
machine. These include circuit breakers, fuses and
relays (IEC/EN 60947).
The isolator switch should be easily accessible for
servicing work.
If the machine is disconnected from the electricity
supply ensure adequate measures are taken to
ensure that it cannot be reconnected to the electricity
supply until all work has been carried out.
Please observe the wiring diagram supplied.
Equipotential bonding
Equipotential bonding must be carried out if required.
The electric heating is set ex-works to
9 kW PW 6107
15 kW PW 6137, PW 6167
18 kW PW 6207.
The heating will only be activated with a minimum
suds levels of 50 mm column of water.
The motor is protected by a winding to prevent it
overheating.
Connection should be made in accordance with the
wiring diagram and installation diagram to a suitable
isolator, with an on-off switch which is easily
accessible for servicing. The wiring and installation
diagrams are important for the correct electrical
functioning of the machine.
36
Page 37

Installation and connection
Connecting the dispenser pumps
Connection points for 4 time controlled dispenser
pumps which can be operated without the
multi-function module are located behind the cover
next to the electrical connection point. See the wiring
diagram supplied.
Steam connection
Steam connection must only be carried out by an
authorised installer. See the installation instructions
supplied.
The gas group to which the washer-extractor has
been set at the factory is given on the Gas Data label
on the rear of the machine.
If the machine is converted for a different gas group,
or to liquid gas, a conversion kit is required. This is
available from the the Miele Spare Parts Department.
When ordering please quote the model and serial
number of the appliance, as well as the gas type,
group and connection pressure in the country of
installation.
Please follow the installation instructions carefully. To
ensure safety, any conversion work must only be
carried out by an authorised technician, e.g. Gas
Safe registered in the UK.
Do not attempt to repair or work on gas-heated
,
appliances yourself. Repairs must only be carried
out by an authorised technician to ensure safety.
In the event of a fault please contact the Miele
Service Department.
After setting up and connecting the machine
successfully ensure that all removable outer
panels are correctly fitted back into position.
A steam solenoid valve, dirt trap and steam stop
valve should be installed on-site.
A steam valve and condensate trap are available to
order from your Miele Dealer or the Miele Spare Parts
Department.
Gas connection
This work must be carried out by
an authorised person in
accordance with local and
national safety regulations. This
must be a Gas Safe registered
technician in the UK. See the
installation instructions supplied.
37
Page 38

Technical data
PW 6107 EL,S/G * PW 6137 EL,S/G * PW 6167 EL,S/G * PW 6207 EL,S/G *
Height in mm 1250 1250 1400 1400
Width in mm 804 804 924 924
Depth in mm 925/1235 1005/1345 1007/1425 1140/1535
Depth with door open inmm1340/1632 1420/1742 1422/1822 1555/1932
Weight in kg 320/395 341/407 475/548 508/589
Drum volume in l 100 130 160 200
Max. capacity in kg (dry
laundry)
Voltage See data plate
Rated load See data plate
Fuse rating See data plate
Test certificates
awarded
Max. load bearing
in operation in N
Product safety standard IEC 335-1, IEC 335-2-11
Emission sound
pressure level in
dB (A), EN ISO 11204
Sound power level in
dB (A), EN ISO 9614-2
10 13 16 20
See data plate
3931/4667 4290/4942 5675/6333 6203/6978
<80
* EL = Electric heating
S/G = Steam heating / Gas heating
38
Page 39

39
Page 40

Alteration rights reserved/1612
M.-Nr.M.-Nr. 09 105 050 / 02
Page 41

Gebruiksaanwijzing
Wasautomaat
PW 6107
PW 6137
PW 6167
PW 6207
Lees beslist de gebruiksaanwijzing voordat u het apparaat
plaatst, installeert en in gebruik neemt.
Dat is veiliger voor uzelf en u voorkomt onnodige schade aan het apparaat.
nl-NL
M.-Nr. 09 105 050
Page 42

2
Page 43

Inhoud
Veiligheidsinstructies en waarschuwingen ......................................................4
Een bijdrage aan de bescherming van het milieu .................................................7
Algemeen..................................................................................8
Algemeen..................................................................................9
Functie van de bedieningselementen .............................................................9
Wassen ..................................................................................11
Wasgoed voorbereiden ......................................................................11
Vulgewicht standaardprogramma's ...............................................................11
Wasmiddeldosering .........................................................................12
Wasmiddeldosering .........................................................................13
Programma kiezen ..........................................................................13
Deur openen na programma-einde .............................................................15
Wassen met kaarten ........................................................................16
Partijen wasgoed ...........................................................................16
Extra functies .............................................................................17
Taalkeuze .................................................................................17
Starttijd/-datum .............................................................................17
Programmastop ............................................................................18
Programma afbreken ........................................................................19
Programma versneld doorlopen ................................................................19
Optionele modules .........................................................................20
Dosering vloeibare reinigingsmiddelen ..........................................................20
Piekbelastingsschakelaar .....................................................................22
Communicatiemodule........................................................................22
Gebruiksgegevens ..........................................................................22
Weegsysteem ..............................................................................24
Nuttige tips ...............................................................................25
De deur kan niet worden geopend..............................................................25
Stroomuitval tijdens het wasproces, noodontgrendeling van de deur ...................................25
Foutmeldingen .............................................................................27
Service ...................................................................................28
Reiniging en onderhoud.....................................................................29
Plaatsen en aansluiten ......................................................................32
Transportbeveiliging .........................................................................33
Aansluitingen (ter plaatse) ....................................................................34
Wateraansluitingen automaat ..................................................................34
Aansluiting doseermiddelen op mengkast (vloeibare reinigingsmiddelen) ...............................35
Elektrische aansluiting .......................................................................36
Doseerpompen aansluiten ....................................................................37
Stoomaansluiting ...........................................................................37
Gasaansluiting .............................................................................37
Technische gegevens.......................................................................38
3
Page 44

Veiligheidsinstructies en waarschuwingen
Technische veiligheid
Toelichting op de veiligheidsinstructies
en waarschuwingen op de automaat
Lees de gebruiksaanwijzing.
Lees de aanwijzingen, bijvoorbeeld een
installatie-instructie.
Waarschuwing! Hete oppervlakken.
Waarschuwing! Spanning tot 1000 Volt.
Aarde
Lees de gebruiksaanwijzing voordat u de wasautomaat in gebruik neemt. Dat is veiliger voor uzelf
en u voorkomt schade aan het apparaat.
Verantwoord gebruik
De wasautomaat mag uitsluitend worden gebruikt
~
voor wasgoed dat niet met gevaarlijke of ontvlambare
stoffen is vervuild.
Reinig in deze automaat alleen wasgoed dat vol-
~
gens het wasetiket geschikt is voor machinale reini
ging.
Gebruik de automaat nooit voor chemisch reini
~
gen! Bij de meeste daarvoor gebruikte reinigingsmid
delen, zoals benzine, bestaat brand-/explosiege
vaar!
Bewaar en gebruik in de buurt van de wasauto
~
maat geen benzine, petroleum of andere licht ont
vlambare stoffen.
Er bestaat brand-/explosiegevaar! Gebruik het ma
chinedeksel niet als werkblad.
Bewaar op het machinedeksel geen chemicaliën
~
(vloeibare wasmiddelen, hulpmiddelen). Dergelijke
middelen kunnen kleurveranderingen en lakschade
veroorzaken. Als er per ongeluk chemicaliën op het
oppervlak terechtkomen, verwijder deze dan meteen
met een in water natgemaakte doek.
-
-
-
-
-
De elektrische veiligheid van het apparaat is al
~
leen dan gewaarborgd als het wordt aangesloten op
een volgens de voorschriften geïnstalleerd aardings
systeem. Het is belangrijk dat u dit controleert en in
geval van twijfel de huisinstallatie door een vakman
laat controleren. De fabrikant kan niet aansprakelijk
worden gesteld voor schade die is ontstaan door een
ontbrekende of beschadigde aarddraad.
De veiligheidsvoorzieningen en de bedieningsele
~
menten van het apparaat mogen niet worden bescha
digd of verwijderd.
Wanneer de bedieningselementen of de isolatie
~
van kabels beschadigd zijn, mag het apparaat niet
worden gebruikt totdat het is gerepareerd.
Gebruik het apparaat alleen wanneer alle afneem
~
bare delen van de ommanteling gemonteerd zijn, zo
dat men niet in aanraking kan komen met onderdelen
die onder stroom staan of draaien.
Bij een vaste aansluiting moet het apparaat via
~
een schakelaar met alle polen van de netspanning
kunnen worden losgekoppeld.
Er staat alleen dan geen spanning op het appa
~
raat als de hoofdschakelaar of de zekering van de
huisinstallatie is uitgeschakeld.
Reparaties aan elektrisch, gas- en stoomverwarm-
~
de apparaten mogen uitsluitend door vakmensen
worden uitgevoerd. Ondeskundig uitgevoerde reparaties kunnen gevaar opleveren voor de gebruiker.
Probeer nooit de deur van de wasautomaat met
~
geweld te openen. Om de veiligheidsfunctie van het
deurslot te waarborgen, is de deurgreep voorzien van
een speciale afbreekbeveiliging.
Defecte onderdelen mogen alleen door originele
~
Miele-onderdelen worden vervangen. Alleen van die
onderdelen kan Miele garanderen dat zij voldoen aan
-
-
de veiligheidseisen die Miele stelt.
Ondanks het feit dat het beste materiaal is ge
~
bruikt en dat bij de productie zeer zorgvuldig te werk
wordt gegaan, zijn de toevoerslangen aan slijtage on
derhevig. Door scheurtjes, knikken, etc. kunnen de
slangen gaan lekken. Controleer de toevoerslangen
daarom regelmatig. U kunt ze dan tijdig vervangen
en zo waterschade voorkomen.
Het apparaat is voor professionele doeleinden. Wij
~
adviseren u het apparaat dan ook periodiek door een
deskundige te laten controleren (bijvoorbeeld door
Miele). De resultaten van de controle moeten in het
zogenaamde machinevolgboek worden vastgelegd
(verkrijgbaar bij Miele).
-
-
-
-
-
-
-
-
-
Wordt de automaat professioneel gebruikt, dan
~
mag alleen geïnstrueerd/geschoold personeel de au
tomaat bedienen.
Als de automaat in een vrij toegankelijke ruimte staat
opgesteld, moet de exploitant veiligstellen dat de au
tomaat zonder risico kan worden gebruikt.
Het apparaat mag niet buiten worden gebruikt.
~
4
-
-
Page 45

Veiligheidsinstructies en waarschuwingen
Gasverwarmde wasautomaten
Veiligheidsmaatregelen bij gaslucht
Doof onmiddellijk alle vlammen!
–
Open onmiddellijk alle ramen en deuren!
–
Sluit onmiddellijk de gaskranen bij de gasmeter of
–
de hoofdkraan!
Betreed ruimtes waar u een gaslucht waarneemt
–
nooit met onafgeschermd licht!
Steek geen lucifers of aanstekers aan!
–
Niet roken!
–
Veroorzaak geen elektrische vonken, bijvoorbeeld
–
door stekkers uit het stopcontact te trekken of door
elektrische schakelaars of bellen te gebruiken.
Sluit de gaskraan die ter plaatse voor de wasauto
–
maat is aangebracht.
Wanneer u de oorzaak van de gaslucht niet kunt
–
vaststellen terwijl alle gaskranen gesloten zijn,
moet u het plaatselijke gasbedrijf waarschuwen.
Let op! Voor beëindiging van de werkzaamheden bij
ingebruikneming, onderhoud, ombouw of reparaties
moeten alle gasleidingen en onderdelen waar gas
door stroomt, van de gaskraan tot de inspuiter, op
lekkage worden gecontroleerd.
Let met name op de meetaansluitingen bij de gasklep.
Controleer als de brander is ingeschakeld en als de
brander is uitgeschakeld.
Gebruik van het apparaat
Dit apparaat mag alleen worden gebruikt door
~
personen die in staat zijn het apparaat veilig te be
dienen en die volledig op de hoogte zijn van de in
houd van de gebruiksaanwijzing!
Zorg dat kinderen nooit in, op of in de buurt van
~
de wasautomaat spelen of deze zelfs bedienen.
Als op hoge temperaturen wordt gewassen, wordt
~
het kijkglas heet. Zorg er daarom voor dat kinderen
het kijkglas niet kunnen aanraken als de wasauto
maat aanstaat.
-
-
-
Het water in de wasautomaat is geen drinkwater!
~
Laat het sop in een afvoersysteem weglopen dat spe
ciaal daarvoor is aangelegd.
Als de wasautomaat zonder toezicht aanstaat,
~
moet zich in de directe omgeving van de automaat
een afvoer in de vloer (putje) bevinden.
Is de wasautomaat uitgeschakeld en de deur ge
~
sloten, schakel dan eerst de wasautomaat in en open
dan pas de deur.
Als de deur open is en er stroomt water uit de kuip,
sluit dan de deur en schakel de wasautomaat in.
De desinfectiestandaard van thermische en che
~
mothermische procédés dient de gebruiker regelma
tig met geschikte controles te waarborgen. De
procédés moeten periodiek thermo-elektrisch met
loggers of met geschikte indicatoren worden gecon
-
troleerd. Ten aanzien van de procesparameters dient
de gebruiker met name de temperatuur en bij chemo
-thermische programma's de concentratie te contro
leren. Desinfectieprogramma's mogen niet worden
onderbroken, omdat anders het desinfectieresultaat
onvoldoende kan zijn.
Let bij gebruik en combinatie van speciale reini
~
gingsmiddelen en speciale producten op de aanwijzingen van de desbetreffende fabrikant. Gebruik het
middel alleen voor toepassingen die door de fabrikant zijn aangegeven. Hiermee voorkomt u materiaalschade en eventuele heftige chemische reacties.
Vraag in geval van twijfel de fabrikant van het middel
of het geschikt is voor gebruik in wasautomaten.
Kleur- en ontkleuringsmiddelen, alsmede ontkal-
~
kingsmiddelen moeten geschikt zijn voor gebruik in
de wasautomaat. Let altijd op de aanwijzingen van de
fabrikant van het middel.
Controleer het wasresultaat bij wasgoed dat met
~
biologische oliën of vetten vervuild is. Als het was
goed niet schoon genoeg is, kan tijdens het droog
proces zelfontbranding optreden. Gebruik voor der
gelijk wasgoed speciale wasmiddelen of speciale
wasprogramma's.
Voor de reiniging van het apparaat mag geen ho
~
gedrukreiniger of waterstraal worden gebruikt.
-
-
-
-
-
-
-
-
-
-
-
-
Sluit de deur nadat u de automaat heeft gebruikt.
~
Zo voorkomt u dat:
–
kinderen zich in de automaat opsluiten of voor
werpen erin verstoppen.
–
kleine dieren in de automaat opgesloten raken.
Wacht tot de trommel stilstaat voordat u de was uit
~
de automaat haalt. U kunt zich verwonden als u uw
hand in de nog draaiende trommel steekt.
U kunt zich verwonden aan de scharnieren van de
~
deur.
U moet de deur van de automaat helemaal kun
~
nen openen. Deuren of bouwkundige situaties mogen
hierop geen invloed hebben.
-
-
5
Page 46

Veiligheidsinstructies en waarschuwingen
Overige opmerkingen
Desinfectie- en reinigingsmiddelen bevatten vaak
~
chloorhoudende verbindingen. Wanneer dergelijke
middelen op een roestvrijstalen oppervlak opdrogen,
kunnen chloriden ontstaan. Deze tasten het roestvrije
staal aan en veroorzaken roest. U beschermt het
roestvrije staal het best tegen roestvorming als u voor
het wassen/desinfecteren en voor het reinigen van de
roestvrijstalen oppervlakken middelen gebruikt die
geen chloor bevatten.
Informeer in geval van twijfel bij de fabrikant van het
middel. Wanneer chloorhoudende middelen per on
geluk op roestvrij staal terechtkomen, verwijder deze
dan met water. Wrijf het oppervlak daarna met een
doek droog.
Wanneer voor een bepaalde toepassing een che
~
misch hulpmiddel wordt aanbevolen, betekent dit niet
dat de fabrikant van het apparaat ook aansprakelijk is
voor het effect van dit middel op het wasgoed en de
machine.
Houd er rekening mee dat veranderingen in formules
en opslagvoorschriften die niet afkomstig zijn van de
fabrikant van de chemische middelen het wasresul
taat kunnen beïnvloeden.
-
-
Als u toch voor bepaalde verontreinigingen chloor
houdende bleekmiddelen gebruikt, dient u altijd een
antichloorbehandeling uit te voeren. U voorkomt zo
dat onderdelen van de wasautomaat en de was on
herstelbaar beschadigd raken.
Antichloorbehandeling
De antichloorbehandeling moet meteen aansluitend
op het gebruik van het chloorbleekmiddel worden uit
gevoerd! Gebruik hiervoor bij voorkeur waterstofpe
roxide of een was- of bleekmiddel op zuurstofbasis
en zonder het water tussendoor af te pompen.
Met thiosulfaat kan, vooral bij hard water, gipsvor
ming optreden waardoor verontreinigingen op het
wasgoed en afzettingen in de wasautomaat kunnen
-
ontstaan. Omdat een behandeling met waterstofpe
roxide het neutralisatieproces van chloor ondersteunt,
dient daaraan de voorkeur te worden gegeven.
De juiste hoeveelheden hulpmiddelen en de behan
delingstemperaturen dienen ter plaatse volgens de
doseeradviezen van de was- en hulpmiddelenfabri
kanten te worden ingesteld en gecontroleerd. Ook
moet worden getest of er resten actieve chloor in de
was zijn achtergebleven.
-
-
-
-
-
-
-
-
Gebruik van toebehoren
Toebehoren mogen alleen worden aan- of inge-
~
bouwd, als ze uitdrukkelijk door Miele zijn vrijgegeven. Als andere onderdelen worden aan- of ingebouwd, kan Miele niet voor de gevolgen instaan en
kan geen beroep worden gedaan op bepalingen met
betrekking tot de garantie en de productaansprakelijkheid.
Bij gebruik van externe onderdelen, zoals zuig-
~
lansen, elektronische watermeters, doseermeters en
signaalgevers, moet aan alle geldende veiligheids
voorschriften worden voldaan.
Een externe PC moet voldoen aan de eisen van EN
60950-1:2001 (IEC 60950-1:2001).
-
Chloor en schade aan onderdelen
Aanwijzingen voor behandelingen met chloor
bleekmiddelen en perchloorethyleen
Hoe groter de gebruikte chloorhoeveelheden, des
~
te groter de kans op schade aan onderdelen van de
automaat.
Het gebruik van chloorhoudende middelen, zoals na
triumhypochloride en poedervormige chloorbleekmid
delen, kan - afhankelijk van de chloorconcentratie, de
inwerktijd en de temperatuur - de beschermlaag van
het roestvrije staal aantasten en corrosie veroorzaken
op onderdelen van de automaat. Om deze redenen
dient u af te zien van het gebruik van dergelijke mid
delen. In plaats daarvan adviseren wij bleekmiddelen
op zuurstofbasis.
-
-
Het afdanken van het apparaat
Wanneer u uw oude wasautomaat afdankt (laat af-
~
voeren), maak dan eerst het deurslot onbruikbaar.
Daarmee voorkomt u dat spelende kinderen zich opsluiten en in levensgevaar komen.
Wanneer andere personen worden geïnstrueerd
om de wasautomaat te bedienen, moeten zij op de
hoogte worden gesteld van deze belangrijke vei
ligheidsinstructies.
Bewaar deze gebruiksaanwijzing zorgvuldig!
-
-
-
6
Page 47

Een bijdrage aan de bescherming van het milieu
Het verpakkingsmateriaal
De verpakking beschermt het apparaat tegen trans
portschade. Het verpakkingsmateriaal is uitgekozen
met het oog op een zo gering mogelijke belasting van
het milieu en de mogelijkheden voor recycling.
Hergebruik van het verpakkingsmateriaal remt de af
valproductie en het gebruik van grondstoffen. Vaak
neemt de leverancier de verpakking terug. Als u de
verpakking zelf wegdoet, informeer dan bij de reini
gingsdienst van uw gemeente waar u die kunt af
geven.
Houd verpakkingsmaterialen (zoals folies en
,
plastic zakken) bij kinderen vandaan. Verstikkings
gevaar!
Het afdanken van het apparaat
Oude elektrische en elektronische apparaten bevat
ten meestal nog waardevolle materialen. Ze bevatten
echter ook schadelijke stoffen die nodig zijn geweest
om de apparaten goed en veilig te laten functioneren.
Wanneer u uw oude apparaat bij het gewone afval
doet of er op een andere manier niet goed mee om
gaat, kunnen deze stoffen schadelijk zijn voor de ge
zondheid en het milieu.
-
-
-
-
-
-
-
-
Tips om energie te besparen
Maak zoveel mogelijk gebruik van de maximale bela
dingscapaciteit van een programma. U gebruikt dan
relatief gezien de minste energie en het minste water.
Bij een te lege trommel is het water- en energiever
bruik relatief hoog. Een te volle trommel beïnvloedt
het wasresultaat.
Centrifugeer de was (indien mogelijk) met het maxi
male centrifugetoerental. Dit bespaart veel tijd en
energie tijdens het drogen.
Als u de was tijdens het laatste spoelen met warm
water spoelt, zal de was minder restvocht bevatten
en al warm zijn. De verwerkingstijd in de droogauto
maat of met de mangel neemt hierdoor af, wat een
aanzienlijke energiebesparing oplevert.
Houdt u zich aan de aanwijzingen van de wasmid
delenfabrikant bij het doseren van het wasmiddel.
De dosering is afhankelijk van de hoeveelheid was
goed, de waterhardheid en de mate van vervuiling.
Kies de juiste programma's (voorwas, intensief) en
temperaturen.
-
-
-
-
-
-
Het apparaat moet volgens de daarvoor geldende
voorschriften worden verwijderd.
Neem zo nodig contact op met Miele of met de vak
handelaar.
Het afgedankte apparaat moet tot die tijd buiten het
bereik van kinderen worden opgeslagen.
-
7
Page 48

Algemeen
d
e
c
b
a
j
g
h
i
l
m
f
a Noodschakelaar
In noodgevallen kan de machine met deze rode knop
worden uitgeschakeld.
b Bedieningspaneel
c Wasmiddelvak
Trek aan de greep om het klepje te openen.
d Deur
De deur wordt met de deurgreep geopend. Probeer
de deur nooit met geweld te openen!
e Deurgreep
Om de veiligheidsfunctie van het deurslot te kunnen
garanderen, is de greep voorzien van een speciale
afbreekbeveiliging (zie "Nuttig tips").
k
g Elektrische aansluiting
h Wateraansluitingen
i Aansluitingen waterterugwinning
j Communicatieschacht
k Waterafvoer
l Aansluitingen vloeibare reinigingsmiddelen
m Wasemafzuiging
Zie het hoofdstuk "Plaatsen en aansluiten".
f Verstelbare machinevoeten (4 stuks)
8
Page 49

Algemeen
a b c d e f g h i
Functie van de bedieningselementen
a Display
1 Witte was 90 °C
2 Bonte was 60 °C
3 Bonte was intensief 60 °C
i FC A
Na het inschakelen, verschijnt kort een welkomst
scherm en daarna de programmalijst. Het laatst gekozen programma is gemarkeerd.
b Functietoetsen
De zes toetsen onder het display zijn de functietoetsen. Afhankelijk van de machinestatus worden hieraan bepaalde functies toegewezen.
De functies verschijnen in het display boven de
toetsen en worden gemarkeerd als u op de betreffende toets drukt.
Bij herprogrammering op "Toetsendefinitie direct"
kunt u de eerste 6 programma's van de programma
lijst rechtstreeks via de functietoetsen1-6kiezen.
c Starttoets
-
f Kaartlezer
Als u een kaart insteekt, kunt u met de programma's
op die kaart wassen.
Steek de kaart in pijlrichting in de lezer.
g I Aan-schakelaar
Met deze schakelaar wordt de machine ingescha
keld.
h 0 Uit-schakelaar
Met deze schakelaar wordt de machine uitgeschakeld.
i Noodschakelaar
Gebruik deze knop alleen in noodsituaties.
Als u op de rode knop drukt, wordt de machine meteen uitgeschakeld. Als het probleem is verholpen,
kunt u de noodschakelaar weer ontgrendelen door
deze naar rechts te draaien.
Druk opnieuw op de toets "START" om het onderbroken programma voort te zetten.
-
-
De ringverlichting knippert als u een gekozen pro
gramma kunt starten. Als u op de knop drukt, wordt
het programma gestart. Als u na de start van een pro
gramma op de knop drukt, wordt de displayinhoud
weergegeven, zoals die voor de programmastart
was.
d Optische interface PC
Met speciale software kunnen gegevens worden uit
gewisseld tussen de besturing en een PC (en omge
keerd). De aansluiting geschiedt via de optische in
terface aan de voorkant van het bedieningspaneel.
e Programmaschakelaar (duo-knop)
Door aan de ring van de knop te draaien, kunt u dis
playkeuzevelden of invoervelden kiezen. Als u op het
binnenste gedeelte van de knop drukt, kunt u een
displaykeuzeveld of een invoerveld voor verandering
vrijgeven of na verandering bevestigen.
-
-
-
-
-
-
9
Page 50

Algemeen
Functietoetsen
Als u op een functietoets drukt, wordt de functie ge
activeerd. Drukt u nogmaals op de toets, dan wordt
de functie weer uitgezet.
f Stop/Einde
De rechter functietoets wordt na de programmastart
als stoptoets gebruikt.
Als u op de toets drukt, wordt het gekozen program
ma gestopt of een gestopt programma beëindigd.
+i Blok plus
Met deze toets wordt het betreffende programmablok
(bijvoorbeeld voorwas) aan het programma toege
voegd.
m Stijfselstop
Druk op deze toets als de was moet worden geste
ven.
k Centrifugeerstop
Druk op deze toets als de was na het spoelen niet
moet worden gecentrifugeerd.
-
-
-
Datatransfer
Kaart exploitant
Op deze kaart staan nog geen programma's.
-
Voor de datatransfer van de besturing naar de kaart
en omgekeerd zie het programmeerhandboek.
FC Instellingen
Als u op deze toets drukt, kunt u tijdelijk naar een an
dere taal overschakelen.
m Starttijd/-datum
Als u vóór de programmastart op deze toets drukt,
verschijnt in het display de melding dat u een starttijd
kunt kiezen.
K Informatie
Als u op deze toets drukt, verschijnt in het display
programma-informatie.
q Waterafvoer
i Handmatige besturing
Zie het programmeerhandboek.
ü Versneld doorlopen
Met deze toets kunt u het lopende programma ver
sneld doorlopen of programmablokken herhalen.
A Terug
Met deze toets gaat u terug naar de vorige display
pagina.
e/- Aanwijzing dat er een volgende of voorafgaande
regel is.
-
-
-
De kaart heeft geheugenruimte voor maximaal 30
programma's met elk 6 blokken.
De achterkant van de kaart kan worden beschreven.
S Opslaan
Zie het programmeerhandboek.
$ Programma vergrendeld
Als een vergrendeld programma gestart is, kan het
na 1 minuut niet meer met de einde-toets worden ge
stopt of afgebroken.
) Programma ontgrendeld
ß Dosering
ä Dosering uitgeschakeld
\ Gebruiksgegevens
->I<-0-stelling (tarreren)
Als de gewichtsweergave bij lege trommel niet op
"00,0" staat, drukt u op deze toets.
10
-
Page 51

De eerste ingebruikneming mag alleen door Miele
worden gedaan.
Draai de waterkranen en afhankelijk van de verwar
^
mingssoort de gas- of stoomkraan open.
Schakel de hoofdschakelaar (ter plaatse) in.
^
Schakel de machine in met de toets "I Aan".
^
PROFESSIONAL
PW 6xx7
Welkom
Wassen
Vulgewicht standaardprogramma's
(droog wasgoed)
PW 6107 PW 6137 PW 6167 PW 6207
1 Witte was 90°C
-
max. 10 kg max. 13 kg max. 16 kg max. 20 kg
max. 5 kg max. 6,6 kg max. 8 kg max. 10 kg
2 Bonte was 60°C
3 Bonte was intensief 60°C
4 Bonte was 30°C
5 Bonte was intensief 30°C
6 Bonte was Eco kort
7 Kreukherstellend 60°C
8 Kreukherstellend intensief 60°C
9 Kreukherstellend 30°C
10 Kreukherstellend intensief 30°C
In het display verschijnt een welkomstscherm
1 Witte was 90 °C
2 Bonte was 60 °C
3 Bonte was intensief 60 °C
i äFC A
en vervolgens de programmalijst (het laatst gekozen
programma is gemarkeerd).
Door aan de programmaschakelaar te draaien, kunt u
een programma kiezen. Als u vervolgens op de toets
"START" drukt, wordt het programma meteen gestart.
Wasgoed voorbereiden
11 Fijne was
12 Wol 30°C
13 Wol (handwas) 30°C
max. 4 kg max. 5,2 kg max. 6,4 kg max. 8 kg
De vulgewichten voor de andere programma's zijn in
het betreffende programma-overzicht weergegeven.
^ Doe het wasgoed in de trommel.
^ Sluit de deur met de deurgreep. Gooi de deur niet
dicht!
Het wasgoed mag niet tussen de deur en de vulopening ingeklemd raken.
^
Maak alle zakken leeg.
Voorwerpen als spijkers, munten en paperclips
kunnen het wasgoed en onderdelen van de auto
maat beschadigen.
-
11
Page 52

Wassen
Wasmiddeldosering
Voor de standaardprogramma's doseert u het was
^
middel voor de hoofdwas in bakje j. Indien ge
wenst, doet u het wasmiddel voor de voorwas in
bakje i. Wasverzachter doseert u in het voorste
gedeelte van bakje p.
Bleekmiddel
U mag textiel alleen bleken als dat in het
wasetiket is aangegeven met het symbool x.
-
-
Doseer het vloeibare bleekmiddel uitsluitend in een
daarvoor bestemd bakje. Het bleekmiddel wordt dan
automatisch tijdens de tweede spoelbeurt in de trom
mel gespoeld. Bont wasgoed mag alleen met bleek
middel worden behandeld als de fabrikant uitdrukke
lijk op het wasetiket vermeldt dat het textiel kleurecht
is en gebleekt mag worden.
-
-
-
^
Andere vloeibare hulpmiddelen doseert u in het
achterste gedeelte van bakje p (indien dit gepro
grammeerd is).
Als u wasgoed wilt bleken, moet u een 3e spoelbeurt programmeren (zie "Programmeerhandboek
Profitronic M").
,
Hoe groter de gebruikte chloorhoeveelheden,
des te groter de kans op schade aan onderdelen
van de automaat.
-
Kleur- en ontkleuringsmiddelen, alsmede ontkal
kingsmiddelen moeten geschikt zijn voor gebruik in
wasautomaten. Let altijd op de aanwijzingen van de
fabrikant van het middel.
-
^
De vakken van het bakje p mogen maximaal tot
aan de markering worden gevuld, anders stromen
de hulpmiddelen meteen via de zuighevel in de
machine.
12
Page 53

Wassen
Wasmiddeldosering
Gebruik niet te veel wasmiddel, anders ontstaat er te
veel schuim.
Gebruik geen wasmiddelen die overmatig schui
–
men.
Volg de aanwijzingen van de fabrikant op de ver
–
pakking.
De dosering is afhankelijk van:
de hoeveelheid wasgoed.
–
de waterhardheid.
–
de mate van vervuiling.
–
Dosering
Houd bij de dosering rekening met de waterhardheid
en neem de aanwijzingen van de wasmiddelenfabri
kant in acht.
Waterhardheid
Hard
heids
Aandui
-
-
ding
Hardheid in
mmol/l
Duitse hard
heid
graad
-
-
-
°d
Extra functies kiezen (voorwas, stijfselstop of cen
-
trifugeerstop)
Bevestig het gekozen programma door op het bin
^
nenste gedeelte van de programmaschakelaar te
drukken.
In het display verschijnt dan (bijvoorbeeld):
1 Witte was 10,0 / 10,0 kg
90 °C Hoofdwas
Spoelen 1100 o/min
+im k m A
Indien gewenst, kunt u het programmablok "Voor
^
-
was" toevoegen met de functietoets "+i Blok
plus".
-
Als u op de functietoets "+i Blok plus" drukt, ver
schijnt in het display:
1 Witte was 10,0 / 10,0 kg
40 °C Voorwas
90 °C Hoofdwas 1100 o/min
-
+i mk m A
I zacht 0 - 1,3 0 - 7
II gemiddeld 1,3 - 2,5 7 - 14
III hard 2,5 - 3,8 14 - 21
IV zeer hard boven 3,8 boven 21
Als u de waterhardheid in uw regio niet kent, neem
dan contact op met uw waterbedrijf.
Gasverwarmde machines
Bij gasverwarmde machines wordt het sop langs het
verwarmingsregister gepompt. Deze extra beweging
van het sop bevordert de schuimvorming. Daarom
mag niet te veel wasmiddel worden gedoseerd en
mag geen wasmiddel worden gebruikt dat te veel
schuimt.
Als er te veel schuim wordt gevormd, moet u schuim
reducerende middelen gebruiken of een wasmid
-
delenexpert raadplegen.
Programma kiezen
Het veld "+i" is gemarkeerd.
Als u nogmaals op de toets drukt, wordt de functie
weer uitgezet.
Druk op de toets "m Stijfselstop" als de was moet
worden gesteven.
Druk op de toets "k Centrifugeerstop" als de was na
het spoelen niet moet worden gecentrifugeerd.
Als geen verdere aanpassingen van het programma
nodig zijn:
^
Druk op de toets "START" en het wasprogramma
begint.
-
^
Kies met de programmaschakelaar een program
ma (bijvoorbeeld programma 1 Witte was).
In het display verschijnt dan (bijvoorbeeld):
16 Extra afvoer
1 Witte was 90 °C
2 Bonte was 60 °C
i äFC A
-
13
Page 54

Wassen
Als voor de programmastart nog aanpassingen
nodig zijn (bijvoorbeeld van het vulgewicht, de
temperatuur of het centrifugetoerental), ga dan als
volgt te werk:
Vulgewicht
Voordat u het programma start, kunt u het vulgewicht
handmatig invoeren.
1 Witte was 10,0 10,0 kg
40 °C Voorwas
90 °C Hoofdwas e
+im k m A
Kies het invoerveld "Vulgewicht" door aan de pro
^
grammaschakelaar te draaien. Bevestig uw keuze
door op de schakelaar te drukken. Wijzig het vulge
wicht door aan de schakelaar te draaien en druk
erop om de waarde te bevestigen.
U kunt de temperatuur in stappen van 1 °C veran
deren. U kunt kiezen uit "koud" en uit waarden tussen
15 en 95 °C.
Kies het invoerveld "Temperatuur" door aan de pro
^
grammaschakelaar te draaien (bijvoorbeeld 40 °C
voor de voorwas). Bevestig uw keuze door op de
schakelaar te drukken.
Na de start wordt het programmaverloop in het dis
-
play weergegeven.
1 Witte was
40 °C Voorwas 20 °C
Hoofdwas Einde om 12:35
+im k mKf
Op de tweede displayregel (hier "Voorwas"), ver
-
schijnt bovendien de actuele soptemperatuur.
1 Witte was
90 °C Hoofdwas 60 °C
Spoelen 1 koud Einde om 12:35
+im k mKf
-
Na afloop van het programmablok "Voorwas" ver
schijnt op de tweede regel het programmablok
"Hoofdwas" met de actuele soptemperatuur. Daaron
der verschijnt het volgende programmablok (hier
"Spoelen 1").
-
Rechts beneden in het display kunt u zien hoe laat
het programma is afgelopen.
1 Witte was 10,0 / 10,0 kg
40 °C Voorwas
90 °C Hoofdwas e
+im k m A
^ Wijzig de temperatuur door aan de schakelaar te
draaien en druk erop om de waarde te bevestigen.
U kunt het centrifugetoerental in stappen van 25
omwentelingen per minuut instellen. U kunt kiezen uit
"0" en een waarde tussen 300 en de maximale centri
fugetoerentallen.
^
Kies het invoerveld "o/min" door aan de program
maschakelaar te draaien (voor het eindcentrifuge
ren). Bevestig uw keuze door op de schakelaar te
drukken.
1 Witte was 10,0 / 10,0 kg
90 °C Hoofdwas
Spoelen 1100 o/min
+im k m A
^
Wijzig het toerental door aan de schakelaar te
draaien en druk erop om de waarde te bevestigen.
1 Witte was
90 °C Hoofdwas 60 °C
Spoelen 1 koud Einde om 12:35
+im k m K f
Als u op de toets "K Informatie" drukt, verschijnt in het
display meer informatie over het wasprogramma, bij
-
voorbeeld:
1 Witte was
-
-
Startdatum: 10.7.2010
Starttijd: 9:47 e
A
Tijd na start: 0h 23 min
Resttijd: 0h 11min
Tijd na start: 0h 23 min e
Resttijd: 0h 11min
Herhaling: nee
Bereik 3: Spoelen e
Maximale centrifugetoerentallen
PW 6107 PW 6137 PW 6167 PW 6207
1200 o/min 1100 o/min 1150 o/min 1100 o/min
^
Druk op de toets "START" en het wasprogramma
begint.
14
Page 55

Wassen
Blok 2: Spoelen 2
Stap: Wastijd 1
Actueel niveau: 22 mm e
Ingesteld niveau: 60 mm
Actuele temperatuur: 35 °C
Ingestelde temperatuur: 60 °C e
1 Witte was
Toerental: 40 o/min
Ritme: 12 / 3 -
A
Met de toets "A terug" gaat u terug naar het pro
^
grammaverloop.
Deur openen na programma-einde
Als de trommel stilstaat en zich geen water meer in
de machine bevindt, verschijnt na afloop van het pro
gramma (bijvoorbeeld) het volgende in het display:
1 Witte was
Programma-einde
U kunt de deur openen
m FC A
Tegelijk klinkt gedurende 5 seconden een akoestisch
signaal om het programma-einde aan te geven.
Wordt het programma met water in de machine of tij
dens het centrifugeren afgebroken, dan verschijnt
(bijvoorbeeld) het volgende display:
1 Witte was
Programma-einde met water in de machine
qmFC A
of
1 Witte was
Programma-einde met draaiende trommel
m FC A
-
De deur is vergrendeld. Probeer niet de deur
,
met geweld te openen!
-
Druk op de functietoets "q Waterafvoer" of kies het
^
programma "Extra centrifugeren" en druk op de
toets "START".
Na afloop van het programma kunt u de deur openen.
Als u de machine daarna niet meer gebruikt:
^ Schakel de machine uit met de toets "0 Uit".
Schakel ook de hoofdschakelaar (ter plaatse) uit.
^ Sluit alle kranen (water, gas c.q. stoom).
^ Trek aan de deurgreep om de deur te openen.
Let op! Als u de deur niet kunt openen, druk dan te
gen de deur en trek daarna opnieuw aan de greep.
Probeer nooit de deur met geweld te openen!
^
Haal het wasgoed uit de trommel.
-
15
Page 56

Wassen met kaarten
Kaarten waarop een programma staat, zijn op een
bepaald machinetype afgestemd. Onbeschreven
kaarten zijn universeel toepasbaar.
Schakel de machine in met de toets "I Aan".
^
Er verschijnt een welkomstmelding.
Als het om een kaart gaat die niet bij dit machinetype
hoort, verschijnt bijvoorbeeld de volgende melding in
het display:
Kaartinhoud
De programma's op de kaart zijn alleen
geschikt voor machinetype PW 6161.
A
Plaats een kaart die geschikt is voor dit machinety
^
pe.
Partijen wasgoed
Voor partijen wasgoed die met een specifiek pro
gramma moeten worden gereinigd, kan een kaart
worden gebruikt waarop dat ene programma staat.
Op exploitatieniveau kan deze functie via het menu
punt "Partij" worden geactiveerd.
De besturing van de machine accepteert dan alleen
nog kaarten voor partijen wasgoed (waarop een pro
gramma staat). De programma's in de besturing wor
den genegeerd.
-
-
-
-
-
^ Voer de kaart in.
In het display verschijnen de programma's die op de
kaart staan.
Kaartgebruik
17 Maskers 45 °C
18 Kreukherstellend 60 °C
i ßFC A
^
Markeer een programma door aan de programma
schakelaar te draaien. Als u op de knop drukt,
wordt het programma gekozen.
^
Druk op de toets "START" en het programma be
gint.
Nadat u op de toets "START" heeft gedrukt, kunt u de
kaart uit de kaartlezer halen. Na afloop van het pro
gramma wordt het programma gewist.
,
Steek geen andere voorwerpen dan de kaart
in de kaartgleuf.
-
-
-
Als u de kaart verkeerd heeft ingestoken, verschijnt
de volgende melding in het display:
Kaartfout
§
^
Steek de kaart goed in de kaartlezer.
16
Kaart verkeerd ingestoken.
A
Page 57

Extra functies
Taalkeuze
Vóór de start van een programma kan de taal via het
vlagsymbool tijdelijk worden gewijzigd.
De instelling wordt 5 minuten na afloop van het pro
gramma en bij geopende deur automatisch terugge
zet.
1 Witte was 90 °C
2 Bonte was 60 °C
3 Bonte was intensief 30 °C
i FC A
Als u op de functietoets FC drukt, verschijnt het vol
gende display:
Instellingen terug <Hoofdmenu Taal
Exploitatieniveau
FC A
Bevestig de functie "Taal" door op de programma
^
schakelaar te drukken.
Instellingen italiano
Taal F Nederlands
português
FC A
^ Draai aan de programmaschakelaar om de ge-
wenste taal te selecteren. Druk op het binnenste
gedeelte van de knop om uw keuze te bevestigen.
-
In het display verschijnt altijd de actuele tijd en da
-
tum. Het invoerveld voor "uren" is gemarkeerd.
U selecteert de uren door op de programmascha
^
-
kelaar te drukken.
-
Door aan de programmaschakelaar te draaien, ver
andert u de waarde. Druk op de schakelaar om de
ingestelde waarde te bevestigen.
Draai aan de programmaschakelaar om het invoer
^
veld "minuten" te selecteren. Bevestig uw keuze.
Door aan de programmaschakelaar te draaien, ver
andert u de waarde. Druk op de schakelaar om de
ingestelde waarde te bevestigen.
Draai aan de programmaschakelaar om het invoer
-
^
veld "Startdatum - dag" te selecteren. Bevestig uw
keuze.
Door aan de programmaschakelaar te draaien, ver
andert u de waarde. Druk op de schakelaar om de
ingestelde waarde te bevestigen.
Verander eventueel de maand en het jaar.
^
Na het instellen van het gewenste tijdstip, gaat u als
-
volgt te werk:
Druk op de toets "START" en het programma wordt
^
op het ingestelde tijdstip gestart.
Het display toont de volgende inhoud:
1 Witte was 10,0 / 16,0 kg
90 °C Hoofdwas
16:15 -2.4.2010 Start: 6:00 -3.4.2010
+im k m A
Op het display verschijnt de actuele tijd en datum en
ook de ingestelde starttijd/-datum.
Starttijd/-datum
Als u aan een programma een starttijd/-datum wilt
toewijzen, kunt u met de functietoets "m Starttijd/
-datum" het gewenste moment instellen.
Starttijd/-datum instellen
Nadat u een programma heeft gekozen, verschijnt in
het display (bijvoorbeeld):
1 Witte was 10,0 / 16,0 kg
90 °C Hoofdwas
Spoelen 1000 o/min
+im k m A
^
Druk op de functietoets "m Starttijd/-datum".
In het display verschijnt dan (bijvoorbeeld):
1 Witte was 10,0/16,0 kg
Starttijd: 16 : 10 Startdatum: 2.4.2010
A
^
Als u de deur van de machine nog eens opent,
moet u opnieuw op de toets "START" drukken.
Starttijd/-datum niet overnemen
Als u opnieuw op de toets "m Starttijd/
-datum" drukt of op de toets "A terug", worden de
veranderingen niet overgenomen.
17
Page 58

Extra functies
Met voorwas
Bij sterk verontreinigd wasgoed kunt u voordat u het
programma start een voorwas toevoegen aan de
standaardprogramma's 1 - 10. Druk hiervoor op de
toets "+i Blok plus".
U kunt de functie weer uitzetten door opnieuw op de
toets te drukken.
Als u op de functietoets "+i Blok plus" drukt, ver
schijnt in het display:
1 Witte was 10,0 / 16,0 kg
40 °C Voorwas
Hoofdwas e
+i mk m A
In het display wordt het veld "+i" gemarkeerd.
-
Stijven
Dosering via het wasmiddelbakje
Voordat u het programma start, kunt u voor alle stan
daardprogramma's (behalve "Extra centrifugeren" en
"Extra afvoer") de functie "Stijven" kiezen. Druk hiervoor op de toets "m Stijfselstop".
In het display wordt het veld m gemarkeerd.
U kunt de functie weer uitzetten door opnieuw op de
toets te drukken.
Dosering in de trommel
Als de programmastap "Stijfselstop" bereikt is, opent
u de deur en voegt u het voorbereide stijfsel toe. Sluit
daarna de deur.
In het display verschijnt weer de volgende melding:
1 Witte was
Programmastop door stijfselstop
U kunt de deur openen
i ü f
Druk op de toets "START" en het programma wordt
voortgezet.
m
Zonder centrifugeren
Voordat u het programma start, kunt u voor alle stan
daardprogramma's (behalve "Extra centrifugeren") de
functie "Centrifugeerstop" kiezen. Druk hiervoor op de
toets "k Centrifugeerstop".
In het display wordt het veld k gemarkeerd.
-
U kunt de functie weer uitzetten door opnieuw op de
toets te drukken.
1 Witte was
Programmastop door centrifugeerstop
i ü f
-
k
1 Witte was
Programmastop door stijfselstop
U kunt de deur openen
i ü f
Als de programmastap "Stijfselstop" bereikt is, knip
pert in het display het woord "Stijfselstop".
Bereid het stijfsel volgens de aanwijzingen van de fa
brikant en doseer het in het voorste gedeelte van het
bakje p. Voeg het aan het instromende water toe.
Verdun het stijfsel eventueel met water. De wastijd
wordt automatisch met 4 minuten verlengd.
Druk op de toets "START" om het programma voort te
zetten.
m
-
Als de programmastap "Centrifugeerstop" bereikt is,
knippert in het display de melding "Centrifugeerstop".
U beëindigt het programma door op de toets "f
Stop/Einde" te drukken. De machine centrifugeert niet
en het water wordt niet afgevoerd.
Als u het programma met centrifugeren wilt voortzet
ten, drukt u op de toets "START".
-
-
Programmastop
Als u het programma wilt stopzetten, drukt u op de
toets "f Stop/Einde".
Het programma wordt dan stopgezet.
1 Witte was
Programmastop
i ü f
Als u het programma wilt voortzetten, drukt u op de
toets "START".
18
Page 59

Extra functies
Programma afbreken
Als u het programma wilt afbreken, drukt u twee keer
achtereen op de toets "f Stop/Einde".
Als u het programma met water in de machine of tij
dens het centrifugeren afgebroken heeft, verschijnt in
het display (bijvoorbeeld) het volgende:
1 Witte was
Programmastop met water in de machine
i ü f
of:
1 Witte was
Programmastop met draaiende trommel
i ü f
Om de deur te kunnen openen, drukt u op de functie
toets "q Waterafvoer". Of kies het programma "Extra
centrifugeren" en druk op de toets "START".
-
Programma versneld doorlopen
U kunt het lopende programma versneld doorlopen
(doorbladeren) of programmablokken herhalen.
Druk op de toets "f Stop/Einde". Het programma
^
wordt stopgezet.
1 Witte was
Programmastop
i ü f
Als u op de toets "ü Versneld doorlopen" drukt,
^
verschijnt in het display het actuele bereik, het ac
tuele blok of de actuele stap.
Zie ook het programmeerhandboek onder "Pro
grammastructuur".
Versneld doorlopen -> Witte was
-
Bereik 2: Hoofdwas e
S A
-
-
Vergrendelde programma's afbreken
Vergrendelde programma's kunnen niet meer worden
stopgezet of afgebroken.
1 Witte was
90 °C Hoofdwas
Vergrendeld Einde om 12:35
)f
Het display geeft de vergrendeling aan, als u pro
beert het programma met de toets "f Stop/Einde" af
te breken.
Als u het programma wilt ontgrendelen, drukt u op de
toets ") Ontgrendelen" en voert u het wachtwoord
(password) in.
Nadat het wachtwoord is ingevoerd, verschijnt in het
display:
Programma ontgrendelen?
S A
-
Bereik 2: Hoofdwas
Blok 1: Hoofdwas
Stap: Wastijd 2 -
S A
^ Draai aan de programmaschakelaar om "Bereik" te
selecteren. Bevestig uw keuze door op de knop te
drukken. Kies en bevestig het bereik: "1 Voorwas",
"2 Hoofdwas" of "3 Spoelen".
^
Draai aan de programmaschakelaar om "Blok" te
selecteren. Bevestig uw keuze door op de knop te
drukken. Kies en bevestig het blok: "Voorwas 1-10",
"Hoofdwas 1-10" of "Spoelen 1-10".
^
Draai aan de programmaschakelaar om "Stap" te
selecteren. Bevestig uw keuze door op de knop te
drukken. Kies en bevestig de gewenste program
-
mastap.
^
Druk op de toets "S Opslaan" en vervolgens op
"START". De functie "Versneld doorlopen" wordt nu
uitgevoerd.
Als u op de toets "A terug" drukt, springt het sys
teem naar programmastop en wordt de functie
"Versneld doorlopen" niet uitgevoerd.
-
Nadat u op de toets "S Opslaan" heeft gedrukt, ver
schijnt de normale displayinhoud en kunt u het pro
gramma afbreken.
1 Witte was
90 °C Hoofdwas 60 °C
Spoelen 1 Einde om 12:35
mKf
-
-
19
Page 60

Optionele modules
Dosering vloeibare reinigingsmiddelen
Doseerpomp Zuiglans
a
c
b
Doseerfunctie uitzetten
1 Witte was 90 °C
2 Bonte was 60 °C
3 Bonte was intensief 60 °C
i ä FC A
Voordat u een programma start, kunt u het doseer
systeem voor vloeibare reinigingsmiddelen handma
tig uitzetten met de functietoets "ä Dosering uit".
Na de start van het programma wordt niet via de do
seerpompen gedoseerd en verschijnt in het display
(bijvoorbeeld):
1 Witte was 10,0/10,0 kg ä
90 °C Hoofdwas
Spoelen 1000 o/min
+im k m A
Doseerhoeveelheden
-
-
-
Houdt u zich aan de aanwijzingen van de fabrikant.
d
a Aansluiting voor de slang (zuigkant)
b Aansluiting voor de slang (drukkant)
c Afvoer (bij slangbreuk)
d Aanzuigopening
e Niveausonde voor het reinigingsmiddel. Als een re
servoir leeg is, worden de pomp en de machine
automatisch uitgeschakeld.
Fout doseersysteem
ö
Tegelijk signaleert de wasautomaat een tekort aan
vloeibaar reinigingsmiddel.
Nadat u het reservoir heeft bijgevuld, kunt u het pro
gramma voortzetten. Druk daartoe op de toets
"START".
Vul doseerreservoir 1.
Druk op de starttoets.
if
e
Let bij gebruik en combinatie van speciale rei-
,
nigingsmiddelen en speciale producten op de
aanwijzingen van de betreffende fabrikant. Gebruik het middel alleen voor toepassingen die door
de fabrikant zijn aangegeven. Hiermee voorkomt u
materiaalschade en eventuele heftige chemische
reacties. Vraag in geval van twijfel de fabrikant van
het middel of het geschikt is voor gebruik in was-
-
-
automaten.
Vloeibare wasmiddelen moeten voor gebruik op ka
mertemperatuur worden gebracht, zodat de viscosi
teit en daarmee de doseerhoeveelheid niet worden
beïnvloed.
-
-
20
Page 61

Ingebruikneming doseerpompen
Voor de ingebruikneming van de doseerpompen
moet het vloeibare wasmiddel worden aangezogen
en de doseerhoeveelheid worden ingesteld.
Kalibratie dosering
Optionele modules
Kalibratie dosering ~ Doseerpomp 1
V: 100ml t: 0s P: nee
0/1 S A
De kalibratiefunctie wordt gebruikt om de doseerhoe
veelheid van de afzonderlijke doseerpompen vast te
stellen.
Om rechtstreeks in de kalibratiefunctie te komen,
gaat u als volgt te werk (bij uitgeschakelde machine):
Druk op functietoets 2 (tweede van links) en houd
^
deze ingedrukt.
Schakel vervolgens de machine in met de toets "I
^
Aan".
Kalibratie dosering ~ Hoofdmenu
Doseerpomp 1
Doseerpomp 2 e
A
Keuzemogelijkheid: doseerpomp1-13
Nadat u een doseerpomp heeft gekozen, verschijnt
het volgende display:
Kalibratie dosering ~ Doseerpomp 1
V: 100ml t: 0s P: nee
0/1 S A
-
Druk op de functietoets 0/1. Onderbreek de pomp
^
door opnieuw op de toets 0/1 te drukken. Na 60 se
-
conden stopt de pomp automatisch.
Meet de hoeveelheid die zich in de maatbeker be
^
-
vindt.
Kalibratie dosering ~ Doseerpomp 1
V: 100ml t: 30s P: 200,0ml/min
0/1 S A
Voer de waarde in het veld "V:" in. De hoeveelheid
^
P wordt door de besturing berekend in ml/min.
Als u op de functietoets S "Opslaan"
^
drukt, wordt de gemeten waarde aan de pomp toe
-
gewezen.
^ Sluit de slang weer aan.
Reiniging en onderhoud doseersysteem
Eens per 2 weken en voordat u de doseerpompen
voor lange tijd uitzet, moet het doseersysteem met
warm water worden doorgespoeld om verstoppingen
en corrosie in het doseersysteem te voorkomen.
^ Reinig de zuiglansen met water.
U kunt een doseerhoeveelheid instellen tussen 0 en
9999 ml (in stappen van 1 ml).
^
Druk op de functietoets 0/1. De doseerslang vult
zich. Druk opnieuw op de toets 0/1 om te stoppen.
^
Houd de slang van de te kalibreren doseerpomp in
een maatbeker (de slang moet omhoog lopen).
,
Vermijd elk contact met de huid en de ogen.
Draag beschermende kleding.
^
Ga met de toets A"Terug" naar het hoofdmenu.
Kalibratie dosering ~ Hoofdmenu
Doseerpomp 1
Doseerpomp 2 e
A
^
Kies de doseerpomp.
^
Zet de zuiglansen in een bak met warm water (40 50 °C).
^
Stuur via de kalibratiefunctie alle pompen aan. Op
deze wijze wordt het doseersysteem doorge
-
spoeld.
^
Controleer de aansluitingen, slangen, tuitjes en de
bijbehorende dichtingen op lekkage.
21
Page 62

Optionele modules
Piekbelastingsschakelaar
Als de piekbelastingsschakelaar reageert, wordt de
verwarming uitgeschakeld en het programma stopge
zet. In het display verschijnt de volgende melding:
1 Witte was
Programmastop door piekbelastingsschakelaar
Programma wordt automatisch voortgezet.
if
Als de piekbelasting voorbij is, wordt het programma
automatisch voortgezet.
-
Alle gegevens (alleen "Alle gegevens" wissen)
Programmagegevens (alleen "Programmagegevens"
wissen)
U kunt de functie weer uitzetten door opnieuw op de
toets "\ Gebruiksgegevens" te drukken.
Als het geheugen van de module "Gebruiksgege
vens" vol is, verschijnt na het indrukken van de toets
"START" de melding dat gebruiksgegevens worden
overschreven.
Als u op de toets "A terug" drukt of binnen 30 se
conden niet op de toets "START", wordt het program
ma niet gestart en verschijnt het display zoals dat
voor de programmastart was.
Communicatiemodule
Via de communicatiemodule kunt u een PC aan de
automaat aansluiten.
De schacht voor de communicatiemodule bevindt
zich aan de achterkant van de wasautomaat.
Alle gegevens
Module gebruiksgegev.
Alle gegevens
Programmagegevens e
\ A
Een geschikt editorprogramma is verkrijgbaar bij
Miele en bij de Miele-vakhandel.
Nadat "Alle gegevens" is gekozen, verschijnt bijvoor
beeld het volgende display:
-
-
-
-
Gebruiksgegevens
Met de module "Gebruiksgegevens" kunnen met de
toets "\ Gebruiksgegevens", voor of na een pro-
gramma, gebruiksgegevens worden gelezen of gewist.
1 Witte was 90 °C
2 Bonte was 60 °C
3 Bonte was intensief 60 °C
i \ FC A
Als u op de toets \ drukt, verschijnt het volgende
display:
Module gebruiksgegev.
Alle gegevens
Programmagegevens e
\ A
Keuzemogelijkheden:
–
Alle gegevens
Module gebruiksgegev. ~ Alle gegevens
Totale inschakeltijd: 200.987 h
Bedrijfsuren: 123456 h e
\ A
Andere keuzemogelijkheden:
Totale inschakeltijd: 200.987 h
Bedrijfsuren: 123.456 h
Actieftijd verwarming: 73.456 h
Actieftijd aandrijfmotor: 93.456 h
Programmastarts: 23.456
Programmastops: 567
Programma-afbrekingen: 67
Waterhoeveelheid: 1.234.567 l
Washoeveelheid: 1.234.567 kg
Doseermiddel: 2.345 l
Energie: 12.345.678 kWh
Bij "Alle gegevens" worden de gegevens van alle pro
gramma's verzameld en berekend.
–
Programmagegevens
Bij de programmagegevens gaat het om de gege
vens die tijdens een programma worden geregi
-
-
streerd.
–
Gegevens wissen
Module ("Alle gegevens" en "Programmagegevens"
wissen)
22
-
Page 63

Optionele modules
Programmagegevens
Module gebruiksgegev. -
Programmagegevens
Gegevens wissen e
\ A
Nadat "Programmagegevens" is gekozen, verschijnt
bijvoorbeeld het volgende display:
Module gebruiksgegev. ~ Programmagegevens
1 Witte was 90 °C
2 Bonte was 60 °C e
\ A
Kies uit de programmalijst het betreffende program
ma. Als u op de programmaschakelaar drukt, ver
schijnt eerst een lijst van alle programmastarts van
"Programma 1 Witte was" met datum en starttijd.
Programmagegevens ~ 1 Witte was
Datum: 21.05.2010 Starttijd: 11:30
Datum: 21.05.2010 Starttijd: 12:30 e
\ A
blok worden gekozen)
Blok 1: Voorwas
Looptijd: 6 min.
Waterhoeveelheid: 20 l
Doseerfase 1: hoeveelheid ml
indrukken van de programmaschakelaar worden de 6 do
seringen weergegeven)
(na het kiezen met en het
-
Max. temperatuur: 12 °C
Temperatuurstop: 6 min.
Doseerfase 2: nee
-
Kies uit de lijst van alle programmastarts van "Programma 1 Witte was" de gewenste programmastart
en bevestig uw keuze door op de schakelaar te drukken.
Programmagegevens ~ 1 Witte was
Datum: 21.05.2010
Naam: Mulder e
\ A
Andere keuzemogelijkheden:
Plaats: Lehrte
Serienummer: 12345678
Machinetype: PW 6107
Washoeveelheid: 13 kg
Toets +: ingedrukt
Toets "Stijfselstop": ingedrukt
Toets "Centrifugeerstop": niet ingedrukt
Programmastart: 11:30
Programma-einde: 12:05
Totale bedrijfsduur:0h35min
Elektrische energie: 12,5 kWh
Gasenergie: 0 kWh
Stoomenergie: 0 kWh
Totaal waterhoeveelheid: 140 l
Max. watertemperatuur: 95 °C
Max. temp. afvoerwater: 45 °C
Programmawijziging: 2
ken van de programmaschakelaar worden alleen de laatste
3 stops en 3 starts weergegeven)
(na het kiezen met en het indruk
Programmafout: geen (alleen de laatste 3 fouten worden
opgeslagen)
Bereik 1: Voorwas (na het kiezen met en het indrukken
van de programmaschakelaar kan telkens het bereik of het
-
23
Page 64

Optionele modules
Gegevens wissen
Module gebruiksgegev.
Programmagegevens
Gegevens wissen e
\ A
Na het kiezen van het menupunt "Gegevens wissen"
verschijnt het volgende display:
Module gebruiksgegev. ~ Gegevens wissen
Module: 21.02.2010
Alle gegevens: 12.07.2010 e
\ A
Via het menupunt "Module" worden "Alle gegevens"
en de "Programmagegevens" uit de gebruiksgege
vens gewist.
Via het menupunt "Alle gegevens" worden alleen die
gegevens gewist en via het menupunt "Programma
gegevens" alleen de programmagegevens.
Nadat u een menupunt heeft gekozen en op de pro
grammaschakelaar heeft gedrukt, verschijnt het ver
zoek het password in te voeren.
Password:____
ABCDEFGHIJKLMNOPQRSTUVWXYZ
0123456789
KSA
Weegsysteem
Als de machine een beladingsmodule heeft (module
"Weegsysteem"), wordt het vulgewicht van het was
goed tijdens de belading in stappen van 0,2 kg weer
gegeven. Ernaast staat het maximale vulgewicht voor
het gekozen programma.
Als de gewichtsweergave bij lege trommel niet op
"00,0" staat, drukt u op de reset-toets "->I<-".
1 Witte was 00,0 / 16,0 kg
60 °C Hoofdwas
Spoelen e
+im k m ->I<- A
Als u het vulgewicht op nul zet en vervolgens was
goed uit de machine haalt dat in de trommel was
achtergebleven, dan verschijnt het volgende display:
1 Witte was - -,- / 16,0 kg
-
-
60 °C Hoofdwas
Spoelen e
+im k m ->I<- A
-
Druk opnieuw op de toets "->I<-" om de waarde op
nul te zetten.
Mocht de machine overbeladen zijn (nat wasgoed),
dan wordt na de start van het programma altijd van
de nominale belading uitgegaan. Deze waarde wordt
ook in de module "Gebruiksgegevens" opgeslagen.
-
-
-
Na het invoeren van het password of het insteken van
de kaart voor het exploitatieniveau komt u in het betreffende menu. Voor de veiligheid verschijnt een ex
tra melding:
Gebruiksgegevens werkelijk wissen?
S A
Nadat u op de toets "S Opslaan" heeft gedrukt, wor
-
den de gegevens gewist.
Als het programma is afgelopen en de trommel stilstaat, verschijnt de restvochtwaarde van het was-
-
goed in het display.
1 Witte was
Programma-einde Restvocht 60 %
U kunt de deur openen
m FC A
24
Page 65

Nuttige tips
De deur kan niet worden geopend
Druk op de deurgreep, schakel de machine uit en
^
in en trek vervolgens weer aan de greep.
De beveiliging van de greep is eruit ge
-
sprongen.
De greep functioneert nu niet meer. U kunt de deur
noch openen noch sluiten.
Deze beveiliging voorkomt dat de greep en het
slot beschadigd raken, als men probeert de deur
met geweld te openen.
Langdurige stroomuitval:
Schakel de machine uit.
^
Schakel de hoofdschakelaar (ter plaatse) uit.
^
Sluit alle kranen (water, gas c.q. stoom).
^
Als u het wasgoed uit de machine wilt halen, moet u
eerst handmatig de afvoerklep openen en daarna de
deur handmatig ontgrendelen.
Open de afvoerklep door de ontluchtingsschroef
^
achter op de machine open te draaien (sleutel 17),
maar draai de schroef er niet helemaal uit. Laat het
sop wegstromen. Uit de schroefopening vloeit een
beetje water (ca. 100 ccm). Vang dit water in een
bakje op.
^
Druk krachtig op de deurgreep, totdat de bevei
liging weer vastklikt. Dat is duidelijk te horen.
U kunt de deur weer openen (behalve als zich water
in de machine bevindt) en sluiten.
-
Stroomuitval tijdens het wasproces,
noodontgrendeling van de deur
Kortdurende stroomuitval:
Het programma blijft op de laatste stand staan en in
het display verschijnt de volgende melding zodra er
weer spanning op het apparaat staat:
Spanningsonderbreking
y
Programmastop
Druk op de starttoets.
i ü f
^ Draai de ontluchtingsschroef na afloop weer vast
en controleer het geheel op dichtheid (waterkraan
openen).
^
Steek een schroevendraaier (punt ca. 4 mm) in de
opening naast het deurslot. De punt moet in de
groef van de ontgrendeling vallen. Door licht tegen
de wijzers van de klok in te draaien, wordt de deur
ontgrendeld.
Open de deur nooit met geweld!
^
Haal de was uit de machine.
^
Druk op de toets "START" en het programma wordt
voortgezet.
25
Page 66

Nuttige tips
Mogelijke oorzaken overmatige schuim
-
vorming
Wasmiddelsoort
–
Gebruik wasmiddelen voor professionele wasauto
^
maten. Gebruik geen huishoudwasmiddelen.
Overdosering
–
Doseer volgens de aanwijzingen van de wasmid
^
delenfabrikant. Let ook op de waterhardheid in uw
regio.
Sterk schuimend wasmiddel
–
Gebruik een minder schuimend wasmiddel of
^
neem contact op met een deskundige.
Zeer zacht water
–
Bij waterhardheidsgraad 1 dient u minder wasmid
^
del te gebruiken. Volg de aanwijzingen van de
wasmiddelenfabrikant.
De vervuilingsgraad van het wasgoed
–
Bij licht verontreinigd wasgoed kunt u minder was
^
middel doseren. Volg de aanwijzingen van de was
middelenfabrikant.
– Restanten reinigingsmiddelen in de was
^ Spoel het wasgoed eerst. Doe dat met koud water
en gebruik geen wasmiddel. Wasgoed dat met inweekmiddel is behandeld, moet goed worden uitgespoeld.
-
Het oprollen van grote stukken wasgoed
Het kan voorkomen dat zich grote stukken wasgoed
(bijvoorbeeld tafelkleden) tijdens het centrifugeren
-
-
oprollen. Dit is te voorkomen door de machine anders
te programmeren.
Neem hiervoor contact op met Miele.
Service-interval, veiligheidsvoorschrift
Als na het indrukken van de "Aan"-schakelaar de volgende melding in het display verschijnt,
moet een onderhoudsbeurt of de jaarlijke veiligheids
controle worden uitgevoerd. Deze werkzaamheden
mogen alleen door Miele Nederland worden uitge
voerd.
-
-
Service-interval 1
§
-
-
Bel Miele Nederland.
A
Veiligheidscontrole
§
Bel Miele Nederland.
A
– Geringe washoeveelheid
^ Verlaag de wasmiddeldosering evenredig.
– Het toerental van de trommel is te hoog (Profi-
tronic-besturing)
^
Pas het toerental van de trommel en het wasritme
aan.
–
Gasverwarmde wasautomaten
Bij gasverwarmde machines wordt het sop langs het
verwarmingsregister gepompt. Hierdoor wordt het
wasmiddel optimaal benut, maar ook de schuimvor
ming vergroot.
^
Neem de voorgaande punten in acht.
^
Gebruik een wasmiddel dat niet teveel schuimt.
^
Alleen bij een Profitronic-besturing (in speciale ge
vallen): verminder voor de opwarmfase het toeren
tal van de trommel en het wasritme.
Na 5 seconden dooft het display.
-
-
-
26
Page 67

Foutmeldingen
Reparaties aan elektrisch, gas- en stoomver
,
warmde apparaten mogen uitsluitend door vak
mensen worden uitgevoerd. Ondeskundig uitge
voerde reparaties kunnen gevaar opleveren voor
de gebruiker.
Als er voor of na de start van een programma sto
ringen optreden, worden deze in het display weerge
geven.
Het display blijft donker.
De wasautomaat heeft geen stroom.
Controleer de stekker, de hoofdschakelaar en de
^
zekeringen (ter plaatse).
-
-
-
-
Nuttige tips
Fout verwarming
§
Programmastop! Druk op de starttoets.
Programma alleen zonder verwarming.
if
Als u op de toets "START" drukt, wordt het pro
^
-
gramma zonder verwarming voortgezet. Bij desin
fectieprogramma's wordt bij deze foutmelding het
programma afgebroken.
Neem contact op met Miele.
Fout aandrijving
m
Laat de motor afkoelen.
^
Programmastop! Druk op de starttoets.
Motortemperatuur te hoog.
if
-
-
Spanningsonderbreking
y
Programmastop
Druk op de starttoets.
f
^ Druk op de toets "START", zodra de stroomvoorzie-
ning is hersteld.
Deze foutmelding kan ook betekenen dat de motorbeveiliging in werking is getreden.
^
Laat de motor afkoelen.
§
De onbalans is te groot. De onbalansschakelaar heeft
gereageerd.
^ Schakel de machine uit en in en druk op de toets
"START".
Fout onbalans
Neem contact op met Miele als na een
herstart het probleem niet is verholpen.
i A
Fout gassysteem
§
Fout watertoevoer
M
Neem contact op met Miele als na een
herstart het probleem niet is verholpen.
if
^
Controleer de waterkraan en druk op de toets
"START".
Fout deurslot
a
Neem contact op met Miele als na een
herstart het probleem niet is verholpen.
if
Verschijnt de foutmelding na de start van het pro
gramma, ga dan als volgt te werk:
^
Open de gaskraan en druk op de toets "START".
Als de foutmelding midden in een programma ver
schijnt, is de gasdruk gedaald, bijvoorbeeld omdat
andere gasapparaten zijn ingeschakeld.
^
Druk op de toets "START".
Draai de gaskraan open.
Druk op de starttoets.
if
-
-
^
Druk stevig tegen de deurgreep totdat het slot
hoorbaar vastklikt. Druk op de toets "START".
27
Page 68

Nuttige tips
Service
Fout gassysteem
§
Neem contact op met Miele als na een
herstart het probleem niet is verholpen.
if
Neem contact op met Miele, als het probleem met
^
de herstart niet is verholpen.
Fout gassysteem
§
Reinig de pluizenzeef zoals beschreven in het hoofd
stuk "Reiniging en onderhoud" en druk op de toets
"START".
Bij gasverwarmde machines kan overmatige schuim
vorming een storing tot gevolg hebben.
Reinig de pluizenzeef.
Druk op de starttoets.
if
-
-
Neem bij storingen contact op met Miele.
Voor een goede en vlotte afhandeling is het noodza
kelijk dat Miele weet welk model wasautomaat u heeft
en welk serienummer (SN) en onderdeelnummer
(M.-Nr.) deze heeft.
Beide gegevens vindt u op de typeplaatjes:
bij geopende deur boven de deur, of boven aan de
achterkant van de machine.
Geef ook de foutmelding in het display door aan
Miele.
Gebruik uitsluitend originele Miele-onderdelen als
onderdelen moeten worden vervangen. Geef ook
hierbij het type, het model en het onderdeelnummer
(M.-Nr.) aan Miele door.
-
Fout afvoerklep
q
Neem contact op met Miele als na een
herstart het probleem niet is verholpen.
if
^ Controleer de afvoer ter plaatse en druk op de
toets "START".
Een defecte afvoerklep mag uitsluitend door Miele
worden gerepareerd.
Fout doseersysteem
ö
Vervang het doseerreservoir.
§
Vul doseerreservoir 1.
Druk op de starttoets.
if
Kaartfout
Kaart verkeerd ingestoken.
^
Steek de kaart goed in de kaartlezer.
28
A
Page 69

Voer reinigings- en onderhoudswerkzaamheden
bij voorkeur na gebruik van de machine uit.
Voor de reiniging van het apparaat mag geen
,
hogedrukreiniger of waterstraal worden gebruikt.
Reinig de ommanteling, het bedieningspaneel en
de kunststof delen alleen met een mild reinigingsmiddel of met een zachte, vochtige doek. Wrijf de delen vervolgens weer droog.
Schuurmiddelen veroorzaken krassen op het oppervlak.
Gebruik voor de roestvrijstalen delen van de ommanteling een normaal reinigingsmiddel voor roestvrij
staal.
Houd de deurdichting schoon. Verwijder eventuele
verontreinigingen met een vochtige doek.
Wasmiddelvak, wasmiddelbakjes en zuighevel reinigen
Reiniging en onderhoud
Om het opvanggootje en de sifon van het wasmiddelvak te reinigen, moet u het klepje van het wasmiddelvak onder een hoek van 45° lostrekken. Als de sifon
verstopt is, kunt u deze met een flessenborstel reinigen.
Controleer regelmatig het rooster van de kuipont-
luchting aan de achterkant van de machine op verontreinigingen. Reinig het rooster indien nodig.
Reinig het wasmiddelvak en de wasmiddelbakjes na
gebruik met warm water. Verwijder alle wasmiddelresten en korstjes. Laat bij langdurige stilstand het
klepje van het wasmiddelvak open. Reinig indien nodig ook de zuighevels van de vakjes voor de washulpmiddelen.
Trek de zuighevel eruit, reinig deze met warm water
en plaats de zuighevel terug.
Roestvorming
De trommel en de kuip zijn van roestvrij staal.
IJzerhoudend water of ijzerhoudende voorwerpen
(zoals paperclips, ijzeren knopen en ijzerdeeltjes) die
met de was in de machine terechtkomen, kunnen
roestvorming in de trommel c.q. kuip tot gevolg hebben.
Reinig in dit geval de trommel c.q. kuip regelmatig en
meteen na het vaststellen van de roestvorming met
een normaal reinigingsmiddel voor roestvrij staal.
Controleer ook de deurdichtingen op ijzerhoudende
verontreinigingen en reinig de dichtingen grondig
met de eerder genoemde reinigingsmiddelen.
Deze maatregelen moeten regelmatig worden uitgevoerd om roestvorming te voorkomen.
De machine moet na gebruik kunnen drogen. Sluit
de deur dan ook niet, maar laat die op een kier
staan.
29
Page 70

Reiniging en onderhoud
Controleer de zeefjes in de koppelstukken (1) en de
toevoerslangen (2) regelmatig op verontreinigingen.
Reinig de zeefjes indien dat nodig is.
Houd bij de reiniging van het pluizenfilter onder
staande volgorde aan:
Plaats een geschikte bak onder het pluizenfilter. De
^
bak moet minstens 2 liter sop kunnen opvangen.
Open het pluizenfilter door het deksel een halve tot
^
een hele slag naar links te draaien.
Het sop dat in het pluizenfilter is achtergebleven
stroomt uit de machine.
-
Wees voorzichtig als het sop nog heet is!
Pluizenfilter reinigen
(geldt alleen voor gasverwarmde machines)
Controleer de zeef in het pluizenfilter regelmatig op
pluizen. Reinig deze indien nodig.
,
Voer controle- c.q. reinigingswerkzaamheden
alleen uit als het wasprogramma beëindigd en de
kuip leeg is.
Als het pluizenfilter verstopt is, knippert in het display
een foutmelding.
^ Giet het bakje op tijd leeg, indien dat nodig is.
Fout gassysteem
§
Reinig de pluizenzeef.
Druk op de starttoets.
if
^
Als er geen sop meer uit de machine
loopt, schroeft u het deksel helemaal van het plui
zenfilter. U haalt daarmee tegelijk ook de pluizen
zeef uit het pluizenfilter.
^
Reinig de pluizenzeef en de binnenkant van het
pluizenfilter.
-
-
30
^
Plaats de pluizenzeef terug en draai het deksel
goed vast (naar rechts draaien).
Page 71

Reiniging en onderhoud
Trommellager PW 6167, PW 6207
Als het service-interval is bereikt, verschijnt de vol
gende melding in het display:
-
Trommellager smeren
§
Met de toets "A terug" kunt u deze melding wissen.
De melding verschijnt echter steeds weer na het in
schakelen van de machine, totdat de onderhouds
werkzaamheden zijn uitgevoerd.
,
Bel Miele Nederland.
A
-
-
Maak de machine spanningsvrij.
Stilstand
Als de machine langdurig stilstaat (vanaf 4 weken)
moet de trommellagering volgens het onderhouds
voorschrift worden ingevet (PW 6167, PW 6207).
Draai de trommel vervolgens enkele malen. Laat de
trommel daarna eens per 4 weken even draaien om
schade aan de lagers te voorkomen.
-
Smeer de trommellagering na ca. 1000 bedrijfsuren
via de smeernippels met Arcanol L 100.
Gasverwarmde wasautomaten.
31
Page 72

Plaatsen en aansluiten
Deze wasautomaat mag uitsluitend door Miele of
door een geautoriseerde vakhandelaar worden
geplaatst.
De wasautomaat mag uitsluitend worden ge
,
bruikt voor wasgoed dat niet met gevaarlijke of
ontvlambare stoffen is vervuild.
Plaats de wasautomaat in een vorstvrije ruimte.
Bevestiging van de automaat
Gasverwarmde wasautomaten moeten altijd aan de
vloer worden bevestigd. Het bevestigingsmateriaal is
bijgevoegd.
Sokkelopstelling
Bij plaatsing op een sokkel moet de automaat altijd
aan de onderbouw of de betonnen sokkel worden be
vestigd.
De onderbouw moet aan de vloer worden bevestigd.
-
Transporteer de automaat in het vertrek met een hef
wagen.
Verwijder de transportverpakking voorzichtig met ge
schikt gereedschap.
Haal de automaat met een geschikt hefsysteem van
de transportpallet.
Plaats de wasautomaat niet op een vloerbedekking
die de ventilatie-openingen aan de onderkant van de
ommanteling zou kunnen afsluiten.
Om latere onderhoudswerkzaamheden door Miele
eenvoudiger te maken, dient u rekening te houden
met de aangegeven minimale afmetingen en met de
afstand tot de wand (met toegang).
-
-
Betonnen sokkel/vloer Onderbouw Miele
Voor onderhoudswerkzaamheden moet een afstand
van minimaal 400 mm tot aan de wand worden aan
gehouden.
De automaat kan alleen optimaal functioneren als
deze waterpas wordt opgesteld.
Plaats de automaat waterpas met behulp van de ver
stelbare machinevoeten.
Verplaats de automaat alleen wanneer alle pane
len van de ommanteling gemonteerd zijn.
32
-
-
-
Page 73

Transportbeveiliging
De transportbeveiligingen (2 x voor en 2 x achter) zijn
elk met 3 schroeven bevestigd en mogen pas op de
plaats van opstelling worden verwijderd, vóór de in
gebruikneming van de automaat.
-
Plaatsen en aansluiten
Hiertoe moeten het voor- en het achterpaneel van de
automaat worden verwijderd. Draai de schroeven aan
de onderkant van het voorpaneel eruit en verwijder
het paneel.
Draai vervolgens de schroeven van het achterpaneel
eruit en verwijder het paneel.
Bewaar de transportbeveiligingen. Als de auto
maat moet worden getransporteerd, moeten de
beveiligingen weer worden gemonteerd.
-
33
Page 74

Plaatsen en aansluiten
Aansluitingen (ter plaatse)
WW Warm water
KW Koud water
KWH Koud Warm Hard water
EL Elektrische aansluiting
AG Rookgas (gasverwarmde automaten)
G Gasaansluiting (gasverwarmde automaten)
AV Waterafvoer
D Stoomaansluiting (stoomverwarmde automaten)
K Condensafvoer (stoomverwarmde automaten)
Wateraansluitingen automaat
Koud water Warm water Koud water
Hard water Hard water
Vloeibare reinigingsmiddelen
Wateraansluiting
De wasautomaat moet met een waterkraan worden
aangesloten op een waterleiding die volgens de voor
schriften is aangelegd. Dit mag uitsluitend door een
erkend installateur worden gedaan.
Watertoevoer/-afvoer aansluiten
Om een storingsvrij programmaverloop te garande
ren, moet de waterdruk liggen tussen 100 kPa (1 bar)
en 1000 kPa (10 bar).
Voor de wateraansluiting moeten de bijgeleverde toe
voerslangen worden gebruikt.
Gebruik bij vervanging alleen slangen die bestand
zijn tegen 7000 kPa (70 bar) overdruk en tegen een
watertemperatuur van minstens 90 °C. Dit geldt ook
voor de betreffende aansluitarmaturen. Originele
Miele-onderdelen voldoen aan deze eisen.
Instromend warm water mag niet warmer zijn dan
70 °C.
-
-
-
34
Page 75

Plaatsen en aansluiten
Aansluiting op alleen koud water
1"
3/4"
Het Y-stuk is bijgevoegd.
Aansluiting doseermiddelen op mengkast
(vloeibare reinigingsmiddelen)
De aansluitingen 1 en 2 zijn voor de dosering van
pastavormige middelen. De aansluitingen zijn afge
sloten en moeten met een 8 mm-boor worden openg
eboord.
-
-
Let op! Doorboor alleen het eerste wandje (1).
Slechts 10 mm achter dit wandje bevindt zich nog
een wandje (2) dat niet mag worden beschadigd (zie
afbeelding)!
Als u de doorboorde aansluitingen niet meer wilt ge
bruiken, moet u deze afsluiten.
De aansluitingen 3 tot 12 zijn voor het doseren van
vloeibare middelen. Deze tuitjes zijn eveneens afge
sloten en moeten met een kleine zaag op de juiste
slangdiameter worden afgezaagd.
Als u de afgezaagde aansluitingen niet meer wilt ge
bruiken, moet u deze afsluiten.
-
-
-
35
Page 76

Plaatsen en aansluiten
Waterafvoer
Waterafvoer AV op de automaat: DN 70, bouwzijdig:
mof DN 70. Volumestroom kortstondig: 200 l/min.
Schuimcompensator SK
Bij grote schuimvorming kan uit de wasemontluchting
schuim komen. Om het schuim af te voeren, kan ach
teraf met in de handel verkrijgbare buizen een afvoer
met sifon worden aangelegd.
Installatievoorbeelden:
Elektrische aansluiting
De wasautomaat mag uitsluitend worden aangesloten
op een huisinstallatie die volgens de voorschriften is
geïnstalleerd. Dit mag alleen door een erkend elektri
cien worden gedaan, met inachtneming van de lan
-
delijke voorschriften en de voorschriften van het
plaatselijke energiebedrijf.
Bij installatie van een aardlekschakelaar (RCD) moet
dit een aardlekschakelaar van het type B zijn (ge
schikt voor alle stroomsoorten).
De elektrische installatie van de wasautomaat PW
6xx7 voldoet aan de normen EN 60335-1, EN
60335-2-7.
Open het machinedeksel. De aansluitklem bevindt
zich op de montageplaat.
De automaat is standaard geschikt voor
3N AC 50-60 Hz. De spanningsgegevens vindt u op
het typeplaatje.
Varianten: 3 N AC 380-415 V 50-60 Hz
3 AC 220-240 V 50-60 Hz
Bij een vaste aansluiting moet het apparaat via een
schakelaar met alle polen van de netspanning kun
nen worden losgekoppeld. De contactopening in uitgeschakelde toestand moet minimaal 3 mm bedragen. Geschikt zijn zelf-uitschakelaars, zekeringen en
relais (EN 60335).
-
-
-
-
De stekkerverbinding of de schakelaar voor het loskoppelen van de netspanning moet altijd toegankelijk
zijn.
Als het apparaat van de netspanning wordt losgekoppeld, moet het betreffende systeem afsluitbaar zijn.
Hierop moet op elk moment controle mogelijk zijn.
Gebruik het bijgevoegde schema.
Aarddraad
Het apparaat moet correct worden geaard (lekstroom
>10 mA).
De elektrische verwarming is af fabriek ingesteld op
9 kW PW 6107
15 kW PW 6137, PW 6167
18 kW PW 6207
Het minimale waterniveau voor het activeren van het
verwarmingssysteem is 50 mm waterkolom.
De motor is beveiligd tegen overbelasting.
36
Page 77

Plaatsen en aansluiten
Doseerpompen aansluiten
De aansluitklemmen voor 4 tijdgestuurde doseer
pompen die zonder multifunctionele module kunnen
worden gebruikt, bevinden zich achter de afdekking
naast de elektrische aansluiting. Zie het bijgeleverde
schema.
-
Stoomaansluiting
De stoomaansluiting mag uitsluitend worden gereali
seerd door een erkend installateur. Zie de bijge
voegde installatiehandleiding.
-
Neem de installatieaanwijzingen in acht. Deze aan
passing mag uitsluitend door een erkend vakman
worden uitgevoerd.
Voer nooit zelf reparaties uit aan gasver
,
warmde machines! Reparaties mogen uitsluitend
door vakmensen worden uitgevoerd. Neem daar
om altijd contact op met Miele.
Nadat het apparaat is geplaatst en aangesloten,
moeten alle gedemonteerde panelen weer worden
teruggeplaatst.
-
-
-
Stoomklep, filter en stoomkraan dienen ter plaatse te
worden gemonteerd.
De stoomklep en de condensafscheider zijn verkrijgbaar bij de Miele-vakhandel en bij Miele.
Gasaansluiting
De gasaansluiting mag uitsluitend worden gerealiseerd door een erkend installateur, met inachtneming
van alle geldende voorschriften. Zie de bijgevoegde
installatiehandleiding.
De gasverwarming is af fabriek ingesteld zoals ver
meld staat op de machine (zie de sticker op de ach
terkant van het apparaat).
Voor aansluiting op een andere gassoort kan bij Miele
een ombouwset worden besteld. Vermeld bij de be
stelling de volgende gegevens: machinetype, machi
nenummer, gasfamilie, gasgroep, gasaansluitdruk en
land van opstelling.
-
-
-
-
37
Page 78

Technische gegevens
PW 6107 EL,D/G PW 6137 EL,D/G PW 6167 EL,D/G PW 6207 EL,D/G
Hoogte in mm 1250 1250 1400 1400
Breedte in mm 804 804 924 924
Diepte in mm 925/1235 1005/1345 1007/1425 1140/1535
Diepte bij geopende deur
in mm
Gewicht in kg 324/395 342/407 454/548 495/589
Trommelinhoud in l 100 130 160 200
Max. capaciteit in kg
(droge was)
Aansluitspanning zie typeplaatje
Aansluitwaarde zie typeplaatje
Zekering zie typeplaatje
Keurmerken zie typeplaatje
Max. vloerbelasting in N als
de automaat in werking is
Gehanteerde normen
inzake productveiligheid
Geluidsdruk in
dB (A), EN ISO 11204
Geluidsvermogen in
dB (A), EN ISO 9614-2
1340/1632 1420/1742 1422/1822 1555/1932
10 13 16 20
3970/4667 4304/4942 5469/6333 6076/6978
IEC 335-1, IEC 335-2-11
<80
38
Page 79

39
Page 80

Wijzigingen
voorbehouden/1016
M.-Nr.M.-Nr. 09 105 050 / 03
 Loading...