

Scanner Networking
User’s Guide
This document explains how the scanner network function in ScanWizard Pro allows you to share and
unshare scanners for public use, as well as how to access remote and local scanners through a network.
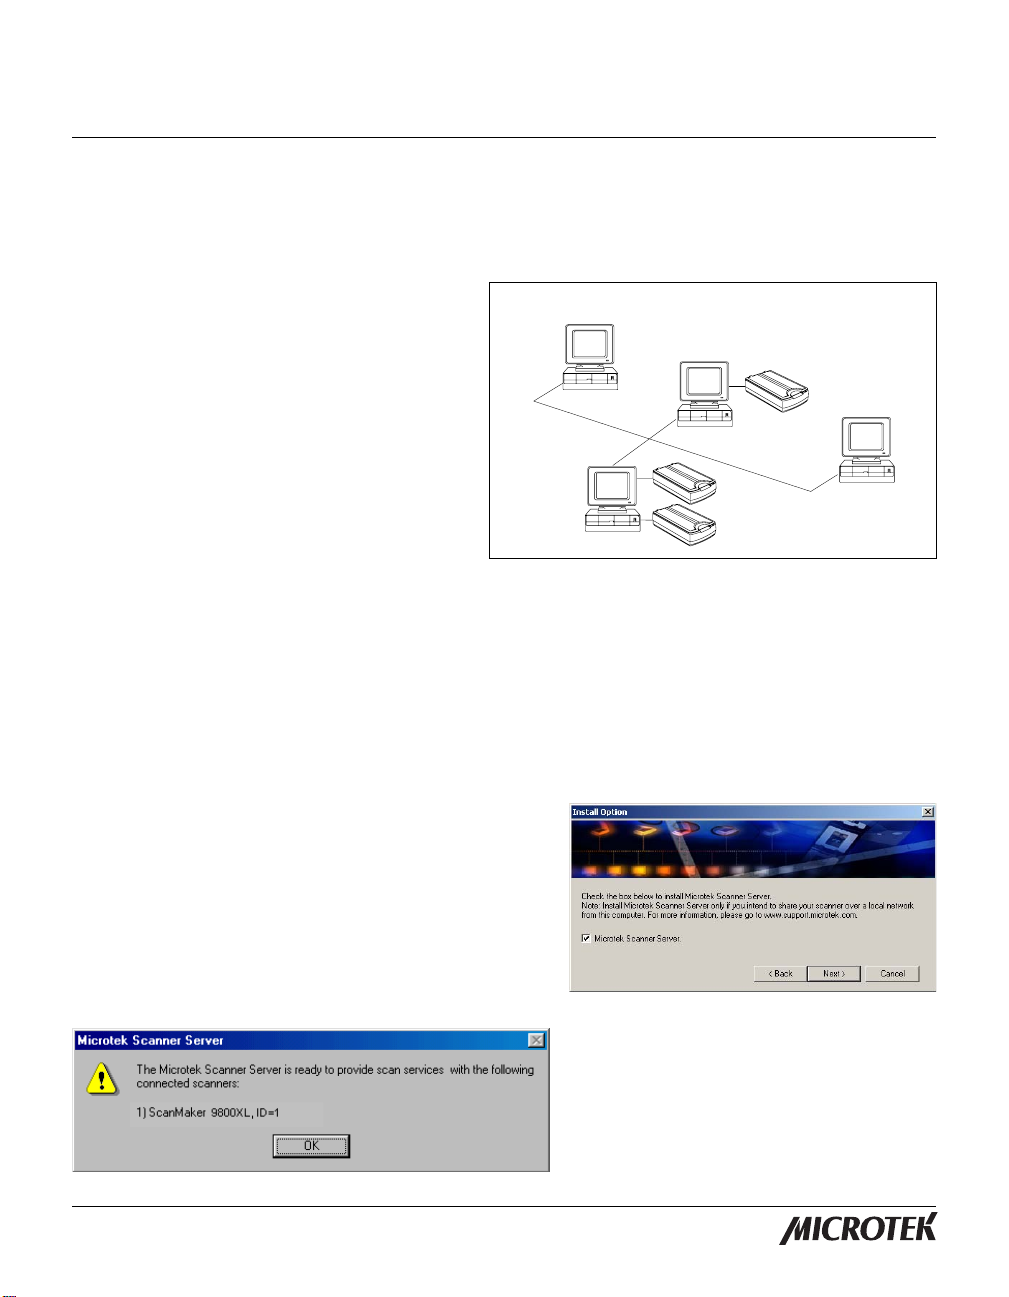
The scanner networking function of ScanWizard
Pro is geared specifically for scanner users
working in a LAN (Local Area Network)
environment. W ith this new feature in
ScanWizard Pro, computers on a network can
share in the use of a single connected scanner,
allowing multiple users to enjoy the use of an
otherwise scarce resource.
Note
: ScanWizard Pro's scanner networking
function runs only on the Windows operating
system.
Client 1
Client 2
Client 3
Server
Microtek Scanner Server (MSS) utility
The Microtek Scanner Server (MSS) utility is a separate but integrated scanner server utility program within
ScanWizard Pro. As an optional utility, the MSS provides scanner services to people (clients) in a work
group through their network. Through the MSS, a scanner server manager is able to control locally
connected scanners and share/unshare them for public use. If the MSS is not installed on your own system,
you still can access the shared or remote scanners of others on the network, but you will not be able to
share your connected local scanner for public use.
T o install the MSS utility program, select “Y es” from the
on-screen instructions during installation of ScanWizard
Pro.
When the MSS is ready to provide scanner services to
other people on the network (clients), a message displays
on the screen, as shown below .
Copyright © 2008 Microtek International, Inc. http://www.microtek.com
I49-003259 B, October 2008
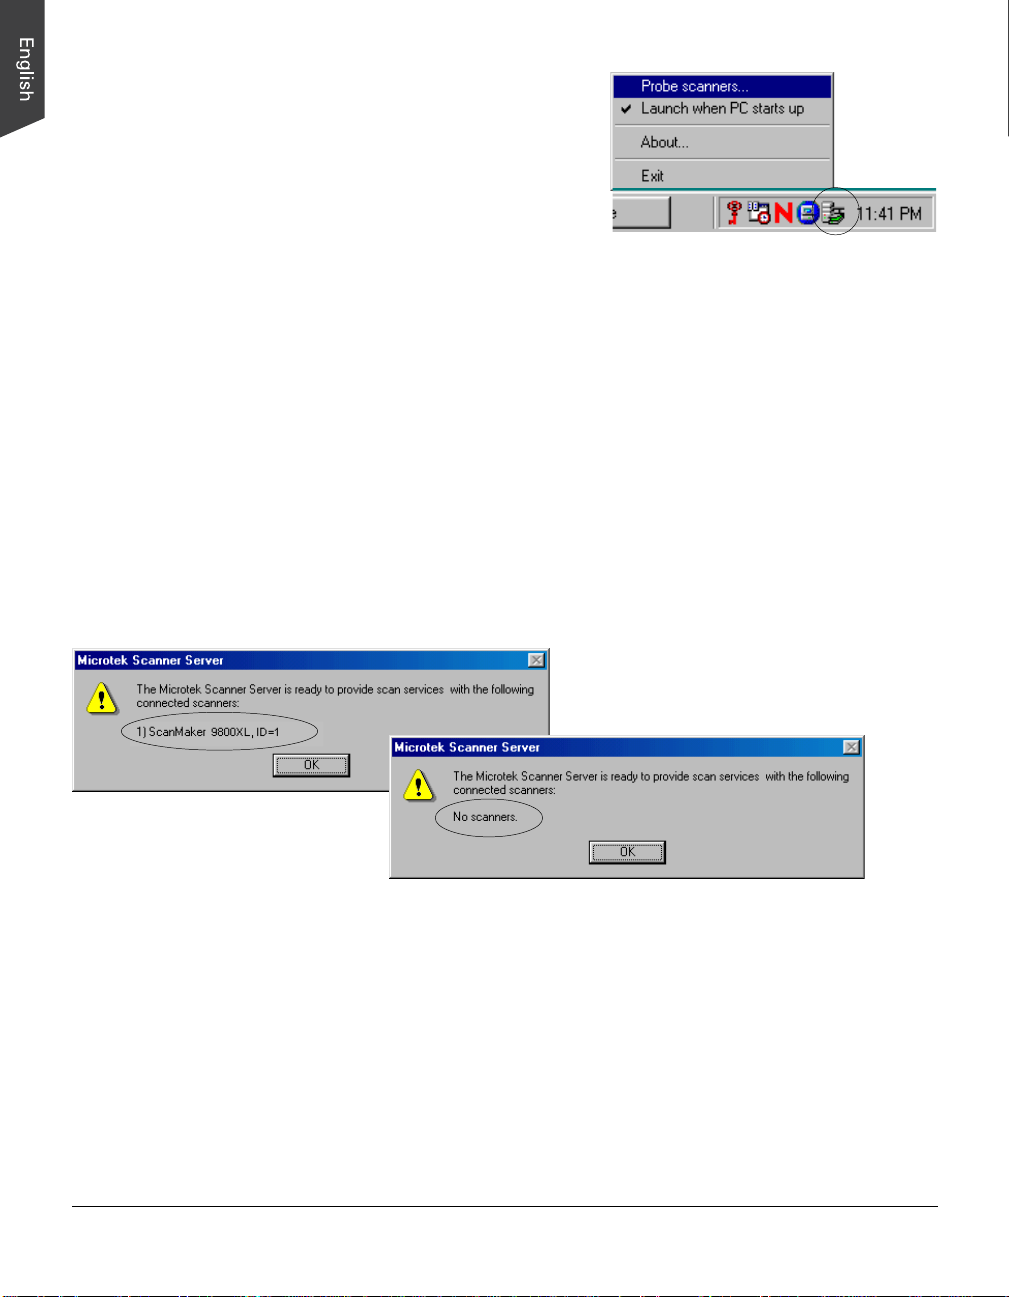
Once the MSS is installed on your system, the MSS utility
program should appear as an icon on the status bar with a menu
of 4 options (Probe scanners, Launch when PC starts up, About,
and Exit), and the utility program name will be added to the
startup menu of the Microtek ScanWizard Pro folder.
Probe scanners
When this option is selected, scanners connected to the server
are listed in the Probe scanners window , and information related
to the connected local scanners is shown as well.
Launch when PC starts up
When this option is selected, the MSS runs automatically each time W indows is restarted. This option is
enabled by default. To change this option from the default setting, select it once more, and when you start
Windows the next time, the MSS utility will not run and the icon is hidden.
If scanners are already connected to the server and are in the ready state, a “found server” scanner message
displays on the screen when you restart W indows. People on the network will be able to locate shared
scanners from the ScanWizard Pro Scanner menu (by using the TCP/IP Scanner Setup command). If no
scanners are connected to the server, or if no scanners have been found by the system, a "No scanners"
message displays on the screen. To resolve this problem, check to see if your scanner is in the ready state,
or refer to the troubleshooting documentation on the Microtek CD-ROM.
Scanner found
Scanner not found
If Launch when PC starts up is unchecked from the MSS menu, none of the connected local scanners can
be shared for public use. People on the network will not be able to locate shared scanners from the Scanner
menu, even if the specified network scanner server location is given.
About
This option gives you information about the MSS utility program.
Exit
This option lets you exit the MSS utility program. To re-launch the MSS utility program, choose Microtek
Scanner Server from the startup menu of the Microtek ScanW izard Pro folder.
2

Sharing your scanners
To share your connected local scanners with other people (clients) on the network, follow these steps:
1. Make sure that your computer is networked before you start Windows.
2 . Make sure that you have ScanWizard Pro with the MSS utility installed on your system.
3. Make sure that your connected scanners are in the ready state.
4. Enable the MSS to verify the status of your connected local scanners on the network.
Right-click the mouse button on the MSS icon to select Probe scanners from the menu. The connected
local scanners (server scanners) should display in the Probe Scanners window , indicating that your
connected local scanners are ready to be shared for use by other people (clients) on the network.
Server station
Note
: If none of the connected local scanners (server scanners) are listed in Probe Scanners window of
the MSS menu, this indicates that your connected local scanners cannot be shared for public use on the
network. To resolve this problem, refer to the troubleshooting documentation on the Microtek CD-ROM .
Unsharing your scanners
Unsharing your connected local scanner prevents anyone from accessing the scanner. To unshare your
scanners, do either of the following below:
• Uninstall the MSS utility program.
• Select Exit from the MSS menu to close the MSS utility program, or terminate the connected local
scanners (server scanners) from the network if the MSS utility program is installed on your system.
3

Choosing a remote scanner on the network
You can use the network scanner for scanning, instead of a locally connected scanner. Follow these steps
to choose a network scanner:
1. Make sure that your computer connected to a network before you start Windows.
2. Make sure that you have ScanWizard Pro installed on your system.
3. Make sure that the remote user is connected to a server, and that the remote scanner is ready for public
use.
4. Bring up the TCP/IP Scanner Setup window from
the Scanner menu, and check the option “Enable
TCP/IP scanning”.
Client station
If this option is checked, your system is enabled to
access the remote scanners on the network. If
unchecked, remote scanning is disabled, and only
connected local scanners can be located.
5. Locate the remote scanner by using either of the
two ways below:
a) By using auto search
Check the option “Automatically find scanner
servers,” and let the system automatically find the
shared scanners (remote scanners) on the network.
b) By using manual search
Uncheck the option “Automatically find scanner
servers,” and in the Server Edit location box, type
the host name or the corresponding IP address of
the host from which scanner services are desired.
The Host name is the network scanner server’s
computer name. To know the name of the host
computer:
• For W indows 95/98/Me users:
Right-click the Network Neighborhood on the
Windows desktop; select Properties, then click
the Identification tab on the server station. The
computer name is shown.
4
5
6
7
Server station
Host name
8
IP address
• For W indows 2000/NT users:
Right-click the My Computer on the W indows desktop; select Properties, then click the Network
Identification tab on the server station. The computer name is shown.
4

The IP address is identified by dot-segregated four-position numbers, should be within the range 0 to
255 (e.g., 172.16.17.38). The first three numbers are common to users in a work group, and the fourth
number is unique to each user on the network. To know the network scanner server’s IP address, select
Scanner Probe from the Scanner menu on the server station. The connected local scanners will be
shown in the Scanner Probe window with the related information.
6. Specify the port number of the server .
All connected, shared scanners on the network should use the same server port number; otherwise, the
shared scanners will not be found on the network. The default port number is 303.
7. Specify the time-out period for the server search.
This edit box allows you to set the search lead time for the remote scanner. Use the up/down button to
increase/decrease time for time-out, and input an acceptable time-out period (1 to 60 seconds), after
which the server stops searching on the network.
8. Click Test Connection to see “found” scanners and related information (including Server Location,
Connection Status, and Number of Scanner), or click OK to perform auto-searching without showing
related information on the scanners.
Client station
Remote scanner
Local scanner
Success - Remote scanner
has been successfully
accessed
Network failed Remote scanner has
not been accessed.
To fix this problem,
check to see if the
network
environment is
ready.
The connection result is based on the settings you have made (above settings on Steps 3-6) in the
Scanner Server group, and the found remote scanners are added into the Scanner menu of ScanWizard
Pro when the remote scanner connection is successful. If a server location has not been specified in the
Server Location edit box and the “Automatically find scanner server” option is unchecked, the Test
Connection button will be dimmed and
disabled.
9 . Select the remote scanner from the Scanner
menu of ScanWizard Pro. The selected
scanner is shown with a check mark on the left.
5

Choosing a local scanner
You can use the local scanner directly connected to your computer for scanning, even though remote
scanners can be found on the network. Follow these steps to choose a local scanner for scanning:
1. Make sure that you have ScanWizard Pro (with or without MSS utility program on your system).
2. Make sure that your connected local scanners are in the ready state.
3. Select your connected local scanner from the Scanner menu of ScanWizard Pro. The active scanner is
shown with a check mark.
If none of the connected local scanners is listed in the Scanner menu, use either of the two ways listed
below to locate the local scanners:
• Choose Scanner Probe from the Scanner menu, and click Probe to locate the connected local
scanners; or
• Right-click the mouse button on the MSS icon to select Probe Scanners from the menu. If
connected local scanners can be found by system, then they will be listed in the Probe Scanners
window.
When the connected local scanners are found by the system, this indicates that the found, local scanners can
be selected in the Scanner menu of ScanWizard Pro. If no connected local scanner can be found by the
system, refer to the troubleshooting document on the Microtek CD-ROM for more details.
No scanners found when ScanWizard Pro is launched
When ScanWizard Pro is launched and the system is unable to find any local or remote scanner, the
Microtek ScanWizard Pro window will appear , as shown below. Click TCP/IP Scanner Setup to specify
network scanner servers for accessing scanners, then click Scanner Probe to detect all linked scanners on
the network. If found, all linked scanners with their related information will be listed in Scanner Probe
window, and the list of available scanners in the ScanWizard Pro Scanner menu will be automatically
updated. Click the Close button to exit ScanWizard Pro.
Specify the network scanner server
(see settings on page 4)
6
 Loading...