

Page 1
Page 2
i
Page 3

Copyright © 2004 by Microtek International, Inc.
All rights reserved.
Trademarks
®
Microtek
is a registered trademark of Microtek International, Inc. Windows® is a
registered trademark of Microsoft Corporation. All other products or name brands are
trademarks of their respective holders.
I49-003741 A
May 2004
Microtek Lab, Inc.
16941 Keegan A venue, Carson, CA 90746
Main: 310-687-5800, Fax: 310-687-5950, http://www.microtekusa.com
Microtek International, Inc.
6, Industry East Road 3, Science Based Industrial Park, Hsinchu 30077, Taiwan
Tel: 886-3-5772155, Fax: 886-3-5772598, http://www .microtek.com
ii
Page 4

Contents
Chapter 1 Scan-in-Dex Product Features ................................................ 1
Chapter 2 Installing Scan-in-Dex ........................................................... 4
Chapter 3 Features .............................................................................. 7
Installing software first ................................................. 4
Installing hardware first ................................................. 4
Calibration ........................................................................... 6
Preparing to Scan ................................................................. 7
A. Calibrating the scanner ............................................. 7
B. Selecting your settings .............................................. 8
Scanning with the Scan-in-Dex Manager ................................. 9
Using Scan-in-Dex .............................................................. 10
Opening Scan-in-Dex. ................................................. 10
Multifunction viewing window ..................................... 10
Inserting cards ........................................................... 12
Checking duplicate data .............................................. 15
Continuous double-sided scanning ............................... 15
Editing Cards ..................................................................... 16
Inserting photos ......................................................... 19
Adding new cards....................................................... 20
Self-defined field. ....................................................... 21
Setting the fields for cards .......................................... 21
Categorizing Cards .............................................................. 22
Categorizing from the management page ...................... 22
Categorizing from the editing page ............................... 23
Sending out E-mail by category .................................... 23
Searching .......................................................................... 24
Text Search ............................................................... 24
Advanced Search ....................................................... 24
Calendar ............................................................................ 25
iii
Page 5

Save, Save as, Export, Import, Synchronize .......................... 26
Save. ......................................................................... 26
Save as ..................................................................... 26
Export. ...................................................................... 26
Import ....................................................................... 27
Synchronize. .............................................................. 28
Scan-in-Dex Portable Disk ................................................... 30
Printing Cards .................................................................... 31
Infrared Transmission .......................................................... 32
IrDA Mobile ................................................................ 32
IrDA Palm. ................................................................. 33
Integrating Scan-in-Dex with Mail Programs .......................... 34
Integrating Outlook Express ......................................... 34
Integrating Microsoft Outlook ...................................... 34
iv
Page 6

Chapter 1 Scan-in-Dex Product Features
The Microtek Scan-in-Dex is a business card scanner that helps manage your business
cards professionally and efficiently. Small, lightweight, and portable, Scan-in-Dex features
Smart Field Recognition technology that accurately reads and properly files contact
information into your database. A background-removal technology is also utilized,
separating text from color-filled backgrounds. Scan-in-Dex lets you export data to your
computer, W indows CE/Palm OS device or cellular phone, and you can synchronize it
with Microsoft Outlook, Outlook Express, ACT!, Lotus Organizer , and many other
popular email and database programs.
Ease of use
With the Microtek Scan-in-Dex, text can be quickly scanned and input through a hasslefree procedure for optimum operating efficiency.
Intelligent self-learning capability
Software is capable of self-learning to improve recognition results.
Multiple view modes
Lets you view and manage business card information and images in the way you are
accustomed to.
Multiple categories and sub-categories
Lets you organize cards and card information into your preferred categories and subcategories.
Search and advanced search
Allows free text search and lets you set up advance search criteria for more accurate and
faster search.
Calendar and reminders
Lets you drag-and-drop business card records to the calendar to set up reminders for
meetings and events.
Business card recognition in multiple languages
Accurately scans and recognizes business cards in English, German, French, Italian,
Spanish, Dutch, and Chinese
Microtek Scan-in-Dex User Guide 1
Page 7

Double-sided business card retrieval
Scans both front and back side of business cards into a single record (with two passes).
Automatic identification of field information
Data is automatically identified and stored properly in their respective fields — i.e.,
name, title, company, telephone, fax and address, etc.
Duplicate finder
Finds duplicate cards with one click.
Easy card organization
Straightforward card control interface allows card info to get organized by sorting, search,
add new, or delete. Duplicate data can also be checked, text info edited, and function lists
accessed directly by right-clicking the mouse. Operating steps are simple and easy to
understand.
Visual icons that illustrate card particulars
V arious graphic icons appear in the front of a card list, by which you can recognize at a
glance whether a card contains data on a single/double side; on whether a photograph is
attached; or whether a card has been edited or exported.
Editing of cards
Instant preview of the edit screen allows you to zoom in various fields, as well as to edit,
change or check card data. Personal particulars can be included, photo information
inserted, and card data located via people-network management.
Vocal content
Card contents can be read in English.
Printing of card information and templates
Templates and print contact information can be set up in many formats with its own
address list, list of card images, mailing labels, and envelopes.
Exporting of card information
Card information can be saved as text files or image files, or exported directly to
application software such as Excel and Access. Specific fields to be exported can be
selected, and Scan-in-Dex also supports file formats such as CSV and VCF , etc.
2 Microtek Scan-in-Dex User Guide
Page 8

Data synchronization
Card data can be synchronized from within Outlook, Outlook Express, PocketPC or Palm.
When data is modified or deleted in Scan-in-Dex, data in the corresponding software can
also be updated simultaneously.
Full integration with Outlook and Outlook Express
Lets you scan, edit, and modify business card information and add to the address book in
Microsoft Outlook and Outlook Express programs. Scanned originals can be previewed.
Infrared Transmission
Data can be transmitted to PDAs and supported cell phones via computer infrared
(internal or external).
Portable disk
Card data can be synchronized in a compact and handy portable disk (sold separately), and
data can be accessed instantly. Simply insert the disk to access the data instantly .
Microtek Scan-in-Dex User Guide 3
Page 9
Chapter 2 Installing Scan-in-Dex
To simplify the installation of Scan-in-Dex, hardware and software installation have been
combined into a single process. Y ou can choose to install the software first followed
immediately by the hardware, or vice versa; this will not affect the usability of the card
scanner. Both procedures are laid out in this chapter, and determining which procedure
you wish to follow is simply a matter of personal preference.
Installing software first
1. Insert the Microtek Scan-in-Dex CD-
ROM into your CD-ROM drive. The
system will automatically start the
installation process. Follow the onscreen installation instructions.
2. At the end of the software installation
for Scan-in-Dex, click Finish, then
restart the computer.
3. Plug the Scan-in-Dex USB connector
into the USB port of the computer.
When the “Digital Signature Not
Found” window appears, click Yes to
complete the hardware installation.
After restarting the computer, the
Scan-in-Dex Manager appears on
the Windows task bar . If you do not
see this, check to make sure that
Scan-in-Dex is properly connected to
the computer, and tighten the USB
connection cord in the card scanner.
4 Microtek Scan-in-Dex User Guide
Installing hardware first
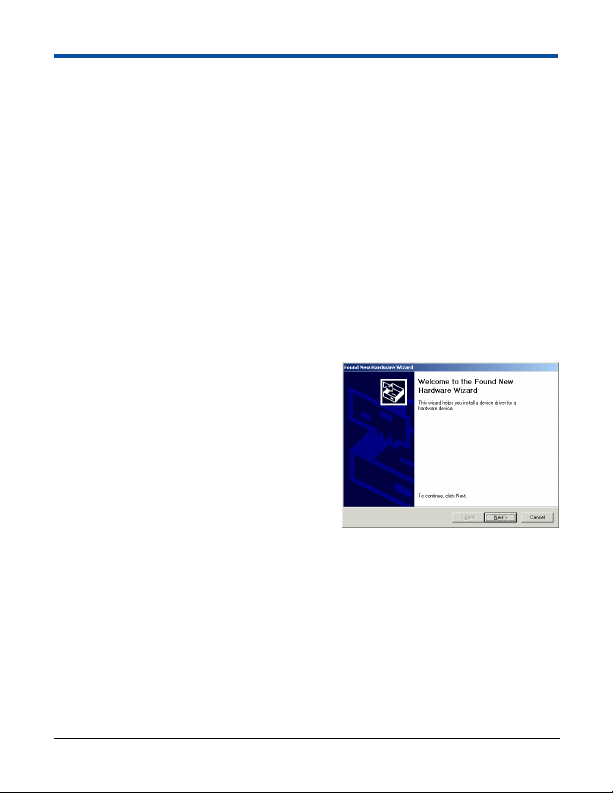
1. To install the hardware first, plug the
Scan-in-Dex USB connector into the
computer’s USB port. The “Add new
hardware wizard” will appear. Choose
Install from list or specific location,
then click Next.
Page 10
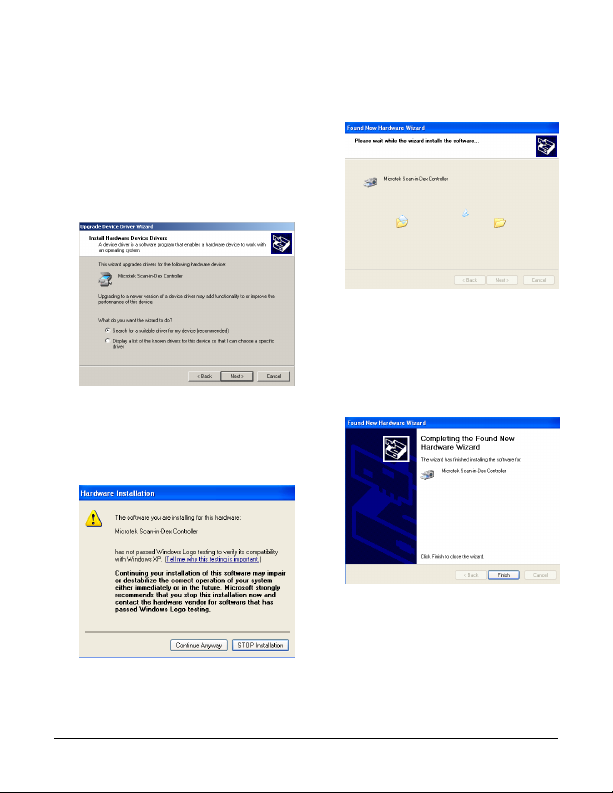
2. Insert the Scan-in-Dex CD-ROM into
the CD-ROM drive. Next, click
Search for Appropriate Driver in
“Locations” and check Search for a
suitable driver for my device
[recommended]. Then, navigate to
Scan-in-Dex under the “Driver”
folder. Finally , click Next after you
have chosen a folder.
3. If the screen “To confirm that this
driver is Windows XP compatible”
appears, choose Continue Anyway.
4. When this screen appears, installation
is completed. Click Finish to end the
driver installation.
5. Following installation of the Scan-inDex hardware driver, launch the
Setup.exe program from the CD to
continue installing the Scan-in-Dex
software.
Microtek Scan-in-Dex User Guide 5
Page 11
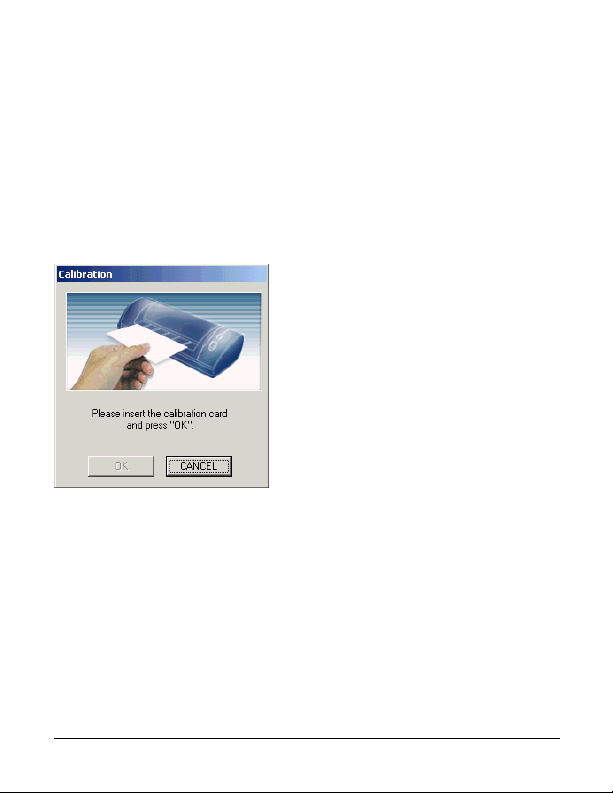
Calibration
When Scan-in-Dex is run for the first
time, the Calibration Wizard will appear .
Insert the calibration card that comes with
your Scan-in-Dex, then click OK. Scan-inDex will scan the calibration card and
calibrate the card scanner accordingly.
Calibration enhances color differentiation
and ensures high recognition accuracy in
the scanning of business cards.
Note:
• When inserting the calibration card,
place the blank side down and insert it
in the direction of the arrow.
• If the calibration card is lost, use a
blank business card to carry out the
calibration.
• If the image of the scanned graphic is
too dark or too light, this may affect
recognition accuracy. In this case, you
will need to recalibrate the card scanner
and repeat the calibration process.
6 Microtek Scan-in-Dex User Guide
Page 12

Chapter 3 Features
Scan-in-Dex has a number of handy features, including the recognition of multiple
languages, the use of a database management system for easier categorizing of
information, and the portability of card information to popular email programs, mobile
phone systems, and palm devices.
Following installation of Scan-in-Dex, the Scan-in-Dex Manager is automatically
activated each time your computer is turned on. A
right corner of the task bar. Y ou can scan cards directly via the Scan-in-Dex Manager and
easily set up a card database.
Preparing to scan
A. Calibrating the scanner
Before you proceed with scanning, calibrate Scan-in-Dex first. If it is your first time to
use Scan-in-Dex, the Calibration Wizard will be automatically launched. For details, refer
to the Calibration section in Chapter 2. Alternatively , you can use the following
commands to start calibration:
• Choose «Calibration» from the main
function list under «Scan-in-Dex
Manager»
icon will also appear on the lower
• Click «Edit / Calibration» on the Scanin-Dex management screen to launch
the Calibration Wizard
Microtek Scan-in-Dex User Guide 7
Page 13

B. Selecting your settings
From the «Scan-in-Dex Manager» menu bar, select «Scan Setting» to activate the Setting
screen. When the Setting dialog box appears, specify your options.
• Scan Rule: If you check «Continuous
Scan», cards are automatically scanned
if you put in another card within 30
seconds — without you having to click
the Scan button again. T ake note of the
following:
If the cards to be scanned consist of
different individual cards, select
«Single».
If the cards being scanned are the front
and back of the same card, select
«Double» so that the front and back
information are combined and stored as
a single card with two scanning passes.
• Recognition: Scan-in-Dex can
recognize multiple languages, including
English, German, French, Italian,
Spanish, Dutch, and Chinese.
In addition, when scanning both sides
of a card, you can choose to recognize a
different language on each side of the
card.
• Edit data before export: After a card
is scanned and recognized, an editing
screen appears to let you edit or change
card information before the card is
exported to another application
software.
8 Microtek Scan-in-Dex User Guide
Page 14

Scanning with the Scan-in-Dex Manager
Scan-in-Dex Manager can store card information directly in many application programs,
including Scan-in-Dex, Outlook, Outlook Express, PocketPC, and Palm. It can also
transmit card information to mobile phones and palm devices via infrared waves.
1. From the main menu, choose the
«Export Platform» command. In the
dialog box that opens, check the
applications or hardware to which you
would like to export, and select an
appropriate port.
2. Under the Scan-in-Dex Manager
active mode, place the card in the
card scanner, then press the button on
the card scanner to start scanning.
3. When the «Recognizing» process is
complete, the card information is
stored automatically in your selected
application program.
Note: If the color of the scanned
picture is too dark or too light and
thus affects recognition accuracy,
calibrate the scanner to eliminate
color variance. For more details, see
the Calibration section in Chapter 2
and at the beginning of this chapter.
Microtek Scan-in-Dex User Guide 9
Page 15

Using Scan-in-Dex
Microtek Scan-in-Dex is a supplementary card database management software for Scanin-Dex Manager. In addition to scanning and recognizing cards, it can categorize, manage,
search, add/delete, and check duplicate data.
Opening Scan-in-Dex
Select «Start / Programs / Microtek Scanin-Dex / Microtek Scan-in-Dex». When
the Scan-in-Dex program starts, login as a
user.
Multifunction viewing window
Microtek Scan-in-Dex has screens such as
«View by category», «Card data list»,
«Scheduler» and «Card graphic view».
Y ou can start with «View / V iew mode»,
or select a suitable viewing mode from the
view-interchange button at the bottom
right corner of the interface).
A. Categorized viewing pane
This lists all the categories and surnames
for direct choosing and viewing. Each
newly added card is moved automatically
to its category according to last name.
10 Microtek Scan-in-Dex User Guide
Page 16

B. Card information list
The card information list displays card information in the category that you have
selected in the categorized viewing pane.
Tip:
• Click the field title or right-click the
field to rearrange cards in ascending or
descending order.
• Hold the left mouse button down on
any field, then drag-and-drop the field
to a new location.
C. Calendar Management Pane
The calendar management area includes three viewing modes: «Daily», «Monthly» and
«Events». «Daily» records your daily schedules. «Monthly» displays dates. «Events» lists
all the contents.
Daily
Monthly
Events
Indicates that the card has a
customized ringing alert.
Indicates that the card has data in
it. Click on this icon to check out
related card data.
Microtek Scan-in-Dex User Guide 11
Page 17

D. Card Image Viewing
You can enlar ge your view of the scanned card
graphic by right-clicking the mouse over the
graphic. To close the graphic, right-click on it
again.
Inserting cards
Insert the card in Scan-in-Dex, then press the scan button to start scanning. When done,
the information is automatically saved to the correct fields.
Tip: T o use the scan function, you can also
click this button
click on the pull-down button to the right
of the button shown above and choose
your scan options. This will launch the
«Scan options» dialog box, and set up the
scanning method you need.
12 Microtek Scan-in-Dex User Guide
. In addition, you can
Page 18

Alternatively, you may open «V iew /
Option», launch the «Option / Scan
options» dialog box, and choose the
scanning method you need.
Unedited cards will appear in bold in the
card management window. The
«Unedited» tag will appear in front of the
record.
«Unedited» tag indicates that the
card is being stored directly to
the card management screen after
scanning without being edited.
Indicates that the card consists of
card image information.
Indicates that the card has
double-sided card imagery data.
Indicates that the card has photo
data.
Indicates that the card has singlesided card imagery and photo
data.
Indicates that the card has
double-sided card imagery and
photo data.
Indicates that the card has been
exported previously.
Microtek Scan-in-Dex User Guide 13
Page 19

On the card management screen, click a
selection of data, and then right-click to
open the function list. Y ou can add cards
that belong to the same company,
interchange the front/back side, change
category, send E-mail, open front page, or
delete the selected data.
In the delete function, you can choose to
delete all record / image data. Inside the
image data, you can also choose to delete
the front / back side of the card, or photo,
or all data.
When a mouse is moved over to certain
information at certain fields, information
content (including both front and back
information) from that particular field will
open up in Tip format. When the mouse
moves away, the detailed content closes.
You can select two cards with front
information, then right-click the mouse to
choose «Merge». Select one of the cards
from the pop-up dialog box as the front
side and click «OK». The two pieces of
information will be combined as the front
and back sides of one card.
14 Microtek Scan-in-Dex User Guide
Page 20

You may separate one double-sided entry
into two different cards. Choose a card that
has data on both the front and back side,
then right-click to choose «UnMerge» to
separate the front / back side of the card
into two different cards.
Checking duplicate data
If you have duplicate cards in your card
data, you can launch «Edit / Find
Duplicates by Name».
This will list all cards with duplicate
names on your card data index, allowing
you to check and modify card information
as necessary.
Continuous double-sided scanning
If you wish to continue scanning a doublesided business card, remember to select
«Continuous Scan / Double» from the
Scan-in-Dex Manager setting screen.
Insert the front side of the business card
into the Card Reader, and after it is
scanned and recognized, insert the back
side again to continue scanning.
Information on both the front and back
side will be stored together when
recognizing is complete. Y ou can switch
between «Front / Back» image from the
image area.
If you wish to continue to scan another
card front right after scanning one front
side, press the button on the Card Reader
to start scanning the front again.
Otherwise, the card will be scanned as
though it is to form the back side of the
scan.
Microtek Scan-in-Dex User Guide 15
Page 21

Editing Cards
On the card management screen, double-click the card you wish to change or edit from
the card index. Alternatively , you can double-click the graphic area of a card to enter the
editing window.
1. On the left side of the data field, click
on the field name to select the desired
data (out of a group of data under the
same field type), and set it as the
primary data. Once setting is
complete, the selected data field will
move to the top of the same field
type. Y ou may also change the field
category or add/delete fields.
2. Click the left mouse button on the
«E-mail» or «Website» field title, and
you can send e-mails or go to a We b
page.
16 Microtek Scan-in-Dex User Guide
3. Y ou can select text in one field and
drag it to other fields.
4. To view an image better , click «Zoom
, «Zoom out» and
in»
«Rotate» on the upper right
corner. Y ou can also click the «Image
Processing» button to make
adjustments to the original image,
then press the «Re-recognition»
button to improve recognition
accuracy.
Page 22

On the window, the upper card is the
original image, while the lower one is
the adjusted image. Y ou can use the
sliding bar to fine-tune the contrast.
In addition, you can click the
button to select an area. Click the
reverse button
to reverse the color
of the selected area. When the image
is adjusted to its optimal condition,
click «OK». The system will ask if
you wish to have another recognizing
action. Click «OK» to re-recognize
another card.
5. If you wish to remove the card border,
click
The button will appear in
sunken mode; use the mouse to drag
and mark the card area that you wish
to keep. The excess border is then
deleted automatically.
6. If the card tilts to one side when
scanned, use the
button to
adjust the angle of the image card
slightly. Click
sunken mode, then use
and turn it into
/
to slightly adjust the angle.
7. If you press the right mouse button,
the cursor changes to a hand. Y ou can
then move the image around for
better viewing.
Microtek Scan-in-Dex User Guide 17
Page 23

8. On the card image, you can press the
left mouse button to drag out a text
area. Add this text to a certain field
on the pop-up menu, or replace the
currently selected field. The selected
text area is shown by a red marquee.
10. Click to add a new field.
9. Click to view the original image
of a card. Click the image to close it.
18 Microtek Scan-in-Dex User Guide
11. Click
, then click the field text; a
floating image will appear. The text
area in the right side of the image will
also automatically correspond to the
field text as selected.
12. When starting the edit window, you
can switch between the front and back
sides on the image, and information
on the left column changes
accordingly. If you click the «Re-
recognition» button , rerecognition is done based on the
current image.
Page 24

13. On the edit card screen, you may
also import photo data. Scan the
photo using a flatbed scanner, or
import from the image folder in your
computer. Y ou may also delete a
picture or save it as a new file.
14. In the «Detail» window, you can add
personal information to the card
database.
15. On the «Relation» view screen:
From the «Search the same field by»
options such as Name/ Company /
Dept. or position, you can check to
see all the card data that has
information related to the selected
field(s).
16. If you wish to scan the back of a card
in the editing window, insert the card
into the card scanner and then select
«Back» from the scan button
The scanned card will be recognized
as the back of the card in the current
editing window. If you click the scan
button without selecting «Back», the
scanned card will be treated as a new
card.
17. Click the
contents of the card will be read out.
button, and the
Inserting photos
When you choose «File» source, the
«Open» dialog box pops up, and you can
choose photos from the source file. If
there is an existing photo file, the «Save
as» dialog box pops up with three image
formats available: «.jpg» / «.bmp» / «.pcx»
.
Microtek Scan-in-Dex User Guide 19
Page 25

Adding new cards
1. In addition to scanning cards with
Scan-in-Dex, you can also click the
arrow next to the «New» button in the
Scan-in-Dex management window to
add new cards. Select «Empty Card»
and start the editing window. Then
scan the card or directly key in card
information.
For instance, in the field category for
«Company», if you key in a first
letter, a pull- down menu appears
listing all your card data with that
starting letter in their company name.
Listing is alphabetical, regardless of
sentence case (upper or lower case).
Move the cursor to choose the data
you need, hit the Enter key, and the
selected data is inserted into the field.
2. Choose a record of information from
the card list, and click the «New»
button. After «By Company» is
chosen, a blank card is opened. Based
on the company name, the
information you have chosen is
automatically filled into the other
fields.
For example, from the card list,
choose a record of information with
«Business Card Management LTD.,»
as the company name. Click «New»
button and select «By Company».
The information about <<Business
Card Management LTD.,>> is
automatically filled into the other
fields of the blank card that was just
opened.
20 Microtek Scan-in-Dex User Guide
Page 26

Self-defined field
Scan-in-Dex allows you to self-define the
key words of a field that Scan-in-Dex can
identify so as to expand recognition
capability. Choose «V iew / Option»
options in the main menu, and select the
«User Defined Column» page.
Y ou can add a column and set up the
recognition label for this field. Later when
cards are scanned, any recognition label
that matches what you have set up will
automatically go to this user-defined field.
Example: A «Bank account» information
exists on your card. Y et there is no such
item in the preset fields of Scan-in-Dex.
Y ou can start the «User Defined Column»
dialog box and add a field name (Bank
account). Y ou can then add a recognition
label (the key words on the card that are
related to the bank account), and set up the
language to be recognized. Once set-up is
complete, Scan-in-Dex will save the cards
to the «Bank account» field as long as
there is information about the «Account
Number, Account, Bank» on subsequent
cards being scanned.
Setting the fields for cards
Select «View/ Option» from the menu bar
and open the Setting dialog box.
Set up the fields to be shown in the card
list area. Use the «Add» / «Remove»
button to add or delete fields. Use the
«Move Up» / «Move Down» buttons to
alter the order of the fields in the list.
Set up the width and alignment of each
field in the card list area.
Microtek Scan-in-Dex User Guide 21
Page 27

Categorizing Cards
Categorizing from the management page
Each card, in addition to being automatically categorized by last names, can also be
categorized with your own settings so that numerous cards can be managed. On the Scanin-Dex management page, highlight the card information you want to categorize, then drag
and drop it directly to a specific category type under Category.
Aside from the default category types that
come with Scan-in-Dex: [Business],
[Personal] or [Unfiled], you can add new
categories on your own. Click the «New»
button
the new category name. The new category
will then be grouped under the «Category»
area.
22 Microtek Scan-in-Dex User Guide
, select «Category», and input
To go further into subcategories, rightclick directly from the category type, then
select «New subcategory», and input the
subcategory name accordingly.
Tip: Card information in each category can
be moved directly from one category to
another by using «drag and drop».
Page 28

Categorizing from the editing page
On the card-editing page, click the
button, and open the editing category dialog
box to start categorizing. Y ou can select
several categories at the same time and
determine which one is the main category.
The results of the categorizing will appear
in the Scan-in-Dex application.
The following categorizing actions can be
performed: Add new subcategory; rename
category; delete category; set as main
category.
Using the above categorization methods,
business cards can be grouped into various
category types at the same time. Take note
that if you use drag and drop to categorize
cards on the Scan-in-Dex Categorized
Viewing Pane, only one category can be set
at a time.
Sending out E-mail by category
Right-click on the desired category, choose
«E-mail», and the new mail page will be
opened. Set all E-mail addresses under the
category as recipients, use «;» in-between
addresses, and you can send E-mail
simultaneously to everyone in this
category.
Microtek Scan-in-Dex User Guide 23
Page 29

Searching
Text Search
In the «Search» field, input the search
strings and press «Enter». Once any part of
the field contents in the card contains
these key strings, the search criteria are
met, and only those cards that meet the
search criteria are listed. The «Restore»
button is in the depressed status.
Tips:
• Y ou can input several key words at one
time. Each key word is separated by a
[blank space].
• Used strings will be automatically
entered into a history list for future use.
• Aside from inputting key words on your
own to search for a business card, the
system will categorize cards
automatically by the first letter of last
names. Y ou can click the A-Z buttons
on the Scan-in-Dex management page
to quickly search for the card desired.
Advanced Search
To perform more precise card searches,
select «Edit / Advanced Search», then
input the key search words, as well as set
up search criteria such as field, category or
date, etc.
24 Microtek Scan-in-Dex User Guide
Page 30

Calendar
Scan-in-Dex integrates the functions of personal calendars and establishes relevant
calendars or memos based on cards.
To use the Calendar function: Point to the
desired time in the calendar management
window, and double-click to start the
calendar-editing dialog box.
In the calendar dialog box, you can set up
the category, time, contents and alarm time
of the calendar. The system will remind
you with an alarm at the appointed time
and display the contents of the calendar.
In the card management window, drag the
related card record from the card list and
drop to the preset calendar. A
will appear.
To view the individuals in relation to the
calendar, click the
list will display only those who have been
dragged to this calendar.
button. The card
icon
Microtek Scan-in-Dex User Guide 25
Page 31

Save, Save as, Export, Import, Synchronize
Save
As a card database management system,
Scan-in-Dex can automatically save card
data into the Scan-in-Dex database after
every 10 cards or when the application
completes. Y ou may also choose «File /
Save» or click the Save button
the menu bar at any time to do backups, so
as to avoid data loss.
from
Save as
Select «File / Save As» or select « Save
As» from the menu bar, and save the card
information into a card document (*.crd).
You can then take the card information as
a duplicate copy, bring it to another
computer, and make use of the «File /
Import / Microtek Business Card»
function on the menu bar to place card
information into the current card database.
Export
Select «File / Export» to export card
information to Excel, Outlook, Outlook
Express, PocketPC or Palm, etc, using
various methods to export. Y ou can also
export card images or text files alone.
Exporting can only be done in versions
later than Excel 97, Outlook 97 and
Outlook Express 4.0.
While exporting to Excel files, you can
transform the various categories into
various worksheets.
A. Export Option
Select «File / Export / Export Options» to
open the Export Platform list, and select
the options according to your needs. Only
those selected options will appear on the
export menu bar.
Y ou may select MS Outlook Express, MS
Outlook, PocketPC Contact or Palm
Desktop from the «Select a PIM» dropdown list, as Scan-in-Dex has integrated
exporting and synchronizingof the above
software.
B. Export out as PIM
Choose «File / Export / PIM». Scan-inDex supports all types of software
platform data applications, and you can
choose to export card data out in certain
software platform data format (*.csv), then
launch such application to read the saved
CSV file by using the «Import» function.
26 Microtek Scan-in-Dex User Guide
Page 32

C. Export out as vCard
VCard is a small document used to autoexchange the recorded data on a card.
Apart from text, you can also save into a
vCard elements such as digital picture,
company logo, website address, etc.
Choose «File / Export / vCard» to save
card data into a vCard, then drag-and-drop
to bring the vCard into other applications
(e.g. Outlook Express address book). Card
data will be automatically saved into the
address book without the need for manual
key in.
D. Export out as Microtek business
card
Choose «File / Export / Microtek business
card» to save card data format (*.crd).
In the dialog box, if you select «Only save
selected», only the selected information is
saved. If you do not select any boxes, all
information on the card list is saved
together. If you select «Image» or
«Photo», only those with card images and
photos will be saved together.
Import
Select «File / Import» to import card
information from Microsoft Outlook
Express, Microsoft Outlook, PocketPC
Contacts, or Palm Desktop. Y ou can also
import card information in CSV and vCard
formats.
Microtek Scan-in-Dex User Guide 27
Page 33

Synchronize
Through File/Synchronize, you can
synchronize data between Scan-in-Dex
and Microsoft Outlook Express, Microsoft
Outlook, PocketPC Contacts or Palm
Desktop.
You can also click the synchronize pulldown menu to select the software that you
wish to synchronize.
Example: Synchronize data between
Microsoft Outlook Express and Scan-inDex.
1. Select File / Synchronize / Microsoft
Outlook Express to start reading the
data in Scan-in-Dex and to display the
number of data records read. A
«Confirm the Address Book’ s
Changes after synchronize» dialog
box will appear.
2. Click «Modification Details » to view
the details of the modified data. The
red column indicates a change in the
data. By default, the result will show
the newer data on both sides. Y ou can
select the correct data from the pulldown window.
3. Click «OK» after you finish selecting
to close this dialog box.
4. Click «Accept» to complete the
synchronization between Microsoft
Outlook Express and Scan-in-Dex.
SynchronizationOptions
Select «File / Synchronize / Sync Option»,
or click the drop-down menu of the
synchronization button to select «Sync
Option» to open the synchronization
option dialog box.
Y ou can select the software you wish to
synchronize from the "Select a PIM" dropdown menu. If you select "Other PIM
File", you can select the fields to be
exported (refer to the chapter on Export
Options)
When the data has been modified or
deleted on both sides, data conflict occurs.
You can then set up data synchronization
rules. For example, to synchronize data
between Scan-in-Dex and MS Outlook
Express, you can do the following:
1. Select “Notify me when conflicts
occur”. When data has been modified
on both sides, a «V erify conflict
records» window appears when you
synchronize. Y ou can adjust the
method of updating for each data.
2. Replace with a more recently
modified item: Synchronization is
based on data with the latest modified
time.
3. Scan-in-Dex Wins: No matter which
side the data has been modified,
synchronization will be based on the
data in Scan-in-Dex. Make the data in
MS Outlook Express the same as
Scan-in-Dex.
28 Microtek Scan-in-Dex User Guide
Page 34

4. MS Outlook Express Wins: No
matter which side the data has been
modified, synchronization will be
based on MS Outlook Express. Make
the data in Scan-in-Dex the same as
MS Outlook Express.
5. Ignore: Do not change any data.
Click the Field-Corresponding
button in the synchronization options
dialogbox to open the Field-Corresponding
dialog box. Y ou can set up the fieldcorresponding conditions between Scanin-Dex and the software you want to
synchronize.
Note: Because the Palm system takes
“Name” as the key value, you cannot
change the corresponding relations of
names in the field-corresponding
function. If the same names exist, this
will cause incorrect results.
Microtek Scan-in-Dex User Guide 29
Page 35

Scan-in-Dex Portable Disk
Note: The portable disk hardware does not come with Scan-in-Dex and is sold separately.
1. To save the card data to a portable
disk :
• Plug a portable disk directly into
the computer’s USB port.
• On the Scan-in-Dex Manager page,
click the MiniDrv
• Choose your disk, click «OK», then
transfer the data to your selected
disk.
• When transmission is complete, do
not unplug the flash memory card
immediately. When the LED stops
blinking, click «OK» and unplug.
button.
2. To manage card data in the portable
disk:
• Insert the portable disk that has
card data into the computer’s USB
port.
• Open «My computer», and you
will see a newly added removable
disk icon.
• Open the «PPCARD» folder under
the removable disk icon, then
launch the «MiniCard.exe»
application. Y ou will see the card
data stored in the portable disk.
Note: The Microtek MiniDrv provides
search/find functions only, and is not
equipped to change or edit card data.
Tip: By copying the «PPCARD» folder
(under the portable disk) to the hard disk
of the computer you want to save to, you
can transfer card data to any computer.
30 Microtek Scan-in-Dex User Guide
Page 36

Printing Cards
Scan-in-Dex allows you to edit templates for printing your cards. Card information can be
printed in envelopes, labels,or directories.
1. Start the Print Setting window from
«File / Page Setup».
2. Scan-in-Dex comes with 3 kinds of
templates: «Label», «List Normal»
and «Letter Size».
3. In the «Label» template, click
«Model», then click the field title on
the right, place it to the editing area
on the left, and adjust its location and
size. Y ou can also set up the
properties of the printing text. After
the model is adjusted, save it as your
specific template for immediate use
in the future.
Take note that if the List Normal
template is chosen, you can only add
field titles to the list and adjust field
width in the model-editing window
— without being able to edit the
layout.
Microtek Scan-in-Dex User Guide 31
Page 37

Infrared Transmission
Scan-in-Dex can use infrared transmission to export card information to mobile phone
devices or palm products.
IrDA Mobile
The ways to switch on the mobile phone infrared transmission mode are transfer from
Scan-in-Dex Manager and transfer from Microtek Scan-in-Dex. The infrared transmitter
and receiver are not supplied by Microtek.
A. Microtek Scan-in-Dex
1. Launch the mobile phone infrared
function first, then choose «File /
IrDA / Mobile phone» from Microtek
Scan-in-Dex.
2. From the pop-up dialog box, click
«Selected», Only those data you
selected from the card list is
exported. If you click «All», all card
data is exported.
3. When the following screen appear
during transmission, you can choose
to export to a mobile phone or to a
SIM card.
4. When finished with choosing or
changing, click «OK» to export data
from the mobile phone.
B. Scan-in-Dex Manager
1. Launch the mobile phone infrared
function first, then check to choose
«IrDA Mobile» from the menu bar of
the Scan-in-Dex Manager.
2. Aim the computer’s infrared receiver
at the mobile phone’s infrared, then
scan a card with Scan-in-Dex. After
the card recognition completes, an
edit screen will appear. Y ou can then
change the data content and click
«OK». The card data will be saved to
the mobile phone.
Note: If you do not want the edit
screen to appear after card
recognition is completed, choose
"Setting" from the menu bar of the
Scan-in-Dex Manager, and unclick
"Edit data before export".
Note: For the latest update on infrared
transmission mobile phones supported
by Scan-in-Dex, please check the
Microtek Technology website at http://
www.microtek.com
32 Microtek Scan-in-Dex User Guide
Page 38

IrDA Palm
The ways to switch on Palm infrared transmission mode include transfer from Scan-inDex Manager and transferfrom Microtek Scan-in-Dex. The infrared transmitter and
receiver are not supplied by Microtek.
A. Scan-in-Dex Manager
1. Launch the Palm infrared function
from the «Preferences» option list.
2. Set «Beam Receive» option settings
to «On», then check to choose «IrDA
Palm» from the menu bar of the Scanin-Dex Manager.
3. Aim the computer’s infrared receiver
at the Palm’s infrared, then scan a
card with the card scanner. After card
recognition completes, an edit screen
will appear. Y ou can then change the
data content and click «OK», and card
data is saved to the Palm.
Note: If you do not want the edit
screen to appear after card
recognition is completed, choose
«Setting» from the menu bar of
Scan-in-Dex Manager, and unclick
«Edit data before export».
B. Microtek Scan-in-Dex
1. Launch the Palm infrared function,
then choose «File / IrDA / Palm»
from the Microtek Scan-in-Dex.
2. IrDA beams one contact at a time.
Select one contact and click «OK»
from the pop-up window to start
beaming.
3. After Export completes, a “Message
received by infrared” appears on your
Palm. Click «Y es» to store card data
to the Palm’s address book.
Microtek Scan-in-Dex User Guide 33
Page 39

Integrating Scan-in-Dex with Mail Programs
In addition to exporting information to Excel, Outlook, Outlook Express, PocketPC and
Palm, Scan-in-Dex integrates with the interfaces of Outlook and Outlook Express. This
allows you to scan card information directly into these mail programs and add information
to their address books.
Integrating Outlook Express
1. Following installation of Scan-inDex, a «Scan-in-Dex» item is added
to the menu bar of Outlook Express’s
address book. T ake note that the
integrating function of Scan-in-Dex in
Outlook Express works only when the
Scan-in-Dex Manager is started.
2. Insert the card into Scan-in-Dex, then
click «Scan» from the menu to start
scanning. After recognition is
complete, the result is automatically
stored in the «Shared Contacts»
folder in the address book of Outlook
Express.
Note: If the editing window is not
desired after card recognition, select
«setting» from the main menu and
uncheck the «Edit data before
export» option.
3. From the address book information
input with Scan-in-Dex, you can view
the card image. Once the name is
chosen, the card image will
automatically appear. T o facilitate
viewing, select «Zoom in» or «Zoom
out», or close the image by clicking
the «x» button on the upper right
corner.
34 Microtek Scan-in-Dex User Guide
Integrating Microsoft Outlook
1. Insert the card into Scan-in-Dex,
then click «Scan» from the menu to
start scanning. After recognition is
complete, the result is automatically
stored in «Contacts».
Note: If the editing window is not
needed after card recognition,
select «Setting» from the main
menu and uncheck the «Edit data
before export» option.
2. From the contact information input
with Scan-in-Dex, you can view the
card image. Y ou can double-click
the name, and the card image will
automatically appear. T o facilitate
viewing, select «Zoom in» or
«Zoom out», or close the image by
clicking the «x» button on the upper
right corner.
Tip: The Scan-in-Dex function in
the Microsoft Outlook program can
be used only with the Office 2000
V ersion.
 Loading...