

Page 1
How do I scan my document using ScanSoft OmniPage Limited Edition (OCR)?
For more information regarding Omnipage Limited Edition refer to the on-line
manual.
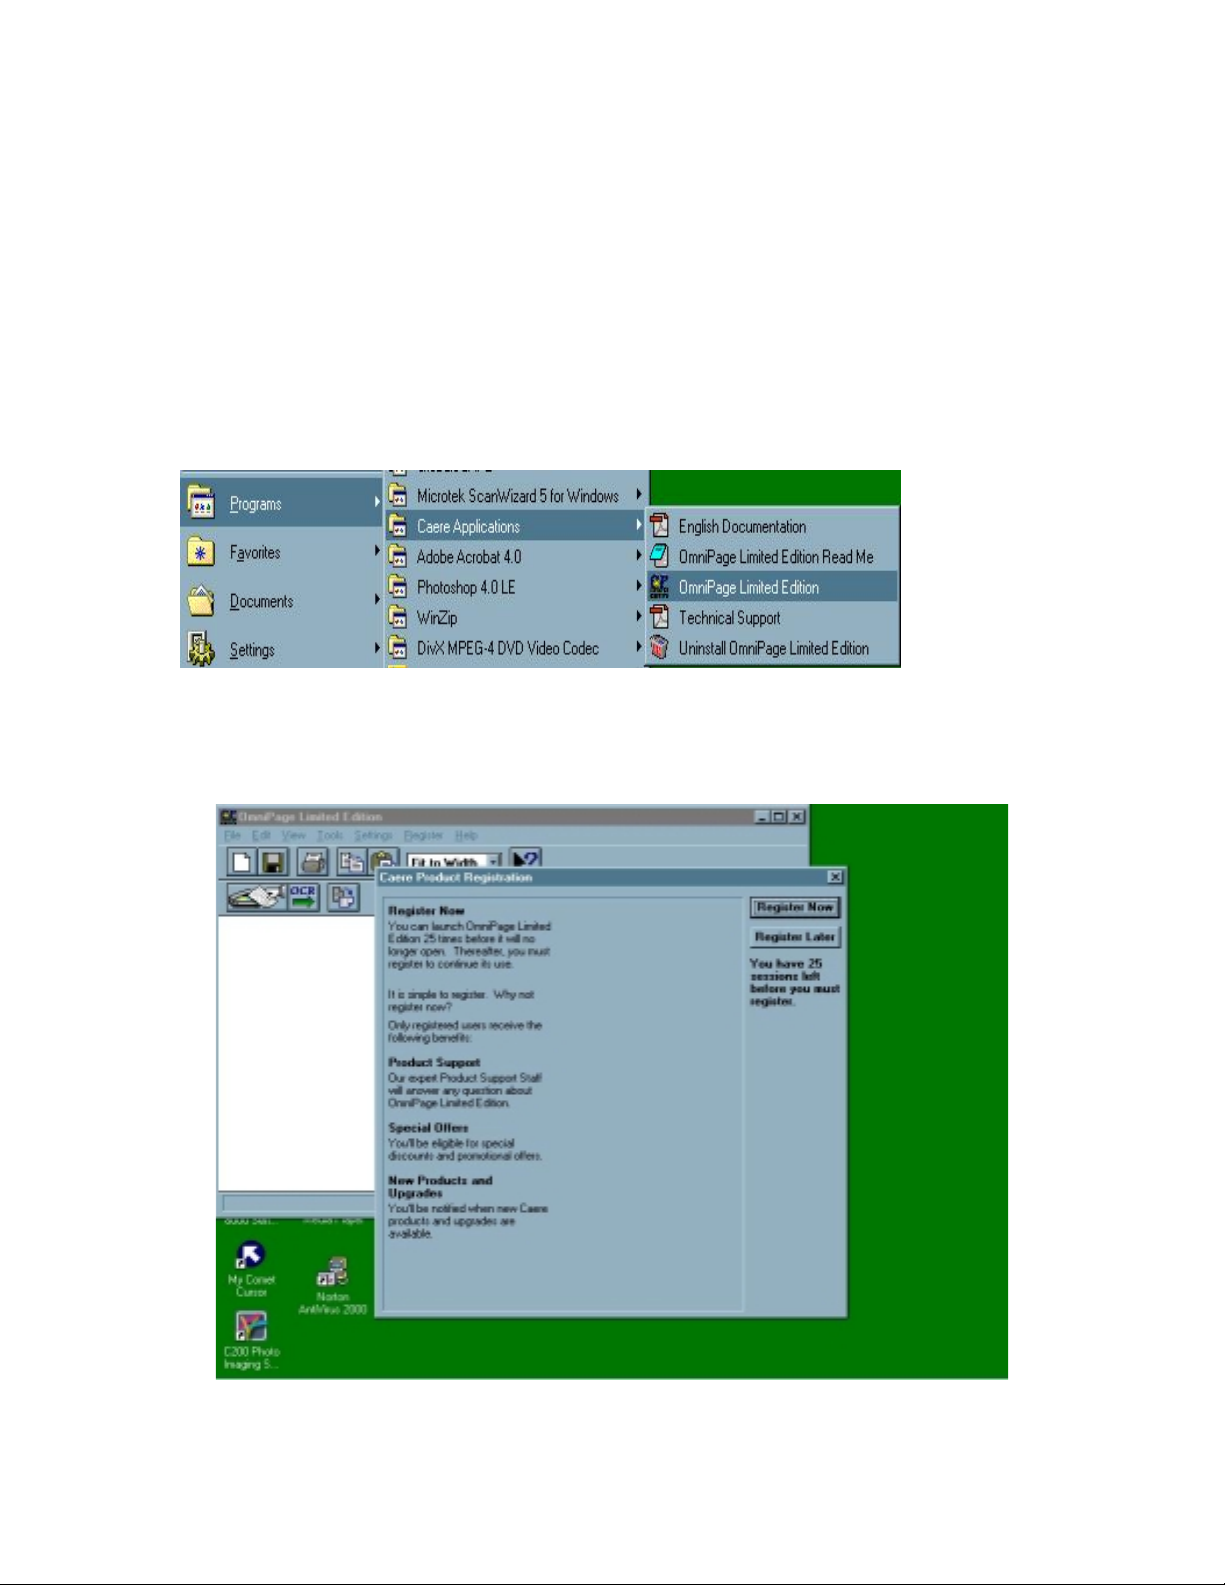
1. Launch ScanSoft OmniPage Limited Edition program. Click on Start >
Programs > Caere Applications > Omnipage Limited Edition.
2. This will launch OmniPage Limited Edition program. You can select
Register Now or Register Later to close the message and you will get the
main window. Click on “Register Later”.
Page 2
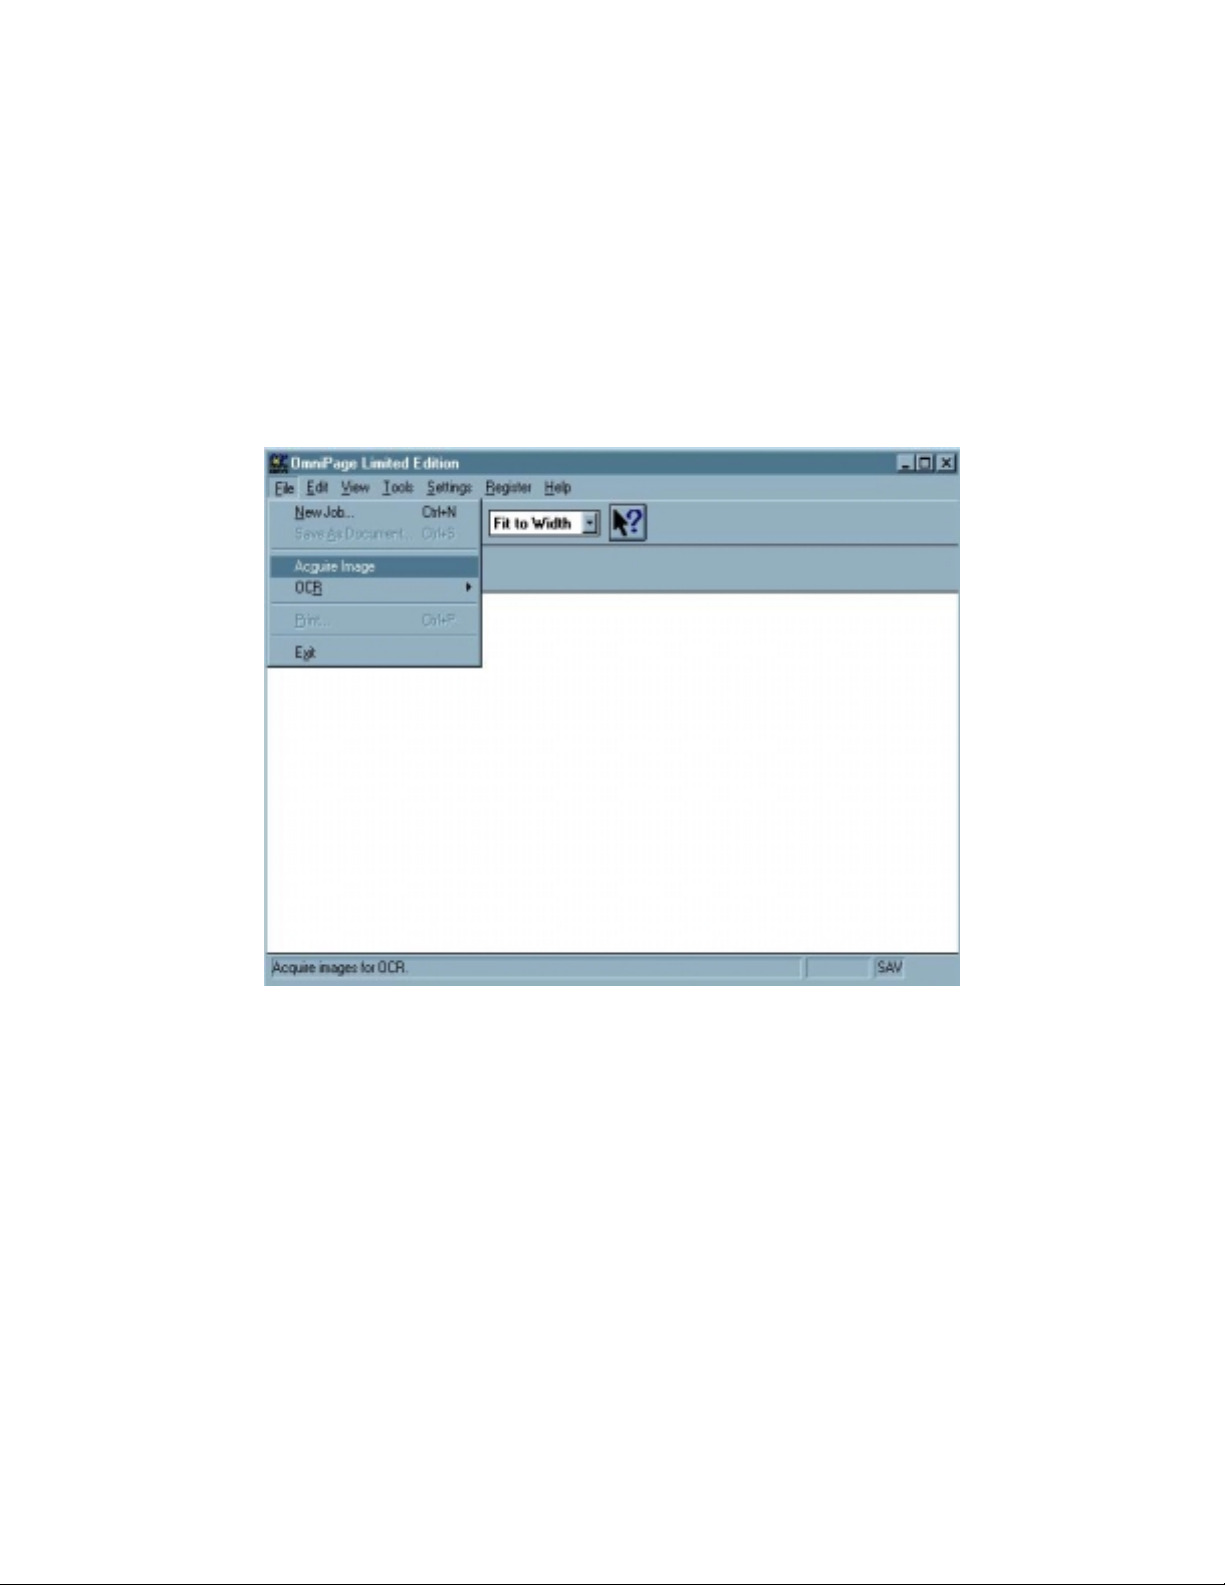
3. Open the lid or cover of the scanner. Place your document on the scanner
glass face down and make sure that the top portion of the docum ent is in
front where the ready light is. Then click on File > Acquire Image.
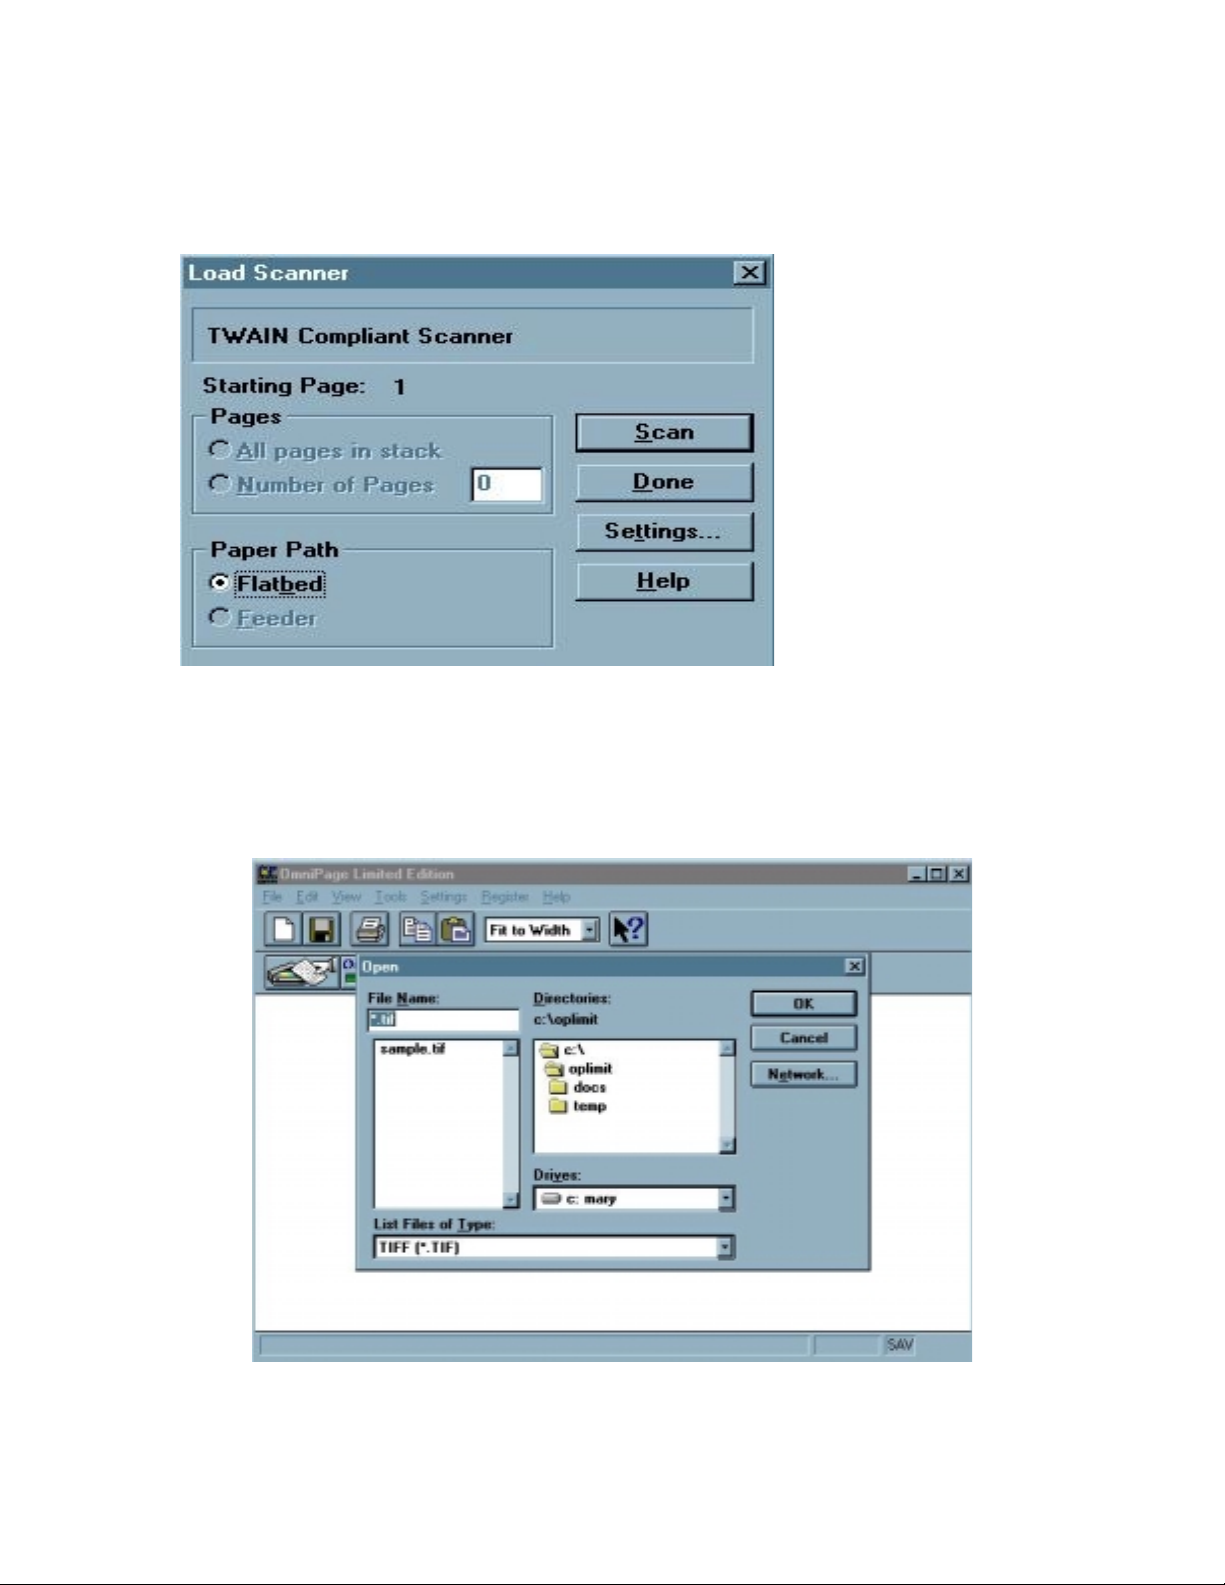
4. A load scanner dialog appears. If you have an ADF (auto document
feeder) the “Feeder” option is activated or highlighted. Click on ” Scan”
to start scanning.
Page 3
For more information about the scanner settings refer to the OmniPage online manual “Scanning Text Directly from OmniPage Limited Edition –
11”.
Note: If the scanner is not turned on or if your computer is not
communicating with your scanner an Open File dialog appears.
Page 4
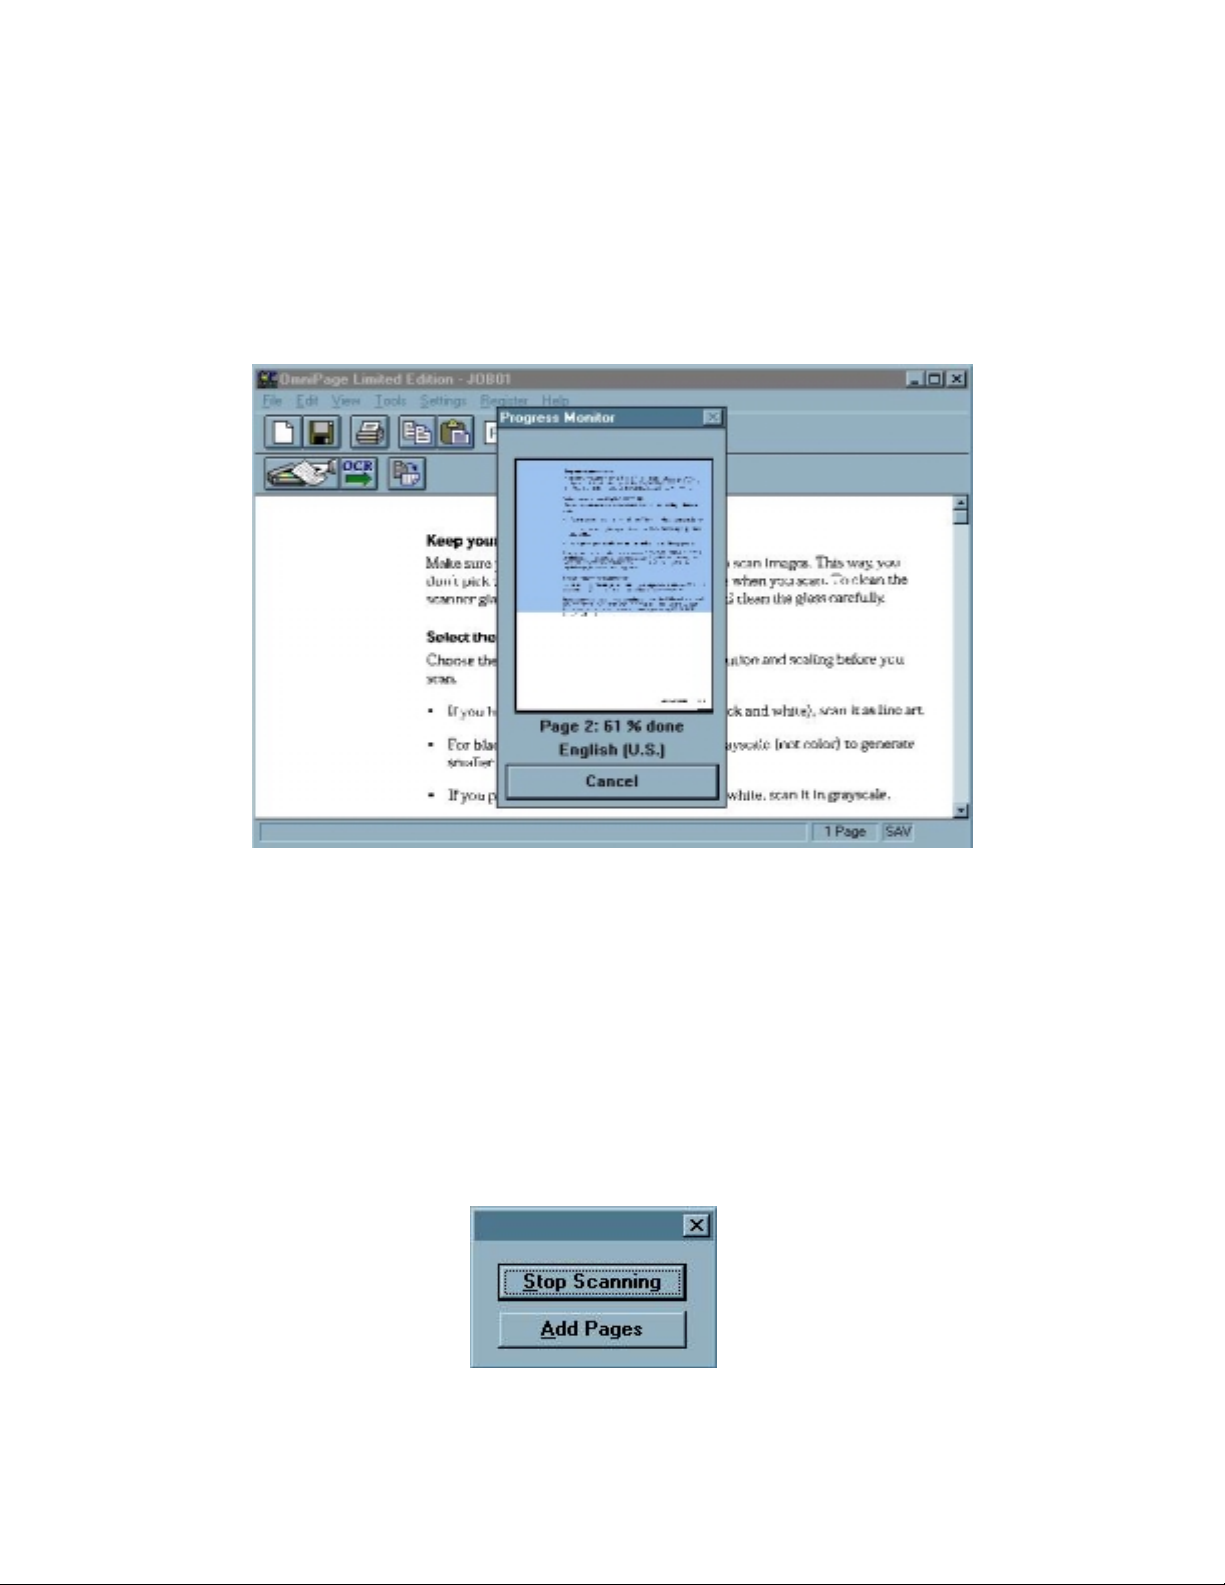
5. OmniPage Limited Edition scans your document and displays the image.
If you have the option set to “Auto OCR” OmniPage Limited Edition
performs OCR (Optical Character Recognition) automatically and a
progress monitor displays the process.
6. After it finished performing OCR (Optical Character Recognition) a
window appears that will let you add pages or stop scanning.
Page 5

7. If you click on “Stop Scanning” a Save As dialog box appears.
8. Enter the file name of the scanned document in the File Name box. You
can change the location o r direct or y if you want to. Select the file type for
your Word Processor by clicking on the down arrow at the end of Save
Text as Type. Then click on “OK” to save it.
Page 6

9. Launch your Word Processor to edit the scanned document. For ex ample
if you are using Microsoft Word. Click on Start > Programs > Microsoft
Word.
10. This will launch the Microsoft Word application.
11. To open your scanned document click File > Open.
Page 7

12. The Open dialog box appears. Click on C:\
13. Look for OPLIMIT folder and double click it. This will bring up the
contents of OPLIMIT folder. Look for DOCS folder and double click it.
(DOCS is the folder where your document will be saved automatically
using your OmniPage Limited Edition the complete path is
\Oplimt\Docs.)
Page 8

14. In your DOCS folder you will see the JOB01 highlight it then click
“Open”.
15. This opens up your scanned document. Now you are ready to edit your
document!
 Loading...