

Microsoft TV Photo Viewer User Manual

Contents
Welcome . . . . . . . . . . . . . . . . . . . . . . . . . . . . . . . . . . . . . . . . . . . . . . . . . . . . . . . . . . . . . . . 2
What’s In the Box? . . . . . . . . . . . . . . . . . . . . . . . . . . . . . . . . . . . . . . . . . . . . . . . . . . . . . . . . . . . . . . . . . 3
Using TV Photo Viewer with or without a Computer . . . . . . . . . . . . . . . . . . . . . . . . . . . . . . 3
The TV Photo Viewer Buttons . . . . . . . . . . . . . . . . . . . . . . . . . . . . . . . . . . . . . . . . . . . . . . . . . . . . . . 4
Setting Up Your TV Photo Viewer . . . . . . . . . . . . . . . . . . . . . . . . . . . . . . . . . . . . . . . . 5
Connecting the Photo Viewer to Your TV . . . . . . . . . . . . . . . . . . . . . . . . . . . . . . . . . . . . . . . . . . 5
Inserting the Batteries in the Remote Control . . . . . . . . . . . . . . . . . . . . . . . . . . . . . . . . . . . . . 7
Selecting the Video Input Source from Your TV . . . . . . . . . . . . . . . . . . . . . . . . . . . . . . . . . . . . 7
Viewing Pictures on Your TV . . . . . . . . . . . . . . . . . . . . . . . . . . . . . . . . . . . . . . . . . . . . 8
Viewing Pictures from a Floppy Disk . . . . . . . . . . . . . . . . . . . . . . . . . . . . . . . . . . . . . . . . . . . . . . . 8
Searching for a Particular Picture . . . . . . . . . . . . . . . . . . . . . . . . . . . . . . . . . . . . . . . . . . . . . . . . . . 8
Viewing Floppy Disks Directly from Your Digital Camera . . . . . . . . . . . . . . . . . . . . . . . . . . 8
Using the Software to Create Floppy Disks . . . . . . . . . . . . . . . . . . . . . . . . . . . . . . 9
What Software Is Included? . . . . . . . . . . . . . . . . . . . . . . . . . . . . . . . . . . . . . . . . . . . . . . . . . . . . . . . . 9
Installing the TV Photo Viewer Software . . . . . . . . . . . . . . . . . . . . . . . . . . . . . . . . . . . . . . . . . . . 9
Creating a TV Photo Viewer Album on a Floppy Disk . . . . . . . . . . . . . . . . . . . . . . . . . . . . . 10
Viewing Sample Photo Albums . . . . . . . . . . . . . . . . . . . . . . . . . . . . . . . . . . . . . . . . . . . . . . . . . . . 11
If You Don’t Have a Computer . . . . . . . . . . . . . . . . . . . . . . . . . . . . . . . . . . . . . . . . . . . . . . . . . . . . 11
MM
M
MM
Troubleshooting Tips . . . . . . . . . . . . . . . . . . . . . . . . . . . . . . . . . . . . . . . . . . . . . . . . . . 11
Getting Help . . . . . . . . . . . . . . . . . . . . . . . . . . . . . . . . . . . . . . . . . . . . . . . . . . . . . . . . . . 13
Visit Us on the Web . . . . . . . . . . . . . . . . . . . . . . . . . . . . . . . . . . . . . . . . . . . . . . . . . . . . . . . . . . . . . . . 13
Click Help in the TV Photo Viewer Software . . . . . . . . . . . . . . . . . . . . . . . . . . . . . . . . . . . . . . 13
Microsoft Product Support Services . . . . . . . . . . . . . . . . . . . . . . . . . . . . . . . . . . . . . . . . . . . . . . 13
Legal Information . . . . . . . . . . . . . . . . . . . . . . . . . . . . . . . . . . . . . . . . . . . . . . . . . . . . . 14
License and Warranty . . . . . . . . . . . . . . . . . . . . . . . . . . . . . . . . . . . . . . . . . . . . . . . . . . . . . . . . . . . . . 14
Software Product License . . . . . . . . . . . . . . . . . . . . . . . . . . . . . . . . . . . . . . . . . . . . . . . . . . . . . . . . 16
Regulatory Information . . . . . . . . . . . . . . . . . . . . . . . . . . . . . . . . . . . . . . . . . . . . . . . . . . . . . . . . . . . 16
Information in this document, including URL and other Internet Web site references, is subject to change without notice. Unless
otherwise noted, the example companies, organizations, products, people and events depicted herein are fictitious and no
association with any real company, organization, product, person or event is intended or should be inferred. Complying with all
applicable copyright laws is the responsibility of the user. Without limiting the rights under copyright, no part of this document may
be reproduced, stored in or introduced into a retrieval system, or transmitted in any form or by any means (electronic, mechanical,
photocopying, recording, or otherwise), or for any purpose, without the express written permission of Microsoft Corporation.
Microsoft may have patents, patent applications, trademarks, copyrights, or other intellectual property rights covering subject matter
in this document. Except as expressly provided in any written license agreement from Microsoft, the furnishing of this document
does not give you any license to these patents, trademarks, copyrights, or other intellectual property.
© 2001 Microsoft Corporation. All rights reserved. Microsoft, Windows, and Picture It! are either registered trademarks or trademarks
of Microsoft Corporation in the U.S.A. and/or other countries/regions.
The names of actual companies and products mentioned herein may be the trademarks of their respective owners.
Patents Pending.
0401 Part No. X08-22768
1
Welcome!
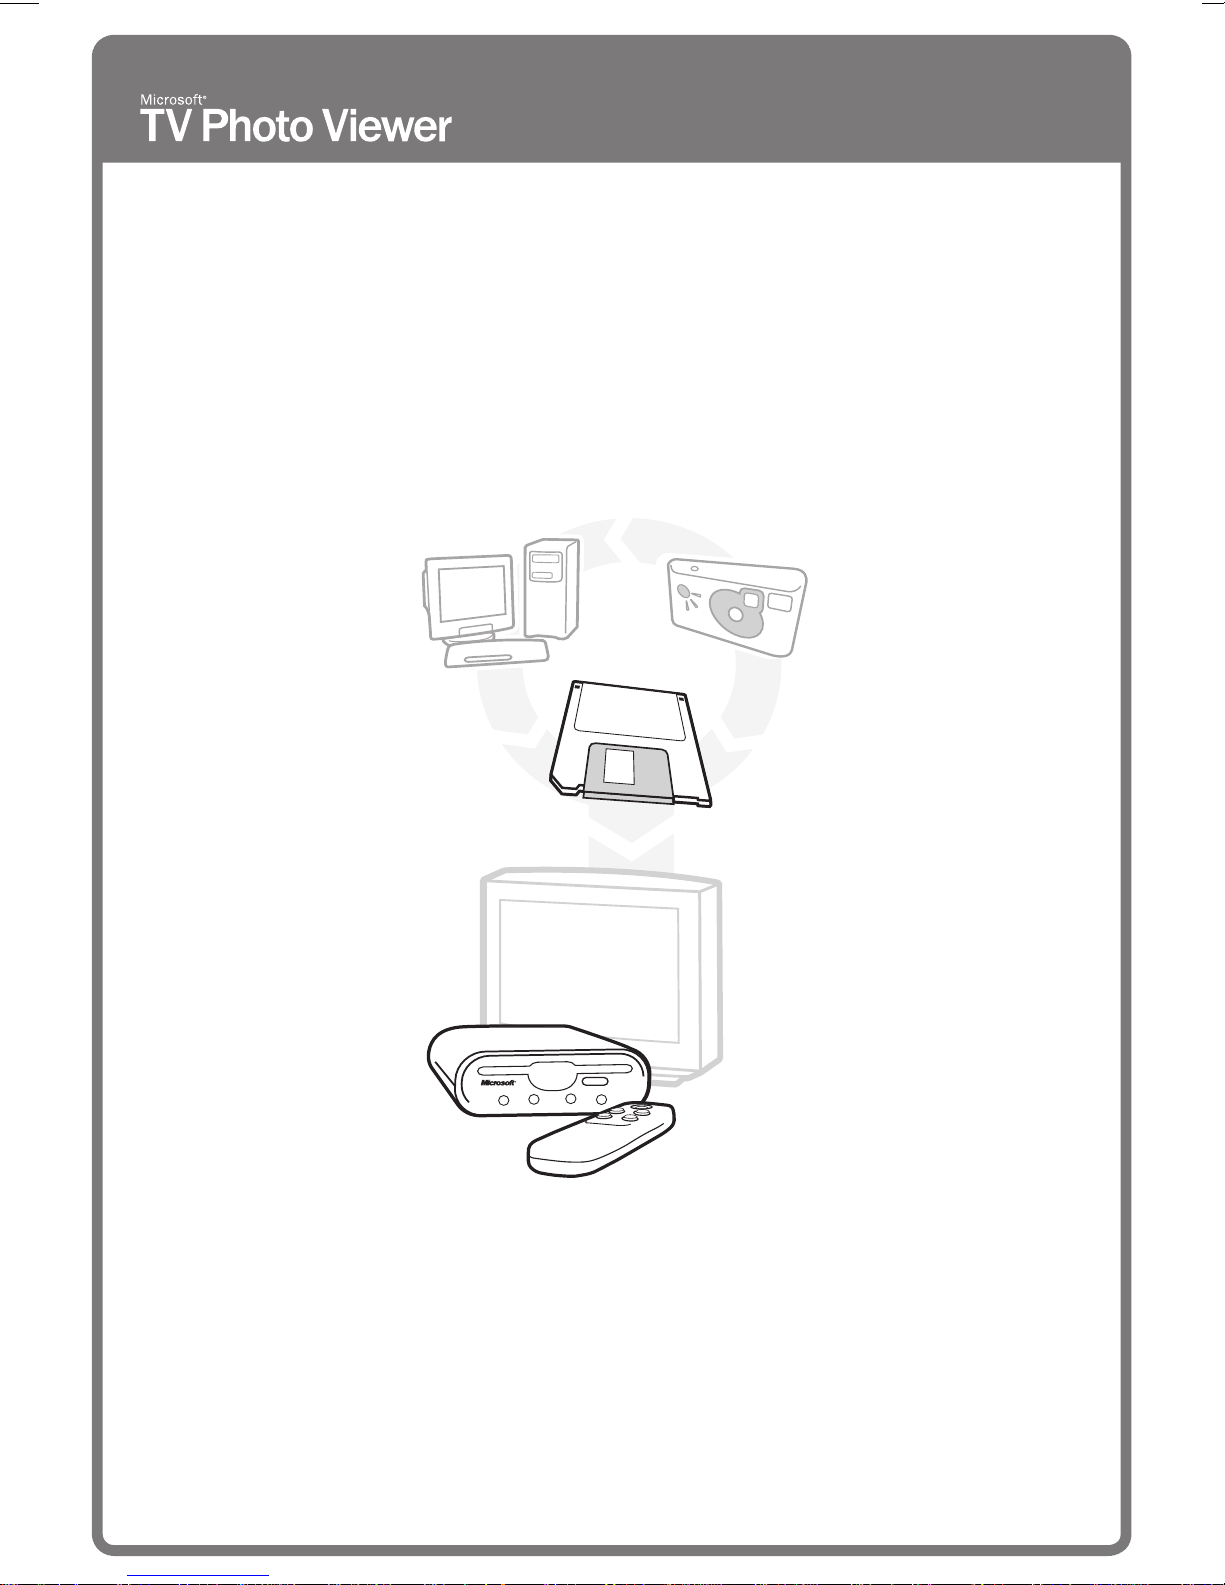
Welcome to Microsoft TV Photo Viewer. No longer do you have to gather your friends
around your computer screen to show the vacation photos you took with your digital
camera. Now you can show your digital photos in the comfort of your living room...on
the TV!
Download pictures from your digital camera onto your
computer, and then use the TV Photo Viewer software
to put your pictures onto a floppy disk.
Use the TV Photo Viewer
computer software to
create your own photo
albums on floppy disks,
using pictures from your
digital camera or other
pictures you have saved
on your computer.
The Photo Viewer connects to
your TV, allowing you to view
digital pictures on your TV
from a floppy disk.
With some digital cameras,
you can insert floppy disks
from your camera directly
into the TV Photo Viewer
device. See page 8.
2

MM
M
MM
What’s in the Box?
Microsoft TV Photo Viewer includes:
Photo Viewer device that connects to your TV
•
Remote control and two AA batteries
•
Power cable with AC adapter
•
Video cable
•
CD-ROM that includes the Microsoft TV Photo Viewer software and
•
Microsoft Picture It! Express 2001
Start Here card
•
User’s Guide
•
Quick Tour floppy disk
•
One blank floppy disk
•
Using TV Photo Viewer with or without a Computer
You don’t need a computer to use your Photo Viewer with your TV. However, the TV
Photo Viewer computer software gives you the ability to create your own digital photo
albums on floppy disks.
If you
If you
do not have a computer:
You can insert and view pictures from a floppy disk that already has a TV Photo
•
Viewer album on it, or from a floppy disk that has digital pictures in 640 x 480 JPEG
format.
For some digital cameras, you can insert floppy disks from your camera directly into
•
the TV Photo Viewer device. See page 8 for more details.
If your friends or relatives have computers, they can use the TV Photo Viewer
•
software to create floppy disks for you. They can download the TV Photo Viewer
software from our Web site at
do have a computer:
You can do everything listed above, and more!
•
You can use the TV Photo Viewer software to create your own digital photo albums
•
on floppy disks, using pictures from your digital camera, the Internet, a CD-ROM, a
scanner, or other pictures you have saved on your computer.
You can create floppy disks using the sample photo albums included with the
•
TV Photo Viewer software.
http://www.microsoft.com/tvphotoviewer/.
3
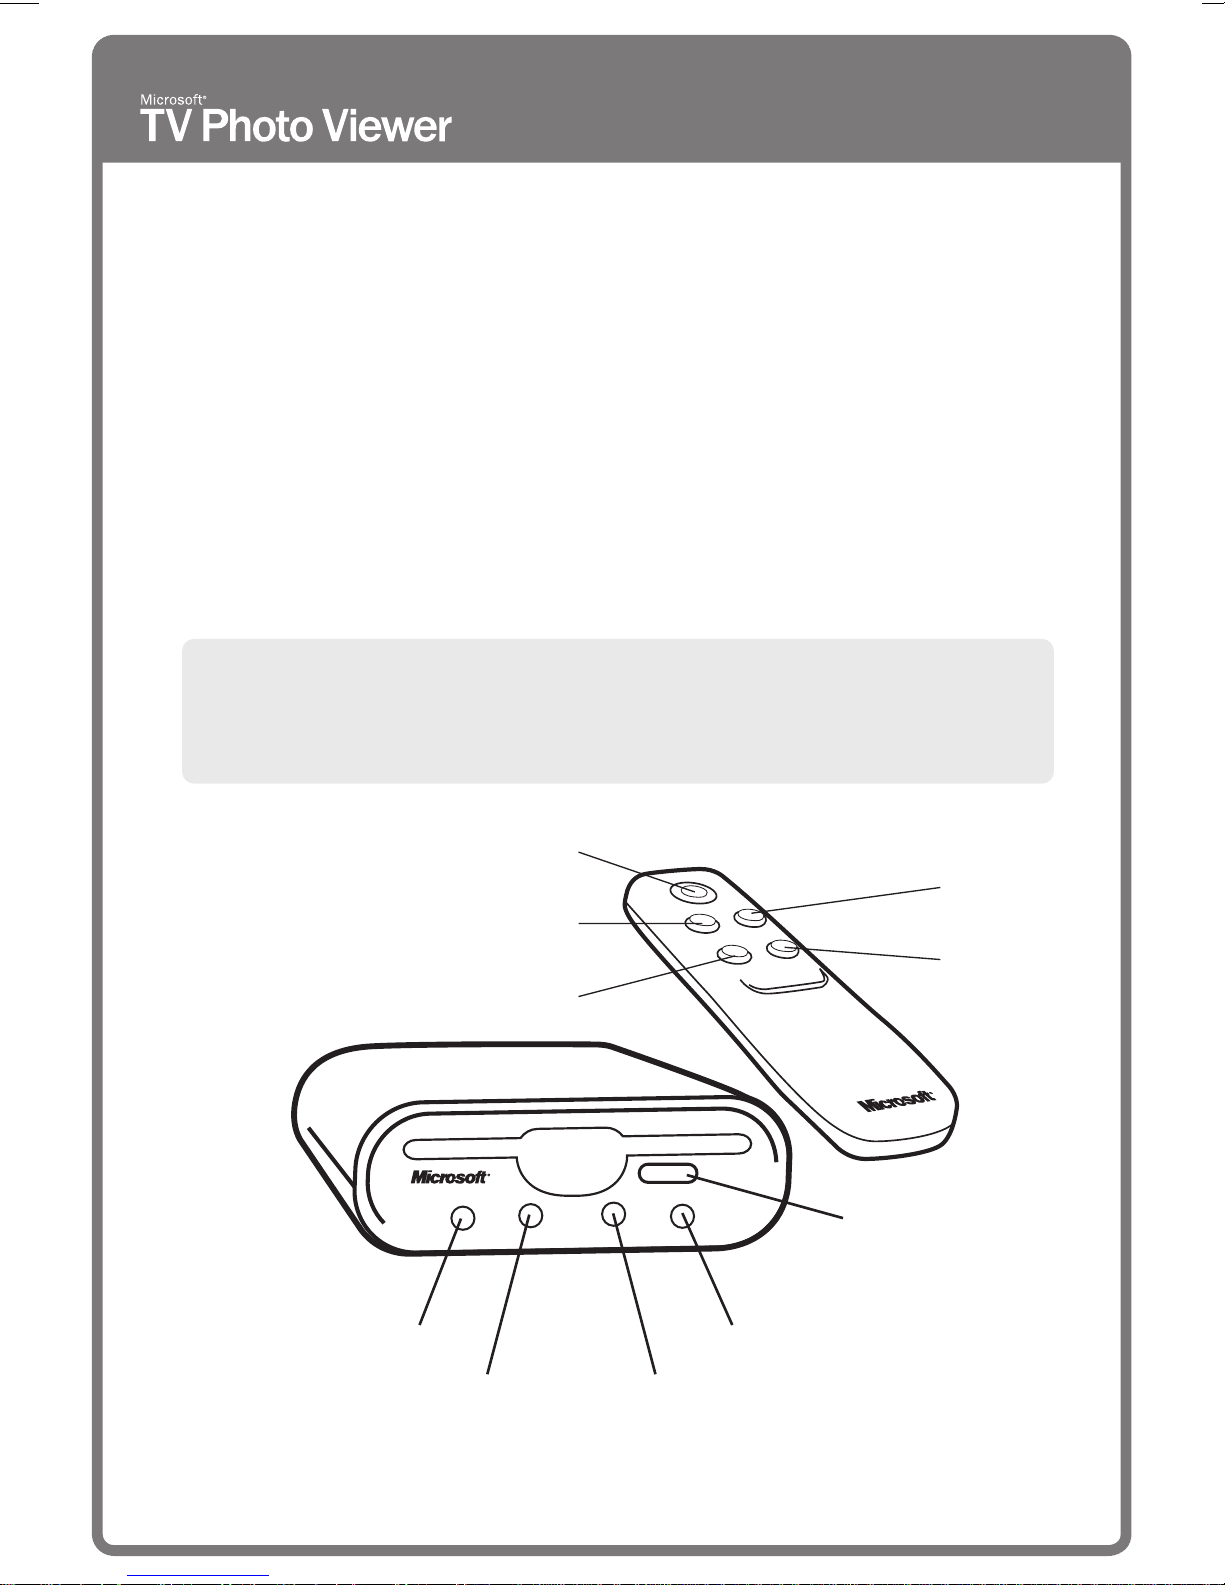
The TV Photo Viewer Buttons
You can use the buttons on either the Photo Viewer device or the remote control to
navigate through the pictures on a disk.
Power Turns the Photo Viewer on and off. The Power button on the device is lit
when the power is on.
Forward Displays the next picture. Press and hold to search.
Back Displays the previous picture. Press and hold to search.
Auto Displays pictures automatically as a slideshow. Press any button on the
remote control to stop the slideshow. The Auto button on the Photo Viewer
is lit when the device is displaying pictures as a slideshow.
Rotate Rotates the picture.
Eject Ejects the disk from the Photo Viewer.
Note about using the Forward and Back buttons to search
Press and hold the Forward or Back buttons to search for a particular picture.
•
A small image in the lower right corner of the screen indicates which picture you
are about to view.
Back
Power
Rotate
Auto
Forward
Back
Eject
AutoPower
Forward
4
MM
M
MM
Setting Up Your TV Photo Viewer
Connecting the Photo Viewer to Your TV
To connect the Photo Viewer to your TV, do the following:
1 Turn off your TV and other components connected to your TV, such as
your VCR.
2 Plug the AC adapter’s cable into the Photo Viewer’s Power jack, and then plug the
AC adapter into a wall outlet.
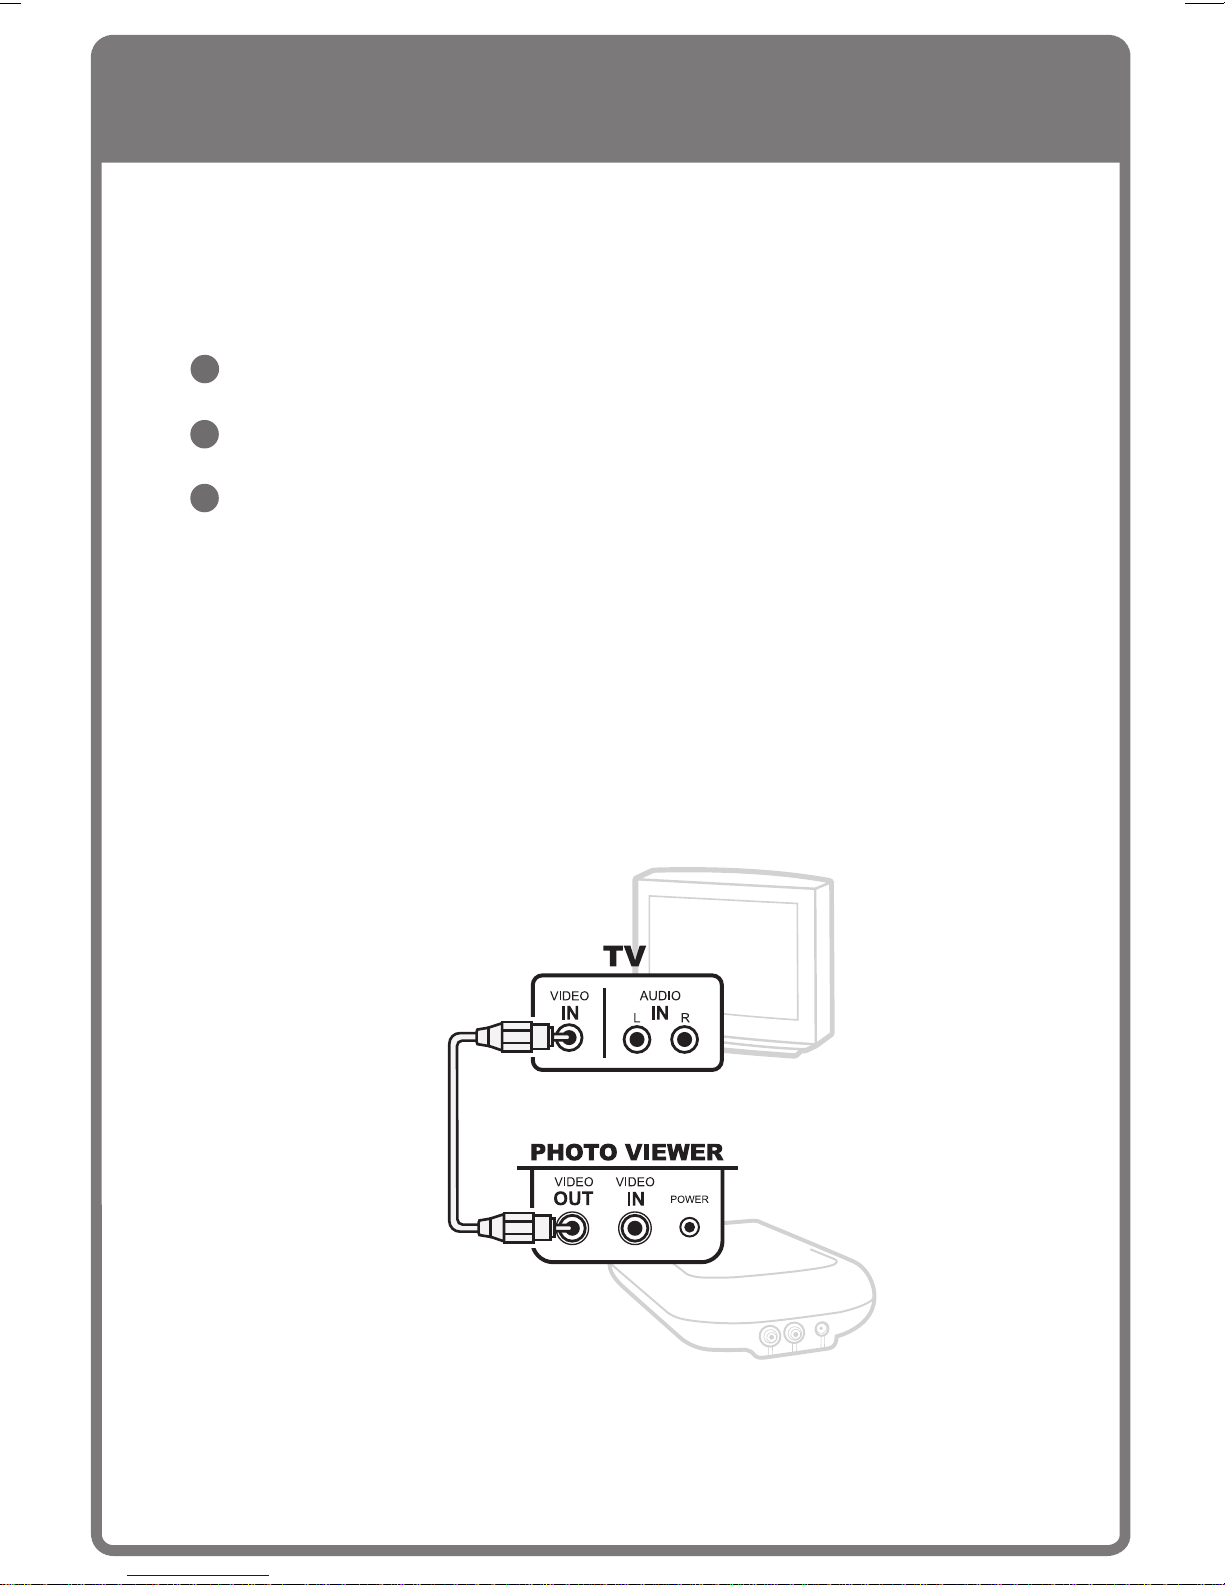
3 Connect the Photo Viewer’s yellow Video Out jack directly to a Video In jack on
your TV using the video cable included with your Photo Viewer.
There are several ways to connect the Photo Viewer to your TV, depending on the type of
TV you have and whether you have other components connected to your TV. See the
following diagrams for connection examples.
Example A
If a Video In jack on your TV is available
If your TV has an available Video In jack, simply use the video cable (included) to connect
the Photo Viewer’s yellow Video Out jack to the TV’s Video In jack.
Note that there may be a Video In jack on the front of your TV, and your TV may have
more than one Video In jack.
The Photo Viewer’s yellow
Video Out jack connects to the
TV’s yellow Video In jack.
5
 Loading...