

Page 1
FLIGHT MANUAL
Page 2

Contents
HOW TO PLAY 1
Map Screen 1
Changing the Map View
Playing Online
Aircraft Icons
Icons 2
Using the Mouse 3
Flying in Mouse Mode
Camera Views 4
The Eyepoint 5
Turning Off the Heads-Up Display (HUD) 5
Heads-Up Display (HUD) 6
Points of Interest (POI) 7
Point of Interest Markers
Point of Interest Arrows
Waypoints 7
Skip to Waypoint
Checkpoints 7
Loading Checkpoints
Walk Around Mode 8
Checklists 8
Using Checklists
Running a Checklist
Checklist Options
Types of Checklists
Rewards 10
Awards
Unlocks
Playing Ofine 10
Essential Keyboard Commands 11
Game Controls
Aircraft Controls
FLIGHT CONDITIONS 12
Flight Conditions Screen 12
Weather
Time of Day
Season
Conditions in Free Flight Mode 12
Conditions in Multiplayer Mode 12
THE HANGAR 13
Choosing an Aircraft
Painting Your Aircraft
Managing Fuel
Downloading New Aircraft
MISSION BASICS 14
Mission Screens 14
Mission Breakdown
Pause Menu
Mission Failed Menu
Mission Debrieng Screen
JOB BOARD 16
Jobs 16
Selecting your Aircraft
Exploring Different Areas
An Introduction to Cargo Runs
Challenges 17
ii
Page 3

CAREER 18
Pilot Prole 18
Statistics
Pilot Portrait
Prole Roaming
Compare to Other Pilots 18
AEROCACHES 19
Finding and Acquiring Aerocaches 19
Finding Aerocaches
Acquiring Aerocaches
Difculty Rating 20
Aerocache Hunts 20
FREE FLIGHT 21
Explore the Skies 21
Select an Aircraft
Customize Flight Conditions
Practice Landing
Earn Awards
MULTIPLAYER 22
OPTIONS 25
Graphics 25
Vertical Sync
Overall Graphics Settings
Custom Settings
Gameplay 26
Flight Control Assistance
Display
Camera
Audio 26
Game Controls 26
Aircraft Controls 26
KEY TERMS 27
Tip: For additional information on steering your aircraft using
alternate controls, such as a joystick or keyboard, view the Basic
Controls guide located at https://www.microsoftight.com/
handbook.
Quick Match 22
Host a Session 22
Selecting a Session Type
Locating Other Players on the Map
Stats 23
Target Friends 23
Locate Friends Online 23
Inviting Friends
Text Chat 24
Voice Chat 24
Speaking with Other Players
iii
Page 4

How to Play
Map Screen
The Map screen is your rst stop on the path to exciting adventures,
challenging missions, and multiplayer fun.
On the left side of the Map screen are the directional arrows, the zoom
bar, and the Microsoft Flight Data Server icon.
Changing the Map View
Playing Online
The dot located below the directional arrows on the Map screen is the
Microsoft Flight Data Server icon. It indicates whether your computer
network is connected to the Microsoft Flight data server. If the icon is
solid black, you are connected. If it is ashing yellow, you are playing
ofine.
Aircraft Icons
If you click the Free Flight icon, an aircraft icon will appear on the map
in the current location of your aircraft. Drag this icon to any location on
the map, and then click Fly in the Free Flight menu to start ying from
that spot.
Your aircraft ies in the direction your aircraft icon is pointing. To
change your heading from the Map screen, rotate the ring around your
aircraft icon.
If you see a gray aircraft icon on the map, it means another player has
joined the game. To y near that player, drag your aircraft icon next to
the gray icon, and then click Fly in the Free Flight menu.
Tip: Some areas may appear less detailed than others while
you are ying. To view higher resolution features such as trees,
buildings, and beyond the Big Island, additional downloadable
content is required.
The directional arrows move the map one step in any cardinal direction.
You can also move the map by simply clicking on the map and
dragging.
The zoom bar is used to increase or decrease the magnication of the
map. Click the Plus Sign (+) to zoom in and the Minus Sign (-) to zoom
out. You can also rotate the mouse wheel to zoom in or out.
1
Page 5
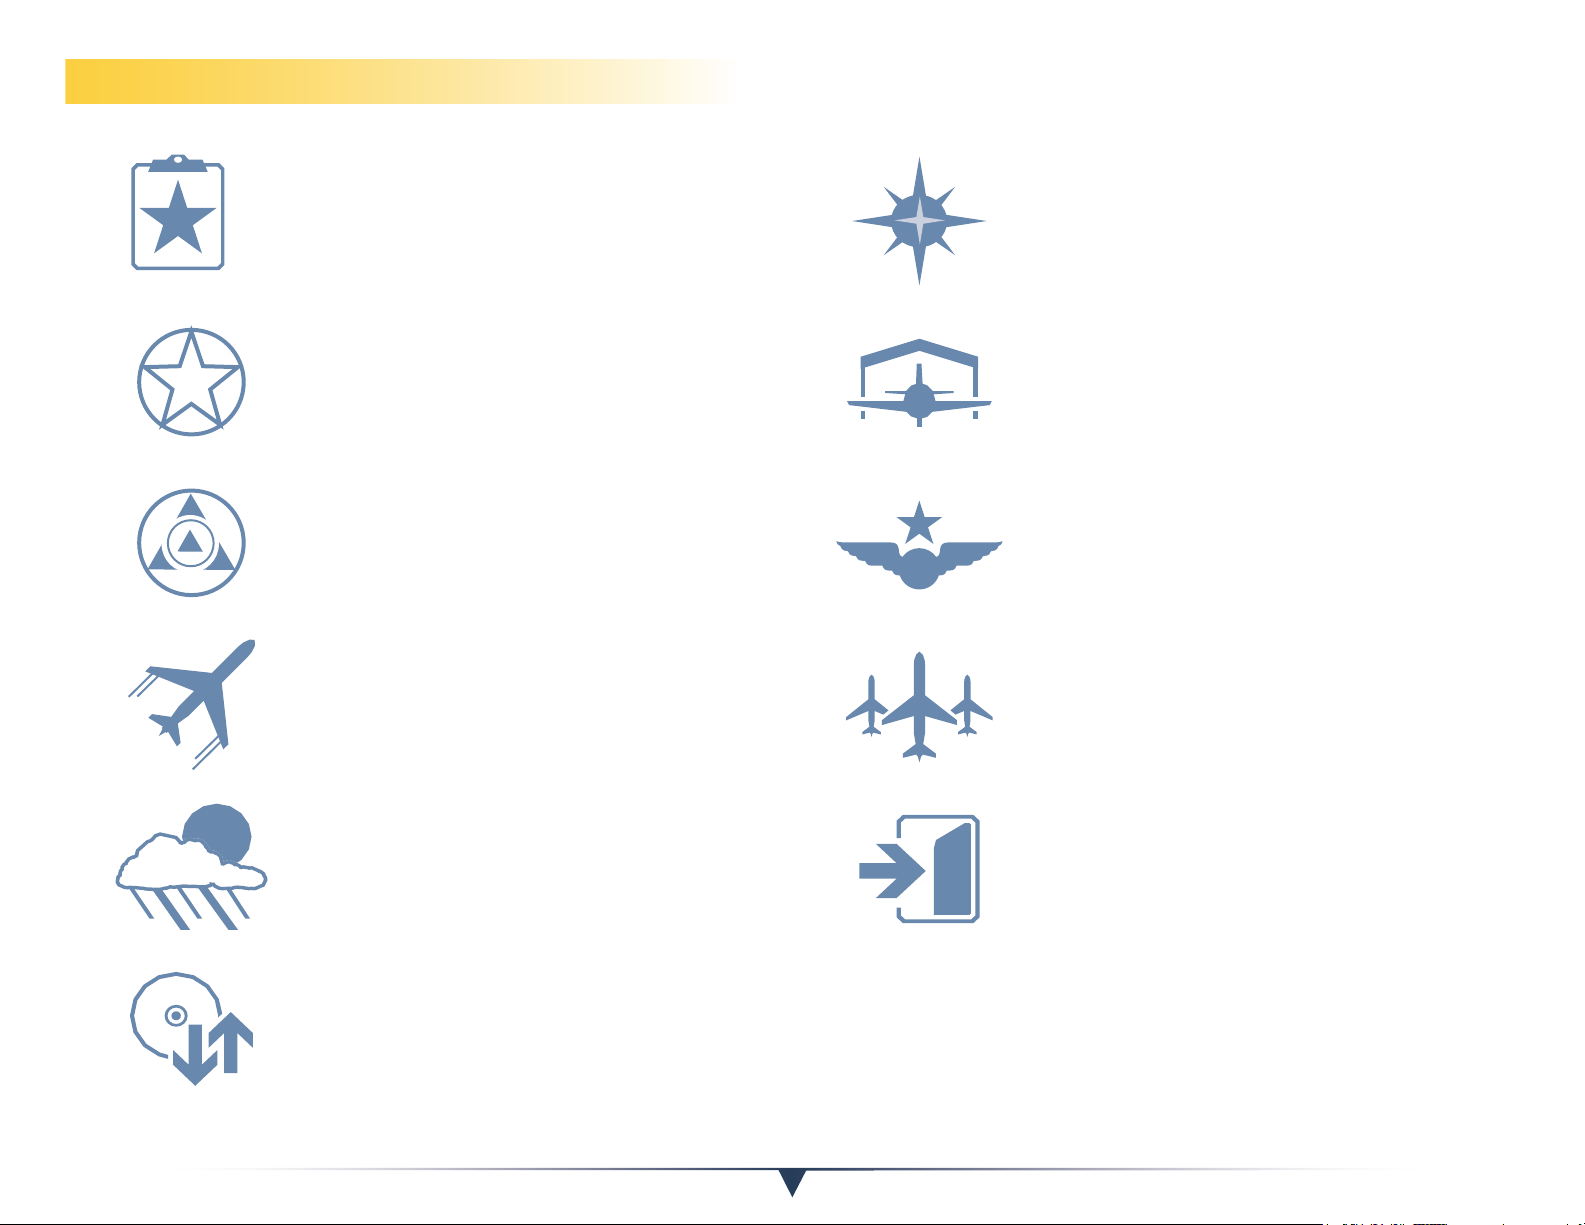
Icons
Missions are more structured adventures that
teach you game play basics and help to advance
your career as a pilot.
Challenges are tasks that test your agility and
skill as pilot, from making a series of precise
landings to collecting rings in a maze of
obstacles.
Aerocache hunts send you out in search of
objects hidden on the ground and in the air.
Free Flight mode gives you the freedom to
explore the skies at your own pace. Drag your
aircraft to any location and let the adventure
begin.
The Legend gives you information about all of
the airports and runways on the map. You can
also use the Legend to identify other players
when ying in Multiplayer mode.
The Hangar is where you store and maintain
your aircraft. It is also where you download new
planes, change paint schemes, and fuel up.
The Pilot Prole offers you a snapshot of your
career as a pilot and your general progress
throughout the game.
Multiplayer mode allows you to y with up to
15 other people. Fly in group formations, share
tips and tricks with other players, or chat with
friends as you explore the skies.
Flight Conditions, such as weather, wind, and
time of day, can make a big difference in your
ight experience. Change the conditions to face
a whole new set of ying challenges.
The Load Free Flight option allows you pick up
right where you left off in a saved Free Flight
session.
The Main Menu enables you to change your
graphic and gameplay settings, connect to your
®
Games for Windows
– LIVE account, or go to
the Microsoft Flight website.
2
Page 6

Using the Mouse
The mouse is a multifunctional tool that can be used to y your aircraft,
look around the world, zoom in on objects, and manipulate the controls
in the cockpit.
Tip: For additional information on steering your
aircraft using alternate controls, such as a joystick or
keyboard, view the Basic Controls guide located at
https://www.microsoftight.com/handbook.
Turning
Move the mouse left or right to bank the wings (turn your aircraft).
Make small movements with the mouse when banking. Moving too
abruptly in any direction may cause you to lose control of your aircraft.
Climbing and Descending
Move the mouse forward to climb and move the mouse back to
descend. If these default mouse controls feel reversed, you can invert
the Y-axis so that you move the mouse back to climb and move the
mouse forward to descend.
Flying in Mouse Mode
Use the mouse to control your aircraft as you turn, climb, and descend.
The mouse also controls the throttle setting.
To pause Mouse mode, press the Spacebar.
To invert the Y-axis
1. Press Esc.
2. Click the Options button.
3. Click the Gameplay tab on the Options menu.
4. Select the Invert Mouse Pitch check box under Aircraft Controls.
5. Click the Accept button at the bottom of the screen.
6. Click Resume on the Pause menu to continue playing.
Adjusting the Throttle Setting
Rotate the mouse wheel to increase or decrease the throttle settings in
Mouse mode.
Zooming in on the Instrument Panel
While in Cockpit view (F9), you can zoom in on the instrument panel.
This allows you to monitor changes in your aircraft’s heading, altitude,
speed, fuel level, and oil pressure.
To practice zooming in on the fuel gauge
1. Press the Spacebar to pause Mouse mode.
When you y in Mouse mode, a cross hair appears in the center of the
screen. It is controlled by the movement of the mouse, which in turn
controls the aircraft.
Tip: Position the pointer in the very center of the cross hair to y
straight and level.
2. Rotate the wheel to zoom in.
3. Right-click and drag your view to the fuel gauge.
4. Check the fuel level.
5. Rotate the wheel to zoom out.
6. Press Backspace to recenter the view.
7. Press the Spacebar again to resume Mouse mode.
3
Page 7

Moving the Cockpit Controls
Many of the controls, levers, and switches in the cockpit can be
adjusted, moved forward and back, or switched on or off. This gives
you a feel for what pilots do in the real world as they perform tasks like
changing throttle settings, pitching up or down, or leaning the mixture.
To interact with the cockpit controls, switch the camera to Cockpit view,
and then pause Mouse mode. The aircraft will continue to y while
Mouse mode is paused.
To practice by manually reducing the throttle setting
1. Press F9 to switch to Cockpit view.
2. Press the Spacebar to pause Mouse mode.
Camera Views
Real-world pilots are skilled at switching between viewpoints during a
ight. While they mostly focus on the horizon, they must also scan the
cockpit instruments and look down at the world below.
There are ve different camera views, each one providing you with a
different experience. Some views show your aircraft and the surrounding
world in a cinematic shot, while other views can help you achieve
greater control of your aircraft.
Chase View (F8)
Chase view shows your aircraft from behind, as if a trailing aircraft is
lming your ight. This is a great view for overall control of the aircraft,
but it does not show the cockpit. Use the Heads-Up Display to view your
heading, altitude, speed, and fuel level. To use Chase view, press F8.
Cockpit View (F9)
Cockpit view closely simulates what pilots see in the real world, with
the camera mounted in the cockpit. Cockpit view offers the most
interactivity, allowing you to zoom in on instruments and move controls.
To use Cockpit view, press F9.
Flyby View (F10)
Flyby view gives you the cinematic experience of watching your aircraft
y past a stationary camera set in the air. From this view, you can take
in-ight screenshots. To use Flyby view, press F10.
3. Drag the throttle lever backward to reduce speed.
4. Press the Spacebar again to resume Mouse mode.
Tip: Before you pause Mouse mode, make sure your aircraft
is ying straight and level at a high enough elevation.
4
Page 8

Free Look (F11)
Free Look is a panoramic view from the outside of the aircraft. This view
can give you perspective on the location of your aircraft relative to
geographic features, such as the ocean or mountain ranges. You don’t
have to pause Mouse mode to use Free Look. Just right-click and drag
to start looking around. To use Free Look, press F11.
The Eyepoint
The eyepoint is your position in the cockpit. Moving the eyepoint can
give you a better view of the horizon, taxiway, or surrounding features,
much like adjusting your seat or leaning to either side would in the real
world.
Top-Down View (F12)
Top-Down view shows your aircraft from above, as if a camera is lming
straight down. This view can help you get a better idea of your location
relative to the world around you. Rotate the mouse wheel to zoom in or
out on the terrain below. To use Top-Down view, press F12.
Remote Control (R)
Remote Control drops a camera when you press R, giving you a view
of your aircraft from wherever you started Remote Control view. Make
sure you keep your aircraft in sight in order to maintain control.
Tip: Switch to Top-Down view before a takeoff. This allows you
to see your aircraft in relation to the runway.
Adjusting your position in the cockpit is especially helpful while taxiing,
since it can give you a better view of the bends and turns on the
taxiway. If you can anticipate turns, you can avoid making dangerous
mistakes like braking too hard, turning too tightly, or driving off the
taxiway.
To move the eyepoint
1. Click the wheel button on your mouse.
2. Drag up, down, right, or left.
To reset your view, press Backspace.
Turning Off the Heads-Up Display (HUD)
If you are an advanced ier, or wish to challenge yourself, turn off the
HUD and use the cockpit instruments to guide your ight. Go to the
Options menu, select the Gameplay tab, and clear the Heads-Up Display
check box.
If you change any of the settings, be sure to press the Accept button
before you exit the Options menu.
Tip: The cockpit instruments are only visible in Cockpit view. If
you turn off the HUD, remember to set the camera to Cockpit
view by pressing F9.
5
Page 9
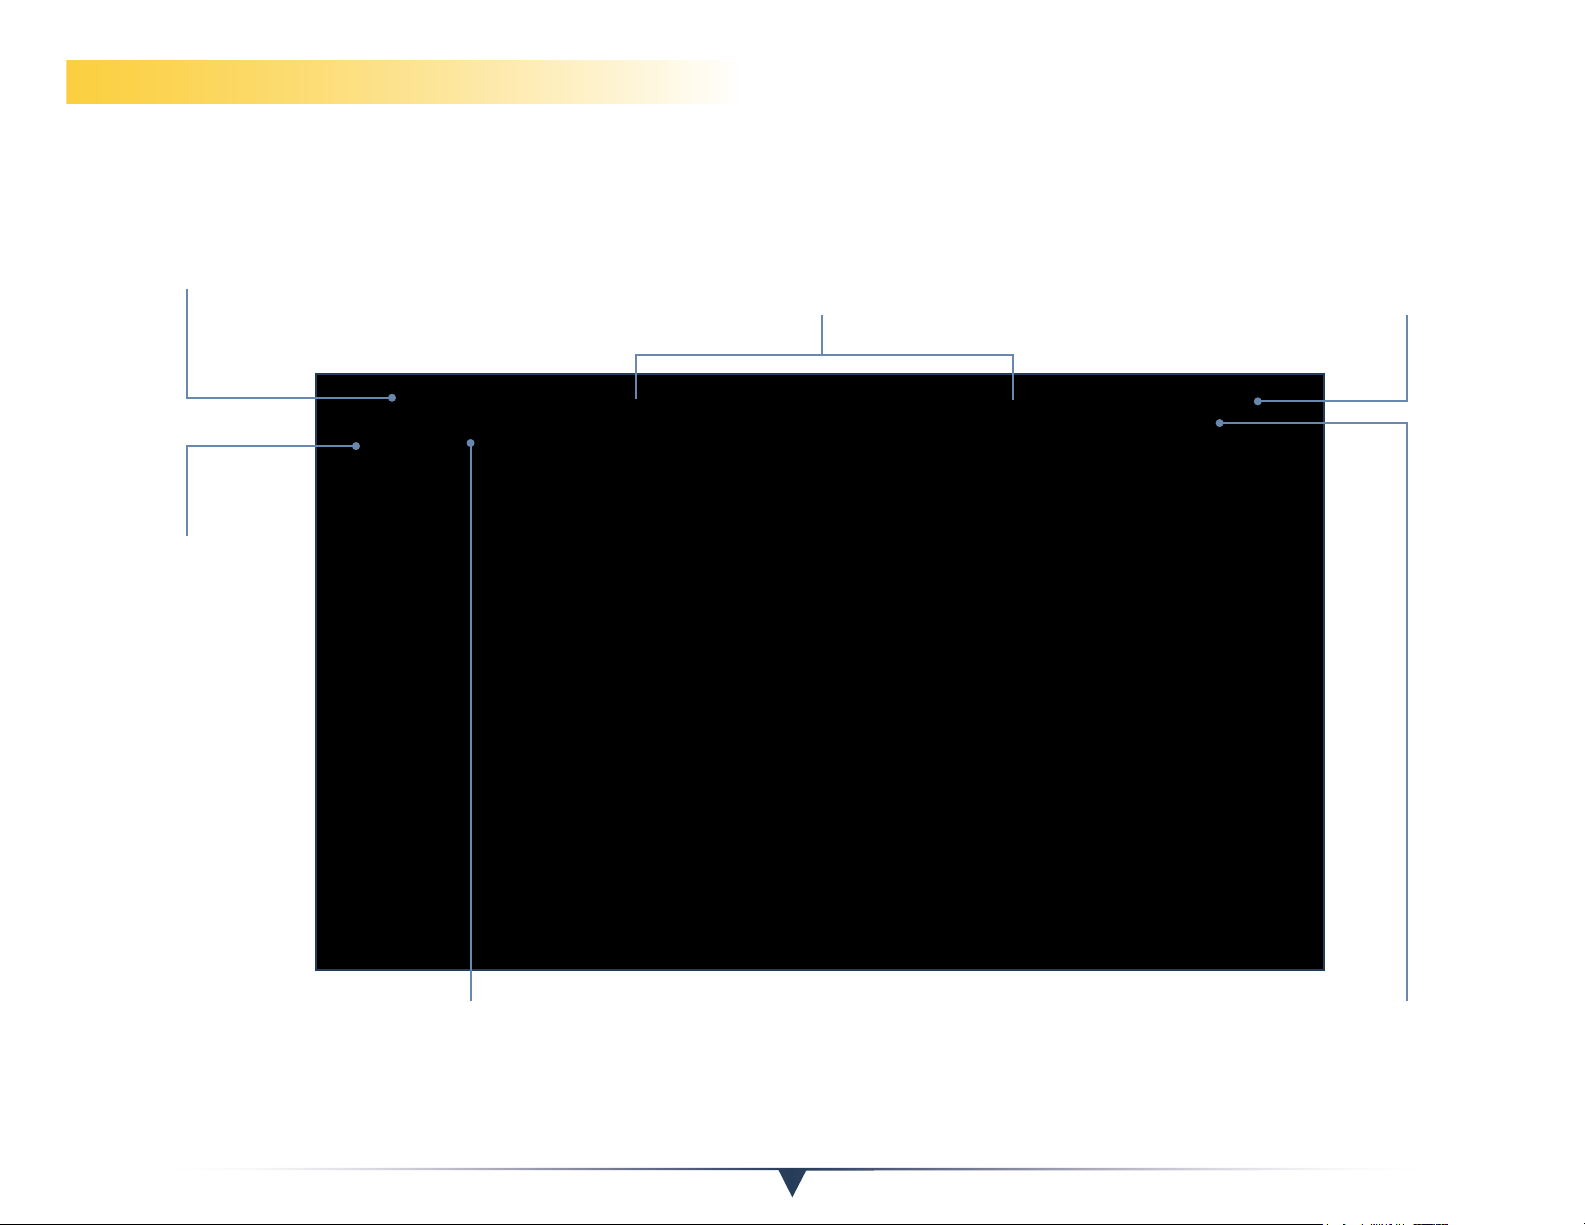
Heads-Up Display (HUD)
The Heads-Up Display, located at the top of the screen, is where you will nd information on your speed, throttle setting, heading, altitude,
and fuel level.
SPEED
Indicates your aircraft’s speed in
nautical miles per hour, or knots.
WIND SPEED
AND DIRECTION
Indicates the
direction of the
wind and its speed
in nautical miles
per hour.
HEADING INDICATOR
Indicates which direction the aircraft is ying. Each
line on the heading indicator represents 5 degrees in
a given direction.
ALTIMETER
Displays your
aircraft’s altitude in
feet above sea level.
THROTTLE SETTING
Shows the current position of the aircraft’s throttle, which can
range from 0% (idle) to 100 % (full throttle).
6
FUEL GAUGE
Indicates the
aircraft’s fuel level.
Page 10

Points of Interest (POI)
Waypoints
Missions and multiplayer sessions feature two directional cues called the
Point of Interest marker and the Point of Interest arrow.
Point of Interest Markers
There are four types of POI markers.
• Objective markers are yellow, diamond-shaped markers that help
you approximate a ight path to the mission objective.
• Aerocache markers are yellow, hexagon-shaped markers that
show you the location of an Aerocache. They are only visible once
you y close enough to an Aerocache to activate its marker.
• Checklist markers are green markers that indicate instruments or
controls related to your current checklist task.
• Multiplayer markers are blue markers that show you where other
players are located. You can cycle through connected players
using the [ and ] keys.
Point of Interest Arrows
POI arrows help guide you toward a POI marker. If you y off course,
the arrow stays xed on the marker. Follow the arrow to continue on
the path toward the mission objective.
Turning Off the POI Arrow
You cannot turn off the POI arrow during missions, but you can turn it
off during Aerocache hunts or while playing in Multiplayer mode.
Some missions contain waypoints, or xed locations along the path to
your nal destination. Waypoints are placed on the runway and in the
air, usually near a Point of Interest marker.
Skip to Waypoint
The Skip to Waypoint function activates when a new leg of your mission
begins. When the Skip to Waypoint pop-up appears on your screen, you
can press N to skip ahead to the next waypoint. If you want to skip tasks
like taxiing to a runway, this is a great time-saving feature.
Tip: Keep an eye on the fuel tank. When you activate the Skip
to Waypoint feature, your aircraft burns the amount of fuel it
would have taken to y to that waypoint normally. If your fuel
level is low, you may need to refuel as soon as you arrive at the
next waypoint.
Checkpoints
All missions feature checkpoints. Checkpoints pop up when you
complete a segment of a mission, marking your progress.
In early missions, checkpoints appear after you accomplish simple tasks,
such as taxiing or taking off. As you progress, checkpoints appear before
challenging tasks, such as landing or performing a tight turn. If you are
unable to complete the task successfully or crash your aircraft, you can
load the last checkpoint instead of restarting the entire mission.
To turn off the POI arrow
1. Go to the Main menu.
2. Click the Options button.
3. Select the Gameplay tab on the Options menu.
4. Select the check box next to Point of Interest under Display.
5. Click the Accept button to save your changes.
Loading Checkpoints
The Load Checkpoint button appears on the Pause menu and the
Mission Fail screen. Click the Load Checkpoint button to return your
aircraft to the last checkpoint you reached in the mission.
Checkpoints cannot be saved. If you exit the mission, all checkpoints are
cleared.
7
Page 11

Walk Around Mode
Checklists
Walk Around mode allows you to explore at ground level. In this mode,
you can move the mouse in any direction to look around you.
Walking to Aircraft
Some missions require you to walk to your aircraft and board before
takeoff. Press W to walk and press E to enter or exit the aircraft. You
cannot enter or exit a moving aircraft.
Walking to Aerocaches
If an Aerocache is hidden on the ground, you may need to get out of
the aircraft and walk to its location.
Tip: To sprint in any direction, hold down Shift while pressing W,
S, A, or D.
Pilots often review checklists before performing routine procedures to
ensure that they do not miss crucial steps during each stage of a ight.
Checklists also contain information specic to each aircraft, including
approach speeds, cruise speeds, and throttle settings.
Using Checklists
Open checklists by pressing Q. Checklist procedures are called out in
the order of operation. Each procedure is associated with a cockpit
instrument or control that will stay lit until the task is completed.
There are three keys to success when using a checklist: changing the
camera view, manipulating the controls, and monitoring the cockpit
instruments.
Changing the Camera View
Before you complete any of the checklist tasks, you must be able to
see the cockpit instruments and controls. You will need to adjust the
view in most aircraft to see controls located below or to the side of the
instrument panel.
8
Page 12

Try any of the following procedures to get a better view of the cockpit:
• Press F9 to switch to Cockpit view.
• Right-click and drag the camera around.
• Press the Spacebar to pause Mouse mode, and then rotate the
mouse wheel to zoom in or out on the instrument panel.
• Click the wheel button on your mouse, and drag the eyepoint in
any direction.
Manipulating the Cockpit Controls
Many of the cockpit controls in an aircraft look similar. Checklists are
designed to reduce the confusion this can create. A control will light up
when a checklist procedure requires a setting change. Follow the green
arrow to locate the control, and then click to make the adjustment.
When you move one of the cockpit controls, it often affects another
instrument. An arrow and checklist POI appear any time this happens.
The arrow points to the control you need to move, and the POI
indicates the additional instrument you need to monitor.
Right-click and drag as you make your way down the checklist.
To verify the settings of some instruments, you may need to pause
Mouse mode and zoom in to see smaller numbers. When you perform
a checklist on the runway, you do not need to pause Mouse mode. You
can simply move the controls by dragging them in the appropriate
direction.
When you perform a checklist in the air, it’s a good idea to pause
Mouse mode before you move any controls. You can perform a
checklist without pausing Mouse mode, but remember that any
movement you make with the mouse will also affect the movement of
the aircraft.
Moving controls with the mouse while using an alternate controller
such as a joystick has no effect on your aircraft’s movement.
Monitoring the Cockpit Instruments
Pilots must scan the instrument panel quickly and then return their
focus to the horizon. Checklists can help you hone this skill while ying.
9
Page 13

Running a Checklist
Rewards
Checklists can be performed at any time when you are in an aircraft.
To run a checklist
1. Press Q.
2. Press 1 for Normal Procedures, or press 2 for Abnormal Procedures.
3. Press the number key corresponding to the appropriate checklist.
4. Perform the tasks, or press 1 to automate the checklist.
Checklist Options
The bottom of a checklist features a series of numbered options. These
options allow you to choose how you want to perform each of the
checklist items. The options are as follows:
• Automate Checklist—Automatically perform all checklist items.
• Abort Checklist—Remove the checklist menu.
• Next Item— Skip current item and move to the next item on the
checklist. This option does not automate the current task.
• Do It—Automatically perform the highlighted checklist item.
Types of Checklists
There are two types of checklists. Normal Procedures checklists walk
you through everyday tasks, such as taking off, maintaining cruise
speeds, and landing. Abnormal Procedures checklists guide you through
a variety of in-ight emergencies.
In Microsoft Flight, you earn awards and unlocks for honing your skills
and logging ight hours.
Awards
You earn Awards for accomplishing ight milestones, such as completing
your rst mission, landing at a certain number of airports, and
transporting passengers. Unconventional gameplay can also earn you
awards, so don’t be afraid to get creative and have some fun in the air.
Unlocks
Unlocks, such as new paint schemes, are awarded when you complete
tasks, such as earning certain amounts of Experience Points (XP) for jobs,
completing landing challenges, or acquiring specic Aerocaches.
Playing Ofine
Once you download Microsoft Flight, you no longer need an Internet
connection to play. Simply start the game and skip the sign-in process.
If you play ofine, your game progress is saved and your Pilot Prole will
synchronize the next time you sign in with your Games for Windows –
LIVE prole and password.
The following features are NOT available when you play ofine:
• Aerocache hunt
• Message of the Day
• Downloadable content
• Text chat
• Voice chat
• Games for Windows – LIVE functionality
• Multiplayer mode
• Marketplace
• Prole updates
10
Page 14

Essential Keyboard Commands
Game Controls
General Gameplay
Fly with Mouse (On/Off) Spacebar
Pause Menu Esc
Skip to Waypoint N
Checklist (On/Off) Q
Map M
Text Chat T
Voice Chat: All Tab
Capture Screenshot V
On the Ground
Walk Forward W
Walk Backward S
Walk Left A
Walk Right D
Aircraft (Enter/Exit) E
Door (Open/Close) O
Fuel F
Camera Views
Camera: Next F7
Camera: Chase View F8
Camera: Cockpit F9
Camera: Flyby F10
Camera: Free Look F11
Camera: Top-Down F12
Camera: Reset Position Backspace
Aircraft Controls
Control Surfaces
Aileron: Left Left Arrow
Aileron: Right Right Arrow
Elevator: Up Down Arrow
Elevator: Down Up Arrow
Rudder: Move Left A
Rudder: Move Right D
Stop and Go
Throttle: Decrease S or F2
Throttle: Increase W or F3
Throttle: Maximum F4
Throttle: Minimum F1
Brakes: Both X
Brake: Right C
Brake: Left Z
Landing Gear (Up/Down) G
In the Cockpit
Flaps: Decrease F5
Flaps: Increase F6
Mixture: Min Shift+F1
Mixture: Decrease Shift+ F2
Mixture: Increase Shift+F3
Mixture: Max Shift+F4
Trim Down Shift+Up Arrow
Trim Up Shift+Down Arrow
Minimum Prop RPM Ctrl+F1
Decrease Prop RPM Ctrl+F2
Increase Prop RPM Ctrl+F3
Maximum Prop RPM Ctrl+F4
11
Page 15

FligHt Conditions
Enhance your experience while ying jobs and during Free Flight
sessions by changing atmospheric conditions. Certain missions aren’t
available in all Flight Conditions. If a mission is unavailable, try changing
the conditions. A dialogue box on the Map screen contains a listing of
the currently selected conditions.
Flight Conditions Screen
Changing conditions like the weather, time, or date can transform a
routine mission into challenging adventure. To get started, go to the
Map screen and click Flight Conditions in the Free Flight menu. The
Flight Conditions screen does not include an Accept button. When you
click one of the options, those conditions are set automatically.
Weather
Click any of the weather options on the Flight Conditions screen to view
a brief description of the associated conditions.
Changing the weather can dramatically affect visibility and aircraft
control. In conditions with heavy rain or clouds, it is more difcult to
see, forcing you to rely on cockpit instruments. In high-wind conditions,
the aircraft is more difcult to control.
Season
The season options are set to mimic real-world conditions in the area
where you are ying. Changing the season usually affects the amount of
daylight available. It may also affect certain climate factors.
Conditions in Free Flight Mode
In Free Flight mode, you can return to the Map screen at any time to
change the Flight Conditions. Just select the conditions you want and
click the Free Flight option.
Conditions in Multiplayer Mode
In Multiplayer mode, the host sets the Flight Conditions. All active
players in the session y in the same conditions.
Tip: You cannot change Flight Conditions during a mission.
If you want to change conditions, you must exit the mission,
change the conditions, and restart the mission.
Time of Day
Use the drop-down menus on the Flight Conditions screen to set your
ight time, or select one of the four general time-of-day buttons: Dawn,
Day, Dusk, or Night.
Tip: You may be able to earn additional Experience Points (XP)
for ying missions at night.
12
Page 16

tHe Hangar
The Hangar is a multipurpose facility where you can swap and repaint
aircraft, fuel up, or download new planes.
Choosing an Aircraft
When you enter the Hangar, your currently selected aircraft is displayed.
If you want to switch to a different aircraft, click one of the aircraft
images displayed at the bottom of the screen.
Use the Details option in the upper-right corner of the screen to review
and compare your available aircraft.
Painting Your Aircraft
You can customize certain aircraft with a brand-new coat of paint.
Choose an aircraft, and then click the Paint Schemes icon in the upperright corner of the screen. To save your changes, remember to click the
Select Aircraft button before you leave the Hangar.
Managing Fuel
Before heading out on a mission or exploring the world in Free Flight,
you can refuel in the Hangar. Click the Fuel icon in the upper-right
corner of the screen, and then drag to the right to add fuel. If you want
to lighten your fuel load, drag left.
Adding fuel increases both the range (distance you can y) and total
weight of the aircraft. Dumping fuel reduces the range, but allows you
to carry more cargo. However, you won’t know how much fuel to take
on board until you actually pick up the cargo for a mission, so plan
accordingly.
Downloading New Aircraft
To nd out more about any new aircraft available in the Hangar, you can
download a free preview. If you then decide you want to purchase the
aircraft, click the Purchase Aircraft button.
Remember to note the type of aircraft you’re purchasing before you
buy. Basic model aircraft don’t feature cockpit interactivity or checklists,
while Deluxe models include both.
You must be online to download new aircraft from Games for Windows
– LIVE. Check the connection on the Microsoft Flight Data Server icon.
13
Page 17

Mission BasiCs
Missions are fun and challenging tasks that are also designed to teach
you the basics of ying.
Mission Screens
There are four different screens you can encounter during a mission: the
mission breakdown, the Pause menu, the Mission Failed menu, and the
Mission Debrieng screen.
Mission Breakdown
Before you begin a mission, you can click any of the items from the
Mission list to view a breakdown of the basic mission details.
Airport Name
The airport name indicates where the mission begins. To learn more
information about an airport, go to the Map screen, move the pointer
over an Airport icon, and then click the icon to display more details.
Aircraft Category
Each aircraft type performs uniquely, making it more or less suitable for
a given mission. Some aircraft are designed for water landings, while
others are known for their agility. The most common types of aircraft
available in Microsoft Flight are the Piston, Trainer, Fixed Wing, and STOL
(Short Takeoff or Landing). Learn more information about each aircraft
in the Hangar.
Pause Menu
Press Esc at any time during a mission to pause the game. From the
Pause menu, you can select options to help you complete the mission,
change your settings, exit the mission, or quit the game.
Resume
Return to the mission.
Options
Change the Gameplay, Graphics, or Audio settings.
Load Free Flight
Exit the mission and resume any saved Free Flight session.
Restart Mission
Restart the mission from the beginning.
Load Checkpoint
Restart the mission from the last successfully reached checkpoint.
Exit Mission
Return to the Map screen.
Quit Game
End your Microsoft Flight session.
Estimated Time
The estimated time represents an average completion time for each
mission. Estimates are based on use of the Skip to Waypoint feature.
Tip: If you see a timer to the right of the Heading indicator,
you’re ying a timed mission. You receive additional Experience
Points (XP) for completing the mission quickly.
14
Page 18

Mission Failed Menu
Mission Debrieng Screen
If you crash during a mission, or simply fail the mission objective, the
Mission Failed menu appears with several options.
Exit Mission
Return to the Map screen.
Restart Mission
Restart the mission from the beginning.
Load Checkpoint
Return to the mission from the last checkpoint you successfully reached
before failing the mission.
Once you complete a mission, a breakdown of your accomplishments
for that mission appears on the Mission Debrieng screen.
Experience Point Breakdown
Experience Points you earn for completing the mission appear in the
center of the screen. Compare the points you earned in each category
to the total points available. If you would like to try for more points, you
can y the mission again later. However, to earn any Experience Points
for ying a repeat mission, you must earn more points than on the
previous attempt.
Accept
Return to the Map screen.
Play Again
Restart the mission from the beginning and give up any XP or awards
you earned during the previous attempt. You will not have the option of
loading the last checkpoint.
15
Page 19

JoB Board
If you are ready to pick up some professional work, click the Free Flight
icon to display Airport icons on the map. Click one of them, and then
click the Job Board button on the information panel.
Jobs
The Job Board lists a variety of different missions available at a
particular airport. There are various factors that determine which
missions you can y, including the type of aircraft you own, the size of
the airport, and the current Flight Conditions.
Selecting your Aircraft
After selecting a mission from the Job Board, you must choose an
aircraft from the Hangar.
You may need to download a new aircraft to complete certain missions.
For example, if you want to transport cargo, you would need to select
an aircraft with an appropriate maximum payload capacity.
Exploring Different Areas
If you download additional areas of the map, more opportunities
open up on the Job Board. Rotate the wheel to zoom out and look for
the Downloadable Content (DLC) icon. Click the icon to preview and
purchase new content.
An Introduction to Cargo Runs
Avoid overloading the aircraft during cargo runs. You should make sure
you have enough fuel to y the total distance, but that the total weight
of the cargo and fuel does not exceed the maximum payload capacity
of the aircraft.
To prepare for a cargo run
1. Click a cargo mission on the Job Board and review the details.
2. Make a note of the total weight of the cargo and the distance of the
mission.
3. Click the Select Mission button.
4. Select an aircraft from the Hangar.
5. Review available aircraft details or download a new aircraft.
6. If necessary, click the Fuel icon and adjust the fuel level.
7. When you’re ready, press the Start Mission button.
Note: “$100 hamburger” is pilot slang for a short trip to a
nearby airport for bite to eat. It is essentially an excuse for a
quick ight, but some say the term originates from the cost of
renting an aircraft, fueling up, and ying there and back.
16
Page 20

Challenges
Challenges test your agility and prociency as a pilot and rene your
abilities in the cockpit. There are three types of challenges to choose
from: landing challenges, challenge courses, and Gold Rush.
Landing Challenges
In a variety of increasingly difcult challenges, you can prove your
ability to land an aircraft smoothly in less-than-ideal conditions.
Challenge Courses
Put your agility skills to the test as you navigate twisting paths. Perform
aerobatics using a joystick or game pad to earn additional Experience
Points while ying challenge courses.
Gold Rush
Fly over, around, and through scenic vistas in an attempt to collect
as many rings as you can before the timer runs out. Fly Gold Rush
challenges repeatedly to beat your own high score.
To access challenges
1. Click the Activities icon on the Map screen.
2. Click Challenges.
3. Select a challenge.
4. Click Select Mission.
17
Page 21

Career
Your career begins with your rst ight. Every time you y a mission,
complete a job, or y in a Free Flight session, you become a better pilot.
Pilot Prole
Visit your Pilot Prole to view your career stats.
Statistics
As soon as you begin ying, your progress is logged. A record is kept
of information including how many times you have landed, how many
ight hours you have logged, what kind of aircraft you like to y, and
the total distance you have own.
To view your ight statistics
1. Click the Pilot Prole icon on the Map screen.
2. Click the Career tab.
3. Review Flight Statistics and Experience Points data.
Pilot Portrait
From the Career tab, you can select a pilot portrait to represent you in
the game.
Prole Roaming
Your Pilot Prole is stored on the Microsoft Flight data server. This means
that you can play on another computer without losing any of your
progress in the game.
Tip: The prole roaming feature uses a default location, so you
may begin at an alternate location when you start the game
from a different computer.
Compare to Other Pilots
You can compare your progress to the progress of other players by
selecting the Multiplayer icon from the Map screen or by visiting the
Microsoft Flight website.
In Multiplayer mode, you can click a player’s name to view their
statistics or view their aircraft in ight. Use this feature to locate a pilot
with a similar style or a more advanced pilot who may show you some
tricks of the trade.
Visit the Microsoft Flight website to compare statistics with your friends.
Log on to the website and select My Flight from the top menu, and then
select Friends. Compare statistics by dragging the icons of your friends
into the columns on the right side of the page.
Tip: If you want to see how your selected portrait looks while
piloting your aircraft, switch to Flyby view the next time you are
up in the air.
18
Page 22

aeroCaCHes
While you are out ying, keep your eyes peeled for hidden objects
called Aerocaches. Aerocaches are represented by a spinning triangular
icon.
Aerocaches are updated in the game by the Microsoft Flight data server,
which means you must be playing online in order to see them.
Finding and Acquiring Aerocaches
You earn Experience Points for tracking down and acquiring
Aerocaches. The total XP value of an Aerocache depends on various
factors, including the surrounding terrain and how close you must y to
acquire it.
Finding Aerocaches
In an Aerocache hunt, you are given a hint about the general location of
the Aerocache. An Internet search term is also provided, allowing you to
do more research. Use the hint in conjunction with the Internet search
to identify a more exact location for the Aerocache.
Acquiring Aerocaches
When you y in the vicinity of an Aerocache, the Aerocache icon lights
up, and a yellow Point of Interest arrow appears on the screen. Follow
the POI arrow to locate the Aerocache.
Once you locate the Aerocache, y near it to acquire it.
Tip: If an Aerocache is placed on an object, do not y directly
into the object. You will crash.
When you successfully acquire an Aerocache, a pop-up notication
appears on the screen. After an Aerocache has been acquired, it no
longer appears in the game.
Tip: Some Aerocaches are hidden at high altitudes. If you are
having trouble acquiring an Aerocache, make sure you are ying
the correct type of aircraft to reach the necessary altitude.
There are a couple of ways to nd Aerocaches in the game: You can
happen upon them while ying, or you can actively search for them in
Aerocache hunts.
19
Page 23

Difculty Rating
Aerocaches are ranked in difculty from 1 (least difcult) to 5 (most
difcult). This rating system is based on several factors, including the
Aerocache’s location and surrounding terrain.
Difculty is also based on the hint and search term provided. Some clues
point you directly to the location of the Aerocache, while others are
more vague.
The nal difculty factor is how close you must y to the Aerocache in
order to acquire it.
Aerocache Hunts
If you want to search for Aerocaches, click Aerocache Hunt in the
Activities section of the Map screen. Click any of the Aerocaches in the
list for more details.
To perform an Aerocache hunt
1. Click Activities, and then click Aerocache Hunt.
2. Select an Aerocache.
3. Read the hint.
4. Click the Begin Search button and review the search results.
5. Click the Start Hunt button.
6. When you’re ready, click the Take Off button to start ying.
When you start a hunt, an Aerocache sensor appears in the upper-right
corner of the screen. As you get closer to the Aerocache, the signal
strengthens and the sensor lls with yellow.
Tip: If you want to get closer to an Aerocache without ying,
press Esc to display the Pause menu, and then press Map. Drag
your aircraft icon in the direction of the Aerocache, and then
click Fly in the Free Flight menu. If you have gotten closer to the
Aerocache, the inner rings of the sensor should be highlighted in
yellow.
20
Page 24

Free FligHt
Free Flight mode allows you to shape your own adventure. Use this
mode to explore the world, y a variety of different aircraft, and test out
your skills.
Explore the Skies
Drag your aircraft icon to any area on the map and click Fly in the Free
Flight menu to begin exploring. Click the ring surrounding your aircraft
to rotate it in any direction.
You can also click an Airport icon and choose to start from either in the
air or on the ground.
Select an Aircraft
Customize your Free Flight session by selecting an aircraft from the
Hangar. Click the Hangar icon from the Map screen, review your aircraft
options, and then click the Select Aircraft button. Before you exit the
Hangar, be sure to check the fuel level of your aircraft and refuel if
necessary.
Customize Flight Conditions
Earn Awards
Logging hours in Free Flight mode can earn you awards. To learn more
about available awards, press the Pilot Prole icon on the Map screen,
and then click the Awards tab. Select Free Flight from the Type dropdown menu, and then scroll down to view all of the awards you can earn
in Free Flight mode.
You can earn awards for hunting down Aerocaches and for
accomplishing ight milestones like landing at 100 airports or
accumulating 40 hours of total ight time.
Tip: Did you know there is an award for landing at every airport
on Hawaii?
If you want to mix things up, change the Flight Conditions before you
head out on your next Free Flight adventure. Press Flight Conditions in
the Free Flight section, make your desired changes, and then select a
location on the map to start your adventure.
Practice Landing
Landing is one of the most difcult skills for any pilot to master. Use
Free Flight mode to practice landing.
Tip: Practice landing at night. This will help you learn how to
rely on instruments and runway lights.
21
Page 25

MultiPlayer
If you want to y with other players, take off in Multiplayer mode! Use
Multiplayer mode to show off your aerobatic skills or demonstrate cool
maneuvers. Gather a group and y in formations, or invite a friend to
go exploring.
To get started, click the Multiplayer icon on the Map screen.
Tip: You must be signed in to Games for Windows – LIVE
in order to host or join a multiplayer session. Check your
connection status by hovering your pointer over the Microsoft
Flight Data Server icon on the Map screen.
Quick Match
Use the Invite Friend button to locate other players, join a session, and
send game invites.
Host a Session
During multiplayer sessions, an arrow appears next to the name of the
host.
Selecting a Session Type
From the Multiplayer information screen, click the Settings button, and
then select a Session Type from the drop-down menu.
There are three different types of sessions:
• Public sessions are open to all players, and anyone can invite
players to join.
• Friends Only sessions are open only to friends. Any friend can
send a game invite.
• Private sessions are hosted by one player, and only the host can
invite players to join the session.
Locating Other Players on the Map
Select any of the players listed in your session to automatically locate
that player’s aircraft on the map.
To start ying, drag your aircraft near another player’s aircraft, and then
select Fly from the Free Flight menu.
The session host controls the following features:
• Session type
• Flight conditions
• Kicking players from the session
• Game invites (Private sessions only)
22
Page 26

Stats
Locate Friends Online
Click a player’s name from the Quick Match list to review that player’s
ight statistics. Use this information to compare your own ight
experience.
There are three basic types of information available about other pilots:
• Quick Statistics—A quick tally of a player’s Experience Points,
awards and achievements earned, and Aerocaches acquired.
• Interactive Prole Data—Find out more about a player’s progress
in Microsoft Flight and other Games for Windows – LIVE titles.
• Live Aircraft Information—Locate a player’s aircraft on the map
or view the aircraft in the game.
Target Friends
If you choose to target a player in the game, you will see the location
of that player’s aircraft any time you y missions or enter Free Flight
mode, making it easier to track and cooperate with other players on
the map. Cycle through connected players in the multiplayer session by
using the [ and ] keys.
When you target a player, a blue Point of Interest arrow appears on
the screen, along with the approximate distance to the other player’s
aircraft.
Select LIVE from the Main menu, and then press the Friends button to
see who is playing online.
Inviting Friends
Want to see your friends y? Once you’re connected, you can view a
friend’s aircraft during a multiplayer session by clicking the player’s
name, and then clicking View Aircraft.
To invite friends to join a multiplayer session
1. Click the Invite Friend button.
2. Click the To : button to see a list of players and friends online.
3. Select players from the list.
4. Type a message.
5. Press Enter to send the message.
Tip: You can exit Multiplayer mode at any time by clicking the
Leave Match button.
23
Page 27

Text Chat
You can text chat with everyone in your multiplayer session or have a
one-on-one conversation (whisper) with another player.
6. Click the Voice Recording Device button.
7. Adjust the Recording Volume and Voice Threshold.
8. Click Done.
To chat with the group
1. Press T on the keyboard.
2. Type your message.
3. Press Enter to send.
To whisper to a friend
1. Press T on the keyboard.
2. Type \w or \whisper.
3. Type the player’s gamertag.
4. Type your message.
5. Press Enter to send.
6. Type /r or /reply and then your response.
If you do not follow step 6, your reply is sent to the entire group.
Tip: The rst time you send a whisper to a friend, enter steps 2,
3, and 4 on the same line. The line should look like this:
\whisper gamertag message.
Voice Chat
Speaking with Other Players
Once you set up voice chat, you can start a voice chat from the Games
for Windows – LIVE screen or by clicking a player’s gamertag from the
session list.
To set up a voice chat from the LIVE menu
1. Click the Private Chat button.
2. Select a Game Channel.
If an active Game Channel does not exist, or if you want to create a
new Game Channel, follow these additional steps
1. Select an inactive Channel.
2. Invite players.
3. Click Send Message.
Once players accept your invite to chat, click the Game Channel to start
the conversation.
Push-to-Chat
Press the Tab key when you want to speak to other players in the Game
Channel.
If you have a headset with a microphone, you can talk to players in your
multiplayer session.
To set up voice chat
1. Go to the Main menu.
2. Click the LIVE button.
3. Click the Settings button.
4. Click the Voice button.
5. Choose a Voice Playback Device.
24
Page 28

oPtions
You can change Graphics, Gameplay, and Audio settings from the
Options section of the Main menu. Remember to click the Accept
button at the bottom of the screen to save your changes.
Graphics
Change the Graphics settings if you want to correct issues such as
jagged-looking edges and low shadow quality. You can also adjust
monitor resolution and screen size.
Vertical Sync
A “screen tear” occurs when the frame buffer is updated while the
monitor is in the middle of refreshing. Turning on the Vertical Sync
setting may help to reduce the appearance of screen tearing by setting
the frame rate to be a fraction of the refresh rate of your monitor.
If you have a fast computer (around 1 gigabyte of video memory or
more), turning on Vertical Sync may result in a smoother frame rate.
Tip: If you have a slower computer, do not turn on Vertical Sync.
It may actually make the game render even slower frame rates.
Overall Graphics Settings
There are three overall setting options to choose from, each designed
to target a specic hardware prole to produce the best possible visual
experience without compromising performance rates.
Use the following hardware proles as a jumping off point for
determining which setting is right for you.
• Low—Gaming laptop or a 5-year-old desktop
• Medium—3-year-old desktop
• High—New desktop
Custom Settings
Use the drop-down menu for each setting to customize your visual
experience. This option gives you more control over visual elements, but
it may cause a change in the overall balance between features.
There are six basic Graphics settings:
• Shadow Quality
• Sharpness
• Scenery Density
• Scenery Quality
• Texture Quality
• Weather Quality
Note: If the Overall Graphics setting is set to Custom, you have altered
at least one of the default settings.
25
Page 29

Gameplay
Audio
Customize the ight controls, display settings, and camera.
Flight Control Assistance
• Increased Stability—Makes the aircraft easier to control during
ight, with reduced tendencies to stall and spin.
• Smooth Braking—Slows the aircraft at a safer rate to help prevent
accidents.
• Auto Mixture—Automatically adjusts the aircraft’s fuel mixture for
optimal engine performance at higher altitudes.
• Propeller Effects—Reduces the aerodynamic and rotation side
effects of a spinning propeller.
Display
Display or hide the following in-game features:
• Heads-Up Display (HUD)
• Dialog text
• Point of Interest (POI)
Note: You can hide the POI for Aerocache hunts and Multiplayer mode.
However, you cannot hide the POI arrow for missions.
Slide the volume control meters to adjust in-game sound effects, music,
and dialog.
Game Controls
This sections lists keyboard commands for in-game actions such
as changing camera views, pausing the game, walking, turning on
checklists, moving the eyepoint, and skipping to waypoints.
Aircraft Controls
This section lists keyboard commands for aircraft-related actions such as
raising the landing gear, applying rudder, increasing the throttle, leaning
the mixture, and trimming the aircraft.
Camera
Invert camera controls to look down when pointing up or look up when
pointing down, which is the reverse of traditional aircraft controls.
26
Page 30

Key terMs
Aerobatics
Precision maneuvers, such as barrel rolls, loops, hammerhead stalls,
spins, and Cuban eights. Often performed at airshows and competitions,
many of these maneuvers are also part of a military pilot’s training and
can be used in aerial combat. In fact, many basic aerobatic maneuvers
evolved from air-combat tactics invented during World War I.
“Aerobatics” is also dened in Federal Aviation Regulation 91.303, which
describes restrictions on aerobatic ight. In that section, “aerobatic
ight” means “any intentional maneuver involving an abrupt change in
an aircraft’s attitude, an abnormal attitude, or abnormal acceleration,
not necessary for normal ight.”
Aerocache
Objects hidden on the ground and in the air. Search out their location
to earn Experience Points (XP).
Ailerons
Movable control surfaces, usually located near the wing tips, that
control the rolling motion of an aircraft. The pilot deects the ailerons
by moving the control yoke or stick left and right. The ailerons move
simultaneously in opposite directions. For example, when the pilot
moves the yoke or stick left, the aileron on the left wing moves up,
decreasing the lift on the left wing. At the same time, the right aileron
moves down, increasing the lift on the right wing. The word derives
from the French word aile, meaning “wing.”
Ceiling
The altitude at which an aircraft’s best rate of climb drops to 100 feet
per minute under standard conditions.
Climb Out
The portion of a ight between takeoff and the initial cruising altitude.
Cruise Speed
The average speed of an aircraft during straight-and-level ight at
normal power settings.
Drag
The resistance of an object to movement through a uid. With respect
to aircraft, drag is one of the four fundamental forces in ight. It
opposes thrust. There are two basic types of drag. Parasite drag is
caused by friction. The airplane surface, antennas, landing gear, and
other appendages all cause parasite drag, which increases in proportion
to the square of the aircraft’s velocity. Induced drag is a byproduct of lift.
At the tip of a wing, air moves from the high-pressure area below the
wing to the low-pressure area above. The energy used to create these
vortices manifests itself as induced drag, which increases as airspeed
drops.
Elevator
A movable control surface located on the horizontal stabilizer of an
aircraft’s tail. Although its name implies that the elevator makes the
airplane climb or descend, it actually controls only the aircraft’s pitch
attitude, that is, the angle of the nose above or below the horizon. The
pilot moves the elevator by applying forward pressure on the control to
decrease pitch attitude and by applying back pressure to increase the
pitch attitude.
Fixed-Wing Aircraft
An aircraft with stable wings that deect air current to create lift.
Flaps
A hinged portion of an airplane’s wing, generally on the trailing edge,
that can be lowered during takeoff and landing to increase the lift and
drag of the wings. When partially extended, a ap adds lift by increasing
the curvature of the wing. Because aps extend into the oncoming air,
they also increase drag, helping an aircraft descend steeply without
building up speed. Often confused with ailerons, aps are not the
primary control surfaces of an airplane.
27
Page 31

Flare
To level off and establish the correct landing attitude just above the
runway prior to landing. A pilot ares by applying back pressure to the
control yoke or stick, which raises the nose of the aircraft. When done
properly, the are is a smooth, continuous transition from a nose-low,
descending ight path to a nose-high attitude that almost stops the
aircraft’s descent.
Heading
The direction in which the aircraft is pointed, usually in reference to
magnetic north. Because wind pushes an airplane in ight, heading
does not necessarily correspond to the aircraft’s path over the ground,
that is, its track. For example, if you want to y due east with respect to
the ground and the wind is blowing from the north, you must turn the
aircraft slightly into the wind to correct for drift.
Gs
A measurement of the load factor, or apparent gravity, experienced by
an aircraft during ight. One G represents the force of gravity exerted
on a body at rest. When an aircraft climbs, turns, or accelerates, positive
G forces act upon it. When it descends or decelerates, negative G forces
act upon it.
Glide Ratio
Ratio of horizontal distance traveled per unit of descent. For example,
a sailplane with a 60:1 glide ratio travels 60 meters forward for every 1
meter it descends. A typical single-engine aircraft has a glide ratio of
about 10:1.
Glide Speed (VBG)
A V-speed indicating the optimal speed for gliding as far as possible
with the engine off.
Glide Slope
The electronic approach path projected as part of an instrument
landing system (ILS). Glide slope transmitters, located near the end of a
runway, send out radio signals to form the proper descent path to the
runway. The angle of the glide slope is usually set at about 3 degrees to
the horizontal.
GUMPS
An acronym pilots use to remember a typical pre-landing checklist.
GUMPS stands for Gas, Undercarriage, Mixture, Propeller, Seat Belts, and
Switches.
Instrument Landing System (ILS)
A system of navigation aids and approach lights that provide both
horizontal and vertical guidance to aircraft approaching a runway.
The ILS is the primary precision-approach system in use today around
the world. A typical ILS includes a localizer and a glide slope, as well
as outer, middle, and inner marker beacons. The localizer transmits a
directional signal that provides left/right guidance. The glide slope is
an electronic glide path that denes the proper descent angle to the
runway. Marker beacons indicate distance from the runway.
Knots
Nautical miles per hour. Abbreviation: kt, kts, or KTS. One nautical mile
(nm or NM) measures 6,076 feet (1,852 meters). This distance is based
on the length of one minute of arc of a great circle—an arc representing
the shortest distance between two points on a globe. One knot equals
about 1.15 statute miles per hour. Therefore, 100 knots equals about
115 mph (185 kilometers per hour), 150 knots equals about 172 mph
(278 kilometers per hour), and 200 knots equals about 230 mph (370
kilometers per hour). All speeds led on ight plans and for air trafc
control purposes are in knots.
Note “Knots” by denition assumes “per hour.” You should never state
speed as “knots per hour.”
Low Pass
A brief, low altitude yover. Pilots perform low passes to notify people
on the ground they’re circling back for a landing. Jet ghter pilots
often perform low pass yovers during airshows to demonstrate aircraft
control at extremely high speeds.
28
Page 32

Manifold Pressure Gauge
An instrument that measures the air pressure in the intake manifold of
a piston engine. Usually calibrated in inches of mercury, this instrument
(really a barometer) is used in combination with the tachometer to
set engine power. Most small training aircraft have only a tachometer.
Aircraft with larger engines and aircraft with constant-speed propellers
usually have manifold pressure gauges.
Master Switch
Along with the mixture and propeller, the master switch controls the
battery and the alternator, which comprise an aircraft’s electrical power
system.
Mixture Control
A device for controlling the ratio between fuel and air entering an
engine’s carburetor or fuel injection system. In most aircraft, the mixture
control is a push-pull knob or lever marked in red, usually located to
the right of the throttle.
Paint Scheme
Exterior design and color, usually applied to the body, wings, and tail of
the aircraft.
Payload
The total weight of passengers, fuel, and cargo an aircraft can carry.
Precision Approach Path Indicator (PAPI)
A lighting system located beside the runway that visually guides the
pilot onto the glide slope. There are four units, each containing two
lights. Red lights indicate the aircraft is too low and white lights indicate
the aircraft is too high. The proper glide slope is two white lights and
two red lights.
Rate of Climb
The speed, usually measured in feet per minute, at which an aircraft
is climbing. The term is sometimes stretched to include the rate of
descent. The rate of climb is read on the vertical speed indicator (VSI).
Because aircraft engines operate over a wide range of altitudes, the
pilot must adjust the mixture to produce the most efcient fuel/air
mixture as an airplane climbs into less dense air or descends into more
dense air. A mixture that is too rich contains too much fuel for the
existing conditions and causes the engine to run rough and lose power.
A mixture that is too lean can cause an engine to overheat or can
cause detonation—the sudden, explosive combustion of fuel within the
cylinders.
Nautical Mile
A distance of about 6,076 feet (1,852 meters). The nautical mile is
based on the length of one minute of arc of a great circle. In aviation,
distances and speeds are measured in nautical miles (nm) and nautical
miles per hour (knots).
Nondirectional Radio Beacon
A radio beacon that transmits nondirectional signals in the lowfrequency or medium-frequency band (190–535 kHz). Today it is used
primarily for NDB nonprecision approaches and in conjunction with the
outer marker component of an ILS. An automatic direction nder (ADF)
points to these beacons.
Rotation Speed (VR)
A V-speed rating that indicates when to pull back on the controller to
rotate the aircraft, causing it to lift off the runway during takeoff.
Rudder
A movable control surface usually mounted on the vertical stabilizer
of the tail. The rudder moves the aircraft about its vertical, or yaw, axis.
It does not, however, turn the airplane. It is used primarily to balance
forces in turns and to counteract yawing motions induced by the
propeller during ight. A pilot moves the rudder by applying pressure
to the left or right rudder pedal. The pedals are mounted on the oor of
the cockpit. In normal maneuvering, the pilot uses simultaneous aileron
and rudder pressures to maintain balanced or coordinated ight.
Stall Speed
A V-speed rating that indicates the lowest possible airspeed needed to
maintain even ight for any given altitude. In many aircraft, the airspeed
indicator features a color-coded system that tells you the stall speed
with the aps retracted and with the aps extended for landing.
29
Page 33

Stick
A tubular control in some aircraft, usually between the pilot’s knees,
used to control the aircraft about its roll and pitch axis, ailerons, and
elevator respectively (same function as a yoke).
Taildragger
An aircraft that has its main wheels mounted ahead of the center
of gravity and a small pivoting or steerable wheel supporting the
aft fuselage. There is no nosewheel, as with tricycle-gear aircraft.
Taildraggers were the norm during the early years of aviation and are
sometimes referred to as conventional-gear aircraft. They are trickier
to handle on the ground than tricycle-gear aircraft and require special
training and skill.
Takeoff Run
The distance from the takeoff point to where the wheels lift off the
runway. Pilots often y into the direction of the wind to reduce the
ground speed and distance needed to lift off the runway.
Throttle
The cockpit control that most directly determines the power output of
the engine. In a piston engine, the throttle actually controls the amount
of air entering the carburetor or induction system. The carburetor, or
fuel metering system, mixes the appropriate amount of fuel with the air
to create a combustible mixture. When fully “open,” the throttle allows
the maximum amount of air to enter the system to produce maximum
power. When the throttle is “closed,” only a small amount of air enters
the system and the engine produces minimum power.
Trainer Aircraft
A type of aircraft used in ight instruction. Trainers are often two-seaters
with tandem controls and simplied instrument panels.
Velocity Speeds (V-Speeds)
A set of suggested velocity speed settings to optimize performance
under a variety of different circumstances.
V1
Takeoff decision speed. The speed at which it may not be possible to
stop the aircraft on the runway in case of a rejected takeoff (RTO).
V2
Minimum takeoff safety speed for a multi-engine aircraft. The minimum
safe ying speed should an engine fail immediately after takeoff.
Visual Approach Slope Indicator (VASI)
A lighting system that indicates an aircraft’s position relative to the
desired glide slope on a particular runway. This system uses two or three
sets of lights on both sides of the runway to visually guide a pilot onto
the glide slope. The pilot is on the glide slope if the rst set of lights is
white and the second red. The pilot is ying too high if both sets are
white and ying too low if both sets are red.
Very High Frequency Omnidirectional Range (VOR)
A ground-based radio transmitter that sends signals in 360 radials. Some
of these radials dene airways, but pilots can track any radial to y a
specic path over the ground.
Touch-and-Go
A landing operation where the pilot lands the aircraft on the runway
and takes off again without coming to a full stop.
Tri m
To adjust a movable tab on a control surface, usually the elevator, to
relieve pressure on the ight controls. Trim is necessary because, as
an aircraft changes speed, the amount of air owing over the control
surfaces varies. Without trim, a pilot would have to hold forward or
back pressure on the yoke or column to maintain a specic airspeed or
pitch attitude. Larger aircraft also have aileron and rudder trim.
Wingspan
The distance from one wing tip to the other.
Ya w
Movement of an aircraft about its vertical axis, as when the nose turns
left or right. Along with roll and pitch, yaw is one of an airplane’s three
basic movements. The vertical stabilizer and rudder are designed to
control yaw.
30
Page 34

Yok e
The steering wheel-like control connected to the ailerons and elevator.
A pilot turns the yoke to move the ailerons and bank the wings. The
pilot moves the yoke forward and back to move the elevator, which
lowers and raises the nose. Some airplanes have a stick or “joystick”
instead of a control yoke.
© 2012 Microsoft Corporation. All rights reserved.
Microsoft, Bing, the Bing logo, Windows, Windows Live, the Windows logo, Xbox, and Xbox 360 are
trademarks of the Microsoft group of companies.
Anti-Grain Geometry - Version 2.3 Copyright © 2002-2005 Maxim Shemanarev (McSeem).
Uses Autodesk® Scaleform® Copyright © 2012, Autodesk, Inc.
FMOD EX Sound System Copyright © Firelight Technologies, 1994-2012.
Uses Fork Particle Tool & SDK. Copyright © 2012 Fork Particle, Inc.
Incorporates GeoBase® Canadian DEM, Minister of Natural Resources Canada.
Uses Granny Animation. Copyright © 1999-2012 by RAD Game Tools.
Uses Havok™: © Copyright 1999-2012. Havok.com Inc. (or its licensors). All Rights Reserved. See
www.havok.com for details.
Airport and Navigation data supplied by Jeppesen.
Jpeg-6b - This software is based in part on the work of the Independent JPEG Group.
libpng - Version 1.2.18 Copyright © 2000-2002 Glenn Randers-Pehrson.
Lua - Version 5.1 Copyright © 1994–2011 Lua.org, PUC-Rio.
Vector data supplied in part by NAVTEQ.
NVIDIA Texture Tools Copyright © 1997-2008 NVIDIA Corporation.
Uses Peter Uliciansky’s Extreme DXT Compression code
Portions of this software utilize SpeedTree technology. © 2012 Interactive Data Visualization, Inc.
All rights reserved.
Squish - Version 1.3 Copyright © 2006 Simon Brown.
TinyXML - Version 2.0 Original code (2.0 and earlier) copyright © 2000-2002 Lee Thomason (www.
grinninglizard.com)
Uses Xceed WPF Controls Copyright © 2011 Xceed Software Inc.
Zlib - Version 1.2.3, Copyright © 1995-2005 Jean-loup Gailly and Mark Adler.
The ICON Aircraft names, emblems, body designs and logos are trademarks and intellectual
property of ICON Aircraft, Inc. and are used under license to Microsoft Corporation.
The Maule aircraft names, emblems, body designs and logos are trademarks and intellectual
property of Maule Air, Inc. and are used under license to Microsoft Corporation.
The RV family of aircraft names, emblems, body designs and logos are trademarks and intellectual
property of Van’s Aircraft, Inc. and are used under license to Microsoft Corporation.
To see credits for people who worked on this game,
go to www.microsoft.com/games/mgsgamecatalog.
31
X18-05986-02
 Loading...