

Page 1
Installation and Operating original instructions.
Part Number 32Z3797 GB
Issue 1
1
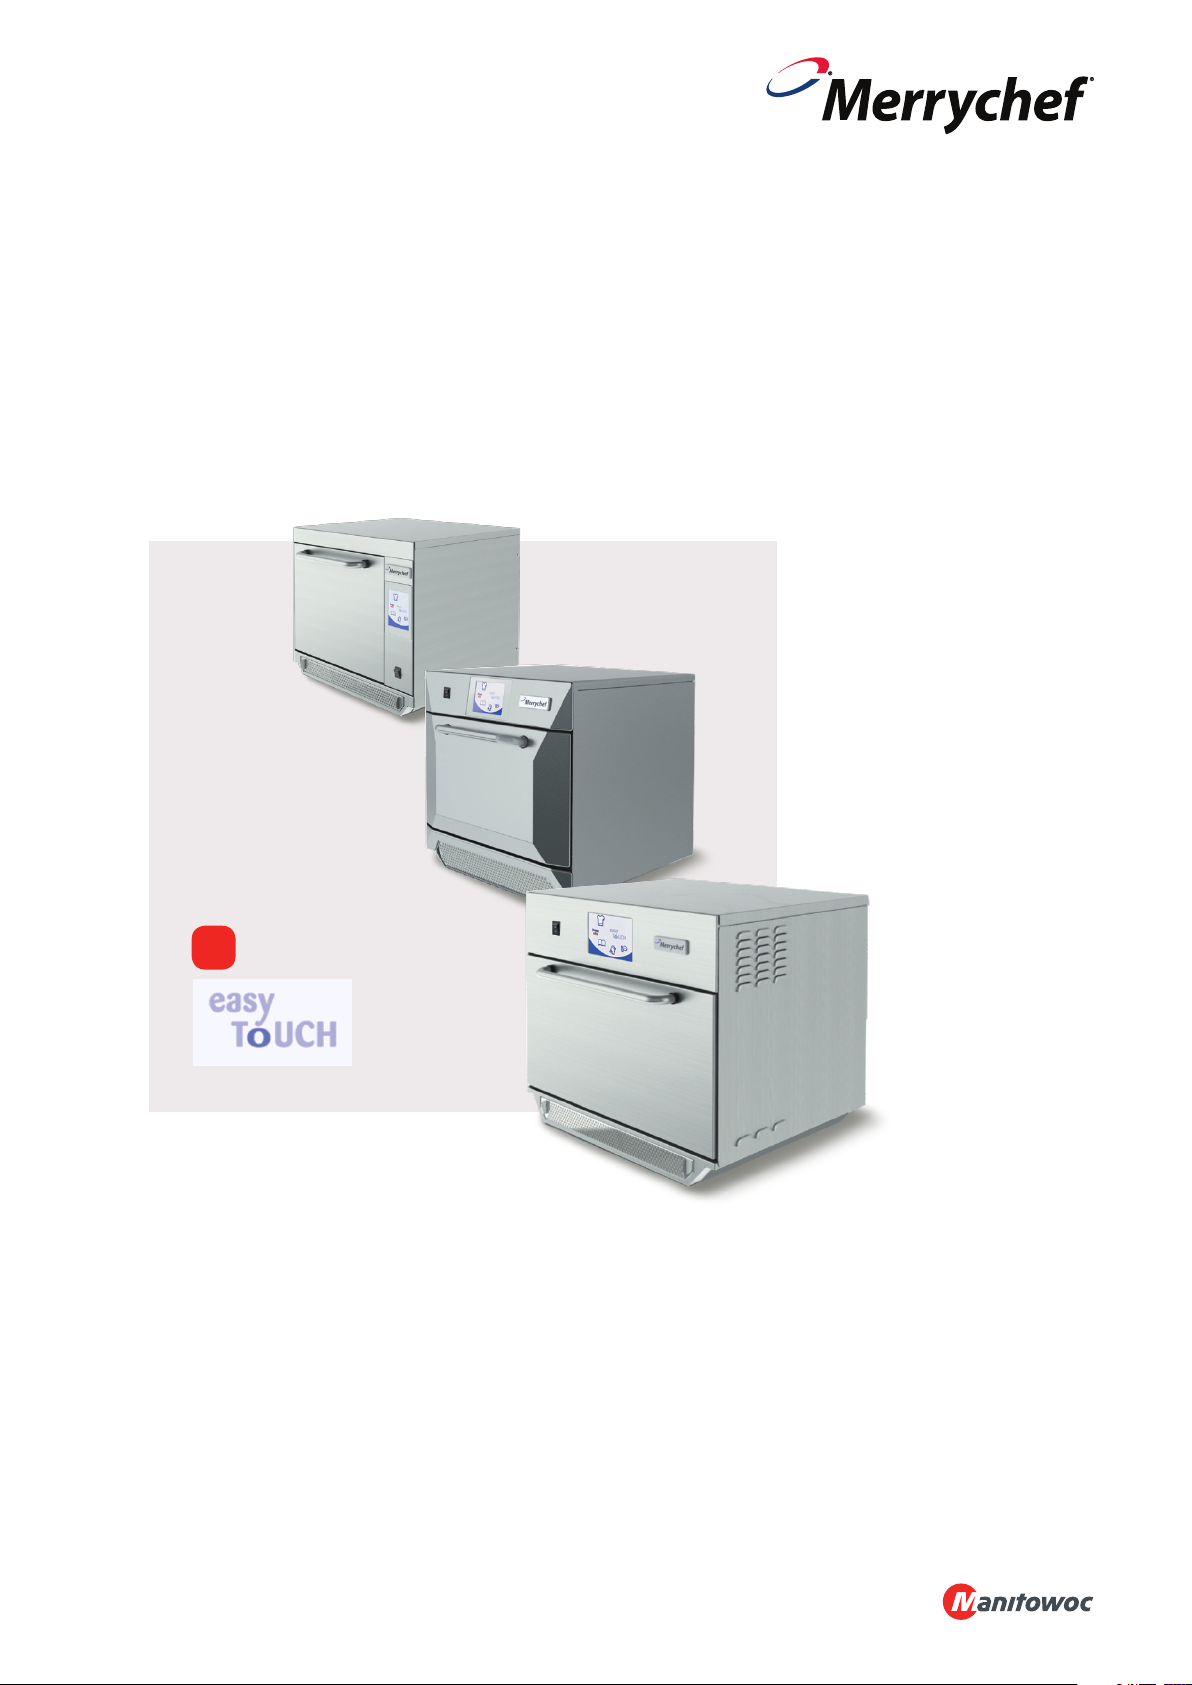
eikon
TM
eikon e3, e4 & e5
Installation and Operating
Instructions
IMPORTANT INFORMATION READ BEFORE USE
Users are cautioned that maintenance and repairs should be performed by a Merrychef authorized service agent
using genuine Merrychef replacement parts. Merrychef will have no obligation with respect to any product that
has been improperly installed, adjusted, operated or not maintained in accordance with national and local codes or
installation instructions provided with the product, or any product that has its serial number defaced, obliterated or
removed, or which has been modied or repaired using unauthorized parts or by unauthorized service agents. For
a list of authorized service agents, please refer to the back page of this booklet. The information contained herein
(including design and parts specications) may be superseded and is subject to change without notice.
Page 2
2
Installation and Operating original instructions.
Part Number 32Z3797 GB
Issue 1
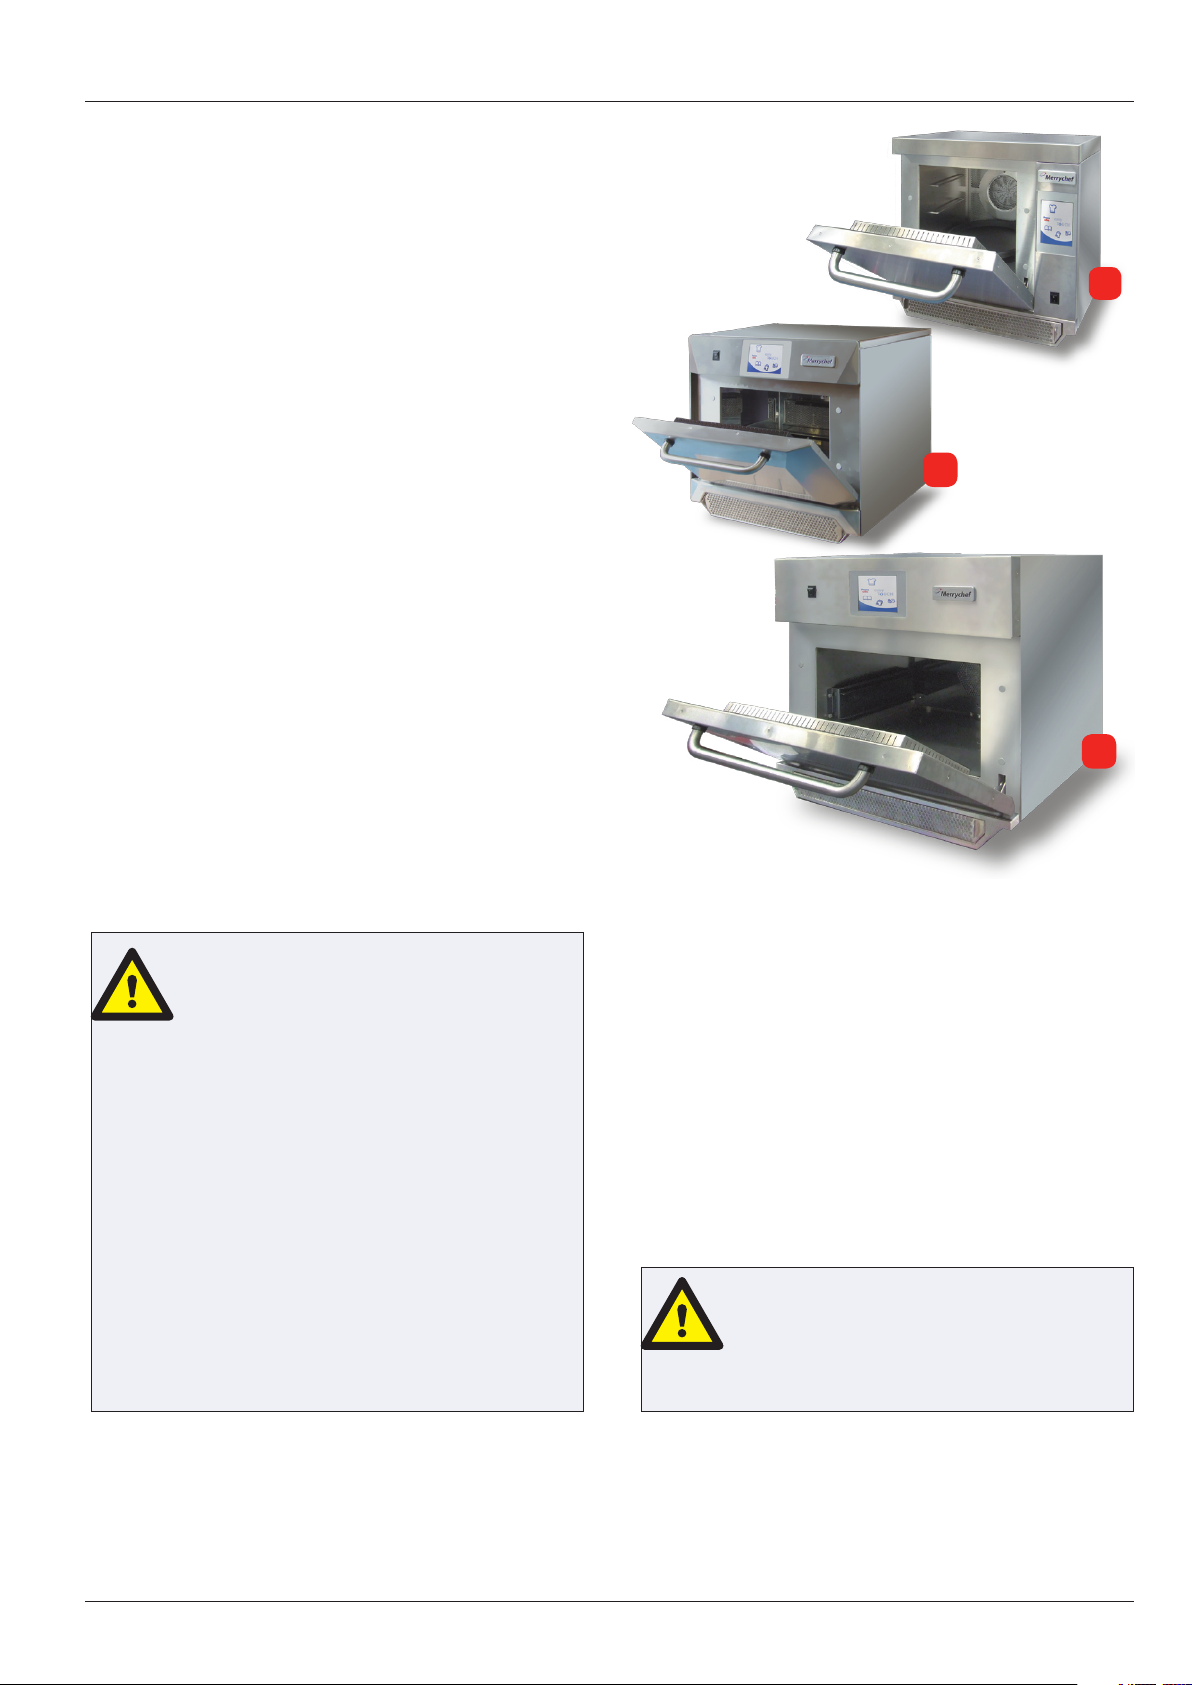
e3
e4
e5
INTRODUCTION
These ovens oer operators the exibility of combination
cooking with additional control over fan speed and
microwave power.
Combination cooking enables high quality results to be
achieved in a fraction of the time taken by conventional
cooking, particularly when baking, browning, roasting
and grilling dishes.
Once established, precise instructions for combination
or convection cooking of selected items may be
programmed into the oven’s memory so that they can be
repeated easily and accurately. Up to 1024 programs can
be stored and simply recalled.
Multistage Programming
The oven controls oer even greater exibility by
allowing multistage programming. This enables the exact
conditions required for quality results to be set according
to the food type.
A single cooking program can have up to 6 stages,
each stage controlled with its own time, fan speed and
microwave power settings, (model dependent).
PRECAUTIONS TO AVOID POSSIBLE
EXPOSURE TO EXCESSIVE MICROWAVE
ENERGY
a) Do not attempt to operate this oven with the door
open since open-door operation can result in harmful
exposure to microwave energy. It is important not to
defeat or tamper with the safety interlocks.
b) Do not place any object between the oven front
face and the door or allow soil or cleaner residue to
accumulate on sealing surfaces.
c) Do not operate the oven if it is damaged. It is
particularly important that the oven door closes properly
and that there is no damage to the (1) door (bent) (2)
hinges and latches (broken or loosened) (3) door seals
and sealing surfaces.
d) The oven should not be adjusted or repaired by
anyone except properly qualied service personnel.
The instructions outlined in this guide are intended to ensure the safety and long life of your Merrychef oven.
WARNING:
THIS IS A CLASS A PRODUCT. IN A DOMESTIC
ENVIRONMENT THIS PRODUCT MAY CAUSE
RADIO INTERFERENCE IN WHICH CASE THE
USER MAY BE REQUIRED TO TAKE ADEQUATE
MEASURES.
PLEASE READ THE FOLLOWING SAFETY INSTRUCTIONS CAREFULLY
Page 3
Installation and Operating original instructions.
Part Number 32Z3797 GB
Issue 1
3
CONTENTS
INTRODUCTION 2
SAFETY & REGULATIONS
IMPORTANT SAFETY INSTRUCTIONS 4
PRECAUTIONS TO BE OBSERVED 5
SUITABLE COOKING UTENSILS 5
PRODUCT DETAILS
MAIN FEATURES 6
TECHNICAL SPECIFICATIONS 7
INSTALLATION 9
ELECTRICAL INSTALLATION 10
ELECTRICAL INSTALLATION GUIDE 11
OPERATION & CONTROLS
QUICK START GUIDE: QUICK SERVICE OVEN 12
OPERATING GUIDE: FULL SERVICE OVEN 14
OVEN CONTROL SETTINGS 20
CLEANING & MAINTENANCE
COOLING THE OVEN DOWN BEFORE CLEANING 23
Cold oven CLEANING INSTRUCTIONS e3 24
Cold oven CLEANING INSTRUCTIONS e4 25
Cold oven CLEANING INSTRUCTIONS e5 26
FAULT FINDING
FAULT FINDING CHART 27
SERVICING 28
SAFETY & REGULATIONSPRODUCT DETAILSOPERATION & CONTROLSCLEANING & MAINTENANCEFAULT FINDING
Specications 7
Serial Number (Rating Plate): 7
Compliances: 7
OVEN LOCATION AND POSITIONING 9
Phase Loading 11
START UP 12
USING A COOKING PROGRAM 13
easyToUCH MAIN MENU & KEYBOARD SCREEN 14
DEVELOPMENT MODE: CREATING A COOK PROGRAM 15
PRESS & GO 16
USING A COOKBOOK PROGRAM 16
CHANGING THE OVEN TEMPERATURE 17
VIEWING & EDITING PROGRAMS 17
ADDING A NEW PROGRAM GROUP 18
MOVE A PROGRAM WITHIN A PROGRAM GROUP 18
ADDING A PROGRAM TO A GROUP 19
MANAGING PROGRAM GROUPS 19
Oven mode/navigation settings (A) 20
Language options (B) 20
Oven temperature settings and labels (C) 20
Recipe counters (E) 21
Date and Time settings (F) 21
Sound levels (G) 21
Oven Timer (H) 21
USB oven programs (J) 22
Restore Factory Defaults (K) 22
Temperature Band (L) 22
Change Password (M) 22
Oven cool down 23
Preparing to clean the oven 23
Page 4

4
Installation and Operating original instructions.
Part Number 32Z3797 GB
Issue 1
SAFETY & REGULATIONS
IMPORTANT SAFETY INSTRUCTIONS
When using electrical appliances basic safety precautions
should be followed, including the following:
WARNING To reduce the risk of burns, electric shock, re,
injury to persons, or exposure to excessive microwave
energy:
1. Read all instructions before using the appliance.
2. Read and follow the specic “PRECAUTIONS TO AVOID
POSSIBLE EXPOSURE TO EXCESSIVE MICROWAVE ENERGY”
found on the Introduction page.
3. This appliance must be grounded. Connect only to a
properly grounded outlet. See “ELECTRICAL INSTALLATION”.
4. Install or locate this appliance only in accordance with the
provided installation instructions.
5. Some products such as whole eggs and sealed containers
— for example, closed jars — may explode and should not
be heated in this oven.
6. Use this appliance only for its intended use as described
in the manual. Do not use corrosive chemicals or vapours
in this appliance. This type of oven is specically designed
to heat, cook or dry food. It is not designed for industrial or
laboratory use.
7. This appliance should not be used by children.
8. Do not operate this appliance if it has a damaged cord or
plug, if it is not working properly, or if it has been damaged
or dropped.
9. This appliance should be serviced only by qualied service
personnel. Contact the nearest authorized service facility for
examination, repair or adjustment.
10 Do not cover or block any openings on the appliance
including air vents/lters and steam outlet.
11 Do not store this appliance outdoors. Do not use this
product near water —– for example, near a kitchen sink, in a
wet basement, or near a swimming pool, and the like.
12. Do not immerse the cord or plug in water.
13. Keep the cord away from heated surfaces.
14. Do not let cord hang over edge of table or counter.
15. Either:
i) When cleaning surfaces of door and oven that come
together on closing the door, use only mild non-abrasive
soaps, or detergents applied with a sponge or soft cloth.
ii) When separate cleaning instructions are provided, see
door surface cleaning instructions.
16. To reduce risk of re in the cavity:
i) Do not overcook food. Carefully attend appliance if paper,
plastic or other combustible materials are placed inside the
oven to facilitate cooking.
ii) Remove wire twist-ties from paper or plastic bags before
placing bag in oven
iii) If materials inside the oven should ignite, keep oven door
closed, turn oven o, and disconnect the power cord , or shut
o power at the fuse or circuit breaker panel.
iv) Do not use the cavity for storage purposes. Do not leave
paper products, cooking utensils or food in the cavity when
not in use.
17. Liquids, such as water, coee, or tea are able to be
overheated beyond the boiling point without appearing to
be boiling. Visible bubbling or boiling when the container
is removed from the microwave oven is not always present.
THIS COULD RESULT IN VERY HOT LIQUIDS SUDDENLY
BOILING OVER WHEN THE CONTAINER IS DISTURBED OR A
UTENSIL IS INSERTED INTO THE LIQUID.
18. DO NOT operate using microwave only or combination
function without food or liquid inside the oven as this may
result in overheating and may cause damage.
19. NEVER remove the exterior of the oven.
20. NEVER remove any xed internal parts of the oven.
21. NEVER tamper with the control panel, door, seals, or any
other oven part.
22. DO NOT obstruct air vents/lters or steam outlet.
23. NEVER hang dish towels or cloths on any part of the oven.
24. If the door seals are damaged, the oven must be repaired
by an approved Service Agent.
25. If the power cable is damaged in any way it MUST be
replaced by an approved Service Agent.
26. When handling hot liquids, foods, and containers, care
should be taken to avoid scalds and burns.
27. When heating liquids using microwave only or
combination function, the contents should be stirred prior to
heating to avoid eruptive boiling.
28. Feeding bottles and baby food jars should not be heated
with this appliance.
29. Never use the oven to heat alcohol, e.g. Brandy, rum
etc. Food containing alcohol can more easily catch re if
overheated, observe caution and do not leave the oven
unattended.
30. Never attempt to deep fry in the oven.
31. The appliance is not intended for use by infants, children
or inrm persons without supervision.
32. Infants and children should be supervised to ensure that
they do not play with the appliance.
SAVE THESE INSTRUCTIONS
Page 5
Installation and Operating original instructions.
Part Number 32Z3797 GB
Issue 1
5
SAFETY & REGULATIONS
PRECAUTIONS TO BE OBSERVED
1. Read this manual before using your oven.
2. As with all electrical appliances, it is wise to have the
electrical connections inspected at least once a year.
3. The oven interior, door seals should be cleaned frequently,
following the instructions described in the cleaning section,
failure to do so could possibly result in a hazardous situation.
4. Switch o the oven at the end of all the cooking sessions
for that day.
5. The oven should not be used to dry linen.
6. As with any cooking appliance, care should be taken to
avoid combustion of the items within the oven.
7. Food in combustible plastic or paper containers should be
transferred to a microwave/oven proof containers to avoid
the possibility of ignition.
If smoke is observed:
Switch o ●
Isolate from the electrical supply ●
Keep the door closed to stie any ames ●
8. Items should be unwrapped when using convection and
combination functions.
9. Eggs in shells and whole hard-boiled eggs should not be
heated in the oven as they may explode.
10. Food with a skin, e.g. Potatoes, apples, sausages etc.
should be pierced before heating.
11. Food should not be heated in a completely sealed
container as the build-up of steam may cause it to explode.
12. Excess fat should be removed during ‘roasting’ and before
lifting heavy containers from the oven.
13. In the event of glass breaking or shattering within the
oven, ensure that food is totally free of glass particles. If in
doubt, dispose of any food that was in the oven at the time
of the breakage.
14. DO NOT attempt to operate the oven with: object caught
in door, that does not close properly or damaged door, hinge,
latch, sealing surface or without food in the oven.
SUITABLE COOKING UTENSILS
Manufacturer’s instructions should be checked to
determine the suitability of individual containers
or utensils using each of the cooking functions. The
following chart provides general guidelines:
Heat resistant containers
Toughened glass
Vitreous ceramics
Earthenware
(porcelain/crockery/china etc.)
Metallic & Foil Trays
Metallic trays
DO NOT USE ANY OTHER METAL OR FOIL CONTAINERS
Plastic containers
Dual-ovenable plastic containers
Disposables
Do not use items with metallic decoration.
Metallic trays may only be used when placed on the
VITREOUS RACK in the oven cavity
(up to certain temperatures) are now available.
Check manufacturer’s instructions before use.
DO NOT USE
Combustibles (paper/card etc.)
Other utensils
Tie tags
Cutlery
Temperature probes
No kitchen utensil should be left in food while it is
cooking in the oven.
Page 6
6
Installation and Operating original instructions.
Part Number 32Z3797 GB
Issue 1
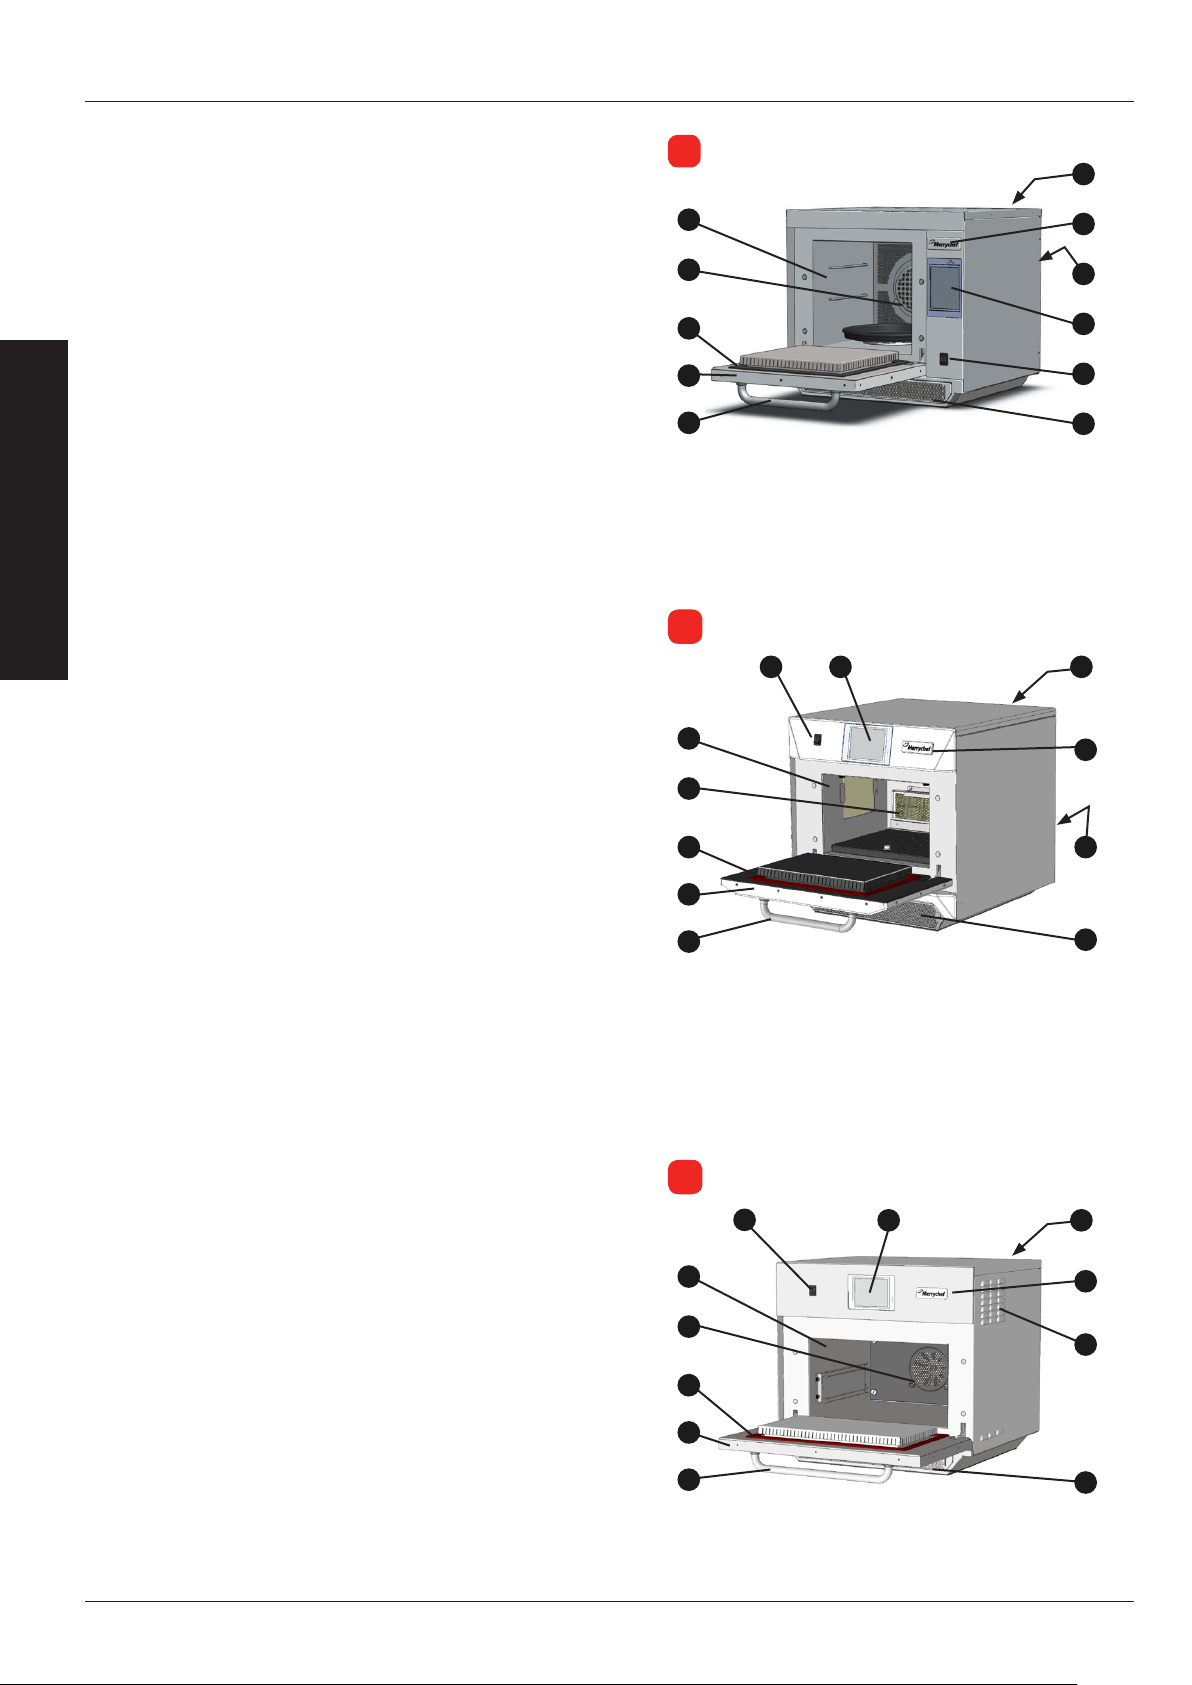
PRODUCT DETAILS
e3
e4
e5
MAIN FEATURES
ON/OFF SWITCH1
When switched ON the easyToUCH screen illuminates
the oven controls. Note; turning this switch OFF does not
isolate the oven from the electricity supply.
easyToUCH SCREEN CONTROL PANEL2
See ‘OPERATION & CONTROLS’ for details.
RATING PLATE3
Located on the rear panel of the oven states the serial
number, model type & electrical specications.
MenuConnect 4
A USB socket located under the Merrychef logo allows
changes to programs stored on the oven (See ‘USB
MenuConnect’, Operation & Controls section, for details of
updating oven programs).
AIR OUTLETS5
Air used to cool internal components and steam from
the cavity escape through the air outlet vents located
on the rear of the oven and side panel of the e5 model.
The air outlets must be kept free from obstruction and
they will not allow microwave energy to escape into the
environment.
AIR INLET FILTER6
The air lter situated at the lower front of the oven is
part of the ventilation system and must be kept free of
obstruction and cleaned daily as described under ‘Cleaning
& Maintenance’. Note, the oven will not operate without the
air lter tted.
DOOR HANDLE7
This is a rigid bar which is pulled downwards and away
from the oven to open.
OVEN DOOR8
This is a precision-made energy barrier with three
microwave safety interlocks. The door must be kept clean
(see ‘CLEANING’) and should NOT be used to support heavy
objects.
DOOR SEALS9
These ensure a tight seal around the door. They should
be kept clean and checked regularly for signs of damage.
At the rst sign of wear they should be replaced by a
Merrychef approved Service Agent.
CONVECTION FAN, GREASE FILTER & CATALYTIC 10
CONVERTOR (model dependant)
The metal grease lter grill covering the convection fan
must be kept clean and free of debris. Great care should
be taken when cleaning this area of the oven noting the
dierent oven requirements shown under ‘Cleaning &
Maintenance’ in this manual.
OVEN CAVITY11
The oven cavity is constructed from stainless steel and
must be kept clean by following the cleaning instructions
in the ‘Cleaning & Maintenance’ section of this manual.
11
10
11
10
11
10
3
4
5
9
8
7
1
9
8
7
1
9
8
2
2
2
1
6
3
4
5
6
3
4
5
7
6
Page 7
Installation and Operating original instructions.
Part Number 32Z3797 GB
Issue 1
7
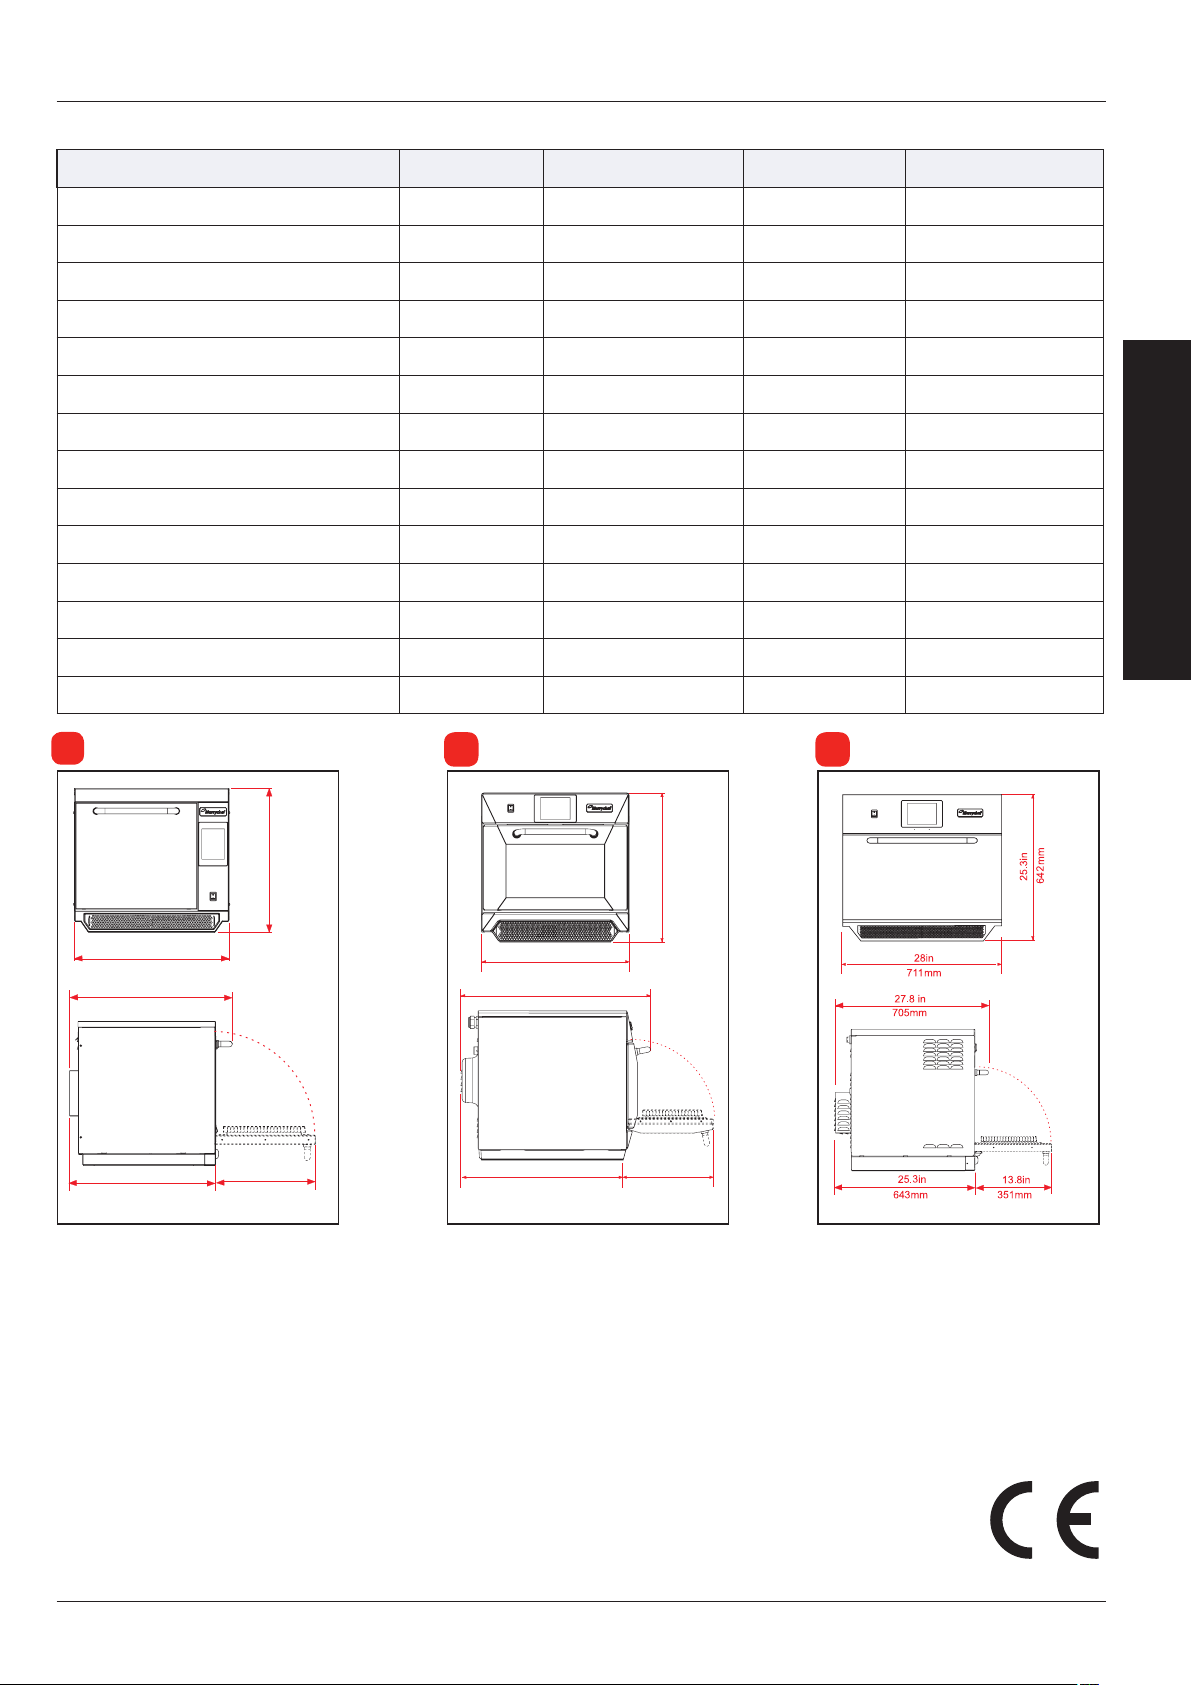
PRODUCT DETAILS
551mm
21.7in
598mm
23.5in
381mm
15.0in
558mm
22.0in
24.5in
622mm
750mm
29.5in
584mm
23.0in
591m
23.3in
643mm
25.3in
356mm
14.0in
e3
e4
e5
TECHNICAL SPECIFICATIONS
Specications
Description unit
Touch screen controls programs
Ambient operating temperature °C
External HxWxD mm
External HxWxD inches
Internal HxWxD mm
Internal HxWxD inches
Cooking chamber Ltr (cu.ins)
Power output microwave Watts
Power output convection kW
Power supply Hz
Power supply kW
Unpackaged oven weight nett Kg (lbs)
Sound pressure level dB(A)
Stacking (with kit) oven
e3
1024
<40
551x598x622
21.7x23.5x24.5
319x332x325
12.6x13.1x12.8
34.4 (2113)
700/1000
3 (3/1.5 EE)
50 & 60
3(EE) 4.3(XE) 4.7(XX)
62.5 (138)
<70
0
e4
1024
<40
591x584x750
23.3x23.0x29.5
218x375x312
8.6x14.8x12.3
25.5 (1566)
1500
3.2
50 & 60
7.0
82.5 (182)
<70
1
e5
1024
<40
642x711x705
25.3x28.0x27.8
258.4x495x363.5
10.17x19.49x14.31
44.4 (2730)
1400
3.2
50 & 60
6.2
94.0 (207)
<70
0
Serial Number (Rating Plate):
Serial number: MM YY SITE SERIAL
i.e. 06 10 2070 12345 (0610207012345)
Oven manufactured in June 2010 at Sheeld (UK),
production number 12345.
Model Number: MODEL CONVECTION MICROWAVE
VOLTAGE HERTZ LEAD PLUG COMMUNICATION VERSION
CUSTOMER/ACCESSORY COUNTRY
i.e. e4C S V 30 5 H E U 1 GM EU (e4CSV305HEU1GMEU)
model e4C, 3200W, 1500W, 230V, 50Hz, L+N+E(4mm EU),
3-pin plug, USB, 1, General Market, European.
Compliances:
EU Directives
EMC 2004/108/EC
LVD 2006/95/EC
RoHS 2002/95/EC
MD 2006/42/EC
Page 8

8
Installation and Operating original instructions.
Part Number 32Z3797 GB
Issue 1
PRODUCT DETAILS
EC Declaration of Conformity
Manufacturer
Merrychef Limited 2) 1) Viscount Catering Limited
Station Road West Provincial Park
Ash Vale Nether Lane
Aldershot Eccleseld
Hampshire Sheeld
GU12 5XA S35 9ZX
United Kingdom United Kingdom
Equipment details
Generic Model Numbers eikon e3, eikon e4, eikon e5
Description Commercial Combination Microwave Oven
Declaration of Conformity with directives and standards
The manufacturer hereby declares that its commercial combination microwave ovens listed above comply with the following
directives and standards.
Compliance with Directives
The commercial combination microwave ovens comply with the relevant provisions of the following European Directives
EMC 2004/108/CE LVD 2006/95/EC RoHS 2002/95/EC MD 2006/42/EC
Harmonised Standards Applied
The commercial combination microwave ovens comply with the relevant requirements of the following European standards.
EN 60335-2-90: 2006•
EN 60335-1: 2002+A11+A1+A12+A2+A13•
EN 62233:2008•
EN 55014-2:1997 inc A2:2008 in accordance with Category IV requirements•
Electrostatic discharge IEC 61000-4-2:1995
Radiated RF interference IEC 61000-4-3:1996
Fast transient common mode, AC port IEC 61000-4-4:1995
Mains surge, AC port IEC 61000-4-5:1995
RF current, common mode, AC port IEC 61000-4-6:1996
Mains voltage dips & interruptions IEC 61000-4-11:1994
Flicker IEC 61000-3-11:2000•
EN 55011:2007 Classication: Class A, Group 2•
Mains terminal disturbance voltage Table 2a
Radiated disturbance, magnetic eld* Table 5a
Radiated disturbance, electric eld Table 5a
Radiated disturbance, electric eld* Tables 6, 7 and 8
AS/NZS CISPR 11 •
Radiated disturbance CISPR 11:2003:A1:2004
Conducted disturbance CISPR 11:2003:A1:2004
Quality and environmental management
Merrychef Limited and Viscount Catering employ a certied quality management system in accordance with EN ISO
9001:2008 and Viscount Catering employs a certied environmental management system in accordance with EN ISO 14001
Page 9
Installation and Operating original instructions.
Part Number 32Z3797 GB
Issue 1
9
PRODUCT DETAILS
e3
e4
e5
INSTALLATION
Check for obvious signs of transit damage.
If necessary, inform the freight company IMMEDIATELY.
Remove packing material and protective lm from the
oven and safely discard.
Included inside your oven:
Model e3 Series:
Handle. Round Trays (x2) + Square Trays (x2). ●
Pack option: Round Trays (x3) + Teon Matts (x3). ●
Model e4 Series:
Self-supporting Rack ●
Vitreous Enamel Tray ●
Cool down Rack ●
Model e5 Series:
Rack. Vitreous Enamel Trays (x2). ●
OVEN LOCATION AND POSITIONING
Choose a site away from major heat sources.
DO NOT position so that hot air is drawn in from fryers,
grills, griddles, etc.
A heat barrier to the height of the oven must be installed if
sited next to a burner, stove or range.
Place the oven on a permanent nonslip/nonammable at
surface that is LEVEL, STABLE and STRONG enough for the
oven and contents.
Allow a minimum clearance (A) of 2 inches (50mm) around
the oven for hot air to escape.
Allow sucient clearance (B), in front of the oven for the
door to open fully.
The air intake is located at the lower front of the oven
(1) and it is important that the airow is as cool as
possible and not preheated by other appliances such as
burners, stoves, ranges, fryers, grills and griddles as this
will deteriorate the life and performance of the oven.
Do not ax labels/stickers to oven other than those
applied or approved by the manufacturer.
A
A
A
A
A A
A
1
B
A
1
B
1
The oven will not operate without the AIR FILTER
correctly tted in place.
HANDLING & STORAGE:
When moving an oven always observe and follow National
and local requirements for lifting and moving heavy
objects. Do not use the oven door handle to lift oven.
When not in use, electrically disconnect the oven and store
safely in a dry cool place, do not stack ovens.
A
B
Page 10

10
Installation and Operating original instructions.
Part Number 32Z3797 GB
Issue 1
PRODUCT DETAILS
ELECTRICAL INSTALLATION
DANGER!
THIS APPLIANCE MUST BE EARTHED. FAILURE
TO DO SO MAY RESULT IN ELECTRIC SHOCK
AND DEATH.
The oven must be connected to a separate electrical
supply installed by a qualied and approved
electrician.
A suitably rated isolating switch with a 3mm contact
gap on all poles should be tted for each oven
installed.
Establishments with standard (Type ‘B’) circuit breakers are
sensitive to ‘surges’ which occur on switching on freezers,
refrigerators and other catering equipment, including
microwave ovens. Because of this, we strongly recommend
that a separate Type ‘C’ circuit breaker (designed specically
for this type of equipment) must be tted. An individual,
suitably rated circuit breaker should be tted for each oven
installed.
This equipment complies with EN61000-3-11, however,
when connecting sensitive equipment to the same supply
as the oven, the user should determine in consultation with
the supply authority, if necessary, that a low impedance
supply is used.
1
SINGLE PHASE
SINGLE PHASE (1)
UK models are tted with a Blue 32Amp Plug to IEC 60309
(EN 60309)
The Circuit Breaker should be rated at 40A (Type C).
TWIN PHASE (2)
Twin Phase models should be connected as shown.
The Circuit Breaker should be rated at 20A/Phase (Type C).
WARNING: HIGH LEAKAGE CURRENT EARTH
CONNECTION IS ESSENTIAL.
EQUIPOTENTIAL
An Equipotential Earth point is provided on
the rear panel of the oven for independent
Earth (GND) connection.
POWER SUPPLY: EARTH LEAKAGE CIRCUIT
BREAKERS
If the oven is connected to an Earth Leakage Circuit Breaker
device, this should allow a minimum of 30 milliamperes
earth current without interrupting the circuit.
BLUE (NEUTRAL)
2
TWIN PHASE
GREEN & YELLOW
(EARTH)
BLUE (NEUTRAL)
GREEN & YELLOW
(EARTH)
BROWN (LIVE)
BROWN TO LIVE No.1
BLACK TO LIVE No.2
If you are in any doubt about your electrical supply,
seek the advice of a qualied electrician.
Page 11

Installation and Operating original instructions.
Part Number 32Z3797 GB
Issue 1
11
PRODUCT DETAILS
ELECTRICAL INSTALLATION GUIDE
DANGER!
THIS APPLIANCE MUST BE EARTHED.
FAILURE TO DO SO MAY RESULT IN
ELECTRIC SHOCK AND DEATH.
The oven must be connected to a separate
electrical supply installed by a qualied and
approved electrician.
A suitably rated isolating switch with a 3mm
contact gap on all poles should be tted for each
oven installed.
OTHER
EQUIPMENT
ELECTRICAL
SUPPLY
230V
WARNING
HIGH LEAKAGE CURRENT.
EQUIPOTENTIAL
An Equipotential Earth point is provided on
the rear panel of the oven for independent
Earth (GND) connection.
TWIN PHASE OVEN
LOADING
Brown
16 Amps
Blue
400V
SINGLE PHASE OVEN
LOADING
Brown
32 Amps
Blue
230V
Grey
Earth connection is essential.
Phase Loading Diagram
Phase Loading
Oven loading per phase is not equal therefore we
recommend that other electrical equipment is
connected to L3+ N.
Circuit Breakers
TWIN PHASE
Circuit Breakers should be rated at 20A per Phase
and be Time Delay, Motor Start Type (European Type C).
SINGLE PHASE
Circuit Breakers should be rated at 40A per Phase
and be Time Delay, Motor Start Type (European Type C).
Earth Leakage Circuit:
If the oven is connected to an Earth Leakage Circuit
Breaker device, this should allow a minimum of 30
milliamps earth current without interrupting the circuit.
If you are in any doubt about your electrical supply,
seek the advice of a qualied electrician.
230V
16 Amps
Black
Yellow/GreenEarth
RED
Rear view of plug
Plug Type:
Three Phase
32Amp
IEC 60309
[EN60309]
L1+ L2+ N+ E
[L3 is not used]
20 Amp
BLUE
Rear view of plug
Plug Type:
Single Phase
32Amp
IEC 60309
[EN60309]
L1+N+E
40 Amp
Page 12

12
Installation and Operating original instructions.
Part Number 32Z3797 GB
Issue 1
OPERATION & CONTROLS
QUICK START GUIDE: QUICK SERVICE OVEN
The easyToUCH screen display, layout and icons
shown herein, are for guidance purposes only and are
not intended to be an exact representation of those
supplied with the oven.
START UP
1. Switch the oven on;
Make all the relevant safety checks and ensure the
oven is clean and empty before pressing the oven
switch down to activate the oven.
2. The easyToUCH screen illuminates with the
display briey showing the serial number and oven
data. Lightly tap the screen once to freeze the
display, tap again to continue.
3. When the oven is setup with two or more
preheating temperatures a choice is displayed.
Scroll arrows at the bottom of the screen indicates
there are more temperature choices not shown
on screen, if necessary, use the scroll arrows, then
select the temperature required to start preheating
the oven.
4. During preheating the display shows the
progress as the oven heats up to the set
temperature. (To stop the oven heating touch the
red ‘X’ symbol.)
5. The oven is ready to use when the ‘COOKBOOK’ is
displayed.
1
2
3
4
5
STOP/CANCEL
COOKBOOK DISPLAY
DISPLAYS ALL COOKING PROGRAMS (Optional)
SHOWS PROGRAM GROUPS
FAVOURITES (Optional)
PROGRAM GROUP
Each group contains a
collection of cooking
programs.
CHANGE OVEN TEMPERATURE (Optional)
Page 13

Installation and Operating original instructions.
Part Number 32Z3797 GB
Issue 1
13
OPERATION & CONTROLS
USING A COOKING PROGRAM
Taking all the necessary
precautions to ensure you do not
burn yourself, open the oven door
to place the food into the hot oven
and close the door.
1. Select a program group, for example, ‘BURGERS’
to display the individual cooking programs.
2. Select a cook program to start, for example, 2
BURGERS.
3. Follow instructions if displayed on the screen.
4. Touch the green tick to cook.
The cooking time counts down for each program
stage.
5. When the program ends a red bar is displayed
usually with an audible sound - open the door or
touch the red ‘X’ to return to the cook program.
Note; opening the oven door during cooking stops
the cooking program and displays a warning. Closing
the door allows the user to continue or cancel the
cooking program.
1
4
2
5
3
PROGRAM STAGE
AIR FILTER
IMPORTANT:
Clean the AIR FILTER (6) in the base of the
oven every day and ensure that the air lter
is in place prior to operating the oven. See
‘CLEANING & MAINTENANCE’.
6
Page 14

14
Installation and Operating original instructions.
Part Number 32Z3797 GB
Issue 1
OPERATION & CONTROLS
OPERATING GUIDE: FULL SERVICE OVEN
easyToUCH MAIN MENU & KEYBOARD SCREEN
MAIN MENU SCREEN:
1. DEVELOPMENT MODE enables multistage
cooking programs to be developed, then stored
under a name and symbol for reuse.
2. PRESS & GO allows quick access to use the
cooking programs that are already stored.
3. COOKBOOK contains the oven’s cooking
programs. It displays Favourites, Cooking Program
Groups and a complete listing of all cooking
programs available.
4. CLEANING/TEMP CHANGE allows the oven
temperature to be changed and the oven to be
prepared for cleaning with reminders displayed to
assist during the cleaning process.
5. SETTINGS are used to control the oven settings
and functions including time and language,
loading cooking programs and for service and
maintenance purposes.
6. KEYBOARD SCREEN is used to enter an
authorised password to enter data for programs
and may restrict operator access to some
functions.
DEVELOPMENT
1
MODE
2
MENU
SHORTCUT
3
COOKBOOK
4
CLEANING/
TEMP CHANGE
5
SETTINGS
For Program Names, Program Group
Names and Passwords use 1-20 characters
in 2 lines max.
For Stage instructions use 1-54 characters
in 5 lines max.
KEYBOARD
SCROLL
ENTER / OK
PREVIOUS
SCREEN
6
SCREEN
CLEAR SCREEN
KEYBOARD
SPACEBAR
Backspace
RETURN
Page 15

Installation and Operating original instructions.
Part Number 32Z3797 GB
Issue 1
15
OPERATION & CONTROLS
DEVELOPMENT MODE: CREATING A COOK PROGRAM
1. Select the ‘chef’s hat’ symbol from the main
menu to enter development mode.
Enter stage 1 of the program
2. The temperature displays the set preheated oven
temperature.
To increase or decrease the temperature required,
select the temperature symbol (2), enter the
temperature in the keypad within the limits
displayed and select OK.
3. Select and set the cooking time up to a
maximum of 10 minutes.
For example : Enter 110 (1minute and 10 seconds).
4. Select and set the Microwave Power [0, 5-100%]
5. Select and set a Fan speed (if available) within
the limits shown.
6. Select the information icon to enter an
instruction (Optional). The instruction appears in
the display at the beginning of that stage.
For example : ‘Stage 1 place product in the oven’.
Enter stage 2 of the program (Optional).
7. Programs can have up to a maximum of 6 stages.
Repeat the steps 2-6 from stage 1 above.
1
Example below; setting the cooking time (step 3):
To Set the cooking Time
select the Time symbol.
2
3
4
5
6
7
Enter the cooking time
on the pad.
Select OK to accept the
time.
CLEAR
Running and saving the program
1. Select OK to conrm the Program.
2. Run the program (optional).
WARNING: ENSURE PRODUCT IS
IN THE OVEN AND ALL SAFETY
PRECAUTIONS ARE FOLLOWED
BEFORE RUNNING THE PROGRAM.
If the results are not satisfactory, select the
backspace, change the cooking settings and retest.
3. Select the save Cookbook symbol to record the
program to the cookbook.
4. Select an image to represent the program.
(Use the scroll arrows for more pictures.)
5. Enter the name for the cooking program, using
a maximum of 20 characters, for example, ‘1
BURGER’, then select OK to save the program to the
Cookbook.
6. A symbol with a green tick on a book is
displayed to indicate that the program has been
successfully saved to the Cookbook.
STAGE 1
DISPLAYED
ADD STAGE
DELETE STAGE
1
4
2
5
3
6
STAGE 2
DISPLAYED
BACK TO
STAGE 1
Page 16

16
Installation and Operating original instructions.
Part Number 32Z3797 GB
Issue 1
OPERATION & CONTROLS
PRESS & GO
Running a cooking program from the Press &
Go menu.
1. Select ‘PRESS & GO’ from the main menu screen.
2. Select the item required to cook.
3. The display shows the temperature, cooking
time, microwave power and fan speed while the
timer counts down. The timer bar turns red to
indicate the cooking cycle has nished.
1
2
3
Choosing which cooking programs are shown in
the ‘PRESS & GO’ menu screen.
1. After selecting ‘PRESS & GO’ from the main menu
screen, select the EDIT symbol.
2. Two lists are displayed, the ‘PRESS & GO’ menu
items are shown in the upper list and the lower list
shows other menu items which are available. Both
lists can be scrolled up or down using the arrows
on the extreme right.
3. Select an item, then choose whether to change
its order within the menu or to remove it into the
lower list.
4. Select an item to move into the upper list,
making it available in the ‘PRESS & GO’ menu.
5. Select backspace to return to the menu screen
when nished.
USING A COOKBOOK PROGRAM
1
Change the
order of a
selected item
shown in the
Press & Go
screen.
Move a
selected item
to or from the
Press & Go
screen.
Select to scroll
a list up or
down.
2
3
4
5
To nd the required Program in the cookbook.
WARNING: ENSURE THERE IS FOOD
PRODUCT IN THE OVEN BEFORE
STARTING A COOKING PROGRAM.
1. Select ‘COOKBOOK’ from the main menu screen.
2. Select the ALL MENUS symbol.
3. Use scroll up/down arrows to nd the program.
NOTE: if an image has a red line around it the oven
temperature is set too high or too low for that
recipe. See ‘CHANGING THE OVEN TEMPERATURE’.
Taking all the necessary precautions to ensure you
do not burn yourself, place the food product into
the hot oven cavity and close the door.
WARNING:
HOT SURFACE HAZARD
1 2 3
Page 17

Installation and Operating original instructions.
Part Number 32Z3797 GB
Issue 1
17
OPERATION & CONTROLS
4. Select the required cooking program to start
cooking.
For example, ‘1 BURGER’.
5. The program either starts immediately
displaying a countdown timer, or an instruction is
displayed rst; follow the stage instruction then
select OK to start cooking. If the oven door is not
opened within 30 seconds a warning message
appears.
6. The cooking timer counts down to zero and
makes a sound to indicate an operator action is
required at the end of a cooking stage or the end
of a cooking program.
Once the cooking program has nished, opening
the oven door to remove the food returns the
display to the ‘COOKBOOK’ screen.
Note; opening the oven door during cooking stops
the cooking program and displays a warning. Closing
the door allows the user to continue or cancel the
cooking program.
To check the oven temperature when cooking, lightly
tap the temperature displayed, the oven cavity
temperature is shown with an asterisk.
5 64
CHANGING THE OVEN TEMPERATURE
1. Take note of the temperature required for the
recipe and select OK.
2. Select the temperature symbol.
3. An asterisk next to the number indicates the
present oven temperature, select the required
oven temperature for the recipe. Once the oven
is at the required temperature continue from
selecting the ‘COOKBOOK’ in step 1.
VIEWING & EDITING PROGRAMS
1. Select ‘COOKBOOK’ from the main menu screen.
2. Select the ALL MENUS symbol.
3. Select ‘EDIT COOKBOOK’.
4. Use the up/down scroll arrows on the right
side of the screen to nd the cooking program,
for example 1 BURGER and select the view/edit
cooking program symbol.
5. View or adjust the program as required, see
Development mode for details.
1 2 3
1 2 3
4 5
Page 18

18
Installation and Operating original instructions.
Part Number 32Z3797 GB
Issue 1
OPERATION & CONTROLS
ADDING A NEW PROGRAM GROUP
To add a new Program Group.
1. Select ‘COOKBOOK’ from the main menu screen.
2. Select ‘EDIT COOKBOOK’.
3. Select the ‘ADD A NEW GROUP’ symbol.
4. Enter a name for the new Program Group (max.
20 characters).
5. Select an image to represent the Group.
(Use the scroll arrows for more pictures.)
6. Select OK to save the Program Group to the
Cookbook.
Select backspace to return to the ‘COOKBOOK’.
1
4
2
5
3
6
MOVE A PROGRAM WITHIN A PROGRAM GROUP
Example moving the position of the ‘4 BURGERS’
cooking program within the program group called
‘BURGERS’.
1. Select ‘COOKBOOK’ from the main menu screen.
2. Select the ‘BURGERS’ program group.
3. Select ‘EDIT COOKBOOK’.
4. Use the up/down scroll arrows on the right side
of the upper part of the edit screen to view the
cooking programs in the group.
Then select the cooking program to be moved (‘4
BURGERS’) and use the up/down arrows on the
left side of the upper screen to move the selected
program within the program group.
Select backspace to return to the ‘COOKBOOK’
screen.
1 2 3
Program Group
Move the
selected
program within
the Program
Group
4
Scroll to show
programs in
the current
Program
Group
Page 19

Installation and Operating original instructions.
Part Number 32Z3797 GB
Issue 1
19
OPERATION & CONTROLS
ADDING A PROGRAM TO A GROUP
To add a cooking program to an existing
PROGRAM GROUP.
Example add Program ‘4 BURGERS’ to the program
group ‘BURGERS’.
1. Select ‘COOKBOOK’ from the main menu screen.
2. Select the ‘BURGERS’ Program Group.
3. Select ‘EDIT COOKBOOK’.
4. In the lower part of the screen use the up/down
scroll arrows on the right side to nd and select the
‘4 BURGERS’ cooking program.
5. Select the green UP arrow to add the ‘4 BURGERS’
cooking program to the Program Group in the
upper part of the screen, then select backspace to
return to the cooking programs.
6. Select backspace again to return to the
‘COOKBOOK’.
1
4
2
5
3
6
MANAGING PROGRAM GROUPS
To move a program position in a Program
Group
1. Select ‘COOKBOOK’ from the main menu screen.
2. Select ‘EDIT COOKBOOK’.
3. Use the scroll arrows, up and down on the right
side of the screen to locate all the Program Groups.
4. Select the Program Group to be moved and use
the up and down arrows, on the left side of the
screen to move the selected program.
5. Select backspace to go back to the ‘COOKBOOK’.
To change the Program Group name.
Select the Program Group.
Select EDIT PROGRAM GROUP.
Enter the new name and select OK.
To delete a Program Group
Select the Program Group.
Select the DELETE Program Group symbol.
Select OK to Delete the Group.
1
Move the
selected
Program
Group
Edit the
selected
Program
Group name
2
Scroll to show
34
5
Program
Groups
Delete the
selected
Program Group
Page 20

20
Installation and Operating original instructions.
Part Number 32Z3797 GB
Issue 1
OPERATION & CONTROLS
OVEN CONTROL SETTINGS
1. Select the ‘settings’ symbol from the main menu
screen.
2. Enter the password and select OK to display the
Settings menu (3) comprising:
A. Oven mode/navigation settings.
B. Language options.
C. Oven temperature settings and labels.
D. Service information and error logs (password
required).
E. Recipe counters.
F. Date & time settings.
G. Speaker sound levels.
H. Oven Timer (Temperature/ON/OFF).
J. USB program connection.
K. Restore settings to Factory defaults.
L. Temperature Band.
M. Change Settings/Service access passwords.
When nished with a setting, select backspace to
return to the main settings menu.
To exit the settings menu, select backspace,
a prompt will be displayed to either ‘SAVE’ or
‘DISCARD’ any changed settings (4).
1 2
3 4
A B
D
G
A
C
E
F
J
H
K
M
L
Oven mode/navigation settings (A)
Select the oven mode/navigation symbol (A) from
the ‘Settings’ menu.
Select ‘Quick Serve Mode’ for cooking only, or ‘Full
Serve Mode’ for cooking & development programs.
Select ‘Enable Settings’ to display an ‘unlock’
symbol on the Quick Serve Cookbook screen to
allow access to the ‘Settings’ menu.
Language options (B)
Select the globe symbol (B).
Select the checkbox of the required language from
the list shown.
Oven temperature settings and labels (C)
To change the oven preheat temperature, select
the temperature symbol (C) to display the keypad,
enter the required temperature and select OK.
Note, the temperature options screen is
only displayed at start up when two or more
temperatures are set above minimum.
To change a temperature label, select the label
to display the keyboard, enter the required label
name and select OK.
B
C
D
For Service information & error logs (D) refer
to Servicing.
Page 21

Installation and Operating original instructions.
Part Number 32Z3797 GB
Issue 1
21
OPERATION & CONTROLS
Recipe counters (E)
Select the clipboard symbol to display a listing of
recipe counters.
If shown, use the arrows (bottom right) to scroll up
and down the list.
Date and Time settings (F)
Select the time/date symbol to display the setting
options.
CHANGE THE DATE: Select ‘MONTH’, enter the
correct Month on the keypad and select OK.
Select ‘DAY’, enter the correct Day on the keypad
and select OK.
Select ‘YEAR’, enter the correct last two digits of the
Year on the keypad and select OK.
To display the Month rst, followed by the Day and
Year, select the ‘MM-DD-YY’ checkbox. Note; the
Error Logs are recorded using these settings.
CHANGE THE TIME: Select ‘HOUR’, enter the correct
Hour on the keypad and select OK.
Select ‘MIN’, enter the correct Minutes on the
keypad and select OK.
Select the ‘AM’ or ‘PM’ checkbox for a 12 Hour clock
or select ‘24’ for a 24 Hour clock.
Select the day name shown to cycle through to
display the correct weekday.
E
F
G
Sound levels (G)
Select the speaker symbol to display the volume
levels.
Select a sound level suitable for the environment
from none (OFF) to the loudest (100%).
Oven Timer (H)
Select the thermometer/timer symbol.
Select the ‘Timer Enabled’ checkbox (green tick).
Select a weekday using the up/down arrows.
Select an empty ‘Time’ box (maximum of 5 per day)
or clear the box using the wipe symbol.
Enter the start time on the keypad and select OK.
Select an empty ‘Temperature’ box opposite the
Time box displaying the time just entered, or clear
the box using the wipe symbol next to it.
Enter the cavity temperature required on the
keypad and select OK. Note; you can also select
zero to turn the heat o. Selecting the red circle
symbol will switch the oven OFF.
H
Page 22

22
Installation and Operating original instructions.
Part Number 32Z3797 GB
Issue 1
USB oven programs (J)
IMPORTANT: Downloading from a USB will clear
all the existing programs.
Check that the key has the correct number/code
for the programs you want to load into the oven
memory.
Select USB from the settings screen.
Slide the USB cover (logo on the oven front)
upwards to insert the USB into the slot.
When the inserted USB stick has nished ashing,
select the required USB symbol, for example;
RECIPES.
Select the new le using the scroll arrows if
required to locate the le. Note; a tinted band over
a le name indicates the le is not available to use.
Double check the le is correct before selecting
OK, if not, select ‘X’ and locate the correct le.
Progress of the le update is displayed. Once
completed the oven restarts and commences
heating up to the PREHEAT temperature ready to
cook.
Remove the USB and keep in a safe place.
Reposition the USB cover.
OPERATION & CONTROLS
Restore Factory Defaults (K)
Select the factory symbol to replace the existing
oven settings with the original factory default
settings. Note; this action cannot be undone.
Select OK, or select the red cross to cancel and
keep the existing settings.
J
K
L
Temperature Band (L)
Select the ‘Temp Band’ symbol at which the oven
controls i.e. ±10°C.
Select the required temperature band checkbox,
shown by a green tick. Note; although the lowest
practical Temp Band should be used, if the set oven
temperature falls by more than the selected Temp
Band, the ready to cook mode and Temp Band are
deactivated until the oven reaches the preheat
temperature.
Change Password (M)
Select the key symbol to change the oven
passwords.
Select the oven Settings or Service symbol.
Enter the existing password and select OK to
conrm.
Enter the new password, select OK.
Conrm new password, select OK.
M
Page 23

Installation and Operating original instructions.
Part Number 32Z3797 GB
Issue 1
23
COOLING THE OVEN DOWN BEFORE CLEANING
Oven cool down
IMPORTANT: the oven must be cooled down
before the cleaning processes are carried out.
1. In Full Serve mode, select the CLEANING symbol
from the main menu.
2. In Full or Quick Serve mode, select the blue
thermometer symbol to disable heating and start
the cooling cycle.
3. Taking all necessary precautions place a suitable
heaped container of ice, into the hot oven cavity.
Select the OK symbol to continue.
4. The cooling progress is displayed and takes
approximately 30 minutes.
5. The oven is now ready for cleaning. Select OK on
the screen after completing each stage.
1
3
2
4
Preparing to clean the oven
For the oven to operate at peak eciency, the
cavity, door, air lter and grease lter must be kept
clean.
A daily cleaning routine will ensure that you
comply with the required hygiene standards and
will help to maintain and prolong the eciency of
your oven.
Equipment required (not supplied):
Non-caustic proprietary branded oven cleaner,
heat proof gloves, protective rubber gloves,
non–abrasive nylon scrub pad, cleaning towel and
cloths, eye protection and dust mask (optional).
CAUTION: WEAR PROTECTIVE RUBBER GLOVES
WHEN CLEANING THE OVEN.
NEVER use sharp implements or harsh abrasives
on any part of the oven.
5
CLEANING & MAINTENANCE
WARNING: DO NOT USE CAUSTIC
CLEANERS ON ANY PART OF THE
OVEN OR OVEN CAVITY AS IT WILL
CAUSE PERMANENT DAMAGE TO
THE CATALYTIC CONVERTORS
Page 24

24
Installation and Operating original instructions.
Part Number 32Z3797 GB
Issue 1
CLEANING & MAINTENANCE
e3
Cold oven CLEANING INSTRUCTIONS e3
Complete COOL DOWN procedure and allow the oven and
accessories to cool before commencing cleaning.
DO NOT USE TOOLS
REMOVE & CLEAN Oven Parts:
1. Remove the air lter at the base of the oven.
2. Open the oven door and lift out the turntable.
3. For ovens with a catalytic converter; open the oven door
and undo fasteners to remove the catalytic convertor when
required or at least once a month.
Wash all parts in warm soapy water. Wash o using a clean
cloth and plenty of clean, warm water.
Dry using a fresh, clean cloth.
1
2 3
CLEAN THE OVEN:
1. Remove any spillages with disposable paper wipes.
Use a dry clean brush to remove any food particles from
between the oven oor and the inside of the front door.
2. Wear protective rubber gloves and protective glasses,
carefully spray a non-caustic proprietary branded Oven
Cleaner onto all the internal surfaces of the oven except
the door seal (A).
DO NOT spray directly into the fan opening at the rear
inside of the oven.
3. For dicult areas, leave to soak for 10 minutes with the
oven door open.
Use a non–abrasive nylon scrub pad/sponge to clean the
cavity, roof and the inside of the door. Do not scrub the
door seal or use metallic scourers.
4. Wash o using a clean cloth and plenty of clean warm
water and dry using a fresh clean cloth or paper towel.
Replace all the cleaned oven parts.
Close the oven door and wipe the outside of the oven with
a damp cloth.
DO NOT USE THE OVEN WITHOUT A CLEAN AIR
FILTER IN PLACE
1
2
3
A
4
1
APPLY OVEN PROTECTOR:
1. Only apply to a clean oven. Spray proprietary branded
Oven Protector onto a sponge.
2. Spread Oven Protector lightly onto all internal surfaces
of the oven.
3. Spread Oven Protector lightly onto the internal surface
of the oven door avoiding the door seal.
Switch on the oven and preheat. When the oven has
reached operating temperature it will take about 30mins to
cure the Oven Protector.
Note: Oven protector turns light brown when cured.
2
3
Page 25

Installation and Operating original instructions.
Part Number 32Z3797 GB
Issue 1
25
CLEANING & MAINTENANCE
e4
Cold oven CLEANING INSTRUCTIONS e4
Complete COOL DOWN procedure and allow the oven and
accessories to cool before commencing cleaning.
DO NOT USE TOOLS
REMOVE & CLEAN Oven Parts:
1. Remove the air lter at the base of the oven.
2. Open the oven door, remove the rack, pull the grease
lter handle downwards and lift out.
3. Undo the fasteners securing the top impinger plate.
4. Remove top impinger plate and lift out bottom impinger
plate.
Wash all parts in warm soapy water. Wash o using a clean
cloth and plenty of clean, warm water.
Dry using a fresh, clean cloth.
1 2
3
4
CLEAN THE OVEN:
1. Remove any spillages with disposable paper wipes.
Use a dry clean brush to remove any food particles from
between the oven oor and the inside of the front door.
2. Wear protective rubber gloves and protective glasses,
carefully spray a non-caustic proprietary branded Oven
Cleaner onto all the internal surfaces of the oven except
the door seal (A).
DO NOT spray directly into the fan opening at the rear
inside of the oven.
3. For dicult areas, leave to soak for 10 minutes with the
oven door open.
Use a non–abrasive nylon scrub pad/sponge to clean the
cavity, roof and the inside of the door. Do not scrub the
door seal or use metallic scourers.
4. Wash o using a clean cloth and plenty of clean warm
water and dry using a fresh clean cloth or paper towel.
Replace all the cleaned oven parts.
Close the oven door and wipe the outside of the oven with
a damp cloth.
DO NOT USE THE OVEN WITHOUT A CLEAN AIR
FILTER IN PLACE
1
2
3
A
4
1
APPLY OVEN PROTECTOR:
1. Only apply to a clean oven. Spray proprietary branded
Oven Protector onto a sponge.
2. Spread Oven Protector lightly onto all internal surfaces
of the oven.
3. Spread Oven Protector lightly onto the internal surface
of the oven door avoiding the door seal.
Switch on the oven and preheat. When the oven has
reached operating temperature it will take about 30mins to
cure the Oven Protector.
Note: Oven protector turns light brown when cured.
2
3
Page 26

26
Installation and Operating original instructions.
Part Number 32Z3797 GB
Issue 1
e5
Cold oven CLEANING INSTRUCTIONS e5
Complete COOL DOWN procedure and allow the oven and
accessories to cool before commencing cleaning.
DO NOT USE TOOLS
REMOVE & CLEAN Oven Parts:
1. Remove the air lter at the base of the oven.
2. Open the oven door to remove any cooking trays/rack.
Wash all parts in warm soapy water. Wash o using a clean
cloth and plenty of clean, warm water.
Dry using a fresh, clean cloth.
CLEAN THE OVEN:
1. Remove any spillages with disposable paper wipes.
Use a dry clean brush to remove any food particles from
between the oven oor and the inside of the front door.
2. Wear protective rubber gloves and protective glasses,
carefully spray a non-caustic proprietary branded Oven
Cleaner onto all the internal surfaces of the oven except
the door seal (A).
DO NOT spray directly into the fan opening at the rear
inside of the oven.
3. For dicult areas, leave to soak for 10 minutes with the
oven door open.
Use a non–abrasive nylon scrub pad/sponge to clean the
cavity, roof and the inside of the door. Do not scrub the
door seal or use metallic scourers.
4. Wash o using a clean cloth and plenty of clean warm
water and dry using a fresh clean cloth or paper towel.
Replace all the cleaned oven parts.
CLEANING & MAINTENANCE
Close the oven door and wipe the outside of the oven with
a damp cloth.
DO NOT USE THE OVEN WITHOUT A CLEAN AIR
FILTER IN PLACE
1 2
1
2
3
A
4
1
APPLY OVEN PROTECTOR:
1. Only apply to a clean oven. Spray proprietary branded
Oven Protector onto a sponge.
2. Spread Oven Protector lightly onto all internal surfaces
of the oven.
3. Spread Oven Protector lightly onto the internal surface
of the oven door avoiding the door seal.
Switch on the oven and preheat. When the oven has
reached operating temperature it will take about 30mins to
cure the Oven Protector.
Note: Oven protector turns light brown when cured.
2
3
Page 27

Installation and Operating original instructions.
Part Number 32Z3797 GB
Issue 1
27
FAULT FINDING CHART
Although every eort is made to ensure your oven will
continue to perform to a high standard, please check the
chart to see if the problem can be easily resolved before
contacting your service agent.
PROBLEM POSSIBLE CAUSE REMEDY
Check if there is a power cut.
The oven does not work and the
display screen is blank
The oven has no power
Some screen controls do not work Unauthorised access Contact the authorised user.
Check the isolator switch is ON or the
oven is plugged in correctly.
Check the oven switch is ON.
Display warning message that the door
is open
Display warning message that the air
lter is removed
Oven door not closed
Air lter missing or incorrectly tted Ret air lter correctly.
Oven not clean
Food not at correct temperature
The oven does not cook the food
correctly
Modied or wrong program selected
Food wrapped
Food removed early
Oven door opened
The oven does not nish cooking
No air lter or incorrectly tted
Oven overheating
Display shows an error code Oven malfunction
Remove any restriction and close the
oven door.
Clean the oven (see cleaning).
Use the correct cooking program.
Unwrap food for non-microwave
cooking.
Check all the cooking stages have
been followed correctly.
Close oven door.
Ret air lter.
Allow the oven to cool down.
Check and remove any restrictions
around the air vents.
Note the error code and contact your
Service Agent.
FAULT FINDING
Page 28

28
Installation and Operating original instructions.
Part Number 32Z3797 GB
Issue 1
SERVICING
Approved Service Agent;
Correct disposal of this product (Waste Electrical &
Electronic Equipment)
Applicable in the European Union and
other European countries with separate
collection systems.
This marking shown on the product or its
literature indicates that it should not be
disposed with other household wastes at
the end of its working life. To prevent possible harm to the
environment or human health from uncontrolled waste
disposal, please separate this from other types of wastes
and recycle it responsibly to promote the sustainable reuse
of material resources.
Household users should contact either the retailer where
they purchased this product, or their local government
oce for details of where and how they can take this item
for environmentally safe recycling.
Business users should contact their supplier and check
the terms and conditions of the purchase contract. This
product should not be mixed with other commercial
wastes for disposal.
Merrychef reserves the right to change product specications without notice and accepts no
liability for any inaccuracies, errors or ommissions contained herein.
Station Road West
Ash Vale, Aldershot
Hampshire GU12 5XA
United Kingdom
Phone: +44 (0) 1252 371000
Fax: +44 (0) 1252 371007
e-mail: info@merrychef.com
www.merrychef.com
 Loading...