

Merrychef eikon e1s Installation Manual
User Manual APAC – GBR
Section 2: Operations and Installation Guide
Part number: 32Z3959s2
Read instructions before use

2
eikon e1s
User Manual
Section 2: Operations and Installation Guide
Table of Contents
Document information ....................................................................................................................................................... 4
Version control .................................................................................................................................................................... 4
Document purpose ............................................................................................................................................................. 4
Related documents ............................................................................................................................................................. 4
How to use this guide ......................................................................................................................................................... 4
Symbols and their meanings ....................................................................................................................................... 4
2A. Introduction to e1s ................................................................................................................................................... 5
Identifying your microwave combination oven............................................................................................................... 5
Appliance parts and their functions ................................................................................................................................. 6
Equipment and accessories supplied ............................................................................................................................... 7
2B. Installing the appliance ........................................................................................................................................... 8
Unpacking ............................................................................................................................................................................ 8
Taking the appliance off the pallet ................................................................................................................................... 8
Installation location requirements ................................................................................................................................... 9
Electrical installation requirements ................................................................................................................................ 10
Safety rules .................................................................................................................................................................. 10
Equipment provided by customer and electrical installation regulations ........................................................... 10
The requirements and specifications for e1s .......................................................................................................... 10
2C. Getting started ........................................................................................................................................................ 12
Fitting the air filter ............................................................................................................................................................ 12
Inserting the cook plate ................................................................................................................................................... 12
Turning the oven on and off ............................................................................................................................................ 12
Settings on first usage ...................................................................................................................................................... 13
Selecting suitable utensils ................................................................................................................................................ 14
Preheating the oven ......................................................................................................................................................... 14
Understanding the main menu and keyboard .............................................................................................................. 15
2D. Cooking procedures ................................................................................................................................................ 16
How to cook ....................................................................................................................................................................... 16
Using a cooking profile – quick serve mode .................................................................................................................. 17
Using a cooking profile – full serve mode ...................................................................................................................... 18
Choosing cooking profiles for Press&Go menu ............................................................................................................ 19
Running a cooking profile from the Press&Go menu ............................................................................................ 19
Changing the cavity temperature ................................................................................................................................... 20
2E. Cooking profiles ...................................................................................................................................................... 21
Creating a cooking profile ................................................................................................................................................ 21

3
eikon e1s
User Manual
Section 2: Operations and Installation Guide
Viewing and editing cooking profiles .............................................................................................................................. 22
Moving a cooking profile in a group of cooking profiles .............................................................................................. 22
Moving a cooking profile in a list .................................................................................................................................... 23
Adding a new cooking profile group............................................................................................................................... 23
Adding a cooking profile to a group of cooking profiles .............................................................................................. 24
Deleting a cooking profile group ..................................................................................................................................... 24
Editing a selected cooking profile group name ............................................................................................................. 25
2F. Changing settings ................................................................................................................................................... 26
Changing settings process ............................................................................................................................................... 26
Operating mode / navigation settings ...................................................................................................................... 27
Language settings ....................................................................................................................................................... 27
Cavity temperature settings and labels ................................................................................................................... 28
Service information and error logs ........................................................................................................................... 29
Cooking profile counters ............................................................................................................................................ 29
Setting the date and time .......................................................................................................................................... 30
Sound settings ............................................................................................................................................................. 31
Temperature timer setting ........................................................................................................................................ 32
USB programme downloads ..................................................................................................................................... 33
Temperature band setting ......................................................................................................................................... 34
Change setting / service access password ............................................................................................................... 34
Set screen saver .......................................................................................................................................................... 35
2G. Cool-down procedures ........................................................................................................................................... 36
2H. Cleaning procedures............................................................................................................................................... 37
Daily cleaning tasks .......................................................................................................................................................... 37
Cleaning items ............................................................................................................................................................. 37
Cleaning instructions ........................................................................................................................................................ 38
Pre-cleaning checklist ................................................................................................................................................. 38
Cleaning process ......................................................................................................................................................... 38
2I. End of day operations ............................................................................................................................................ 42
Turning the oven off ......................................................................................................................................................... 42
2J. Servicing information ............................................................................................................................................ 43
Warranty information and contacting customer services ........................................................................................... 43
Required information ................................................................................................................................................. 43
Contact data ................................................................................................................................................................ 43
Fault finding ....................................................................................................................................................................... 44
4
eikon e1s
User Manual
Section 2: Operations and Installation Guide
Document information
Version control
Date
Issue number
Description
Issued by
10th December 2017
1.2
Installation and operating instructions and
procedures for eikon e1s
Merrychef
Document purpose
The purpose of this guide is to give a brief introduction to the Merrychef eikon e1s oven. It is intended to get you
started as well as to provide instructions on how to operate the system on a regular basis.
Related documents
This document forms one part of the overall Merrychef eikon e1s user manual. The complete manual is separated
into three sections:
• Section 1: Safety Guide
• Section 2: Operations and Installation Guide
• Section 3: Service and Repair Guide
How to use this guide
This guide should be read prior to installing and using the appliance. It should also be used in conjunction with the
Safety Guide (Section 1) and the Service and Repair Guide (Section 3).
Symbols and their meanings
Important information has been highlighted throughout this section using symbols and warning notices.
Symbol
Meaning
Warnings of potential injuries. Heed all the warning notices that appear after this symbol to
avoid potential injuries or death.
See specified section or guide.
Take note of this information.
Warning notices
Hazard level
Consequences
Likelihood
Death / serious injury (irreversible)
Immediate risk
Death / serious injury (irreversible)
Potential risk
Minor injury (reversible)
Potential risk
Damage to property
Potential risk

5
eikon e1s
User Manual
Section 2: Operations and Installation Guide
2A. Introduction to e1s
The Merrychef eikon e1s microwave combination oven offers you the flexibility of
combination cooking with additional control over fan speed and microwave
power.
Combination cooking enables high quality results to be achieved in a fraction of
the time taken by conventional cooking, particularly when baking, browning,
roasting and grilling dishes.
Once established, precise instructions for combination or convection cooking of
selected items may be programmed into the oven’s memory so that they can be
repeated easily and accurately. Up to 1024 programmes can be stored and simply
recalled.
The oven controls offer even greater flexibility by allowing multistage
programming. This enables the exact conditions required for quality results to be
set according to the food type. A single cooking programme can have up to six
stages, each stage controlled with its own time, fan speed and microwave power
settings.
Figure 2.1: e1s oven front view
Identifying your microwave combination oven
The following information is included at the rear of the oven on the name plate:
• Brand and name (Merrychef)
• Model range (e1s)
• Model number
• Serial number
• Supply voltage
• Maximum phase current
• Maximum supply power
• Output microwave power
• Output convected power
• Microwave frequency
• Manufacturer
• Manufacturing site
• Brand headquarters
Figure 2.2: e1s name plate

6
eikon e1s
User Manual
Section 2: Operations and Installation Guide
Appliance parts and their functions
Figure 2.3: Appliance parts and their functions
1) ON/OFF appliance switch – Used to turn the microwave combination oven on and off. Turning this switch
off does not isolate the appliance from the electricity supply.
2) easyTouch® screen control panel – When the appliance is switched on, the easyTouch® screen illuminates
the user interface.
3) USB port – A USB socket located under the cover allows updates to programmes stored on the appliance.
4) Protective cover – The cover can only be removed with specific tools. It prevents live parts from being
touched accidentally and prevents access to the moving fan. Always ensure the cover is securely in place.
5) Operating panel – Prevents live parts from being touched accidentally. Always ensure the panel is in place.
6) Appliance door – This is a precision-made energy barrier with three microwave safety interlocks. Always
keep it clean and do not use it to support heavy objects.
7) Air filter – Situated at the lower front of the appliance, the air filter is part of the ventilation system. Keep it
free of obstruction and clean it daily as described under Section 2G: Cleaning procedures.
8) Door handle – A rigid bar which is pulled downwards and away from the appliance to open it.
9) Door seals – Ensure a tight seal around the door. Always keep them clean and check regularly for signs of
damage.
10) Cavity – Also known as the cooking chamber, the cavity is constructed from stainless steel and used for
cooking products.
11) Nameplate – A plate on the rear of the oven that states the serial number, model type and electrical
specifications.
12) Air outlets - On the rear and are used to cool internal components and allow steam from the cavity to
escape. The air outlets must be kept free from obstruction and they will not allow microwave energy to
escape into the environment.
13) Steam pipe and cover – A covered pipe from the cavity to the back of the oven to vent steam during cooking
and prevent pressure build up.

7
eikon e1s
User Manual
Section 2: Operations and Installation Guide
Equipment and accessories supplied
The e1s microwave combination oven is supplied with the following equipment and accessories.
Cook plate
The cook plate sits inside the
appliance and food is placed on top
of it using suitable liners or baskets.
It is removable for cleaning.
Air filter
The air filter situated at the
lower front of the appliance is
part of the ventilation system
and should be kept clean and
free of obstruction.
Paddle
The paddle is used to remove food from
the oven.
There are a number of other optional Merrychef accessories that customers can purchase to use with the microwave
combination oven. Contact Merrychef suppliers for more information.
8
eikon e1s
User Manual
Section 2: Operations and Installation Guide
2B. Installing the appliance
Users must read Section 1: Safety Guide before installing or using the microwave oven.
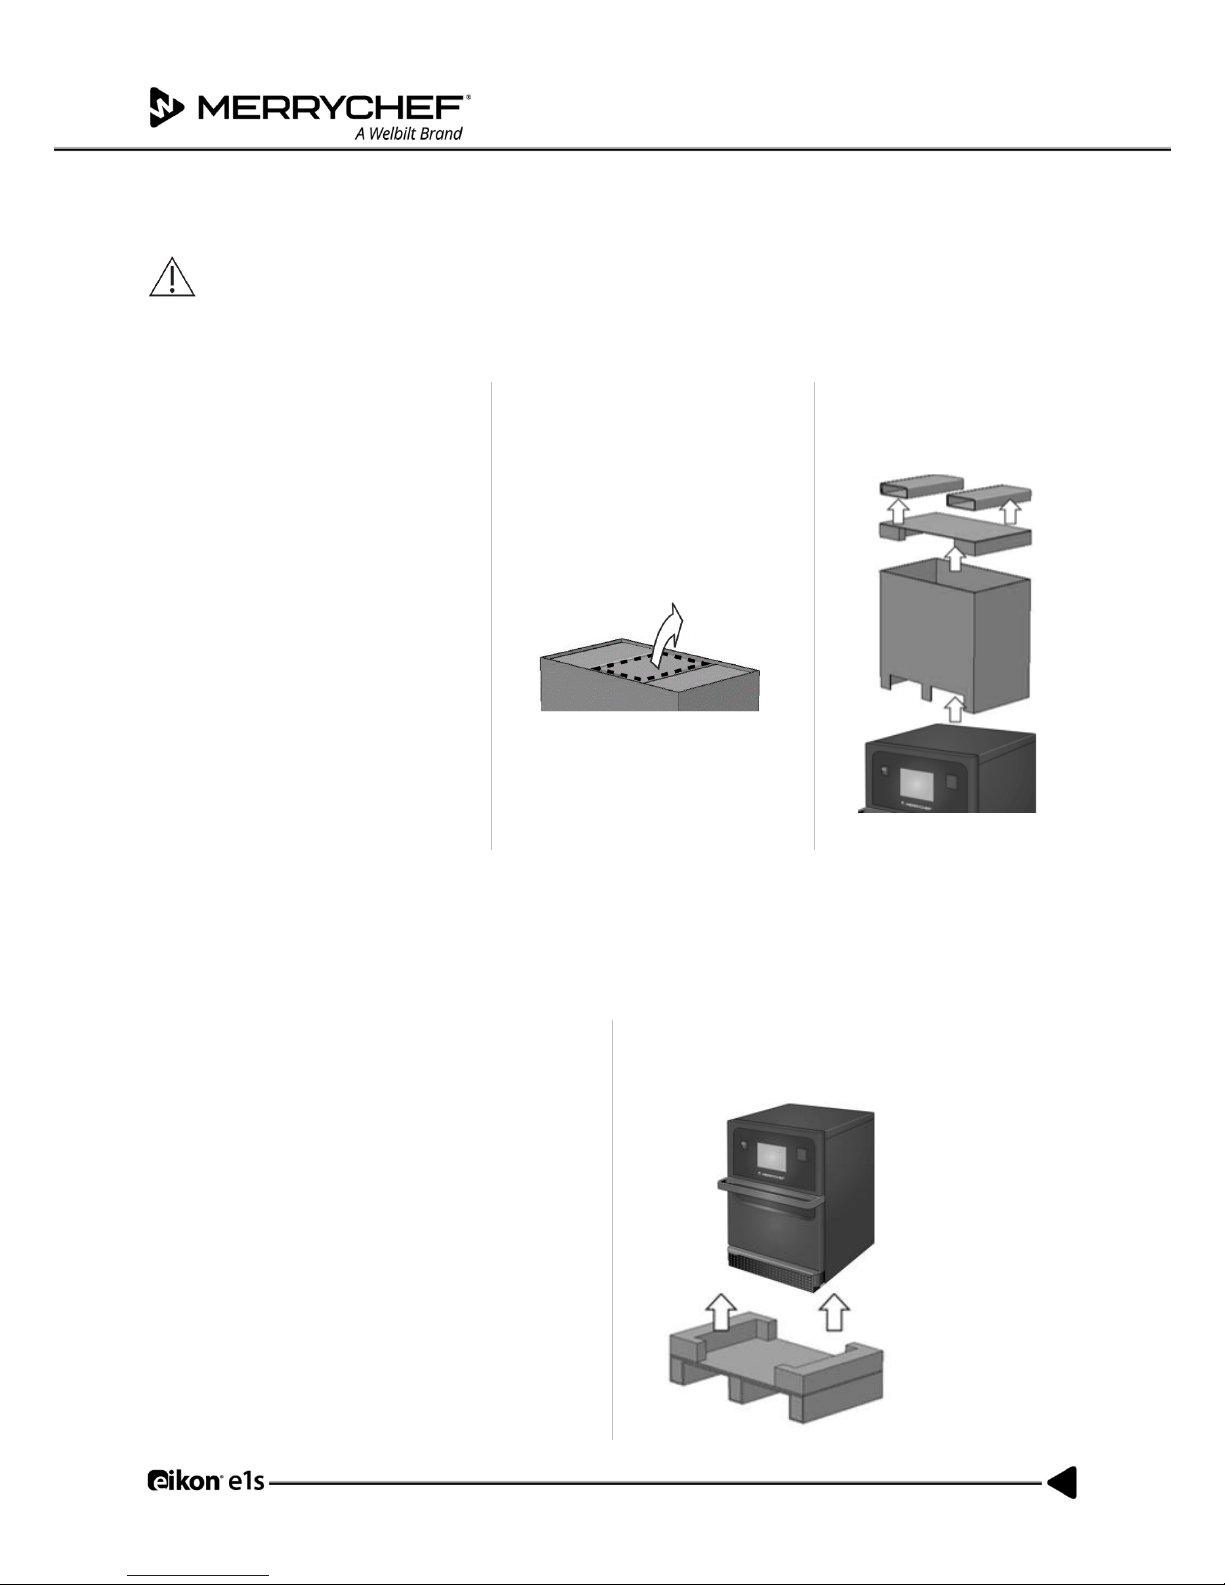
Unpacking
1. Cut the box banding straps and
remove the lid.
2. Remove the customer
documentation and any product
accessories:
• 1x air filter
• 1x cook plate
• 1x Safety Guide
• 1x Operations and
Installation Guide
3. Remove the packaging to
reveal your microwave
combination oven.
Inspect the appliance for damage before signing the delivery note. Record any damage on the delivery note and
notify the carrier and manufacturer.
Never install or put into service a damaged appliance under any circumstances.
Taking the appliance off the pallet
1. Identify appropriate lifting points.
• Wear appropriate Personal Protective
Equipment.
• Do not lift the oven by the handle.
• Risk of crushing from the appliance tipping
over. Take precautions.
2. Lift the appliance from the packaging. The appliance
is now ready for installation.

9
eikon e1s
User Manual
Section 2: Operations and Installation Guide
Installation location requirements
Minimum space required
Figure 2.4 shows the space required to install the appliance. It also shows the minimum horizontal distances from
adjacent walls and surfaces. The safety clearance on the top must also always be complied with.
Figure 2.4: Minimum space requirements
• Safety clearance from the top (A) = 50mm (2”)
• Depth requirement:
Width of appliance (X) = 406.4mm (16”)
Total depth with door open (Y) = 806.9mm (31.8”)
Counter depth (Z) = 499.0mm (19.6”)
• Safety clearance on left-/right-hand side / at rear: 0mm
Actual space requirements
Far more room than the specified minimum space requirement is needed in front of the appliances to operate the
microwave combination ovens safely, in particular to handle hot food safely. Larger wall gaps are generally
recommended to provide access for servicing.
In the installation location, the following parts must not be covered, adjusted or blocked:
• Air vent on the rear of the appliance
• Air filter at the front of the appliance
Mounting the appliance on a work surface
The appliance can be mounted on a suitable work surface that can bear the weight.
Observe the following rules to ensure that the appliance is installed in a stable situation:
• The worktop must have a non-slip surface.
• The supporting surface must have the following properties:
• The supporting surface must be flat and level.
• The supporting surface must be able to bear the in-use weight of the appliance, plus the weight of
the structure supporting the appliance as follows: 50Hz = 46kg /101lbs and 60Hz = 45kg / 99lbs.
10
eikon e1s
User Manual
Section 2: Operations and Installation Guide
Electrical installation requirements
Safety rules
Observe the following rules to prevent hazards caused by faulty electrical connections:
• Only electricians qualified under the terms of EN 50110-1 and from an authorised service company are
permitted to perform work on electrical equipment.
• The electrical supply must be connected in accordance with applicable local regulations of the professional
associations and of the relevant power supply company.
• The case of the appliance must be grounded in a suitable manner and connected to an equipotential
bonding system.
• If two microwave combination ovens are installed in a stacking kit, both cases of the appliances and the
stacking kit itself must be grounded in a suitable manner and connected to an equipotential bonding system.
• Wear the personal protective equipment as specified in the Safety Guide – Section 1F.
Equipment provided by customer and electrical installation regulations
Table 2.1 shows what equipment must be provided by the customer and what regulations must be observed when
connecting the appliance.
Equipment
Regulations
Fuse
Fuse protection and connection of the appliance must comply with local regulations
and national installation requirements.
Equipotential bonding
The appliance must be incorporated in an equipotential bonding system.
Equipotential bonding: electrical connection that ensures that the frames of electrical
equipment and any external conductive components are at an equal (or practically
equal) potential.
Residual-current device
(RCD)
The installation regulations require protection by a residual-current device (RCD).
Suitable residual-current devices meeting the relevant national regulations must be
used.
If the installation includes more than one appliance, one residual-current device must
be provided for each appliance.
Disconnection device
An easily accessible all-pole disconnection device with a minimum contact separation
of 3mm must be installed close to the appliance. The appliance must be connected via
this disconnection device.
The disconnection device is used to disconnect the appliance from the electrical
supply for cleaning, repair and installation work.
Table 2.1: Electrical equipment and regulations
The requirements and specifications for e1s
Fitted frequency converter
• The appliance is fitted with one frequency converter (FC) and an EMC mains input filter.
• These devices may result in a leakage current of more than 3.5mA per FC drive.
• Use a suitable RCD for the rated voltage.
11
eikon e1s
User Manual
Section 2: Operations and Installation Guide
Properties of the residual-current device
The residual-current device (RCD) must have the following properties:
• Filter for filtering out RF currents.
• ‘Time delayed’ trip characteristic for RCD devices with trip threshold >30mA: prevents RCD being tripped by
charging currents of capacitors and parasitic capacitances when appliance is switched on.
• ‘Leakage current protection, Type SI’ trip characteristic for RCD devices with trip threshold >30mA: insensitive
to nuisance tripping.
Circuit Breakers
• Establishments with standard (Type ‘B’) circuit breakers are sensitive to ‘surges’ which occur on switching on
freezers, refrigerators and other catering equipment, including microwave combination ovens. Because of
this, a Type ‘D’ circuit breaker (designed specifically for this type of equipment) must be fitted. An individual,
suitably rated circuit breaker should be fitted for each appliance installed.
Low impedance electrical supply
• This commercial combination microwave oven complies with EN 61000-3-11. However, when connecting
sensitive equipment to the same supply as the appliance, the user should determine in consultation with the
supply authority, if necessary, that a low impedance supply is used.
Electrical supply
• The e1s microwave combination oven is only available as a single-phase model and is designed to draw 13
amps maximum in all configurations, as shown in Table 2.2.
Illustration
Meaning
Phase: Single
16 A Breaker for 15/16 A plug
configurations and be Time Delay, Motor
Start Type (European Type D).
UK 13 A models are fitted with a
moulded plug to BS1363, fused at 13A.
EU13 A models are fitted with a
moulded plug to CEE 7/7 (Type F Schuko)
rated at 16 A.
ROW 13 A models are fitted with country
specific 15/16 A plugs.
Please contact your local Welbilt
representative for further information.
Table 2.2: e1s electrical specifications
Equipotential bonding
• An equipotential bonding point is provided on the rear panel of the appliance for independent Earth (GND)
connection.
12
eikon e1s
User Manual
Section 2: Operations and Installation Guide
2C. Getting started
Before turning on the oven, users must read the Section 1G: Hazards and safety precautions when preparing
appliance for use in the Safety Guide.
Fitting the air filter
The air filter is fitted in position below the
cavity door. It is a magnetic attachment.
Inserting the cook plate
The cook plate is inserted in the cavity,
simply by sliding it onto the shelf runners.
Turning the oven on and off
To start up the oven, ensure the appliance is clean and empty with just the cook plate inside it. Then switch the
appliance on using the on/off switch at the front of the oven.
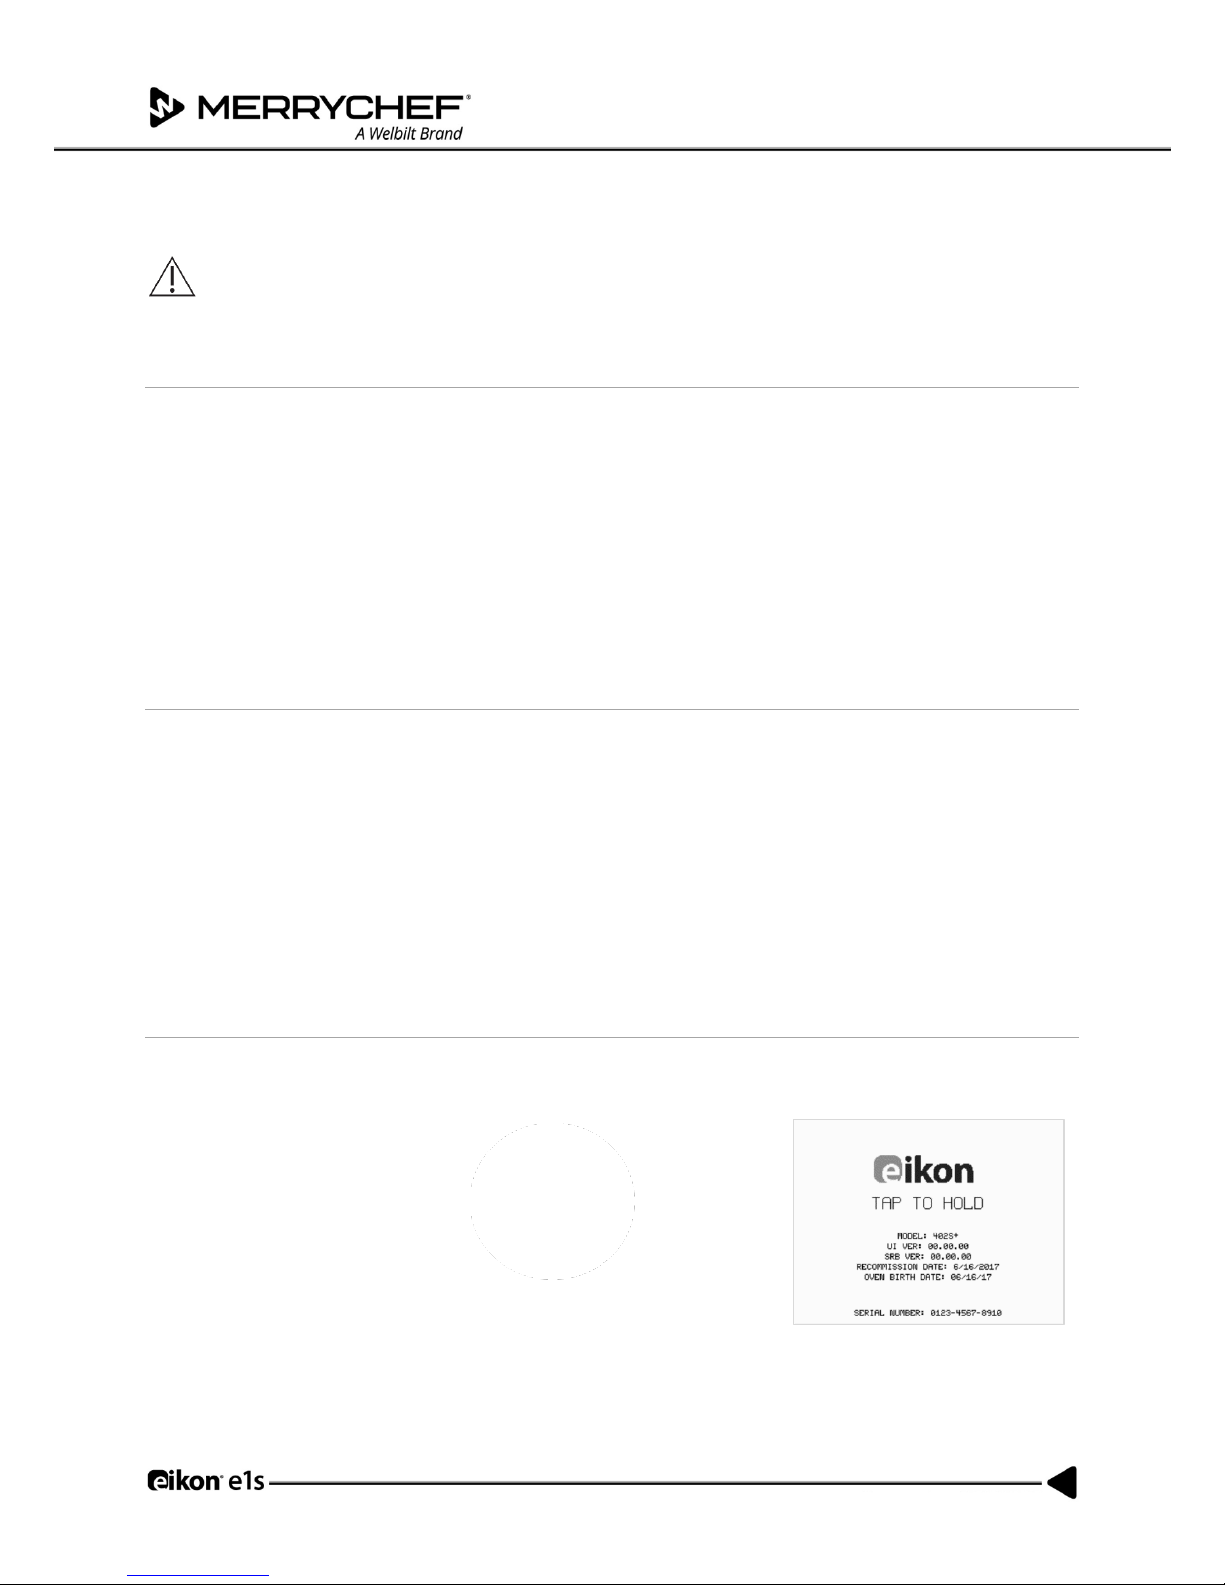
When the oven is switched on, the easyTouch® screen illuminates with the display briefly showing the serial
number and appliance data. To keep the data on the screen, lightly tap the screen to freeze the display. Tap
again to continue.
13
eikon e1s
User Manual
Section 2: Operations and Installation Guide
Settings on first usage
The system is preconfigured with all the required settings to start cooking immediately following installation.
However, you may want to configure the following before using the oven.
• Date and time
• Alarms
• Temperature
• Oven time
Settings are changed by selecting the ‘settings’ screen which is accessible from the main menu.
However, the main menu is only displayed after the oven is pre-heated and therefore, if you want to change settings
before or whilst the oven is heating, for example before first usage, do as follows:
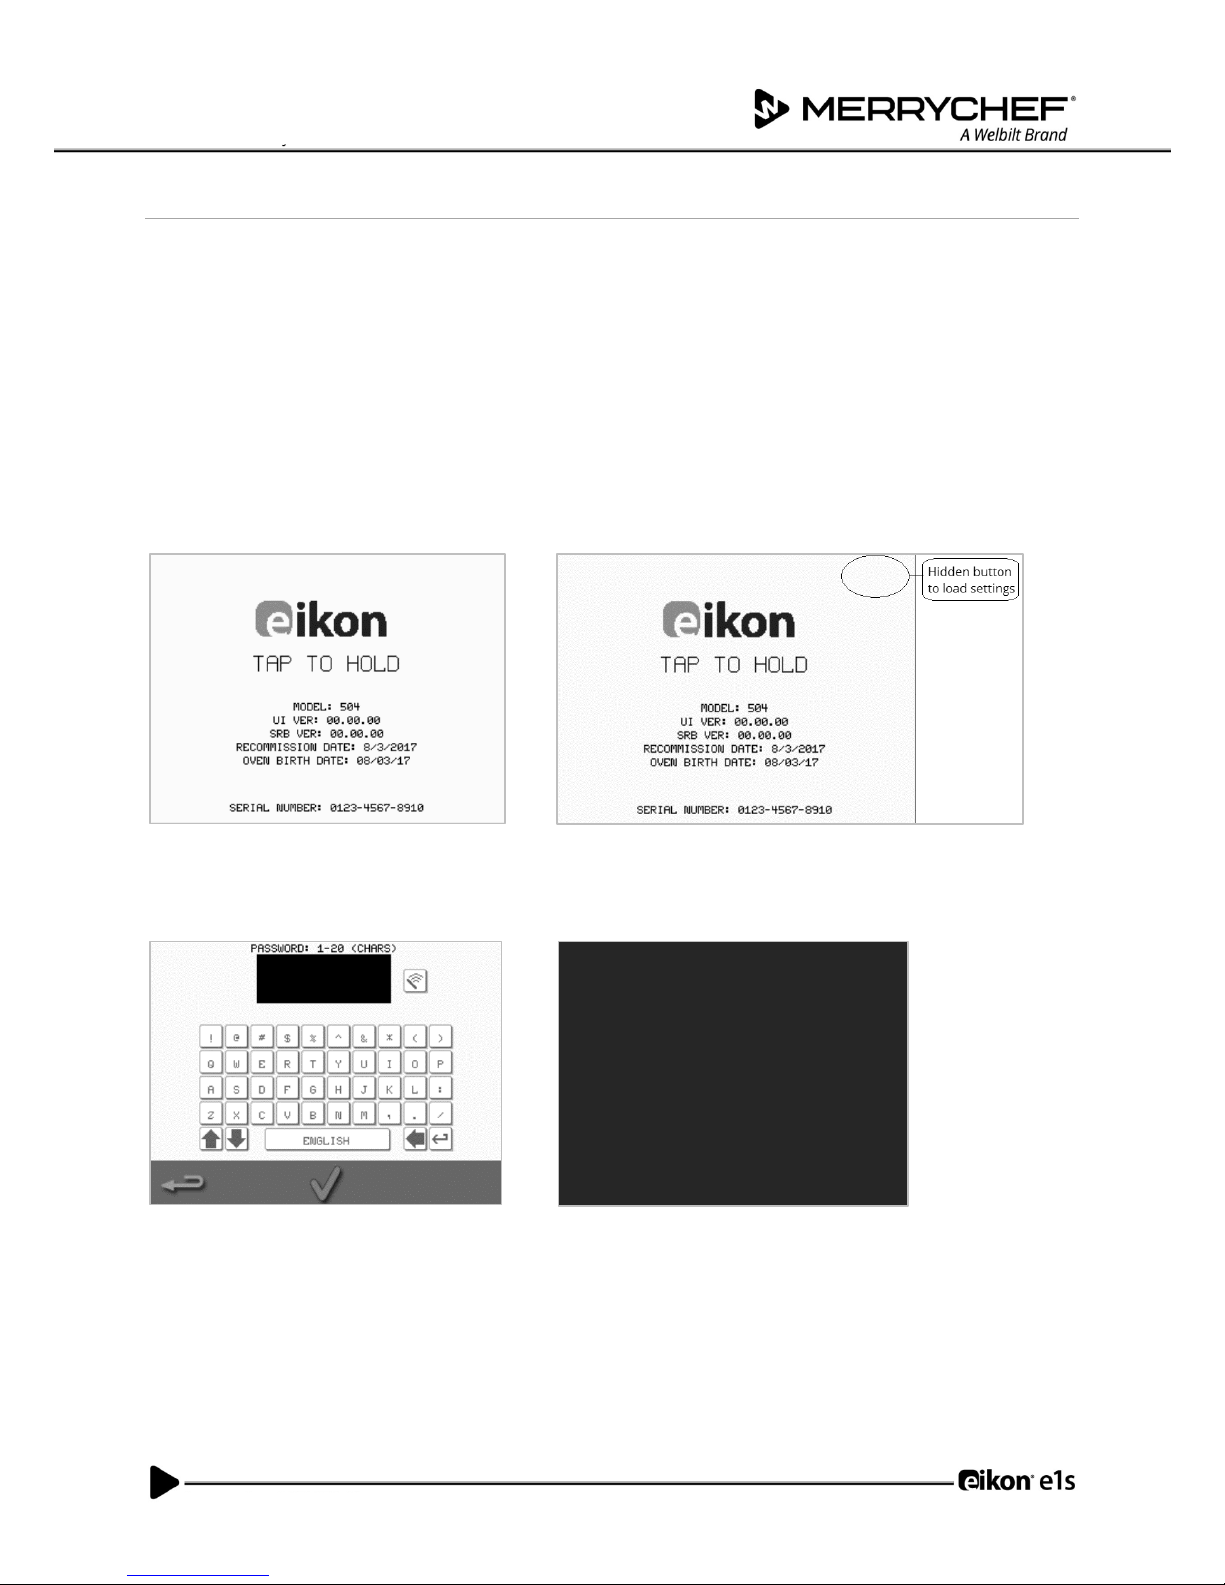
1) Tap to hold the first screen upon switching on, which shows the serial number.
2) Press the hidden button at the top right-hand corner to load the password screen.
3) Enter the administration password. The default password is ‘MANAGER’.
4) Select the required settings icon to make changes as required.
See Section 2F: Changing settings for instructions.
14
eikon e1s
User Manual
Section 2: Operations and Installation Guide
Selecting suitable utensils
You may want to ensure you have suitable utensils before using the oven. Only use utensils that are suitable for use
in microwave combination ovens. Check the manufacturer’s instructions and temperature rating to determine the
suitability of individual containers or utensils.
Table 2.3 provides general guidelines:
Cooking utensils
Permitted
Notice
Heat resistant containers
Toughened glass
YES
Compatible vitreous ceramics
YES
Do not use items with metallic decoration
Earthenware (porcelain, crockery and china)
YES
Metals, foils and plastics
Metallic and foil trays and containers
NO
Dual-ovenable plastic containers
YES
Use only containers approved by the manufacturer
Disposables
Combustibles (paper, card, etc.)
YES
Use only combustibles approved by the manufacturer
Other utensils
Tie tags
NO
Cutlery
NO
Do not leave utensils in a food product while it is cooking
Temperature probes
NO
Table 2.3: Suitable utensils
Preheating the oven
The oven will automatically preheat to the set temperature
when it is switched on. However, if the appliance is set up with
two or more preheating temperatures, a choice is displayed
when the oven is switched on. Select the required
temperature.
You may see a scroll arrow at the bottom of the screen
which indicates that there are more temperature choices.
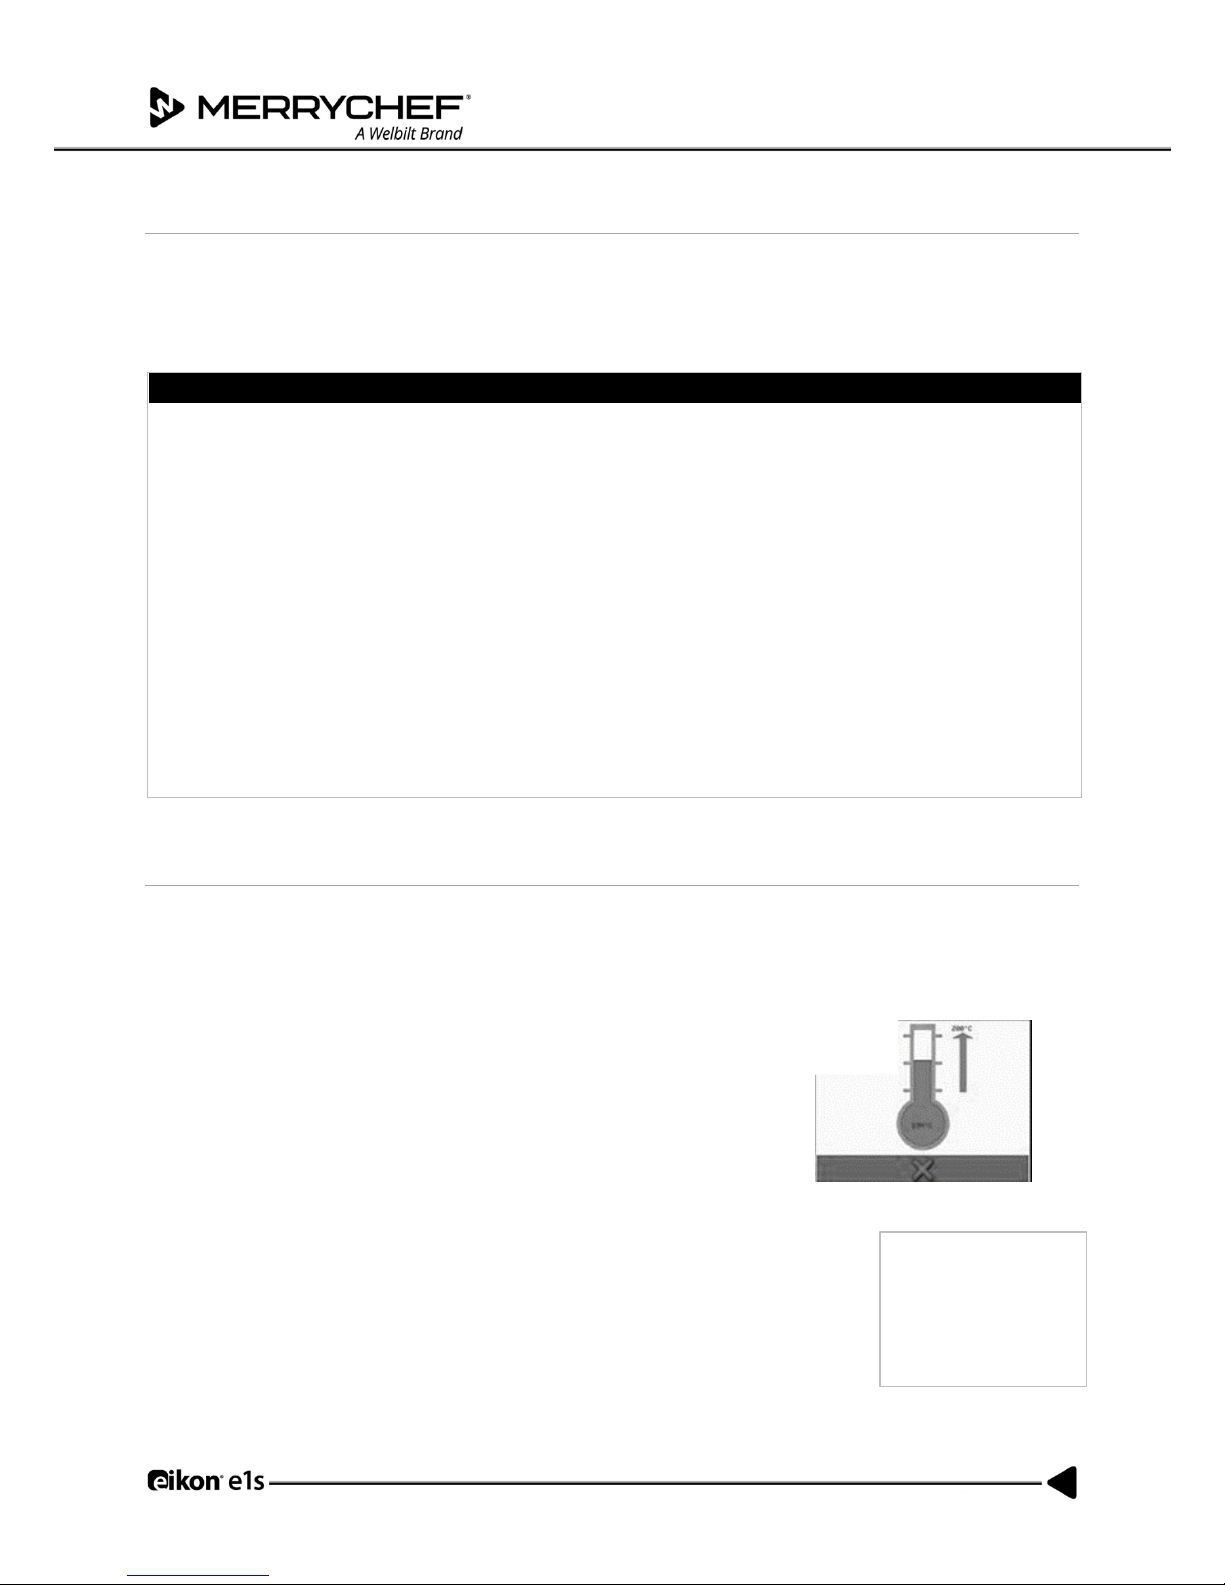
During preheating. the display shows the progress as the
cavity heats up to the set temperature. To stop the cavity
heating up, touch the red ‘X’ symbol at the bottom of the
screen.
The appliance is ready to use when either the cookbook or
main menu is displayed.
If the cookbook is displayed, press the Backspace button in the
bottom left-hand corner of the screen to display the main
menu.
 Loading...