

Page 1
D
A B
J J
A
B
C
C
Assembly Instructions
• The stand should be assembled on a at oor surface.
• Make sure you are using the correct screws for each assembly step, and only use the screws included with your piano. Use of
incorrect screws can permanently damage the piano.
• All screws should be tightened after each assembly step (except where otherwise indicated).
Tool required: Phillips-head (+) screwdriver.
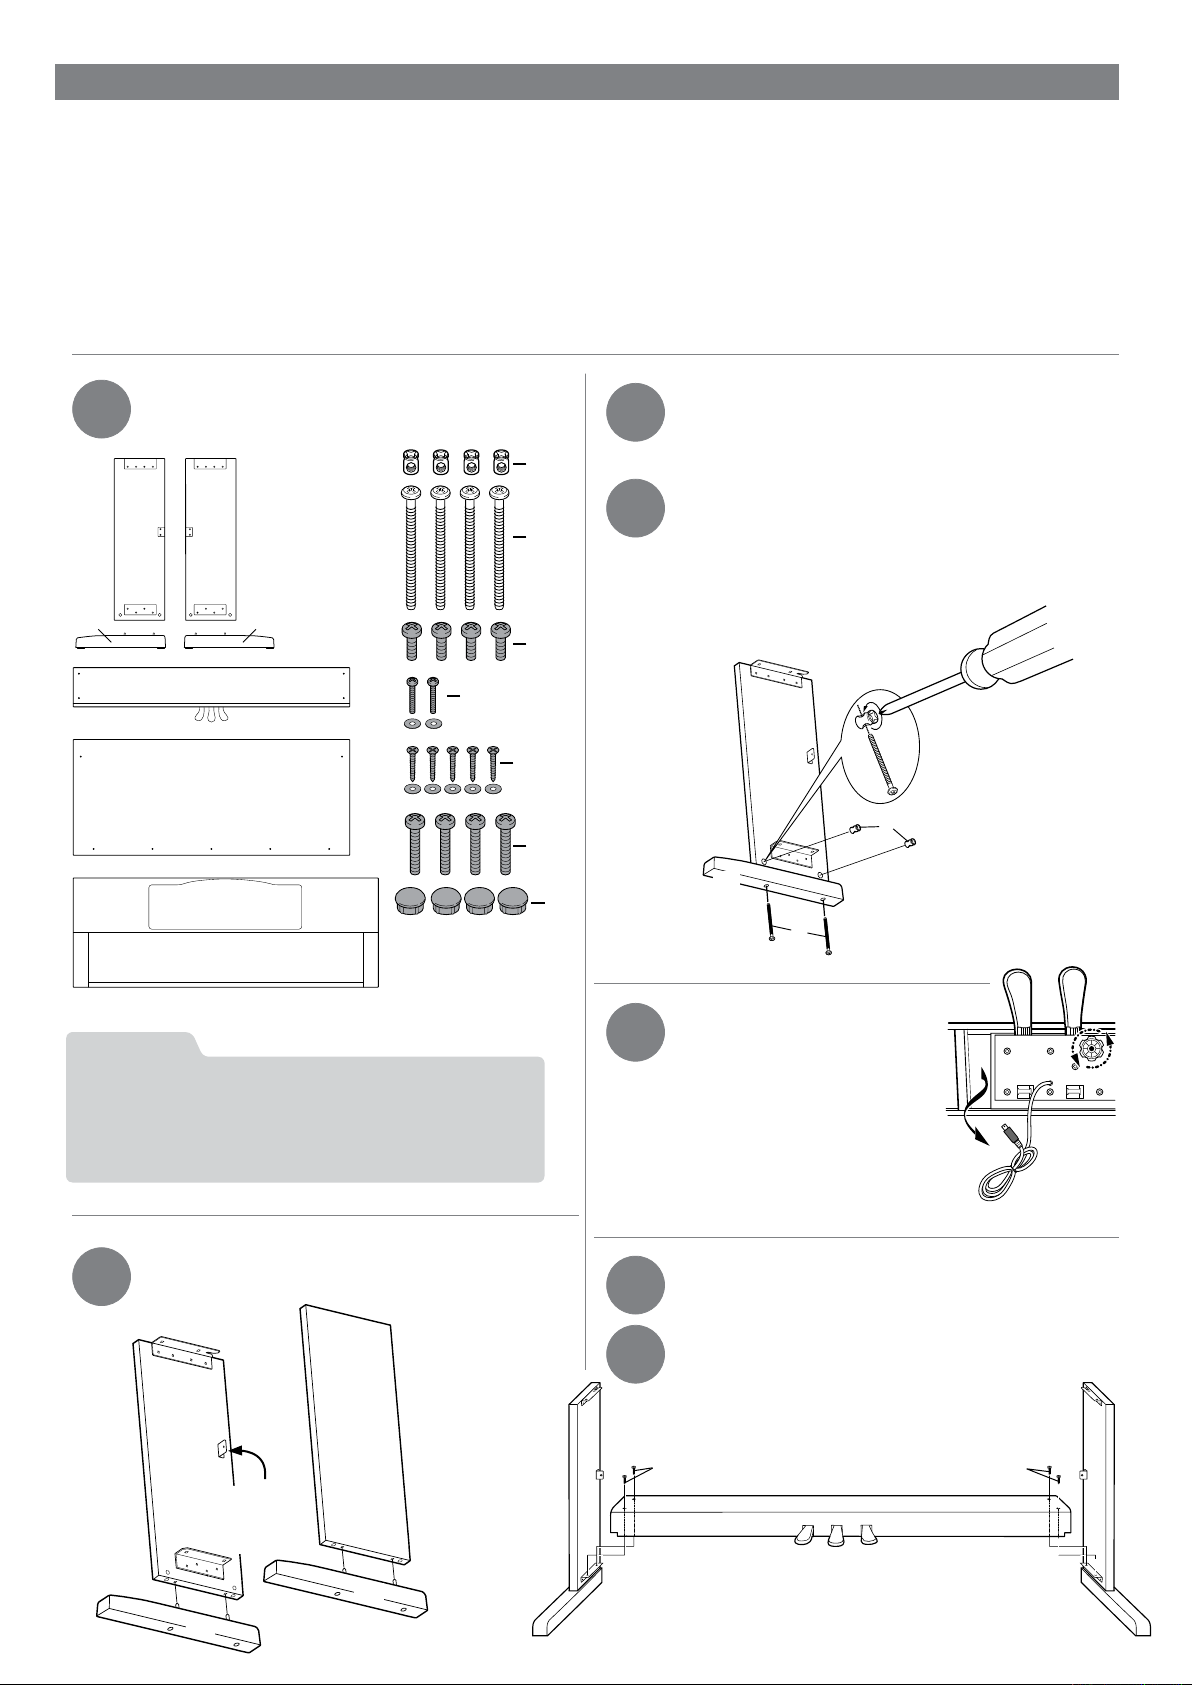
Remove all parts from their packaging, and verify
that you have all the following items:
Push the feet (C) into the bottom of the legs (A,B),
with each foot pointing away from the Modesty
Panel bracket.
. Place the cylindrical nuts (G) in the holes near the
lower bracket in each leg (A and B), with the Phillips
slots (+) facing up for each nut.
. Use a screwdriver to rotate the cylindrical nut (G)
into position so that the nut’s threaded hole lines up
with the hole at the bottom of the leg (A,B). Insert the
long screw (H) through the bottom of the foot (C) and
screw it into the cylindrical nut until tight. Do this for
each of the four nuts.
Remove the cable tie and
unwrap the pedal connector
cable on the bottom of the
Pedal Board.
Turn the adjustable Pedal
Board support counterclockwise until it is moved out
about an inch.
Attach the left side of the Pedal Board (D) to the left
leg (A) using two of the four short screws (J).
Attach the right side of the Pedal Board (D) to the
right leg (B) using the remaining short screws (J).
1
3
4
5
6
7
2
Warning:
Suffocation Hazard
Some parts of your Digital Piano ship in plastic bags which could be
dangerous for infants and children. To avoid danger of suffocation,
keep plastic bags away from infants and children at all times.
A B
C C
D
E
G
H
J
M
N
K
L
F
G
H
A
C
Modesty
Panel
bracket
Page 2

Slide the Modesty Panel (E) into place so that the two
top screw holes are in front of the two corresponding
metal brackets, and the ve bottom screw holes line
up behind the Pedal Board (D).
From the front of the Modesty Panel, use the two
screws (K) with washers to attach the top of the
Modesty Panel to the metal brackets on each leg.
While lifting the piano keyboard unit on both ends
(one person on each side), carefully lower it and
slide the guide screws all the way forward into
the brackets at the top of the piano stand (see the
illustration in Step 11 for details).
Secure the piano keyboard unit to both the left and
right sides of the piano stand, using the four (M)
screws. (Only the left side is shown in this picture.)
Place the four plastic caps (N) into the holes above
the foot in each leg (A and B).
Holding the bottom of the Modesty Panel (E) rmly
against the bottom of the Pedal Board (D), use the ve
wood screws (L) with washers to attach the bottom of
the Modesty Panel (E) to the Pedal Board (D). You will
be driving the screws directly into the pedal board
material.
Turn the adjustable Pedal Board support, until it is in
rm contact with the oor.
8
11
12
13
14
9
10
E
D
K
K
Metal Brackets
E
L
L
NOTE:
Before moving the piano to a new location, always remember
to raise the level of the Pedal Board support so that it is not
touching the oor. Once the piano is in place, you can adjust it
so it is in rm contact with the oor again.
! CAUTION:
Only lift holding the bottom of the piano keyboard unit.
Do not lift holding the sliding keyboard cover or the top
of the keyboard. Be careful not to pinch your ngers.
M
L
 Loading...