

Page 1

Model ST6000 User Guide
TUNER
R
Page 2
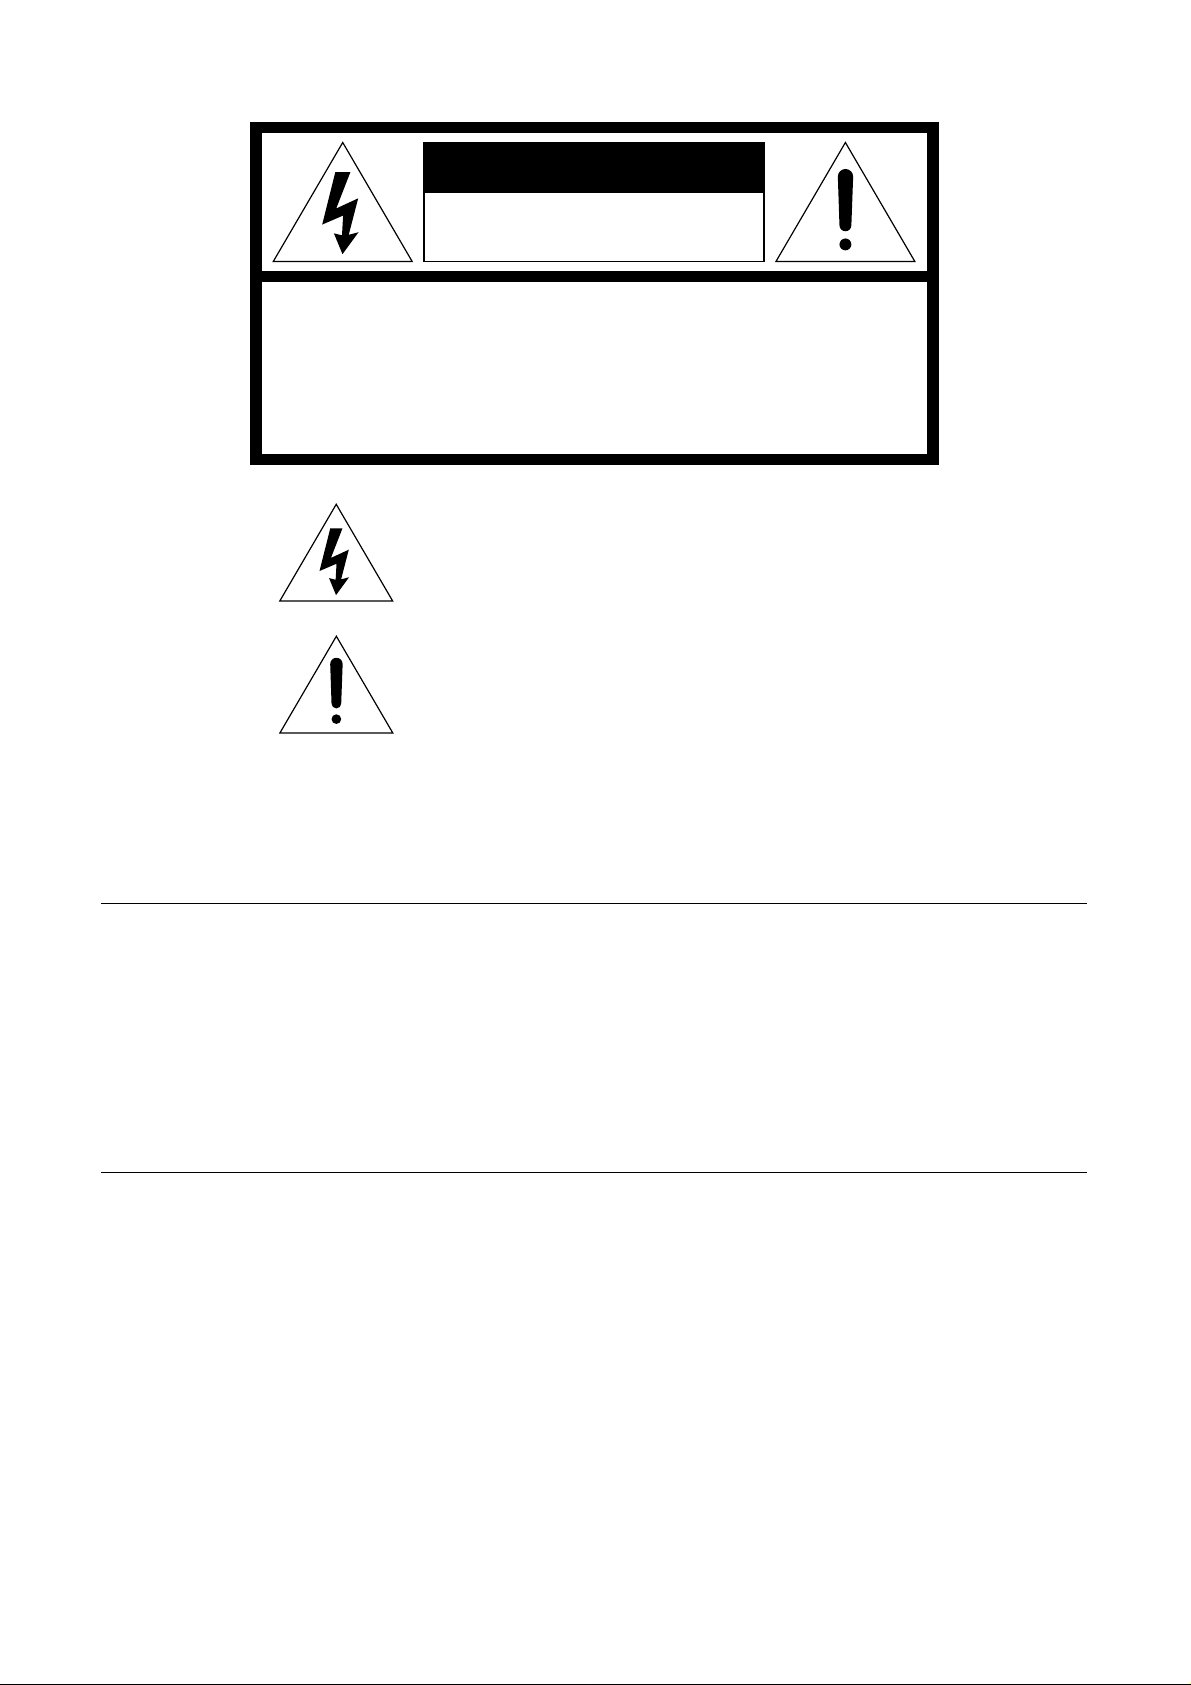
CAUTION
RISK OF ELECTRIC SHOCK
DO NOT OPEN
CAUTION: TO REDUCE THE RISK OF ELECTRIC SHOCK,
DO NOT REMOVE COVER (OR BACK).
NO USER-SERVICEABLE PARTS INSIDE.
REFER SERVICING TO QUALIFIED SERVICE PERSONNEL.
The lightning flash with arrowhead symbol, within
an equilateral triangle, is intended to alert the user
to the presence of uninsulated “dangerous voltage”
within the product’s enclosure that may be of sufficient magnitude to constitute a risk of electric shock
to persons.
The exclamation point within an equilateral triangle
is intended to alert the user to the presence of
important operating and maintenance (servicing)
instructions in the literature accompanying the
product.
WARNING
TO REDUCE THE RISK OF FIRE OR ELECTRIC SHOCK,
DO NOT EXPOSE THIS APPLIANCE TO RAIN OR MOISTURE.
CAUTION: TO PREVENT ELECTRIC SHOCK, MATCH WIDE
BLADE OF PLUG TO WIDE SLOT, FULLY INSERT.
ATTENTION: POUR ÉVITER LES CHOCS ÉLECTRIQUES,
INTRODUIRE LA LAME LA PLUS LARGE DE LA FICHE DANS LA
BORNE CORRESPON DANTE DE LA PRISE ET POUSSER
JUSQU’AU FOND.
NOTE:
This equipment has been tested and found to comply with the
limits for a Class B digital device, pursuant to part 15 of the
FCC Rules. These limits are designed to provide reasonable
protection against harmful interference in a residential
installation. This equipment generates, uses and can radiate
radio frequency energy and, if not installed and used in
accordance with the instructions, may cause harmful
interference to radio communications. However, there is no
guarantee that interference will not occur in a particular
installation.
If this equipment does cause harmful interference to radio or
television reception, which can be determined by turning the
equipment off and on, the user is encouraged to try to correct
the interference by one or more of the following measures:
― Reorient or relocate the receiving antenna.
― Increase the separation between the equipment and
receiver.
― Connect the equipment into an outlet on a circuit different
from that to which the receiver is connected.
― Consult the dealer or an experienced radio/TV technician
for help.
NOTE:
Changes or modifications may cause this unit to fail to comply
with Part 15 of the FCC Rules and may void the user's
authority to operate the equipment.
Page 3

IMPORTANT SAFETY
INSTRUCTIONS
READ BEFORE OPERATING EQUIPMENT
This product was designed and manufactured to meet strict
quality and safety standards. There are, however, some installation and operation precautions which you should be particularly aware of.
1. Read Instructions — All the safety and operating instructions should be read before the appliance is operated.
2. Retain Instructions — The safety and operating instructions should be retained for future reference.
3. Heed Warnings — All warnings on the appliance and in
the operating instructions should be adhered to.
4. Follow Instructions — All operating and use instructions
should be followed.
5. Water and Moisture — The appliance should not be used
near water — for example, near a bathtub, wash-bowl,
kitchen sink, laundry tub, in a wet basement, or near a
swimming pool, etc.
6. Carts and Stands — The appliance should be used only
with a cart or stand that is recommended by the manufacturer.
7. An appliance and cart combination should be moved with
care. Quick stops, excessive force, and uneven surfaces
may cause the appliance and cart combination to overturn.
8. Wall or Ceiling Mounting — The appliance should be
mounted to a wall or ceiling only as recommended by the
manufacturer.
9. Ventilation — The appliance should be situated so that its
location or position does not interfere with its proper ventilation. For example, the appliance should not be situated on a bed, sofa, rug, or similar surface that may block
the ventilation openings; or, placed in a built-in installation, such as a bookcase or cabinet that may impede the
flow of air through the ventilation openings.
10. Heat — The appliance should be situated away from heat
sources such as radiators, heat registers, stoves, or
other appliances (including amplifiers) that produce
heat.
11. Power Sources — The appliance should be connected to
a power supply only of the type described in the operating
instructions or as marked on the appliance.
12. Grounding or Polarization — The precautions that should
be taken so that the grounding or polarization means of an
appliance is not defeated.
AC POLARIZED PLUG
13. Power-Cord Protection — Power-supply cords should be
routed so that they are not likely to be walked on or
pinched by items placed upon or against them, paying particular attention to cords at plugs, convenience receptacles, and the point where they exit from the appliance.
14. Cleaning — The appliance should be cleaned only as recommended by the manufacturer.
15. Power Lines— An outdoor antenna should be located
away from power lines.
16. Outdoor Antenna Grounding — If an outside antenna is
connected to the receiver, be sure the antenna system is
grounded so as to provide some protection against voltage surges and built up static charges. Section 810 of the
National Electrical Code, ANSI/NFPA No. 70-1984, provides information with respect to proper grounding of the
mast and supporting structure, grounding of the lead-in
wire to an antenna discharge unit, size of grounding conductors, location of antenna-discharge unit, connection to
grounding electrodes, and requirements for the grounding
electrode. See Fig. 1.
17. Nonuse Periods — The power cord of the appliance
should be unplugged from the outlet when left unused for
a long period of time.
18. Object and Liquid Entry — Care should be taken so that
objects do not fall and liquids are not spilled into the enclosure through openings.
19. Damage Requiring Service — The appliance should be
serviced by qualified service personnel when:
A. The power-supply cord or the plug has been damaged;
or
B. Objects have fallen, or liquid has spilled into the appli-
ance; or
C. The appliance has been exposed to rain; or
D. The appliance does not appear to operate normally or
exhibits a marked change in performance; or
E. The appliance has been dropped, or the enclosure
damaged.
20. Servicing — The user should not attempt to service the
appliance beyond that described in the operating instructions. All other servicing should be referred to qualified
service personnel.
Page 4

FIG. 1
EXAMPLE OF ANTENNA GROUNDING ACCORDING TO
NATIONAL ELECTRICAL CODE INSTRUCTIONS
CONTAINED IN ARTICLE 810 - “RADIO AND TELEVISION EQUIPMENT”
ANTENNA
LEAD IN
WIRE
GROUND
CLAMP
ELECTRIC
SERVICE
EQUIPMENT
NEC – NATIONAL ELECTRICAL CODE
This Class B digital apparatus meets all requirements of the
Canadian Interference - Cansing Equipment Regulations.
ANTENNA
DISCHARGE UNIT
(NEC SECTION 810–20)
GROUNDING CONDUCTORS
(NEC SECTION 810–21)
GROUND CLAMPS
POWER SERVICE GROUNDING
ELECTRODE SYSTEM
(NEC ART 250, PART H)
Cet appareil numérique de la Classe B respecte toutes les
exigences du Règlement sur le materiel brouilleur du Canada.
NOTE TO CATV SYSTEM INSTALLER:
This reminder is provided to call the CATV system installer’s attention to Article 820–40 of the NEC that
provides guidelines for proper grounding and, in particular, specified that the cable ground shall be connected
to the grounding system of the building, as close to the point of cable entry as practical.
Page 5

INTRODUCTION
Thank you for selecting the Marantz ST6000 FM/AM Stereo Tuner for
your system.
Please read these operating instructions carefully. We recommend that
you read the entire user guide before you attempt to connect or operate
the Tuner.
After you have reviewed the contents of this manual, we suggest that
you make all system connections before you attempt to operate the
unit.
Refer to the figures on the pages at the back of this user’s guide. The
callout numbers on the figures correspond to those found in the text. All
references to the connections and controls that are printed in BOLD
type are as they appear on the unit.
INSTALLATION
Remember the following important points when installing the Tuner.
• Do not expose the component to rain or moisture, as this may cause
damage to the Tuner.
• Prevent extra heat from reaching the unit. Never put the Tuner in the
full glare of the sun or near a heat source.
PRECAUTIONS
The following precautions should be taken when operating the equipment.
LOCATION AND FUNCTION OF PARTS AND
CONTROLS
FRONT PANEL FEATURES
(SEE APPEARANCE DRAWING)
qq
q POWER ON /STANDBY button
qq
This button is used to power on or power standby.
ww
w ANTENNA A/B button
ww
This button is used selection of the FM antenna A or B.
ee
e IF BAND button
ee
This button is used for selecting the bandwidth of the FM broadcast.
rr
r TIME ADJ (adjust) button
rr
This button is used for adjusting the current time.
tt
t ST.NAME/DISPLAY button
tt
This button is used for manual tuning or selecting the display mode.
Press this button slightly longer (for more than 1.5 second) to file in
manually stations name in the preset memory.
yy
y TUNING MODE button
yy
This button is used for selecting the manual tuning or the fine tuning
mode. Fine tuning mode is available only in the FM band.
uu
u TUNING
uu
This button used for tuning in the desired broadcasting stations or
adjusting the time, or manual tuning, etc.
55
5∞ (UP/DOWN) button
55
ENGLISH
ENGLISH
GENERAL PRECAUTIONS
When installing the equipment ensure that:
— air is allowed to circulate freely around the equipment.
— it is placed on a vibration-free surface.
— it will not be exposed to excessive heat, cold, moisture or dust.
— it will not be exposed to direct sunlight.
— it will not be exposed to electrostatic discharges.
In addition, never place heavy objects on the equipment.
If a foreign objector water does enter the equipment, contact your nearest dealer or service center.
Do not pull out the plug by pulling on the mains lead; grasp the plug
itself.
It is advisable when leaving the house, or during a thunderstorm, to
disconnect the equipment from the AC outlet.
ST6000 FEATURES
• Max.30-station preset memory (each FM,AM) with auto preset
memory function
• Remote control operation
• Select the FM Antenna A/B
• Select the IF band (wide/narrow)
• Fine Tuning
ii
i CANCEL button
ii
This button is used for canceling the program during manual file or
adjusting the on/off time of the timer.
oo
o NEXT button
oo
This button is used for advancing to the next step during time adjustment or manual filing, etc.
!0!0
!0 MEMO button
!0!0
This button is used for presetting the broadcasting stations.
!1!1
!1 (Timer) ON/OFF button
!1!1
This button used for engaging the daily timer function.
!2!2
!2 TIMER SET button
!2!2
This button is used for presetting the time when the system is turned
on and off every day at a specified time.
!3!3
!3 PRESET
!3!3
This button used for preset in the desired broadcasting stations.
!4!4
!4 FM MODE button
!4!4
This unit automatically switches into the STEREO mode when a FM
stereo broadcast is received press this button to change the monaural mode, then the “STEREO” indicator will go out on the display .
!5!5
!5 BAND button
!5!5
This button is used for selecting the FM or AM broadcast.
!6!6
!6 DISPLAY/INDICATOR
!6!6
55
5∞ (UP/DOWN) button
55
aa
TIMER
a
aa
This indicator light up when the daily timer is engaged by pressing the timer button.
bb
b DAILY timer indicator
bb
cc
c TUNED indicator
cc
dd
d STEREO indicator
dd
ee
e MEMORY indicator
ee
ff
f PRESET Number indicator
ff
gg
g FM IF band indicator
gg
hh
h Antenna A or B indicator
hh
1
Page 6

OPERATIONS
1. MEMORY PRESETTING
a. Manual operation
For example: presetting FM 90.1 M Hz, to Preset number. 10
1. Select the FM by using the BAND button.
2. Tune to 90.1 MHz by using the TUNING 5∞ button.
3. Press the MEMO button briefly (for less than 0.5 second) Then,
“MEMO” will bricking in the florescent tube display.
4. Select the preset number by using the TUNING 5∞ button.
5. MEMO button pushed again, 90.1 MHz (broadcast station) was able
to be memorized in number 10 by this.
Note:
ENGLISH
Be sure to select the antenna A or B memorization when you preset
manual memory in FM broadcast.
b. Automatic operation
Select the desired broadcasting (FM or AM) by using the BAND but-
1.
ton.
2. Press the MEMO button slightly longer than 1.5 second does.
Then, broadcasting will be automatically received, and as many
broadcasting station are received well will be memorized preset number-01 after another
3. Check the broadcasting station by using the TUNING 5∞ button.
Note:
1. In the case of FM automatic presetting, the antenna A, B selector
is set to “A” automatically,
And the broadcasting station is scanned twice. The stations that
have stronger broadcasting signal are preset in the first time.;
weaker ones are preset in the second time.
2. If a new broadcasting station is preset into a channel the broad-
casting station which has been preset into that position aria will be
automatically erased.
3. In mountainous or remote area broadcasting stations which have
weak broadcasting signals cannot be automatically preset into the
memory.
4. Max. 30 broadcasting stations each for FM, AM bands can be
preset.
3. FINE, MANUAL TUNING
This function used for selection the manual tuning of the fine tuning
mode.
Fine tuning mode is available only in the FM mode.
1. Press the TUNING MODE button.
2. Every time you press this button, the following will be displayed
FINE ⇔ MANUAL.
a. In FINE (Tuning) mode
When you try press the TUNING 5∞ button, the frequency will be selected by 10 kHz step to ±50 kHz. Then, it will automatically be set to
the MANUAL mode in 4 second.
b. In MANUAL (Tuning) mode
Press the TUNING 5∞ button in the FM band, then the frequency
1.
will be selected by 50 kHz step.
2. In the MW band, the frequency will be selected by 10 kHz step.
4. DIRECT TUNING
1. Press the F. DIRECT (frequency direct) button
2. Next press the numeric (0 to9) button.
For example: FM 98.10 MHz
a. FM is chosen with BAND (or TUNER) button on remote controller.
b. Press the F. DIRECT (Frequency Direct) button.
c. Press the numeric button of “9”.
d. Press the numeric button of “8”.
e. Press the numeric button of “1”.
f. Press the numeric button of “0”.
g. The display fixed 98.10 MHz and broadcast station received.
MW, LW band is same as above operations.
5. ADJUSTING CURRENT TIME
You can adjust the current time regardless of power on/standby.
1. Press the TIME ADJ button. Then “Hour display” indicator will blink.
2. LISTENING TO RADIO
1. Select FM or AM by using the BAND button.
2. Tune to the desired broadcast by using the TUNING or PRESET
5∞ button.
3. FM broadcasting is set up to “STEREO” mode
If the broadcasting signal is weak, or if there is a large amount of
interference in FM stereo broadcast, change the monaural mode by
presetting the FM MODE button.
4. Select the IF BAND (FM bandwidth)
Select the NARROW bandwidth by pressing this button if the broad-
cast signal is interfered with adjacent broadcast in the FM .
blink
2. The hour is set with the TUNING 5∞ button.
3. Press the NEXT button. Then “minute display” indicator will blink.
blink
4. The minute is set with the TUNING 5∞ button.
blink
5. Press the NEXT button.
2
Page 7

Daily timer
Example: presetting ON time: 7:15 OFF time: 9:30
1. Press the TIMER SET button.
DAILY
6. FILING (STATION NAME, ETC. )
For example: FM 98.8 MHz Preset CH-10 Station name BBC1
1. Select the preset number 10 in the preset mode.
PRESET
MHz
ENGLISH
CH
2. Preset the ON time by the TUNING 5∞ button and the NEXT button.
(Same as operation of time adjust)
DAILY
3. If ON time setting OK, Press the NEXT button.
DAILY
4. Preset the OFF time by the TUNING 5∞ button and the NEXT but-
ton.
(Same as operation of time adjust)
DAILY
5. Press the NEXT button and the TIMER SET button.
DAILY
TIMER
2. Press the ST.NAME/DISPLAY button long pushed (for more than 1.5
second)
Then, “_ _ _ _” will be displayed in the clock indicator.
blink
3. Select “B” with the TUNING 5∞ button.
blink
4. Press the NEXT button. and then, the cursor will move one space.
blink
5. After selecting “BBC 1” with the TUNING 5∞ and the NEXT button,
press the MEMO button. and then, the broadcasting station name
will be changed to “BBC 1”.
ENGLISH
* Daily timer makes the system turn on and off at preset times every
day.
* If you want to record at ON time, select the desired source with the
input selector deck to the REC position.
* If the timer indicator “TIMER DAILY” is off, the daily timer doesn’ t work.
DAILY
* While setting the daily timer, if the cancel button is held depressed,
the timer function will be canceled.
blink
blink
blink
3
Page 8

TROUBLESHOOTING GUIDE
If your T uner should not perform as expected, consult the table below to see if the problem can be corrected before seeking help from your dealer or
our service organization.
Symptom
No sound
Only noise is heard
ENGLISH
Broadcasting is received but with
noise
INPUT SELECTOR of amplifier is not Select
“TUNER” in INPUT SELECTOR
Volume of amplifier positioned in “MIN.”
The terminal for system connection is pullet out.
The antenna is pulled out
The frequency is not detected exactly
The position of antenna is not suitable.
The power of CD player is turned on
WHEN TO USE RESET SWITCH
• When this system is subjected to an electrical shock.
• When the power is irregular.
In the above cases, function buttons may not often operate or the
display may operate wrongly. In these cases, try the following:
— Rear panel —
LINE OUT
R
REMOTE
CONTROL
L
RESET
RESET SWITCH
Probable cause (s)
Suggested remedy
set to “TUNER”
Adjust Volume accordingly
Connect the terminal for system
Connection correctly
Connect the antenna on the rear panel.
Set the frequency correctly
Install the antenna again after locating the best
reception position.
Turn off CD player.
REPAIRS
Only the most competent and qualified service technicians shoud be
allowed to service your unit. Marantz and its factory trained warranty
station personnel have the knowledge and special equipment needed
for the repair and calibration of this precision instrument.
In the event of difficulty, call the proper toll-free telephone number listed
on the face of the warranty to obtain the name and address of the Marants
Authorized Service Center nearest you. In many cases, the dealer where
you purchased your Marants unit may be equipped to provide service.
Please include the model, serial number of your unit together with a
copy of your purchase receipt and a full description of what you feel is
abnormal in its behaviour.
Press the RESET switch lightly once or twice with a pencil or a ballpoint
pen.
CARE AND MAIN TENANCE
This section describes the care and maintenance tasks that must be
performed to optimize the operation of your Marantz equipment.
CLEANING OF EQUIPMENT EXTERNAL
SURFACES
The exterior finish of your ST6000 will last indefinitely with proper care
and cleaning. Never use scouring pads, steel wool, scouring powders
or harsh chemical agents (e.g., lye solution), alxohol, thinners, benzine,
insecticide or other volatile substances as these will mar the finish of the
equipment. Likewise, never use cloths containing chemical substances.
If the equipment gets dirty, wipe the external surfaces with a soft, lintfree cloth.
If the equipment becomes heavily soiled:
– dilute some washing up liquid in water, in a ratio of one par t deter-
gent to six parts water;
– dip a soft, lint free cloth in the solution and wring the cloth out until it
is damp;
– wipe the equipment with the damp cloth;
– dry the equipment by wiping it with a dry cloth.
Memory backup
• In case a power outage occurs or the power cord is accidentally unplugged, the ST6000 is equipped with a backup function to prevent memory data such as the preset memory from
being erased.
The memory funcitons are backed up for up to about one
week.
4
Page 9

NAME AND USE OF EACH BUTTON ON THE
REMOTE CONTROL
w
e
SLEEP
DISPLAYBAND F.DIRECT
q
t
r
321
u
654
987
IF BANDFM MODE
0
y
i
tt
t F.DIRECT button,
tt
Use these buttons together to tune in a station by inputting the
station’s broadcast frequency directly through the remote control.
1. Press the F.DIRECT button on the remote control.
2. Next, use the numeric buttons (0 to 9) to input the broadcast fre-
quency of the desired station.
(You can find the br oadcast fr equencies of local stations in the news-
paper, etc.)
Example: Tuning in FM 84.0MHz through the remote control
a. Make sure that the set is set to the FM band. If the set is set to
the AM band, press the BAND button in order to switch to FM.
b. Press the F.DIRECT button on the remote control.
The frequency that was being displayed disappears, and is replaced by “ ” on the display.
c. Next, press numeric button “8”. The display now reads “ ”.
d. Next, press numeric button “4”. The display now r eads “ ”.
e. Next, press numeric button “0”. The display now reads “ ”.
yy
y Numeric buttons
yy
ENGLISH
ENGLISH
o
!1
!2
TUNING
PRESET PRESET
MEMO
P.SCAN
!0
REMOTE CONTROL UNIT
RC6000ST
qq
q POWER ON/OFF button
qq
Use this button to turn the power on or to put the unit into standby
mode.
ww
w SLEEP button
ww
Press this button to set the sleep timer. The sleep timer can be set
to 10, 20, 30, 40, 60, or 90 minutes, or OFF. To cancel the sleep
timer, either use this button to select “OFF,” or use the POWER button to turn the set off (i.e., put the set in standby mode).
f. Next, press numeric button “0”. The display now r eads “ ”,
the TUNED and STEREO indicators light, and you can now hear
the broadcast from that station.
To tune in an AM station, follow the same procedure, except set
the band to AM.
uu
u FM MODE button
uu
Use this button to listen to a stereo broadcast in monaural sound.
This button works for both FM and AM stereo broadcasts.
ii
i IF BAND button
ii
Use this button to switch the FM intermediate frequency band.
oo
o TUNING
oo
Use these buttons to increase or decrease the frequency to which
the tuner is currently tuned. Holding one of these buttons down
initiates the auto tuning operation. (The operation of these buttons
is the same as on the main unit.)
!0!0
!0 PRESET
!0!0
Use these buttons to move up or down through the preset stations.
!1!1
!1 MEMO button
!1!1
Use this button to store a station in preset memory . The operation of
this button is the same as on the main unit.
!2!2
!2 P.SCAN (Preset Scan) button
!2!2
Use this button to automatically tune in each of the stations stored
in preset memory, for five seconds each. If you hear a broadcast
that you want to listen to, press this button again to stop scanning
on that station.
55
5∞ buttons
55
55
5∞ buttons
55
ee
e BAND button
ee
Use this button to select either the AM band or the FM band. The
band switches each time this button is pressed.
rr
r ST.NAME/DISPLAY button
rr
Press this button to switch the display between the programmed
name, the frequency, and the antenna input level.
5
Page 10

USING THE REMOTE CONTROL UNIT
A
1. Remote control
Operate the remote control unit (RC6000ST) within a distance of approx.
5 m from the infrared signal reception window (remote sensor) on the
front of the Tuner.
Remote control operation may not be possible if the remote control unit’s
transmitter is not pointing in the direction of the remote sensor or if there
is an obstruction between the transmitter and the remote sensor.
Remote control operating range
Tuner(ST6000)
ENGLISH
Approx. 5m
60°
Remote control unit (RC6000ST)
2. Loading batteries
Batteries in this remote control unit have a life of approximately 1 year
under normal operating conditions. If the remote control unit is not going
to be used for an extended period of time, remove the batteries. Also, if
you notice that the batteries are starting to run down, replace them as
soon as possible.
1. Open the battery cover by lifting it in direction B while
pushing section A in the direction of the arrow.
B
2. Insert the provided batteries with correct polarity.
6
Page 11

SPECIFICATIONS
FM section
Frequency range.........................................................................................................................87.5 MHz to 108.0 MHz
50 kHz steps: Manual mode
(10 kHz steps: Fine mode)
Sensitivity (S/N: 30 dB).......................................................................................................................................... 1.2 µV
Total harmonic distortion (1 kHz)
Mono ............................................................................................................................................................... 0.08 %
Stereo.............................................................................................................................................................. 0.15 %
Signal to Noise ratio
Mono: ................................................................................................................................................................ 80 dB
Stereo:............................................................................................................................................................... 75 dB
Selectivity (±400 kHz)
Wide mode ........................................................................................................................................................ 65 dB
Narrow mode..................................................................................................................................................... 80 dB
Frequency Response......................................................................................................20 Hz to 15 kHz (+1.0, -3.0 dB)
Image Rejection...................................................................................................................................................... 70 dB
AM Suppression ..................................................................................................................................................... 55 dB
Stereo Separation (1 kHz) ...................................................................................................................................... 50 dB
AM Section
Frequency range.......................................................................................................520 kHz to 1710 kHz (10 kHz step)
Sensitivity (S/N: 20 dB)..................................................................................................................................50 dBµV /m
Signal to Noise ratio................................................................................................................................................ 50 dB
Total harmonic distortion ......................................................................................................................................... 1.0 %
Image Rejection...................................................................................................................................................... 35 dB
General
Power supply ..........................................................................................................................................AC 120 V 60 Hz
Power consumption ................................................................................................................................................ 7.5 W
Dimension (WxHxD) ......................................................................................................................... 440 x 96 x 311 m/m
Weight (Net)............................................................................................................................................................3.8 kg
Accessories
Remote control connection cord ...................................................................................................................................x1
Audio signal connection cord........................................................................................................................................x1
FM indoor antenna........................................................................................................................................................x1
AM loop antenna...........................................................................................................................................................x1
Remote control unit (RC6000ST) .................................................................................................................................x1
AAA (R03) Batteries......................................................................................................................................................x2
Note:
Improvements may result in specification or feature changes without notice.
Photos and illustrations may differ slightly from production models.
14
Page 12

FIGURES
BEFORE USE
Matching
Transformer
(optional)
Roof-top FM Antenna(75 ohms)
CAUTION:Do not plug the power cord of any
component into AC outlets and do not turn their POWER
switches on until connections have been performed.
Lead-type FM Antenna(75Ω)
(provided)
FM ANTENNA B
FM ANTENNA A
75Ω 75Ω
AM ANTENNA
GND
AM
RCA Pin Plug Cord
(Provided)
CD
PHONO TAPE 2AUXTUNER TAPE 1
IN
IN
OUT
OUT
AM Outdoor Antenna
5 to 12m
AM Indoor Loop Antenna
(provided)
Tuner
REMOTE
LINE OUT
CONTROL
L
R
RESET
RCA Pin Plug Cord
(Provided)
To AC Outlet
Stereo Amplifier
SYSTEM 1: MINIMUM 8 OHMS
SYSTEM 2: MINIMUM 8 OHMS
SYSTEM 1 AND 2: MINIMUM 16 OHMS
SPEAKER SYSTEMS 1
R
RR
R
SPEAKER SYSTEMS 2
IN
OUT
REMOTE
CONT
.
SWITCHED
1.0 A 120W
MAX
UNSWITCHED
1.0 A 120W
MAX
AC OUTLETS
AC 120V 60HZ
15
Page 13

CONTROLS AND FUNCTIONS
POWER
FL-DISPLAY
gh
TUNER ST6000
DAILY ONCE
TIMER
STANDBY
ON/STAMDBY
AB
ANTETTA
WIDE
NARROW
IF BAND
FM
AM
ST.NAME
TUNING
MODE
/DISPLAY
TIME ADJ.
!6
TUNEDPMSTEREO RDS
DOWN
TUNING
PTY PT TP TA AUTO
kHz
MHz
UP
CANCEL
MEMO
PRESET
CH
!1 !2 !3
MEMONEXT
q w e rty iuo!0
AM
TIMER
DAILY
ca b
TUNEDPMSTEREO
de
AUTO
PRESET
kHz
MHz
ON/OFF
MEMO
TIMER SET
CH
UP
PRESET
DOWN
FM MODE
BAND
!4 !5
f
16
Page 14

COUNTRY COMPANY ADDRESS
AUSTRALIA Scan audio Pty. Ltd. 4 Station Street, Thornleigh NSW 2120, Australia
AUSTRIA Huber & Prohaska GmbH Taborstraße 95 / Ladestraße 1, Gebäude Hangartner, A-1200 Wien, Austria
BELGIUM Van der Heyden Audio N.V. Brusselbaan 278, 9320 Erembodegem, Belgium
BULGARIA Ariescommerce GmbH Makedonia Blvd. 16, 1606 Sofia, Bulgaria
CANADA Lenbrook Industries Limited 633 Granite Court, Pickering, Ontario
CYPRUS Empire Hifi systems Ltd. P.O. Box 5604, Nicosia, Cyprus
CZECH REPUBLIC Audio International Fugnerova 1, 67801 Blansko, Czech Republic
DENMARK Hi-Fi Klubben Denmark Aboulevarden 1, DK-8000 Arhus C., Denmark
DUBAI V.V.& SONS P.O. Box 105, Dubai, U.A.E.
ESTONIA Audio International Baltic Lo Hu 12, EE0026 Tallin, Estonia
F.Y.R.O.M. T.P. KODI ul.Cedomir Kantargiev 21a, Skopje, Former Yugoslavian Republic of Macedonija
FINLAND Hi-Fi Klubi Finland Uudenmaankatu 4-6, SF-00120 Helsinki, Finland
FRANCE Marantz France A division of Marantz Europe B.V., P.O. Box 301, 92 156 Suresnes Cedex, France
GERMANY Marantz Deutschland Hakenbusch 3, 49078 Osnabrück, Germany
GREECE Adamco S.A. 188, Hippocratous Street, 11471 Athens, Greece
HEADQUARTERS EUROPE: Marantz Europe B.V. Building SFF-2, P.O. Box 80002, 5600 JB Eindhoven, The Netherlands
HONG KONG Marantz Asia Ltd.
HUNGARY Infovox Ltd. Terez Krt.31, 1067 Budapest, Hungary
ICELAND Radiobudin HF Skipholti 19, P.O. Box 424, 121 Reykjavik, Iceland
INDIA Marantz India c/o Philips India Ltd., Plot 80, Bhosari Industrial Estate Pune - 411026, India
IRAN Home Co. 5th floor no 878 Philips Building Enghelab ave, P.O. 11365/7844 Tehran, Iran
IRELAND Marantz Ireland Clonskeagh, Dublin 14, Ireland
ISRAEL Elmor Ltd. 52 Heh Beiyar Street, Kikar Hamedina, Tel Aviv, Israel
ITALY Marantz Italy Via Casati 23, 20052 Monza (Milano), Italy, Servizio Consumatori 1678-20026, Numero Verde
JAPAN Marantz Japan Inc. 35-1 Sagami Ohno 7-Chome, Sagamihara-shi, Kanagawa 228-8505,Japan
KOREA Mk Enterprises Ltd. #604 Electro-officetel, 16-58, 3GA Hangang-ro, Yongsan-ku, Seoul 140-013 Korea
KUWAIT alAlamiah Electronics Intl. P.O. Box 8196, Salmiah 22052, Kuwait
LATVIA Ace Ltd. 61, LacPlesa Str., Riga LV 1011, Latvia
LEBANON AZ Electronics S.A., 1, P.O. Box 11 2833, Beirut, Lebanon
LITHUANIA A Accapella Ltd. Ausros, Vartu G5, Pasazo Skg., 2001 Vilnius, Lithuania
MALAYSIA Wo Kee Hong Electronics Sdn. Bhd. 102 Jalan SS 21/35, Damansara Utama, 47400 Petaling Jaya, Selangordarul Ehsan, Malaysia
MALTA Doneo Co Ltd. 78 The Strand, Sliema SLM07, Malta
MAURITIUS SKR Electronics Ltd. P.O. Box 685, Bell Village, Port Louis, Mauritius
NETHERLANDS Marantz Trading
NEW ZEALAND Scan audio Pty. Ltd. 4 Station Street, Thornleigh NSW 2120, Australia
NORWAY Hi-Fi Klubben Norway Lillegrensen 7, N-0159 Oslo, Norway
OMAN Mustafa & Jawad Trading CO. P.O. Box 1918, Ruwi, Oman
POLAND Marantz Polska Ul. Marszalkowska 45/49, 00-648 Warszawa, Poland
PORTUGAL Corel2 Comércio de Electrónica Lda., Av. Luís Bívar, No 85 A, 1050 Lisboa, Portugal
PROFESSIONAL EUROPE Marantz Professional Products Kingsbridge House, Padbury Oaks, 575-583 Bath Road, Longford, Middlesex UB7 0EH, U.K.
PROFESSIONAL U.S.A. Marantz Professional Products Distributed by: Superscope Technologies Inc., 1000 Corporate Blvd. Ste.D, Aurora, Illino
QATAR Almana & Partners W.W.L. P.O. Box 49, Doha, Qatar
REUNION Vision + 180 Rue du Marechal Leclerc, 97400 Saint Denis, Ile de la Reunion
ROMANIA Alltrom SRL Soseaua Bucuresti, Ploiesti 10, Sector 1, Bucharest, Romania
RUSSIA Trade Company SV Bld. 2, 7 Montazhnaya Street, 107497 Moscow, Russia
SAUDI ARABIA Ultimate Fidelity Sameria Comm. Center, Roadah Dist., P.O. Box 7760, Jeddah 21472, Saudi Arabia
SINGAPORE Forward Marketing (S) Pte. Ltd. Wo Kee Hong Centre, 29 Leng Kee Road, Singapore 159099, Singapore
SLOVAKIA Audio International Slovakia Nam. SNP 10, 96001 Zvolem, Slovakia
SLOVENIA Bofex Smartinska 152, HALA V/3, 61000 Ljubljana, Slovenia
SOUTH AFRICA Coherent Imports (PTY) Ltd. P.O. Box 1614, Alberton, 1450, South Africa
SPAIN Marantz Spain Martinez Villergas 2, Apartado 2065, Madrid 28027, Spain
SWEDEN Hi-Fi Klubben A.B. Tegnersgatan 21, S-412 52 Gotenborg, Sweden
SWITZERLAND Sound Company AG Postfach, 8010 Zürich, Switzerland
TAHITI Covecolor Av. Prince Hinoi, Cours de l'union sacré, P.O. Box 2334, Papeete, Tahiti
TAIWAN Pai-Yuing Co. Ltd. 6th No 148 Sung Kiang Road, Taipei 10429, Taiwan R.O.C.
THAILAND MRZ Standard Co. Ltd. 746-750 Mahachai Road, Wangburapa, Bangkok 10200, Thailand
TURKEY Penta Elektronic Sanayi Ve Ticaret Ltd. Sti., Selvi Kokak, No. 4/1, Senlikkoy, 34810 Florya, Istanbul, Turkey
U.K. Marantz Hifi UK Ltd. Kingsbridge House, Padbury Oaks, 575-583 Bath Road, Longford, Middlesex UB7 0EH, U.K.
U.S.A. Marantz America Inc. 440 Medinah Road, Roselle, IL 60172, U.S.A.
YUGOSLAVIA ITM Ljutice Bogdana la, Belgrade, Yugoslavia
EXPORT Marantz Trading
www.marantz.com
Unit 1706, Metroplaza ll, 223 Hing Fong Road, Kwai Fong, N.T., Kowloon, Hong Kong
A division of Marantz Europe B.V., Building SFF-2, P.O. Box 80002, 5600 JB Eindhoven, The Netherlands
A division of Marantz Europe B.V., Building SFF-2, P.O. Box 80002, 5600 JB Eindhoven, The Netherlands
is a registered trademark.
http://www.marantz.co.jp
Printed in China 99/6 MITs 282W851250
 Loading...