

Page 1

Quick Start Guide
Guide de démarrage rapide
English
Français
EsPaÑOl
Integrated Amplier
PM7005
Guía de inicio rápido
Page 2

Welcome Before You Begin
Thank you for choosing a Marantz amplifier. This guide
provides step-by-step instructions for setting up your
amplifier.
Please do not return this unit to the store – call for
assistance.
If you need help… :
If you need additional help in solving problems, contact
Marantz customer service in your area.
1-855-ONE-Marantz
1-855-663-6272
Call for Assistance:
Monday – Friday 10:00AM to 10:00PM E.S.T,
Saturday 12:00PM to 8:00PM E.S.T
For frequently asked questions please visit
http://marantz.custhelp.com/app/answers/list
For US and Canada only
Required for Basic connections
CD player
Speaker systems
Speaker cables
Required for PC or Mac Audio
connections
Computer USB cable
These drawings are for illustrative purposes only and may not represent the
actual product(s).
1
Page 3
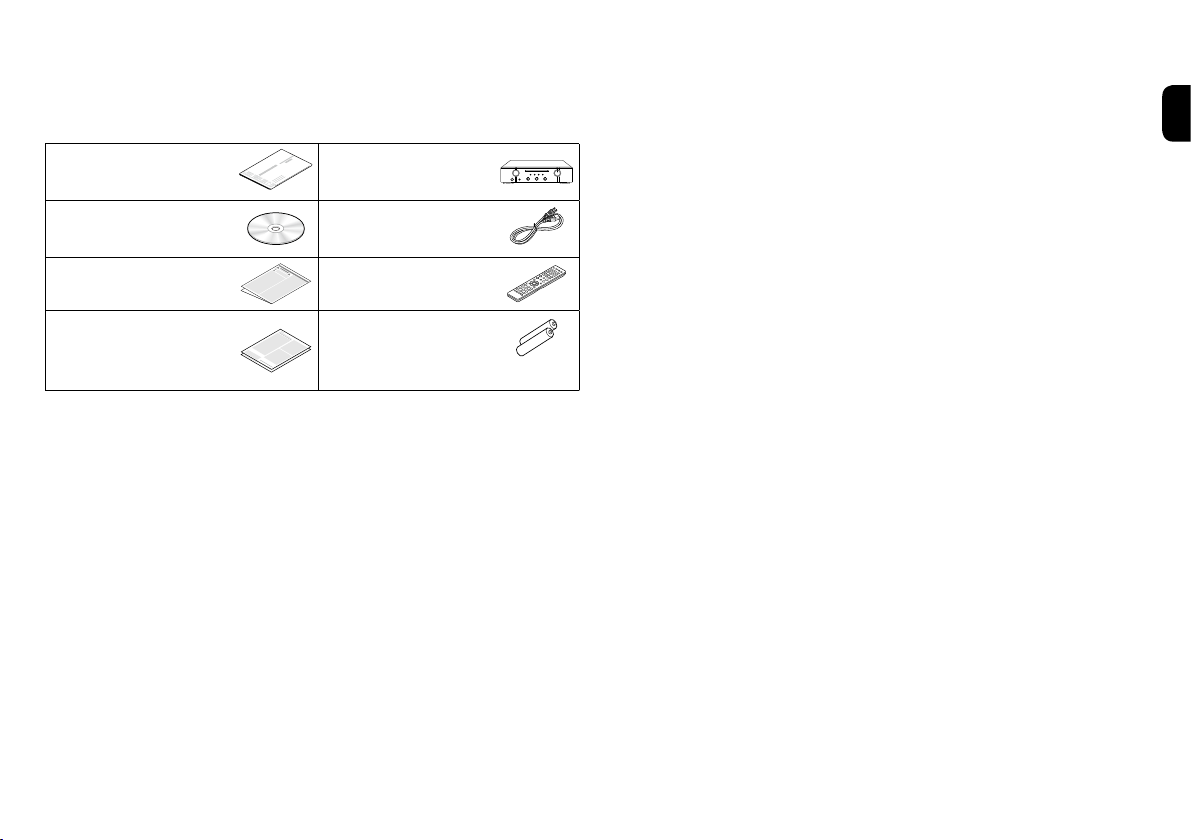
What’s In the Box
Quick Start Guide Integrated
Amplifier
Owner’s Manual Power cord
Safety Instructions Remote control
unit
Warranty
(for USA /
for CANADA)
R03/AAA batteries
2
Page 4
Setup
There are seven steps to the setup
process.
Install batteries in the remote control unit
1
Connect the speakers to the amplifier
2
Connect the CD player to the amplifier
3
Plug the power cord into a power outlet
4
Turn the amplifier’s power on
5
Begin playback
6
Enjoying music using PC or Mac
7
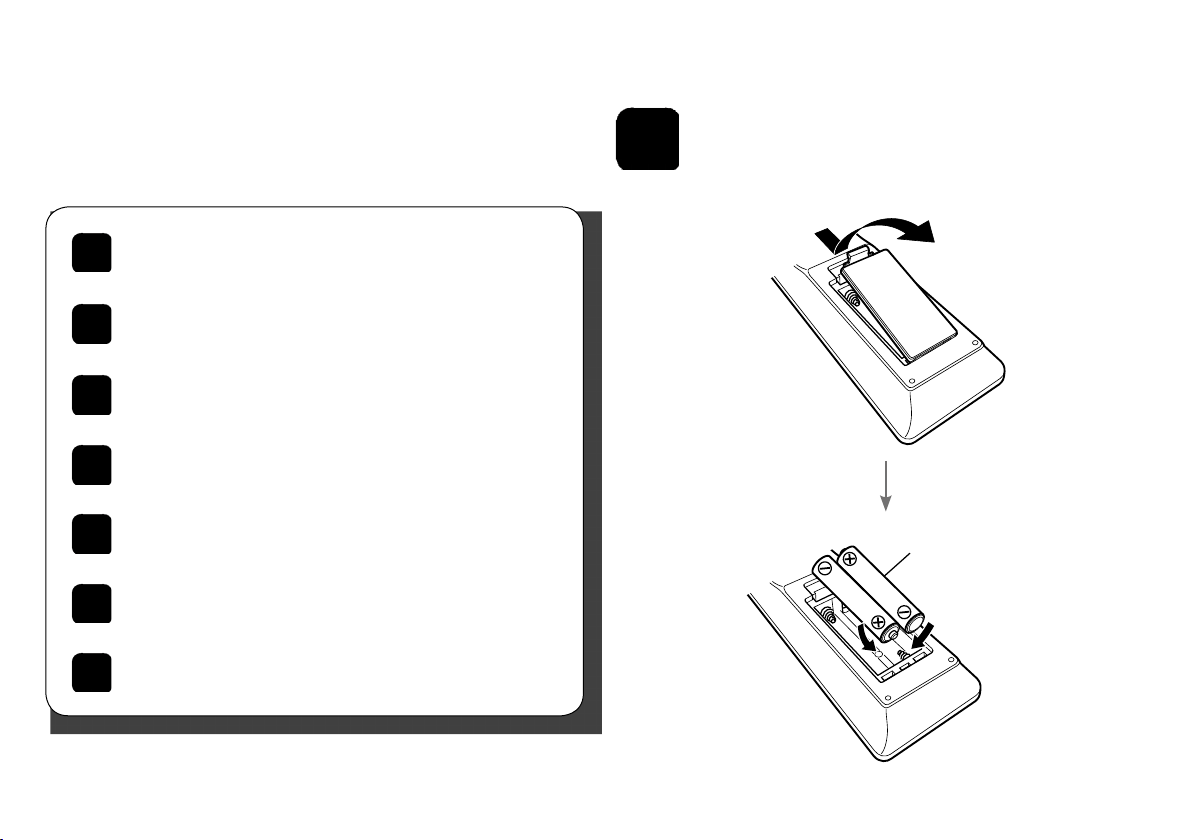
1
Install batteries in the
remote control unit
R03/AAA batteries
3
Page 5

2
wq
Connect the speakers to the amplifier
(R)
wq
(L)
Connecting the speaker cables
q Peel off about 3/8 inch (10 mm)
of sheathing from the tip of the
speaker cable, then either twist
the core wire tightly or apply
solder to it.
w Turn the speaker terminal
counterclockwise to loosen it.
e Insert the speaker cable’s core
wire to all the way into the
speaker terminal.
r Turn the speaker terminal
clockwise to tighten it.
4
Page 6

3
Connect the CD player to the amplifier
L
R
CD player
AUDIO
OUT
R L
R
L
5
Page 7

4
Plug the power cord into a power outlet
Connect to household
power outlet
(AC 120 V, 60 Hz)
Power cord (supplied)
6
Page 8

5
Turn the amplifier’s power on
1
Reduce the volume to the minimum level.
2
Press the power operation button.
12
7
Page 9

6
Begin playback
1
Press SPEAKERS on the unit.
SPEAKERS indicator lights.
2
Set the input source to “CD”.
2
2
1
4
4
3
Play the CD player.
4
Adjust the volume.
8
Page 10

7
Enjoying music using PC or Mac
7.1) Connect to PC or Mac
1
Download the driver for this unit from
the Marantz web site and install it on
your PC.
•Drivers do not need to be installed for Mac OS.
•Download the driver software from the Marantz
website.
•Operation will not occur correctly if connected to
the computer before the dedicated driver has been
installed.
•For instructions on operation, refer to the owner’s
manual.
9
2
Connect to PC or Mac.
Plug that fits the shape of the
connection device connector
3
Power on.
Type B
Type A
Computer installed
with a media
player
Page 11

7.2) Listen to PC or Mac Audio
1
Press SPEAKERS on the unit.
SPEAKERS indicator lights.
2
Set the input source to “USB-DAC”.
2
1
2
4
4
3
Play back a music le with music playback
software such as foobar2000, Audirvana
Plus and JRiver Media Center.
4
Adjust the volume.
Please refer to the Owner's manual about the required specifications of
suiting Computer.
10
Page 12

Owner’s Manual
Please reference to the Owner's Manual for more details about the setup and operation of the amplifier and its features.
n Online Version
Enter the following URL into your web browser:
manuals.marantz.com/PM7005/NA/EN/
Online Manual
Contents
Overview
Connections
Playback
Settings
Tips
Appendix
PDF
PDF Download
WEB Manual
Integrated Amplifier
PM7005
Integrated Amplifier
c
Copyright 2014 D&M Holdings Inc. All Rights Reserved.
English
n Printable Version
Access the print version of the owner's manual from the
included CD-ROM or select the “PDF Download” link
from the Online Version.
1
Insert the disc into
your PC.
2
Follow the screen or double click on
the PDF le.
Product Name : Integrated Amplifier
Model Number : PM7005
11
Page 13

Printed in Japan 5411 11190 00AM
D&M Holdings Inc.
 Loading...