

Makita DVC862LZ operation manual
EN
Cordless Vacuum Cleaner INSTRUCTION MANUAL 6
FR
DE
IT
NL
ES
PT
DA
EL
TR
Aspirateur Sans Fil MANUEL D’INSTRUCTIONS 13
Akku-Staubsauger BETRIEBSANLEITUNG 21
Aspirapolvere a batteria ISTRUZIONI PER L’USO 29
Accustofzuiger GEBRUIKSAANWIJZING 37
Aspiradora Inalámbrica
Aspirador de Pó a Bateria MANUAL DE INSTRUÇÕES 53
Akku støvsuger BRUGSANVISNING 61
Φορητή σκούπα
αναρρόφησης
Akülü Süpürge KULLANMA KILAVUZU 77
DVC862L
MANUAL DE
INSTRUCCIONES
ΕΓΧΕΙΡΙΔΙΟ ΟΔΗΓΙΩΝ 68
45
DVC863L
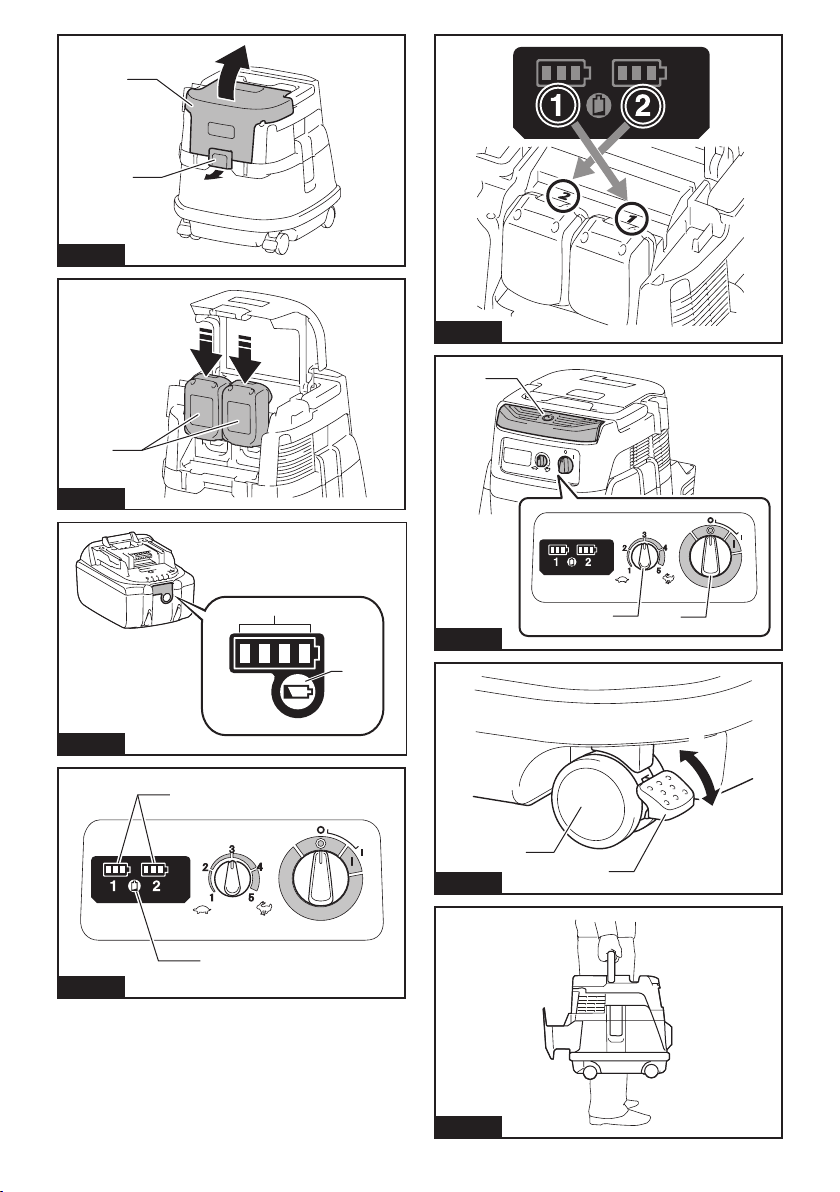
Fig.1
Fig.2
2
1
Fig.5
2
1
Fig.3
Fig.4
1
Fig.6
2
3
1
3
1
4
1
Fig.7
2
2
Fig.8
2
1
1
Fig.9
6
2
2
3
3
6
4
5
Fig.12
6
4
5
1
1
2
3
3
2
4
Fig.13
5
1
Fig.10
Fig.11
1
Fig.14
2
3
1
2
Fig.15
Fig.16
Fig.19
1
2
Fig.20
1
Fig.21
Fig.17
Fig.18
Fig.22
4
Fig.23
Fig.24
Fig.25
1
Fig.26
5
ENGLISH (Original instructions)
Cd
Li-ion
WARNING
This appliance can be used by children aged from 8 years and
above and persons with reduced physical, sensory or mental capabilities or lack of experience and knowledge if they have been given
supervision or instruction concerning use of the appliance in a safe
way and understand the hazards involved. Children shall not play
with the appliance. Cleaning and user maintenance shall not be
made by children without supervision.
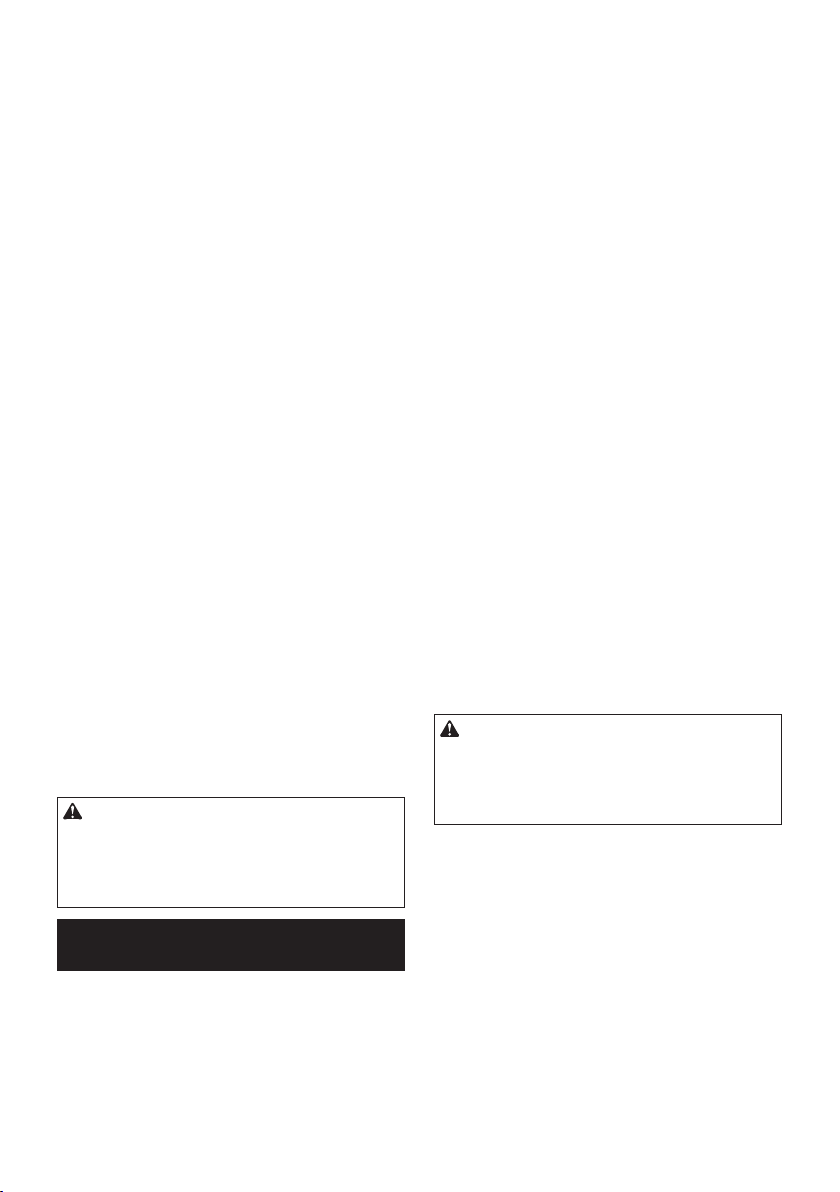
SPECIFICATIONS
Model: DVC862L DVC863L
Standard lter type Cloth lter (for dry and wet dust) Powder lter (for dry dust)
Volume ow (air)
(with BL1850B, ø38 mm x 2.5 m hose)
Vacuum (with BL1850B, ø38 mm x 2.5 m hose) 98 hPa
Recoverable capacity Dust 8 L
Water 6 L -
Dimensions (L x W x H) 366 mm x 334 mm x 368 mm
Rated voltage D.C. 36 V
Standard battery cartridge BL1815N, BL1820,
Net weight 7.0 kg 7.6 kg 7.7 kg 8.4 kg
• Due to our continuing program of research and development, the specications herein are subject to change
without notice.
• Specications and battery cartridge may differ from country to country.
• Weight, with battery cartridge, according to EPTA-Procedure 01/2003
• For wet dust, the oat and the water lter or cloth lter are required.
BL1820B
Symbols
The following show the symbols used for the equipment. Be sure that you understand their meaning before
use.
Read instruction manual.
Take particular care and attention.
Warning! The cleaner may contain hazardous dust.
Never stand on the cleaner.
Dust class L (light). The cleaners are capable of picking up dust class L. Follow your
country's regulations relating to dusts and
to occupational health and safety.
BL1830, BL1830B,
BL1840, BL1840B,
BL1850, BL1850B,
BL1860B
Ni-MH
Intended use
The tool is intended for collecting both wet and dry dust.
The tool is suitable for commercial use, for example in
hotels, schools, hospitals, factories, shops, ofces and
rental businesses.
6 ENGLISH
3
2.1 m
/min
BL1815N, BL1820,
BL1820B
Only for EU countries
Do not dispose of electric equipment or
battery pack together with household waste
material! In observance of the European
Directives, on Waste Electric and Electronic
Equipment and Batteries and Accumulators
and Waste Batteries and Accumulators and
their implementation in accordance with
national laws, electric equipment and batteries and battery pack(s) that have reached
the end of their life must be collected separately and returned to an environmentally
compatible recycling facility.
BL1830, BL1830B,
BL1840, BL1840B,
BL1850, BL1850B,
BL1860B

Noise
The typical A-weighted noise level determined according to 60335-2-69:
Model DVC862L
Sound pressure level (L
Uncertainty (K) : 2.5 dB(A)
Model DVC863L
Sound pressure level (L
Uncertainty (K) : 2.5 dB(A)
The noise level under working may exceed 80 dB (A).
) : 70 dB(A) or less
pA
) : 70 dB(A) or less
pA
WARNING: Wear ear protection.
Vibration
The vibration total value (tri-axial vector sum) determined according to 60335-2-69:
Vibration emission (a
Uncertainty (K) : 1.5 m/s
NOTE: The declared vibration emission value has
been measured in accordance with the standard test
method and may be used for comparing one tool with
another.
NOTE: The declared vibration emission value
may also be used in a preliminary assessment of
exposure.
) : 2.5 m/s2 or less
h,M
2
WARNING: The vibration emission during actual
use of the power tool can differ from the declared
emission value depending on the ways in which the
tool is used.
WARNING: Be sure to identify safety measures
to protect the operator that are based on an estima-
tion of exposure in the actual conditions of use (taking
account of all parts of the operating cycle such as
the times when the tool is switched off and when it is
running idle in addition to the trigger time).
EC Declaration of Conformity
For European countries only
The EC declaration of conformity is included as Annex A
to this instruction manual.
SAFETY WARNINGS
Cordless vacuum cleaner safety
warnings
WARNING: IMPORTANT! READ CAREFULLY
all safety warnings and all instructions BEFORE
USE . Failure to follow the warnings and instructions
may result in electric shock, re and/or serious injury.
1. Before use, make sure that this cleaner must
be used by people who have been adequately
instructed on the use of this cleaner.
2. If foam/liquid comes out, switch off
immediately.
3. Clean the water level limiting device regularly
and examine it for signs of damage.
4. Do not use the cleaner without the lter.
Replace a damaged lter immediately.
5. AVOID UNINTENTIONAL STARTING. Be sure
switch is OFF when installing battery(ies).
6. Do not attempt to pick up ammable materials,
re works, lighted cigarettes, hot ashes, hot
metal chips, sharp materials such as razors,
needles, broken glass or the like.
7. NEVER USE THE CLEANER IN THE VICINITY
OF GASOLINE, GAS, PAINT, ADHESIVES OR
OTHER HIGHLY EXPLOSIVE SUBSTANCES.
The switch emits sparks when turned ON and
OFF. And so does the motor commutator during
operation. A dangerous explosion may result.
8.
Never vacuum up toxic, carcinogenic, combustible or other hazardous materials such as
asbestos, arsenic, barium, beryllium, lead, pesticides, or other health endangering materials.
9. Never use the cleaner outdoors in the rain.
10. Do not use close to heat sources (stoves, etc.).
11. Do not block cooling vents. These vents per-
mit cooling of the motor. Blockage should be
carefully avoided otherwise the motor will burn
out from lack of ventilation.
12. Keep proper footing and balance at all times.
13. Do not fold, tug or step on the hose.
14. Stop the cleaner immediately if you notice
poor performance or anything abnormal
during operation.
15.
REMOVE THE BATTERY(IES). When not in use,
before servicing, and when changing accessories.
16.
Clean and service the cleaner immediately after
each use to keep it in tiptop operating condition.
17. MAINTAIN THE CLEANER WITH CARE. Keep
the cleaner clean for better and safer performance. Follow instructions for changing
accessories. Keep handles dry, clean, and free
from oil and grease.
18. CHECK DAMAGED PARTS. Before further use
of the cleaner, a guard or other part that is
damaged should be carefully checked to determine that it will operate properly and perform
its intended function. Check for alignment of
moving parts, binding of moving parts, breakage of parts, mounting, and any other conditions that may affect its operation. A guard or
other part that is damaged should be properly
repaired or replaced by an authorized service
center unless otherwise indicated elsewhere
in this instruction manual. Have defective
switches replaced by authorized service center. Don’t use the cleaner if switch does not
turn it on and off.
19. REPLACEMENT PARTS. When servicing, use
only identical replacement parts.
20. STORE IDLE CLEANER. When not in use, the
cleaner should be stored indoors.
21.
Be kind to your cleaner. Rough handling can cause
breakage of even the most sturdily built cleaner.
22. Do not attempt to clean the exterior or interior
with benzine, thinner or cleaning chemicals.
Cracks and discoloration may be caused.
7 ENGLISH
23. Do not use cleaner in an enclosed space where
ammable, explosive or toxic vapors are given
off by oil-base paint, paint-thinner, gasoline,
some mothproong substances, etc., or in
areas where ammable dust is present.
24. Do not operate the this or any tool while under
the inuence of drugs or alcohol.
25. As a basic rule of safety, use safety goggles or
safety glasses with side shields.
26. Use a dust mask in dusty work conditions.
27. This machine is not intended for use by per-
sons including children with reduced physical,
sensory or mental capabilities, or lack of experience and knowledge.
28. Young children should be supervised to
ensure that they do not play with the cleaner.
29. Never handle battery(ies) and cleaner with wet
hands.
30. Use extreme caution when cleaning on stairs.
31. Do not use the cleaner as a stool or work
bench. The machine may fall down and may
result in personal injury.
Battery tool use and care
1. Recharge only with the charger specied by
the manufacturer. A charger that is suitable for
one type of battery pack may create a risk of re
when used with another battery pack.
2. Use power tools only with specically desig-
nated battery packs. Use of any other battery
packs may create a risk of injury and re.
3. When battery pack is not in use, keep it away
from other metal objects, like paper clips,
coins, keys, nails, screws or other small metal
objects, that can make a connection from one
terminal to another. Shorting the battery termi-
nals together may cause burns or a re.
4. Under abusive conditions, liquid may be
ejected from the battery; avoid contact. If con-
tact accidentally occurs, ush with water. If
liquid contacts eyes, additionally seek medical
help. Liquid ejected from the battery may cause
irritation or burns.
SAVE THESE INSTRUCTIONS.
WARNING: DO NOT let comfort or familiarity
with product (gained from repeated use) replace
strict adherence to safety rules for the subject
product. MISUSE or failure to follow the safety
rules stated in this instruction manual may cause
serious personal injury.
Important safety instructions for
battery cartridge
1. Before using battery cartridge, read all instructions and cautionary markings on (1) battery
charger, (2) battery, and (3) product using
battery.
2. Do not disassemble battery cartridge.
3. If operating time has become excessively
shorter, stop operating immediately. It may
result in a risk of overheating, possible burns
and even an explosion.
4. If electrolyte gets into your eyes, rinse them
out with clear water and seek medical attention right away. It may result in loss of your
eyesight.
5. Do not short the battery cartridge:
(1) Do not touch the terminals with any con-
ductive material.
(2) Avoid storing battery cartridge in a con-
tainer with other metal objects such as
nails, coins, etc.
(3) Do not expose battery cartridge to water
or rain.
A battery short can cause a large current
ow, overheating, possible burns and even a
breakdown.
6. Do not store the tool and battery cartridge in
locations where the temperature may reach or
exceed 50 °C (122 °F).
7. Do not incinerate the battery cartridge even if
it is severely damaged or is completely worn
out. The battery cartridge can explode in a re.
8. Be careful not to drop or strike battery.
9. Do not use a damaged battery.
10. The contained lithium-ion batteries are subject
to the Dangerous Goods Legislation requirements.
For commercial transports e.g. by third parties,
forwarding agents, special requirement on pack-
aging and labeling must be observed.
For preparation of the item being shipped, consulting an expert for hazardous material is required.
Please also observe possibly more detailed
national regulations.
Tape or mask off open contacts and pack up the
battery in such a manner that it cannot move
around in the packaging.
11. Follow your local regulations relating to disposal of battery.
SAVE THESE INSTRUCTIONS.
CAUTION: Only use genuine Makita batteries.
Use of non-genuine Makita batteries, or batteries that
have been altered, may result in the battery bursting
causing res, personal injury and damage. It will
also void the Makita warranty for the Makita tool and
charger.
Tips for maintaining maximum
battery life
1. Charge the battery cartridge before completely
discharged. Always stop tool operation and
charge the battery cartridge when you notice
less tool power.
2. Never recharge a fully charged battery cartridge. Overcharging shortens the battery
service life.
3. Charge the battery cartridge with room temperature at 10 °C - 40 °C (50 °F - 104 °F). Let
a hot battery cartridge cool down before
charging it.
4. Charge the battery cartridge if you do not use
it for a long period (more than six months).
8 ENGLISH
FUNCTIONAL
DESCRIPTION
CAUTION: Always be sure that the tool is
switched off and the battery cartridge is removed
before adjusting or checking function on the tool.
Installing or removing battery
cartridge
Indicator lamps Remaining
Lighted Off Blinking
capacity
75% to 100%
50% to 75%
25% to 50%
0% to 25%
CAUTION: Always switch off the tool before
installing or removing of the battery cartridge.
CAUTION: Hold the tool and the battery car-
tridge rmly when installing or removing battery
cartridge. Failure to hold the tool and the battery
cartridge rmly may cause them to slip off your hands
and result in damage to the tool and battery cartridge
and a personal injury.
CAUTION: Be careful not to pinch your n-
gers when opening or closing the battery cover.
Failure to do so may cause personal injury.
To install the battery cartridge, release the lock rst,
and open the battery cover. And then, insert the battery
cartridge.
► Fig.1: 1. Lock 2. Battery cover
Align the tongue on the battery cartridge with the groove
in the housing and slip it into place. Insert it all the way
until it locks in place with a little click. Then lock the
battery cover.
► Fig.2: 1. Battery cartridge
To remove the battery cartridge, slide it from the tool
while sliding the button on the front of the cartridge.
CAUTION: Always install the battery cartridge
fully until the red indicator cannot be seen. If not,
it may accidentally fall out of the tool, causing injury to
you or someone around you.
CAUTION: Do not install the battery cartridge
forcibly. If the cartridge does not slide in easily, it is
not being inserted correctly.
NOTE: The cleaner does not work with only one
battery cartridge.
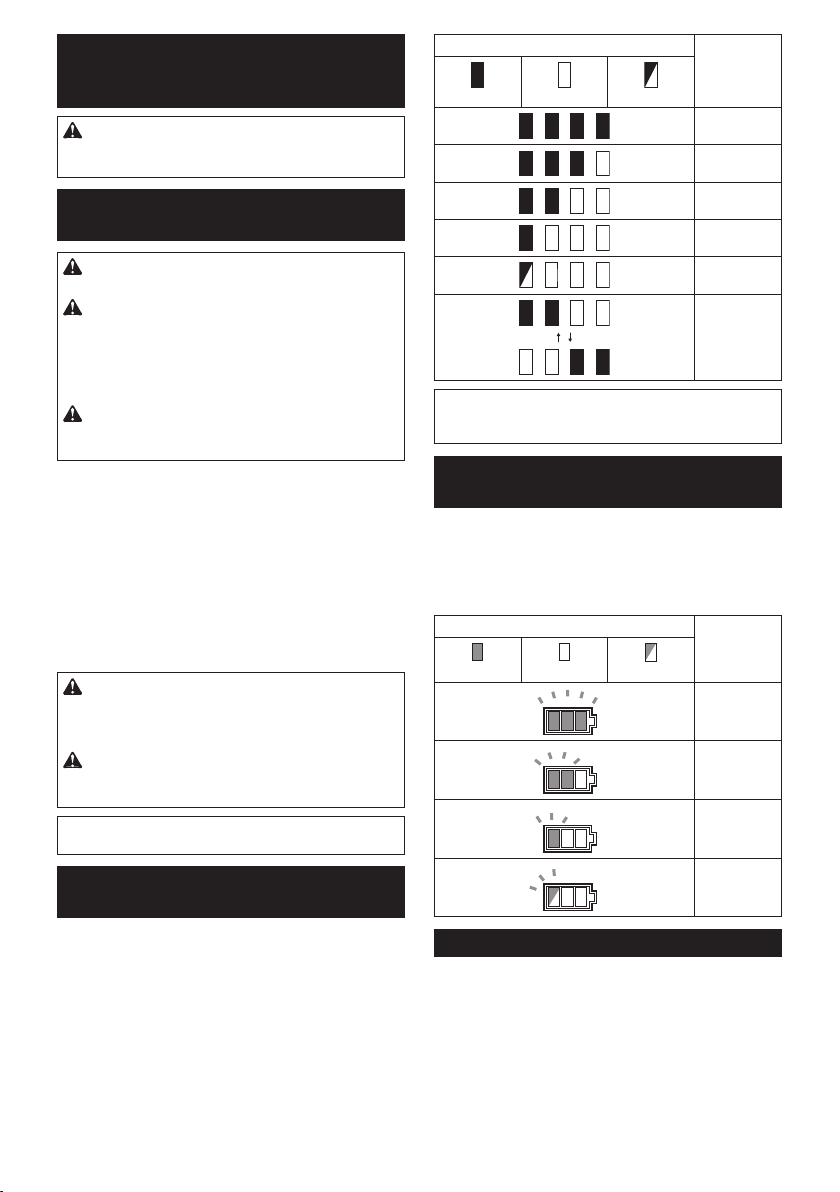
Indicating the remaining battery
capacity
Only for battery cartridges with the indicator
► Fig.3: 1. Indicator lamps 2. Check button
Press the check button on the battery cartridge to indi-
cate the remaining battery capacity. The indicator lamps
light up for few seconds.
Charge the
battery.
The battery
may have
malfunctioned.
NOTE: Depending on the conditions of use and the
ambient temperature, the indication may differ slightly
from the actual capacity.
Indicating the remaining battery
capacity
► Fig.4: 1. Battery indicator 2. Check button
► Fig.5
Press the check button to indicate the remaining battery
capacities. The battery indicators correspond to each
battery.
Battery indicator status Remaining
On
Off
Blinking
battery
capacity
50% to 100%
20% to 50%
0% to 20%
Charge the
battery
Tool / battery protection system
The tool is equipped with a tool/battery protection system. This system automatically cuts off power to the
motor to extend tool and battery life. The tool will automatically stop during operation if the tool or battery is
placed under one of the following conditions:
9 ENGLISH
 Loading...