

Page 1

ADOBE®FLEX
®
3
DEVELOPER GUIDE
Page 2

© 2008 Adobe Systems Incorporated. All rights reserved.
Adobe® Flex® 3 Developer Guide
If t his gui de is dist ri bute d wi th s oft ware tha t inc lud es a n en d-u ser agr eeme nt, thi s gui de , as we ll a s th e sof twa re d esc rib ed i n it, is furnished under license
and may be used or copied only in accordance with the terms of such license. Except as permitted by any such license, no part of this guide may be
reproduced, stored in a retrieval system, or transmitted, in any form or by any means, electronic, mechanical, recording, or otherwise, without the prior
written permission of Adobe Systems Incorporated. Please note that the content in this guide is protected under copyright law even if it is not distributed
with software that includes an end-user license agreement.
The content of this guide is furnished for informational use only, is subject to change without notice, and should not be construed as a commitment by
Adobe Systems Incorporated. Adobe Systems Incorporated assumes no responsibility or liability for any errors or inaccuracies that may appear in the
informational content contained in this guide.
Please remember that ex isting artwork or i mages that you m ay want to include i n your project m ay be protected und er copyright law. The unauthorized
incorporation of such material into your new work could be a violation of the rights of the copyright owner. Please be sure to obtain any permission
required from the copyright owner.
Any references to company names in sample templates are for demonstration purposes only and are not intended to refer to any actual organization.
Adobe, the Adobe logo, ActionScript, Adobe AIR, ColdFusion, Fireworks, Flash, Flex, Illustrator, LiveCycle, and Photoshop are either registered
trademarks or trademarks of Adobe Systems Incorporated in the United States and/or other countries.
Java is a trademark or registered trademark of Sun Microsystems, Inc. in the United States and other countries. Linux is a registered trademark of Linus
Torvalds. Macintosh is a trademark of Apple Inc., registered in the United States and other countries. Microsoft, OpenType, Windows, Windows ME,
and Windows Vista are either registered trademarks or trademarks of Microsoft Corporation in the United States and/or other countries. Sun is a
registered trademark or trademark of Sun Microsystems, Inc. in the United States and other countries. All other trademarks are the property of their
respective owners.
This product includes software developed by the Apache Software Foundation (http://www.apache.org/)
This product contains either BISAFE and/or TIPEM software by RSA Data Security, Inc.
The Flex Builder 3 software c ontains code provided by the Eclipse Foundati on (“Eclips e Code”). The source code for the Eclipse Code as contained in
Flex Builder 3 software (“Eclipse Source Code”) is made available under the terms of the Eclipse Public License v1.0 which is provided herein, and is
also available at http://www.eclipse.org/legal/epl-v10.html .
Adobe Systems Incorporated, 345 Park Avenue, San Jose, CA 95110-2704, USA.
Notice to U.S. gove rnme nt end users. The software and documentation are “Commercial Items,” as that term is defined at 48 C.F.R. §2.101, consisting
of “Commercial Computer Software” and “Commercial Computer Software Documentation,” as such terms are used in 48 C.F.R. §12.212 or 48 C.F.R.
§227.7202, as applicable. Consistent with 48 C.F.R. §12.212 or 48 C.F.R. §§227.7202-1 through 227.7202-4, as applicable, the Commercial Computer
Soft ware and Commercial Computer Sof tware Docu mentation are being licensed to U.S. Government en d users (a) o nly as Comm ercial items and (b)
with only those rights as are granted to all other end users pursuant to the terms and conditions herein. Unpublished-rights reserved under the
copyright laws of the United States. For U.S. Government End Users, Adobe agrees to comply with all applicable equal opportunity laws including, if
appropriate, the provisions of Executive Order 11246, as amended, Section 402 of the Vietnam Era Veterans Readjustment Assistance Act of 1974 (38
USC 4212), and Section 503 of the Rehabilitation Act of 1973, as amended, and the regulations at 41 CFR Parts 60-1 through 60-60, 60-250 ,and 60-
741. The affirmative action clause and regulations contained in the preceding sentence shall be incorporated by reference.
Part Number: 90085057 (01/08)
Page 3

Contents
Part 1: Flex Programming Elements
Chapter 1: Developing Applications in MXML
About MXML . . . . . . . . . . . . . . . . . . . . . . . . . . . . . . . . . . . . . . . . . . . . . . . . . . . . . . . . . . . . . . . . . . . . . . . . . . . . . 3
Developing applications . . . . . . . . . . . . . . . . . . . . . . . . . . . . . . . . . . . . . . . . . . . . . . . . . . . . . . . . . . . . . . . . . . 7
Chapter 2: MXML Syntax
Basic MXML syntax . . . . . . . . . . . . . . . . . . . . . . . . . . . . . . . . . . . . . . . . . . . . . . . . . . . . . . . . . . . . . . . . . . . . . . . 23
Setting component properties . . . . . . . . . . . . . . . . . . . . . . . . . . . . . . . . . . . . . . . . . . . . . . . . . . . . . . . . . . . 24
Chapter 3: Using ActionScript
Using ActionScript in Flex applications . . . . . . . . . . . . . . . . . . . . . . . . . . . . . . . . . . . . . . . . . . . . . . . . . . . . 37
Working with Flex components . . . . . . . . . . . . . . . . . . . . . . . . . . . . . . . . . . . . . . . . . . . . . . . . . . . . . . . . . . . 42
Comparing, including, and importing ActionScript code . . . . . . . . . . . . . . . . . . . . . . . . . . . . . . . . . . 49
Techniques for separating ActionScript from MXML . . . . . . . . . . . . . . . . . . . . . . . . . . . . . . . . . . . . . . . 53
Creating ActionScript components . . . . . . . . . . . . . . . . . . . . . . . . . . . . . . . . . . . . . . . . . . . . . . . . . . . . . . . 55
Performing object introspection . . . . . . . . . . . . . . . . . . . . . . . . . . . . . . . . . . . . . . . . . . . . . . . . . . . . . . . . . . 56
iii
Chapter 4: Using Events
About events . . . . . . . . . . . . . . . . . . . . . . . . . . . . . . . . . . . . . . . . . . . . . . . . . . . . . . . . . . . . . . . . . . . . . . . . . . . . 61
Using events . . . . . . . . . . . . . . . . . . . . . . . . . . . . . . . . . . . . . . . . . . . . . . . . . . . . . . . . . . . . . . . . . . . . . . . . . . . . . 65
Manually dispatching events . . . . . . . . . . . . . . . . . . . . . . . . . . . . . . . . . . . . . . . . . . . . . . . . . . . . . . . . . . . . . 83
Event propagation . . . . . . . . . . . . . . . . . . . . . . . . . . . . . . . . . . . . . . . . . . . . . . . . . . . . . . . . . . . . . . . . . . . . . . . 86
Event priorities . . . . . . . . . . . . . . . . . . . . . . . . . . . . . . . . . . . . . . . . . . . . . . . . . . . . . . . . . . . . . . . . . . . . . . . . . . . 94
Using event subclasses . . . . . . . . . . . . . . . . . . . . . . . . . . . . . . . . . . . . . . . . . . . . . . . . . . . . . . . . . . . . . . . . . . . 95
About keyboard events . . . . . . . . . . . . . . . . . . . . . . . . . . . . . . . . . . . . . . . . . . . . . . . . . . . . . . . . . . . . . . . . . . 97
Chapter 5: Flex Data Access
About data access . . . . . . . . . . . . . . . . . . . . . . . . . . . . . . . . . . . . . . . . . . . . . . . . . . . . . . . . . . . . . . . . . . . . . . . 103
Comparing Flex data access to other technologies . . . . . . . . . . . . . . . . . . . . . . . . . . . . . . . . . . . . . . . 108
Page 4

CONTENTS
iv
Part 2: User Interfaces
Chapter 6: Using Flex Visual Components
About visual components . . . . . . . . . . . . . . . . . . . . . . . . . . . . . . . . . . . . . . . . . . . . . . . . . . . . . . . . . . . . . . . 113
Class hierarchy for visual components . . . . . . . . . . . . . . . . . . . . . . . . . . . . . . . . . . . . . . . . . . . . . . . . . . .114
Using the UIComponent class . . . . . . . . . . . . . . . . . . . . . . . . . . . . . . . . . . . . . . . . . . . . . . . . . . . . . . . . . . . 115
Sizing visual components . . . . . . . . . . . . . . . . . . . . . . . . . . . . . . . . . . . . . . . . . . . . . . . . . . . . . . . . . . . . . . .121
Handling events . . . . . . . . . . . . . . . . . . . . . . . . . . . . . . . . . . . . . . . . . . . . . . . . . . . . . . . . . . . . . . . . . . . . . . . . 124
Applying styles . . . . . . . . . . . . . . . . . . . . . . . . . . . . . . . . . . . . . . . . . . . . . . . . . . . . . . . . . . . . . . . . . . . . . . . . . 128
Applying behaviors . . . . . . . . . . . . . . . . . . . . . . . . . . . . . . . . . . . . . . . . . . . . . . . . . . . . . . . . . . . . . . . . . . . . . 131
Applying skins . . . . . . . . . . . . . . . . . . . . . . . . . . . . . . . . . . . . . . . . . . . . . . . . . . . . . . . . . . . . . . . . . . . . . . . . . .132
Changing the appearance of a component at run time . . . . . . . . . . . . . . . . . . . . . . . . . . . . . . . . . . .132
Extending components . . . . . . . . . . . . . . . . . . . . . . . . . . . . . . . . . . . . . . . . . . . . . . . . . . . . . . . . . . . . . . . . . 134
Chapter 7: Using Data Providers and Collections
About collections and data provider components . . . . . . . . . . . . . . . . . . . . . . . . . . . . . . . . . . . . . . . . 137
Using simple data access properties and methods . . . . . . . . . . . . . . . . . . . . . . . . . . . . . . . . . . . . . . . 149
Working with data views . . . . . . . . . . . . . . . . . . . . . . . . . . . . . . . . . . . . . . . . . . . . . . . . . . . . . . . . . . . . . . . . 151
Collection events and manual change notification . . . . . . . . . . . . . . . . . . . . . . . . . . . . . . . . . . . . . . . 161
Hierarchical data objects . . . . . . . . . . . . . . . . . . . . . . . . . . . . . . . . . . . . . . . . . . . . . . . . . . . . . . . . . . . . . . . . 167
Remote data in data provider components . . . . . . . . . . . . . . . . . . . . . . . . . . . . . . . . . . . . . . . . . . . . . . 180
Data providers and the uid property . . . . . . . . . . . . . . . . . . . . . . . . . . . . . . . . . . . . . . . . . . . . . . . . . . . . . 181
Chapter 8: Sizing and Positioning Components
About sizing and positioning . . . . . . . . . . . . . . . . . . . . . . . . . . . . . . . . . . . . . . . . . . . . . . . . . . . . . . . . . . . . 185
Sizing components . . . . . . . . . . . . . . . . . . . . . . . . . . . . . . . . . . . . . . . . . . . . . . . . . . . . . . . . . . . . . . . . . . . . .192
Positioning and laying out controls . . . . . . . . . . . . . . . . . . . . . . . . . . . . . . . . . . . . . . . . . . . . . . . . . . . . . . 208
Using constraints to control component layout . . . . . . . . . . . . . . . . . . . . . . . . . . . . . . . . . . . . . . . . . .213
Chapter 9: Controls
About controls . . . . . . . . . . . . . . . . . . . . . . . . . . . . . . . . . . . . . . . . . . . . . . . . . . . . . . . . . . . . . . . . . . . . . . . . . .224
Working with controls . . . . . . . . . . . . . . . . . . . . . . . . . . . . . . . . . . . . . . . . . . . . . . . . . . . . . . . . . . . . . . . . . . . 230
Button control . . . . . . . . . . . . . . . . . . . . . . . . . . . . . . . . . . . . . . . . . . . . . . . . . . . . . . . . . . . . . . . . . . . . . . . . . .233
PopUpButton control . . . . . . . . . . . . . . . . . . . . . . . . . . . . . . . . . . . . . . . . . . . . . . . . . . . . . . . . . . . . . . . . . . .237
ButtonBar and ToggleButtonBar controls . . . . . . . . . . . . . . . . . . . . . . . . . . . . . . . . . . . . . . . . . . . . . . . . 240
LinkBar control . . . . . . . . . . . . . . . . . . . . . . . . . . . . . . . . . . . . . . . . . . . . . . . . . . . . . . . . . . . . . . . . . . . . . . . . . . 243
TabBar control . . . . . . . . . . . . . . . . . . . . . . . . . . . . . . . . . . . . . . . . . . . . . . . . . . . . . . . . . . . . . . . . . . . . . . . . . . 244
CheckBox control . . . . . . . . . . . . . . . . . . . . . . . . . . . . . . . . . . . . . . . . . . . . . . . . . . . . . . . . . . . . . . . . . . . . . . .248
Page 5

RadioButton control . . . . . . . . . . . . . . . . . . . . . . . . . . . . . . . . . . . . . . . . . . . . . . . . . . . . . . . . . . . . . . . . . . . . 249
NumericStepper control . . . . . . . . . . . . . . . . . . . . . . . . . . . . . . . . . . . . . . . . . . . . . . . . . . . . . . . . . . . . . . . . . 253
DateChooser and DateField controls . . . . . . . . . . . . . . . . . . . . . . . . . . . . . . . . . . . . . . . . . . . . . . . . . . . . .255
LinkButton control . . . . . . . . . . . . . . . . . . . . . . . . . . . . . . . . . . . . . . . . . . . . . . . . . . . . . . . . . . . . . . . . . . . . . .265
HSlider and VSlider controls . . . . . . . . . . . . . . . . . . . . . . . . . . . . . . . . . . . . . . . . . . . . . . . . . . . . . . . . . . . . .267
SWFLoader control . . . . . . . . . . . . . . . . . . . . . . . . . . . . . . . . . . . . . . . . . . . . . . . . . . . . . . . . . . . . . . . . . . . . . . 274
Image control . . . . . . . . . . . . . . . . . . . . . . . . . . . . . . . . . . . . . . . . . . . . . . . . . . . . . . . . . . . . . . . . . . . . . . . . . . . 278
VideoDisplay control . . . . . . . . . . . . . . . . . . . . . . . . . . . . . . . . . . . . . . . . . . . . . . . . . . . . . . . . . . . . . . . . . . . . 287
ColorPicker control . . . . . . . . . . . . . . . . . . . . . . . . . . . . . . . . . . . . . . . . . . . . . . . . . . . . . . . . . . . . . . . . . . . . . . 294
Alert control . . . . . . . . . . . . . . . . . . . . . . . . . . . . . . . . . . . . . . . . . . . . . . . . . . . . . . . . . . . . . . . . . . . . . . . . . . . .301
ProgressBar control . . . . . . . . . . . . . . . . . . . . . . . . . . . . . . . . . . . . . . . . . . . . . . . . . . . . . . . . . . . . . . . . . . . . . 306
HRule and VRule controls . . . . . . . . . . . . . . . . . . . . . . . . . . . . . . . . . . . . . . . . . . . . . . . . . . . . . . . . . . . . . . . . 309
ScrollBar control . . . . . . . . . . . . . . . . . . . . . . . . . . . . . . . . . . . . . . . . . . . . . . . . . . . . . . . . . . . . . . . . . . . . . . . .312
Chapter 10: Using Text Controls
About text controls . . . . . . . . . . . . . . . . . . . . . . . . . . . . . . . . . . . . . . . . . . . . . . . . . . . . . . . . . . . . . . . . . . . . . 315
Using the text property . . . . . . . . . . . . . . . . . . . . . . . . . . . . . . . . . . . . . . . . . . . . . . . . . . . . . . . . . . . . . . . . .317
Using the htmlText property . . . . . . . . . . . . . . . . . . . . . . . . . . . . . . . . . . . . . . . . . . . . . . . . . . . . . . . . . . . .321
Selecting and modifying text . . . . . . . . . . . . . . . . . . . . . . . . . . . . . . . . . . . . . . . . . . . . . . . . . . . . . . . . . . . . 330
Label control . . . . . . . . . . . . . . . . . . . . . . . . . . . . . . . . . . . . . . . . . . . . . . . . . . . . . . . . . . . . . . . . . . . . . . . . . . . . 334
TextInput control . . . . . . . . . . . . . . . . . . . . . . . . . . . . . . . . . . . . . . . . . . . . . . . . . . . . . . . . . . . . . . . . . . . . . . . 336
Text control . . . . . . . . . . . . . . . . . . . . . . . . . . . . . . . . . . . . . . . . . . . . . . . . . . . . . . . . . . . . . . . . . . . . . . . . . . . . .337
TextArea control . . . . . . . . . . . . . . . . . . . . . . . . . . . . . . . . . . . . . . . . . . . . . . . . . . . . . . . . . . . . . . . . . . . . . . . . 339
RichTextEditor control . . . . . . . . . . . . . . . . . . . . . . . . . . . . . . . . . . . . . . . . . . . . . . . . . . . . . . . . . . . . . . . . . . .340
v
Chapter 11: Using Menu-Based Controls
About menu-based controls . . . . . . . . . . . . . . . . . . . . . . . . . . . . . . . . . . . . . . . . . . . . . . . . . . . . . . . . . . . . . 347
Defining menu structure and data . . . . . . . . . . . . . . . . . . . . . . . . . . . . . . . . . . . . . . . . . . . . . . . . . . . . . . . 348
Menu-based control events . . . . . . . . . . . . . . . . . . . . . . . . . . . . . . . . . . . . . . . . . . . . . . . . . . . . . . . . . . . . . 353
Menu control . . . . . . . . . . . . . . . . . . . . . . . . . . . . . . . . . . . . . . . . . . . . . . . . . . . . . . . . . . . . . . . . . . . . . . . . . . . 362
MenuBar control . . . . . . . . . . . . . . . . . . . . . . . . . . . . . . . . . . . . . . . . . . . . . . . . . . . . . . . . . . . . . . . . . . . . . . . .365
PopUpMenuButton control . . . . . . . . . . . . . . . . . . . . . . . . . . . . . . . . . . . . . . . . . . . . . . . . . . . . . . . . . . . . . .367
Chapter 12: Using Data-Driven Controls
List control . . . . . . . . . . . . . . . . . . . . . . . . . . . . . . . . . . . . . . . . . . . . . . . . . . . . . . . . . . . . . . . . . . . . . . . . . . . . . . 373
HorizontalList control . . . . . . . . . . . . . . . . . . . . . . . . . . . . . . . . . . . . . . . . . . . . . . . . . . . . . . . . . . . . . . . . . . . 382
TileList control . . . . . . . . . . . . . . . . . . . . . . . . . . . . . . . . . . . . . . . . . . . . . . . . . . . . . . . . . . . . . . . . . . . . . . . . . .385
Page 6

CONTENTS
vi
ComboBox control . . . . . . . . . . . . . . . . . . . . . . . . . . . . . . . . . . . . . . . . . . . . . . . . . . . . . . . . . . . . . . . . . . . . . .388
DataGrid control . . . . . . . . . . . . . . . . . . . . . . . . . . . . . . . . . . . . . . . . . . . . . . . . . . . . . . . . . . . . . . . . . . . . . . . . 395
Tree control . . . . . . . . . . . . . . . . . . . . . . . . . . . . . . . . . . . . . . . . . . . . . . . . . . . . . . . . . . . . . . . . . . . . . . . . . . . . . 405
Chapter 13: Introducing Containers
About containers . . . . . . . . . . . . . . . . . . . . . . . . . . . . . . . . . . . . . . . . . . . . . . . . . . . . . . . . . . . . . . . . . . . . . . . 419
Using containers . . . . . . . . . . . . . . . . . . . . . . . . . . . . . . . . . . . . . . . . . . . . . . . . . . . . . . . . . . . . . . . . . . . . . . . . 421
Using scroll bars . . . . . . . . . . . . . . . . . . . . . . . . . . . . . . . . . . . . . . . . . . . . . . . . . . . . . . . . . . . . . . . . . . . . . . . . 433
Using Flex coordinates . . . . . . . . . . . . . . . . . . . . . . . . . . . . . . . . . . . . . . . . . . . . . . . . . . . . . . . . . . . . . . . . . .436
Creating and managing component instances at run time . . . . . . . . . . . . . . . . . . . . . . . . . . . . . . . . 441
Chapter 14: Application Container
About the Application container . . . . . . . . . . . . . . . . . . . . . . . . . . . . . . . . . . . . . . . . . . . . . . . . . . . . . . . . . 451
About the Application object . . . . . . . . . . . . . . . . . . . . . . . . . . . . . . . . . . . . . . . . . . . . . . . . . . . . . . . . . . . .457
Showing the download progress of an application . . . . . . . . . . . . . . . . . . . . . . . . . . . . . . . . . . . . . . . 462
Chapter 15: Using Layout Containers
About layout containers . . . . . . . . . . . . . . . . . . . . . . . . . . . . . . . . . . . . . . . . . . . . . . . . . . . . . . . . . . . . . . . . . 471
Canvas layout container . . . . . . . . . . . . . . . . . . . . . . . . . . . . . . . . . . . . . . . . . . . . . . . . . . . . . . . . . . . . . . . . . 472
Box, HBox, and VBox layout containers . . . . . . . . . . . . . . . . . . . . . . . . . . . . . . . . . . . . . . . . . . . . . . . . . . .476
ControlBar layout container . . . . . . . . . . . . . . . . . . . . . . . . . . . . . . . . . . . . . . . . . . . . . . . . . . . . . . . . . . . . . 478
ApplicationControlBar layout container . . . . . . . . . . . . . . . . . . . . . . . . . . . . . . . . . . . . . . . . . . . . . . . . . . 479
DividedBox, HDividedBox, and VDividedBox layout containers . . . . . . . . . . . . . . . . . . . . . . . . . . . 481
Form, FormHeading, and FormItem layout containers . . . . . . . . . . . . . . . . . . . . . . . . . . . . . . . . . . . . 484
Grid layout container . . . . . . . . . . . . . . . . . . . . . . . . . . . . . . . . . . . . . . . . . . . . . . . . . . . . . . . . . . . . . . . . . . . . 504
Panel layout container . . . . . . . . . . . . . . . . . . . . . . . . . . . . . . . . . . . . . . . . . . . . . . . . . . . . . . . . . . . . . . . . . . 509
Tile layout container . . . . . . . . . . . . . . . . . . . . . . . . . . . . . . . . . . . . . . . . . . . . . . . . . . . . . . . . . . . . . . . . . . . . 513
TitleWindow layout container . . . . . . . . . . . . . . . . . . . . . . . . . . . . . . . . . . . . . . . . . . . . . . . . . . . . . . . . . . .516
Chapter 16: Using Navigator Containers
About navigator containers . . . . . . . . . . . . . . . . . . . . . . . . . . . . . . . . . . . . . . . . . . . . . . . . . . . . . . . . . . . . .529
ViewStack navigator container . . . . . . . . . . . . . . . . . . . . . . . . . . . . . . . . . . . . . . . . . . . . . . . . . . . . . . . . . . 529
TabNavigator container . . . . . . . . . . . . . . . . . . . . . . . . . . . . . . . . . . . . . . . . . . . . . . . . . . . . . . . . . . . . . . . . .535
Accordion navigator container . . . . . . . . . . . . . . . . . . . . . . . . . . . . . . . . . . . . . . . . . . . . . . . . . . . . . . . . . . 538
Chapter 17: Using Behaviors
About behaviors . . . . . . . . . . . . . . . . . . . . . . . . . . . . . . . . . . . . . . . . . . . . . . . . . . . . . . . . . . . . . . . . . . . . . . . .545
Applying behaviors in MXML . . . . . . . . . . . . . . . . . . . . . . . . . . . . . . . . . . . . . . . . . . . . . . . . . . . . . . . . . . . . 554
Page 7

Applying behaviors in ActionScript . . . . . . . . . . . . . . . . . . . . . . . . . . . . . . . . . . . . . . . . . . . . . . . . . . . . . . 557
Working with effects . . . . . . . . . . . . . . . . . . . . . . . . . . . . . . . . . . . . . . . . . . . . . . . . . . . . . . . . . . . . . . . . . . . . 566
Chapter 18: Using Styles and Themes
About styles . . . . . . . . . . . . . . . . . . . . . . . . . . . . . . . . . . . . . . . . . . . . . . . . . . . . . . . . . . . . . . . . . . . . . . . . . . . .589
Using external style sheets . . . . . . . . . . . . . . . . . . . . . . . . . . . . . . . . . . . . . . . . . . . . . . . . . . . . . . . . . . . . . . 617
Using local style definitions . . . . . . . . . . . . . . . . . . . . . . . . . . . . . . . . . . . . . . . . . . . . . . . . . . . . . . . . . . . . .619
Using the StyleManager class . . . . . . . . . . . . . . . . . . . . . . . . . . . . . . . . . . . . . . . . . . . . . . . . . . . . . . . . . . . . 621
Using the setStyle() and getStyle() methods . . . . . . . . . . . . . . . . . . . . . . . . . . . . . . . . . . . . . . . . . . . . . . 627
Using inline styles . . . . . . . . . . . . . . . . . . . . . . . . . . . . . . . . . . . . . . . . . . . . . . . . . . . . . . . . . . . . . . . . . . . . . . . 631
Loading style sheets at run time . . . . . . . . . . . . . . . . . . . . . . . . . . . . . . . . . . . . . . . . . . . . . . . . . . . . . . . . . 633
Using filters in Flex . . . . . . . . . . . . . . . . . . . . . . . . . . . . . . . . . . . . . . . . . . . . . . . . . . . . . . . . . . . . . . . . . . . . . . 642
About themes . . . . . . . . . . . . . . . . . . . . . . . . . . . . . . . . . . . . . . . . . . . . . . . . . . . . . . . . . . . . . . . . . . . . . . . . . . 645
Chapter 19: Using Fonts
About fonts . . . . . . . . . . . . . . . . . . . . . . . . . . . . . . . . . . . . . . . . . . . . . . . . . . . . . . . . . . . . . . . . . . . . . . . . . . . . . 653
Using device fonts . . . . . . . . . . . . . . . . . . . . . . . . . . . . . . . . . . . . . . . . . . . . . . . . . . . . . . . . . . . . . . . . . . . . . .655
Using embedded fonts . . . . . . . . . . . . . . . . . . . . . . . . . . . . . . . . . . . . . . . . . . . . . . . . . . . . . . . . . . . . . . . . . . 656
Using multiple typefaces . . . . . . . . . . . . . . . . . . . . . . . . . . . . . . . . . . . . . . . . . . . . . . . . . . . . . . . . . . . . . . . . 668
About the font managers . . . . . . . . . . . . . . . . . . . . . . . . . . . . . . . . . . . . . . . . . . . . . . . . . . . . . . . . . . . . . . . .672
Setting character ranges . . . . . . . . . . . . . . . . . . . . . . . . . . . . . . . . . . . . . . . . . . . . . . . . . . . . . . . . . . . . . . . . 673
Embedding double-byte fonts . . . . . . . . . . . . . . . . . . . . . . . . . . . . . . . . . . . . . . . . . . . . . . . . . . . . . . . . . . . 676
Embedding fonts from SWF files . . . . . . . . . . . . . . . . . . . . . . . . . . . . . . . . . . . . . . . . . . . . . . . . . . . . . . . . . 677
Troubleshooting fonts in Flex applications . . . . . . . . . . . . . . . . . . . . . . . . . . . . . . . . . . . . . . . . . . . . . . . 686
vii
Chapter 20: Creating Skins
About skinning . . . . . . . . . . . . . . . . . . . . . . . . . . . . . . . . . . . . . . . . . . . . . . . . . . . . . . . . . . . . . . . . . . . . . . . . .689
Applying skins . . . . . . . . . . . . . . . . . . . . . . . . . . . . . . . . . . . . . . . . . . . . . . . . . . . . . . . . . . . . . . . . . . . . . . . . . .700
Creating graphical skins . . . . . . . . . . . . . . . . . . . . . . . . . . . . . . . . . . . . . . . . . . . . . . . . . . . . . . . . . . . . . . . . .708
Creating programmatic skins . . . . . . . . . . . . . . . . . . . . . . . . . . . . . . . . . . . . . . . . . . . . . . . . . . . . . . . . . . . . 713
Creating stateful skins . . . . . . . . . . . . . . . . . . . . . . . . . . . . . . . . . . . . . . . . . . . . . . . . . . . . . . . . . . . . . . . . . . . 727
Creating advanced programmatic skins . . . . . . . . . . . . . . . . . . . . . . . . . . . . . . . . . . . . . . . . . . . . . . . . . . 735
Chapter 21: Using Drag and Drop
About drag and drop . . . . . . . . . . . . . . . . . . . . . . . . . . . . . . . . . . . . . . . . . . . . . . . . . . . . . . . . . . . . . . . . . . . .741
Using drag-and-drop with list-based controls . . . . . . . . . . . . . . . . . . . . . . . . . . . . . . . . . . . . . . . . . . . . 743
Manually adding drag-and-drop support . . . . . . . . . . . . . . . . . . . . . . . . . . . . . . . . . . . . . . . . . . . . . . . . 750
Using drag and drop with Flex applications running in AIR . . . . . . . . . . . . . . . . . . . . . . . . . . . . . . . 761
Page 8

viii
CONTENTS
Drag and drop examples . . . . . . . . . . . . . . . . . . . . . . . . . . . . . . . . . . . . . . . . . . . . . . . . . . . . . . . . . . . . . . . . 763
Moving and copying data . . . . . . . . . . . . . . . . . . . . . . . . . . . . . . . . . . . . . . . . . . . . . . . . . . . . . . . . . . . . . . . 770
Chapter 22: Using Item Renderers and Item Editors
About item renderers . . . . . . . . . . . . . . . . . . . . . . . . . . . . . . . . . . . . . . . . . . . . . . . . . . . . . . . . . . . . . . . . . . . 779
Creating an item renderer and item editor . . . . . . . . . . . . . . . . . . . . . . . . . . . . . . . . . . . . . . . . . . . . . . . 788
Creating drop-in item renderers and item editors . . . . . . . . . . . . . . . . . . . . . . . . . . . . . . . . . . . . . . . .797
Creating inline item renderers and editors . . . . . . . . . . . . . . . . . . . . . . . . . . . . . . . . . . . . . . . . . . . . . . . 800
Creating item renderers and item editor components . . . . . . . . . . . . . . . . . . . . . . . . . . . . . . . . . . . .807
Working with item renderers . . . . . . . . . . . . . . . . . . . . . . . . . . . . . . . . . . . . . . . . . . . . . . . . . . . . . . . . . . . .813
Chapter 23: Working with Item Editors
The cell editing process . . . . . . . . . . . . . . . . . . . . . . . . . . . . . . . . . . . . . . . . . . . . . . . . . . . . . . . . . . . . . . . . .821
Creating an editable cell . . . . . . . . . . . . . . . . . . . . . . . . . . . . . . . . . . . . . . . . . . . . . . . . . . . . . . . . . . . . . . . . . 822
Returning data from an item editor . . . . . . . . . . . . . . . . . . . . . . . . . . . . . . . . . . . . . . . . . . . . . . . . . . . . . . 823
Sizing and positioning an item editor . . . . . . . . . . . . . . . . . . . . . . . . . . . . . . . . . . . . . . . . . . . . . . . . . . . . 826
Creating an item editor that responds to the Enter key . . . . . . . . . . . . . . . . . . . . . . . . . . . . . . . . . . . 828
Using cell editing events . . . . . . . . . . . . . . . . . . . . . . . . . . . . . . . . . . . . . . . . . . . . . . . . . . . . . . . . . . . . . . . .829
Item editor examples . . . . . . . . . . . . . . . . . . . . . . . . . . . . . . . . . . . . . . . . . . . . . . . . . . . . . . . . . . . . . . . . . . .836
Examples using item editors with the list-based controls . . . . . . . . . . . . . . . . . . . . . . . . . . . . . . . . . 846
Chapter 24: Using View States
About view states . . . . . . . . . . . . . . . . . . . . . . . . . . . . . . . . . . . . . . . . . . . . . . . . . . . . . . . . . . . . . . . . . . . . . . .853
Create and apply view states . . . . . . . . . . . . . . . . . . . . . . . . . . . . . . . . . . . . . . . . . . . . . . . . . . . . . . . . . . . . 860
Defining view state overrides . . . . . . . . . . . . . . . . . . . . . . . . . . . . . . . . . . . . . . . . . . . . . . . . . . . . . . . . . . . . 867
Defining view states in custom components . . . . . . . . . . . . . . . . . . . . . . . . . . . . . . . . . . . . . . . . . . . . . 880
Using view states with a custom item renderer . . . . . . . . . . . . . . . . . . . . . . . . . . . . . . . . . . . . . . . . . . .881
Using view states with history management . . . . . . . . . . . . . . . . . . . . . . . . . . . . . . . . . . . . . . . . . . . . . 884
Creating your own override classes . . . . . . . . . . . . . . . . . . . . . . . . . . . . . . . . . . . . . . . . . . . . . . . . . . . . . . 886
Chapter 25: Using Transitions
About transitions . . . . . . . . . . . . . . . . . . . . . . . . . . . . . . . . . . . . . . . . . . . . . . . . . . . . . . . . . . . . . . . . . . . . . . . 889
Defining transitions . . . . . . . . . . . . . . . . . . . . . . . . . . . . . . . . . . . . . . . . . . . . . . . . . . . . . . . . . . . . . . . . . . . . . 892
Handling events when using transitions . . . . . . . . . . . . . . . . . . . . . . . . . . . . . . . . . . . . . . . . . . . . . . . . . 898
Using action effects in a transition . . . . . . . . . . . . . . . . . . . . . . . . . . . . . . . . . . . . . . . . . . . . . . . . . . . . . . . 899
Filtering effects . . . . . . . . . . . . . . . . . . . . . . . . . . . . . . . . . . . . . . . . . . . . . . . . . . . . . . . . . . . . . . . . . . . . . . . . .902
Transition tips and troubleshooting . . . . . . . . . . . . . . . . . . . . . . . . . . . . . . . . . . . . . . . . . . . . . . . . . . . . . . 913
Page 9

Chapter 26: Using ToolTips
About ToolTips . . . . . . . . . . . . . . . . . . . . . . . . . . . . . . . . . . . . . . . . . . . . . . . . . . . . . . . . . . . . . . . . . . . . . . . . . . 915
Creating ToolTips . . . . . . . . . . . . . . . . . . . . . . . . . . . . . . . . . . . . . . . . . . . . . . . . . . . . . . . . . . . . . . . . . . . . . . . 916
Using the ToolTip Manager . . . . . . . . . . . . . . . . . . . . . . . . . . . . . . . . . . . . . . . . . . . . . . . . . . . . . . . . . . . . . . 922
Using error tips . . . . . . . . . . . . . . . . . . . . . . . . . . . . . . . . . . . . . . . . . . . . . . . . . . . . . . . . . . . . . . . . . . . . . . . . . 932
Reskinning ToolTips . . . . . . . . . . . . . . . . . . . . . . . . . . . . . . . . . . . . . . . . . . . . . . . . . . . . . . . . . . . . . . . . . . . . . 935
Chapter 27: Using the Cursor Manager
About the Cursor Manager . . . . . . . . . . . . . . . . . . . . . . . . . . . . . . . . . . . . . . . . . . . . . . . . . . . . . . . . . . . . . .939
Creating and removing a cursor . . . . . . . . . . . . . . . . . . . . . . . . . . . . . . . . . . . . . . . . . . . . . . . . . . . . . . . . . 939
Using a busy cursor . . . . . . . . . . . . . . . . . . . . . . . . . . . . . . . . . . . . . . . . . . . . . . . . . . . . . . . . . . . . . . . . . . . . . 942
Chapter 28: Dynamically Repeating Controls and Containers
About Repeater components . . . . . . . . . . . . . . . . . . . . . . . . . . . . . . . . . . . . . . . . . . . . . . . . . . . . . . . . . . . . 947
Using the Repeater component . . . . . . . . . . . . . . . . . . . . . . . . . . . . . . . . . . . . . . . . . . . . . . . . . . . . . . . . . 948
Considerations when using a Repeater component . . . . . . . . . . . . . . . . . . . . . . . . . . . . . . . . . . . . . .965
Part 3: Advanced Flex Programming
Chapter 29: Embedding Assets
About embedding assets . . . . . . . . . . . . . . . . . . . . . . . . . . . . . . . . . . . . . . . . . . . . . . . . . . . . . . . . . . . . . . . .969
Syntax for embedding assets . . . . . . . . . . . . . . . . . . . . . . . . . . . . . . . . . . . . . . . . . . . . . . . . . . . . . . . . . . . .972
Embedding asset types . . . . . . . . . . . . . . . . . . . . . . . . . . . . . . . . . . . . . . . . . . . . . . . . . . . . . . . . . . . . . . . . .976
ix
Chapter 30: Creating Modular Applications
Modular applications overview . . . . . . . . . . . . . . . . . . . . . . . . . . . . . . . . . . . . . . . . . . . . . . . . . . . . . . . . . . 985
Writing modules . . . . . . . . . . . . . . . . . . . . . . . . . . . . . . . . . . . . . . . . . . . . . . . . . . . . . . . . . . . . . . . . . . . . . . . .989
Compiling modules . . . . . . . . . . . . . . . . . . . . . . . . . . . . . . . . . . . . . . . . . . . . . . . . . . . . . . . . . . . . . . . . . . . . .991
Loading and unloading modules . . . . . . . . . . . . . . . . . . . . . . . . . . . . . . . . . . . . . . . . . . . . . . . . . . . . . . . . 993
Using ModuleLoader events . . . . . . . . . . . . . . . . . . . . . . . . . . . . . . . . . . . . . . . . . . . . . . . . . . . . . . . . . . . . . 999
Passing data . . . . . . . . . . . . . . . . . . . . . . . . . . . . . . . . . . . . . . . . . . . . . . . . . . . . . . . . . . . . . . . . . . . . . . . . . . .1006
Chapter 31: Printing
About printing by using Flex classes . . . . . . . . . . . . . . . . . . . . . . . . . . . . . . . . . . . . . . . . . . . . . . . . . . . .1019
Using the FlexPrintJob class . . . . . . . . . . . . . . . . . . . . . . . . . . . . . . . . . . . . . . . . . . . . . . . . . . . . . . . . . . . .1020
Using a print-specific output format . . . . . . . . . . . . . . . . . . . . . . . . . . . . . . . . . . . . . . . . . . . . . . . . . . . . 1024
Printing multipage output . . . . . . . . . . . . . . . . . . . . . . . . . . . . . . . . . . . . . . . . . . . . . . . . . . . . . . . . . . . . .1028
Page 10

CONTENTS
x
Chapter 32: Communicating with the Wrapper
About exchanging data with Flex applications . . . . . . . . . . . . . . . . . . . . . . . . . . . . . . . . . . . . . . . . . .1039
Passing request data with flashVars properties . . . . . . . . . . . . . . . . . . . . . . . . . . . . . . . . . . . . . . . . . .1043
Accessing JavaScript functions from Flex . . . . . . . . . . . . . . . . . . . . . . . . . . . . . . . . . . . . . . . . . . . . . . . .1047
Accessing Flex from JavaScript . . . . . . . . . . . . . . . . . . . . . . . . . . . . . . . . . . . . . . . . . . . . . . . . . . . . . . . . .1056
About ExternalInterface API security in Flex . . . . . . . . . . . . . . . . . . . . . . . . . . . . . . . . . . . . . . . . . . . . .1061
Chapter 33: Using the Flex Ajax Bridge
About the Flex Ajax Bridge . . . . . . . . . . . . . . . . . . . . . . . . . . . . . . . . . . . . . . . . . . . . . . . . . . . . . . . . . . . . .1063
Integrating with the Flex Ajax Bridge . . . . . . . . . . . . . . . . . . . . . . . . . . . . . . . . . . . . . . . . . . . . . . . . . . .1064
Chapter 34: Deep Linking
About deep linking . . . . . . . . . . . . . . . . . . . . . . . . . . . . . . . . . . . . . . . . . . . . . . . . . . . . . . . . . . . . . . . . . . . .1069
Using the BrowserManager . . . . . . . . . . . . . . . . . . . . . . . . . . . . . . . . . . . . . . . . . . . . . . . . . . . . . . . . . . . . .1072
Setting the title of the HTML wrapper . . . . . . . . . . . . . . . . . . . . . . . . . . . . . . . . . . . . . . . . . . . . . . . . . . .1079
Passing request data with URL fragments . . . . . . . . . . . . . . . . . . . . . . . . . . . . . . . . . . . . . . . . . . . . . . .1080
Using deep linking with navigator containers . . . . . . . . . . . . . . . . . . . . . . . . . . . . . . . . . . . . . . . . . . .1082
Accessing information about the current URL . . . . . . . . . . . . . . . . . . . . . . . . . . . . . . . . . . . . . . . . . . .1086
Using the HistoryManager . . . . . . . . . . . . . . . . . . . . . . . . . . . . . . . . . . . . . . . . . . . . . . . . . . . . . . . . . . . . . .1088
Chapter 35: Using Shared Objects
About shared objects . . . . . . . . . . . . . . . . . . . . . . . . . . . . . . . . . . . . . . . . . . . . . . . . . . . . . . . . . . . . . . . . . .1095
Creating a shared object . . . . . . . . . . . . . . . . . . . . . . . . . . . . . . . . . . . . . . . . . . . . . . . . . . . . . . . . . . . . . . .1096
Destroying shared objects . . . . . . . . . . . . . . . . . . . . . . . . . . . . . . . . . . . . . . . . . . . . . . . . . . . . . . . . . . . . . .1102
SharedObject example . . . . . . . . . . . . . . . . . . . . . . . . . . . . . . . . . . . . . . . . . . . . . . . . . . . . . . . . . . . . . . . . .1102
Chapter 36: Localizing Flex Applications
Introduction to localization . . . . . . . . . . . . . . . . . . . . . . . . . . . . . . . . . . . . . . . . . . . . . . . . . . . . . . . . . . . . .1105
Creating resources . . . . . . . . . . . . . . . . . . . . . . . . . . . . . . . . . . . . . . . . . . . . . . . . . . . . . . . . . . . . . . . . . . . . .1107
Using resources . . . . . . . . . . . . . . . . . . . . . . . . . . . . . . . . . . . . . . . . . . . . . . . . . . . . . . . . . . . . . . . . . . . . . . . .1113
Using resource modules . . . . . . . . . . . . . . . . . . . . . . . . . . . . . . . . . . . . . . . . . . . . . . . . . . . . . . . . . . . . . . . .1123
Creating resource bundles at run time . . . . . . . . . . . . . . . . . . . . . . . . . . . . . . . . . . . . . . . . . . . . . . . . . .1130
Formatting dates, times, and currencies . . . . . . . . . . . . . . . . . . . . . . . . . . . . . . . . . . . . . . . . . . . . . . . . .1137
Adding styles and fonts to localized resources . . . . . . . . . . . . . . . . . . . . . . . . . . . . . . . . . . . . . . . . . .1139
Editing framework resource properties . . . . . . . . . . . . . . . . . . . . . . . . . . . . . . . . . . . . . . . . . . . . . . . . .1140
Chapter 37: Creating Accessible Applications
Accessibility overview . . . . . . . . . . . . . . . . . . . . . . . . . . . . . . . . . . . . . . . . . . . . . . . . . . . . . . . . . . . . . . . . . .1143
Page 11

About screen reader technology . . . . . . . . . . . . . . . . . . . . . . . . . . . . . . . . . . . . . . . . . . . . . . . . . . . . . . . .1145
Configuring Flex applications for accessibility . . . . . . . . . . . . . . . . . . . . . . . . . . . . . . . . . . . . . . . . . . .1146
Accessible components and containers . . . . . . . . . . . . . . . . . . . . . . . . . . . . . . . . . . . . . . . . . . . . . . . . .1147
Creating tab order and reading order . . . . . . . . . . . . . . . . . . . . . . . . . . . . . . . . . . . . . . . . . . . . . . . . . . .1154
Creating accessibility with ActionScript . . . . . . . . . . . . . . . . . . . . . . . . . . . . . . . . . . . . . . . . . . . . . . . . .1157
Accessibility for hearing-impaired users . . . . . . . . . . . . . . . . . . . . . . . . . . . . . . . . . . . . . . . . . . . . . . . . .1158
Testing accessible content . . . . . . . . . . . . . . . . . . . . . . . . . . . . . . . . . . . . . . . . . . . . . . . . . . . . . . . . . . . . . .1158
Part 4: Data Access and Interconnectivity
Chapter 38: Accessing Server-Side Data with Flex
Using HTTPService components . . . . . . . . . . . . . . . . . . . . . . . . . . . . . . . . . . . . . . . . . . . . . . . . . . . . . . . .1163
Using WebService components . . . . . . . . . . . . . . . . . . . . . . . . . . . . . . . . . . . . . . . . . . . . . . . . . . . . . . . . .1172
Using RemoteObject components . . . . . . . . . . . . . . . . . . . . . . . . . . . . . . . . . . . . . . . . . . . . . . . . . . . . . .1190
Explicit parameter passing and parameter binding . . . . . . . . . . . . . . . . . . . . . . . . . . . . . . . . . . . . . .1206
Handling service results . . . . . . . . . . . . . . . . . . . . . . . . . . . . . . . . . . . . . . . . . . . . . . . . . . . . . . . . . . . . . . . .1213
Chapter 39: Representing Data
About data representation . . . . . . . . . . . . . . . . . . . . . . . . . . . . . . . . . . . . . . . . . . . . . . . . . . . . . . . . . . . . .1223
xi
Chapter 40: Binding Data
About data binding . . . . . . . . . . . . . . . . . . . . . . . . . . . . . . . . . . . . . . . . . . . . . . . . . . . . . . . . . . . . . . . . . . . .1229
Data binding examples . . . . . . . . . . . . . . . . . . . . . . . . . . . . . . . . . . . . . . . . . . . . . . . . . . . . . . . . . . . . . . . . .1234
Binding to functions, Objects, and Arrays . . . . . . . . . . . . . . . . . . . . . . . . . . . . . . . . . . . . . . . . . . . . . . .1236
Using ActionScript in data binding expressions . . . . . . . . . . . . . . . . . . . . . . . . . . . . . . . . . . . . . . . . .1243
Using an E4X expression in a data binding expression . . . . . . . . . . . . . . . . . . . . . . . . . . . . . . . . . . .1245
Defining data bindings in ActionScript . . . . . . . . . . . . . . . . . . . . . . . . . . . . . . . . . . . . . . . . . . . . . . . . . .1247
Using the Bindable metadata tag . . . . . . . . . . . . . . . . . . . . . . . . . . . . . . . . . . . . . . . . . . . . . . . . . . . . . . .1249
Considerations for using the binding feature . . . . . . . . . . . . . . . . . . . . . . . . . . . . . . . . . . . . . . . . . . . .1254
Chapter 41: Storing Data
About data models . . . . . . . . . . . . . . . . . . . . . . . . . . . . . . . . . . . . . . . . . . . . . . . . . . . . . . . . . . . . . . . . . . . . .1257
Defining a data model . . . . . . . . . . . . . . . . . . . . . . . . . . . . . . . . . . . . . . . . . . . . . . . . . . . . . . . . . . . . . . . . .1257
Specifying an external source for an <mx:Model> tag or <mx:XML> tag . . . . . . . . . . . . . . . . .1261
Using validators with a data model . . . . . . . . . . . . . . . . . . . . . . . . . . . . . . . . . . . . . . . . . . . . . . . . . . . . .1262
Using a data model as a value object . . . . . . . . . . . . . . . . . . . . . . . . . . . . . . . . . . . . . . . . . . . . . . . . . . .1263
Binding data into an XML data model . . . . . . . . . . . . . . . . . . . . . . . . . . . . . . . . . . . . . . . . . . . . . . . . . . .1265
Page 12

xii
CONTENTS
Chapter 42: Validating Data
Validating data . . . . . . . . . . . . . . . . . . . . . . . . . . . . . . . . . . . . . . . . . . . . . . . . . . . . . . . . . . . . . . . . . . . . . . . . .1267
Using validators . . . . . . . . . . . . . . . . . . . . . . . . . . . . . . . . . . . . . . . . . . . . . . . . . . . . . . . . . . . . . . . . . . . . . . . .1271
General guidelines for validation . . . . . . . . . . . . . . . . . . . . . . . . . . . . . . . . . . . . . . . . . . . . . . . . . . . . . . .1284
Working with validation errors . . . . . . . . . . . . . . . . . . . . . . . . . . . . . . . . . . . . . . . . . . . . . . . . . . . . . . . . . .1287
Working with validation events . . . . . . . . . . . . . . . . . . . . . . . . . . . . . . . . . . . . . . . . . . . . . . . . . . . . . . . . .1290
Using standard validators . . . . . . . . . . . . . . . . . . . . . . . . . . . . . . . . . . . . . . . . . . . . . . . . . . . . . . . . . . . . . .1293
Chapter 43: Formatting Data
Using formatters . . . . . . . . . . . . . . . . . . . . . . . . . . . . . . . . . . . . . . . . . . . . . . . . . . . . . . . . . . . . . . . . . . . . . . .1305
Writing an error handler function . . . . . . . . . . . . . . . . . . . . . . . . . . . . . . . . . . . . . . . . . . . . . . . . . . . . . . .1307
Using the standard formatters . . . . . . . . . . . . . . . . . . . . . . . . . . . . . . . . . . . . . . . . . . . . . . . . . . . . . . . . . .1308
Page 13

Part 1: Flex Programming Elements
Top ic s
Developing Applications in MXML . . . . . . . . . . . . . . . . . . . . . . . . . . . . . . . . . . . . . . . . . . . . . . . . . . . . . . . . . . . . . . . . . . 3
MXML Syntax . . . . . . . . . . . . . . . . . . . . . . . . . . . . . . . . . . . . . . . . . . . . . . . . . . . . . . . . . . . . . . . . . . . . . . . . . . . . . . . . . . .23
Using ActionScript . . . . . . . . . . . . . . . . . . . . . . . . . . . . . . . . . . . . . . . . . . . . . . . . . . . . . . . . . . . . . . . . . . . . . . . . . . . . . . .37
Using Events . . . . . . . . . . . . . . . . . . . . . . . . . . . . . . . . . . . . . . . . . . . . . . . . . . . . . . . . . . . . . . . . . . . . . . . . . . . . . . . . . . . .61
Flex Data Access . . . . . . . . . . . . . . . . . . . . . . . . . . . . . . . . . . . . . . . . . . . . . . . . . . . . . . . . . . . . . . . . . . . . . . . . . . . . . . . .103
1
Page 14

2
PART 1
Page 15

Chapter 1: Developing Applications in MXML
MXML is an XML language that you use to lay out user interface components for Adobe® Flex® applications. You
also use MXML to declaratively define nonvisual aspects of an application, such as access to server-side data
sources and data bindings between user interface components and server-side data sources.
For information on MXML syntax, see “MXML Syntax” on page 23.
Top ic s
About MXML . . . . . . . . . . . . . . . . . . . . . . . . . . . . . . . . . . . . . . . . . . . . . . . . . . . . . . . . . . . . . . . . . . . . . . . . . . . . . . . . . . . . 3
Developing applications. . . . . . . . . . . . . . . . . . . . . . . . . . . . . . . . . . . . . . . . . . . . . . . . . . . . . . . . . . . . . . . . . . . . . . . . . . . . 7
About MXML
You use two languages to write Flex applications: MXML and ActionScript. MXML is an XML markup language
that you use to lay out user interface components. You also use MXML to declaratively define nonvisual aspects
of an application, such as access to data sources on the server and data bindings between user interface components and data sources on the server.
Like HTML, MXML provides tags that define user interfaces. MXML will seem very familiar if you have worked
with HTM L. However, MXM L is mo re st ruc tured th an HTM L, and it provide s a mu ch riche r tag set. For example,
MXML includes tags for visual components such as data grids, trees, tab navigators, accordions, and menus, as
well as nonvisual components that provide web service connections, data binding, and animation effects. You can
also extend MXML with custom components that you reference as MXML tags.
One of the biggest differences between MXML and HTML is that MXML-defined applications are compiled into
SWF files and rendered by Adobe® Flash® Player or Adobe® AIR™, which provides a richer and more dynamic user
interface than page-based HTML applications.
You can write an MXML application in a single file or in multiple files. MXML also supports custom components
written in MXML and ActionScript files.
3
Page 16
CHAPTER 1
4
Writing a simple application
Because MXML files are ordinary XML files, you have a wide choice of development environments. You can write
MXML code in a simple text editor, a dedicated XML editor, or an integrated development environment (IDE)
that supports text editing. Flex supplies a dedicated IDE, called Adobe® Flex™ Builder™, that you can use to develop
your applications.
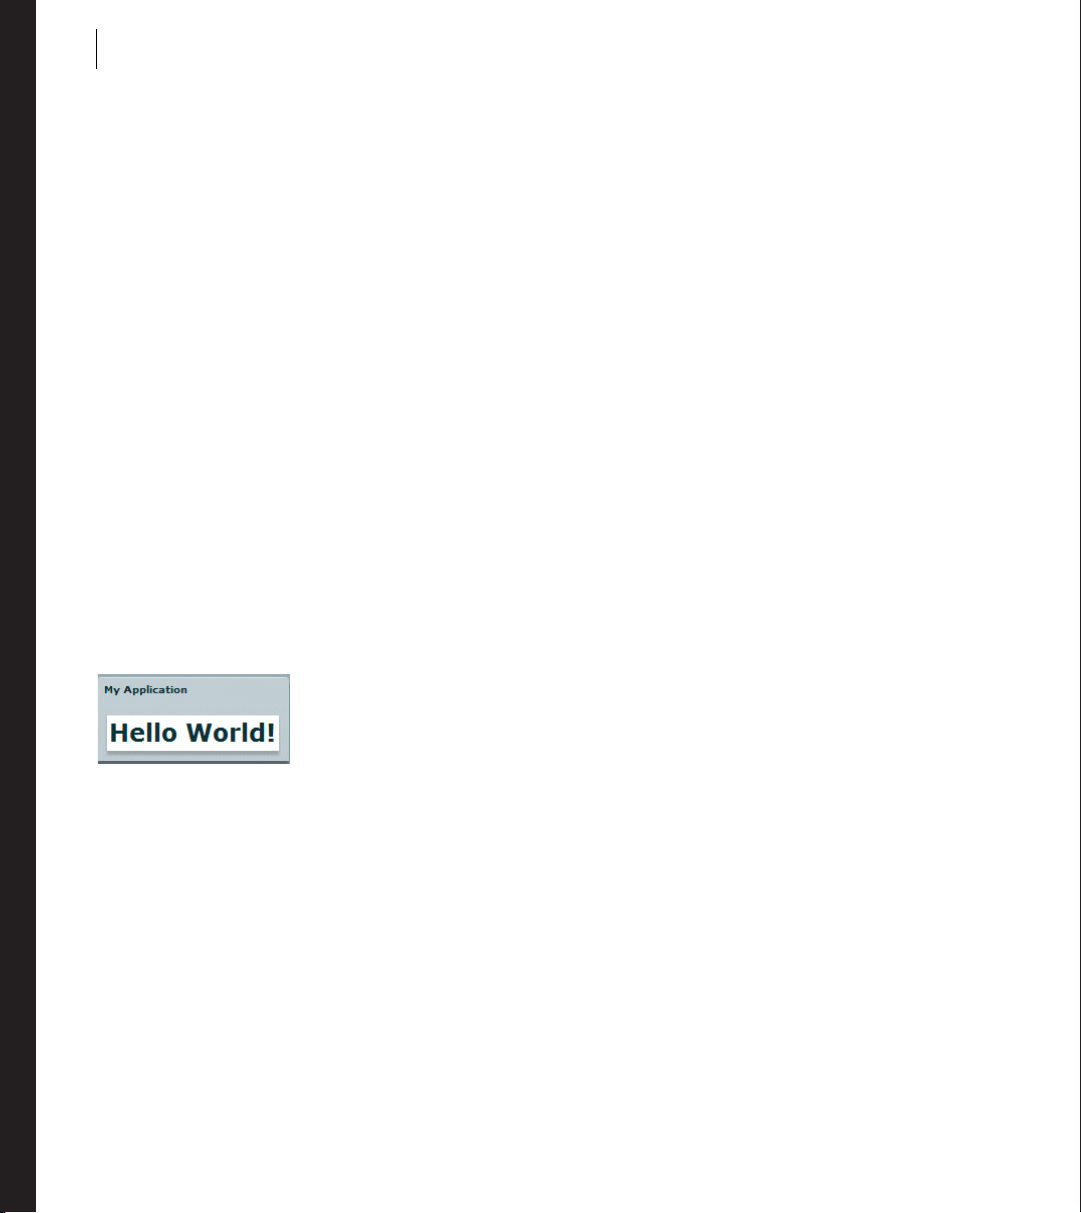
The following example shows a simple “Hello World” application that contains just an
and two child tags, the
cation container that is always the root tag of a Flex application. The
<mx:Panel> tag and the <mx:Label> tag. The <mx:Application> tag defines the Appli-
<mx:Panel> tag defines a Panel container
that includes a title bar, a title, a status message, a border, and a content area for its children. The
represents a Label control, a very simple user interface component that displays text.
<?xml version="1.0"?>
<!-- mxml\HellowWorld.mxml -->
<mx:Application xmlns:mx="http://www.adobe.com/2006/mxml">
<mx:Panel title="My Application"
paddingTop="10"
paddingBottom="10"
paddingLeft="10"
paddingRight="10"
>
<mx:Label text="Hello World!" fontWeight="bold" fontSize="24"/>
</mx:Panel>
</mx:Application>
Save this code to a file named hello.mxml. MXML filenames must end in a lowercase .mxml file extension.
The following image shows the “Hello World” application rendered in a web browser window:
<mx:Application> tag
<mx:Label> tag
About XML encoding
The first line of the document specifies an optional declaration of the XML version. It is good practice to include
encoding information that specifies how the MXML file is encoded. Many editors let you select from a range of
file encoding options. On North American operating systems, ISO-8859-1 is the dominant encoding format, and
most programs use that format by default. You can use the UTF-8 encoding format to ensure maximum platform
compatibility. UTF-8 provides a unique number for every character in a file, and it is platform-, program-, and
language-independent.
If you specify an encoding format, it must match the file encoding you use. The following example shows an XML
declaration tag that specifies the UTF-8 encoding format:
<?xml version="1.0" encoding="utf-8"?>
Page 17

Adobe Flex 3 Developer Guide
About the <mx:Application> tag
In addition to being the root tag of a Flex application, the <mx:Application> tag represents an Application
container. A container is a user-interface component that contains other components and has built-in layout rules
for positioning its child components. By default, an Application container lays out its children vertically from top
to bottom. You can nest other types of containers inside an Application container, such as the Panel container
shown above, to position user interface components according to other rules. For more information, see “Using
Flex Visual Components” on page 113.
About MXML tag properties
The p roper ties of an MXML t ag, such as t he text, fontWeight, and fontSize properties of the <mx:Label> tag,
let you declaratively configure the initial state of the component. You can use ActionScript code in an
<mx:Script> tag to change the state of a component at run time. For more information, see “Using ActionScript”
on page 37.
Compiling MXML to SWF Files
You can deploy y our applicat ion as a compiled S WF fi le or a s a S WF fuk e in cluded in an AIR application , or if you
have Adobe LiveCycle Data Services ES, you can deploy your application as a set of MXML and AS files.
If you are using Flex Builder, you compile and run the compiled SWF file from within Flex Builder. After your
application executes correctly, you deploy it by copying it to a directory on your web server or application server.
Users then access the deployed SWF file by making an HTTP request in the form:
http://hostname/path/filename.html
Flex also provides a command-line MXML compiler, mxmlc, that lets you compile MXML files. You can use
mxmlc to compile hello.mxml from a command line, as the following example shows:
cd flexInstallDir/bin
mxmlc --show-actionscript-warnings=true --strict=true c:/appDir/hello.mxml
In this example, flexInstallDir is t he Fle x inst allat ion directory, and appDir is the directory containing hello.mxml.
The resultant SWF file, hello.swf, is written to the same directory as hello.mxml.
For more information about mxmlc, see “Using the Flex Compilers” on page 125 in Building and Deploying Adobe
Flex 3 Applications. For more information about the debugger version of Flash Player, see “Logging” on page 227
in Building and Deploying Adobe Flex 3 Applications.
5ADOBE FLEX 3
Page 18

CHAPTER 1
6
The relationship of MXML tags to ActionScript classes
Adobe implemented Flex as an ActionScript class library. That class library contains components (containers and
controls), manager classes, data-service classes, and classes for all other features. You develop applications by
using the MXML and ActionScript languages with the class library.
MXML tags correspond to ActionScript classes or properties of classes. Flex parses MXML tags and compiles a
SWF file that contains the corresponding ActionScript objects. For example, Flex provides the ActionScript
Button class that defines the Flex Button control. In MXML, you create a Button control by using the following
MXML statement:
<mx:Button label="Submit"/>
When you declare a control using an MXML tag, you create an instance object of that class. This MXML statement
creates a Button object, and initializes the
An MXML tag that corresponds to an ActionScript class uses the same naming conventions as the ActionScript
class. Class names begin with an uppercase letter, and uppercase letters separate the words in class names. Every
MXML tag attribute corresponds to a property of the ActionScript object, a style applied to the object, or an event
listener for the object. For a complete description of the Flex class library and MXML tag syntax, see the Adobe
Flex Language Reference.
label property of the Button object to the string “Submit”.
Understanding a Flex application structure
You can write an MXML application in a single file or in multiple files. You typically define a main file that
contains the
in MXML, ActionScript, or a combination of the two languages.
A common coding practice is to divide your Flex application into functional units, or modules, where each
module performs a discrete task. In Flex, you can divide your application into separate MXML files and ActionScript files, where each file corresponds to a different module. By dividing your application into modules, you
provide many benefits, including the following:
Ease of development Different developers or development groups can develop and debug modules indepen-
dently of each other.
Reusability You can reuse modules in different applications so that you do not have to duplicate your work.
Maintainability You can isolate and debug errors faster than if your application is developed in a single file.
In Flex, a module corresponds to a custom component implemented either in MXML or in ActionScript. These
custom components can reference other custom components. There is no restriction on the level of nesting of
component references in Flex. You define your components as required by your application.
<mx:Application> tag. From within your main file, you can then reference additional files written
Page 19

Adobe Flex 3 Developer Guide
Developing applications
MXML development is based on the same iterative process used for other types of web application files such as
HTML, JavaServer Pages (JSP), Active Server Pages (ASP), and ColdFusion Markup Language (CFML). Developing a useful Flex application is as easy as opening your favorite text editor, typing some XML tags, saving the
file, requesting the file’s URL in a web browser, and then repeating the same process.
Flex also provides tools for code debugging. For more information, see “Using the Command-Line Debugger” on
page 245 in Building and Deploying Adobe Flex 3 Applications.
Laying out a user interface using containers
In the Flex model-view design pattern, user interface components represent the view. The MXML language
supports two types of user interface components: controls and containers. Controls are form elements, such as
buttons, text fields, and list boxes. Containers are rectangular regions of the screen that contain controls and other
containers.
You use container components for laying out a user interface, and for controlling user navigation through the
application. Examples of layout containers include the HBox container for laying out child components horizon-
tally, the VBox container for laying out child components vertically, and the Grid container for laying out child
components in rows and columns. Examples of navigator containers include the TabNavigator container for
creating tabbed panels, the Accordion navigator container for creating collapsible panels, and the ViewStack
navigator container for laying out panels on top of each other.
The Container class is the base class of all Flex container classes. Containers that extend the Container class add
their own functionality for laying out child components. Typical properties of a container tag include
and
height. For more information about the standard Flex containers, see “Introducing Containers” on page 419.
id, width,
7ADOBE FLEX 3
Page 20
CHAPTER 1
8
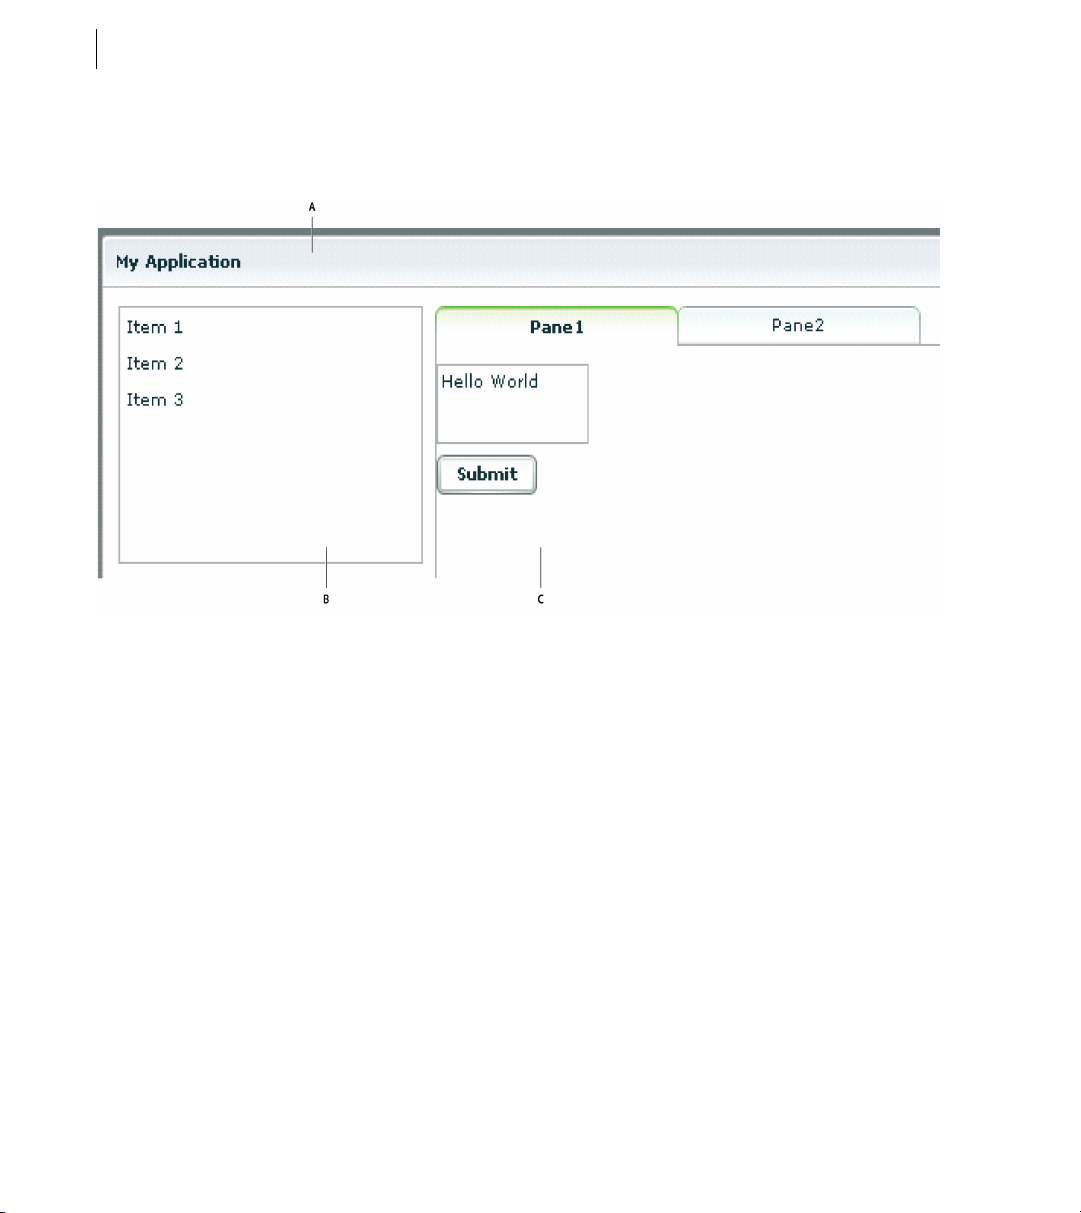
The following image shows an example Flex application that contains a List control on the left side of the user
interface and a TabNavigator container on the right side. Both controls are enclosed in a Panel container.
A. Panel container B. List control C. TabNavigator container
Use the following code to implement this application:
<?xml version="1.0"?>
<!-- mxml/LayoutExample.mxml -->
<mx:Application xmlns:mx="http://www.adobe.com/2006/mxml">
<mx:Panel title="My Application"
paddingTop="10"
paddingBottom="10"
paddingLeft="10"
paddingRight="10"
>
<mx:HBox>
<!-- List with three items -->
<mx:List>
<mx:dataProvider>
<mx:Array>
<mx:String>Item 1</mx:String>
<mx:String>Item 2</mx:String>
<mx:String>Item 3</mx:String>
</mx:Array>
</mx:dataProvider>
</mx:List>
<!-- First pane of TabNavigator -->
Page 21

Adobe Flex 3 Developer Guide
<mx:TabNavigator borderStyle="solid">
<mx:VBox label="Pane1" width="300" height="150">
<mx:TextArea text="Hello World"/>
<mx:Button label="Submit"/>
</mx:VBox>
<!-- Second pane of TabNavigator -->
<mx:VBox label="Pane2" width="300" height="150">
<!-- Stock view goes here -->
</mx:VBox>
</mx:TabNavigator>
</mx:HBox>
</mx:Panel>
</mx:Application>
The List control and TabNavigator container are laid out side by side because they are in an HBox container. The
controls in the TabNavigator container are laid out from top to bottom because they are in a VBox container.
For more information about laying out user interface components, see “Using Flex Visual Components” on
page 113.
Adding user interface controls
Flex includes a large selection of user interface components, such as Button, Tex tI np ut , and ComboBox controls.
After you define the layout and navigation of your application by using container components, you add the user
interface controls.
The following example contains an HBox (horizontal box) container with two child controls, a TextInput control
and a Button control. An HBox container lays out its children horizontally.
<?xml version="1.0"?>
<!-- mxml/AddUIControls.mxml -->
<mx:Application xmlns:mx="http://www.adobe.com/2006/mxml">
<mx:Script>
<![CDATA[
private function storeZipInDatabase(s:String):void {
// event handler code here
}
]]>
</mx:Script>
<mx:HBox>
<mx:TextInput id="myText"/>
<mx:Button click="storeZipInDatabase(myText.text)"/>
</mx:HBox>
</mx:Application>
Typical properties of a control tag include id, width, height, fontSize, color, event listeners for events such as
click and change, and effect triggers such as showEffect and rollOverEffect. For information about the
standard Flex controls, see “Controls” on page 223.
9ADOBE FLEX 3
Page 22

CHAPTER 1
10
Using the id property with MXML tags
With a few exceptions (see “MXML tag rules” on page 34), an MXML tag has an optional id property, which must
be unique within the MXML file. If a tag has an
Script.
In the following example, results from a web-service request are traced in the writeToLog function:
<?xml version="1.0"?>
<!-- mxml/UseIDProperty.mxml -->
<mx:Application xmlns:mx="http://www.adobe.com/2006/mxml">
<mx:VBox>
<mx:TextInput id="myText" text="Hello World!" />
<mx:Button id="mybutton" label="Get Weather" click="writeToLog();"/>
</mx:VBox>
<mx:Script>
<![CDATA[
private function writeToLog():void {
trace(myText.text);
}
]]>
</mx:Script>
</mx:Application>
This code causes the MXML compiler to autogenerate a public variable named myText that contains a reference
to that Te x t In p u t instance. This autogenerated variable lets you access the component instance in ActionScript.
You can explicitly refer to the TextInput control’s instance with its
or script block. By referring to a component’s instance, you can modify its properties and call its methods.
Because each id value in an MXML file is unique, all objects in a file are part of the same flat namespace. You do
not qualify an object by referencing its parent with dot notation, as in
For more information, see “Referring to Flex components” on page 42.
id property, you can reference the corresponding object in Action-
id instance reference in any ActionScript class
myVBox.myText.text.
Using XML namespaces
In an XML document, tags are associated with a namespace. XML namespaces let you refer to more than one set
of XML tags in the same XML document. The
use the default namespace, specify no prefix. To use additional tags, specify a tag prefix and a namespace.
For example, the xmlns property in the following <mx:Application> tag indicates that tags in the MXML
namespace use the prefix mx:. The Universal Resource Identifier (URI) for the MXML namespace is
http://www.adobe.com/2006/mxml.
<mx:Application xmlns:mx="http://www.adobe.com/2006/mxml">
xmlns property in an MXML tag specifies an XML namespace. To
Page 23

Adobe Flex 3 Developer Guide
XML namespaces give you the ability to use custom tags that are not in the MXML namespace. The following
example shows an application that contains a custom tag called CustomBox. The namespace value
containers.boxes.* indicates that an MXML component called CustomBox is in the containers/boxes
directory.
<?xml version="1.0"?>
<!-- mxml/XMLNamespaces.mxml -->
<mx:Application xmlns:mx="http://www.adobe.com/2006/mxml"
xmlns:MyComps="containers.boxes.*"
>
<mx:Panel title="My Application"
paddingTop="10"
paddingBottom="10"
paddingLeft="10"
paddingRight="10"
>
<MyComps:CustomBox/>
</mx:Panel>
</mx:Application>
The containers/boxes directory can be a subdirectory of the directory that contains the application file, or it can
be a subdirectory of one of the ActionScript source path directories assigned in the flex-config.xml file. If copies
of the same file exist in both places, Flex uses the file in the application file directory. The prefix name is arbitrary,
but it must be used as declared.
When using a component contained in a SWC file, the package name and the namespace must match, even
though the SWC file is in the same directory as the MXML file that uses it. A SWC file is an archive file for Flex
components. SWC files make it easy to exchange components among Flex developers. You exchange only a single
file, rather than the MXML or ActionScript files and images, along with other resource files. Also, the SWF file
inside a SWC file is compiled, which means that the code is obfuscated from casual view. For more information
on SWC files, see “Using the Flex Compilers” on page 125 in Building and Deploying Adobe Flex 3 Applications.
11ADOBE FLEX 3
Using MXML to trigger run-time code
Flex applications are driven by run-time events, such as when a user selects a Button control. You can specify event
listeners, which consist of code for handling run-time events, in the event properties of MXML tags. For example,
the
<mx:Button> tag has a click event property in which you can specify ActionScript code that executes when
the Button control is clicked at run time. You can specify simple event listener code directly in event properties.
To use more complex code, you can specify the name of an ActionScript function defined in an
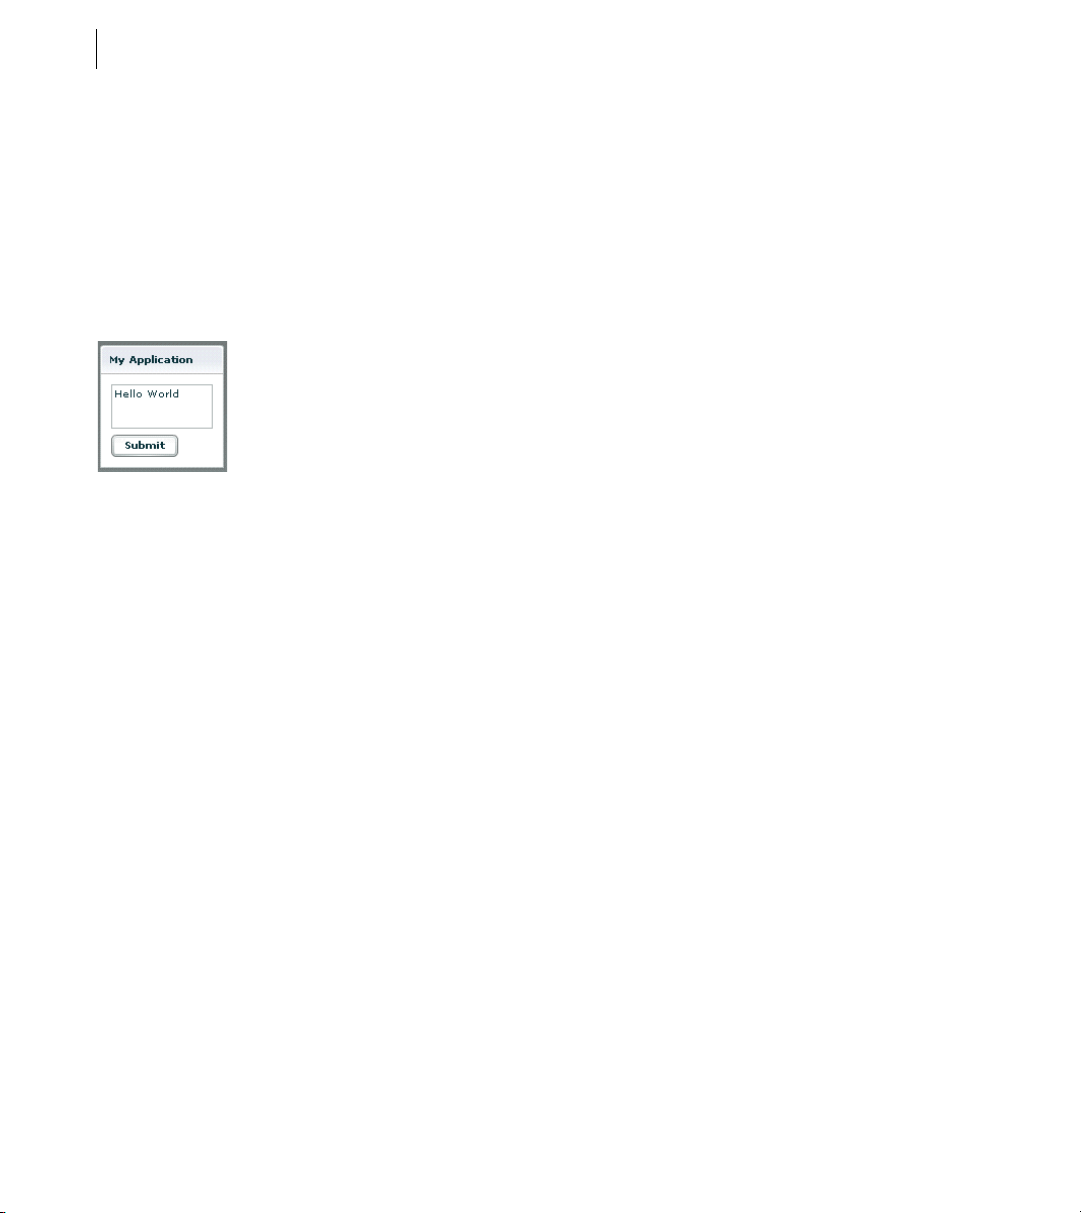
The following example shows an application that contains a Button control and a Te x t A r e a control. The
property of the Button control contains a simple event listener that sets the value of the TextArea control’s
property to the text
<?xml version="1.0"?>
<!-- mxml/TriggerCodeExample.mxml -->
<mx:Application xmlns:mx="http://www.adobe.com/2006/mxml">
Hello World.
<mx:Script> tag.
click
text
Page 24
CHAPTER 1
12
<mx:Panel title="My Application"
paddingTop="10"
paddingBottom="10"
paddingLeft="10"
paddingRight="10"
>
<mx:TextArea id="textarea1"/>
<mx:Button label="Submit" click="textarea1.text='Hello World';"/>
</mx:Panel>
</mx:Application>
The following image shows the application rendered in a web browser window:
[
The following example shows the code for a version of the application in which the event listener is contained in
an ActionScript function in an
<?xml version="1.0"?>
<!-- mxml/TriggerCodeExample2.mxml -->
<mx:Application xmlns:mx="http://www.adobe.com/2006/mxml">
<mx:Script>
<![CDATA[
private function hello():void {
textarea1.text="Hello World";
}
]]>
</mx:Script>
<mx:Panel title="My Application"
paddingTop="10"
paddingBottom="10"
paddingLeft="10"
paddingRight="10"
>
<mx:TextArea id="textarea1"/>
<mx:Button label="Submit" click="hello();"/>
</mx:Panel>
</mx:Application>
<mx:Script> tag:
For more information about using ActionScript with MXML, see “Using ActionScript” on page 37.
Page 25

Adobe Flex 3 Developer Guide
Binding data between components
Flex provides simple syntax for binding the properties of components to each other. In the following example, the
value inside the curly braces ({ }) binds the
TextInput control. When the application initializes, both controls display the text
Button control, both controls display the text
<?xml version="1.0"?>
<!-- mxml/BindingExample.mxml -->
<mx:Application xmlns:mx="http://www.adobe.com/2006/mxml">
<mx:Panel title="My Application"
paddingTop="10"
paddingBottom="10"
paddingLeft="10"
paddingRight="10"
>
<mx:TextInput id="textinput1" text="Hello"/>
<mx:TextArea id="textarea1" text="{textinput1.text}"/>
<mx:Button label="Submit" click="textinput1.text='Goodbye';"/>
</mx:Panel>
</mx:Application>
The following image shows the application rendered in a web browser window after the user clicks the Submit
button:
text property of a Te x t A re a control to the text property of a
Hello. When the user clicks the
Goodbye.
13ADOBE FLEX 3
As an alternative to the curly braces ({ }) syntax, you can use the <mx:Binding> tag, in which you specify the
source and destination of a binding. For more information about data binding, see “Storing Data” on page 1257.
Using RPC services
Remote-procedure-call (RPC) services let your application interact with remote servers to provide data to your
applications, or for your application to send data to a server.
Flex is designed to interact with several types of RPC services that provide access to local and remote server-side
logic. For example, a Flex application can connect to a web service that uses the Simple Object Access Protocol
(SOAP), a Java object residing on the same application server as Flex using AMF, or an HTTP URL that returns
XML.
Page 26

CHAPTER 1
14
The MXML components that provide data access are called RPC components. MXML includes the following
types of RPC components:
• WebService provides access to SOAP-based web services.
• HTTPService provides access to HTTP URLs that return data.
• RemoteObject provides access to Java objects using the AMF protocol (Adobe LiveCycle Data Services ES
only).
The following example shows an application that calls a web service that provides weather information, and
displays the current temperature for a given ZIP code. The application binds the ZIP code that a user enters in a
TextInput control to a web service input parameter. It binds the current temperature value contained in the web
service result to a TextArea control.
<?xml version="1.0"?>
<!-- mxml/RPCExample.mxml -->
<mx:Application xmlns:mx="http://www.adobe.com/2006/mxml">
<!-- Define the web service connection
(the specified WSDL URL is not functional). -->
<mx:WebService id="WeatherService"
wsdl="http:/example.com/ws/WeatherService?wsdl"
useProxy="false">
<!-- Bind the value of the ZIP code entered in the TextInput control
to the ZipCode parameter of the GetWeather operation. -->
<mx:operation name="GetWeather">
<mx:request>
<ZipCode>{zip.text}</ZipCode>
</mx:request>
</mx:operation>
</mx:WebService>
<mx:Panel title="My Application" paddingTop="10" paddingBottom="10"
paddingLeft="10" paddingRight="10" >
<!-- Provide a ZIP code in a TextInput control. -->
<mx:TextInput id="zip" width="200" text="Zipcode please?"/>
<!-- Call the web service operation with a Button click. -->
<mx:Button width="60" label="Get Weather"
click="WeatherService.GetWeather.send();"/>
<!-- Display the location for the specified ZIP code. -->
<mx:Label text="Location:"/>
<mx:TextArea text="{WeatherService.GetWeather.lastResult.Location}"/>
<!-- Display the current temperature for the specified ZIP code. -->
<mx:Label text="Temperature:"/>
<mx:TextArea
text="{WeatherService.GetWeather.lastResult.CurrentTemp}"/>
</mx:Panel>
</mx:Application>
Page 27
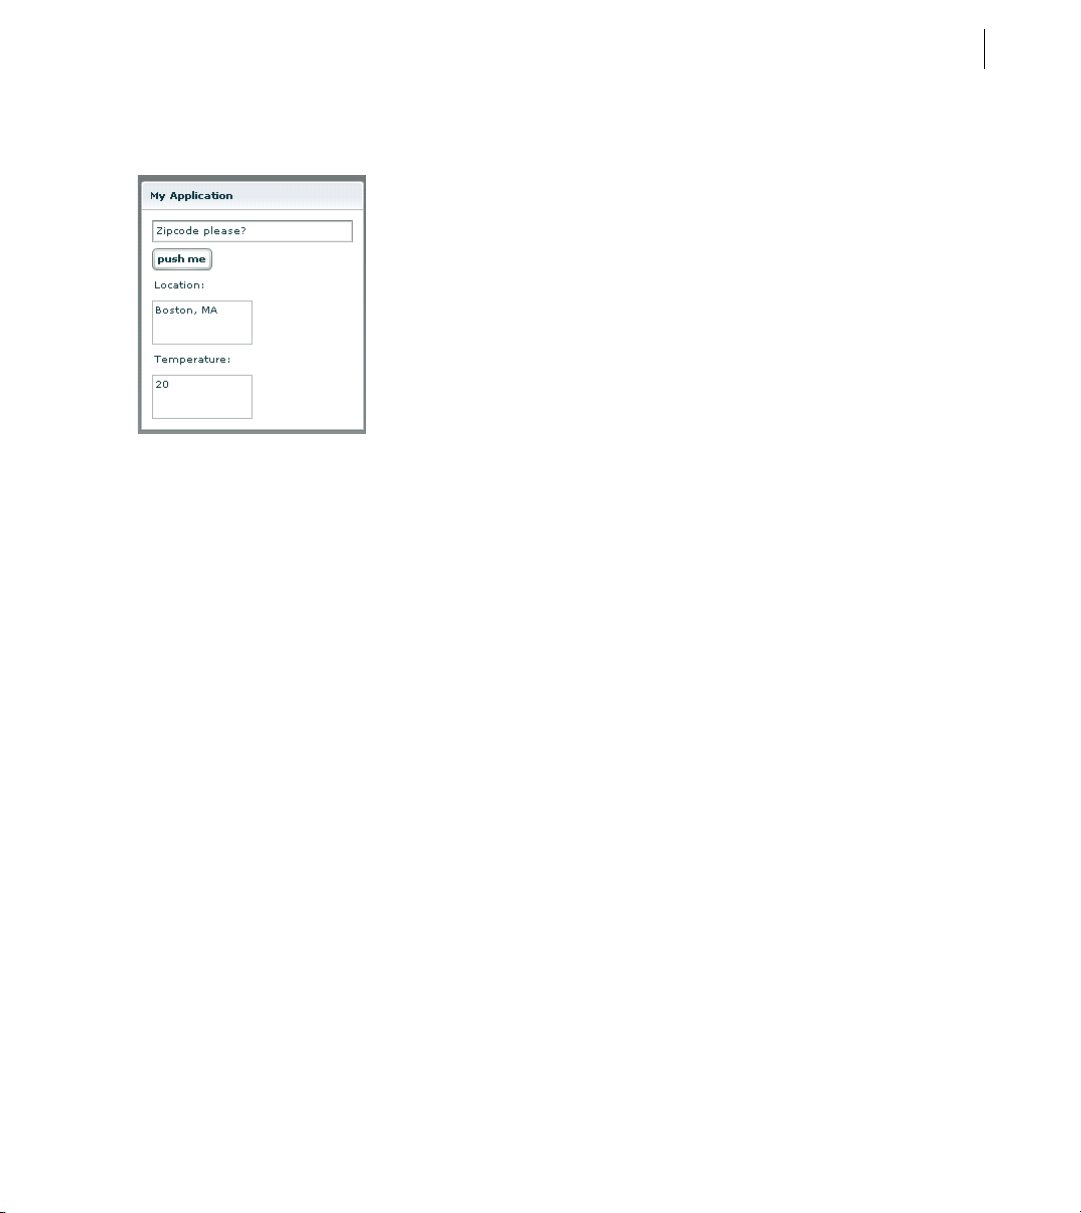
Adobe Flex 3 Developer Guide
The following image shows the application rendered in a web browser window:
For more information about using RPC services, see “Accessing Server-Side Data with Flex” on page 1163.
Storing data in a data model
You can use a data model to store application-specific data. A data model is an ActionScript object that provides
properties for storing data, and optionally contains methods for additional functionality. Data models provide a
way to store data in the Flex application before it is sent to the server, or to store data sent from the server before
using it in the application.
You can declare a simple data model that does not require methods in an
<mx:XMLList> tag. The following example shows an application that contains Te x t I np u t controls for entering
personal contact information and a data model, represented by the
mation:
<?xml version="1.0"?>
<!-- mxml/StoringData.mxml -->
<mx:Application xmlns:mx="http://www.adobe.com/2006/mxml">
<!-- A data model called "contact" stores contact information.
The text property of each TextInput control shown above
is passed to a field of the data model. -->
<mx:Model id="contact">
<info>
<homePhone>{homePhoneInput.text}</homePhone>
<cellPhone>{cellPhoneInput.text}</cellPhone>
<email>{emailInput.text}</email>
</info>
</mx:Model>
<mx:Panel title="My Application" paddingTop="10" paddingBottom="10"
paddingLeft="10" paddingRight="10" >
<!-- The user enters contact information in TextInput controls. -->
<mx:Model>, <mx:XML>, or
<mx:Model> tag, for storing the contact infor-
15ADOBE FLEX 3
Page 28

CHAPTER 1
16
<mx:TextInput id="homePhoneInput"
text="This isn't a valid phone number."/>
<mx:TextInput id="cellPhoneInput" text="(999)999-999"/>
<mx:TextInput id="emailInput" text="me@somewhere.net"/>
</mx:Panel>
</mx:Application>
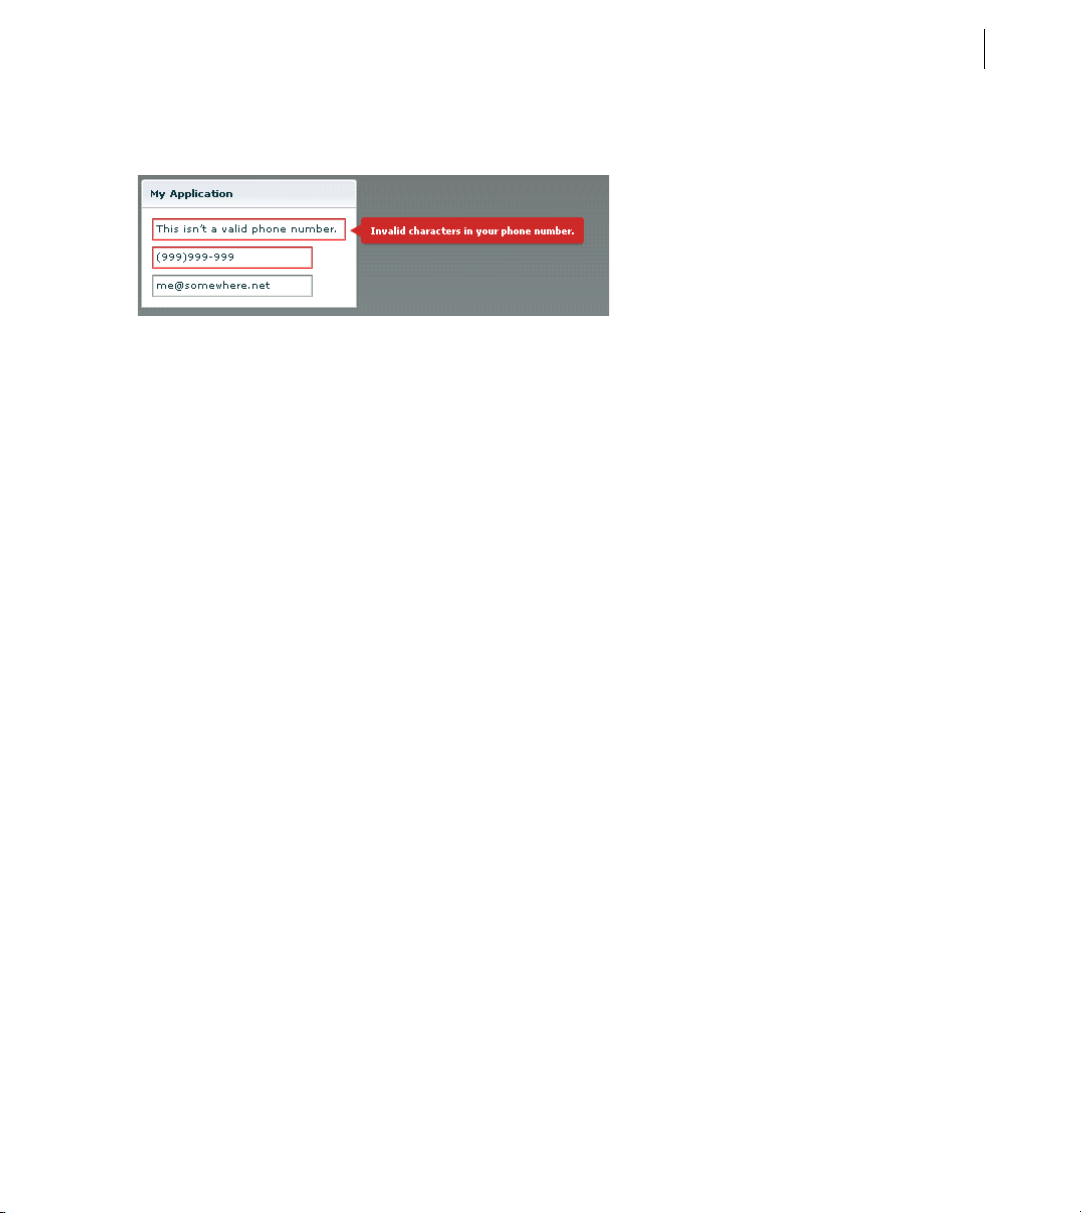
Validating data
You can use validator components to validate data stored in a data model, or in a Flex user interface component.
Flex includes a set of standard validator components. You can also create your own.
The following example uses validator components for validating that the expected type of data is entered in the
Te x t In p u t fields. Validation is triggered automatically when the user edits a TextInput control. If validation fails,
the user receives immediate visual feedback.
<?xml version="1.0"?>
<!-- mxml/ValidatingExample.mxml -->
<mx:Application xmlns:mx="http://www.adobe.com/2006/mxml">
<!-- A data model called "contact" stores contact information.
The text property of each TextInput control shown above
is passed to a field of the data model. -->
<mx:Model id="contact">
<info>
<homePhone>{homePhoneInput.text}</homePhone>
<cellPhone>{cellPhoneInput.text}</cellPhone>
<email>{emailInput.text}</email>
</info>
</mx:Model>
<!-- Validator components validate data entered into the TextInput controls. -->
<mx:PhoneNumberValidator id="pnV"
source="{homePhoneInput}" property="text"/>
<mx:PhoneNumberValidator id="pnV2"
source="{cellPhoneInput}" property="text"/>
<mx:EmailValidator id="emV" source="{emailInput}" property="text" />
<mx:Panel title="My Application" paddingTop="10" paddingBottom="10"
paddingLeft="10" paddingRight="10" >
<!-- The user enters contact information in TextInput controls. -->
<mx:TextInput id="homePhoneInput"
text="This isn't a valid phone number."/>
<mx:TextInput id="cellPhoneInput" text="(999)999-999"/>
<mx:TextInput id="emailInput" text="me@somewhere.net"/>
</mx:Panel>
</mx:Application>
Page 29
Adobe Flex 3 Developer Guide
The following image shows the application rendered in a web browser window:
For more information about using data models, see “Storing Data” on page 1257. For more information on
validators, see “Validating Data” on page 1267.
Formatting data
Formatter components are ActionScript components that perform a one-way conversion of raw data to a
formatted string. They are triggered just before data is displayed in a text field. Flex includes a set of standard
formatters. You can also create your own formatters. The following example shows an application that uses the
standard ZipCodeFormatter component to format the value of a variable:
<?xml version="1.0"?>
<!-- mxml/FormatterExample.mxml -->
<mx:Application xmlns:mx="http://www.adobe.com/2006/mxml">
<!-- Declare a ZipCodeFormatter and define parameters. -->
<mx:ZipCodeFormatter id="ZipCodeDisplay" formatString="#####-####"/>
<mx:Script>
<![CDATA[
[Bindable]
private var storedZipCode:Number=123456789;
]]>
</mx:Script>
<mx:Panel title="My Application"
paddingTop="10"
paddingBottom="10"
paddingLeft="10"
paddingRight="10"
>
<!-- Trigger the formatter while populating a string with data. -->
<mx:TextInput text="{ZipCodeDisplay.format(storedZipCode)}"/>
</mx:Panel>
</mx:Application>
17ADOBE FLEX 3
Page 30

CHAPTER 1
18
The following image shows the application rendered in a web browser window:
For more information about formatter components, see “Formatting Data” on page 1305.
Using Cascading Style Sheets (CSS)
You can use style sheets based on the CSS standard to declare styles to Flex components. The MXML <mx:Style>
tag contains inline style definitions or a reference to an external file that contains style definitions.
<mx:Style> tag must be an immediate child of the root tag of the MXML file. You can apply styles to an
The
individual component using a class selector, or to all components of a certain type using a type selector.
The following example defines a class selector and a type selector in the <mx:Style> tag. Both the class selector
and the type selector are applied to the Button control.
<?xml version="1.0"?>
<!-- mxml/CSSExample.mxml -->
<mx:Application xmlns:mx="http://www.adobe.com/2006/mxml">
<mx:Style>
.myClass { color: Red } /* class selector */
Button { font-size: 18pt} /* type selector */
</mx:Style>
<mx:Panel title="My Application"
paddingTop="10"
paddingBottom="10"
paddingLeft="10"
paddingRight="10"
>
<mx:Button styleName="myClass" label="This is red 18 point text."/>
</mx:Panel>
</mx:Application>
A class selector in a style definition, defined as a label preceded by a period, defines a new named style, such as
myClass in the preceding example. After you define it, you can apply the style to any component using the
styleName property. In the preceding example, you apply the style to the Button control to set the font color to
red.
A type selector applies a style to all instances of a particular component type. In the preceding example, you set
the font size for all Button controls to 18 points.
Page 31

Adobe Flex 3 Developer Guide
The following image shows the application rendered in a web browser window:
For more information about using Cascading Style Sheets, see “Using Styles and Themes” on page 589.
Using skins
Skinning is the process of changing the appearance of a component by modifying or replacing its visual elements.
These elements can be made up of bitmap images, SWF files, or class files that contain drawing methods that
define vector images. Skins can define the entire appearance, or only a part of the appearance, of a component in
various states. For more information about using skins, see “Creating Skins” on page 689.
Using effects
An effect is a change to a component that occurs over a brief period of time. Examples of effects are fading,
resizing, and moving a component. An effect is combined with a trigger, such as a mouse click on a component, a
component getting focus, or a component becoming visible, to form a behavior. In MXML, you apply effects as
properties of a control or container. Flex provides a set of built-in effects with default properties.
The following example shows an application that contains a Button control with its
to use the WipeLeft effect when the user moves the mouse over it:
<?xml version="1.0"?>
<!-- mxml/WipeLeftEffect.mxml -->
<mx:Application xmlns:mx="http://www.adobe.com/2006/mxml">
<!-- Define the effect. -->
<mx:WipeLeft id="myWL" duration="1000"/>
<mx:Panel title="My Application"
paddingTop="10"
paddingBottom="10"
paddingLeft="10"
paddingRight="10"
>
<!-- Assign effect to targets. -->
<mx:Button id="myButton" rollOverEffect="{myWL}"/>
</mx:Panel>
</mx:Application>
For more information about effects, see “Using Behaviors” on page 545.
rollOverEffect property set
19ADOBE FLEX 3
Page 32

CHAPTER 1
20
Defining custom MXML components
Custom MXML components are MXML files that you create and use as custom MXML tags in other MXML files.
They encapsulate and extend the functionality of existing Flex components. Just like MXML application files,
MXML component files can contain a mix of MXML tags and ActionScript code. The name of the MXML file
becomes the class name with which you refer to the component in another MXML file.
Note: You cannot access custom MXML component URLs directly in a web browser.
The following example shows a custom ComboBox control that is prepopulated with list items:
<?xml version="1.0"?>
<!-- mxml/containers/boxes/MyComboBox.mxml -->
<mx:VBox xmlns:mx="http://www.adobe.com/2006/mxml">
<mx:ComboBox >
<mx:dataProvider>
<mx:String>Dogs</mx:String>
<mx:String>Cats</mx:String>
<mx:String>Mice</mx:String>
</mx:dataProvider>
</mx:ComboBox>
</mx:VBox>
The following example shows an application that uses the MyComboBox component as a custom tag. The value
containers.boxes.* assigns the MyComps namespace to the containers/boxes sub-directory. To run this
example, store the MyComboBox.mxml file in that sub-directory.
<?xml version="1.0"?>
<!-- mxml/CustomMXMLComponent.mxml -->
<mx:Application xmlns:mx="http://www.adobe.com/2006/mxml"
xmlns:MyComps="containers.boxes.*">
<mx:Panel title="My Application"
paddingTop="10"
paddingBottom="10"
paddingLeft="10"
paddingRight="10"
>
<MyComps:MyComboBox/>
</mx:Panel>
</mx:Application>
The following image shows the application rendered in a web browser window:
Page 33

Adobe Flex 3 Developer Guide
For more information about MXML components, see “Simple MXML Components” on page 63 in Creating and
Extending Adobe Flex 3 Components.
You can also define custom Flex components in ActionScript. For more information, see “Simple Visual Components in ActionScript” on page 105 in Creating and Extending Adobe Flex 3 Components.
21ADOBE FLEX 3
Page 34

CHAPTER 1
22
Page 35

Chapter 2: MXML Syntax
MXML is an XML language that you use to lay out user-interface components for Adobe® Flex® applications.
Top ic s
Basic MXML syntax . . . . . . . . . . . . . . . . . . . . . . . . . . . . . . . . . . . . . . . . . . . . . . . . . . . . . . . . . . . . . . . . . . . . . . . . . . . . . . 23
Setting component properties. . . . . . . . . . . . . . . . . . . . . . . . . . . . . . . . . . . . . . . . . . . . . . . . . . . . . . . . . . . . . . . . . . . . . . 24
Basic MXML syntax
Most MXML tags correspond to ActionScript 3.0 classes or properties of classes. Flex parses MXML tags and
compiles a SWF file that contains the corresponding ActionScript objects.
ActionScript 3.0 uses syntax based on the ECMAScript edition 4 draft language specification. ActionScript 3.0
includes the following features:
• Formal class definition syntax
• Formal packages structure
• Typing of variables, parameters, and return values (compile-time only)
• Implicit getters and setters that use the get and set keywords
• Inheritance
• Public and private members
• Static members
• Cast operator
For more information about ActionScript 3.0, see “Using ActionScript” on page 37.
23
Naming MXML files
MXML filenames must adhere to the following naming conventions:
• Filenames must be valid ActionScript identifiers, which means they must start with a letter or underscore
character (_), and they can only contain letters, numbers, and underscore characters after that.
• Filenames must not be the same as ActionScript class names, component id values, or the word application.
Do not use filenames that match the names of MXML tags that are in the mx namespace.
• Filenames must end with a lowercase .mxml file extension.
Page 36

CHAPTER 2
24
Using tags that represent ActionScript classes
An MXML tag that corresponds to an ActionScript class uses the same naming conventions as the ActionScript
class. Class names begin with a capital letter, and capital letters separate the words in class names. For example,
when a tag corresponds to an ActionScript class, its properties correspond to the properties and events of that
class.
Setting component properties
In MXML, a component property uses the same naming conventions as the corresponding ActionScript property.
A property name begins with a lowercase letter, and capital letters separate words in the property names.
You can set most component properties as tag attributes, in the form:
<mx:Label width="50" height="25" text="Hello World"/>
You can set all component properties as child tags, in the form:
<mx:Label>
<mx:width>50</mx:width>
<mx:height>25</mx:height>
<mx:text>Hello World</mx:text>
</mx:Label>
You often use child tags when setting the value of a property to a complex Object because it is not possible to
specify a complex Object as the value of tag attribute. In the following example, you use child tags to set the data
provider of a ComboBox control of an ArrayCollection object:
<mx:ComboBox>
<mx:dataProvider>
<mx:ArrayCollection>
<mx:String>AK</mx:String>
<mx:String>AL</mx:String>
<mx:String>AR</mx:String>
</mx:ArrayCollection>
<mx:dataProvider>
</mx:ComboBox>
The one restriction on setting properties that use child tags is that the namespace prefix of a child tag, mx: in the
previous example, must match the namespace prefix of the component tag.
Each of a component’s properties is one of the following types:
• Scalar properties, such as a number or string
• Array of scalar values, such as an array of numbers or strings
• ActionScript object
• Array of ActionScript objects
Page 37

Adobe Flex 3 Developer Guide
• ActionScript properties
• XML data
Adobe recommends that you assign scalar values using tag attributes, and that you assign complex types, such as
ActionScript objects, by using child tags.
Setting scalar properties
You usually specify the value of a scalar property as a property of a component tag, as the following example
shows:
<mx:Label width="50" height="25" text="Hello World"/>
Setting properties using constants
The valid values of many component properties are defined by static constants, where these static constants are
defined in an ActionScript class. In MXML, you can either use the static constant to set the property value, or use
the value of the static constant, as the following example shows:
<!-- Set the property using the static constant. -->
<mx:HBox width="200" horizontalScrollPolicy="{ScrollPolicy.OFF}">
...
</mx:HBox>
<!-- Set the property using the value of the static constant. -->
<mx:HBox width="200" horizontalScrollPolicy="off">
...
</mx:HBox>
The HBox container defines a property named horizontalScrollPolicy that defines the operation of the
container’s horizontal scroll bar. In this example, you explicitly set the
disable the horizontal scroll bar.
In the first example, you set the horizontalScrollPolicy property using a static constant named OFF, which is
defined in the ScrollPolicy class. In MXML, you must use data binding syntax when setting a property value to a
static constant. The advantage of using the static constant is that the Flex compiler recognizes incorrect property
values, and issues an error message at compile time.
Alternatively, you can set the value of the
The value of the
OFF static constant is "off". When you use the value of the static constant to set the property
horizontalScrollPolicy property to the value of the static constant.
value, the Flex compiler cannot determine if you used an unsupported value. If you incorrectly set the property,
you will not know until you get a run-time error.
In ActionScript, you should always use static constants to set property values, as the following example shows:
var myHBox:HBox = new HBox();
myHBox.horizontalScrollPolicy=ScrollPolicy.OFF;
horizontalScrollPolicy property to
25ADOBE FLEX 3
Page 38

CHAPTER 2
26
Setting the default property
Many Flex components define a single default property. The default property is the MXML tag property that is
implicit for content inside of the MXML tag if you do not explicitly specify a property. For example, consider the
following MXML tag definition:
<mx:SomeTag>
anything here
</mx:SomeTag>
If this tag defines a default property named default_property, the preceding tag definition is equivalent to the
following code:
<mx:SomeTag>
<default_property>
anything here
</default_property>
</mx:SomeTag>
It is also equivalent to the following code:
<mx:SomeTag default_property="anything here"/>
The default property provides a shorthand mechanism for setting a single property. For a ComboBox, the default
property is the
equivalent:
<?xml version="1.0"?>
<!-- mxml\DefProp.mxml -->
<mx:Application xmlns:mx="http://www.adobe.com/2006/mxml" >
<!-- Omit the default property. -->
<mx:ComboBox>
<mx:ArrayCollection>
<mx:String>AK</mx:String>
<mx:String>AL</mx:String>
<mx:String>AR</mx:String>
</mx:ArrayCollection>
</mx:ComboBox>
<!-- Explicitly speficy the default property. -->
<mx:ComboBox>
<mx:dataProvider>
<mx:ArrayCollection>
<mx:String>AK</mx:String>
<mx:String>AL</mx:String>
<mx:String>AR</mx:String>
</mx:ArrayCollection>
</mx:dataProvider>
</mx:ComboBox>
</mx:Application>
Not all Flex components define a default property. To determine the default property for each component, see the
Adobe Flex Language Reference.
dataProvider property. Therefore, the two ComboBox definitions in the following code are
Page 39

Adobe Flex 3 Developer Guide
You can als o define a default property w hen you create a custom component. For more information, see “Metadata
Tags in Custom Components” on page 33 in Creating and Extending Adobe Flex 3 Components.
Escaping characters using the backslash character
When setting a property value in MXML, you can escape a reserved character by prefixing it with the backslash
character (\), as the following example shows:
<?xml version="1.0"?>
<!-- mxml\EscapeChar.mxml -->
<mx:Application xmlns:mx="http://www.adobe.com/2006/mxml" >
<mx:Label text="\{\}"/>
</mx:Application>
In this example, you want to use literal curly brace characters ({ }) in a text string. But Flex uses curly braces to
indicate a data binding operation. Therefore, you prefix each curly brace with the backslash character to cause the
MXML compiler to interpret them as literal characters.
Setting String properties using the backslash character
The MXML compiler automatically escapes the backslash character in MXML when the character is part of the
value specified for a property of type String. Therefore, it always converts
This is necessary because the ActionScript compiler recognizes
"\\" as the character sequence for a literal "\"
character, and strips out the leading backslash when it initializes the property value.
Note: Do not use the backslash character (\) as a separator in the path to an application asset. You should always use
a forward slash character (/) as the separator.
"\" to "\\".
27ADOBE FLEX 3
Including a newline character in a String value
For properties of type String, you can insert a newline character in the String in two ways:
• By inserting the
code in your String value in MXML
• By inserting "\n" in an ActionScript String variable used to initialize the MXML property
To use the
code to insert a newline character, include that code in the property value in MXML, as the
following example shows:
<mx:TextArea width="100%" text="Display
Content"/>
To use an ActionScript String variable to insert a newline character, create an ActionScript variable, and then use
data binding to set the property in MXML, as the following example shows:
<mx:Script>
Page 40

CHAPTER 2
28
<![CDATA[
[Bindable]
public var myText:String = "Display" + "\n" + "Content";
]]>
</mx:Script>
<mx:TextArea width="100%" text="{myText}"/>
In this example, you set the text property of the Te x t Ar e a control to a value that includes a newline character.
Notice that this example includes the
specifies that the
ically copies the value of a
when the
myText property can be used as the source of a data binding expression. Data binding automat-
source property of one object to the destination property of another object at run time
source property changes.
[Bindable] metadata tag before the property definition. This metadata tag
If you omit this metadata tag, the compiler issues a warning message specifying that the property cannot be used
as the source for data binding. For more information, see “Binding Data” on page 1229.
Setting Arrays of scalar values
When a class has a property that takes an Array as its value, you can represent the property in MXML using child
tags. The component in the following example has a
<mx:List width="150">
<mx:dataProvider>
<mx:Array>
<mx:Number>94062</mx:Number>
<mx:Number>14850</mx:Number>
<mx:Number>53402</mx:Number>
</mx:Array>
</mx:dataProvider>
</mx:List>
The <mx:Array> and </mx:Array> tags around the Array elements are optional. Therefore, you can also write
this example as the following code shows:
<mx:List width="150">
<mx:dataProvider>
<mx:Number>94062</mx:Number>
<mx:Number>14850</mx:Number>
<mx:Number>53402</mx:Number>
</mx:dataProvider>
</mx:List>
In this example, since the data type of the dataProvider property is define d as Ar ray, Fle x autom aticall y conver ts
the three number definitions into a three-element array.
dataProvider property that contains an Array of numbers:
Page 41

Adobe Flex 3 Developer Guide
Component developers may have specified additional information within the component definition that defines
the data type of the Array elements. For example, if the developer specified that the
dataProvider property
supports only String elements, this example would cause a compiler error because you specified numbers to it.
The Adobe Flex Language Reference documents the Array properties that define a required data type for the Array
elements.
Setting Object properties
When a component has a property that takes an object as its value, you can represent the property in MXML using
a child tag with tag attributes, as the following example shows:
<mynamespace:MyComponent>
<mynamespace:nameOfProperty>
<mynamespace:typeOfObject prop1="val1" prop2="val2"/>
</mynamespace:nameOfProperty>
</mynamespace:MyComponent>
The following example shows an ActionScript class that defines an Address object. This object is used as a
property of the PurchaseOrder component in the next example.
class Address
{
public var name:String;
public var street:String;
public var city:String;
public var state:String;
public var zip:Number;
}
The following example shows an ActionScript class that defines a PurchaseOrder component that has a property
type of Address:
import example.Address;
class PurchaseOrder {
public var shippingAddress:Address;
public var quantity:Number;
...
}
In MXML, you define the PurchaseOrder component as the following example shows:
<mynamespace:PurchaseOrder quantity="3" xmlns:e="example">
<mynamespace:shippingAddress>
<mynamespace:Address name="Fred" street="123 Elm St."/>
</mynamespace:shippingAddress>
</mynamespace:PurchaseOrder>
If the value of the shippingAddress property is a subclass of Address (such as DomesticAddress), you can
declare the property value, as the following example shows:
<mynamespace:PurchaseOrder quantity="3" xmlns:e="example">
29ADOBE FLEX 3
Page 42

CHAPTER 2
30
<mynamespace:shippingAddress>
<mynamespace:DomesticAddress name="Fred" street="123 Elm St."/>
</mynamespace:shippingAddress>
</mynamespace:PurchaseOrder>
If the property is explicitly typed as Object like the value property in the following example, you can specify an
anonymous object using the
class ObjectHolder {
public var value:Object
}
<mx:Object> tag.
The following example shows how you specify an anonymous object as the value of the value property:
<mynamespace:ObjectHolder>
<mynamespace:value>
<mx:Object foo='bar'/>
</mynamespace:value>
</mynamespace:ObjectHolder>
Populating an Object with an Array
When a component has a property of type Object that takes an Array as its value, you can represent the property
in MXML using child tags, as the following example shows:
<mynamespace:MyComponent>
<mynamespace:nameOfObjectProperty>
<mx:Array>
<mx:Number>94062</mx:Number>
<mx:Number>14850</mx:Number>
<mx:Number>53402</mx:Number>
</mx:Array>
</mynamespace:nameOfObjectProperty>
</mynamespace:MyComponent>
In this example, you initialize the Object to a three-element array of numbers.
As described in the section “Setting Arrays of scalar values” on page 28, the
</mx:Array> tag around the Array elements are optional and may be omitted, as the following example shows:
<mynamespace:MyComponent>
<mynamespace:nameOfObjectProperty>
<mx:Number>94062</mx:Number>
<mx:Number>14850</mx:Number>
<mx:Number>53402</mx:Number>
</mynamespace:nameOfObjectProperty>
</mynamespace:MyComponent>
The only exception to this rule is when you specify a single Array element for the Object property. In that case,
Flex does not create an Object containing a single-element array, but instead creates an object and sets it to the
specified value. This is a difference between the following two lines:
object=[element] // Object containing a one-element array
object=element // object equals value
<mx:Array> tag and the
Page 43

Adobe Flex 3 Developer Guide
If you want to create a single-element array, include the <mx:Array> and </mx:Array> tags around the array
element, as the following example shows:
<mynamespace:MyComponent>
<mynamespace:nameOfObjectProperty>
<mx:Array>
<mx:Number>94062</mx:Number>
</mx:Array>
</mynamespace:nameOfObjectProperty>
</mynamespace:MyComponent>
Populating Arrays of objects
When a component has a property that takes an Array of objects as its value, you can represent the property in
MXML using child tags, as the following example shows:
<mynamespace:MyComponent>
<mynamespace:nameOfProperty>
<mx:Array>
<mynamespace:objectType prop1="val1" prop2="val2"/>
<mynamespace:objectType prop1="val1" prop2="val2"/>
<mynamespace:objectType prop1="val1" prop2="val2"/>
</mx:Array>
</mynamespace:nameOfProperty>
</mynamespace:MyComponent>
The component in the following example contains an Array of ListItem objects. Each ListItem object has
properties named
<mynamespace:MyComponent>
<mynamespace:dataProvider>
<mx:Array>
</mx:Array>
</mynamespace:dataProvider>
</mynamespace:MyComponent>
The following example shows how you specify an anonymous object as the value of the dataProvider property :
<mynamespace:MyComponent>
<mynamespace:dataProvider>
<mx:Array>
</mx:Array>
</mynamespace:dataProvider>
</mynamespace:MyComponent>
As described in the section “Setting Arrays of scalar values” on page 28, the <mx:Array> tag and the
</mx:Array> tag around the Array elements are optional and may be omitted, as the following example shows:
<mynamespace:MyComponent>
<mynamespace:dataProvider>
<mx:Object label="One" data="1"/>
label and data.
<mynamespace:ListItem label="One" data="1"/>
<mynamespace:ListItem label="Two" data="2"/>
<mx:Object label="One" data="1"/>
<mx:Object label="Two" data="2"/>
31ADOBE FLEX 3
Page 44

CHAPTER 2
32
<mx:Object label="Two" data="2"/>
</mynamespace:dataProvider>
</mynamespace:MyComponent>
Setting properties that contain XML data
If a component contains a property that takes XML data, the value of the property is an XML fragment to which
you can apply a namespace. In the following example, the
value property of the MyComponent object is XML
data:
<mynamespace:MyComponent>
<mynamespace:value xmlns:a="http://www.example.com/myschema">
<mx:XML>
<a:purchaseorder>
<a:billingaddress>
...
</a:billingaddress>
</a:purchaseorder>
</mx:XML>
</mynamespace:value>
</mynamespace:MyComponent>
...
Setting style and effect properties in MXML
A style or effect property of an MXML tag differs from other properties because it corresponds to an ActionScript
style or effect, rather than to a property of an ActionScript class. You set these properties in ActionScript using the
setStyle(stylename, value) method rather than object.property=value notation.
You define style or effect properties in ActionScript classes using the
than defining them as ActionScript variables or setter/getter methods. For more information, see “Metadata Tags
in Custom Components” on page 33 in Creating and Extending Adobe Flex 3 Components.
For example, you can set the
<mx:TextArea id="myText" text="hello world" fontFamily="Tahoma"/>
fontFamily style property in MXML, as the following code shows:
This MXML code is equivalent to the following ActionScript code:
myText.setStyle("fontFamily", "Tahoma");
[Style] or [Effect] metadata tags, rather
Setting event properties in MXML
An event property of an MXML tag lets you specify the event listener function for an event. This property corresponds to setting the event listener in ActionScript using the
You define event properties in ActionScript classes using the
as ActionScript variables or setter/getter methods. For more information, see “Metadata Tags in Custom Components” on page 33 in Creating and Extending Adobe Flex 3 Components.
addEventListener() method.
[Event] metadata tags, rather than defining them
Page 45

Adobe Flex 3 Developer Guide
For example, you can set the creationComplete event property in MXML, as the following code shows:
<mx:TextArea id="myText" creationComplete="creationCompleteHandler()"/>
This MXML code is equivalent to the following ActionScript code:
myText.addEventListener("creationComplete", creationCompleteHandler);
Specifying a URL value
Some MXML tags, such as the <mx:Script> tag, have a property that takes a URL of an external file as a value.
For example, you can use the
instead of typing ActionScript directly in the body of the
Note: You specify a script in the source property of an <mx:Script> tag. You do not specify ActionScript classes in
the
source property. For information on using ActionScript classes, see “Creating ActionScript components” on
page 55.
MXML supports the following types of URLs:
• Absolute, as in the following example:
<mx:Style source="http://www.somesite.com/mystyles.css">
• A path used at run time that is relative to the context root of the Java web application in which a Flex appli-
cation is running. For example:
<mx:HTTPService url="@ContextRoot()/directory/myfile.xml"/>
• A path used at compile time that is relative to the context root of the Java web application in which a Flex appli-
cation is running, as in the following example:
<mx:Script source="/myscript.as"/>
• Relative to the current file location, as in the following example:
<mx:Script source="../myscript.as"/>
source property in an <mx:Script> tag to reference an external ActionScript file
<mx:Script> tag.
33ADOBE FLEX 3
Specifying a RegExp value
For a property of type RegExp, you can specify its value in MXML using the following format:
"/pattern/flags"
pattern Specifies the regular expression within the two slashes. Both slashes are required.
flags (Optional) Specifies any flags for the regular expression.
For example, the
value as the following example shows:
<mynamespace:MyComponent regExpression="/\Wcat/gi"/>
regExpression property of an MXML component is of type RegExp. Therefore, you can set its
Page 46

CHAPTER 2
34
Or set it using child tags, as the following example shows:
<mynamespace:MyComponent>
<mynamespace:regExpression>/\Wcat/gi</mynamespace:regExpression>
</mynamespace:MyComponent>
The flags portion of the regular expression is optional, so you can also specify it as the following example shows:
<mynamespace:MyComponent regExpression="/\Wcat/"/>
Using compiler tags
Compiler tags are tags that do not directly correspond to ActionScript objects or properties. The names of the
following compiler tags have just the first letter capitalized:
• <mx:Binding>
• <mx:Component>
• <mx:Metadata>
• <mx:Model>
• <mx:Script>
• <mx:Style>
• <mx:XML>
• <mx:XMLList>
The following compiler tags are in all lowercase letters:
• <mx:operation>
• <mx:request>
• <mx:method>
• <mx:arguments>
MXML tag rules
MXML has the following syntax requirements:
• The id property is not required on any tag.
• The id property is not allowed on the root tag.
• Boolean properties take only true and false values.
• The <mx:Binding> tag requires both source and destination properties.
• The <mx:Binding> tag cannot contain an id property.
• The <mx:WebService> tag requires a wsdl value or destination value, and does not allow both.
Page 47

Adobe Flex 3 Developer Guide
• The <mx:RemoteObject> tag requires a source value or a named value, and does not allow both.
• The <mx:HTTPService> tag requires a url value or a destination value, and does not allow both.
• The <mx:operation> tag requires a name value, and does not allow duplicate name entries.
• The <mx:operation> tag cannot contain an id property.
• The <mx:method> tag requires a name value and does not allow duplicate name entries.
• The <mx:method> tag cannot contain an id property.
35ADOBE FLEX 3
Page 48

CHAPTER 2
36
Page 49

Chapter 3: Using ActionScript
Flex developers can use ActionScript to extend the functionality of their Adobe® Flex® applications. ActionScript
provides flow control and object manipulation features that are not available in MXML. For a complete introduction to ActionScript and a reference for using the language, see Programming ActionScript 3.0 and ActionScript
3.0 Language Reference.
Top ic s
Using ActionScript in Flex applications . . . . . . . . . . . . . . . . . . . . . . . . . . . . . . . . . . . . . . . . . . . . . . . . . . . . . . . . . . . . .37
Working with Flex components . . . . . . . . . . . . . . . . . . . . . . . . . . . . . . . . . . . . . . . . . . . . . . . . . . . . . . . . . . . . . . . . . . . . 42
Comparing, including, and importing ActionScript code . . . . . . . . . . . . . . . . . . . . . . . . . . . . . . . . . . . . . . . . . . . . . .49
Techniques for separating ActionScript from MXML. . . . . . . . . . . . . . . . . . . . . . . . . . . . . . . . . . . . . . . . . . . . . . . . . . 53
Creating ActionScript components . . . . . . . . . . . . . . . . . . . . . . . . . . . . . . . . . . . . . . . . . . . . . . . . . . . . . . . . . . . . . . . . .55
Performing object introspection. . . . . . . . . . . . . . . . . . . . . . . . . . . . . . . . . . . . . . . . . . . . . . . . . . . . . . . . . . . . . . . . . . . .56
Using ActionScript in Flex applications
37
Flex developers can use ActionScript to implement custom behavior within their Flex applications. You first use
MXML tags to declare things like the containers, controls, effects, formatters, validators, and web services that
your application requires, and to lay out its user interface. Each of these components provides the standard
behavior you’d expect. For example, a button automatically highlights when you roll over it, without requiring you
to write any ActionScript. But a declarative language like MXML is not appropriate for coding what you want to
happen when the user clicks a button. For that, you need to use a procedural language like ActionScript, which
offers executable methods, various types of storage variables, and flow control such as conditionals and loops. In
a general sense, MXML implements the static aspects of your application, and ActionScript implements its
dynamic aspects.
ActionScript is an object-oriented procedural programming language, based on the ECMAScript (ECMA-262)
edition 4 draft language specification. You can use a variety of methods to mix ActionScript and MXML, including
the following:
• Use ActionScript to define event listeners inside MXML event attributes.
• Add script blocks using the <mx:Script> tag.
• Include external ActionScript files.
Page 50

CHAPTER 3
38
• Import ActionScript classes.
• Create ActionScript components.
ActionScript compilation
Although a simple Flex application can be written in a single MXML or ActionScript (AS) file, most applications
will be broken into multiple files. For example, it is common to move the
for an
<mx:Application> into separate AS and CSS files which the application then includes. It is also common
for an application to import custom MXML and ActionScript components. These must be defined in other files,
and MXML components may put their own
<mx:Script> blocks i nto yet more A S fi les that they include. C ompo-
nents may also be imported from precompiled SWC files rather than source code. Finally, SWF files containing
executable code can also be embedded in an application. The end result of all these input files is a single SWF file.
The Flex compiler transforms the main MXML file and other files it includes into a single ActionScript class. As
a result, you cannot define classes or use statements outside of functions in the MXML files and the included
ActionScript files.
You can reference imported ActionScript classes from your MXML application files, and those classes are added
to the final SWF file. When the transformation to an ActionScript file is complete, Flex links all the ActionScript
components and includes those classes in the final SWF file.
<mx:Script> and <mx:Style> blocks
About generated ActionScript
When you write an MXML file and compile it, the Flex compiler creates a class and generates ActionScript that
the class uses. MXML tags and ActionScript are used by the resulting class in several ways. This information is
useful for understanding what is happening in the background of the application.
An MXML application (a file that starts with the
class. Similarly, an MXML component (a file that starts with some other component’s tag, such as
defines a subclass of that component.
The name of the subclass is the name of the file. The base class is the class of the top-level tag. An MXML application actually defines the following:
class MyApp extends Application
If MyButton.mxml starts with <mx:Button>, you are actually defining the following:
class MyButton extends Button
The variable and function declarations in an <mx:Script> block define properties and methods of the subclass.
<mx:Application> tag) defines a subclass of the Application
<mx:Button>)
Page 51

Adobe Flex 3 Developer Guide
Setting an id property on a component instance within a class results in a public variable being autogenerated in
the subclass that contains a reference to that component instance. For example, if the
id="myButton"/>
tag is nested deeply inside several containers, you can still refer to it as myButton.
<mx:Button
Event attributes become the bodies of autogenerated event listener methods in the subclass. For example:
<mx:Button id="myButton" click="foo = 1; doSomething()">
becomes
private function __myButton_click(event:MouseEvent):void {
foo = 1;
doSomething()
}
The event attributes become method bodies, so they can access the other properties and methods of the subclass.
All the ActionScript anywhere in an MXML file, whether in its
this keyword referring to an instance of the subclass.
the
<mx:Script> block or inside tags, executes with
The public properties and methods of the class are accessible by ActionScript code in other components, as long
as that code “dots down” (for example,
or reaches up using
parentDocument, parentApplication, or Application.application to specify which
myCheckoutAccordion.myAddressForm.firstNameTextInput.text)
component the property or method exists on.
39ADOBE FLEX 3
Using ActionScript in MXML event handlers
One way to use ActionScript code in a Flex application is to include it within the MXML tag’s event handler, as
the following example shows:
<?xml version="1.0"?>
<!-- usingas/HelloWorldAS.mxml -->
<mx:Application xmlns:mx="http://www.adobe.com/2006/mxml" layout="absolute">
<mx:Panel title="My Application" height="128" x="226" y="24" layout="absolute">
<mx:TextArea id="textarea1" width="155" x="0" y="0"/>
<mx:Button label="Click Me"
click="textarea1.text='Hello World';"
width="92"
x="31.5"
y="56"
/>
</mx:Panel>
</mx:Application>
In this example, you include ActionScript code for the body of the click event handler of the Button control. The
MXML compiler takes the attribute
public function __myButton_click(event:MouseEvent):void {
textarea1.text='Hello World';
}
click="..." and generates the following event handler method:
Page 52

CHAPTER 3
40
When the user clicks the button, this code sets the value of the TextArea control’s text property to the String
“Hello World.” In most cases, you do not need to look at the generated code, but it is useful to understand what
happens when you write an inline event handler.
To see the generated code, set the value of the keep-generated-actionscript compiler option to true. The
compiler then stores the *.as helper file in the /generated directory, which is a subdirectory of the location of the
SWF file.
For more information about events, see “Using Events” on page 61. For more information on using the commandline compilers, see “Using the Flex Compilers” on page 125 in Building and Deploying Adobe Flex 3 Applications.
Using ActionScript blocks in MXML files
You use the <mx:Script> tag to insert an ActionScript block in an MXML file. ActionScript blocks can contain
ActionScript functions and variable declarations used in MXML applications. Code inside
also declare constants (with the
(with
include), import declarations (with import), and use namespaces (with use namespace).
<mx:Script> tag must be a child of the <mx:Application> or other top-level component tag.
The
const statement) and namespaces (with namespace), include ActionScript files
Statements and expressions are allowed only if they are wrapped in a function. In addition, you cannot define new
classes or interfaces in
<mx:Script> blocks. Instead, you must place new classes or interfaces in separate AS files
and import them.
All ActionScript in the block is added to the enclosing file’s class when Flex compiles the application. The
following example declares a variable and sets the value of that variable inside a function:
<?xml version="1.0"?>
<!-- usingas/StatementSyntax.mxml -->
<mx:Application xmlns:mx="http://www.adobe.com/2006/mxml"
creationComplete="doSomething()">
<mx:Script><![CDATA[
public var s:Boolean;
public function doSomething():void {
// The following statements must be inside a function.
s = label1.visible;
label1.text = "label1.visible = " + String(s);
}
]]></mx:Script>
<mx:Label id="label1"/>
</mx:Application>
Most statements must be inside functions in an <mx:Script> block. However, the following statements can be
outside functions:
• import
• var
<mx:Script> tags can
Page 53

Adobe Flex 3 Developer Guide
• include
• const
• namespace
• use namespace
When using an <mx:Script> block, you should wrap the contents in a CDATA construct. This prevents the
compiler from interpreting the contents of the script block as XML, and allows the ActionScript to be properly
generated. Adobe recommends that you write all your
<mx:Script> open and close tags as the following example
shows:
<mx:Script>
<![CDATA[
...
]]>
</mx:Script>
Flex does not parse text in a CDATA construct, which means that you can use XML-parsed characters such as
angle brackets (< and >) and ampersand (&). For example, the following script that includes a less-than (<)
comparison must be in a CDATA construct:
<?xml version="1.0"?>
<!-- usingas/UsingCDATA.mxml -->
<mx:Application xmlns:mx="http://www.adobe.com/2006/mxml"
creationComplete="doSomething()">
<mx:Script><![CDATA[
public var m:Number;
public var n:Number;
public function doSomething():void {
n = 42;
m = 40;
label1.text = "42 > 40 = " + String(n > m);
}
]]></mx:Script>
<mx:Label id="label1"/>
</mx:Application>
41ADOBE FLEX 3
Accessing ActionScript documentation
The ActionScript 3.0 programming language can be used from within several development environments,
including Adobe® Flash® Professional and Adobe® Flex® Builder™.
The Flex documentation includes Programming ActionScript 3.0, which describes the ActionScript language. The
ActionScript API reference is included as part of the Adobe Flex Language Reference.
Page 54

CHAPTER 3
42
Working with Flex components
The primary use of ActionScript in your Flex applications is probably going to be for working with the visual
controls and containers in your application. Flex provides several techniques for doing this, including referencing
a Flex control in ActionScript and manipulating properties during the instantiation of controls and containers.
Referring to Flex components
To work with a component in ActionScript, you usually define an id property for that component in the MXML
tag. For example, the following code sets the
<mx:Button id="myButton" label="Click Me"/>
This property is optional if you do not want to access the component with ActionScript.
This code causes the MXML compiler to autogenerate a public variable named
to that Button instance. This autogenerated variable lets you access the component instance in ActionScript. You
can explicitly refer to the Button control’s instance with its
block. By referring to a component’s instance, you can modify its properties and call its methods.
For example, the following ActionScript block changes the value of the Button control’s label property when the
user clicks the button:
<?xml version="1.0"?>
<!-- usingas/ButtonExample.mxml -->
<mx:Application xmlns:mx="http://www.adobe.com/2006/mxml">
<mx:Script><![CDATA[
private function setLabel():void {
if (myButton.label=="Click Me") {
myButton.label = "Clicked";
} else {
myButton.label = "Click Me";
}
}
]]></mx:Script>
<mx:Button id="myButton" label="Click Me" click="setLabel();"/>
</mx:Application>
The IDs for all tags in an MXML component, no matter how deeply nested they are, generate public variables of
the component being defined. As a result, all
that if you specified an ID for a component instance, you can access that component from anywhere in the application: from functions, external class files, imported ActionScript files, or inline scripts.
You can refer to a Flex component if it does not have an
container, such as the
getChildAt() and getChildByName() methods.
You can refer to the current enclosing document or current object using the
id property of the Button control to the String "myButton":
myButton that contains a reference
id instance reference in any ActionScript class or script
id properties must be unique within a document. This also means
id property by using methods of the component’s
this keyword.
Page 55

Adobe Flex 3 Developer Guide
You can also get a reference to a component when you have a String that matches the name. To access an object
on the application, you use the
this keyword, followed by square brackets, with the String inside the square
brackets. The result is a reference to the objects whose name matches the String.
The following example changes style properties on each Button control using a compound String to get a reference
to the object:
<?xml version="1.0"?>
<!-- usingas/FlexComponents.mxml -->
<mx:Application xmlns:mx="http://www.adobe.com/2006/mxml">
<mx:Script><![CDATA[
private var newFontStyle:String;
private var newFontSize:int;
public function changeLabel(s:String):void {
s = "myButton" + s;
if (this[s].getStyle("fontStyle")=="normal") {
newFontStyle = "italic";
newFontSize = 18;
} else {
newFontStyle = "normal";
newFontSize = 10;
}
this[s].setStyle("fontStyle",newFontStyle);
this[s].setStyle("fontSize",newFontSize);
}
]]></mx:Script>
<mx:Button id="myButton1"
click="changeLabel('2')"
label="Change Other Button's Styles"
/>
<mx:Button id="myButton2"
click="changeLabel('1')"
label="Change Other Button's Styles"
/>
</mx:Application>
This technique is especially useful if you use a Repeater control or when you create objects in ActionScript and do
not necessarily know the names of the objects you want to refer to prior to run time. However, when you instantiate an object in ActionScript, to add that object to the properties array, you must declare the variable as public
and declare it in the class’s scope, not inside a function.
The following example uses ActionScript to declare two Label controls in the application scope. During initialization, the labels are instantiated and their
text properties are set. The example then gets a reference to the Label
controls by appending the passed-in variable to the String when the user clicks the Button controls.
<?xml version="1.0"?>
<!-- usingas/ASLabels.mxml -->
<mx:Application xmlns:mx="http://www.adobe.com/2006/mxml"
creationComplete="initLabels()">
<mx:Script><
CHAPTER 3
44
import mx.controls.Label;
public var label1:Label;
public var label2:Label;
// Objects must be declared in the application scope. Adds the names to
// the application's properties array.
public function initLabels():void {
label1 = new Label();
label1.text = "Change Me";
label2 = new Label();
label2.text = "Change Me";
addChild(label1);
addChild(label2);
}
public function changeLabel(s:String):void {
// Create a String that matches the name of the Label control.
s = "label" + s;
// Get a reference to the label control using the
// application's properties array.
this[s].text = "Changed";
}
]]></mx:Script>
<mx:Button id="b1" click="changeLabel('2')" label="Change Other Label"/>
<mx:Button id="b2" click="changeLabel('1')" label="Change Other Label"/>
</mx:Application>
Calling component methods
You can invoke the public methods of a component instance in your Flex application by using the following dotnotation syntax:
componentInstance.method([parameters]);
The following example invokes the adjustThumb() method when the user clicks the button, which invokes the
public
setThumbValueAt() method of the HSlider control:
<?xml version="1.0"?>
<!-- usingas/ComponentMethods.mxml -->
<mx:Application xmlns:mx="http://www.adobe.com/2006/mxml">
<mx:Script><![CDATA[
public function adjustThumb(s:HSlider):void {
var randomNumber:int = (Math.floor(Math.random() * 10));
s.setThumbValueAt(0, randomNumber);
}
]]></mx:Script>
<mx:HSlider id="slider1" tickInterval="1"
labels="[1,2,3,4,5,6,7,8,9,10]"
width="282"
Page 57

Adobe Flex 3 Developer Guide
/>
<mx:Button id="myButton"
label="Change Thumb Position"
click="adjustThumb(slider1);"
/>
</mx:Application>
To invoke a method from a child document (such as a custom MXML component), you can use the
parentApplication, parentDocument, or Application.application properties. For more information, see
“Application Container” on page 451.
Note: Because Flex invokes the initialize event before drawing the component, you cannot access size and position
information of that component from within the initialize event handler unless you use the creationComplete event
handler. For more information on the order of initialization events, see
“About startup order” on page 92 in Building
and Deploying Adobe Flex 3 Applications.
Creating visual Flex components in ActionScript
You can use ActionScript to programmatically create visual Flex components using the new operator, in the same
way that you create instances of any ActionScript class. The created component has default values for its
properties, but it does not yet have a parent or any children (including any kind of internal DisplayObjects), and
it is not yet on the display list in Flash Player or Adobe® AIR™, so you can’t see it. After creating the component,
you should use standard assignment statements to set any properties whose default values aren’t appropriate.
Finally, you must add the new component to a container, by using that container’s
method, so that it becomes part of the visual hierarchy of a Flex application. The first time that it is added to a
container, a component’s children are created. Children are created late in the component’s life cycle so that you
can set properties that can affect children as they are created.
When creating visual controls, you must import the appropriate package. In most cases, this is the mx.controls
package, although you should check the Adobe Flex Language Reference.
The following example creates a Button control inside the HBox:
<?xml version="1.0"?>
<!-- usingas/ASVisualComponent.mxml -->
<mx:Application xmlns:mx="http://www.adobe.com/2006/mxml">
<mx:Script><![CDATA[
import mx.controls.Button;
public var button2:Button;
public function createObject():void {
button2 = new Button();
button2.label = "Click Me";
hb1.addChild(button2);
}
]]></mx:Script>
<mx:HBox id="hb1">
addChild() or addChildAt()
45ADOBE FLEX 3
Page 58

CHAPTER 3
46
<mx:Button label="Create Object" click="createObject()"/>
</mx:HBox>
</mx:Application>
Flex creates the new child as the last child in the container. If you do not want the new child to be the last in the
container, use the
call to the
addChildAt() method to change the order. You can the setChildIndex() method after the
addChild() method, but this is less efficient.
You should declare an instance variable for each dynamically created component and store a reference to the
newly created component in it, just as the MXML compiler does when you set an id property for a component
instance tag. You can then access your dynamically created components in the same way as those declaratively
created in MXML.
To programmatically remove a control, you can use the
also use the
removeAllChildren() method to remove all child controls from a container. Calling these methods
removeChild() or removeChildAt() methods. You can
does not actually delete the objects. If you do not have any other references to the child, Flash Player includes it
in garbage collection at some future point. But if you stored a reference to that child on some object, the child is
not removed from memory.
In some cases, you declaratively define a component with an MXML tag. You can set the
property of the component’s container to
none to defer the creation of the controls inside that container. Then, to
creationPolicy
create a component that has been declared with a tag but not instantiated, you use the
createComponentFromDescriptor() and createComponentsFromDescriptors() methods. These methods
let you create a component programmatically rather than declaratively. For information on using the
creationPolicy property, see “Improving Startup Performance” on page 91 in Building and Deploying Adobe
Flex 3 Applications.
The only component you can pass to the
addChild() method is a UIComponent. In other words, if you create a
new object that is not a subclass of mx.core.UIComponent, you must wrap it in a UIComponent before you can
attach it to a container. The following example creates a new Sprite object, which is not a subclass of UIComponent, and adds it as a child of the UIComponent before adding it to the Panel container:
<?xml version="1.0"?>
<!-- usingas/AddingChildrenAsUIComponents.mxml -->
<mx:Application xmlns:mx="http://www.adobe.com/2006/mxml">
<mx:Script><
Adobe Flex 3 Developer Guide
var c:UIComponent = new UIComponent();
c.addChild(circle);
panel1.addChild(c);
xLoc = xLoc + 5;
yLoc = yLoc + 1;
circleColor = circleColor + 20;
}
]]></mx:Script>
<mx:Panel id="panel1" height="250" width="300" verticalScrollPolicy="off"/>
<mx:Button id="myButton" label="Click Me" click="addChildToPanel();"/>
</mx:Application>
About scope
Scoping in ActionScript is largely a description of what the this keyword refers to at a particular point. In your
application’s core MXML file, you can access the Application object by using the
an MXML component,
In an ActionScript class file, the
this keyword refers to an instance of myClass. Because this is implicit, you do not have to include it, but it is
this is a reference to the current instance of that component.
this keyword refers to the instance of that class. In the following example, the
shown here to illustrate its meaning.
class myClass {
var _x:Number = 3;
function get x():Number {
return this._x;
}
function set x(y:Number):void {
if (y > 0) {
this._x = y;
} else {
this._x = 0;
}
}
}
However, in custom ActionScript and MXML components or external ActionScript class files, Flex executes in the
context of those objects and classes, and the
this keyword refers to the current scope and not the Application
object scope.
Flex includes an Application.application property that you can use to access the root application. You can
also use the
the
parentApplication property to access the next level up in the application chain when one Application object
parentDocument property to access the next level up in the document chain of a Flex application, or
uses a SWFLoader component to load another Application object.
this keyword. In a file defining
47ADOBE FLEX 3
Page 60

CHAPTER 3
48
If you write ActionScript in a component’s event listener, the scope is not the component but rather the application. For example, the following code changes the label of the Button control to
“Clicked” once the Button
control is pressed:
<?xml version="1.0"?>
<!-- usingas/ButtonScope.mxml -->
<mx:Application xmlns:mx="http://www.adobe.com/2006/mxml" layout="absolute">
<mx:Panel width="250" height="100" layout="absolute" x="65" y="24">
<mx:Button id="myButton"
label="Click Me"
click="myButton.label='Clicked'"
x="79.5"
y="20"
/>
</mx:Panel>
<mx:Button label="Reset"
x="158"
y="149"
click="myButton.label='Click Me'"
/>
</mx:Application>
Contrast the previous example with the following code:
<?xml version="1.0"?>
<!-- usingas/AppScope.mxml -->
<mx:Application xmlns:mx="http://www.adobe.com/2006/mxml">
<!-- The following does nothing because the app level scope does
not have a label to set -->
<mx:Button id="myButton" label="Click Me" click="label='Clicked'"/>
</mx:Application>
This code does not work because when an event listener executes, the this keyword does not refer to the Button
instance; the
attempts to set the
this keyword refers to the Application or other top-level component instance. The second example
label property of the Application object, not the label property of the Button.
Variables declared within a function are locally scoped to that function. These variables can share the same name
as variables in outer scopes, and they do not affect the outer-scoped variable. If a variable is just used temporarily
by a single method, make it a local variable of that method rather than an instance variable. Use instance variables
only for storing the state of an instance, because each instance variable will take up memory for the entire lifetime
of the instance. You can refer to the outer-scoped variable with the
this. prefix.
Page 61

Adobe Flex 3 Developer Guide
Comparing, including, and importing ActionScript code
To make your MXML code more readable, you can reference ActionScript files in your <mx:Script> tags, rather
than insert large blocks of script. You can either include or import ActionScript files.
There is a distinct difference between including and importing code in ActionScript. Including copies lines of code
from one file into another, as if they had been pasted at the position of the
reference to a class file or package so that you can access objects and properties defined by external classes. Files
that you import must be found in the source path. Files that you include must be located relative to the file using
the
import statement, or you must use an absolute path.
You use the
Flex applications.
You us e import statements in an <mx:Script> block to define the locations of ActionScript classes and packages
that your Flex applications might use.
include statement or the <mx:Script source="filename"> tag to add ActionScript code to your
Including ActionScript files
To include ActionScript code, you reference an external ActionScript file in your <mx:Script> tags. At compile
time, the compiler copies the entire contents of the file into your MXML application, as if you had actually typed
it. As with ActionScript in an
files can also declare constants and namespaces, include other ActionScript files, import declarations, and use
namespaces. You cannot define classes in included files.
Variables and functions defined in an included ActionScript file are available to any component in the MXML file.
An included ActionScript file is not the same as an imported ActionScript class. Flex provides access to the
included file’s variables and functions, but does not add a new class, because the MXML file itself is a class.
Included ActionScript files do not need to be in the same directory as the MXML file. However, you should
organize your ActionScript files in a logical directory structure.
There are two ways to include an external ActionScript file in your Flex application:
• The source attribute of the <mx:Script> tag. This is the preferred method for including external Action-
Script class files.
• The include statement inside <mx:Script> blocks.
<mx:Script> block, Ac tio nSc ript state ments can only be ins ide fu nct ions . Included
include statement. Impor ting adds a
49ADOBE FLEX 3
Page 62

CHAPTER 3
50
Using the source attribute to include ActionScript files
You use the source attribute of the <mx:Script> tag to include external ActionScript files in your Flex applicati ons. Thi s provid es a way to make your MXM L fi les less clutt ered and p romote s co de reuse ac ross dif ferent app lications.
Do not give the script file the same name as the application file. This causes a compiler error.
The following example shows the contents of the IncludedFile.as file:
// usingas/includes/IncludedFile.as
public function computeSum(a:Number, b:Number):Number {
return a + b;
}
The following example imports the contents of the IncludedFile.as file. This file is located in the includes subdirectory.
<?xml version="1.0"?>
<!-- usingas/SourceInclude.mxml -->
<mx:Application xmlns:mx="http://www.adobe.com/2006/mxml" layout="absolute">
<mx:Script source="includes/IncludedFile.as"/>
<mx:TextInput id="ta1st" text="3" width="40" x="170" y="24" textAlign="right"/>
<mx:TextInput id="ta2nd" text="3" width="40" x="170" y="52" textAlign="right"/>
<mx:TextArea id="taMain" height="25" width="78" x="132" y="82" textAlign="right"/>
<mx:Button id="b1" label="Compute Sum"
click="taMain.text=String(computeSum(Number(ta1st.text), Number(ta2nd.text)));"
x="105"
y="115"
/>
<mx:Label x="148" y="52" text="+" fontWeight="bold" fontSize="17" width="23"/>
</mx:Application>
The source attribute of the <mx:Script> tag supports both relative and absolute paths. For more information,
see “Referring to external files that have been included” on page 51.
You cannot use the
<mx:Script> tag. To include a file and write ActionScript in the MXML file, use two <mx:Script> tags.
source attribute of an <mx:Script> tag and wrap ActionScript code inside that same
Using the include directive
The include directive is an ActionScript statement that copies the contents of the specified file into your MXML
file. The
include "file_name";
include directive uses the following syntax:
The following example includes the myfunctions.as file:
<?xml version="1.0"?>
<!-- usingas/IncludeASFile.mxml -->
<mx:Application xmlns:mx="http://www.adobe.com/2006/mxml">
Page 63

Adobe Flex 3 Developer Guide
<mx:Script><![CDATA[
/* The myfunctions.as file defines two methods that
return Strings. */
include "includes/myfunctions.as";
]]></mx:Script>
<mx:Button id="myButton"
label="Call Methods in Included File"
click="ta1.text=doSomething();ta1.text+=doSomethingElse()"
/>
<mx:TextArea width="268" id="ta1"/>
<mx:Button label="Clear" click="ta1.text=''"/>
</mx:Application>
You can specify only a single file for each include directive, but you can use any number of include directives.
You ca n ne st
include directive supports only relative paths. For more information, see “Referring to external files that
The
include directives; files with include directives can include files that have include directives.
have been included” on page 51.
You can use the
if (expr)
include "foo.as"; // First statement is guarded by IF, but rest are not.
...
include only where multiple statements are allowed. For example, the following is not allowed:
The following is allowed:
if (expr) {
include "foo.as"; // All statements inside { } are guarded by IF.
}
The use of curly braces ({ }) allows multiple statements because you can add multiple statements inside the braces.
Adobe recommends that you not use the
include directive if you use a large number of included ActionScript
files. You should try to break the code into separate class files where appropriate and store them in logical package
structures.
51ADOBE FLEX 3
Referring to external files that have been included
The source attribute of the <mx:Script> tag and the include directive refer to files in different ways.
The following are the valid paths to external files that are referenced in an
<mx:Script> tag’s source attribute:
• Relative URLs, such as ../myscript.as. A relative URL that does not start with a slash is resolved relative to the
file that uses it. If the tag
<mx:Script source="../IncludedFile.as"> is included in
“mysite/myfiles/myapp.mxml,” the system searches for “mysite/IncludedFile.as”.
Page 64

CHAPTER 3
52
For an ActionScript include directive, you can reference only relative URLs. Flex searches the source path for
imported classes and packages. Flex does not search the source path for files that are included using the
directive or the
source attribute of the <mx:Script> tag.
include
Importing classes and packages
If you create many utility classes or include multiple ActionScript files to access commonly used functions, you
might want to store them in a set of classes in their own package. You can import ActionScript classes and
packages using the
names when accessing classes within ActionScript.
The following example imports the MyClass class in the MyPackage.Util package:
<?xml version="1.0"?>
<!-- usingas/AccessingPackagedClasses.mxml -->
<mx:Application xmlns:mx="http://www.adobe.com/2006/mxml">
<mx:Script><![CDATA[
import MyPackage.Util.MyClass;
private var mc:MyClass = new MyClass;
]]></mx:Script>
<mx:Button id="myButton" label="Click Me" click="myButton.label=mc.returnAString()"/>
</mx:Application>
In your ActionScript code, instead of referring to the class with its fully qualified package name
(MyPackage.Util.MyClass), you refer to it as MyClass.
You can also use the wildcard character (*) to import the entire package. For example, the following statement
imports the entire MyPackage.Util package:
import MyPackage.Util.*;
Flex searches the source path for imported files and packages, and includes only those that are used in the final
SWF file.
It is not sufficient to simply specify the fully qualified class name. You should use fully qualified class names only
when necessary to distinguish two classes with the same class name that reside in different packages.
If you import a class but do not use it in your application, the class is not included in the resulting SWF file’s
bytecode. As a result, importing an entire package with a wildcard does not create an unnecessarily large SWF file.
import statement. By doing this, you do not have to explicitly enter the fully qualified class
Page 65

Adobe Flex 3 Developer Guide
Techniques for separating ActionScript from MXML
The following single sample application, which calls a single function, shows several methods of separating
ActionScript from the MXML.
The Temperature application takes input from a single input field and uses a function to convert the input from
Fahrenheit to Celsius. It then displays the resulting temperature in a Label control.
The following image shows the sample Temperature application:
One MXML document (event handling logic in event attribute)
The following code shows the ActionScript event handling logic inside the MXML tag’s click event:
<?xml version="1.0"?>
<!-- usingas/ASOneFile.mxml -->
<mx:Application xmlns:mx="http://www.adobe.com/2006/mxml">
<mx:Panel title="My Application" paddingTop="10" paddingBottom="10"
paddingLeft="10" paddingRight="10">
<mx:HBox>
<mx:Label text="Temperature in Fahrenheit:"/>
<mx:TextInput id="fahrenheit" width="120"/>
<mx:Button label="Convert"
click="celsius.text=String(Math.round((Number(fahrenheit.text)-32)/1.8 *
10)/10);"/>
<mx:Label text="Temperature in Celsius:"/>
<mx:Label id="celsius" width="120" fontSize="24"/>
</mx:HBox>
</mx:Panel>
</mx:Application>
53ADOBE FLEX 3
One MXML document (event handling logic in <mx:Script> block)
In this example, the logic for the function is inside an <mx:Script> block in the MXML document, and is called
from the MXML tag’s
<?xml version="1.0"?>
<!-- usingas/ASScriptBlock.mxml -->
<mx:Application xmlns:mx="http://www.adobe.com/2006/mxml">
<mx:Script><
CHAPTER 3
54
}
]]></mx:Script>
<mx:Panel title="My Application" paddingTop="10" paddingBottom="10"
paddingLeft="10" paddingRight="10">
<mx:HBox>
<mx:Label text="Temperature in Fahrenheit:"/>
<mx:TextInput id="fahrenheit" width="120"/>
<mx:Button label="Convert" click="calculate();" />
<mx:Label text="Temperature in Celsius:"/>
<mx:Label id="celsius" width="120" fontSize="24"/>
</mx:HBox>
</mx:Panel>
</mx:Application>
One MXML document and one ActionScript file (event handling logic in separate script file)
Here, the function call is in an MXML event attribute, and the function is defined in a separate ActionScript file,
as the following code shows:
<?xml version="1.0"?>
<!-- usingas/ASSourceFile.mxml -->
<mx:Application xmlns:mx="http://www.adobe.com/2006/mxml">
<!-- Specify the ActionScript file that contains the function. -->
<mx:Script source="includes/Sample3Script.as"/>
<mx:Panel title="My Application" paddingTop="10" paddingBottom="10"
paddingLeft="10" paddingRight="10">
<mx:HBox>
<mx:Label text="Temperature in Fahrenheit:"/>
<mx:TextInput id="fahrenheit" width="120"/>
<mx:Button label="Convert" click="celsius.text=calculate(fahrenheit.text);"/>
<mx:Label text="Temperature in Celsius:"/>
<mx:Label id="celsius" width="120" fontSize="24"/>
</mx:HBox>
</mx:Panel>
</mx:Application>
The Sample3Script.as ActionScript file contains the following code:
// usingas/includes/Sample3Script.as
public function calculate(s:String):String {
var n:Number = Number(s);
var t:Number = Math.round((n-32)/1.8*10)/10;
return String(t);
}
Page 67

Adobe Flex 3 Developer Guide
Creating ActionScript components
You can create reusable components that use ActionScript and reference these components in your Flex applications as MXML tags. Components created in ActionScript can contain graphical elements, define custom business
logic, or extend existing Flex components. They can inherit from any components available in Flex.
Defining your own components in ActionScript has several benefits. Components let you divide your applications
into individual modules that you can develop and maintain separately. By implementing commonly used logic
within custom components, you can build a suite of reusable components that you can share among multiple Flex
applications.
Also, you can base your custom components on the set of Flex components by extending from the Flex class
hierarchy. You can create custom versions of Flex visual controls, as well as custom versions on nonvisual components, such as data validators, formatters, and effects.
For example, you can define a custom button, derived from the Button control, in the myControls package, as the
following example shows:
package myControls {
import mx.controls.Button;
public class MyButton extends Button {
public function MyButton() {
...
}
...
}
}
In this example, you write your MyButton control to the MyButton.as file, and you store the file in the myControls
subdirectory of the root directory of your Flex application. The fully qualified class name of your component
reflects its location. In this example, the component’s fully qualified class name is myControls.MyButton.
You can reference your custom Button control from a Flex application file, such as MyApp.mxml, as the following
example shows:
<mx:Application xmlns:mx="http://www.adobe.com/2006/mxml" xmlns:cmp="myControls.*">
<cmp:MyButton label="Jack"/>
</mx:Application>
In this example, you define the cmp namespace that defines the location of your custom component in the application’s directory structure. You then reference the component as an MXML tag using the namespace prefix.
Typically, you put custom ActionScript components in directories that are in the source path. These include any
directory that you specify in the
You can also create custom components using MXML. For more information, see Creating and Extending Adobe
Flex 3 Components.
<source-path> tag in the flex-config.xml file.
55ADOBE FLEX 3
Page 68

CHAPTER 3
56
Types of custom components
You can create the following types of components in ActionScript:
User-interface components User-interface components contain both processing logic and visual elements. These
components usually extend the Flex component hierarchy. You can extend from the UIComponent classes, or any
of the Flex components, such as Button, ComboBox, or DataGrid. Your custom ActionScript component inherits
all of the public methods, along with public and protected properties of its base class.
Nonvisual components Nonvisual components define no visual elements. A nonvisual component is an Action-
Script class that does not extend the UIComponent class. They can provide greater efficiency at run time.
Performing object introspection
Object introspection is a technique for determining the elements of a class at run time, such as its properties and
methods. There are two ways to do introspection in ActionScript:
• Using for..in loops
• Using the introspection API
You might find object introspection a useful technique when debugging your application. For example, you might
write a method that takes a generic object of type Object as an argument. You can use introspection to output all
of the properties and methods of the Object to determine exactly what your application passed to it.
Using for..in loops
You can use a for..in loop to iterate over objects and output their properties and their values. A for..in loop
enumerates only dynamically added properties. Declared variables and methods of classes are not enumerated in
for..in loops. This means that most classes in the ActionScript API will not display any properties in a for..in
loop. However, the generic type Object is still a dynamic object and will display properties in a
The following example creates a generic Object, adds properties to that object, and then iterates over that object
when you click the button to inspect its properties:
<?xml version="1.0"?>
<!-- usingas/IntrospectionForIn.mxml -->
<mx:Application xmlns:mx="http://www.adobe.com/2006/mxml" creationComplete="initApp()">
<mx:Script><
Adobe Flex 3 Developer Guide
}
public function dumpObj():void {
for (var p:String in obj) {
ta1.text += p + ":" + obj[p] + "\n";
}
}
]]></mx:Script>
<mx:TextArea id="ta1" width="400" height="200"/>
<mx:Button label="Dump Object" click="dumpObj()"/>
</mx:Application>
You can also use the mx.utils.ObjectUtil.toString() method to print all the dynamically added properties
of an object, for example:
<?xml version="1.0"?>
<!-- usingas/ObjectUtilToString.mxml -->
<mx:Application xmlns:mx="http://www.adobe.com/2006/mxml" creationComplete="initApp()">
<mx:Script><![CDATA[
import mx.utils.ObjectUtil;
private var obj:Object = new Object();
private function initApp():void {
// Create the object.
obj.a = "Schotten Totten";
obj.b = "Taj Majal";
obj.c = "Durche die Wuste";
}
public function dumpObj():void {
ta1.text = ObjectUtil.toString(obj);
}
]]></mx:Script>
<mx:TextArea id="ta1" width="400" height="200"/>
<mx:Button label="Dump Object" click="dumpObj()"/>
</mx:Application>
The mx.utils.ObjectUtil class has other useful methods such as compare(), copy(), and isSimple(). For more
information, see the Adobe Flex Language Reference.
57ADOBE FLEX 3
Using the introspection API
If you want to list all the public properties and methods of a nondynamic (or sealed) class or class instance, use
the
describeType() method and parse the results using the E4X API. The describeType() method is in the
flash.utils package. The method’s only parameter is the target object that you want to introspect. You can pass it
any ActionScript value, including all available ActionScript types such as object instances, primitive types such as
uint, and class objects. The return value of the describeType() method is an E4X XML object that contains an
XML description of the object’s type.
Page 70

CHAPTER 3
58
The describeType() method returns only public members. The method does not return private members of the
caller’s superclass or any other class where the caller is not an instance. If you call
describeType(this), the
method returns information only about nonstatic members of the class. If you call
describeType(getDefinitionByName("MyClass")), the method returns information only about the target’s
static members.
The following example introspects the Button control and prints the details to TextArea controls:
<?xml version="1.0"?>
<!-- usingas/IntrospectionAPI.mxml -->
<mx:Application xmlns:mx="http://www.adobe.com/2006/mxml"
creationComplete="getDetails()">
<mx:Script><![CDATA[
import flash.utils.*;
public function getDetails():void {
// Get the Button control's E4X XML object description.
var classInfo:XML = describeType(button1);
// Dump the entire E4X XML object into ta2.
ta2.text = classInfo.toString();
// List the class name.
ta1.text = "Class " + classInfo.@name.toString() + "\n";
// List the object's variables, their values, and their types.
for each (var v:XML in classInfo..variable) {
ta1.text += "Variable " + v.@name + "=" + button1[v.@name] +
" (" + v.@type + ")\n";
}
// List accessors as properties.
for each (var a:XML in classInfo..accessor) {
// Do not get the property value if it is write only.
if (a.@access == 'writeonly') {
ta1.text += "Property " + a.@name + " (" + a.@type +")\n";
}
else {
ta1.text += "Property " + a.@name + "=" +
button1[a.@name] + " (" + a.@type +")\n";
}
}
// List the object's methods.
for each (var m:XML in classInfo..method) {
ta1.text += "Method " + m.@name + "():" + m.@returnType + "\n";
}
}
]]></mx:Script>
<mx:Button label="This Button Does Nothing" id="button1"/>
<mx:TextArea id="ta1" width="400" height="200"/>
<mx:TextArea id="ta2" width="400" height="200"/>
</mx:Application>
Page 71

Adobe Flex 3 Developer Guide
The output displays accessors, variables, and methods of the Button control, and appears similar to the following:
Class mx.controls::Button
...
Variable id=button1 (String)
Variable __width=66 (Number)
Variable layoutWidth=66 (Number)
Variable __height=22 (Number)
Variable layoutHeight=22 (Number)
...
Property label=Submit (String)
Property enabled=true (Boolean)
Property numChildren=2 (uint)
Property enabled=true (Boolean)
Property visible=true (Boolean)
Property toolTip=null (String)
...
Method dispatchEvent():Boolean
Method hasEventListener():Boolean
Method layoutContents():void
Method getInheritingStyle():Object
Method getNonInheritingStyle():Object
Another useful method is the ObjectUtil’s getClassInfo() method. This method returns an Object with the
name and properties of the target object. The following example uses the
getClassInfo() and toString()
methods to show the properties of the Button control:
<?xml version="1.0"?>
<!-- usingas/IntrospectionObjectUtil.mxml -->
<mx:Application xmlns:mx="http://www.adobe.com/2006/mxml">
<mx:Script><![CDATA[
import mx.controls.Alert;
import mx.utils.ObjectUtil;
private function showProps(b:Button):void {
var o:Object = ObjectUtil.getClassInfo(b);
ta1.text = ObjectUtil.toString(o);
}
]]></mx:Script>
<mx:Button id="b1" label="Show Properties" click="showProps(b1)"/>
<mx:TextArea id="ta1" width="300" height="500"/>
</mx:Application>
For more information about using E4X, see Programming ActionScript 3.0.
59ADOBE FLEX 3
Page 72

CHAPTER 3
60
Page 73

Chapter 4: Using Events
One of the most important parts of your Adobe® Flex™ application is handling events by using controls and
ActionScript in your Flex applications.
Top ic s
About events . . . . . . . . . . . . . . . . . . . . . . . . . . . . . . . . . . . . . . . . . . . . . . . . . . . . . . . . . . . . . . . . . . . . . . . . . . . . . . . . . . . . 61
Using events. . . . . . . . . . . . . . . . . . . . . . . . . . . . . . . . . . . . . . . . . . . . . . . . . . . . . . . . . . . . . . . . . . . . . . . . . . . . . . . . . . . . . 65
Manually dispatching events. . . . . . . . . . . . . . . . . . . . . . . . . . . . . . . . . . . . . . . . . . . . . . . . . . . . . . . . . . . . . . . . . . . . . . . 83
Event propagation. . . . . . . . . . . . . . . . . . . . . . . . . . . . . . . . . . . . . . . . . . . . . . . . . . . . . . . . . . . . . . . . . . . . . . . . . . . . . . . . 86
Event priorities . . . . . . . . . . . . . . . . . . . . . . . . . . . . . . . . . . . . . . . . . . . . . . . . . . . . . . . . . . . . . . . . . . . . . . . . . . . . . . . . . . 94
Using event subclasses . . . . . . . . . . . . . . . . . . . . . . . . . . . . . . . . . . . . . . . . . . . . . . . . . . . . . . . . . . . . . . . . . . . . . . . . . . . . 95
About keyboard events. . . . . . . . . . . . . . . . . . . . . . . . . . . . . . . . . . . . . . . . . . . . . . . . . . . . . . . . . . . . . . . . . . . . . . . . . . . . 97
About events
61
Events let a developer know when something happens within a Flex application. They can be generated by user
devices, such as the mouse and keyboard, or other external input, such as the return of a web service call. Events
are also triggered when changes happen in the appearance or life cycle of a component, such as the creation or
destruction of a component or when the component is resized.
Any user interaction with your application can generate events. Events can also occur without any direct user
interaction, su ch as w hen data finis hes load ing from a se rve r or when an att ache d came ra become s ac tive . You can
“handle” these events in your code by adding an event handler. Event handlers are the functions or methods that
you write to respond to specific events. They are also sometimes referred to as event listeners.
The Flex event model is based on the Document Object Model (DOM) Level 3 events model. Although Flex does
not adhere specifically to the DOM standard, the implementations are very similar. The event model in Flex
comprises the Event object and its subclasses, and the event dispatching model. For a quick start in using events
in Flex, see the sample code in “Using events” on page 65.
Components generate and dispatch events and consume (listen to) other events. An object that requires information about another object’s events registers a listener with that object. When an event occurs, the object
dispatches the event to all registered listeners by calling a function that was requested during registration. To
receive multiple events from the same object, you must register your listener for each event.
Page 74

CHAPTER 4
62
Comp onents hav e bui lt-in events t hat you can handle i n Act ionScr ipt blocks in yo ur MXML applic ations. You can
also take advantage of the Flex event system’s dispatcher-listener model to define your own event listeners outside
of your applications, and define which methods of your custom listeners will listen to certain events. You can
register listeners with the target object so that when the target object dispatches an event, the listeners get called.
All visual objects, including Flex controls and containers, are subclasses of the DisplayObject class. They are in a
tree of visible objects that make up your application. The root of the tree is the Stage. Below that is the SystemManager object, and then the Application object. Child containers and components are leaf nodes of the tree. That
tree is known as the display list. An object on the display list is analogous to a node in the DOM hierarchical
structure. The terms display list object and node are used interchangeably.
For information about each component’s events, see the component’s description in “Controls” on page 223 or the
control’s entry in ActionScript 3.0 Language Reference.
For a detailed description of a component’s startup life cycle, including major events in that life cycle, see
“Advanced Visual Components in ActionScript” on page 129 in Creating and Extending Adobe Flex 3 Components.
About the Event flow
You can instruct any container or control to listen for events dispatched by another container or control. When
Adobe® Flash® Player dispatches an Event object, that Event object makes a roundtrip journey from the root of the
display list to the target node, checking each node for registered listeners. The target node is the node in the display
list where the event occurred. For example, if a user clicks a Button control named Child1, Flash Player dispatches
an Event object with Child1 defined as the target node.
The event flow is conceptually divided into three parts: the capturing phase, the targeting phase, and the bubbling
phase, as briefly described next. For more information about the event flow, see “Event propagation” on page 86.
About the capturing phase
The first part of the event flow is called the capturing phase. This phase comprises all of the nodes from the root
node to the parent of the target node. During this phase, Flash Player examines each node, starting with the root,
to see if it has a listener registered to handle the event. If it does, Flash Player sets the appropriate values of the
Event object and then calls that listener. Flash Player stops after it reaches the target node’s parent and calls any
listeners registered on the parent. For more information, see “Capturing phase” on page 88.
About the targeting phase
The second part of the event flow, the targeting phase, consists solely of the target node. Flash Player sets the appropriate values on the Event object, checks the target node for registered event listeners, and then calls those
listeners. For more information, see “Targeting phase” on page 89.
Page 75

Adobe Flex 3 Developer Guide
About the bubbling phase
The third part of the event flow, the bubbling phase, comprises all of the nodes from the target node’s parent to the
root node. Starting with the target node’s parent, Flash Player sets the appropriate values on the Event object and
then calls event listeners on each of these nodes. Flash Player stops after calling any listeners on the root node. For
more information about the bubbling phase, see “Bubbling phase” on page 89.
About the Event class
The flash.events.Event class is an ActionScript class with properties that contain information about the event that
occurred. An Event object is an implicitly created object, similar to the request and response objects in a
JavaServer Page (JSP) that are implicitly created by the application server.
Flex creates an Event object each time an event is dispatched. You can use the Event object inside an event listener
to access details about the event that was dispatched, or about the component that dispatched the event. Passing
an Event object to, and using it in, an event listener is optional. However, if you want to access the Event object’s
properties inside your event listeners, you must pass the Event object to the listener.
Flex creates only one Event object when an event is dispatched. During the bubbling and capturing phases, Flex
changes the values on the Event object as it moves up or down the display list, rather than creating a new Event
object for each node.
63ADOBE FLEX 3
About event subclasses
There are many classes that extend the flash.events.Event class. These classes are defined mostly in the following
two packages:
• mx.events.*
• flash.events.*
The mx.events package defines event classes that are specific to Flex controls, including the DataGridEvent,
DragEvent, and ColorPickerEvent. The flash.events package describes events that are not unique to Flex but are
instead defined by Flash Player. These event classes include MouseEvent, DataEvent, and Te x tE v e n t . All of these
events are commonly used in Flex applications.
In addition to these packages, some packages also define their own event objects: for example,
mx.messaging.events.ChannelEvent and mx.logging.LogEvent.
Child classes of the Event class have additional properties and metho ds that may be unique to them. In some cases,
you will want to use a more specific event type rather than the generic Event object so that you can access these
unique properties or methods. For example, the LogEvent class has a
class does not.
getLevelString() method that the Event
Page 76

CHAPTER 4
64
For information on using Event subclasses, see “Using event subclasses” on page 95.
About the EventDispatcher class
Every object in the display list can trace its class inheritance back to the DisplayObject class. The DisplayObject
class, in turn, inherits from the EventDispatcher class. The EventDispatcher class is a base class that provides
important event model functionality for every object on the display list. Because the DisplayObject class inherits
from the EventDispatcher class, any object on the display list has access to the methods of the EventDispatcher
class.
This is significant because every item on the display list can participate fully in the event model. Every object on
the display list can use its
for a particular event, but only if the listening object is part of the event flow for that event.
Although the name EventDispatcher seems to imply that this class’s main purpose is to send (or dispatch) Event
objects, the methods of this class are used much more frequently to register event listeners, check for event
listeners, and remove event listeners.
The EventDispatcher class implements the IEventDispatcher interface. This allows developers who create custom
classes that cannot inherit from EventDispatcher or one of its subclasses to implement the IEventDispatcher
interface to gain access to its methods.
The
addEventListener() method is the most commonly used method of this class. You use it to register your
event listeners. For information on using the
method” on page 71.
Advanced programmers use the dispatchEvent() method to manually dispatch an event or to send a custom
Event object into the event flow. For more information, see “Manually dispatching events” on page 83.
Several other methods of the EventDispatcher class provide useful information about the existence of event
listeners. The
hasEventListener() method returns true if an event listener is found for that specific event type
on a particular display list object. The
list object, but it also checks for listeners on all of that display list object’s ancestors for all phases of the event flow.
The method returns
addEventListener() method—inherited from the EventDispatcher class—to listen
addEventListener() method, see “Using the addEventListener()
willTrigger() method checks for event listeners on a particular display
true if it finds one.
Page 77

Adobe Flex 3 Developer Guide
Using events
Using events in Flex is a two-step process. First, you write a function or class method, known as an event listener
or event handler, that responds to events. The function often accesses the properties of the Event object or some
other settings of the application state. The signature of this function usually includes an argument that specifies
the event type being passed in.
The following example shows a simple event listener function that reports when a control triggers the event that
it is listening for:
<?xml version="1.0"?>
<!-- events/SimpleEventHandler.mxml -->
<mx:Application xmlns:mx="http://www.adobe.com/2006/mxml" creationComplete="initApp();">
<mx:Script><![CDATA[
import mx.controls.Alert;
private function initApp():void {
b1.addEventListener(MouseEvent.CLICK, myEventHandler);
}
private function myEventHandler(event:Event):void {
Alert.show("An event occurred.");
}
]]></mx:Script>
<mx:Button id="b1" label="Click Me"/>
</mx:Application>
As you can see in this example, you also register that function or class method with a display list object by using
the
addEventListener() method.
Most Flex controls simplify listener registration by letting you specify the listener inside the MXML tag. For
example, instead of using the addEventListener() method to specify a listener function for the Button control’s
click event, you specify it in the click attribute of the <mx:Button> tag:
<?xml version="1.0"?>
<!-- events/SimplerEventHandler.mxml -->
<mx:Application xmlns:mx="http://www.adobe.com/2006/mxml">
<mx:Script><![CDATA[
import mx.controls.Alert;
private function myEventHandler(event:Event):void {
Alert.show("An event occurred.");
}
]]></mx:Script>
<mx:Button id="b1" label="Click Me" click="myEventHandler(event)"/>
</mx:Application>
65ADOBE FLEX 3
Page 78

CHAPTER 4
66
This is equivalent to the addEventListener() method in the previous code example. However, it is best practice
to use the
addEventListener() method. This method gives you greater control over the event by letting you
configure the priority and capturing settings, and use event constants. In addition, if you use
addEventListener() to add an event handler, you can use removeEventListener() to remove the handler
when you no longer need it. If you add an event handler inline, you cannot call
removeEventListener() on that
handler.
Each time a control generates an event, Flex creates an Event object that contains information about that event,
including the type of event and a reference to the dispatching control. To use the Event object, you specify it as a
parameter in the event handler function, as the following example shows:
<?xml version="1.0"?>
<!-- events/EventTypeHandler.mxml -->
<mx:Application xmlns:mx="http://www.adobe.com/2006/mxml">
<mx:Script><![CDATA[
import mx.controls.Alert;
private function myEventHandler(e:Event):void {
Alert.show("An event of type '" + e.type + "' occurred.");
}
]]></mx:Script>
<mx:Button id="b1" label="Click Me" click="myEventHandler(event)"/>
</mx:Application>
If you want to access the Event object in an event handler that was triggered by an inline event, you must add the
event keyword inside the MXML tag so that Flex explicitly passes it to the handler, as in the following:
<mx:Button id="b1" label="Click Me" click="myEventHandler(event)"/>
You are not required to use the Event object in a handler function. The following example creates two event
handler functions and registers them with the events of a ComboBox control. The first event handler,
takes no arguments. The second event handler,
object to access the
<?xml version="1.0"?>
<!-- events/MultipleEventHandlers.mxml -->
<mx:Application xmlns:mx="http://www.adobe.com/2006/mxml">
<mx:Script><![CDATA[
private function openEvt():void {
forChange.text="";
}
private function changeEvt(e:Event):void {
forChange.text =
"Value: " + e.currentTarget.value + "\n" +
"Index: " + e.currentTarget.selectedIndex;
}
]]></mx:Script>
<mx:ComboBox open="openEvt()" change="changeEvt(event)">
value and selectedIndex of the ComboBox control that triggered the event.
changeEvt(), takes the Event object as an argument and uses this
openEvt(),
Page 79

Adobe Flex 3 Developer Guide
<mx:dataProvider>
<mx:Array>
<mx:String>AK</mx:String>
<mx:String>AL</mx:String>
<mx:String>AR</mx:String>
</mx:Array>
</mx:dataProvider>
</mx:ComboBox>
<mx:TextArea id="forChange" width="150" height="100"/>
</mx:Application>
This example shows accessing the target property of the Event object. For more information, see “Accessing the
currentTarget property” on page 67.
Specifying the Event object
You specify the object in a listener function’s signature as type Event, as the following example shows:
function myEventListener(e:Event):void { ... }
However, if you want to access properties that are specific to the type of event that was dispatched, you must
instead specify a more specific event type, such as ToolTipEvent or KeyboardEvent, as the following example
shows:
import mx.events.ToolTip
function myEventListener(e:ToolTipEvent):void { ... }
In some cases, you must import the event’s class in your ActionScript block.
Most objects have specific events that are associated with them, and most of them can dispatch more than one
type of event.
If you declare an event of type Event, you can cast it to a more specific type to access its event-specific properties.
For more information, see “Using event subclasses” on page 95.
67ADOBE FLEX 3
Accessing the currentTarget property
Event objects include a reference to the instance of the dispatching component (or target), which means that you
can access all the properties and methods of that instance in an event listener. The following example accesses the
id of the Button control that triggered the event:
<?xml version="1.0"?>
<!-- events/AccessingCurrentTarget.mxml -->
<mx:Application xmlns:mx="http://www.adobe.com/2006/mxml">
<mx:Script><
CHAPTER 4
68
}
]]></mx:Script>
<mx:Button id="b1" label="Click Me" click="myEventHandler(event)"/>
</mx:Application>
You can access members of the currentTarget. If you do not cast the current target to a specific type, the
compiler assumes that it is of type Object. Objects can have any property or method because the Object type is
dynamic in ActionScript. Therefore, when accessing methods and properties of the
practice to cast
currentTarget to whatever class you anticipate will dispatch that event. This gives you strong
currentTarget, it is best
type checking at compile time, and helps avoid the risk of throwing a run-time error.
The following example casts the current target to a TextInput class before calling the setSelection() method,
but does not cast it before trying to set the
tmesis property. The tmesis property does not exist on the TextInput
class. This illustrates that you will get a run-time error but not a compile-time error when you try to access
members that don’t exist, unless you cast
<?xml version="1.0"?>
<!-- events/InvokingOnCurrentTarget.mxml -->
<mx:Application xmlns:mx="http://www.adobe.com/2006/mxml">
<mx:Script><![CDATA[
import mx.core.UIComponent;
private function tiHandler(e:Event):void {
/* The following enforces type checking: */
TextInput(e.currentTarget).setSelection(0,3);
/* The following throws a run-time error but not a compile-time error:
e.currentTarget.tmesis = 4;
*/
/*
... unless you cast it to the expected type like the following. Then
the compiler throws an error.
TextInput(e.currentTarget).tmesis = 4;
*/
}
]]></mx:Script>
<mx:TextInput id="ti1" click="tiHandler(event)"
text="This is some text. When you click on this control, the first three characters
are selected."/>
</mx:Application>
currentTarget to a specific type so that type checking can occur:
You could also cast currentTarget to UIComponent or some other more general class that still has methods of
display objects. That way, if you don’t know exactly which control will dispatch an event, at least you can ensure
there is some type checking.
You can also access methods and properties of the
target property, which contains a reference to the current
node in the display list. For more information, see “About the target and currentTarget properties” on page 87.
Page 81

Adobe Flex 3 Developer Guide
Registering event handlers
There are several strategies that you can employ when you register event handlers with your Flex controls:
1 Define an event handler inline. This binds a call to the handler function to the control that triggers the event.
<?xml version="1.0"?>
<!-- events/SimplerEventHandler.mxml -->
<mx:Application xmlns:mx="http://www.adobe.com/2006/mxml">
<mx:Script><![CDATA[
import mx.controls.Alert;
private function myEventHandler(event:Event):void {
Alert.show("An event occurred.");
}
]]></mx:Script>
<mx:Button id="b1" label="Click Me" click="myEventHandler(event)"/>
</mx:Application>
In this example, whenever the user clicks the Button control, Flex calls the myClickHandler() function.
For more information on defining event handlers inline, see “Defining event listeners inline” on page 70.
2 Use the addEventListener() method, as follows:
<?xml version="1.0"?>
<!-- events/SimpleEventHandler.mxml -->
<mx:Application xmlns:mx="http://www.adobe.com/2006/mxml"
creationComplete="initApp();">
<mx:Script><![CDATA[
import mx.controls.Alert;
private function initApp():void {
b1.addEventListener(MouseEvent.CLICK, myEventHandler);
}
private function myEventHandler(event:Event):void {
Alert.show("An event occurred.");
}
]]></mx:Script>
<mx:Button id="b1" label="Click Me"/>
</mx:Application>
As with the previous example, whenever the user clicks the Button control, Flex calls the myClickHandler()
handler function. However, registering your event handlers using this method provides more flexibility. You
can register multiple components with this event handler, add multiple handlers to a single component, or
remove the handler. For more information, see “Using the addEventListener() method” on page 71.
3 Create an event handler class and register components to use the class for event handling. This approach to
event handling promotes code reuse and lets you centralize event handling outside your MXML files. For more
information on creating custom event handler classes, see
“Creating event handler classes” on page 76.
69ADOBE FLEX 3
Page 82

CHAPTER 4
70
Defining event listeners inline
The simplest method of defining event handlers in Flex applications is to point to a handler function in the
component’s MXML tag. To do this, you add any of the component’s events as a tag attribute followed by an
ActionScript statement or function call.
You add an event handler inline using the following syntax:
<mx:tag_name event_name="handler_function"/>
For example, to listen for a Button control’s click event, you add a statement in the <mx:Button> tag’s click
attribute. If you add a function, you define that function in an ActionScript block. The following example defines
the
submitForm() function as the handler for the Button control’s click event:
<mx:Script><![CDATA[
function submitForm():void {
// Do something.
}
]]></mx:Script>
<mx:Button label="Submit" click="submitForm();"/>
Event handlers can include any valid ActionScript code, including code that calls global functions or sets a
component property to the return value. The following example calls the
<mx:Button label="Get Ver" click="trace('The button was clicked');"/>
trace() global function:
There is one special parameter that you can pass in an inline event handler definition: the event parameter. If you
add the
event keyword as a parameter, Flex passes the Event object and inside the handler function, you can then
access all the properties of the Event object.
The following example passes the Event object to the submitForm() handler function and specifies it as type
MouseEvent:
<?xml version="1.0"?>
<!-- events/MouseEventHandler.mxml -->
<mx:Application xmlns:mx="http://www.adobe.com/2006/mxml">
<mx:Script><![CDATA[
import mx.controls.Alert;
private function myEventHandler(event:MouseEvent):void {
// Do something with the MouseEvent object.
Alert.show("An event of type '" + event.type + "' occurred.");
}
]]></mx:Script>
<mx:Button id="b1" label="Click Me" click="myEventHandler(event)"/>
</mx:Application>
It is best practice to include the event keyword when you define all inline event listeners and to specify the most
stringent Event object type in the resulting listener function (for example, specify MouseEvent instead of Event).
Page 83

Adobe Flex 3 Developer Guide
You can use the Event object to access a reference to the target object (the object that dispatched the event), the
type of event (for example,
click), or other relevant properties, such as the row number and value in a list-based
control. You can also use the Event object to access methods and properties of the target component, or the
component that dispatched the event.
Although you will most often pass the entire Event object to an event listener, you can just pass individual
properties, as the following example shows:
<?xml version="1.0"?>
<!-- events/PropertyHandler.mxml -->
<mx:Application xmlns:mx="http://www.adobe.com/2006/mxml">
<mx:Script><![CDATA[
import mx.controls.Alert;
private function myEventHandler(s:String):void {
Alert.show("Current Target: " + s);
}
]]></mx:Script>
<mx:Button id="b1" label="Click Me" click="myEventHandler(event.currentTarget.id)"/>
</mx:Application>
Registering an event listener inline provides less flexibility than using the addEventListener() method to
register event listeners. The drawbacks are that you cannot set the
useCapture or priority properties on the
Event object and that you cannot remove the listener once you add it.
71ADOBE FLEX 3
Using the addEventListener() method
The addEventListener() method lets you register event listener functions with the specified control or object.
The following example adds the
user clicks b1, Flex calls the
b1.addEventListener(MouseEvent.CLICK, myClickListener);
myClickListener() function to the b1 instance of a Button control. When the
myClickListener() method:
The addEventListener() method has the following signature:
componentInstance.addEventListener(
event_type:String,
event_listener:Function,
use_capture:Boolean,
priority:int,
weakRef:Boolean
)
The event_type argument is the kind of event that this component dispatches. This can be either the event type
String (for example,
MouseEvent.MOUSE_OUT). This argument is required.
click or mouseOut) or the event type static constant (such as MouseEvent.CLICK or
Page 84

CHAPTER 4
72
The constants provide an easy way to refer to specific event types. You should use these constants instead of the
strings that they represent. If you misspell a constant name in your code, the compiler catches the mistake. If you
instead use strings and make a typographical error, it can be harder to debug and could lead to unexpected
behavior.
You should use the constants wherever possible. For example, when you are testing to see whether an Event object
is of a certain type, use the following code:
if (myEventObject.type == MouseEvent.CLICK) {/* your code here */}
Do not use the following code:
if (myEventObject.type == "click") {/* your code here */}
The event_listener argument is the function that handles the event. This argument is required.
use_capture parameter of the addEventListener() method lets you control the phase in the event flow in
The
which your listener will be active. It sets the value of the
is set to
true, your listener is active during the capturing phase of the event flow. If useCapture is set to false,
useCapture property of the Event object. If useCapture
your listener is active during the targeting and bubbling phases of the event flow, but not during the capturing
phase. The default value is determined by the type of event, but is
To listen for an event during all phases of the event flow, you must call
useCapture parameter set to true, and again with use_capture set to false. This argument is optional. For
false in most cases.
addEventListener() twice, once with the
more information, see “Capturing phase” on page 88.
The
priority parameter sets the priority for that event listener. The higher the number, the sooner that event
handler executes relative to other event listeners for the same event. Event listeners with the same priority are
executed in the order that they were added. This parameter sets the
priority property of the Event object. The
default value is 0, but you can set it to negative or positive integer values. If several event listeners are added
without priorities, the earlier a listener is added, the sooner it is executed. For more information on setting priorities, see “Event priorities” on page 94.
The
weakRef parameter provides you with some control over memory resources for listeners. A strong reference
(when
weakRef is false) prevents the listener from being garbage collected. A weak reference (when weakRef is
true) does not. The default value is false.
When you add a listener function and that function is invoked, Flex implicitly creates an Event object for you and
passes it to the listener function. You must declare the Event object in the signature of your listener function.
If you add an event listener by using the
object as a parameter of the
b1.addEventListener(MouseEvent.CLICK, performAction);
listener_function, as the following example shows:
addEventListener() method, you are required to declare an event
In the listener function, you declare the Event object as a parameter, as follows:
public function performAction(e:MouseEvent):void {
Page 85

Adobe Flex 3 Developer Guide
...
}
The following example defines a new handler function myClickListener(). It then registers the click event of
the Button control with that handler. When the user clicks the button, Flex calls the
<?xml version="1.0"?>
<!-- events/AddEventListenerExample.mxml -->
<mx:Application xmlns:mx="http://www.adobe.com/2006/mxml" initialize="createListener()">
<mx:Script><![CDATA[
import mx.controls.Alert;
private function createListener():void {
b1.addEventListener(MouseEvent.CLICK, myClickHandler, false, 0);
}
private function myClickHandler(e:MouseEvent):void {
Alert.show("The button was clicked.");
}
]]></mx:Script>
<mx:Button label="Click Me" id="b1"/>
</mx:Application>
Using addEventListener() inside an MXML tag
myClickHandler() function.
You can add event listeners with the addEventListener() method inline with the component definition. The
following Button control definition adds the call to the
control’s
<?xml version="1.0"?>
<!-- events/CallingAddEventListenerInline.mxml -->
<mx:Application xmlns:mx="http://www.adobe.com/2006/mxml">
<mx:Script><![CDATA[
import mx.controls.Alert;
private function myClickHandler(event:Event):void {
Alert.show("The button was clicked.");
}
]]></mx:Script>
<mx:Button id='b1'
label="Click Me"
initialize='b1.addEventListener(MouseEvent.CLICK, myClickHandler, false, 1);'
/>
</mx:Application>
initialize property:
addEventListener() method inline with the Button
This is the equivalent of defining the event handler inline. However, defining a handler by using the
addEventListener() method rather than setting click="handler_function" lets you set the value of the
useCapture and priority properties of the Event object. Furthermore, you cannot remove a handler added
inline, but when you use the
removeEventListener() method to remove that handler.
addEventListener() method to add a handler, you can call the
73ADOBE FLEX 3
Page 86

CHAPTER 4
74
Using n ested inne r functions as event listener s
Rather than passing the name of an event listener function to the addEventListener() method, you can define
an inner function (also known as a closure).
In the following example, the nested inner function is called when the button is clicked:
<?xml version="1.0"?>
<!-- events/AddingInnerFunctionListener.mxml -->
<mx:Application xmlns:mx="http://www.adobe.com/2006/mxml" creationComplete="initApp()">
<mx:Script><![CDATA[
import mx.controls.Alert;
private function initApp():void {
b1.addEventListener("click",
function(e:Event):void {
Alert.show("The button was clicked.");
}
);
}
]]></mx:Script>
<mx:Button id='b1' label="Click Me"/>
</mx:Application>
Function closures are created any time a function is executed apart from an object or a class. They retain the scope
in which they were defined. This creates interesting results when a function is passed as an argument or a return
value into a different scope.
For example, the following code creates two functions:
rectArea() that calculates the area of a rectangle, and bar(), which calls foo() and stores the returned function
closure in a variable named
value of 2), when the function closure
in function
foo(). The bar() function therefore returns the product of the numbers in the TextInput controls,
myProduct. Even though the bar() function defines its own local variable x (with a
myProduct() is called, it retains the variable x (with a value of 40) defined
foo(), which returns a nested function named
rather than 8.
<?xml version="1.0"?>
<!-- events/FunctionReturnsFunction.mxml -->
<mx:Application xmlns:mx="http://www.adobe.com/2006/mxml" creationComplete="foo()">
<mx:Script><![CDATA[
[Bindable]
private var answer:String;
private function foo():Function {
var x:int = int(ti1.text);
function rectArea(y:int):int { // function closure defined
return x * y;
}
return rectArea;
}
private function bar():void {
var x:int = 2; // ignored
var y:int = 4; // ignored
var myProduct:Function = foo();
Page 87

Adobe Flex 3 Developer Guide
answer = myProduct(int(ti2.text)); // function closure called
}
]]></mx:Script>
<mx:Form width="107">
<mx:FormItem label="X">
<mx:TextInput id="ti1" text="10" width="37" textAlign="right"/>
</mx:FormItem>
<mx:FormItem label="Y" width="71">
<mx:TextInput id="ti2" text="20" width="38" textAlign="right"/>
</mx:FormItem>
<mx:Label id="label1" text="{answer}" width="71" textAlign="right"/>
</mx:Form>
<mx:Button id='b1' label="Compute Product" click="bar()"/>
</mx:Application>
If the listener that you pass to addEventListener() method is a nested inner function, you should not pass true
useWeakReference argument. For example:
for the
addEventListener("anyEvent",
function(e:Event) { /* My listener function. */ },
false, 0, true);
In this example, passing true as the last argument can lead to unexpected results. To Flex, an inner function is
actually an object, and can be freed by the garbage collector. If you set the value of the
argument to
true, as shown in the previous example, there are no persistent references at all to the inner function.
useWeakReference
The next time the garbage collector runs, it might free the function, and the function will not be called when the
event is triggered.
If there are other references to the inner function (for example, if you saved it in another variable), the garbage
collector will not free it.
Regular class-level member functions are not subject to garbage collection; as a result, you can set the value of the
useWeakReference argument to true and they will not be garbage collected.
75ADOBE FLEX 3
Removing event handlers
It i s a goo d id ea to remove any handlers that will no longe r be us ed. Th is rem oves references to objec ts so t hat th ey
can be cleared from memory. You can use the
you no longer need. All components that can call
removeEventListener() method. The syntax for the removeEventListener() method is as follows:
componentInstance.removeEventListener(event_type:String, listener_function:Function,
use_capture:Boolean)
removeEventListener() method to remove an event handler that
addEventListener() can also call the
For example, consider the following code:
myButton.removeEventListener(MouseEvent.CLICK, myClickHandler);
Page 88

CHAPTER 4
76
The event_type and listener_function parameters are required. These are the same as the required parameters for the
use_capture parameter is also identical to the parameter used in the addEventListener() method. Recall
The
that you can listen for events during all event phases by calling
use_capture set to true, and again with it set to false. To remove both event listeners, you must call
removeEventListener() twice: once with use_capture set to true, and again with it set to false.
You can remove only event listeners that you added with the
addEventListener() method.
addEventListener() twice: once with
addEventListener() method in an ActionScript
block. You cannot remove an event listener that was defined in the MXML tag, even if it was registered using a
call to the
addEventListener() method that was made inside a tag attribute.
The following sample application shows what type of handler can be removed and what type cannot:
<?xml version="1.0"?>
<!-- events/RemoveEventListenerExample.mxml -->
<mx:Application xmlns:mx="http://www.adobe.com/2006/mxml"
initialize="createHandler(event)">
<mx:Script><![CDATA[
import mx.controls.Alert;
private function createHandler(e:Event):void {
b1.addEventListener(MouseEvent.CLICK, myClickHandler);
}
private function removeMyHandlers(e:Event):void {
/* Remove listener for b1's click event because it was added
with the addEventListener() method. */
b1.removeEventListener(MouseEvent.CLICK, myClickHandler);
/* Does NOT remove the listener for b2's click event because it
was added inline in an MXML tag. */
b2.removeEventListener(MouseEvent.CLICK, myClickHandler);
}
private function myClickHandler(e:Event):void {
Alert.show("The button was clicked.");
}
]]></mx:Script>
<mx:Button id="b1" label="Click Me"/>
<mx:Button label="Click Me Too" id="b2" click="myClickHandler(event)"/>
<mx:Button label="Remove Event Listeners" id="b3" click="removeMyHandlers(event)"/>
</mx:Application>
Creating event handler classes
You can create an external class file and use the methods of this class as event handlers. Objects themselves cannot
be event handlers, but methods of an object can be. By defining one class that handles all your event handlers, you
can use the same event handling logic across applications, which can make your MXML applications more
readable and maintainable.
Page 89

Adobe Flex 3 Developer Guide
To create a class that handles events, you usually import the flash.events.Event class. You also usually write an
empty constructor. The following ActionScript class file calls the Alert control’s
handles an event with the
// events/MyEventHandler.as
package { // Empty package.
import flash.events.Event;
import mx.controls.Alert;
public class MyEventHandler {
public function MyEventHandler() {
// Empty constructor.
}
public function handleAllEvents(event:Event):void {
Alert.show("Some event happened.");
}
}
}
handleAllEvents() method:
show() method whenever it
In your MXML file, you declare a new instance of MyEventHandler and use the addEventListener() method
to register its
handleAllEvents() method as a handler to the Button control’s click event, as the following
example shows:
<?xml version="1.0"?>
<!-- events/CustomHandler.mxml -->
<mx:Application xmlns:mx="http://www.adobe.com/2006/mxml" initialize="createHandler()">
<mx:Script><![CDATA[
private var myListener:MyEventHandler = new MyEventHandler();
private function createHandler():void {
b1.addEventListener(MouseEvent.CLICK, myListener.handleAllEvents);
}
]]></mx:Script>
<mx:Button label="Submit" id="b1"/>
</mx:Application>
The best approach is to define the event handler’s method as static. When you make the event handler method
static, you are not required to instantiate the class inside your MXML application. The following
createHandler() function registers the handleAllEvents() method as an event handler without instantiating
the
MyStaticEventHandler class:
<?xml version="1.0"?>
<!-- events/CustomHandlerStatic.mxml -->
<mx:Application xmlns:mx="http://www.adobe.com/2006/mxml" initialize="createHandler()">
<mx:Script><
CHAPTER 4
78
]]></mx:Script>
<mx:Button label="Submit" id="b1"/>
</mx:Application>
In the class file, you just add the static keyword to the method signature:
// events/MyStaticEventHandler.as
package { // Empty package.
import flash.events.Event;
import mx.controls.Alert;
public class MyStaticEventHandler {
public function MyStaticEventHandler() {
// Empty constructor.
}
public static function handleAllEvents(event:Event):void {
Alert.show("Some event happened.");
}
}
}
Store your event listener class in a directory in your source path. You can also store your ActionScript class in the
same directory as your MXML file, although Adobe does not recommend this.
Defining multiple listeners for a single event
You can define multiple event handler functions for a single event in two ways. When defining events inside
MXML tags, you separate each new handler function with a semicolon. The following example adds the
submitForm() and debugMessage() functions as handlers of the click event:
<?xml version="1.0"?>
<!-- events/MultipleEventHandlersInline.mxml -->
<mx:Application xmlns:mx="http://www.adobe.com/2006/mxml">
<mx:Script><![CDATA[
[Bindable]
private var s:String = "";
private function submitForm(e:Event):void {
// Handle event here.
s += "The submitForm() method was called. ";
}
private function debugMessage(e:Event):void {
// Handle event here.
s += "The debugMessage() method was called. ";
}
]]></mx:Script>
<mx:Button id="b1"
label="Do Both Actions"
click='submitForm(event); debugMessage(event);'
Page 91

Adobe Flex 3 Developer Guide
/>
<mx:Label id="l1" text="{s}"/>
<mx:Button id="b2" label="Reset" click="s='';"/>
</mx:Application>
For events added with the addEventListener() method, you can add any number of handlers with additional
calls to the
specified object. The following example registers the
with b1’s
<?xml version="1.0"?>
<!-- events/MultipleEventHandlersAS.mxml -->
<mx:Application xmlns:mx="http://www.adobe.com/2006/mxml"
creationComplete="createHandlers(event)">
<mx:Script><![CDATA[
[Bindable]
private var s:String = "";
public function createHandlers(e:Event):void {
b1.addEventListener(MouseEvent.CLICK, submitForm);
b1.addEventListener(MouseEvent.CLICK, debugMessage);
}
private function submitForm(e:Event):void {
// Handle event here.
s += "The submitForm() method was called. ";
}
private function debugMessage(e:Event):void {
// Handle event here.
s += "The debugMessage() method was called. ";
}
]]></mx:Script>
<mx:Button id="b1" label="Do Both Actions"/>
<mx:Label id="l1" text="{s}"/>
<mx:Button id="b2" label="Reset" click="s='';"/>
</mx:Application>
addEventListener() method. Each call adds a handler function that you want to register to the
submitForm() and debugMessage() handler functions
click event:
You can mix the methods of adding event handlers to any component; alternatively, you can add handlers inline
and with the
Button control, which calls the
call the
<?xml version="1.0"?>
<!-- events/ConditionalHandlers.mxml -->
<mx:Application xmlns:mx="http://www.adobe.com/2006/mxml" initialize="initApp(event)">
<mx:Script><
CHAPTER 4
80
private function initApp(e:Event):void {
cb1.addEventListener(MouseEvent.CLICK, handleCheckBoxChange);
b1.addEventListener(MouseEvent.CLICK, logAction);
}
private function handleCheckBoxChange(e:Event):void {
if (cb1.selected) {
b1.addEventListener(MouseEvent.CLICK, logAction);
ta1.text += "Added log listener." + "\n";
} else {
b1.removeEventListener(MouseEvent.CLICK, logAction);
ta1.text += "Removed log listener." + "\n";
}
}
private function performAction(e:Event):void {
Alert.show("You performed the action.");
}
private function logAction(e:Event):void {
ta1.text += "Action performed: " + e.type + ".\n";
}
]]></mx:Script>
<mx:Button label="Perform Action" id="b1" click="performAction(event)"/>
<mx:CheckBox id="cb1" label="Log?" selected="true"/>
<mx:TextArea id="ta1" height="200" width="300"/>
</mx:Application>
You can set the order in which event listeners are called by using the priority parameter of the
addEventListener() method. You cannot set a priority for a listener function if you added the event listener
using MXML inline. For more information on setting priorities, see “Event priorities” on page 94.
Registering a single listener with multiple components
You can register the same listener function with any number of events of the same component, or events of
different components. The following example registers a single listener function,
different buttons:
<?xml version="1.0"?>
<!-- events/OneHandlerTwoComponentsInline.mxml -->
<mx:Application xmlns:mx="http://www.adobe.com/2006/mxml">
<mx:Script><![CDATA[
import mx.controls.Alert;
private function submitForm(e:Event):void {
// Handle event here.
Alert.show("Current Target: " + e.currentTarget.id);
}
]]></mx:Script>
submitForm(), with two
Page 93

Adobe Flex 3 Developer Guide
<mx:Button id="b1"
label="Click Me"
click="submitForm(event)"
/>
<mx:Button id="b2"
label="Click Me, Too"
click="submitForm(event)"
/>
</mx:Application>
When you use the addEventListener() method to register a single listener to handle the events of multiple
components, you must use a separate call to the
addEventListener() metho d for each inst ance, as th e follow ing
example shows:
<?xml version="1.0"?>
<!-- events/OneHandlerTwoComponentsAS.mxml -->
<mx:Application xmlns:mx="http://www.adobe.com/2006/mxml"
creationComplete="createHandlers(event)">
<mx:Script><![CDATA[
import mx.controls.Alert;
public function createHandlers(e:Event):void {
b1.addEventListener(MouseEvent.CLICK, submitForm);
b2.addEventListener(MouseEvent.CLICK, submitForm);
}
private function submitForm(e:Event):void {
// Handle event here.
Alert.show("Current Target: " + e.currentTarget.id);
}
]]></mx:Script>
<mx:Button id="b1" label="Click Me"/>
<mx:Button id="b2" label="Click Me, Too"/>
</mx:Application>
When doing this, you should add logic to the event listener that processes the type of event. The event target (or
object that dispatched the event) is added to the Event object for you. No matter what triggered the event, you can
conditionalize the event processing based on the
target or type properties of the Event object. Flex adds these
two properties to all Event objects.
The following example registers a single listener function (myEventHandler()) to the click event of a Button
control and the
listener checks the
<?xml version="1.0"?>
<!-- events/ConditionalTargetHandler.mxml -->
<mx:Application xmlns:mx="http://www.adobe.com/2006/mxml" creationComplete="initApp()">
<mx:Script><
CHAPTER 4
82
button1.addEventListener(MouseEvent.CLICK, myEventHandler);
cb1.addEventListener(MouseEvent.MOUSE_DOWN, myEventHandler);
}
public function myEventHandler(event:Event):void {
switch (event.currentTarget.className) {
case "Button":
// Process Button click.
Alert.show("You clicked the Button control.");
break;
case "CheckBox":
// Process CheckBox click.
Alert.show("You clicked the CheckBox control.");
break;
}
}
]]></mx:Script>
<mx:Button label="Click Me" id="button1"/>
<mx:CheckBox label="Select Me" id="cb1"/>
</mx:Application>
Passing additional parameters to listener functions
You can pass additional parameters to listener functions depending on how you add the listeners. If you add a
listener with the
function, and that listener function can declare only a single argument, the Event object (or one of its subclasses).
For example, the following code throws an error because the clickListener() method expects two arguments:
<mx:Script>
public function addListeners():void {
}
public function clickListener(e:MouseEvent, a:String):void { ... }
</mx:Script>
<mx:Button id="b1"/>
Because the second parameter of addEventListener() is a function, you cannot specify parameters of that
function in the
define them in the listener function and then call the final method with those parameters. If you define an event
listener inline (inside the MXML tag), you can add any number of parameters as long as the listener function’s
signature agrees with that number of parameters. The following example passes a string and the Event object to
the
runMove() method:
<?xml version="1.0"?>
<!-- events/MultipleHandlerParametersInline.mxml -->
<mx:Application xmlns:mx="http://www.adobe.com/2006/mxml">
<mx:Script><
Adobe Flex 3 Developer Guide
} else if (dir == "down") {
moveableButton.y = moveableButton.y + 5;
} else if (dir == "left") {
moveableButton.x = moveableButton.x - 5;
} else if (dir == "right") {
moveableButton.x = moveableButton.x + 5;
}
}
]]></mx:Script>
<mx:Canvas height="100%" width="100%">
<mx:Button id="moveableButton"
label="{moveableButton.x.toString()},{moveableButton.y.toString()}"
x="75"
y="100"
width="80"
/>
</mx:Canvas>
<mx:VBox horizontalAlign="center">
<mx:Button id="b1"
label="Up"
click='runMove("up",event);'
width="75"
/>
<mx:HBox horizontalAlign="center">
<mx:Button id="b2"
label="Left"
click='runMove("left",event);'
width="75"
/>
<mx:Button id="b3"
label="Right"
click='runMove("right",event);'
width="75"
/>
</mx:HBox>
<mx:Button id="b4"
label="Down"
click='runMove("down",event);'
width="75"
/>
</mx:VBox>
</mx:Application>
83ADOBE FLEX 3
Manually dispatching events
You can manually dispatch events using a component instance’s dispatchEvent() method. All components that
extend UIComponent have this method. The method is inherited from the EventDispatcher class, which UICom-
ponent extends.
Page 96

CHAPTER 4
84
The syntax for the dispatchEvent() method is as follows:
objectInstance.dispatchEvent(event:Event):Boolean
When dispatching an event, you must create a new Event object. The syntax for the Event object constructor is as
follows:
Event(event_type:String, bubbles:Boolean, cancelable:Boolean)
The event_type parameter is the type property of the Event object. The bubbles and cancelable parameters
are optional and both default to
false. For information on bubbling and capturing, see “Event propagation” on
page 86.
You can use the dispatchEvent() method to dispatch any event you want, not just a custom event. You can
dispatch a Button control’s
click event, even though the user did not click a Button control, as in the following
example:
<?xml version="1.0"?>
<!-- events/DispatchEventExample.mxml -->
<mx:Application xmlns:mx="http://www.adobe.com/2006/mxml"
initialize="createListener(event);">
<mx:Script><![CDATA[
import mx.controls.Alert;
private function createListener(e:Event):void {
b1.addEventListener(MouseEvent.MOUSE_OVER, myEventHandler);
b1.addEventListener(MouseEvent.CLICK, myClickHandler);
}
private function myEventHandler(e:Event):void {
var result:Boolean = b1.dispatchEvent(new MouseEvent(MouseEvent.CLICK, true,
false));
}
private function myClickHandler(e:Event):void {
Alert.show("The event dispatched by the MOUSE_OVER was of type '" + e.type +
"'.");
}
]]></mx:Script>
<mx:Button id="b1" label="Click Me"/>
</mx:Application>
You can also manually dispatch an event in an MXML tag. In the following example, moving the mouse pointer
over the button triggers the button’s
<?xml version="1.0"?>
<!-- events/DispatchEventExampleInline.mxml -->
<mx:Application xmlns:mx="http://www.adobe.com/2006/mxml"
initialize="createListener(event);">
<mx:Script><
Adobe Flex 3 Developer Guide
private function myClickHandler(e:Event):void {
Alert.show("The event dispatched by the MOUSE_OVER was of type '" + e.type +
"'.");
}
]]></mx:Script>
<mx:Button id="b1"
label="Click Me"
mouseOver="b1.dispatchEvent(new MouseEvent(MouseEvent.CLICK, true, false));"
/>
</mx:Application>
Your Flex application is not required to handle the newly dispatched event. If you trigger an event that has no
listeners, Flex ignores the event.
You can set properties of the Event object in ActionScript, but you cannot add new properties because the object
is not dynamic. The following example intercepts a
dispatches it as a
object to
<?xml version="1.0"?>
<!-- events/DispatchCustomizedEvent.mxml -->
<mx:Application xmlns:mx="http://www.adobe.com/2006/mxml"
creationComplete="addListeners()">
<mx:Script><![CDATA[
private function customLogEvent(e:MouseEvent):void {
l1.text = String(e.currentTarget.id);
l2.text = String(e.type);
l3.text = String(e.shiftKey);
// Remove current listener to avoid recursion.
e.currentTarget.removeEventListener("doubleClick", customLogEvent);
}
private function handleEvent(e:MouseEvent):void {
// Add new handler for custom event about to be dispatched.
e.currentTarget.addEventListener("doubleClick", customLogEvent);
// Create new event object.
var mev:MouseEvent = new MouseEvent("doubleClick");
// Customize event object.
mev.shiftKey = true;
// Dispatch custom event.
e.currentTarget.dispatchEvent(mev);
}
private function addListeners():void {
b1.addEventListener("click",handleEvent);
b2.addEventListener("click",handleEvent);
}
]]></mx:Script>
doubleClick event. In addition, it sets the value of the shiftKey property of the MouseEvent
true, to simulate a Shift-click on the keyboard.
click event. It then creates a new MouseEvent object and
85ADOBE FLEX 3
Page 98

CHAPTER 4
86
<mx:Button id="b1" label="Click Me (b1)"/>
<mx:Button id="b2" label="Click Me (b2)"/>
<mx:Form>
<mx:FormItem label="Current Target:">
<mx:Label id="l1"/>
</mx:FormItem>
<mx:FormItem label="Event Type:">
<mx:Label id="l2"/>
</mx:FormItem>
<mx:FormItem label="Shift Key Pressed:">
<mx:Label id="l3"/>
</mx:FormItem>
</mx:Form>
</mx:Application>
If you want to add custom properties to an Event object, you must extend the Event object and define the new
properties in your own custom class. You can then manually dispatch your custom events with the
dispatchEvent() method, as you would any event.
If you create a custom ActionScript class that dispatches its own events but does not extend UIComponent, you
can extend the flash.events.EventDispatcher class to get access to the addEventListener(),
removeEventListener(), and dispatchEvent() methods.
For more information on creating custom classes, see Creating and Extending Adobe Flex 3 Components.
Event propagation
When events are triggered, there are three phases in which Flex checks whether there are event listeners. These
phases occur in the following order:
• Capturing
• Targ et i ng
• Bubbling
During each of these phases, the nodes have a chance to react to the event. For example, assume the user clicks a
Button control that is inside a VBox container. During the capturing phase, Flex checks the Application object and
the VBox for listeners to handle the event. Flex then triggers the Button’s listeners in the target phase. In the
bubbling phase, the VBox and then the Application are again given a chance to handle the event but now in the
reverse order from the order in which they were checked in the capturing phase.
Page 99

Adobe Flex 3 Developer Guide
In ActionScript 3.0, you can register event listeners on a target node and on any node along the event flow. Not all
events, however, participate in all three phases of the event flow. Some types of events are dispatched directly to
the target node and participate in neither the capturing nor the bubbling phases. All events can be captured unless
they are dispatched from the top node.
Other events may target objects that are not on the display list, such as events dispatched to an instance of the
Socket class. These event objects flow directly to the target node, without participating in the capturing or
bubbling phases. You can also cancel an event as it flows through the event model so that even though it was
supposed to continue to the other phases, you stopped it from doing so. You can do this only if the
property is set to
true.
cancelable
Capturing and bubbling happen as the Event object moves from node to node in the display list: parent-to-child
for capturing and child-to-parent for bubbling. This process has nothing to do with the inheritance hierarchy.
Only DisplayObject objects (visual objects such as containers and controls) can have a capturing phase and a
bubbling phase in addition to the targeting phase.
Mouse events and keyboard events are among those that bubble. Any event can be captured, but no DisplayObject
objects listen during the capturing phase unless you explicitly instruct them to do so. In other words, capturing is
disabled by default.
When a faceless event dispatcher, such as a Validator, dispatches an event, there is only a targeting phase, because
there is no visual display list for the Event object to capture or bubble through.
87ADOBE FLEX 3
About the target and currentTarget properties
Every Event object has a target and a currentTarget property that help you to keep track of where it is in the
process of propagation. The
refers to the current node that is being examined for event listeners.
When you handle a mouse event such as MouseEvent.CLICK by writing a listener on some component, the
event.target property does not necessarily refer to that component; it is often a subcomponent, such as the
Button control’s UITextField, that defines the label.
When Flash Player or Adobe® AIR™ dispatches an event, it dispatches the event from the frontmost object under
the mouse. Because children are in front of parents, that means the player or AIR might dispatch the event from
an internal subcomponent, such as the UITextField of a Button.
The
event.target property is set to the object that dispatched the event (in this case, UITextField), not the object
that is being listened to (in most cases, you have a Button control listen for a
target property refers to the dispatcher of the event. The currentTarget property
click event).
Page 100

CHAPTER 4
88
MouseEvent events bubble up the parent chain, and can be handled on any ancestor. As the event bubbles, the
value of the
property is set at each level to be the ancestor that is handling the event. Eventually, the
event.target property stays the same (UITextField), but the value of the event.currentTarget
currentTarget will be
Button, at which time the Button control’s event listener will handle the event. For this reason, you should use the
event.currentTarget property rather than the event.target property; for example:
<mx:Button label="OK" click="trace(event.currentTarget.label)"/>
In this case, in the Button event’s click event listener, the event.currentTarget property always refers to the
Button, while
event.target might be either the Button or its UITextField, depending on where on the Button
control the user clicked.
Capturing phase
In the capturing phase, Flex examines an event’s ancestors in the display list to see which ones are registered as a
listener for the event. Flex starts with the root ancestor and continues down the display list to the direct ancestor
of the target. In most cases, the root ancestors are the Stage, then the SystemManager, and then the Application
object.
For example, if you have an application with a Panel container that contains a TitleWindow container, which in
turn contains a Button control, the structure appears as follows:
Application
Panel
TitleWindow
Button
If your listener is on the click event of the Button control, the following steps occur during the capturing phase
if capturing is enabled:
1 Check the Application container for click event listeners.
2 Check the Panel container for click event listeners.
3 Check the TitleWindow container for click event listeners.
During the capturing phase, Flex changes the value of the currentTarget property on the Event object to match
the current node whose listener is being called. The
event.
By default, no container listens during the capturing phase. The default value of the
false. The only way to add a listener during this phase is to pass true for the use_capture argument when
calling the
myPanel.addEventListener(MouseEvent.MOUSE_DOWN, clickHandler, true);
addEventListener() method, as the following example shows:
If you add an event listener inline with MXML, Flex sets this argument to false; you cannot override it.
target property continues to refer to the dispatcher of the
use_capture argument is
 Loading...