

Page 1
®
A Division of Cisco Systems, Inc.
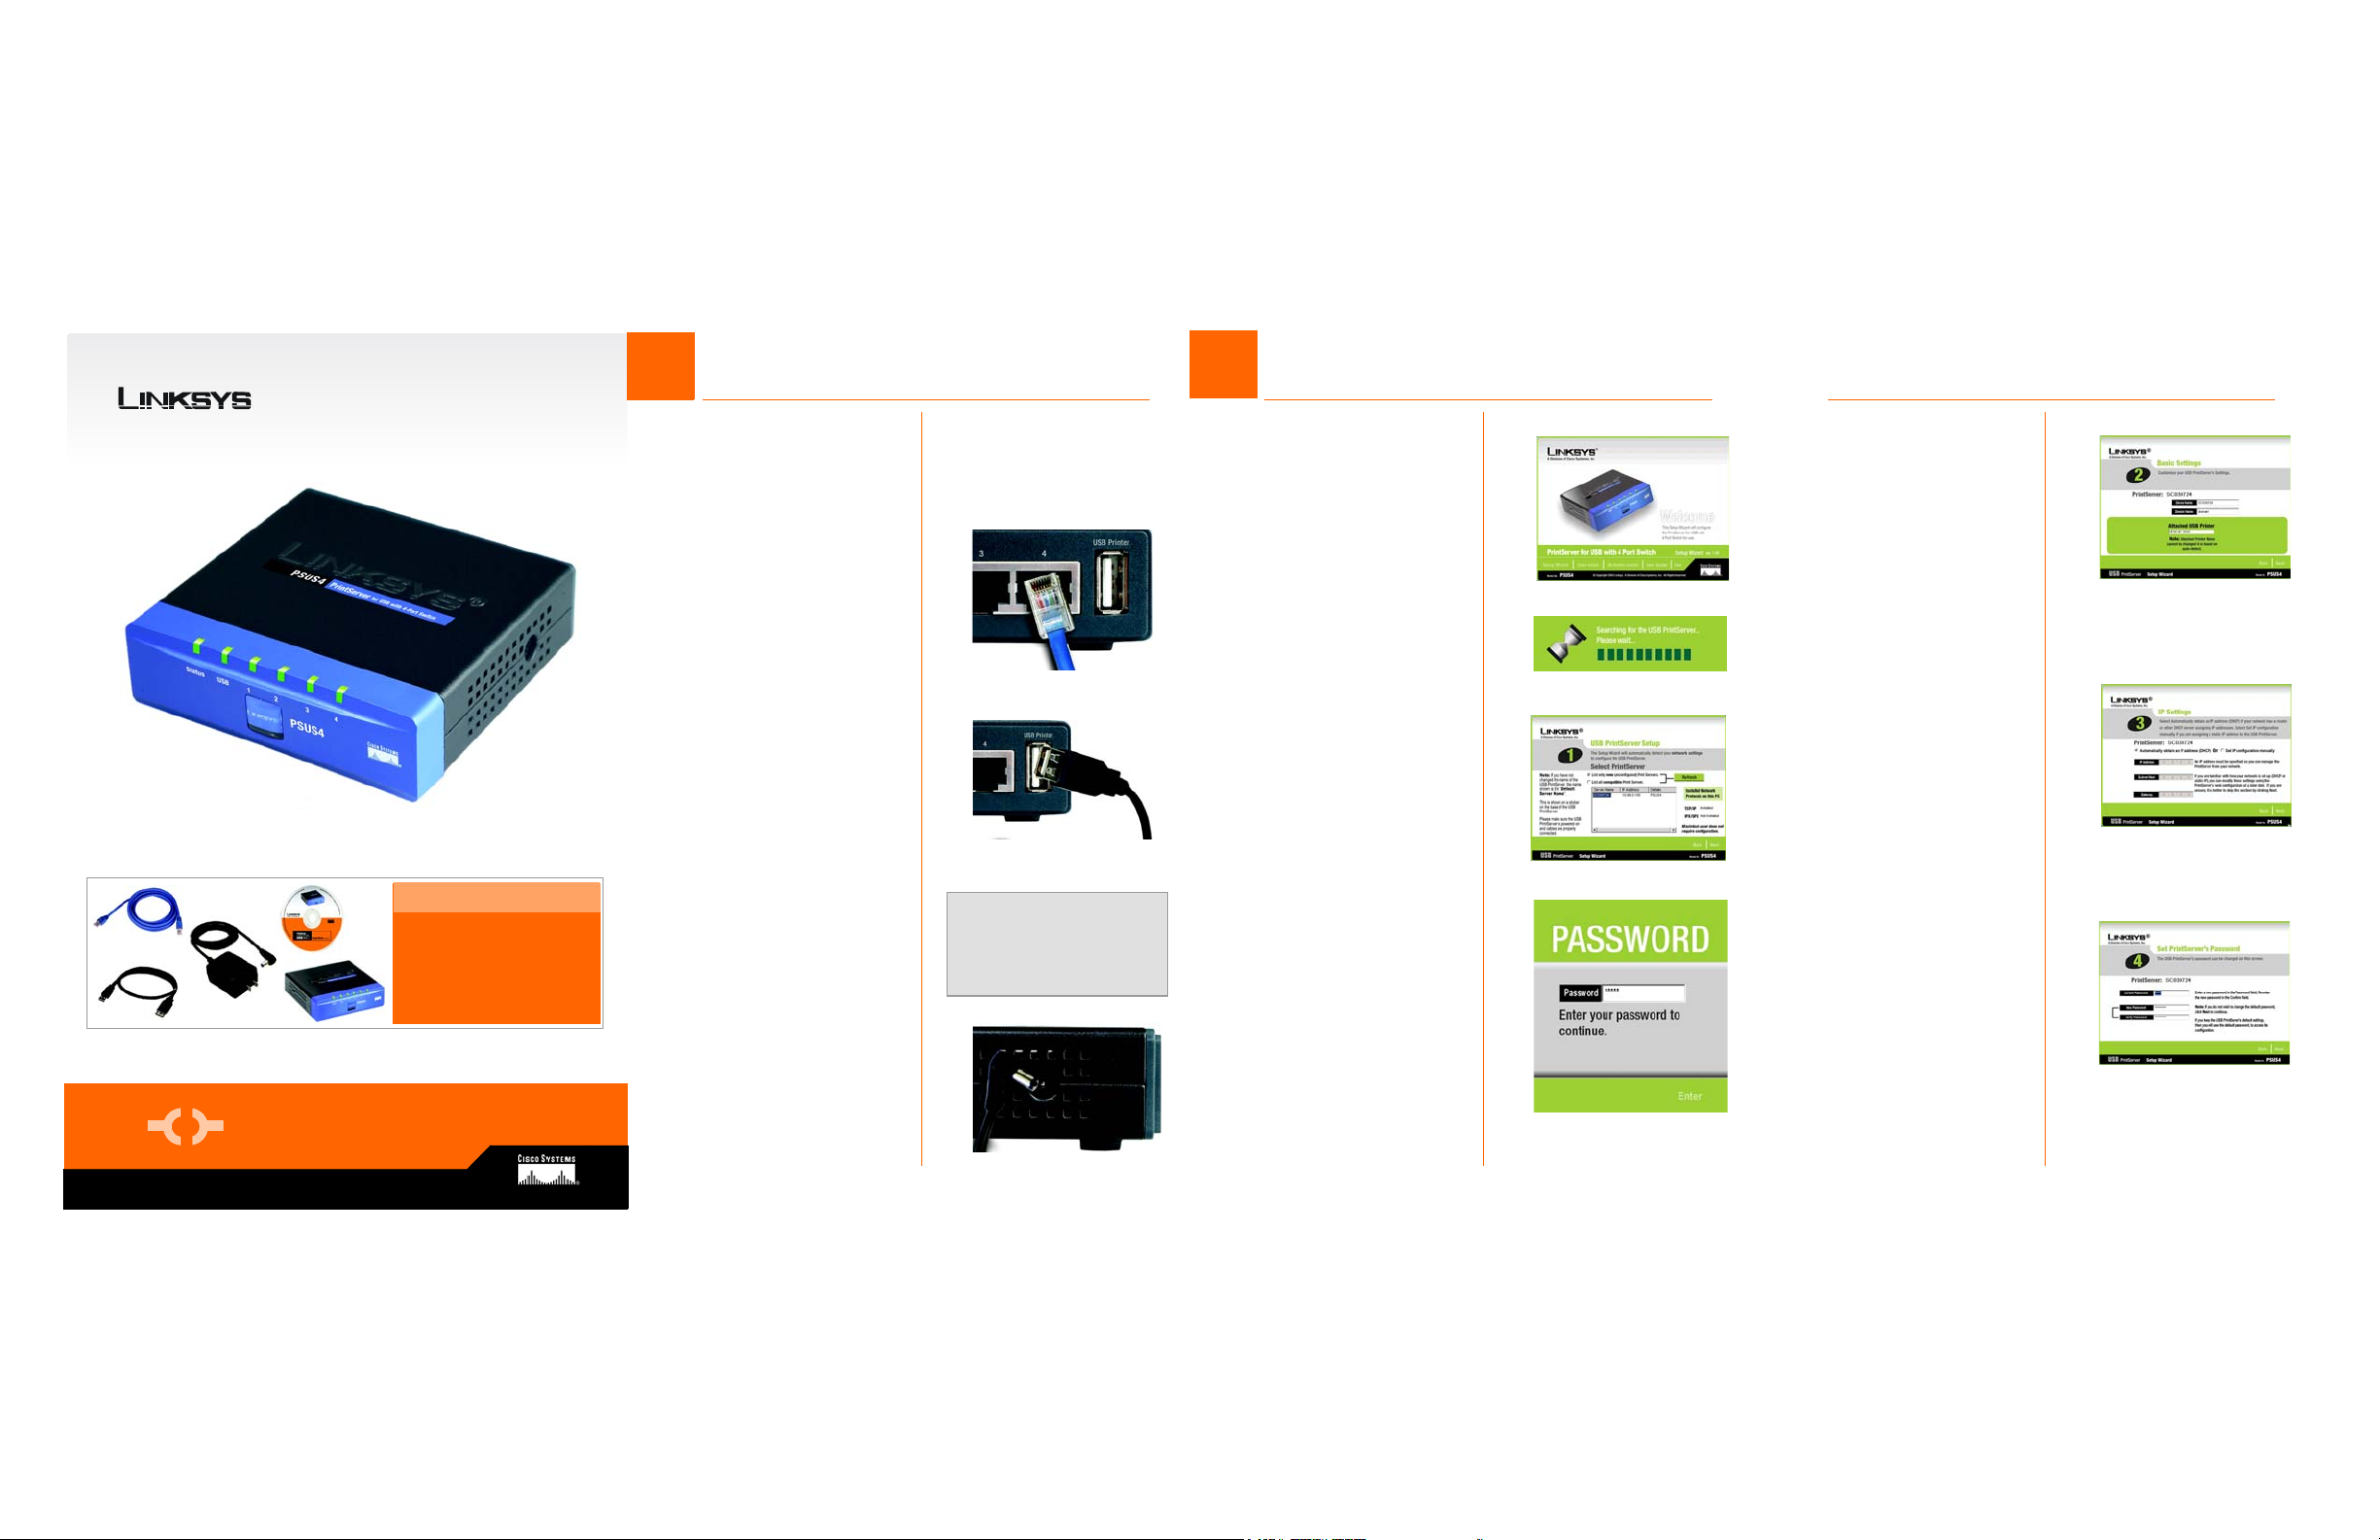
Package Contents
• One PrintSer ver for USB with 4-Port Switch
• One Power Supply
• One Setup CD with User Guide
• One Ethernet Network Cable
• One US B cable
• One Quick Installation
• One Registration Card
PrintServer for USB
with 4-Port Switch
WIRED
Quick Installation
Quick Installation
12
Connecting the PrintServer
Before starting the physical installation, note the PrintServer ’s Default
Name on the bottom of the PrintServer for future use.
A
A Plug one end of the Ethernet
network cable into one of the
PrintServer’s LAN Ports (1-4).
(See Figure A.)
B Connect the other end of the
cable into your networked hub,
switch, or router. The distance
between the PrintServer and
the other device should not
exceed 328 feet (100 meters).
A
B When you see the Welcome
C The screen in Figure C will
C Use the USB cable to connect
your printer to the PrintServer’s
USB port. Plug the Type A connector end into the PrintServer
(Figure D) and the Type B connector end into the printer.
C
D After the Setup Wizard has
D Power on your printer.
E Plug the power adapter cord
into the PrintServer ’s Power port,
which is located on the right
side of the PrintServer. (See Figure F.)
IMPORTANT: Make sure to use
the power adapter that is supplied with the PrintServer. Use of
a different power adapter could
damage the PrintServer.
Configuring the PrintServer
Insert the Setup CD-ROM into
the computer’s CD-ROM drive.
The Setup CD-ROM should run
automatically. If it does not,
click the Start button and
choose Run. In the box that
appears, enter D:\setupWizard.exe (if “D” is the letter of
your CD-ROM drive).
screen, Figure B, click Setup
Wizard to continue.
appear while the Setup Wizard
is searching for the USB PrintServer.
found the USB PrintServer, the
screen in Figure D will appear.
If this is the first time you have
run the Setup Wizard, make
sure that List only new (unconfigured) Print Servers is selected
and your Print Server is listed by
its default server name. If you
have previously configured the
Print Server, select List all compatible Print Servers. Click Next
to continue.
B
C
D
F Plug the power adapter into
an electrical outlet.
The PrintServer connection is com-
plete. Go to Step 2.
E The Password screen, Figure E,
will appear next. Enter the
default password admin in the
field. Click Enter.
E
E
F The Basic Settings screen,
shown in Figure F, will appear. If
you want to change the
Device Name or Domain
Name, enter the Device Name
and Domain Name in the
respective fields. Click Next.
G The IP Settings screen, Figure
G, appears next. If your network
uses a router with a DHCP Internet Protocol setting that automatically assigns an IP
address, select Automatically
obtain an IP address (DHCP). If
your network uses a static IP
address, select Set IP configuration manually, and enter the
IP Address, Subnet Mask, and
Gateway in the fields provided.
Click Next.
H The next screen that appears is
the Set PrintServer’s Password
screen, shown in Figure H. If
you want to change your password, enter your current password in the Current Password
screen. Enter the new password in the New Password field,
then enter it again in the Verify
Password field. Click Next.
F
G
H
Model No.
Model No.
PSUS4
Page 2
3
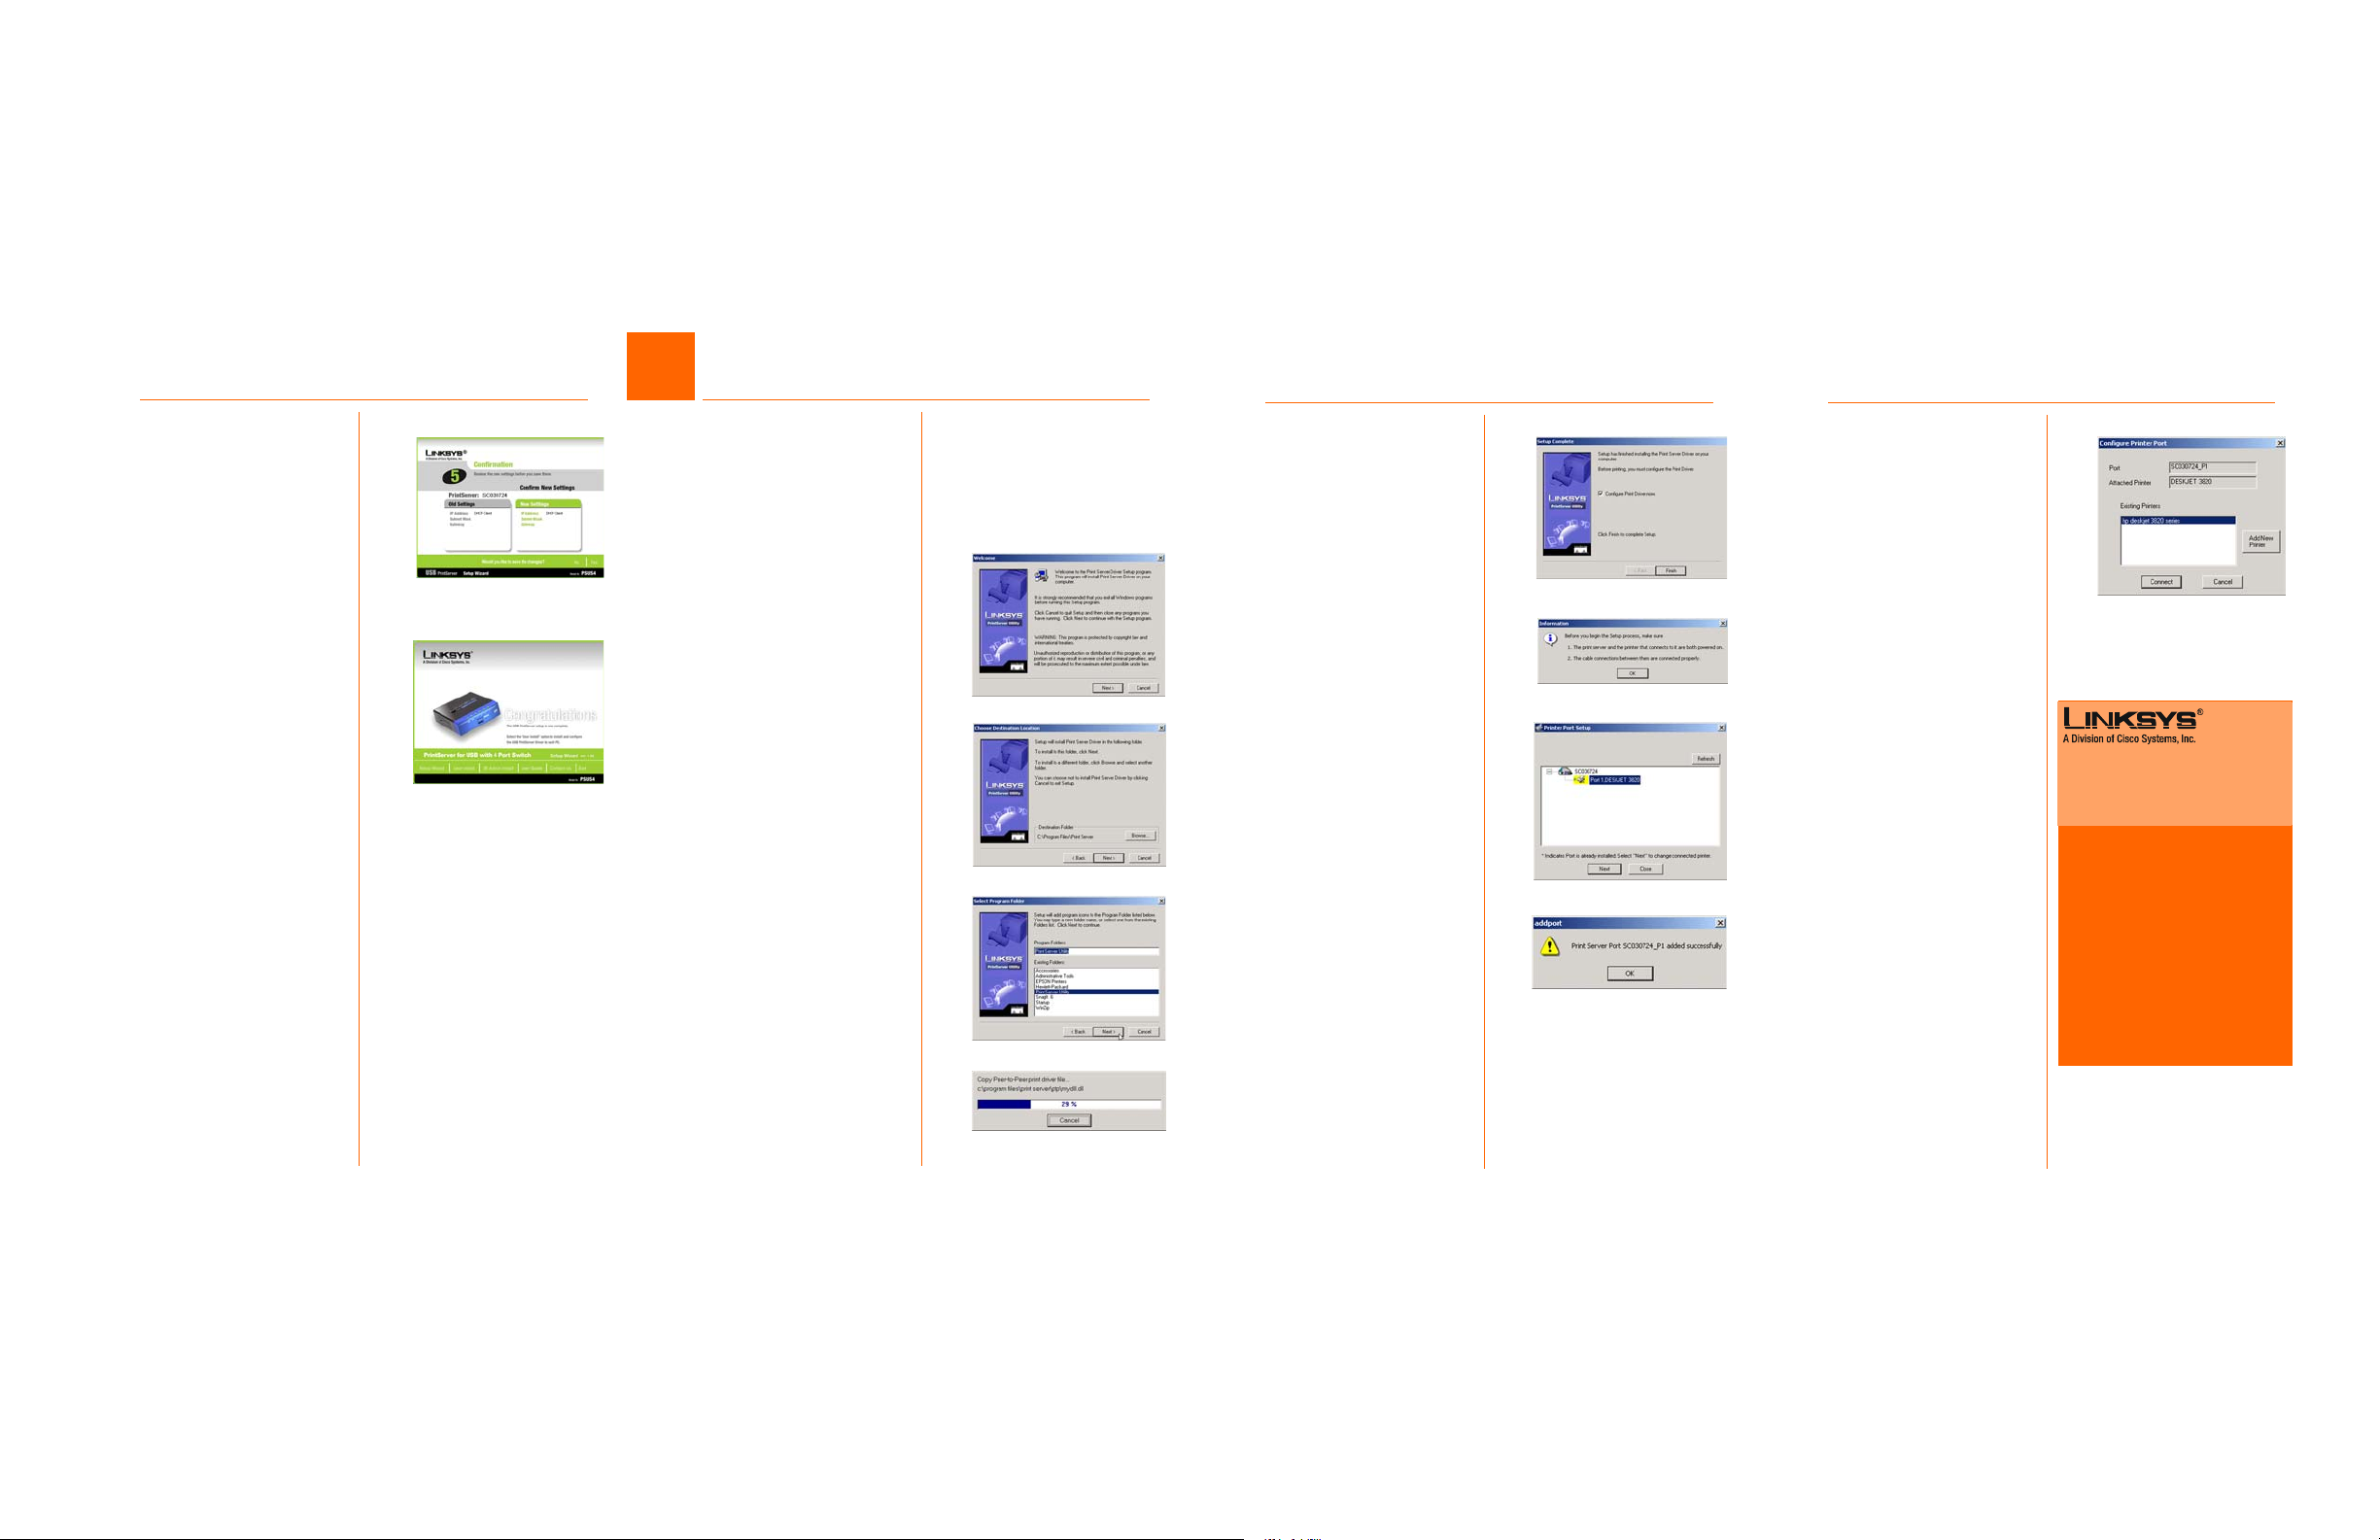
Windows Driver Installation
2
I The Confirmation screen
appears next. See Figure I. Your
old and new settings will be displayed. If you want to make a
change, click No. If the settings
are correct and you want to
save the changes, click Yes.
J The Congratulations screen,
shown in Figure J, will appear
when the setup is complete.
K Click User Install at the bottom
of the screen, and go to Step
3.B.
Configuration of your PrintServer
is complete.
Linksys recommends that you set up
your printer and install your printer ’s
driver before you install the PrintServer’s driver.
A If you haven’t already done so,
insert the Setup CD-ROM into
I
the computer’s CD-ROM drive.
When the Setup Wlizard’s Welcome screen appears, click
User Install to continue.
B When the Print Server Driver
Welcome screen appears,
click Next. See Figure B.
B
C When the next screen
appears, Figure C, choose the
J
location of where the driver’s
folder will be installed. If you
want the folder to be installed
in a different location, click the
Browse button and select the
location. To install the driver in
the default location, click Next
to continue.
C
D The next screen to appear is
Select Program Folder, shown
in Figure D. An icon will be
added to the program folder
listed. You may change the
name for the program folder.
Click Next.
D
F When the driver is installed, the
Setup Complete screen, Figure
F, will appear. The Print Driver
must still be configured, so
make sure that Configure Print
Driver now is selected. Click
Finish to continue.
G The Information screen
appears next. See Figure G.
Read the information, then
click OK.
H The Printer Port Setup screen will
appear, as shown in Figure H,
and list the PrintServer and the
connected printers. Select a
printer, then click Next.
If the PrintServer or printer isn’t
listed, make sure that the
cable connections are good
and that the PrintServer and
printer are on.
I You will be informed that the
PrintServer Port has been
added successfully. (Figure I.)
Click OK.
F
G
H
I
J
The Configure Printer Port
screen will appear, as shown in
Figure J. Your installed printer
will appear in the field. Click
the Connect button to connect the printer for configuration. To add another printer,
click the Add New Printer button.
The driver installation is complete.
Congratulations!
The PrintServer installation
is complete.
J
For additional information or troubleshooting
help, refer to the User Guide on the Setup CDROM. You can also call or email for further
support.
24-hour Technical Support
800-326-7114
(toll-free from US or Canada)
E-mail Support
support@linksys.com
Website
http://www.linksys.com or
http://support.linksys.com
RMA (Return Merchandise Authorization)
http://www.linksys.com/support
FTP Site
ftp://ftp.linksys.com
Sales Information
800-546-5797 (800-LINKSYS)
Model No.
E The next screen that may
appear while the driver is being
installed, is shown in Figure E.
Linksys is a registered trademark or trademark of
Cisco Systems, Inc. and/or its affiliates in the U.S.
E
and certain other countries. Copyright © 2003
Cisco Systems, Inc. All rights reserv ed.
PSUS4-QI-30813NC-BW
 Loading...