

Page 1
This sheet will guide you through the basic steps needed to install any
of the EtherFast®10/100 PrintServers onto your network. If you have
any problems during installation, refer to the Troubleshooting section
of the User Guide.
Overview
Overview
After installing the PrinServer hardware onto your network,
you will need to install the PrintServer Driver software. For
information on hardware installation or if you experience any
difficulty, refer to your User Guide.
WWindows Driver Setup
indows Driver Setup
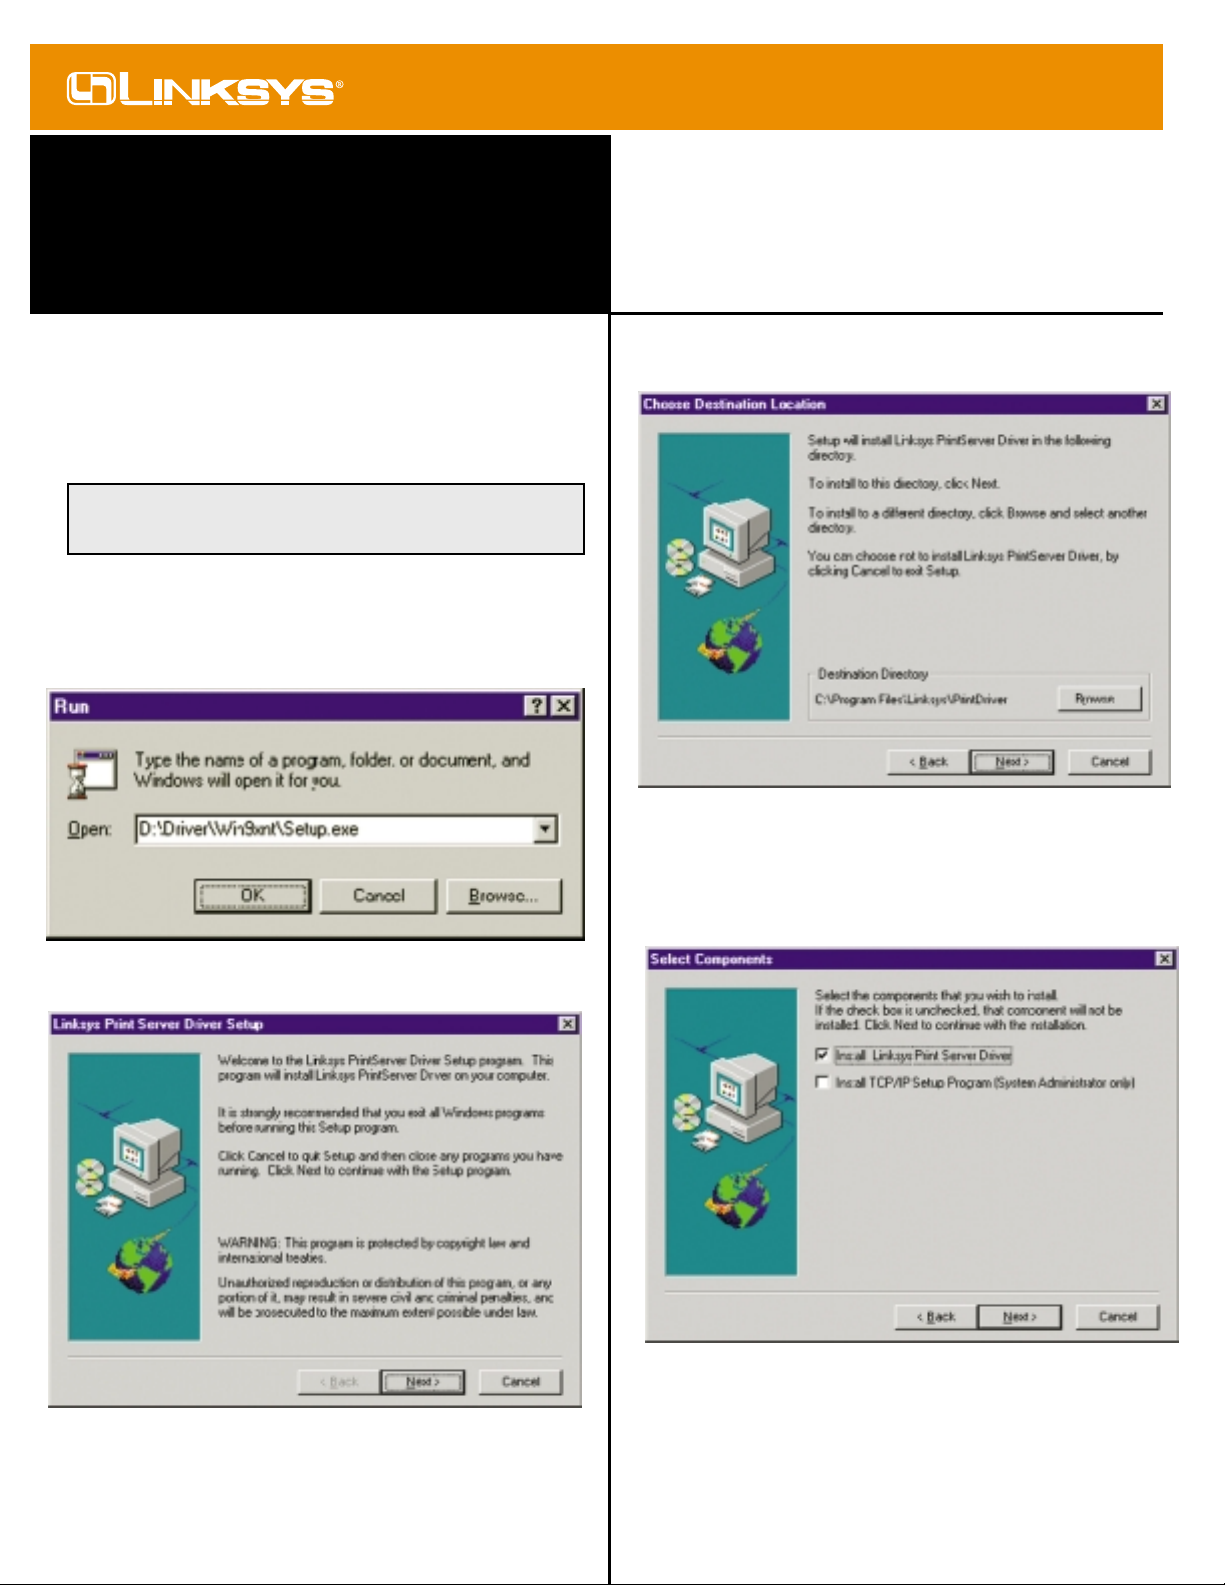
1. Click on Start, Run, and enter
D:\Driver\Win9xnt\Setup.exe. Click OK.
2. The Install Wizard window appears. Click Next.
3. Click Next to accept the Destination Directory default,
shown below.
4. The Select Components window appears. If your computer
is the network administrator’s computer, check Install
TCP/IP Setup Program (System Administrator only).
Otherwise, select the default, Install Linksys PrintServer
Driver. Click Next.
Model No.:EFSP42 ver. 2, EPSX3, PPSX1
EtherFast®10/100
PrintServers
Instant EtherFast®Series
Quick Installation
Making Connectivity Easier
™
Continued on back...
QI-EFSP42v2-10720A DG
For All Windows Operating Systems
NNoottee
: To set up DHCP on the PrintServer, install
BBii--AAddmmiinn
first (see
page 37 of the User Guide), then install
DDHHCCPP
(see page 57 of the
User Guide), then proceed to install the Printer Driver.
Page 2
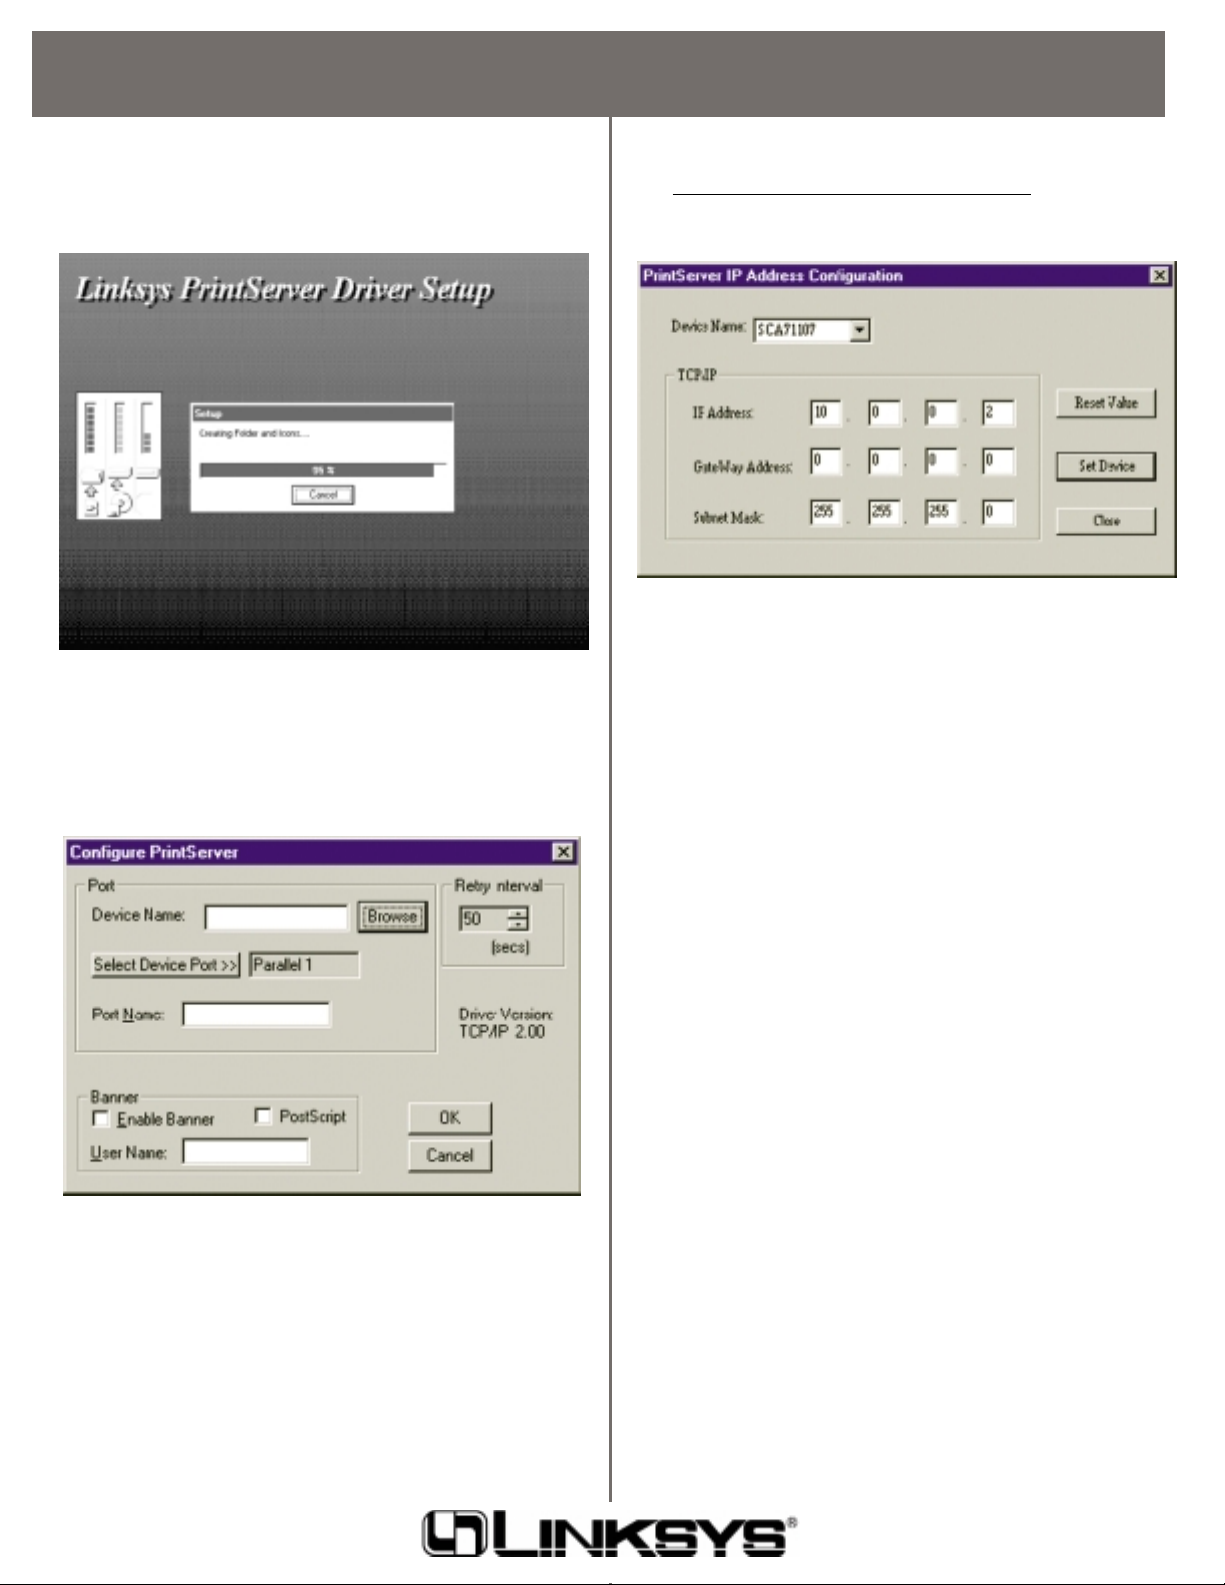
5. Accept the default Program Folder. Click Next. The win-
dow below will appear as the f iles are copied to your computer.
6. Before the file copy f inishes, the Configure PrintServer
window will pop up again as a pre-test. Click Cancel to
complete the file copy. To check for your successful file
copy, click on Start, Programs, Linksys PrintServer
Driver, and check to see that TCPIP Setup is on its sub-
folder.
If you are setting up the network administrator’s computer, finish steps 7 to 10. Otherwise, if you are simply installing this on
a network user’s computer, skip steps 7 to 9 and proceed to step
10 to finish this section.
7. On the netw
ork administrator computer only, click Start,
Programs, Linksys PrintServer Driver, and TCPIP Setup to
set up your PrintServer’s IP address.
8. In the Device Name field, enter the PrintServer’s 8-digit
Default Name written on page 10 and the white barcode
sticker on your unit. The example settings below for the
PrintServer Settings and the Network Administrator
Computer Settings show how the settings have been set for
the picture in step 7. If you are not sure what settings to
use, see your network administrator.
Printserver Settings
Device Name: SCA71107
IP Address: 10.0.0.2
Subnet Mask: 255.255.255.0
Gateway: 0.0.0.0 (optional)
Network Administrator Computer Settings
IP address: 10.0.0.1
Subnet Mask: 255.255.255.0
9. When you are finished entering the values for the IP
address, Gateway address (optional), and the Subnet Mask,
click Set Device.
The Windows PrintServer driver installation is complete.
Refer to the section on Windows P ort Configuration section for
your operating system of your User Guide for more information about the setup of the Printserver.
QI-EFSP42v2-10720A DG
 Loading...