

Page 1
Page 2

Page 3
Page 4

BA
POD
PRO BASS TONE ON THE FLOOR
Pilot’s Handbook
An in-depth exploration of the revolutionary technologies and
pulsing tonal pleasures that lurk within Bass POD
SS
XT
LIVE
Live.
XT
Electrophonic Limited Edition. Also available at www.line6.com. Revision B.
Page 5
The serial number can be found on the left side of the rear panel of your Bass POD
Live. It’s the number that begins with “(21)”. Please note it here for future reference:
SERIAL NO:
XT
WARNING:
electric shock, do not expose this appliance to
rain or moisture.
CAUTION:
pursuant to Part 15 of FCC Rules. Operation is subject to the following two conditions: (1) This device may not cause
harmful interference, and (2) this device must accept any interference received, including interference that may cause
undesired operation.
Before using Bass PODXT Live, carefully read the applicable items of these operating instructions and safety
suggestions:
1. Obey all warnings on Bass POD
2. Do not place near heat sources, such as radiators, heat registers, or appliances which produce heat.
3. Guard against objects or liquids entering the enclosure.
4. Connect only to AC power outlets rated 100-120V or 230V 47-63Hz (depending on the voltage range of the
5. Do not step on power cords. Do not place items on top of power cords so that they are pinched or leaned on.
6. Unplug your Bass PODXT Live when not in use for extended periods of time.
7. Do not perform service operations beyond those described in the Bass POD
8. Prolonged listening at high volume levels, especially with headphones, may cause irreparable hearing loss
To reduce the risk of fire or
This equipment has been tested and found to comply with the limits for a Class B digital device
The lightning symbol within a triangle means
“electrical caution!” It indicates the presence
of information about operating voltage and
potential risks of electrical shock.
YOU
SHOULD READ THESE IMPORTANT SAFETY INSTRUCTIONS
K
EEP THESE INSTRUCTIONS IN A SAFE PLACE
XT
included power supply).
Pay particular attention to the cord at the plug end and the point where it connects to Bass POD
following circumstances, repairs should be performed only by qualified service personnel:
• liquid is spilled into the unit
• an object falls into the unit
• the unit does not operate normally or changes in performance in a significant way
• the unit is dropped or the enclosure is damaged
and/or damage. Always be sure to practice “safe listening.”
CAUTION:
do not remove screws. No user-serviceable parts inside. Refer
servicing to qualified service personnel.
Live and in this Pilot’s Handbook.
To reduce the risk of fire or electric shock,
The exclamation point within a
triangle means “caution!” Please
read the information next to all
caution signs.
Live Pilot’s Handbook. In the
XT
XT
Live.
Bass PODXT Pilot’s Handbook © 2005, Line 6, Inc.
Page 6

Please Note:
Line 6, POD, PODXT, PODXT Live, Bass PODXT Live, POD
XT
Pro, FBV, FBV Shortboard, FBV4, FBV2, Amp Farm,
Line 6 Monkey and Variax are trademarks of Line 6,
Inc. All other product names, trademarks, and artists’
names are the property of their respective owners,
which are in no way associated or affiliated with Line
6. Product names, images, and artists’ names are used
solely to identify the products whose tones and sounds
were studied during Line 6’s sound model development
for this product. The use of these products,
trademarks, images, and artists’ names does not imply
any cooperation or endorsement.
Page 7

Quick Start Guide ................................................................................1•1
Register Now! ......................................................................................................................................1•2
Go on-line and get more stuff!....................................................................................................1•2
Introduction............................................................................................................................................1•3
Welcome to Bass POD
XT
Live ............................................................................................1•3
Who is Line 6? ................................................................................................................................1•3
Modeling .............................................................................................................................................1•4
Amp, Cab and Effect Models .................................................................................................1•5
There’s Magic in the A.I.R. .......................................................................................................1•5
D.I. ..........................................................................................................................................................1•7
And Away We Go........................................................................................................................1•8
Controls and Connections...................................................................2•1
Getting Set Up...................................................................................... 3•1
All Purpose Basics...............................................................................................................................3•1
Variax..........................................................................................................................................................3•2
On Stage ..................................................................................................................................................3•3
Keeping Your Options Open..................................................................................................3•3
What are you connecting to? .................................................................................................3•3
Bi-Amp Mode...................................................................................................................................3•4
Getting The Right Tone With An Amp............................................................................3•6
External Stomp Boxes and Bass POD
XT
Live ...............................................................3•7
In The Studio .........................................................................................................................................3•8
What are you connecting to?..................................................................................................3•8
The Ins and Outs of Great Tone ..........................................................................................3•8
Setting Levels ...................................................................................................................................3•9
Radiation Alert .................................................................................................................................3•9
MIDI Mania.........................................................................................................................................3•10
Page 8

Creating & Storing Sounds.................................................................. 4•1
Recalling Channel Memories ......................................................................................................4•1
Editing Basics .........................................................................................................................................4•1
Inside the Edit Menu ........................................................................................................................4•2
Amp Knob settings........................................................................................................................4•2
Amp Bypass Channel Volume ................................................................................................4•3
Cabinet and Mic settings (There’s magic in the A.I.R.!)............................................4•3
Comp/Gate settings......................................................................................................................4•4
EQ settings.........................................................................................................................................4•4
Stomp settings..................................................................................................................................4•5
Mod and Delay/Reverb settings.............................................................................................4•6
Config....................................................................................................................................................4•6
Setting your Tone to Tempo ......................................................................................................4•7
Mod and Delay/Reverb X-Overs .............................................................................................4•8
Reverb Settings.....................................................................................................................................4•8
Wah and Volume Settings.............................................................................................................4•9
Assigning the Pedal and Tweak Knob and Dialing in Tempo....................................4•10
Variax..........................................................................................................................................................4•11
D.I. Settings .............................................................................................................................................4•13
Saving Yourself......................................................................................................................................4•14
Saving a Channel Memory.........................................................................................................4•14
Custom Saving Amp Models...................................................................................................4•15
Single Channel Recall ...................................................................................................................4•16
Complete Factory Recall............................................................................................................4•16
MIDI Dumps......................................................................................................................................4•17
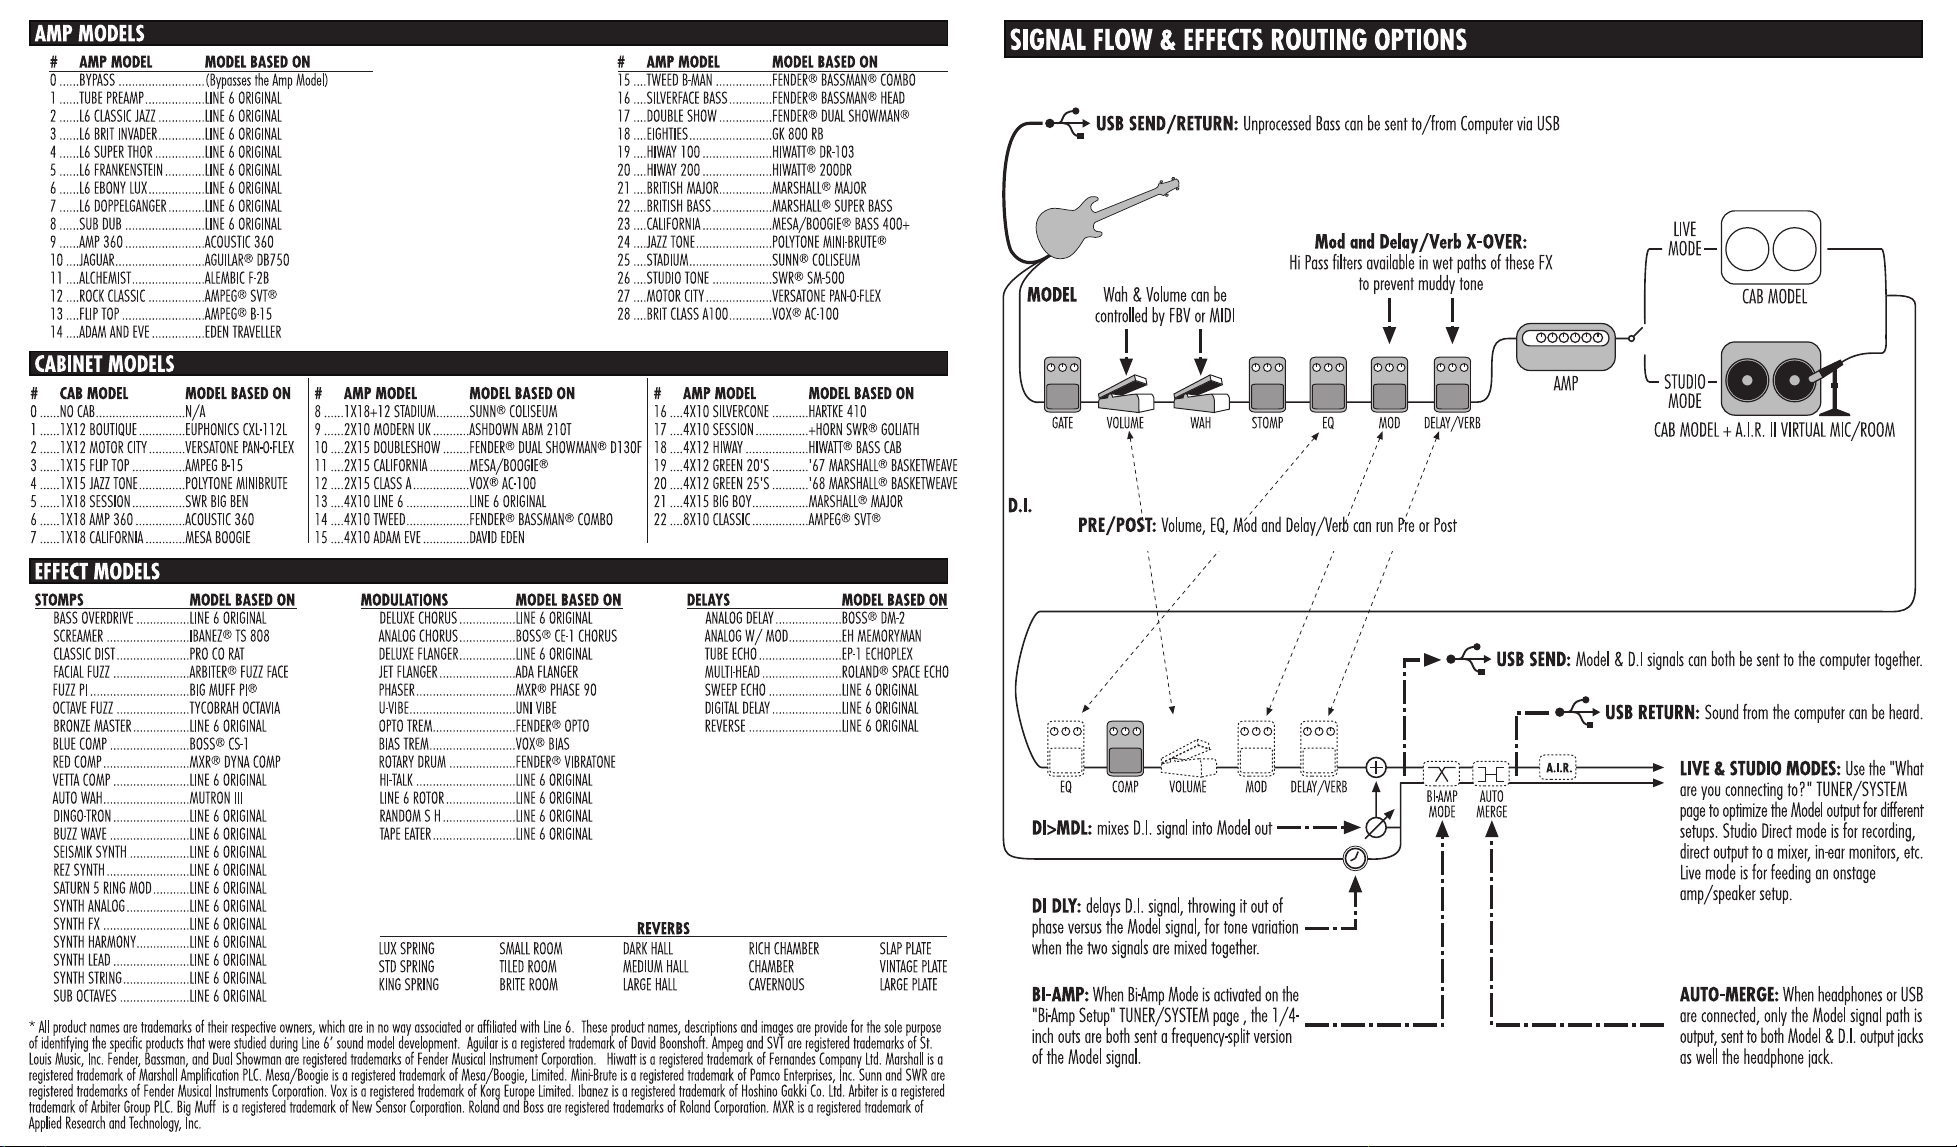
Modeled Amps & Cabs.........................................................................5•1
Which Amps and Cabs Are Modeled? .................................................................................5•1
Cabinet Models ...................................................................................................................................5•18
Effect Model Details ............................................................................. 6•1
Effect Junkies Welcome...................................................................................................................6•1
Comp.........................................................................................................................................................6•1
Gate ............................................................................................................................................................6•2
Stomp Models: Distortions, Overdrives & Fuzzes............................................................6•3
Stomp Models: Stompbox Compressors..............................................................................6•8
Page 9

Stomp Models: Auto Wah.............................................................................................................6•9
The Modulation Models..................................................................................................................6•10
Synth and Filter Effects: Basic Editing........................................................................................6•16
Synth Models .........................................................................................................................................6•18
Filter Models...........................................................................................................................................6•20
Delay Models.........................................................................................................................................6•22
Reverb Models......................................................................................................................................6•25
MIDI ....................................................................................................... 7•1
MIDI Basics ............................................................................................................................................7•1
What’s MIDI?.....................................................................................................................................7•1
In/Out....................................................................................................................................................7•1
MIDI Channel....................................................................................................................................7•1
MIDI Messages .....................................................................................................................................7•3
Backing Up Bass POD
XT
Live Programs to Other Devices .....................................7•4
Other Things You Can Do with MIDI ..................................................................................7•6
Changing sounds with MIDI Program Changes............................................................7•6
Tweaking Bass POD
Full MIDI Automation of Bass POD
XT
Live Tones with MIDI Controllers ...................................7•6
XT
Live....................................................................7•6
MIDI Setup Trouble-shooting .....................................................................................................7•8
Appendices............................................................................................ 8•1
A: Amp Models ...................................................................................................................................8•1
B: MIDI Program Changes..............................................................................................................8•3
C: POD
D: Variax Data in Bass POD
XT
MIDI Controls..............................................................................................................8•4
XT
Live.........................................................................................8•10
E: Line 6 Contact.................................................................................................................................8•11
Warranty Info........................................................................................................................................8•12
Page 10

UICK
Q
TART
S
Q
UICK START GUIDE
UIDE
G
or:
•
“Manual? I don’t need no stinking manual!”
1 •
1
“M
1.
2.
3.
4.
5.
6.
7.
8.
9.
10.
11.
ANUAL
On the rear panel, turn the small
down to zero, flip the switch to the amp position if you’re plugging into
an amp, or the line position if you’re plugging into line level equipment
such as a recorder or mixer, or using only headphones.
Connect the
inputs, or plug just the
connect headphones to the
Connect the included power pack to your Bass PODXT Live, and plug
the other end into a power jack.
Connect your bass to Bass PODXT Live’s rear
there to
Got a Variax guitar? Connect it to Bass PODXT Live’s rear panel Variax
jack, using only Line 6-supplied Variax cables. See
Flip the rear panel
Press the
D
Bass PODXT Live what you’re connecting to. This setting will be
overridden when you plug in headphones, so you don’t have to do
anything to get great headphone sound.
Turn up the rear panel
PODXT Live’s output, but don’t turn up so high that you’re overdriving
the input of whatever you’re plugging into.
Turn the
Banks of 4 Channels, with Channels labeled A, B, C, D. Banks 1-6 are
great for headphones, mixers and recorders. Banks 7-12 are best in front
of an amp. Banks 13-16 include complete Variax Bass settings. With the
E
“
Step on the
parts of your sound on/off. Turn the knobs to further adjust.
adjusts the volume of this Channel Memory relative to the others.
Now before you run off, please give the page a quick flip and....
? I
DON’T NEED NO STINKING MANUAL
UTPUT
O
M
ORM
N
UTPUT MODE/SYSTEM
O
EST
(Destination), then turn the
S
ELECT
button NOT lit, press the left button under the display for
DIT
Manual
Override,” where-the-knobs-are-is-how-it-sounds operation.
AMP,
and
ODEL
for most basses, or
P
knob to choose from preset sounds, organized in 16
S
D.I. O
M
ODEL
OWER
UTPUT LEVEL
O
TOMP
,
MOD, or
UTPUTS
output into your bass amp’s input. Or
P
HONES
switch to fire up.
jack on your Bass PODXT Live.
PAD for extra-hot-output pickups.
button. Press the button below
FFECT TWEAK
E
DLY/VRB switches to turn those
EVEL
L
knob all the way
to your recorder or mixer’s
NPUT
I
. Flip the switch
Variax
knob to tell your
knob so you can hear Bass
on page
C
3•2
HAN VOL
!”
.
Page 11

Q
UICK START GUIDE
Register now!
2
1 •
Included in this manual is a handy, postage-paid card for you to send back to us to
register your purchase. It’s
right now
www.line6.com. Registering insures that you’re dialed in for warranty service
(warranty info is at the end of this manual) and insures we can contact you if new
software versions or other cool enhancements are offered — cutting edge technology
and such.
Go on-line and get more stuff!
Here at Line 6, our mission is to help you be more creative by bringing you powerful
new technologies. As part of that mission, we focus great effort on making the
Internet a valuable resource for every one of our customers. The Line 6 web site is one
of the most effective ways for us to deliver you what you need to make you and your
PODXT Live ever more powerful.
•
Register now!
very important
that you fill that registration card out
and drop it in the mail, or jump on the Internet and register at
Our web site is the place to download the free
check for and install the latest versions of our
easy access to any future firmware updates for your Bass POD
www.line6.com/monkey
to get started. You’ll also want to visit the
Line 6 Monkey
USB driver
software, and give you
XT
utility, which will
Live! Go to
line6.com
discussion boards to learn tips & tricks, trade advice, and generally hang out and get
POD-a-licious with the whole extended family of POD
XT users. Use the Support
pages to get answers to your technical questions and contact our customer service
experts. Or grab electronic versions of this book and other documentation, learn
what your favorite artists are doing with Line 6 gear, and see the latest products we’re
introducing for you.
Not on the Internet yet? This may be your time to make the jump, and thereby ensure
that you will get all the great resources we can offer for you and your Bass POD
XT
Live.
Page 12

QUICK START GUIDE • Introduction
Introduction
Welcome To Bass PODXT Live...
Thank you for inviting Bass PODXT Live into your life. Whether you use it as the
ultimate multi-effect pedal, a direct recording miracle, a powerhouse preamp, a practice
partner, or a creative digital signal processing tool (and heck, why should it be just
one?) — we think you’ll agree that Bass POD
to happen to the electric bass since, well, since the bass amplifier itself! Bass POD
Live delivers the incredible tones of the acclaimed Line 6 Point-to-Point Interactive
modeling technology (as featured in our other POD
guitar amps), fuses it with the wonderfully portable and easy to use POD which has
been the bass recording world standard for years, and smacks it all down on the floor for
rugged professional use. So you’ve got the tonal heritage of the past century of stomp
box and bass amplifier design, plus no-compromise recording and direct sound
excellence — all ready to roll when you are.
Who is Line 6?
As you may know, Line 6 first came on the scene several years back with a new kind of
guitar amplifier — the first to put digital software modeling technology to work in a
combo amp for guitarists. We also knew then that guitarists need great amp tone when
recording, but generally don’t have the room to crank up that classic stack, or the
money to hire a team of ace engineers to get it to tape. So we squished our patented
modeling technology down into a small, kidney-bean-shaped wonder called POD, and
forever changed the world of guitar recording. Then we churned out a Bass POD, and
welcomed bass players into the Line 6 world.
XT Live is about the most amazing thing
XT products and Vetta II series
1 • 3
XT
Once we’d gotten this whole thing started, it was time to see what we could do if we
really cranked up the horsepower and took our modeling to the next level. I mean,
once you’ve climbed to the top of the mountain, it’s on to the next mountain, right?
So, eyes glowing like power tubes, we stocked up on the Pepsi, gathered our genius
engineers into a secret lab, fired up our extensive collection of amplifiers and stomp
boxes... and spirited their treasured tones into a newly-supercharged modeling
technology we dubbed Point-to-Point modeling. It first hit the streets in the awardwinning Vetta guitar amp, whose superb tone and unparalleled selection of dream
amps, cabinets and effects make it a pretty good contender for the world heavyweight
Page 13

QUICK START GUIDE • Introduction
1 • 4
guitar amp title. After that, we poured the same magic elixir into the classic POD
and—ta-dah!—POD
XT and Bass PODXT were born. It’s now available in the original
bean shape, a rack mount, and the floor unit that you are enjoying.
So, how does Bass POD
XT Live help you create a bass tone that is out of this world,
and then get that tone wherever you need it? Easy! It’s…
Modeling
Modeling: just what is it, and why is it so important?
To answer that question, we’ll start with tubes (better know as “valves” to our friends
in England and elsewhere). Tubes, we can all agree, are the heart and soul of pretty
much every legendary guitar amp and many treasured bass tone rigs, and are key to
the warm, harmonic-rich tone quality of that gear. Solid state devices (transistors) are
simply unable to duplicate tube warmth and performance. And “hybrids” — a tube in
a circuit along with a bunch of transistors — are really a vain attempt at warming up
a transistor-based tone. They fall short in any comparison to a 100% tube circuit. So
that’s it — tubes or nothin’, right? Well, not any more....
You see, Line 6’s team of crack engineer-musicians has spent years understanding
pretty much everything there is to know about tube-powered gear, including exactly
how different types of tubes respond under various conditions typical of guitar and
bass amplifier design. How tubes process an input signal, how the signal is colored and
shaped, at what point it begins to distort, the quality and characteristic of the
distortion, what happens when the signal gets to other parts of the system —
complicated stuff, but all analyzable as electronic data. A guitar or bass pickup output,
after all, is an electronic signal, and tubes and all the rest are really just a complex
form of signal processing.
Having sussed it all out, the Line 6 engineers translated all this arcane knowledge
into software that simulates the signal processing of guitar and bass amps’ tubes and
other electronics, entirely within the digital domain. Cool, huh? The Line 6 crew also
directed their caffeine-enhanced modeling attention to a study of speaker cabinets
and the important part they play in communicating great tone. And the great variety
of stomp box and rack effects that guitarists and basses use to juice things up. They
translated it all into yet more powerful software, and it’s this revolutionary DSP
(Digital Signal Processing) software-based modeling technology that gives Line 6 the
power to create super silicon-based life forms like Bass POD
XT Live.
Page 14

QUICK START GUIDE • Introduction
Amp, Cab and Effect Models
The tone and technology know-how of Line 6 thus comes to you as Amp, Cab and
Effect Models based on a collection of gear recognized by guitarists and bassists the
world over as true “tone classics.” These models were tweaked through careful,
scientific A/B comparisons to the gear that inspired them, with an ear open for the
effects of different volume levels and settings of the originals’ tone and gain
controls. The gain and equalization characteristics of the modeled gear were
carefully measured so that changes to knobs on the models would mirror the effects
of these changes on the originals as closely as possible. We’re talkin’ major
attention to detail here. Tone control center frequencies, slopes, and cut/boost
range were painstakingly analyzed, in addition to a whole host of factors unique to
each piece of gear. Not only that, but since many classic amps and effects have
highly interactive circuits, we paid careful attention to the way that the setting of
one knob changes the way that another knob may behave. All in an effort to make
our Models as much like the amps, cabs and effects in our collection as possible.
The resulting Amp, Cab and Effect Models are the foundation of Bass POD
Now, then — here are a couple of things we want to be completely crystal clear on:
1. The Line 6 modeling process is a patented, 100% digital softwarebased technology exclusive to Line 6.
2. Line 6 Modeling is not sampling, nor is it solid state; no special
guitar, bass, pickup, or cabling is needed.
XT Live.
1 • 5
There’s Magic in the A.I.R.
For recording and direct feed to a mixer, PA system, or headphones, Bass PODXT
Live delivers its modeling tones through another innovation: Line 6’s A.I.R. direct
recording output. The A.I.R. (acoustically integrated recording) technology is the
result of intensive research and careful study of the tonal characteristics produced
by the interaction of amplifiers, cabinets, speakers, microphones and the recording
room during the recording process.
The direct output of many preamps, amplifiers and direct box-style amp
replacements available today offer some limited form of cabinet simulation or
speaker emulation. Those that happen to be more than simple high end roll-offs
have little or no control options. Generic cabinet simulations cannot reproduce the
Page 15

QUICK START GUIDE • Introduction
1 • 6
markedly different tones resulting from the choice of speakers, wood, and other
details of a great real-life speaker cabinet. Other equipment also fails to reproduce the
significant tonal contribution of microphone selection and placement, and do
nothing to reproduce the subtle ambience of the recording space.
The result is the familiar dissatisfaction with direct recording products — even those
that deliver a reasonably usable basic tone fail to reproduce the “life” of the guitar and
bass sound, and destroy the proper feel in the process. It is as if your guitar or bass
strings became heavier and less responsive, like they just went up a couple of gauges
when you plugged into your direct box. And your sound lost its life.
Bass POD
XT Live’s combination of Amp Models and A.I.R. technology provides
superior direct tones by recreating all the elements contributing to a great recorded
guitar sound, and giving you that tone with the same feel as playing through a real
amp and speaker cabinet:
•The effect of the guitar or bass amplifier circuit is emulated by the Amp Model you
choose. Each model was developed from extensive study of a classic amplifier
treasured as a tone classic.
•In a guitar or bass amp, once the guitar signal passes through the electronics, it is
output to one or more speakers in a speaker cabinet. The specific design of the
speakers, how many there are, and how they are arranged contributes significantly
to your tone, as does the construction and resulting tone of the wood box itself. A
Marshall head driving a single 15-inch speaker in an open-back cabinet, for
instance, will sound dramatically different from the same head driving a 4x12
closed-back cabinet. Line 6 has carefully constructed virtual software speaker
cabinets that emulate the contribution made by real speaker cabinets to get great
guitar and bass sound.
•Once the sound makes it out of the speaker cabinet, the next important link in the
recording system is the microphone that receives that sound. Guitar and bass
recordists select different microphones, and arrange them in different placements,
to get particular sounds. A microphone pointing directly into the cone of a speaker
will hear something different than one positioned off-axis. Line 6 carefully analyzed
the coloring that various microphones add to the bass and guitar sound, as well as
the effects of different mic placement techniques, and gave you control of these
details in your Bass POD
XT Live.
Page 16

QUICK START GUIDE • Introduction
•The guitar or bass amp, cabinet, and microphone don’t just sit in empty space.
The room that they are in contributes importantly to the guitar sound you will
record. Reverb can be used to capture the basic character of the space, simulating
the effect of the sound reflecting off the room’s walls, floors and ceiling. But there
are other subtle details that have more to do with the “spread” of the sound as it
passes through the air between the speaker and microphone. This final
component is the key to the sense that the listener is in one position in the room,
and the guitar or bass sound is in another position, and that the two are separated
by a mass of air that sound spreads through to reach the listener.
All of these important sound-shaping components are accounted for in your Bass
POD
XT Live. Stomp on the AMP foot switch to enable an amplifier emulation. You
can then press the second button under the Bass POD
E
DIT button is NOT lit, select the Amp Model of your choice, and Bass PODXT
XT Live display while the
Live automatically matches that amplifier with an appropriate cabinet and
microphone setup, and gives you the sound of that setup coming through the air of
a recording space. So you’re ready to start playing or recording with incredible
mic’d up sound! Press a button and twiddle a knob or two, and you can switch
cabinets, change out mics and their placement, and adjust the “spread” of the
sound in your virtual room as well.
The A.I.R. direct recording output is exclusive to Line 6. In combination with the
Line 6 Amp, Cab and Effect Models, it is an indispensable part of Bass POD
XT
Live’s phenomenally satisfying sound.
1 • 7
D.I.
Of course, we also realize that many great recorded bass tracks and live bass sounds
are achieved by going direct with a D.I., or using a blend of amped and D.I.
together. And that’s why your Bass POD
output, a D.I. output that gives you an unprocessed direct bass signal line level
output that is exactly time- and phase-aligned with the amp+cab+mic+effects
sound pumping out of the Model output.
XT Live includes, along with its Model
Page 17

QUICK START GUIDE • And Away We Go....
1 • 8
And Away We Go....
So, now that you know what’s in store, it’s time to experience Bass PODXT Live for
yourself. Grab your favorite axe, plug in, and flip back to the handy Quick Start
Guide on the first page of this chapter if you haven’t already been through that.
Then fold out the back cover and follow me, my friend, for the Bass POD
Grand Tour....
XT Live
Page 18

Controls & Connections
ONTROLS
C
Now would be a good time to turn to the nifty back cover of this manual and notice
that it folds out. Ooh, pretty pictures! The idea is to have this essential pictorial
reference always opened out while you’re thumbing through the manual. It’s also got all
the essential details for quickly getting around on your Bass POD
numbers that pop up throughout this manual correspond to the numbers on the
foldout’s illustrations. The back side of the cover’s also got signal flow and connection
guides plus lists of all Amp, Cab and Effect Models.
1
Power Switch -
the included PX-2
2
USB -
computers, and record your Bass POD
recording software. We’ve included a USB cable to make the needed connection. You
can get the required driver software — and easily get it installed along with any other
Bass POD
which you can download at
Bass PODXT Live’s USB jack lets you connect it directly to most
XT
Live-related computer stuff — by using the free
& C
Flip this to bring your Bass PODXT Live to life.
power pack to supply power to your Bass POD
www.line6.com/monkey
ONNECTIONS
XT
Live. The boxed
XT
Live directly to a wide variety of popular
XT
Line 6 Monkey
.
Use only
Live.
software,
2•
1
3
Variax -
of possibility and sound-control power. In addition to a direct digital audio connection
between the bass and Bass POD
time you choose a new Channel Memory from your Bass PODXT Live’s footswitches or
S
POD
giving you the sound of an entire guitar collection in one instrument — at the Line 6
website.
it’s not connected to a Variax, so you won’t damage it by mistakenly
inserting a 1/4-inch cable or other connection. When you are ready to
connect a Variax, use only Line 6 supplied Variax-compatible cables — not
standard Ethernet or other cables — to avoid damage to the jack.
knob.
ELECT
Live’s built-in pedal! Learn more about Variax basses and guitars — each one
XT
Be sure to keep the protective plastic cap on this connection when
Connect a Line 6 Variax Bass here, and experience a whole new world
Live, you can have the Variax change sounds each
XT
AND
you can even tweak the sound of your Variax Bass tone with Bass
Page 19

Controls & Connections
4
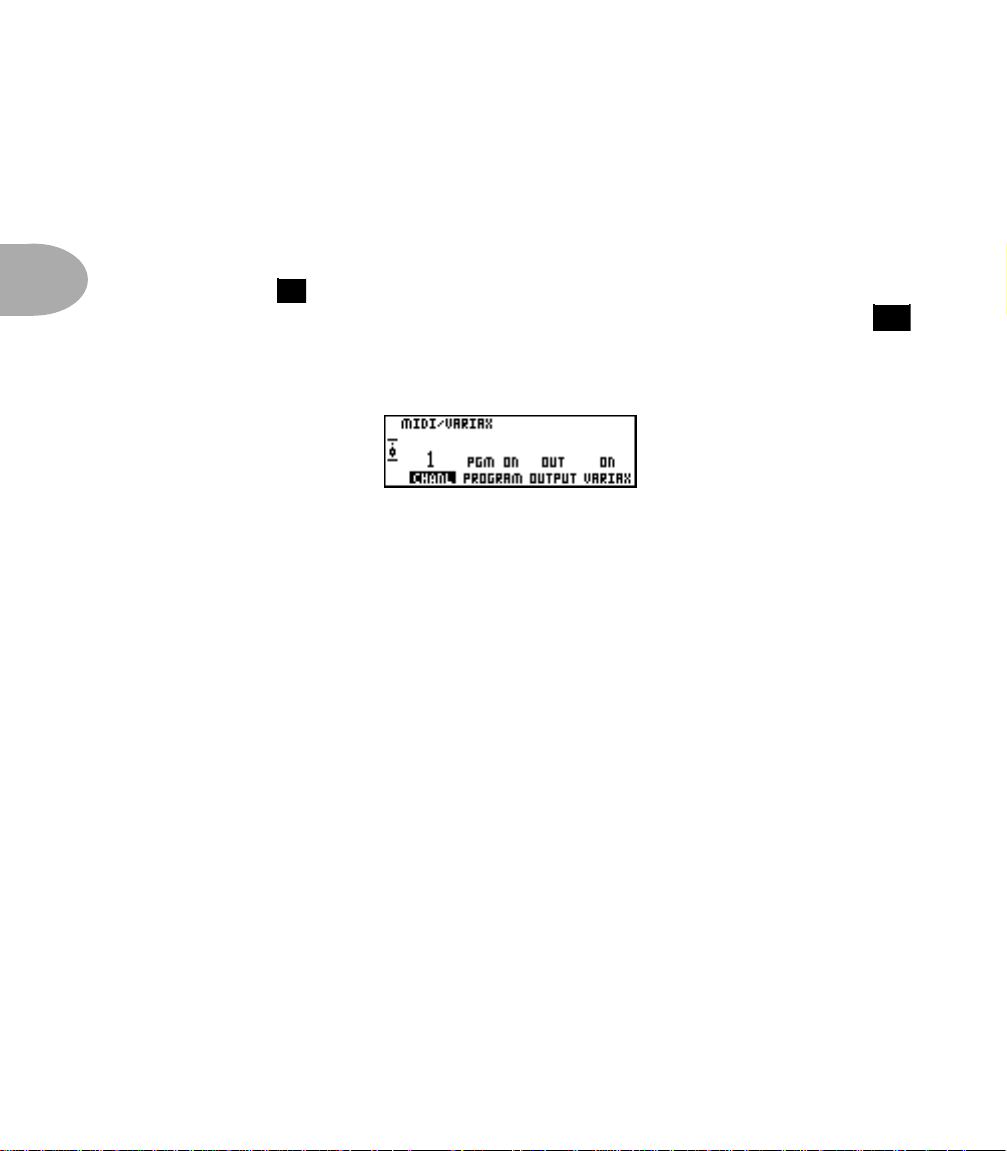
MIDI In & Out -
select Channel Memories (via Program Change messages), or automate Bass PODXT
Live settings (via controllers and/or SySex). The Bass POD
2•
2
connects to another device’s
OUT
. Please also see Chapter 7,
MIDI gear with Bass POD
Connect Bass PODXT Live to your MIDI equipment to
XT
Live
MIDI OUT
MIDI IN
XT
Live and find out what MIDI can do for you.
; its
MIDI IN
goes to another device’s
Deep Editing and MIDI Control
MIDI
, to setup your
Phones -
5
volume is set by the
When you want to listen with headphones, plug them in here. The
O
UTPUT LEVEL
knob. Any time you use headphones, it’s
6
important to be sure they’re not set for ridiculous volume before your slap them on your
ears. Use a low setting of the knob when first putting the headphones on, then turn up
from there if you need more volume.
When headphones are connected, Bass POD
XT
Live feeds them the same thing you
would hear at the Model output, and autmatically switches to Studio Mode (for more
on Studio Mode, see “What are you connecting to?” on page
6
Output To Amp/Line -
The unbalanced 1/4-inch connectors here get
3•8
).
your Bass PODXT Live’s sound to a bass amplifier, recorder, mixer or PA system. Flick
the rear panel switch to
front of a bass amp, and otherwise choose
you guessed it! — output level. Changing the
tone, so you can get the tone you want at
when you store settings into one of the Bass POD
MODEL
The
connector gives you the fully processed Amp+Cab+Effects+Mic signal
generated by your Bass POD
when you’ve got your Bass PODXT Live feeding into the
AMP
XT
Live. The D.I.
. The rear panel
LINE
O
UTPUT
any
volume level. This setting is
XT
Live’s memory locations.
connector gives you a time- and phase-
L
EVEL
level does
knob sets the —
not
change your
not
saved
aligned, unprocessed version of your signal.
When running into a bass amp, you’ll want to use the
the
knob so high that you’re overdriving the front end of your amp. Try turning
L
EVEL
MODEL
output, and avoid setting
any drive-type control on your amp low so that it’s not adding more “dirt” to your
sound, and compare the Bass POD
XT
Live sound on headphones to the sound coming
from your amp to be sure the sound from the amp isn’t getting too crunchy because
XT
you’re feeding it too much level from the Bass POD
Live. The tone from the
headphones and from the amp will of course sound different, depending on the “color”
Page 20

Controls & Connections
that your amp adds. You just want to make sure that you’re not getting extra distortion
degrading your sound and preventing you from achieving the tones you want with your
Bass POD
When running into line level gear (like recorders, mixers and PA’s) Bass POD
will give the best signal-to-noise performance when you have the rear panel
knob at max. With the
XT
-Live-and-amp-setup.
LEVEL
XT
LEVEL
control turned down low, you may get extra hiss —
Live
which obviously ain’t what you want — if you turn up your mixer or recorder’s output
as high as possible when
to compensate. In order to allow you to set the
connecting to recording, mixing, and other studio gear,
Bass POD
Live’s outputs into line level
XT
Line level inputs should allow you to set Bass POD
then turn Bass PODXT’s
knob up all the way (or close to it) and thereby get the
LEVEL
LEVEL
be sure you are plugging
, not microphone or guitar level inputs.
Live’s amp/line switch to
XT
LINE
,
best sound possible. If your gear has inputs that function as mic/line level inputs, try to
set the trim for those inputs to the minimum level, and Bass POD
XT
Live’s
LEVEL
to
maximum, when setting levels.
7
Aux Input -
Connect a CD player, MP3 player, drum machine or other device
here, and you’ll hear it at Bass PODXT Live’s headphone and Amp/Line outputs. Very
handy for jamming along! Use the output volume control on the connected device to
set its level.
This aux input signal will NOT be fed to the USB digital audio output.
2•
3
8
Input -
Plug your bass in here. (You techies will want to know this is a mono,
un-balanced connection.) Set the switch to norm for use with most basses. The pad
position may work better with bass pickups that have particularly high output levels, to
XT
prevent them from overdriving the front end of your Bass POD
Live in an
unpleasant-sounding way.
9
Pedal 2 -
you’ll be able to assign it to control the Volume Pedal or Effect Tweak
See page
4•10
Connect a standard expression pedal, such as the Line 6 EX-1, and
functions.
12
for the detail on that.
Page 21

Controls & Connections
13
Select - Bass PODXT Live has 64 Channel Memories. They are arranged in 16
10
banks of four channels each. (The four are called A, B, C, and D.) You can think of
each bank as a sort of virtual four-channel bass amp.
4
2•
The first 24 Channel Memories (Banks 1-6) store a variety of complete amp-and-effect
selections pre-programmed by the tone mavens at Line 6 to sound great when feeding a
recorder, mixer, PA or headphones. The second 24 (Banks 7-12) are designed to run in
front of a bass amp. The next 16 (Banks 13-16) are ideal for use with Variax Bass, to
give you complete, pre-programmed Bass+Effect+Amp+Cab+Mic tone.
You load Bass POD
B
ANK UP/DOWN and A, B, C, D switches described later in this chapter). When
recalling a channel, you may have left the physical T
the just-recalled channel has this control set to max. To change T
XT Live channels by turning the SELECT knob (or stepping on the
REBLE knob at minimum, whereas
REBLE (or anything
else), just grab the knob you want and tweak.
To leave the Channel Memory world and enter Manual operation, step on the A, B, C
or D foots witch
and hold it for 2 seconds. In this mode, Bass PODXT Live’s
21
display will show “Manual Mode” in place of the Channel Memory name, and the
physical positions of the A
MP TONE CONTROLS and CHANNEL VOLUME
14
knobs will determine your sound.
When the E
selects from the available display pages. When you press E
effect and channel parameters; when you press O
through all of the Tuner and system-wide settings. When S
DIT, SAVE or OUTPUT MODE/SYSTEM button is lit, the SELECT knob
DIT, it selects pages of amp,
UTPUT MODE/SYSTEM, it takes you
AVE is lit, you’ll find amp
and effect customization features as well as MIDI dump operations. The vertical “scroll
bar” on the left side of each display page shows you where you are in that group of
pages.
Page 22

Controls & Connections
Displays - The left of these displays always shows the bank number and
11
channel letter of the currently selected Channel Memory. The right of these displays,
Bass POD
XT Live’s LCD (liquid crystal display), is your window into every parameter and
setting available. Here’s how to get around that right display:
2• 5
1. When the S
AVE, EDIT and OUTPUT MODE/SYSTEM buttons are NOT lit, the
display shows you the name of the selected Channel Memory, and the Amp Model
that it uses. (And lets you use the Soft Buttons as described in .)
2. When the S
the left side of Bass POD
AVE, EDIT or OUTPUT MODE/SYSTEM button IS lit, a scroll bar on
XT Live’s display shows you where you are in the available
17
display “pages.” Press one of these buttons to see the scroll bar now. For those that
really need to get all the nerdy details, each dot in that bar represents a page. As
you turn the S
ELECT knob, you move through the pages and so does the little
square. When you’re on the first page, the little square is at the top. When you get
to the last page, the square’s at the bottom. Square goes up, square goes down.
Square goes up, square goes down. Fun for the whole family!
3. Each page typically has words that appear in the bottom of the display. These words
label things you can adjust. Press the button below the thing you want to adjust,
then turn the E
Effect Tweak - While the EDIT, OUTPUT MODE/SYSTEM and SAVE
12
FFECT TWEAK knob to do your adjusting. Here’s more detail:
buttons AREN’T lit, this knob varies some effect-related aspect of the sound that your
Bass POD
XT Live is currently running. Turn it up and that effect will generally go
deeper, louder, faster, longer or just plain more. You’ll know what you’re tweakin’
because a window will pop up on Bass POD
looking for the way to set the delay time, note that that’s usually set by the T
button.) To learn how you can customize the E
the effect that E
FFECT TWEAK is “targeting” is off, then, big surprise, EFFECT TWEAK
XT Live’s display to show you. (If you’re
AP
FFECT TWEAK knob, see page 4•10. If
won’t change anything.
While the E
DIT, OUTPUT MODE/SYSTEM or SAVE button IS lit, the EFFECT TWEAK
knob adjusts parameter values instead of tweaking your effect.
Page 23

Controls & Connections
13
Amp Tone Controls - DRIVE, BASS, LO MID, HI MID, TREBLE. These
control the tone of the Amp Modeling that you have selected. (The A
determines whether the Amp Modeling is on or off; if it’s off, you of course won’t hear
2• 6
any changes as you adjust these knobs.) The D
driving the input of the chosen Amp Model. Like the input volume control on a nonmaster volume bass amp, higher settings give you more “dirt.” The exact response and
interactivity of this and the rest of the Amp Tone Controls will vary from Amp Model
to Amp Model, to mimic the tone controls of the original amp that inspired the Amp
Model you’ve selected. See C
Chan Vol - This knob controls the relative volume level of the “channel” you
14
are playing through — thus, C
the sounds you store in two different Bass POD
between your more laid back, clean tones and your more aggressive, distorted ones). In
general, you want to set the C
best signal-to-noise ratio performance — but back off on this control if you’re seeing
CLIP in Bass POD
experience with your Channel Volume settings:
You probably want to have all of your favorite sounds as loud as possible, while also
having the right difference in volume between your more laid back and more aggressive
sounds, clean and dirty sounds, etc. Right? OK, then, to get this happy balance, start
with your favorite ‘clean’ sounds. Turn up their Chan Vol as high as you can without
getting the CLIP indicator in Bass POD
them that way. Then switch amongst them to see if some are too loud, and turn them
down a bit to match well with the others. Next, move on to select your ‘dirtier’ crunch
and overdrive tones, comparing them to the clean sounds and saving them with lower
Chan Vol settings to match well with those clean sounds. Now, each time you use your
Bass POD
LEVEL knob, and you can switch amongst your various sounds without unhappy
XT Live, you just have to set an overall volume you like with the rear panel
6
volume differences.
MP footswitch
RIVE knob controls how hard you’re
HAPTER 5 for details on specific Amp Models.
HANNEL VOLUME. Use this to balance levels between
XT Live Channel Memories (say
HAN VOL as high as possible to ensure you’re getting the
XT Live’s display. Here’s a handy tip to help you get the best
XT Live’s display when you play hard, and save
Another little Channel Volume detail: unlike the A
knob works whether your Amp Model is on or off. POD
separate Channel Volume settings — one for the Amp-on state , and one for Amp-
MP TONE CONTROLS , this
XT Live actually stores two
13
19
off. So you can balance the volume difference between these two if needed, as well as
Page 24

Controls & Connections
balance the volumes between any two Channel Memories regardless of whether they
happen to use Amp Modeling or not.
15
Save - When you want to store your own tweaked-up sounds in your Bass
POD
XT Live, this button is the key. Exactly how it works is detailed in Chapter 4,
Creating & Storing Sounds. But you’re probably impatient, so here are the basics:
When using a pre-programmed sound, Bass POD
and channel letter in its left display , and the channel name at the top of the right
11
display. If you turn one of the knobs or change a parameter in the E
XT Live will display the bank number
DIT mode pages,
you’ll notice an asterisk appears next to the channel name. This is a reminder to you
that you have tweaked the memorized channel, and that you should save it if you want
your Bass POD
To save the changes you’ve made to a Channel Memory, press the S
button will start to flash. Just press S
XT Live to remember the tweak.
AVE button. The
AVE again if you want to overwrite the currently
loaded Channel, using the same name. Or, if you’d like to change the name first, use
the middle two Soft Buttons to select a character, then press the right soft button and
turn the E
DEST, turn the EFFECT TWEAK knob, and you will see that you are switching
FFECT TWEAK knob to change the character. Press the soft button under
through memory locations A, B, C, and D in each of the 32 numbered banks. Pick one
to store your sound in, and press that S
AVE button a second time. The button’s light
will stop flashing, a progress bar will appear on the display, and the sound will be
stored at the location you chose, replacing the sound that was there before.
After the sound is stored, you can bring it back any old time by simply turning the
S
ELECT knob to call up the location where you stored it, or by dancing around on Bass
POD
XT Live’s footswitches to select the appropriate bank and channel.
2• 7
If you aren’t using one of Bass POD
XT Live’s Channel Memories — you’ve activated
Manual mode, and you’re just getting the sound of where the knobs are set — you can
store that state into a memory location the same way. Press S
E
FFECT TWEAK to choose a place to save to, and press SAVE again.
AVE, then DEST, then use
If you decide you don’t want to store the sound after you’ve started saving, press any
other button to cancel the save. (The save will also be canceled if you don’t touch
anything for 15 seconds after pressing S
AVE.)
Page 25
Controls & Connections
The S
AVE button also lets you customize any of the Amp Models to your own taste so
your favorite settings for that amp comes up instantly when you load the A
See page 4•15 for the details on that.
2• 8
16
Edit - A deep-dive into tone central is available at the press of the EDIT button.
While E
DIT is lit, the SELECT knob selects pages of everything that makes up a
Channel Memory. From here, you set all the effect parameters, select cabinets and
microphones, and assign a parameter to the E
about deep editing, please see Chapter 4.
17
Soft Buttons - These four buttons operate differently depending on what
you’re doing. Since their function changes to control different software functions at
different times, we call them the “Soft” Buttons.
MP MODEL.
FFECT TWEAK knob. To learn more
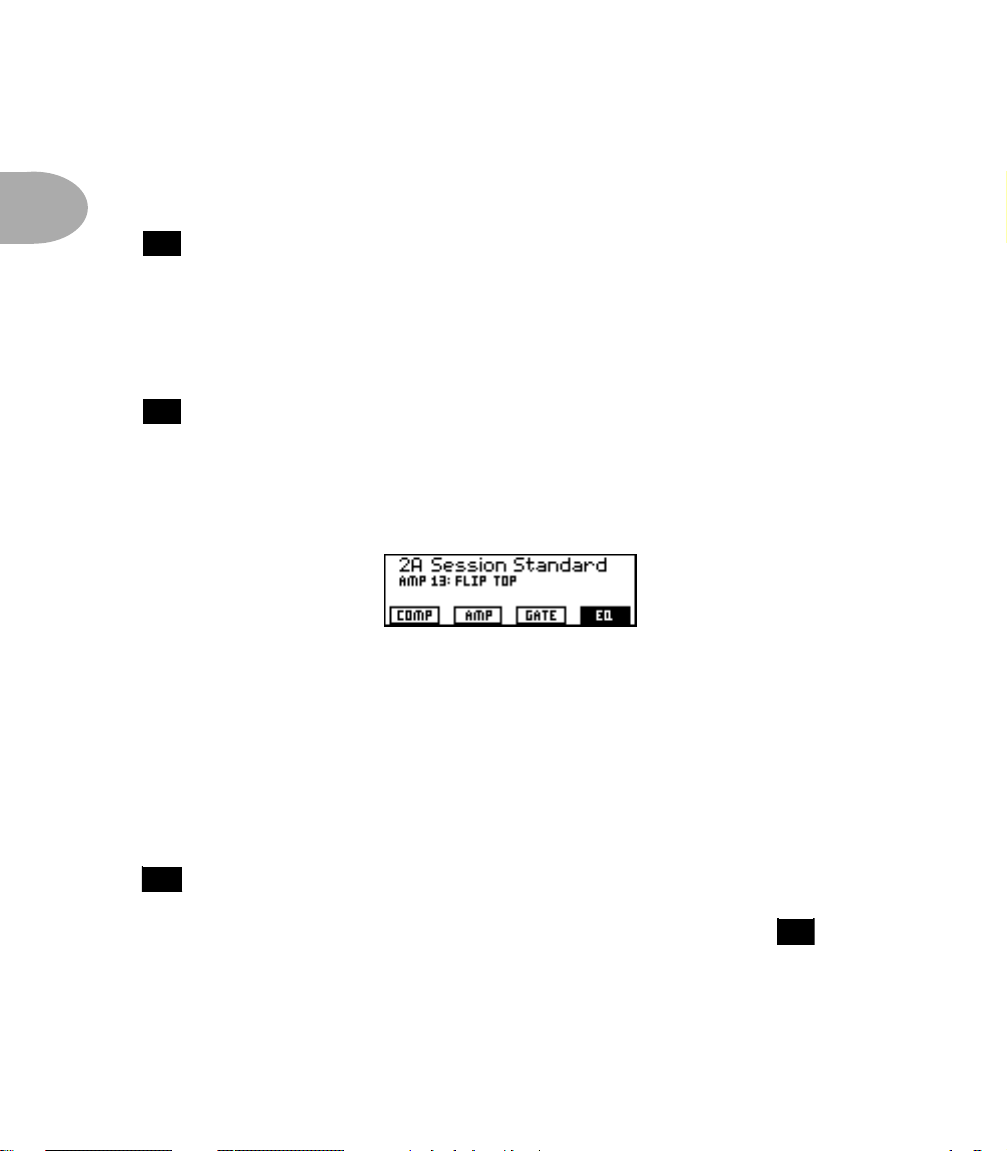
If the E
DIT button is NOT lit, Bass PODXT Live’s display will look about like this:
Press any one of the Soft Buttons below the display to turn the item above that button
on or off. In the example above, the Comp, Amp, and Gate processing are off, and
the EQ is on. Double-press any of these Soft Buttons to show the settings for that item,
then press the lit E
If the E
DIT button IS lit, the Soft Buttons will let you select which displayed setting
DIT button to exit that display when you’re done tweaking details.
you’d like to tweak. See Chapter 4 for the detail on that.
18
Output Mode/System - This button takes you to a page where you tell
Bass POD
properly. There are also other pages here (selectable with the S
adjusting the operation of your Bass POD
XT Live what you’re connecting to so that everything will sound and work
ELECT knob) for
XT Live. The settings made in these pages are
10
NOT saved in individual Channel Memories. They affect the overall, general
operation of the Bass POD
XT Live.
Page 26

Controls & Connections
10
19
Amp, Stomp, Mod, Dly/Vrb - These footswitches show you which of
these “blocks” of sound processing is currently running. Light on means that item is
active. Light off means it’s bypassed. Step on a switch to switch it on/off. Chapter 4
tells you about editing the details of the Amp, Stomp, Mod and Dly/Vrb Models.
Chapter 5 tells you about the individual Amp Models that Bass POD
XT Live gives
you, while Chapter 6 tells you all about the individual effect Models.
20
Bank Up/Down - These foots witches choose amongst Bass PODXT Live’s
32 banks of Channel Memories, similar to the S
ELECT knob. Once you’ve
footswitched your way to a new bank, you’ll then also need to step on the A, B, C or D
foots witch to actually load one of the channels from that bank. (We set things up this
way so your audience won’t hear you switching through channels as you make your
way to your next bank of sounds.)
21
A, B, C, D - The lights on these footswitches show you which of the
Channels in the current Bank is running. You can step on any of them to choose a
different channel — basically the same thing you can do with the S
ELECT knob.
10
You can also step on one of these switches and hold it for two seconds to activate a
Manual Mode. In this mode, Bass POD
place of the Channel Memory name, and the physical positions of the A
C
ONTROLS and CHANNEL VOLUME knobs will determine your sound.
13 14
XT Live’s display will show “Manual Mode” in
MP TONE
2• 9
22
Tap (Hold/Tuner) - Bass PODXT Live lets you control the time and speed
of your effects by simply tapping on this button. To use the T
AP control, just tap the
button at the tempo you want and the effects that are set to “lock” to that tempo will
change to match what you tapped. There’s also a Tempo parameter near the end of the
E
DIT pages, so you can see exactly what Tempo you’ve tapped. This is especially useful
if you are trying to nudge your T
AP setting to just the right value. See Chapter 4 to
learn how to set up effects to follow the tempo that you’ve tapped.
But wait, that’s not all. You can instead hold the switch for about 2 seconds and —
Shazam! Instant digital chromatic tuner. Play a note on your bass and Bass POD
XT Live
will show you what it is on that handy display; all notes are displayed as flats, so you’ll
see A instead of G . Play that string you’re trying to tune again, spin its tuning key so
it goes sharp and flat, and the little ball will move to the right if it’s sharp and back
Page 27

Controls & Connections
12
down to the left when the note’s flat. The little ball will sit right in the middle when
you’ve got it just right. Give Bass POD
tuner disappears just as swiftly as it came, taking you right back to normal operation.
2• 10
Tuner Bypass/Volume - Normally, the audio will be muted while you’re tuning, but
if you prefer to hear yourself tune, press the button labeled Mute, and turn E
T
WEAK counter-clockwise to select Bypass.
Tuner Reference - Want a different reference than A=440Hz? When you’re in the
tuner mode, press the button labeled 440 Hz and turn the E
Bass POD
XT Live while watching the display. This control lets you set the reference
frequency anywhere from 430-450 Hz. This setting is stored so you don’t have to reset
it every time you turn on Bass POD
that piano in your rehearsal room has decided to be different).
23
Onboard Pedal - The lights to the left of this pedal show whether it will
operate the Wah effect, Volume Pedal, or (when both lights are lit) Tweak, which is
the same thing controlled by the E
Wah, you can press hard with your toe at the top of the pedal, and the wah — as well
as the wah light to the left of the pedal — will turn on and off. To learn how to change
what the pedal controls, see page 4•10.
XT Live’s TUNE/SYSTEM button a push and the
FFECT
FFECT TWEAK knob on
XT Live if you decide you want to be different (or if
FFECT TWEAK knob. When operating the
Page 28

G
ETTING SET UP
•
All Purpose Basics
ETTING
G
The numbers in black boxes below and throughout the chapter refer to the back cover
foldout’s illustrations
XT
Bass POD
plugging into. It’s as happy to live on stage, plugged into the house sound system or
your ol’ standby amp, as it is working alongside the most elite of world-class
recording systems. (And who wouldn’t be?) To tell you what you need for where
you’re going, this chapter’s got two sections,
first, it’s time for the...
Live is ready to give you world-class tone, no matter what you’re
S
ET
U
P
On Stage
and
In the Studio
All Purpose Basics
1.
Plug the power supply or cable into the wall, and connect it to the power connector
on your Bass PODXT
2.
Connect your bass to Bass PODXT Live’s I
3.
Connect Bass PODXT Live to whatever you’re going to be playing it into.
Live
.
NPUT
8
.
. But
3 •
1
Page 29
G
ETTING SET UP
Variax
The Variax line of guitars and basses is unique, thanks to Line 6 modeling technology
that gives you a whole collection of guitars or basses in one single instrument. (You can
learn more about them at the Line 6 web site.)
•
Variax
3 •
2
If you’re a lucky Variax owner, you’ll want to take advantage of Bass POD
panel
ARIAX
V
Variax cables. Once you’ve done that, press the
3
jack. Connect your Variax to this jack using only Line 6-supplied
O
UTPUT MODE/SYSTEM
XT
Live’s rear
button
18
and give the Effect Tweak knob a spin until you see this page:
Press the Soft Button under the word
choose
ON
or
OFF
to tell Bass PODXT Live whether you’d like it control the Variax.
VARIAX
and turn the Effect Tweak knob to
When control is enabled, Bass PODXT Live can change Variax models as you change
Bass PODXT Live channels, as described on page
Note also that you can have a standard bass and your Variax plugged into Bass POD
4•11
.
XT
Live at the same time, and both will work. Just be sure to roll the volume knob back all
the way on the one you’re not using.
Page 30
G
ETTING SET UP
On Stage
Keeping Your Options Open
When you’re playing live with Bass PODXT Live, you’ve got a choice of setups. You can
plug your Bass POD
Live acts as a tone-shaping front end for the amp. You can plug straight out of Bass
POD
XT
Live’s outputs into the house system for awesome amp and effect tone without
the hassle of mics and cabinets and all that other stage setup. Or you can choose to run
Bass PODXT Live into a power amp and speaker cabinets, using it as the ultimate
preamp. Whichever setup you choose, you’re gonna have to tell your Bass POD
about it first. Read along and we’ll get’cha dialed in like a pro.
What are you connecting to?
You can supply your Bass PODXT Live with one of five answers to this question, and
thereby ensure that your friend on the floor gives you the best possible tones in any
setup. To start the dialogue, press the
up and you’ll see:
Live in between your bass and a bass amplifier so Bass PODXT
XT
O
UTPUT MODE/SYSTEM
button to light it
18
XT
Live
•
On Stage
3 •
3
STUDIO DIRECT
in-ear monitoring systems, press the Soft Button below
T
knob to select
WEAK
— When plugging Bass PODXT Live straight into a P.A., or using
12
STUDIO DIRECT
and turn the
DEST
for amazing amp and effect tone, night
E
FFECT
after night. Line 6 exclusive A.I.R. processing serves up a virtual speaker-cabinet-airmicrophone experience so good you may never use a regular bass amplifier and
microphone on stage again. You’re as powerful as the entire P.A. — and guaranteed to
be in the mix!
LIVE W HORN, LIVE W H EQ, LIVE NO HORN, LIVE NO H EQ
— Choose one of these
settings when plugging into a combo amp, head and bass cabinets, or power amp and
bass cabinets. Choose
LIVE NO HORN
LIVE NO H EQ
or
if your system doesn’t have a
horn or high frequency driver, or you’ve chosen to turn them off on your speaker
cabinet. Choose the
LIVE W HORN
or
LIVE W H EQ
option if your system includes a
horn or other high frequency driver. The Mic component of A.I.R. is turned off, and
Page 31

G
ETTING SET UP
3 •
4
•
On Stage
the Cabinet Models are revoiced to sound their best coming through the kind of
setup you choose. The two “with EQ” modes also give you some Tone Correction
controls, as shown here:
The idea of these Tone Correction controls is to adjust Bass PODXT Live’s overall
sound to compensate for the tonal response of the preamp section of the amp that
you’re plugging into. We’ve found that it is often necessary to reduce the low
frequency or high frequency parts of the Bass PODXT Live to get decent results in this
sort of a configuration, or shift the focus of the mid frequencies, so that’s what these
controls are set to do. Press the Soft Button
FFECT TWEAK
the
E
Bass POD
XT Live will send out. Use FOCUS to choose which mid frequencies to
knob to reduce the amount of low or high frequencies that
12
17
below
LOWS
or
HIGHS
and twiddle
emphasize.
Note: When running Bass PODxt Live into a bass amp (as opposed to
studio monitors or headphones) remember that different speaker/amp
combinations sound wildly different. Consider the name of each DEST
choice as a recommendation only, and experiment with all the options to
see which sounds best for your particular setup.
Bass POD
XT Live remembers the “What are you connected to?” settings you choose, so
you don’t have to re-set them every time you power up. If you change to a different
setting when using a different setup, don’t forget to change back to your standard
setting once you get back to your regular setup.
Bi-Amp Mode
Bass PODXT Live includes a Bi-Amp Mode. Bi-Amping is the technique of using a
crossover to split a signal into its higher frequency and lower frequency portions, and
sending each frequency range to a different amplification system. Lows would typically
be sent to a power amp setup with lots of wattage and large diameter speakers, while
highs would be sent to smaller diameter speakers and/or horns. Bass POD
Amp Mode includes selectable slope and frequency.
XT Live’s Bi-
Page 32

GETTING SET UP • On Stage
To activate Bass POD
S
YSTEM button and then turn the SELECT knob until you see this page:
Press the far-left Soft Button below
OFF—Bi-amp Mode is off, and Bass PODXT Live functions normally, sending the
XT Live’s Bi-Amp mode and adjust its options, press the TUNE/
SLOPE and select from the options:
Model signal out its Model output, and D.I. signal out the D.I. output.
6dB, 12dB, 18dB
OR 24dB—Bi-Amp Mode is on. Text appears on the right side of
the screen to tell you that Lows are being sent to the D.I. output, and Highs are being
sent to the Model output. Each of the available slopes has different characteristics:
6 dB This is a single pole crossover, a gentle slope that is phase and amplitude
coherent. The gentleness of the slope means that a fair amount of low
frequency content is left in the highs, and a fair amount of high frequency
content is left in the lows.
12 dB This is a 2nd order Linkwitz-Riley crossover, making a stronger separation of
the lows from the highs than the 6 dB setting. The high frequency path is out
of phase.
3 • 5
18 dB This is a 3rd order Butterworth crossover, making a still stronger separation
of the lows from the highs, while also retaining coherent phase and
amplitude.
24 dB This is a 4th order Linkwitz-Riley crossover, making the strongest separation
of the lows from the highs (flat phase and amplitude). This strong slope
removes almost all high frequency content from the lows, and almost all low
frequency content from the highs.
Press the second Soft Button from the left, below freq, to select the frequency of the BiAmp crossover, with a range from 48 Hz to 1440 Hz.
Page 33

GETTING SET UP • On Stage
Getting The Right Tone With An Amp
The first thing to consider when running Bass PODXT Live in front of an amp is what
you want to achieve. If you want to use your amp for its tone, with Bass PODxt Live
supplying effects and some extra distortion when needed, then you’ll generally get the
best results turning the A
when you want to add distortion. The sounds that are pre-programmed in Banks 9-16
3 • 6
are set up this way, to complement the tone provided by your amp. For this setup, you’ll
want to plug right into your amp’s front panel bass input, and be sure you’ve made the
proper choice of
the “What are you connecting to?” system page (see page 3•3).
MP off on Bass PODXT Live, and using STOMP
19 19
LIVE W HORN, LIVE W H EQ, LIVE NO HORN, or LIVE NO H EQ on
On the other hand, if you want to use Bass POD
XT Live’s Amp Modeling ability to
transform the basic tone of your amp to make it sound more like another amp, you’ll
probably want the A
MP processing on, as you’ll find it in the pre-programmed
19
sounds in Banks 1-8. If you’ve got an amp with effect send/return jacks, or a power amp
input, we recommend you first try feeding your Bass POD
XT Live’s input into them,
bypassing your bass amp’s own preamp and its tone contribution. If your amp doesn’t
have these input jacks, just go right into its bass input. Either way, be sure you’ve made
the proper choice of
HORN WITH EQ,
LIVE WITH HORN WITH EQ, LIVE WITH HORN NO EQ, LIVE NO
or LIVE NO HORN NO EQ on the “What are you connecting to?”
system page (see page 3•3).
It’s also important to be realistic about what you’re going to achieve here — as good as
it is, Bass POD
XT Live won’t be able to make a $100 combo amp with a cheap speaker
sound exactly like the vintage amp of your dreams. When you’re plugging into the front
of an amp, it’s a good idea to start off with that amp in neutral. What is “neutral,” you
ask? Well, if you only have one volume control on your amp, set it low enough to get a
“clean” tone; that ensures Bass POD
XT Live’s sounds come through as purely as
possible. If you have a master volume in addition to a volume control on the input, set
them both so that the first volume doesn’t overdrive the master volume (so you’re
getting a clean tone). This will vary from amp to amp, but usually the input volume is
going to be less than the master volume to get a clean, non-distorted sound. If you have
passive tone controls, try setting your mid control at max, and your treble and bass
controls at zero (this is actually “flat” equalization-wise on most amps). Active tone
controls may vary, but just be sure you’re not overdriving the amp so the Bass POD
XT
Live tone comes through without extra coloration. Once you get going, you can tweak
the amplifier settings to suit your tastes. Try to set Bass POD
knob so you’re not overdriving the input of the amp.
6
XT Live’s rear panel LEVEL
Page 34

GETTING SET UP • On Stage
External Stomp Boxes and PODXT LIVE
If you’ve been playing bass for awhile, you probably have some favorite pedals that you
dig. And even though Bass POD
stomp box and rack effects models, you probably still want to have the option of
keeping those old pedals in your arsenal. No problem! Just remember that if you’re
going to use Bass POD
XT Live with those other effects boxes in front, they’re going to
act differently based on the Amp Model you’ve selected on your Bass POD
just like you’d expect — different combinations will produce a veritable feast of tone!
Some distortion boxes may sound overly harsh if you max their output volume into
your Bass POD
XT Live. Try lowering the distortion box’s volume, and you can always
add more gain with Bass POD
also try setting the rear panel I
particularly hot output pedals.
XT Live has now graced your life with some pretty hip
XT Live. It’s
XT Live’s DRIVE knob or its own STOMP effects. You can
NPUT switch to the “pad” position to contend with
6
3 • 7
Page 35

GETTING SET UP • In The Studio
In The Studio
To use the USB connector, visit www.line6.com/monkey and use it to grab Bass PODXT
Live USB Driver software.
3 • 8
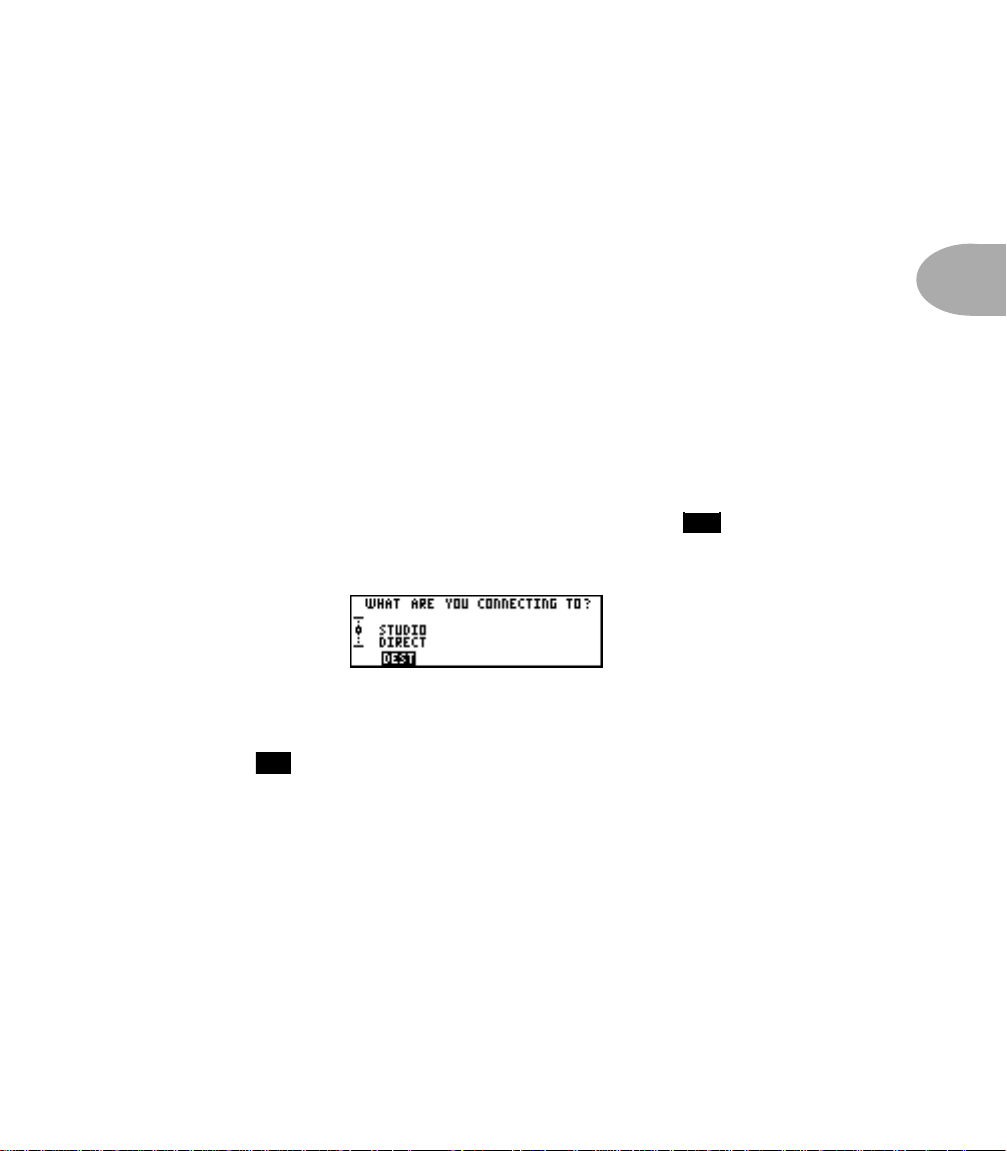
What are you connecting to?
Your Bass PODXT Live needs to adjust itself to deliver the best possible sound
depending on what you’re connecting to. Press the O
UTPUT MODE/SYSTEM
18
button so the display asks, “What are you connecting to?”
Press the Soft Button below
STUDIO: DIRECT mode. In this mode, Line 6’s exclusive A.I.R. II DSP is active, and
DEST and turn the EFFECT TWEAK knob to select
12
you are treated to a virtual speaker-cabinet-air-microphone experience that’s so good
you may never use a regular bass amplifier and microphone setup again.
The
DEST setting you select will be remembered by your Bass PODXT Live, so you don’t
have to re-set it every time you power up. If you change it to a different setting for a
special situation you come across, don’t forget to change it back again to the setting you
normally use once you get back to your standard setup. When you plug your
headphones into Bass POD
DIRECT, giving you the best tone for private jamming.
XT Live, DEST will be automatically set to STUDIO:
The Ins and Outs of Great Tone
If you’re hooking your Bass PODXT Live up to a recorder, mixer, or other equipment, be
sure you are plugging its outputs into line level inputs on your other gear, as opposed
to microphone level or guitar level inputs. This will ensure that you get the best signalto-noise ratio (lots of juicy guitar tone, not too much hiss) with Bass POD
Some equipment only gives you a single input for both mic & line level sources,
allowing you to trim low level signals (like mics) up to a high level at the inputs. If you
are plugging your Bass POD
minimum, and twisting Bass POD
XT Live into one of these inputs, try setting the trim to
XT Live’s rear panel LEVEL knob and top panel
6
XT Live.
Page 36

GETTING SET UP • In The Studio
HANNEL VOLUME knobs up to maximum. If your equipment has a couple of
C
14
open line-level only inputs, you’ll probably get better performance by plugging into
these, rather than the wide-ranging mic-to-line level trimmed inputs.
Setting Levels
Start by setting Bass PODXT Live to the sound you intend to use, strum hard, and set
C
HAN VOL as close to max as you can without getting the CLIP indicator in Bass
POD
XT Live’s display. Now play with Bass PODXT Live’s OUTPUT knob and any input
volume control on your system so you can get the maximum sound level out of your
Bass POD
cause unwanted distortion.
Here’s a handy tip: You probably want to have all of your favorite sounds as loud as
possible, while also having the right difference in volume between your more aggressive
and more laid back sounds, clean and dirty sounds, etc. Right? OK, then, to get this
happy balance, start with your favorite ‘clean’ sounds. Turn up their Chan Vol as high
as you can without getting the CLIP indicator in Bass POD
play hard, and save them that way. Then switch amongst them to see if some are too
loud, and turn them down a bit to match well with the others. Next, move on to select
your ‘dirtier’ crunch and overdrive tones, comparing them to the clean sounds and
saving them with lower Chan Vol settings to match well with those clean sounds. Now,
each time you use your Bass POD
like with the rear panel
sounds without unhappy volume differences.
14
XT Live without going so far that you overdrive the input on your system and
XT Live’s display when you
XT Live, you just have to set an overall volume you
LEVEL knob, and you can switch amongst your various
6
3 • 9
Radiation Alert
You’re also likely to find that it is quite easy to pick up some serious noise from any
computer CRT (which stands for cathode ray tube) display you might have in your
studio. CRT displays are, after all, just special purpose ray guns that shoot photons at
you all day long. Your bass pickups receive and amplify the electro-magnetic fields that
your display radiates, and you hear this in your audio signal as buzz and hum. Moving
farther from the CRT, and turning your bass so it does not directly face the computer’s
display, will minimize this problem. But if you find yourself in a tight studio setup,
needing to lay down some quick tracks, and being pestered by CRT-induced buzz, you
may find it helpful to do as we have sometimes done: set up your track to record and
start your pre-roll; reach up and flick your computer monitor’s power switch off; record
your bass part; stop your recording, flick the monitor back on, and check out the buzz-
Page 37

GETTING SET UP • In The Studio
free playback. Flatscreen LCD monitors generally don’t cause hum and buzz. And just
in case you’re looking for an excuse to buy one... Line 6 Variax basses and guitars are
immune to this sort of radiation-induced hum also, since they do not use traditional
magnetic pickups!
3 • 10
MIDI Mania
Those of you with MIDI-capable studios will find that your Bass PODXT Live lets you
control everything via MIDI. Using MIDI, you can select any Bass POD
Channel and automate any Bass POD
XT Live parameter. You are truly lord of your
domain. Pretty neat, huh? Read the Deep Editing & MIDI Control chapter if you
plan to venture into this realm.
XT Live
Page 38

Creating & Storing Sounds •
Recalling Channel Memories
REATING
C
This chapter gives you the inside scoop on editing your new Bass PODXT Live. Here,
we’ll take you through everything from loading and changing sounds to full
customization of Bass POD
want to read on and learn the tips and tricks to the quickest way around for instant
tonal satisfaction.
& S
TORING
XT
Live’s Amp and Effect Models. Even you power users will
OUNDS
S
Recalling Channel Memories
When you first turn your Bass PODXT Live on, the display will look something like
this:
Use the
Banks, where each Bank has four Channel Memories: A, B, C, D. Or step on the
U
Try spinning that
or perhaps lots more drive? No problem! Simply reach up, grab a knob and twiddle
away, my friend. In addition to the
knobs, you’ve got those handy on/off buttons for the effects , plus the smart
E
parameter.
S
ELECT
P/DOWN
FFECT TWEAK
and A, B, C and D footswitches to let your feet do the driving.
20 21
knob to spin through the channels, which are organized into 32
ELECT
S
knob that is always ready to change the most important effects
knob to find something you like. Need a bit more bass,
10
12
A
MP TONE CONTROLS
and
13 14
19
C
HAN VOL
ANK
B
4 •
1
Editing Basics
In this section we’ll take a trip into tweak — a deep dive into the way your Bass PODXT
Live works, and how to make it best work for you. Bass PODXT Live’s knobs, buttons
and display give you direct access to absolutely every detail.
Page 39

Creating & Storing Sounds •
Inside the Edit Menu
4 •
To begin your editing adventure, all you have to do is press the E
up. Now turn the
on your Bass POD
the display, simply press the Soft Button
WEAK
T
. Everything you tweak here, by the way, is remembered when you press
and choose a Channel Memory to save to.
Inside the Edit Menu
2
When the
E
DIT
E
DIT
“menu” on the left side of Bass PODXT Live’s display. Turn the select knob, and
notice that the box in the graphic slides up and down the menu, with each dot in the
graphic representing one of the available
you keep your place in the great circle of life — er,
Amp Knob settings
With the
Amp Knob settings. You can also get here when the
S
ELECT
got the the
E
DIT
knob counterclockwise to select the first page from the
A
button to light it
DIT
S
XT
knob. Well lookey here, everything you’d ever want to tweak
ELECT
Live is right there in front of you. To change something shown on
directly below it and spin
17
FFECT
E
button is lit, you’ll see that there is a graphic representation of the
E
DIT
pages. This “scroll bar” is there to help
DIT
E
pages.
button
MP
NOT
lit, double-press the Soft Button labeled
on, the display will look like this:
19
E
DIT
button
to see the
AMP
IS
lit, if you spin the
E
menu. If you’ve
DIT
S
AVE
At the top of the display you’ll also see the Amp Model name. You can spin the
FFECT TWEAK
E
knob to select from the available Amp Models. (If the
AMP
19
is
currently off, you’ll first need to turn it on before selecting a different Amp Model.) As
you change Amp Models, you’ll see the tone control settings change as each amp loads.
This shows you the settings that the helpful elves at Line 6 have programmed to make
each Amp Model come up with a ready-to-use tone. See page
4•15
to find out how to
customize these settings for your taste.
Page 40

Creating & Storing Sounds •
Inside the Edit Menu
Look carefully now... do you see the little ‘dots’ by the knobs? These tell you where the
knobs were last saved. Reach up and spin the Drive knob. Notice that the knob moves
on the display. Cool, huh? And notice that the little dots are still where they were. This
allows you to compare your edit with the saved settings for this Channel Memory.
Now, that’s handy!
Amp Bypass Channel Volume
If you’ve got the the
AMP
off, the display will instead look like this:
19
4 •
3
This is the volume that this channel will be set to when
not affect the volume that you’ll hear when
is not bypassed.
A
MP
AMP is bypassed. It does
19
Cabinet and Mic settings (There’s magic in the A.I.R.!)
From the Amp Bypass Channel Volume display, turn
You’re now looking at something like this:
These are the advanced A.I.R. settings where you can mix and match any cabinet
model with any amp, as well as dial in the perfect microphone setup.
Press the button under the displayed word
, then use the
CAB
spin through the available Cabinet models.
You can change the microphone selection or amount of room ambience the same way.
Press the button under the displayed word
MIC, then use EFFECT TWEAK to spin
through the Mic options, or press the button under
room.
Select
ROOM and dial in more or less
one click to the right.
E
FFECT TWEAK knob to
Page 41

Creating & Storing Sounds • Inside the Edit Menu
17
These settings allow you to completely customize the sound of the virtual recording
environment we call A.I.R. — all without leaving the privacy of your own mind!
Comp/Gate settings
From the A.I.R. settings display, turn SELECT one click to the right (you can also get
here directly by double-pressing the Soft Button
when the E
4 • 4
DIT button is not already lit). You’re now looking at something like this:
Just like any other edit page, you can press a Soft Button, then turn the Effect Tweak
knob to adjust the settings shown here. Chapter 6 tells you more about getting the
most out of the Comp and Gate effects.
EQ settings
From the Comp/Gate settings display, turn Select one click to the right (you can also
get here directly by double-pressing the Soft Button
E
DIT button is not already lit). Welcome to the EQ edit display:
under the word COMP or GATE
17
under the word EQ when the
The 6 graphic sliders on the left side of the page show you the gain settings of the six
bands of Bass POD
XT Live’s 6 Band Semi-Parametric EQ. The bands toward the left are
for lower frequencies, the bands toward the right are for higher frequencies, and you
can adjust the gain and frequency of each of them. The far left band is a low shelf,
affecting all the sound at and below the frequency you select for it, and the far right is a
high shelf, affecting the sound at and above its frequency. The middle four affect the
sound centered on their frequency. The currently selected band is shown with heavier
graphics, like the sixth band in the illustration. Press one of the two Soft Buttons on
the left to
SELECT one of the four bands for adjusting.
Page 42

Creating & Storing Sounds • Inside the Edit Menu
Pressing the two left Soft Buttons
simultaneously will set the EQ “flat,” so all
17
bands have a gain setting of 0 and a default setting for frequency. Press the third Soft
Button from the left and turn the E
correctly selected band. Press the far right Soft Button and turn the E
knob to adjust
FREQ for the correctly selected band. As you do all this, you can press
FFECT TWEAK knob to adjust GAIN for the
FFECT TWEAK
two right Soft Buttons simultaneously any time to turn the EQ off (“EQ Bypassed” will
show at the top of the display) and on to see what difference the EQ is making, and
ensure that the changes you’re making are improving your sound.
Stomp settings
From the EQ settings display, turn Select one click to the right. You’ll be looking at
the Stompbox E
As with all of the effects, the first button from the left below the display allows you to
choose the effect model. You can also see that the model selected here, Vetta Comp,
has ‘knobs’ for Sensitivity and Level. Pressing the button under
tweaking via the E
DIT page that looks something like this:
SENS selects it for
FFECT TWEAK knob.
4 • 5
Some Stomp effects will have a second page, which you’ll see if you turn the Select
knob. See Chapter 6 to learn the details of the many Stomp models, and how to get
the most out of each one of them.
Page 43

Creating & Storing Sounds • Inside the Edit Menu
Mod and Delay/Reverb settings
Turn the SELECT knob one click clockwise from the STOMP page(s) to see the Mod
settings pages. Turn S
ELECT another couple clicks clockwise to see the Dly/Rvb
(meaning “Delay/Reverb”) pages. For the most part, things here work like the other
edit pages already described (and Chapter 6 will tell you about all the Mod, Delay and
Reverb models in detail). The pages look something like this:
Delay Edit Page 1
4 • 6
Delay Edit Page 2
Config
The CONFIG parameter on the second Mod and Delay/Reverb pages determines
whether those effects will come before (
flow.
PRE) the amp or after it (POST) in the signal
Here’s a typical routing with a M
effect
PRE and a DELAY running POST:
OD
Here’s another routing with both M
D
ELAY effects in the PRE position:
AMP/CAB – A.I.R. II DELAYMODULATION
OD and
AMP/CABMODULATION DELAY
Page 44

Creating & Storing Sounds • Inside the Edit Menu
And this is what the full signal flow looks like inside your Bass POD
XT Live, including
the pre and post options for Mod, Delay/Reverb and the Volume pedal:
Setting your Tone to Tempo
Mod Speed or Delay Time can optionally be set using note values and tempo:
1. Select the Delay
2. Spin E
FFECT TWEAK counter-clockwise until you start seeing little notes in the
place where milliseconds or Hertz used to be. Pick the note value you’d like your
TIME or SPEED to match.
TIME or Mod SPEED by pressing the button below it.
4 • 7
3. Tap twice on the T
AP button to set your tempo, and your Delay and/or Mod now
match the tempo you tapped.
When you set your Delay time to match dotted-eighth notes, for instance, the
control will look like this:
TIME
Page 45

Creating & Storing Sounds • Inside the Edit Menu
Mod and Delay/Reverb X-Overs
While effects are great, they can sometimes cause a lack of tonal definition. The biggest
problem is often what they do to the bass frequencies, where things can get real muddy
real fast when you’re laying on effects. To help you keep your tone’s punch even while
bathing it in wetness, we’ve included a set of crossovers in the wet path of the Mod and
Delay/Reverb effects of your Bass POD
XT Live.
4 • 8
From the last Delay/Reverb edit page, spin the S
ELECT knob one click clockwise and
you’ll see them:
Press the Soft Button below MOD and turn the knob down to the minimum setting to
select OFF and disable the Mod effect’s crossover. Or turn the knob clockwise to select
a frequency range from 25Hz to 800Hz. The portion of the signal below the frequency
you choose will not have the Mod effect applied to it. As you’d expect, things work
basically the same way for the Delay/Verb crossover: press the Soft Button below DLY/
VERB and choose OFF or set a frequency.
Since the crossover point only affects the effected part of your sound, changes will be
most noticeable when the mix of the Mod or Delay/Reverb effect is set high.
Page 46

Creating & Storing Sounds • Inside the Edit Menu
Wah and Volume Settings
From the last Reverb edit page, spin the SELECT knob one click clockwise and you’ll
find the wah and volume pedal parameters. The display now looks something like this:
Let’s check out the wah first. You can save the on/off state of the wah with a Channel
Memory. That way when you recall that channel, the wah comes on automatically. In
fact, you can even save the position you want the wah to be set at when it comes on —
by pressing the button below
POSI and twiddling that EFFECT TWEAK knob.
Moving on to the right side of the wah/volume page.... Here you can choose the
position of the volume pedal in your signal flow:
The
MIN setting determines how much volume you’ll hear when the volume pedal is at
PRE (before the amp model), or POST.
its minimum (heel down) setting. Set it to 0% to have silence in the heel down
position.
4 • 9
Page 47

Creating & Storing Sounds • Inside the Edit Menu
Assigning the Pedal and Tweak Knob and Dialing in Tempo
Light up the Edit button and spin the Select knob clockwise to the last page and you’ll
get this page:
4 • 10
Press the Soft Button
under ASSIGN, and you can pick what will be controlled by
18
the built-in pedal as well as the optional Pedal 2. Here are your choices:
Setting Internal Pedal Pedal 2
W/V
12-TWEAK
1-TWEAK
2-VOL
1-W/OFF
2-VOL
Press the Soft Button under
T
WEAK knob (and any pedal assigned to Tweak) will adjust when you are not in the
E
DIT pages.
Wah/Volume Tweak
Tw eak Volume
Wah/Off Volume
TWEAK, and you can choose which parameter the EFFECT
Variax Bass owners, note that one thing you can control with the
Tw eak is the tone of your Variax Bass!
The right side of this display shows you the tempo for this Channel Memory. This
tempo is used to calculate the time/speed of any delay and modulation effects that you
set to follow tempo. You set the tempo by tapping the T
you can press the button beneath
TEMPO and spin the EFFECT TWEAK knob until you
AP button a couple of times. Or
get exactly the tempo that will make your heart beat with passion and joy!
Page 48

Creating & Storing Sounds • Inside the Edit Menu
Variax
The Variax line of basses and guitars is unique, thanks to Line 6 modeling technology
that gives you a whole collection of guitars or basses in one single instrument. (You can
learn more about them at the Line 6 web site.) Connect any Variax to your Bass
POD
XT Live as described on page 3•2, and you can take charge of your entire bass-
amp-effects (or guitar-amp-effects) sound with your feet.
The last Edit page gives you the ability to decide, for each Channel Memory, how the
Variax will respond when you select the channel on the Bass POD
E
DIT button and spin the EFFECT TWEAK until you get to this last page:
XT Live. Light up the
4 • 11
Press the Soft Button
POD
XT Live will not force Variax to change sounds when this Bass PODXT Live
under MODEL, and you can choose DON’T CHANGE (Bass
18
channel is selected) or any of the available models in the Variax — in which case Bass
POD
XT Live will force the Variax to this model when you load up this Bass PODXT
Live channel, allowing you to change your entire guitar-amp-effects sound with via
footswitch!
The other Soft Buttons give you access to the other settings that your Variax lets you
save with your Bass POD
when you select this Bass POD
XT Live Channel Memory to give you a dialed-in guitar sound
XT Live channel.
If you select Variax Models by pressing the left Soft Button here and twiddling the
E
FFECT TWEAK knob, you’ll see that in addition to the Variax’s Custom models, there
are versions of the rest of the Models whose names are preceeded by “F-” and a set
preceeded by “U-”. The “U-” Models are the same ones that you get when you operate
the Variax’s own hardware controls for Model selection. These Models will be
customizable using the Variax Workbench hardware/software package, when
Workbench provides support for that particular Variax. (As of this writing, Workbench
does not support Variax Bass. Please check the Line 6 website for the latest support
info.) The “F-” Models are a “Factory” copy of these same models that are never edited.
The reason they’re there is so that Bass POD
XT Live sound programmers can always
have a known set of Models available in a connected Variax — even one that’s been
Page 49

Creating & Storing Sounds • Inside the Edit Menu
fully customized with Variax Workbench. All Line 6 provided sounds will be
programmed to use these Factory versions of your Variax Models. You should also
restrict yourself to these Models if you want to be able to share your Bass POD
Variax settings with other Variax owners, and get predictable results even if they’ve
customized their Variax. If you’d prefer to use some other Model instead, you can
choose a new one from your Variax while you’re on this Edit page, and you’ll see that
Bass POD
POD
XT Live updates to show this Model’s name. If you then save that Bass
XT Live channel, it will select that Variax Model for you each time.
XT Live +
4 • 12
One other detail: each Bass POD
XT Live channel actually stores a separate set of
parameters for different types of Variax basses or guitars. This way, a programmed sound
can be ready to call up one Model on one type of Variax, while selecting a different
Model (or none at all) if a different type of Variax happens to be connected. For
instance, a classic bass sound might be set to pull up a VINJ Model on a Variax Bass,
while leaving the Model selection of a Variax Acoustic alone. We did it this way so
that Line 6 programmed preset sounds for Bass POD
XT Live would be able to “do the
right thing” regardless of which kind of Variax might be connected. As of this writing,
there are three families of Variax available: the Variax Bass, the Variax 300/500/700
electric family (all guitars in this family use the same Model set), and the Variax
Acoustic.
Page 50

Creating & Storing Sounds • Inside the Edit Menu
D.I. Settings
Spin the SELECT knob fully clockwise to see the edit page with D.I. settings:
The two parameters on the left side of the page let you adjust the D.I. signal for mixing
with the Model signal. The first of these lets you mix some of the D.I. signal into the
Model signal path, so the resulting blend is fed to Bass POD
Press the Soft Button below
to select
OFF and no D.I. signal is added to the Model signal path. Or turn the knob
DI>MDL and turn the knob down to the minimum setting
clockwise to mix some D.I. in. This doesn’t affect the level of D.I. signal output by Bass
POD
XT Live’s D.I. output.
XT Live’s Model output.
4 • 13
The far right parameter on the page,
DI DLY, lets you add a very small amount of delay
to the D.I. signal relative to the Model signal. We give you the ability to delay the D.I.
signal in .1 millisecond steps, which is so small a portion of time that you won’t hear it
in terms of timing. The point of this delay is to throw the D.I. signal out of phase with
the Model signal, because combining the two signals with a shifted phase relationship
can give you some great sounds that you can’t get from the normally phase-sync’d
Model and D.I. signals output by Bass POD
signal so that you’ll hear it at Bass POD
DI>MDL can feed into the Model signal path.
XT Live. This delay is applied to the D.I.
XT Live’s Model output, and the D.I. signal that
Page 51

Creating & Storing Sounds • Saving Yourself
Saving Yourself
Bass PODXT Live lets you save as many as 64 tones that you create as described earlier
in this chapter. And even though we ship it to you chock full of some of our favorites,
go ahead and save over whatever you want. We recommend spending some time with
each of the factory sounds so you’ll know which you want to keep, and which you’ll
want to save over. And don’t worry, because we’ll soon show you how to recall that
favorite factory sound you just saved over and simply have to get back.
4 • 14
Saving a Channel Memory
One of the simplest things to do with Bass PODXT Live is call up a Channel Memory,
make a few tweaks, and save that Channel without changing its name. To simply save a
Channel you’ve changed, press S
Of course, you might want to stick your sound somewhere else, or at least change the
name so you know which one it is. Bass POD
To save your edit to a new location - Make your edits, then press S
calls up a screen that looks something like this:
Now, press the button under the display that reads
then use the E
S
AVE again will confirm your decision, and save your sound to that Channel
FFECT TWEAK knob to pick a different Channel Memory. Pressing
Memory, replacing what was there before.
Give your tone a name - Make your edits, then press S
display like the one above. Now, use the
under the letters you want to change. Press the button under
character) and then use E
you’re done, press S
AVE again to complete the job. See, that wasn’t so bad.
AVE, then SAVE again. That’s it.
XT Live lets you do that just as easily.
AVE. This
DEST (short for destination) and
AVE. Again, you’ll see a
CURSOR < and > buttons to move the cursor
CHAR (short for
FFECT TWEAK to change the selected character. When
Page 52

Creating & Storing Sounds • Saving Yourself
Custom Saving Amp Models
Using this powerful feature, you can pack your Bass PODXT Live with all the
special amp-tweaking genius that only you possess. This brilliance will then be
available instantly whenever you select a new Amp Model, loading your
customized settings of the amp controls, including your chosen Cab Model, Mic
selection, EQ settting and your personal tweak of the ‘room.’ This way, when you
load the Sub Dub model, you’ll get your personal Sub Dub, with all the controls
set for your very own version. Here’s how it works:
Choose an Amp Model, change the cab, tweak the room, and even use a different
microphone. Press the S
AVE button, then turn the SELECT knob one click to the right.
The display will looks like this:
You have entered the land of Custom Save. Now, if you want your current settings to
be recalled with this Amp Model, simply press S
Bass POD
when you turn the A
XT Live saves the following controls with an Amp Model, and loads them
MP MODELS knob:
AVE again.
Controls you can customize
Amp Model
Cabinet Model
Microphone Model and Room amount
Drive, Bass, Lo Mid, Hi Mid and Treble controls
Chan Vol
EQ settings
4 • 15
Page 53

Creating & Storing Sounds • Saving Yourself
Single Channel Recall
Imagine this: you’re in the middle of massive inspiration, moving at the speed of light,
and before you know it... you just saved an edit over one of your favorite factory presets.
Perish the thought! Fortunately, we’ve got you covered. To recall that favorite preset:
4 • 16
Press S
AVE, and then use the SELECT knob to get to the page that looks like this:
You can now press SAVE to recall the factory version of the chosen Channel Memory,
or turn the E
retrieve. Press S
FFECT TWEAK knob to choose another Channel Memory you’d like to
AVE again, and you’ve safely recovered that lost gem!
Complete Factory Recall
If for any reason, or just for the sheer mad joy of it, you decide you need to reset your
Bass POD
Press S
Now ask yourself, “Do I really want to do this?” Now, ask it again. How about now? If
this is truly your heart’s desire, then press S
your goal. That’ll wipe your Bass POD
when it left the Line 6 factory.
XT Live’s entire memory to its factory-programmed state, then boldly do this:
AVE once, then use the SELECT knob to scroll to the page that looks like this:
AVE again and you’ll have accomplished
XT Live’s memory and reset it just like it was
Warning: This will erase ALL the channels, as well as the custom amp and
effect settings you might have created. Everything. So be sure and ask yourself
again, “Do I really want to do this?” If the answer is yes, go on ahead with your bad self.
Page 54

Creating & Storing Sounds • Saving Yourself
MIDI Dumps
If you want to transfer one or more tones directly from one Bass PODXT Live to
another Bass POD
recorder, workstation, computer or sequencer, read on. For communication to
MIDI hardware, you’ll need to use a standard MIDI cable to connect the MIDI
Out of your POD
exchanging MIDI with a computer, you also have the option of installing the Bass
POD
XT Live USB Driver software (a free download using Line 6 Monkey,
available from www.line6.com/monkey) and have your Bass POD
exchange MIDI messages with your computer over a USB cable.
You can then transfer:
•All Channels
•The Current Channel
•The Effect Setups
•The Amp Setups (including your customizations)
Transferring All Channel Memories - This feature will let you send all of your
Bass POD
XT Live’s Channel Memories out via MIDI for a complete back-up of the
64 Channel Memories:
XT Live, or between Bass PODXT Live and a MIDI data
XT Live to the MIDI In of the receiving device. If you’re
XT Live
4 • 17
Press S
Press the button under
AVE once, and use the SELECT knob to scroll down to this page:
SELECT. Turn the EFFECT TWEAK knob to the left
(counterclockwise) until the display reads:
Press S
its MIDI jack. If another Bass POD
clone of your own Bass POD
AVE again and your Bass PODXT Live’s 64 Channel Memories are sent out of
XT Live is connected, this data makes it a virtual
XT Live channels! Who knew cloning was so easy?
Page 55

Creating & Storing Sounds • Saving Yourself
Transferring Only Some Channels - To transfer only one or more individual
Channel Memories, Effects Setups or Amp Models from one Bass POD
another, do this:
XT Live to
4 • 18
Press S
AVE once, and turn the SELECT knob to show the page that looks like this:
Turn the E
FFECT TWEAK knob to tell Bass PODXT Live what to transfer:
Any Channel Memory:
All Channel Memories:
All Amp Models:
All Effects Setups:
Now, if you press S
AVE again, the MIDI dump you’ve selected will be transmitted out
the MIDI jack, into the brain of a receiving Bass POD
or other MIDI device for backup.
XT Live, or into your computer
Page 56

Modeled Amps & Cabs •
Which Amps and Cabs Are Modeled?
ODELED
M
A
MPS
& C
ABS
Which Amps and Cabs Are Modeled?
General Notes About the Models
As you may have guessed, we’re tone fanatics here at Line 6. Once we’ve set our sights
on creating a software emulation of a particular kind of amp, we will (and have) scour
the globe in search of just the right specimen—that one, very particular amplifier that
has the magic. We are also intensely mindful of the fact that, although amp model
names may stay the same over the years, the circuit designs sometimes change radically.
Amps from ’57, ’62, ’65, ’67, ’75, and 2001 may all bear the same model name, yet
sometimes have totally different sound and response, and quite often a different look as
well. And as we all know, even two amps with the same circuit design, from the same
era, can sound radically different, just on the basis of variance in component tolerances,
among other things. Plus, there’s the fact that every amp has its own special way of
settling in over the years. And, just like people, some of them only get better with age.
That’s exactly why we went to so much trouble to find the very best examples we could
of every amp that we wanted to model for Bass POD
the software amp models that are emulations of other amplifiers, we’ve included photos
here of the actual, individual amps that we lovingly selected, studied and measured—
so that you’ll know
When you turn the
can then mix’n’ match different cabs with the amp by pressing the
and choosing any Cab model you like with the
you how you can customize Bass PODXT Live to call up your favorite Amp/Cab
combinations.
exactly
which amp we’re talking about.
A
MP MODELS
knob, you select an Amp/Cab combination. You
XT
’s. And it’s why, when describing
E
FFECT TWEAK
CAB/A.I.R.
knob.
Chapter 4
button
tells
5 •
1
Let’s take a tour of the amp models that live inside your Bass POD
original equipment that helped to make them possible...
XT
Live, and the
Page 57

Modeled Amps & Cabs •
Amp 360:
Based on* an Acoustic 360
5 •
Amp 360:
2
Jaguar:
Based on* an Acoustic 360
This amp was modeled after an Acoustic 360, as used by
Larry Graham, John Paul Jones, and Jaco Pastorius. We
modeled an early 70’s Acoustic 360, featuring a separate
preamp “head,” plus a powered cabinet with a single 18inch speaker in a folded horn. The 360 with the built in
fuzz and tuner was the choice was John Paul Jones’ choice
for Led Zeppelin’s Low end—he can be seen playing
through two in the film, “The Song Remains the Same.”
But Jaco’s work with Weather Report really showed us what
a versatile amp the 360 really was. When the band left him
alone on stage for his bass solo, he really wrenched
everything he could out of his gear which included two
Acoustic 360’s, a wah pedal, a rackmount “blue” MXR
®
digital delay and his trusty Jazz Bass.® Towards the end of
his solo he would stomp on the wah pedal, turn on the fuzz
and do a great rendition of the “Star Spangled Banner.” He got everything out of
that amp, from mellow jazz to speaker shredding feedback, and thanks to your Bass
PODXT Live’s Amp 360 model, now it’s your turn!
Based on* an Aguilar® DB750
This monster is a relatively new addition to the
high-end bassist’s tone menagerie. And by high-end,
we don’t mean “turn up the treble,” we mean highend as in Rolls Royce
®
, Ferrari® or AC Cobra!
These hand-built babies are super-clean and super-warm and especially cool for players
who have super-discriminating ears and need to hear it all…You know, those guys who
like to hear the ridges of their calloused fingerprints scraping across the strings!
Particularly popular with high-end session bassists in New York and LA, the Aguilar
®
DB750 can also be heard doing serious bass duty with Chris Chaney as he powers the
likes of Jane’s Addiction, Alanis Morrissette and Methods of Mayhem.
*All product names are trademarks of their respective owners, which are in no way associated or
affiliated with Line 6. These product names, descriptions and images are provided for the sole purpose
of identifying the specific products that were studied during Line 6’s sound model development. MXR
is a registered trademark of Applied Research and Technology, Inc. JAZZ BASS is a registered
trademark of Fender Musical Instrument Corporation. AGUILAR is a registered trademark of David
Boonshoft. ROLLS-ROYCE is a registered trademark of Rolls-Royce PLC. FERRARI is a registered
trademark of Ferrari S.P.A.
Page 58

Modeled Amps & Cabs •
Alchemist:
Based on* an Alembic F-2B
Alchemist:
Based on* an Alembic F-2B
Back in the mid and late ‘60’s, the San Francisco
Bay Area was quite a cultural hot spot. And as the
“San Francisco Sound” became the soundtrack for
the Summer of Love, many local San Francisco-area
musicians were thrust into the international
spotlight to find themselves leading the Hippie “Peace and Love” charge. Behind the
scenes there were more than underground chemists hard at work making things
magical! Electronics expert Jim Furman (of Furman Sound) was right there in the
middle of that cultural crucible, cooking up gizmos for the Jefferson Airplane and the
Grateful Dead. If you take a close look at archival photographs of the Dead, the
Airplane and other Bay Area bands of the time, quite often you see bassists and
guitarists playing through Fender
®
Showman® and Dual Showman® amps chained in
front of audiophile Macintosh power amps. The Alembic F-2B was Mr. Furman’s wildly
successful attempt to better the front end of that sweet signal chain by creating a
cleaner, sweeter version of the Showman
your Bass POD
XT
Live, and you’ll be able to jump between various tones from the
®
sound. So turn to the Alchemist model in
Summer of Love faster than a hippie can change his tie-dye t-shirt! Oh, and don’t
forget— Alembic F-2B’s have often found their way into Stanley Clarke’s rigs, and
you’ll also find them in frequent use in many a world-class studio’s rack, ready to
guarantee bassists, engineers and record producers everywhere world-class tone.
5 •
3
*All product names are trademarks of their respective owners, which are in no way associated or
affiliated with Line 6. These product names, descriptions and images are provided for the sole purpose
of identifying the specific products that were studied during Line 6’s sound model development.
FENDER, SHOWMAN, and DUAL SHOWMAN are registered trademarks of Fender Musical
Instrument Corporation.
Page 59

Modeled Amps & Cabs •
Rock Classic:
Based on* an Ampeg® SVT
®
5 •
Rock Classic:
4
The sonic combination of this head and cab is beyond big, but you had to pray
that your bandmates would help you move it! Thanks to Bass POD
can now get big classic rock bass tone without frequent visits to the chiropractor.
Flip Top:
Ampeg® B-15. We think you’ll agree that the sound of his P Bass® through that
Based on* an Ampeg® SVT
For 30 years now, we’ve heard the tone and felt the power of the
mighty Ampeg
®
SVT.® This workhorse has appeared on
innumerable recordings and arena stages worldwide – there is no
equal to the original SVT® and its 300 watts of pure tube magic.
(FYI – replacing the tubes in a SVT
more than you paid for your Bass POD
in July 1969, the SVT® set the tone, punch and arena-rattling
standard for all future big gun bass rigs. Its users have included
everyone from The Rolling Stones to Van Halen, and pretty
much every “rock” bass player in between. For your Bass POD
Live, we selected a 1974 Ampeg
also given you a 70’s SVT 8x10 speaker cabinet to pair it with.
Based on* an Ampeg® B-15
This is modeled after a 60’s Ampeg
one of the most popular studio bass amps of all time. It’s
tuned and front-ported, has a closed back, is 25 watts with
a single 15-inch speaker, and set a new standard for
cabinet and speaker efficiency, tone and convenience in
bass amplification. If we had to sum up the amp’s sound up
in one sentence, we would simply say: Listen to James
Jamerson’s bass playing on the Motown®/Tamala records
of the 1960’s—The Supremes, The Four Tops, The
Temptations, Marvin Gaye, Stevie Wonder, and many
more. Jamerson played bass on more Motown hits than
anyone else, and his choice for amplification was the
®
®
nowadays would cost you
Live!) First introduced
XT
XT
®
SVT® to model, and we’ve
Live, you
XT
®
B-15 Portaflex® –
*All product names are trademarks of their respective owners, which are in no way associated or
affiliated with Line 6. These product names, descriptions and images are provided for the sole purpose
of identifying the specific products that were studied during Line 6’s sound model development.
AMPEG, SVT, and PORTAFLX are registered trademarks of St. Louis Music, Inc. MOTOWN is a
registered trademark of UMG Recordings, Inc. P BASS is a registered trademark of Fender Musical
Instruments Corporation.
Page 60

Modeled Amps & Cabs •
Adam and Eve:
Based on* an Eden Traveller WT-300
amp on those records is as fresh and exciting today as it was 35 years ago. And if
he’s not enough to convince you, how about “Duck” Dunn? Don’t get us started...
Adam and Eve:
Based on* an Eden Traveller WT-300
After David Eden made cabs for SWR® for 3 or 4 years, he
went into the business of making his own bass amp and
cabinet line. Jim Demeter designed the electronics of the
first Eden amps, and they were quickly adopted by a
veritable who’s who of modern bass society. The inspiration
for Bass POD
XT
Live’s Adam & Eve model was the WT-300,
one of Eden’s latter offerings which produces a clean, clear
and rich tone.
Tweed B-Man:
Based on* a Fender® Bassman® Combo
The classic ’58 Fender® Bassman® 4x10 combo was the amp
that started it all—instant rock and roll tone. Originally a bass
guitar amp, the Bassman
®
also became a Blues staple for 6string guitarists. Try using it with the Drive control maxed out
for a real sweet bass overdrive. And if you feel you could use a
little more low end, select one of the bigger cabinet models like
the 8x10. It has the fat bottom end you'd expect from a bass
amp, but also has the Fender
when Jim Marshall built his first amps with Ken Bran they
were heavily influenced by the early Bassman.
interesting things about the Bassman
®
is just how interactive the Middle and Treble
®
twang on the top. Incidentally,
®
controls are. The Middle control isn’t a bandpass, as in most tone control setups.
Instead, it’s almost like a second treble control. The two are additive, so if you’re
Live’s Lo Mid knob higher than halfway up with this model,
running Bass POD
XT
One of the
5 •
5
* All product names are trademarks of their respective owners, which are in no way associated or
affiliated with Line 6. These product names, descriptions and images are provided for the sole purpose
of identifying the specific products that were studied during Line 6’s sound model development. SWR,
FENDER and BASSMAN are registered trademarks of Fender Musical Instruments Corporation.
Page 61

Modeled Amps & Cabs •
you’ll find that the Hi Mid control might give you more bright than you really want.
On the other hand, when you turn the Lo Mid knob down, you’ll probably want to
boost the Hi Mid. For a bass tone of doom, try the afore-mentioned maxed-out Drive
setting and dredge up the heaviest licks you know!
Silverface Bass:
Based on* a Fender® Bassman® Head
5 •
Silverface Bass:
6
reminds us of the theme music from Barney Miller, and all of those days practicing
with the high-school jazz ensemble. Try playing a little of the Peter Gunn
Theme....
Based on* a Fender® Bassman® Head
Modeled after a 1967 Fender
®
Bassman.® By ’68, when
the Beatles went in to record The White Album, they
had pretty much done away with their Vox® amps in
favor of the new “silverface” Fender
George each played through a Twin Reverb,
through the 2x15 “tall cab” Bassman.
®
line. John and
®
This amp
remained his favorite through the end of the Beatles’
recording career, and can be seen in the
Revolution
(the cab is laying on its side), and all over the
movie – including the infamous “rooftop” concert which
closes the film. Paul went on to use the amp for his first
solo recordings, and live during the early Wings period.
We’ve paired this Bassman
®
head with a 2x15 closed
back cab loaded with JBL®’s. The sound of this cab also
®
and Paul
video
Let it be
*All product names are trademarks of their respective owners, which are in no way associated or
affiliated with Line 6. These product names, descriptions and images are provided for the sole purpose
of identifying the specific products that were studied during Line 6’s sound model development.
FENDER, BASSMAN, TWIN REVERB, and DUAL SHOWMAN are registered trademarks of
Fender Musical Instruments Corporation. VOX is a registered trademark of Korg Europe Limited.
Page 62

Modeled Amps & Cabs • Double Show: Based on* a Fender® Dual Showman®
Double Show: Based on* a Fender
®
Dual Showman
®
Have you ever wanted a Fender® Bassman® that
wouldn’t distort once you turned it up loud enough
to hear yourself alongside any self-respecting
drummer thumping on any decent drum set? Like a
Genie in a bottle, the Fender
answers your wish. Many Bassman
®
Dual Showman®
®
users, most
notably Phil Lesh, have used a Dual Showman at one time or another for that extra
“whoomph” necessary to be heard. Voiced slightly brighter than the Bassman,
Dual Showman
®
paired with a 2x15 cabinet was the rig of choice for many a classic
Rock and Roller. And as all types of bands got bigger and louder, the Dual Showman
became quite popular with Funk and R+B players too.
Eighties: Based on* a Gallien-Krueger 800RB
What would any collection of bass amps be
without a Gallien-Krueger 800RB, whose great
tone was modeled for your Bass POD
Eighties amp model? After all, this solid state
amp helped define what new bass amps sounded
like for the better part of that decade. Geddy Lee had one. Will Lee used one on
Late Night With David Letterman. And bands like Def Leppard powered through a
decade of pop metal with the 800RB. The GK 800RB produces a very scooped
sound, and doesn’t really distort. Try pairing this amp with another legend of the
Eighties, the Hartke 410 cabinet. This rig is known for producing what we call the
“mid 80’s metal bass” tone. It’s the perfect choice when you’re ready for a little
Pyromania....
XT Live’s
®
the
®
5 • 7
*All product names are trademarks of their respective owners, which are in no way associated or
affiliated with Line 6. These product names, descriptions and images are provided for the sole purpose
of identifying the specific products that were studied during Line 6’s sound model development.
FENDER, BASSMAN, and DUAL SHOWMAN are registered trademarks of Fender Musical
Instruments Corporation. JBL is a registered trademark of Harman International Industries, Inc.
Page 63

Modeled Amps & Cabs • Hiway 100: Based on* a Hiwatt® DR-103
5 • 8
Hiway 100: Based on* a Hiwatt
®
DR-103
Long before instrument amp designers copped to the
fact that you need a ton of wattage for “real” bass, we
bassists were stuck with the unenviable task of
sorting through a very limited selection of
underpowered bass amps in an effort to try to find
one that could at least be heard. Sometimes the
search would lead us to a powerfully clean guitar
amp and it would find its way into a bass rig and do
the job just fine. Imagine that day when the late,
great John Entwistle walked across the stage in front
of Moonie’s drums to inquire, “Pete, would you mind
if I tried your lovely Hiwatt
®
for a bit? I can’t hear
myself over the racket you two make…”
* All product names are trademarks of their respective owners, which are in no way associated or
affiliated with Line 6. These product names, descriptions and images are provided for the sole purpose
of identifying the specific products that were studied during Line 6’s sound model development.
HIWATT is a registered trademark of Fernandes Company Ltd.
Page 64

Modeled Amps & Cabs • Hiway 200: Based on* a Hiwatt® 200 DR
Hiway 200: Based on* a Hiwatt
®
200 DR
Imagine a brighter SVT® with a little more attack and
you’ve got an accurate aural image of this 200-watt, 75
pound tone monster. And while you’re listening to that
lovely sound inside your head, think back to that era in
the late ‘60’s when Rock and Roll morphed into Hard
Rock. Back then, as music got louder and louder, and
hair got longer and longer, this was the bass amp of
choice for many a low-ender across the Atlantic. Just as
we Americans fondly remember our silver-faced
®
SVT
’s, our British cousins happily recall these
Hiwatts
®
! Rumor has it that Black Sabbath’s Geezer
Butler was quite fond of his and Glen Cornick of Jethro
Tull used a 200 DR quite a lot in his band’s heyday. To
this day, many an American rocker, particularly those
heavily influenced by all things English, favor the
Hiwatt
®
200DR, too. It’s an “amp of choice” for Cheap Trick’s Tom Petersson, and
crucial to the distinctive growl roaring from his 8 and 12 string basses. So, select Hiwatt
200 DR on your Bass POD
XT Live, grab your aqualung and take the heavy, deep end
plunge, British style!
5 • 9
* All product names are trademarks of their respective owners, which are in no way associated or
affiliated with Line 6. These product names, descriptions and images are provided for the sole purpose
of identifying the specific products that were studied during Line 6’s sound model development.
HIWATT is a registered trademark of Fernandes Company Ltd.
Page 65

Modeled Amps & Cabs • British Major: Based on* a Marshall® Major
5 • 10
British Major: Based on* a Marshall
®
Major
For this model, we studied our 1969 Marshall
Major. While doing the initial research, we
discovered our amp had the wrong tubes in it,
and that sent us on a quest to find some NOS
(new old stock) vintage KT-88s. We called
experts across the country looking for “new”
thirty year old tubes. Several months and a
king’s ransom later, our search paid off, and we
started over with an original set of vintage
Mullards in the amp. What an incredible
difference the “right” tubes in the “right” amp
can make! We “jumped” the channel 1 input to
the channel 2 input, thus combining the high
and low channels (this was a common practice
for bassists and guitarists alike.) Wow! Stand
back and bow down to the royalty of British
Bass Tone. If this sound doesn’t cause your
neighbors to come looking for Jack Bruce, nothing will. Higher drive settings will
get you those warm, natural overdrive tones heard on Cream records and many
others from that era. The cabinet we’ve paired with the Marshall
Marshall
®
4x15 cab. The 4x15 sound is unique and awesome, and the
®
Major is a ’76
combination of the Major and this cab is somewhat darker that the Brit Bass
model that’s coming up next....
®
* All product names are trademarks of their respective owners, which are in no way associated or
affiliated with Line 6. These product names, descriptions and images are provided for the sole purpose
of identifying the specific products that were studied during Line 6’s sound model development.
MARSHALL is a registered trademark of Marshall Amplification PLC.
Page 66

Modeled Amps & Cabs • British Bass: Based on* a Marshall® Super Plexi
British Bass: Based on* a Marshall
®
Super Plexi
This is modeled after a 1968 Marshall
Bass “plexi” with vintage EL-34 tubes. In
general, the Super Bass is brighter than the
Major, and sounds a little “fuzzier” with higher
Drive settings. The Marshall
®
of this era
powered the signature backline for most of the
British bands, so you would have seen and
heard them with John Entwistle (The Who),
Andy Fraser (Free), Noel Redding (Jimi
Hendrix Experience), Ron Wood (Jeff Beck
Group), Jack Bruce (Cream), Tim Bogert
(Vanilla Fudge), and Roger Glover (Deep
Purple). We’ve matched this amp model up
with a cabinet model crafted from our studies
of the 1967 Marshall
watt Celestion
®
®
4x12 with pre-Rola® 20
greenbacks. This speaker
cabinet occupies an especially respected place
in our studio. The ragged vinyl on this vintage
treasure proves it has earned its way on many a road gig, and its signature
basketweave grille, gets every bassist and guitarist that passes through our shop
stopping to plug in and learn what we have learned: this is the best cab we’ve ever
heard. Warm and woody, this cabinet has every player in the building bowing
down to the gods of great tone. And now, of course, thanks to the wonders of
modern technology, your Bass POD
XT Live brings you cab tone modeled from this
same, truly remarkable piece of tone history.
®
Super
5 • 11
* All product names are trademarks of their respective owners, which are in no way associated or
affiliated with Line 6. These product names, descriptions and images are provided for the sole purpose
of identifying the specific products that were studied during Line 6’s sound model development.
MARSHALL is a registered trademark of Marshall Amplification PLC. ROLA is a registered
trademark of Recoton Audio Corporation. CELESTION is a registered trademark of KH Technology
Corporation.
Page 67

Modeled Amps & Cabs • California: Based on* a Mesa/Boogie® Bass 400+
5 • 12
California: Based on* a Mesa/Boogie
®
Bass 400+
Introduced in the late Eighties, the Bass 400+
features 500 watts of Class A/B operation, with
twelve(!) 5881 Output tubes and four12AX7
Preamp tubes. The Bass 400+ has been the
mainstay of Boogie’s bass line for over a decade.
Both Michael Anthony (Van Halen) and Flea
(Red Hot Chili Peppers) have toured with the
Bass 400+, which produces a warm, dynamic, and earthy tone that’s well suited for
many playing styles.
Jazz Tone: Based on* a Polytone Minibrute
®
With this model, you now have your very own
place to go for the classic tones modeled after the
Polytone Mini-Brute.
®
This amp is known as the
combo that knows every wedding standard and
lounge hit from the last 40 years. The original amp
houses a single 15-inch speaker that can best be
described as intimate and subdued. Plug in here
when it’s time for your more introspective mood
indigo moments.
*All product names are trademarks of their respective owners, which are in no way associated or
affiliated with Line 6. These product names, descriptions and images are provided for the sole purpose
of identifying the specific products that were studied during Line 6’s sound model development.
MESA/BOOGIE is a registered trademark of Mesa/Boogie, Limited. MINI-BRUTE is a registered
trademark of Pamco Enterprises, Inc.
Page 68

Modeled Amps & Cabs • Stadium: Based on* a Sunn® Coliseum
Stadium: Based on* a Sunn
®
Coliseum
This model is based on the Sunn
amplifier that spawned the explosion of power line-ups
throughout the 60’s and 70’s. The amplifier used by Jimi
Hendrix and Noel Redding, by Pete Townsend and John
Entwistle, by Tony Iommi and Geezer Butler, by... well...
take a look at the inside cover of your Woodstock album,
and you’ll get an idea of the impact that Sunn
had in revolutionizing early rock music. Oddly, this amp
was developed by Conrad Sundholm for his brother Norm,
who was the bass player for the Kingsmen of “Louie Louie”
fame. Pair the Stadium model with our model of Sunn
unique cab that features one front mounted 12-inch
speaker and one upward-angled 18-inch speaker and you’ll
experience the Mojo first-hand!
Studio Tone: Based on* a SWR
®
Coliseum 300—the
®
amplifiers
®
’s
®
SM-500
A beefier, redefined version of the SM-400, this is
one of the latest of the “contemporary classics” to
come out of SWR.
®
As one of the most, if not the
most recognizable and popular of all contemporary
bass amps, the SM-500 delivers a full range of tone
and is especially known for its very defined high
end. This makes the SM-500 a favorite amongst
“slap and pop” players in all genres. These amps are
so popular, they’re used on concert stages and in
studios everywhere. Led Zeppelin alumnus John
Paul Jones is one of their current users.
5 • 13
* All product names are trademarks of their respective owners, which are in no way associated or
affiliated with Line 6. These product names, descriptions and images are provided for the sole purpose
of identifying the specific products that were studied during Line 6’s sound model development.
SUNN and SWR are registered trademarks of Fender Musical Instruments Corporation.
Page 69

Modeled Amps & Cabs • Motor City: Based on* a Versatone Pan-O-Flex
Motor City: Based on* a Versatone Pan-O-Flex
While researching the legends of great bass gear,
we discovered a true lost gem: the Versatone PanO-Flex! This single 12-inch combo was designed
by Bob Hall in the late 60’s and was a hit among
the LA Studio scene – in particular, at RCA
Studios. Carol Kaye used a Versatone amplifier
on countless sessions, and Jack Casady still uses
one with his SWR
combo with some cool internal baffling that
makes it sound much larger than it actually is.
5 • 14
sweet sustain. Turn to the Motor City model, and this range of tone is available
via the Drive knob of your Bass POD
delivers: this model may well become the secret of your sound. Its Bass and Treble
knobs give you the classic Pan-O-Flex tone, and you can set its Low Mid and Hi
Mid knobs to their 12 o’clock positions to keep things traditional. Then, try
creating your own variation on the classic Pan-O-Flex sound by turning the Hi
and Low Middle knobs up or down for post-Model boost/cut.
Turn it up to about 1/3, and it has a warm tone.
Turn it up a bit higher, and it will distort with a
XT Live. We think you’ll agree that it really
®
amps. It’s a sealed back
* All product names are trademarks of their respective owners, which are in no way associated or
affiliated with Line 6. These product names, descriptions and images are provided for the sole purpose
of identifying the specific products that were studied during Line 6’s sound model development.
SUNN and SWR are registered trademarks of Fender Musical Instruments Corporation.
Page 70

Modeled Amps & Cabs • Brit Class A100: Based on* a Vox® AC100
Brit Class A100: Based on* a Vox
The Brit Class A100 model in your Bass POD
modeled after a Vox
®
AC100
®
AC-100, the rig Paul McCartney
XT Live is
began using in 1965 when he had outgrown his Vox
60. This rig was used for recording and touring thru 1965
and can be seen in countless pictures and videos of live
Beatles performances such as the Shea Stadium concert,
the Hollywood Bowl concert and, of course, The Ed
Sullivan Show in 1965. It’s characterized by its low-down
lows and sweet high end. Now, those of you who have had
the chance to get intimate with a Vox
®
AC-100 may
know that, true to Vox form, it’s got its quirks. One of the
more obvious ones is that the Bass knob works backwards
because it’s technically a “Bass Cut” knob. While we
strive for authenticity when creating out models, we
decided that this time it was appropriate to opt for ease of
use by setting this knob up so that you get more bass as
you turn up, and less bass as you turn down. You get the
same response curve and frequency control as the AC-100’s knob would have
given you, but now you don’t have to learn how to work things backwards. And
thus, balance and harmony have been maintained in the Line 6 product design
universe....
®
T-
5 • 15
* All product names are trademarks of their respective owners, which are in no way associated or
affiliated with Line 6. These product names, descriptions and images are provided for the sole purpose
of identifying the specific products that were studied during Line 6’s sound model development. VOX
is a registered trademark of Korg Europe Limited.
Page 71

Modeled Amps & Cabs • Line 6’s Original Models
Line 6’s Original Models
Long ago, in a land that time forgot, electric basses existed and bass amps didn’t! That’s
right—bass players had to plug into anything they could find to amplify that newfangled electric bass. Couple that knowledge with the gigantic model library at Line 6
and the intrepid spirit of musicians in general, and pretty soon you start trying crazy
stuff. Like plugging into guitar amps to see what basses sound like through them, then
doing some high tech tweaking to make that marriage really work. After all, many
successful bass amp designs originally started as guitar amps, and visa versa. Unfettered
by the rules of physics and good sense, this led us to stich what were originally guitar
amp models and other tonal oddments into some brand new bone-shakin’ bass tone
makers that await you in the Line 6 section of the model lineup....
5 • 16
L6 Classic Jazz
Join us, for a moment, in contemplation of the Roland® JC120. If you think about it,
it’s easy to follow our logic – it’s an amp that has a great reputation for cleanliness and
accuracy. Now aren’t those two tonal characteristics often sought after by bassists in
every genre? Grab a bass, plus in, and behold—it definitely works for us! Push down
that CAB/A.I.R. button and try pairing the L6 Classic Jazz Model with the 8 x 10
®
SVT
cabinet model. You’ll be glad you did.
L6 Brit Invader
Since Class A amps overdrive differently than their Class B cousins, we just had to jack
our trusty basses into our favorite Vox
ultra-rare blue back speakers (and fear of the repercussions of blowing one of ‘em!) we
set our beloved Vox
®
on top of a Marshall® Major 4x15 cabinet. We happily found this
unlikely combination produced a very furry tone that readily responds to any tonal
adjustments you may make on your bass or your Bass POD
tweaking we went from a top end that could cut through anything to a pleasurable
vintage “woofyness” that would make Joe Meek proud.
*All product names are trademarks of their respective owners, which are in no way associated or
affiliated with Line 6. These product names, descriptions and images are provided for the sole purpose
of identifying the specific products that were studied during Line 6’s sound model development.
ROLAND is a registered trademark of Roland Corporation. SVT is a registered trademark of St. Louis
Music, Inc. VOX is a registered trademark of Korg Europe Limited.
®
AC 30 Top Boost. Out of respect for those
XT Live. And with a little
Page 72

Modeled Amps & Cabs • Line 6’s Original Models
L6 Super Thor
If you were in a roomful of vintage gear, an open back, little ol’ combo amp is probably
the last thing you’d choose to play your bass through, right? Well, its one of the first we
plugged into, but we like doing the unexpected. Anyway, this tough little cookie we
call the Super Thor is based on the Supro Thunderbolt, the bass-minded love child
Line 6 and the infamous Supro S6616 of early Led Zeppelin fame. Our very reliable
sources also tell us that Jimi Hendrix occasionally played through a Supro Thunderbolt.
We figured that if that little amp, mic’d up right in a studio, could churn out big guitar
tones for the big Jim’s, maybe a bass-loving cousin could do something similarly huge
for us. After you’ve dialed in a tone to your liking, notice that the harder you hit your
strings, the more fuzz on the peach! We’ve also found that Super Thor adds a very warm
character to Bass POD
XT Live’s Synth/Filter models.
L6 Frankenstein
Are your dreams filled with warm and fuzzy bass tones with lots of sustain? If so, the
sound designers here at Line 6 are in the business of making your dreams come true.
We’re not sure what they used to cook up the JTS 400-S, but based on the secret
apocryphal codex created by those afore-mentioned sound designers, our guess is that
this is one of their Marshall
watt Plexi grafted on to the power section of a Dual Showman
that? Whatever this is, our tone wizards (who, by the way, are seen occasionally inside
the Line 6 Tone Lab wearing capes and funny hats) concocted it with sweet, fuzzy bass
in mind. The first time we plugged in to this dream machine, we, as Captain Beefheart
used to be fond of saying, “…hit the lunar note and let it float….” Man, we’re still
happy we did.
®
/Fender® Frankensteins. Could it be the front end of a 100
®
? Or something like
5 • 17
L6 Ebony Lux
This original creation was inspired by a Fender® black face Deluxe Reverb.® Although
not commonly used for bass, plugging a bass into this Holy Grail of guitar tone yields a
most pleasurable experience to say the least. Imagine a clear top end, transparent
bottom and a nice mid scoop that makes your bass wonderfully unobtrusive. This amp
model makes it easy to find the proper space for your bass when accompanying those
* All product names are trademarks of their respective owners, which are in no way associated or
affiliated with Line 6. These product names, descriptions and images are provided for the sole purpose
of identifying the specific products that were studied during Line 6’s sound model development.
MARSHALL is a registered trademark of Marshall Amplification PLC. FENDER, DUAL
SHOWMAN, DELUXE REVErb, and TWIN REVERB are registered trademarks of Fender Musical
Instruments Corporation.
Page 73

Modeled Amps & Cabs • Line 6’s Original Models
finicky singer/songwriters who don’t want anything getting in the way of their precious
guitar or dainty piano!
L6 Doppelganger
Loosely based on a Fender Twin, this original Line 6 creation gives up the low end with
a nice, friendly rattle in the high mid’s. To enhance the Doppelganger and its unique
sonic character, choose a speaker cabinet of the open back variety.
Sub Dub
This fabulous tone was brought to us by Justin Meldal-Johnsen currently in his own
5 • 18
band “Ima Robot”, who’s also played bass with Beck, Tori Amos, Air, Macy Gray and
other luminaries. When we were creating the original Bass POD, he brought his rack
full of esoteric gear into the studio for us to poke and prod and model. The resulting
Amp Model was included in the original, pre-XT Bass POD, and has become a
particular favorite of the Bass POD faithful. It’s perfect for Hip Hop, Electronica,
Trance, Eurodance, Rave and all of your Alternative tone needs. Lower Drive settings
produce virtually no clipping (distortion), while higher Drive settings will produce
massive square wave distortion (thus giving your synth player tone envy). Dig Justin’s
own description...
“Dark and oh so deep, this is the sound you pull out when it’s time to go lower than
low... to hit deeper than the Moog line, to rock harder than the 808 kick. The sound
of this model is a particular, well-tuned, fundamental tone which gives you a lot of
serious pure “note” without the muddiness you get when you try and make your amp
do it. For myself, the sound creates a similar effect to standing in front of a wellexecuted bass rig with a few 18-inch speakers involved to handle the low parts of the
sound spectrum (which is what I do playing live). Inspiration for this sound for me
came from everyone from Massive Attack to Dr. Dre, DeAngelo to Aphex Twin, King
Tubby to Future Sound of London, and all other champions of the ultra-low.”
Thanks Justin – we couldn’t have said it any better!
Tube Preamp
The thinking went like this: ‘Once people get this Bass PODXT Live thing, it’s gonna
be so great that they’re gonna wish they could use it for everything—warming up
keyboards, crunching up drums, fuzzing up vocals. We’ve gotta give ’em something to
Page 74

Modeled Amps & Cabs • Line 6’s Original Models
do that with!’ So we did. Tube Preamp lets you warm up any sound source the way
producers and engineers often do in the studio with vintage tube gear. For more “edge”
on vocals, send your vocal tracks through Bass POD
synth bass track by sending it through Bass POD
XT Live. Punch up (or munch up) a
XT Live and cranking up the drive and
EQ controls to suit your taste. And, although this is not actually a bass amp model, you
can certainly get some great bass tones out of it. When you do this stuff, you want to use
the Drive control like a mix knob on a reverb to control how much processing you
want to hear. You generally don’t want to mix the pre-Bass POD
post-Bass POD
XT Live sound because of the comb filtering that results. Instead, jack
XT Live sound with the
the sound source right into Bass PODxt and then only monitor the sound post-Bass
POD
XT Live processing. With the tone controls at 12 o’clock, the EQ is “flat.”
Bypass
Choose Bypass when you don’t want any amp model at all. This lets you use only the
effects of your Bass POD
XT Live, without amp tone.
5 • 19
Page 75

Modeled Amps & Cabs • Line 6’s Original Models
Cabinet Models
The following Cabinet Models are available on Bass PODXT Live, and are accessed by
5 • 20
pressing the C
Cabinet Model Based On...
1x12 Boutique 1x12 Euphonics CXL-112L
1x12 Motor City 1x12 Versatone Pan-O-Flex
1x15 Flip Top 1x15 Ampeg® B-15
1x15 Jazz Tone 1x15 Polytone Minibrute®
1x15 Session 1x15 SWR® Big Ben
1x15 Amp 360 1x18 Acoustic 360
1x18 California 1x18 Mesa/Boogie®
1x18+12 Stadium 1x18+12 Sunn® Coliseum
2x10 Modern UK 2x10 Ashdown ABM 210T
2x15 DoubleShow 2x15 Fender® Dual Showman® D130F
2x15 California 2x15 Mesa/Boogie®
2x15 Class A 2x15 Vox® AC-100
4x10 Line 6 4x10 Line 6 Original Model
4x10 Tweed 4x10 Bassman® Combo w/ new speakers
4x10 Adam Eve 4x10 Bassman® Combo
4x10 SilverCone 4x10 Hartke 410
4x10 Session 4x10 David Eden
4x12 Hiway 4x12 Hiwatt® Bass Cab
4x12 Green 20’s 4x12 1967 Marshall® Basketweave with Greenbacks
4x12 Green 25’s 4x12 1968 Marshall® Basketweave with Greenbacks
4x15 Big Boy 4x15 Marshall® Major
8x10 Classic 8x10 Ampeg® SVT® Cab
No Cab
AB/A.I.R. button, then turning the EFFECT TWEAK knob:
You will probably want to use this Cabinet model with the Tube
Preamp model for non-guitar sources. It is selected by default
when you pull up the Tube Preamp Amp Model.
All product names are trademarks of their respective owners, which are in no way associated or
affiliated with Line 6. These product names, descriptions and images are provided for the sole purpose
of identifying the specific products that were studied during Line 6’s sound model development.
AMPEG AND SVT are registered trademarks of St. Louis Music, Inc. SWR, SUNN, FENDER,
DUAL SHOWMAN, and BASSMAN are registered trademarks of Fender Musical Instruments
Corporation. MINI-BRUTE is a registered trademark of Pamco Enterprises, Inc. MESA/BOOGIE is a
registered trademark of Mesa/Boogie Limited. VOX is a registered trademark of Korg Europe Limited.
HIWATT is a registered trademark of Fernandes Company Ltd. MARSHALL is a registered trademark
of Marshall Amplification PLC.
Page 76

S
TOMP
, M
OD
& D
Effect Junkies Welcome
Stomp, Mod & Delay/Verb Models •
ELAY
/V
ERB
M
ODELS
Effect Junkies Welcome
What bassist doesn’t like effects? Bass PODXT Live’s got a bunch of great
and
Delay/Verb
Modulation Modeler, and DL4 Delay Modeler pedals, some brand spankin’ new models
that come straight from our flagship combo, Vetta, and a few that our making their first
appearance in a Line 6 product. Who says you can get too much of a good thing?
In this chapter, we’re not only going to take a look at just which
Delay/Verb
tweaking them. We’ll assume you’ve already got the basics from
& Storing Sounds
models. So hold onto your hats and glasses, and please keep your hands and feet inside
the car at all times....
effects adapted from Line 6’s DM4 Distortion Modeler, MM4
Stomp, Mod
effects are modeled. We’ll also be talking about how you go about
Chapter 4, Creating
, and are now ready to dive into the detail on the individual
Stomp, Mod
Comp
The Compressor effect that’s always available in your Bass PODXT Live is modeled
after the classic, studio-standard LA-2A
smooth out your levels the way that you would typically do in a recording studio.
When you’re not already in Edit or Tuner/System mode, you can quickly jump into
editing the Compressor by pressing twice on the button beneath the Bass POD
display that’s labeled
so even when you’re really squashing your signal with an aggressive threshold setting,
you’ll be able to get good volume levels out of your Bass POD
COMP
. The compressor includes automatic gain compensation,
®
tube compressor. It’s just the thing to
Live.
XT
and
XT
Live
1
6 •
* All product names are trademarks of their respective owners, which are in no way associated or
affiliated with Line 6. These product names, descriptions and images are provided for the sole purpose
of identifying the specific products that were studied during Line 6’s sound model development. LA2A is a registered trademark of Universal Audio, Inc.
Page 77

Stomp, Mod & Delay/Verb Models •
Gate
The Gate effect helps eliminate unwanted noise when you’re not playing, and can be
especially valuable when using high gain sounds. Like a security gate, it’s supposed to
quickly open to pass the things that you want, and then swing closed to keep out the
things that you don’t want. Turn the
6 •
the Gate (
THRESH
determines how loud your playing has to be to open the gate. More negative numbers
(where the knob is near its fully-counterclockwise setting) mean that the gate will
open and allow sound through even when you are playing quietly, and less negative
numbers (where the knob is near its fully-clockwise setting) mean that the gate will
only allow sound to pass when you are playing pretty hard. The
determines how fast the gate will swing closed. Like a gate in the real world, a fast
decay means the gate might catch your trailing foot as you pass through—in this case,
that means the gate will chop off the decay of your notes. And a slow decay means
2
that as the gate swings slowly closed behind you, someone might have time to slip
through behind you—in this case, that would be the unwanted noise that you hear as
your notes decay. You’ll have to experiment with the
happy medium for your particular bass, playing style, and sound settings.
’s value will then be
Gate
THRESH
OFF
all the way down to minimum to disable
, as shown above). The
DECAY
THRESH
DECAY
knob
knob
to get just the right
Page 78

Stomp, Mod & Delay/Verb Models •
Stomp Models
Bass PODXT Live’s Stomp effect slot give you a whole line-up of delicious stompbox
effects. There are several types of effects here: (1) Distortion and Overdrives, (2)
Stompbox Compressors, (3) an Auto Wah and (4) Synths. Let’s start with a few words
on each:
Distortions and Overdrives
Can you remember that magic moment when you first heard a distorted bass? Was it
McCartney credited as “Paul on Fuzz Bass” on Rubber Soul’s “Think For Yourself?”
Could it have been Jack Bruce overdriving his Marshall
was it on some post-modern classic by Spiritualized or My Bloody Valentine?
Regardless, the mesmerizing power of real low end growl cannot be denied. Distorted
and overdriven bass sounds are all over contemporary music. From Hip Hop to Trip
Hop, through Psychedelic Trance and all things in between, distorted or overdriven
bass is gaining prominence in every mix and every live performance. You must have
been asleep for the last ten years not to know there’s a popular musical idiom known as
Drum and Bass! Need we say more? Now with all the Distortions and Overdrives
available in Bass POD
Live, we have more ways to furry up that Funk.
XT
®
s to fill up Cream’s low end, or
Stomp Models
6 •
3
Stompbox Compressors
A compressor takes quiet sounds and loud sounds coming into it, and makes them have
a more similar volume, so the loudest sounds aren’t so loud versus the quiet sounds, and
the quiet sounds are closer to the level of the loudest sounds. The result is that a
compressor can be set to keep boosting the level of your bass signal as a note dies away,
giving your bass a longer note decay. In other words, plop a stomp box compressor
down in front of an amp and you’ve got an instant sustain enhancer! As a side benefit,
the compressor evens out your attacks and enables you to make up some gain (so you
can hit the front end of your amp a bit hotter, but without extra before-the-amp
* All product names are trademarks of their respective owners, which are in no way associated or
affiliated with Line 6. These product names, descriptions and images are provided for the sole purpose
of identifying the specific products that were studied during Line 6’s sound model development.
MARSHALL is a registered trademark of Marshall Amplification PLC.
Page 79

Stomp, Mod & Delay/Verb Models •
distortion that a distortion box would create when boosting input level to your amp).
We’ve provided you with a number of stompbox compression options in Bass POD
Live, so you can squash your signal ’til the cows come home.
Auto Wah
In a class of its own, the Auto Wah is the perfect choice when you want to funk it up.
For complete detail, see
Auto Wah
Synths
These effects give you a wealth of tones inspired by synthesizers of the past, present and
future. To get the most out of them, there are some things that are handy to know, all
6 •
4
of which are covered in glorious detail under the heading
on page
6•16
.
And now it’s time to meet our Stomp models, starting with those overdrives and
distortions:
Stomp Models
on page
6•10
XT
.
Synth and Filter Effects
Bass Overdrive
This model was inspired by our look at the Tech 21 Bass Sans Amp, plus a few extra
liberties taken by the Line 6 sound design team. The Sans Amp is famous for delivering
a very quiet and crisp signal under all circumstances, while also serving up a very
distinct distortion. Is pleasingly metallic quality makes it a favorite with the Post-Metal
crowd and Industrial bands, and producers in all genres of music have come to favor the
Bass Sans Amp for crunching up loops. The Bass Overdrive covers the same sort of
territory, with a bit of a uniquely Line 6 bent. Choose this distortion for your bass or
any other signal and it will immediately become a very close and furry friend.
* All product names are trademarks of their respective owners, which are in no way associated or
affiliated with Line 6. These product names, descriptions and images are provided for the sole purpose
of identifying the specific products that were studied during Line 6’s sound model development.
Page 80

Stomp, Mod & Delay/Verb Models •
Stomp Models
Screamer
From Stevie Ray Vaughan to Michael Landau, the simple Ibanez®
Tubescreamer® is the overdrive heard ’round the world. This
medium-gain pedal was introduced in the early ’80s, and in many
blues circles, you’re not allowed to solo without one. Over the
years, Ibanez issued several variations of the venerable
Tubescreamer,® but none have reached the fabled status of the TS-
808. Of course, we obsessed over which of our vintage 808s to
model, and in the end we think you’ll agree that our model of this
green jewel makes a precious addition to Bass POD
XT
Live.
Classic Dist
Born and bred in the late ’70s, the ProCo Rat was
the beginning of a new generation of distortion
boxes. With a sound that was angrier and more
aggressive than a fuzz, the Rat put teeth into a new
breed of metal that was beginning to crawl to the
surface of the music scene.
Through its life span, the Rat has seen several
changes, and the unanimous choices for tone are the
originals pictured here. Inside, these two Rats use the same board, and their circuits are
identical. (For those that need to know, we modeled the smaller one.)
6 •
5
The
TONE
knob on Bass POD
XT
Live’s Rat model functions like the original Rat’s
“filter” control, which gives you brighter tone at lower settings, and darker tone at
higher settings. Once bitten, you’ll know why we call this one tone with teeth!
* All product names are trademarks of their respective owners, which are in no way associated or
affiliated with Line 6. These product names, descriptions and images are provided for the sole purpose
of identifying the specific products that were studied during Line 6’s sound model development.
IBANEZ and TUBESCREAMER are registered trademarks of Hoshino Gakki Co. Ltd.
Page 81

Stomp, Mod & Delay/Verb Models •
Facial Fuzz
Sometime in late 1966, an infamous circular stompbox
hit the London music scene. Designed and built by
Arbiter® Music, the Fuzz Face would soon begin its
famous association with guitar legend Jimi Hendrix. It
would also come to be known as a great bass effect
because of it’s association with Soft Machine’s Hugh
Hopper.
Like all stompboxes from the early era, the Fuzz Face
would see many design changes, as well as re-issues. Our
model is based on* the germanium diode-powered treasure pictured here: an original,
very early “gray with black screening” Arbiter Fuzz Face. Call the Bass POD
Facial Fuzz model up, and treat yourself to our faithful re-creation of the original’s fuzz
and glory. Crank up the drive, and you’ll be seeing Purple Haze right before your eyes.
6
6 •
Stomp Models
Fuzz Pi
Not to be outdone by the Brits, the colonies came
up with their own twist on the fuzz rage. Mike
Mathews and his band of merry men at ElectroHarmonix
effects when their attention turned to the
distortion/fuzz pedal. Their most popular offering
was the Electro-Harmonix
more for its sweet sustain than for its buzz.
XT
Live
®
had been cooking up all sorts of nifty
®
Big Muff Pi,® known
Electro-Harmonix® was famous for their use of
surplus parts, and the results of this practice were
ever-changing circuit designs and parts specs. As
you can see in the picture of our collection of Big Muffs, these pedals had several looks
determined by the parts that Mike and the gang found at hand. Our sweetheart of the
bunch is the one in the middle, known as the “triangle knob pattern” model. We know
you’ll agree, there’s nothing like a slice of Pi.
*All product names are trademarks of their respective owners, which are in no way associated or
affiliated with Line 6. These product names, descriptions and images are provided for the sole purpose
of identifying the specific products that were studied during Line 6’s sound model development.
ARBITER is a registered trademark of Arbiter Group PLC. ELECTRO-HARMONIX and BIG MUFF
PI are registered trademarks of New Sensor Corporation.
Page 82

Stomp, Mod & Delay/Verb Models •
Stomp Models
Octave Fuzz
What was that? If it sounded like a phantom guitar or bass
possessed by The Ghost of Great Guitarists Past, then it
probably was a Tycobrahe Octavia.
The Octavia is an example of a fuzz+octave effect. One
pioneering user of this type of effect was Jimi Hendrix.
The Tycobrahe Octavia in particular was used by Jeff
Beck, and continues to be an essential part of Michael
Landau’s tone making tool kit.
The Octavia uses an audio output transformer and two germanium diodes to rectify (a
fancy word for whack) the bass signal, thus creating the high octave type sound. For our
model, we studied the sweet-sounding original pictured here. We knew we had a keeper
when every guitarist and bassist in the building wanted to take it home for a little of
their own after hours “research.”
Bronze Master
The Maestro Bass Brassmaster is considered by many to be the Holy Grail of bass
distortion units, and ultra-rare bird designed in the early ‘70’s for Maestro by synth
genius Tom Oberheim. It showed up on Chris Squire’s gear list in a mid-70’s Yes tour
program. In fact, the Brassmaster was the first distortion unit we can think of designed
primarily with the bassist in mind, and man, did Mr. Oberheim get it right! The
original has a fairly elaborate set of controls, include two separate volumes and toggles
for accentuating different harmonic voicings. We weren’t able to make an exact
duplicate of some of that complexity when creating the Bronze Master for your Bass
POD
XT
Live, but you’ll find that this model does give you a luscious palette of supersweet bass fuzz in the style of the BrassMaster, with righteous distortion that doesn’t
take away that all-important low end.
6 •
7
* All product names are trademarks of their respective owners, which are in no way associated or
affiliated with Line 6. These product names, descriptions and images are provided for the sole purpose
of identifying the specific products that were studied during Line 6’s sound model development.
Page 83

Stomp, Mod & Delay/Verb Models •
Stomp Compressors
Compression is supposed to be the bassist’s best friend. By including more than just one
compressor in the Bass PODXT Live, we hope to give you, the discriminating bassist,
who’s obviously hip enough to own a Line 6 Bass POD
Along with the amazing sounding and highly popular LA-2A
XT
heart of Bass POD
compressor gizmos in stomp box configuration.
Live’s always available compressor, we’ve provided a few extra
Stomp Compressors
XT
Live, a few
®
new
best friends.
model that is at the
6 •
A friend of ours likes to say, ‘If less is more, think how much more
more
must be!’ With
that in mind, try this little trick for more compression: turn off the Stomp effect, select
the Tube Preamp Amp Model, and dial up a clean world-class bass sound that your ears
tell you would sound great on a hit record booming out of radios around the world. Set
the
Compress
knob at about ten o’clock, so it tames your dynamics a bit the way a
producer would do it on a recording. Then press the Stomp button to light it up,
8
double-press it to call up the Stomp edit page, and start picking from the other
compressors we’ve made available for you to run at the same time as the LA 2A model
controlled by the
Compress
knob. Used by leading producers the world over, this is
what’s known as double compression. While the front-end compressor of the Stomp
effect shapes your basic tone and dynamics, the second compression stage of the
Compress knob gives you the extra grace and polish of studio-quality smoothness....
Blue Comp
Roland®/Boss® made their first contribution to the compressor
stompbox world with the CS-1 Compression Sustainer, which still
remains a favorite of many players. Like the original, the Bass
XT
POD
the threshold of the compressor circuitry.
expect.
Live model based on* it has a
SUSTAIN
LEVEL
control varying
does what you’d
*All product names are trademarks of their respective owners, which are in no way associated or
affiliated with Line 6. These product names, descriptions and images are provided for the sole purpose
of identifying the specific products that were studied during Line 6’s sound model development. LA2A is a registered trademark of Universal Audio, Inc. ROLAND and BOSS are registered trademarks
of Roland Corporation.
Page 84

Stomp, Mod & Delay/Verb Models •
Stomp Compressors
Red Comp
Back in the ’70’s, this was one of the most popular stomp
boxes for bassists. Quite often, it was a bassist’s first purchase
because it offered affordable, world-class compression in a
stompbox. It was a crucial part of bass signal chains on stages
everywhere from tiny clubs to monolithic stadiums. Probably
the most widely used stompbox compressor, and pretty much
the standard against which others are judged, the MXR
®
Dynacomp has a fixed compression ratio with variable
threshold and gain, which is what you get in the Bass
POD
XT Live model.
Vetta Comp
A Line 6 original, Vetta Comp has a fixed ratio (2.35:1, in case you’re asking) with the
threshold (that would be your SENS knob) adjustable from -9dB to -56dB and up to
12dB of gain available at the LEVEL knob. In other words, turn the Sens knob ’til you
like the way your signal’s compressed, then set the volume with Level. If you’re into
multi-tasking your Bass POD
to create a very expensive sounding vocal processor…hmm, delicious!!!
XT Live, try using this in line with the Tube Preamp model
6 • 9
* All product names are trademarks of their respective owners, which are in no way associated or
affiliated with Line 6. These product names, descriptions and images are provided for the sole purpose
of identifying the specific products that were studied during Line 6’s sound model development. MXR
is a registered trademark of Applied Research and Technology, Inc.
Page 85

Stomp, Mod & Delay/Verb Models • Auto Wah
Auto Wah
Do you want the Funk? Do you need the Funk? Well, we’ve got
the Funk, right here for you! What self-respecting, bass-playing
filter-junkie would be without a Mu-Tron III envelope follower,
as used by the mighty George Clinton and others?
Part auto-wah, part triggered filter, it’s all about wacky, and this
model based on* the Mu-Tron III gives it to you both coming
and going. Go ahead—unbutton that shirt, put on the flares,
and get down with your bad self! The SENS knob varies the
filter’s response to your playing, and Q adjusts the filter’s width.
6 • 10
Synth Models
To learn about the Synth Models, see Synth and Filter Effects on page 6•16.
Modulation Models
Modulation effects are things that swoosh, pulse and warble—from phase shifters to
flangers to choruses to filter effects. Why are they called modulation effects? Well, if we
consult a dictionary, we discover that ‘modulate,’ in the electronic world means to
“alter the amplitude or frequency of (a wave) by (using) a wave of a lower frequency to
carry a signal” (definition courtesy of The Oxford Encyclopedic English Dictionary, Third
Edition, thank you very much). That modulating wave is what causes all that
swooshing, pulsing, and warbling.
There are two set of effects in the Bass POD
first set includes Chorus, Flanger, Phase, Vibrato, Tremolo and Rotary Speaker effects.
All of these include controls for
the modulating waveform sweeps.
* All product names are trademarks of their respective owners, which are in no way associated or
affiliated with Line 6. These product names, descriptions and images are provided for the sole purpose
of identifying the specific products that were studied during Line 6’s sound model development.
SPEED and DEPTH. SPEED controls how fast (or slow)
DEPTH controls the overall amplitude of the
XT Live Modulation models line-up. The
Page 86

Stomp, Mod & Delay/Verb Models • Modulation Models
modulating wave, which usually determines just how intense the effect will be. There’s
always a
MIX control, and sometimes there are also other controls. Refer to the
individual effects listed in the following pages of this chapter for details.
The second set of Modulation effects are the filters. To learn about them and the Synth
Models in the Stomp effects slot, see Synth and Filter Effects on page 6•16.
And now, it’s time to meet our models...
Deluxe Chorus
This is your basic digital chorus (as opposed to the analog type vibe of the CE-1 chorus
model), with a sine wave as the modulator. Smooth going down, with BASS and
TREBLE controls for bassing and trebling. Using this effect the next time you create a
part with harmonics, ala the late great Jaco Pastorious. Sine Chorus has a way of adding
a very pleasing, liquid-like character to high register double stops too.
6 • 11
* All product names are trademarks of their respective owners, which are in no way associated or
affiliated with Line 6. These product names, descriptions and images are provided for the sole purpose
of identifying the specific products that were studied during Line 6’s sound model development.
Page 87

Stomp, Mod & Delay/Verb Models • Modulation Models
Analog Chorus
After the CE-1 came onto the music scene in
1977 and made waves with its big, warm and
groovy chorus tones. One of the first bassists to
incorporate chorus effects into his sound was
6 • 12
Geddy Lee of Rush, so the Bass POD
wouldn’t be complete without paying homage to
the original stompbox chorus, the Boss
Chorus Ensemble.
It quickly found its way onto many a bassists’
pedal board. The CE-1’s controls included
SPEED and DEPTH and Vibrato switch. The
CE-1 is spacious, and sounds great feeding into a distorted amp. Our model is every bit
as warm and gooey as its inspiration. Dial up some lush landscape and enter into chorus
heaven. “Hey, wait a second!” you say, “The original CE-1 had a cool pitch vibrato
mode, too. Whatcha gonna do about that?” Well, no worries, mate, we’ve got you
covered. Since a chorus is, when you come right down to it, a pitch vibrato mixed with
a dry signal, what the vibrato mode switch on a CE-1 did was simply turn off the dry
signal. To get that effect here, just set the MIX knob to 100% wet (in other words,
crank it all the way up), and, presto change-o, you’ve got vibrato. You can use the
DEPTH knob to get as seasick as you want, too.
XT Live
®
CE-1
Deluxe Flanger
Cooked up in the Line 6 labs, this creation really shines when you set CONFIG to
POST, letting its stereo sweep offset serve up luscious harmonic shimmer.
* All product names are trademarks of their respective owners, which are in no way associated or
affiliated with Line 6. These product names, descriptions and images are provided for the sole purpose
of identifying the specific products that were studied during Line 6’s sound model development. BOSS
is a registered trademark of Roland Corporation.
Page 88

Stomp, Mod & Delay/Verb Models • Modulation Models
Jet Flanger
This is our model of the A/DA “studio quiet” Flanger. Mars
Cowlong, who made lots of waves as Pat Travers’ bassist in
the ‘70’s and 80’s made great use of this box on his bass
immediately after it was introduced in 1977. Check
Travers’ “Go For What You Know” live CD and you’ll hear
what we mean! This stompbox has a sweep range of 35-to1 and a built-in compressor that work together with the
tone circuitry to give the A/DA its signature jet-like sweep.
It can be very dramatic with its unique wave shape and
ability to create almost ring modulator-like effects at extreme settings. When the model
of the A/DA Flanger is selected for editing on the Bass POD
XT Live, the knob below
DEPTH controls the sweep range. FDBK adjusts feedback (in other words, how much
of the effected signal is fed back to the input of the effect), and the MANUAL knob
controls the length of the very short delay that’s applied to the sweep to make the
flanging effect happen. Plug in, spin up depth and feedback, and get ready for take-off!
Phaser
The unassuming metal box pictured here is the phaser
that changed the world—the MXR
90 is relatively subtle compared to other phasers, and
when you use it, it becomes part of the overall guitar tone
rather than trying to grab the spotlight all to itself.
Perhaps the best demonstration of its lush, organic, and
groovy swirl is on Anthony Jackson’s amazing bass line on
the O’Jays’ “For the Love of Money.” The Phase 90 is a
four stage phaser; its single knob controlled only speed.
Bass POD
XT Live’s Phaser model gives you additional
flexibility with a MIX control and a FEEDBACK
control to adjust the intensity of the effect.
®
Phase 90. The Phase
6 • 13
* All product names are trademarks of their respective owners, which are in no way associated or
affiliated with Line 6. These product names, descriptions and images are provided for the sole purpose
of identifying the specific products that were studied during Line 6’s sound model development. MXR
is a registered trademark of Applied Research and Technology, Inc.
Page 89

Stomp, Mod & Delay/Verb Models • Modulation Models
U-Vibe
The now-legendary Uni-Vibe was put on the
map in 1969 by Jimi Hendrix. Essentially a
four-stage phase shifter, the Uni-Vibe is best
known for its watery texture and sultry tones.
One listen to “Machine Gun” and you’ll know
what we mean. ‘What,’ you ask, ‘does this have
to do with bass?’ Everything, Grasshopper!
More than any other instrument, the bass has
risen to the challenge presented by Jimi every
time he cracked a new cranny in the sonic universe. Just check the out front, heavily
effected bass lines put out there by heavy hitters like Billy Sheehan, Doug Wimbish and
Mike Elizando, just to name a few. Use your Line 6 U-Vibe effect on your next sultry
post- Trip Hop bass line and you’ll immediately know exactly what we know—its
watery sultriness cannot be denied! As with the CE-1 model’s stealth vibrato mode, you
6 • 14
can recreate the effect of the original Uni-Vibe’s vibrato switch by turning the MIX
control to 100% wet. (That’s what the switch did on the original.) The DEPTH
control acts like the Uni-Vibe’s “Intensity” knob.
Opto Trem
This one is based on* the optical tremolo circuit that was used in the blackface
Fender
bulb and a photoresistor, when the light got brighter, the tremolo got louder. It’s a very
smooth, even tremolo, and the obvious choice for use with the amp models that are
based on* Fender
®
amps, like the ’64 Deluxe Reverb® and ’65 Twin Reverb®. Basically a light
®
originals.
*All product names are trademarks of their respective owners, which are in no way associated or
affiliated with Line 6. These product names, descriptions and images are provided for the sole purpose
of identifying the specific products that were studied during Line 6’s sound model development.
FENDER, TWIN REVERB and DELUXE REVERB are registered trademarks of Fender Musical
Instruments Corporation.
Page 90

Stomp, Mod & Delay/Verb Models • Modulation Models
Bias Trem
One of our long time favorite pieces of ‘Rube Goldberg’ engineering, the old Vox®
tremolo (and a similar circuit in some blonde and brown Fender
literally varying the bias of the power amp tubes. While this tended to reduce the life
span of the output tubes in these amps, it gave a beautifully liquid, uneven, and rather
‘lumpy’ sound that bears a distinct resemblance to a Uni-Vibe or other phase shifter
(mainly because treating the tube bias in such a cavalier manner actually caused some
phase shift to occur).
®
amps) got its pulse by
Rotary Drum
Leslie®s—cabinets with rotating speakers in them—
were originally created for organists. When they
noticed that guitar players had started using Leslie
®
Fender
decided to come out with its own, guitarspecific whirling dervish of a tone machine. Dubbed
the Vibratone, it used a styrofoam baffle spinning in
front of a 12-inch speaker, kicking all the sound out
the sides of the box, and one of the best known uses of
a Vibratone is Stevie Ray Vaughan’s guitar classic
‘Cold Shot’. Now we figure its bassist’s turn to take
the mighty power of the rotary horn for themselves!
®
s,
6 • 15
* All product names are trademarks of their respective owners, which are in no way associated or
affiliated with Line 6. These product names, descriptions and images are provided for the sole purpose
of identifying the specific products that were studied during Line 6’s sound model development. VOX
is a registered trademark of Korg Europe Limited. LESLIE is a registered trademark of Suzuki Musical
Instrument Manufacturing Co. Ltd. FENDER is a registered trademark of Fender Musical Instruments
Corporation.
Page 91

Stomp, Mod & Delay/Verb Models • Synth and Filter Effects
Synth and Filter Effects
A lot of strange things can happen when you spend long, intimate hours in a room with
your basses, synths, filters and modern software development tools! The Synth/ Filter
stomps in your new Bass POD
Line 6 for your enjoyment. These sounds were all inspired by some of our favorite old
synths from the past like the ARP Omni, ARP Solina String Ensemble, Elka
Minimoog,
®
Sequential Circuits Prophet V and others. To be clear, none of these
vintage instruments were “modeled.” The Synth/Filter effects are all 100% Line 6
creations.
XT Live are all 100% brand new sounds developed by
®
Synthex,
6 • 16
There are many presets in Bass POD
XT Live that show off these new toys. Have a listen
and see what kinds of interesting sounds are possible. Although there are no “right”
ways to use these tools, here are a couple of tips.
1. These effects are made to be used with single notes, not double stops or chords.
You may notice that some effects work better on higher pitched notes or
staccato (as in “fast” and “short”) style, while other effects sound better on
lower pitched notes or in a legato (as in “slow” and “long”) style. Rather then
trying to play your normal bass lines and licks through these effects, try playing
parts that really show off the effects. Try to think of your bass as a completely
different instrument when you use the synth/filter effects and you’ll find that
you will play your bass very differently and therefore make music that you never
knew was possible. And hey, what better way to impress yourself, your
bandmates, your audience, and your favorite producer?
2. If your bass has more than one pickup, experiment with using the neck pickup
first, when using the Synth/Filter effects. Then try the bridge pickup and
pickup combinations. Always begin your sonic exploration into this brave new
world of Line6 Bass Synth and Filter effects with your bass volume and tone
knobs on 11. Even though its not a common practice (particularly in the
studio,) try “hitting” the Synth or Filter effect a little softer by turning your
volume knob down. And if you’re really adventurous, experiment with that
often forgotten tone knob too! But remember – always start with your bass set
to stun: volume ALL THE WAY UP TO 11!
*All product names are trademarks of their respective owners, which are in no way associated or
affiliated with Line 6. These product names, descriptions and images are provided for the sole purpose
of identifying the specific products that were studied during Line 6’s sound model development. ELKA
is a registered trademark of Generalmusic S.p.A. MINIMOOG is a registered trademark of Moog
Music, Inc.
Page 92

Stomp, Mod & Delay/Verb Models • Synth and Filter Effects
3. Your synth effects are in the STOMP section of your Bass PODXT Live. The filter
effects are right next door in the
MOD section. This allows you to open up not
only your brave new world of layered synth/filter effects, it also lets you put
filter effects after your distortion effects. On bass, this too can be very synthlike. And don’t forget, other instruments, especially single note keyboard lines,
drum loops and yes, even vocals can be processed through your Bass POD
XT
Live Synth and Filter effects.
4. Your Synth and Filter effects will behave very differently in front of different
amp models. Don’t get scared, this is a good thing! As a rule, try auditioning
them first in front of Amp #1, the Tube Preamp, with all its controls set close
to 12 o’clock. Then set the compressor around 10:30. Select Auto Wah in your
Stomp slot. And if you want to hear a good example of how these effects
interact with the amp models, try turning the Drive all the way up and listen as
the Auto Wah begins to morph from something that resembles a Mu-Tron III
to the even-more -hard to-find Funk Box!
Basic Synth/Filter Editing
Most of the synth/filter parameters look pretty much like this: All of the synth/filter
effects that have a
These are basically 8 different presets of the style of synth the name infers. Do the math
and you quickly realize that your Bass POD
four!) different synth patches. The
determining how much effect you hear versus non-effected signal.
WAVE parameter here allow you to choose between 8 different waves.
XT Live gives you 74 (that’s right – seventy-
MIX control is the same as all other effects,
6 • 17
The
FILTER is a “low pass” filter. Meaning that frequencies above the low pass filter
frequency are cut. The
FILTER control changes the frequency of the low pass filter.
Turning the control to the left lowers the frequency of the filter meaning less high
frequencies get through. Turning the control to the right raises the frequency of the
filter meaning more high frequencies get through.
Set the
DECAY knob near minimum to cut sound off as soon as you stop playing, or set it
high to let the synth effect trail off at the end of each note you play.
Page 93

Stomp, Mod & Delay/Verb Models • Synth Models
Synth Models
Dingo Tron
This is similar to the sound made by a Mutron III when you flip the “down” switch. It’s
kind of like a reverse auto wah. Play with a hard attack to get the most out of this effect.
(You careful readers already know how to make it sound like a Funk Box!)
Buzz Wave
If you’ve ever messed around with a Bass Synth pedal or stompbox, and thought “Yeah,
this is kind of cool, but it only does one thing well…” the Buzz Wave Synth stomp
effect immediately dispels that notion. These are cool combinations of saw and square
waves with fast vibrato. The 8 different
and different pitches. Don’t forget to tweak and tweez the Filter and Decay parameters
– you’ll be totally blown away by Buzz Wave’s flexibly fluid waveforms.
WAVE parameters offer different vibrato speeds
6 • 18
Seismik Synth
This effect has an oscillator that tracks the pitch of your bass. You can choose between
8 different wave shapes which give you different “flavors” – all of them one or two
octaves down from the original pitch. A cool trick is to use Seismic Synth with the Sub
Dub Amp model. DEATH TO ALL SUBWOOFERS!!!
Rez Synth
This model has a sound reminiscent of a Roland® TB-303. These are all sweeping low
pass filter effects with the resonance set high. Resonance is a peak at the frequency of
the low pass filter.
Saturn 5 Ring Modulator
A Ring Modulators takes two signals (one supplied by your bass, the other supplied by
the effect) then adds and subtracts similar frequencies. Electro-Harmonix
ring modulator pedal called the Frequency Analyzer that is a popular guitar effect
known to be used by, shall we say, that very small minority of more “adventurous”
bassists. In all our years of collective tone-questing experience, we’ve only come across
a few bass players who’ve ever bothered to own, let alone use a ring modulator. Why?
The limiting factor used to be that the pitch of the signal provided by the effect was
*All product names are trademarks of their respective owners, which are in no way associated or
affiliated with Line 6. These product names, descriptions and images are provided for the sole purpose
of identifying the specific products that were studied during Line 6’s sound model development.
ROLAND is a registered trademark of Roland Corporation. ELECTRO-HARMONIX is a registered
trademark of New Sensor Corporation.
®
makes a
Page 94

Stomp, Mod & Delay/Verb Models • Synth Models
constant. This meant that up until the advent of Bass POD
XT Live bassists had to play
only in the key of that pitch to be musical. The Saturn 5 RM “tracks” the pitch of your
bass signal. This allows you to use the effect at that setting in ANY key. This is a
GIANT leap forward for ring modulator effects and bassists everywhere! And by the
way, one of our tonal argonauts was quick to find out that waveforms 5 and 8 make
awesome “sub octave” effects that sound very different than the “Sub Octave” effect
found in the
MOD slot.
Synth Analog
These are great for funky synth bass lines! These sounds were made popular by Moog
and ARP, Shades of Keith Emerson, Dr. Dre and Stevie Wonder and their wonderful
left hand synth bass parts!
Synth FX
These sounds aren’t really designed to be musical, but since your Bass PODXT Live has
both
MODEL and D.I . outputs you can blend these “special effects” with your unaffected
direct sound for some very interesting and quite usable results. On their own, these are
sounds you’ll hear in movie sound tracks…or at Halloween parties…or in cutting-edge
club remixes…
Synth Harmony
There are two waves at work here and they can be used in combination to create some
very big bass synth tones, similar to the hard-to-find but very popular Moog Taurus
pedals. The
gain remains constant. Don’t forget – square waves and sawtooth waves set at the same
pitch increment
WAVE parameter controls the gain of the saw wave, while the square wave
6 • 19
Synth Lead
These are styled after popular analog monophonic synth lead sounds from Moog, ARP
and Sequential Circuits. Remember that your Bass POD
Semi-Parametric EQ in front of your synths, so you’re free to poke around in the “freq
zone” for just the right tone. It may be helpful to know that “shelving” your upper
frequencies, which means drastically reducing them, is a way to make your bass sound
even more like a synth than it already does!
* All product names are trademarks of their respective owners, which are in no way associated or
affiliated with Line 6. These product names, descriptions and images are provided for the sole purpose
of identifying the specific products that were studied during Line 6’s sound model development.
XT Live gives you a 6-Band
Page 95

Stomp, Mod & Delay/Verb Models • Filter Models
Synth String
This emulates classic synth string sounds like those found in the ARP Solina String
Ensemble. Try exploring Waves 3 and 7 with radically opposing Filter and Attack
levels, i.e., Filter at 0% and Attack at 100% for parts that work great at slower tempos.
Sub Octaves
All bassists know that in just about every musical situation, lower can be better! So, to
help you the all-important bassist, do your music better, we put an Octave device in
your Bass POD
Octave gets you down into booty-shaking territory mighty quick. Use it to create
additional voices below what you’re playing. Remember, lower can be better, especially
when it makes the booty shake!
XT Live that’s inspired by the very popular Boss
®
OC-2. Your Sub
6 • 20
Filter Models
Bassists and filters have had an ongoing love affair ever since they first met. Something
magical happens when low freq’s pass through a well-conceived filter. Groovy bass lines
get groovier, the funk gets even more funky, and that lopey slow bass part becomes
even more “just right.” Since we put your Bass POD
section, you can dial them up on their own, or after a distortion unit or a synth patch.
Your choices are just about endless! Bottom line (my, how we basses love that bottom!)
is this: in your Stomp section, you’ll find the Auto Wah and Dingotron. W believe
those two create the most popular filter colors for your bass tone. In the
we added an additional four filter voices to help you paint your masterpiece. Let’s look
at some more filter fun:
Hi Talk
A, shall we say, less subtle version of the Line6 Rotor (the next model in the list), the
Hi Talk can make heads spin with its high-passed filtered frequencies. Try this one to
dress up some mean distortion!
* All product names are trademarks of their respective owners, which are in no way associated or
affiliated with Line 6. These product names, descriptions and images are provided for the sole purpose
of identifying the specific products that were studied during Line 6’s sound model development. BOSS
is a registered trademark of Roland Corporation.
XT Live’s filters in your MOD
MOD section,
Page 96

Stomp, Mod & Delay/Verb Models • Filter Models
Line 6 Rotor
Select this baby and watch the sparks fly! To our ears, our Line6 tone chefs have
managed to combine a moog-like filter and a rotary speaker in a touch-sensitive, taptempo package. Imagine what the world would be like if Bootsy lived inside a Leslie
®
speaker! This one is particularly cool after your fave synth patch!
Random S H
We put this one in your Bass PODXT Live so that you can make any music you’re
playing sound even more “electronic.” Your Synth patches will become more “synthier,” and your distortions more pronounced. Random S H is a great way to evoke the
spirit of Electronic. Try using it this way on a bass part with lots of long notes: Get a
wickedly cool tone, (no problem with Bass POD
MOD section and then tap 1/4 notes on your TA P button. Next, press the arrow button
under
SPEED and use your EFFECT TWEAK knob to start scrolling through the different
XT Live!) Select Random S H in your
all the different rhythmic subdivisions. You’ll be wide-eyed in no time!
Tape Eater
OK, OK…there was too much coffee in the Sound Designer Suite one Friday…they
stayed up a little too late and things got a little weird…but…the next day, the world
had a Tape Eater!!! This one will help you de-construct your bass sound in totally new
and original ways. Nothing sounds like this. Its kind of like your bass is being gobbled
by a vintage multi-track in full tape-saturation mode, but in time (thanks to that handy
TA P button!) And don’t forget, you’ve got a Semi-Parametric EQ for even more tweak
madness!
6 • 21
* All product names are trademarks of their respective owners, which are in no way associated or
affiliated with Line 6. These product names, descriptions and images are provided for the sole purpose
of identifying the specific products that were studied during Line 6’s sound model development.
LESLIE is a registered trademark of Suzuki Musical Instrument Manufacturing Co. Ltd.
Page 97

Stomp, Mod & Delay/Verb Models • Delay Models
Delay Models
When you’re looking to add some space to your sound, the Delay/Verb button of your
Bass POD
and reverb effects. Let’s meet the gang...
6 • 22
These Days’ opening bass line… Roger Waters… you’ll get what we mean…
Analog w/Mod
Here’s a model based on* the Electro-Harmonix®
Deluxe Memory Man which is a pedal that uses the
“bucket brigade” electronics of other analog echoes, and
adds a chorus circuit to boot. This adjustable chorus is
applied to the echoes only, leaving the direct sound
unaffected. The Memory Man, with its warm, distorted
tone and swimming echoes, became an important tool
for many guitarists, and was an essential part of the
guitar sounds for the first U2 album. Part of the Deluxe
in Deluxe Memory Man was the increased delay time of
500 milliseconds. Your Bass POD
Man tone with the added advantage of 2 seconds of delay time. On page 2, you’ll find
the MOD SPEED and DEPTH control to set up the chorus on the delays. Now, with
XT Live gives you instant access to a mouth-watering line up of delays, echoes
Analog Delay
Analog echo units like the DM-2 were designed as
improvements over the tape echoes that came before them,
using “bucket brigade” electronics to give guitarists echo units
that were more reliable than the tape-based delays, with the
added advantage of a low power circuit that can be run on
batteries. Analog delays are treasured for the warm, distorted
tones they produce, and Bass POD
the Boss
realm of existence. Just think Pink Floyd… Meddle… One of
®
DM-2 gets you the same sort of thing in a new digital
XT Live Analog w/Mod emulates that classic Memory
XT Live’s model based on*
*All product names are trademarks of their respective owners, which are in no way associated or
affiliated with Line 6. These product names, descriptions and images are provided for the sole purpose
of identifying the specific products that were studied during Line 6’s sound model development. BOSS
is a registered trademark of Roland Corporation. ELECTRO-HARMONIX is a registered trademark of
New Sensor Corporation.
Page 98

Stomp, Mod & Delay/Verb Models • Delay Models
just the push of a button, we bassists can select Analog w/ Mod, add it to our bass rigs
for a little “edge” ourselves. Try it after your fave distortion in the Stomp family.
Tube Echo
The classic 1963 Maestro EP-1 was the first of a series of
“Echoplex” designs distributed by the company, and made by
Harris-Teller in Chicago. As touted in a Maestro
advertisement, the Echoplex’s “...special effects range all the
way from a controlled high speed reverberation to a full,
throbbing echo”! The main feature of the Echoplex design is
a special cartridge of looped 1/4-inch audio tape that wraps
past separate record and playback heads. The position of the
playback head can be moved to adjust the delay time from 60
to 650 milliseconds. Bass POD
emulates the classic Echoplex tone with the extra advantage
of up to 2 seconds of delay time. Because of it’s tube-based
design, this effect is a great choice for bass tones that could use a little extra “fur.” Plus,
there’s lots of room in more modern music for bass that’s, well, shall we say, a bit more
than just “bass.” On page 2, you’ll find FLUT (wow and flutter) and DRIVE controls
so that you can not only dial up some tube warmth like the original, but add that
unique sound of a slipping, dirty capstan as well.
XT Live’s EP-1 model
6 • 23
Multi-Head
Long before Boss® pedals, the RE-101 Space
Echo was Roland
of effects processing. Instead of having one
movable playback head (like the Echoplex) this
machine has multiple stationary heads. You
change delay times by switching amongst these
heads, and then fine-tune delay time with a
motor speed control. The groovy part is that you can play back on multiple heads at the
same time to get multi-tap delay effects. Soon after its release, bassists started
experimenting with the RE-101 and soon found that its fastest settings could be used to
* All product names are trademarks of their respective owners, which are in no way associated or
affiliated with Line 6. These product names, descriptions and images are provided for the sole purpose
of identifying the specific products that were studied during Line 6’s sound model development. BOSS
and ROLAND are registered trademarks of Roland Corporation.
®
’s first venture into the world
Page 99

Stomp, Mod & Delay/Verb Models • Delay Models
6 • 24
really fatten up the low end. One of our Beta testers used to use one between two
Ampeg
®
SVT®’s! That’s 180 pounds more weight than your Bass PODXT Live... my
how times have changed! Page 2 controls include HEADS, which enables you to
choose from various combinations of the 4 virtual tape heads. There’s also a FLUT
(wow and flutter) control for dialing in some classic tape warble.
Sweep Echo
This model is a Line 6 original. It first appeared on our DL4 Delay Modeler stompbox
and has turned out to be a special favorite amongst the many DL4 users that we’ve
spoken to. The Page 2 knobs adjust the speed and depth of the sweeping filter part of
the effect. Sweep SPEED sets how fast the filter sweeps, and sweep DEPTH sets the
range of frequencies that the filter affects, allowing you to create and explore your own
shifting landscape of tonal possibilities. There’s both subtle texture and serious
weirdness to be found in this one. If you’ve got an FBV, try assigning its pedal to
control the Mix, and use a relatively short delay for some fun.
Digital Delay
This model is a straight up digital delay with BASS and TREBLE tone controls
(located on Page 2, of course). Nothing fancy here, just basic echo-cho-cho-cho. After
all, it’s good to cleanse the palate every once in a while. Just the thing for bassists who
need clean echo fast.
Reverse
!seltaeB eht dna xirdneH imiJ ekil tsuJ—Take a step back in time with your cool new
reverse delay. Whatever you play in comes back out at you backwards, delayed by the
time you set (up to 2 seconds). To use this little wonder most effectively, try playing a
legato lick, ignoring the reverse playback as well as you can. Longer licks can translate
into very cool reverse phrases. We’ve seen Tom Petty guitarist Mike Campbell taking
advantage of the Reverse Delay in the Line 6 DM4 Delay Modeler stompbox to play a
backwards guitar solo live—on a worldwide TV broadcast, no less. When using
Reverse, try setting the MIX knob to full (100% wetness) so all you hear is the reversed
sound—instant backwards bass solo fun. Here’s another trick to try: start by selecting
* All product names are trademarks of their respective owners, which are in no way associated or
affiliated with Line 6. These product names, descriptions and images are provided for the sole purpose
of identifying the specific products that were studied during Line 6’s sound model development.
AMPEG and SVT are registered trademarks of St. Louis Music, Inc.
Page 100

Stomp, Mod & Delay/Verb Models • Reverb Models
Reverse Delay, then tap in your tempo with your delay time set to lock to a 1/4 note.
Set 0% feedback and 65% mix, and you’ve now got a bow-like effect that works great
on parts with slurs in them. And that’s only the beginning....
Reverb Models
When we set out to create the XT generation of our POD products, we devoted our
fanatical modeling technology and energy for innovation to developing no-compromise
reverb effects. Bass POD
environments (rooms and halls), plate reverbs (which traditionally feature a big steel
plate with some sort of speaker driving it, and usually multiple pickups to pick up the
vibrations of the plate), spring reverbs (the kind that are built into many amps), and
even a couple of unique new models that you’ll have to hear to appreciate.
Springs
Ahh, the ‘sproing’ of a good spring reverb tank. The only thing missing here is the ugly
crash when the guitar player stumbles over your amp.
XT Live’s collection of reverb models emulate physical
6 • 25
Lux Spring
The blackface Fender
®
Deluxe Reverb® amp had a two spring reverb tank, which
we’ve modeled here.
STD Spring
One of the many things that people have loved about the blackface Fender
Reverb
offered a more complex sound than Fender
®
over the years has been its rich, dense reverb sound. The three-spring tank
®
’s earlier spring reverbs. Go find yourself
®
Twin
a bevy of bikini-clad beauties, wax up your board, and dig in.
King Spring
A Line 6 original, inspired by the Sealy Posturepedic. If three springs are cool, how
about a whole mattress full of Slinkies? Richer, denser, wigglier. A good night sleep is
guaranteed, or we’ll give you your money back.
*All product names are trademarks of their respective owners, which are in no way associated or
affiliated with Line 6. These product names, descriptions and images are provided for the sole purpose
of identifying the specific products that were studied during Line 6’s sound model development.
FENDER, TWIN REVERB and DELUXE REVERB are registered trademarks of Fender Musical
Instruments Corporation.
 Loading...