

Liebherr ICNH5133RH, ICNH5123RH, ICNH5123LH, ICNH5133LH User Manual for ICNH5133LH
User Guide
Quality, Design and Innovation
home.liebherr.com/fridge-manuals
Appliance at a glance
Contents
1 Appliance at a glance............................................ 2
1.1 Scope of delivery...................................................... 2
1.2 Overview of the appliance and its equipment........... 3
1.3 Appliance range of use............................................. 3
1.4 Conformity................................................................ 3
2 General safety instructions................................... 4
3 Putting into operation............................................ 5
3.1 Switching on appliance............................................. 5
3.2 Inserting the components......................................... 5
4 Foods management............................................... 5
4.1 Storing food.............................................................. 5
4.2 Storage times........................................................... 6
5 Saving energy........................................................ 6
6 Controls.................................................................. 6
6.1 Controls and displays............................................... 6
6.1.1 Status display..........................................................6
6.1.2 Navigation............................................................... 6
6.1.3 Operating structure..................................................7
6.1.4 Display symbols...................................................... 7
6.2 Control concept........................................................ 7
6.2.1 Activating/deactivating the function......................... 7
6.2.2 Selecting function value.......................................... 7
6.2.3 Activating/deactivating settings............................... 8
6.2.4 Selecting the setting value.......................................8
6.2.5 Go to the Customer menu....................................... 8
6.3 Functions.................................................................. 8
Temperature............................................................ 8
SuperCool............................................................... 9
SuperFrost.............................................................. 9
PowerCool...............................................................9
PartyMode...............................................................9
HolidayMode...........................................................9
TubeClean*............................................................12
Ice cubes*............................................................. 12
D-Value*................................................................ 12
Reminder...............................................................12
Reset.....................................................................12
Turn off appliance.................................................. 13
6.5 Warnings.................................................................. 13
6.5.1 Message............................................................... 13
6.5.2 DemoMode........................................................... 13
7 Features.................................................................. 13
7.1 Door rack.................................................................. 13
7.2 Shelves.................................................................... 14
7.3 Dividing shelf*.......................................................... 14
7.4 VarioSafe*................................................................ 14
7.5 Space for baking tray................................................ 15
7.6 Drawers.................................................................... 15
7.7 EasyFresh-Safe cover.............................................. 16
7.8 Adjusting the moisture levels.................................... 17
7.9 IceMaker*................................................................. 17
7.10 VarioSpace............................................................... 18
7.11 Accessories.............................................................. 18
8 Maintenance........................................................... 18
8.1 FreshAir carbon filter................................................ 18
8.2 Defrosting the appliance........................................... 18
8.3 Cleaning the appliance............................................. 19
9 Customer help........................................................ 20
9.1 Technical specifications............................................ 20
9.2 Operating noises...................................................... 21
9.3 Technical fault........................................................... 21
9.4 Customer Services................................................... 22
9.5 Model plate............................................................... 22
10 Shutting down........................................................ 23
11 Disposing of the appliance................................... 23
E-Saver................................................................. 10
IceMaker*..............................................................10
MaxIce*................................................................. 10
6.4 Settings.................................................................... 10
Connecting to the WLAN.......................................10
Entry lock.............................................................. 11
Display brightness.................................................11
Door alarm............................................................ 11
Info........................................................................ 11
SabbathMode........................................................11
CleaningMode.......................................................12
The manufacturer works constantly on the further development
of all the types and models. Therefore please understand that
we have to reserve the right to make design, equipment and
technical modifications.
To get to know all the benefits of your new appliance, please
read the information contained in these instructions carefully.
The instructions apply to several models. Differences may
occur. Text relating only to specific appliances is marked with
an asterisk (*).
Instructions are marked with a , and results are marked
with a .
These operating instructions apply to:
ICN(h) 51..
1 Appliance at a glance
1.1 Scope of delivery
Check all parts for damage during transport. If you have any
complaints, please contact your retailer or Customer Services
(see 9.4 Customer Services) .
2 * Depending on model and options

Appliance at a glance
Your new appliance comes with the following parts:
Built-in appliance
-
Features (depending on the model)
-
Installation materials (depending on the model)
-
User Guide
-
Installation Guide
-
1.2 Overview of the appliance and its
equipment
1.3 Appliance range of use
Intended use
The appliance is only suitable for cooling food
products in a domestic or household-like environment. This includes, for example, use:
-
in staff kitchens, bed and breakfast establishments,
-
by guests in country houses, hotels, motels
and other accommodation,
-
for catering and similar services in the wholesale trade.
All other types of use are not permitted.
Foreseeable misuse
The following applications are expressly
forbidden:
-
Storing and refrigerating medicines, blood
plasma, laboratory preparations or similar
substances and products based on the
Medical Device Directive 2007/47/EC
-
Use in outdoor areas with very high humidity *
-
Use in areas at risk of explosions
Misusing the appliance may lead to damage to
the goods stored or they may spoil.
Climate classifications
Depending on the climate classification the
appliance is designed to operate in restricted
ambient temperatures. The climate classification applying to your appliance is printed on the
rating plate.
Fig. 1 Example illustration
Temperature range
(A) Fridge section (C) Freezer compartment
(B) EasyFresh
(D) Coldest zone
Features
(1) Controls (10) Drainage outlet
(2) Fan with FreshAir active
carbon filter
(3) Dry rear wall (12) Freezer compartment
(4) Split shelf* (13) IceMaker*
(5) Shelf (14) VarioSpace
(6) VarioSafe* (15) Nameplate
(7) IceMaker water tank* (16) Door rack
(8) Space for baking tray (17) Bottle rack
(9) EasyFresh-Safe cover
Note
Shelves, drawers and baskets are arranged for optimum
u
energy efficiency when the appliance is delivered. Changing
how the shelves, for example, are inserted in the fridge
compartment does not have any impact on energy
consumption.
(11) EasyFresh-Safe
Note
Keep to the specified ambient temperatures
u
in order to guarantee that the appliance works
properly.
Climate classification
SN 10 °C to 32 °C
N 16 °C to 32 °C
ST 16 °C to 38 °C
T 16 °C to 43 °C
for ambient temperatures of
1.4 Conformity
The refrigerant circuit has been tested for leaks. When
installed, the appliance complies with the applicable safety
regulations and with the directives 2014/35/EU, 2014/30/EU,
2009/125/EC, 2011/65/EU, 2010/30/EU and 2014/53/EU.
The full text of the EU Declaration of Conformity is available on
the following website: www.Liebherr.com
* Depending on model and options 3
General safety instructions
2 General safety instructions
Danger for the user:
-
This device can be used by children and
people with impaired physical, sensory or
mental abilities or with a lack of experience and knowledge provided that they are
supervised or have received instruction in
the safe use of this device, and about the
resulting hazards. Children must not play
with this appliance. Cleaning and user maintenance work must not be carried out by children without adult supervision. Children aged
between 3 and 8 are allowed to load and
unload the appliance. Children below the age
of 3 must be kept away from the appliance
unless they are under continuous adult supervision.
-
When disconnecting the appliance from the
supply, always take hold of the plug. Do not
pull the cable.
-
In the event of a fault pull out the mains plug
or deactivate the fuse.
-
Do not damage the mains power cable. Do
not operate the appliance with a defective
mains power cable.
-
Only customer service or other specially
trained staff may repair or perform other operations on the appliance.
-
Only install, connect and dispose of the appliance according to the instructions.
-
Only use the appliance when it is installed.
-
Please keep these instructions in a safe place
and pass them on to any subsequent owners.
Fire hazard:
-
The coolant used (information on the model
plate) is eco-friendly but also flammable. Any
leaking coolant may ignite.
•
Do not damage the refrigerant circuit pipes.
•
Do not handle ignition sources inside the
appliance.
•
Do not use electrical appliances inside the
appliance (e.g. steam cleaners, heaters, ice
cream makers, etc.).
•
If the refrigerant leaks: remove any naked
flames or ignition sources from the vicinity
of the leakage point. Properly air the room.
Inform customer services.
-
Do not store explosives or sprays using
combustible propellants such as butane,
propane, pentane, etc. in the appliance. To
identify these spray cans, look for the list
of contents printed on the can, or a flame
symbol. Gases possibly escaping may ignite
due to electrical components.
-
Please be sure to store alcoholic drinks or
other packaging containing alcohol in tightly
closed containers. Any alcohol that leaks out
may be ignited by electrical components.
Danger of tipping and falling:
-
Do not misuse the plinth, drawers, doors etc.
as a step or for support. This applies particularly to children.
Danger of food poisoning:
-
Do not consume food which has been stored
too long.
Danger of frostbite, numbness and pain:
-
Avoid prolonged skin contact with cold
surfaces or refrigerated/frozen goods or take
protective measures, e.g wear use gloves.
Danger of injury and damage:
-
Hot steam can lead to injury. Do not use electrical heating or steam cleaning equipment,
open flames or defrosting sprays to defrost.
-
Do not use sharp implements to remove the
ice.
Danger of crushing:
-
Do not hold the hinge when opening and
closing the door. Fingers may get caught.
Symbols on the appliance:
The symbol can be located on the
compressor. It refers to the oil in the
compressor and indicates the following
danger: Swallowing or inhaling can be fatal.
This is only relevant for recycling. There is no
danger in normal operation.
This symbol is found on the compressor and
indicates the danger of flammable materials.
Do not remove the sticker.
A sticker to this effect may be applied to
the rear of the appliance. It refers to the
foam-padded panels in the door and/or the
housing. This is only relevant for recycling. Do
not remove the sticker.
Please observe the specific information in
the other sections:
DANGER identifies a situation involving direct
danger which, if not obviated, may
result in death or severe bodily
injury.
WARNING identifies a dangerous situation
which, if not obviated, may result in
death or severe bodily injury.
CAUTION identifies a dangerous situation
which, if not obviated, may result in
minor or medium bodily injury.
4 * Depending on model and options

Putting into operation
NOTICE identifies a dangerous situation
which, if not obviated, may result in
damage to property.
Note It contains useful instructions and
tips.
3 Putting into operation
3.1 Switching on appliance
Ensure that the following conditions are met:
Appliance is installed and connected according to installa-
q
tion instructions.
All adhesive strips, adhesive and protective films as well
q
as transport safety devices in and on the appliance are
removed.
All marketing leaflets are removed from the drawers.
q
Switch on the appliance via the control panel next to the
u
display.
4 Foods management
4.1 Storing food
Risk of fire
u
Note
The energy consumption increases and the cooling power
goes down if ventilation is not sufficient.
u
When storing food, always observe the following:
q
q
q
q
q
q
q
WARNING
Do not use any electrical appliances in the food area of the
appliance unless recommended by the manufacturer.
Always keep air slots clear.
Air vents on the inside rear wall are unobstructed.
Air vents on the fan are unobstructed.
Food is in sealed packaging.
Foods that easily absorb or give off smell or taste are stored
in sealed containers or covered.
Raw meat and fish are in clean, sealed containers to prevent
them coming into contact with or dripping onto other foods.
Liquids are in sealed containers.
Foods are not stored too closely together, as the air needs
to circulate.
Fig. 2
The status screen appears.
u
If DemoMode is displayed after switching on the appliance,
u
DemoMode can be deactivated within the next 5 minutes.
Fig. 3
Press confirmation next to the display for 3 seconds.
u
DemoMode is deactivated.
w
Note
The manufacturer recommends:
Storing food: wait approx. 6 hours for the set temperature to
u
be reached.
Store frozen produce at -18 °C or colder.
u
3.2 Inserting the components
Insert the supplied components to make the most of your
u
appliance.
Purchase and install the SmartDevice Box (see https://
u
smartdevice.liebherr.com/install).
Install the SmartDevice app (see https://
u
apps.home.liebherr.com/).
Note
You can purchase accessories from the Liebherr household
appliance store (home.liebherr.com).
Note
Failure to follow these guidelines can lead to food perishing.
4.1.1 Fridge section
The natural air circulation creates a range of temperatures.
Arrange your food as follows:
In the top section and in the door: butter and cheese,
u
preserves and tubes.
In the coldest zone
u
ready-to-eat meals, meat and sausages
On the bottom shelf: Raw meat and fish
u
Fig. 1 (D)
: Perishable foods such as
4.1.2 EasyFresh-Safe
This compartment is great for non-packaged foods, such as
fruit and vegetables.
The air moisture in the compartment depends on the moisture
content of the items being stored and the number of times the
door is opened. You can adjust the air moisture.
Arrange your food as follows:
Store your loose fruit and vegetables.
u
Excessive air moisture: Regulate the air humidity
u
(see 7.8 Adjusting the moisture levels) .
4.1.3 Freezer compartment
This provides a dry, frosty storage climate at -18 °C. A frosty
climate is great for storing frozen food and frozen goods for
several months, making ice cubes and freezing fresh food.
Freezing food
You can freeze as many kilograms of fresh food within 24 hours
as indicated on the nameplate (see 9.5 Model plate) under
"freezing capacity ... kg/24h".
So that the food is rapidly frozen through to the core, keep to
the following quantities per pack:
Fruit, vegetables up to 1 kg
-
Meat up to 2.5 kg
-
* Depending on model and options 5
Saving energy
Before freezing goods, please make sure of the following:
SuperFrost is activated (see 6.3 Functions) when the
q
amount of food to freeze exceeds approx. 2 kg.
With a small amount to freeze: SuperFrost is on for about 6
q
hours beforehand.
With a maximum amount to freeze: SuperFrost is on for
q
about 24 hours beforehand.
Arrange your food as follows:
CAUTION
Risk of injury from glass fragments!
Drink bottles and cans may explode if frozen. This applies
particularly to carbonated drinks.
Only freeze drink bottles and cans when using the
u
timer
function.
With a small amount to freeze:
Put packaged food in the top drawers.
u
With a maximum amount to freeze:
Remove the top drawers and place the packaged food onto
u
the top shelves.
With the maximum frozen quantities:
Once SuperFrost turns off automatically, place the food in
u
the drawer compartment.
Defrost the food
- In the fridge
- In the microwave
- In the stove/oven
- At room temperature
bottle
WARNING
Risk of food poisoning!
Do not re-freeze thawed food.
u
Only take out the food you need at the time.
u
Cook defrosted food as soon as possible.
u
5 Saving energy
Pay attention to good ventilation. Do not cover ventilation
-
holes or grids.*
Always keep the fan air slits clear.
-
Do not install the appliance in direct sunlight, next to an
-
oven, radiator or similar.
Energy consumption depends on the installation conditions,
-
e.g. the ambient temperature (see 1.3 Appliance range of
use) . A warmer ambient temperature can increase the
energy consumption.
Open the appliance for as short a time as possible.
-
The lower the temperature is set the higher the energy
-
consumption.
Sort your food: home.liebherr.com/food.
-
Keep all food properly packed and covered. This prevents
-
frost from forming.
Only take food out for as long as necessary so that it doesn’t
-
warm up too much.
Inserting warm food: allow to cool down to room temperature
-
first.*
Thaw frozen food in the refrigerator.
-
For longer periods of absence, use HolidayMode (see Holi-
-
dayMode) .
6 Controls
6.1 Controls and displays
The display provides a quick overview of the temperature
setting and the status of functions and settings. You can control
the functions and settings either by deactivating/activating them
or by selecting a value.
6.1.1 Status display
4.2 Storage times
Refer to the specified storage times as a guide.
In the case of foods with a minimum shelf life, the date indi-
cated on the packaging still applies.
4.2.1 Fridge section
Always follow the best-before date stated on the packaging.
4.2.2 Freezer compartment
Recommended storage period for various types of food
Ice cream at -18 °C 2 to 6 months
Sausages, ham at -18 °C 2 to 3 months
Bread, baked goods at -18 °C 2 to 6 months
Game, pork at -18 °C 6 to 9 months
Fatty fish at -18 °C 2 to 6 months
Lean fish at -18 °C 6 to 8 months
Cheese at -18 °C 2 to 6 months
Poultry, beef at -18 °C 6 to 12 months
Vegetables, fruit at -18 °C 6 to 12 months
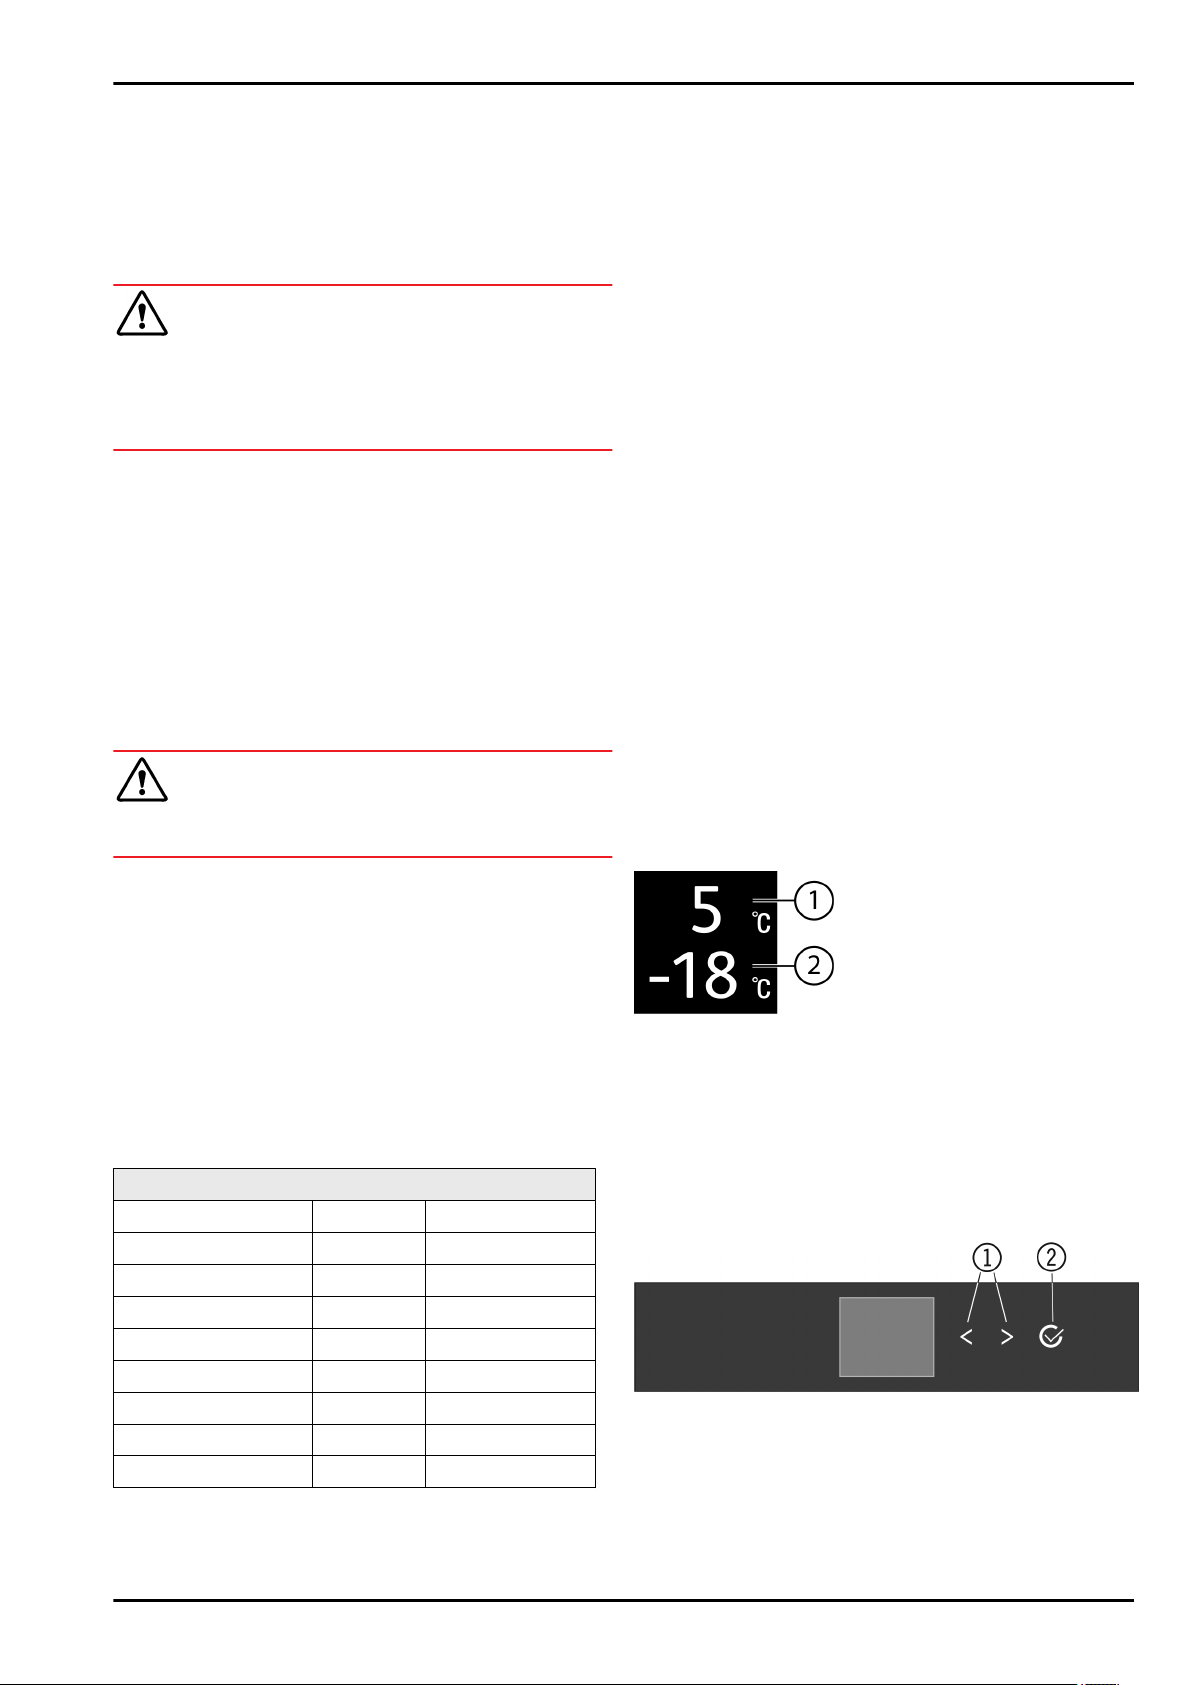
Fig. 4
(1) Temperature display of
the fridge section
(2) Freezer compartment
temperature display
6.1.2 Navigation
Navigate in the menu to access the individual functions. An
audible signal sounds after confirming a function or setting. If
no selection is made after 10 seconds the display switches to
the Status screen.
The appliance is operated with the buttons next to the display.
Fig. 5
(1) Navigation arrow left/
right
Navigation arrow left/right
Navigating in the menu. After the last menu page, it goes
-
back to the first one.
(2) Confirm
Fig. 5 (1)
:
6 * Depending on model and options
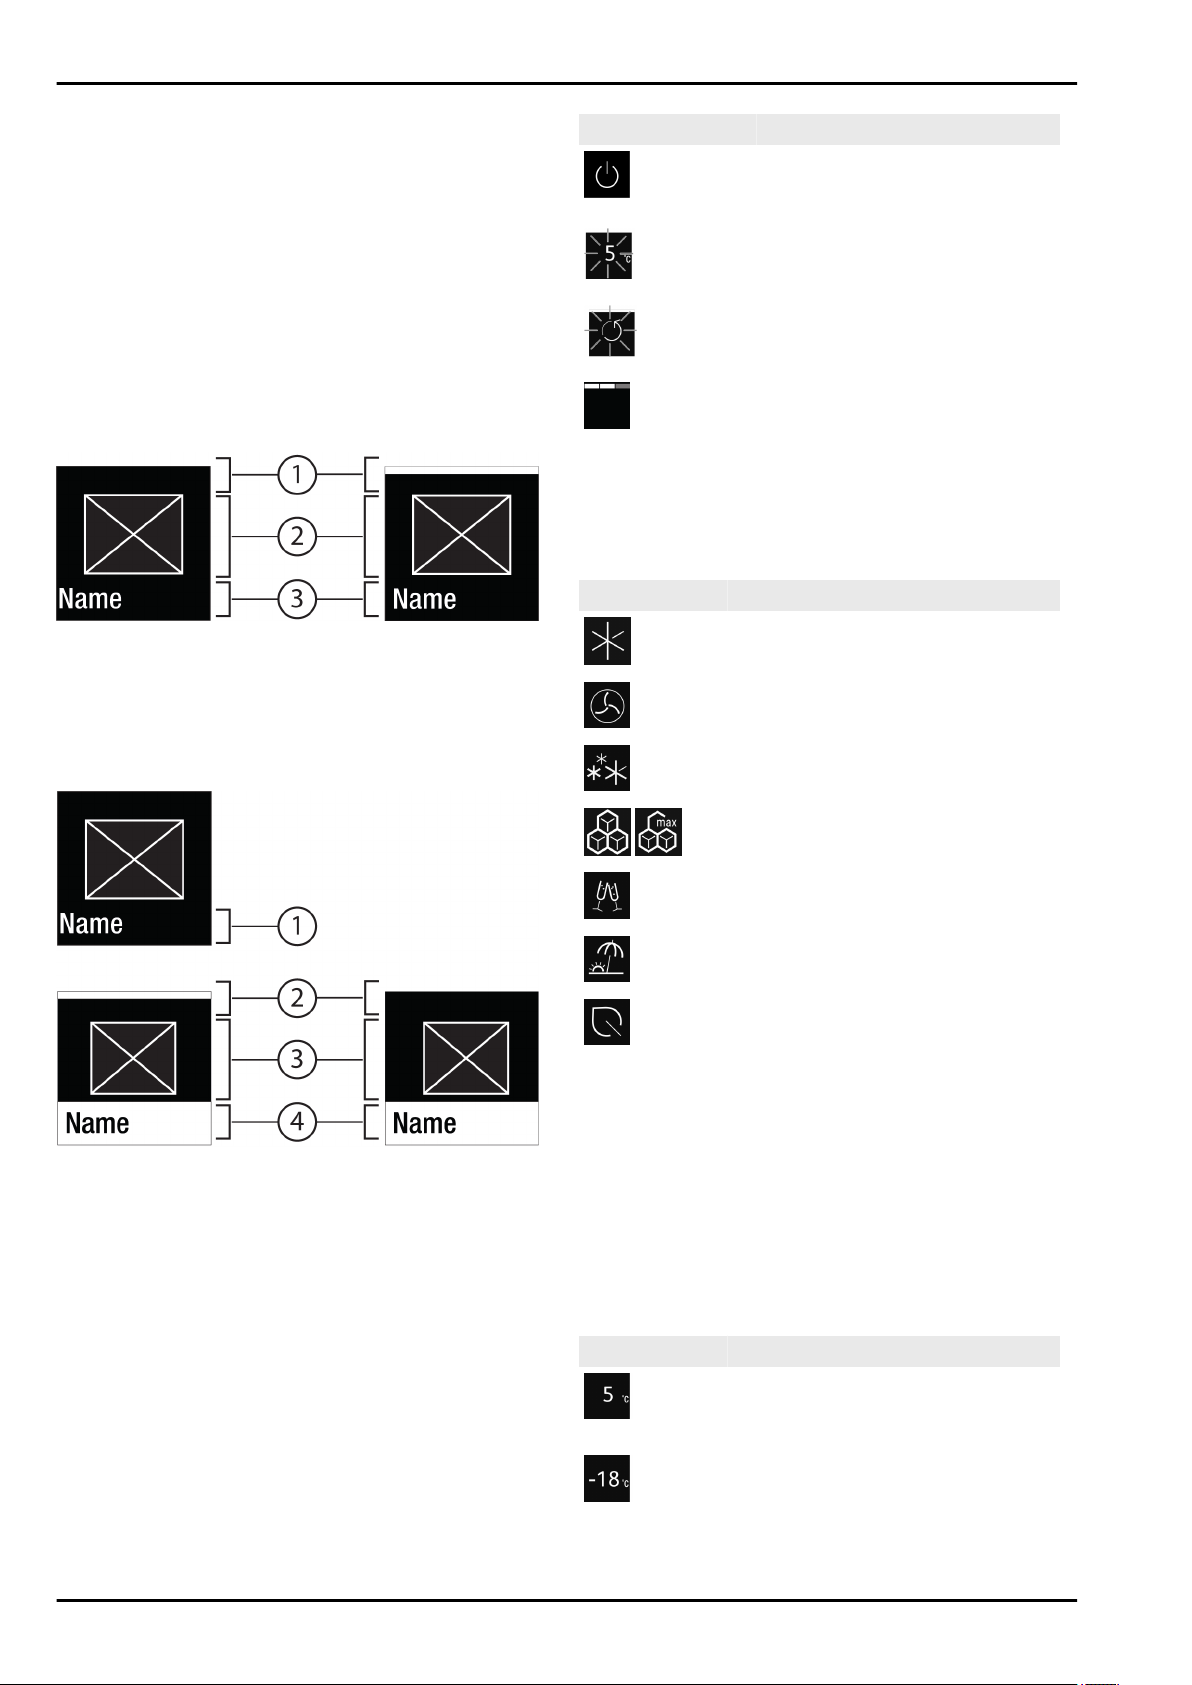
Controls
Confirm
-
-
-
Back to Status display: in the fastest manner:
-
-
Fig. 5 (2)
Activating/deactivating a function.
Open a submenu.
Confirm a selection. After confirmation the display switches
back to the menu.
Close and open the door.
or wait 10 seconds. The display switches to the Status
display.
:
6.1.3 Operating structure
The controls are explained by a template. The display changes
depending on the function or settings.
Menus without a submenu
Fig. 6
(1) Status deactivated /
status activated white
bar in the top area
(2) Symbol or activated
value
Menus with a submenu
(3) Menu: Function name or
menu: Setting name
Symbol Appliance status
Standby
The appliance or temperature zone
is switched off.
Flashing number
Appliance is working. Temperature
flashes until the set value is reached.
Flashing symbol
Appliance is working. Setting is
made.
Bar grows steadily
Function is activated.
6.2 Control concept
6.2.1 Activating/deactivating the function
You can activate/deactivate the following functions:
Symbol Function
SuperCool
PowerCool
SuperFrost
x
x
x
Fig. 7
(1) Menu: Function name or
menu: Setting name
(2) Status (4) Submenu: function name
(2) off / on
You can navigation as follows:
Press the left/right
-
Press Confirm
-
Press the left/right
•
Set a new value: Press Confirm
•
active value
Back to the menu: Press Confirm
•
active value
Fig. 5 (1)
Fig. 5 (2)
Fig. 5 (1)
Fig. 6 (1)
Fig. 6 (2)
(3) Symbol or activated value
or submenu: Setting name
arrow to navigate.
to open the submenu
arrow to navigate.
Fig. 5 (2)
.
Fig. 5 (2)
.
Fig. 7 (4)
to select an
to select the
.
6.1.4 Display symbols
Display symbols provide information on the current appliance
status:
*
x
When a function is on, the appliance works harder. This
means the appliance could make louder noises and consume
more energy.
Press the navigation arrows
u
Press Confirm
u
You hear the confirmation tone.
w
Status appears in the menu.
w
Function is on/off.
w
IceMaker and MaxIcex*
PartyMode
HolidayMode
E-Saver
x
Fig. 5 (1)
Fig. 5 (2)
.
until the appears.
6.2.2 Selecting function value
With the following functions you can set a value in the
submenu:
Symbol Function
Cool:
Setting the temperature
Turn on/off the temperature zone
Freeze:
Setting the temperature
Turn on/off the temperature zone
* Depending on model and options 7
Controls
Tap the navigation arrows
u
Fig. 5 (1)
repeatedly until the function is displayed.
Press Confirm
u
Select the setting value with the navigation arrows
u
Fig. 5 (2)
.
Setting the temperature
Press Confirm
u
You hear the confirmation tone.
w
Status: On
w
Fig. 7 (4)
Display switches back to the menu.
w
Fig. 5 (2)
Fig. 6 (1)
.
.
appears briefly in the submenu
Switching the temperature zone on/off
To Confirm, press for 3 seconds.
u
You hear the confirmation tone.
w
Display returns to the Status screen.
w
6.2.3 Activating/deactivating settings
You can activate/deactivate the following settings:
Symbol Setting
1
WiFi
Entry lock
SabbathMode
2
2
Fig. 5 (1)
Tap the navigation arrows
u
Fig. 5 (1)
repeatedly until settings
appears.
Press Confirm
u
.
Tap the navigation arrows
u
Fig. 5 (2)
.
Fig. 5 (1)
repeatedly until the
desired setting is displayed.
Press Confirm
u
Select the setting value with the navigation arrows
u
Press Confirm
u
You hear the confirmation tone.
w
Status appears briefly in the submenu.
w
Display switches back to the menu.
w
Fig. 5 (2)
Fig. 5 (2)
.
.
6.2.5 Go to the Customer menu
You can see the following settings in the Customer menu:
Symbol Function
D-Value*
*
TubeClean*
*
Ice cubes1*
*
Software
1*
2*
Fig. 5 (1)
.
Cleaning Mode
Reminders
Reset
Off
u
Tap the navigation arrows
2
2
2
1
Fig. 5 (1)
repeatedly until the
settings appear.
Press Confirm
u
Tap the navigation arrows
u
Fig. 5 (2)
.
Fig. 5 (1)
repeatedly until the
desired setting is displayed.
1
Activate setting (shortpress)
Press Confirm
u
You hear the confirmation tone.
w
Status appears in the menu.
w
Setting is on / off.
w
2
Activate setting (longpress)
To Confirm
u
You hear the confirmation tone.
w
Status appears in the menu.
w
Display changes.
w
Fig. 5 (2)
Fig. 5 (2)
.
, press for 3 seconds.
6.2.4 Selecting the setting value
With the following settings you can set a value in the submenu:
Symbol Settings
Brightness
u
Press the navigation arrows
Fig. 5 (1)
until Settings
appears.
Press Confirm
u
u
Press the navigation arrows
Fig. 5 (2)
.
Fig. 5 (1)
until About
appears in the display.
Press Confirm
u
Go to the Customer menu: Enter the code 151.
u
In the customer menu, press the navigation arrows
u
Fig. 5 (2)
.
until you see the setting you want.
1
Select the value
Press Confirm
u
You hear the confirmation tone.
w
Status appears briefly in the display.
w
Display switches back to the menu.
w
2
Activate the setting
ToConfirm
u
You hear the confirmation tone.
w
Status appears on the display.
w
The symbol flashes as long as the appliance is working.
w
Fig. 5 (2)
Fig. 5 (2)
.
, press for 3 seconds.
6.3 Functions
Temperature
The temperature depends on the following factors:
The amount of times the door is opened
-
How long the door is open for
-
The room temperature of the installation site
-
The type, temperature and amount of food
-
Temperature zone Recommended setting
Fig. 5 (1)
5 °C
Door alarm
Fridge section
8 * Depending on model and options
 Loading...