

Liebherr EWTGB3583 Installation Guide
Installation instructions Page 14
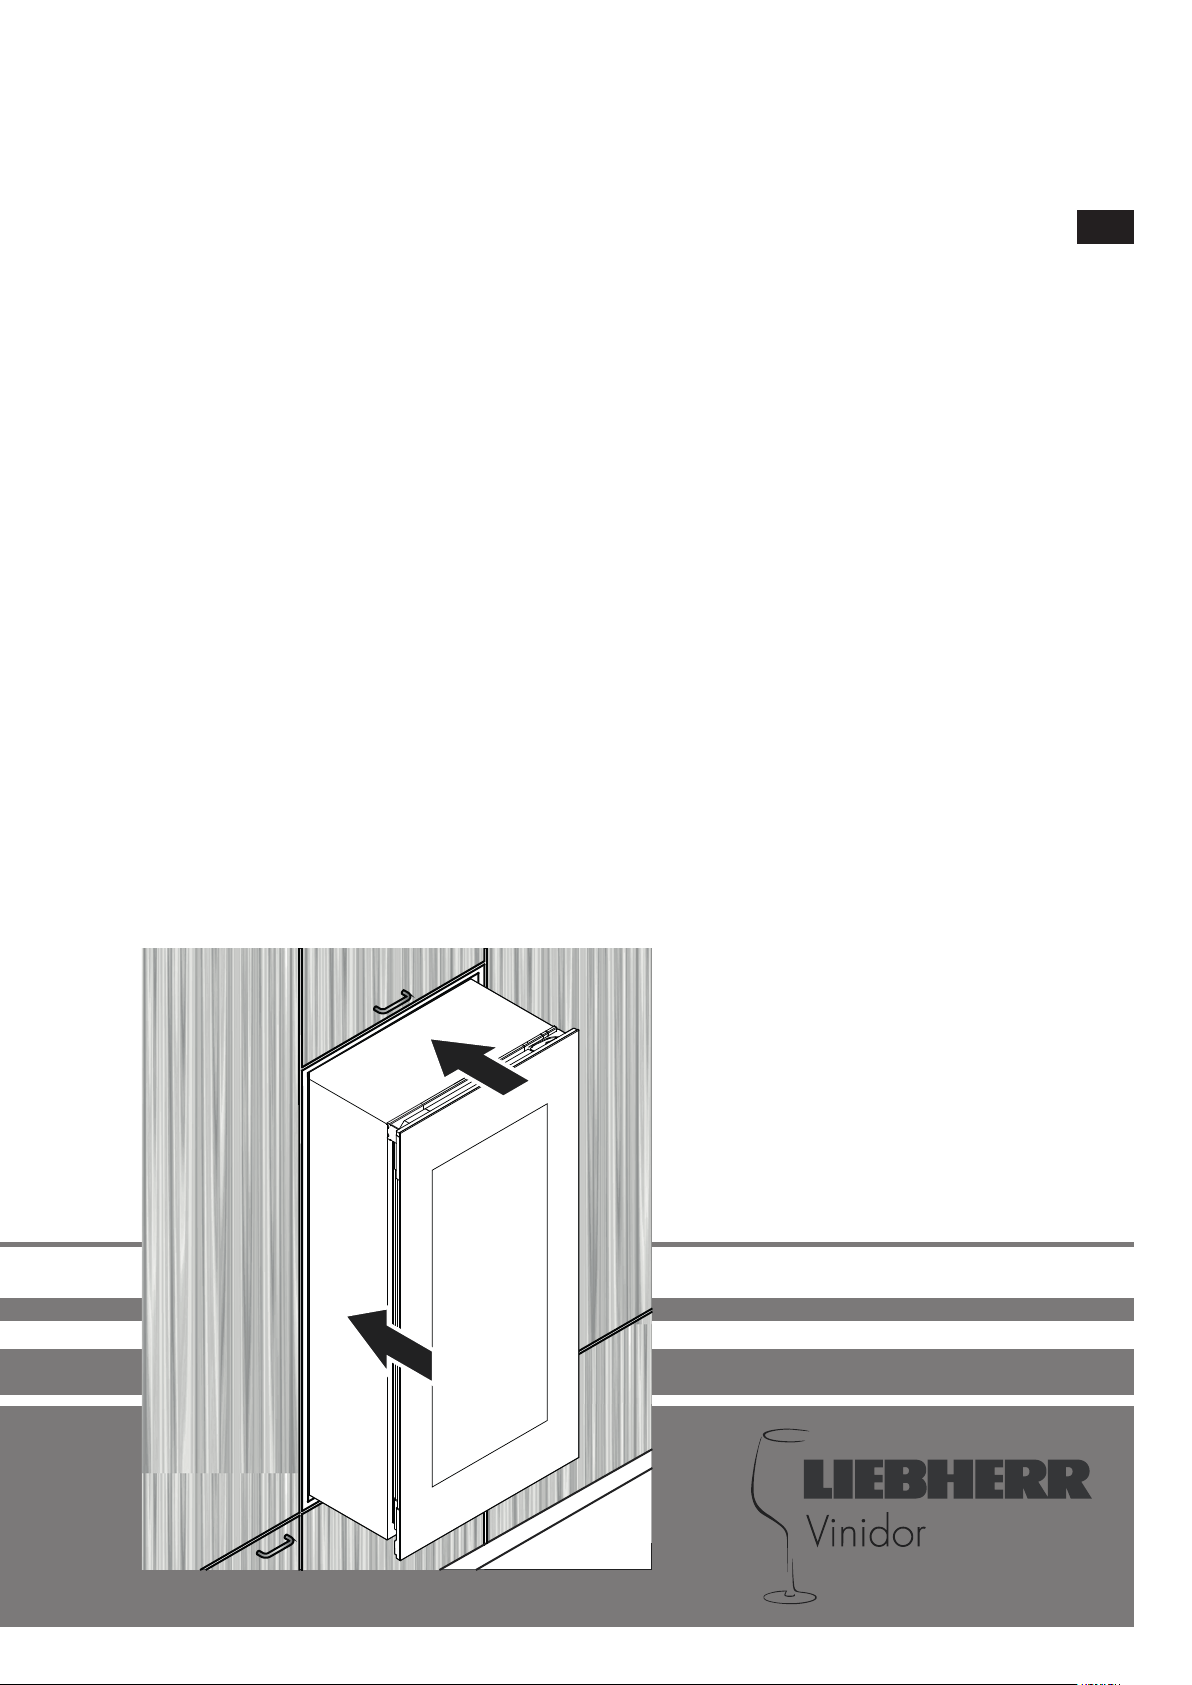
Multi-temperature wine cabinet
EN
7085 665-02
EWTgb/gw 1683 / 2383 / 35 83
EN
Content
Scope of delivery ....................................................................14
Appliance dimensions ............................................................ 14
Transporting the appliance .....................................................15
Installation dimensions ........................................................... 16
Appliance venting ................................................................... 16
Changing over door hinges ....................................................17
Installing the appliance ...........................................................20
Adjusting the door ..................................................................24
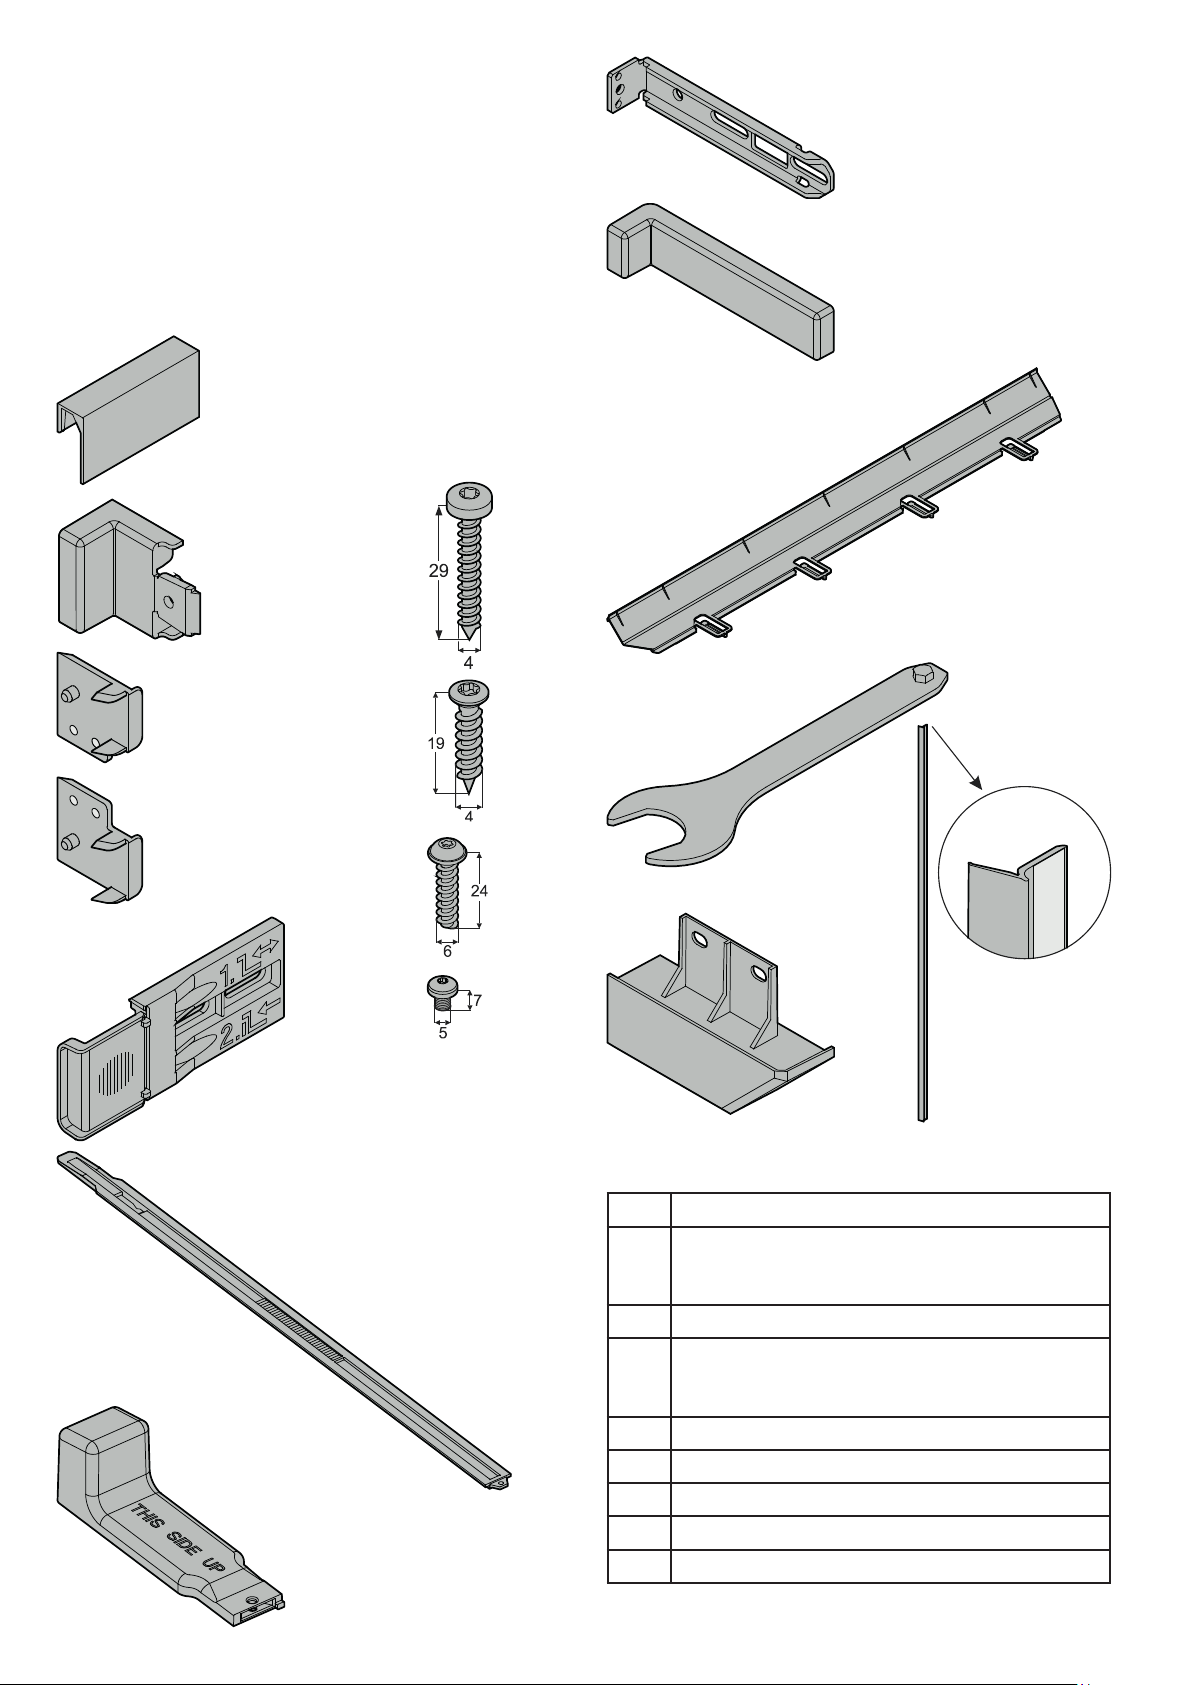
Attachment bracket
Scope of delivery
Spacer
Spacer
Cover
Labels
2 pc. - EWT 1683
4 pc. - EWT 2383
8 pc. - EWT 3583
Cover prole
2 pc.
Cover
5 pc.
Open-ended
spanner
2 pc.
Cover
Attachment bracket
Stabilising rail
2 pc.
Stabilising rail handle
2 pc.
Appliance dimensions
A 510 mm
EWT 16.. - 906 mm
B
C 572 mm
D
E 595 mm
F 557 mm
G 254 mm
H 1100 mm
I 115°
EWT 23.. - 1233 mm
EWT 35.. - 1816 mm
EWT 16.. - 872 mm
EWT 23.. - 1218 mm
EWT 35.. - 1770 mm
Cover prole
14
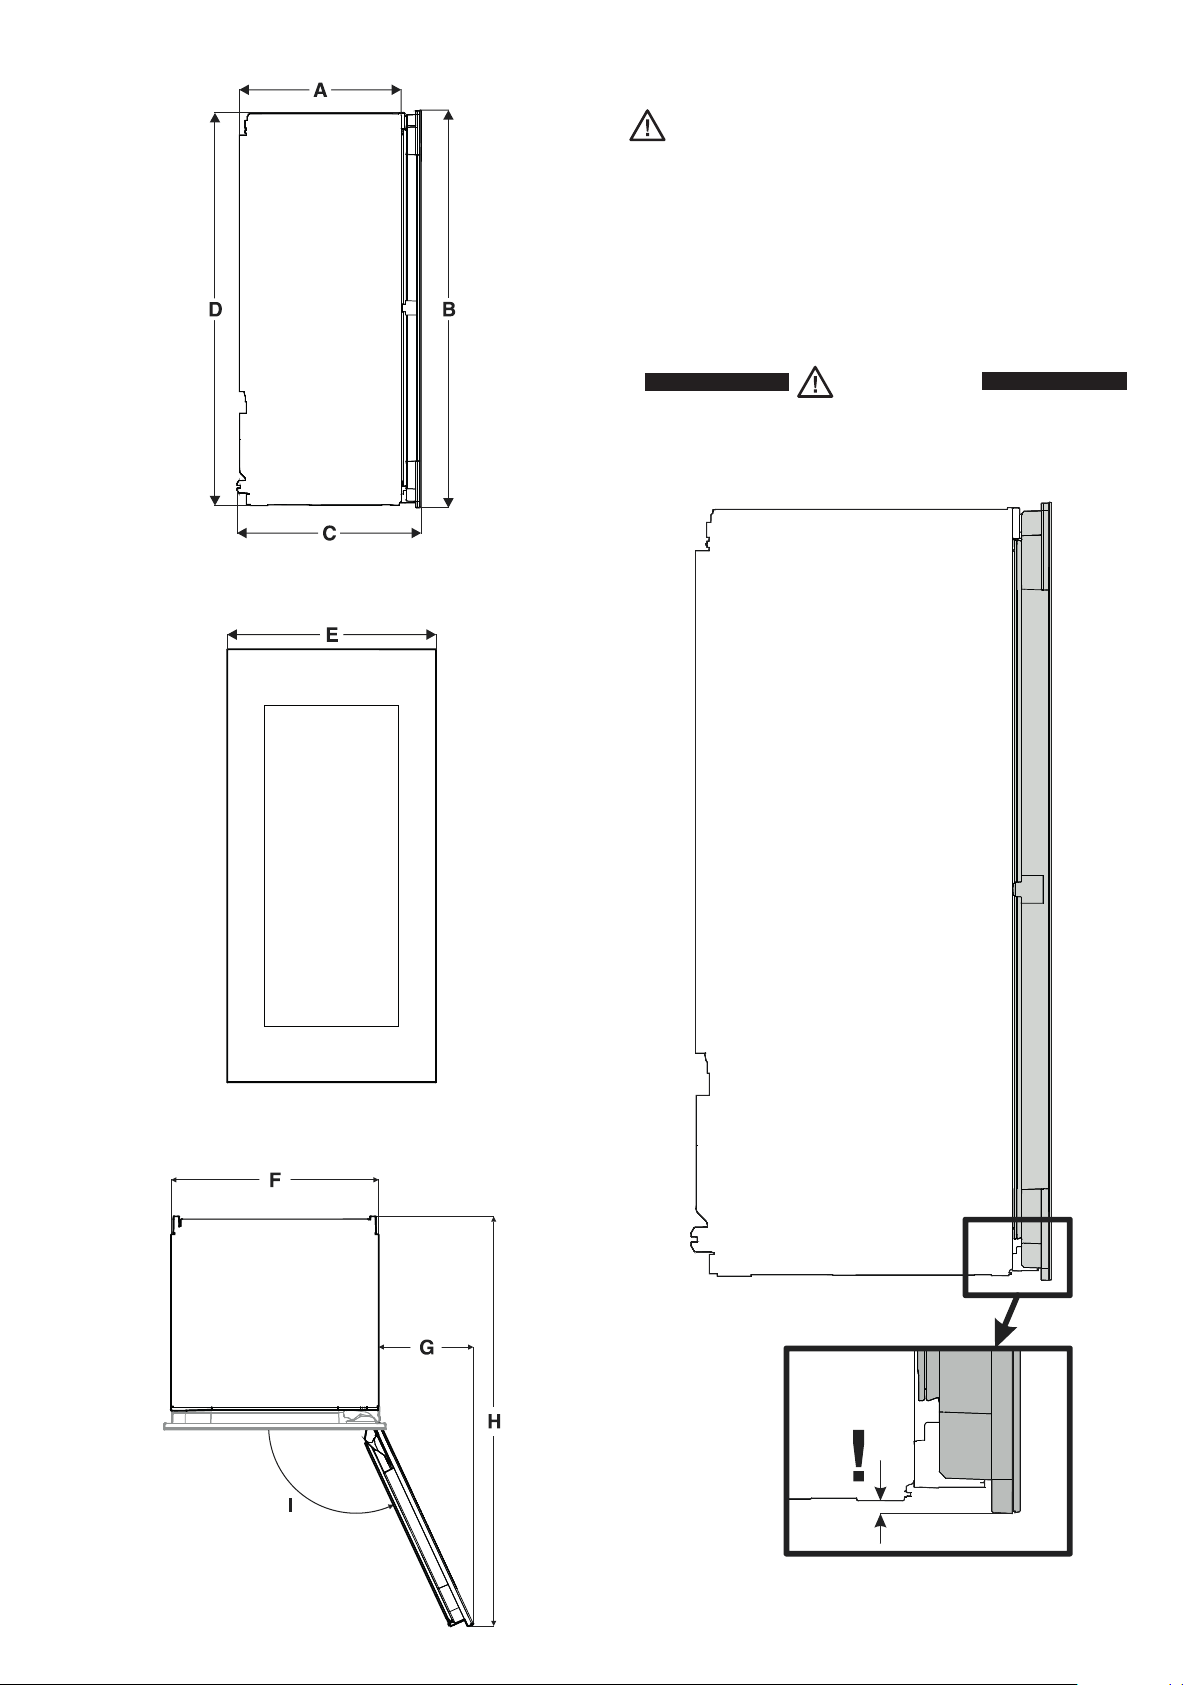
Side view
Front view
EN
Transporting the appliance
CAUTION
Danger of injury or damage as a result of incorrect transport!
- Transport the appliance in a packed condition.
- Transport the appliance upright.
- Do not transport the appliance without assistance.
WARNING!
An appliance which has not been built in can
topple over!
View from above
15
EN
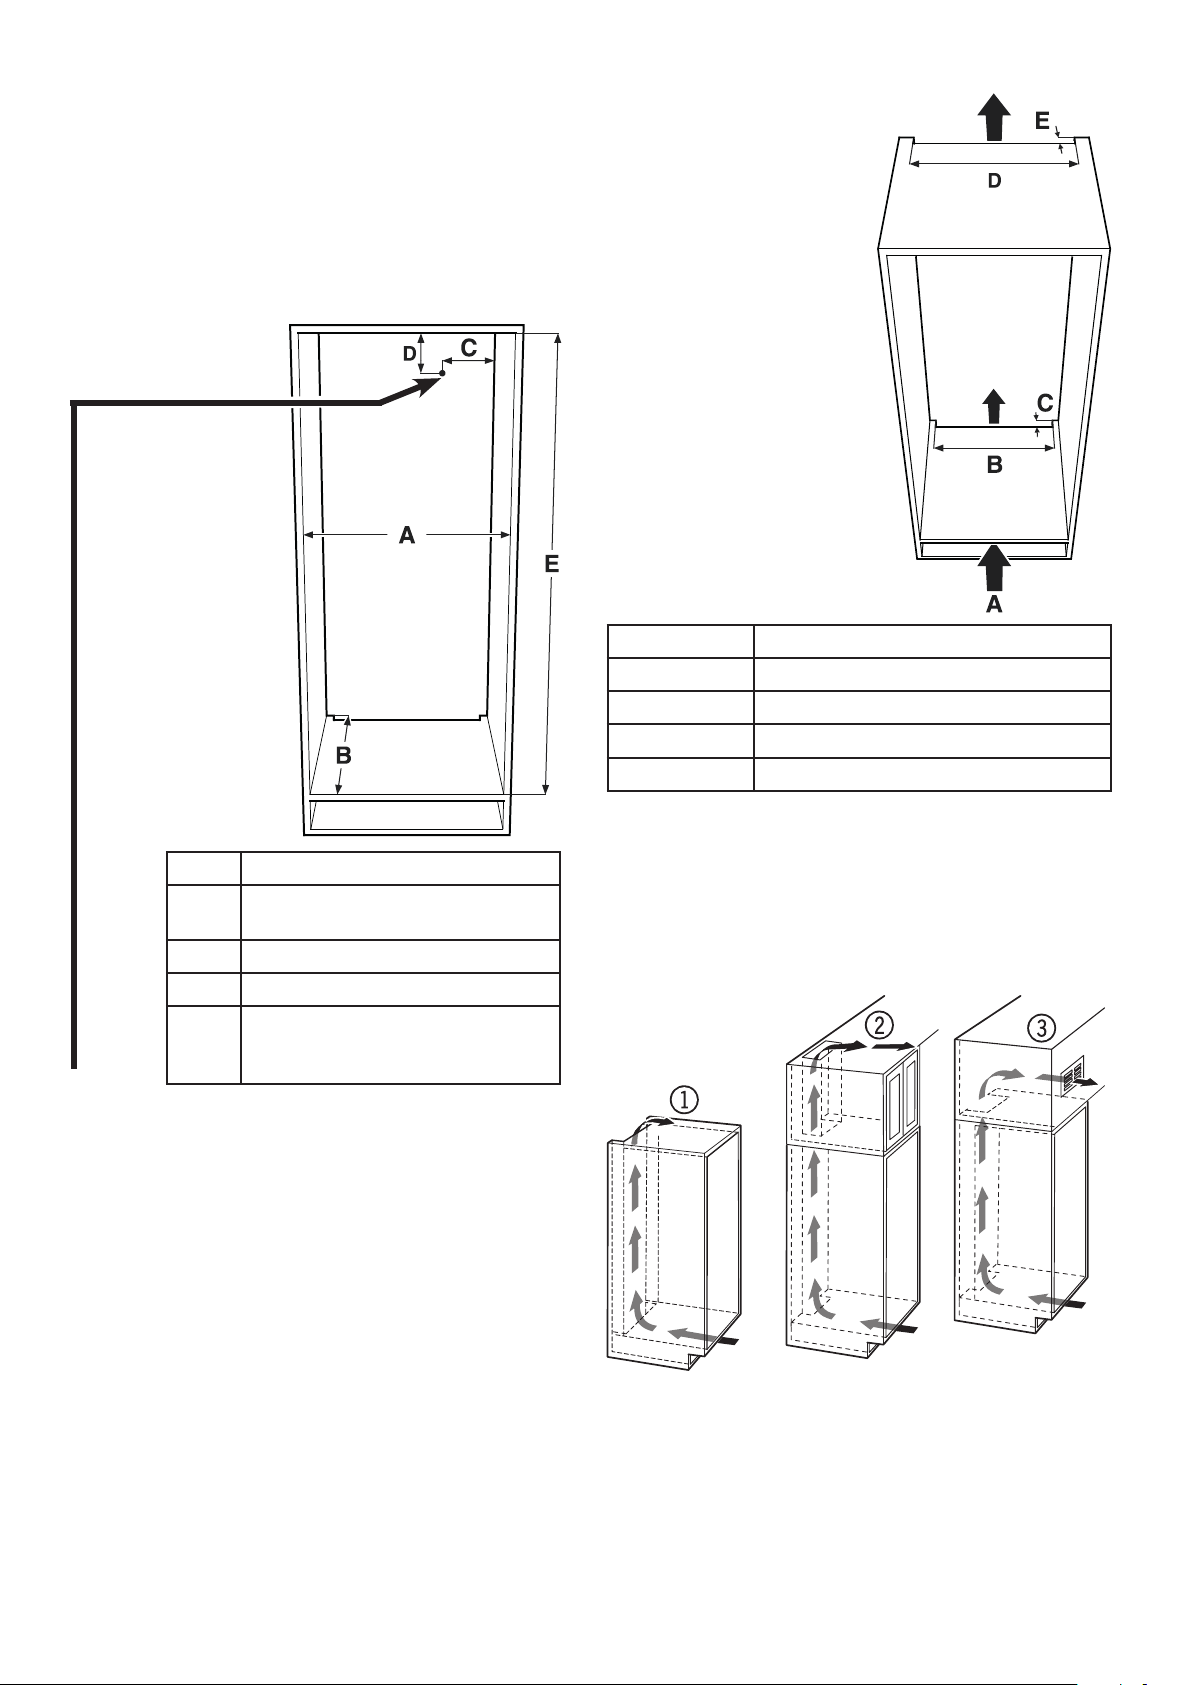
Installation dimensions
Important note
In order to avoid any problems when installing the appliance
and to avoid damage to the appliance, the following conditions
must be complied with.
The kitchen unit must be aligned horizontally and
vertically!
Minimum wall thick ness of the body of the uni t = 16 mm.
Appliance venting
Important note
The clear ventilation cross-
section must be at least
200 cm² from the lower
ventilation opening right to
the upper one.
A
B
C
D
E
In this area, the mains power cable comes out of the appliance
rear.
Free length of the mains power cable:
EWT 16..: 2000 mm
EWT 23..: 2000 mm
EWT 35..: 2800 mm
560 mm - 570 mm
min. 550 mm
(recommended 560 mm)
70 mm
30 mm
EWT 16.. - 874-890 mm
EWT 23.. - 1220-1236 mm
EWT 35.. - 1772-1788 mm
A
B
C
D
E
Types of air outlet
1
Directly above the appliance
2
Above the top unit
3
From the front of the top unit with decor grille
min. 200 cm²
min. 500 mm
min. 40 mm
min. 500 mm
min. 40 mm
Choose the position of the socket considering these specifications.
The socket must not be situated behind the appliance and must be easily accessible.
16
Important note
When using de cor grilles, it must be taken in to account
that the clear ventilation cross-section corresponds
to the sum of the individual openings in the grille.
A cut-out section of merely 200 cm² for installing the
ventilation grille is thus not sucient.
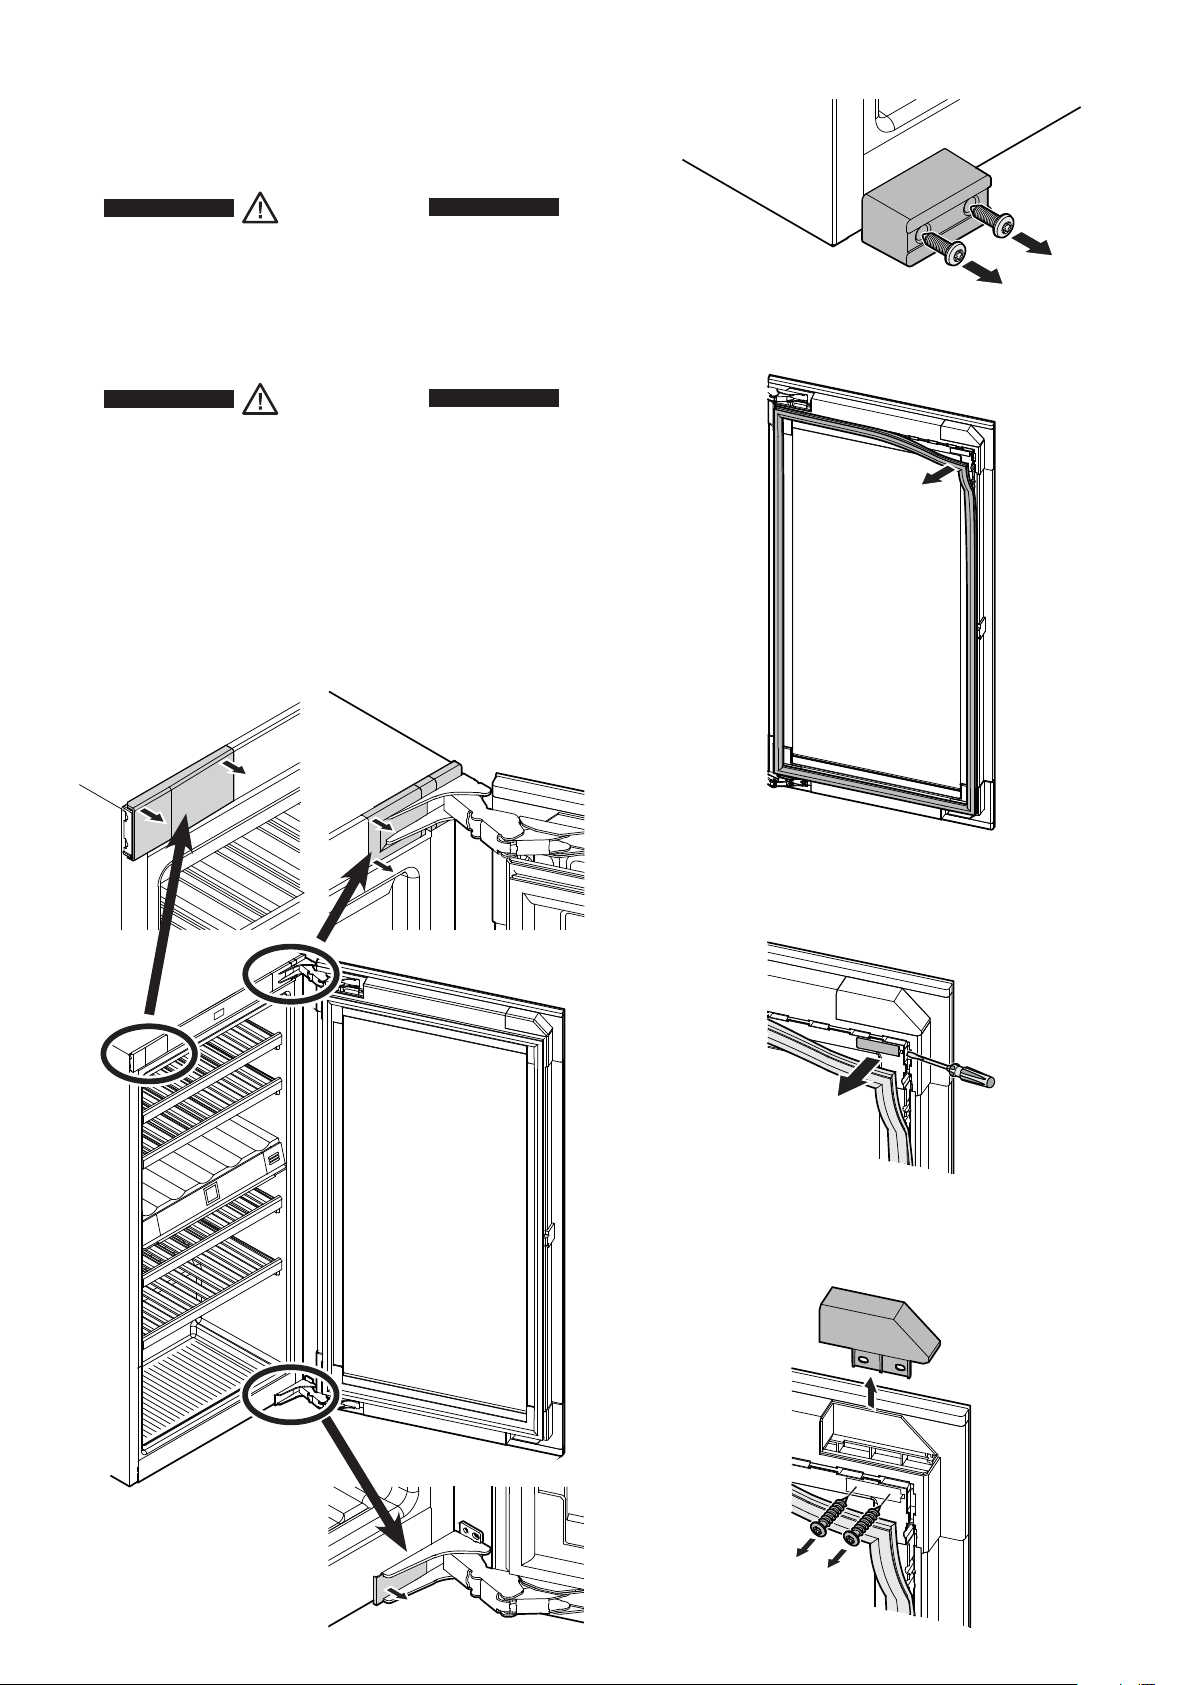
Changing over door hinges
Door hinges should only be changed by a trained expert.
EN
2. Remove the transportation safety component.
Changing the door hinges must be done by two people.
WARNING!
High door weight.
Danger of injury and damage to property.
Only complete the modification work if you
can lift a weight of 60 kg.
WARNING!
Risk of injury due to the door dropping out!
If the fastening parts are not screwed into
place firmly enough, the door may drop out.
This may lead to severe injuries. What is
more, the door may not close and therefore
the appliance may fail to cool properly.
1. Remove covers.
Remove seal.
3.
2.
3.
1.
4.
Remove cover.
Remove cover.
5.
4.
5.
17
 Loading...