

Page 1

UÎIVATELSK¯ MANUÁL
KG110
UÎIVATELSK¯ MANUÁL
KG110
Pfieãtûte si tento návod peãlivû je‰tû pfied pouÏíváním svého nového mobilního
telefonu. Uchovejte si ho pro pfiípad potfieby do nûj nahlédnout.
UÎIVATELSK¯ MANUÁL
KG110
P/N : MMBB0217339(1.0)
ENGLISH
âESKY
SLOVENSKY
Made in Korea
H
KG110 Cze_Cover 2006.10.25 4:46 PM Page 1
Page 2
KG110
USER GUIDE
Please read this manual carefully
before operating your mobile phone.
Retain it for future reference.
DDii sspp ooss aa ll oo ff yyoouurr ooll dd aa pp ppll iiaann ccee
1. When this crossed-out wheeled bin symbol is attached to a product it
means the product is covered by the European Directive 2002/96/EC.
2. All electrical and electronic products should be disposed of separately from
the municipal waste stream via designated collection facilities appointed by
the government or the local authorities.
3. The correct disposal of your old appliance will help prevent potential
negative consequences for the environment and human health.
4. For more detailed information about disposal of your old appliance, please
contact your city office, waste disposal service or the shop where you
purchased the product.
KG110 Cze_(Eng)_Rev.1.0_(1025) 2006.10.25 4:33 PM Page 1
Page 3

Table of Contents
2
Introduction 5
For Your Safety 6
Guidelines for safe and efficient use 7
KG110 Features 11
Parts of the phone 11
Front view 11
Rear view 12
Key description 13
On-Screen icons 14
Getting started 15
Installing the SIM card and the battery 15
Inserting the SIM card 15
Removing the SIM card 15
Installing the battery 16
Charging the Battery 16
Disconnecting the adapter 17
General functions 18
Making and answering calls 18
Signal strength 19
Entering text 19
Phonebook 22
In-call menu 22
Multiparty or conference calls 24
Selecting functions and options 26
Menu tree 27
Profile 29
Contacts 31
Search 31
Add new 31
Caller groups 32
Speed dials 32
Settings 33
Information 34
Table of Contents
KG110 Cze_(Eng)_Rev.1.0_(1025) 2006.10.25 4:33 PM Page 2
Page 4

Call register 35
Missed calls 35
Received calls 35
Dialled calls 35
All calls 36
Call charges 36
GPRS information 37
Fun & Tools 38
Favourites 38
My Folder 38
Game 38
Calculator 38
Unit converter 39
World time 39
Memory status 39
Messages 40
Write text message 40
Inbox 41
Outbox 42
Drafts 43
Listen to voice mail 43
Info service 43
Templates 44
Settings 45
Organizer 47
Alarm clock 47
Scheduler 47
Memo 47
Settings 48
Date & Time 48
Language 48
Call settings 48
Security settings 50
Network settings 52
GPRS setting 53
Reset settings 53
Memory status 53
Browser 54
Wa p 54
3
Table of Contents
KG110 Cze_(Eng)_Rev.1.0_(1025) 2006.10.25 4:33 PM Page 3
Page 5

Table of Contents
4
Display Setting 57
Theme 57
Wallpaper 57
Backlight time 57
Brightness 57
Standby text 57
Network name 57
Home screen shortcut 57
Accessories 58
Technical data 59
Table of Contents
KG110 Cze_(Eng)_Rev.1.0_(1025) 2006.10.25 4:33 PM Page 4
Page 6

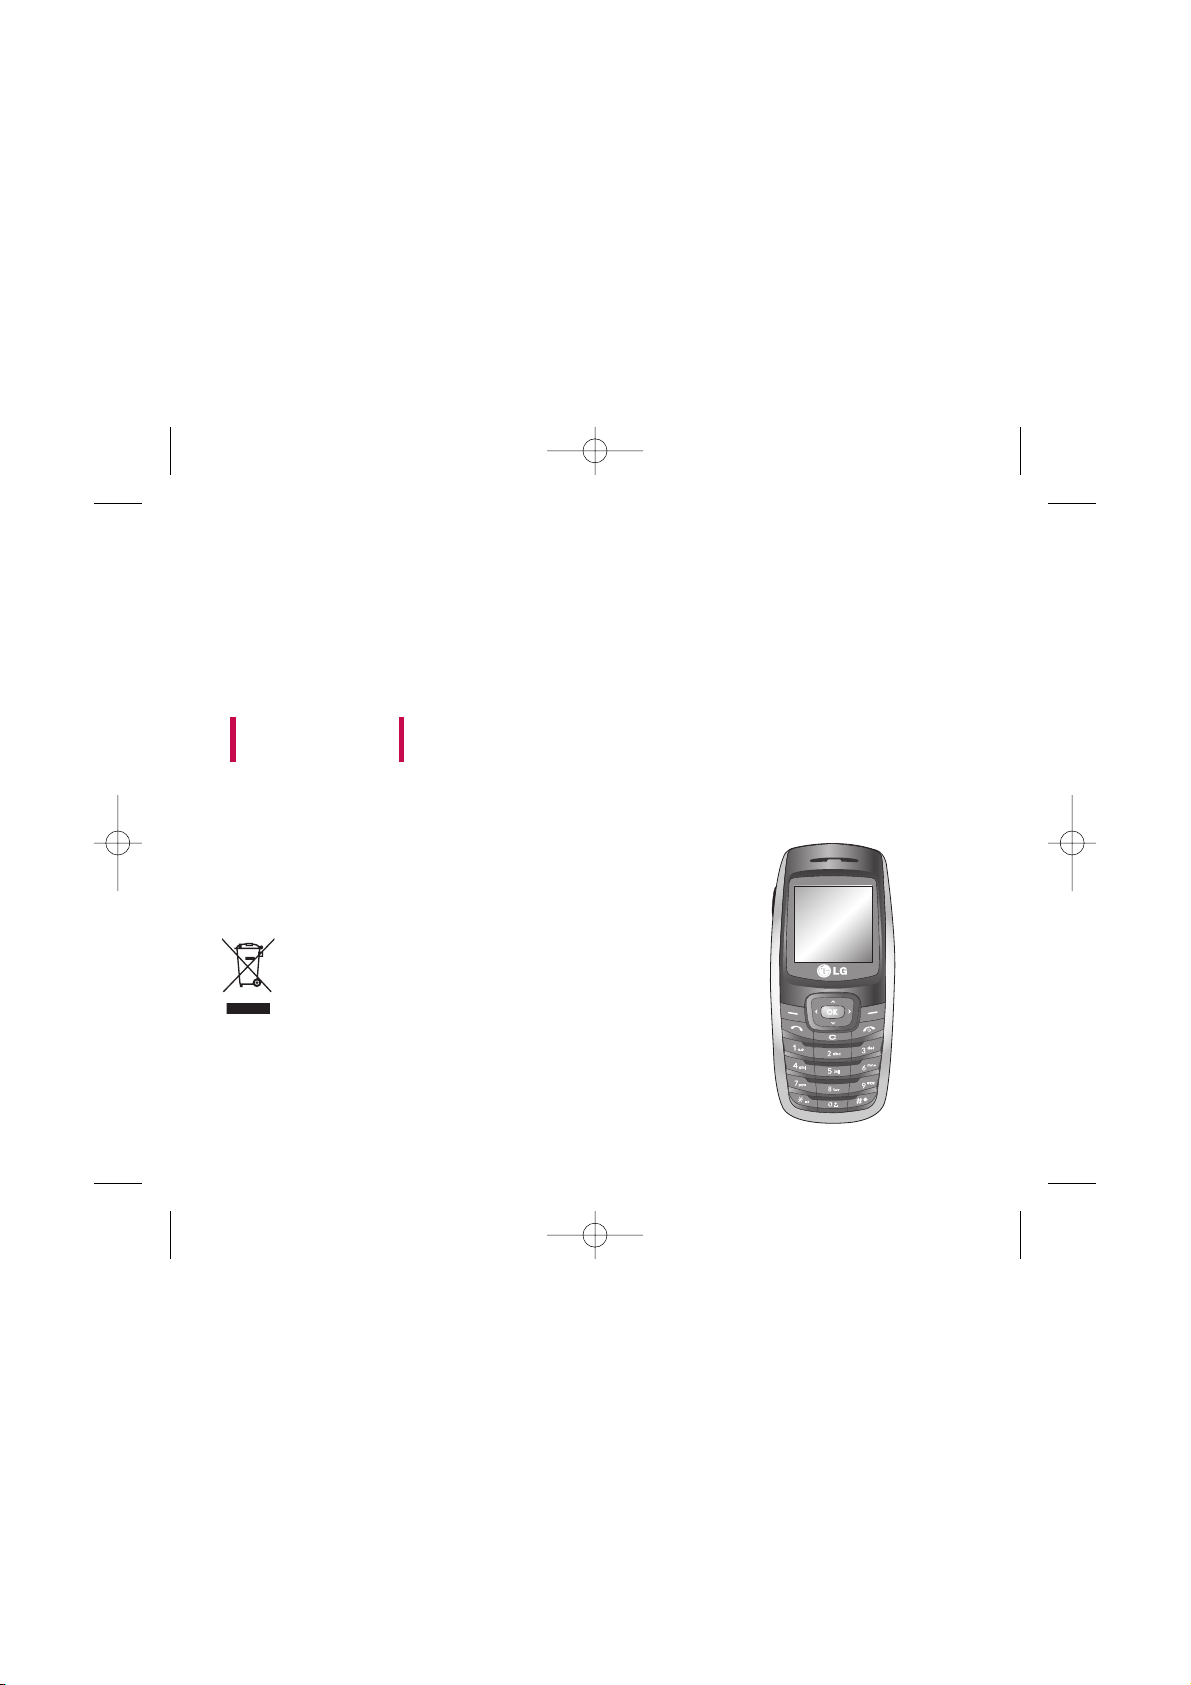
Congratulations on your purchase of the advanced
and compact KG110 mobile phone, designed to
operate with the latest digital mobile communication
technology.
Introduction
5
Introduction
This user’s guide contains important information
on the use and operation of this phone. Please
read all the information carefully for optimal
performance and to prevent any damage to or
misuse of the phone. Any changes or
modifications not expressly approved in this user’s
guide could void your warranty for this equipment.
KG110 Cze_(Eng)_Rev.1.0_(1025) 2006.10.25 4:33 PM Page 5
Page 7

For Your Safety
6
For Your Safety
Please read these simple guidelines. Not following
these guidelines may be dangerous or illegal. Further
detailed information is given in this manual.
WARNING
] Mobile Phones must be switched off at all times in
aircrafts.
] Do not hold the phone in your hand while driving.
] Do not use your phone near petrol stations, fuel
depots, chemical plants or blasting operations.
] For your safety, use ONLY specified ORIGINAL
batteries and chargers.
] Do not handle the phone with wet hands while it is
being charged. It may cause an electric shock or
seriously damage your phone.
] Keep the phone in a safe place out of small children’s
reach. It includes small parts which, if detached, may
cause a choking hazard.
CAUTION
] Switch off the phone in any area where required any
special regulations. For example, do not use your phone
in hospitals or it may affect sensitive medical
equipment.
] Emergency calls may not be available under all mobile
networks. Therefore, you should never depend solely on
your mobile phone for emergency calls.
] Only use ORIGINAL accessories to avoid damage to
your phone.
] All radio transmitters carry risks of interference with
electronics in close proximity. Minor interference may
affect TVs, radios, PCs, etc.
] Batteries should be disposed off in accordance with
relevant legislation.
] Do not dismantle the phone or battery.
KG110 Cze_(Eng)_Rev.1.0_(1025) 2006.10.25 4:33 PM Page 6
Page 8

Please read these simple guidelines. Not following
these guidelines may be dangerous or illegal. Further
detailed information is given in this manual.
Exposure to radio frequency
energy
Radio wave exposure and Specific Absorption Rate
(SAR) information
This mobile phone model KG110 has been designed
to comply with applicable safety requirements for
exposure to radio waves. This requirement is based
on scientific guidelines that include safety margins
designed to assure the safety of all persons,
regardless of age and health.
]
The radio wave exposure guidelines employ a unit
of measurement known as the Specific Absorption
Rate, or SAR. Tests for SAR are conducted using
standardised methods with the phone transmitting
at its highest certified power level in all used
frequency bands.
]
While there may be differences between the SAR
levels of various LG phone models, they are all
designed to meet the relevant guidelines for
exposure to radio waves.
]
The SAR limit recommended by the International
Commission on Non-Ionizing Radiation Protection
(ICNIRP) is 2W/kg averaged over ten (10) gram of
tissue.
]
The highest SAR value for this model phone tested
by DASY4 for use at the ear is 0.728 W/kg (10g).
]
SAR data information for residents in
countries/regions that have adopted the SAR limit
recommended by the Institute of Electrical and
Electronics Engineers (IEEE) is 1.6 W/kg averaged
over one (1) gram of tissue (for example USA,
Canada, Australia and Taiwan).
Product care and maintenance
Warning! Only use batteries, chargers and accessories
approved for use with this particular phone model. The
use of any other types may invalidate any approval or
warranty applying to the phone, and may be dangerous.
]
Do not disassemble this unit. Take it to a qualified
service technician when repair work is required.
Guidelines for safe and efficient use
7
Guidelines for safe and efficient use
KG110 Cze_(Eng)_Rev.1.0_(1025) 2006.10.25 4:33 PM Page 7
Page 9

Guidelines for safe and efficient use
8
Guidelines for safe and efficient use
]
Keep away from electrical appliances such as a TV's,
radios or personal computers.
]
The unit should be kept away from heat sources
such as radiators or cookers.
]
Never place your phone in a microwave oven as it
will cause the battery to explode.
]
Do not drop.
]
Do not subject this unit to mechanical vibration or
shock.
]
The coating of the phone may be damaged if
covered with wrap or vinyl wrapper.
]
Do not use harsh chemicals (such as alcohol,
benzene, thinners, etc.) or detergents to clean your
phone. There is a risk of this causing a fire.
]
Do not subject this unit to excessive smoke or dust.
]
Do not keep the phone next to credit cards or
transport tickets; it can affect the information on
the magnetic strips.
]
Do not tap the screen with a sharp object as it may
damage the phone.
]
Do not expose the phone to liquid or moisture.
]
Please remove the data cable before powering on
the handset.
Electronic devices
All mobile phones may get interference, which
could affect performance.
]
Do not use your mobile phone near medical
equipment without requesting permission. Avoid
placing the phone over pacemakers (i.e. in your
breast pocket.)
]
Some hearing aids might be disturbed by mobile
phones.
]
Minor interference may affect TVs, radios, PCs, etc.
KG110 Cze_(Eng)_Rev.1.0_(1025) 2006.10.25 4:33 PM Page 8
Page 10

9
Guidelines for safe and efficient use
Road safety
Check the laws and regulations on the use of
mobile phones in the areas when you drive.
]
Do not use a hand-held phone while driving.
]
Give full attention to driving.
]
Use a hands-free kit, if available.
]
Pull off the road and park before making or
answering a call if driving conditions so require.
]
RF energy may affect some electronic systems in
your motor vehicle such as a car stereo or safety
equipment.
]
If your vehicle is equipped with an air bag, do not
obstruct it with installed or portable wireless
equipment. It can cause serious injury due to
improper performance.
If you are listening to music whilst out and about,
please ensure that the volume is at a reasonable
level so that you are aware of your surroundings.
This is particularly imperative when attempting to
cross the street.
Avoid damage to your hearing
Damage to your hearing can occur if you are exposed
to loud sound for long periods of time. We therefore
recommend that you do not turn on or off the
handset close to your ear. We also recommend that
music and call volumes are set to a reasonable level.
Blasting area
Do not use the phone where blasting is in progress.
Observe restrictions, and follow any regulations or
rules.
Potentially explosive atmospheres
]
Do not use the phone at a refueIling point. Don't
use near fuel or chemicals.
]
Do not transport or store flammable gas, liquid, or
explosives in the compartment of your vehicle,
which contains your mobile phone and accessories.
KG110 Cze_(Eng)_Rev.1.0_(1025) 2006.10.25 4:33 PM Page 9
Page 11

Guidelines for safe and efficient use
10
Guidelines for safe and efficient use
In aircraft
Wireless devices can cause interference in aircraft.
]
Turn off your mobile phone before boarding any
aircraft.
]
Do not use it on the ground without crew
permission.
Children
Keep the phone in a safe place out of small children's
reach. It includes small parts which if detached may
cause a choking hazard.
Emergency calls
Emergency calls may not be available under all mobile
networks. Therefore, you should never depend solely
on your mobile phone for emergency calls. Check
with your local service provider.
Battery information and care
]
You do not need to completely discharge the
battery before recharging. Unlike other battery
systems, there is no memory effect that could
compromise the battery's performance.
]
Use only LG batteries and chargers. LG chargers are
designed to maximize the battery life.
]
Do not disassemble or short-circuit the battery
pack.
]
Keep the metal contacts of the battery pack clean.
]
Replace the battery when it no longer provides
acceptable performance. The battery pack may be
recharged hundreds of times until it needs
replacing.
]
Recharge the battery if it has not been used for a
long time to maximize usability.
]
Do not expose the battery charger to direct
sunlight or use it in high humidity, such as the
bathroom.
]
Do not leave the battery in hot or cold places, this
may deteriorate the battery performance.
KG110 Cze_(Eng)_Rev.1.0_(1025) 2006.10.25 4:33 PM Page 10
Page 12
KG110 Features
11
KG110 Features
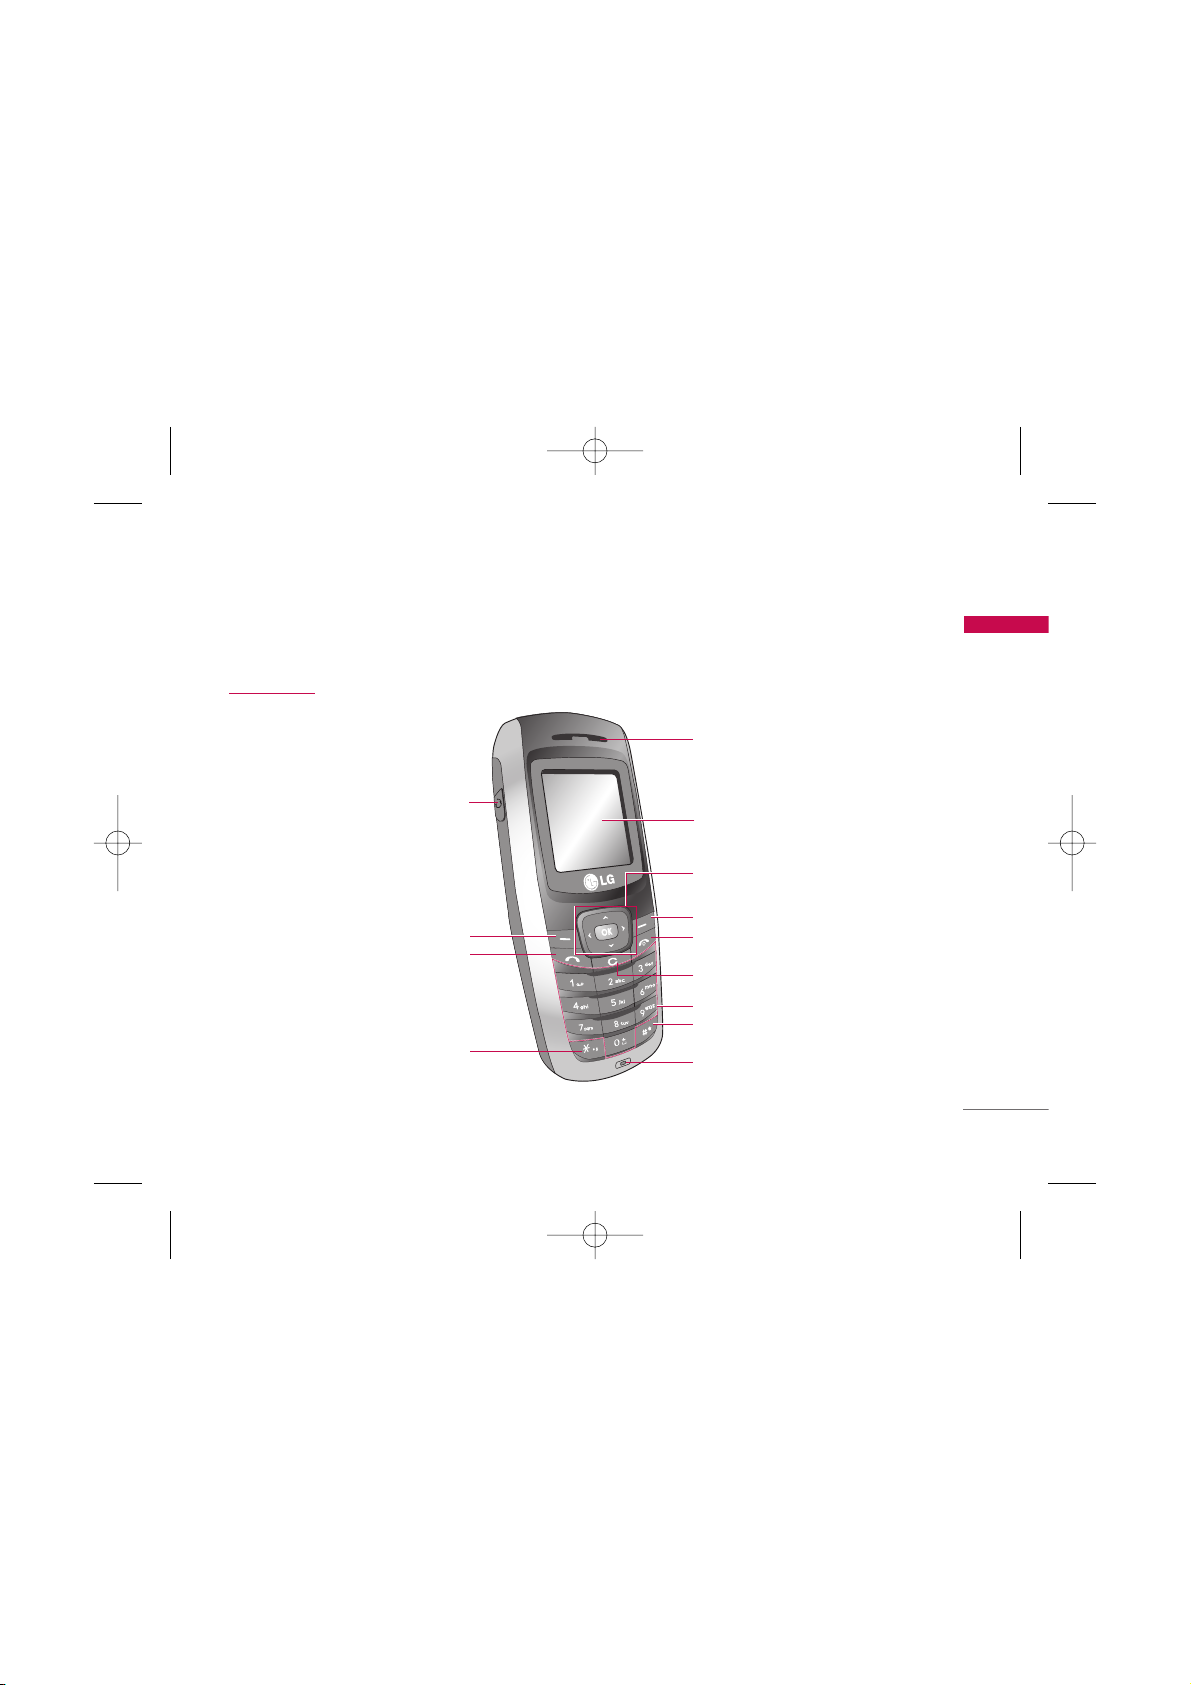
Parts of the phone
Front view
Star key
Send key
Left soft key
Headset connector
Navigation key
Earpiece
LCD Screen
Right soft key
END/PWR key
Clear key
Alphanumeric keys
Hash key
Microphone
KG110 Cze_(Eng)_Rev.1.0_(1025) 2006.10.25 4:33 PM Page 11
Page 13
KG110 Features
12
KG110 Features
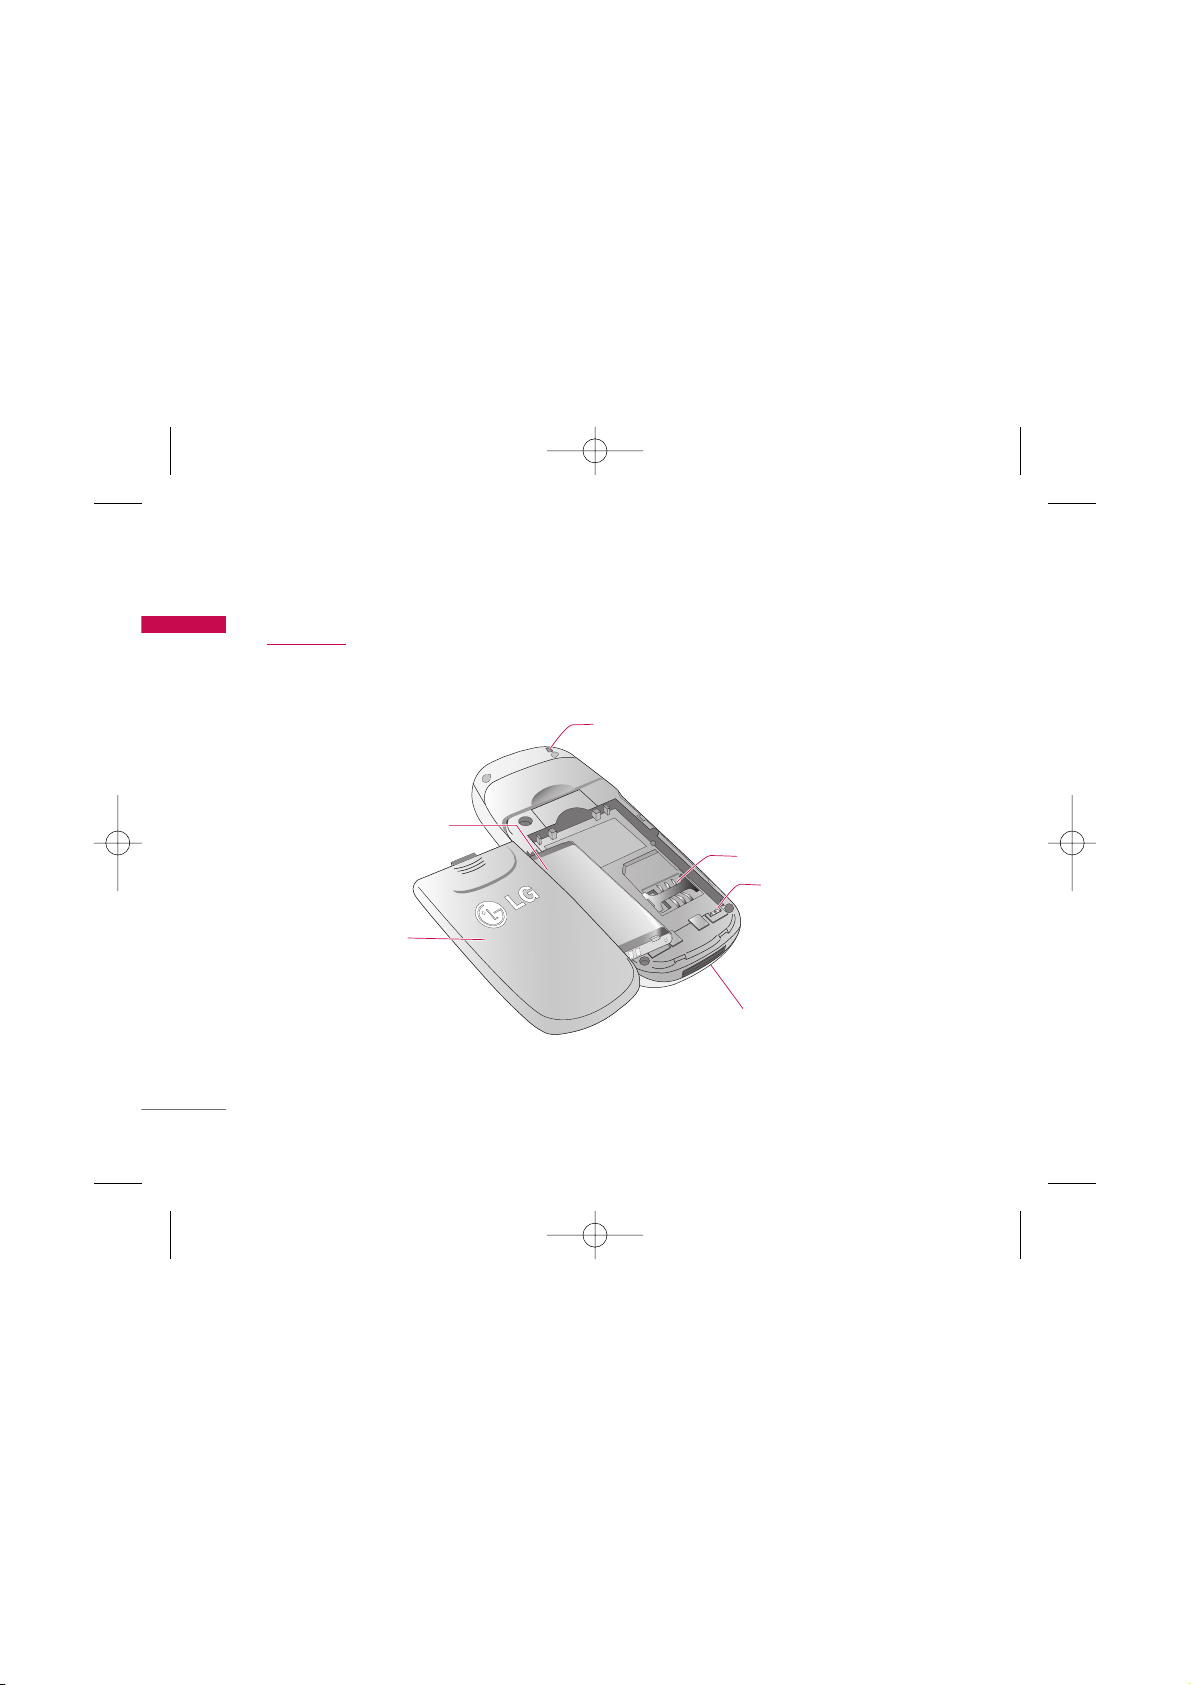
Rear view
Battery terminals
SIM card socket
Handstrap hole
Battery
Battery Cover
Cable Connector /
Battery Charging Connector
KG110 Cze_(Eng)_Rev.1.0_(1025) 2006.10.25 4:33 PM Page 12
Page 14
13
KG110 Features
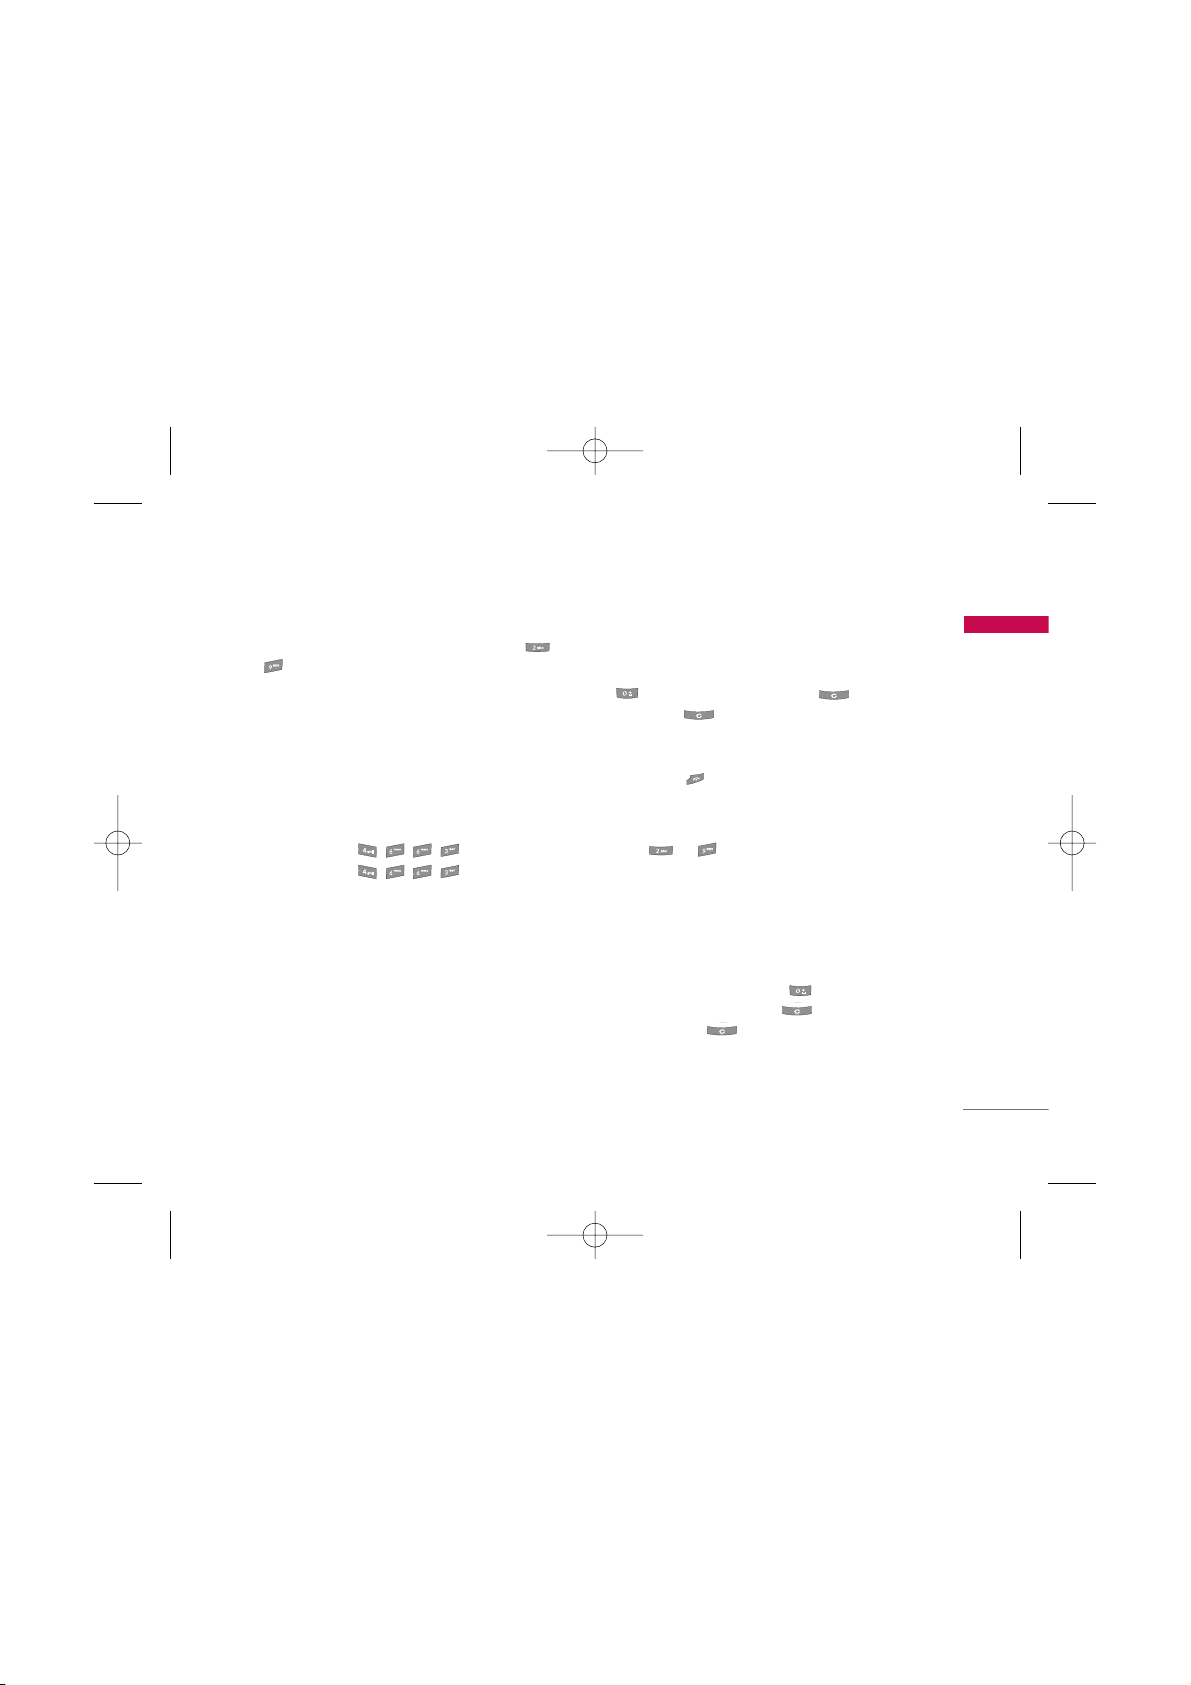
Key description
The following shows key components of the phone.
Keypad description
DescriptionKey
Left soft key / Right soft key
Each of these keys performs the function
indicated by the text on the display
immediately above it.
Navigation keys
Use to scroll through menus and move the
cursor. You can also use these keys for quick
access to the following functions.
• Up navigation key ( ) : A shortcut key
to access Favourites.
• Down navigation key ( ) : A shortcut
key to search the phonebook list.
• Left navigation key ( ) : A shortcut key to
the Profile menu.
• Right navigation key ( ) : A shortcut key
to List of Messages.
Clear key
Deletes a character by each press. Hold the
key down to clear all input. Also use this key
to go back to the previous screen.
DescriptionKey
Send Key
You can dial a phone number and answer a
call. If you press this key without entering a
number, your phone shows the most recently
dialled, received and missed calls.
Numeric keys
These keys are used mainly to dial in standby
mode and enter numbers or characters in
editing mode.
When you press these keys for a long time.
• Used to call your voicemail box .
• Used to add the international prefix .
• Used to call Speed dials from to .
• Used to enter a pause .
5
5
~
END/PWR key
Used to end or reject a call. This key is also
used as Power Key by pressing and holding
this key for a few seconds.
KG110 Cze_(Eng)_Rev.1.0_(1025) 2006.10.25 4:33 PM Page 13
Page 15

KG110 Features
14
KG110 Features
The table below describes various display indicators
or icons that appear on the phone’s display screen.
On-Screen icons
Icon/Indicator Description
Tells you the strength of the
network signal.
Call is connected.
You can use GPRS service.
Shows that you are using a
roaming service.
The alarm has been set and is on.
Tells you the status of the battery.
You have received a text message.
You have received a voice message.
You have received a push message.
Indicates that the phone is accessing
the WAP.
Icon/Indicator Description
You can view your schedule.
Vibrate only menu in profile.
General menu in profile.
Loud menu in profile.
Silent menu in profile.
Headset menu in profile.
You can divert a call.
KG110 Cze_(Eng)_Rev.1.0_(1025) 2006.10.25 4:33 PM Page 14
Page 16
Getting started
15
Getting started
Installing the SIM card and the
battery
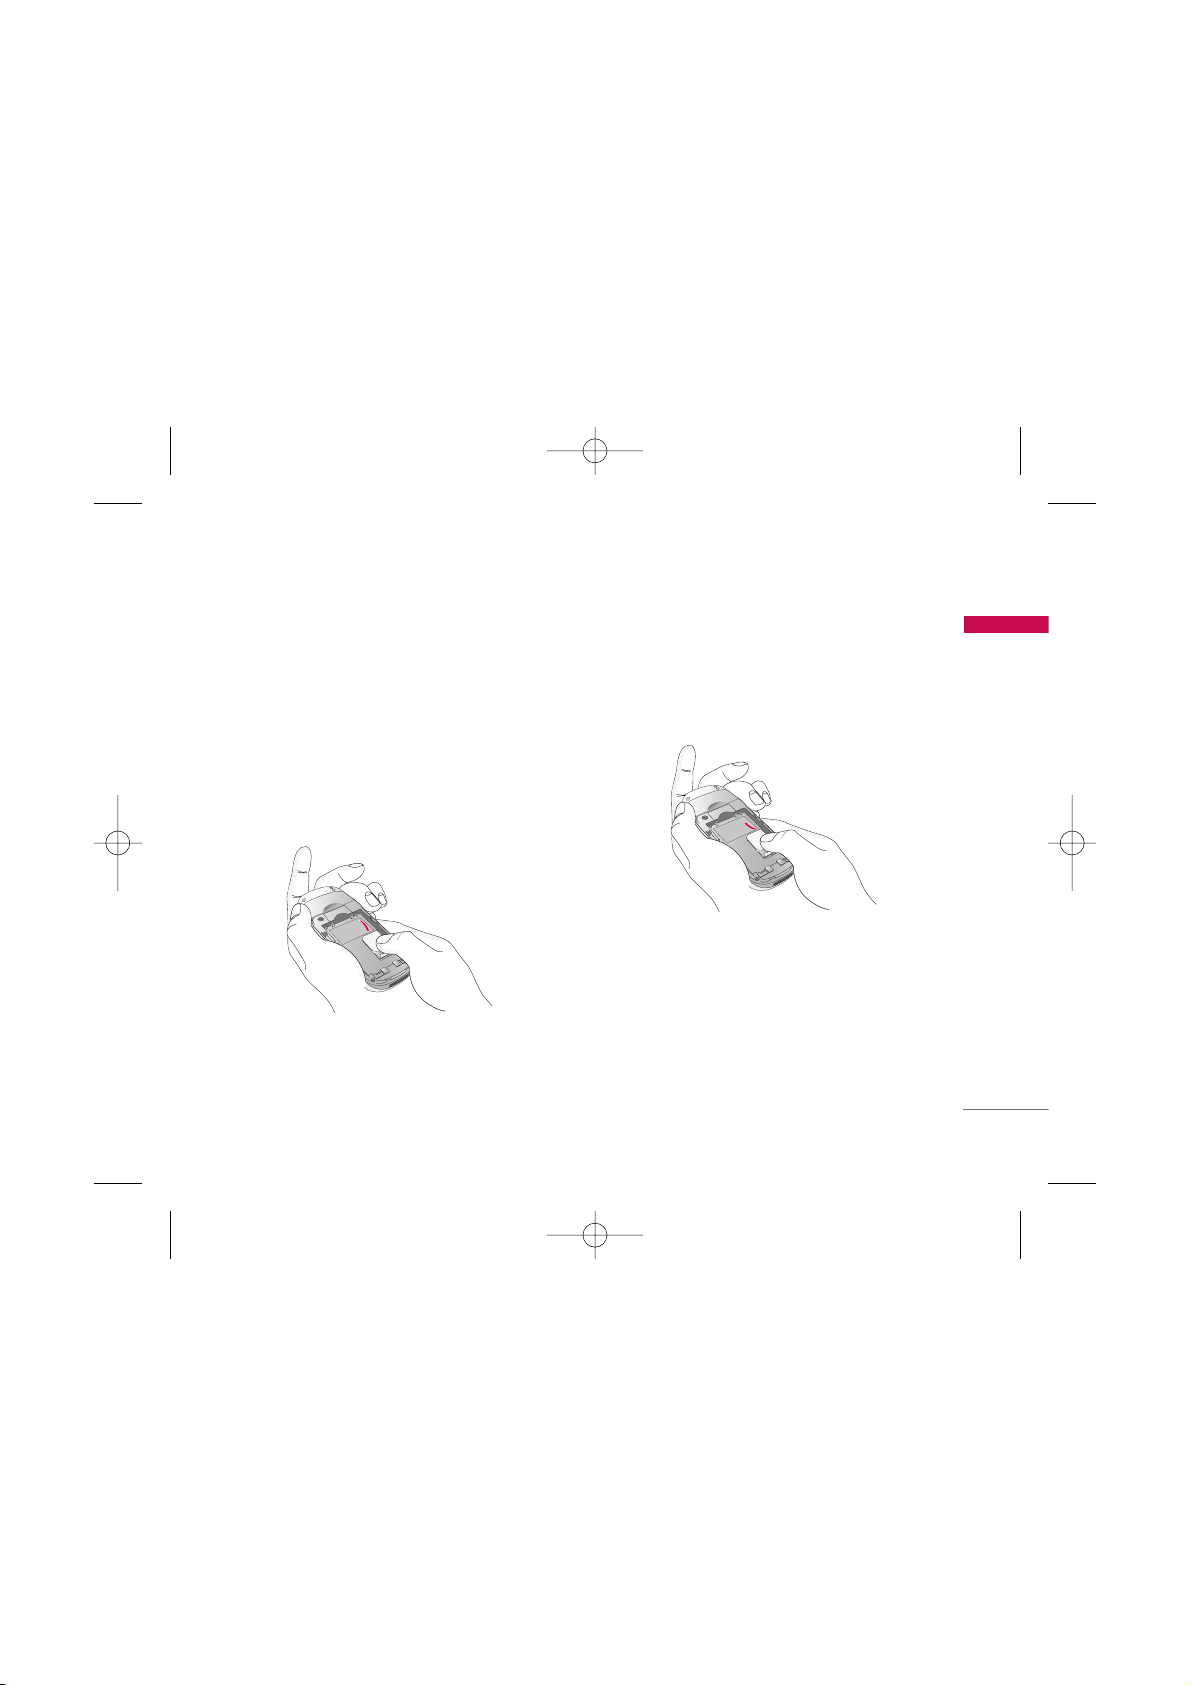
1. Inserting the SIM card
Locate the SIM card socket in the back of the phone.
Follow the steps below to install the SIM card.
1. Remove the battery if attached.
2. Slide the SIM card into the slot, under the silvery
holders, with the golden connectors facing down.
2. Removing the SIM card
Follow the steps below to Remove the SIM card.
1. Remove the battery if attached.
2. Take out the SIM card from the slot.
Notice
]
Removing the battery from the phone whilst it is
switched on may cause it to malfunction.
]
The metal contact of the SIM card can be easily
damaged by scratches. Pay special attention to the SIM
card when you handle and install. Follow the instructions
supplied with the SIM card.
KG110 Cze_(Eng)_Rev.1.0_(1025) 2006.10.25 4:33 PM Page 15
Page 17
Getting started
16
Getting started
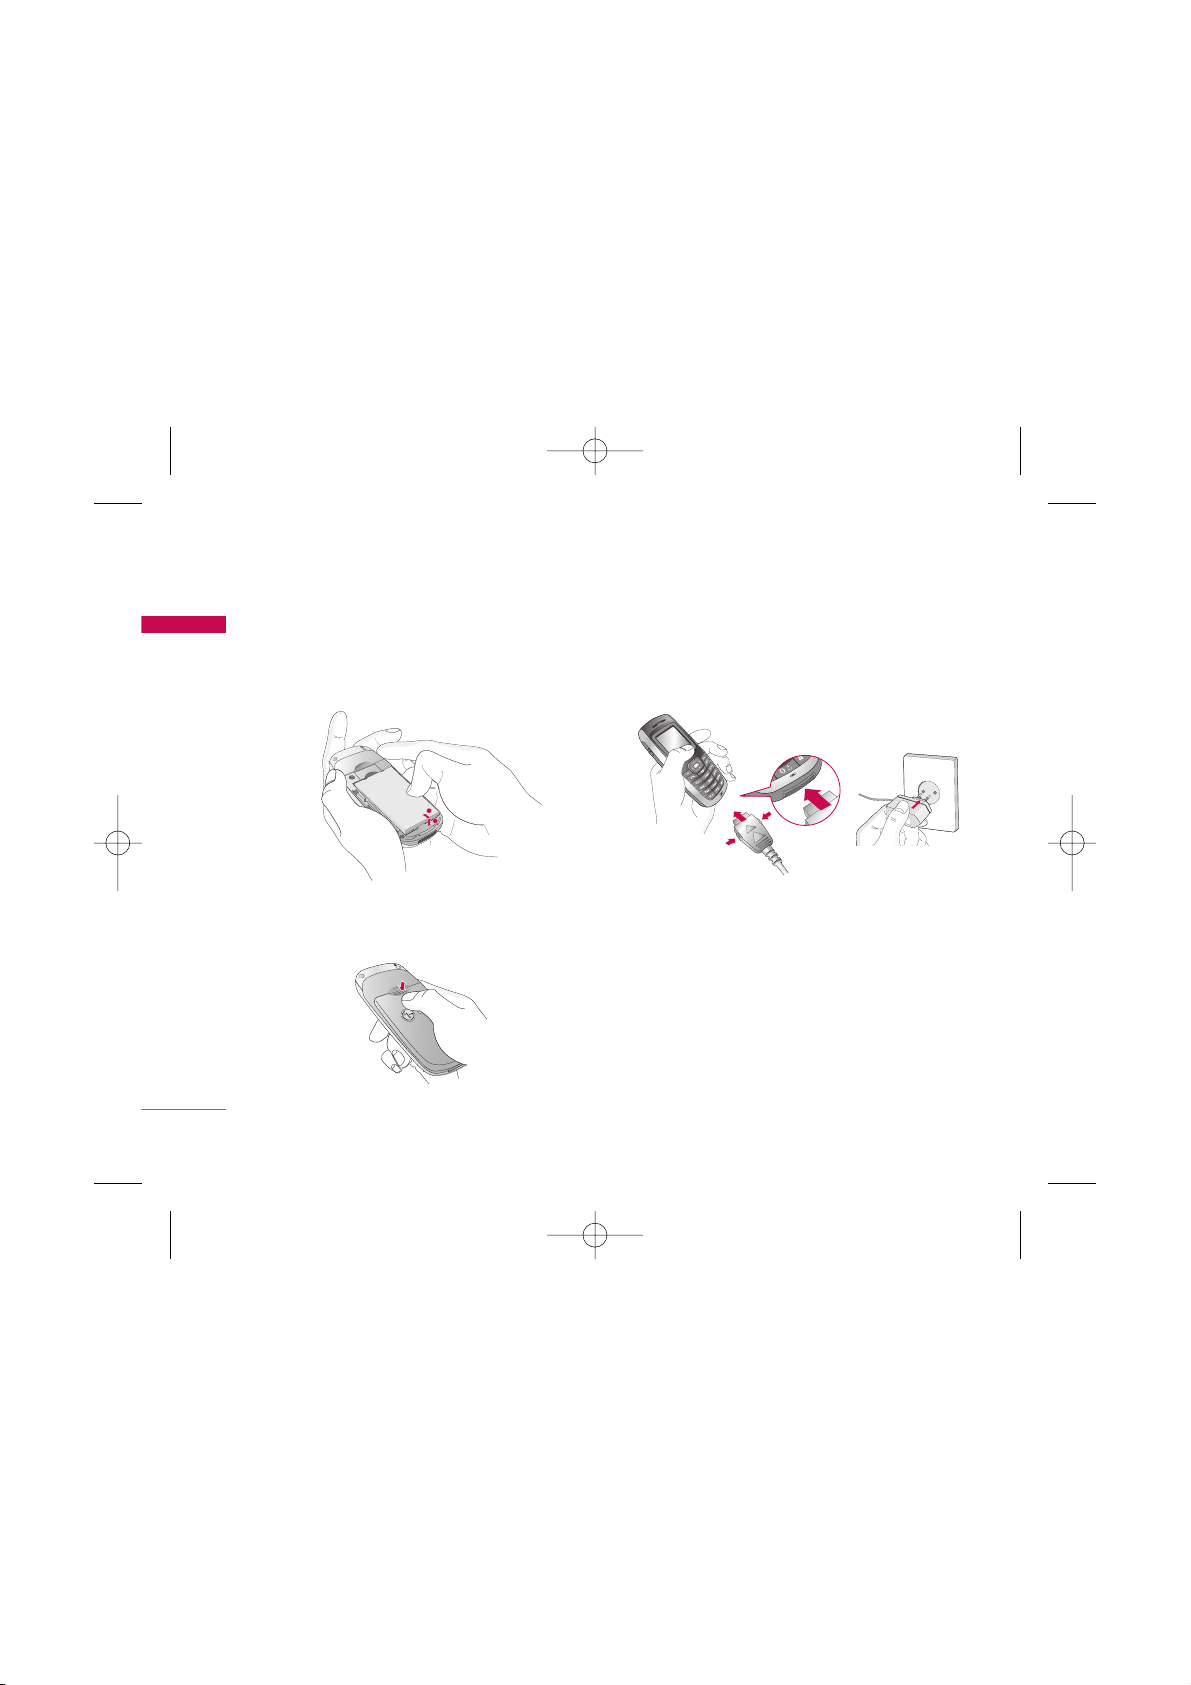
3. Installing the battery
1. Position the lugs on the bottom of the battery into
the retaining holder.
2. Then push the half of the battery into position.
Charging the Battery
To connect the travel adapter to the phone, you
must have installed the battery.
1. With the arrow facing you as shown in the diagram
push the plug of the battery adapter into the
socket on the bottom of the phone until it clicks
into place.
2. Connect the other end of the travel adapter to the
mains socket. Only use the charger provided in the
box.
2
1
KG110 Cze_(Eng)_Rev.1.0_(1025) 2006.10.25 4:33 PM Page 16
Page 18
17
Getting started
3. The moving bars of battery icon will stop after
charging is complete.
Caution
]
Do not force the connector as this may damage the
phone and/or the charger.
]
If you use the battery pack charger out of your own
country, use an attachment plug adapter for the proper
configuration.
]
Do not remove your battery or the SIM card while
charging.
Warning
]
Unplug the power cord and charger during lightning
storms to avoid electric shock or fire.
]
Make sure that no sharp-edged items such as animal
teeth or nails come into contact with the battery. There
is a risk of this causing a fire.
]
Do not place or answer calls while charging the phone as
it may short-circuit the phone and/or cause electric
shock or fire.
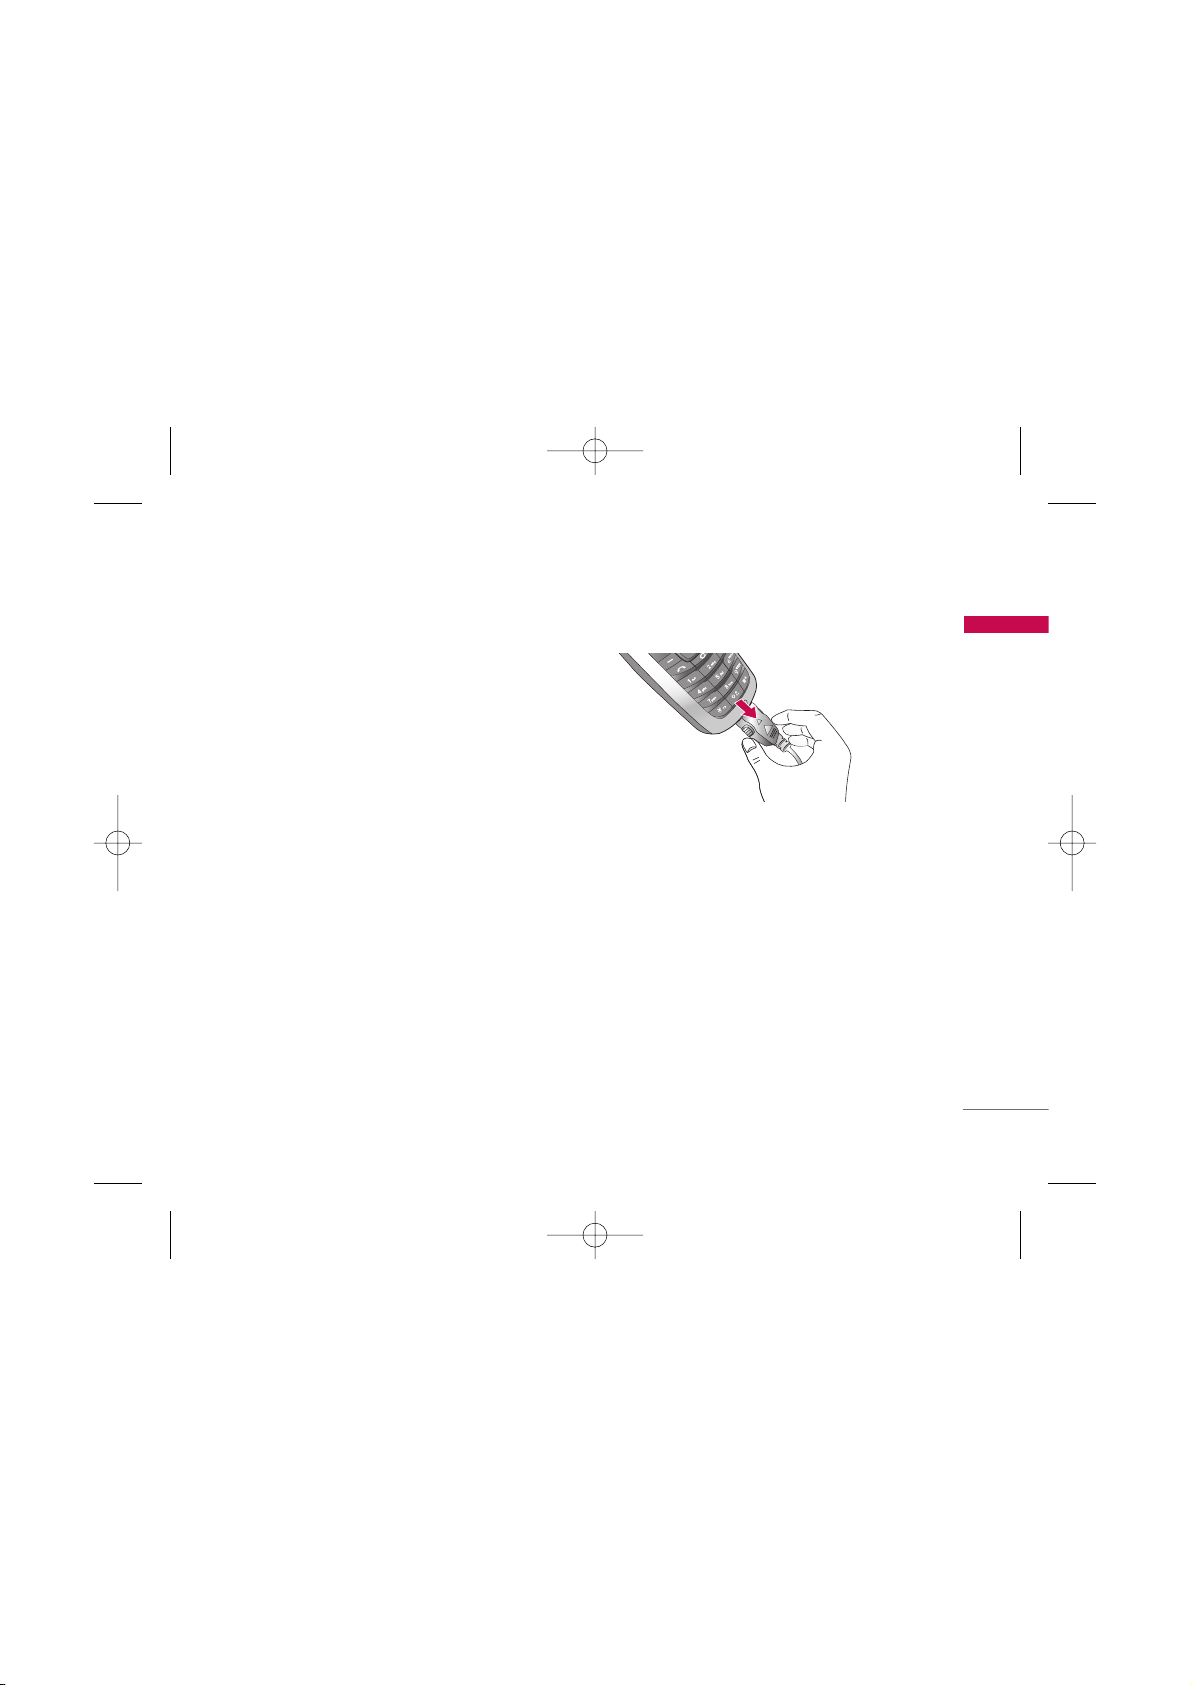
Disconnecting the adapter
Disconnect the travel adapter from the phone by
pressing its side buttons as shown in the diagram.
Note
]
Ensure the battery is fully charged before using the
phone for the first time.
]
In the case the battery is not properly charged, please
turn the phone off and on using the power key. Then
detach and reattach the battery, and recharge the
phone.
KG110 Cze_(Eng)_Rev.1.0_(1025) 2006.10.25 4:33 PM Page 17
Page 19

General functions
18
General functions
Making and answering calls
Making a call
1. Make sure your phone is switched on.
2. Enter a phone number, including the area code.
]
To delete numbers press the key. Press and
hold the clear key to erase the entire number.
3. Press to call the number.
4. To end the call, press the end key or the right
soft key.
Making a call from the call history list
1. In standby mode, press the send key and the
latest incoming, outgoing and missed calls will be
displayed.
2. Select the desired number by using the up/down
navigation keys.
3. Press to call the number.
Making an international call
1. Press and hold the key for the international
prefix. The ‘+’ character automatically selects the
international access code.
2. Enter the country code, area code, and the phone
number.
3. Press to call the number.
Ending a call
When you have finished your call, press the end
key.
Making a call from the address book
You can save the names and phone numbers dialled
regularly in the SIM card and/or phone memory. You
can dial a number by simply looking up the desired
name in the contacts and pressing the key.
5
KG110 Cze_(Eng)_Rev.1.0_(1025) 2006.10.25 4:33 PM Page 18
Page 20

19
General functions
Answering a call
When you receive a call, the phone rings and the
flashing phone icon appears on the screen. If the
caller can be identified, the caller’s phone number
(or
name
if saved in the phonebook) is displayed.
1. To answer an incoming call, Press left soft key or
Send key.
Note
]
If Press any key has been set as the answer mode , any
key press will answer a call except for the or the
right soft key.
]
You can answer a call whilst using the phonebook or
other menu features.
2. To end the call, press the key.
Signal strength
You can check the strength of your signal by the
signal indicator ( ) on the LCD screen of your
phone. Signal strength can vary, particularly inside
buildings. Moving near to a window may improve
reception.
Entering text
You can enter alphanumeric characters by using the
phone’s keypad. For example, storing names in the
phonebook, writing a message, creating a personal
greeting.
The following text input methods are available in the
phone.
KG110 Cze_(Eng)_Rev.1.0_(1025) 2006.10.25 4:33 PM Page 19
Page 21
General functions
20
General functions
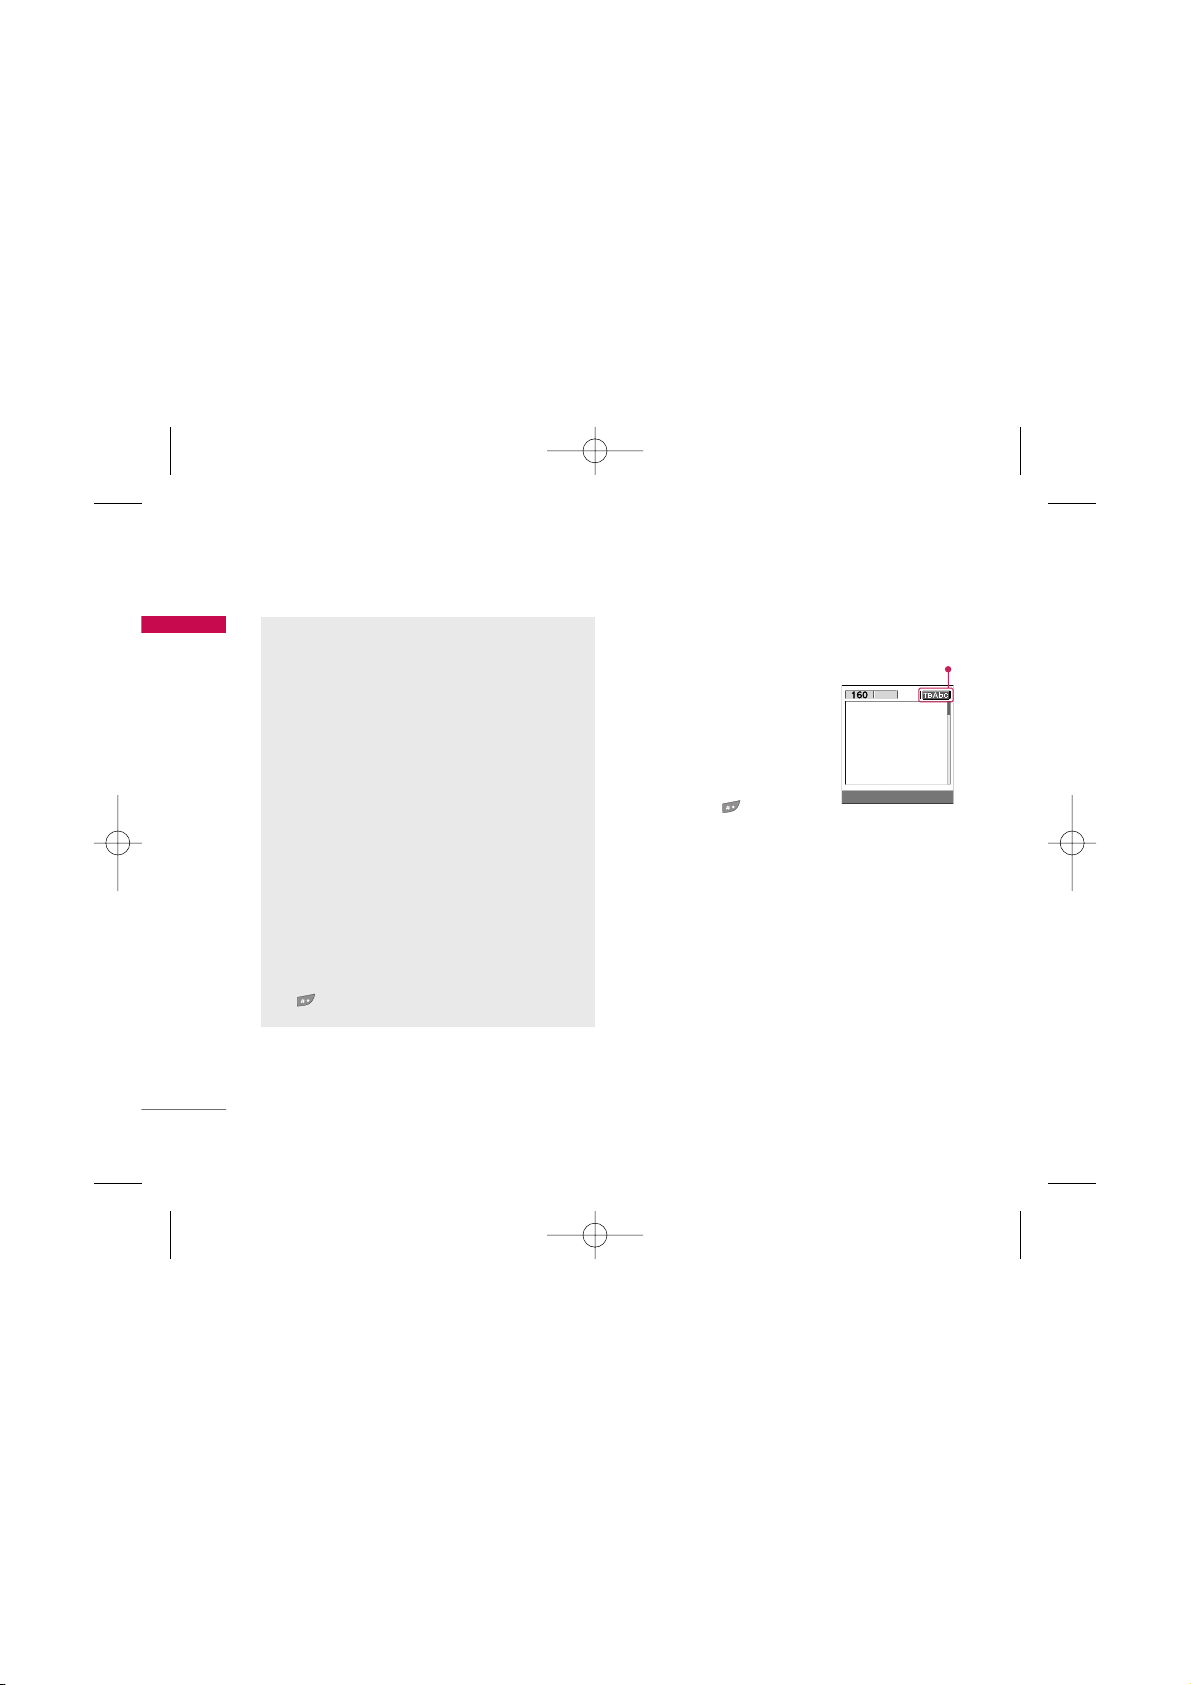
Changing the text input mode
1. When you are in a field that
allows characters to be
entered, you will notice the
text input mode indicator in
the top right corner of the
LCD screen.
2. Change the text input mode
by pressing . You can
check the current text input
mode in the top right corner
of the LCD screen.
]
Using the T9 mode
The T9 predictive text input mode lets you enter
words easily with a minimum number of key presses.
As you press each key, the phone begins to display
the characters that it thinks you are typing based on
the built-in dictionary. You can also add new words in
the dictionary. As new words are added, the word
changes to reflect the most likely candidate from the
dictionary.
Text input mode
T9 Mode
This mode lets you enter words with only one
keystroke per letter. Each key on the keypad has
more than one letter. The T9 mode automatically
compares your keystrokes with an internal
dictionary to determine the correct word, thus
requiring far fewer keystrokes than the traditional
ABC mode. This is sometimes known as predictive
text.
ABC Mode
This mode lets you enter letters by pressing the
key labeled with the required letter once, twice,
three or four times until the letter is displayed.
123 Mode (Numbers Mode)
Type numbers using one keystroke per number. To
change to 123 mode in a text entry field, press
the key until 123 mode is displayed.
Options Insert
KG110 Cze_(Eng)_Rev.1.0_(1025) 2006.10.25 4:33 PM Page 20
1p
Page 22
21
General functions
1. When you are in the T9 predictive text input
mode, start entering a word by pressing keys
to . Press one key per letter.
]
The word changes as letters are typed. Ignore
what’s on the screen until the word is typed
completely.
]
If the word is still incorrect after you have
finished typing, press the down navigation key
once or more to cycle through the other word
options.
Example:
Press to type
Good
.
Press [down
navigation key] to type
Home
.
]
If the desired word is missing from the word
choice list, add it using the ABC mode.
]
You can select the language of the T9 mode.
Press the left soft key [Option], then select
T9
languages
. Select the desired language of T9
mode. You can also turn off the T9 mode by
selecting
T9 off
. The default setting on the
phone is T9 enabled mode.
2. Enter the whole word before editing or deleting
any keystrokes.
3. Complete each word with a space by pressing the
key. To delete letters, press . Press and
hold down to erase entire words.
Note
]
To exit from the text input mode without saving your
input, press . The phone goes back to standby
mode.
]
Using the ABC mode
Use the to keys to enter your text.
1. Press the key labeled with the required letter:
]
Once for the first letter
]
Twice for the second letter.
]
And so on.
2. To insert a space, press the key once.
To delete letters, press the key. Press and
hold down the key to clear the whole display.
Note
]
Refer to the table below for more information on the
characters available using the alphanumeric keys.
5
5
5
5
KG110 Cze_(Eng)_Rev.1.0_(1025) 2006.10.25 4:33 PM Page 21
Page 23
General functions
22
General functions
]
Using the 123 (Number) mode
The 123 mode enables you to enter numbers in a
text message (a telephone number, for example).
Press the keys corresponding to the required digits
before manually switching back to the appropriate
text entry mode.
Phonebook
You can store phone numbers and their
corresponding names in the memory of your SIM
card.
In addition, you can store up to 500 numbers and
names in the phone memory.
The SIM card and phone are both used in the same
way in the
Contacts
menu.
In-call menu
Your phone provides a number of control functions
that you can use during a call. To access these
functions during a call, press the left soft key
[Options].
During a call
The menu displayed on the handset screen during a
call is different to the default main menu displayed
when in standby mode, and the options are
described below.
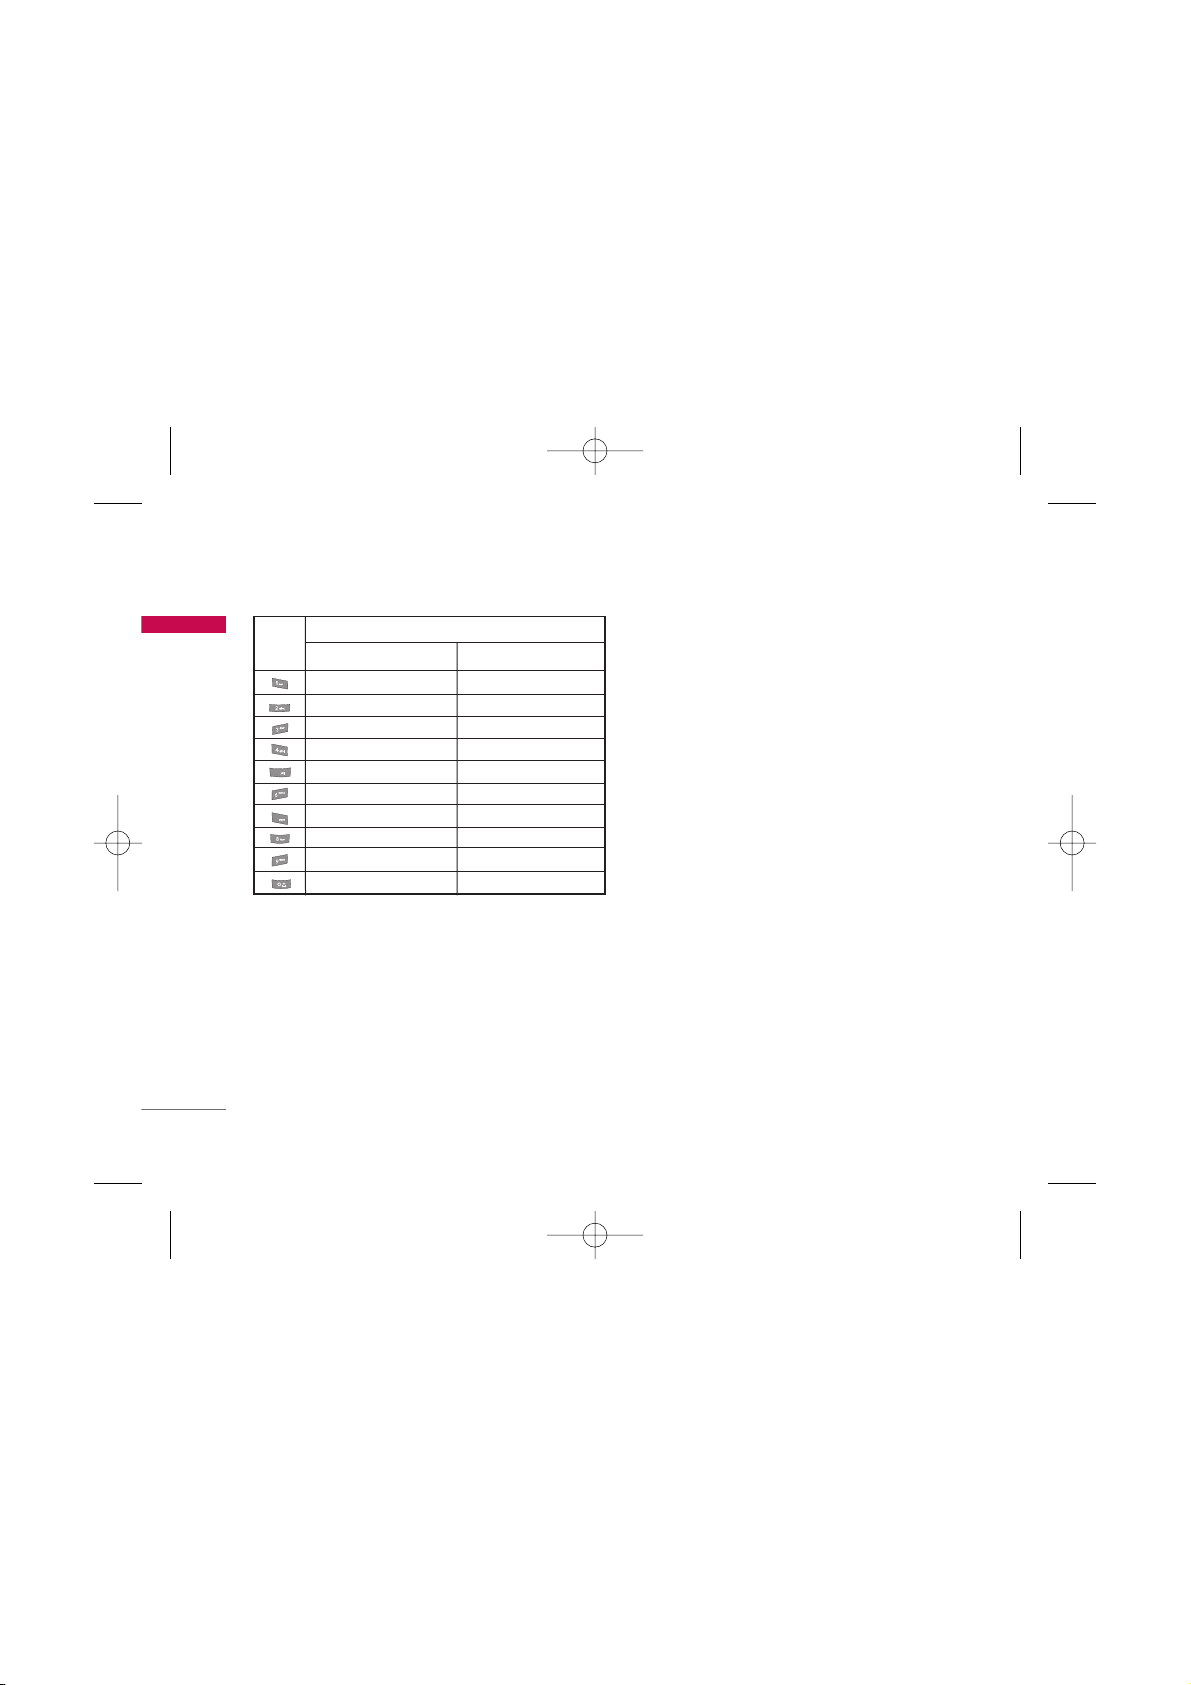
Key
Characters in the order display
Upper Case
Lower Case
. , / ? ! - : ' " 1 . , / ? ! - : ' " 1
A B C 2 a b c 2
D E F 3 d e f 3
G H I 4 g h i 4
J K L 5 j k l 5
M N O 6 m n o 6
P Q R S 7 p q r s 7
T U V 8 t u v 8
W X Y Z 9 w x y z 9
Space 0 Space 0
5
5
5
7
5
5
KG110 Cze_(Eng)_Rev.1.0_(1025) 2006.10.25 4:33 PM Page 22
Page 24

23
General functions
Making a second call
You can make a second call while currently on a call.
Enter the second number and press the send key.
When the second call is connected, the first call is
automatically placed on hold. You can get a number
you wish to dial from the phonebook to make a
second call. Press the right soft key then select
Search
. To save the dialled number into the
phonebook during a call, press the right soft key
then select
Add new.
Switching between two calls
To switch between two calls, press the left soft key
then select
Swap
or by pressing key
.
Answering an incoming call
To answer an incoming call when the handset is
ringing, simply press the key. The handset is also
able to warn you of an incoming call while you are
already on a call. A tone sounds in the earpiece, and
the display will show that a second call is waiting.
This feature, known as
Call waiting
, is only available if
your network supports it.
For details of how to activate and deactivate it see
Call waiting
.
If
Call waiting
is activated, you can put the first call
on hold and answer the second, by pressing or
by selecting the left soft key [
Answer].
Rejecting an incoming call
You can reject an incoming call without answering by
simply pressing the key.
During a call, you can reject an incoming call by
pressing the right soft key [End] key or by pressing
the .
Muting the microphone
You can mute the microphone during a call by
pressing the [Menu] key then selecting
Mute
. The
handset can be unmuted by selecting
Unmute.
When the handset is muted, the caller cannot hear
you, but you can still hear them.
KG110 Cze_(Eng)_Rev.1.0_(1025) 2006.10.25 4:33 PM Page 23
Page 25

General functions
24
General functions
Switching DTMF tones on during a call
To turn DTMF tones on during a call, press the left
soft key, and then select
DTMF on
. DTMF tones can
be turned off the same way. DTMF tones allow your
phone to make use of an automated switchboard.
Multiparty or conference calls
The multiparty or conference service provides you
with the ability to have a simultaneous conversation
with more than one caller, if your network operator
supports this feature. A multiparty call can only be
set up when you have one active call and one call on
hold, both calls having been answered. Once a
multiparty call is set up, calls can be added,
disconnected or separated (that is, removed from the
multiparty call but still connected to you) by the
person who set up the multiparty call. These options
are all available from the In-Call menu. The maximum
callers in a multiparty call are five. Once started, you
are in control of the multiparty call, and only you can
add callers to the multiparty call.
Making a second call
You can make a second call while currently on a call.
Enter the second number and press the key.
When the second call is connected, the first call is
automatically placed on hold. You can swap between
calls by pressing the left soft key then selecting
Swap.
Setting up a conference call
Place one call on hold and while the active call is on,
press the left soft key and then select the
Conference/Join all.
Putting a conference call on hold
Press the left soft key, then select the
Conference/Hold all.
Activate the conference call on hold
Press the left soft key, then select the
Conference/Join all.
KG110 Cze_(Eng)_Rev.1.0_(1025) 2006.10.25 4:33 PM Page 24
Page 26

25
General functions
Adding calls to the conference call
To add a call to an existing conference call, press the
left soft key, then select the Multiparty/Join all.
Displaying callers in a conference call
To scroll through the numbers of the callers who
make up a conference call on the handset screen, use
the
up/down navigation keys.
Taking a private call during a
conference call
To have a private call with one caller from a
conference call, display the number of the caller you
wish to talk to on the screen, then press the left soft
key. Select the
Conference/Private
to put all the
other callers on hold.
Ending a conference call
The currently displayed caller from a conference call
can be disconnected by pressing the key. To
end a conference call, press the left soft key, then
select the
Multiparty/End multiparty.
After pressing
the left soft key, selecting
Multiparty/End all
will end
all the active and on-hold calls.
KG110 Cze_(Eng)_Rev.1.0_(1025) 2006.10.25 4:33 PM Page 25
Page 27
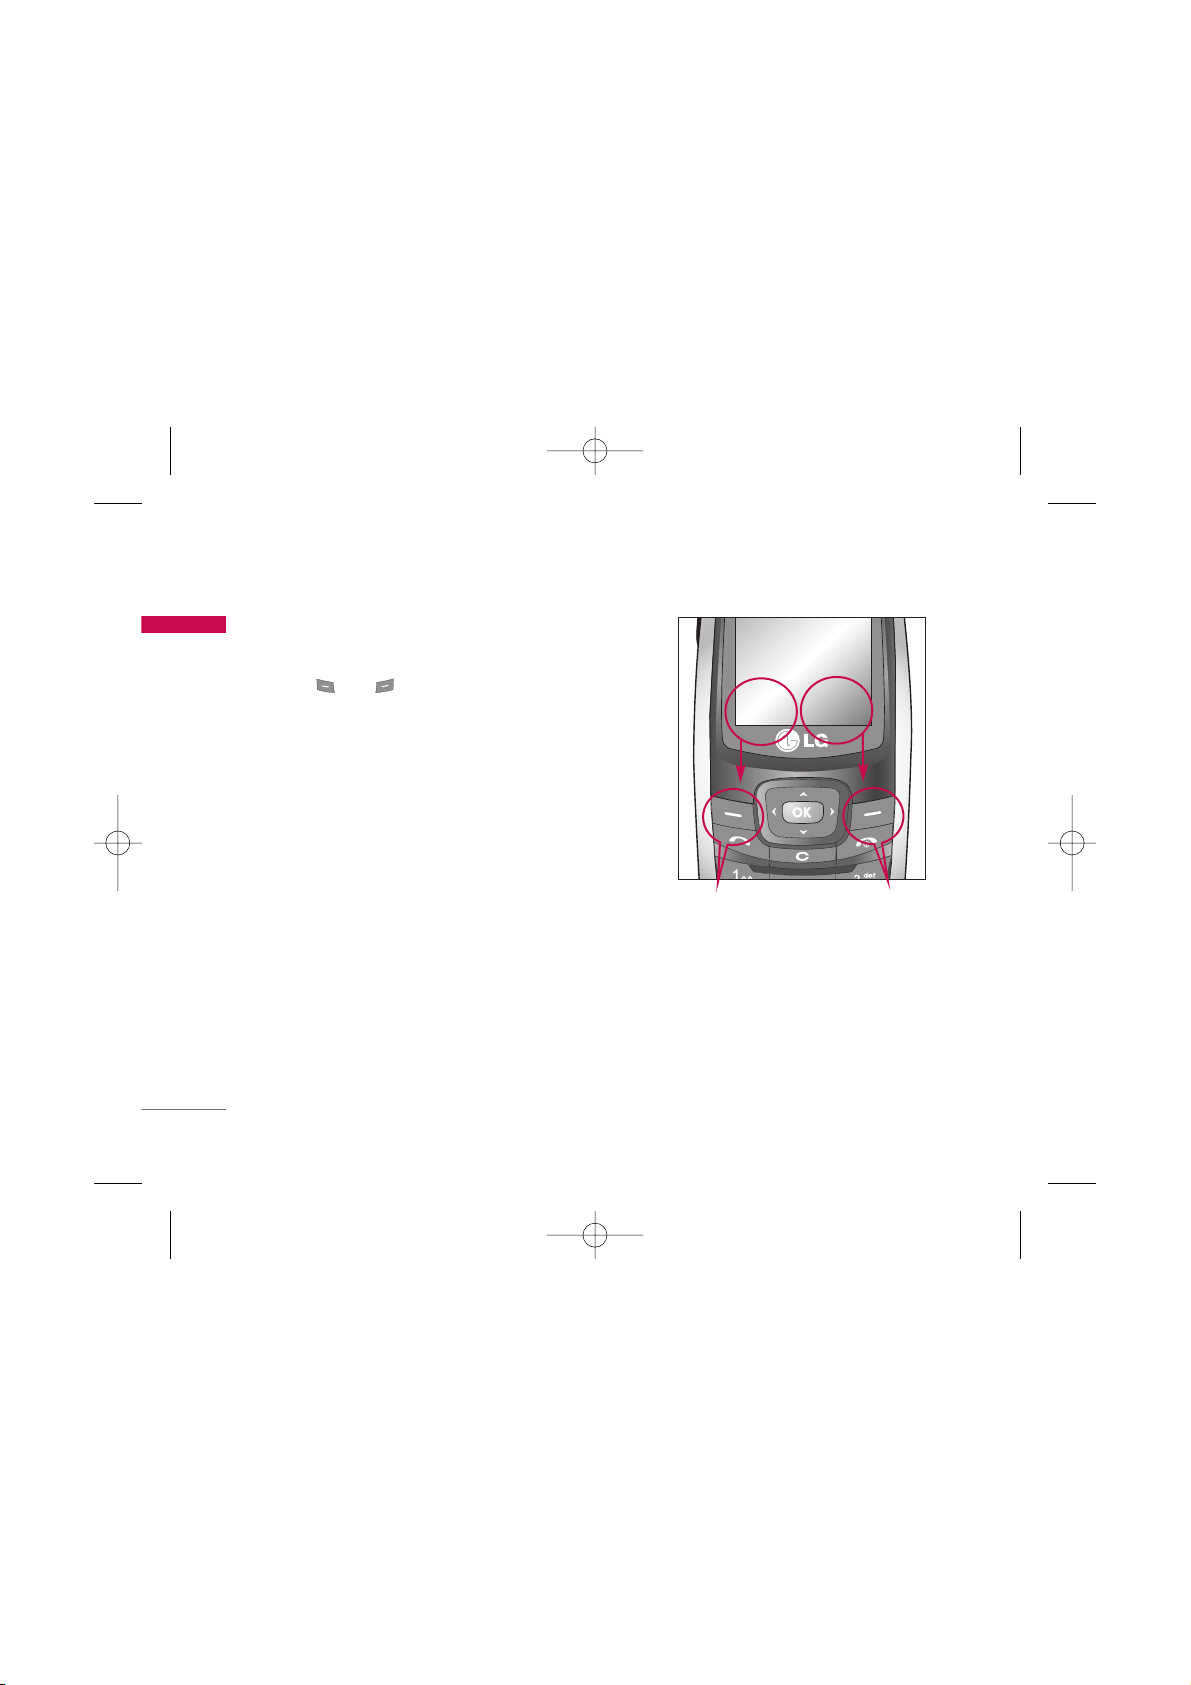
Your phone offers a set of functions that allow you to
customise the phone. These functions are arranged in
menus and sub-menus, accessed via the two soft keys
marked and . Each menu and sub-menu lets
you view and alter the settings of a particular
function.
The roles of the soft keys vary according to the
current context or the label on the bottom line of the
screen just above each key indicates its current role.
Selecting functions and options
26
Selecting functions and options
Press the left soft key
to access the available
menu.
Press the right soft
key to activate the
corresponding action.
MMeennuu CCoo nnttaaccttss
KG110 Cze_(Eng)_Rev.1.0_(1025) 2006.10.25 4:33 PM Page 26
Page 28
Menu tree
27
Menu tree
1. Profiles
1.1 Vibrate only
1.2 Silent
1.3 General
1.4 Loud
1.5 Headset
2. Contacts
2.1 Search
2.2 Add new
2.3 Caller groups
2.4 Speed dials
2.5 Settings
2.6 Information
3. Call register
3.1 Missed calls
3.2 Received calls
3.3 Dialled calls
3.4 All calls
3.5 Call charges
3.6 GPRS information
4. Fun & Tools
4.1 Favourites
4.2 My folder
4.3 Game
4.4 Calculator
4.5 Unit converter
4.6 World time
4.7 Memory status
KG110 Cze_(Eng)_Rev.1.0_(1025) 2006.10.25 4:33 PM Page 27
Page 29
Menu tree
28
Menu tree
5. Messages
5.1 Write text message
5.2 Inbox
5.3 Outbox
5.4 Drafts
5.5 Listen to voice mail
5.6 Info service
5.7 Templates
5.8 Settings
6. Organizer
6.1 Alarm clock
6.2 Scheduler
6.3 Memo
7. Settings
7.1 Date & time
7.2 Language
7.3 Call settings
7.4 Security settings
7.5 Network settings
7.6 GPRS setting
7.7 Reset settings
7.8 Memory status
8. Browser
8.1 Wap
9. Display Setting
9.1 Theme
9.2 Wallpaper
9.3 Backlight time
9.4 Brightness
9.5 Standby text
9.6 Network name
9.7 Home screen shortcut
KG110 Cze_(Eng)_Rev.1.0_(1025) 2006.10.25 4:33 PM Page 28
Page 30

Profile
29
Profile
In Profiles, you can adjust and customise the phone
tones for different events, environments, or caller
groups. There are five preset profiles:
Vibrate only,
Silent, General, Loud and Headset.
Each profile can be personalised(Except Vibrate only,
Silent menu).
Press the left soft key
[Menu]
and select
Profiles
using Up/Down navigation keys.
Changing the profile Menu 1.X.1
1. A list of profiles are displayed.
2. In the
Profiles
list, scroll to the profile you want to
activate and press the left soft key [OK] or OK
key.
3. Then, select
Activate.
Note
]
When a headset is connected to the phone the Headset
profile is automatically activated.
Customising profiles – Personalise
Menu 1.X.2
You can customise profiles except (Vibrate only and
Silent menu). Scroll to the desired profile in the
Profile list. After pressing the left soft key or the OK
key, select Personalise. The profile setting option
opens. Set the options as required.
]
Call
- Call alert type :
Set the alert type for incoming
calls.
- Ring tone :
Select the desired ring tone from the
list.
]
Message
-
Message alert type :
Set the alert type for
messages.
- Message tone :
Select the alert tone for
messages.
KG110 Cze_(Eng)_Rev.1.0_(1025) 2006.10.25 4:33 PM Page 29
Page 31

Profile
30
Profile
]
Volume setting
- Ring tone :
Set the volume of the ringing tone.
- Message tone :
Set the volume of the message
tone.
- Keypad tone :
Set the volume of keypad tone.
- Effect sound :
Set the volume of effect sound.
- Power on/off :
Set the volume of the ringing tone
when switching the phone on/off.
Customising profiles – Rename
Menu 1.X.3
You can rename a profile and give it any name you
want.
Note
]
Vibrate only, Headset and Silent profiles cannot be
renamed.
1. To change the name of a profile, scroll to the
profile in the profile list and after pressing the left
soft key or the OK key, select
Rename.
2. Key in the desired name and press the OK key or
the left soft key [OK].
KG110 Cze_(Eng)_Rev.1.0_(1025) 2006.10.25 4:33 PM Page 30
Page 32

Contacts
31
Contacts
Search Menu 2.1
1. In standby mode, press [Contacts].
2. Search by pressing [OK].
3. If you want to edit, delete, copy an entry, or to
add the voice to one, select [Options]. The
following menu will be displayed.
]
Detail :
You can see the detail.
]
Edit :
You can edit the name and number by using
the navigation key.
]
Write text message :
After you have found the
number you want, you can send a text message to
the selected number.
]
Add new :
You can add a new phonebook entry by
using this function.
]
Delete :
You can delete an entry.
]
Copy :
You can copy an entry from SIM to phone
or from phone to SIM.
]
Move :
You can move an entry from SIM to phone
or from phone to SIM.
]
Assign speed dial :
You can assign the entry as a
speed dial.
Add new Menu 2.2
You can add a contact entry using this function.
There are 2 memories: Phone memory and SIM
memory. To select the memory, go to Contacts Settings - Memory in use option.
The phone memory capacity is 500 entries. You can
enter up to 14 characters in each name in the phone
memory. The SIM card memory capacity depends on
the SIM card.
1. Press the Menu key and select
Contacts>Add
new
.
2. You can add new contact entries to the SIM
memory or the phone memory. To select the
memory, go to Contacts - Settings - Memory in
use option.
]
Adding new entries into SIM memory :
You can enter a name and number, and select the
required group. (Depends on the SIM)
]
Adding new entries into the phone memory :
You can enter a name, and number, and select the
required group.
KG110 Cze_(Eng)_Rev.1.0_(1025) 2006.10.25 4:33 PM Page 31
Page 33

Caller groups Menu 2.3
You can add up to 20 members per group, with up to
a maximum of 5 groups in total.
1. Scroll to Caller groups item and every Group list
will be displayed.
2. Select Group name you want by pressing
[Options].
]
Member list :
Displays the member list in the
group.
]
Group ring tone :
Use this to select the ring tone
to be used when you receive a voice phone call
from a person in the group.
]
Add member :
Add a member to the group. You
can add up to 20 members per group.
]
Remove member :
Removes the member from the
group member list. The contact entry still remains
in Contacts.
]
Rename :
Assigns a new name to the group.
Speed dials Menu 2.4
You can assign any of the keys, to with a
Name list entry. You can call directly by Long
pressing this key.
1. Open the phonebook first by pressing the Right
soft key [Contacts] in standby mode.
2. Scroll to Speed dial, then press the left soft key
[OK].
3. If you want to add Speed dial, select (empty).
Then, you can search the name in phonebook.
4. If you want to modify or delete the assigned
speed dial, choose from the following options :
Change, Remove and Remove all.
32
Contacts
Contacts
KG110 Cze_(Eng)_Rev.1.0_(1025) 2006.10.25 4:33 PM Page 32
Page 34

33
Contacts
Settings Menu 2.5
1. Press the [Contacts] in standby mode.
2. Scroll to Settings, then press the [OK].
Memory in use
Scroll to highlight
Memory in use
, then press
[OK].
- If you select
Always ask, while
adding entry, the
phone will ask where to store.
- If you select
SIM
or
Phone
, the phone will store
an entry to SIM or phone.
View options
You can set the Contact display option.
]
Name and number :
When you search Contacts,
the list displays the names and numbers.
]
Name only :
When you search Contacts, the list
displays the names only.
Copy/Move all
You can copy/move entries from the SIM card
memory to the phone memory and vice versa.
1. Open the Phonebook first by pressing the
[Contacts] in standby mode.
2. Scroll to Copy/Move all, and then press the
[OK] to enter this menu.
]
SIM to Phone :
Use this to copy the entry from the
SIM Card to the Phone memory.
]
Phone to SIM :
Use this to copy the entry from the
Phone memory to the SIM Card.
Delete all
You can delete all entries in SIM and Phone. This
function requires Security code.
1. Press [Contacts] in standby mode and select
Delete all, press [OK].
2. Then select a memory to erase.
3. Enter security code and Press [OK] or
[Back].
KG110 Cze_(Eng)_Rev.1.0_(1025) 2006.10.25 4:33 PM Page 33
Page 35

Contacts
34
Memory status
You can check free space and memory usage of each
repository, SIM card and Handset.
Information Menu 2.6
]
Service dial number (SIM dependent) :
Use this to view the list of Service Dialling Numbers
(SDN) assigned by your network operator
(if supported by the SIM card). Such numbers
include the emergency, directory enquiries and
voice mail numbers.
1. Select the Service dial number option.
2. The names of the available services will be shown.
3. Use and to select a service. Press
[Send].
]
Service dial number :
This feature allows you to see
how many free and in-use are in your phone
memory.
]
Own number (SIM dependent) :
You can check
your own number in SIM card.
Contacts
KG110 Cze_(Eng)_Rev.1.0_(1025) 2006.10.25 4:33 PM Page 34
Page 36

Call register
35
You can check the record of missed, received, and
dialled calls only if the network supports the Calling
Line Identification (CLI) within the service area.
The number and name (if available) are displayed
together with the date and time at which the call was
made. You can also view call times.
Missed calls Menu 3.1
This option lets you view the last 20 unanswered
calls. You can also:
]
View the number if available and call it, or save it in
the phonebook.
]
Enter a new name for the number and save both in
the phonebook.
]
Send a message to this number.
]
Delete the call from the list.
Received calls Menu 3.2
This option lets you view the last 40 incoming calls.
You can also:
]
View the number if available and call it, or save it in
the phonebook.
]
Enter a new name for the number and save both in
the phonebook.
]
Send a message to this number.
]
Delete the call from the list.
Dialled calls Menu 3.3
This option lets you view the last 40 outgoing calls
(called or attempted).
You can also:
]
View the number if available and call it, or save it in
the phonebook.
]
Enter a new name for the number and save both in
the phonebook.
]
Send a message to this number.
]
Delete the call from the list.
Call register
KG110 Cze_(Eng)_Rev.1.0_(1025) 2006.10.25 4:33 PM Page 35
Page 37

All calls Menu 3.4
You can view Missed, Dialled and Received calls.
Call charges Menu 3.5
Call duration (Menu 3.5.1)
Allows you to view the duration of your incoming and
outgoing calls. You can also reset the call times. The
following timers are available:
]
Last call :
Duration of the last call.
]
Dialled numbers :
Duration of the outgoing calls.
]
Received calls :
Duration of the incoming calls.
]
All calls :
Total duration of all calls made and
received since the timer was last reset.
Call costs (Menu 3.5.2)
This network service allows you to check the cost of
your last call, all calls, remaining and clear all.
To reset you will be requested to enter the PIN2
code.
Note
]
The actual cost invoiced for calls by your service
provider may vary, depending on network features,
rounding-off for billing, taxes, etc.
Settings (SIM Dependant) (Menu 3.5.3)
]
Set cost in :
You can set the currency type and the
unit price. Contact your service provider to obtain
charging unit prices. To select the currency or unit
in this menu, you need the PIN2 code.
]
Set limits :
This network service allows you to limit
the cost of your calls by selected charging units. If
you select
Read
, the number of remaining units are
shown. If you select
Change
, you can change your
charge limit.
]
Auto display :
This network service allows you to
automatically see the cost of your last calls. If set
to
On
, you can see the cost of the last call when
the call is released.
Call register
36
Call register
KG110 Cze_(Eng)_Rev.1.0_(1025) 2006.10.25 4:33 PM Page 36
Page 38

37
Call register
GPRS information Menu 3.6
You can check the amount of data transferred over
the network through the GPRS information option. In
addition, you can also view how much time you were
online.
Call duration (Menu 3.6.1)
You can check the duration of
Last data session
and
All data session
. You can also reset the call timers by
selecting
Reset all.
Data volumes (Menu 3.6.2)
You can check The Sent, Received or All data
volumes for Last data session or All data session and
can clear all
.
KG110 Cze_(Eng)_Rev.1.0_(1025) 2006.10.25 4:33 PM Page 37
Page 39

Fun & Tools
38
Fun & Tools
Favourites Menu 4.1
This option allows you to add your own favorites to
the list already provided. Once you create your own
menu, you can access the desired function quickly in
the idle screen by pressing the up navigation key.
My Folder Menu 4.2
You can select a picture or an animation set as
wallpaper and a sound set as ringtone.
Images (Menu 4.2.1)
Sounds (Menu 4.2.2)
Submenu
:
]
Set as wallpaper/ringtone
Currently selected image/sound can be set as a
wallpaper or ringtone.
]
Delete
Delete available image or sound (downloaded
only).
]
Delete All
Delete all the available images or sounds
(downloaded only).
]
Rename
Edit title of available image or sound (Downloaded
only).
]
Information
You can view downloaded image and sound’s
information.
Game Menu 4.3
You can enjoy a game on the phone. For further
details, use the on-screen instruction or help menu.
Calculator Menu 4.4
The calculator provides the basic arithmetic
functions:
addition, subtraction, multiplication and
division.
1. Enter the first number using the numeric keys.
2. Press the corresponding navigation key to select a
mathematical function.
KG110 Cze_(Eng)_Rev.1.0_(1025) 2006.10.25 4:33 PM Page 38
Page 40

39
Fun & Tools
Note
]
To erase any mistake or clear the display, use the key.
]
To include a decimal point, press the key.
]
To include a minus sign, press the key.
3. To calculate the result, press the left soft key
[Result] or OK key.
4. After calculation, press the left soft key [OK] to
return to the initial state.
Unit converter Menu 4.5
This converts any measurement into a unit you want.
There are 6 types that can be converted into units:
Surface, Length, Weight, Temperature, Volume and
Velocity.
1. Select one of six unit types by pressing the left
soft key [OK].
2. Select the standard value by using
,
.
3. Select the unit you want to convert by pressing
and
.
4. You can check the converted value for the unit
you want. Also, you can input a decimal number
by pressing .
World time Menu 4.6
You can check the current time of Greenwich Mean
Time (GMT) and major cities around the world, using
the left/right navigation keys.
The screen shows the city name, current date and
time.
To select the time zone in which you are located,
proceed as follows:
1. Select the city corresponding to your time zone
by pressing the left/right navigation keys one or
more times. The local date and time are displayed.
2. If you want to change the time display in standby
mode to the selected time, press the left soft key
and select Set.
Memory status Menu 4.7
This feature allows you to see how much memory is
free and how much is in use in your phonebook.
5
7
5
7
KG110 Cze_(Eng)_Rev.1.0_(1025) 2006.10.25 4:33 PM Page 39
Page 41

40
Messages
Messages
Write text message Menu 5.1
You can write and edit text messages up to 10 pages.
1. Enter the
Messages
menu by pressing [OK].
2. If you want to write a new message, select
Write
text message.
3. To make text input easier, use T9. For details, refer
to page 19 through 22 (Entering text).
4. Press [Insert] to attach the following :
Insert
]
Symbol :
You can add special characters.
]
Picture :
You can insert the Default graphics or
graphics in My folder that are available for short
messages.
]
Sound :
You can insert sounds that are available for
short messages.
]
Text templates :
You can use Text templates already
set in the phone.
]
Contacts :
You can add phone numbers or e-mail
addresses in the address book.
]
Signature :
You can add your business card to the
message.
5. After you have completed the message, to select
the required option, press the left soft key
[Options].
Options
]
Send :
Sends the text message.
1. Enter the number of the recipient.
2. Press key to add more recipients.
3. You can add phone numbers from the address
book.
4. Once the numbers have been entered, press the
left soft key to send the message.
All messages will automatically be saved in the
outbox folder, even after a sending failure.
]
Save :
Stores messages in the Drafts folder.
]
Font :
You can select the Size and Style of font.
]
Colour Font :
You can also set the Colour of the
text (foreground) and the background.
KG110 Cze_(Eng)_Rev.1.0_(1025) 2006.10.25 4:33 PM Page 40
Page 42

41
]
Alignment :
You can select the alignment of text.
[Left/Centre/Right]
]
Add T9 dictionary :
You can add your own words.
This menu will only be shown when the edit mode
has been set to T9ABC/T9Abc/T9abc.
]
T9 languages :
Select the desired language for T9
input mode. You can also deactivate the T9 input
mode by selecting ‘T9 off’.
]
Exit :
If you press Exit whilst writing a message, you
will be taken back to the message menu. Also the
written message will not have been saved.
Note
]
This phone supports EMS release 5, so is available to
send colour pictures, sounds, text styles, etc.. If the
other parties handsets do not support such options, the
pictures, sounds or texts sent may not be displayed
correctly on their phones.
Inbox Menu 5.2
You will be alerted when you have received messages.
They will be stored in the Inbox.
In the Inbox, you can identify each message by their
icons. For detail, see the icon directive.
] Icon directive
If the phone shows ‘No space for SIM message’, you
have to only delete some SIM messages from the
Inbox. If the phone displays ‘No space for message’,
you can make space for each repository as deleting
messages, media and applications.
Note
]
SSIIMM mmeessss aagg ee::
SIM message means the message is
exceptionally stored in the SIM card.
Icon Description
Short message
SIM message
Read text message
Messages
KG110 Cze_(Eng)_Rev.1.0_(1025) 2006.10.25 4:33 PM Page 41
Page 43

Messages
42
Messages
To read a message, select one of the messages by
pressing .
]
View :
You can view the selected message.
]
Reply :
You can reply to the sender.
]
Forward :
You can forward the selected message to
another party.
]
Return call :
You can call the sender back.
]
Delete :
You can delete the current message.
]
View Information :
You can view information about
received messages ; From, Date,Time, Type and Size.
]
Delete all :
You can delete all messages.
Outbox Menu 5.3
You can view the list and contents of sent messages
in this menu and can also verify if the transmission
was successful.
] Icon directive
]
View :
You can view the selected message.
]
Forward :
You can edit the selected message.
]
Delete :
Deletes the selected message from outbox.
]
View information :
You can check the information
of each message.
]
Delete all :
Deletes all the messages in the outbox
folder.
Icon Description
SMS sent
Failed SMS
SMS Delivery confirmed
KG110 Cze_(Eng)_Rev.1.0_(1025) 2006.10.25 4:55 PM Page 42
Page 44

43
Drafts Menu 5.4
You can view the messages saved as a draft. The draft
messages are listed with the date and time when they
were saved. Scroll through the list using up/down
navigation keys.
Each draft has the following options. Press
[Options].
]
View :
You can view the selected message.
]
Edit :
You can edit the selected message.
]
Send :
You can send the selected message.
]
Delete :
Deletes the selected message from the
drafts folder.
]
View information :
To view the information of the
message.
]
Delete all :
Deletes all the messages from drafts
folder.
Listen to voice mail Menu 5.5
Once this menu has been selected, simply press the
[OK] to listen to voice mail. You can also hold
down in standby mode to listen to voice mail.
Note
]
When you receive a voice mail, your phone will display an
icon and you will hear an alert. Please check with your
network provider for details of their service in order to
configure the handset correctly.
Info service Menu 5.6
(Dependant to network and subscription)
Info service messages are text messages delivered by
the network to your handset. They provide general
information such as weather reports, traffic news,
taxis, pharmacies, and stock prices. When you receive
an info service message, a popup message will
indicate a new message receipt or the info service
message will be displayed directly. In standby mode,
the following options are available when viewing info
service messages.
Messages
KG110 Cze_(Eng)_Rev.1.0_(1025) 2006.10.25 4:33 PM Page 43
Page 45

Messages
44
Messages
Read (Menu 5.6.1)
When you have received an info service message and
select Read to view the message, it will be displayed
on the screen. You can read another message by
scrolling
and
or
[Next].
Topics (Menu 5.6.2)
]
Add new :
You can add Info service message
numbers in the Phone memory with its nickname.
]
View list :
You can see Info service message
numbers which you have added. If you press
[Options], you can edit and delete info message
categories which you have added.
]
Active list :
You can select Info service message
numbers in the active list.
If you activate an info service number, you can
receive messages sent from the number.
Templates Menu 5.7
There are pre-defined messages in the list. You can
view and edit the template messages or create new
messages. Two types of templates are available: Text
and Signature.
Text templates (Menu 5.7.1)
The followings are pre-defined text templates.
• Please call me back.
• I’m late. I will be there at
• Where are you now?
• I’m on the way.
• Top urgent. Please contact.
• I love you.
The following options are available.
]
View :
Select this to view the selected template.
]
Edit :
Use this to edit the selected template.
]
Add new :
Use this to create a new template.
]
Write text message :
Use this to write a text
message.
]
Delete :
Deletes the selected template from the
text template list.
]
Delete all :
Deletes all templates.
KG110 Cze_(Eng)_Rev.1.0_(1025) 2006.10.25 4:33 PM Page 44
Page 46

45
Signature (Menu 5.7.2)
You can make your signature.
Settings Menu 5.8
Text message (Menu 5.8.1)
]
Message types :
Text, Voice, Fax, Nati.paging, X.400, E-mail,
ERMES
Usually, the type of message is set to Text. You can
convert your text into alternative formats. Contact
your service provider for the availability of this
function.
]
Validity period :
This network service allows you to
set how long your text messages will be stored at
the message centre.
]
Delivery report :
If you set to Yes, you can check
whether your message is sent successfully.
]
Reply via same service :
When a message is sent, it
allows the recipients to reply and charge the cost
of the reply to your telephone bill.
]
SMS centre :
If you want to send the text message,
you can receive the address of SMS centre through
this menu.
Voice mail centre (Menu 5.8.2)
You can receive voicemail if this feature is supported
by your network service provider. When a new
voicemail has arrived, the symbol will be displayed on
the screen. Please check with your network service
provider for details of their service in order to
configure the phone accordingly.
1. Hold down key in standby mode.
2. You can check the following submenus.
]
Home :
You can listen to voice mails by selecting
Home.
]
Roaming :
Even when you are abroad, you can
listen to voice mails if a roaming service is
supported.
Messages
KG110 Cze_(Eng)_Rev.1.0_(1025) 2006.10.25 4:33 PM Page 45
Page 47

Messages
46
Messages
Info message (Menu 5.8.3)
(Dependent to network and subscription)
]
Receive
-
Yes :
If you select this menu, your phone will
receive Info service messages.
-
No :
If you select this menu, your phone will not
receive Info service messages any more.
]
Alert
-
Yes :
Your phone will beep when you have
received Info service message numbers.
-
No :
Your phone will not beep even though you
have received info service messages.
]
Languages
- You can select the language you want by pressing
[On/Off]. Then, the info service message will be
shown in the language that you have selected.
Push messages (Menu 5.8.4)
You can set the option whether you will receive the
message or not.
KG110 Cze_(Eng)_Rev.1.0_(1025) 2006.10.25 4:33 PM Page 46
Page 48

47
Alarm clock Menu 6.1
You can set up to 5 alarm clocks to go off at a
specified time.
1. Select
On
and enter the alarm time you want.
2. Select the repeat period :
Once, Mon ~ Fri, Mon
~ Sat, Everyday
.
3. Select the alarm tone you want and press
[OK].
4. Edit the alarm name and press [OK].
Scheduler Menu 6.2
When you enter this menu, a calendar appears. A
square cursor is located on the current date. You can
move the cursor to another date using the navigation
keys. On the calendar, you can use the following keys.
You can enter a schedule or memo in the scheduler by
pressing the left soft key [Options].
]
Add new : Select this to enter a new schedule or
memo. After a schedule note is entered on a date, the
date is shown in a different colour and appears on
the right bottom of the screen. This function reminds
you of your schedule. And the phone will sound an
alarm tone if you set the phone to do so.
]
View :
Shows the schedule note or memo for the
chosen day. Press the left soft key [Options] to
edit or delete the note you selected.
]
Delete entries :
Select this to delete Past entries,
Date entries and All entries.
]
Go to date :
You can view the enter date in
scheduler quickly by use this menu.
Memo
Menu 6.3
1. Select the Memo by pressing the [OK].
2. If the entry is empty, press the [Add].
3. Input the memo and then press the [OK].
Note
]
If you want to change the text input mode, press the in order.
Organizer
skips back a year.
skips forward a year.
skips back a month.
skips forward a month.
Each press of
5
7
Organizer
KG110 Cze_(Eng)_Rev.1.0_(1025) 2006.10.25 4:33 PM Page 47
Page 49

Settings
48
You can set the following menus for your
convenience and preferences.
Date & Time Menu 7.1
You can set functions relating to the date and time.
Date
Set date
You can enter the current date.
Date format
You can set the Date format such as
DD/MM/YYYY,
MM/DD/YYYY, YYYY/MM/DD.
(D: Day / M: Month / Y: Year)
Time
Set time
You can enter the current time.
Time format
Your can set the time format between 24-hour and 12- hour.
Language Menu 7.2
You can change the language for the display texts in
your phone. This change will also affect the Language
Input mode.
Call settings Menu 7.3
You can set the menu relevant to a call by pressing
[OK] in the Setting menu.
Call divert (Menu 7.3.1)
The Call divert service allows you to divert incoming
voice calls, fax calls, and data calls to another
number.
For details, contact your service provider.
]
All voice calls :
Diverts voice calls unconditionally.
]
If busy :
Diverts voice calls when the phone is in use.
]
If no reply :
Diverts voice calls which you do not
answer.
]
If out of reach :
Diverts voice calls when the phone
is switched off or out of coverage.
Settings
KG110 Cze_(Eng)_Rev.1.0_(1025) 2006.10.25 4:33 PM Page 48
Page 50

49
Settings
]
All data calls :
Diverts to a number with a PC
connection unconditionally.
]
All fax calls :
Diverts to a number with a fax
connection unconditionally.
]
Deactivate all :
Cancels all call divert service.
The submenus
Call divert menus have the submenus shown below.
]
Activate :
Activate the corresponding service.
- To voice mail centre : Forwards to message
centre.This function is not shown at All data calls
and All fax calls menus.
-
To other number :
Inputs the number for diverting.
-
To favourite number :
You can check back to last
five diverted numbers.
]
Cancel :
Deactivate the corresponding service.
]
View status :
View the status of the corresponding
service.
Answer mode (Menu 7.3.2)
]
Any key
If you select this menu, you can receive a call by
pressing any key except [End] key.
]
Send Key only
If you select this menu, you can receive a call by
only pressing [Send] key.
Send my number (Menu 7.3.3)
(network and subscription dependent)
]
On
You can send your phone number to another party.
Your phone number will be shown on the receiver’s
phone.
]
Off
Your phone number will not be shown.
]
Set by network
If you select this, you can send your phone number
depending on two line service such as line 1 or line
2.
KG110 Cze_(Eng)_Rev.1.0_(1025) 2006.10.25 4:33 PM Page 49
Page 51

50
Call waiting (network dependent) (Menu 7.3.4)
]
Activate
If you select On, you can accept a waiting
(receiving) call.
]
Deactivate
If you select Off, you cannot recognize the waiting
(receiving) call.
]
View status
Shows the status of Call waiting.
Minute minder (Menu 7.3.5)
If you select On, you can check the call duration by
beep sound every minute during a call.
Auto redial (Menu 7.3.6)
]
On
When this function is activated, the phone will
automatically try to redial in the case of failure to
connect a call.
]
Off
Your phone will not make any attempts to redial
when the original call has not connected.
Security settings Menu 7.4
PIN code request (Menu 7.4.1)
In this menu, you can set the phone to ask for the
PIN code of your SIM card when the phone is
switched on. If this function is activated, you’ll be
requested to enter the PIN code.
1. Select PIN code request in the security settings
menu, and then press [OK].
2. Set
Enable/Disable.
3. If you want to change the setting, you need to
enter PIN code when you switch on the phone.
4. If you enter the wrong PIN code more than 3
times, the phone will lock out. If the PIN is
blocked, you will need to key in the PUK code.
Settings
Settings
KG110 Cze_(Eng)_Rev.1.0_(1025) 2006.10.25 4:33 PM Page 50
Page 52

51
Settings
5. You can enter your PUK code up to 10 times. If
you enter the wrong PUK code more than 10
times, you can not unlock your phone. You will
need to contact your service provider.
Handset lock (Menu 7.4.2)
You can use a security code to avoid unauthorised
use of the phone. Whenever you switch on the
phone, the phone will request a security code if you
set the handset lock to
On.
Auto key lock (Menu 7.4.3)
You can set if activate Auto key lock.
1. Off
2. 10 secs
3. 15 secs
4. 30 secs
5. 45 secs
6. When backlight off
Call barring (Menu 7.4.4)
The Call barring service prevents your phone from
making or receiving certain category of calls. This
function requires the call barring password. You can
view the following submenus.
]
All outgoing
The barring service for all outgoing calls.
]
Outgoing international
The barring service for all outgoing international
calls.
]
Outgoing international except home country
The barring service for all international outgoing
calls except home network.
]
All incoming
The barring service for all incoming calls.
]
Incoming when abroad
The barring service for all incoming calls when
roaming.
]
Deactivate all
You can cancel all barring services.
KG110 Cze_(Eng)_Rev.1.0_(1025) 2006.10.25 4:33 PM Page 51
Page 53

Settings
52
]
Change password
You can change the password for Call Barring
Service.
The submenus:
• Activate
Allows to request the network to set call restriction
on.
• Disable
Set the selected call restriction off.
• View status
View the status whether the calls are barred or not.
Fixed dialling (Menu 7.4.5)
(SIM dependent)
You can restrict your outgoing calls to selected
phone numbers. The numbers are protected by your
PIN2 code.
]
Activate
You can restrict your outgoing calls to selected
phone numbers.
]
Deactivate
You can cancel fixed dialling function.
]
Fixed dial list
You can view the number list saved as Fixed dial
number.
Change codes (Menu 7.4.6)
PIN is an abbreviation of Personal Identification
Number to prevent use by an unauthorised person.
You can change the access codes:
PIN2 code,
Security code.
1. If you want to change the Security code/PIN2
code input your original code, and then press
[OK].
2. Input new Security code/PIN2 code and verify
them.
Network settings Menu 7.5
You can select a network which will be registered
either automatically or manually. Usually, the network
selection is set to Automatic.
Settings
KG110 Cze_(Eng)_Rev.1.0_(1025) 2006.10.25 4:33 PM Page 52
Page 54

53
Settings
Automatic (Menu 7.5.1)
If you select Automatic mode, the phone will
automatically search for and select a network for
you. Once you have selected “Automatic”, the phone
will be set to “Automatic” even though the power is
off and on.
Manual (Menu 7.5.2)
The phone will find the list of available networks and
display them. Then you can select the network which
you want to use if this network has a roaming
agreement with your home network operator.
Preferred (Menu 7.5.3)
You can set a list of preferred networks and the
phone attempts to register with first, before
attempting to register to any other networks. This list
is set from the phone’s predefined list of known
networks.
GPRS setting Menu 7.6
You can set the GPRS service depending on various
situations.
Power on (Menu 7.6.1)
If you select
Power on
and you are in a network that
supports GPRS, the phone registers to the GPRS
network and sending short messages will be done via
GPRS.
When needed (Menu 7.6.2)
If you select
When needed
, the phone will use a
GPRS connection only if you start an application or
action that needs it. The GPRS connection is closed
after it is no longer required by any application.
Reset settings Menu 7.7
You can initialise all factory defaults. You will need
the Security code to activate this function.
Memory status Menu 7.8
You can check the capacity of free memory.
KG110 Cze_(Eng)_Rev.1.0_(1025) 2006.10.25 4:33 PM Page 53
Page 55

Wap Menu 8.1
Home (Menu 8.1.1)
Connect to a homepage. The homepage may be the
site which is defined in the activated profile. It will be
defined by Service Provider if you don’t make in
activated profile.
Bookmarks (Menu 8.1.2)
This menu allows you to store the URL of favourite web
pages for easy access at a later time.
To create a bookmark
1. Press the left soft key [Options].
2. Select Add new and press the OK key.
3. After entering the desired URL and title, press the
OK key.
After selecting a desired bookmark, the following
options are available.
]
Connect :
Connects to the selected bookmark.
]
Add new :
Select this to create a new bookmark.
]
Edit :
You can edit the URL and/or the title of the
selected bookmark.
]
Delete :
Deletes the selected bookmark.
]
Delete all :
Deletes all the bookmarks.
Profiles (Menu 8.1.3)
Each profile contains the following menu:
]
Activate :
Activates the selected profile.
]
Settings :
Use this to edit and change WAP settings
for the selected profile.
-
Homepage :
This setting allows you to enter the
address (URL) of a site you want to use as
homepage. You do not need to type http:// at
the front of each URL as the WAP Browser will
automatically add it.
-
Bearer
1 Data
2 GPRS
Browser
54
Browser
KG110 Cze_(Eng)_Rev.1.0_(1025) 2006.10.25 4:33 PM Page 54
Page 56

55
Browser
-
GPRS settings
The service settings are only available when GPRS
is chosen as a bearer service.
IP address
: Input the IP address of the WAP
gateway you access.
APN
: Input the APN of the GPRS.
User ID
: The users identify for your APN server.
Password :
The password required by your APN
server.
-
Connection type
The options for connection type are Temporary or
Continuous and depend on the gateway you are
using.
Continuous
A confirmed delivery mechanism but generates
more network traffic.
Temporary
A non-confirmed (connectionless) service.
-
Secure settings
According to the used gateway port, you can
choose this option as On or Off.
-
Display image
You can select whether images on WAP cards are
displayed or not
]
Rename :
You can change the profile name.
]
Add new :
You can add a new profile.
]
Delete :
Delete the Profile.
Go to URL (Menu 8.1.4)
You can connect directly to the site you want. After
entering a specific URL, press the OK key.
KG110 Cze_(Eng)_Rev.1.0_(1025) 2006.10.25 4:33 PM Page 55
Page 57

56
Browser
Cache settings (Menu 8.1.5)
You can remove the contents of Cache memory or
change the Cache mode.
Clear cache
(Menu 8.1.5.1)
The contents of Cache memory will be removed.
Check cache
(Menu 8.1.5.2)
You can set the option whether you will check the
cache memory or not.
Cookies settings (Menu 8.1.6)
You can clear and check cookies.
1. Clear Cookies
2. Check Cookies
Browser version (Menu 8.1.7)
The WAP Browser version is displayed.
Browser
KG110 Cze_(Eng)_Rev.1.0_(1025) 2006.10.25 4:33 PM Page 56
Page 58

57
Display Setting
Display Setting
Theme Menu 9.1
You can select Clean style, Calm style, Colorful style
and Silky style.
Wallpaper Menu 9.2
You can select the background pictures in standby
mode.
]
Picture
]
Clock
Backlight time Menu 9.3
You can set the light-up duration of the internal
display. There are 4 choices to choose from Off,
10 Secs, 20 Secs and 30 Secs..
Brightness Menu 9.4
You can select 100%, 80%, 60% or 40% of the
brightness.
Standby text Menu 9.5
If you select On, you can edit the text which will be
displayed in standby mode.
Network name Menu 9.6
If you select on, you can see the network service
provider name which is displayed in standby mode.
Home screen shortcut Menu 9.7
Selecting On displays the functionalities of 4
Navigation keys and Menu key as pictures on the
middle of the idle window.
KG110 Cze_(Eng)_Rev.1.0_(1025) 2006.10.25 4:33 PM Page 57
Page 59

58
Accessories
Accessories
There are various accessories for your mobile phone. You can select these options according to your
personal communication requirements.
Standard Battery
Travel Adapter
This charger allows you
to charge the battery.
Note
]
Always use genuine LG accessories. Failure to do this
may invalidate your warranty.
]
Accessories may be different in different regions; please
check with our regional service company or agent for
further inquires.
KG110 Cze_(Eng)_Rev.1.0_(1025) 2006.10.25 4:33 PM Page 58
Page 60

59
Technical data
Technical data
General
Product name : KG110
System : GSM 900 / DCS 1800
Ambient temperatures
Max : +55°C
Min : -10°C
KG110 Cze_(Eng)_Rev.1.0_(1025) 2006.10.25 4:33 PM Page 59
Page 61

KG110 Cze_(Eng)_Rev.1.0_(1025) 2006.10.25 4:33 PM Page 60
.TBAB yb deifirev si sdradnats evoba ot ytimrofnoc ehT
sliateDsdr
CE/5/
9
9
9
adn
s
l
ia
t
eD
s
r
eilp
e
p
m
a
u
N
S
s
l
i
at
sserddA
t
c
cu
u
d
do
or
rP
P
em
e
D
aN
t
emaNedarT
emaN
l
e
d
oM
1
evitceriD
atSelba
ET
c
i
lpp
T&R
A
no
ita
m
r
of
n
Iy
ra
tn
em
e
l
p
p
uS
noitaralceD
Page 62

KG110
Pfiíruãka uÏivatele
Pfieãtûte si tento návod peãlivû je‰tû pfied
pouÏíváním svého nového mobilního telefonu.
Uchovejte si ho pro pfiípad potfieby do nûj nahlédnout.
Likvidace star˘ch spotfiebiãÛ
1. Pokud je u v˘robku uveden symbol pojízdného kontejneru v
pfie‰krtnutém poli, znamená to, Ïe na v˘robek se vztahuje smûrnice
Evropské unie ãíslo 2002/96/EC.
2. V‰echny elektrické a elektronické v˘robky by mûly b˘t likvidovány
oddûlenû od bûÏného komunálního odpadu prostfiednictvím sbûrn˘ch
zafiízení zfiízen˘ch za tímto úãelem vládou nebo místní samosprávou.
3. Správn˘ zpÛsob likvidace starého elektrického spotfiebiãe pomáhá
zamezit moÏn˘m negativním dopadÛm na Ïivotní prostfiedí a zdraví.
4. Bliωí informace o likvidaci starého spotfiebiãe získáte u místní
samosprávy, ve sbûrném zafiízení nebo v obchodû, ve kterém jste
v˘robek zakoupili.
KG110 Cze_Rev.1.0_(1025) 2006.10.25 4:22 PM Page 1
Page 63

Obsah
2
Úvod 5
Pro va‰i bezpeãnost 6
Pokyny k bezpeãnému a efektivnímu
pouÏívání 7
Funkce telefonu KG110 12
âásti telefonu 12
Pohled zepfiedu 12
Pohled zezadu 13
Popis klávesnice 14
Ikony na displeji 16
První kroky 17
Instalace SIM karty a baterie 17
Vkládání SIM karty 17
Vyjímání SIM karty 17
Vkládání baterie 18
Nabíjení baterie 18
Odpojování nabíjeãky 19
Základní funkce 20
Telefonování 20
Síla signálu 21
Zadávání textu 21
Telefonní seznam 25
V Menu volání 25
Skupinové neboli konferenãní hovory 26
V˘bûr funkcí a moÏností 29
Strom menu 30
Profily 32
Kontakty 34
Hledat 34
Pfiidat kontakt 34
Skupiny volajících 35
Rychlé volby 35
Nastavení 36
Informace 37
Obsah
KG110 Cze_Rev.1.0_(1025) 2006.10.25 4:22 PM Page 2
Page 64

V˘pis volání 38
Zme‰kané hovory 38
Pfiijaté hovory 38
Volané hovory 38
V‰echny hovory 39
Tarifikace hovoru 39
Informace GPRS 40
Zábava a nástroje 41
Oblíbené 41
Moje sloÏka 41
Hry 41
Kalkulaãka 41
Pfievodník jednotek 42
Svûtov˘ ãas 42
Stav pamûti 43
Zprávy 44
Napsat textovou zprávu 44
Pfiijaté zprávy 45
Odeslané zprávy 46
Koncepty 47
Poslechnout hlasovou schránku 47
Inform. sluÏba 47
·ablony 48
Nastavení 49
Organizér 51
Budík 51
Kalendáfi 51
Poznámky 52
Nastavení 53
Datum a ãas 53
Jazyky 53
Nastavení hovoru 53
Nastavení zabezpeãení 56
Nastavení sítû 58
Nastavení GPRS 59
PÛvodní nastavení 59
Stav pamûti 59
Internet 60
WAP 60
3
Obsah
KG110 Cze_Rev.1.0_(1025) 2006.10.25 4:22 PM Page 3
Page 65

Obsah
4
Nastavení displeje 63
Téma 63
Tapeta 63
Doba podsvícení 63
Jas 63
Uvítání 63
Název sítû 63
Zobrazit mapu menu 63
Pfiíslu‰enství 64
Technické údaje 65
Obsah
KG110 Cze_Rev.1.0_(1025) 2006.10.25 4:22 PM Page 4
Page 66

Blahopfiejeme vám ke koupi vyspûlého a
kompaktního mobilního telefonu KG110, kter˘
byl navrÏen, aby spolupracoval s nejnovûj‰ími
technologiemi pro mobilní komunikaci.
Úvod
5
Úvod
Tento návod k obsluze obsahuje dÛleÏité
informace o pouÏívání tohoto telefonu a
nakládání s ním. V‰echny informace si
pfieãtûte velmi pozornû, abyste mohli svÛj
telefon optimálnû vyuÏívat a pfiede‰li jeho
po‰kození nebo ‰patnému uÏívání. V‰echny
zmûny nebo modifikace, které nejsou
v˘slovnû povoleny v tomto návodu k obsluze,
mohou vést k zániku záruky na tento pfiístroj.
KG110 Cze_Rev.1.0_(1025) 2006.10.25 4:22 PM Page 5
Page 67

Pro va‰i bezpeãnost
6
Pro va‰i bezpeãnost
Pfieãtûte si tyto jednoduché pokyny. Jejich
nedodrÏení mÛÏe b˘t nebezpeãné nebo
nezákonné. Dal‰í podrobné informace naleznete
v této pfiíruãce.
UPOZORNùNÍ!
]
V letadle musí b˘t mobilní telefon vÏdy
vypnut˘.
]
NedrÏte telefon v ruce, kdyÏ fiídíte.
]
NepouÏívejte mobilní telefon v blízkosti
benzínov˘ch stanic, skladÛ paliv, chemick˘ch
v˘robních zafiízení nebo v prostorech s
nebezpeãím v˘buchu.
]
Pro svou bezpeãnost pouÏívejte POUZE
urãené ORIGINÁLNÍ baterie a nabíjeãky.
]
KdyÏ se telefon nabíjí, nedot˘kejte se jej
mokr˘ma rukama. Mohlo by dojít k zasaÏení
elektrick˘m proudem nebo k váÏnému
po‰kození telefonu.
V¯STRAHA!
]
Vypnûte telefon na v‰ech místech, kde to
vyÏadují zvlá‰tní pfiedpisy. NepouÏívejte
napfiíklad telefon v nemocnicích, protoÏe to
mÛÏe ovlivnit citlivé lékafiské pfiístroje.
]
PouÏívejte pouze ORIGINÁLNÍ pfiíslu‰enství,
abyste nezpÛsobili po‰kození svého telefonu.
]
V‰echny rádiové vysílaãe zpÛsobují riziko
ru‰ení s elektronikou v bezprostfiední blízkosti.
Men‰í ru‰ení mÛÏe ovlivnit televizory, rádia,
poãítaãe atd.
]
Baterie by se mûly likvidovat v souladu s
platn˘mi právními pfiedpisy.
]
Nerozebírejte telefon ani baterii.
KG110 Cze_Rev.1.0_(1025) 2006.10.25 4:22 PM Page 6
Page 68

Pokyny k bezpeãnému a efektivnímu
pouÏívání
7
Pokyny k bezpeãnému a efektivnímu pouÏívání
Proãtûte si prosím tyto jednoduché pokyny.
NedodrÏení tûchto pokynÛ mÛÏe b˘t
nebezpeãné nebo protiprávní. V této pfiíruãce
jsou podány dal‰í podrobné informace.
Vystavení vysokofrekvenãní
energii
Informace o vystavení radiov˘m vlnám a
SAR
Tento mobilní telefon - model KG110 - byl
zkonstruován tak, aby splÀoval platné
bezpeãnostní normy pro vystavení radiov˘m
vlnám. Tento poÏadavek je zaloÏen na
vûdeck˘ch poznatcích stanovujících
bezpeãnostní limity zaruãující bezpeãnost v‰ech
osob bez ohledu na vûk nebo zdraví.
]
U smûrnic o vystavení radiov˘m vlnám se
pouÏívá mûrná jednotka s názvem SAR
(Specific Absorption Rate). Testy SAR se
provádûjí standardizovanou metodou s
telefonem vysílajícím na nejvy‰‰í certifikované
v˘konové úrovni ve v‰ech frekvenãních
pásmech.
]
I kdyÏ u rÛzn˘ch modelÛ telefonÛ LG se mÛÏe
úroveÀ SAR do jisté míry li‰it, v‰echny jsou
navrÏeny tak, aby splÀovaly platné smûrnice
pro vystavení radiov˘m vlnám.
]
Limitní hodnota SAR doporuãená mezinárodní
komisí pro ochranu pfied neionizujícím záfiením
ICNIRP (Commission on Non-Ionizing
Radiation Protection) je 2 W/kg v prÛmûru na
deset (10) gramÛ tkánû.
]
Pro pouÏití tohoto modelu telefonu u ucha je
nejvy‰‰í hodnota SAR zji‰tûná testem DASY4
rovna 0.728 W/kg (10g).
]
Hodnota SAR pro obyvatele zemí/oblastí,
které pfiijaly limit SAR doporuãen˘ spoleãností
Institute of Electrical and Electronics
Engineers (IEEE), je v prÛmûru 1,6 W/kg na
jeden (1) gram tkánû (napfiíklad USA, Kanada,
Austrálie a Tchaj-wan).
KG110 Cze_Rev.1.0_(1025) 2006.10.25 4:22 PM Page 7
Page 69

Pokyny k bezpeãnému a efektivnímu pouÏívání
8
Pokyny k bezpeãnému a efektivnímu pouÏívání
Péãe o pfiístroj a jeho údrÏba
Varování! PouÏívejte pouze baterie, nabíjeãku
a pfiíslu‰enství schválené pro tento konkrétní
model telefonu. PouÏití jin˘ch typÛ by mohlo
vést nejen ke zru‰ení platnosti homologace
nebo záruk, které se na telefon vztahují, ale i k
ohroÏení zdraví.
]
Pfiístroj nerozebírejte. V pfiípadû nutnosti
opravy, pfiístroj odneste kvalifikovaném
servisním technikovi.
]
Telefon neponechávejte a nepouÏívejte v
blízkosti elektrick˘ch spotfiebiãÛ, jako je
televizor, radiopfiijímaã nebo osobní poãítaã.
]
Telefon by mûl b˘t v bezpeãné vzdálenosti od
zdrojÛ tepla, jako jsou radiátory a vafiiãe.
]
Nikdy neumisÈujte pfiístroj do mikrovlnné
trouby, baterie telefonu by mohla explodovat.
]
NeupusÈte pfiístroj na zem.
]
Pfiístroj by nemûl b˘t vystaven mechanick˘m
vibracím nebo nárazÛm.
]
Pfii zabalení do fólie nebo obalu z PVC by
mohlo dojít k po‰kození ochranného nátûru
telefonu.
]
K ãi‰tûní povrchu pfiístroje pouÏívejte ãistou
suchou tkaninu.
(NepouÏívejte rozpou‰tûdla, jako je benzen,
fiedidlo nebo alkohol.)
]
Telefon by nemûl b˘t vystaven nadmûrnému
koufii nebo prachu.
]
Telefon by nemûl b˘t umístûn v tûsné blízkosti
platebních karet a dopravních jízdenek, kde by
mohlo dojít k po‰kození údajÛ na
magnetick˘ch prouÏcích.
]
Nedot˘kejte se displeje ostr˘mi pfiedmûty;
mohlo by dojít k po‰kození telefonu.
]
Telefon by nemûl pfiijít do styku s tekutinami a
vlhk˘m prostfiedím.
]
Pfiíslu‰enství jako sluchátka nebo headsety
pouÏívejte opatrnû. Ubezpeãte se, Ïe jejich
kabely nejsou zoh˘bané a Ïe se zbyteãnû
nedot˘kají antény.
KG110 Cze_Rev.1.0_(1025) 2006.10.25 4:22 PM Page 8
Page 70

9
Pokyny k bezpeãnému a efektivnímu pouÏívání
Elektronické pfiístroje
V‰echny mobilní telefony mohou
zpÛsobovat ru‰ení s moÏn˘m negativním
vlivem na normální funkci elektronick˘ch
pfiístrojÛ.
]
Bez povolení není dovoleno pouÏívat mobilní
telefon v blízkosti lékafisk˘ch pfiístrojÛ. Telefon
by nemûl b˘t umístûn tûsnû u
kardiostimulátoru (tzn. v náprsní kapse).
]
Nûkteré mobilní telefony mohou ru‰it
funkãnost naslouchátek.
]
MÛÏe dojít i k urãit˘m drobn˘m interferencím
televize, rádia, osobních poãítaãÛ apod.
Bezpeãnost na silnici
Pfii fiízení motorov˘ch vozidel se seznamte s
místními zákony a pfiedpisy o pouÏívání
mobilních telefonÛ.
]
Pfii fiízení nedrÏte pfii telefonování telefon v
ruce.
]
Vûnujte plnou pozornost fiízení.
]
Pokud máte handsfree soupravu, pouÏívejte ji.
]
Pokud to podmínky fiízení vyÏadují, je tfieba
pfied voláním nebo pfiijímáním hovoru vozidlo
zastavit a zaparkovat.
]
Vysokofrekvenãní energie by mohla mít vliv na
nûkteré elektronické systémy ve voze,
napfiíklad radiopfiijímaã nebo bezpeãnostní
zafiízení.
]
Pokud máte vozidlo vybavené airbagem,
nesmí jeho funkci naru‰ovat pevnû
nainstalované ani pfienosné bezdrátové
zafiízení. Nefunkãnost airbagu by mohla vést k
váÏnému zranûní.
Pokud posloucháte hudbu venku,
nezapomeÀte si nastavit hlasitost tak, abyste
sly‰eli okolní zvuky. Toto doporuãení platí
hlavnû pfii pfiecházení ulice.
KG110 Cze_Rev.1.0_(1025) 2006.10.25 4:22 PM Page 9
Page 71

Pokyny k bezpeãnému a efektivnímu pouÏívání
10
Pokyny k bezpeãnému a efektivnímu pouÏívání
Zabránûní po‰kození sluchu
Pokud jste del‰í dobu vystaveni hlasit˘m
zvukÛm, mÛÏete si po‰kodit sluch. Proto je
doporuãeno, abyste telefon nezapínali ani
nevypínali v blízkosti u‰í. Také se doporuãuje
upravit hlasitost hudby a hovorÛ na rozumnou
úroveÀ.
Oblast odstfielovacích prací
Telefon není dovoleno pouÏívat v oblastech, kde
probíhají odstfielovací práce. Je tfieba dodrÏovat
pfiíslu‰ná nafiízení a postupovat podle platn˘ch
pfiedpisÛ a pravidel.
Potenciálnû v˘bu‰né
prostfiedí
]
Telefon nepouÏívejte u ãerpacích stanic.
NepouÏívejte jej v blízkosti paliv nebo
chemikálií.
]
V ãásti vozidla, ve kterém pfieváÏíte mobilní
telefon nebo jeho pfiíslu‰enství, nepfieváÏejte
ani neuchovávejte hofilavé plyny, kapaliny
nebo v˘bu‰niny.
V letadle
Bezdrátová zafiízení mohou v letadlech
zpÛsobovat ru‰ení.
]
Pfied nástupem do letadla je tfieba vÏdy
mobilní telefon vypnout.
]
Bez povolení posádky nepouÏívejte telefon ani
na zemi.
KG110 Cze_Rev.1.0_(1025) 2006.10.25 4:22 PM Page 10
Page 72

11
Pokyny k bezpeãnému a efektivnímu pouÏívání
Dûti
Telefon je tfieba uchovávat na bezpeãném místû
mimo dosah mal˘ch dûtí. Obsahuje totiÏ malé
souãástky, s jejichÏ uvolnûním by mohlo b˘t
spojeno riziko udu‰ení.
TísÀové volání
TísÀová volání nemusejí b˘t k dispozici ve
v‰ech mobilních sítích. Z tohoto dÛvodu byste
se nemûli v pfiípadû tísÀového volání spoléhat
na mobilní telefon. Ovûfite si tuto informaci u
místního poskytovatele sluÏby.
Informace o bateriích a jejich
údrÏba
]
Pfied dobíjením nemusí b˘t baterie úplnû
vybitá. Na rozdíl od jin˘ch bateriov˘ch
systémÛ zde neexistuje pamûÈov˘ efekt, kter˘
by sniÏoval v˘kon baterie.
]
PouÏívejte pouze baterie a nabíjeãe od firmy
LG. Sv˘m provedením nabíjeãe LG zaruãují
maximální Ïivotnost baterií.
]
U baterie neprovádûjte demontáÏ ani
zkratování.
]
Kontakty na baterii je tfieba udrÏovat v ãistotû.
]
AÏ baterie pfiestane podávat pfiimûfien˘ v˘kon,
vymûÀte ji. Potfieba v˘mûny v‰ak nastává aÏ
po stovkách dobití.
]
Pokud nebyla baterie dlouho pouÏívána, pfied
pouÏitím ji znovu nabijte.
]
Nabíjeãka by nemûla b˘t vystavena pfiímému
sluneãnímu záfiení a nemûla by se pouÏívat ve
vlhkém prostfiedí, napfiíklad v koupelnû.
]
Baterii nenechávejte na hork˘ch ani na
chladn˘ch místech, sníÏila by se tím její
kapacita.
KG110 Cze_Rev.1.0_(1025) 2006.10.25 4:22 PM Page 11
Page 73

Funkce telefonu KG110
12
Funkce telefonu KG110
âásti telefonu
Pohled zepfiedu
Tlaãítko
Tlaãítko Odeslat
Levé kontextové tlaãítko
Konektor sluchátek
Navigaãní tlaãítko
Sluchátko
Displej LCD
Pravé kontextové tlaãítko
Tlaãítko pro zapnutí/vypnutí
Tlaãítko pro mazání
Tlaãítka ãíslic a znakÛ
Tlaãítko kfiíÏek
Mikrofon
KG110 Cze_Rev.1.0_(1025) 2006.10.25 4:22 PM Page 12
Page 74

13
Funkce telefonu KG110
Pohled zezadu
Kontakty baterie
DrÏák SIM karty
Úchyt fiemínku
Baterie
Kryt baterie
Konektor na kabel /
Konektor na nabíjení baterie
KG110 Cze_Rev.1.0_(1025) 2006.10.25 4:22 PM Page 13
Page 75

Funkce telefonu KG110
14
Funkce telefonu KG110
PopisTlaãítko
Levé kontextové tlaãítko / Pravé
kontextové tlaãítko
KaÏdá z tûchto kláves vykonává funkci,
která je uvedena na displeji
bezprostfiednû nad klávesou.
Navigaãní tlaãítka
PouÏívají se k procházení nabídek menu
a k pohybu kurzoru. Tato tlaãítka mÛÏete
také vyuÏít k rychlému pfiístupu k
následujícím funkcím:
• Navigaãní tlaãítko nahoru ( ):
Rychl˘ pfiístup k menu Oblíbené.
• Navigaãní tlaãítko dolÛ ( ): Tlaãítko
pro rychlé vyhledávání
v seznamu kontakty.
• Navigaãní tlaãítko vlevo ( ): Rychl˘
pfiístup k menu Profily.
• Navigaãní tlaãítko vpravo ( ):
Klávesová zkratka pro seznam zpráva.
PopisTlaãítko
Odesílací tlaãítko
Tímto mÛÏete vytoãit telefonní ãíslo a
pfiijmout hovor. Pfii stisku tohoto tlaãítka
bez zadání ãísla telefon zobrazí poslední
volané, pfiijaté a zme‰kané hovory.
Tlaãítka ãíslic a znakÛ
Tato tlaãítka jsou pouÏívaná hlavnû pro
vytáãení v pohotovostním reÏimu a psaní
ãísel nebo znakÛ v editaãním reÏimu.
Pokud tato tlaãítka chvíli podrÏíte:
• voláte svou hlasovou schránku .
• zadáte mezinárodní pfiedãíslí .
• vytáãíte ãísla Rychlé volby ~ .
• vloÏíte pauzu .
5
5
~
Tlaãítko pro zapnutí/vypnutí
Jím mÛÏete zakonãit nebo odmítnout
hovor. PfiidrÏením tohoto tlaãítka po dobu
nûkolika sekund telefon zapnete nebo
vypnete.
Popis klávesnice
Následující tabulka pfiedstavuje klíãové souãásti
telefonu.
Popis klávesnice
KG110 Cze_Rev.1.0_(1025) 2006.10.25 4:22 PM Page 14
Page 76

15
Funkce telefonu KG110
Tlaãítko Smazat
Pfii kaÏdém stisku vymaÏe jeden znak.
PodrÏíte-li tlaãítko stisknuté, smaÏe se
cel˘ text. Tímto tlaãítkem rovnûÏ pfiejdete
na pfiedchozí obrazovku.
PopisTlaãítko
KG110 Cze_Rev.1.0_(1025) 2006.10.25 4:22 PM Page 15
Page 77

Funkce telefonu KG110
16
Funkce telefonu KG110
NíÏe uvedená tabulka popisuje indikátory nebo
ikony zobrazující se na displeji telefonu.
Ikony na displeji
Ikona/indikátor
Popis
Informuje vás o síle signálu sítû.
Hovor je spojen.
MÛÏete pouÏívat sluÏby GPRS.
Ukazuje, Ïe pouÏíváte sluÏbu
roamingu.
Alarm byl nastaven a je zapnut˘.
Informuje vás o stavu baterie.
ObdrÏeli jste textovou zprávu.
ObdrÏeli jste hlasovou zprávu.
ObdrÏeli jste push zprávu.
Telefon se p
fiipojuje k WAP.
Ikona/indikátor
Popis
MÛÏete si prohlíÏet svÛj kalendáfi.
Menu Pouze vibrace v profilu.
Normáln
í
menu v profilu.
Hlasitû menu v profilu.
Tich˘ menu v profilu.
Menu Sluchátka v profilu.
MÛÏete P
fi
esmûrovánÍ hovoru.
KG110 Cze_Rev.1.0_(1025) 2006.10.25 4:22 PM Page 16
Page 78

První kroky
17
První kroky
Instalace SIM karty a baterie
1. Vkládání SIM karty
Najdûte drÏák na SIM kartu na zadní stranû
telefonu. ¤iìte se následujícími pokyny k
instalaci SIM karty.
1.
Vyjmûte baterii, pokud je vloÏena v telefonu.
2.
VloÏte SIM kartu do pozice pod stfiíbrné
drÏáky. Pozlacené konektory smûfiují dolÛ k
telefonu.
2. Vyjímání SIM karty
¤iìte se následujícími pokyny k vyjmutí SIM
karty.
1.
Vyjmûte baterii, pokud je vloÏena v telefonu.
2.
Vyjmûte SIM kartu z jejího drÏáku.
Upozornûní
] Vyjímání baterie ze zapnutého telefonu mÛÏe
naru‰it správné fungování telefonu.
] Proto buìte pfii instalaci a manipulaci se SIM kartou
zvlá‰È pozorní.
KG110 Cze_Rev.1.0_(1025) 2006.10.25 4:22 PM Page 17
Page 79

První kroky
18
První kroky
3. Vkládání baterie
1.
PfiiloÏte baterii k telefonu tak, aby v˘stupky
na spodní ãásti baterie zapadly do
odpovídajících otvorÛ v telefonu.
2.
Zatlaãte na baterii a zaklapnûte ji do
odpovídající pozice.
Nabíjení baterie
Pfied pfiipojením nabíjeãky k telefonu
zkontrolujte, zda jste vloÏili baterii.
1. Konektor nabíjeãky vloÏte do otvoru na
spodní ãásti telefonu tak, aby ‰ipka na
konektoru smûfiovala k telefonu (viz diagram).
Po cvaknutí je nabíjeãka pfiipravena k pouÏití.
2. Pfiipojte druh˘ konec nabíjeãky do zásuvky.
PouÏívejte v˘hradnû pfiiloÏené pfiíslu‰enství.
3. Jakmile je nabíjení dokonãeno, sloupeãky na
ikonû baterie se zastaví.
2
1
KG110 Cze_Rev.1.0_(1025) 2006.10.25 4:22 PM Page 18
Page 80

19
První kroky
V˘straha
]
Na konektor netlaãte, mohli byste pfiístroj nebo
cestovní nabíjeãku po‰kodit.
]
Pokud pouÏíváte nabíjeãku v jiné zemi, pouÏijte
pfiíslu‰nou redukci.
]
NeodstraÀujte baterii pfiístroje bûhem nabíjení.
Poznámka
]
Pfii boufice odpojte nabíjeãku ze sítû, vyvarujete se
tím pfiípadnému po‰kození pfiístroje nebo poÏáru.
]
Ujistûte se, Ïe baterie není v kontaktu s ostr˘mi
pfiedmûty, napfi. zvífiecími zuby nebo nehty.
Vyvarujete se tím pfiípadnému poÏáru.
]
Bûhem nabíjení telefonu nepfiijímejte ani
neuskuteãÀujte hovory, vyvarujete se tím
pfiípadnému zkratu pfiístroje, elektrickému ‰oku
nebo poÏáru.
Odpojování nabíjeãky
Stisknûte postranní tlaãítka, jak je ukázáno na
diagramu, a vyjmûte konektor.
Upozornûní
]
Pfied pouÏíváním telefonu se pfiesvûdãte, Ïe je
baterie plnû nabitá.
]
Pokud není baterie fiádnû nabitá, tlaãítkem Vypnout
telefon vypnûte a zase zapnûte, a potom baterii
nabijte. Baterii také nabijte po vyjmutí a novém
zapojení baterie.
KG110 Cze_Rev.1.0_(1025) 2006.10.25 4:22 PM Page 19
Page 81

Základní funkce
20
Základní funkce
Telefonování
Volání
1. Telefon musí b˘t zapnut˘.
2. Zadejte telefonní ãíslo vãetnû místní
pfiedvolby.
]
Pro vymazání ãísel stisknûte tlaãítko .
PodrÏíte-li tlaãítko Smazat déle, budou
se ãíslice postupnû umazávat.
3. Stisknutím tlaãítka Zvednout zavoláte
vybrané ãíslo.
4. Ukonãení hovoru se provádí tlaãítkem PoloÏit
nebo prav˘m kontextov˘m tlaãítkem.
Volání se seznamu posledních
hovorÛ
1. V pohotovostní reÏimu stisknûte tlaãítko
Odeslat a zobrazí se poslední pfiíchozí,
odchozí a zme‰kané hovory.
2. Navigaãním tlaãítkem nahoru/dolÛ vyberte
poÏadované ãíslo.
3. Pro volání ãísla stisknûte tlaãítko .
Mezinárodní hovory
1. PodrÏte stisknuté tlaãítko mezinárodního
pfiedãíslí. Znak „+“ automaticky vybere
mezinárodní pfiístupov˘ kód.
2. Zadejte pfiedvolbu zemû, místní pfiedvolbu a
telefonní ãíslo.
3. Pro volání ãísla stisknûte tlaãítko .
Ukonãení hovoru
AÏ pfiestanete mluvit, ukonãíte hovor tlaãítkem
PoloÏit
.
Volání z telefonního seznamu
Pravidelnû volaná jména a ãísla si mÛÏete uloÏit
na SIM-kartu nebo do pamûti telefonu.
PoÏadované ãíslo mÛÏete vytoãit jeho
vyhledáním v kontaktech a stiskem tlaãítka .
5
KG110 Cze_Rev.1.0_(1025) 2006.10.25 4:22 PM Page 20
Page 82

21
Základní funkce
Pfiijímání hovoru
Pfiíchozí hovor je ohlá‰en zazvonûním telefonu.
Pokud lze volajícího identifikovat, zobrazí se
jeho telefonní ãíslo (anebo jméno, je-li uloÏeno v
telefonním seznamu).
1. Pfiijmûte hovor stisknutím tlaãítka .
Upozornûní
]
Pokud byl jako reÏim odpovûdi zvolen reÏim
Libovolné tlaãítko, pfiíchozí hovor se pfiijme
stisknutím libovolného tlaãítka kromû tlaãítka
nebo pravého kontextového tlaãítka.
]
Hovor mÛÏete pfiijmout i bûhem pouÏívání
telefonního seznamu i procházení jin˘ch moÏností
menu.
2. Chcete-li hovor ukonãit, zavfiete telefon nebo
stisknûte tlaãítko .
Síla signálu
Pomocí indikátoru signálu ( ) na displeji
telefonu mÛÏete kontrolovat sílu signálu. Síla
signálu se mÛÏe mûnit, zejména uvnitfi budov.
U okna mÛÏe b˘t pfiíjem lep‰í.
Zadávání textu
Pomocí klávesnice telefonu mÛÏete vkládat
alfanumerické znaky. Napfiíklad pfii ukládání
jmen do telefonního seznamu, pfii psaní zpráv
nebo vytváfiení osobního pfiivítání.
U tohoto telefonu jsou dostupné následující
moÏnosti zadávání textu.
KG110 Cze_Rev.1.0_(1025) 2006.10.25 4:22 PM Page 21
Page 83

Základní funkce
22
Základní funkce
Zmûna reÏimu zadávání textu
1. Nacházíte-li se v poli,
které umoÏÀuje zadávání
znakÛ, zobrazí se v
pravém horním rohu LCD
obrazovky indikátor
reÏimu zadávání textu.
2. ReÏim zadávání zmûníte
stisknutím tlaãítka .
Aktuální reÏim mÛÏete
kontrolovat v pravém
horním rohu LCD obrazovky.
]
PouÏití reÏimu T9
ReÏim prediktivního psaní textu T9 umoÏÀuje
snadné psaní slov s minimálním poãtem
stisknut˘ch tlaãítek. Pfii kaÏdém stisknutí tlaãítka
telefon zaãíná na základû vestavûného slovníku
zobrazovat zaãátek slova, které asi chcete
napsat. Do slovníku mÛÏete také pfiidávat nová
slova. Nová slova pfiidaná do slovníku jsou pak
vybírána jako nejpravdûpodobnûj‰í slova.
1p
ReÏim pro
zadávání textu
ReÏim T9
Tento reÏim umoÏÀuje psát slova tak, Ïe pro
jedno písmeno staãí stisknout pouze jedno
tlaãítko. KaÏdému tlaãítku na klávesnici je
pfiifiazeno více písmen. ReÏim T9
automaticky porovnává vámi stisknutá
tlaãítka s interním slovníkem a odhaduje
správné slovo, takÏe je zapotfiebí men‰ího
poãtu stisknutí neÏ u tradiãního reÏimu ABC.
Nûkdy se tento reÏim naz˘vá prediktivní text.
ReÏim ABC
Tento reÏim umoÏÀuje vkládat písmena
stisknutím tlaãítka oznaãeného pfiíslu‰n˘m
písmenem jednou aÏ ãtyfiikrát, dokud se
nezobrazí poÏadované písmeno.
ReÏim 123 (ãíseln˘ reÏim)
V tomto reÏimu se zadávají ãísla, jedním
stisknutím jedna ãíslice. Chcete-li pfii psaní
textu pfiejít na reÏim 123, opakovanû tisknûte
tlaãítko , dokud se nezobrazí reÏim 123.
MoÏnosti VloÏit
KG110 Cze_Rev.1.0_(1025) 2006.10.25 4:22 PM Page 22
Page 84

23
Základní funkce
1. Jste-li v reÏimu prediktivního psaní textu T9,
zaãnûte psát slovo pomocí tlaãítek aÏ .
tak, Ïe pro kaÏdé písmeno stisknete tlaãítko
jen jednou.
]
Zobrazené slovo se mûní pfii kaÏdém stisku
tlaãítka. Nev‰ímejte si toho, co je na displeji
dokud slovo nenapí‰ete celé.
]
Pokud je slovo stále nesprávnû, mÛÏete
navigaãním tlaãítkem dolÛ procházet
ostatními nabízen˘mi slovy.
Pfiíklad:
Stisknutím tlaãítek
napi‰te
Good
.
Stisknutím tlaãítek
napi‰te
Home
.
]
Pokud v nabízeném seznamu poÏadované
slovo chybí, mÛÏete je pfiidat pouÏitím
reÏimu ABC.
]
MÛÏete zvolit jazyk reÏimu T9. Stisknûte
levé kontextové tlaãítko [MoÏnosti], pak
zvolte poloÏku
Jazyky T9
. MÛÏete také
reÏim T9 vypnout volbou poloÏky T9
vypnuto. V˘chozí nastavení telefonu je se
zapnut˘m reÏimem T9.
2. Dfiíve neÏ zaãnete upravovat nebo mazat
zadané znaky, zadejte celé slovo.
3. Jednotlivá slova oddûlte mezerou stisknutím
tlaãítka nebo tlaãítka. Písmena mÛÏete
smazat stisknutím tlaãítka . KdyÏ podrÏíte
tlaãítko stisknuté déle, smaÏou se celá
slova.
Upozornûní
]
Chcete-li zavfiít reÏim pro zadávání textu a napsan˘
text nechcete uloÏit, stisknûte . Na displeji
telefonu se zobrazí reÏim neãinnosti.
]
PouÏití reÏimu ABC
S pomocí tlaãítek aÏ zadejte text, kter˘
chcete napsat.
1. Stisknûte tlaãítko s poÏadovan˘m písmenem:
]
Pro první písmeno jednou.
]
Pro druhé písmeno dvakrát.
]
atd.
2. Chcete-li vloÏit mezeru, stisknûte tlaãítko
jednou. Mazání se provádí tlaãítkem .
Del‰ím stisknutím tlaãítka vymaÏete
postupnû cel˘ text.
5
5
5
5
KG110 Cze_Rev.1.0_(1025) 2006.10.25 4:22 PM Page 23
Page 85

Základní funkce
24
Základní funkce
Poznámka
]
Pro dal‰í informace o zadávání znakÛ pomocí
alfanumerick˘ch tlaãítek nahlédnûte do tabulky níÏe.
]
Práce v 123 (ãíselném) reÏimu
ReÏim 123 umoÏÀuje zadávání ãísel v textové
zprávû (napfiíklad telefonního ãísla).
Stisknûte tlaãítka s pfiíslu‰n˘mi ãíslicemi a pak
ruãnû pfiepnûte do odpovídajícího reÏimu pro
zadávání textu.
Tlaãítko
Znaky v pofiadí zobrazení
Velká písmena
Malá písmena
. , / ? ! - : ' " 1 . , / ? ! - : ' " 1
A B C 2 Á
â
Â Ä A
˘
Ñ
å a b c 2 á
ã
â ä a
˘ àç
D E F 3 D˘É E˘D ¢ d e f 3 d’ é e˘ì
´
G H I 4 Í Î g h i 4 í î
J K L 5 Ω ª ¸ £ j k l 5 æ º
∏
£
M N O 6 ≈ Ó ¡ Ô Ö
Ã
m n o 6 À ó ƒ ô ö
Œ
P Q R S 7 ¤ · ŸÂ p q r s 7
fi ‰ ⁄ Ê
ß
T U V 8
Ë
Ú Ò T˛Ü Ùt u v 8 t’ ú
Û t˛ ü ı
W X Y Z 9 ¯ Z
˘
è
˚ w x y z 9 ˘ z
˘ ê ˝
Mezerník 0 Mezerník 0
5
5
5
7
5
5
KG110 Cze_Rev.1.0_(1025) 2006.10.25 4:22 PM Page 24
Page 86

25
Základní funkce
Telefonní seznam
Do pamûti SIM-karty lze ukládat telefonní ãísla i
s pfiíslu‰n˘mi jmény.
Kromû toho tu je je‰tû pamûÈ telefonu, do které
lze uloÏit aÏ 500 ãísel a jmen.
V nabídce
Kontakty
se pamûÈ SIM-karty a
telefonu pouÏívají stejnû.
V Menu volání
Telefon poskytuje celou fiadu ovládacích funkcí,
které lze bûhem hovoru vyuÏít. Tyto funkce si
pfii hovoru mÛÏete vyvolat lev˘m kontextov˘m
tlaãítkem [MoÏnosti].
Bûhem hovoru
Pfii hovoru je na displeji zobrazena jiná menu
neÏ standardní hlavní menu v pohotovostním
reÏimu. Její volby zde nyní popí‰eme.
Druhé volání
Bûhem jednoho hovoru mÛÏete zahájit druh˘
hovor. Zadejte druhé telefonní ãíslo a stisknûte
tlaãítko Odeslat. AÏ se spojí druh˘ hovor, první
hovor se automaticky pfiidrÏí. MÛÏete si vybrat
ãíslo z telefonního seznamu a zahájit druh˘
hovor. Stisknûte pravé kontextové tlaãítko a pak
zvolte
Hledat
. Chcete-li bûhem volání vytáãené
ãíslo uloÏit do telefonního seznamu, stisknûte
pravé kontextové tlaãítko a pak zvolte P
fi
idat
kontakt.
Pfiepínání mezi dvûma hovory
Pfiepínání mezi dvûma hovory se provádí lev˘m
kontextov˘m tlaãítkem a následnû volbou
Vymûnit
nebo tlaãítkem
.
Pfiijmutí pfiíchozího hovoru
KdyÏ pfiístroj vyzvání, a vy chcete pfiíchozí hovor
pfiijmout, stisknûte tlaãítko JestliÏe pfii
pfiíchodu hovoru právû voláte, pfiístroj vás mÛÏe
na tuto skuteãnost upozornit. Ve sluchátku
zazní tón a na displeji se zobrazí upozornûní na
KG110 Cze_Rev.1.0_(1025) 2006.10.25 4:22 PM Page 25
Page 87

Základní funkce
26
Základní funkce
dal‰í ãekající hovor.
Tuto funkci, která se naz˘vá
Dal‰í hovor na
linc
e, lze pouÏít pouze za pfiedpokladu, Ïe to
umoÏÀuje va‰e síÈ.
Podrobné informace o aktivaci a deaktivaci této
funkce jsou uvedeny v kapitole
Dal‰í hovor na
lince
.
Je-li funkce
Dal‰í hovor na lince
aktivována,
mÛÏete první hovor pfiidrÏet a pfiijmout druh˘. To
provedete stisknutím tlaãítka nebo v˘bûrem
levého kontextového tlaãítka. Probíhající hovor
mÛÏete ukonãit a pfiijmout ãekající hovor
v˘bûrem pravého kontextového tlaãítka a potom
Ukonãit a odpovûdût
.
Odmítnutí pfiíchozího hovoru
Pfiíchozí hovor mÛÏete odmítnout, aniÏ byste ho
pfiijali; staãí stisknout tlaãítko .
Bûhem hovoru mÛÏete odmítnout dal‰í pfiíchozí
hovor stisknutím pravého kontextového tlaãítka
[Konec] nebo stisknutím tlaãítka
.
Vypnutí mikrofonu
Bûhem hovoru mÛÏete mikrofon vypnout
stiskem tlaãítka [Menu] a následnou volbou
Ztlumeno. Zru‰it ztlumení pfiístroje mÛÏete
volbou
Hlasit
û.
Pfii ztlumení pfiístroje vás volající nesly‰í, ale vy
jeho ano.
Zapínání tónÛ DTMF bûhem
hovoru
Chcete-li bûhem hovoru zapnout tóny DTMF,
stisknûte levé kontextové tlaãítko a potom
vyberte
DTMF zap
. Stejn˘m zpÛsobem lze tóny
DTMF vypnout. Díky tónÛm DTMF mÛÏe telefon
vyuÏívat automatickou ústfiednu.
Skupinové neboli
konferenãní hovory
Skupinová neboli konferenãní sluÏba vám
umoÏÀuje hovofiit s více neÏ jedním
úãastníkem, ov‰em za pfiedpokladu, Ïe tuto
funkci podporuje vበoperátor. Konferenãní
KG110 Cze_Rev.1.0_(1025) 2006.10.25 4:22 PM Page 26
Page 88

27
Základní funkce
hovor lze sestavit pouze v pfiípadû, kdyÏ máte
jeden aktivní hovor a jeden pfiidrÏen˘, a na oba
hovory jste jiÏ odpovûdûli. Jakmile je vytvofien
jeden konferenãní hovor, mÛÏe osoba, která
konferenãní hovor zaloÏila, pfiidávat, odpojovat
nebo oddûlovat dal‰í hovory (to znamená,
odpojit jednu osobu od konferenãního hovoru a
hovofiit s ní dále soukromû). Tyto moÏnosti jsou
k dispozici v nabídce Bûhem hovoru.
Konferenãního hovoru se mÛÏe zúãastnit
maximálnû pût úãastníkÛ. Jakmile zahájíte
konferenãní hovor, fiídíte jej pouze vy a pouze
vy do nûj mÛÏete pfiidávat dal‰í úãastníky.
Uskuteãnûní druhého hovoru
Pfii hovoru lze uskuteãnit druh˘ hovor. Zadejte
druhé ãíslo a stisknûte tlaãítko .
KdyÏ je druh˘ hovor spojen, první hovor je
automaticky pfiidrÏen. Mezi hovory lze pfiepínat
stisknutím levého kontextového tlaãítka a
vybráním moÏnosti Vymûnit.
Zfiízení konferenãního hovoru
Jeden hovor pfiidrÏte a zatímco je aktivní hovor
zapnut˘, stisknûte levé kontextové tlaãítko a pak
vyberte
Konferenãní hovor/Pfiipojit se ke
v‰em.
PfiidrÏení konferenãního hovoru
Stisknûte levé kontextové tlaãítko a potom
vyberte
Konferenãní hovor/PfiidrÏet v‰e
.
Aktivování pfiidrÏeného
konferenãního hovoru
Stisknûte levé kontextové tlaãítko a potom
vyberte
Konferenãní hovor/Pfiipojit se ke
v‰em
.
Pfiidávání hovorÛ do
konferenãního hovoru
Chcete-li do probíhajícího konferenãního hovoru
pfiidat dal‰í hovor, stisknûte levé kontextové
tlaãítko a potom vyberte
Konferenãní
hovor/Pfiipojit se ke v‰em
.
KG110 Cze_Rev.1.0_(1025) 2006.10.25 4:22 PM Page 27
Page 89

Základní funkce
28
Základní funkce
Zobrazení úãastníkÛ
konferenãního hovoru
Navigaãními tlaãítky nahoru/dolÛ mÛÏete
procházet telefonními ãísly úãastníkÛ
konferenãního hovoru.
S
oukrom˘ hovor bûhem
konferenãního hovoru
Chcete-li s jedním úãastníkem konferenãního
hovoru mluvit soukromû, zobrazte jeho ãíslo na
obrazovce a potom stisknûte levé kontextové
tlaãítko. V˘bûrem
Konferenãní hovor/
Soukrom˘
pfiidrÏíte v‰echny ostatní úãastníky.
Ukonãení konferenãního hovoru
Stisknutím tlaãítka je moÏné odpojit
aktuálnû zobrazeného úãastníka z
konferenãního hovoru. Chcete-li konferenãní
hovor ukonãit, stisknûte levé kontextové tlaãítko
a potom vyberte
Konferenãní hovor/Ukonãit
konferenãní hovor
. Po stisknutí levého
kontextového tlaãítka vyberte Konferenãní
hovor/Ukonãit v‰echny a v‰echny aktivní i
pfiidrÏené hovory budou ukonãeny.
KG110 Cze_Rev.1.0_(1025) 2006.10.25 4:22 PM Page 28
Page 90

V˘bûr funkcí a moÏností
29
V˘bûr funkcí a moÏností
Telefon nabízí sadu funkcí, které vám umoÏní
pfiizpÛsobit si telefon vlastním potfiebám. Tyto
funkce jsou obsaÏeny v systému menu a
podmenu, které jsou pfiístupné pomocí dvou
kontextov˘ch tlaãítek oznaãovan˘ch a .
KaÏdé menu a podmenu umoÏÀuje zobrazit a
mûnit nastavení urãité funkce.
V˘znam kontextov˘ch tlaãítek se mûní v
závislosti na aktuálním kontextu; aktuální
v˘znam je uveden v dolním fiádku displeje
bezprostfiednû nad kontextov˘m tlaãítkem.
Stisknûte levé
kontextové tlaãítko
pro pfiístup do
dostupného menu.
Stisknûte levé
kontextové tlaãítko
pro aktivaci
odpovídající akce.
Menu Kontakty
KG110 Cze_Rev.1.0_(1025) 2006.10.25 4:22 PM Page 29
Page 91

Strom menu
30
Strom menu
1. Profily
1.1 Pouze vibrace
1.2 Tich˘
1.3 Normální
1.4 Hlasitû
1.5 Sluchátka
2. Kontakty
2.1 Hledat
2.2 Pfiidat kontakt
2.3 Skupiny volajících
2.4 Rychlé volby
2.5 Nastavení
2.6 Informace
3. V˘pis volání
3.1 Zme‰kané hovory
3.2 Pfiijaté hovory
3.3 Volané hovory
3.4 V‰echny hovory
3.5 Tarifikace hovoru
3.6 Informace GPRS
4. Zábava a nástroje
4.1 Oblíbené
4.2 Moje sloÏka
4.3 Hry
4.4 Kalkulaãka
4.5 Pfievodník jednotek
4.6 Svûtov˘ ãas
4.7 Stav pamûti
KG110 Cze_Rev.1.0_(1025) 2006.10.25 4:22 PM Page 30
Page 92

31
Strom menu
5. Zprávy
5.1 Napsat textovou
zprávu
5.2 Pfiijaté zprávy
5.3 Odeslané zprávy
5.4 Koncepty
5.5 Poslechnout hlasovou
schránku
5.6 Inform. sluÏba
5.7 ·ablony
5.8 Nastavení
6. Organizér
6.1 Budík
6.2 Kalendáfi
6.3 Poznámky
7. Nastavení
7.1 Datum a ãas
7.2 Jazyky
7.3 Nastavení hovoru
7.4 Nastavení zabezpeãení
7.5 Nastavení sítû
7.6 Nastavení GPRS
7.7 PÛvodní nastavení
7.8 Stav pamûti
8. Internet
8.1 WAP
9. Nastavení displeje
9.1 Téma
9.2 Tapeta
9.3 Doba podsvícení
9.4 Jas
9.5 Uvítání
9.6 Název sítû
9.7 Zobrazit mapu menu
KG110 Cze_Rev.1.0_(1025) 2006.10.25 4:22 PM Page 31
Page 93

Profily
32
V profilech si mÛÏete nastavit a pfiizpÛsobit tóny
telefonu pro rÛzné události, prostfiedí nebo
skupiny volajících. K dispozici je pût
pfiednastaven˘ch profilÛ:
Pouze vibrace,
Tich˘, Normální, Hlasitû a Sluchátka.
V‰echny profily si lze upravit podle vlastních
pfiedstav (kromû profilÛ Pouze vibrace, Tich˘).
Stisknûte levé kontextové tlaãítko
[Menu]
a
navigaãními tlaãítky nahoru/dolÛ vyberte
Profily
.
Zmûna profilÛ Menu 1.X.1
1. Zobrazí se seznam profilÛ.
2. V seznamu profilÛ zv˘raznûte profil, kter˘
chcete aktivovat, a stisknûte levé kontextové
tlaãítko [OK] nebo tlaãítko OK.
3. Potom vyberte
Aktivovat
.
Upozornûní
]
Po pfiipojení sluchátek se automaticky aktivuje profil
Sluchátka.
Vlastní úprava profilÛ –
PfiizpÛsobit
Menu 1.X.2
Profily si mÛÏete upravit podle vlastních
pfiedstav, kromû profilu Pouze vibrace (a Tich˘).
Ze seznamu profilÛ vyhledejte poÏadovan˘
profil. Po stisknutí levého kontextového tlaãítka
nebo tlaãítka OK vyberte PfiizpÛsobit. Otevfie se
moÏnost nastavení profilÛ. Nastavte tuto
moÏnost podle potfieby.
]
Hovor
- Typ ohlá‰ení hovoru :
Nastavte typ
ohlá‰ení pfiíchozích hovorÛ.
- Vyzvánûcí tón :
Vyberte ze seznamu
poÏadované vyzvánûní.
]
Zpráva
- Typ ohlá‰ení zprávy :
Nastavte typ
ohlá‰ení pfiijaté zprávy.
- Tón zprávy :
Vyberte zvuk pro ohlá‰ení
pfiijaté zprávy.
Profily
KG110 Cze_Rev.1.0_(1025) 2006.10.25 4:22 PM Page 32
Page 94

33
Profily
]
Nastavení hlasitosti
- Vyzvánûcí tón :
Nastavte hlasitost vyzvánûní.
- Tón zprávy :
Nastavte hlasitost tónu zprávy.
- Tóny klávesnice :
Vyberte poÏadovan˘ tón
klávesnice.
- Hlasitost efektu :
Nastavte hlasitost
zvukov˘ch efektÛ.
- Zapnutí a vypnutí pfiístroje :
Nastavte
hlasitost zvuku pfii vypínání a zapínání
telefonu.
Vlastní úprava profilÛ –
Pfiejmenovat
Menu 1.X.3
Profil lze pfiejmenovat libovoln˘m jin˘m názvem.
Upozornûní
]
Nelze pfiejmenovat profily Pouze vibrace, Sluchátka,
Tich˘ a Auto.
1. Chcete-li profil pfiejmenovat, najdûte jej v
seznamu profilÛ a po stisknutí levého
kontextového tlaãítka nebo tlaãítka OK
vyberte
Pfiejmenovat
.
2.
Zadejte poÏadovan˘ název a stisknûte tlaãítko
OK nebo levé kontextové tlaãítko [OK].
KG110 Cze_Rev.1.0_(1025) 2006.10.25 4:22 PM Page 33
Page 95

Kontakty
34
Kontakty
Hledat Menu 2.1
1. V pohotovostním reÏimu stisknûte tlaãítko
[Kontakty].
2. Hledat mÛÏete stisknutím tlaãítka [OK].
3. Pokud chcete záznam upravit, odstranit nebo
zkopírovat, nebo pokud chcete k záznamu
pfiidat hlas, vyberte moÏnost [MoÏnosti].
Zobrazí se následující
menu.
]
Zobrazit :
MÛÏete zobrazit podrobnosti.
]
Upravit :
MÛÏete upravit jméno a ãíslo pomocí
navigaãního tlaãítka.
]
Napsat textovou zprávu :
Po nalezení
poÏadovaného ãísla mÛÏete na vybrané ãíslo
odeslat textovou zprávu.
]
Pfiidat kontakt :
Pomocí této funkce mÛÏete
pfiidat nov˘ záznam do telefonního seznamu.
]
Smazat :
MÛÏete odstranit záznam.
]
Kopírovat :
MÛÏete kopírovat poloÏky ze SIM
karty do telefonu.
]
Pfiesunout :
MÛÏete pfiesunout poloÏku z
karty SIM do telefonu nebo z telefonu na kartu
SIM.
]
Pfiifiadit rychlou volbu :
Záznam lze nastavit
jako rychlou volbu.
Pfiidat kontakt Menu 2.2
S pomocí této funkce mÛÏete pfiidat nov˘
kontakt.
Existují 2 pamûti: pamûÈ telefonu a pamûÈ SIM.
Chcete-li vybrat pamûÈ, pfiejdûte na moÏnost
Nastavit pamûÈ. PamûÈ telefonu má kapacitu
500 záznamÛ. V pamûti telefonu mÛÏe b˘t
jméno dlouhé maximálnû 14 znakÛ. Kapacita
pamûti SIM závisí na pouÏívané SIM-kartû.
1. Nejprve stisknutím pravého kontextového
tlaãítka [Kontakty] v pohotovostním reÏimu
otevfiete
Kontakty
.
2. Do pamûti SIM nebo do pamûti telefonu
mÛÏete pfiidat nov˘ kontakt. Chcete-li vybrat
pamûÈ, pfiejdûte na moÏnost Nastavit pamûÈ.
KG110 Cze_Rev.1.0_(1025) 2006.10.25 4:22 PM Page 34
Page 96

35
Kontakty
]
Pfiidávání nov˘ch záznamÛ do pamûti SIM :
MÛÏete zadat jméno a ãíslo a vybrat
potfiebnou skupinu. (závisí na pouÏívané SIM)
]
Pfiidávání nov˘ch záznamÛ do pamûti
telefonu :
MÛÏete zadat jméno, ãíslo a zvolit
poÏadovanou skupinu. A také zvolit, které
ãíslo má b˘t hlavním ãíslem.
Skupiny volajících Menu 2.3
MÛÏete pfiidávat aÏ 20 ãlenÛ na skupinu v
maximálnû 5 skupinách.
1. Pfiejdûte na poloÏku Skupiny volajících a
zobrazí se v‰echny seznamy skupin.
2. Vyberte název poÏadované skupiny
stisknutím tlaãítka [MoÏnosti].
]
Seznam ãlenÛ :
Zobrazí se seznam ãlenÛ ve
skupinû.
]
Vyzvánûcí tón skupiny :
Vyberte vyzvánûcí
tón, kter˘ zazní, kdyÏ vám nûkdo ze skupiny
zavolá.
]
Pfiidat ãlena :
Pfiidejte do skupiny ãlena. Do
jedné skupiny lze pfiidat maximálnû 20 ãlenÛ.
]
Odebrat ãlena :
Odeberte jednoho ãlena ze
seznamu ãlenÛ ve skupinû. Záznam tohoto
kontaktu v‰ak stále zÛstane uloÏen ve sloÏce
Kontakty.
]
Pfiejmenovat :
Pfiidûlte skupinû jin˘ název.
Rychlé volby Menu 2.4
Tlaãítka aÏ mÛÏete pfiifiadit k poloÏce
seznamu jmen. MÛÏete volat pfiímo stisknutím
tohoto tlaãítka.
1. Otevfiete telefonní seznam stisknutím pravého
kontextového tlaãítka [Kontakty] v
pohotovostním reÏimu.
2. Pfiejdûte na moÏnost Rychlá volba a potom
stisknûte levé kontextové tlaãítko [OK].
3. Pokud chcete pfiidat rychlou volbu, vyberte
moÏnost(prázdné). Potom mÛÏete vyhledat
jméno v telefonním seznamu.
4. Vyberte jméno pfiifiazené k rychlé volbû a
zvolte moÏnost Zmûnit nebo Smazat, pokud
chcete upravit jméno.
KG110 Cze_Rev.1.0_(1025) 2006.10.25 4:22 PM Page 35
Page 97

36
Kontakty
Kontakty
Nastavení Menu 2.5
1. Stisknûte tlaãítko [Kontakty] v
pohotovostním reÏimu.
2. Pfiejdûte na moÏnost Nastavení a stisknûte
tlaãítko [OK].
Nastavit pamûÈ
Oznaãte moÏnost Nastavit pamûÈ a stisknûte
tlaãítko [OK].
- Pokud zvolíte moÏnost Promûnná, pfii
pfiidávání poloÏky se telefon zeptá, kam ji má
uloÏit.
- KdyÏ vyberete moÏnost SIM nebo Telefon,
telefon uloÏí záznam na kartu SIM nebo do
telefonu.
Zobrazit moÏnosti
MÛÏete nastavit moÏnosti zobrazení kontaktu.
]
Jméno a ãíslo :
Pfii prohledávání KontaktÛ se
na seznamu zobrazí pouze jména.
]
Pouze jméno :
Pfii prohledávání KontaktÛ se
na seznamu zobrazí jména a ãísla.
Kopírovat v‰e/Pfiesunout v‰e
Zadané poloÏky lze zkopírovat nebo pfiemístit z
pamûti SIM karty do pamûti telefonu a naopak.
1. Otevfiete telefonní seznam stisknutím tlaãítka
[Kontakty] v pohotovostním reÏimu.
2. Pfiejdûte na moÏnost Kopírovat/Pfiesunout
v‰e a stisknutím tlaãítka [OK] otevfiete
toto menu.
]
SIM do telefonu :
Nastavením této moÏnosti
se poloÏka zkopíruje z pamûti SIM karty do
pamûti telefonu.
]
Z telefonu na SIM :
Nastavením této
moÏnosti se poloÏka zkopíruje z pamûti
telefonu na SIM kartu.
Smazat v‰e
Je moÏné odstranit v‰echny záznamy na kartû
SIM a v telefonu.Tato funkce vyÏaduje
bezpeãnostní kód.
1. Stisknûte tlaãítko [Kontakty] v
pohotovostním reÏimu a vyberte moÏnost
Smazat v‰e, stisknûte tlaãítko [OK].
KG110 Cze_Rev.1.0_(1025) 2006.10.25 4:22 PM Page 36
Page 98

37
Kontakty
2. Potom vyberte, která pamûÈ se má vymazat.
3. Zadejte bezpeãnostní kód a stisknûte
tlaãítko [OK] nebo [Zpût].
Stav pamûti
MÛÏete zkontrolovat volné místo a vyuÏití
pamûti pro jednotlivá úloÏi‰tû, kartu SIM a
telefon.
Informace Menu 2.6
]
Servisní ãíslo (závisí na SIM) :
tato funkce umoÏÀuje zobrazit seznam ãísel
sluÏeb (SDN – Service Dialling Numbers),
které pfiidûluje operátor sítû (pokud to
podporuje SIM karta). K tûmto ãíslÛm patfií
pohotovost, informace o telefonních ãíslech a
ãísla hlasové po‰ty.
1. Vyberte moÏnost ãísla sluÏeb.
2. Zobrazí se názvy dostupn˘ch sluÏeb.
3. Pomocí tlaãítek a vyberete sluÏbu.
Stisknûte tlaãítko [Odeslat].
]
Servisní ãíslo:
Pomocí této funkce mÛÏete
vidût, kolik poloÏek v telefonním seznamu je
pouÏívan˘ch a voln˘ch.
]
Vlastní ãíslo (závisí na SIM) :
Na kartû SIM
mÛÏete zkontrolovat vlastní ãíslo.
KG110 Cze_Rev.1.0_(1025) 2006.10.25 4:22 PM Page 37
Page 99

V˘pis volání
38
Záznamy zme‰kan˘ch, pfiijat˘ch a volan˘ch
hovorÛ si mÛÏete prohlédnout za pfiedpokladu,
Ïe síÈ v oblasti sluÏby podporuje identifikaci
volající linky CLI (Calling Line Identification).
âíslo a jméno (je-li k dispozici) se zobrazují
zároveÀ s datem a ãasem, kdy do‰lo k volání.
MÛÏete si také prohlédnout trvání hovorÛ.
Zme‰kané hovory Menu 3.1
Tato funkce umoÏÀuje zobrazit 20 posledních
hovorÛ, které jste nepfiijali. MÛÏete také:
]
zobrazit ãíslo, je-li k dispozici, nebo je uloÏit do
telefonního seznamu
]
zadat pro toto ãíslo nové jméno a obojí uloÏit
do telefonního seznamu
]
odeslat zprávu na toto ãíslo
]
vymazat hovor ze seznamu
Pfiijaté hovory Menu 3.2
Tato funkce umoÏÀuje zobrazit 40 posledních
pfiijat˘ch hovorÛ. Dále mÛÏete:
]
zobrazit ãíslo, je-li k dispozici, nebo je uloÏit do
telefonního seznamu
]
zadat pro toto ãíslo nové jméno a obojí uloÏit
do telefonního seznamu
]
odeslat zprávu na toto ãíslo
]
vymazat hovor ze seznamu
Volané hovory Menu 3.3
Tato funkce umoÏÀuje zobrazit 40 posledních
odchozích hovorÛ (uskuteãnûn˘ch i
neuskuteãnûn˘ch).
MÛÏete také:
]
zobrazit ãíslo, je-li k dispozici, nebo je uloÏit do
telefonního seznamu
]
zadat pro toto ãíslo nové jméno a obojí uloÏit
do telefonního seznamu
]
odeslat zprávu na toto ãíslo
V˘pis volání
KG110 Cze_Rev.1.0_(1025) 2006.10.25 4:22 PM Page 38
Page 100

39
V˘pis volání
]
vymazat hovor ze seznamu
V‰echny hovory Menu 3.4
MÛÏete procházet v‰emi seznamy pfiíchozích a
odchozích hovorÛ.
Tarifikace hovoru Menu 3.5
Trvání hovoru (Menu 3.5.1)
Zde je moÏné zobrazit dobu trvání pfiíchozích a
odchozích hovorÛ. Doby hovorÛ je také moÏné
vynulovat. K dispozici jsou následující ãasovaãe:
]
Poslední hovor :
Délka posledního hovoru.
]
Volané hovory :
Délka odchozích hovorÛ.
]
Pfiijaté hovory :
Délka pfiíchozích hovorÛ.
]
V‰echny hovory :
Celková délka v‰ech
volan˘ch a pfiíchozích hovorÛ od posledního
vynulování mûfiiãe.
Cena hovoru (Menu 3.5.2)
Zde si mÛÏete zjistit cenu posledního hovoru,
v‰ech hovorÛ, zb˘vajících hovorÛ a cenu
vynulovat. K vynulování ceny potfiebujete kód
PIN2.
Upozornûní
]
Skuteãná doba, kterou vám za hovory úãtuje
poskytovatel sluÏby, se mÛÏe mûnit v závislosti na
síÈov˘ch funkcích, zaokrouhlování pro fakturaci,
apod.
Nastavení
(ZáleÏí na SIM kartû.) (Menu 3.5.3)
]
Nastavit ceny :
MÛÏete nastavit typ mûny a
cenu za jednotku. Vበposkytovatel sluÏeb
vám sdûlí cenu za jednotku. Pro v˘bûr mûny
nebo jednotky v tomto menu potfiebujete znát
kód PIN2.
]
Nastavit limity :
Tato síÈová sluÏba vám
umoÏÀuje omezit cenu hovoru dle vybraného
limitu. Pokud vyberete
âíst
, zobrazí se poãet
zb˘vajících jednotek. Pokud vyberete
Limit
provolan˘ch
, mÛÏete zmûnit svÛj limit.
KG110 Cze_Rev.1.0_(1025) 2006.10.25 4:22 PM Page 39
 Loading...