


ENGLISH
OWNER’S MANUAL
HOUSEHOLD
REFRIGERATOR-FREEZER
Please read this owner's manual thoroughly before
operating and keep it handy for reference at all times.
K336NS15
www.lg.com
MFL67704809_Rev.00
Copyright © 2017 LG Electronics Inc. All rights reserved.

TABLE OF CONTENTS
ENGLISH
2
TABLE OF CONTENTS
3 PRODUCT FEATURES
4 IMPORTANT SAFETY
INSTRUCTIONS
7 COMPONENTS
7 Refrigerator Exterior
8 Refrigerator Interior
9 INSTALLATION
9 Installation Overview
10 Unpacking Your Refrigerator
10 Choosing the Proper Location
11 Turning On The Power
12 HOW TO USE
12 Before use
13 Control Panel
16 Adjusting the Refrigerator Shelves
17 CustomChill Drawer
18 SMART FUNCTIONS
18 Using LG SmartThinQ Application
19 Smart Diagnosis™ Using a Smart Phone
20 Using Smart Diagnosis™
21 MAINTENANCE
21 Cleaning
23 TROUBLESHOOTING
ENGLISH
PRODUCT FEATURES
PRODUCT FEATURES
3
* Depending on the model, some of the following functions may not be available.
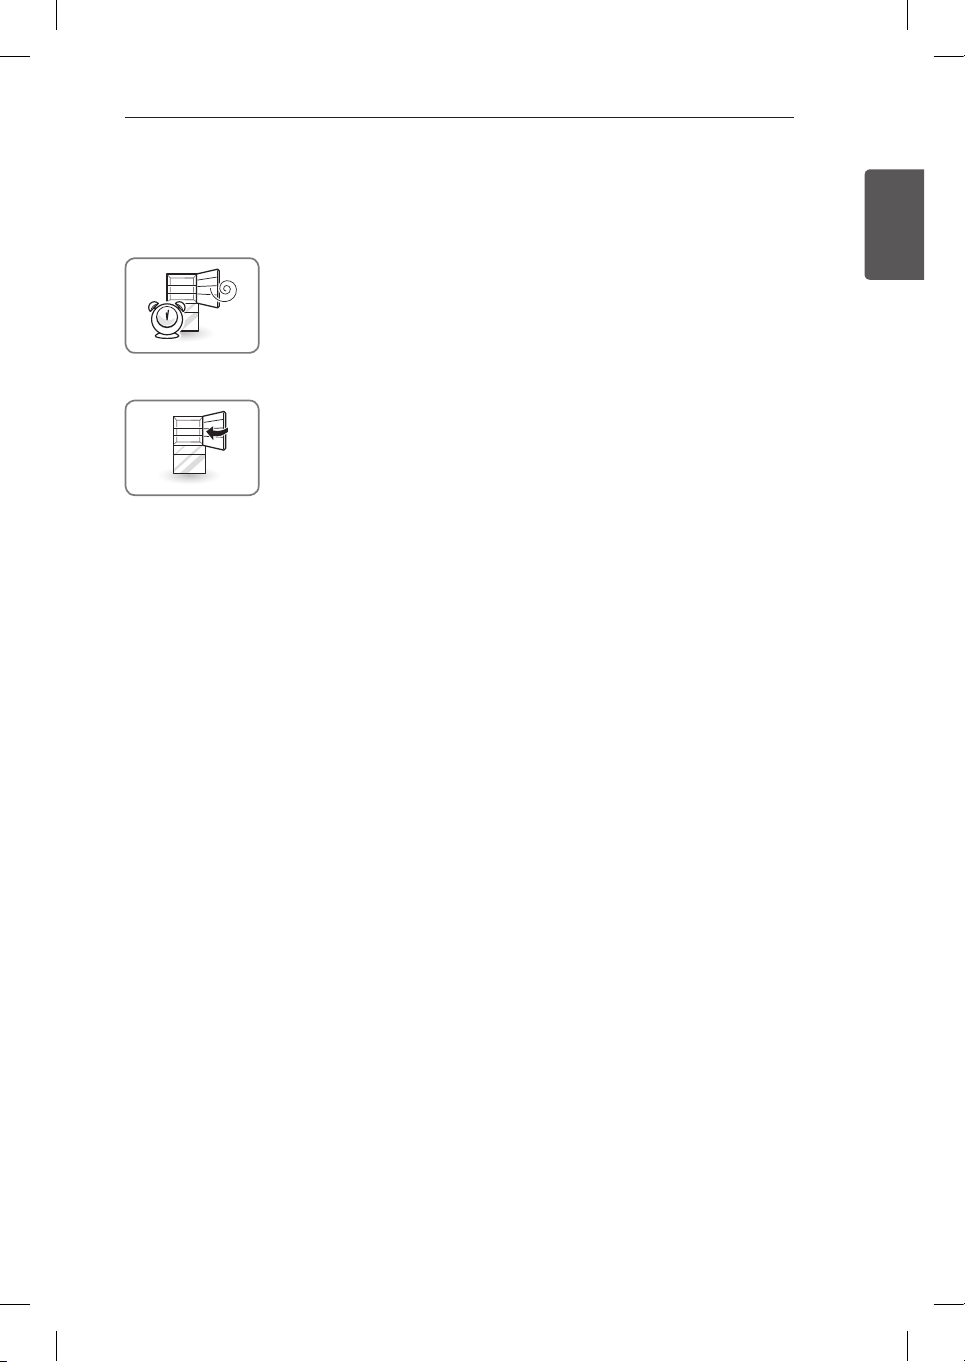
DOOR ALARM
The Door Alarm function is designed to prevent refrigerator malfunctioning
that could occur if a refrigerator door or freezer door remains open. If a
refrigerator door or freezer door is left open for more than 60 seconds, a
warning alarm sounds in 30 second intervals until it is closed.
AUTO CLOSING HINGE
The refrigerator doors close automatically with a slight push. (The door only
closes automatically when it is open at an angle less than 30°.)
IMPORTANT SAFETY INSTRUCTIONS
ENGLISH
4
IMPORTANT SAFETY INSTRUCTIONS
READ ALL INSTRUCTIONS BEFORE USING THE APPLIANCE.
This guide contains many important safety messages. Always
This is the safety alert symbol. It alerts you to safety messages that inform you of
hazards that can kill or hurt you or others, or cause damage to the product.
All safety messages will be preceded by the safety alert symbol and the hazard signal
word WARNING or CAUTION. These words mean:
WARNING
CAUTION
You can be killed or seriously injured if you do not follow instructions.
Indicates an imminently hazardous situation which, if not avoided, may result in
minor or moderate injury, or product damage.
read and obey
all safety messages.
WARNING
To reduce the risk of fire, electric shock, or personal injury when using your product, basic safety
precautions should be followed, including the following.
Power
•NEVER unplug your refrigerator by pulling on the power cord. Always grip the plug firmly and pull it
straight out from the outlet.
•If the supply cord is damaged, it must be replaced by the manufacturer or its service agent or a
similarly qualified person in order to avoid a hazard. Do not use a cord that shows cracks or abrasion
damage along its length or at either the plug or connector end.
•Do not use an uncertified power outlet.
•Unplug the power plug immediately in the event of a blackout or thunderstorm.
•Plug in the power plug with the power cord facing downward.
Installation
•Contact an authorized service center when you install or relocate the refrigerator.
•When moving your refrigerator away from the wall, be careful not to roll over or damage the power
cord.
•Connect this product to a dedicated grounded electric outlet conforming with the rating prior to use. It
is the user’s responsibility to replace a standard 2-prong wall outlet with a standard 3-prong wall outlet.
•Do not install the refrigerator where there may be a danger of it falling. Installation on a non sturdy
timber floor may cause difficulty in door alignment and cause the cabinet to deform.
Use
•DO NOT allow children to climb, stand, or hang on the refrigerator doors or shelves in the refrigerator.
They could damage the refrigerator and seriously injure themselves.
•Where fitted, do not place heavy objects on the dispenser of the refrigerator or hang onto it.
•Do not place heavy or dangerous objects (bottles or vases with liquid) on the refrigerator.
•Do not put live animals inside of the refrigerator.
•Do not allow children to climb into the product when it is in or out of use.
•In the event of a gas leak (propane/LPG), ventilate sufficiently and contact an authorized service center
before use. Do not touch or disassemble the electric outlet of the refrigerator.
•In the event of a refrigerant leak, move flammable objects away from the refrigerator. Ventilate
sufficiently and contact an authorized service center.
•Do not use or place flammable substances (chemicals, medicine, cosmetics, etc) near the refrigerator
or store them inside the refrigerator. Do not place the refrigerator in the vicinity of flammable gas.

IMPORTANT SAFETY INSTRUCTIONS
ENGLISH
READ ALL INSTRUCTIONS BEFORE USING THE APPLIANCE.
5
To reduce the risk of fire, electric shock, or personal injury when using your product, basic safety
precautions should be followed, including the following.
•This appliance is intended to be used in household and similar applications such as
- Staff kitchen areas in shops, offices and other working environments;
- Farm houses and by clients in hotels, motels and other residential type environments;
- Bed and breakfast type environments;
- Catering and similar non-retail applications.
•Do not use this product for special purposes or mobile applications (storage of medicine or test
materials or on ships, etc).
•Unplug the power plug before cleaning or repairing the refrigerator.
•If the refrigerator is fitted with light bulbs and require replacing, unplug the refrigerator or turn off the
power before doing so.
•Do not modify or extend the power cord.
•Do not use a hair dryer to dry the interior. Do not light a candle to remove any interior odor.
•For your safety, this appliance must be properly grounded. Have the wall outlet and the circuit checked
by a qualified electrician to make sure the outlet is properly grounded.
•Do not use an outlet that can be turned off via a remote switch. Do not use an extension cord. It is the
user’s responsibility to replace a standard 2-prong wall outlet with a standard 3-prong wall outlet.
•Do not, under any circumstances, cut or remove the third (ground) prong from the power cord.
•Do not use an adapter plug and plug the power plug into a multi-outlet extension cord.
•Disconnect the power cord immediately if you hear a noise, smell a strange odor or detect smoke.
•Turn the power off if dust or water from above or below penetrates into the refrigerator. Call a service
agent.
•Do not disassemble or modify the refrigerator.
•Do not put hands, feet, or metal objects below or behind the refrigerator.
•Do not operate the refrigerator or touch the power cord with wet hands.
•In refrigerators with automatic icemakers, avoid contact with the moving parts of the ejector
mechanism or with the heating element that releases the cubes. Do not place fingers or hands on the
automatic ice-making mechanism while the refrigerator is plugged in.
•When dispensing ice from the dispenser, do not use crystal ceramics.
•Do not touch the cold surfaces in the freezer compartment with wet or damp hands, when your
refrigerator is in operation.
•Do not put glass containers, glass bottles or beverage cans in the freezer.
•Do not store explosive substances such as aerosol cans with a flammable propellant in this appliance.
•This appliance is not intended for use by persons (including children) with reduced physical, sensory or
mental capabilities, or lack of experience and knowledge, unless they have been given supervision or
instruction concerning the use of the appliance by a person responsible for their safety.
•Do not refreeze frozen foods that have thawed completely. It may result in serious health issues.
•If you are throwing away your old refrigerator, make sure the CFC coolant is removed for proper
disposal by a qualified servicer. If you release CFC coolant, you may be fined or imprisoned in
accordance with the relevant environmental law.
•Disposed or abandoned refrigerators are dangerous, even if they are sitting for only a few days. When
disposing the refrigerator, remove the packing materials from the door or take off the doors but leave
the shelves in place so that children may not easily climb inside.
•If the refrigerant gas has leaked, do not touch the refrigerator or the power outlet and ventilate the
room immediately. A spark could trigger an explosion causing a fire or burns. Because this refrigerator
uses natural gas (isobutene, R600a) as the environment-friendly refrigerant, even a small amount
(50~80g) is combustible. If gas leaks from severe damage during delivering, installing or using the
refrigerator, any spark may cause fire or burns.
•If there is a damage of the drawer rail or if the operation is not fluent, do not use it, and contact the
servcie center to receive service before using it.
•When you open or close the door of the product, it may cause injury to nearby people, so be carfeful.

IMPORTANT SAFETY INSTRUCTIONS
ENGLISH
6
READ ALL INSTRUCTIONS BEFORE USING THE APPLIANCE.
To reduce the risk of fire, electric shock, or personal injury when using your product, basic safety
precautions should be followed, including the following.
CAUTION
Installation
•The refrigerator must be properly installed in accordance with the Installer Instructions that were taped
to the front of the refrigerator.
•Be careful when you unpack and install the refrigerator. Immediately dispose of packing materials
(plastic) out of reach of children.
Use
•Close the doors carefully when children are around.
•Keep fingers out of pinch point areas; clearances between the doors and cabinets are necessarily
small. Be careful closing doors when children are in the area.
•If food is stacked or stored poorly on the shelves, it may fall and cause injury when the door is opened.
•Do not move refrigerator while the refrigerator is operating. A Compressor rattling noise may occur
as a result and will only stop when the compressor cycles off, or when the power to the unit is
turned off and back on again. (This is normal and will not impact on the performance or the life of the
compressor. The rattling will stop after the compressor comes to a rest.)
Maintenance
•Do not use strong detergents like wax or thinners for cleaning. Clean with a soft fabric.
•Wipe foreign objects (dust, water, etc) off the prongs of the power plug and contact areas before
connecting.
WARNING
•Use drinkable water for ice making.
WARNING
•Keep ventilation openings, in the appliance enclosure or in the built-in structure, clear of obstruction.
•Do not use mechanical devices or other means to accelerate the defrosting process, other than those
recommended by the manufacturer.
•Do not damage the refrigerant circuit.
•Do not use electrical appliances inside the food storage compartments of the appliance, unless they
are of the type recommended by the manufacturer.
•The refrigerant and insulation blowing gas used in the appliance require special disposal procedures.
When disposal, please consult with service agent or a similarly qualified person.
This appliance contains a small amount of isobutane refrigerant (R600a), natural gas with high
environmental compatibility, but it is also combustible. When transporting and installing the
appliance, care should be taken to ensure that no parts of the refrigerating circuit are damaged.
Refrigerant squirting out of the pipes could ignite or cause an eye injury. If a leak is detected,
avoid any naked flames or potential sources of ignition and air the room in which the appliance is
standing for several minutes.
In order to avoid the creation of a flammable gas air mixture if a leak in the refrigerating circuit
occurs, the size of the room in which the appliance may be sited depends on the amount of
refrigerant used. The room must be 1m2 in size for every 8g of R600a refrigerant inside the
appliance. The amount of refrigerant in your particular appliance is shown on the identification
plate inside the appliance. Never start up an appliance showing any signs of damage. If in doubt,
consult your dealer.
SAVE THESE INSTRUCTIONS
ENGLISH
COMPONENTS
COMPONENTS
7
Use this page to become more familiar with the parts and features of your refrigerator.
Page references are included for your convenience.
*The appearance and specifications of the actual product may differ depending on the model.
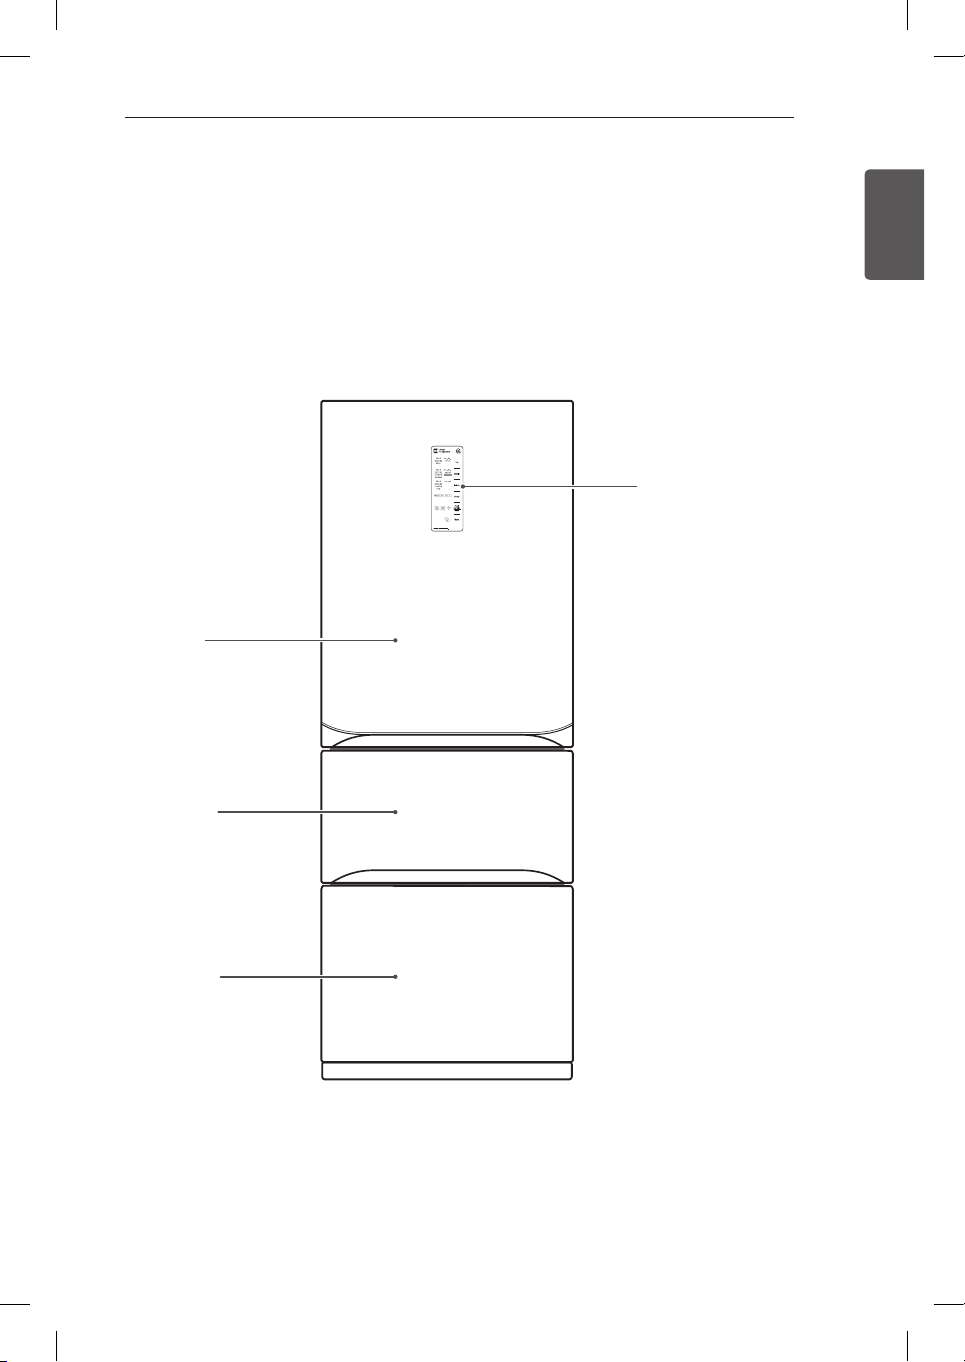
Refrigerator Exterior (Applicable to some models only)
LED Display
Displays the refrigerator
and freezer’s target
temperature and
CustomChill settings.
To p
Middle
Bottom
ENGLISH
COMPONENTS
8
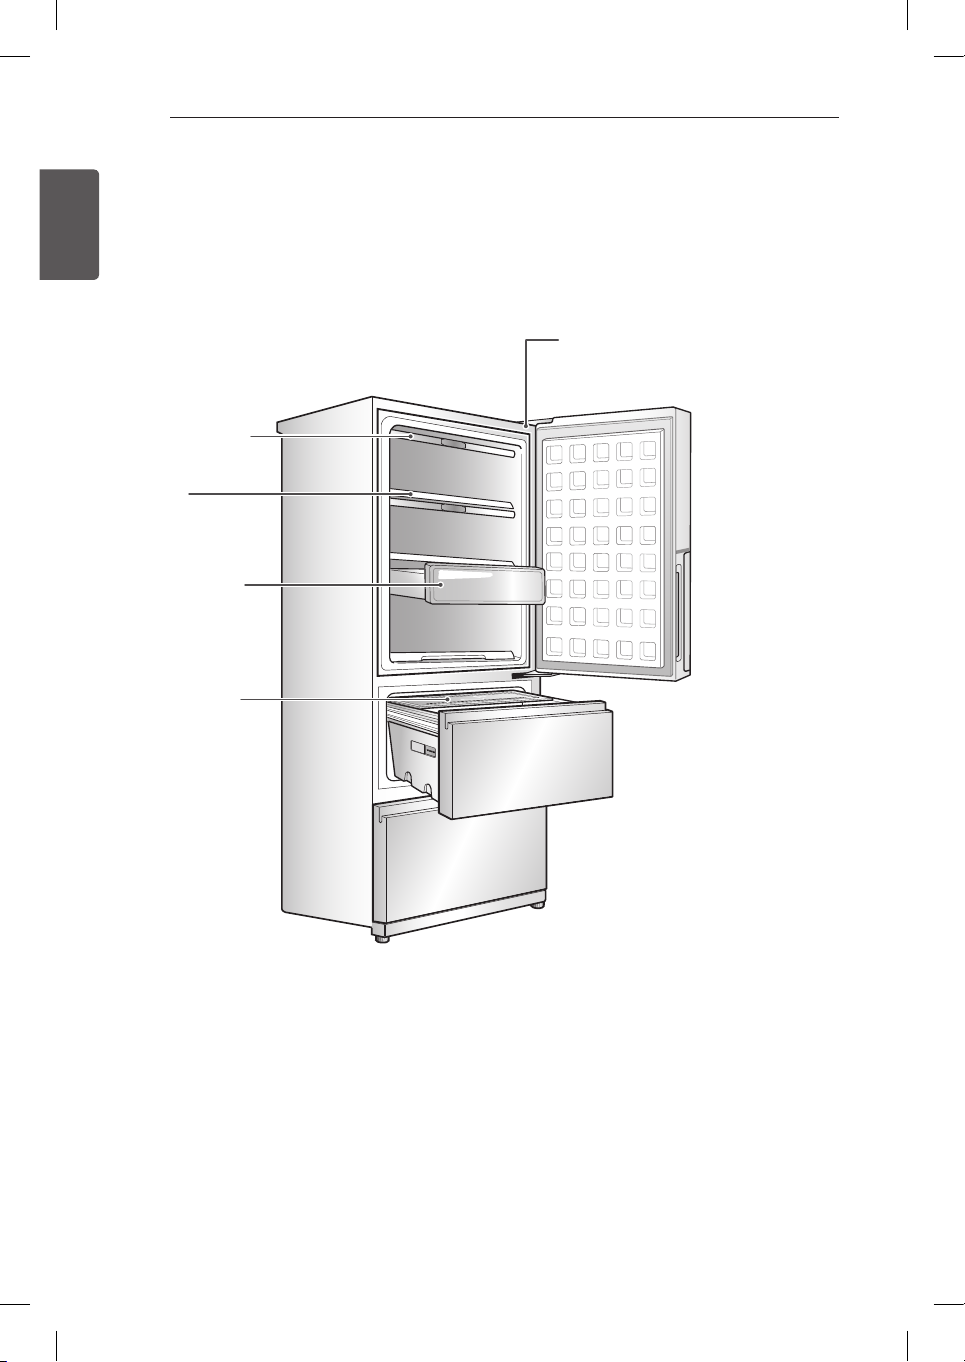
Refrigerator Interior (Applicable to some models only)
Smart Diagnosis
Flap-up Cover
Shelf
Shelf Basket
Multi Basket
ENGLISH
INSTALLATION
INSTALLATION
9
Installation Overview
Please read the following installation instructions first after purchasing this product or transporting
it to another location.
1 Unpacking your
refrigerator
2 Choosing the proper
location

INSTALLATION
ENGLISH
10
Unpacking Your Refrigerator
WARNING
•Use two or more people to move and
install the refrigerator. Failure to do so
can result in back or other injury.
•Your refrigerator is heavy. When moving
the refrigerator for cleaning or service,
be sure to protect the floor. Always pull
the refrigerator straight out when moving
it. Do not wiggle or walk the refrigerator
when trying to move it, as floor damage
could occur. Wind the leveling feet up
first so that the unit is on its rollers.
•Keep flammable materials and vapors,
such as gasoline, away from the
refrigerator. Failure to do so can result in
fire, explosion, or death.
Remove tape and any temporary labels from
your refrigerator before using. Do not remove
any warning-type labels, the model and serial
number label, or the Tech Sheet that is located
under the front of the refrigerator.
To remove any remaining tape or glue, rub the
area briskly with your thumb. Tape or glue
residue can also be easily removed by rubbing
a small amount of liquid dish soap over the
adhesive with your fingers. Wipe with warm
water and dry.
Do not use sharp instruments, rubbing alcohol,
flammable fluids, or abrasive cleaners to
remove tape or glue. These products can
damage the surface of your refrigerator.
Refrigerator shelves are installed in the
shipping position. Please reinstall shelves
according to your individual storage needs.
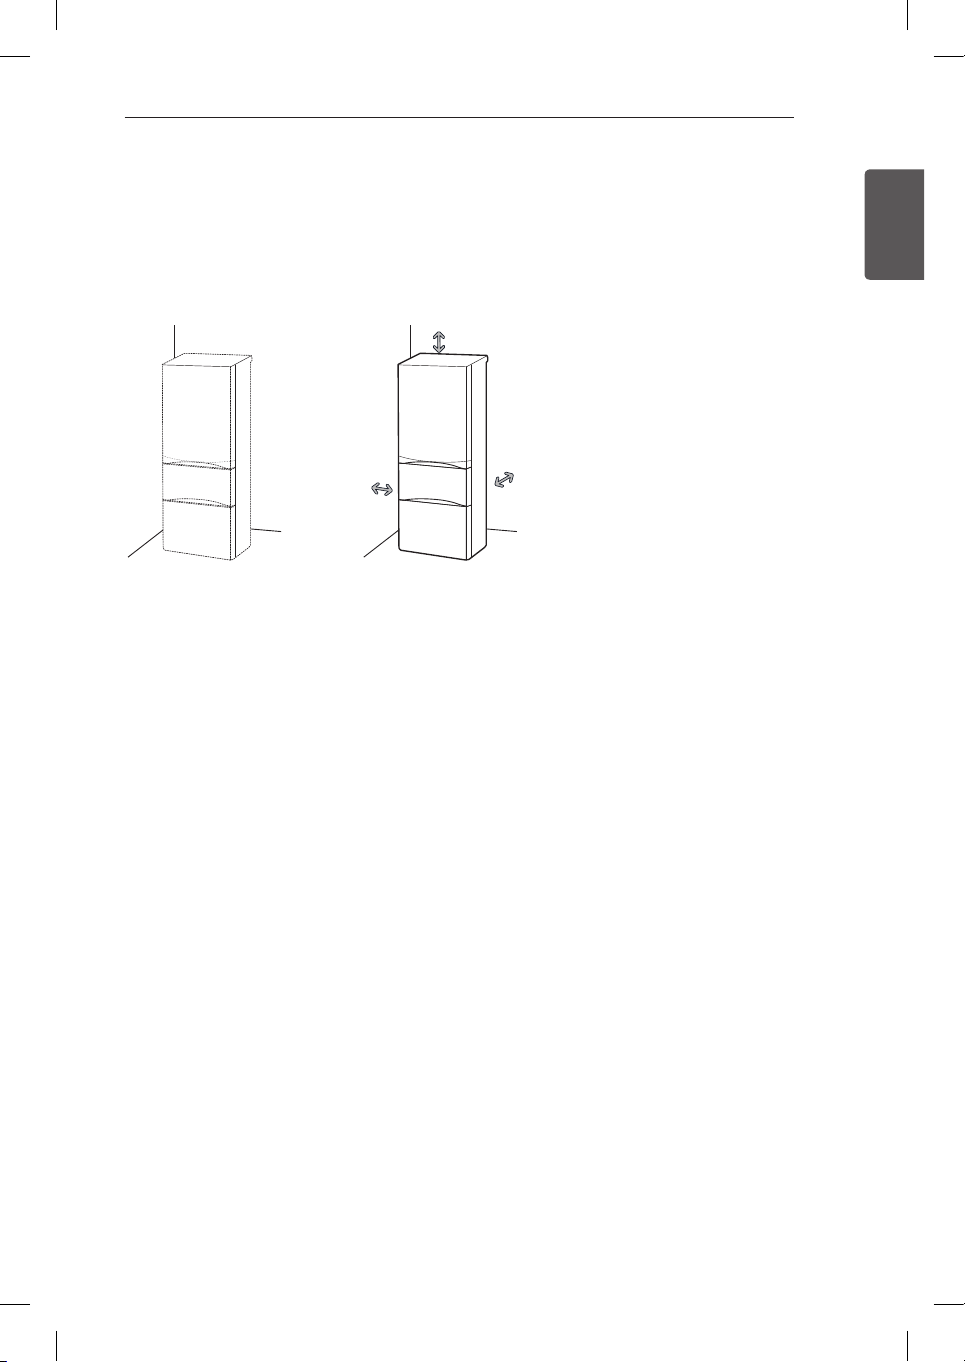
Choosing the Proper Location
•The refrigerator should always be plugged
into its own individual properly grounded
electrical outlet rated for 220 Volts, 60 Hz,
AC only, and fused at 15 or 20 amperes.
This provides the best performance and
also prevents overloading house wiring
circuits which could cause a fire hazard
from overheated wires. It is recommended
that a separate circuit serving only this
appliance be provided.
WARNING
To reduce the risk of electric shock, do
not install the refrigerator in a wet or
damp area. do not install in any outdoor
or sheltered outdoor location or direct
sunlight.
Flooring
To avoid noise and vibration, the unit must be
leveled and installed on a solidly constructed
floor. If required, adjust the leveling legs to
compensate for unevenness of the floor. The
front should be slightly higher than the rear to
aid in door closing. Leveling legs can be turned
easily by tipping the cabinet slightly. Turn the
leveling legs to the left to raise the unit or to
the right to lower it. Poorly constructed timber
flooring can cause a limit in door adjustment
and the cabinet to become out of shape. (See
Leveling and door AlIgnment.)
NOTE
Installing on carpeting, soft tile surfaces,
a platform or weakly supported
structure is not recommended.

INSTALLATION
ENGLISH
11
Ambient Temperature
Install this appliance in an indoor area where
the temperature is between 41°F (5°C) and
110°F (43°C). If the temperature around the
appliance is too low or high, the cooling ability
may be adversely affected.
Place your appliance where it is easy to
1
use.
Avoid placing the unit near heat sources,
2
direct sunlight or moisture.
To ensure proper air circulation around the
3
fridge -freezer, please maintain sufficient
space on both the sides as well as top and
maintain at least 3.9 inches (10cm) from
the rear wall.
To avoid vibrations, the appliance must be
4
leveled.
Don’t install the appliance below 41°F
5
(5°C). It may affect the performance.
Turning On The Power
Plug in the refrigerator.
CAUTION
•Connect to a rated power outlet.
•Have a certified electrician check the
wall outlet and wiring for proper
grounding.
•Do not damage or cut off the ground
terminal of the power plug.
3.9” (10 cm)

HOW TO USE
ENGLISH
12
HOW TO USE
Before use
Clean the refrigerator.
Clean your refrigerator thoroughly and wipe off all dust that may have accumulated
during shipping.
CAUTION
•Do not scratch the refrigerator with a sharp object or use a detergent that
contains alcohol, a flammable liquid or an abrasive when removing any tape
or adhesive from the refrigerator,.
•Do not peel off the model or serial number label or the technical information
on the rear surface of the refrigerator.
NOTE
Remove adhesive residue by wiping it off with your thumb or dishwashing detergent.
Connect the power supply.
Check if the power supply is connected before use.
Read the “Turning On The Power” section. (Your plug type might be different from
the picture.)
Wait for the refrigerator to cool.
Allow your refrigerator to run for at least three to four hours before putting food in
it. Check the flow of cold air in the freezer compartment to ensure proper cooling.
CAUTION
Putting food in the refrigerator before it has cooled could cause the food
to spoil, or a bad odor could remain inside the refrigerator.
The refrigerator makes a loud noise after initial operation.
This is normal. The loudness will decrease as the temperature lowers.
Before Plugging in, open the refrigerator doors to ventilate the interior.
The inside of the refrigerator may smell like plastic at first. Remove any adhesive
tape from inside the refrigerator and open the refrigerator doors for ventilation until
any odors have subsided.

ENGLISH
Control Panel (Applicable to
some models only)
Control Panel Features
1
2
3
4
5
6
7
HOW TO USE
1
Top
•This sets Kimchi, Fridge, Freezer and
Act.
2
Middle
•This sets Kimchi, Vege/Fruit, Meat/Fish,
Kimchi+ and Act.
3
Bottom
•This sets Kimchi, Vege/Fruit, Grain and
Long Term.
4
Power
•This sets the power off of the Top or
Middle/Bottom.
5
Fresh Air Filter
•This sets the Fresh Air Filter.
6
Wi-Fi
•This sets the refrigerator to connect to
your home’s Wi-Fi network.
13
7
Lock
•This locks the buttons on the control
panel.

HOW TO USE
ENGLISH
14
Notes for Use of the Control Panel
•The control panel will turn on in any of the
following cases.
−When the power is turned on
−When a button is pressed
−When the appliance door is opened
•The control panel will turn off automatically
for energy saving in any of the following
cases.
−When one minute has passed after
turning on the power
−When no button operation is carried out
for 60 seconds after a desired button is
pressed
−When 60 seconds has passed after the
appliance door is opened and closed
•When the power-saving function is
operational, the control panel window will
turn off except the Lock lamp.
Setting Functions
•Select the button for your desired function.
•Each time you press the button, the
following functions will show up
sequentially:
[Top]
Kimchi : M → H → L
Fridge : M → H → L Æ Freezer Æ Act.
Æ
Act.(Activation)
•This function detects the external
temperature and then ripens Kimchi.
•Select another function if you wish to cancel
“Act.”.
•If you set the Ripen function, “Act.” will be
turned on.
•Once Ripen has been completed, “Act. Fin.”
will be turned on and Kimchi M will be set.
•If you press the Lock button when Ripen
has been completed, “Act. Fin.” will be
turned off.
NOTE
The completion time is subject to
change depending on seasonality,
surrounding temperature and Kimchi
temperature.
Fridge
•Stores refrigerated foods.
NOTE
If you store Kimchi after setting the
Fridge, the Kimchi will get sour in taste
fast.
[Middle]
Kimchi : M → H → L
Vege/Fruit : M → H → L Æ Meat/Fish
Æ
Kimchi+ Æ Act.
Æ
[Bottom]
Kimchi : M → H → L
Vege/Fruit : M → H → L Æ Grain
Æ
Long Term
Æ
Freezer
•Stores frozen foods.
NOTE
If you store Kimchi after setting the
Freezer, the Kimchi will get frozen.
Vege/Fruit
•You can store vegetables and fruits and
keep them fresh for a long time.

HOW TO USE
ENGLISH
15
Meat/Fish
•You can store meat and fish and keep them
fresh.
NOTE
If you store Kimchi after setting Meat/
Fish, the Kimchi will get frozen.
Kimchi+
•Implement a temperature at which
Leuconostoc grows well and then cool
rapidly so that Kimchi can be stored
preserving good taste for a long time.
•The gauge displays the degree of ripeness.
Once the gauge gets filled up, help yourself
to Kimchi. (About 6 days are required.)
•Apply to freshly prepared Kimchi only.
NOTE
•Apply once only. If you apply twice or
more times, Kimchi may get sour in
taste.
•Notice) Apply to cabbage Kimchi.
Lightly-salted Kimchi can get frozen.
Fresh Air Filter
•This is the function to quickly circulate the
air inside the refrigerator for deodorization
inside the refrigerator.
Wi-Fi
•The Wi-Fi button, when used with the LG
Smart ThinQ application, allows the
refrigerator to connect to a home Wi-Fi
network.
•The Wi-Fi icon shows the status of the
refrigerator’s network connection. The icon
illuminates when the refrigerator is
connected to the Wi-Fi network.
•Press and hold the Wi-Fi button for 3
seconds to connect to the network. The icon
blinks while the connection is being made,
then turns on once the connection is
successfully made.
Long Term
•Minimizes changes in taste in order to store
Kimchi for a long time.

HOW TO USE
ENGLISH
16
Adjusting the Refrigerator
Shelves
The shelves in your refrigerator are adjustable
to meet your individual storage needs. Your
model may have either glass or wire shelves.
Adjusting the shelves to fit different heights of
items will make finding the exact item you
want easier. Doing so will also reduce the
amount of time the refrigerator door is open
which will save energy.
Detaching the Shelf
•Hold one side of the shelf and pull it out
while squeezing it to the other side.
•Lift the rear part slightly and pull it out.
•When removing the shelf, remove all
content on it, pull the basket all the way out,
hold the front of th e shelf with both hands,
lift it up at an angle and pull it out.
•After removing the 4th-layer shelf at the left/
right compartments, hold the deodorizer
with the hand and remove it from the back
wall of the refrigerator. The deodorizer is
reusable.
Gently lift and pull out the shelf.
Depending on the model, the shelves and
cold insulation cover may not be present or
differ from the figures in their shapes.
•When removing the upper 3rd-layer basket,
lift the basket up slightly and pull it out.
When reinserting the basket, align it with
the grooves at both ends and push it inside.
(Remove all content inside the baskets
before removing it from the refrigerator.)

HOW TO USE
ENGLISH
17
CustomChill Drawer
The CustomChill Drawer provides storage
space with a variable temperature control that
can be adjusted to keep the compartment
either colder or warmer than the refrigerator.
Use it to store meat and seafood, cold drinks,
deli snacks, or chilled wine.
CustomChill Drawer Disassembly
The Mid Drawer
Raise the Mid drawer slightly, lift the basket up
and remove it while the roller is pulled out
halfway. (The basket is released when the
upper door is open.)
When reinserting the basket, put the basket in
while the roller is pulled out halfway, lift the
drawer up slightly, align it with the roller, and
push it in.
When removing or mounting the middle
drawer, be sure to open the door at the
upper compartment.
When reinserting the basket, insert the drawer
to the refrig erator and lift the left roller of the
drawer to align and push it in. If you hear a
knocking sound, lift it up slightly and keep
pushing it in.
When removing or mounting the middle
drawer, be sure to open the doors at the
left/right compartments.
You need to remove the baskets together
with the middle/lower drawers. Removing
only the baskets is impossible.
CAUTION
•When removing the lower drawer, be
careful as you may hurt your foot.
•The lower doors may be heavy, and
your back may be hurt when
removing them. Be sure to remove
the content before removing them.
The Bottom Drawer
Open the drawer completely.
1
Pull up the drawer slightly and pull it out.
2
(When you hear the knocking sound, the
drawer will no longer be pulled or pushed.)
Remove the Bottom drawer by lifting it
3
with full power as shown in the figure.

SMART FUNCTIONS
ENGLISH
18
SMART FUNCTIONS
Using LG SmartThinQ
Application
Things to check before using LG
SmartThinQ
•For appliances with the or logo
Check the distance between the appliance
1
and the wireless router (Wi-Fi network).
•If the distance between the appliance
and the wireless router is too far, the
signal strength becomes weak.
It may take a long time to register or
installation may fail.
Turn off the
2
on your smartphone.
•For iPhones, turn data off by going to
Settings
Connect your smartphone to the wireless
3
router.
Mobile data
→
Cellular
or
Cellular Data
→
Cellular Data
NOTE
•To verify the Wi-Fi connection, check
that
lit.
•The appliance supports 2.4 GHz Wi-Fi
networks only. To check your network
frequency, contact your Internet service
provider or refer to your wireless router
manual.
•LG SmartThinQ is not responsible for
any network connection problems or any
faults, malfunctions, or errors caused by
network connection.
•If the appliance is having trouble
connecting to the Wi-Fi network, it may
be too far from the router. Purchase a
Wi-Fi repeater (range extender) to
improve the Wi-Fi signal strength.
•The Wi-Fi connection may not connect
.
or may be interrupted because of the
home network environment.
•The network connection may not work
properly depending on the Internet
service provider.
•The surrounding wireless environment
can make the wireless network service
run slowly.
•The appliance cannot be registered due
to problems with the wireless signal
transmission. Unplug the appliance and
wait about a minute before trying again.
•If the firewall on your wireless router is
enabled, disable the firewall or add an
exception to it.
•The wireless network name (SSID)
should be a combination of English
letters and numbers.
(Do not use special characters.)
•Smartphone user interface (UI) may vary
depending on the mobile operating
system (OS) and the manufacturer.
•If the security protocol of the router is
set to
network.
Please change it to other security
protocols (
register the product again.
icon on the control panel is
Wi-Fi
, you may fail to set up the
WEP
is recommended) and
WPA2

SMART FUNCTIONS
ENGLISH
19
Installing LG SmartThinQ
Search for the LG SmartThinQ application from
the Google Play Store or Apple App Store on a
smart phone. Follow instructions to download
and install the application.
NOTE
•If you choose the simple login to access
the LG SmartThinQ application, you
must go through the appliance
registration process each time you
change your smartphone or reinstall the
application.
Wi-Fi Function
•For appliances with the or logo
Communicate with the appliance from a smart
phone using the convenient smart features.
Firmware Update
Keep the appliance performance updated.
Smart Diagnosis™
If you use the Smart Diagnosis function, you
will be provided with the useful information
such as a correct way of using the appliance
based on the pattern of use.
Settings
Allows you to set various options on the
refrigerator and in the application.
Open Source Software Notice
Information
To obtain the source code under GPL, LGPL,
MPL, and other open source licenses, that is
contained in this product, please visit
http://opensource.lge.com.
In addition to the source code, all referred
license terms, warranty disclaimers and
copyright notices are available for download.
LG Electronics will also provide open source
code to you on CD-ROM for a charge covering
the cost of performing such distribution (such
as the cost of media, shipping, and handling)
upon email request to opensource@lge.com.
This offer is valid for a period of three years
after our last shipment of this product. This
offer is valid to anyone in receipt of this
information.
Smart Diagnosis™ Using a
Smart Phone
•For appliances with the or logo
Use this function if you need an accurate
diagnosis by an LG Electronics customer
information centre when the appliance
malfunctions or fails.
Smart Diagnosis™ can not be activated unless
the appliance is connected to power. If the
appliance is unable to turn on, then
troubleshooting must be done without using
Smart Diagnosis™.
NOTE
•If you change your wireless router, your
Internet service provider or your
password after registering the appliance,
please delete it from the LG SmartThinQ
→
Settings
again.
•The application is subject to change for
appliance improvement purposes
without notice to users.
•Functions may vary by model.
Edit Product
and register

SMART FUNCTIONS
ENGLISH
20
Using Smart Diagnosis™
Smart Diagnosis™ Through the
Customer Information Centre
Use this function if you need an accurate
diagnosis by an LG Electronics customer
information center when the appliance
malfunctions or fails. Use this function only to
contact the service representative, not during
normal operation.
Press the Lock button to activate the lock
1
function.
• If the lock function has been activated
already, press the Lock button to deactivate
the lock function, and then press the Lock
button again to activate the lock function.
• Please note that the Smart Diagnosis
function will not operate until five minutes
has passed since the lock function was
activated.
Open the top door and then hold the phone
2
on the upper right speaker hole.
• Position the phone so that its microphone
is aligned with the speaker hole.
NOTE
•Position the phone so that its
microphone is aligned with the speaker
hole.
•The Smart Diagnosis™ sound is
generated after around three seconds.
•Do not take the phone off the speaker
hole while the data is transmitted.
•Hold the phone to the upper right
speaker hole and wait while the data is
transmitted.
•The data transfer sound may be harsh to
the ear while the Smart Diagnosis™ data
is being transmitted, but do not take the
phone off the speaker hole for accurate
diagnosis until the data transfer sound
has stopped.
•When the data transfer is complete, the
transfer completion message is
displayed and the control panel is
automatically turned off and then on
again after a few seconds. After the
customer information centre explains
the diagnosis result.
•The Smart Diagnosis™ function depends
on the local call quality.
•The communication performance will
improve and you can transmit a better
signal if you use a land line home phone.
•If the Smart Diagnosis™ data transfer is
poor due to poor call quality, you may
not receive the best Smart Diagnosis™
service.
Press and hold the Bottom button for three
3
seconds or longer while continuing to hold
your phone to the speaker.
After the data transfer is complete, the
4
service agent will explain the result of the
Smart Diagnosis™.

ENGLISH
MAINTENANCE
MAINTENANCE
21
Cleaning
•Both the refrigerator and freezer sections defrost automatically; however, clean both sections
about once a month to prevent odors.
•Wipe up spills immediately.
•Always unplug the refrigeration before cleaning.
General Cleaning Tips
•Unplug refrigerator or disconnect power.
•Remove all removable parts, such as
shelves, crispers, etc.
•Use a clean sponge or soft cloth and a mild
detergent in only warm water. Do not use
abrasive or harsh cleaners.
•Hand wash, rinse and dry all surfaces
thoroughly.
Exterior
Waxing external painted metal surfaces helps
provide rust protection. Do not wax plastic
parts. Wax painted metal surfaces at least
twice a year using appliance wax (or auto paste
wax). Apply wax with a clean, soft cloth.
For products with a stainless steel exterior,
use a clean sponge or soft cloth and a mild
detergent in warm water. Do not use abrasive
or harsh cleaners. Dry thoroughly with a soft
cloth.
WARNING
Use non-flammable cleaner. Failure to do
so can result in fire, explosion, or death.
Always remove power cord from the wall
outlet prior to cleaning in the vicinity of
electrical parts (lamps, switches, covers,
controls, etc.).
Wipe up excess moisture with a sponge or
cloth to prevent water or Liquid from
getting into any electrical part and causing
an electric shock.
Never use metallic scouring pads, brushes,
coarse abrasive cleaners, Strong alkaline
solutions, industrial detergent (bleach
containing detergent) Flammable or toxic
cleaning liquids on any surface. Do not use
Hot water to clean the interior or any
interior parts of the unit when they are
cold.
CAUTION
•Do not use a rough cloth or sponge
when cleaning the interior and exterior
of the refrigerator.
•Do not place your hand on the bottom
surface of the refrigerator when opening
and closing.

MAINTENANCE
ENGLISH
22
Inside Walls (allow freezer to warm
up so the cloth will not stick)
To help remove odors, you can wash the inside
of the refrigerator with a mixture of baking
soda and warm water. Mix 2 tablespoons of
baking soda to 1 litre of warm water. Be sure
the baking soda is completely dissolved so it
does not scratch the surfaces of the
refrigerator.
Door Liners and Gaskets
Use a clean sponge or soft cloth and a mild
detergent in warm water. Do not use cleaning
waxes, concentrated detergents, bleaches, or
cleaners containing petroleum on plastic
refrigerator parts.
Plastic Parts (covers and panels)
Use a clean sponge or soft cloth and a mild
detergent in warm water. Do not use window
sprays, abrasive cleansers, or flammable fluids.
These can scratch or damage the material.
Condenser Coil Cover
Use a vacuum cleaner with an attachment to
clean the condenser cover and vents located at
the rear of the appliance. Do not remove the
panel covering the condenser coil area. Always
disconnect the main power before cleaning.

ENGLISH
TROUBLESHOOTING
TROUBLESHOOTING
23
Review the Troubleshooting section before calling for service; doing so will save you both time
and money.
Problem Possible Causes Solutions
There is no
refrigeration or
freezing.
There is poor
refrigeration or
freezing.
Is there a power interruption? Check the power of other appliances.
If the power plug unplugged
from the outlet?
Is the power supply 220 V? If it is 110 V, then use a transformer.
If you are using a transformer,
is the power lamp off?
Is the storage temperature
set to ‘L’?
Is the fridge or freezer
temperature set to its
warmest setting?
Is the appliance in direct
sunlight, or is it near a heat
generating object such as
cooking oven or heater?
Did you store hot food
without cooling it first?
Did you put in too much
food?
Are the appliance doors
completely closed?
Is there enough space around
the appliance?
Did you install the product
where the ambient
temperature is between 5°C
and 43°C?
Is the control panel set to
vegetable/fruit or Grain?
Is the middle or bottom shelf
incorrectly assembled?
Plug the power plug in the outlet properly.
Turn on the power lamp for the transformer.
Set it to ‘M’.
Set the fridge or freezer temperature to ‘M’.
Check the installation area and reinstall it away
from heat generating objects.
Cool the hot food first before putting it inside
the fridge or freezer.
Maintain an appropriate space between food.
Completely close the door and make sure that
stored food is not obstructing in the door.
Adjust the installation position to make
enough space around the appliance.
Install the product where the ambient
temperature is between 5°C and 43°C.
In the Control panel, select the proper function
for the type of foods stored.
Assemble the middle or bottom shelf
correctly.

ENGLISH
TROUBLESHOOTING
24
Problem Possible Causes Solutions
Refrigerated
foods are
frozen.
The appliance
contains a bad
smell.
The inside lamp
in the appliance
does not turn
on.
The appliance
door is not
closed tightly.
It is difficult to
open the
appliance door.
Is the storage temperature
set to ‘H’?
Did you put moist and
easy-tofreeze foods near the
cold air exit?
Did you put moist and
easy-tofreeze foods on the
upper shelf of the
refrigeration compartment?
Is the control panel set to
Meat/Fish, Kimchi or Long
term?
Did you put foods in the
container provided?
Is the storage temperature
set to ‘L’?
Did you put in food with a
strong smell?
Is the Kimchi container cover
open?
Does the inside lamp in the
appliance turn off?
Is the appliance leaning
forward?
Were the shelves properly
assembled?
Did you close the door with
excessive force?
Are the foods stored on the
shelf touching the ceiling of
the product?
Did you open the door right
after you closed it?
Set it to ‘M’ or lower.
Put them on the outer edge of the shelf.
Put them on the bottom shelf.
In the Control panel, select the proper function
for the type of foods stored.
Put foods in the container provided.
Set it to ‘M’.
Store foods with strong smells in sealed
containers.
Completely close the Kimchi container cover.
It is hard for customers to replace the inside
lamp in the appliance as they are not
serviceable. If the inside lamp does not turn
on, please contact the LG Electronics
customer information center.
Adjust the front feet to raise the front side
slightly.
Refit the shelves if needed.
If you apply too much force or speed when
closing the door, it may remain briefly open
before closing. Make sure that you do not
slam the door closed. Close without force.
Do not let the foods touch the ceiling.
If you try to open the appliance door within 1
minute after you closed it, you may have
difficulties because of the pressure inside the
appliance. Try to open the appliance door
again in a few minutes so that the internal
pressure stabilizes.

TROUBLESHOOTING
ENGLISH
Problem Possible Causes Solutions
There is
condensation
inside the
appliance or on
the bottom of
the vegetable
drawer cover.
Frost is formed
in the
compartment
set to Freeze.
Frost or
condensation
has formed
inside or outside
the appliance.
The appliance is
noisy and
generates
abnormal
sounds.
The side or front
of the appliance
is warm.
Did you store hot food
without cooling it first?
Did you leave the appliance
door open?
Do you open and close the
appliance door frequently?
Did you put warm or moist
food inside without sealing it
in a container?
Doors may not be closed
properly?
Did you store hot food
without cooling it first?
Is the air entry or exit of the
freezer blocked?
Is the freezer overfilled? Maintain an appropriate space between items.
Did you open and close the
appliance door frequently or
is the appliance door
improperly closed?
Is the installation environment
humid?
Is the appliance installed on a
weak floor or improperly
leveled?
Does the rear of the appliance
touch the wall?
Are objects scattered behind
the appliance?
Is there an object on top of
the appliance?
There are anti condensation
pipes fitted to these areas of
the appliance to reduce
condensation forming from
around the door area.
Cool the hot food first before putting it inside
the fridge or freezer.
Although the condensation will disappear soon
after you close the appliance door, you can
wipe it with a dry cloth.
Condensation can form due to the
temperature difference from the outside.
Wipe out the dampness with a dry cloth.
Store food in a covered or sealed container.
Check if the food item inside the appliance is
blocking the door and make sure that the door
is tightly closed.
Cool the hot food first before putting it inside
the fridge or freezer.
Make sure that air entry or exit is not blocked
so that the air can circulate inside.
Frosts or condensation can form if the outside
air penetrates inside the appliance.
Condensation can appear on the exterior of
the appliance if the installation area is too
humid or on a humid day such as a rainy day.
Wipe off any moisture with a dry cloth.
Install the appliance on a solid and flat area.
Adjust the installation position to allow enough
clearance around the appliance.
Remove the scattered objects from behind
the appliance.
Remove the object on top of the appliance.
The heat releasing pipe to prevent
condensation is installed on the front and side
of the appliance. You may feel it particularly
hot right after the appliance is installed or
during the summer. You can be assured that
this is not a problem and is quite normal.
25

ENGLISH
TROUBLESHOOTING
26
Problem Possible Causes Solutions
The bottom side
of the product is
warm or there
is warm air
coming from
the back.
The internal wall
of the product is
warm.
Clicking noises The defrost control will click
Rattling nosies Rattling noises may come
Whooshing
nosies
Gurgling nosies Refrigerant flowing through
Popping nosies Contraction and expansion of
Vibrating If the side or back of the
Did you install the product not
too long ago?
Did you touch it when the
product is operating?
when the automatic defrost
cycle begins and ends. The
thermostat control (or
appliance control on some
models) will also click when
cycling on and off.
from the flow of refrigerant,
the water line on the back of
the unit (for plumbed models
only), or items stored on top
of or around the appliance.
Appliance is not resting
evenly on the floor.
Appliance with linear
compressor was moved while
operating.
Evaporator fan motor is
circulating air through the
fridge and freezer
compartments.
Air is being forced over the
condenser by the condenser
fan.
the cooling system
the inside walls due to
changes in temperature.
appliance is touching a
cabinet or wall, some of the
normal vibrations may make
an audible sound.
Right after installation, the compressor will
operate very hard to cool it down quickly. So,
you can expect warmth or warm air at the
bottom right.
After cooling down, the warm air will be gone.
So do not worry.
To maintain the optimal temperature, the cold
air and the hot air will take turns to control the
temperatures, causing the inner wall to be
warm. It is not a malfunction, so keep using
the product as usual.
Normal Operation
Normal Operation
Floor is weak or uneven or leveling legs need
to be adjusted. See the door alignment
section.
Normal operation. If the compressor does not
stop rattling after 3 minutes, turn the power to
the appliance off and then on again.
Normal Operation
Normal Operation
Normal Operation
Normal Operation
To eliminate the noise, make sure that the
sides and back do not make any contact with
any wall or cabinet.

TROUBLESHOOTING
ENGLISH
Problem Possible Causes Solutions
Kimchi gets
sour too quickly.
There are white
fungus on the
surface of
Kimchi.
The power is off
for some
compartments.
Kimchi is soggy
and less chewy.
Your home
appliance and
smartphone is
not connected
to the Wi-Fi
network.
Is the control panel set to
“Act.”, “Kimchi+” or
“Fridge”?
Is the control panel set to
Fresh Kimchi (MIN)?
Is the door or shelf closed
properly?
Is the Kimchi container cover
open?
Is the control panel set to
“Top Off” or “Mid/Bot. Off”?
Did you add an adequate
amount of salt or seafood
seasoning when you made
Kimchi?
The password for the Wi-Fi
that you are trying to connect
to is incorrect.
Mobile data for your
smartphone is turned on.
The wireless network name
(SSID) is set incorrectly.
The router frequency is not
2.4 GHz.
The distance between the
appliance and the router is
too far.
In the control panel, select the proper function
for the type of foods stored.
Set it to Fresh Kimchi (MID) or higher.
Please note that if you select Fresh Kimchi
(MAX), Kimchi may get frozen.
Close the door or shelf properly.
Close the cover completely. If the cover does
not close completely, the Kimchi may contact
with air to generate oxidation yeasts (white
fungus).
Cover up the surface of Kimchi with wraps or
hygienic vinyl to store it for a longer time.
Change to other settings.
If you add too little salt then it will look good
but the enzyme contained in the Kimchi will
make it less chewy and soggy.
Also, seafood seasoning can affect Kimchi in
terms of ripening it quickly or making it soggy.
Find the Wi-Fi network connected to your
smartphone and remove it, then register your
appliance on LG SmartThinQ.
Turn off the
and register the appliance using the Wi-Fi
network.
The wireless network name (SSID) should be
a combination of English letters and numbers.
(Do not use special characters.)
Only a 2.4 GHz router frequency is supported.
Set the wireless router to 2.4 GHz and
connect the appliance to the wireless router.
To check the router frequency, check with
your Internet service provider or the router
manufacturer.
If the distance between the appliance and the
router is too far, the signal may be weak and
the connection may not be configured
correctly. Move the location of the router so
that it is closer to the appliance.
Mobile data
27
of your smartphone


128, Yeoui-daero, Yeongdeungpo-gu,
Seoul, 150-721 Korea
Printed in Korea
 Loading...