

Page 1

PCM NATIVE STRINGBOX
OWNER’S MANUAL
Page 2

The Lexicon® Legacy
continues...
2
2
Page 3
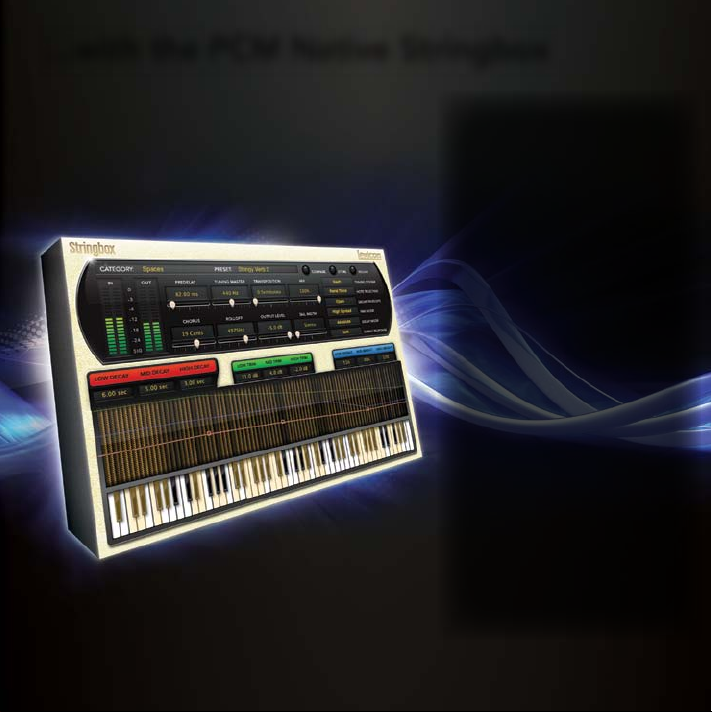
...with the PCM Native Stringbox
For over 40 years Lexicon® has
been recognized as the gold
standard of digital reverb and
effects processing and has
continuously introduced leading
edge technology for the audio
industry. Lexicon again rocked
the audio industry with the
introduction of the PCM Native
Reverb and PCM Native Effects
Plug-In Bundles, the ultimate
bundles for creating professional,
inspirational mixes within popular
DAWs like Pro Tools
any other VST
®
RTA S
compatible platform.
With all the flexibility you would
expect from native plug-ins,
these powerhouse plug-ins offer
legendary Lexicon processing
with the most versatile and finely
crafted studio presets. Designed
to bring the highest level of sonic
quality and functionality to all
your audio applications, the PCM
Native Series Plug-Ins will take
center stage in your DAW.
®
, Logic®, and
®
, Audio UnitTM, or
Page 4

Congratulations and thank you
for purchasing the PCM Native Stringbox plug-in. With decades of legacy products to pull from,
the PCM Native plug-ins include the finest collection of factory presets available. Designed to
bring the highest level of sonic quality and functionality to all of your audio applications, the
PCM Native plug-ins will take center stage in your DAW.
Quick Start
• Open your DAW and choose the Lexicon plug-in from your list of plug-ins
• In the plug-in’s window, select a category
• Select a preset
• Adjust parameters (optional)
• Save the preset (optional)
It can be as simple or as in-depth as you’d like. The included presets work well for most
situations, but you can easily adjust any parameter and save any preset. See the “Factory
Presets” section for more information on editing, loading and saving presets.
Included Items
• PCM Native Stringbox software CD
• iLok license code
• This manual
Page 5

Table of Contents
Installation ............................................... 1
Install the Plug-in .................................... 1
iLok License ............................................ 1
First Look—The User Interface ................ 2
Overview ................................................. 2
Strings Window .................................. 3
Decay/Tone Parameters ..................... 3
Level Meters ....................................... 3
Preset Category.................................. 3
Preset Selector ................................... 3
Slider Parameters .............................. 3
Control Buttons .................................. 3
Combo Box Parameters ..................... 3
The Realtime Display .............................. 4
Off ...................................................... 5
String Resonance View ....................... 5
The Control Buttons ................................ 6
Compare ............................................ 6
Store ................................................... 6
Reload ................................................ 6
Presets ..................................................... 7
Loading a Preset ..................................... 7
Storing and Managing Presets ................ 8
Portable Presets ...................................... 9
Where are presets stored? ...................... 10
Tempo Mode Presets ............................... 11
Getting the most out of your computer .. 12
The Algorithm .......................................... 16
Stringbox ................................................ 17
The Parameters ....................................... 18
Chorus ................................................ 18
Decay Envelope ................................. 18
Delay Mode ........................................ 18
Keyboard ............................................ 18
Low Bright, Mid Bright, High Bright ... 18
Low Decay, Mid Decay, High Decay... 18
Low Trim, Mid Trim, High Trim ........... 19
Mix...................................................... 19
Note Selection ................................... 19
Output Level ...................................... 19
Pan Mode ........................................... 19
Predelay ............................................. 19
Rolloff ................................................. 19
String Response ................................. 19
Tail Width ........................................... 20
Transposition ...................................... 20
Tuning Master..................................... 20
Tuning System .................................... 20
Lexicon Plug-Ins & Upgrades ................... 21
Available Lexicon Plug-Ins ...................... 21
Upgrading .............................................. 21
Page 6

Page 7

Installation
Install the Plug-in
Insert the CD into your CD-ROM drive. The Installer should start automatically.
If the Installer doesn’t start automatically, you can start it manually by opening the appropriate
file on the CD:
Mac®: Use the “.dmg” installation file
Windows®: Use the “32-bit.exe” or “64-bit.exe” installation file
Once the Installer is open, follow the on-screen instructions to install the software.
iLok License
You must download the license to your 2nd Generation iLok USB smart key before running
any program that might use this plug-in. If a valid iLok license is not present, the initial plug-in
validation scan will fail and you may not be able to run the plug-in without digging into your
system. For more information go to www.iLok.com.
Important! Your PCM Native Plug-in will not work without an authorized
!
2nd Generation iLok USB smart key inserted in your computer’s USB
port!
!
1
Page 8
First Look—The User Interface
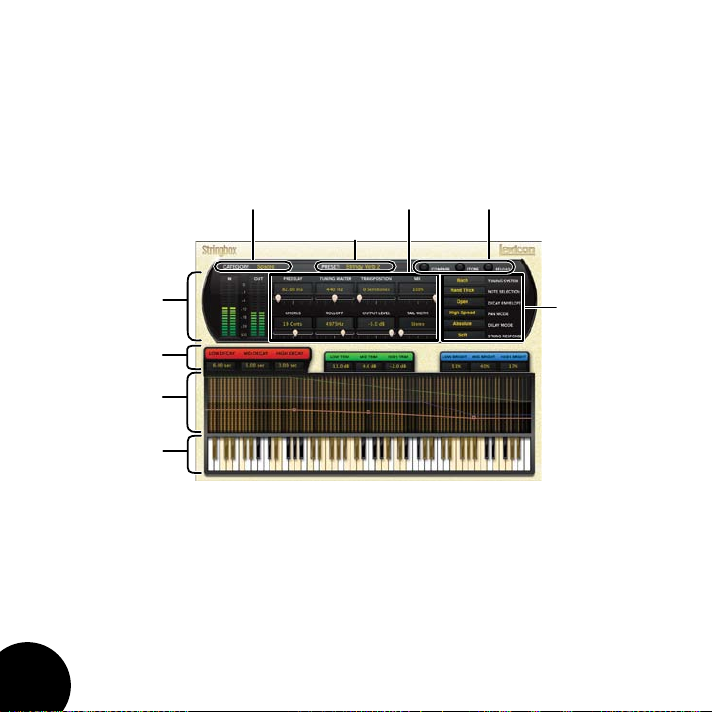
Overview
When the plug-in is instantiated, you will see a window that looks something like this:
Preset
Slider
Parameters
Control
Buttons
Preset
Category
Selector
Level Meters
Decay/Tone
Parameters
Strings
Window
Keyboard
Combo Box
Parameters
Keyboard
When the Note Selection parameter is set to Keyboard this keyboard section becomes active.
This full piano keyboard allows you to select which keys are held down by clicking on each
key. When pressed, the key will turn yellow indicating that the key is being held down. Any
combination of keys can be held down and there is no limit to the number of keys that can be
held.
Note: The keyboard area in the Stringbox algorithm does not respond to midi note commands
2
Page 9

Strings Window
Stringbox has a unique metering system that shows just which strings are resonating. The
strings window is a real time visual representation of the piano strings vibrating based on the
energy in each resonator. There is a string image for each note. If that string is resonating, then
the string image brightens.
The Decay/Tone parameters can also be adjusted in this graphical display by selecting
the group of Decay/Tone parameters, then left clicking and dragging the nodes on the
corresponding colored line.
Decay/Tone Parameters
Filtering, decay and level can be set here in each of 3 bands. The resulting curve is displayed in
the strings window, represented by matching color coded lines.
Level Meters
Shows the input, output and feedback levels. The Feedback meters measure the energy level
being fed back into the beginning of the delay line.
Preset Category
Presets for the algorithm are grouped into categories to make them easier to find. Clicking
in this area will show the list of categories. Selecting a category will load the presets for that
category in the Preset Selector.
Preset Selector
Displays the list of presets within the selected category. Selecting a preset from the list will
cause the preset to be loaded into the plug-in.
Slider Parameters
These are the fader type parameters.
Control Buttons
These buttons are used to compare, reload and store presets. This is explained in more detail in
the “Control Buttons” section of this manual.
Combo Box Parameters
These are the combo box type parameters. Each parameter is described in the “Parameters”
section starting on page 18.
3
Page 10

The Realtime Display
The realtime display window allows you to visualize the effect. While your ears will always be the
primary tool in choosing and adjusting presets, the display provides a direct way to see what’s
going on. Click anywhere in the realtime display window to change the view.
4
Page 11

Off
This display mode is the default view for the plug-in
and requires the least amount of CPU cycles.
String Resonance View
This disply mode shows a visual representation of
the piano strings vibrating based on the energy in
each resonator.
5
Page 12

The Control Buttons
These buttons let you access all of a preset’s parameters, manage presets, and compare
changes you’ve made to the original settings.
Compare
The Compare button temporarily resets all parameters to the original preset value. It is used to
get back to the original preset and quickly audition your edits verses the original preset. When
compare is on, all parameters are frozen and cannot be changed. Turning compare off returns
you to your edits. Choosing a different preset cancels compare mode.
Store
The Store button allows you to create and manage user presets. See the “Storing and
Managing Presets” section for more information.
Reload
Clicking the Reload button reloads the current preset, overriding all user edits.
6
Page 13

Presets
The PCM Native plug-ins come with a large complement of Factory Presets. These presets are
grouped in categories that make it easier for you to find the sound you need. Most presets also
come with several variants that may save you a lot of editing time.
Loading a Preset
The preset category is chosen from the drop-down menu in the upper-left portion of the edit
window. When you select a category, the preset menu is updated to show availability of the new
presets within the selected category. An initial preset will be loaded from the category. It will be
the first preset in the list unless you have previously visited the category. In that case, it will be
the last preset you loaded from that category.
Click here
to select
a category
Click here
to select
a preset
7
Page 14

Storing and Managing Presets
When you load a Lexicon® plug-in, the overall appearance may be something like this:
You will notice that the Lexicon plug-in (with the gold border) is embedded within a larger
window provided by the DAW. Appearance will differ from host to host (this example is from
Logic®). Oftentimes, the DAW itself provides the ability to save presets. The presets saved by
the DAW can only be used with the DAW that saved them. If you work with multiple DAWs, this
would be a problem. However, Lexicon® solves this problem with the use of Portable Presets.
8
Page 15

Portable Presets
When you store presets with the Lexicon Store button (shown below), your presets are available
to all DAWs on your machine. With only a little effort, you can also share them with other
machines, even when going between Mac and PC.
If you’ve made some edits you’d like to save as a User Preset, press the Store button on the
upper portion of the plug-in editor. You’ll see a screen that looks like this:
1. Click Store
2. Click to
edit name
3. Click Store
to save
The upper field contains the list of User Presets that have already been created for this
algorithm. Presets appear in alphabetical order. Click the name field to edit the name of the
preset. Once done, click the Store button.
The lower field contains the name of the preset that was loaded before you began editing.
You can easily click in this field and change the name to anything you like. Once you have the
appropriate name, click the Store button and the preset will be saved. If you decide not to save
the preset, pressing the Cancel button will return you to the editor without saving the preset.
9
Page 16

If you select one of the existing presets in the library, you can replace or delete that preset.
1. Click on a preset
2. Preset name
appears here
3. Click to replace, or
Click to delete
Where are presets stored?
On the Mac, User Presets are stored in:
”Home”/Library/Application Support/Lexicon/Native/User Presets/”AlgorithmName”
(“Home” is the name of the account you’re logged in under. “AlgorithmName” is the name of the plug-in.)
On Windows Vista/Seven, User Presets are stored in:
Users/”Username”/AppData/Roaming/Lexicon PCM Native/
UserPresets/”AlgorithmName”
(“Username” is the name of the account you’re logged in under. “AlgorithmName” is the name of the plug-in.)
On Windows XP, User Presets are stored in:
Documents and Settings/”Username”/Application Data/Lexicon PCM Native/User
Presets/”AlgorithmName”
(“Username” is the name of the account you’re logged in under. “AlgorithmName” is the name of the plug-in.)
Note: The AppData and Application Data folders are Windows system folders and are hidden
by default. Windows must be configured to “show hidden files and folders” to view these
folders.
10
Page 17

Tempo Mode Presets
Some presets will contain “(T)” in the preset name. These are tempo mode presets. The delays
in these presets respond (or are synced) to the tempo of the DAW. They are best used when the
tempo of the project actually reflects the tempo of the musical material (MIDI sequences and
such). In those cases, the tempo component of the preset will reinforce the tempo in some way.
11
Page 18

Getting the most out of your computer
The PCM Native plug-ins are written to be efficient, and most computers will run more copies
than you may need. But if you find yourself needing to squeeze a little bit more out of your
CPU, you can take the following simple steps:
• Turn off the active realtime display. The active display window can represent your effect
in real time. However, this display consumes some of your computer’s processing power.
If you click until you reach the static display, your computer will have more CPU power
available.
• Close the plug-in editor. Unless you’re actively controlling your mix in realtime, you don’t
need the editor after you’ve made the appropriate settings. All those knobs, faders and
displays require processing power. You can always reopen the editor if you need to edit.
12
Page 19

This page intentionally left blank.
13
Page 20

The
Heritage
Page 21

Lexicon® occupies a unique position as a leading innovator in both
professional and consumer audio industries. Since the release of
the first digital delay, Lexicon has stood at the forefront of digital
audio with a reputation as a manufacturer of exceptional audio
and home theater products and an inventor of new technologies.
Years of research, development, and learning allow us to continue
expanding the boundaries of the listening experience.
Our professional products are prominent in the creation of
worldwide music, television, and film productions. These products
have won numerous awards, including an Emmy® and numerous
TEC awards, including a TEC Hall of Fame award for the Lexicon
Delta T-101, the world’s first digital delay. Lexicon processors have
been embraced as the standard in professional signal processing
since the introduction of the 480L Digital Effects Processor, which
has retained tremendous popularity for the past 22 years. It has since
been replaced as the standard in professional signal processing
by the 960L Multi-Channel Digital Effects System and the PCM96
Series Reverb/Effects Processors, which have themselves garnered
an impressive following of producers, artists, and engineers.
Growing demand for proprietary Lexicon technologies has led to
its appearance in numerous applications, with dramatic results.
Our processing is relied upon to enhance the sound of prestigious
live halls and venues.
Knowingly or unknowingly, you experience Lexicon products and
technologies on a daily basis. Chances are that Lexicon processing
was involved in the television program you watch at home, the
film you see at the cinema, or the song you listen to on the radio.
From the initial tracks to your listening room or automobile,
Lexicon is part of the process that brings these recordings to life.
Our commitment to the audio professional and content delivery
ensures an unbroken chain between the artist and the audience.
Now hear this…
Page 22

The Algorithm
Page 23

Stringbox
If you’ve ever made a sound near a piano, then you know what Stringbox is. The strings of the
piano vibrate by sympathetic resonance. If there is sound energy at the frequency of a string (or
a multiple of that frequency), that string will vibrate. By holding down different combinations of
keys, a ghostly harmony can be created.
The Stringbox algorithm is a resonator that reacts to whatever energy it sees. It has 88 courses
of virtual strings, with each course consisting of three strings. The strings can be tuned in several
ways and those strings may be detuned relative to one another. The characteristics of the
strings, the material from which they are made, can also be easily adjusted.
17
Page 24

Content Checked
The Parameters
The PCM Native plug-ins contain presets covering a wide range of needs, but you can refine
and customize any preset by adjusting its parameters. Parameters are the building blocks within
each preset that determine how it sounds and behaves.
Each PCM Native plug-in contains a set of parameters, and a variety of those parameters are
combined to create a preset.
Following are all the algorithm parameters you can edit in the PCM Native Stringbox Plug-in.
Chorus
Controls the amount of detuning in each course of strings.
Decay Envelope
Controls how the note rings after a key is deselected. Open means that the note will ring until it
dies away. The Damped settings causes it to die more quickly.
Delay Mode
Determines whether the predelay uses an absolute value (milliseconds) or a note value related
to the tempo of the mix.
Keyboard
This region shows which keys of the virtual piano have been pressed, indicating which pitches
will be resonated. If the Note Selection parameter has been set to Keyboard, then notes may
be selected by clicking on keys.
Low Bright, Mid Bright, High Bright
This parameter controls the target brightness of strings in each of four zones. This is the
brightness of the string as it reaches the end of its decay. Lower brightness means that the
string becomes duller as it decays. This may be adjusted by selecting the blue tab and then
shaping the blue line above the keyboard.
Low Decay, Mid Decay, High Decay
This parameter controls the decay time in each of four zones. This may be adjusted by selecting
the red tab and then shaping the red line above the keyboard.
18
Page 25

Content Checked
Low Trim, Mid Trim, High Trim
This parameter controls the level of strings in each of four zones. This may be adjusted by
selecting the green tab and then shaping the green line above the keyboard.
Mix
Mix is the proportion of wet (processed) signal to dry (unprocessed) signal.
Note Selection
Controls which strings are allowed to resonate. There are several preset selections, such as
Damper Down, White Keys, and Black Keys. The Keyboard setting allows you to select any
pattern of notes by simply clicking on the keyboard. There are even several random modes
which will play the keyboard for you.
Output Level
Controls the level of the signal out of the plug-in.
Pan Mode
Determines how the strings are panned across the stereo field. Piano places strings low-tohigh from left to right. Reverse Piano flips that orientation. Low Spread alternates notes, with
the lowest notes at the farthest left and right position. High Spread places lower notes in the
center (just the way organ pipes are distributed). Random continually moves the positions of the
strings.
Predelay
This parameter is found only in the Stringbox algorithm. Your piano doesn’t have this, but this
parameter allows the resonated signal to be delayed. Operates in either absolute or tempo
mode.
Rolloff
This parameter is found only in the Stringbox algorithm. This is a lowpass filter that is applied to
the complete resonated signal.
String Response
This parameter is found only in the Stringbox algorithm and controls the virtual material (soft,
hard, just right) that the string is made from.
19
Page 26

Content Checked
Tail Width
This parameter is found only in the Stringbox algorithm. A matrix is used to mix the output
signal. This controls the impression of signal width. Very spacious signals should be monitored
with both a surround decoder and in mono, in order to maintain compatibility. All settings in
factory presets are safe for any application.
Transposition
In the Stringbox algorithm, this parameter transposes the resonance relative to the keyboard.
For example, if a C is depressed on the keyboard and the transposition is 2 semitones, that
string will resonate a D.
Tuning Master
In the musical world, the tuning reference is A=440. This means that the note A (above middle
C) is equivalent to 440 Hz. However, that’s not the way it always works in the real world. In the
Stringbox algorithm, this parameter allows you to change the base tuning to something other
than A=440.
Tuning System
Controls the way the strings are tuned. Many choices are available. Equal-tempered is best
for most applications, but several forms of just-intonation are available for Baroque musicians.
Quarter-tone is available as are several non-tonal tuning plans.
20
Page 27

Content Checked
Lexicon Plug-Ins & Upgrades
Available Lexicon Plug-Ins
Please visit www.lexiconpro.com for the latest information on available Lexicon plug-ins.
Upgrading
Please visit www.lexiconpro.com for the latest information on upgrading to the PCM Native
Effects Bundle or PCM Total Bundle.
21
Page 28

Harman
8760 South Sandy Parkway, Sandy, Utah 84070, U.S.A.
Phone: 801.568.7660 | Fax: 801.568.7662
Questions or comments? Visit us at www.lexiconpro.com
©2012 Harman. All rights reserved.
Lexicon is a registered trademark of Harman.
All other trademarks are property of their respective owners.
All features and specifications are subject to change.
PCM Stringbox Manual v0.1
www.lexiconpro.com
 Loading...