

Page 1

Thank you for choosing the 7” DVB-T Player. The unit applies the latest
state of the art electronics and is designed for use in hotels, offices,
vehicles or your home. The unit is constructed to provide years of reliable,
trouble-free service, and is compact so that you can take it with you
anywhere and is designed for quick and easy setup. Please read all
documentation prior to using this product. The documentation will assist
you in obtaining the best equipment performance. Save this manual for
later use.
Important Notice
Introduction
It is unlawful in most jurisdictions for a person to drive a motor vehicle
which is equipped with a television viewer or screen that is located in the
motor vehicle at any point forward of the back of the driver’s seat, or that
is visible, directly or indirectly, to the driver while operating the vehicle.
In the interest of safety, this system should never be installed where it will
be visible, directly or indirectly, by the operator of the motor vehicle.
Safety Precaution
For safety reasons, when changing video media, it is recommended that
the vehicle is not in motion, and that you do not allow children to unfasten
seat-belts to change video media or make any adjustments to the system.
Enjoy your entertainment system but always remember: safety of all
passengers remains the number one priority.
- 1 -
Page 2

Important Safety Instruction
The lightning flash with arrowhead symbol, within an equilateral triangle, is
intended to alert the user to the presence of un-insulated “dangerous
voltage” within the product’s enclosure tha t may be of sufficient magnitude
to constitute a risk of electric to persons.
The exclamation point within an equilateral triangle is intended to alert the
user to the presence of im portant operating and maintenance (servicing)
instructions in the literature acc ompanying the appliance.
CAUTION
1. To reduce the risk of electric shock, do not remove the cover ( or back). No
user-serviceable parts inside. Refer servicing to qualified service personnel.
Unplug the product from the wall outlet before servicing or when it is unused for a
long period of time.
2. T he manufacturer should not hold responsibility for th e damage caused by any
substitutions and modificat ions of the product without authorization from th e
manufacturer or authorized unit.
3. Danger of explosion if battery is incorrectly replaced. Replace only with the same
or equivalent type.
WARNING
The apparatus shall not be exposed to dripping or splashing and no objects filled wit h
liquids, such as vases, shal l be placed on the apparatus.
- 2 -
Page 3

Important Safety Instruction
NOTES
1. Read these instructions.
2. Keep these instructions.
3. Heed all warnings.
4. Follow all instructions.
5. Do not use this apparatus nea r water.
6. Clean only with dry cloth.
7. Do not block any ventilation open ings. Maintain well ventilated conditions around
the product. Do not put prod uct on bed, sofa or anything that blocks ventilat ion.
Install according to the manufactur er’s instructions.
8. Do not install near any heat sources such as radiators, heat registers, stoves or
other apparatus (including amplif iers) that produce heat.
9. Read, heed and follow all instructions to ensure correct and safe installation and
interconnection of the apparatus;
10. The apparatus shall not be exposed to dripping or splashing and that no objects
filled with liquids, such as vases, shall be placed on the apparatus;
11. The mains socket-outlet sha ll be installed near the apparatus and the mains plug
shall remain readily operable;
12. Protect the power cord f rom being walked on or pinched particularly at plugs,
convenience receptacles, and the point where they exit from the apparatus.
13. Only use attachments/acce ssories specified by the manufacturer.
14. Use only with the cart, stand, tr ipod, bracket, or table specified by the
manufacturer, or sold with the apparatus. When a cart is used, use caution when
moving the cart/apparatus combination to avoid injury from tip-over.
15. Unplug the apparatus during lightning storms or when unused for long periods of
time.
16. Refer all servicing to qualified servi ce personnel. Servicing is required when the
apparatus has been damaged in any way, such as power-supply cord or plug is
damaged, liquid has been spilled or objects have fallen into the apparatus, the
apparatus has been exposed to rain or moisture, does not op erate normally, or
has been dropped.
Note: Do not touch the color TFT LCD scree n by hand directly.
- 3 -
Page 4

Function Features
This unit incorporates analog TV a nd portable DVB-T receiver in one system.
DVB-T receiving function
DVB-T signal reception.
CATV receiving function
Can be connected to the CATV antenna for receiving CATV signal.
Radio receiving function
Receiving DVB-T radio signal via the external antenna.
EPG function
PG (Electronic Program Guide) function.
High Resolution
Provides high-resolution image.
Superior Sound
Built-in 2x1.5w stereo amplifier realizes high quality sound effects.
LCD (Liquid Crystal Display)
Designed with 7" color TFT liquid cr ystal display to provide clear picture.
Audio and Video Output
Audio and video output can be connected t o an external audio and video device.
TTX Function
Designed with teletext funct ion to provide more entertainment and information.
Channel Search Function
Auto and manual channel search function .
- 4 -
Page 5

Table Of Contents
Introduction--------------------------------------------------------------------------------------------- 1
Important Safety Instruction----------------------------------------------------------------------- 2
Function Features ------------------------------------------------------------------------------------ 4
Table of Contents--------------------------------------------------------------------------------------
Unit Introduction -------------------------------------------------------------------------------------- 6
Main Panel ---------------------------------------------------------------------------------------------- 6
Rear Panel-----------------------------------------------------------------------------------------------
Remote Control---------------------------------------------------------------------------------------- 8
Preparation of Remote Control ------------------------------------------------------------------ 10
Rechargeable Battery-------------------------------------------------------------------------------- 11
System Connections--------------------------------------------------------------------------------- 14
Power Supply Connection --------------------------------------------------------------------------- 14
Connecting to a TV -------------------------------------------------------------------------------------
Connecting to an Amplifier---------------------------------------------------------------------------- 15
Connecting to a DC Adapter ------------------------------------------------------------------------ 15
Connecting to a Headphone-------------------------------------------------------------------------
Connecting to DVB-T Antenna----------------------------------------------------------------------- 16
Connecting to External Antenna-------------------------------------------------------------------- 17
Connecting to CATV Antenna----------------------------------------------------------------------- 17
TV Setup-------------------------------------------------------------------------------------------------- 18
DVB-T Setup-------------------------------------------------------------------------------------------- 21
Preparation-----------------------------------------------------------------------------------------------
Main Menu------------------------------------------------------------------------------------------------ 21
System Setting------------------------------------------------------------------------------------------ 21
Channel Setting-----------------------------------------------------------------------------------------
Channel List---------------------------------------------------------------------------------------------- 26
Favorites List--------------------------------------------------------------------------------------------- 28
EPG--------------------------------------------------------------------------------------------------------- 29
System Info----------------------------------------------------------------------------------------------- 29
Troubleshooting--------------------------------------------------------------------------------------- 30
Specifications------------------------------------------------------------------------------------------
5
7
14
16
21
24
31
- 5 -
Page 6

Unit Introduction
Main Panel
1. STANDBY button
2. MENU/SETUP button
3. CH−/button
4. CH +/ button
5. SELECT button
6. OK button
7. Remote sensor
8. Power Indicator
9. Speakers
Press to enter or exit the standby mode.
Press to enter or exit the setup menu.
In TV or DVB-T mode, press to select ch annel.
In the menu, press to adjust the value.
In TV or DVB-T mode, press to select ch annel.
In the menu, press to adjust the value.
Press to select item in the setup menu .
In DVB-T mode, press to confirm selection in the setup menu.
IR receiver for remote control operation.
In standby mode, the light will turn off; in working status, it turns green.
Output high quality stereo sound.
- 6 -
Page 7

Unit Introduction
10. Fixing jack
Used to connect to the external antenna.
11. TV Antenna jack
Used to connect to the antenna and the connecting line of CATV.
12. DVB antenna jack
Used to connect to the DVB-T antenna.
13. LCD screen
7" color TFT LCD screen.
Left Panel
1. Headphone jack
When the headphone is plugged in, the internal speakers output will turn off
automatically.
2. Volume Control knob
Used to adjust the volume of the headpho ne and speaker.
3. Video Output Jack
Used to connect to an e xternal monitor for output video sign al.
4. Audio Output and Optical Digita l Output Jack.
Used to connect for analog or opt ical audio output.
5. TV/DVB switch
Shift the TV or DVB signal input mode.
6. DC 12V Input Jack
Used to connect the AC adapter or DC adapter.
Rear Panel
Pull the bracket, located on
the rear panel, out to be able
to put the unit in an upright positio n.
- 7 -
Page 8

Remote Control
Remote Control
1. STANDBY button
Press to access or exit standby m ode.
2. INFO
Press to display the status information, press again to cancel.
3. MENU button
In DVB mode, press to enter or exit the setup m enu.
4. Directional buttons (▲▼◄►)
Used to select different items in the menu.
5. OK button
Press to confirm the selectio n in setup menu.
- 8 -
Page 9

Remote Control
6. EXIT button
In the DVB-T mode, during setting, press to return to the previous menu.
7. 0-9 numeric buttons
Select numbers by pressing these buttons.
8. FAV button
Press to enter the favorite list, and then use the direction button to select, then
press the OK button to confirm and start pla yback.
9. CH +/- button
Press to change the channel forward or back ward.
10. PIC button
Press to switch the current picture mode between standard, memory, soft and light.
11. LCD MODE
Press to shift the aspect ratio of the screen bet ween 16:9,4:3 and turning off the
screen.
12. SUB button
In the DVB-T mode, press to select th e subtitle language.
13. TTX button
In DVB-T mode, press to displa y the teletext information, press it again to can cel the
display.
14. Setup button
In TV mode, press this button to enter the picture, TV and function setup.
In DVB-T mode, press to enter pictu re and function setup menu.
15. LANGUAGE button
In DVB-T mode, press to select the audio language.
16. AUDIO button
In DVB-T mode, press this button repeatedly to choose Left, Right, Mono, Stereo.
17. PAU SE button
In DVB-T mode, press to freeze the current image.
18. EDIT button
In TV mode, press to edit the channels.
19.
In TV mode, press this butt on and the additional number buttons to select item
numbers which are greater th an 9.
20. RADIO button
Press to enter or exit the DVB-T radio mode.
21. EPG button
In DVB-T mode, press to enter the channel schedule.
22. MUTE button
Press to turn on/off the speaker output.
23. RETURN button
Press to return to the previous chann el that you have viewed.
-/-- button
- 9 -
Page 10

Preparation of Remote Control
Preparation of remote control
•
refer to the drawing below, take out
the battery holder.
• Insert the battery with the correct
polarity facing up according to the
mark on the batter y holder.
• Close the back cover.
• The battery size is CR2025
Usage of remote control
For best results, please aim the rem ote
control directly at the unit’s remote
sensor. Please operate the remote
control within angles about 60 degrees
and distance about 5 meters withou t
obstructions between the remot e control
and the unit.
• The service life of the battery is
about six months in normal use.
Please replace the battery when
the remote control becomes le ss
sensitive.
• Please take out the battery when
the remote control is not used for a
long time, in order to avoid
damage to the remote control
caused by possible liquid leakage .
- 10 -
Page 11

Rechargeable Battery
About Rechargeable Battery Pack
Your portable DVB-T receiver ca n be connected with a lithium polymer rechargeable
battery that attaches to the bott om of the unit. Your new battery should be fully char ged
before initial use. Charging time is no rmally about 4 hours. A fully charged battery
delivers about 2.5-3 hours of use. If the battery will not be used for a long period of
time, first fully charge the battery prior to storage
Working conditions and precaut ions of the battery
• Battery should only be used an d charged when temperatures are between
32ºF and 80ºF. (0ºC - 27ºC)
• Never put the battery in fire or water.
• Do not expose the battery to high temperatures or store in hot, sunny places.
• Maintain we ll-ventilated conditions around the product, avoiding heat . Don’t
put the product on bed, sofa or anything th at may block ventilation to the
product.
• Do not open the battery.
• Never charge the battery for more than 8 hours. Detach battery immediately
after charging is complete if not being used. W hen charging the battery
pack, the light on the battery will turn red, when the charging is complete or
the battery is being used, the ligh t will turn green.
• Detach battery when not in use.
• When the battery is weak, there will be a mark displayed on the LCD screen ,
and about one minute later, the unit will power off automatically.
.
- 11 -
Page 12

Rechargeable Battery
Battery Pack Attaching and Placement
The unit’s power supply is the AC po wer adapter or the battery pack. The battery pack
can also be used as a stand.
Refer to the following steps for attaching the Battery Pack:
1. Place the unit on a soft and smooth sur face with its back cover facing up (to avoid
scratching the screen).
2. Position the Battery Pack directly toward the ba ttery slot on the back cover of the
unit.
3. Align the pins on the battery pa ck with the holes on the unit and plug them in. You
will hear a click when it’s locked into place.
After attaching the Battery Pack, place the unit LCD screen in normal position. T he
attached Battery Pack serves as a stand.
When used in a vehicle, the unit is placed into a sturdy carrying Bag/Mount. The
Bag/Mount is easy to attach to a headrest and fits on most vehicle headrest types.
This makes it convenient f or the rear seat passengers to view the scree n.
- 12 -
Page 13

Rechargeable Battery
Charging the Battery Pack
The battery must be attached to the unit to ch arge it. Plug the Power Adapter into the
unit’s DC 12V IN Jack, whi ch is located on left Side of the unit. Plug the other end of
the Power Cord into a wall Outlet.
Detaching the Battery Pack
If the unit is not going to be used for long periods of time, the Battery Pack should be
detached.
Make sure the power is turn ed off before detaching the Battery Pack. Af ter detaching
the battery pack, take care when handling the unit.
1. Place the unit on a soft and smooth s urface with its back cover up to avoid
scratching the screen.
2. Press the button located on the backside of the unit to unlock the batter y pack and
while pressing the button pull th e battery pack out from the unit.
NOTE: When attaching or detaching the battery pack, m ake sure to protect the LCD
screen.
- 13 -
Page 14

System Connections
• Before plugging the power cord int o an AC outlet, make sure that all other
connections have been made as describ ed below.
• Always ensure that the unit, T V and any other electrical components are switched
OFF before connecting to the unit.
Power Supply Connection
Connect the supplied adapter to the side of the unit in the jack marked “DC 12V IN”.
Plug the two-prong end of the po wer cord to an AC100-240V outlet. If you have
difficulty inserting the plug, turn it over and reinsert it. If the unit will not be used for a
long time, disconnect the plug from the outlet.
Connecting to a TV
Use the audio/video cable to con nect the audio/video output of the unit to the
audio/video input of the TV. Ensu re that you observe the color coding when connecting
audio and video cables.
In TV mode, it outputs an ana log audio signal; in DVB-T mode, it can output both
analog and optical digital audio si gnal.
- 14 -
Page 15

System Connections
Connecting to an Amplifier
The unit can be connected to an amplifier. Plug the A/V cable into th e audio jack on the
left side of the unit and p lug the other end into an audio input on t he amplifier. Please
refer to the equipment’s manual before connecting.
In TV mode, i t can output an analog audio signal; in DVB-T mode, it can output
both an analog as an optical digit al audio signal. It can be connected to a digital
amplifier.
Connecting to a DC Adapter
Connect one end of the specific DC a dapter to the “DC 12V IN” jack on the left panel of
the unit, and connect the other end to the c igarette lighter socket in the car as shown
below:
• The power supply of t he car is not suitable for charging the bat tery.
• Make sure the unit is not connected to the car adapter when the car is started.
- 15 -
Page 16

System Connections
Connecting a Headphone
Connect the headphone to the headphon e jack on the left side of the unit.
When headphones are connecte d, the speaker will be turned off auto matically
Connecting to DVB-T Antenna
The unit is designed with an antenna input jack. Plug the DVB-T antenna into th e jack
on the right panel of t he unit to receive TV signal, then slide the DVB /TV se lector to
DVB, As shown below:
- 16 -
Page 17

System Connections
Connecting to external antenna
Plug the provided external antenna into the TV signal input jack on the right panel of
the unit, as shown below. Then slide the DVB /TV selector (left side of unit) to TV.
Connecting to CATV antenna
Connect one end of the provided connecting line to the TV signal input jack on the right
panel of the unit, and the ot her end to the CATV cable, as shown below. Then switch
the DVB /TV selector to TV (left side of unit).
- 17 -
Page 18

TV Setup
Preparation
1. Connect the unit to the external anten na or CATV connecting cord.
2. Connect the unit to a power supply。
3. Turn on the power of the unit.
4. Switch the DVB /TV on the left panel to TV.
5. Press the TV SETUP button to enter the setup menu.
Picture Setup Menu
Press the TV SETUP button once to enter the Picture setup menu, as sho wn below:
The items in the menu are used to adjust the brightness, contrast, and color of the
screen.
Press the SELECT or button to select the desired item. Then use the or
button to adjust the value.
You can adjust the items in this menu to compensate for environ ment influences or to
setup the screen to your own preferen ce.
TV Setup Menu
Press the TV SETUP button twice to enter the TV setup menu, as shown below:
In the TV Setup menu, press the SELECT or buttons to select item.
1. System
Press the SELECT or buttons to select SYSTEM, press the buttons to select
item.
2. Channel
Press the SELECT or buttons to select CHANNEL, press the buttons to se lect
the channel number.
PICTURE
COLOR 30
BRIGHT 32
CONTRAST 30
TV SETUP
SYSTEM PAL B/G
CHANNEL 28
FINE 487.25UHF
SKIP OFF
MANUAL
AUTO OFF
- 18 -
Page 19

TV Setup
3. Fine Tuning
When reception quality is le ss than desirable, you can improve this with the fine tuning
function.
Press the SELECT or buttons to select FINE, pres s the button to start fine
tuning, when video and audio are at their best, stop the fine tun ing and the program will
be stored automatically.
4. Skip
Press the buttons to select ON, the channel will be skipped when using the CH-/+
to select channels.
5. Manual Searching
Press the SELECT or buttons to select MANUAL, press the buttons to start
searching, press the buttons ag ain to stop searching, the programs searched will
be stored automatically.
6. Auto Searching
Press the SELECT or buttons to select AUTO, press the buttons to select ON.
It will start auto searching. It will tak e a few minutes, when searching is finished, it will
exit and return to channel 1. All found program s will be placed in sequence.
Function Setup Menu
Press the TV SETUP button three times to enter the Function Setup menu, as shown
here:
In the Function setup menu, press the SELECT or buttons to select item.
1. Language
Press the SELECT or buttons to select LANGUAGE, press the buttons to
select different languages.
2. Time Of f
Press the SELECT or buttons to select TIME OFF, press the buttons to select
the time when the unit should shut itself off.
3. Default
Press the SELECT or button to select DEFAULT, press the OK button to return to
the default setting.
FUNCTION
LANGUAGE ENGL
TIME OFF _ _ _
DEFAULT
- 19 -
Page 20

TV Setup
Channel Editing
Press the EDIT button on the remote cont rol to enter the TV program edit mode. Then
the screen will display as below.
Press the buttons to select differe nt items. The selected one will be highlighted.
1. SWAP
Meant to swap the program number of a TV station with another TV station. The first
number is the current channel n umber. Use the --/- button and the 0-9 numeric buttons
to enter the target channel numbe r, and then press the directiona l buttons to swap and
exit from the menu. Then the currently playing channel will change to the target
channel automatically.
2. COPY
Meant to copy the program of the current chan nel to a target channel. Use the --/button and the 0-9 numeric buttons to en ter the target channel number, and then press
directional buttons to copy and exit from the menu. Then the currently playing channel
will change to the target channel automatically.
3. CLEAR ALL
To turn the SKIP function of all the saved channels to ON. Highlight this item and press
the directional buttons to engage. The player will go back to channel 1 after finishing.
NOTE: If the menu is not used for more than 10 seconds, th e menu will disappear
automatically.
CHANNEL EDIT
SWAP − − − −
COPY − − − −
CLEAR ALL
− −
- 20 -
Page 21

DVB-T Setup
Preparation
1. Connect the unit to the power.
2. Slide the DVB/TV sele ctor switch to DVB.
3. Press the MEN U button on the remote control to enter the DVB-T setup menu.
4. You can take the following steps to continue setup:
Main Menu
Press the MENU button, the scr een will display the following:
System Setting
Press the directional buttons to sel ect System Settings. Press the OK button to
enter the submenu, screen will display a s below:
In the main menu, press the
directional buttons to
select the item you want to set
up. Press the OK button to
select the item. Press the
MENU or EXIT button to exit
In the menu, press the
buttons to select the item
you want to configure, press
the OK butt on to select the
item. Press the MENU or EXIT
button to return to the previous
menu.
- 21 -
Page 22
DVB-T Setup
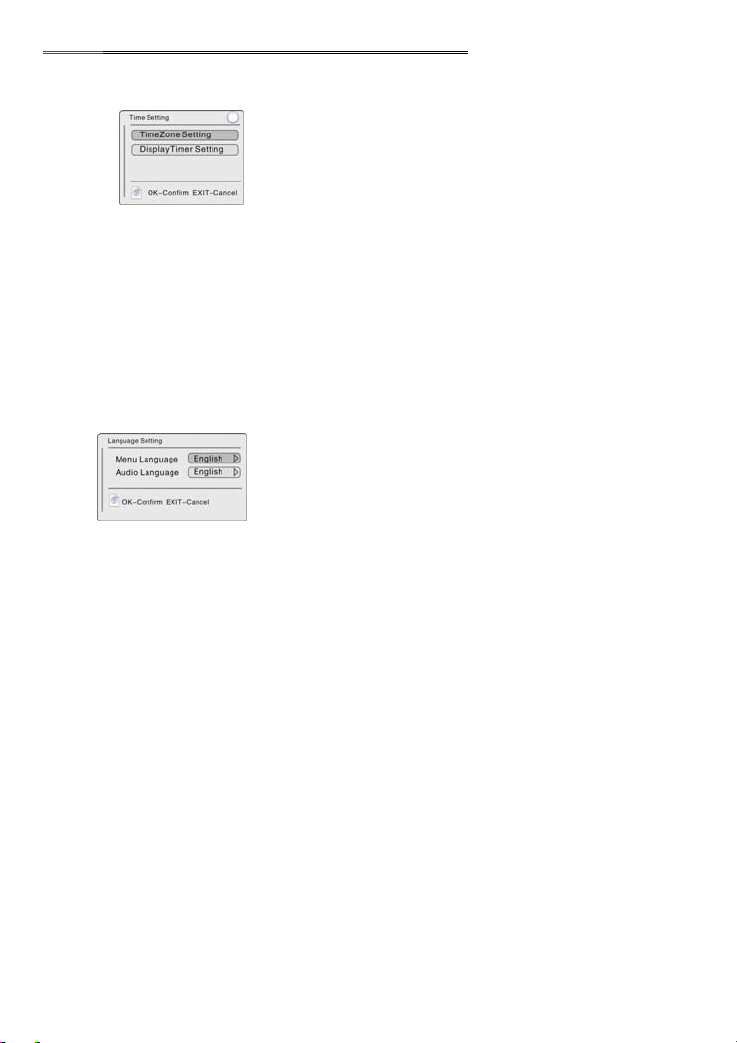
Time Setting
Press the buttons to select Time S etting , press the OK button to enter, the screen
will display as below:
1. TimeZone Setting
Press the buttons to select the TimeZone Settin g, press the OK button to enter the
TimerZone Setting menu, then press the button to enter the item, pr ess the
buttons to select GMT+(0~11), GMT-(1~12), then press the OK button to confirm
selection and return. Press the EXIT button to return.
2. DisplayTimer Setting
Press the buttons to select the DisplayTimer Setting, press the OK button to enter
the DisplayTimer Setting menu, then press the button to enter t he item, press the
buttons to select different Display times, then press the OK button to confirm
selection and return. During setting, press the EXIT button to return.
Language Setting
Here you can set the menu or audio language .
Press the buttons to select Language Setting, press the OK button to enter t he
Language Setting menu, the screen wi ll display as below:
1. Menu Language
Select Menu Language, press the button to enter the item, and then press the
buttons to select different menu language, th en press the OK button to confirm
selection and return. Press the EXIT button to return.
2. Audio Language
Select Audio Language, press the button to enter the it em, and then press the
buttons to select different audio lan guages, then press the OK button to confirm
selection and return. Press the EXIT button to return.
There are three items for
setting: TimeZone Setting, and
DisplayTimer Setting. Press the
buttons to select item,
press the OK button to enter,
press the Exit button to return.
In the menu, press the
buttons to select Menu or
Audio. Press the EXIT button to
return.
- 22 -
Page 23
DVB-T Setup
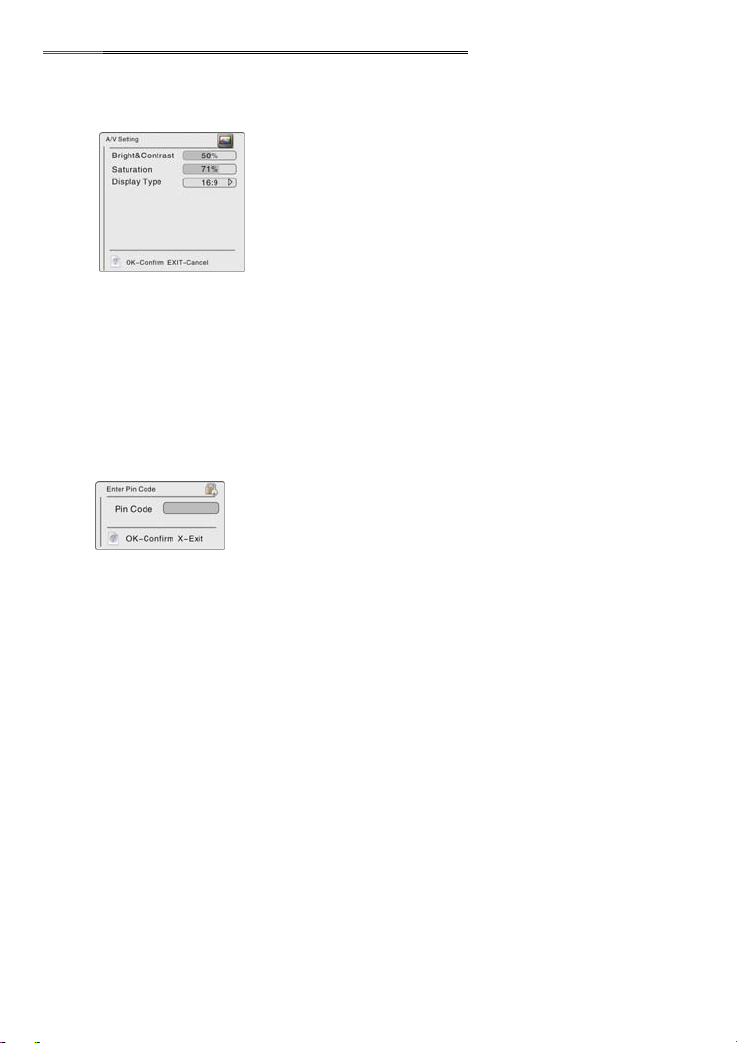
A/V Setting
This item is used to change the audio an d video settings.
Press the buttons to select A/V Setting , press the OK button to enter, the screen
will display as below:
1. Brightness&Contrast
Select Bright&Contrast, press the buttons to adjust the value.
2. Saturation
Select Saturation, press th e buttons to adjust the value.
3. Display Type
Select Dis play Type, press the to enter, then press the buttons to select 4:3 or
16:9. Press the button to return.
Advanced Setting
Press the buttons to select Advance Setting, press the OK button to enter the
submenu, the screen will display as bel ow:
In the menu, press the
buttons to select items,
press the buttons to
adjust the values. Press the
EXIT button to return.
In the menu, use the numeric
buttons to enter the pin code,
press the OK button to
confirm.
The default code is:888888
- 23 -
Page 24
DVB-T Setup
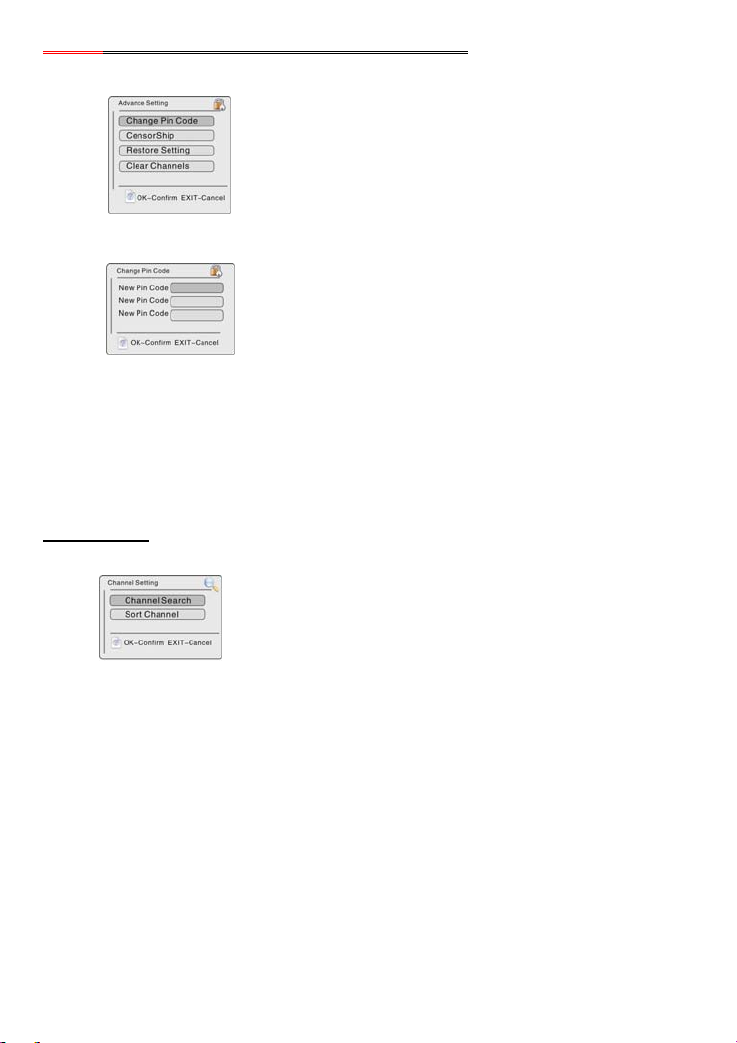
When you have entered the PIN code, press the OK button to enter the menu shown
below:
1. Change Pin Code
In the menu, press the buttons to select Change Pin Code, press the OK button to
e
nter the menu shown below:
2. CensorShip
Press the buttons to select CensorShip, press the OK button to enter the setup
menu, then press the button to enter, press the buttons to select items, press the
ENTER button to confirm select ion.
3. Restore Setting
Press the buttons to select Restore Setting, press the OK button to return to the
default settings.
4. Clear Channels
Press the buttons to select Clear Channels, press the OK button to clear all the
channels.
Channel Setting
Select Channel Setting, press the OK button to confirm and enter the channel setting
menu, as shown below:
In the menu, press the
buttons to select item.
Press the EXIT button to
return.
In the menu, enter the pin
code according to the
indication. Press the EXIT
button to return.
In the channel setting menu,
press the directional
buttons to select the item you
want to set up, press the OK
button to enter the item.
Press the EXIT button to
return to the previous menu.
- 24 -
Page 25

DVB-T Setup
Channel Search
Use the directional buttons to select Channel Search, press the OK button to
confirm, the screen will displa y as below:
1. Search Type
Select Search Type, press the button to enter, then press the direct ional buttons
to select Auto Search, Manual Search or Scan By NIT. Press the EXIT or button to
return.
2. Channel No.
Select Channel No., use the number butto ns to input the channel No., press the EDIT
button to enter the character or numb er list, in the list, press the direction buttons to
select character or number, press the OK button to confir m input, press the EXIT button
to return.
3. TPS
Select TPS, use the numeric buttons to input, press the button to delete the input,
press the EDIT button to enter the character or numbe r list, in the list, press the
directional buttons to select ch aracter or number, press the OK button to confirm input,
press the EXIT button to return.
4. BandWidth
Select BandWidth, press the button to ente r, then press the directional buttons
to select item, press the EXIT or button to return.
5. Encrypted Service
Select Encrypted Service, press the button to enter, and then press t he
directional buttons to select Save or No Save, press the EXIT or button to retu rn.
6. Update Mode
Select Update Mode, press the button to enter, and then press the directional
buttons to select
After setting these items, use the directional buttons to highlight Star t Sear ch, and
press the OK button to start searching. During searching, press the MENU or EXIT
button to stop searching.
Append or New, press the EXIT or button to return.
In the channel search menu,
press the directional
buttons to select the item you
want to set up, press the
button to enter the submenu.
Press the EXIT button to
return to the previous menu.
- 25 -
Page 26

DVB-T Setup
Sort Channel
Select Sort Channel, press the button to enter, the screen wi ll display as below:
This setting is used to sort channels from A-Z or from Z-A or to encrypt the selected
channel.
Channel List
Select the Channel List, press the OK button to confirm and enter, the screen will
display as below:
The first time you use this menu, you should add some programs into the channel list.
Press the OK button to start playback, press numer ic button 1 to select TV or Radio,
press the (right) button to display the menu.
Add Channel
Select a number, and press the button to enter, press the OK button, the screen will
display as below:
In the menu, press the
directional buttons to
select the desired item, press
the OK button to confirm.
Press the EXIT button to
return to the previous menu.
- 26 -
Page 27

DVB-T Setup
Press the directional or numer ic buttons to select the desired item, press the button
to enter. Press the button to delete the input. Press the EDIT button to enter the
character or number list. In this list, press th e directional buttons to select a character
or a number, press the OK button to confirm input. Press the EXIT button to return.
Repeat the above procedure to se t different programs. In the channel list, the set
program will be displayed with the nam e and Index number. There are a few more
options you can use with every progr am: Select the program and press the button to
enter, and then use the button to select Add, Modify, Delete, Lock/Unlock or move.
See the picture below:
Select Add to add new programs into the list. Follow the procedure mentioned abo ve to
add programs.
Select Mod ify to modify the information of th e program. Use the to select Mo dify
and press the ENTER button to enter the below menu:
Press the directional or numer ic buttons to select the desired item, press the button
to enter. Press the button to delete the input. Press the EDIT button to enter the
character or number list. In this list, press th e directional buttons to select a character
or a number, press the OK button to confirm input. Press the EXIT button to return.
Select Move to change the place of this channel in the list. Press the button to
select Move and press the ENTER button to enter, screen will display: ,
press the button to delete input , use the numberic buttons to enter the channel index.
- 27 -
Comment: Please put the translation
for these items behind the English.
Page 28

DVB-T Setup
Then press the ENTER button to confirm and the prog ram will be moved to the
selected index number.
Select Delete to delete the program. Press the button to select Delete, the screen
will display a menu, according to the indication on the menu, press the ENTER button
to confirm and delete th e program; press the EXIT button to cancel and retur n.
Press the button to select Lock/Unlock to lock or unlo ck the program, according to
the indication on the menu, you should enter the pin code.
Favorites List
Select the Favorites List, press the button to enter, the screen will display as below:
Add Favorite
Press the button to enter, press the OK button, the screen will display as below:
During initial setting, you shou ld set the channel list at first. Then you can select
channels from the channel list, and add the channel into the favorites list. You can also
delete the channel from the favorites list.
Press the directional butto n to enter, and then use the directional buttons to
select channels, press the OK button to add, press the EXIT button to return.
In the menu, press numberic
button 1 to select the favorite
group, press the
directional buttons to select a
channel, press the OK button
to confirm. Press the EXIT
button to return to the
previous menu.
- 28 -
Page 29

DVB-T Setup
EPG (Electronic Program Guide)
Select EPG, press the OK button to enter, the screen will display as below:
Use the Booking function to rece ive a reminder when a program in this list is about to
start:
Use the button to select channel, and the but tons to select the program.
Press the OK button to add the program to t he booking list. Then press the EXIT button
to return.
System Info
Select System Info, press the OK button to enter, the screen will display as belo w:
In the menu, press the
directional buttons to
select the item, press the OK
button to enter. Press the
EXIT button to return to the
previous menu.
- 29 -
Page 30

Troubleshooting
Problem How To Check
There is no sound.
There is no picture.
The remote control does not
work.
Other possibilities:
Static or other external inte rference may cause the unit to function abn ormally. Unplug
the power-supply cord from th e outlet and plug it in again to reset the unit so that
normal operation can resume. If you are still having problems, then disconnect the
power to the unit and consult a qualif ied technician.
• Make sure the system connection is correct .
• If headphones are plugged in, unplug them.
• Make sure your system connection is correct.
• Make sure the DVB-T antenna is connected.
• Make sure the unit is turned on.
• Make sure there is no obstruction between the
remote control and the unit.
• Make sure you are pointing the remote control
towards the unit.
• Make sure battery is inserted correctly (check
polarity).
• Replace weak battery.
- 30 -
Page 31

Specifications
TFT screen size 7 inches
TV System PAL
Frequency Response (DVB-T) 20Hz〜20kHz ±2.5dB
Audio Out (DVB-T) Analog Audio Out
Video Out (DVB-T) Video Out
Power AC100-240V〜50/60Hz
Power Consumption <15W
Dimension
Weight(Without Battery) About 0.53 Kg
DESIGN AND SPECIFICATION S ARE SUBJECT TO CHANGE WITHOUT NOTICE
200mmX154mmX41mm
Output Level: 1.5V±
Output Level:1V
Unbalanced Negative
0.2
, Load: 10KΩ
1.0
±0.2, Load: 75Ω
P-P
- 31 -
 Loading...