

LENCO DVD-249 Owner's Manual
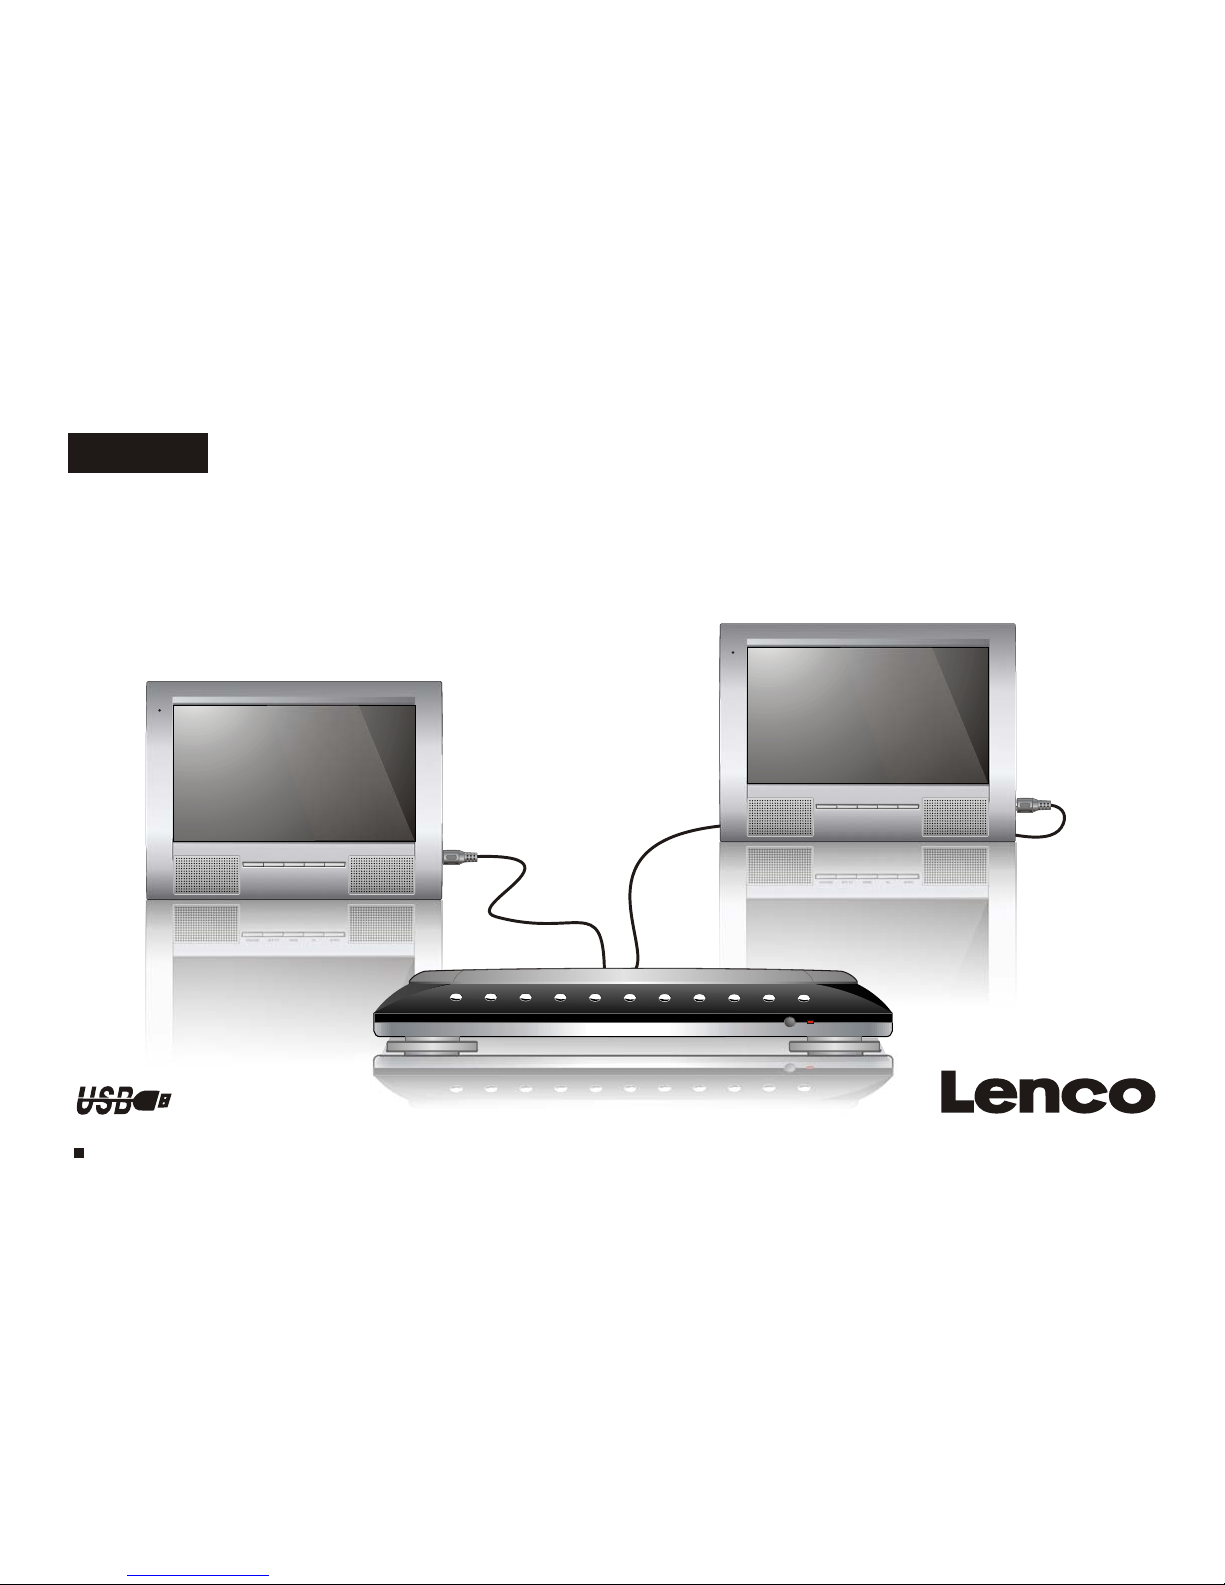
DUAL SCREENS PORTABLE DVD PLAYER
WITH BVBT-TV
DUAL SCREENS PORTABLE DVD PLAYER
WITH BVBT-TV
ENGLISH
OWNER`S MANUAL
DUAL SCREENS PORTABLE DVD PLAYER
WITH BVBT-TV
DUAL SCREENS PORTABLE DVD PLAYER
WITH BVBT-TV
REVERSE 16:9 / 4:3 MODE UP DOWN
REVERSE 16:9 / 4:3 MODE UP DOWN
UNIVERSAL SERIAL BUS
Please read this manual before operating
MODEL NO.: DVD-249


Table of Contents
~ 1 ~
Table of Contents.....................................................................................................................................................................1
Safety Information...................................................................................................................................................................2
Remote Control.....................................................................................................................................................................3-4
Description of the Player..........................................................................................................................................................5
Using the Remote Control........................................................................................................................................................6
Connecting the LCD Screens...................................................................................................................................................7
Using the AC Adaptor...............................................................................................................................................................8
Connecting DIGITAL-TV Antenna............................................................................................................................................9
Using USB Port......................................................................................................................................................................10
Watching DIGITAL TV.........................................................................................................................................................11-12
Listening to Digital Radio.......................................................................................................................................................13
Setting Up Favorite Program List, Changing Program Order, Deleting Program .....................................................................14
Scanning and Setting TV Channel..........................................................................................................................................15
Setting Channel Lock, Parental Control, Changing Password................................................................................................16
Setting Country, Language, GMT , Time Zone, Program Scheduling...................................................................................17-18
Playing a Disc....................................................................................................................................................................19-21
Playing MP3 and Regular Audio CD........................................................................................................................................22
Playing Picture CD.................................................................................................................................................................23
Displaying and Sorting Files..................................................................................................................................................24
Setting Language for Menu, Audio, Subtitle...........................................................................................................................25
Setting Audio for Downmix....................................................................................................................................................26
Setting Parental Control, Change Password, Camera Angle...................................................................................................27
Setting Language for OSD.....................................................................................................................................................28
Setting Display for TV System, Display Type..........................................................................................................................29
Setting Display for Default.....................................................................................................................................................30
Playing Games for Mine, Tetris, Rush Hour.............................................................................................................................31
Display Calendar....................................................................................................................................................................32
Troubleshooting...............................................................................................................................................................33-34
Specifications.......................................................................................................................................................................35
Safety Information
CLASS 1 LASER PRODUCT / KLASSE 1 LASER PRODUKT / LUOKAN 1 LASER LAITE / KLASS 1 LASER APPARAT / PRODUCTO
LASER CLASE.
INVISIBLE LASER RADIATION WHEN OPEN AND INTERLOCKS DEFEATED. AVOID EXPOSURE TO BEAM.
1.To prevent fire or electrical shock, do not expose this Player to rain or moisture.
2.To avoid electrical shock, do not open the cabinet, no user-serviceable parts inside, refer servicing to qualified personnel only.
3.Listening with earphones for many hours at maximum volume may damage your hearing.
4.The Player should be connected to a power supply only of the type described in the operating instructions or as marked on the Player.
Please read all of the safety and operating instructions before operating this Player, follow all warnings placed on the Player
and in the user's manual. These safety and operating instructions should be retained for future reference.
WARNING
SAFETY WARNING
Safety Information
Do not expose the system to excessive moisture, rain, sand, or heat sources.
Place the DVD Player on a firm, flat surface.
Keep the DVD Player away from domestic heating equipment and direct sunlight.
When placing the DVD Player in a cabinet, allow about one inch of space all around the DVD Player for ventilation.
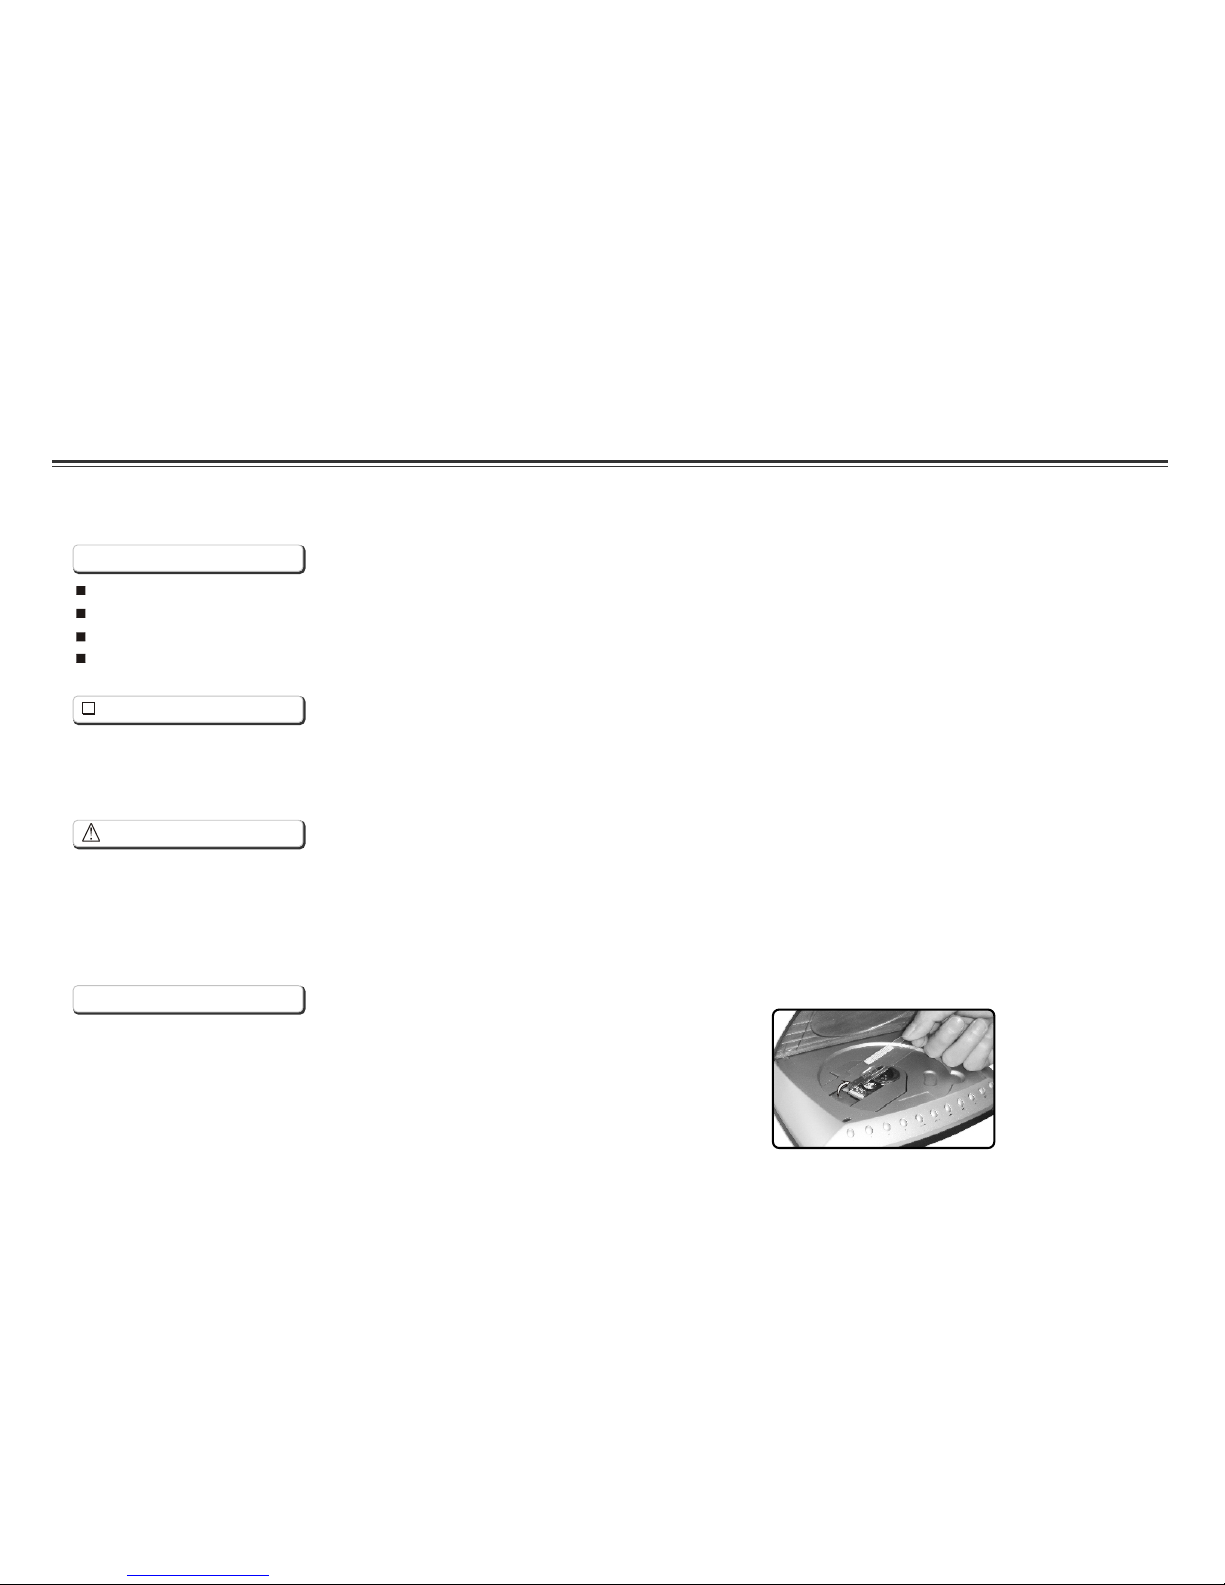
Attention:
Remove the protection card inside the disc compartment before using this Player.
~ 2 ~
~ 3 ~
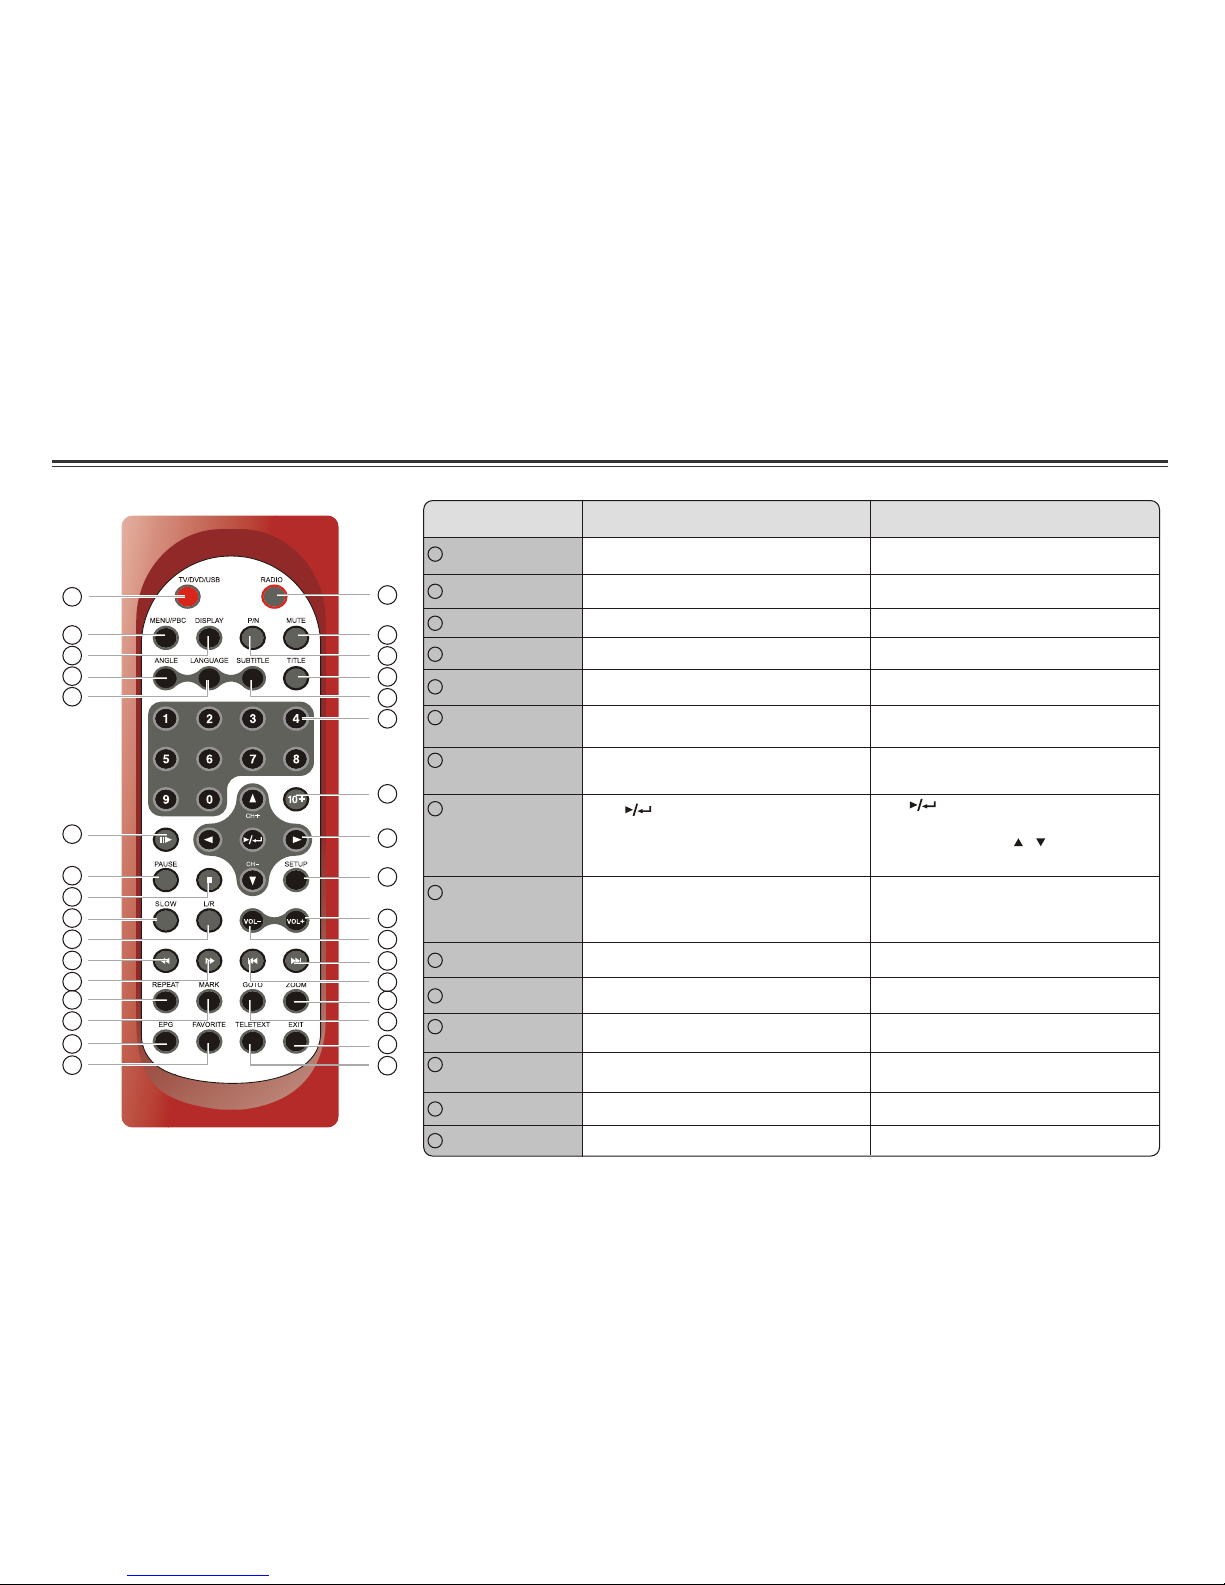
Remote Control
Name
1
In DVD /USB Mode In TV Mode
2
3
TITLE Button
Display title menu if it exists in the disc.
4
SUBTITLE Button
Selects the subtitle's language.
5
Number Buttons
(0,1,...,9)
Selects or enters title, charter or track
number.
6
10+ Button
Uses to input 10 to 999 (combining this
button and other digit number buttons).
7
(PLAY/ENTER)/
DIRECTION
Buttons
Use to start play or to activate (or
change) a particular item.
Use direction button to selects different
options.
8
SETUP Button
Brings up the Main Menu to set up the
system's language, audio, display,
password etc.
9
VOL+ Button
Use to increase the speaker's volume.
10
VOL- Button
Use to decrease the speaker's volume.
11
13
Changes channel ( , ) or selects
different options.
14
15
Enters numbers for program, date,
time, etc.
Brings up the Main Menu for editing
program, setting up system, OSD/audio
language etc.
No function.
Use to increase the speaker's volume.
Use to decrease the speaker's volume.
No function.
Selects the subtitle's language.
Use to activate (or change) a
particular item.
P/N Button
Selects PAL/NTSC/AUTO TV systems. Selects PAL/NTSC/AUTO TV systems
SKIP FORWARD
Button
Use to skip to next title, chapter or
track.
No function.
SKIP BACKWARD
Button
Use to skip to previous title,chapter
or track.
No function.
12
ZOOM Button
Zoom in and out of videos and photos. No function.
GOTO Button Use to enter the specific time to playback. No function.
2
3
4
5
6
7
8
9
10
11
12
19
20
21
22
23
24
25
26
27
28
18
13
29
1
14
30
15
31
16
32
17
33
RADIO Button
No function.
Switche to radio mode.
MUTE Button
Silences the sound.
Silences the sound.
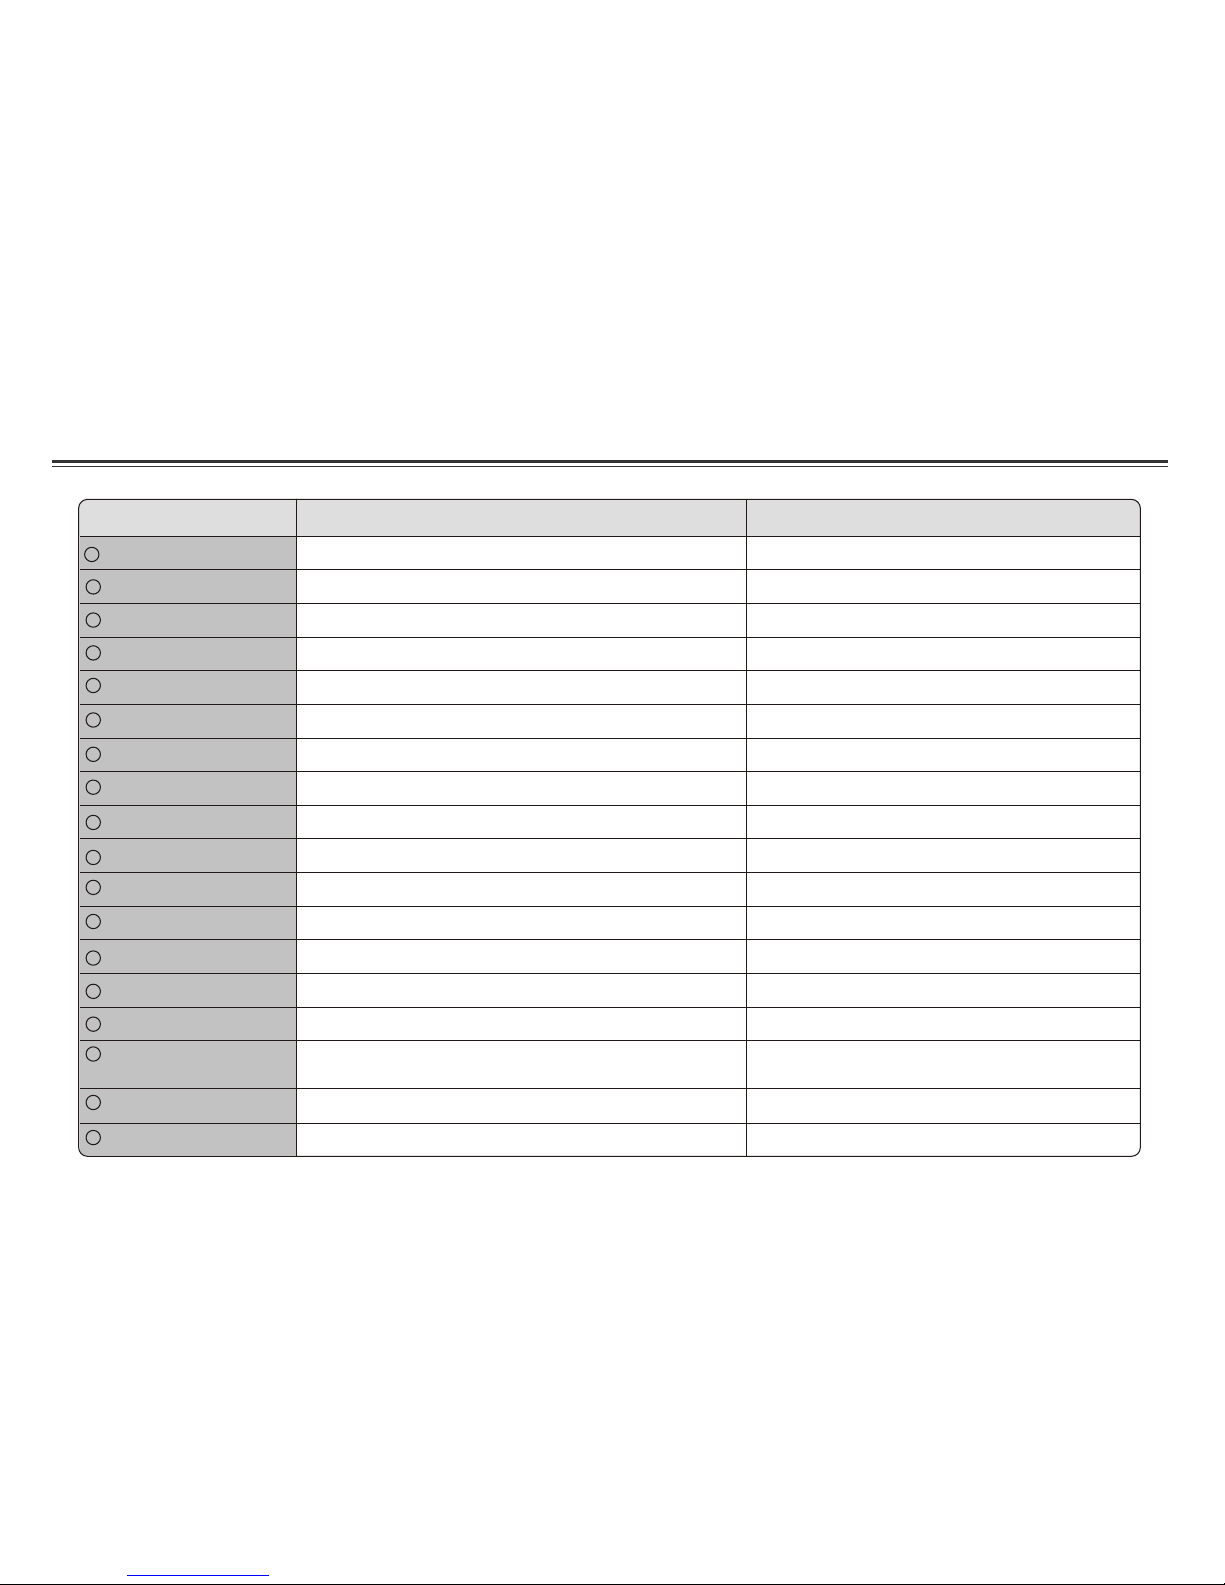
Remote Control
~ 4 ~
TELETEXT Button
No function.
17
EXIT Button
No function.
16
18
DISPLAY Button
19
20
21
LANGUAGE Button
22
23
24
STOP Button
25
Accesses teletext function.
Exit the setup
Name In DVD /USB Mode In TV Mode
Displays the current disc playback information.
Displays the current program information.
Selects the voice language in a DVD. Selects OSD language.
Stops the playback.
No function.
26
27
EPG Button
FAVORITE Button
29
30
31
32
33
No function.
No function.
Accesses favorite TV/radio station.
Displays Electronic Program Guide.
No function.
No function.
No function.
No function.
MENU/PBC Button
Brings up the disc menu.
No function.
ANGLE Button
Use to access various camera angles on a DVD.
No function.
STEP Button
Plays frame-by-frame.
No function.
PAUSE Button
Use to pause.
Use to freeze the screen display.
28
Plays backward at various fast speeds.
FAST REVERSE Button
FAST FORWARD Button
Plays at various fast speeds.
MARK Button
TV/DVD/USB Button
Switches between TV , DVD or USB mode. Switches between TV , DVD or USB mode.
L/R button
Selects left and right speaker output.
No function.
SLOW Button
Plays the video at lower speeds.
REPEAT Button
Allows you to repeat play a title, chapter, track, or disc.
Use to mark a point where the playback starts each time when
the MARK button is pressed later on.
Selects left and right audio channel of the program.
P
O
W
RE
O
N
O
F
F
OUT1 OUT 2
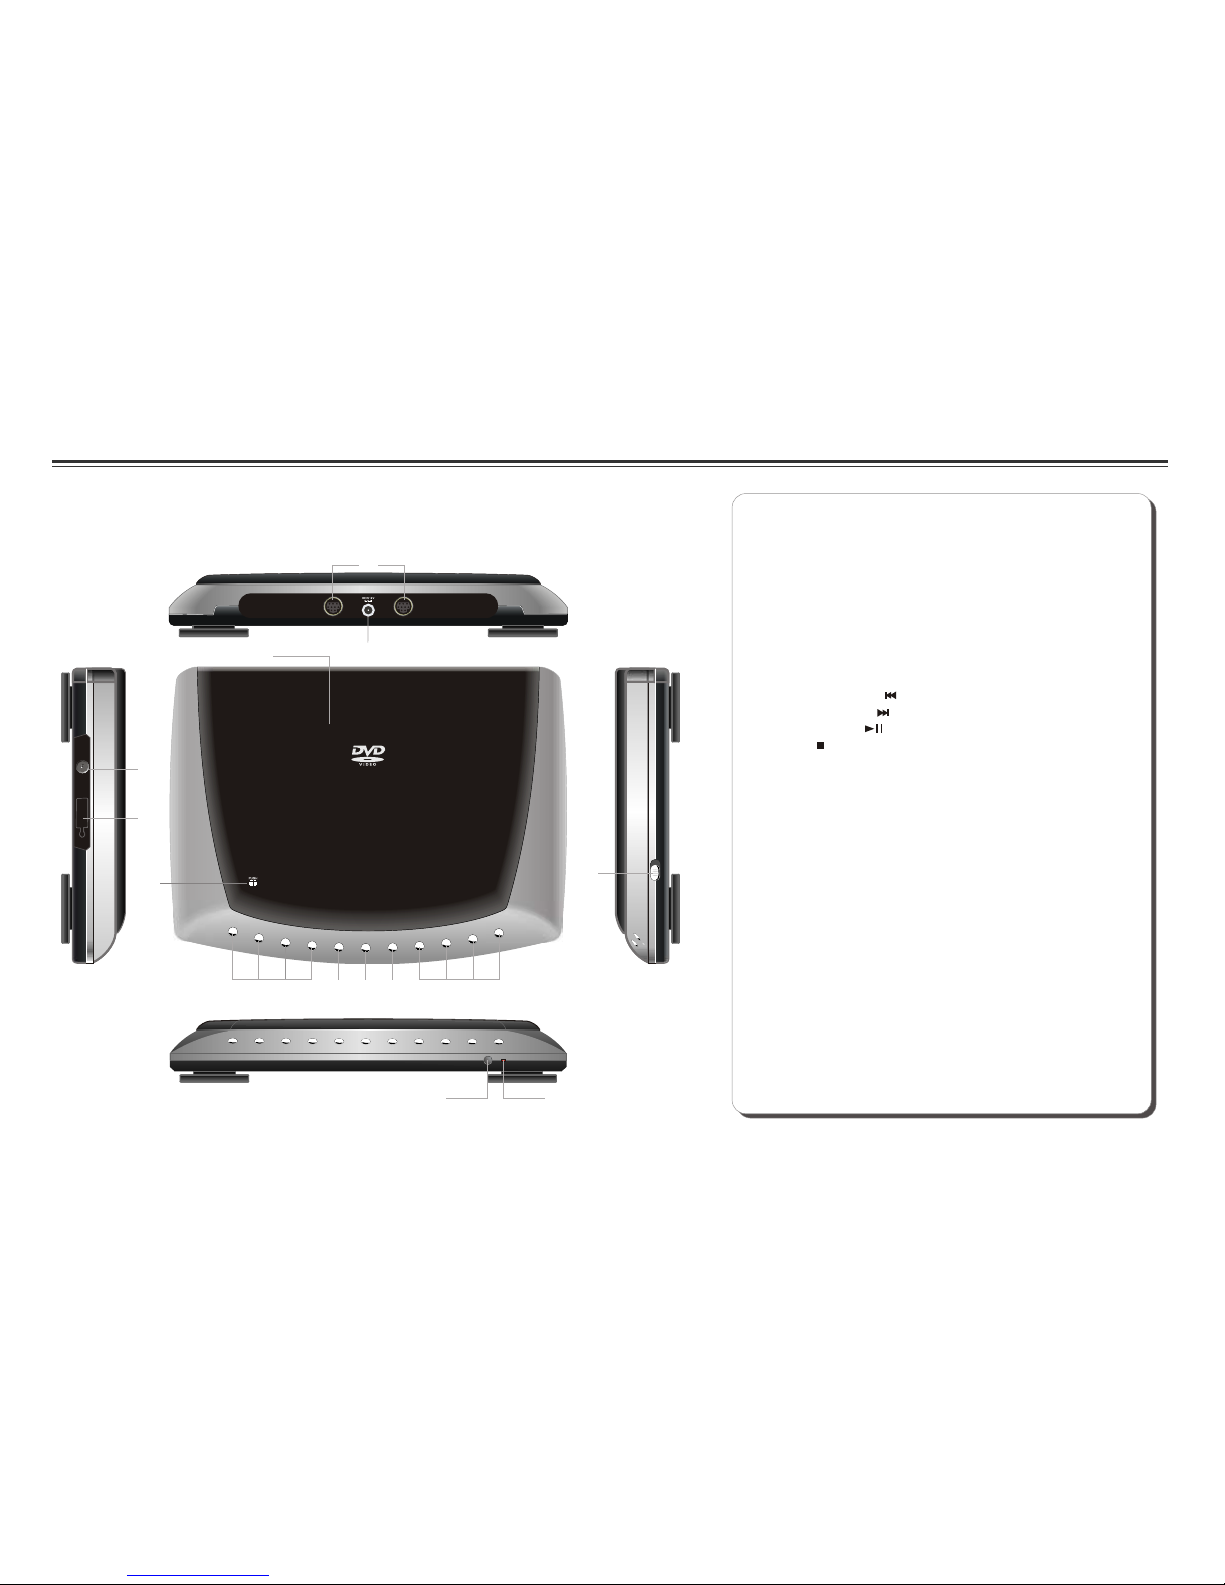
1
1.OUT1/OUT2 jack
2.DC IN 12 V jack
3.DISC COVER
4.DIRECTION button ( up / down / left / right )
5.ENTER button
6.MENU button
7. TV/DVD/USB button
8.PLAY BUTTONS
SKIP BACKWARD ( ) / CH+
SKIP FORWARD ( ) / CH-
PLAY / PAUSE ( )
STOP ( )
9.POWER ON/OFF
TV Antenna Socket
12.OPEN button
13.REMOTE CONTROL SENSOR
14.LED LIGHT
10.
11.USB slot
Description of the Player
~ 5 ~
2
4
3
5
6
8
9
13 14
USB
ANTENNA
10
11
7
12
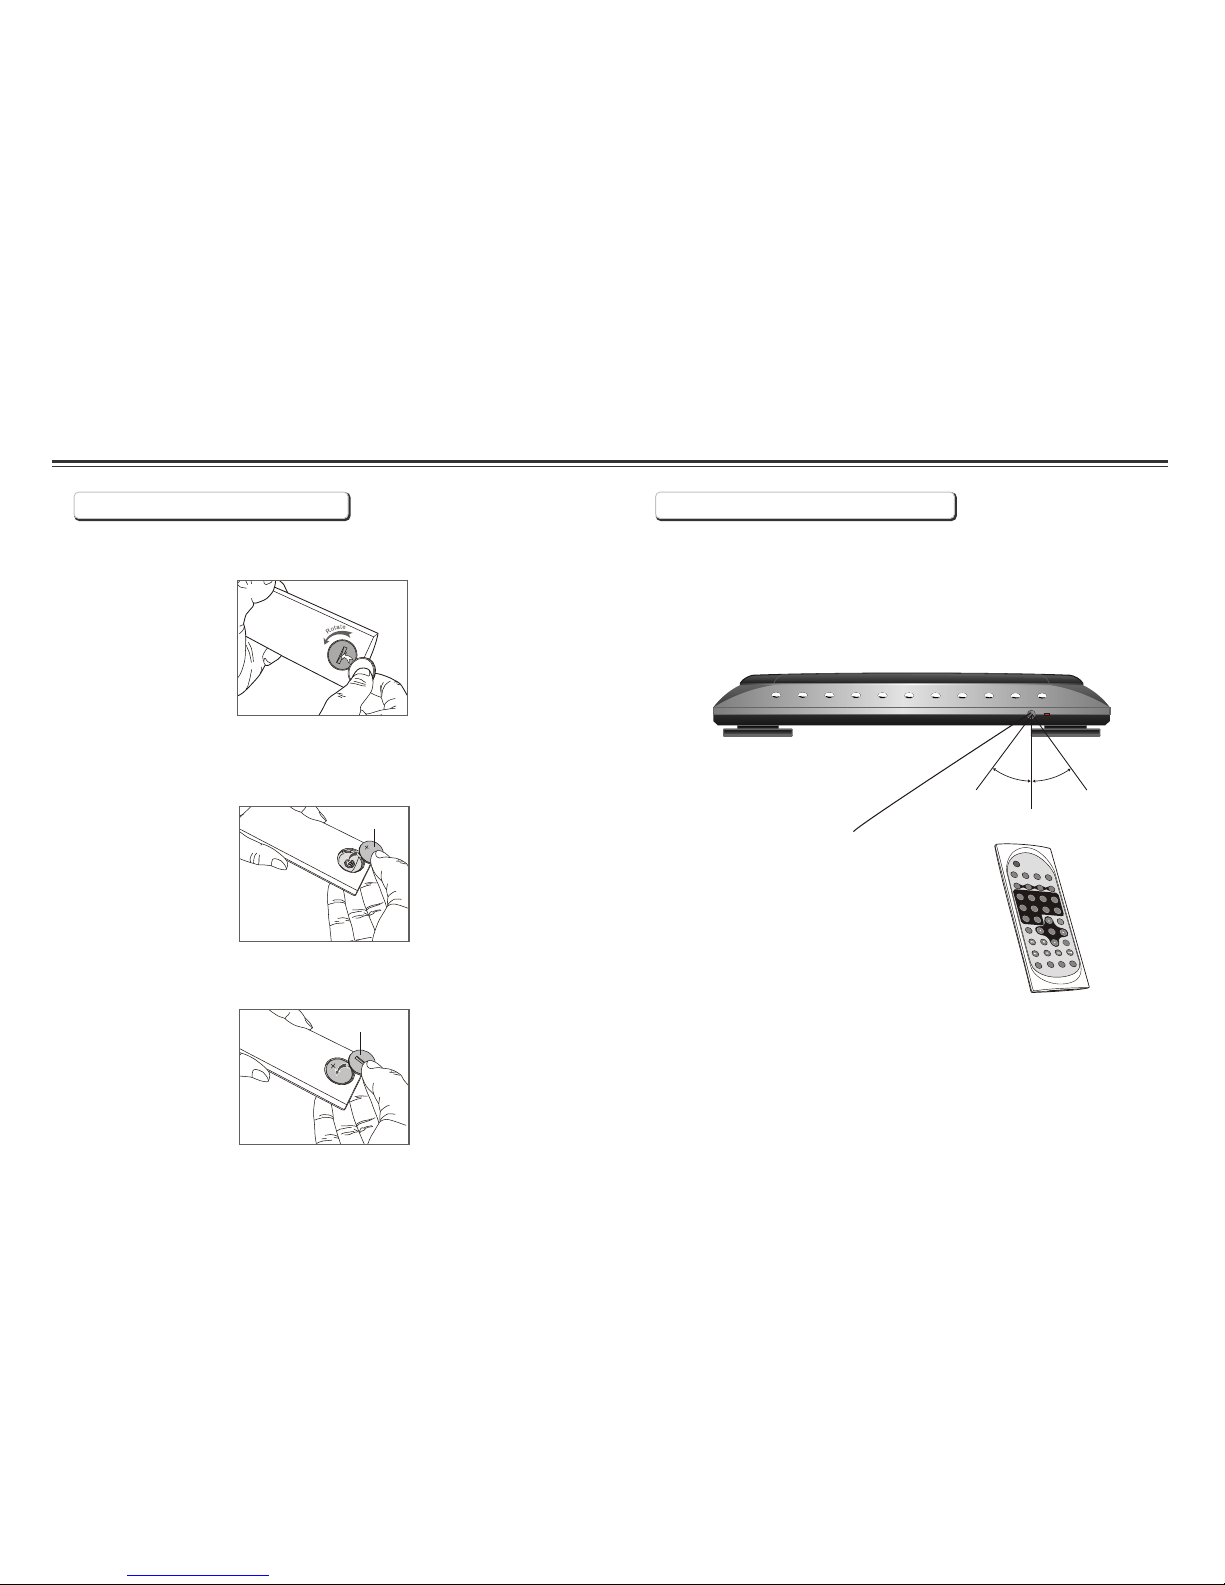
Using the Remote Control
Installing the battery Using the remote control
Point the remote control directly at the remote sensor
on the front of the DVD Player.
Remote Control Sensor
O
30
O
30
2m(6.5ft)
~ 6 ~
P/
N
TITL
E
DI
SP
LAY
AN
GL
E
LANGUA
GE
SU
BTITLE
M
UT
E
L/
R
1
2
3
4
5
6
7
8
SE
TUP
EN
TE
R
SL
OW
ZO
OM
REPE
AT
M
AR
K
GO
TO
M
EN
U/
PBC
9
0
1
0
+
REMOTE
CONTRO
L
1. Open the battery compartment cover using a coin.
3. Replace the battery compartment cover and turn clockwise
until it stops.
2. Insert a 3V lithium battery into the battery compartment with
the polarity ( + ) facing up as marked.
Battery
battery compartment
cover
OUT1 OUT 2
ON OFF
POWER
VOL
DC .AV INPUT
ON OFF
POWER
VOL
DC .AV INPUT
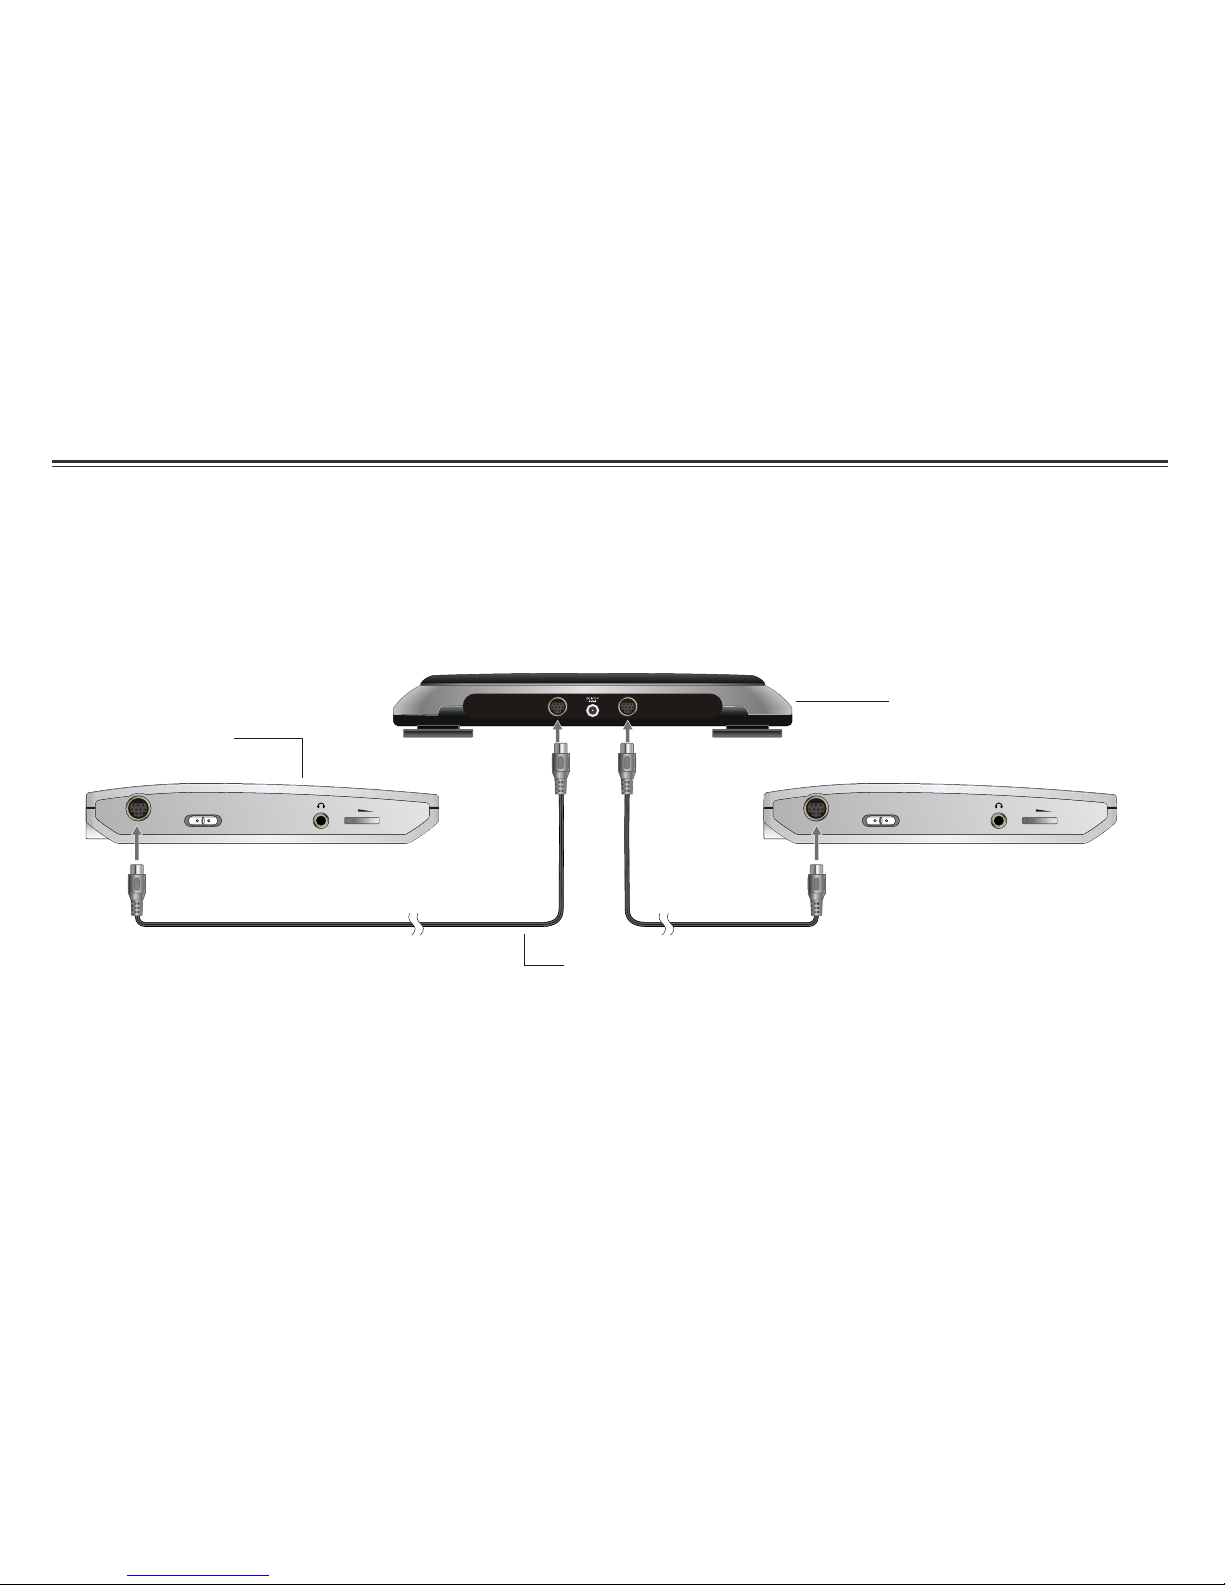
Connecting the LCD Screens
The power for the two screens is provided by the DVD player through the provided cables which also serve to provide the audio/video
signal from the player to the screens. Follow these steps to make the connections.
1. Connect one end of the Power/AV cable (mini DIN) to the OUT1 on the player and the other end to the DC. AV INPUT on the screen.
2. Repeat step 1 for the other screen.
DVD Player
LCD Screen
~ 7 ~
Power/AV Cable
Warning!
1. Do not turn on the DVD player power until the connection of Power/AV cable between the Player and the screen is done.
2. Always turn off the DVD player power before disconnecting the Power/AV cable between the Player and the screen.
OUT1 OUT 2
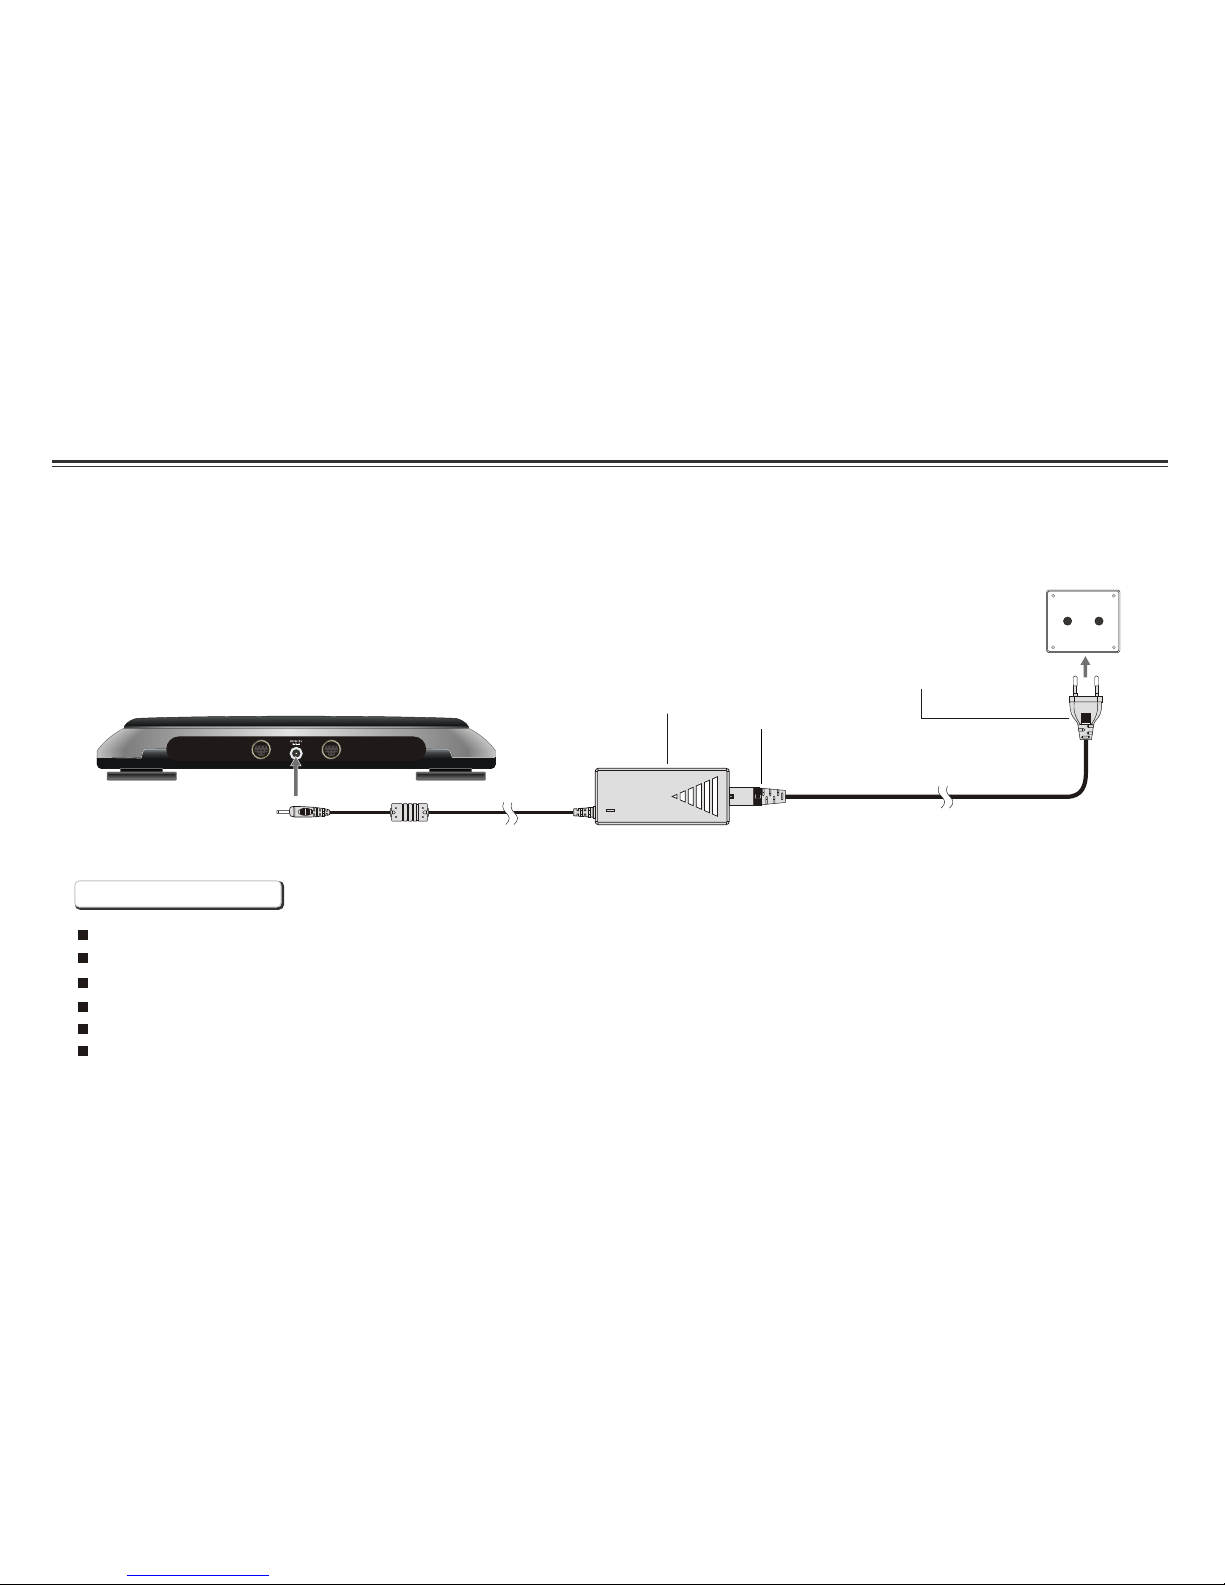
Using the AC Adaptor
AC adaptor
To home power outlet
Power cord
Important !
Always turn off the DVD Player before connecting or disconnecting the AC cord.
. Using a different type of adaptor may cause malfunction or damage to the product.Only use the AC adaptor supplied with this player
When the AC adaptor is used for prolonged period of time, the adaptor may heat up, this is normal and is not a cause for concern.
When not using the adaptor, unplug it from the outlet.
Do not use the AC adaptor if damaged. And do not try to disassemble or repair this adaptor.
Do not use this AC adaptor for other products.
To DC12V IN on the DVD player
This portable DVD player is powered by AC through the supplied switching power AC adaptor.
For in-car use, this Player is powered by car battery through the supplied car(DC) adaptor.
~ 8 ~
USB
ANTENNA
~ 9 ~
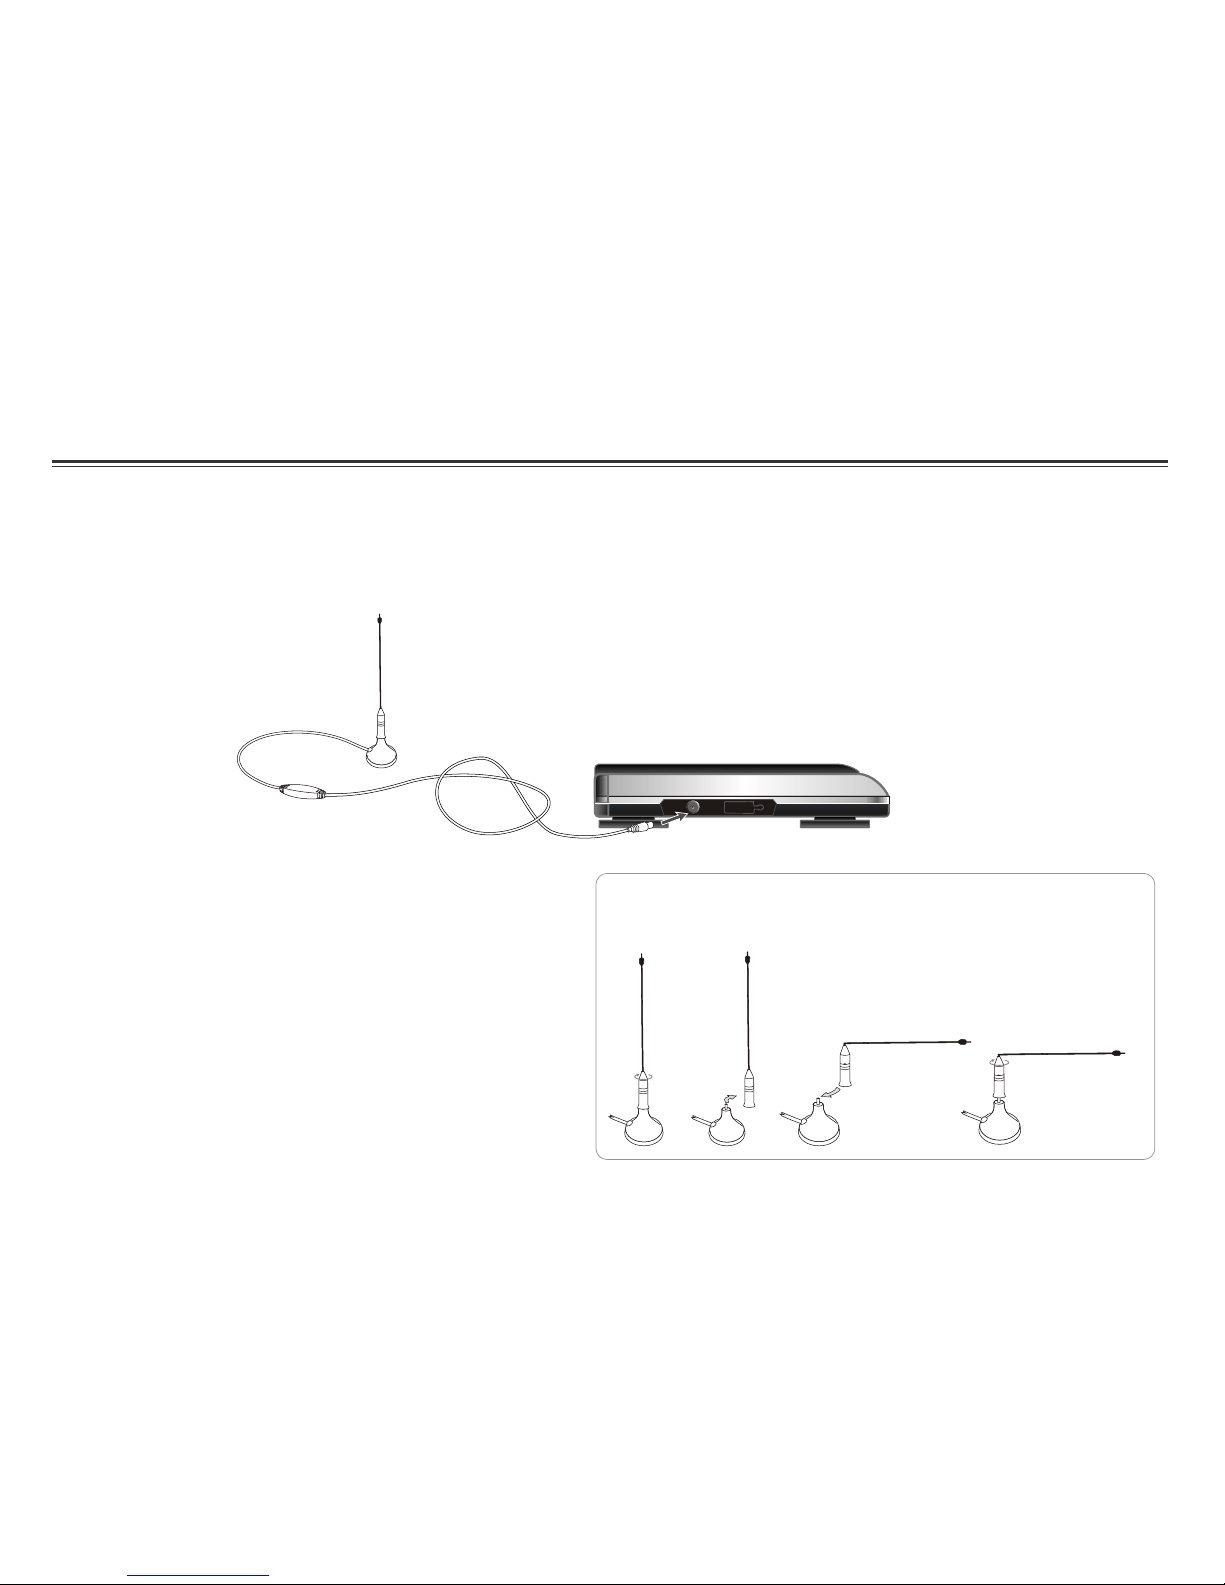
To receive digital TV and radio, you need to connect an antenna to the player. Follow these steps:
1.Plug the antenna cable into the antenna socket on the Player.
2.Place the antenna on any surface.
3.The antenna has a magnetic base which can be attached to any metal surface.
2 3
Suggestions to Improve TV Reception
Two antenna poles are included for vertical and horizontal placement. When
placing the antenna on a vertical surface, a 90 degree-bend antenna maybe
used. To change, simply unscrew the pole from the base and replace with the
other pole.
41
Connecting DIGITAL-TV Antenna
You will significantly improve your TV reception by following
these tips
1.Place the antenna near the windows.
2.Place the antenna on a metal surface especially of large
surface such as metal chair, table, cooking pot, coat rack,
radiator etc.
3.Orient the antenna in different direction until a best reception
is obtained.
Note:
This Players uses active(powered) antenna, the amplifier
provides an increased signal level compared to passive (no
power) antenna.
~ 10 ~
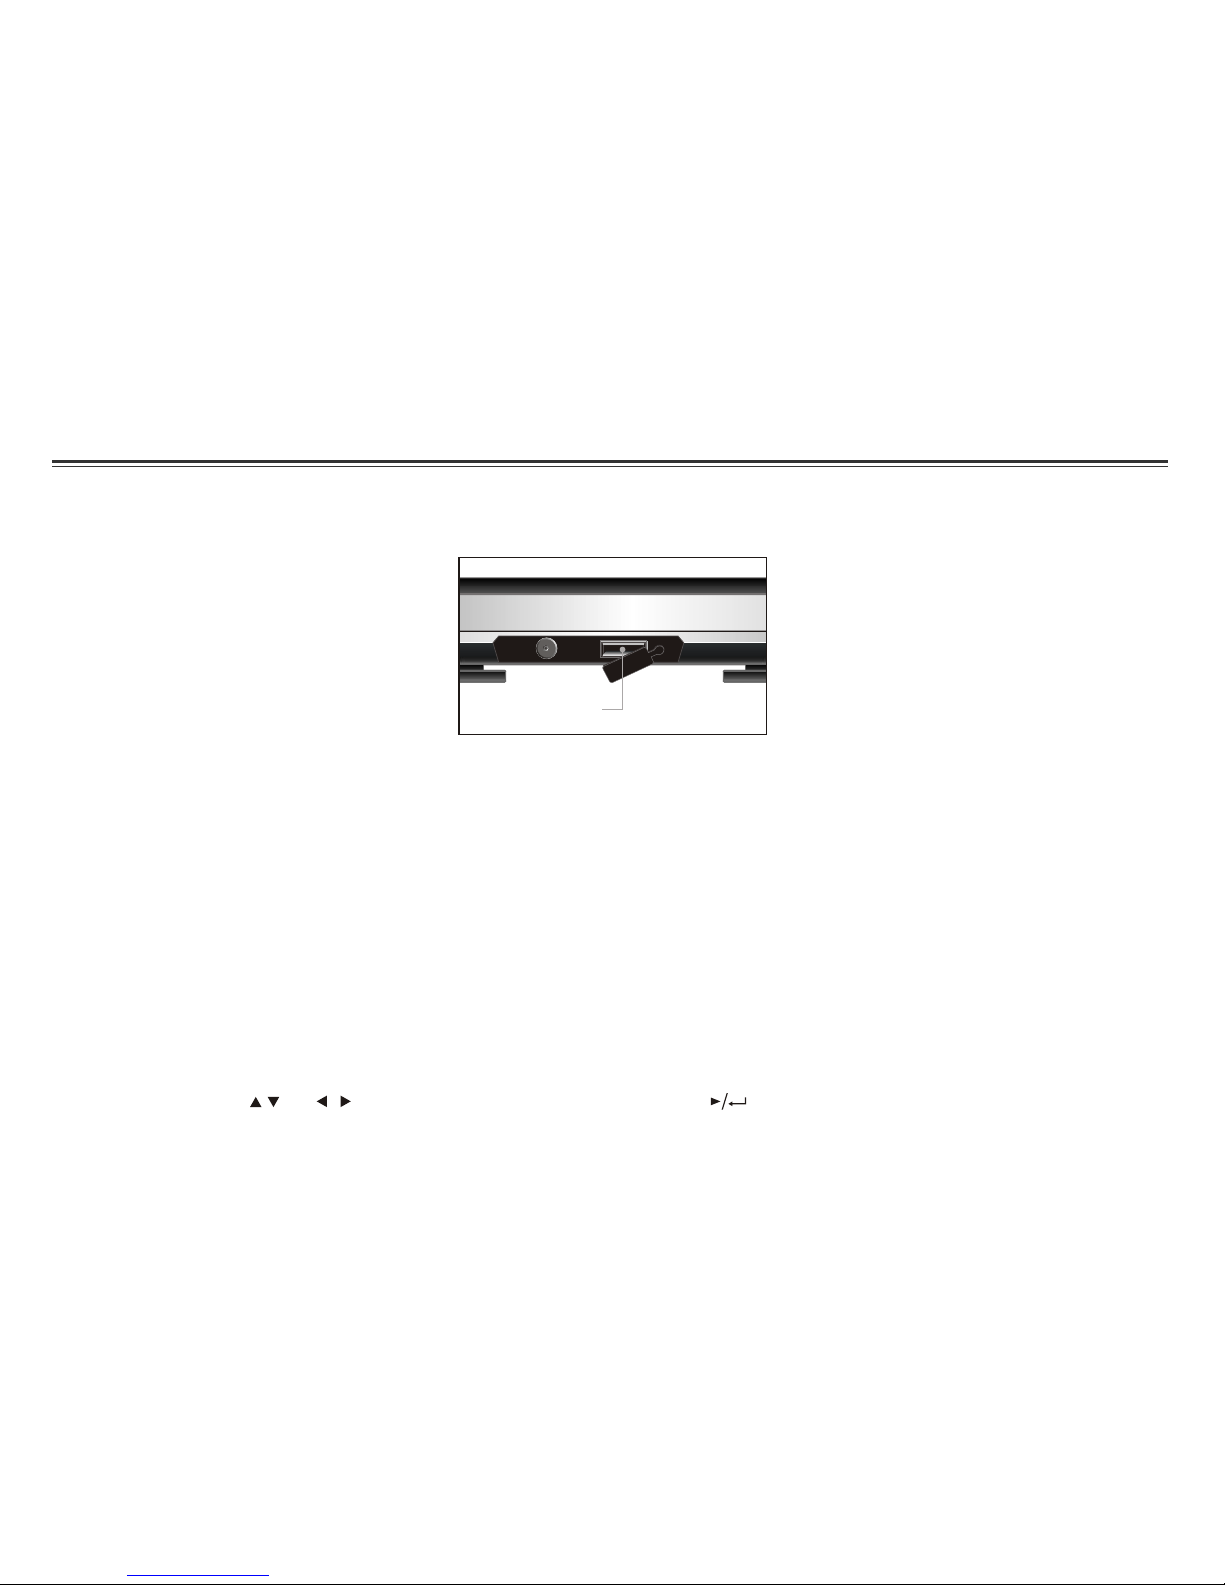
Using USB Port
USB
ANTENNA
USB slot
Pluging a USB device
1.Plug in the USB device to the USB port on the player.
2.Repeatedly press TV/DVD/USB to select USB mode.
Removing a USB device
You can remove the USB device anytime even it is playing. To remove the USB device, simply grasp the end of the USB and remove it
from the slot.
Playing a USB device
The player accepts most USB devices such as MP3, DSC, USB- drive, Digital Camcorder etc. The USB in this Player supports
version 1.1/2.0.
1.Insert the USB device and repeatedly press TV/DVD/USB to select USB mode. The file manager appears and the first song file of the
first folder plays.
2.Use direction key ( and ) to select the file you want to play and press to play.
 Loading...