

Page 1
User Instructions
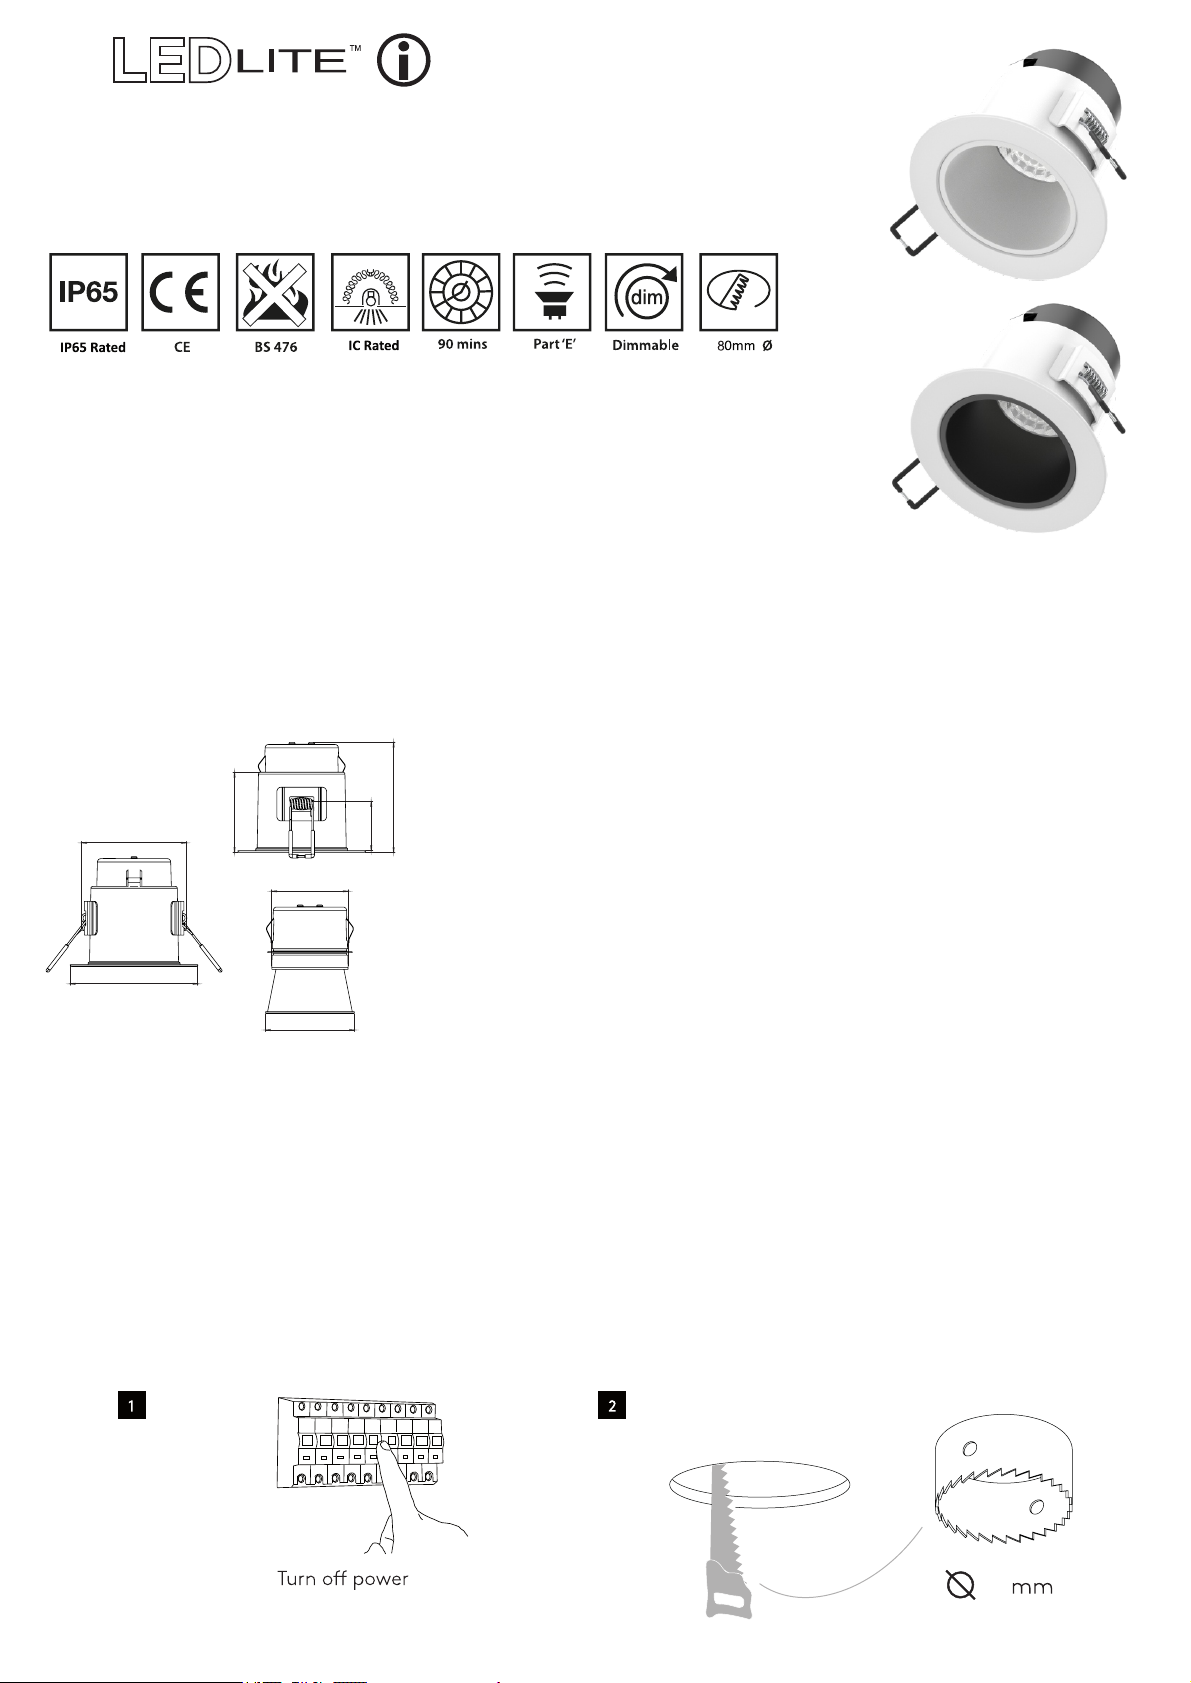
10W Smart WiFi & Bluetooth CCT Changeable
LTTFDB
General Instructions
These instructions should be read carefully and retained after installation for further
reference and maintenance.
Important information
It is recommended that luminaires are installed by a qualified electrician ensuring the
installation complies with current IEE wiring regulations & local building control.
• Before installation or maintenance ensure that the mains supply to the luminaire
is switched off and the circuit supply fuses are removed or circuit breaker turned off.
• Check that the total load on the circuit, including when this luminaire is fitted, does
not exceed the rating of the circuit cable, fuse or circuit breaker.
• We will not accept responsibility for any claims arising from a poor installation.
• Suitable for bathroom and shower room use.
LED Fire Rated Downlight c/w Baffle Bezel*
LTTFDDR or LTTFWDR drivers
*for use with
(not included)
Dimensions:
78mm
Ø95mm
59.5mm
36.5mm
Ø56.8mm
Ø66mm
Specifications:
• LED Voltage Range: 33-39V/DC
• LED Current: 230mA
81.8mm
• Wattage: 10W
• Beam Angle: 40
• CCT Changeable (3000K/4000K/6000K)
• White & Black Reflector Included
• Lumens: White Reflector Black Reflector
3000K 800lm 600lm
4000K 870lm 660lm
6000K 840lm 640lm
0
• Solid Joist & I-Joist Fire Rated
• Insulation Coverable
• Baffle Bezel Included
• Cut-out: 80mm
• Housing Materials: Aluminium + Iron
• Warranty: 5 Years
• IP65 Rated
Installation:
• Turn the power off before commencing installation (see Fig.1).
• Cut a suitable hole in the ceiling as as per the cut-out details ensuring that it does not infringe with electrical cables,
water/gas pipes or ceiling joists. (see Fig.2).
• The downlight is IC Rated and designed for use with insulated material, it does not need extra IC cage accessories.
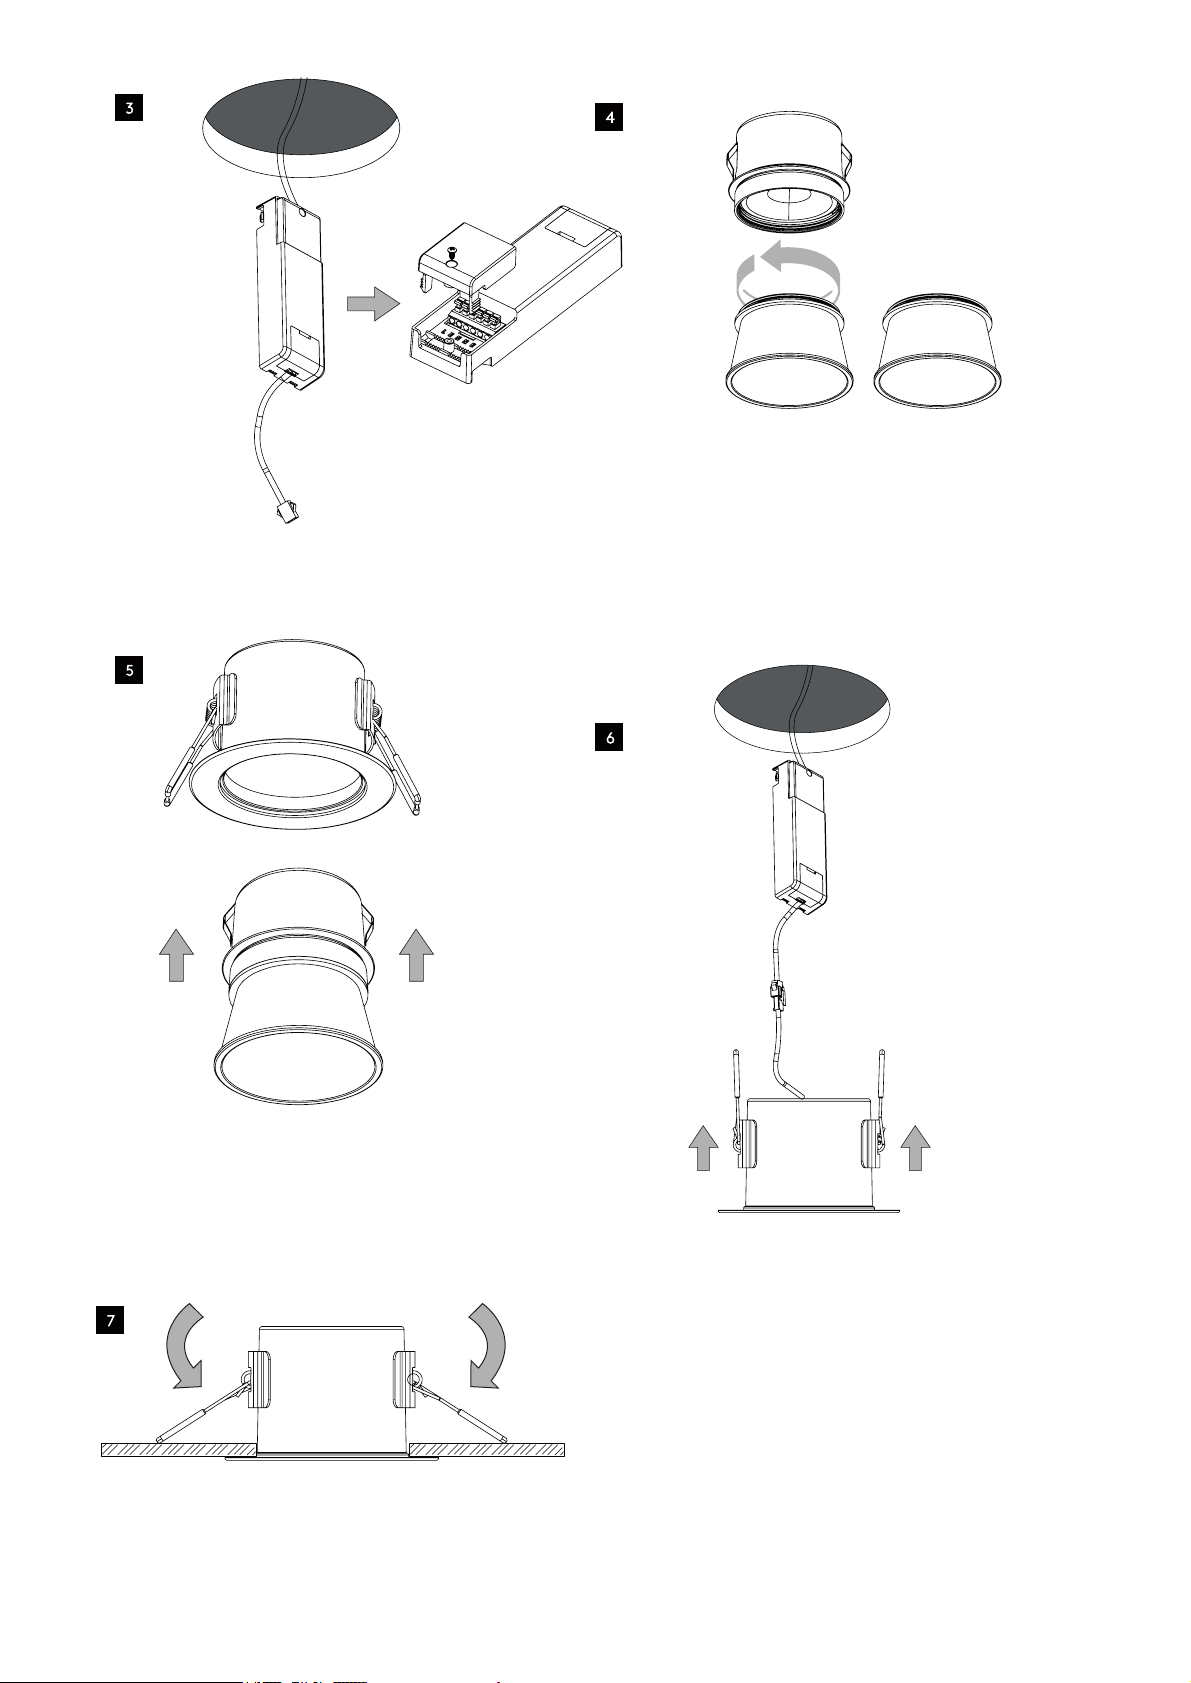
• Connect the driver to the downlight (see Fig.3).
• Install the required reflector - white and black reflectors included.(see Fig.4).
• Insert the LED module into the bracket.(see Fig.5).
• Fit the downlight into the hole in the ceiling with the 2 spring clips supplied. (see Fig.6).
• Test for correct operation.
• If you need to remove the downlight use a rubber suction cup & pull down (suction cup not included).
80
Page 2
White
Black
 Loading...