


 LeapFrog® Connect Quick Start Guide
Welcome to the LeapFrog Connect Application, a comprehensive system for managing all of your LeapFrog Connected toys! This Quick Start Guide provides basic instructions to get you started with LeapFrog Connect. Visit the LeapFrog Customer Support website for user guides, video tutorials and other support materials (http://www.leapfrog.com/support). Visit the LeapFrog Connect online Help to guide you through the application features (http://lfccontent.leapfrog.com/ help/LeapFrog_Connect_Help.htm).
Installing the LeapFrog Connect Application
•Insert the LeapFrog Connect CD (if one came with your toy) into your computer or download the installer from the
LeapFrog Customer Support website (http://www.leapfrog.com/support).
Note: You need to install the appropriate version of LeapFrog Connect for each connected toy you own (Tag, Tag
Junior, My Pals Scout and Violet, My Own Leaptop, LeapPad, Leapster Explorer, Leapster2, Didj, Crammer).
•Follow the prompts to install the LeapFrog Connect Application.
Getting Started with LeapFrog Connect
•Open the LeapFrog Connect Application by double-clicking the LeapFrog Connect icon on your desktop.
•Follow the instructions to connect your toy.
For Tag, Tag Junior, My Pals Scout and Violet, My Own Leaptop and Crammer: Connect the toy to the computer using the USB cable and turn it on. You will be asked to create a LeapFrog parent account.
For LeapPad, Leapster Explorer, Leapster2 and Didj: Create player names on the handheld and then connect the handheld to the computer using the USB cable and turn it on. The player name(s) will automatically transfer to the application.
•On the Create a LeapFrog Account screen, fill in the required information to create your LeapFrog parent account and click the Agree and Continue button (or you can sign in if you already have an account).
•On the “Who plays with these toys?” screen, add the required information for each toy.
•When you are done entering information, click the Finish button at the bottom of the screen.
•You have now created a personal Learning Path for your child and have access to all features of the LeapFrog Connect Application.
•On the LeapFrog Home screen, click the “Go” button for the toy you want to explore.
See also:
My Pals Scout and Violet Quick Start Guide
My Own Leaptop Quick Start Guide
My Own Story Time Pad Quick Start Guide
Tag Junior Quick Start Guide
Tag Quick Start Guide
LeapPad Quick Start Guide
Leapster Explorer Quick Start Guide
Leapster2 Quick Start Guide
Didj Quick Start Guide
Crammer Quick Start Guide
All LeapFrog products may not be available in all countries.
Screenshots are for illustrative purposes only. Actual screenshots may vary.
LeapFrog Connect Quick Start Guide: My Pals Scout and Violet
Welcome to the LeapFrog Connect Application, a comprehensive system for managing all of your LeapFrog Connected toys! This Quick Start Guide provides basic instructions to get you started with LeapFrog Connect. Visit the LeapFrog Customer Support website for user guides, video tutorials and other support materials (http://www.leapfrog.com/support). Visit the LeapFrog Connect online Help to guide you through the application features (http://lfccontent.leapfrog.com/ help/index.html).
Installing the LeapFrog Connect Application
•Download the LeapFrog Connect installer for My Pals from the LeapFrog Customer Support website (www.leapfrog.com/support).
•Follow the prompts to install the LeapFrog Connect Application.
Setting up a LeapFrog Parent Account
•Open the LeapFrog Connect Application by double-clicking the LeapFrog Connect icon on your desktop (if it is not already open).
•Follow the instructions to connect your toy, set up a LeapFrog parent account, and enter information to
create a personal LeapFrog® Learning Path for your child. For more information, see the LeapFrog Connect Quick Start Guide.
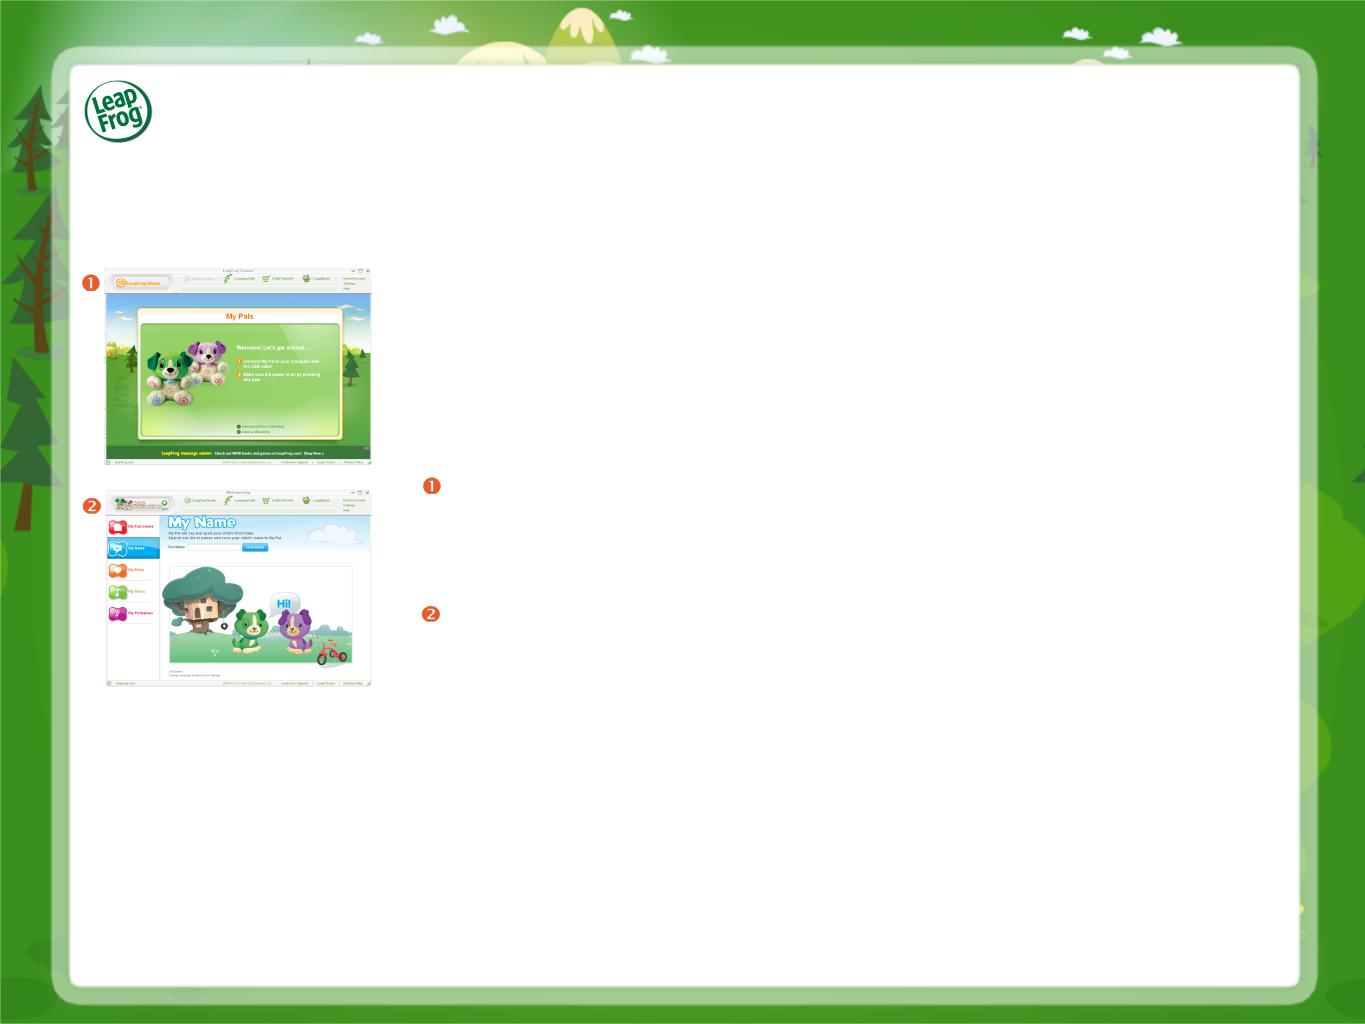
Making My Pals Your Own
•My Name page: Scout or Violet can express love and friendship to your child by name. Follow the instructions to find the audio for your child’s name. Click Save to My Pal to save the name to Scout or Violet. Click Continue to My Picks to go to the My Picks page.
•My Picks page: Pick an animal, food and color/colour your child loves. Click Save to My Pal to save the picks to Scout or Violet. Click Continue to My Music to go to the My Music page.
•My Music page: Select up to five lullaby melodies and five daytime melodies to play for your child. Click Save to My Pal to save the songs to Scout or Violet. Click Done to return to the Home page.
•You have now created a custom puppy for your child. You can return to any screen at any time to make changes.
•To begin playing, click the Eject icon and remove the USB cable from Scout or Violet. Then touch any paw.
My Pals Scout and Violet may not be available in all countries.
Screenshots are for illustrative purposes only. Actual screenshots may vary.
LeapFrog Connect Quick Start Guide: My Own LeapTop™
Welcome to the LeapFrog Connect Application, a comprehensive system for managing all of your LeapFrog Connected toys! This Quick Start Guide provides basic instructions to get you started with LeapFrog Connect. Visit the LeapFrog Customer Support website for user guides, video tutorials and other support materials (http://www.leapfrog.com/support). Visit the LeapFrog Connect online Help to guide you through the application features (http://lfccontent.leapfrog.com/ help/index.html).
Installing the LeapFrog Connect Application
•Download the LeapFrog Connect installer for My Pals from the LeapFrog Customer Support website
(www.leapfrog.com/support).
•Follow the prompts to install the LeapFrog Connect Application.
Setting up a LeapFrog Parent Account
•Open the LeapFrog Connect Application by double-clicking the LeapFrog Connect icon on your desktop (if it is not already open).
•Follow the instructions to connect your toy, set up a LeapFrog parent account, and enter information to create a
personal LeapFrog® Learning Path for your child. For more information, see the LeapFrog Connect Quick Start Guide.
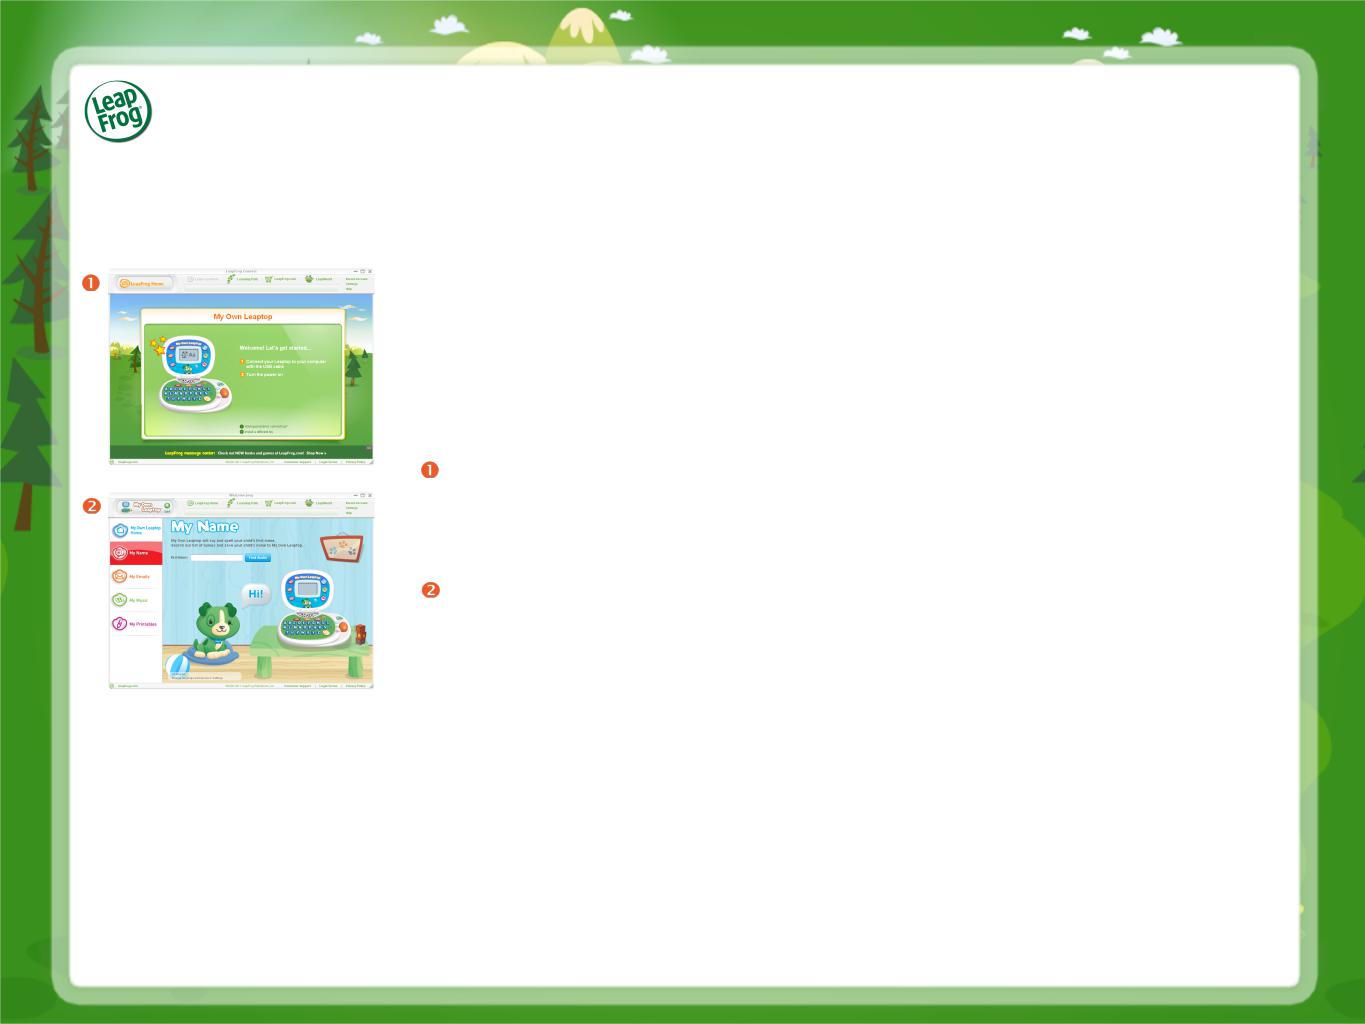
Personalizing/ Personalising My Own Leaptop
•My Name page: My Own Leaptop can use your child's name in songs and activities. Follow the instructions to save your child's name to My Own Leaptop. Click Continue to My Emails to go to the My Emails page.
•My Emails page: Pick a message to send to your child. Then, click the "Add Sender" link to choose the email's sender (for example, "Mommy"). When you have completed all three emails, click Save to Leaptop to save your emails to My Own Leaptop. Click Continue to My Music to go to the My Music page.
•My Music page: Select one sing-along song and up to five melodies to play on My Own Leaptop. Click Save to Leaptop to save the songs to My Own Leaptop. Click Done to return to the Home page.
•Make sure to watch the "syncing" message at the top of the application. Do not disconnect or turn off the Leaptop until the message says "Sync complete."
•You have now personalized/personalised Leaptop for your child. You can return to any screen at any time to make changes.
•To begin playing, click the Eject icon and remove the USB cable from My Own Leaptop.
My Own Leaptop may not be available in all countries.
Screenshots are for illustrative purposes only. Actual screenshots may vary.

LeapFrog Connect Quick Start Guide:
My Own Story Time Pad™
Welcome to the LeapFrog Connect Application, a comprehensive system for managing all of your LeapFrog Connected toys! This Quick Start Guide provides basic instructions to get you started with LeapFrog Connect. Visit the LeapFrog Customer Support website for user guides, video tutorials and other support materials (http://www.leapfrog.com/support). Visit the LeapFrog Connect online Help to guide you through the application features (http://lfccontent.leapfrog.com/ help/index.html).
Installing the LeapFrog Connect Application
•Download the LeapFrog Connect installer for My Own Story Time Pad from the LeapFrog Customer Support website (www.leapfrog.com/support).
•Follow the prompts to install the LeapFrog Connect Application.
Setting up a LeapFrog Parent Account
•Open the LeapFrog Connect Application by double-clicking the LeapFrog Connect icon on your desktop (if it is not already open).
•Follow the instructions to connect your toy, set up a LeapFrog parent account, and enter information to create a
personal LeapFrog® Learning Path for your child. For more information, see the LeapFrog Connect Quick Start Guide.
Personalizing/ Personalising My Own Story Time Pad
•Name page: My Own Story Time Pad can use your child's name in songs, stories, and activities. Follow the instructions to save your child's name to My Own Story Time Pad. Click Save and Continue to go to the stories page.
•Stories page: My Own Story Time Pad lets your child create personalized stories featuring your child’s favorite food,
color, and animals. Follow the instructions to choose your child's favorite things, then choose up to five stories . When you are done, click Save and Continue to go to the Emails page.
•Emails page: Pick a message to send to your child. Then, click the "Add Sender" drop-down to choose the email's sender (for example, "Mommy"). When you have completed all three emails, click Next to save your emails to My Own Story Time Pad. Click Save and Continue to go to the Music page.
•Music page: Select up to four sing-along songs and up to five melodies to play on My Own Story Time Pad. Click Next to save the songs to My Own Story Time Pad. Click Save and Finish to return to the Home page.
•Make sure to watch the "syncing" message at the top of the application. Do not disconnect or turn off My Own Story Time Pad until the message says "Sync complete."
•You have now personalized/personalised My Own Story Time Pad for your child. You can return to any screen at any time to make changes.
•To begin playing, click the Eject icon and remove the USB cable from My Own Story Time Pad.
My Own Story Time Pad may not be available in all countries.
Screenshots are for illustrative purposes only. Actual screenshots may vary.
 Loading...