


 Loading...
INSTRUCTIONS FOR THE TECHNICAL EXPERT
LCG-241M
09 |
1999 |
|
II |
|
39D0910 |
|
|
||||
|
|
|
|
|
|

IMPORTANT IMPORTANT IMPORTANT
Post in a prominent location, a set of instructions to be followed in the event the user smell gas. Obtain these instructions from your local gas supplier.
FOR YOUR SAFETY: Do not store or use gasoline or other flammable vapors and liquids in the vicintiy of this or any other gas appliance.
In the event a gas odor is detected, shut down units at the main shut-off valve and contact the local gas company or supplier for service.
WARNING: Improper installation, adjustment, alteration, service or maintenance can cause property damage, injury or death. Read the installation, operating and maintenance intructions thoroughly before installing or servicing this equipment.
Installation, startup and adjustments of this appliance should be accomplished by personnel qualified to install gas equipment.
Retain this manual for future reference.


Section A
GENERAL INSTRUCTIONS
1. Preliminary operations
Make sure the appliance is supplied complete and has not been damaged in transit.
2. Positioning
Keep the appliance area free and clear of combustible material and do not obstruct the flow of combustion or ventilation air.
The installation of any components such as a vent hood, grease extractors, and/or fire extinguisher systems, must conform to the their applicable nationally recognized installation standards.
3.Gas connection
For the exact position and size of connections, consult the gas connection chart enclosed in Section B.
All gas connections must be in accordance with local codes and comply with the National Fuel Gas Code ANSI Z223.1 latest edition, Natural Gas Installation Code CAN/CGA - B149.1 or Propane Installation Code CAN/CGA - B149.2.
Connect each oven separately. A gas shut off valve must be installed to the oven(s) and located in an accessible area.
This appliance and its individual shutoff valve must be disconnected from the gas supply piping system during any pressure testing of that system at test pressures in excess of 1/2 PSGI (3.45 kPA) and the appliance must be isolated from the gas supply piping system by closing its individual manual shutoff valve during any pressure testing of the gas supply system at test pressures equal to or less than 1/2 PSIG (3.45 kPA).
3.1 Test gas
Model XXX |
Serial number |
NAT. - 7" 4.5" Btu/h
|
|
120V1N |
60 Hz |
|
A |
|
|
||
|
|
|
|
|
|
|
|
|
|
|
|
|
|
|
|
|
|
|
|
1)Gas type and supply pressure
2)Injector pressure
3)Input rating Btu/h
12 3
Check the data plate to make sure that the appliance has been tested for the type of gas with wich it is to be operated.
Always check the pressure of the the gas supply. For this purpose, use the pressure test outlet provided on the appliance, following procedure outlined in section B.
Test for gas leaks. Use a commercial leak detector or a soap and water solution.
WARNING
DO NOT USE AN OPEN FLAME TO TEST FOR GAS LEAKS.
- 1 -

 Section A
GENERAL INSTRUCTIONS
4. Electrical connection
The appliace must be electrically grounded in accordance with local codes, or in the absence of local codes, with the National Electrical Code, ANSI/NFPA 70, or the Canadian Electrical
Code, CSA C22.1-.2.
4.1 Operating voltage
Model XXX |
|
|
|
Serial number |
|
|
NAT. - 7" 4.5" Btu/h
|
|
120V1N |
60 Hz |
|
A |
|
|
||
|
|
|
|
|
|
|
|
|
|
|
|
|
|
|
|
|
|
|
|
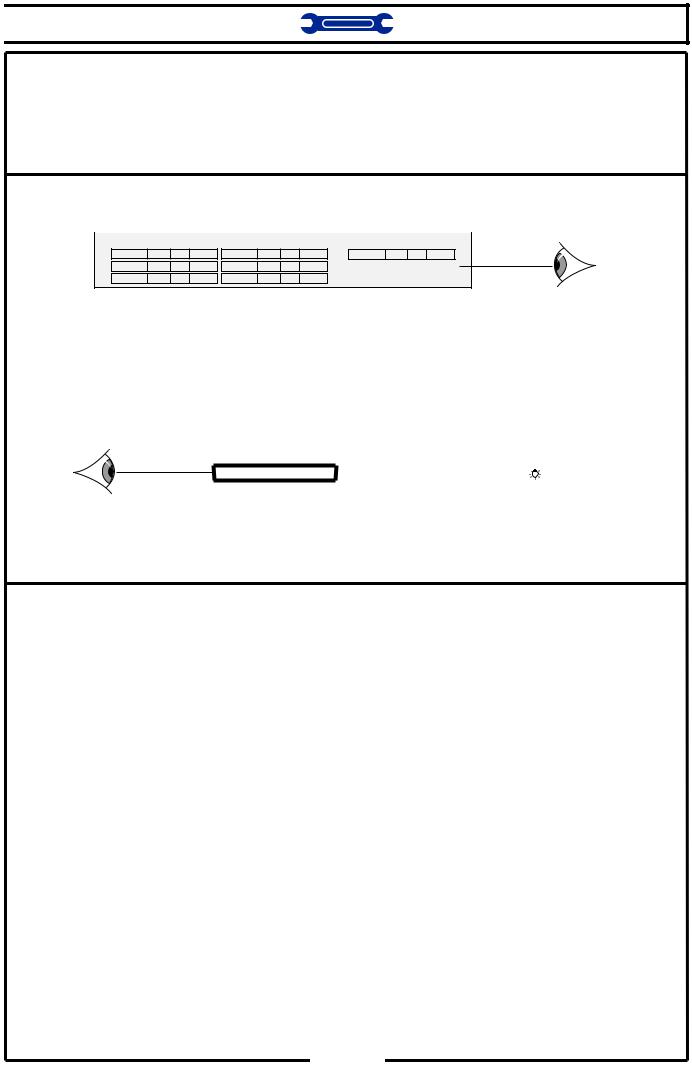
Check the data plate to make sure the operating voltage and frequency of the appliance correspond to those of mains supply.
Adhere scrupulously to the indications in the technical chart and in the wiring diagram, and the instructions contained in section B.
In the notes for the customer service is indicated the location of the wiring diagram on the appliance.
XXXXXXXXXX |
|
|
0000 |
|
|
|
|
0000000000000000000 |
|
||||||||||||||
|
|
|
|
|
|
|
|
|
|
|
|
|
|
|
|
|
|
|
|
|
|
|
|
|
208V3 ~ |
|
A |
|
Hz |
|
kW |
|
|
|
|
|
|
|
|
|
|
|
|
|
|
|
|
|
|
|
|
|
|
|
|
|
|
|
|
|
|
|
|
|
|
|
|
|
|
|
|
|
|
|
|
|
|
|
|
|
|
|
|
|
|
|
|
|
|
|
|
|
|
|
|
|
|
|
|
|
|
|
|
|
|
|
|
|
|
|
|
|
|
|
|
|
|
|
|
|
|
|
|
|
|
|
|
|
|
|
|
|
|
|
|
|
|
|
|
|
|
|
|
Check the current absorption indicated on the data plate to determine the crosssectional area of the supply cable.
5.Water connection
This appliance is to be installed to comply with the applicable Federal, state, or local plumbing codes having jurisdiction.
Always install a stop-valve upstream of the appliance.
Downstream of the stop-cock, install appropriate fittings for easy disconnection of the appliance and filters which can easily be inspected and cleaned.
Use materials, seals and fittings approved according to applicable standards. Use suitable pipes which have properly treated in order to prevent the release of iron oxides into the water (as these can alter the taste of the food and mark stainless
steel)Make.sure the water specifications are within the limits indicated in section B.
If necessary, install a suitable water treatment system.
- 2 -


1. INSTALLATION
1.1 Connections |
|
|
LCG-241M |
46.4" |
|
LCG-241D |
|
|
Gas inlet |
Ø 3/4" NPT |
|
Flue outlet |
* |
|
|
|
|
Water inlet |
Ø 3/4" |
59" |
|
43.3" |
|
Water drain |
Ø 1" 1/2 |
|
Terminal board |
3 Ph |
|
|
|
22. |
Cable gland |
15.7" |
|
|
|
|
Equipotential terminal |
|
|
* |
The oven must be installed under a ventilation hood only. |
|
32.6" |
2.9" |
5.1" |
||
|
|
||
|
|
|
Not suitable for connection to type B gas vent. |
|
|
|
||
1.2 |
Positioning |
9.4" |
|
|
|
5.7" |
|
14" |
|||
|
• |
leave at least 4" clearance |
|
17.7" |
|
|
|
|
35" |
||
|
|
between the rear of the appliance and the |
13.5" |
|
|
|
|
|
|
||
|
|
wall |
|
|
|
|
• leave at least 20" clearance at the |
|
|
|
|
|
|
sides of the appliance |
|
|
|
|
|
|
2" |
1.3" |
1.9" |
|
|
|
|
|
46.4" |
|
|
The cooling outlets of the control |
|
|
|
|
|
section of the oven (side panel) |
|
|
|
|
|
must not be near sources of |
|
|
|
|
|
hot fumes or steam. |
|
|
|
All clearance requirements are the same for combustible or non combustible constructions. For use only on non combustible foor.
1.3 Specifications (total weight of the appliance is marked on the packaging)
GAS |
|
|
|
|
ELECTRICAL RATING |
||||
|
INPUT RATING |
|
VOLTAGE |
|
|
POWER RATING |
|
MAX. LOAD (A) |
|
|
|
|
|
|
|||||
|
|
|
|
|
|
|
|
|
|
Natural gas |
115.000 |
Btu/h |
208V |
3 Ph |
60Hz |
|
1.1 kW |
|
3.4 A |
|
|
|
|
|
|
|
|
|
|
Propane |
115.000 |
Btu/h |
240V |
3 Ph |
60Hz |
|
1.1 kW |
|
3.4 A |
|
|
|
|
|
|
|
|
|
|
Maximum sound pressure is no higher than 70 dB (A)
- 1 -

1. INSTALLATION
1.4 Installation - procedure
Fit the following units on |
|
|
|
|
|
|
2 |
||
1 |
|
|||
the top of the oven: |
|
|||
1) |
Flue outlet |
|
|
|
2) |
Steam vent pipe |
|
|
|
Connecting the water supply
3) Remove the lh side panel by unscrewing the two fixing screws at the bottom (if the optional spray gun is fitted - also the relative fixing screws must be removed).
4)Fit the supplied filters on the water inlet connections in an accessible position.
The appliance must be supplied exclusively with cold water conforming to the following specifications:
Pressure: between 200 and 600 kPa |
|
|
(30 − 80 PSI); |
|
|
pH: from 7 to 7.5; |
|
|
Conductivity: less than 200 S/cm; |
|
|
t.d.s. < 100 ppm |
|
|
Hardness: from 9 to 13 °f (= 5 7 °d |
= 6,3 8,8 °e = |
|
- pressione tra 200 e 600 kPa (2 |
6 bar); |
|
90 125 ppm)(5 10° clark); |
|
°Fr; |
- grado di mineralizzazione tra 9 e 13 |
||
Max. salinity and ion content in mg/l: |
|
|
- PH = da 7 a 7,5. |
|
|
- chlorides < 30; sulphates < 40; Fe (iron) |
< 0.1; Cu |
|
- cloruri = max. 150 mg/l |
|
|
(copper) < 0.05; Mn (manganese) < 0.05. |
|
|
|
|
|
Internal pressure gauges must give a reading of 100 kPa (15 PSI); if the reading is different, correct by adjusting the pressure regulators.
min. Ø 1" 1/2
min. 5% (3°)
max. 5 ft
3
Spray gun support
4
Pressure gauges
Water pressure regulator screws
3/4"
|
|
Water drain |
|
|
||
|
|
WARNING: to ensure the |
||||
|
|
appliance |
operates |
|||
|
|
correctly and to avoid the |
||||
|
|
risk |
of serious |
damage, |
||
|
|
the drain must be vented |
||||
|
|
(i.e. in communication with |
||||
|
|
the atmosphere). |
|
|
||
|
|
The |
material |
of |
the |
|
min. Ø 1" |
1/2 |
drainage pipe must be heat |
||||
resistant type |
and |
not |
||||
|
|
|||||
flexible.
1-1

1.INSTALLATION
1.5Electrical connection
Equipotential connection
• The equipotential terminal ( ) is located beneath the appliance at the rear lh corner.
Mains connection
• Remove the lh side panel as indicated in heading 1.4.
• Read the general precautionary notes in
Chapter 4, Section A. of this handbook.
• Fit the suitable cable gland in the relative hole.
• Route the cable from the main power switch through the cable gland, and connect the wires to the terminal board (see electrical diagram on next page).
terminal board
cable gland
N.B.: After making the connection ensure that the motor turns in the direction indicated by the arrow on the fan shroud (in the oven chamber).
1-2

1.5.1 Wiring diagram |
|
|
|
|
|
|
|
|
|
|
<![if ! IE]> <![endif]>1 |
||
|
|
|
|
|
|
|
|
|
|
|
|
|
<![if ! IE]> <![endif]>. |
|
|
|
|
|
|
|
|
|
|
ELECTRIC PANEL |
|
|
<![if ! IE]> <![endif]>INSTALLATION |
|
|
|
|
|
|
|
|
|
|
|
208/240V |
|
|
|
|
|
|
|
|
|
|
|
|
|
ALARM |
|
|
|
|
|
|
|
|
|
|
|
|
|
MOTOR ALARM |
|
|
|
|
|
|
|
|
|
|
WATER DRAIN |
|
|
WATER ALARM |
|
|
|
|
|
|
|
|
|
|
PRESSURE |
|
|
|
||
|
|
|
|
|
FAN |
|
|
SOLENOID VALVE |
SWITCH |
|
|
|
|
|
|
|
|
|
MOTOR |
|
|
|
|
|
|
|
|
|
THERMOCOUPLE |
|
|
<![if ! IE]> <![endif]>IGNITION PUSHBUTTON |
|
|
|
|
|
|
CIRCUIT BOARD |
|
|
| <![if ! IE]> <![endif]>SAFETY THERMOSTAT |
|
GAS |
|
|
|
|
|
WATER INLET |
|
|
|
||
|
SOLENOID |
|
|
|
|
|
|
|
|||||
|
|
|
|
|
SOLENOID |
|
|
|
|||||
|
VALVE |
|
|
|
|
|
|
|
SAFETY |
||||
|
|
|
|
|
|
VALVE |
|
|
|||||
|
|
|
|
|
|
|
|
|
|||||
|
|
|
|
|
|
|
DOOR |
|
|
THERMOSTAT |
|||
|
|
|
MOTOR |
|
|
|
|
|
|
||||
|
|
|
|
|
|
|
|
MICRO-SWITCH |
|
|
|
|
|
|
|
|
|
|
THERMAL |
|
|
|
|
|
|
|
|
|
|
|
|
|
CUT-OUT |
|
|
|
|
|
|
|
|
| <![if ! IE]> <![endif]>-1 |
|
|
|
|
|
|
|
|
ELECTRIC |
<![if ! IE]> <![endif]>-6WAYS |
|
|
|
|
|
|
|
|
|
|
|
IGNITION |
SELECTOR SWITCH |
|
|
||
| <![if ! IE]> <![endif]>3 |
|
|
|
|
MOTOR |
|
|
|
|
<![if ! IE]> <![endif]>HOUSINGS |
122-482°F |
86-194°F |
|
|
|
|
|
|
|
|
|
THERMOSTAT |
THERMOSTAT |
|
|||
|
|
|
|
CONTACTOR |
|
|
<![if ! IE]> <![endif]>NR. 2 |
OVEN |
DRAIN |
|
|||
|
|
|
|
|
|
|
|
|
|
|
|||
|
|
TRANSFORMER |
|
|
|
|
|
|
|
|
|
||
|
|
|
|
|
|
<![if ! IE]> <![endif]>F1 1A |
<![if ! IE]> <![endif]>F2 1A |
<![if ! IE]> <![endif]>F3 0.5A F4 6.3A-T F5 6.3A-T F6 0.032A FUSE HOLDER |
|
|
TIMER 120' |
BUZZER |
|
ELECTRIC PANEL |
PANEL SX |
|
|
POWER SUPPLY |
|
|
|
|
|||||
|
|
|
|
|
|
|
|||||||
|
|
|
|
|
TERMINAL BOARD |
|
|
|
|
|
|||
|
|
|
|
|
|
|
|
|
|
|
|||
|
|
|
ELECTRIC |
|
|
|
|
|
|
|
|
|
|
CONTROL PANEL |
|
|
CABINET |
|
|
|
|
|
|
|
|
|
|
|
|
|
|
|
|
|
|
|
|
|
|
|
|
PANEL DX |
LAMP |
LAMP |
|
LAMP |
|
|
|
|
|
|
|
|
|
|
|
|
|
|
LCG-241M |
|
|
208/240V 3Ph |
|
|
|
|
|
Loading...