

laerdal LSU Directions For Use Manual
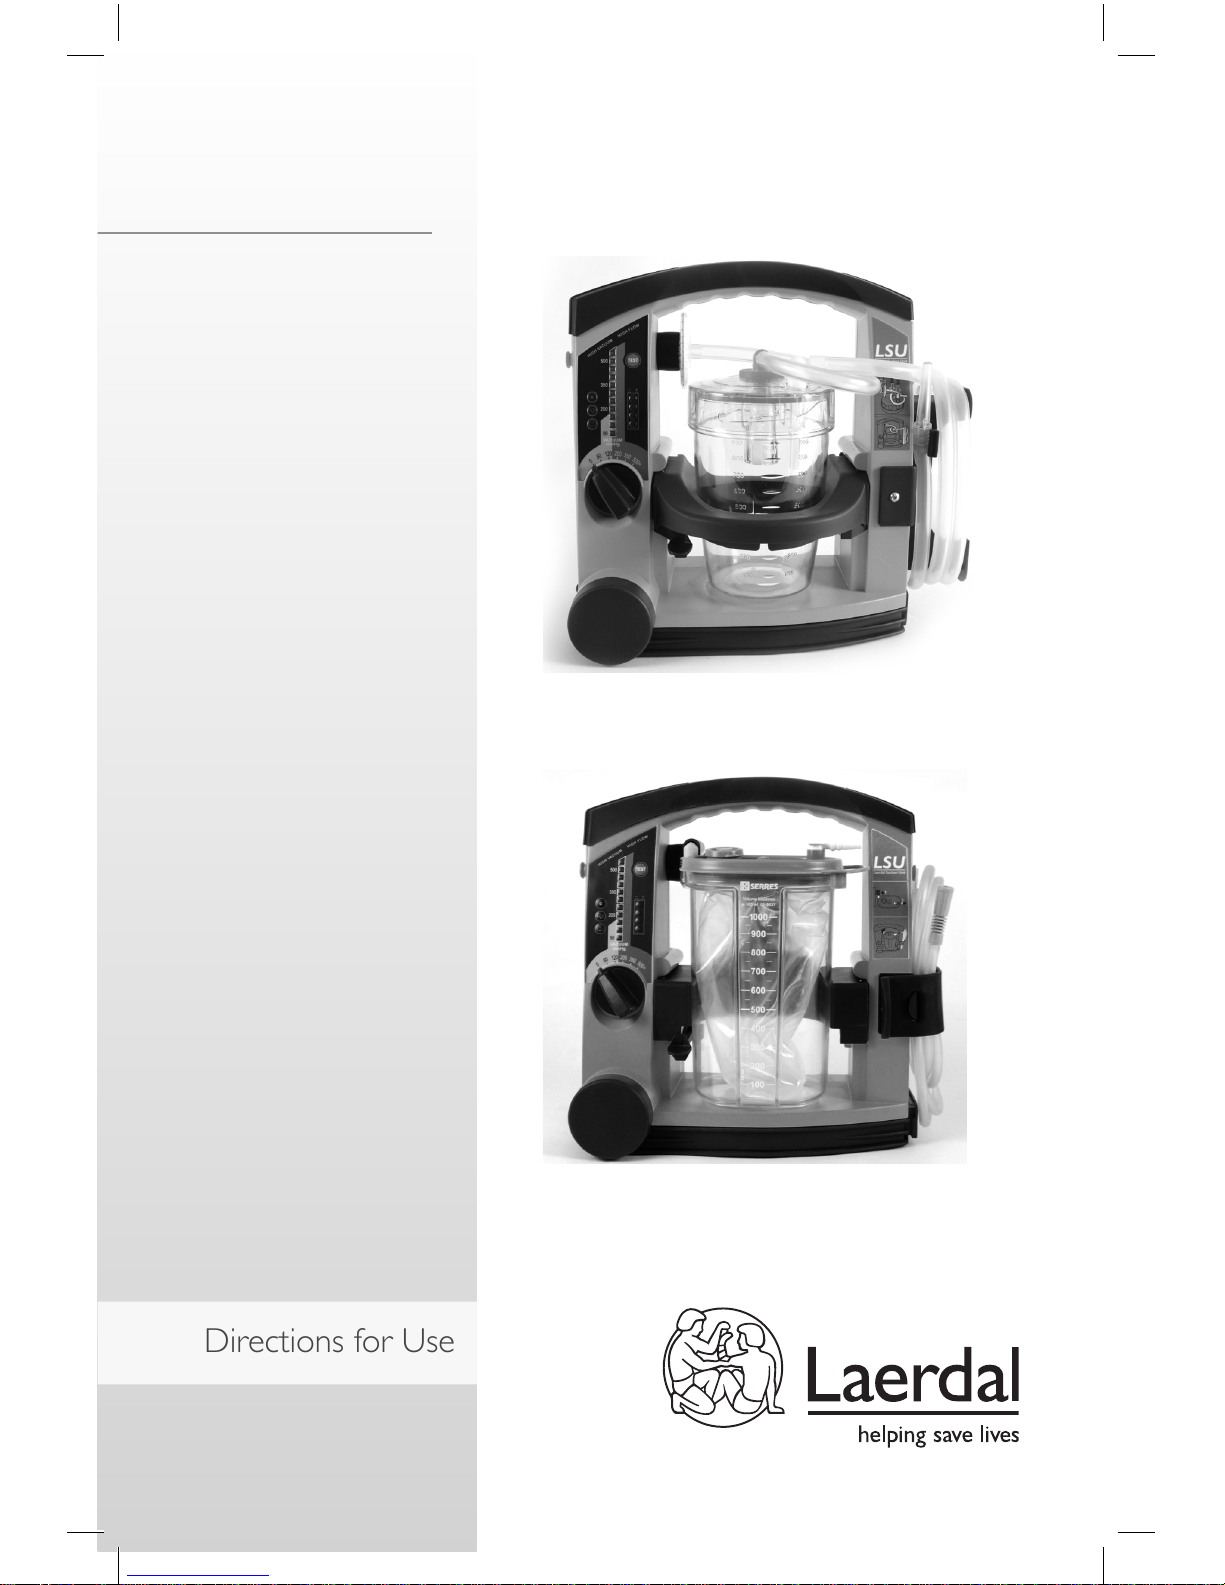
Laerdal Suction Unit
Cat. No. 78 00 00 - Reusable
Cat. No. 78 00 30 - Serres
Directions for Use
LSU


English
3
1 Cautions and Warnings 4
2 Intended Use 4
3 User Interface
– 3.1 Operating Knob 5
– 3.2 Indicators 5
– 3.3 TEST-Button 6
– 3.4 Power Sources 6
– 3.5 Automatic Power-save Function 6
4 LSU Reusable Canister System
– 4.1 Overview 7
– 4.2 Parts 7
– 4.3 Use 8
– 4.4 Quick Reference 11
– 4.5 After Use 11
– 4.6 Decontamination of Laerdal Reusable
Canister 11
5 Serres Suction Bag System
– 5.1 Overview 12
– 5.2 Parts 12
– 5.3 Use 13
– 5.4 Quick Reference 15
– 5.5 After Use 15
6 Cleaning and Maintenance
– 6.1 General 16
– 6.2 Clean the Cabinet and parts 16
– 6.3 Disinfection of reusable parts 16
– 6.4 Charge the Battery 16
– 6.5 External Battery Charger 17
– 6.6 Check the Battery Quality 17
– 6.7 Replace the Battery 17
– 6.8 Fastening the brackets 18
– 6.9 Release arm for Canister holder 18
7 Device Test 18
– 7.1 Setup 18
– 7.2 Run the Test 19
– 7.3 Evaluation of Device Test Results 20
8 Servicing 21
9 Troubleshooting 21
10 Accessories and Parts 22
11 Specifications 24
– 11.1 Classification 24
– 11.2 General Tolerance 24
– 11.3 Physical Characteristics 24
–
11.4 Operation 24
– 11.5 Power Requirements 24
– 11.6 Enviromental Conditions 25
– 11.7 Material Chart 25
–
11.8 Symbols 26
– 11.9 EMC Specifications 27
12 Limited Warranty 28
13 Addresses 28

English
4
These Directions for Use covers two
configurations of the Laerdal Suction Unit (LSU):
Reusable, Serres Suction Bag System. Unless
otherwise specified the information in this
Directions for Use applies to both configurations.
Read these Directions for Use carefully, and
become thoroughly familiar with the operation
and maintenance of the LSU before using it.
1 Cautions and Warnings
The LSU should only be used by persons trained
in the use of medical suction equipment.
The LSU is not suitable for use in the presence of
flammable liquids or gases; there can be a danger
of explosion or fire.
Do not use the LSU under environmental
conditions that are outside the ranges specified
under section 11.6. This can endanger safety and
adversely affect operation of the device.
Do not block the Exhaust Outlet during use.
This will lead to reduced flow and can also cause
damage to the LSU.
Always use the Reusable version with the filter
and the Float Ball in place.
Overflow of suctioned material can damage the
device. If overflow of liquid from the Canister
into the pump is suspected, the LSU must be
returned for service (see section 8).
Disconnect the LSU from external power prior
to cleaning. Use a minimum of liquid to prevent
any electrical shock hazard.
Do not immerse the LSU or allow it to stand
in water or other liquids. This might damage the
device, and cause electrical hazard.
Do not pump any cleaning solution or other
liquids through the vacuum pump, i.e. through the
Vacuum Connector. This can damage the LSU.
Use only accessories supplied by Laerdal Medical
or one of our authorised distributors to ensure
that the LSU operates satisfactorily.
Battery
• Only use batteries approved by Laerdal
Medical. Other batteries will have problems
related to the battery status indicator of the
LSU, the batter y operation time, and safety.
• To maintain satisfactory operation of the
battery, it is recommended to place the LSU
on continuous charge when not in use.
• The LSU must be placed on charge for
a minimum of 24 hours to reach full
battery capacity. The fast charging gives
approximately 80% battery capacity after
3 hours (for a new battery). Please note
that repetitive 3 hour charging is not
recommended.
• If it is not possible to place the LSU on
continuous charge when not in use, make
sure the battery is charged for a minimum of
24 hours at least once a month.
• Do not store the battery when it is
discharged; always fully charge the battery
before storage.
• We recommend charging a spare battery
every 6 months when stored in room
temperature at 25°C (77°F ).
2 Intended Use
The LSU is a portable, electrically powered,
medical suction equipment intended for field and
transport use. It is intended for intermittent
operation to remove secretions, blood or vomit
from a patient´s airway to allow ventilation.
Higher vacuum levels are generally selected for
oropharyngeal suctioning, and lower vacuum
levels are usually selected for tracheal suctioning
and the suctioning of children and infants.
English
5
3 User Interface (all configurations)
3.1 Operating Knob
The Operating Knob is a combined ON/OFF
switch and vacuum selector, located at the
bottom of the User Interface.
The LSU is switched ON by turning the
Operating Knob to the required setting.
Each setting indicates the maximum achievable
vacuum level for the selected position (80, 120,
200, 350, 500+ mmHg).
The free air flow value changes along with the
increasing vacuum settings (see section 11.4 for
details). The LSU is switched OFF by resetting the
Operating Knob to “0”.
Even if the Operating Knob is in “0” position,
voltage is present on some of the internal
circuitry, when the LSU is connected to mains. To
fully remove power, pull out the Power Cord.
3.2 Indicators
3.2.1 Power ON Indicator
This green LED has 3 modes:
• It is lit continuously while the LSU
is switched ON.
• It flashes rapidly (approx. twice per second)
during the Device Test.
• It flashes slowly (approx. once per second)
while the Automatic Power-save Function is
activated, if the Device Test is interrupted or
when the battery is discharged.
3.2.2. External Power Indicator
This green LED is continuously lit
while external AC or DC power is
connected.
3.2.3 Failure Mode Indicator
The red LED is lit when a possible
malfunction of the LSU has been
detected. If lit, turn the LSU OFF, and then
ON again to check if the indication disappears.
Provided that the indication does not occur
again the LSU can be operated. If the Indicator
continues to lit after three OFF/ON cycles and
after replacing the battery with a fully charged
battery, discontinue use and return the LSU for
service. (See section 8).
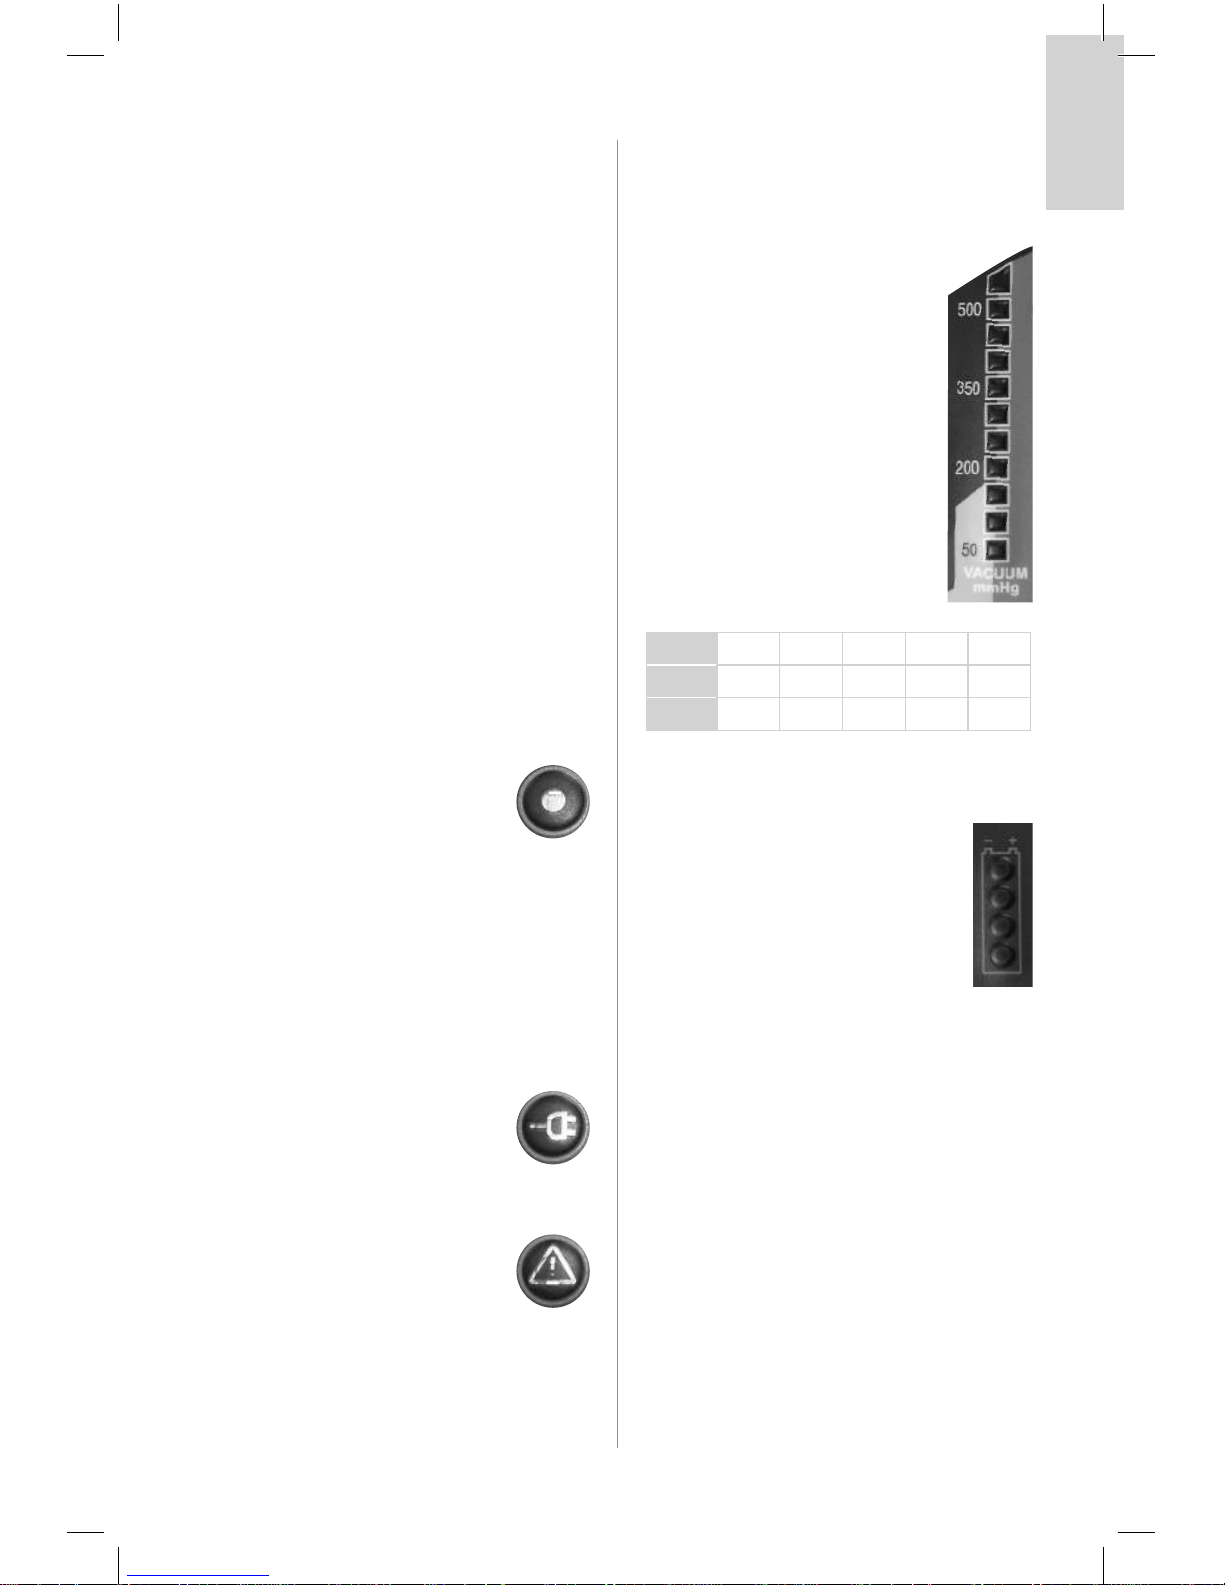
3.2.4 Vacuum Indicator
This green LED bargraph displays the
actual vacuum level during operation
of the LSU.
Each fully lit segment represents 50
mmHg. If a segment has a weak light,
this represents 25 mmHg (e.g 125
mmHg means 2 fully lit and 1 weakly
lit segments).
mmHg 80 120 200 350 500
kPa 11 16 27 47 67
mBar 107 160 267 467 667
Pressure conversion chart
3.2.5 Battery Status Indicator
This green LED bargraph has 3 functions:
• Indicates remaining battery capacity
during operation from internal
battery
• Indicates approx. achieved battery
capacity during charging.
• Indicates which test is currently in progress
during device test
During operation from internal battery:
Indicates approx. remaining battery capacity.
During operation from internal battery and
during charging the displayed values must only be
used as indications.
Several parameters can influence them e.g.
device settings, state of battery, temperature etc.
Note: Immediately after turning the LSU ON and
immediately after switching from external power
to internal battery operation, all 4 LED’s will
flash for 5 seconds before the remaining battery
capacity is displayed.
English
6
Typical remaining Battery capacity
Accuracy is dependent upon the lifetime and
condition of the battery, as well as, the condition
of the unit. Outside variables such as temperature
may also affect accuracy.
Battery Capacity Output
> 50 % 4 LEDs lit.
30 - 50% 3 LEDs lit.
20 - 30% 2 LEDs lit.
< 20% 1 LED lit.
Battery Low; (min. 1 minute of operation left
based on 500+ mmHg/free flow). 1 LED flashes.
During charging: indicates approx. achieved
battery capacity.
Capacity Output*
< 75% The LED’s will be lit sequentially
75 - 80% 3rd LED’s lit and 4th flashing
> 80% 4 LED’s lit.
*Note: If no battery is installed, the battery status
indicator will be fully lit for approx. 5 sec. until it
is turned off.
During the Device Test
Indicates which step of the test is currently in
progress or which corresponding test result is
being displayed:
LED 1 (lower LED) lit = STEP 1,
LED 2 lit = STEP 2 etc.
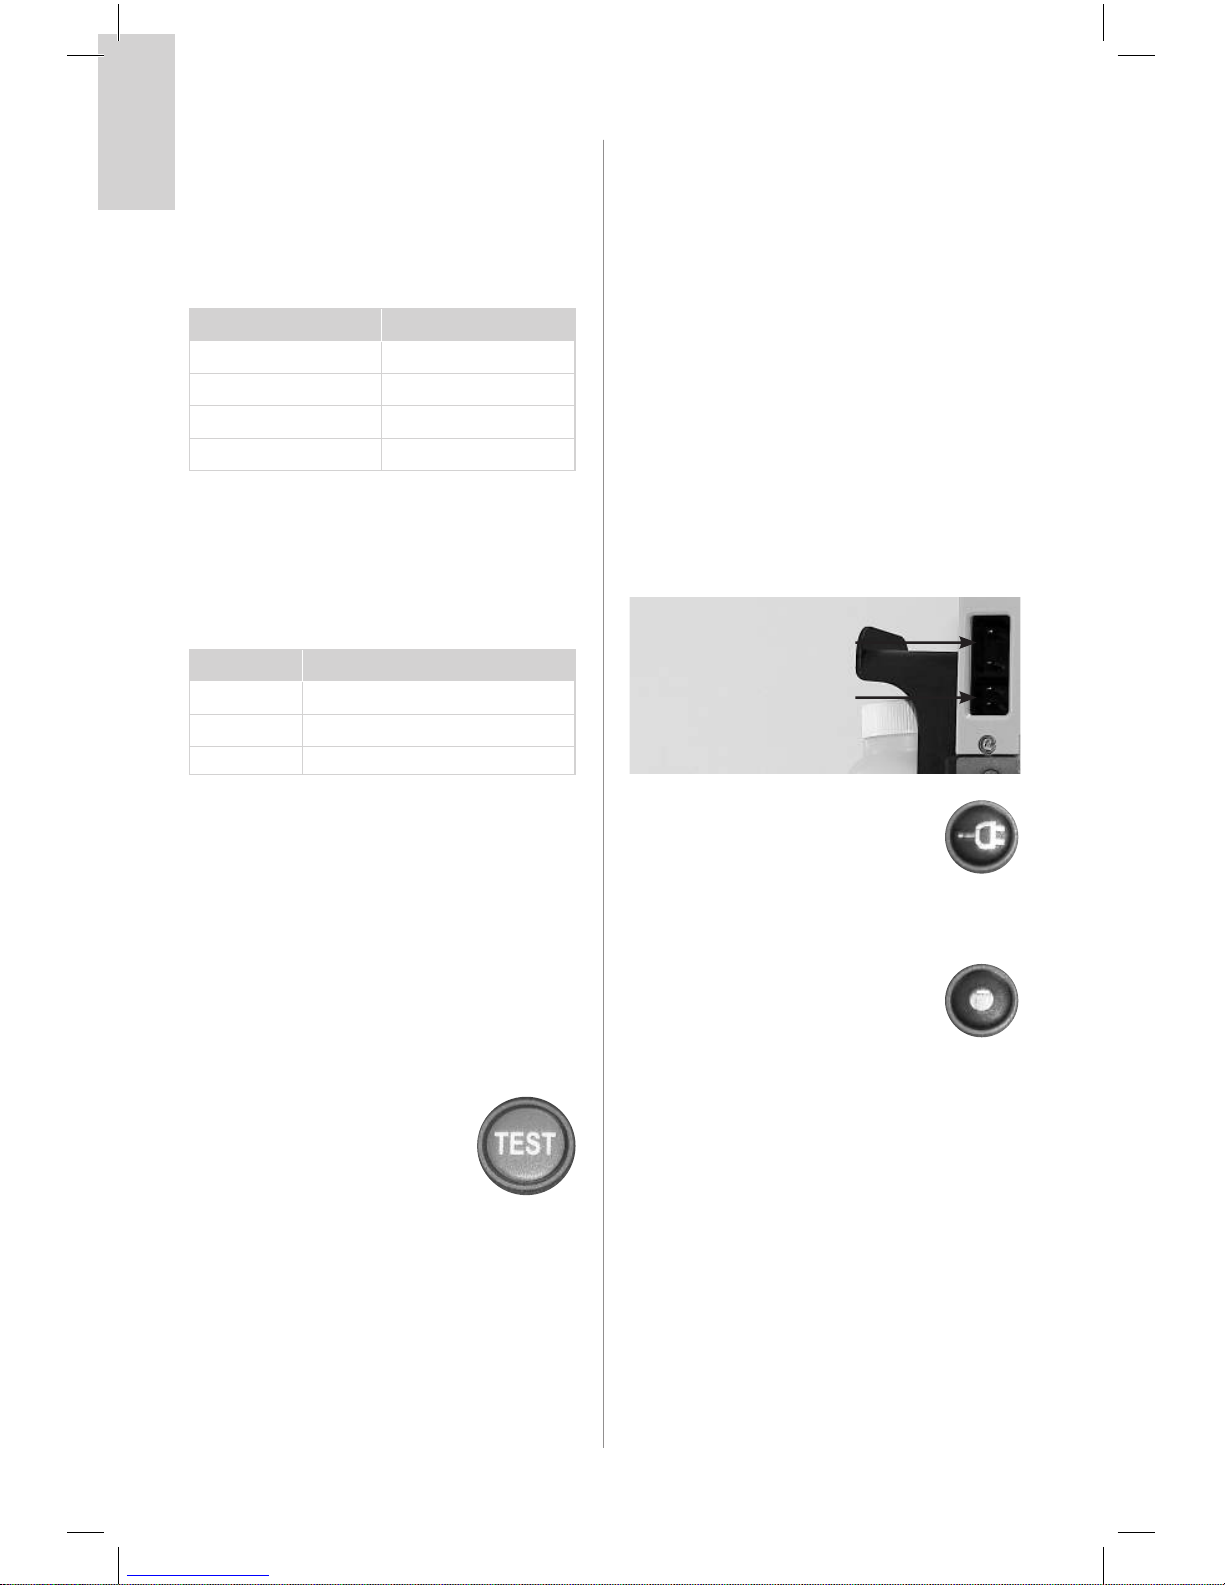
3.3 TEST-Button
This button allows you to run a
4-step user initiated Device Test
program to identify whether the
LSU is operating satisfactorily or if it needs
service (see section 7).
3.4 Power Sources
The LSU is delivered with an AC Power Cord for
connection to AC mains and a DC Power Cord
for connection to DC mains.
The device can be operated from the internal
battery, and can be operated or charged from
one of the following external Power Sources:
• AC mains when used with the AC Power
Cord: 100-240 VAC (50 / 60 Hz).
• DC mains when used with the DC Power
Cord: 12-28 VDC.
A Wall Bracket to hold the LSU during operation
and (optional) charging is available separately
(see section 10).
AC Connector Socket
DC Connector Socket
External power connection will cause
the External Power Indicator to be lit.
Always check that it is lit when
connecting external power or
inserting the LSU into the Wall Bracket.
3.5 Automatic Power-save Function
The LSU has an Automatic Powersave Function that switches the pump
motor off.
While in this mode, the Power ON Indicator will
flash slowly (approx. once per second).
This function will be activated when the
Operating Knob is set to 200, 350 or 500+
mmHg and the actual vacuum level has been
continuously higher than 120 mmHg for more
than 2 minutes.
To exit the Power-save Mode and revert to
normal operation, set the Operating Knob to
any other position and then go back to required
setting.
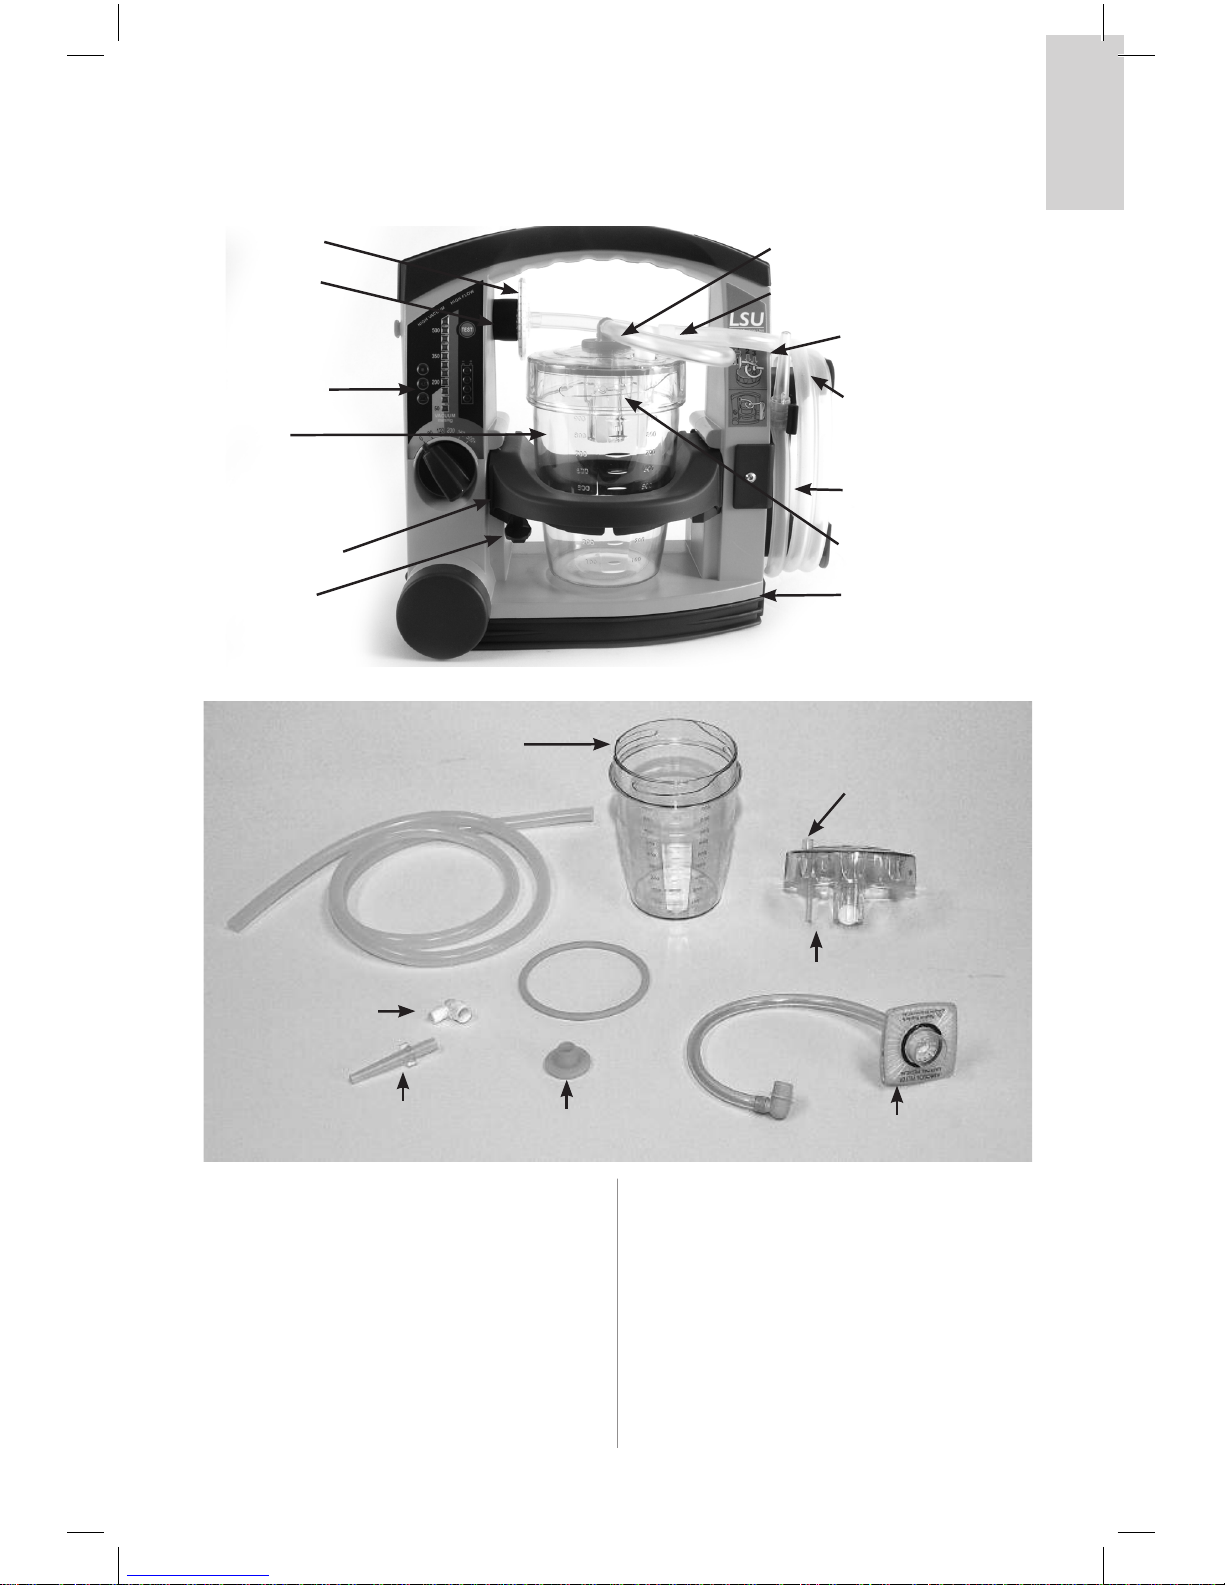
4 LSU Reusable Canister System
4.1 Overview
Aerosol Filter
Vacuum inlet
User Interface
Canister Holder
PATIENT Inlet
Patient Suction Tubing
Suction Catheter
Adapter
Holder for Water
Bottle/Patient
Suction Tubing.
Water Bottle
Canister Lid
with Float Ball
Battery Door
Release Arm
Canister
4.2 Parts
Gasket
Vacuum seal
PATIENT Inlet
Canister
Aerosol Filter
Angled Connector
Patient Suction Tubing
Canister Lid w/Float Ball
Suction Catheter Adapter
English
7
The LSU Reusable Canister System consists of:
• A 1000 ml transparent plastic Canister.
• A Canister Lid w/Float Ball
• An Aerosol Filter with tubing
The Canister Lid contains a Float Ball that shuts
off the vacuum if the canister is full or the LSU
tips over. To restore the vacuum, remove the
Angled
Connector from the VACUUM Inlet. The Float
Ball will be released and the Angled Connector
can be reattached,
Note: The LSU Reusable Canister System must
not be used without the Aerosol Filter or the
Float Ball.
Decontamination of reusable parts must be
performed in accordance with section 4.6.
English
8
The Aerosol Filter protects the LSU by
preventing aerosols from entering the Pump
Unit. It is not intended for microbiological or
for particle filtration. The Aerosol Filter is not
designed for decontamination.
It is recommended that the Aerosol Filter be
replaced after each use or at least once every
shift. If the LSU is used on patients in areas where
cross contamination is not an issue, the Aerosol
Filter should be replaced at least once a month.
It is recommended always to have extra Aerosol
Filters with the LSU in case one has to be
discarded. If the Aerosol Filter becomes wet, it
should be replaced immediately or as soon as
possible after use.
4.3 Use
Note: Read all the Cautions and Warnings listed
in section 1 thoroughly before you use the LSU.
The parts are color coded to help re-assembly
after cleaning.
4.3.1 Check list
• Check that no parts are missing and that all
parts are clean.
• If you decide to operate the LSU from
external power, connect to either external AC
or DC power as described in section 3.4.
If you decide to operate the LSU from internal
battery, check that the battery is installed.
• Check that the Patient Suction Tubing is
securely connected to the PATIENT Inlet on
the Canister Lid; and the Aerosol filter is
securely fastened in the LSU and the lid.
4.3.2 Using the LSU
Note: The LSU must be operated and
transported in the upright position to prevent
overflow of suctioned material.
1 Unwind the Patient Suction Tubing
2 Set the Operating Knob to the required
vacuum level. The LSU will automatically be
switched ON and start to operate.
The green Power ON Indicator is lit
continuously while the LSU is switched ON.
3 When suction is complete, set the Operating
Knob to “0”
4.3.3 Emptying the Canister
Note: To prevent damage and keep the LSU in
good working order; empty the canister when
3/4 full. Check the filter after each use.
If the filter is broken so liquid penetrates the
membrane, the pump will be contaminated, and
the LSU must be returned for service (see
section 8).
When liquid reaches the top of the Canister, the
LSU will stop suctioning. To continue suctioning,
empty canister and replace the filter.
Overflow of suctioned material can damage the
device.

English
9
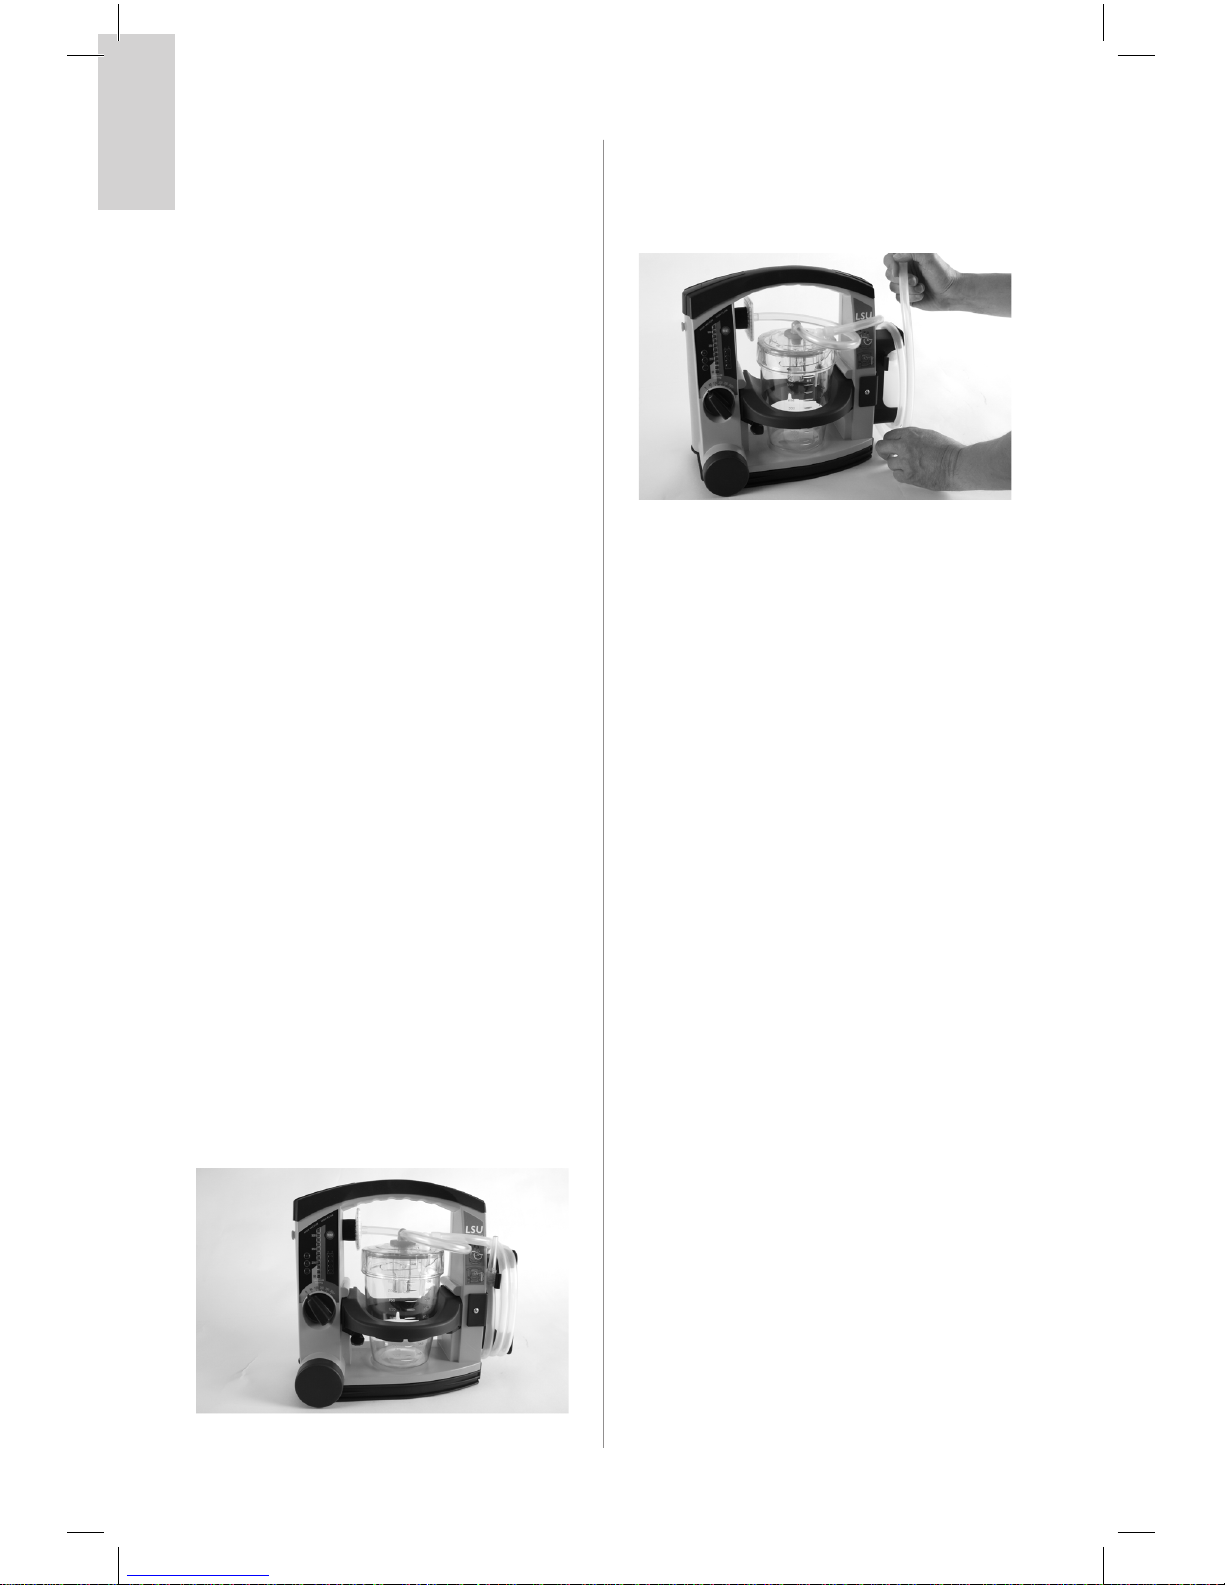
To remove the Canister, proceed as follows:
1 Disconnect the Filter Tubing from the blue
Vacuum Inlet (see section 4.2 regarding
handling instructions for the Aerosol Filter).
2 To release the Canister Holder, press down the
Release Arm while sliding the Holder towards
you. Remove the Canister from the Holder.
3 Release the Patient Suction Tubing (if
applicable).
4 Safely dispose of the contents of the Canister
according to local protocols.
5 Clean the LSU according to section 6.2 and
its reusable parts according to section 4.6.
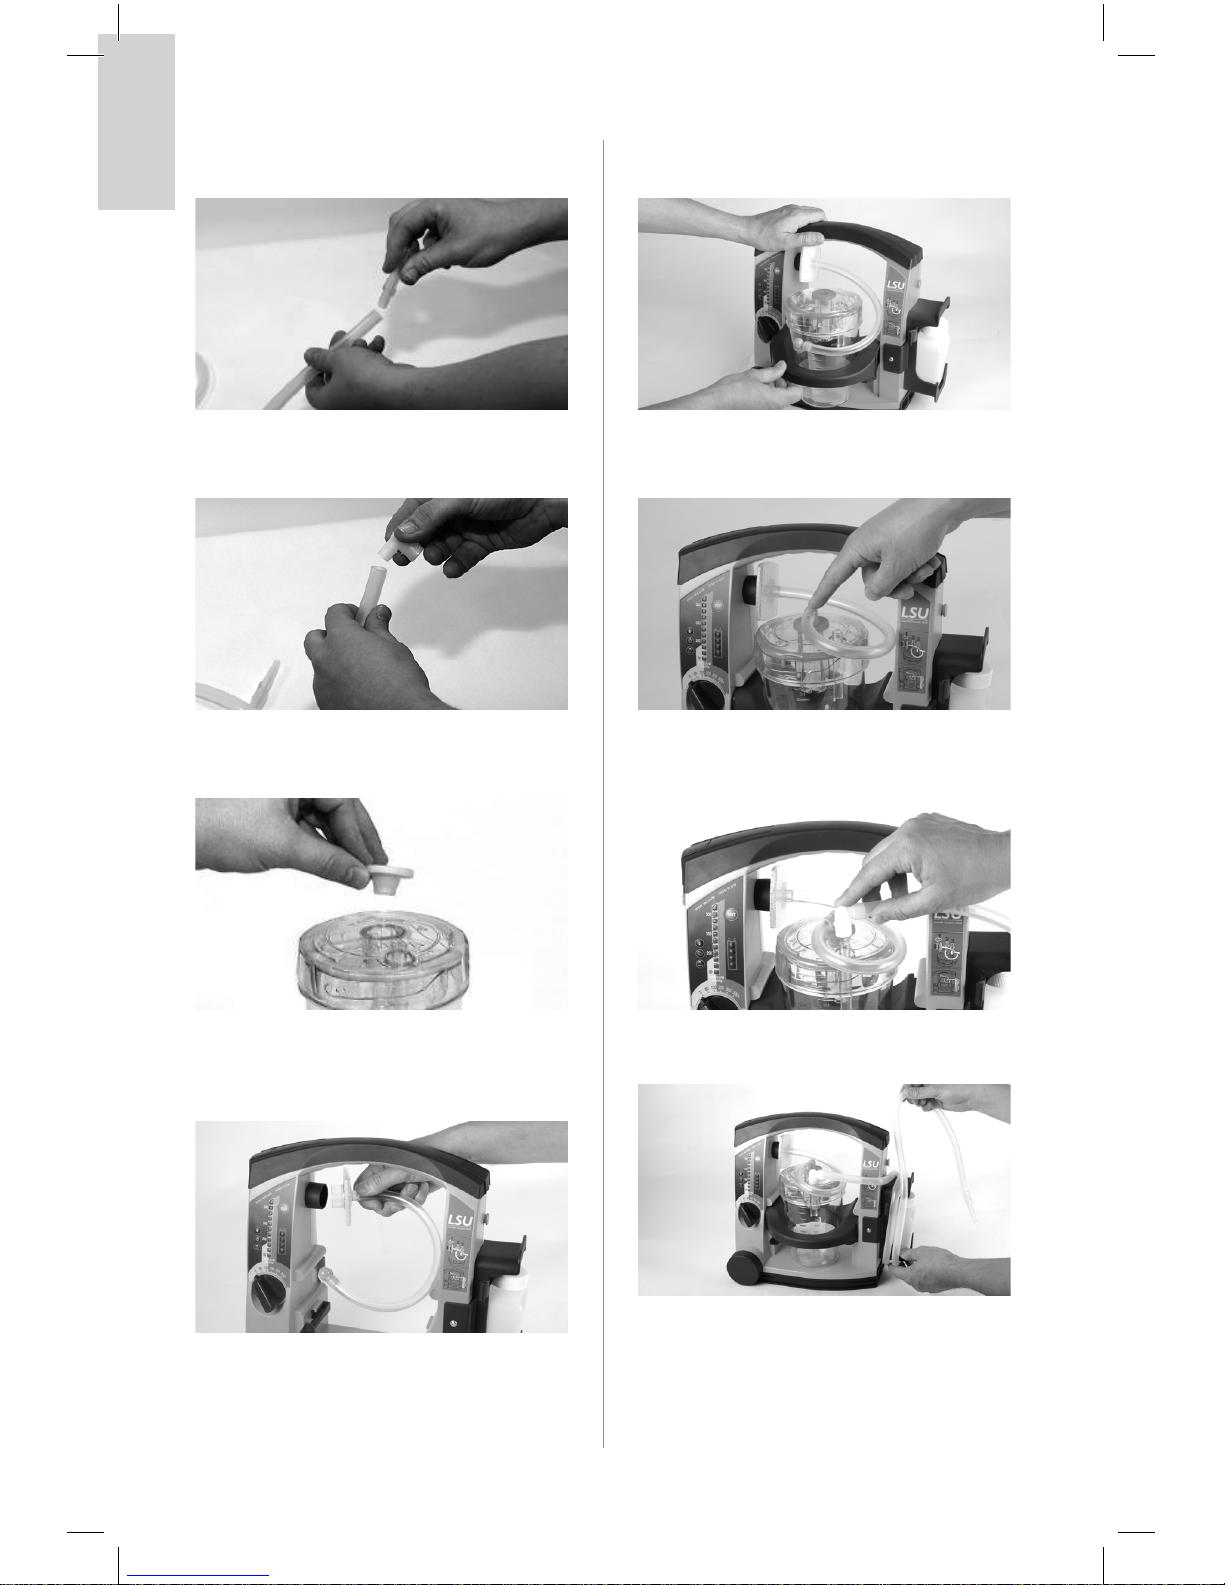
4.3.4 Assembly of the Reusable Canister System
1 Place the yellow Gasket in the Lid, make sure
that the gasket is placed flat in the Lid and
not twisted.
2 If the Float Ball has been removed, hold the
lid upside down and snap the ball into place
as shown.
Note: Never use the LSU without the Float Ball.
3 Secure the Lid to the Canister by turning it
clockwise until it is securely fastened.
English
10
4 Connect the Suction Catheter Adapter to
the Patient Tube.
5 Connect the Angled Connector to the Patient
Tube.
6 Mount the yellow Vacuum Seal in the centre
hole of the Lid and push it into place.
7 Connect the Aerosol Filter (blue ring) to the
blue Vacuum Inlet on the LSU. (Color code:
Blue on Blue)
8 Insert the Canister in the canister holder and
slide it into the LSU.
9 Connect the yellow Angled Connector to the
yellow Vacuum Seal
10 Connect the Angled Connector on the Patient
tubing to the PATIENT Inlet on the canister Lid.
11 Perform the Device Test according to section 7.
12 Wind the Patient Tubing on the Patient
Tubing Holder.
13 Place the LSU on charge (see section 6.4)
 Loading...