

Page 1
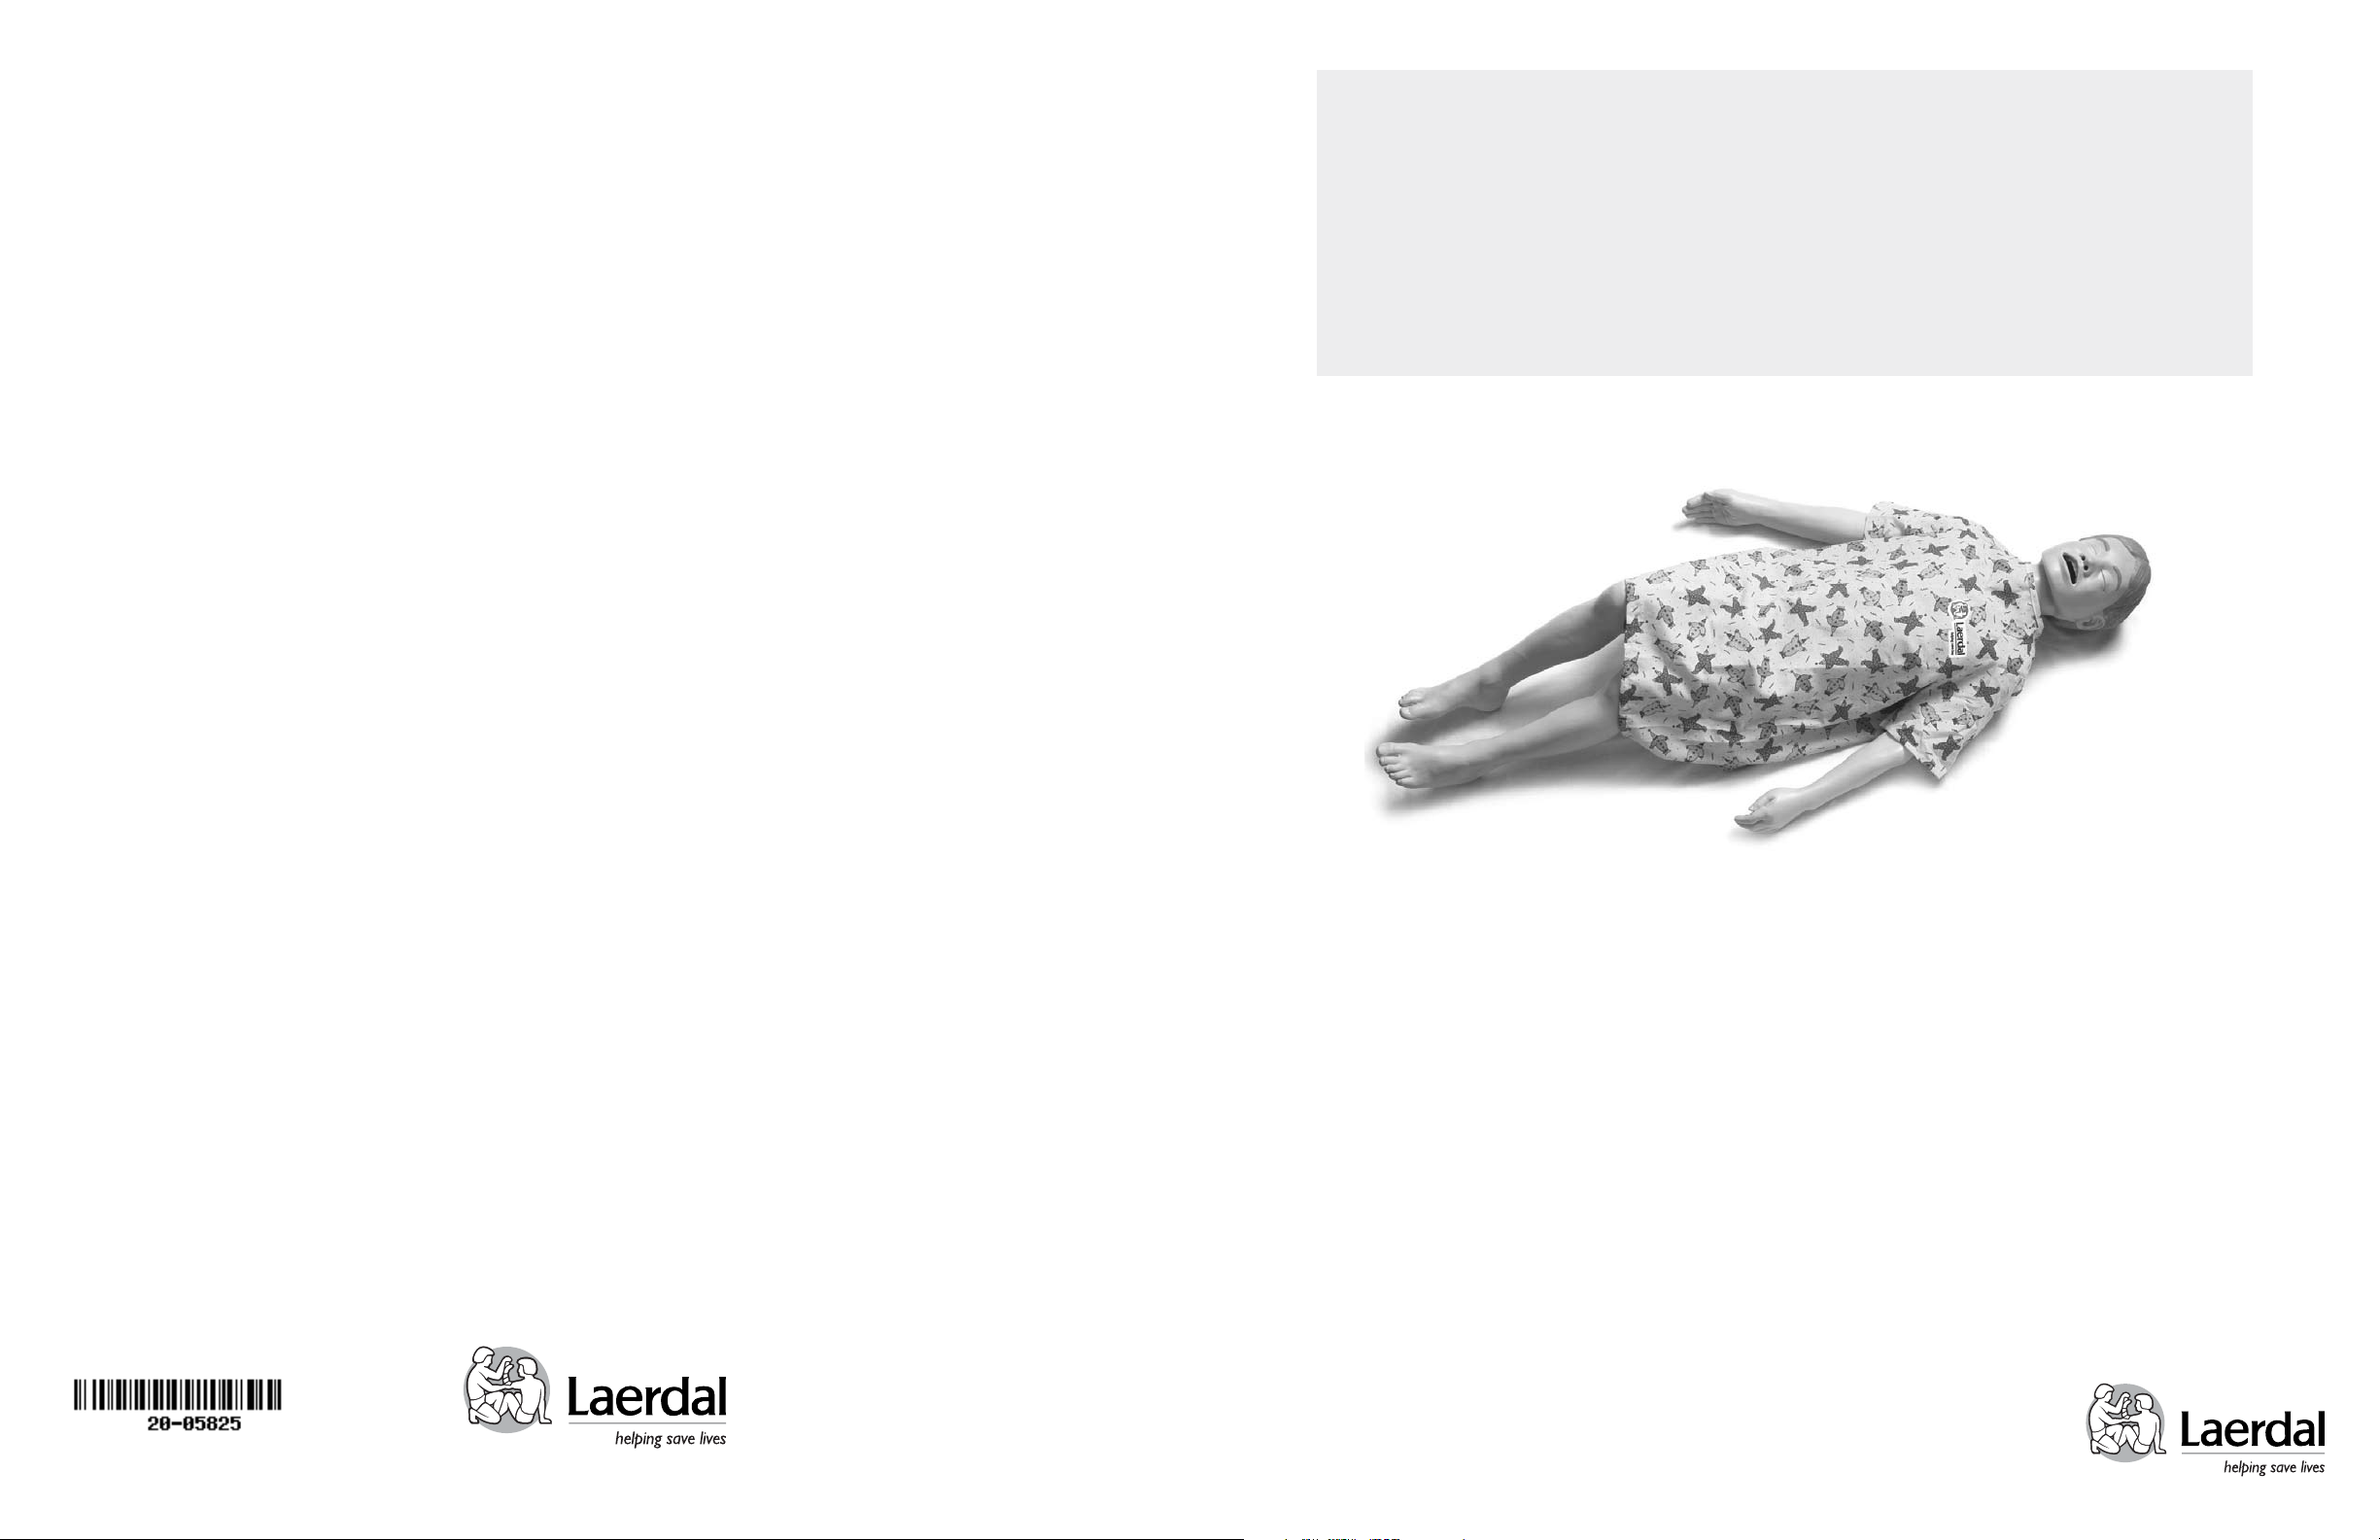
Nursing Kid
© 2012 Laerdal Medical. All rights reserved
rev B Printed in US
20-05825
ENGLISH Directions for Use
www.laerdal.com
Page 2
ENGLISH
Table of Contents
Laerdal Recommends .............................................................................................1
Items Included ..........................................................................................................1
Skills Taught .............................................................................................................1
Intubation ..................................................................................................................2
Carotid Pulse ...........................................................................................................2
Tracheostomy Plug ................................................................................................2
Tracheostomy Care ................................................................................................2
Lungs ..........................................................................................................................2
NG Tube ....................................................................................................................2
Stomach Reservoir .................................................................................................2
Chest Plate ...............................................................................................................2
Belly Plate with Sounds ..........................................................................................2
Injection Pads ...........................................................................................................2
Multi-Venous IV Arm ..............................................................................................3
Replacing Skin & Veins ............................................................................................3
Replacing Veins .........................................................................................................3
Genitalia ....................................................................................................................3
Colon Reservoir ......................................................................................................3
Urinary Catheterization & Enema Simulation ..................................................4
SimPad Connection.................................................................................................5
Vocal Interaction and Auscultation of Heart, Breath & Bowel Sounds ......5
Troubleshooting .......................................................................................................5
Care & Maintenance ...............................................................................................5
Replacement Parts ..................................................................................................5
ENGLISH
Cautions and Warnings
This product contains Natural Rubber latex which may cause
allergic reactions when in contact with humans.
The Nursing Kid is a lifelike manikin which realistically
simulates a six-year-old male patient. It is specifically designed for training
professionals in the practice of basic and advanced nursing techniques,
and the auscultation and recognition of normal and abnormal heart and
breath sounds.
As a result of quality construction and the ease of replacing individual parts,
this simulator should provide many years of training when reasonable care
and maintenance is practiced.
Laerdal Recommends
IV Injections – 22 gauge needle or smaller
Tracheostomy Tube – Size 4
Laryngoscope Blade – Size #2, straight or curved
Urethral Catheterization – Size #12 French
Enema Simulation – Size #7
NG Tube – 10 French
ET Tube – 5.0
The product, when carrying the CE-mark, is in
compliance with essential CE requirements and other
relevant provisions of council directive 1999/5/EC.
Items Included:
nikinaM cirtaideP ydoB lluF )1(
(1) Pediatric Multi-Venous IV Training Arm
ailatineG elaM )1(
ailatineG elameF )1(
(3) Urinary Valves
(3) Anal Valves
(1) Manikin Lubricant Spray
nwoG latipsoH )1(
esaC yrraC )1(
Skills Taught:
• Basic patient handling
• Oral hygiene
• Oral intubation
• Venous cannulation
• Nasal intubation
• Catheterization skills
• Eye irrigation & ear irrigation
• Colonic irrigation
• Enema simulation
• NG tube insertion , care, removal and med administration
• Lavage/Gavage
• OG tube insertion
• Tracheostomy care and suctioning
• IV infusion
• Subcutaneous and intramuscular injections
• Heart, Breath & Bowel Sound Auscultation
• Vocal Sound capabilities for interpersonal communication skills
1 Laerdal
Page 3

Intubation -
The following equipment is recommended:
a. Endotracheal tube size 4 or 5, cuffed or uncuffed
b. Manikin lubricant or liquid soap for lubrication
c. Laryngoscope blade, size 2 straight or curved blade
d. Laryngoscope handle
Stomach Reservoir -
1. Remove belly plate.
2. Unscrew black screw connector connecting reservoir to esophagus.
3. Fill reservoir with fluid for lavage simulation.
4. Replace in manikin.
Chest Plate -
Remove trach plug prior to insertion of intubation tubes.
Laerdal Recommends
Intubation tubes and airway passages should be sprayed with manikin
lubricant or lubricate with liquid soap prior to intubation.
Carotid Pulse -
Carotid Pulse is manually generated with the red bulb. Pulse rate is
controlled by squeezing bulb.
Tracheostomy Plug -
The tracheostomy plug may be removed by grasping firmly, then lifting up
and out. To replace, press into hole.
Laerdal Recommends
We recommend a size 4 tracheostomy tube. Opening will accommodate
other sizes, but a size 4 is usually most suitable.
Tracheostomy Care -
1. Mix solution of ½ cup mild liquid detergent and ½ cup water.
2. Remove lungs and trachea.
3. Pour mixture into simulated lungs.
4. Fill lungs to a level where suction catheter will pick up mixture.
5. Reattach lungs at connector.
Be careful not to introduce fluids into speaker ports or near electronics in
manikin’s chest.
The consistency of the solution approximates the mucus normally
suctioned in a tracheostomy patient.
Drain and air dry lungs immediately after each use.
Laerdal Recommends
Dusting with talcum powder is helpful in replacing chest and belly plates.
To remove:
1. Apply pressure to center of plate.
2. Work your fingers under edge of plate while lifting.
3. Disconnect heart sound speaker connector to release plate.
To insert:
1. Position plate over cavity.
2. Reconnect heart sound speaker.
3. Work plate edges into groove on torso cavity.
Belly Plate with Sounds -
Laerdal Recommends
Dusting with talcum powder is helpful in replacing belly plates.
To remove:
1. Apply pressure to center of plate.
2. Work your fingers under edge of plate while lifting.
3. Disconnect bowel sound speaker connector to release plate.
To insert:
1. Position plate over cavity.
2. Reconnect bowel sound speaker.
3. Work plate edges into groove on pelvis cavity.
Injection Pads -
A. To remove, squeeze pad with fingers and pull.
B. To replace, squeeze pad and insert in opening.
Lungs -
Lungs may be detached from the bronchial tubes by removing bands and
pulling them off. To replace, reverse the procedure.
Spreading the bands with forceps and slipping them over the “Y” connector
may aid in reconnecting the lungs.
NG Tube Placement -
This manikin features an esophagus and stomach reservoir for practice of
NG tube insertion and skills such as lavage and gavage.
Laerdal Recommends
For best results, lubricate tube with either manikin lubricant
or liquid detergent prior to NG or OG tube insertion.
Nursing Kid 2 Laerdal
Injection pads may be injected with water. Immediately following training,
foam must be removed, liquid squeezed out and air dried.
Laerdal Recommends
Dusting pads with talcum powder will assist reinsertion into skins and
injections sites.
Page 4
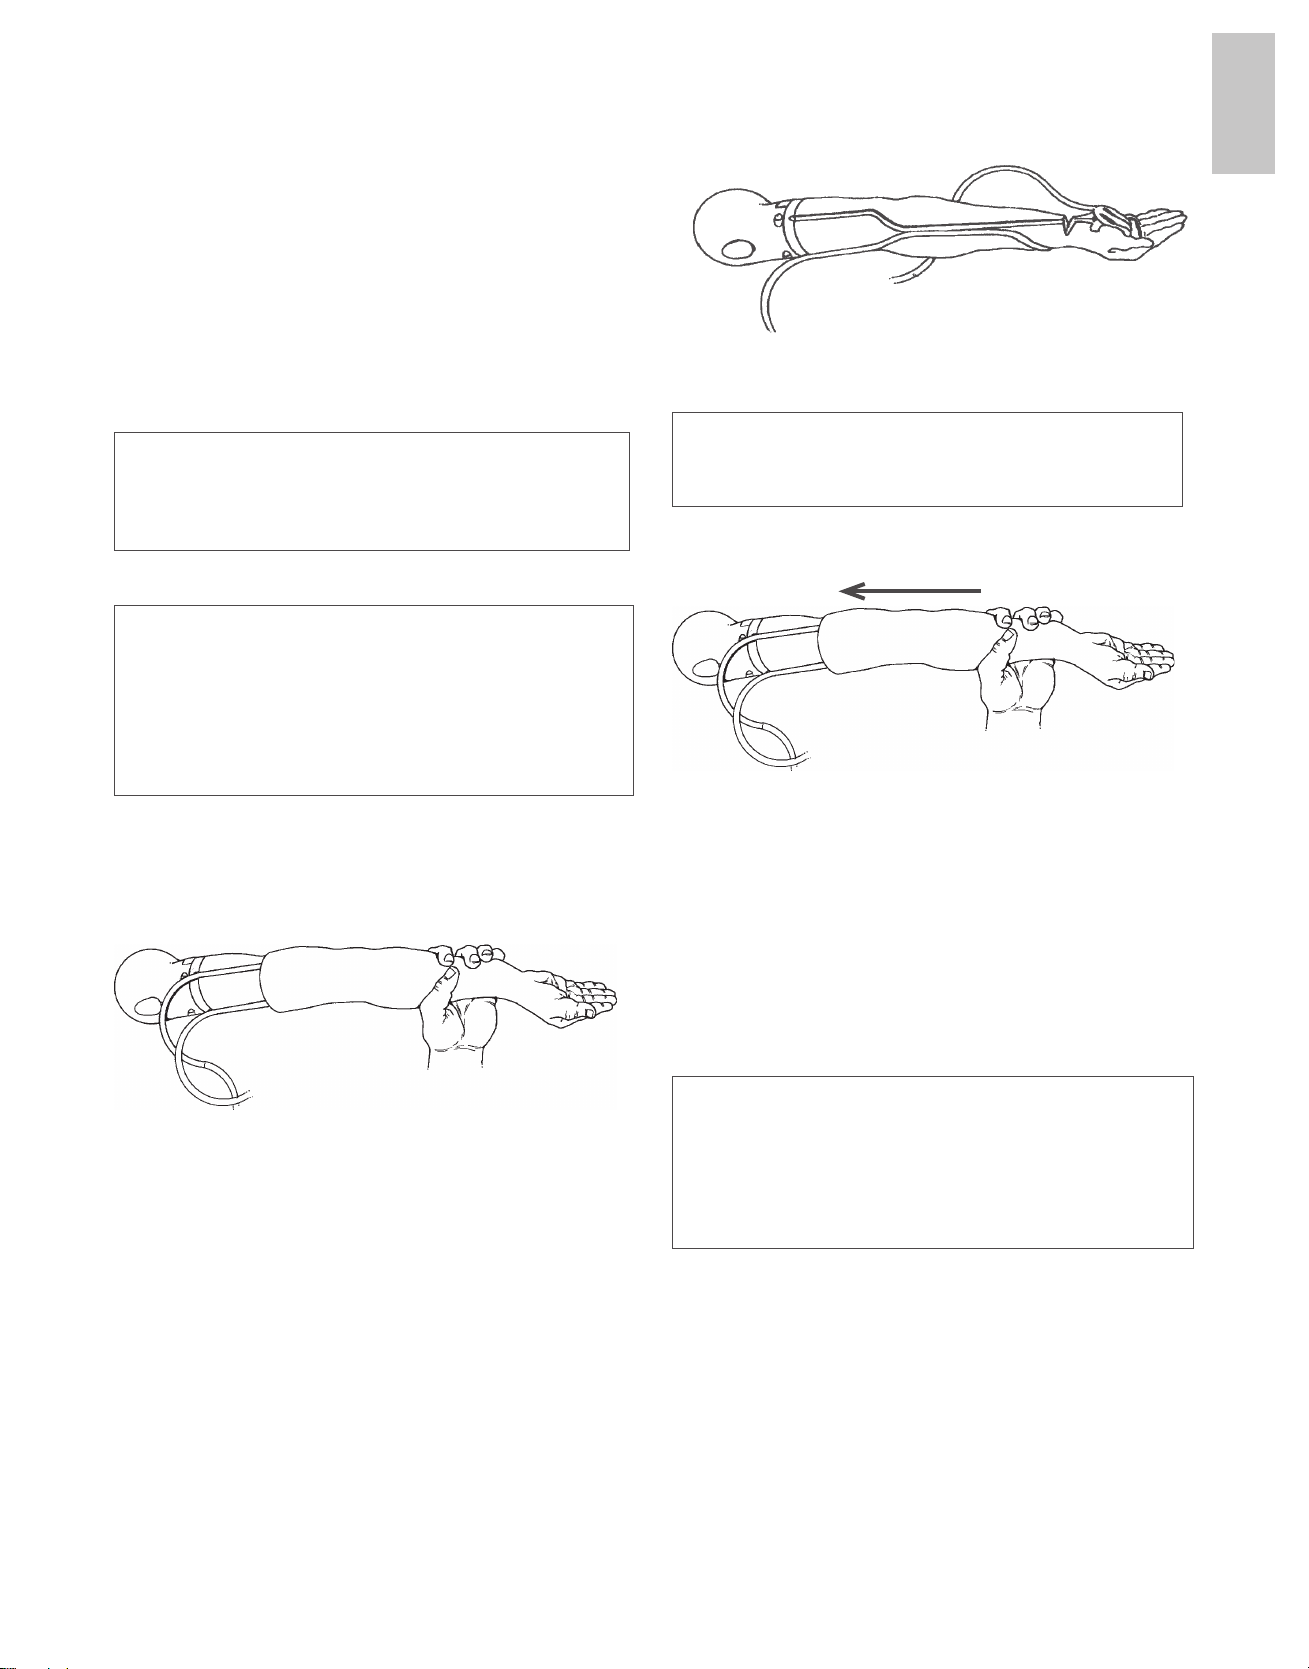
Multi-Venous IV Arm Multiple Venipuncture Sites:
• Dorsal Veins of Hand (3)
• Antecubital
• Cephalic Vein
• Median Vein
• Basilic Vein
ENGLISH
Instructions for Use:
1. Attach IV Bag to IV tubing.
2. Attach IV tubing to either latex vein.
3. Allow fluid to flow through arm and out other latex vein.
4. Clamp off flow of fluid.
Laerdal Recommends
We recommend nothing larger than a 22 gauge catheter. This will extend
the life of the IV Arm. When using a catheter, lubricate with soft soap and
water or spray with manikin lubricant for easier insertion.
The arm is now ready to practice venipuncture.
Laerdal Recommends
When excessive leaking occurs at puncture sites, either a new
vein system or skin should be installed to reduce loss of fluid.
We recommend working at a sink when replacing
the skin and vein system.
Replacing Skin and Veins -
To replace skin and veins:
1. Cut off skin. This can be done with a sharp knife or scalpel. (Figure1)
2. Discard skin.
Fig. 2
6. Generously lather arm mandrel with liquid soap.
7. Slide hand into skin.
Laerdal Recommends
Heat arms skins before replacing on mandrel.
This can be done with a hair-dryer.
8. Work skin over fingers, as with a glove.
9. Work arm skin up, over mandrel. (Figure 3)
Fig. 3
Genitalia -
Both male and female genitalia have been provided for urinary
catheterization and enema training procedures.
Tube-like valves, with a screw cap on one end, connect genitalia to the
corresponding reservoirs. The cap must be connected to genitalia openings.
Soft vinyl end of connector is attached to urinary and anal reservoirs with
a white clamp. (Long valve connects urinary reservoir; short valve
connects anal reservoir.)
Pelvic support pin must be removed and replaced immediately when
assembling and disassembling genitalia.
Laerdal Recommends
Fig. 1
Replacing veins - (Keeping skin)
1. Lubricate inside of skin with liquid detergent; let it flow down into the
finger area.
2. Begin at top of arm and slowly pull skin down and off of arm. Do not
roll, as that will cause skin to bind. Thumb will detach with skin.
3. Remove tubing from track in mandrel. Glue may need to be scraped away
to allow removal.
4. Rinse and dry vein grooves well and swab with alcohol. Be sure to
remove any excess glue.
5. Place new veins along grooves, (Figure 2) spot gluing as needed.
(We recommend a fast-drying glue.)
Nursing Kid 3 Laerdal
The belly plate with ileostomy plug contains the urinary reservoir. To fill
reservoir, remove plug, fill, then reinsert plug.
Pelvic support pin must be replaced.
Failure to replace pin will result in pelvic spread.
If this occurs, the genitalia module will no
longer fit properly in the manikin.
Page 5
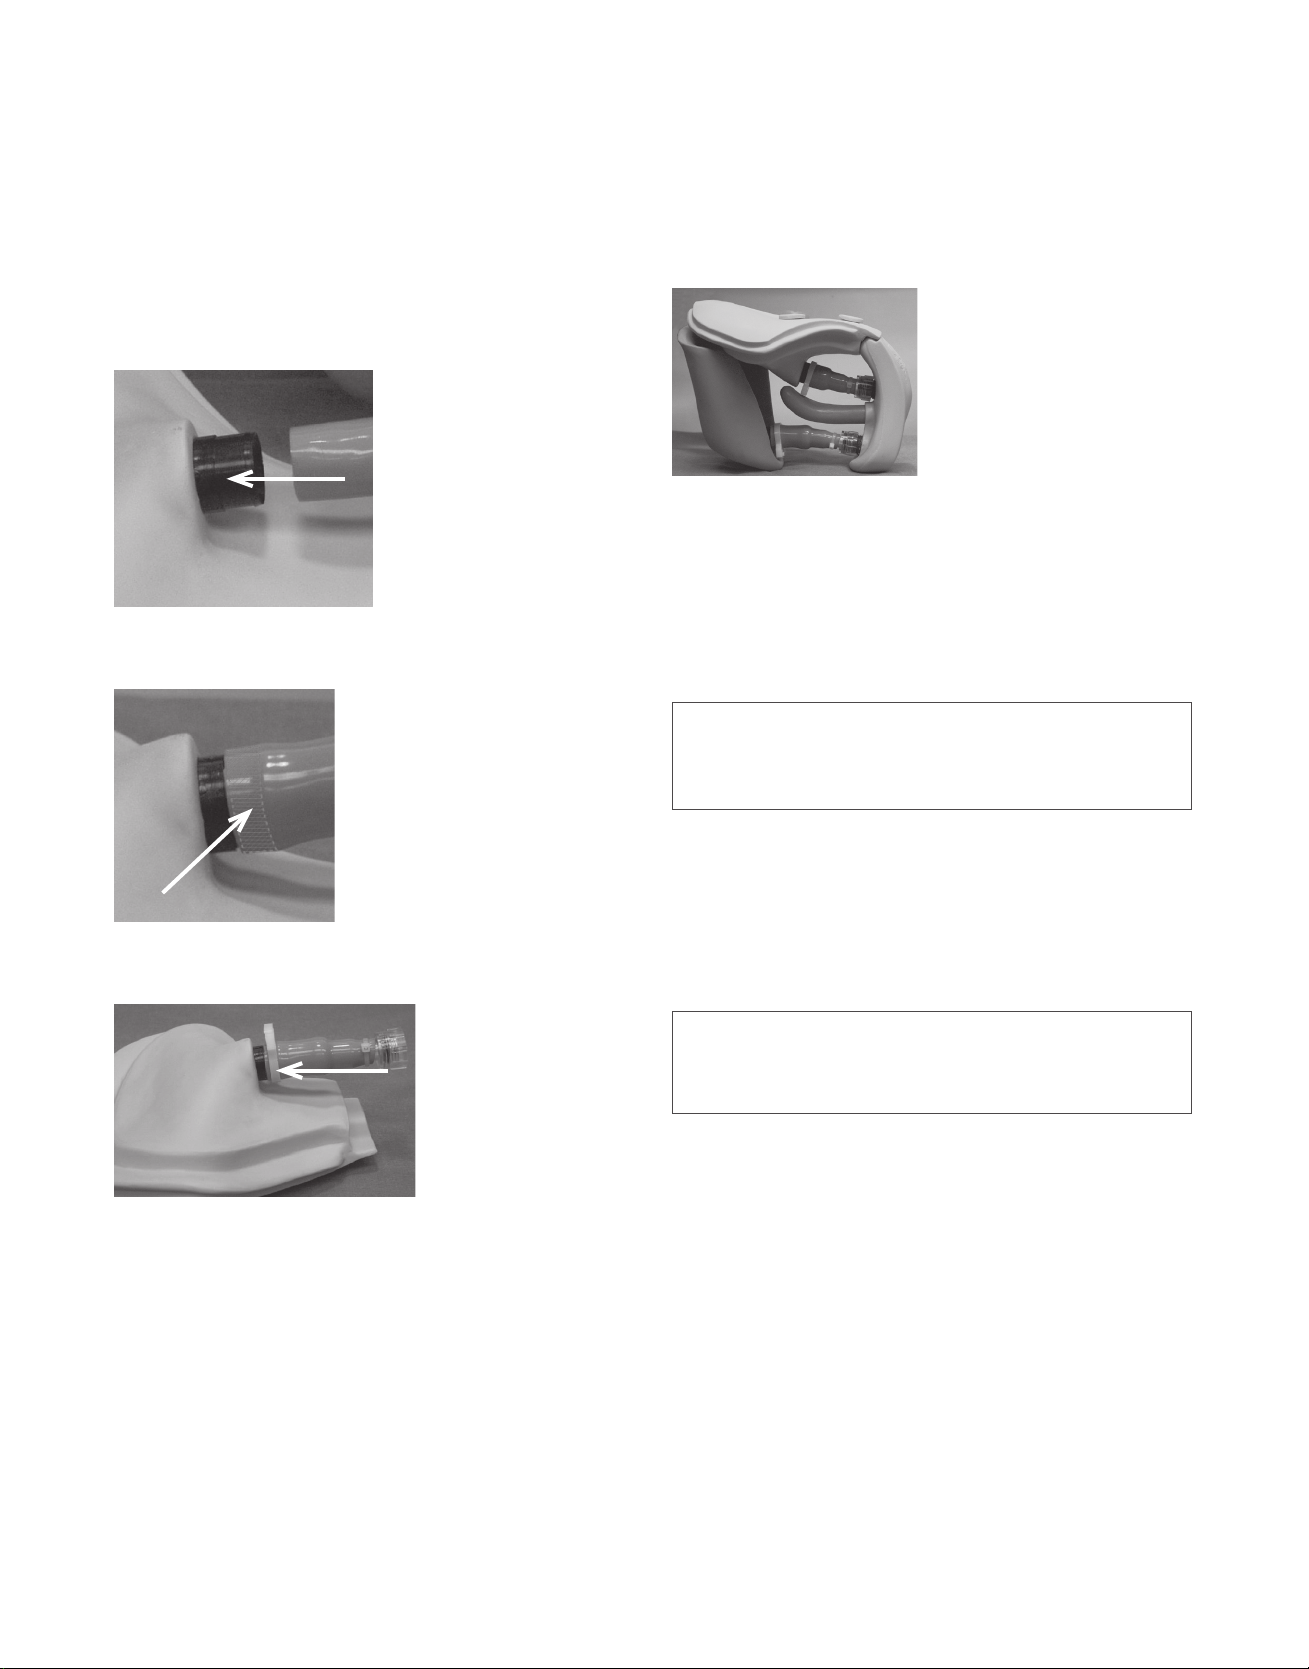
To assemble:
1. Screw valve onto genitalia.
2. Slide C ring over the connector.
3. Slide connector over the reservoir end.
4. Tighten C clamp connector.
5. Insert genitalia assembly (Photo 2) into pelvic cavity.
6. Replace the pelvic support pin.
7. Press belly plate into position.
See Photos 1A, 1B & 1C below
Photo 1A
Slide tube to meet ridge on connector.
Colon Reservoir -
The colon reservoir inserts into the pelvic cavity with narrow end
downward and connector pointing out. This connector attaches the
reservoir to the rectal valve on the genitalia. The reservoir should be
removed from the manikin, inverted and drained completely before storage.
(Photo 2)
Photo 2
Long valve connects urinary reservoir; short valve connects anal reservoir.
To disassemble:
1. Lift up on belly plate.
2. Pull upper portion of genitalia back to remove pelvic support pin.
3. Belly plate, genitalia with connectors, and colon reservoir may now be
removed simultaneously.
Urinary Catheterization and Enema Simulation -
Laerdal Recommends
Catheters should be well lubricated with manikin
lubricant or full strength liquid soap prior to using.
Photo 1B
Area where clamp is placed.
Photo 1C
Apply clamp and squeeze to tighten.
After several uses, catheter may “hang” when water has washed away
lubricant, causing friction and binding. If this occurs, generously lubricate a
catheter and insert into urethra several times.
If catheter hangs during removal, work it with an “in and out” motion.
Use warm water in reservoirs when possible to keep soap from clogging
the catheters. Make sure reservoirs are well drained of all water before
disconnecting valves.
Laerdal Recommends
A size 12 French catheter is suggested for urethral catheterization.
Size 7mm catheter is suggested for enema simulation.
Check List for Valves That May Leak:
A. Are tubes/connectors attached correctly?
B. Do valve connectors have an O-ring?
C. Does the white clamp fit firmly against base of valve?
D. If valves are attached correctly, are they properly connected to
reservoirs and to genitalia?
Nursing Kid 4 Laerdal
Page 6
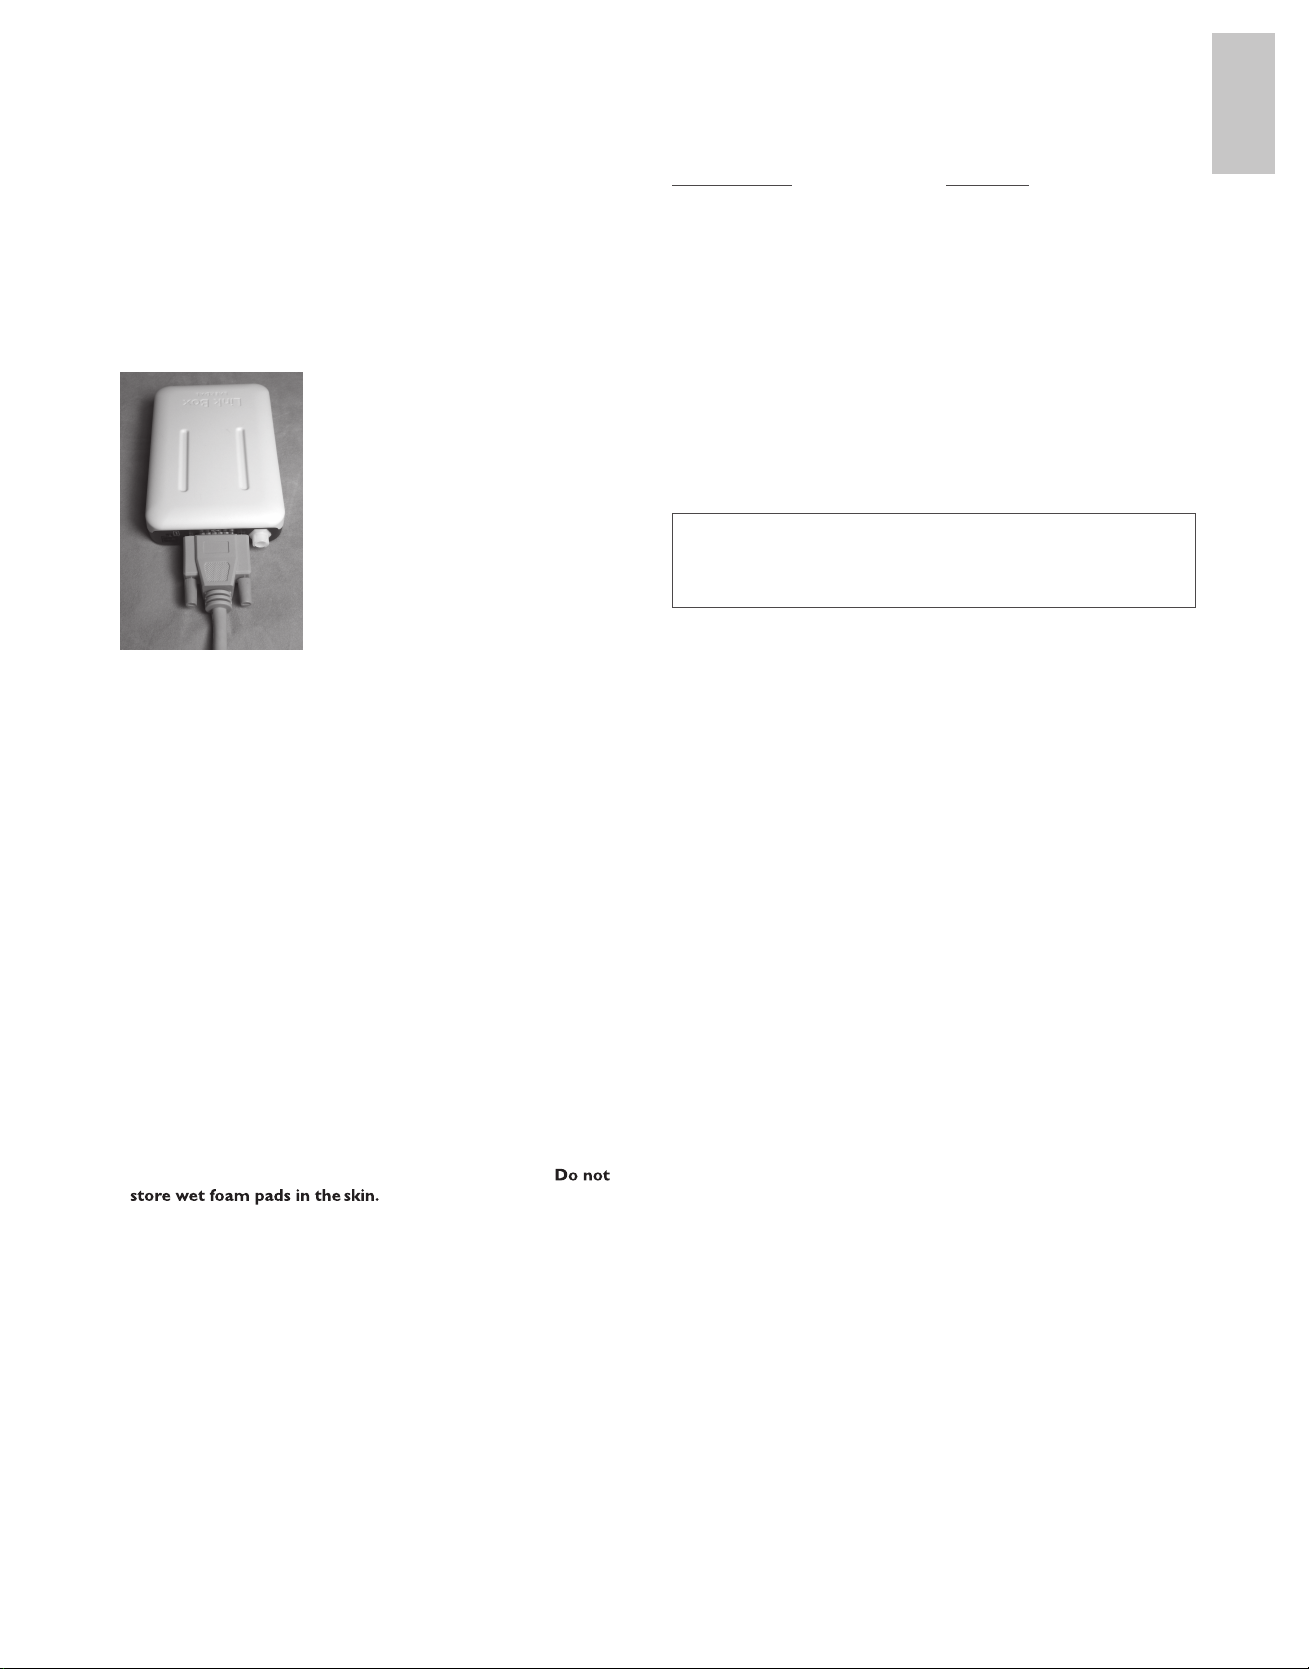
Sim Pad Connection
1. Connect Nursing Kid to Link Box, via cable located
on back of manikin (Photo 1)
2. For some manikins, the adapter cable supplied with
SimPad may have to be used
See SimPad DFU for complete Heart, Breath and Bowel
Sound Auscultation.
(Photo 1)
Troubleshooting
Replacement Parts:
Product Number: ........................................Description:
350-00250 ..................................................... Head
350-00350 ..................................................... Left Arm
375-71001 ..................................................... Right IV Arm
350-00450 ..................................................... Left Leg
350-00550 ..................................................... Right Leg
350-00650 ..................................................... Deltoid Pad
350-00750 ..................................................... Thigh Pad
350-00850 ..................................................... Gluteal Pad
375-70150 ..................................................... Pediatric Skin & Vein Kit
200-10001 ..................................................... SimPad System
350-00150 ..................................................... Urinary/Anal Valve
350-00950 ..................................................... Gown
231-01150 ..................................................... Carry Case
Please contact Customer Service Representatives
for more information on Replacement
Parts in other skin tones.
ENGLISH
What can I do if my manikin develops a pelvic spread?
Cinch pelvis with a belt and heat with a hair dryer to soften, cinching as you
heat. Insert pin, leaving belt in place until cool.
What do I do if my connectors leak?
Make sure clamps are squeezed tightly into place and connectors are
screwed on tightly.
What can I do if I can’t remove my catheter?
Make sure the cuff is deflated.
Care and Maintenance:
1. Clean with mild soap and water; do not submerse manikin or parts in
cleaning fluids or water.
2. Use only on clean surface. Avoid felt tipped markers, ink pens, acetone,
iodine or other staining products and avoid placing the manikin on
newsprint or inked lines of any kind.
3. To ensure longevity, each manikin should be cleaned after each training
session and a general inspection should be conducted regularly.
4. Modules and all other parts should be drained and air-dried thorough
before storage and disinfected when needed. After use of injection pads
(use water only), accumulated water should be squeezed out.
To prevent mildew or mold, pads can be
soaked in a mild solution of disinfectant and water or bleach and wate
Squeeze excess solution from pads, allow them to dry, then store or
reinsert in manikin.
5. Articulating parts will benefit from a light application of talcum powder
prior to training sessions.
6. Store properly between teaching sessions.
ly
r.
Do not allow foreign matter to fall into sound openings in the
manikin’s torso.
Nursing Kid 5 Laerdal
 Loading...