

Page 1

Model: WT-2160
Radio-controlled
Travel Alarm Clock
Instruction Manual
1
Page 2

TABLE OF CONTENTS
Topic Page
Inventory of Contents 1
Quick Setup 2
Detailed Setup Guide
Battery Installation 3
About WWVB 4-6
Programming 6-8
Time zone 6
Daylight on/off 7
Snooze setting 7
Time setting 7-8
Setting Alarms 9-10
Operating Screens 11-12
Traveling 12
Troubleshooting 13
Maintenance, Warranty,
Contact information
14-16
2
Page 3

INVENTORY OF CONTENTS
1.
Radio controlled clock (figure 1 & 2)
2.
Instruction Manual and Warranty Card.
Figure 1: Open
Figure 2: Closed
1
Page 4

QUICK SETUP
1.
The alarm clock is packed in the closed
position. To open, grasp the two parts
and slide the cover down (Figure 3).
Figure 3
2.
The alarm clock includes a button cell
battery in the battery compartment.
Open up the compartment and remove
the plastic insulating strip to activate. it
will start searching for a signal and set
to the correct time and date, usually not
until overnight. After the time and date
are set, set to the correct time zone.
DETAILED SETUP GUIDE
2
Page 5

I.
BATTERY INSTALLATION
A.
The battery is included in the clock with
a plastic insulating strip that needs to be
removed to activate the clock.
1.
Using a coin, turn the battery cover
slightly counter-clockwise.
2.
Take off the cover; you may need to pry
it off using a paperclip or other small
object.
3.
Remove the plastic from under the
battery.
Battery
cover
Battery
Compartment
B.
Install the battery, type LR44, with the
positive side facing out. The alarm will
sound briefly after installation; do not
press any buttons for 10 minutes.
3
Page 6

PROGRAMMING
II.
A.
SETTING THE TIME
There are two methods by which the time
and date can be set: 1) Automatically via
WWVB reception, or 2) Manually.
B.
WWVB (Radio-Controlled Time)
This method requires you to do nothing,
except wait for the signal to be received,
and to select a time zone. Reception
usually takes approximately 6-10 minutes
during optimal conditions. The best
conditions for reception is at night,
between midnight and 6:00 am—when
there is less atmospheric interference. To
keep your time as accurate as possible, the
alarm clock conducts a WWVB search
every night between these hours, and
overrides any manually set time. The
WWVB tower icon (appearing in the
TIME LCD) will flash when a signalsearch is in progress and a signal is being
received, and will remain steady when the
signal has been received. If the WWVB
time has not been received after 10
4
Page 7

minutes of battery installation, you may
manually set the time or leave the time
function alone (reception will occur
regardless).
About Radio Controlled Time signal,
WWVB:
The NIST (National Institute of Standards
and Technology—Time and Frequency
Division) WWVB radio station is located
in Ft. Collins, Colorado, and transmits the
exact time and date signal continuously
throughout the United States at 60 kHz.
The signal can be received up to 2,000
miles away through the internal antenna in
the alarm clock. However, due to the
nature of the Earth’s Ionosphere,
reception is very limited during daylight
hours. The alarm clock will search for a
signal every night when reception is best.
The WWVB radio station derives its signal
from the NIST Atomic clock in Boulder,
Colorado. A team of atomic physicists is
continually measuring every second, of
every day, to an accuracy of ten billionths
of a second per day. These physicists
5
Page 8

have created an international standard,
measuring a second as 9,192,631,770
vibrations of a Cesium-133 atom in a
vacuum.
C.
PROGRAMMING
(includes manual time setting)
**To end the programming mode at any
time, simply press the SNOOZE button
a)
Press the SET button. The US map and
time zone will flash (“-5” is the default).
The time zone is displayed according to
“GMT”; please see below table for
explanation. Press the “+” key to move
the time zone West one hour until it
reaches the your time zone, then press
-4: Atlantic, =-5: Eastern
-6: Central, -7: Mountain
-8: Pacific, -9: Alaska
-10: Hawaii
GMT: Greenwich
Mean Time
Eastern time zone
shown
the SET key to set the time zone and
move to the next programming step.
6
Page 9

“DST On” will flash. Press the “+”
b)
key to toggle between the Daylight
Saving Time ON or OFF (for places that
do not follow Daylight Saving Time
changes). Press the SET key.
c)
“Sno” will show at the bottom of the
screen, and a number will flash at the
top. This is the setting for the length of
the alarm snooze. Press the “+” key to
advance the length from 0 (no snooze))
to 59 minutes. This sets the time the
alarm is silenced after pressing the
SNOOZE key while the alarm is
sounding. Press the SET key.
d)
The hour will now flash. Press the “+”
key to advance to the correct hour; be
sure to note the correct am/pm setting
(“PM” will show for pm setting, nothing
for the am setting). Press the SET key.
e)
The minutes will now flash. Press the
“+” key to advance the minutes. By
holding the “+” key, the minutes will
advance in five minute increments. Press
the SET key.
7
Page 10

The year will now flash. Press the “+”
f)
key to advance to the correct year. Press
the SET key.
g)
The month will now flash. Press the
“+” key to advance to the correct month.
Press the SET key.
h)
The date will now flash. Press the “+”
key to advance to the correct day. Press
the SET key.
i)
The day of the week will now flash
(Sun, Mon, etc.). Press the “+” key to
advance to the correct day of the week.
Press the SET key.
j)
“12” or “24” will now flash. Press the
“+” key to select either 12 –hour or 24hour (military time). The programming
is now complete.
2.
PROGRAMMING SEQUENCE
→Time Zone→DST On/OFF→Snooze
Setting→Hour→Minute→Year→Month
→Date→Day→12/24 hour format
8
Page 11

SETTING THE ALARMS
III.
La Crosse Technology’s travel alarm clock
has two separate alarms that can be set.
Each alarm has a distinctive sound and
operate independently.
A.
Press and hold the “ALM1” (or
“ALM2” key) key for two seconds to enter
the setting mode. The alarm time will
flash. Press the “HOUR” key to advance
the hour of the alarm, and press the “MIN”
key to advance the minutes of the alarm. If
no button is pressed within fifteen seconds,
the alarm will set and will activate, and
the clock will revert to the normal
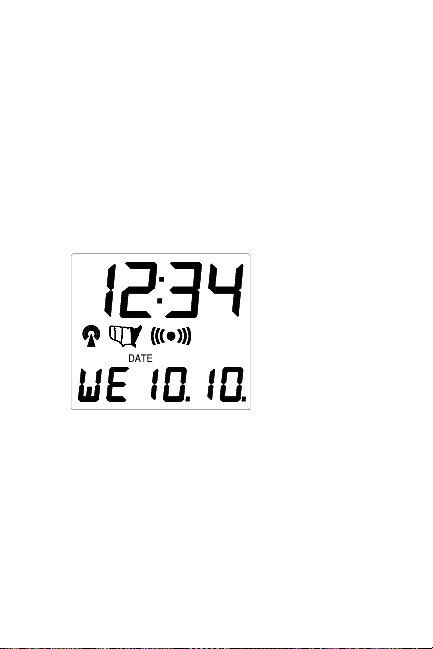
operating screen. The picture below shows
both alarms activated.
B.
To activate/deactivate the alarm, press
“Alarm 1”
activated
“Alarm 2”
activated
9
Page 12

the “ALM1” or “ALM2” key once,
depending on which alarm needs to be
activated.
C.
When the alarm is sounding, pressing
the “SNOOZE” bar will turn it off for the
time that was selected in the programming
mode (section II.A.2.c.). If the setting is
“0”, the alarm will turn off for 24 hours.
During the snooze period, the lower screen
will show a countdown until the alarm will
sound again. If the snooze bar is pressed
again during the original snooze period,
the period will be reset. Once the period is
finished, the alarm will sound again.
Pressing any key other than the snooze key
will turn off the alarm for 24 hours.
10
Page 13
OPERATING SCREENS
IV.
A.
The exact time will always be displayed
in the upper portion of the screen, and the
US map will show when the time zone is
set to the continental US (with the time
zone selected showing in black). The
lower portion of the screen has five
different screens that can be selected. The
default is “DAY, MONTH, DATE” as
shown below.
B.
Press the “MODE” key to select which
screen to show. It will change in order as
follows:
1.
DAY MONTH DATE
2.
MONTH DATE YEAR
3.
SECONDS
11
Page 14

ALARM 1 TIME
4.
5.
ALARM 2 TIME
C.
While in non-alarm mode, pressing the
“SNOOZE” bar will show the “ALARM1”
and “ALARM2” briefly in the lower
section.
V.
TRAVELING
A.
When traveling, it will only be
necessary to change to the appropriate
time zone. Please note that the clock will
only search for a signal when it is set
between “GMT-4 and GMT-10.The alarm
clock will set to any time zone from
“GMT” to “GMT-12”. Outside this range,
it will only be necessary to set the hour to
the correct hour, leaving the time zone set
to your local time zone. For example, if
you are traveling to Hong Kong, you will
need to manually set the hour to the local
time. When the clock is back in the US, it
will search for a signal and set to the
proper time according to the time zone
selected.
12
Page 15

TROUBLESHOOTING
NOTE: For problems not solved, please
contact La Crosse Technology via e-mail or
phone, or visit our website,
www.lacrossetechnology.com
Problem: The time and date will not set
initially.
Solution: It usually takes overnight before
the clock can receive the signal due to the
interference the sun has on the WWVB
signal. Wait overnight for the signal.
Solution: Computer monitors and
televisions can cause interference with the
signal reception. Please keep the clock at
least six feet from electrical sources.
Solution: In some areas of the US, in
particular on the East and West coasts, the
signal is very weak. It may take up to 72
hours before a good signal is received. The
reception can be helped by placing the clock
in a window facing Colorado, with the back
towards Colorado.
Solution: Be sure the time zone is set to a
US time zone.
13
Page 16

MAINTENANCE AND CARE
INSTRUCTIONS
• Extreme temperatures, vibration, and
shock should be avoided to prevent
damage to the unit.
• Clean displays and units with a soft,
damp cloth. Do not use solvents or
scouring agents; they may mark the
displays and casings.
• Do not submerge in water.
• Do not subject the units to unnecessary
heat or cold by placing them in the
oven or freezer.
• Opening the casings invalidates the
warranty. Do not try to repair the unit.
Contact La Crosse Technology repairs.
14
Page 17

SPECIFICATIONS
Dimensions:
(L x W x H)
Battery LR44 Alkaline Button
Battery life Approximately 1 year
WARRANTY INFORMATION
La Crosse Technology provides a 1-year warranty
on this alarm clock. Contact La Crosse
Technology immediately upon discovery of any
defects covered by this warranty.
Before sending the clock in for repairs, contact
La Crosse Technology. The clock will be repaired
or replaced with the same or similar model.
This warranty does not cover any defects resulting
from improper use, unauthorized repairs, faulty
batteries, or the alarm clock inability to receive a
signal due to any source of interference.
LA CROSSE TECHNOLOGY WILL NOT
ASSUME LIABILITY FOR INCIDENTAL,
CONSEQUENTIAL, PUNITIVE, OR OTHER
SIMILAR DAMAGES ASSOCIATED WITH
THE OPERATION OR MALFUNCTION OF
2-1/2” x 5/8” x 3-5/8”
(62 x 15 x 93 mm).
15
Page 18

THIS ALARM CLOCK. THIS PRODUCT IS
NOT TO BE USED FOR MEDICAL PURPOSES
OR FOR PUBLIC INFORMATION. THIS
PRODUCT IS NOT A TOY. KEEP OUT OF
CHILDREN’S REACH.
This warranty gives you specific legal rights. You
may also have other rights specific to your State.
Some States do no allow the exclusion of
consequential or incidental damages therefore the
above exclusion of limitation may not apply to
you.
For warranty work, technical support, or
information contact
La Crosse Technology, Ltd
2809 Losey Blvd. S.
La Crosse, WI 54601
Phone: 608.782.1610
Fax: 608.796.1020
e-mail:
support@lacrossetechnology.com
(warranty work)
web: www.lacrossetechnology.com
16
 Loading...