

La Crosse Technology WT-2150B, WT-2150 Instruction Manual

RADIO CONTROLLED ANALOG CLOCK
P
WT-2150 Instruction manual
acific Time (-
8h GMT)
Mountain Time
(-7h GMT)
Central Time
(-6h GMT)
United States
Mexico
Canada
Eastern Time
(-5h GMT)
1
Radio Controlled Alarm Clock
Introduction:
Congratulations on purchasing this Radio Controlled Alarm Clock. Welcome to the world of radio
controlled time-keeping technology. We hope you will enjoy the convenience of never having to set
your clock again and having the confidence of knowing exactly what time it is. This innovative clock is
ideal for home or office use and is loaded with many features. Please read this instruction manual to
enjoy the full benefits of all the features.
Features:
• WWVB radio controlled time and date
• 12 or 24 hour time display
• Indoor temperature reading (°F/°C user selectable)
• Two independent alarm times
• Snooze interval setting from 0 (off) to 59 minutes
• Calendar display (weekday/month/date or month/date/year)
• Time zone map for continental United States
• Time zone selectable –1 hour to –12 hour or Greenwich Mean Time (GMT)
• LCD back light
• Manual time setting option
• Daylight savings time ON/OFF option
• Low battery indicator
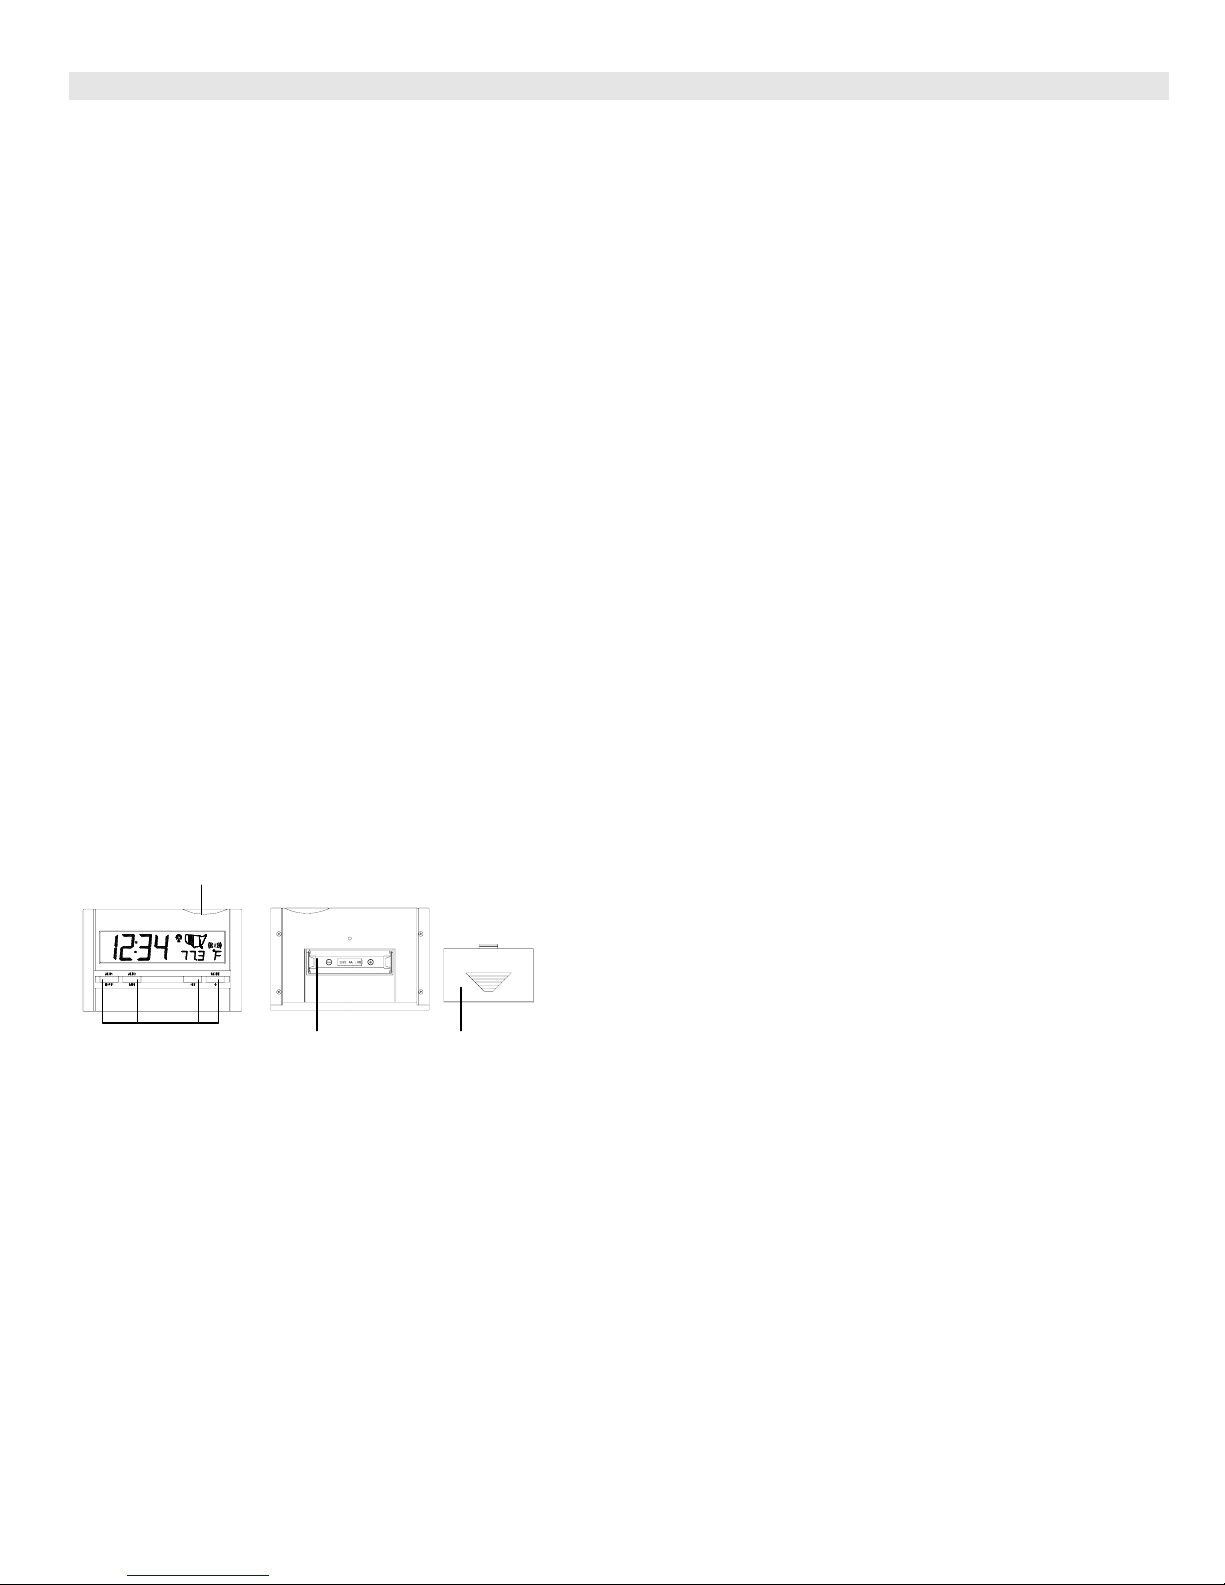
Starting up the Alarm Clock
The alarm clock uses 1 x AA LR6 battery (Alkaline recommended)
Snooze button
Function Keys
Battery Compartment
Battery Cover
1. Slide the battery cover off as indicated by the triangle to open the battery compartment.
2. Insert 1 x AA battery, observing polarity.
3. Replace battery cover.
4. Upon power-up, the alarm will sound once and all LCD segments will light up briefly.
5. The clock will now start searching for the WWVB time signal and the radio tower icon will flash to
indicate signal reception attempt. Do not press any buttons at this time.
6. Reception typically takes 6-10 minutes during ideal reception time (nighttime hours) and will timeout
after 10 minutes if no signal is found.
7. Upon successful reception, the time and date will be set to absolutely accurate time (default to
Eastern time zone).
8. In the case of no reception keep in mind that for most locations reception during daylight hours is
not possible. In this case, you may manually set the time or simply wait overnight.
2
A
y
A
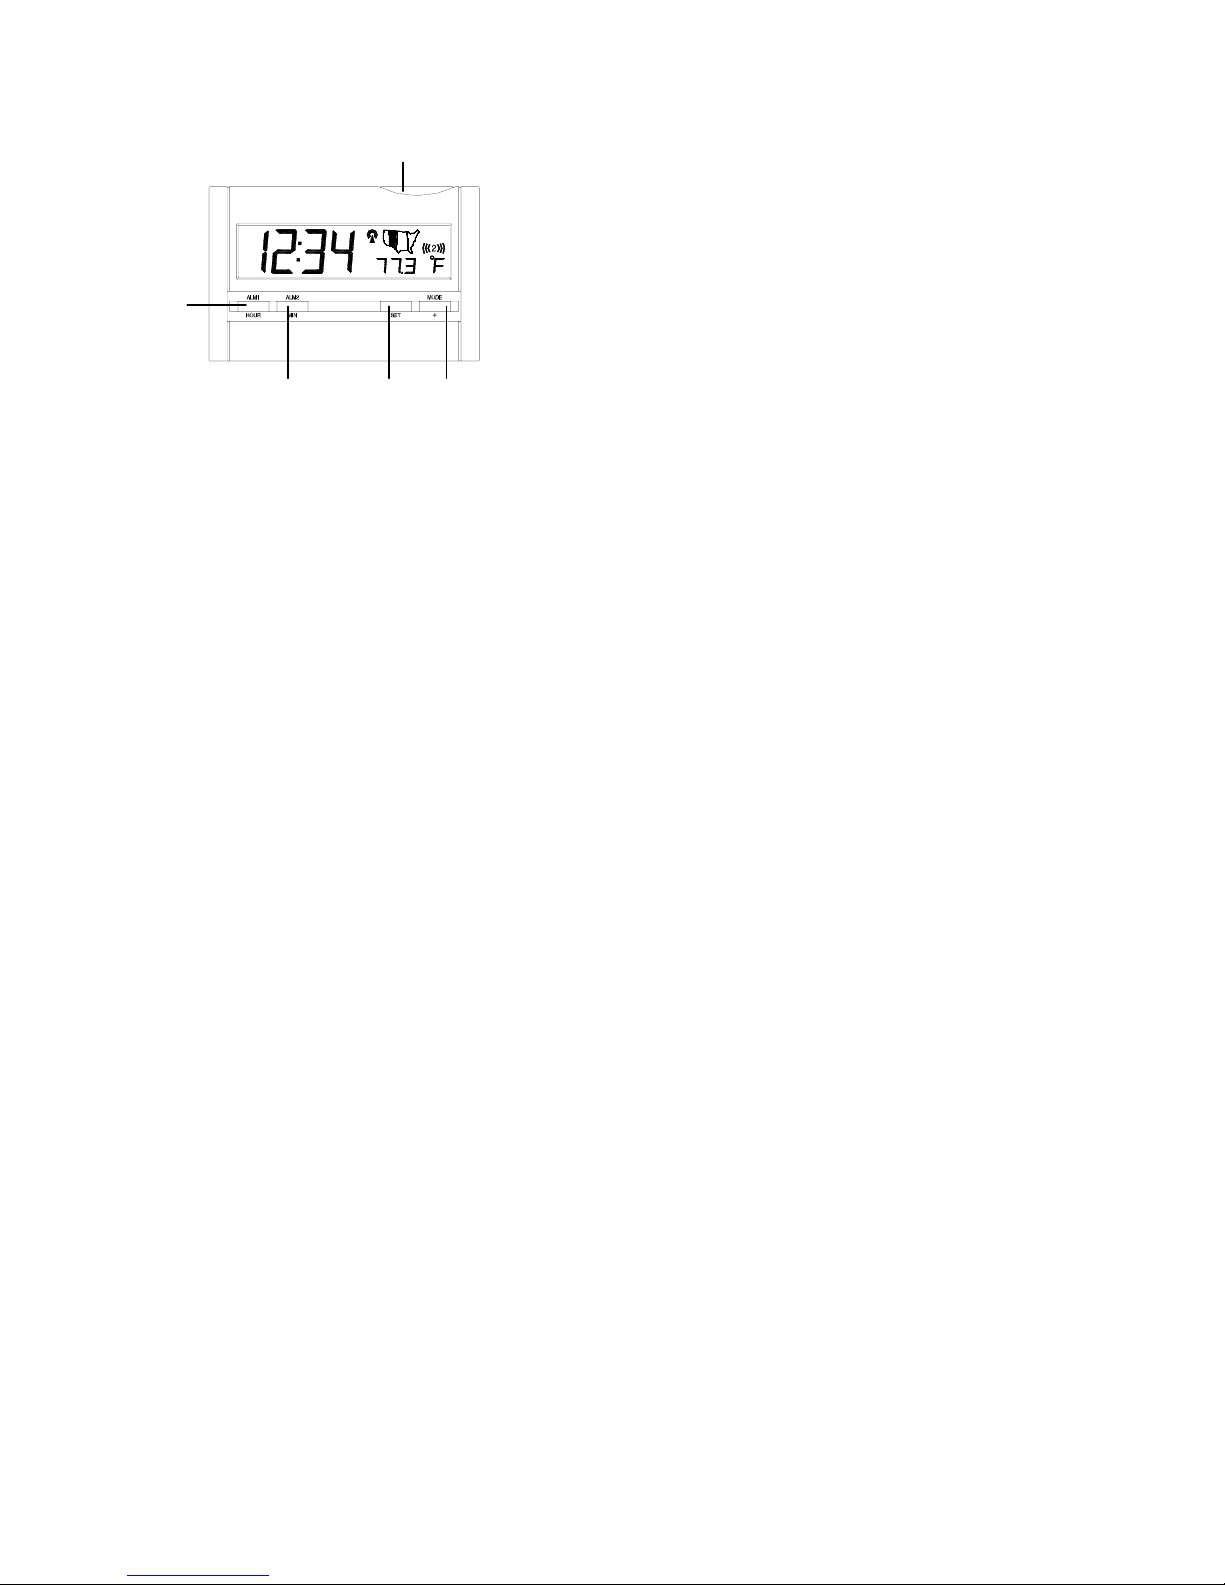
Your Radio Controlled Alarm Clock has five easy to use function keys:
LM1/Hour ke
LM2/Minute key
SNOOZE Bar
SET key
MODE/+ key
Use of keys:
SET: • Enter the programming mode.
• Select and confirm settings while in programming mode.
MODE/+:
• Toggle between displaying seconds, calendar, alarm times or temperature.
• Change or select value while in programming mode.
ALM1/HOUR:
• Enter the alarm setting mode for alarm 1.
• Set Alarm 1 on/off
• Set hour while in alarm set mode
ALM2/MIN:
• Enter the alarm setting mode for alarm 2
• Set Alarm 2 on/off
• Set minute while in alarm set mode
SNOOZE:
• While alarm is sounding, turns off alarm for set time (or off if
set to 0)
• Turns on back light for LCD (automatic turnoff)
Programming Mode
1) Press the SET key to enter programming mode.
2) Time Zone: Press the MODE/+ key to change the time zone.
a) Default upon starting is Eastern (-5 GMT)
b) Can be set to –1 to –12 hour and GMT
c) The US map will highlight the time zones set within continental United
d) States (Eastern (-5), Central (-6), Mountain (-7), Pacific (-8)) or
“GMT” will be displayed if set to GMT (0).
e) Press the SET key
3) DST: Press the MODE/+ key to switch Daylight Savings Time off or on. The
WWVB automatically corrects for DST; “DST” is to be set to “OFF” only in areas that do not follow
DST. Press the SET key.
3
 Loading...