

La Crosse Technology WS-7212NU Instruction Manual
WS-7212NU
Wireless 433 MHz
Weather Station
Instruction Manual
TABLE OF CONTENTS
Topic Page
Inventory of Contents 3
Additional Equipment 4
Quick Setup Guide 5-9
Function Keys 5
Detailed Set-up Guide 10-15
Battery Installation 10-12
Setting the Time 12-13
Setting °C or °F 13
Setting 12/24 Time 13
Features 14-18
Minimum and Maximum
Temperatures
Resetting Minimum and Maximum
Temperatures
Adding additional remote
temp/humidity sensors (optional)
Viewing & operating multiple
remote temperature/humidity
sensors
Mounting 18-20
Troubleshooting 20-23
Maintenance and Care 24
Specifications 25-26
14
14
15-17
17-18
Warranty Information 27-29
2
INVENTORY OF CONTENTS
1.
2.
3.
4.
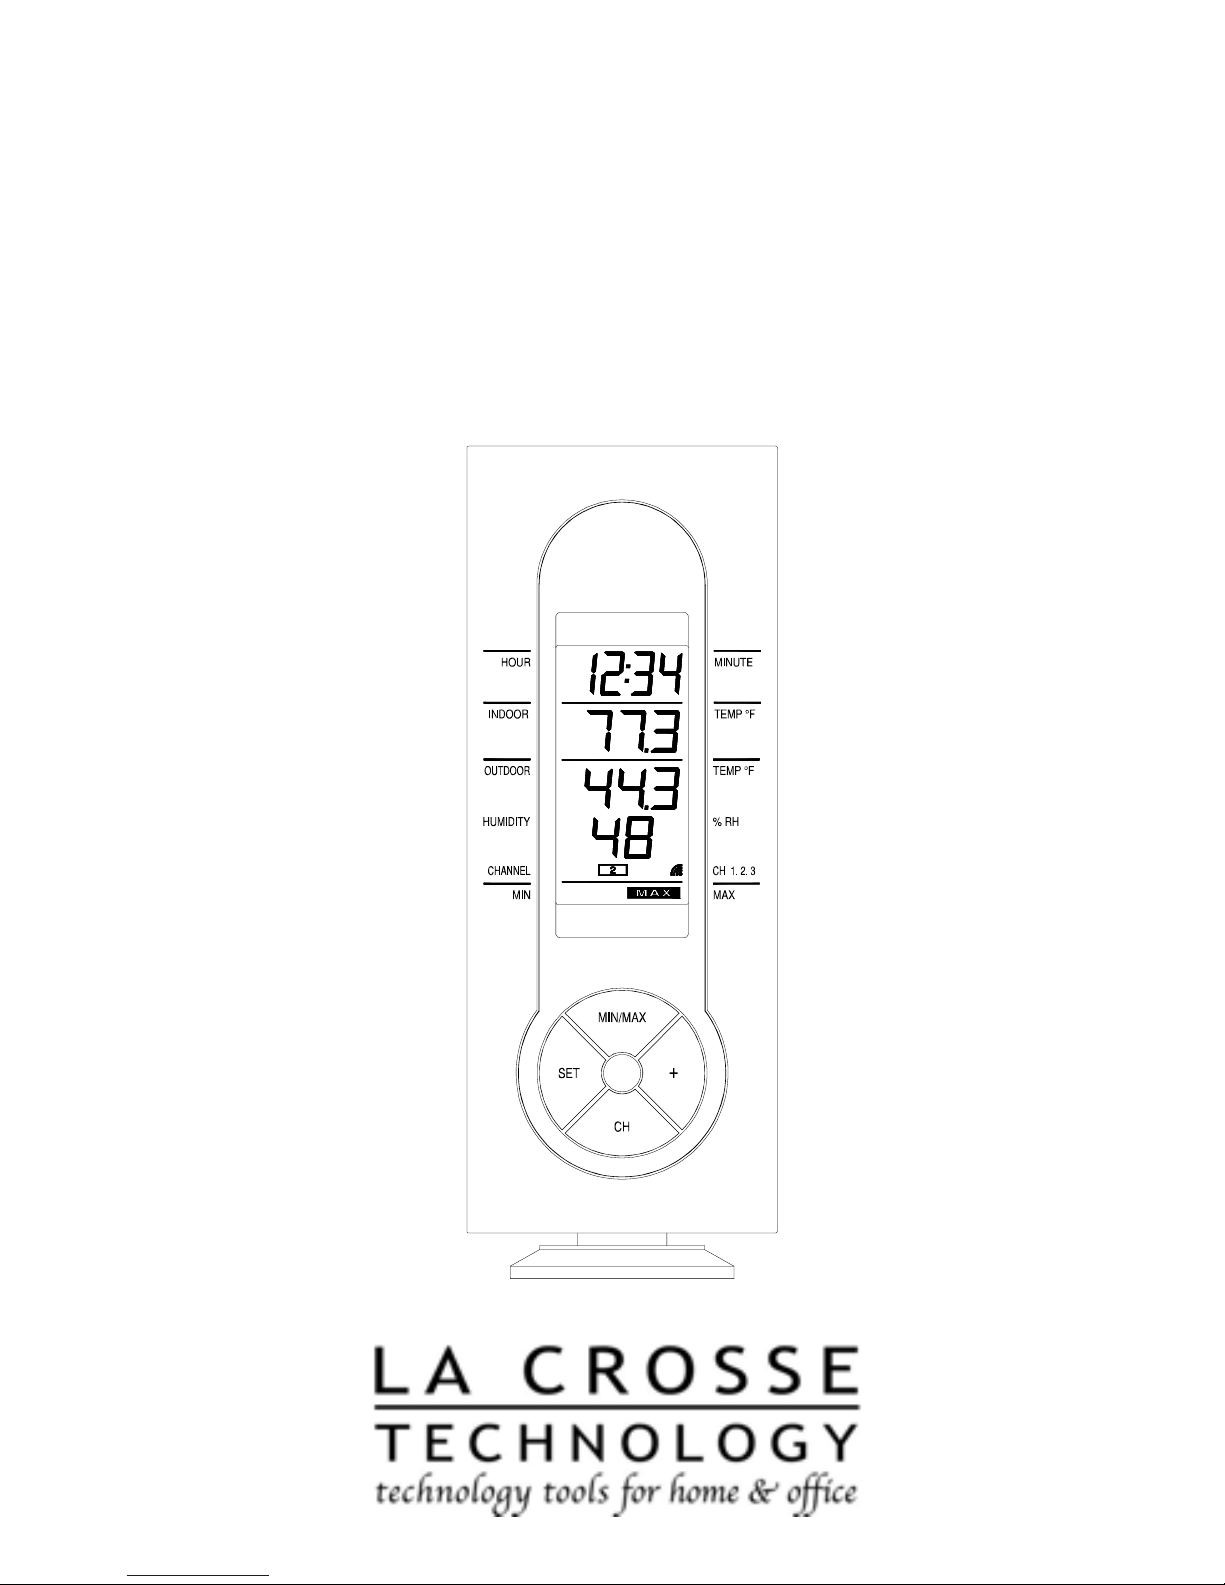
One indoor weather
Figure 1
station (Figure 1)
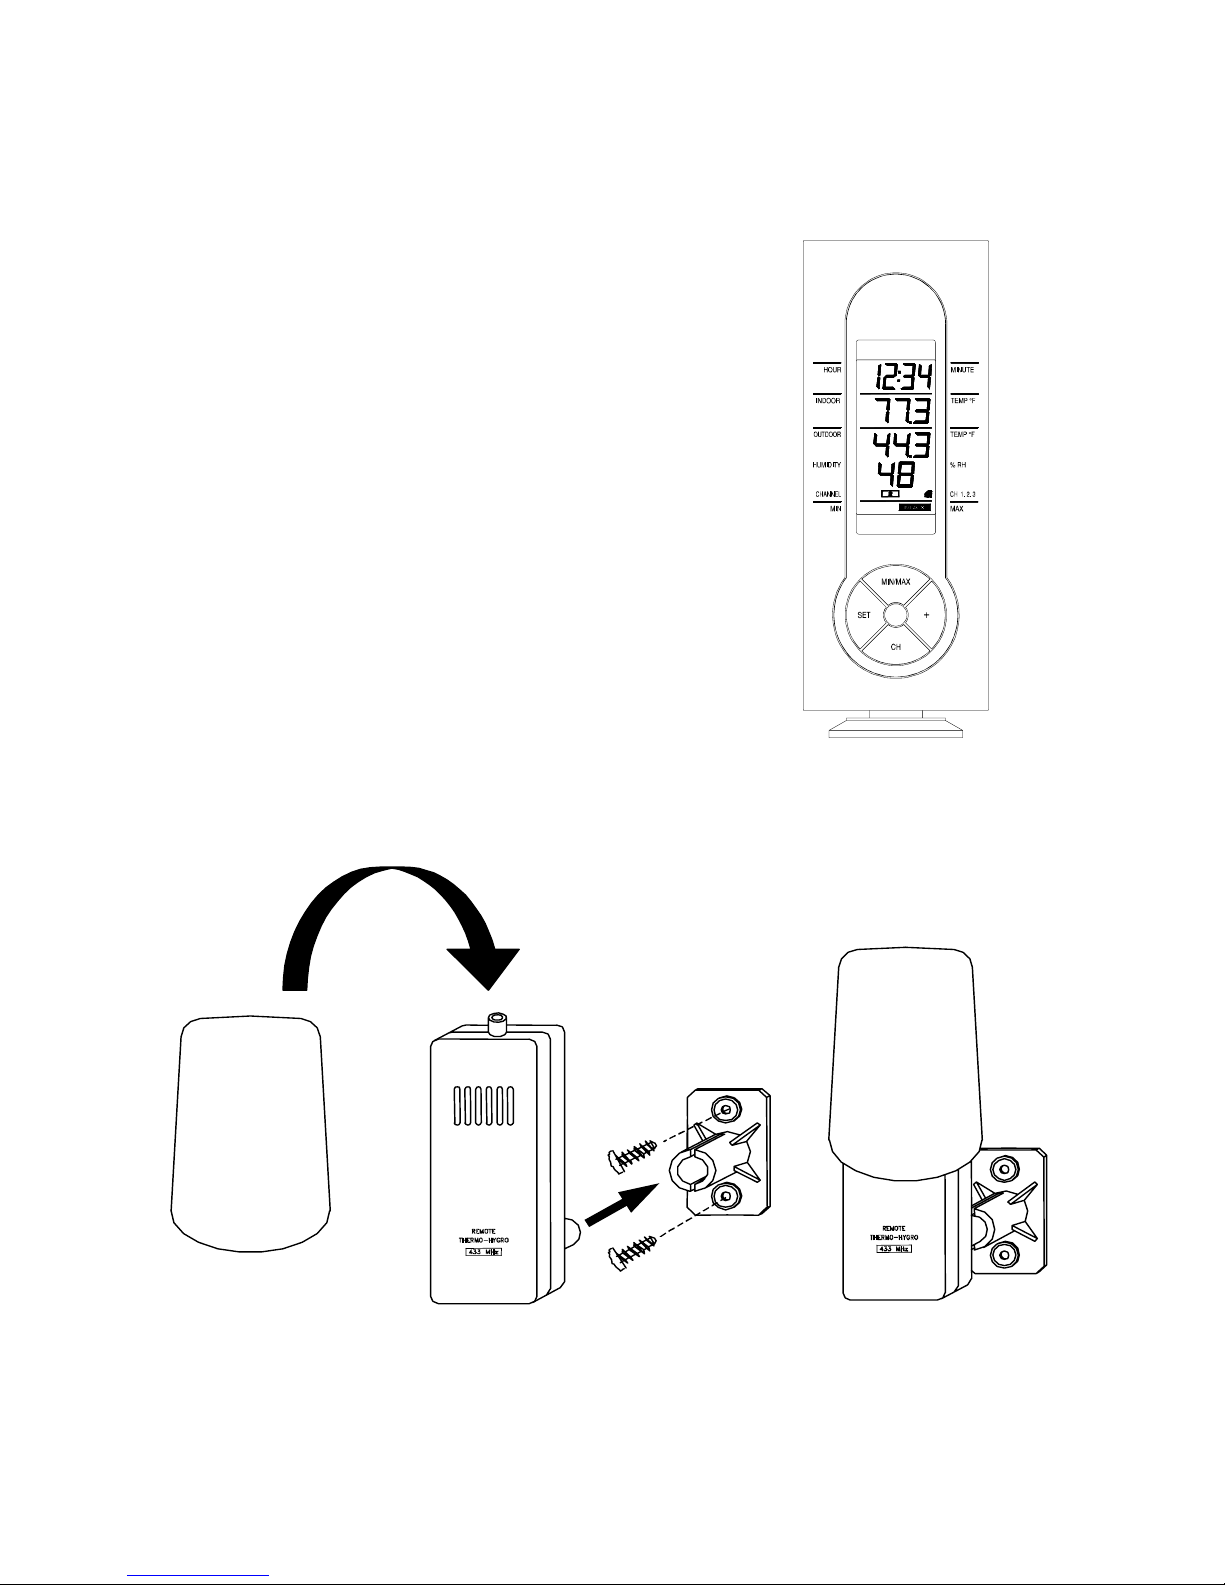
The remote
temperature/humidity
sensor (TX4U) and
mounting bracket.
(Figure 2)
Mounting hardware.
Instruction Manual
and Warranty Card.
Figure 2
3

ADDITIONAL EQUIPMENT
(not included)
1.
2.
3.
1 Philips screwdriver.
2 Fresh AA 1.5V batteries.
(for indoor weather station)
2 Fresh AA 1.5V batteries.
(for temperature/humidity sensor)
4

QUICK SET-UP GUIDE
Hint: Use good quality alkaline
batteries and avoid rechargeable
batteries.
FUNCTION KEYS
1. “SET”: Allows you to set the time,
select °C or °F, and select 12 or 24
time display.
2. “MIN/MAX”: Allows you to view the
minimum and maximum
temperatures recorded.
3. “+”: In the set-up display, allows
you to change the hours, minutes,
temperature unit, and 12/24 hour
time display.
4. “CH”: (Channel) Allows you to view
temperature and humidity readings
from up to 3 remote sensors. Each
channel corresponds to one of the
remote sensors. For more
information on Channels see the
“VIEWING AND OPERATING WITH
5

MULTIPLE REMOTE SENSOR
UNITS” section in the Detailed Set-
Up Guide.
1. Have the indoor weather station and
remote temperature/humidity sensor
3 to 5 feet apart.
2. Batteries should be out of all units
for 15 minutes.
3. Place the batteries into the remote
temperature/humidity sensor first,
then into the indoor weather
station.
(All remote temp/humidity sensors
must be started before the indoor
weather station)
4. DO NOT PRESS ANY BUTT O NS
FOR 15 MINUTES.
In this time the indoor weather station
and remote temperature/humidity sensor
will start to communicate with each
other, and the display will show both the
indoor temperature and an outdoor
6

temperature and humidity. If the indoor
weather station does not display both the
indoor temperature and the outdoor
temperature and humidity after the 15
minutes please re-try the set-up as
shown on page 5.
After both indoor temperature and
outdoor temperature and humidity are
displayed for 15 minutes you can place
your remote temperature/humidity
sensor outdoors and set your time.
Notes on Outdoor Sensor Placement
The remote temperature/humidity sensor
should be placed in a dry, shaded area.
Fog and mist will not harm your remote
temperature/humidity sensor but direct
rain must be avoided.
The remote temperature/humidity sensor
has a range of 330 feet. Any walls that
the signal will have to pass through will
7

reduce the distance of the range. An
outdoor wall or window can have up to
30 feet of resistance and an interior wall
can have up to 20 feet of resistance.
Your distance plus resistance should not
exceed 330 feet in a straight line.
To complete the set up of your indoor
weather station after the 15 minutes
have passed, please follow the steps
below.
1. Press and hold the “SET” button for
5 seconds.
2. The minutes will now be flashing.
a. Press and release the “+”
button until the correct
minutes are shown.
Note: There is “PM” displayed
to the left of the hour when
between noon and midnight.
During the AM hours this area
will be blank.
b. When the correct minutes
are shown, press and
8

release the “SET” button
once.
3. The hour will now be flashing.
Press and release the “+”
button until the correct hour is
displayed.
Press and release the SET butto n
once more, and you are done.
9
 Loading...