

Laars NEOTHERM NTH, NEOTHERM NTV Series Series Manual

Start Up Guide Document 1370
Start Up Guide for
®
NEOTHERM
with
Touchscreen Display
Modulating Boilers and
Volume Water Heaters
Indoor models NTH & NTV
Sizes 285 – 850 MBTU/h
Outdoor models NTH & NTV
Sizes 150 – 850 MBTU/h
ON / OFF
SWITCH
THE TOUCH SCREEN
ON OUTDOOR UNIT
IS LOCATED BEHIND
FRONT PANEL
2 SCREWS
DOOR
LATCHES
(RELEASE BOTH
LATCHES TO OPEN)
DOOR
HANDLE
(PULL TO OPEN)
Indoor
Outdoor

2
LAARS Heating Systems
Table Of Contents
Single Boiler Set Up -------------------------------------------------------------------------3-4
Setting Up Outdoor Reset --------------------------------------------------------------------5
Warm Weather Shutdown -------------------------------------------------------------------6
Domestic Hot Water Configuration --------------------------------------------------------6
Log in ----------------------------------------------------------------------------------------------7
Lead/Lag Set Up ------------------------------------------------------------------------------7-8
Lead/Lag Master Configuration ---------------------------------------------------------9-11
Lead/Lag Slave Configuration ----------------------------------------------------------11-14
Setting The Date And Time -----------------------------------------------------------------15
Combustion Setup Procedures --------------------------------------------------------16-17
Setting up 4-20 MA Set Point --------------------------------------------------------------18
Page 2
NEOTHERM Boilers and Water Heaters
3
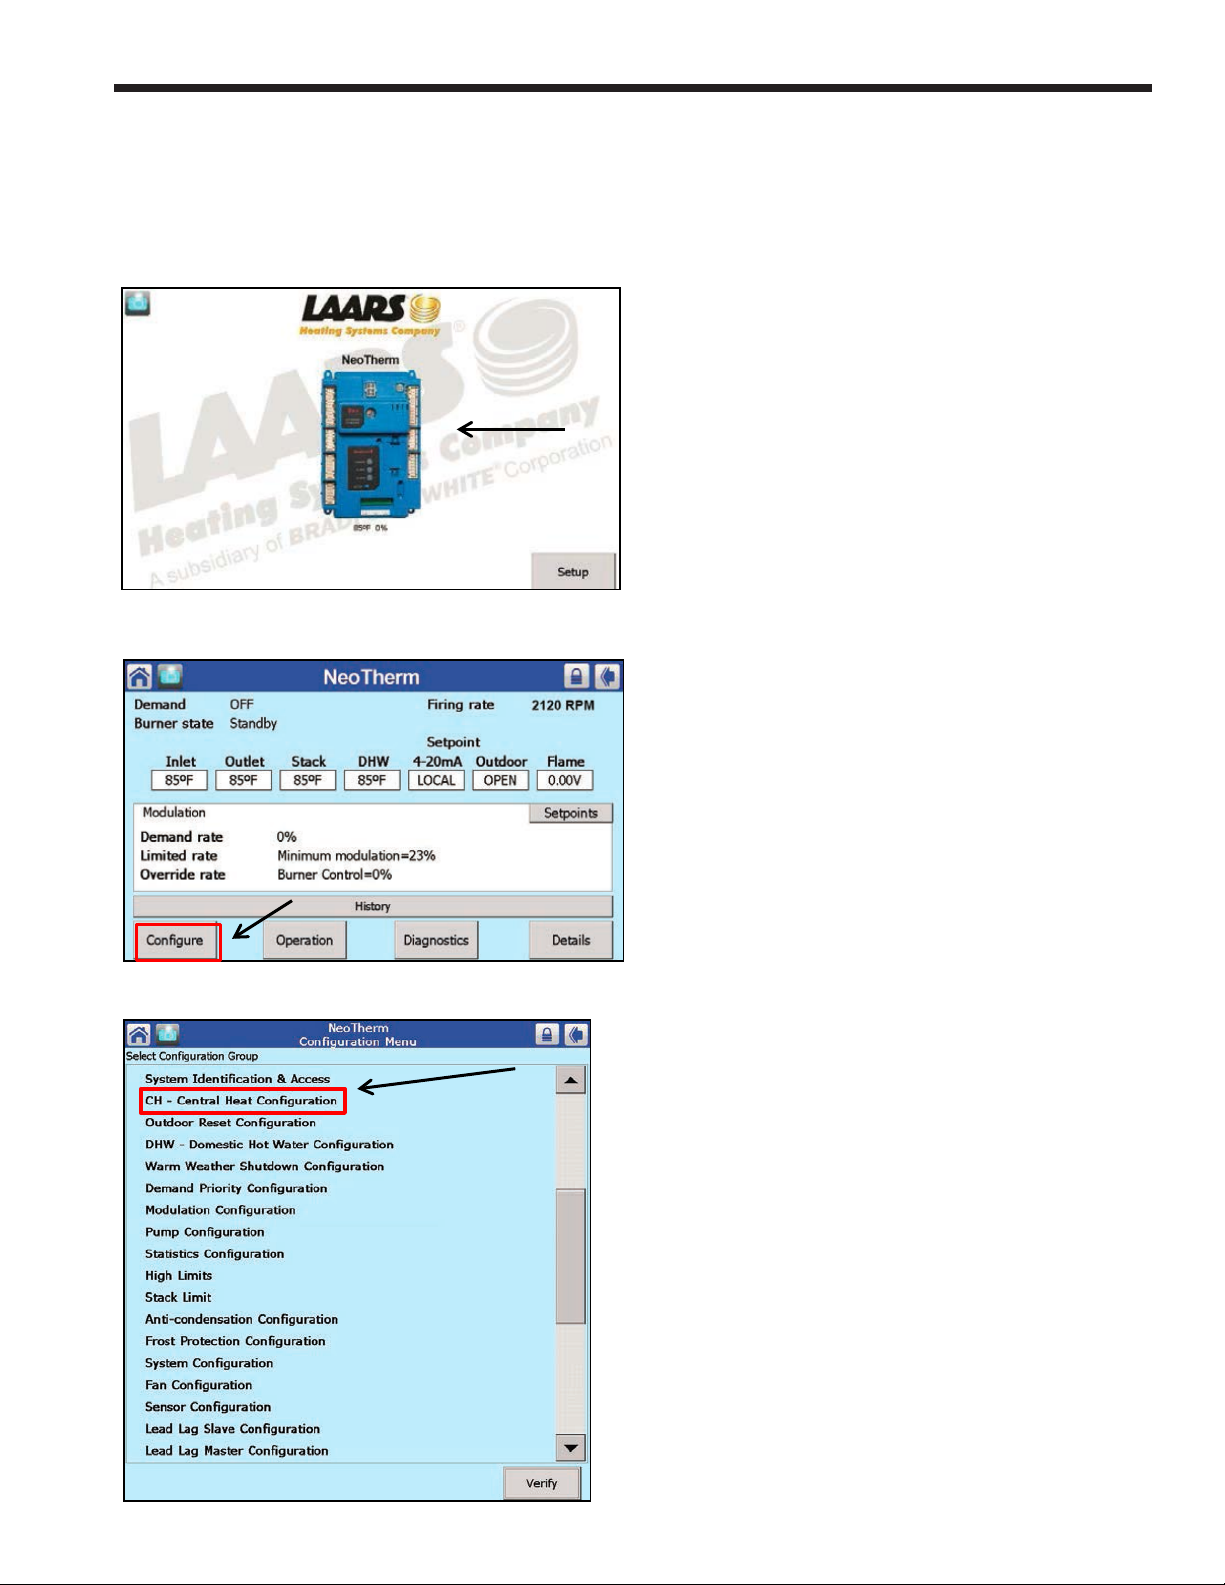
Single Boiler Setup
Adjusting Central Heat Set point for CH demand
1. Starting from the Home Screen press the
controller icon.
2. From the Status Summary Screen, press the
“Configure” button.
3. Press, “CH-Central Heat Configuration”
to adjust the set point.
Page 3
4
LAARS Heating Systems
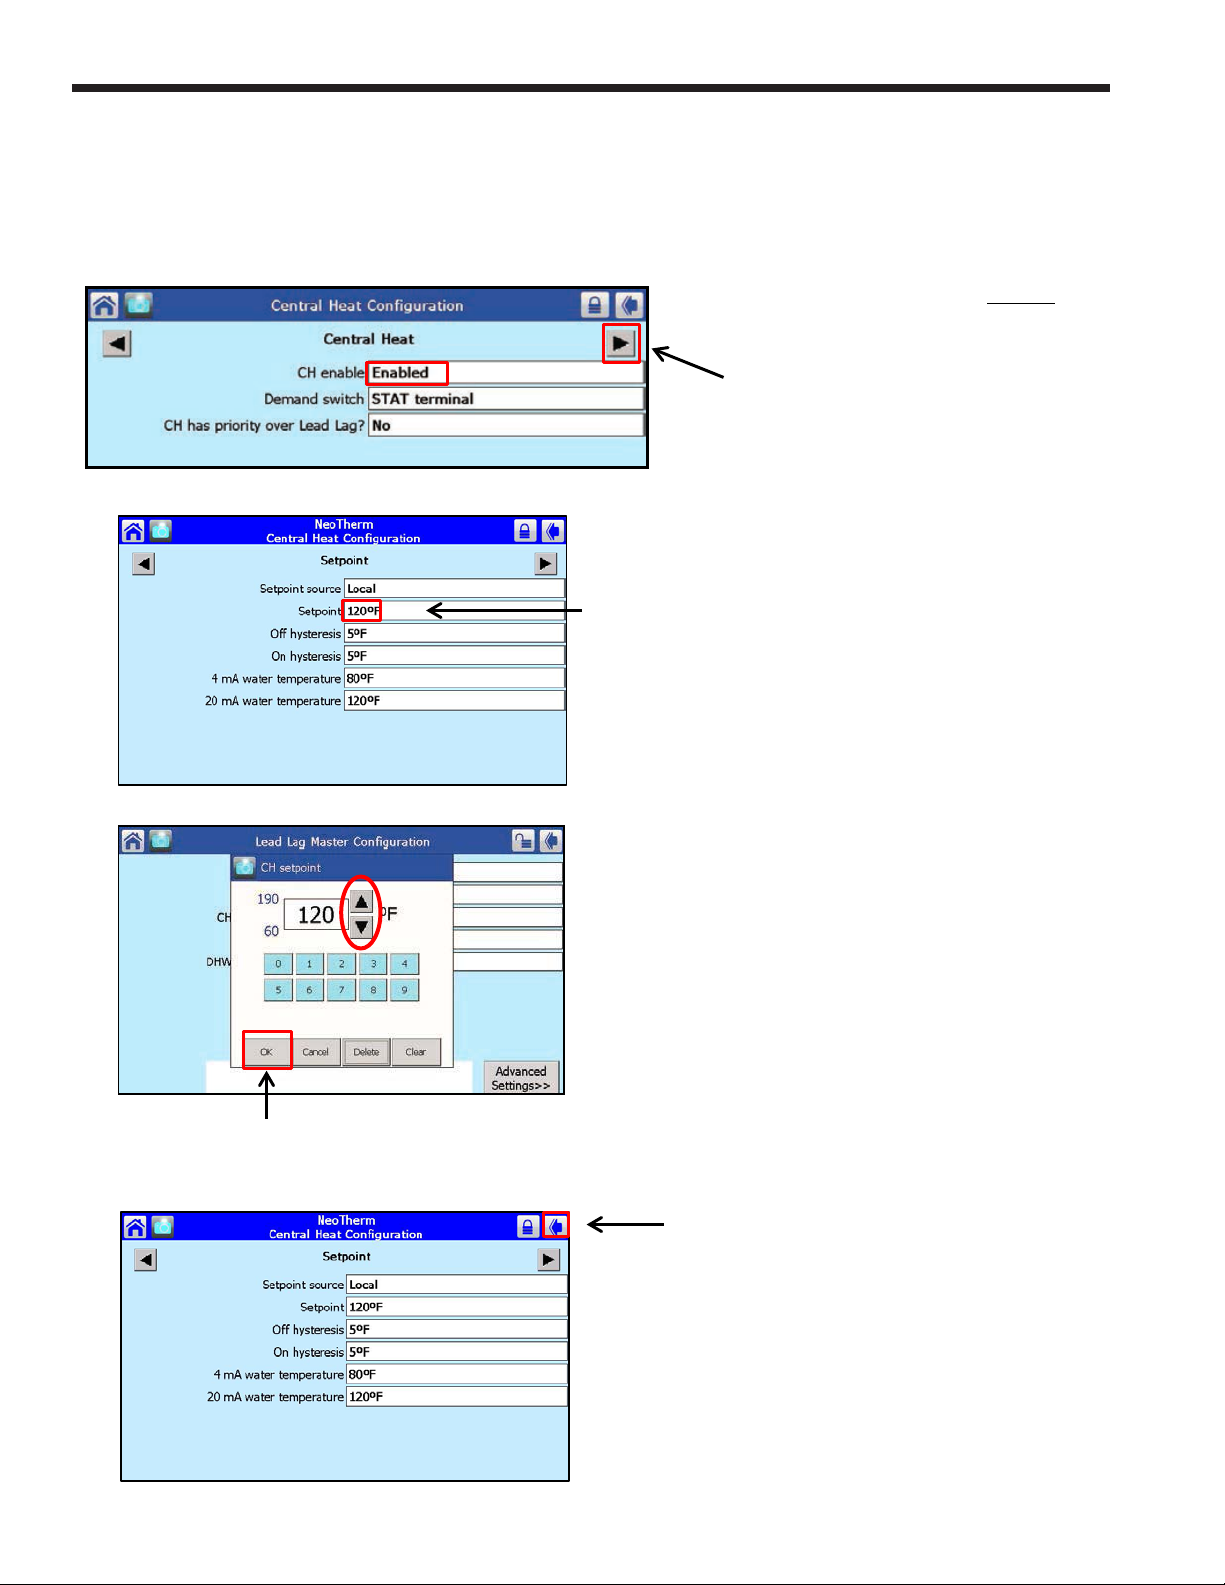
Single Boiler Setup Continue
4. Confirm that “CH enable” reads Enabled as
shown in this example.
5. Press the right had arrow on the screen to
get to the set point screen.
6. Press on the “Setpoint” box to adjust the temperature.
7. A smaller box will appear. Use the Up/Down arrows on the
screen to adjust the desired set point. Then Press “OK”.
8. Press the back arrow button on the top right corner of
the screen to return to the “Configuration Menu”.
Page 4
NEOTHERM Boilers and Water Heaters
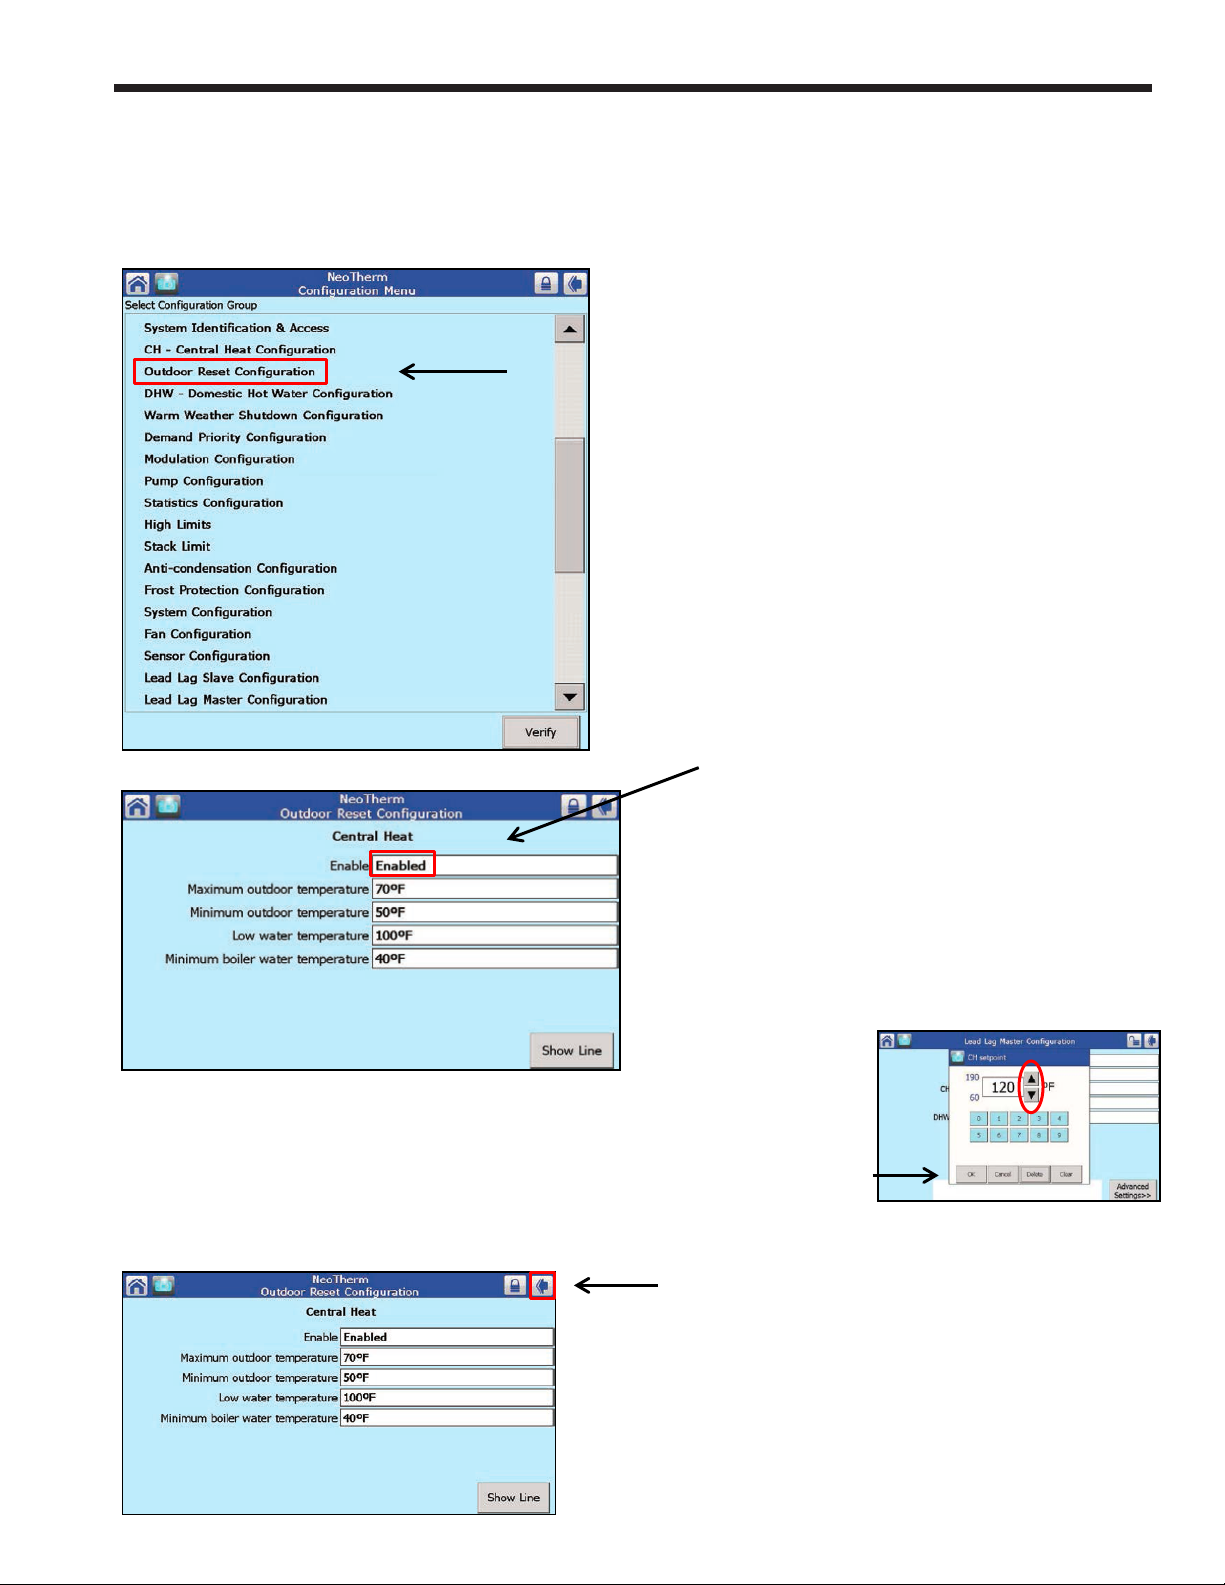
Setting Up Outdoor Reset
Outdoor Reset is Strongly Recommended. You may skip this step if you are not using this function
1. From the Configuration Menu,
Press “Outdoor Reset Configuration”
5
2. Confirm that Central Heat is “Enabled”.
3. Next, adjust the Maximum Outdoor Temperature,
Minimum Outdoor Temperature and Low Water
Temperature by pressing each set point box.
Use the Up/Down arrows
on the screen to adjust
the temperature.
Press “OK” after each
adjustment is made.
4. After configuring the outdoor reset, press the
back arrow on the top right corner of the screen
to return back to the Configuration Menu.
Page 5
LAARS Heating Systems
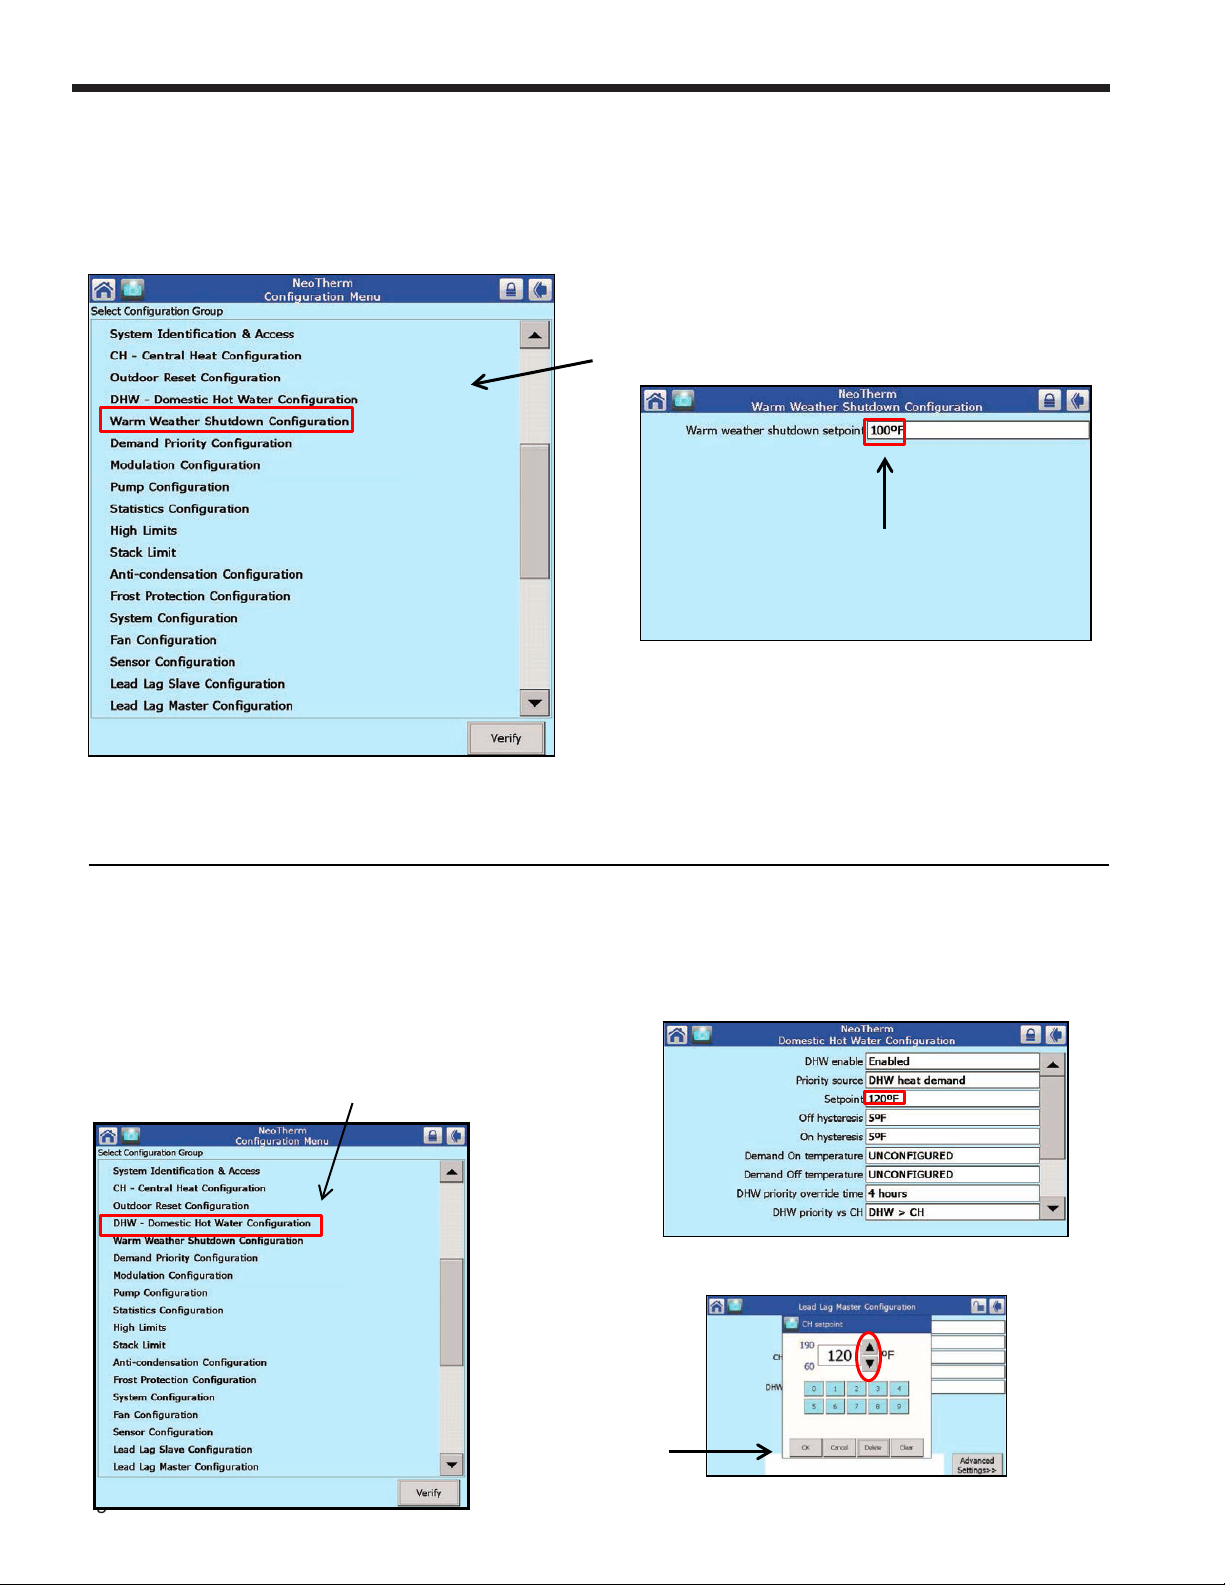
Warm Weather Shutdown
You may skip this step if you are not using Outdoor Reset
1. From the Configuration Menu, choose
“Warm Weather Shutdown Configuration”.
6
Domestic Hot Water Configuration
Skip this step if you are not using Domestic Hot Water
1. From the Configuration Menu,
press “DHW Domestic Hot Water Configuration”
2. Press on the set point box and adjust the shutdown.
3. After adjusting the shutdown set point, then press “OK”.
4. Press the back arrow on the top right corner of the screen
to return to the Configuration Menu.
Page 6
2. Make adjustments from the DHW set point screen.
3. After adjusting the DHW set point, press “OK’.
 Loading...