

Page 1

Printing System (V)
Operation Guide
Function Edition
Page 2

Page 3

About this Operation Guide
This Operation Guide Functions Edition is included with your Printing System (V) and should be
read in combination with the Operation Guide Set-Up Edition for that product.
This Operation Guide contains information on making settings in your printer.
i
Page 4

Trademark Information
• PRESCRIBE and ECOSYS are registered trademarks of Kyocera Corporation.
• KPDL and KIR are trademarks of Kyocera Corporation.
• Microsoft, MS-DOS, Windows and WindowsNT are registered trademarks of Microsoft
Corporation of America and other countries.
• Windows ME and Windows XP are trademarks of Microsoft Corporation.
• PCL and PJL are registered trademarks of Hewlett-Packard Company.
• PostScript is a registered trademark of Adobe Systems Incorporated.
• Ethernet is a registered trademark of Xerox Corporation.
• Novell and NetWare are registered trademarks of Novell, Inc.
• Centronics is a trademark of Centronics Data Computer Corporation.
• IBM and IBM PC-AT are trademarks of International Business Machines Corporation.
• PowerPC is trademarks of International Business Machines Corporation of America and other
corporations.
• Microdrive is a registered trademark of Hitachi Global Storage T echnologies Netherlands B.V . in
the US and other countries.
• TrueType and Macintosh are registered trademarks of Apple Computer, Inc.
• AppleTalk is a trademark of Apple Computer, Inc.
• CompactFlash and CF are trademarks of SanDisk Corporation of America.
• This product was developed using Tornado, the real-time operating system (ROTS) general
development environment from Wind River Systems, Inc.
• The Kyocera product uses PeerlessPrintXL to provide the HP LaserJet compatible PCL6
language emulation. PeerlessPrintXL is a trademark of Peerless Systems Corporation, 2381
Rosecrans Ave. El Segundo, CA 90245, U.S.A.
TM
• Contains UFST
All other company and product names contained in this Operation Guide are trademarks or
registered trademarks of their respective companies. The designations ™ and ® will not be used in
this Operation Guide.
• This product has been certified by the USB Implementers Forum, Inc.
All rights reserved. No part of this material may be reproduced or transmitted in any form or by any
means, electronic or mechanical, including photocopying, recording or by any information storage
and retrieval system, without permission in writing from the Publisher.
and MicroType® from Agfa Corporation.
Legal Restriction On Copying
• It may be prohibited to copy copyrighted material without permission of the copyright owner.
• It is prohibited under any circumstances to copy domestic or foreign currencies.
• Copying other items may be prohibited.
ii
Page 5

IBM Program License Agreement
THE DEVICE YOU HAVE PURCHASED CONTAINS ONE OR MORE SOFTWARE PROGRAMS
(“PROGRAMS”) WHICH BELONG TO INTERNATIONAL BUSINESS MACHINES CORPORATION
(“IBM”). THIS DOCUMENT DEFINES THE TERMS AND CONDITIONS UNDER WHICH THE
SOFTWARE IS BEING LICENSED TO YOU BY IBM. IF YOU DO NOT AGREE WITH THE TERMS
AND CONDITIONS OF THIS LICENSE, THEN WITHIN 14 DAYS AFTER YOUR ACQUISITION OF
THE DEVICE YOU MAY RETURN THE DEVICE FOR A FULL REFUND. IF YOU DO NOT SO
RETURN THE DEVICE WITHIN THE 14 DAYS, THEN YOU WILL BE ASSUMED TO HAVE
AGREED TO THESE TERMS AND CONDITIONS.
The Programs are licensed not sold. IBM, or the applicable IBM country organization, grants you a
license for the Programs only in the country where you acquired the Programs. You obtain no rights
other than those granted you under this license.
The term “Programs” means the original and all whole or partial copies of it, including modified
copies or portions merged into other programs. IBM retains title to the Programs. IBM owns, or has
licensed from the owner, copyrights in the Programs.
1. License
Under this license, you may use the Programs only with the device on which they are installed and
transfer possession of the Programs and the device to another party. If you transfer the Programs,
you must transfer a copy of this license and any other documentation to the other party. Y our license
is then terminated. The other party agrees to these terms and conditions by its first use of the
Program.
You may not:
1) use, copy, modify, merge, or transfer copies of the Program except as provided in this license;
2) reverse assemble or reverse compile the Program; or
3) sublicense, rent, lease, or assign the Program.
2. Limited Warranty
The Programs are provided “AS IS.”
THERE ARE NO OTHER WARRANTIES COVERING THE PROGRAMS (OR CONDITIONS),
EXPRESS OR IMPLIED, INCLUDING, BUT NOT LIMITED TO, THE IMPLIED WARRANTIES OF
MERCHANTABILITY AND FITNESS FOR A PARTICULAR PURPOSE.
Some jurisdictions do not allow the exclusion of implied warranties, so the above exclusion may not
apply to you.
SUPPLEMENT TO AGREEMENT FOR SOFTWARE BUNDLING AND DISTRIBUTION FOR ALDC
3. Limitation of Remedies
IBM’s entire liability under this license is the following;
1) For any claim (including fundamental breach), in any form, related in any way to this license,
IBM’s liability will be for actual damages only and will be limited to the greater of;
a) the equivalent of U.S.$25,000 in your local currency; or
b) IBM’s then generally available license fee for the Program
This limitation will not apply to claims for bodily injury or damages to real or tangible personal
property for which IBM is legally liable. IBM will not be liable for any lost profits, lost savings, or any
incidental damages or other economic consequential damages, even if IBM, or its authorized
supplier, has been advised of the possibility of such damages. IBM will not be liable for any
damages claimed by you based on any third party claim. This limitation of remedies also applies to
any developer of Programs supplied to IBM. IBM's and the developer's limitations of remedies are
not cumulative. Such developer is an intended beneficiary of this Section. Some jurisdictions do not
allow these limitations or exclusions, so they may not apply to you.
4. General
iii
Page 6

You may terminate your license at any time. IBM may terminate your license if you fail to comply
with the terms and conditions of this license. In either event, you must destroy all your copies of the
Program. Y ou are responsible for payment of any t axes, including personal property taxes, resulting
from this license. Neither party may bring an action, regardless of form, more than two years after
the cause of action arose. If you acquired the Program in the United States, this license is governed
by the laws of the State of New York. If you acquired the Program in Canada, this license is
governed by the laws of the Province of Ontario. Otherwise, this license is governed by the laws of
the country in which you acquired the Program.
Typeface T r ademark Acknowledgement
All resident fonts in this printer are licensed from Agfa Corporation.
Helvetica, Palatino and Times are registered trademarks of Linotype-Hell AG.
ITC Avant Garde Gothic, ITC Bookman, ITC ZapfChancery and ITC Zapf Dingbats are registered
trademarks of International Typeface Corporation.
Agfa Japan License Agreement
1. “Software” shall mean the digitally encoded, machine readable, scalable outline data as
encoded in a special format as well as the UFST Software.
2. You agree to accept a non-exclusive license to use the Software to reproduce and display
weights, styles and versions of letters, numerals, characters and symbols (“Typefaces”) solely
for your own customary business or personal purposes at the address stated on the registration
card you return to Agfa Japan. Under the terms of this License Agreement, you have the right to
use the Fonts on up to three printers. If you need to have access to the fonts on more than three
printers, you need to acquire a multi-user license agreement which can be obtained from Agfa
Japan. Agfa Japan retains all rights, title and interest to the Software and Typefaces and no
rights are granted to you other than a License to use the Software on the terms expressly set
forth in this Agreement.
3. To protect proprietary rights of Agfa Japan, you agree to maintain the Software and other
proprietary information concerning the Typefaces in strict confidence and to establish
reasonable procedures regulating access to and use of the Software and Typefaces.
4. You agree not to duplicate or copy the Software or Typefaces, except that you may make one
backup copy. You agree that any such copy shall contain the same proprietary notices as those
appearing on the original.
5. This License shall continue until the last use of the Software and Typefaces, unless sooner
terminated. This License may be terminated by Agfa Japan if you fail to comply with the terms of
this License and such failure is not remedie d within thirty (30) days after notice from Agfa Japan.
When this License expires or is terminated, you shall either return to Agfa Japan or destroy all
copies of the Software and Typefaces and documentation as requested.
6. You agree that you will not modify, alter, disassemble, decryp t, reverse engineer or decompile
the Software.
7. Agfa Japan warrants that for ninety (90) days after delivery, the Software will perform in
accordance with Agfa Japan-published specifications, and the diskette will be free from defects
in material and workmanship. Agfa Japan does not warrant that the Software is free from all
bugs, errors and omissions.
The parties agree that all other warranties, expressed or implied, including warranties of fitness
for a particular purpose and merchantability, are excluded.
8. Your exclusive remedy and the sole liability of Agfa Japan in connection with the Software and
Typefaces is repair or replacement of defective parts, upon their return to Agfa Japan.
In no event will Agfa Japan be liable for lost profits, lost data, or any other incidental or
consequential damages, or any damages caused by abuse or misapplication of the Software
and Typefaces.
9. New York, U.S.A. law governs th is Agreement.
10.You shall not sublicense, sell, lease, or otherwise transfer the Software and/or Typefaces
without the prior written consent of Agfa Japan.
iv
Page 7

11. Use, duplication or disclosure by the Government is subject to restrictions as set forth in the
Rights in Technical Data and Computer Software clause at FAR 252-227-7013, subdivision
(b)(3)(ii) or subparagraph (c)(1)(ii), as appropriate. Further use, duplication or disclosure is
subject to restrictions applicable to restricted rights software as set forth in FAR 52.227-19
(c)(2).
12.YOU ACKNOWLEDGE THAT YOU HAVE READ THIS AGREEMENT, UNDERSTAND IT, AND
AGREE TO BE BOUND BY ITS TERMS AND CONDITIONS. NEITHER PARTY SHALL BE
BOUND BY ANY STATEMENT OR REPRESENTATION NOT CONTAINED IN THIS
AGREEMENT. NO CHANGE IN THIS AGREEMENT IS EFFECTIVE UNLESS WRITTEN AND
SIGNED BY PROPERLY AUTHORIZED REPRESENTATIVES OF EACH PARTY.
v
Page 8

Conventions
This manual uses the following conventions:
Convention Description Example
Bracket Bold
Text Typeface
Bracket Text
Typeface
Italic Typeface Used to denote messages or names
Notes Used to provide additional or useful
Important Use to provide important information. Important!
Used to emphasise the selection of the
operation panel key.
Used to emphasise the selection of the
touch panel key.
displayed on the operation panel, names
of machine parts and for references to
additional information and other
publications.
information about a function or fe at ure.
Can also contain references to other
publications.
Press the [Print] key.
Press [Interface].
Processing message is displayed.
Note
You can set the emulation for each
interface.
Formatting of the memory card must
be executed from the printer.
vi
Page 9

Index
1 Procedure for Making Settings .....................................................................1-1
Procedure ..............................................................................................................................1-1
Menu Hierarchical Diagram ...................................................................................................1-2
e-MPS ..............................................................................................................................1-2
Print Menu ........................... .. ..................................... ... .................................... ... ... ........1-3
2 Selecting the Printer Settings .......................................................................2-1
Status Pages .........................................................................................................................2-2
Understanding the Status Page ............................ ... ....................................... ... ..............2-3
Changing the Interface Parameters .......................................................................................2-5
Changing Parallel Interface Mode ...................................................................................2-6
Changing Serial Interface Parameters ............................................................................. 2-7
Changing Network Interface Parameters .........................................................................2-9
Emulation Mode ................................. ... .................................... ... ........................................2-13
Emulation Mode Selection .............................................................................................2-13
KPDL (AUTO) Alternative Emulation Selection .............................................................2-13
KPDL Error Printing .......................................................................................................2-14
KC-GL Pen Thickness ...................................................................................................2-14
Default Font .........................................................................................................................2-16
Selecting the Default Font .............................................................................................2-16
Changing the Default Font Size .....................................................................................2-17
Character Pitch for Courier/Letter Gothic ......................................................................2-17
Selecting Regular or Dark Courier/Letter Gothic ...........................................................2-18
Setting the Code Set ......................................................................................................2-18
Printing Lists of Fonts .............................................. ....................................... ...............2-19
Print Configuration ......................................................... ......................................................2-21
Number of Copies ..........................................................................................................2-21
Print Orientation ...................................... ... ....................................................................2-22
Zoom ..............................................................................................................................2-22
Page Protect Mode ........................................................................................................2-23
Line Feed (LF) Action ....................................................................................................2-24
Carriage-Return (CR) Action .........................................................................................2-24
Wide A4 Pitch ................................................................................................................2-25
Setting Print Quality ........................................................................................... ... ... ............2-26
KIR Mode .......................................................................................................................2-26
EcoPrint .........................................................................................................................2-27
Resolution ......................................................................................................................2-27
Paper Handling ....................................................................................................................2-29
Selecting the Paper Feed Source ..................................................................................2-29
Duplex Print Mode .........................................................................................................2-29
Output Destination .........................................................................................................2-30
Overriding Difference between A4 and Letter ................................................................2-31
Operating the Storage Device .............................................................................................2-32
Using the Memory Card .................................................................................................2-32
Using the RAM Disk ....................................................... .. ... ..................................... ... .. .2-35
Using the Optional Hard Disk ........................................................................................2-37
Using the Option ROM ............................................................................................. ......2-38
e-MPS Function ...................................................................................................................2-39
Printing a Quick Copy ....................................................................................................2-39
Using Proof-and-Hold ........................................ ... ....................................... ..................2-40
Printing a Private Print/Stored Job .................................................................................2-40
Retrieving Jobs from Virtual Mailbox (VMB) ..................................................................2-42
Printing a List of Virtual Mailbox (VMB) .........................................................................2-42
Printing a List of Code Jobs ...........................................................................................2-43
Changing e-MPS Configuration .....................................................................................2-44
vii
Page 10

Other Modes ........................................................................................................................2-46
Automatic Form Feed Timeout Setting ............................. ........................................ ... ..2-46
Resource Protect Mode .................................................................................................2-47
Auto Error Clear Setting .................................................................................................2-47
Stapling Error Detection .................................................................................................2-48
Printing the Service Status Page ...................................................................................2-49
Restart ...........................................................................................................................2-49
Received Data Dump .....................................................................................................2-50
3 Troubleshooting .............................................................................................3-1
Basic troubleshooting chart ...................................................................................................3-1
Display message ...................................................................................................................3-2
Storage Error Codes ....................................................... ... ... .................................................3-4
Pausing Printing ....................................................................................................................3-6
Canceling Printing .................................................................................................................3-7
Restart ...................................................................................................................................3-8
4 Options ............................................................................................................4-1
5 Specifications .................................................................................................5-1
viii
Page 11
1 Procedure for Making Settings
This chapter explains how to use the operator panel to configure the printer function and shows the
hierarchy diagram of the menu selection.
Procedure
To enter the printing function, perform the following procedure.
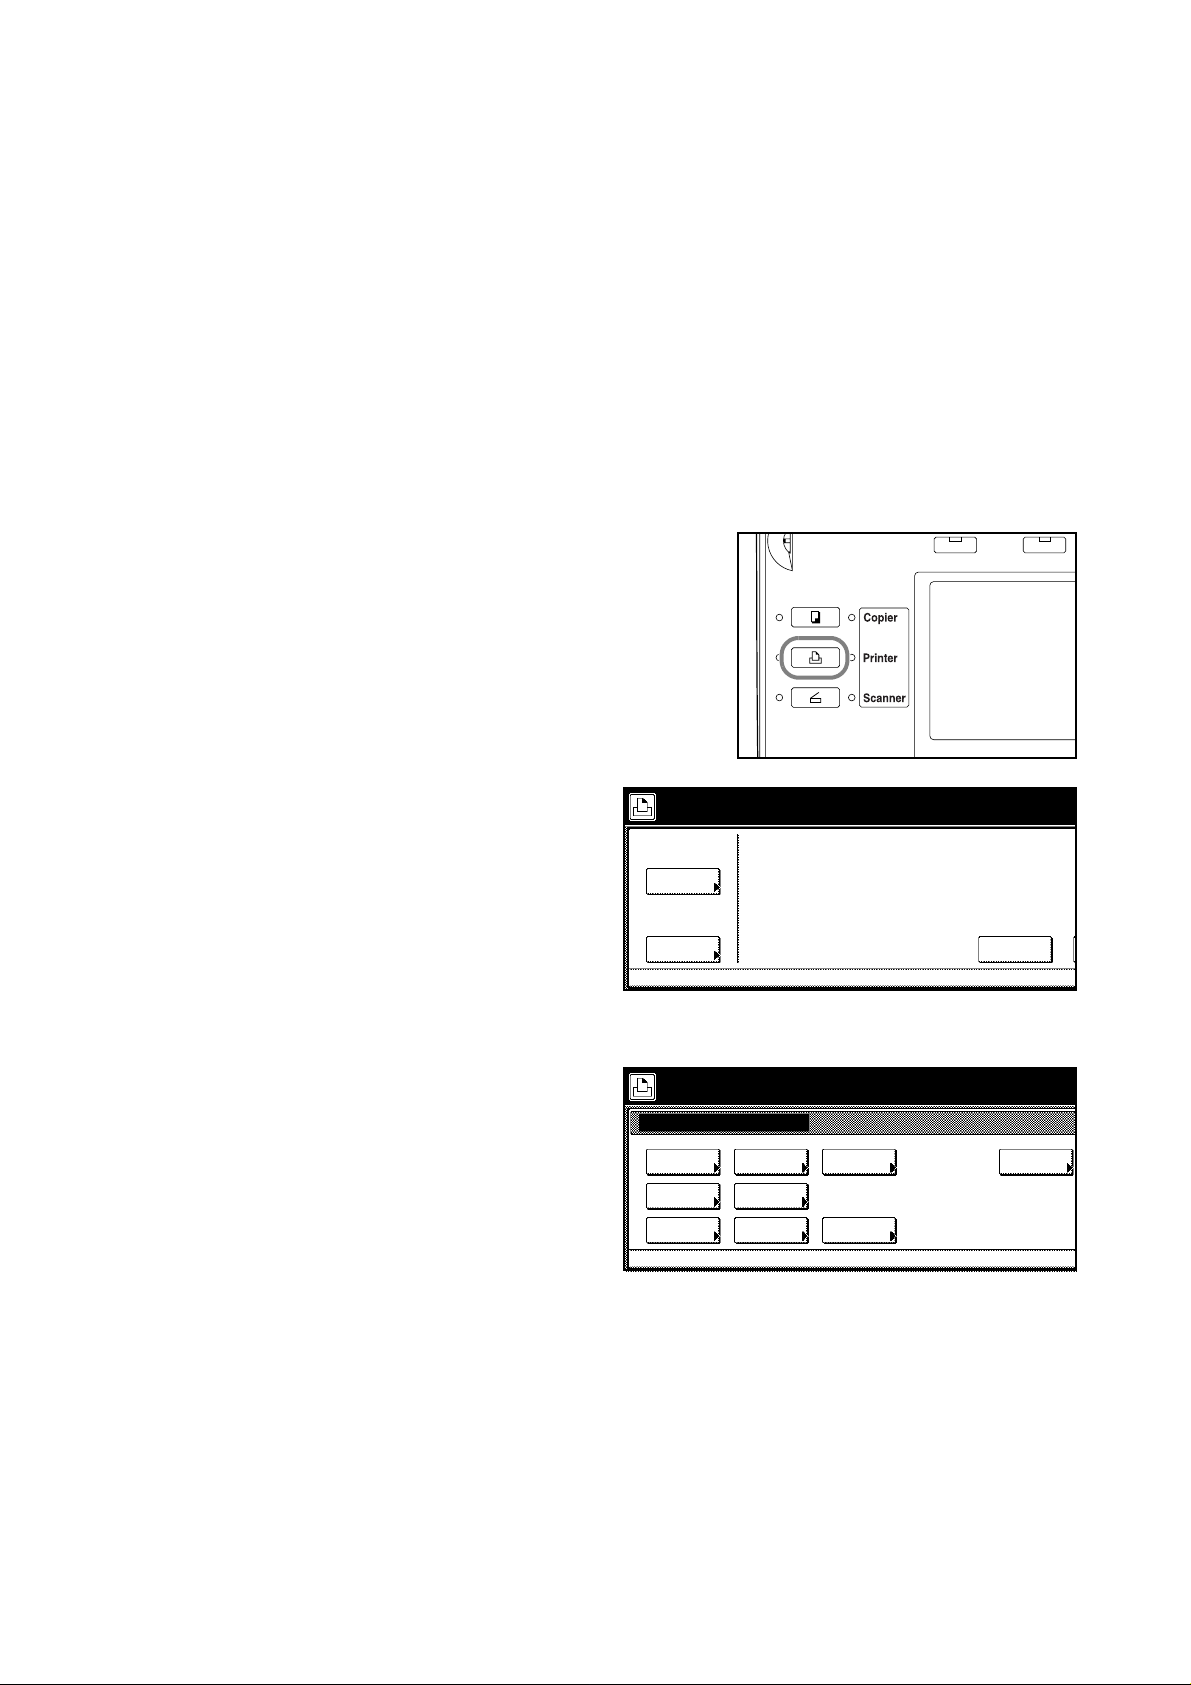
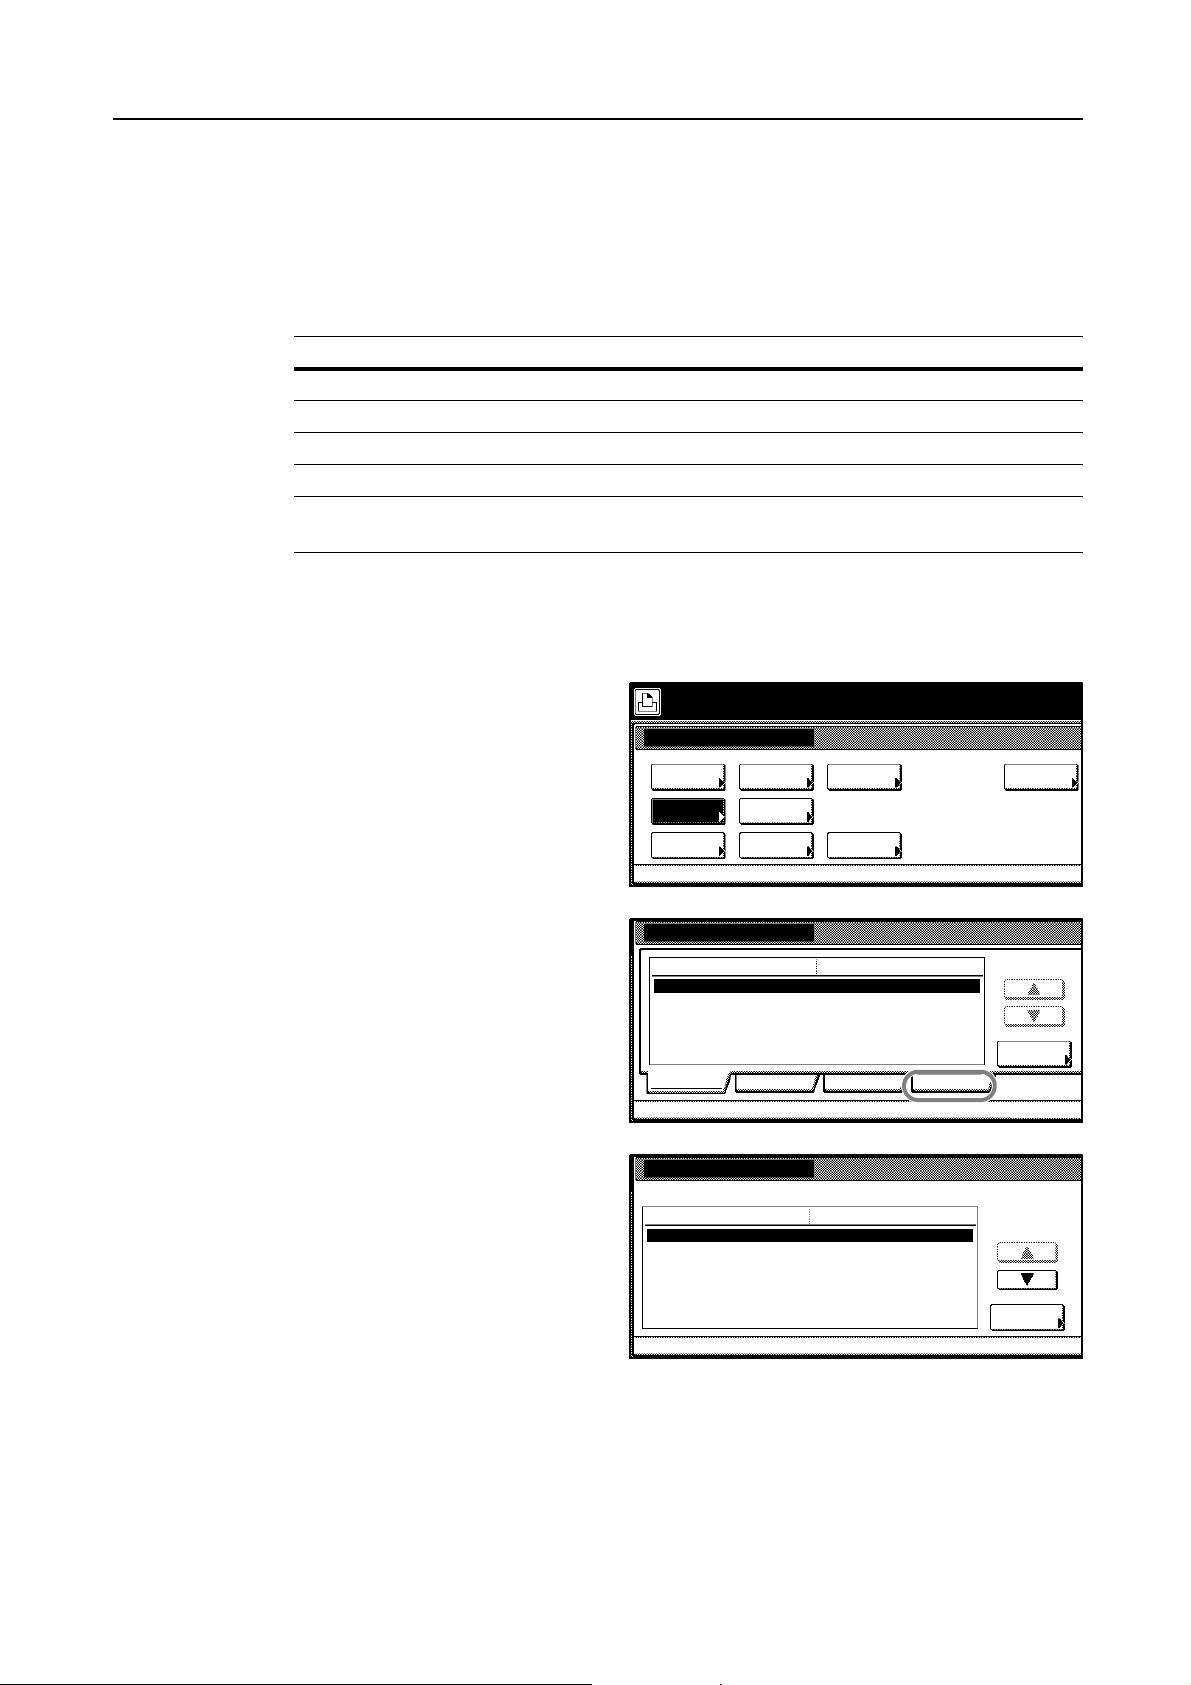
Press the [Printer] key . The mac hine enters the printer
1
mode.
Press [Printer Menu] or [e-MPS]. The
2
Printer Menu or e-MPS screen will
appear.
Ready to print.
e-MPS
Printer
Menu
Canc el
Note To use the [e-MPS], an optional hard disk is installed in this machine or RAM disk mode is On.
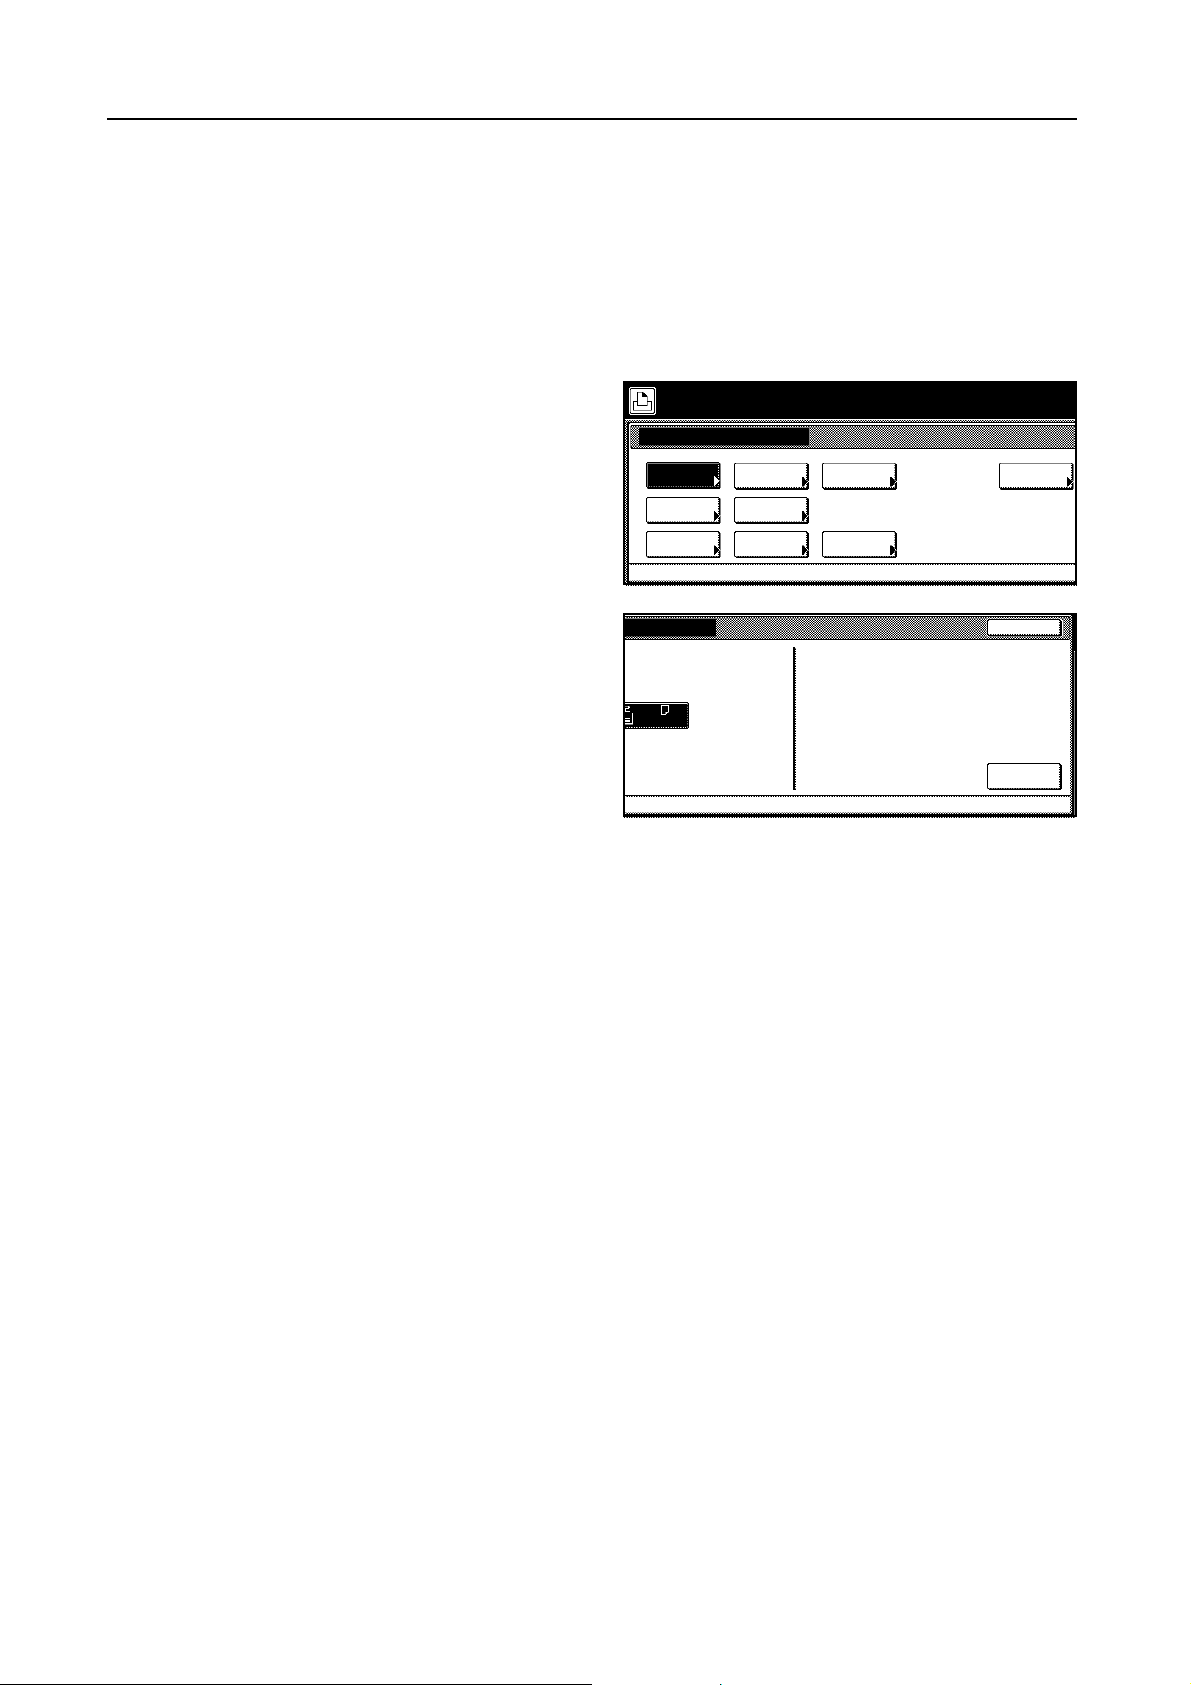
Select the desired settings that you want
3
to make. For details, refer to Selecting
the Printer Settings on page 2-1.
When the setting is completed, press [Close]. The setting is decided, returns to the before screen.
4
Select item.
Printer menu
Print St a tus Page
Interface
Emulation
Font
Page Set
Print Qua lity
Paper
Handling
RAM DISK
Mode
Others
Note To cancel the setting, press [Back]. The setting value is cleared and the previous value is set again.
1-1
Page 12
Procedure for Making Settings
Menu Hierarchical Diagram
The following is the hierarchy diagram of the menu selection system of the printer.
These items will not appear unless the printer is installed with the applicable option unit.
e-MPS
Quick Copy Job User ` Job ` 1 to 9999 (Set) ` Printing
Delete
Private/Stored ` User ` Job ` 1 to 9999 (Set)
Delete
Print VMB Data Tray ` Job ` Printing, Cancel
List of Printing ` Printing, Cancel
List of Code JOB ` Printing, Cancel
Configuration ` Quick Copy ` 0 to 50 (Job)
Temporary Code JOB
Size `
Permanent Code JOB
Size `
VMB Size ` 0 to 9999 (MB)
0 to 9999 (MB)
0 to 9999 (MB)
` ID-code `Printing
1-2
Page 13
Print Menu
Print Status Page ` Printing, Cancel
Interface ` Parallel ` Auto, Normal, High Speed, Nibble (High)
Network ` Netware ` On, Off
Auto, 802.3, Ethernet II, 802.2, 802.3SNAP
TCP/IP ` On, Off
DHCP ` On, Off
BOOTP ` On, Off
IP Address ` ###.###.###.###
Subnet Mask ` ###.###.###.###
Gateway ` ###.###.###.###
EtherTalk ` On, Off
Network Status Page` On, Off
USB
Serial ` Baud Rate ` 1200, 2400, 4800, 9600, 19200, 38400, 57600,
115200
Data Bits ` 7, 8
Stop Bits ` 1, 2
Parity ` None, Odd, Even, Ignore
Protocol ` DTR(positive)&XOn/XOff, DTR(positive),
DTR(negative), XOn/XOff, ETX/ACK
Option ` Netware ` On, Off
Auto, 802.3, Ethernet II, 802.2, 802.3SNAP
TCP/IP ` On, Off
DHCP ` On, Off
BOOTP ` On, Off
IP Address ` ###.###.###.###
Subnet Mask ` ###.###.###.###
Gateway ` ###.###.###.###
EtherTalk ` On, Off
Opt. Status Pag e ` On, Off
Emulation ` PCL6
KPDL ` Print KPDL errors ` On, Off
KPDL (AUTO) ` Alt Emulation ` PCL6, Line Printer, IBM Proprinter, Diabro 630,
EPSON LQ-850, KC-GL
Print KPDL errors ` On, Off
KC-GL ` Pen Adjust ` Pen(1) to (8) ` 1 to 99 dots
Page Set ` A2, A1, A0, B3, B2, B1, B0, SPSZ
Line Printer
IBM Proprinter
Diabro 630
EPSON LQ-850
Procedure for Making Settings
1-3
Page 14

Procedure for Making Settings
Font ` Font selection ` Font ID ` ####
Detail ` 4.00 to 999.75 (Point)
0.44 to 99.99 (CPI)
Courier Internal, Dark
Letter Gothic Internal, Dark
Code Set ` ########
Internal Font ` Printing, Cancel
Option Font ` Printing, Cancel
Page Set ` Copies ` 1 to 9999 (Set)
Orientation ` Portrait, Landscape
Zoom(Reduce) ` Paper Size ` ####
Print Size ` ####
Page Protect ` Auto, On
LF Action ` LF only, CR and LF, Ignore LF
CR Action ` CR only, CR and LF, Ignore CR
Wide A4 ` On, Off
Print Quality ` KIR Mode ` On, Off
Eco Print ` On, Off
Resolution ` Fast1200 Mode, 600 dpi, 300 dpi
Paper Handling ` Feed Select ` 1st , 2nd, 3rd ,4th paper, MP tray
Duplex Mode ` None, Short edge bind, Long edge bind
Paper Output ` Left tray
Face down, Face up
Override A4/Letter ` On, Off
RAM DISK Mode ` On, Off
Write Data
List of Partitions ` Printing, Cancel
RAM DISK Size ` 1 to 16 (MB)
Read Data ` ######## ` Enter
Read Program ` ######## ` Enter
Delete Data ` ######## ` Delete
Delete Program ` ######## ` Delete
Delete Font ` ######## ` Delete
Delete Macro ` ######## ` Delete
Hard Disk ` Write Data
List of Partitions ` Printing, Cancel
Format ` Yes, No
Read Data ` ######## ` Enter
Read Program ` ######## ` Enter
Delete Data ` ######## ` Delete
Delete Program ` ######## ` Delete
Delete Font ` ######## ` Delete
Delete Macro ` ######## ` Delete
Tray A, Tray B, Tray 1 to 5
5th paper
1-4
Page 15
Memory Card ` Write Data
List of Partitions ` Printing, Cancel
Format ` Yes, No
Read Data ` ######## ` Enter
Read Program ` ######## ` Enter
Read Font ` ######## ` Enter
Read Macro ` ######## ` Enter
Delete Data ` ######## ` Delete
Delete Program ` ######## ` Delete
Delete Font ` ######## ` Delete
Delete Macro ` ######## ` Delete
Delete Language ` ######## ` Delete
Option ROM ` List of Partitions ` Printing, Cancel
Read Data ` ######## ` Enter
Others ` Form Feed Time Out ` 0 to 495 (Seconds)
Resource Protect ` Off, Permanent, Permanent/Temporary
Auto Continue ` On, Off
0 to 495 (Seconds)
Finishing Error ` Staple Mode ` On, Off
Service ` Print Status page ` Printing, Cancel
Paper Feed ` Normal, Special
Printer Reset ` Yes, No
Print HEX-DUMP ` Yes, No
Procedure for Making Settings
1-5
Page 16

Procedure for Making Settings
1-6
Page 17

2 Selecting the Printer Settings
This chapter provides the information you need to configure this machine. In general you need to
use the operator panel only to make default settings. You can make most changes to the printer
settings using the printer driver through the application software.
Note Changes to printer settings made using a software application override changes made using the
operator panel.
This chapter contains explanations on the following topics:
• Status Pages
• Changing the Interface Parameters
•Emulation Mode
• Default Font
• Print Configuration
• Setting Print Quality
• Paper Handling
• Operating the Storage Device
• e-MPS Function
• Other Modes
2-1
Page 18
Selecting the Printer Settings
Status Pages
This section explains the procedure for printing the status pages. The status page is a list of
parameters and settings for most basic machine configurations. You may be required to produce a
status page when requesting service to the machine.
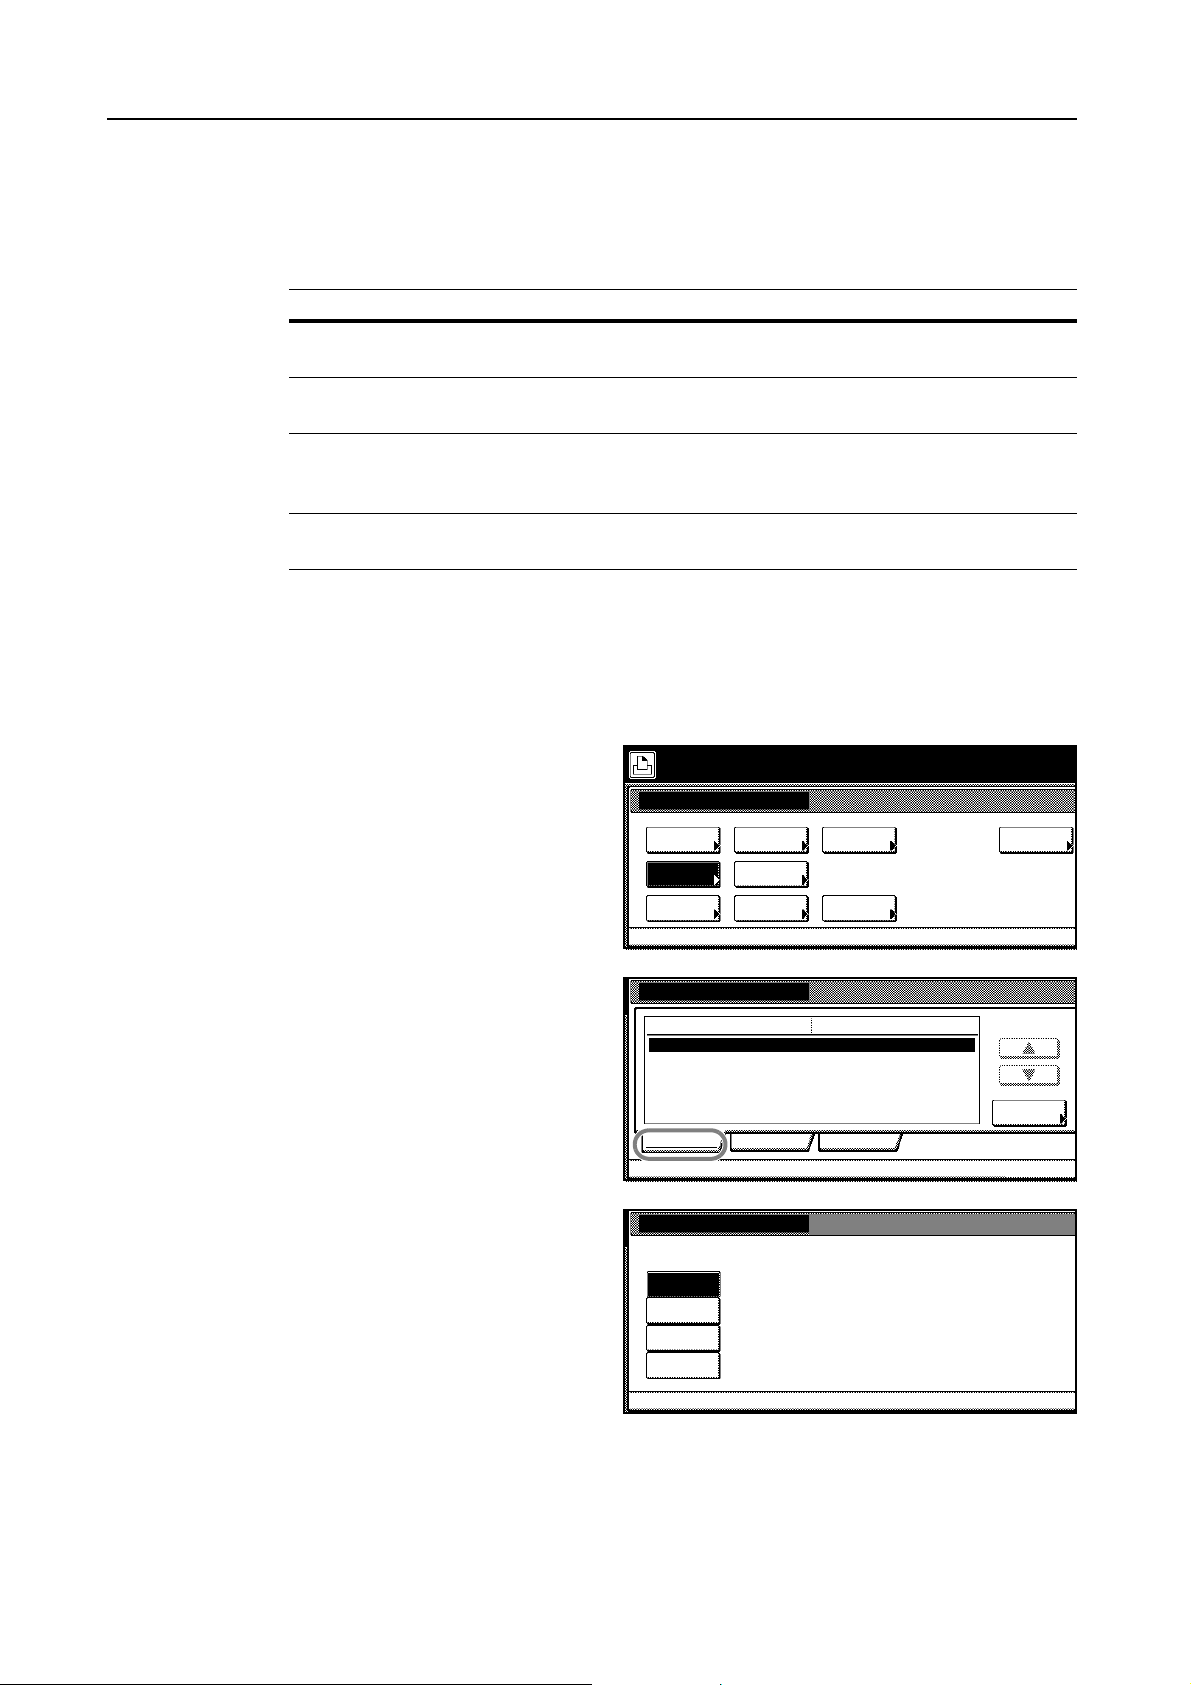
Press the [Printer] key. The machine enters the printer mode.
1
Press [Printer Menu].
2
Press [Print Status Page].
3
Press [Printing].
4
The message Processing data appears
and the machine prints a status page.
Select item.
Printer menu
Print St a tus Page
Interface
Emulation
e
A4
Font
Page Set
Print Qua lity
Paper
Handling
RAM DISK
Mode
Others
Stop
After the status page is printed, the display returns to the Printer menu screen.
5
Printing
2-2
Page 19
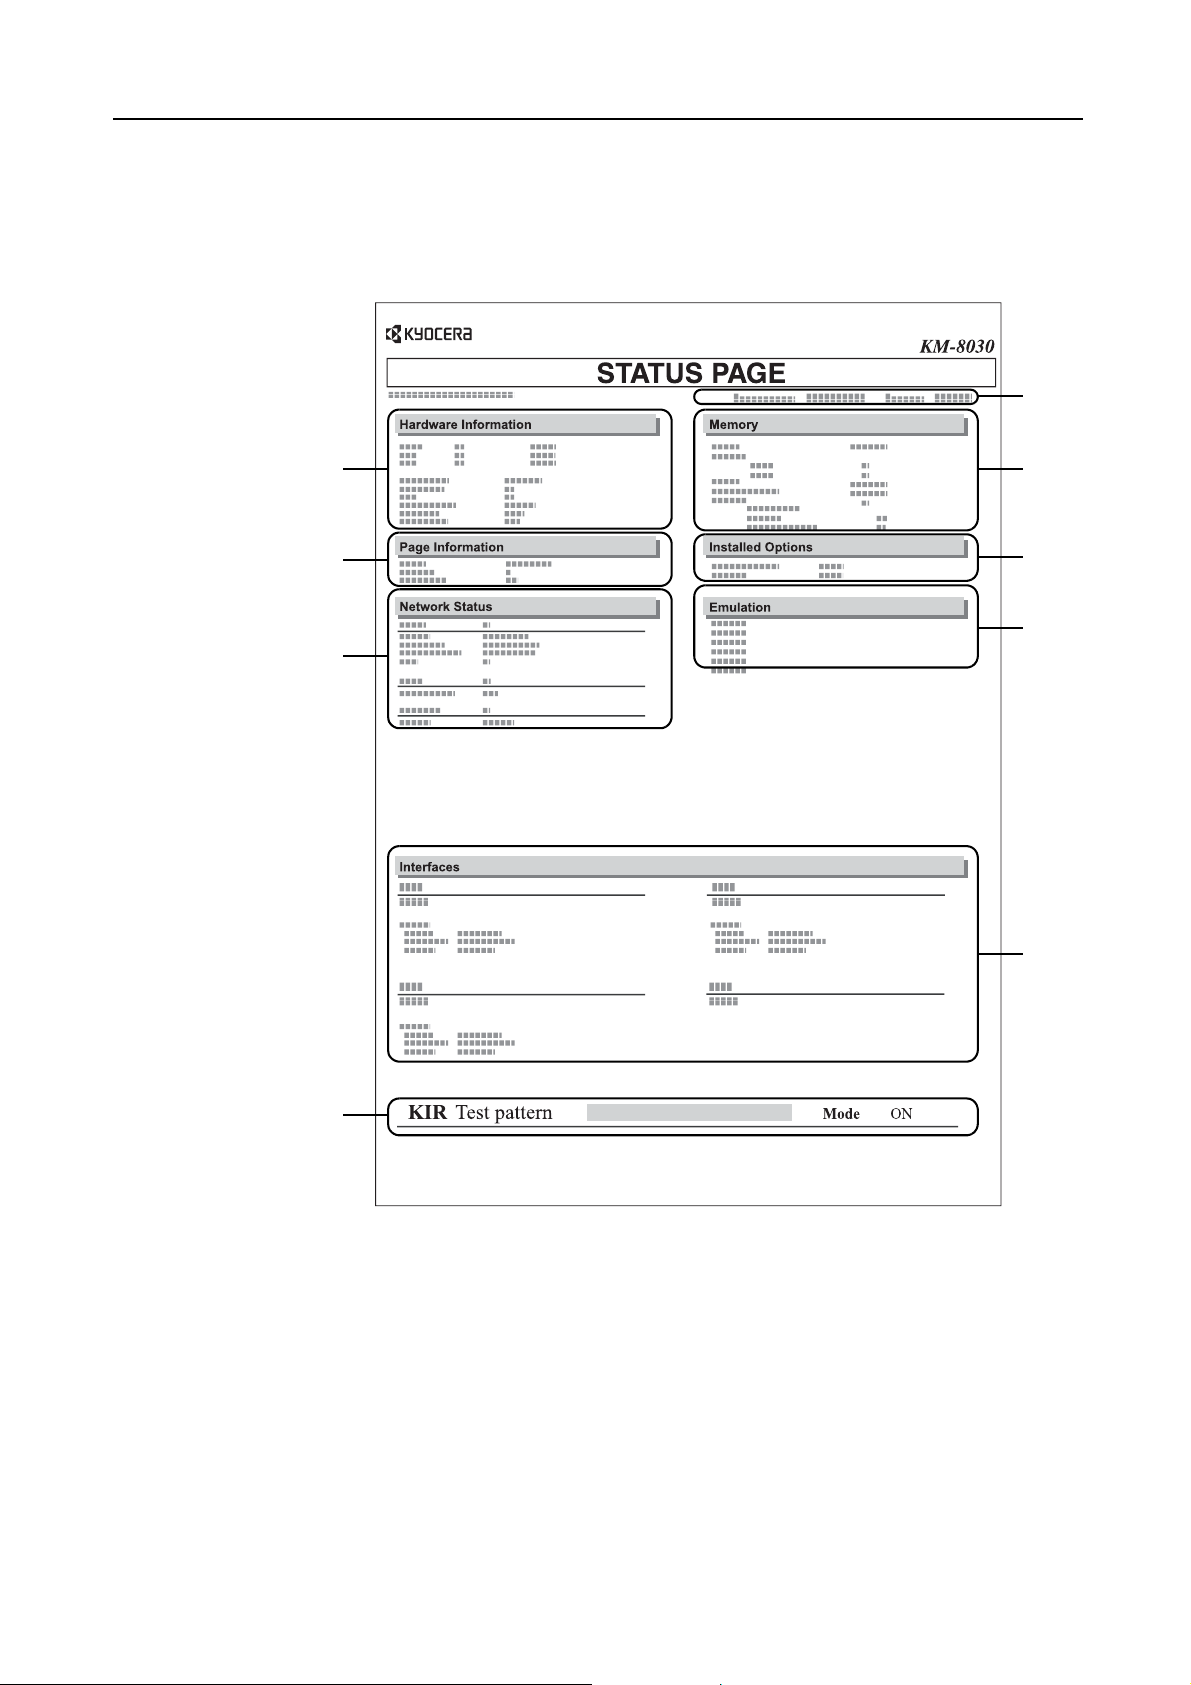
Understanding the Status Page
The numbers in the following diagram refer the items explained below the diagram.
Note The items and values on the status page may vary depending on the machine's firmware version.
Selecting the Printer Settings
1
2
4
6
3
5
7
8
9
2-3
Page 20

Selecting the Printer Settings
1 Firmware Version — This item shows the version and release date of the machine firmware.
2 Hardware Information — This item shows various machine settings for hardware-related
items.
3Memory — This shows the amount of total memory installed in the machine, the amount of
currently available memory, and the current status of the RAM disk.
4 Page Information — This shows the print resolution, number of copies, and the total page
count.
5 Installed Options — This item shows the options installed in the machine.
6 Network Status — This item shows the IP address, subnet mask address, and gateway
address for the network interface card in the machine.
7 Emulation — This item shows all available emulations of the machine. The PCL6 emulation is
set as default when the machine is shipped from the factory.
8 Interface Information — This information shows the emulation and the default font for all
interfaces installed in the machine.
9 Test pattern — KIR is the Kyocera Mita's original smoothing function. This test pattern shows
the effect of the KIR (Kyocera Image Refinement) system.
2-4
Page 21
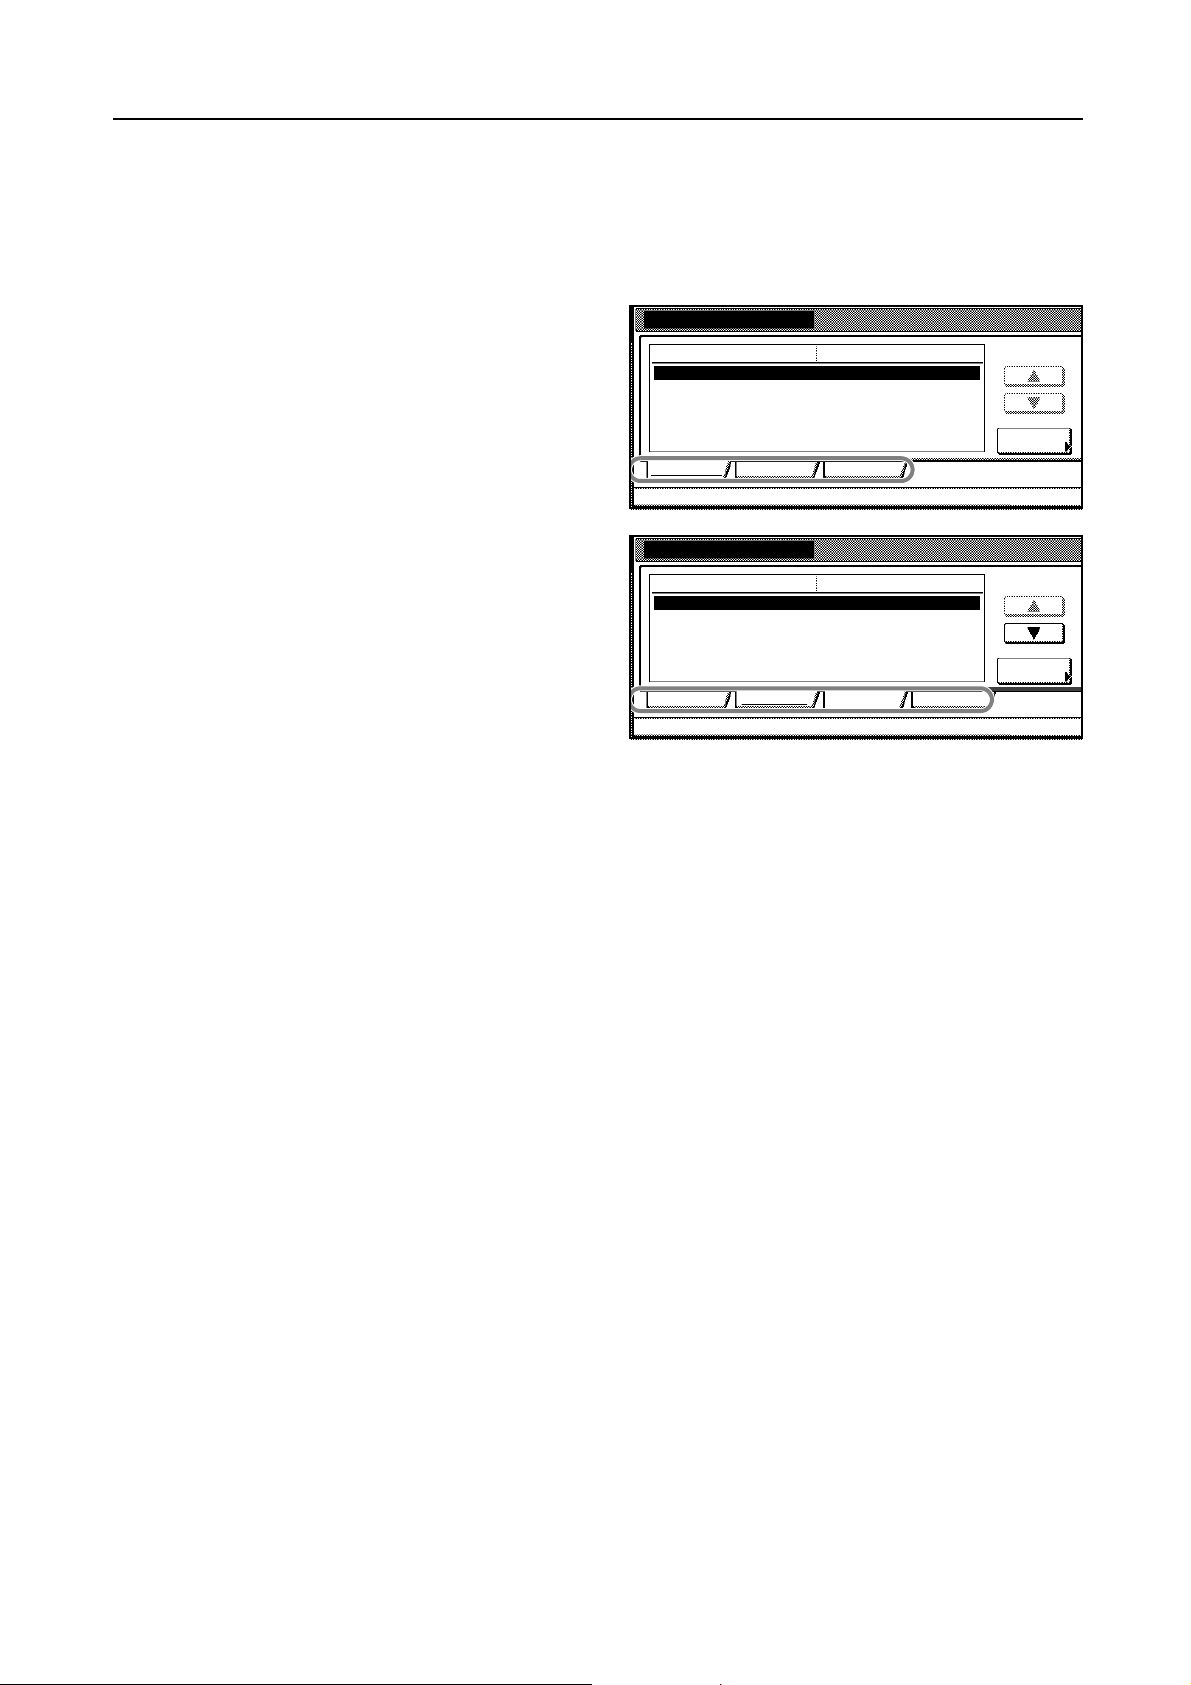
Changing the Interface Parameters
The machine is equipped with both parallel and USB interfaces. Optional serial interface board kit
and network interface card can also be installed. Various printing environment parameters such as
the default emulation can be changed independently on different interfaces by using the machine’s
menu selection system. Select the interface to apply the changes in the procedure described below.
Interface
Default menu
Send & re c eive mo de
Parallel Network USB
Printer m e nu
Interface
Setting Ite m
NetWare
Parallel Network USB
Printer menu - Interface
Selecting the Printer Settings
Setting mode
Auto
Cha nge #
On
OnTCP/IP
OnEthertalk
OnOpt. Status Page
Value
Cha nge #
Option
Note This interface selection described below does not select the interface from which data will be
received. The machine automatically selects the interface.
2-5
Page 22
Selecting the Printer Settings
Changing Parallel Interface Mode
The parallel interface supports a bi-directional/high-speed mode according to IEEE standards.
Normally, this interface is used under the default setting Auto.
Item Description
Auto The printer automatically changes its communication mode to that of the host
computer. Ordinarily, you should leave this setting unchanged.
Normal The printer uses the standard communication method recommended for
Centronics interfaces.
High Speed This mode enables faster data transmission between the machine and the host
computer. (Select this mode if printing problems occur when the machine is
connected to a workstation.)
Nibble (high) High speed data communication is used in compliance with the IEEE 1284
standard.
Important! Use a parallel printer cable that complies with the IEEE1284 standard.
Press the [Printer] key. The machine enters the printer mode.
1
Press [Printer Menu].
2
Press [Interface].
3
Press [Parallel] tab and press [Change
4
#].
Select the parallel interface mode.
5
Select item.
Printer menu
Print St a tus Page
Interface
Emulation
Interface
Send & rec eive mode
Parallel Network USB
Printer menu
Parallel
Auto
Normal
High Speed
Nibble
(High)
Printe r menu - Inter face
Font
Page Set
Print Qua lity
Def ault m e nu
Paper
Handling
RAM DISK
Mode
Auto
Others
Setting mode
Cha nge #
Back
2-6
Press [Close] and returns to the Printer menu screen.
6
Page 23
Changing Serial Interface Parameters
Selecting the Printer Settings
Note
This section applies to the machine having the optional serial interface board kit (IB-1 1) inst alled.
You can confirm or change the serial interface parameters including baud rate, data bits, stop bits,
parity, and protocol. These parameters must match those of the computer's serial interface.
Item Available Settings
Baud rate 1200, 2400, 4800, 9600, 19200, 38400, 57600, 115200
Data bit length 7, 8
Stop bit length 1, 2
Parity None, Odd, Even, Ignore
Protocol DTR(positive)&XOn/XOff, DTR(positive), DTR(negative), XOn/XOff,
Press the [Printer] key. The machine enters the printer mode.
1
Press [Printer Menu].
2
3 Press [Interface].
ETX/ACK
Select item.
Printer menu
Print Status Page
Interface
Emulation
Font
Page Set
Print Quality
Paper
Handling
RAM DISK
Mode
Others
4 Press [Serial] tab.
Press S or T to select Baud Rate and
5
press [Change #].
Interface
Default menu
Send & re c eive mo de
Parallel Network USB Serial
Printer m e nu
Serial
Default menu Setting mode
Baud Rate
Data Bits 7
Stop Bits 8
Parity XON/XOFF
Protocol DTR(pos.)&XON/XOFF
Barcode Off
Printer menu - Interface
Setting mode
Auto
9600
Cha nge #
Change #
2-7
Page 24

Selecting the Printer Settings
Select the baud rate.
6
Baud R at e
Back
115200
57600
38400
19200
Printer menu - Interface
Press [Close] and returns to the Serial screen.
7
Repeat steps 5 to 7 to set the data bits, stop bits, parity, and protocol.
8
Press [Close] and returns to the Printer menu screen.
9
9600
4800
2400
1200
-Serial
2-8
Page 25

Changing Network Interface Parameters
This machine supports TCP/IP, IPX/SPX, NetBEUI, and Appletalk protocols. In addition, you can
install the optional network interface card in the option interface slot.
Using the operator panel, you can:
• Activate or deactivate TCP/IP, NetWare, and EtherTalk
• Activate or deactivate DHCP
• Enter IP address, subnet mask address, and default gateway address
• Determine whether to print a network status page when the machine is turned on
Note The operations of the optional network interface are the same as those of the network interface.
TCP/IP
Turn this setting On when this machine is connected to a Windows network, etc., using TCP/IP.
Note • Before setting the IP Address, ask your Network Administrator to obtain the address and
prepare it.
• If you use the following procedure to manually register the IP add ress, be sure to turn the
DHCP setting Off and the TCP/IP setting On.
Selecting the Printer Settings
Press the [Printer] key. The machine enters the printer mode.
1
Press [Printer Menu].
2
3 Press [Interface].
Press [Network] tab.
4
Note When option network interface sets,
press [Option] tab.
Select item.
Printer menu
Print Status Page
Interface
Emulation
Interface
NetWare
Parallel
Printer m e nu
Interface
NetWare
Parallel Network USB
Printer menu - Interface
Font
Page Set
Print Quality
Default menu
Network USB
Setting Ite m
Paper
Handling
RAM DISK
Mode
On
OnTCP/IP
OnEthertalk
OnNetwork Status Page
On
OnTCP/IP
OnEthertalk
OnOpt. St a tus Page
Others
Setting mode
Cha nge #
Value
Cha nge #
Option
2-9
Page 26

Selecting the Printer Settings
Press S or T to select TCP/IP and
5
press [Change #].
Press [On].
6
Press S or T to select DHCP and press
7
[Change #].
Press [Off] and press [Close].
8
Interface
Def ault m e nu
NetWare
Parallel Network USB
Printer menu
DHCP On
BOOTP On
IP address 10. 141. 110. 204
Subnet Mask 255. 255. 248. 0
Gate way 10. 181. 39. 254
terface - Network
Setting mode
On
OnTCP/IP
OnEthertalk
OnNetwork Status Page
Back
Default menu Sett ing m ode
Cha nge #
Clos e
Change #
Press S or T to select BOOTP and
9
press [Change #].
Press [Off] and press [Close].
10
Press S or T to select IP Address and
11
press [Change #].
Use the numeric keys to enter the
12
address. Enter the 3-digit address in the
highlighted area and press the [#] key.
DHCP On
BOOTP On
IP address 10. 141. 110. 204
Subnet Mask 255. 255. 248. 0
Gate way 10. 181. 39. 254
terface - Network - TCP/IP
DHCP On
BOOTP On
IP address 10. 141. 110. 204
Subnet Mask 255. 255. 248. 0
Gate way 10. 181. 39. 254
terface - Network - TCP/IP
IP Address
Confirm pe r 3 line s pr e s sing # key.
Back
Default menu Sett ing m ode
Back
Default menu Sett ing m ode
Clos e
Change #
Clos e
Change #
Back
2-10
10
000
Printer menu -Interface - Network -TCP/IP
(with #ke y)
Page 27

Enter the next 3-digit address and press
13
the [#] key.
To modify the entered addres s, press
the [#] key to select the 3-digit address
to be modified and use the numeric keys
to enter the address again.
Use the same procedure to enter the
14
remaining address and then press
[Close]. The display returns to the
TCP/IP screen.
If you press [Back], the entered address
is cleared and the previous address is
set again.
Press S or T to select Subnet Mask
15
and press [Change #].
Selecting the Printer Settings
IP Address
Confirm per 3 line s pr es s ing # key .
10
141 00
Printer menu - Interface - Net work - TCP/IP
IP Address
Confirm per 3 line s pr es s ing # key .
10
141 110 204
Printer menu - Interface - Net work - TCP/IP
(with #key)
(with #key)
Back
Back
Back
Clos e
Def ault m e nu Set ting mode
DHCP On
BOOTP On
IP address 10. 141. 110. 204
Subnet Mask 255. 255. 248. 0
Gate way 10. 181. 39. 254
terface - Network
Enter the Subnet Mask address using the same procedure used for the IP Address in steps 12
16
through 14 of IP Address Setting.
Press S or T to select Gateway and
17
press [Change #].
Def ault m e nu Set ting mode
DHCP On
BOOTP On
IP address 10. 141. 110. 204
Subnet Mask 255. 255. 248. 0
Gate way 10. 181. 39. 254
terface - Network
Enter the Gateway address using the same procedure used for the IP Address in steps 12 through
18
Back
14 of IP Address Setting.
Press [Close] and returns to the Interface screen.
19
Press [Close] and returns to the Printer menu screen.
20
Chan g e #
Clos e
Chan g e #
NetWare
Set this item to On when you connect to a network using NetWare.
from
Auto, 802.3, Ethernet II, 802.2, and 802.3SNAP.
Access Interface, refer to TCP/IP on page 2-9.
1
Press S or T to select Netware and press [Chang e #].
2
Frame mode can be selected
2-11
Page 28

Selecting the Printer Settings
Press [On] and select the frame type.
3
NetWare
Back
NetWare
Off
On
Printer menu - Interface - Net wor k
Press [Close] and returns to the Interface screen.
4
Press [Close] and returns to the Printer menu screen.
5
EtherTalk
Set this option to On if connecting to an Apple Macintosh computer.
Access Interface, refer to TCP/IP on page 2-9.
1
Press S or T to select EtherTalk and
2
press [Change #].
Interface
Def ault m e nu
NetWare
Parallel Network USB
Printer menu
Auto
802.3
Ethernet I I
Frame Type
802.2
802.3SNAP
On
OnTCP/IP
OnEthertalk
OnNetwork Status Page
Setting mode
Cha nge #
Select [On] or [Off].
3
Press [Close] and returns to the Interface screen.
4
Press [Close] and returns to the Printer menu screen.
5
Network Status Page Printing
You can have your machine print out a network status page when the machine prints the status
page. The network status page shows the network addresses, and other information under various
network protocols about the network interface card. The default setti ng is Off (print disable).
Access Interface, refer to TCP/IP on page 2-9.
1
Press S or T to select Network Status
2
Page and press [Change #].
Select [On] or [Off].
3
Interface
Def ault m e nu
NetWare
Parallel Network USB
Printer menu
Setting mode
On
OnTCP/IP
OnEthertalk
OnNetwork Status Page
Cha nge #
2-12
Press [Close] and returns to the Interface screen.
4
Press [Close] and returns to the Printer menu screen.
5
Page 29

Emulation Mode
This section explains the procedure to select the emulation protocol.
Note You can set the emulation for each interface.
Emulation Mode Selection
Emulation modes that can be used with this machine: PCL6, KC-GL, KDPL, KDPL (AUTO), Line
Printer, IBM Proprinter, Diablo 630, and EPSON LQ-850
Press the [Printer] key. The machine enters the printer mode.
1
Press [Printer Menu].
2
Press [Emulation].
3
Select item.
Printer menu
Print Status Page
Interface
Emulation
Font
Page Set
Print Quality
Selecting the Printer Settings
Paper
Handling
RAM DISK
Mode
Others
Select the desired interface ta b .
4
Select the desired emulation mode .
5
Emulation
PCL6
KPDL
KPDL
(AUTO)
KC-GL
Printer m e nu
Line
Printer
IBM
Proprinter
Diablo 630
EPSON
LQ-850
Parallel Network USB
Important! • If you set KPDL(AUTO), switching between KPDL and an alternative emulation mode will be
automatically performed according to the print data.
• If you set KPDL or KPDL(AUTO), the details of any error that occurs during printing can be
printed.
• If you set KC-GL, you can set the thickness of the pen and page size.
On completion, Press [Close] and returns to the Printer menu screen.
6
KPDL (AUTO) Alternative Emulation Selection
If you set KPDL(AUTO), switching between KPDL and an alternative emulation mode will be
automatically performed according to print data.
Available emulatio n modes: PCL6, KC-GL, Line Printer, IBM Proprinter, DIABLO 630, and EPSON
LQ-850
Access Emulation, refer to Emulation Mode Selection on page 2-13.
1
Press [KPDL(AUTO)].
2
2-13
Page 30

Selecting the Printer Settings
Press [Alt. Emulation].
3
Select the desired alternative emulation
4
mode.
Line
Printer
IBM
Proprinter
Diablo 630
EPSON
LQ-850
Network USB
Alt . Emula t ion
Clos e
Alt.
Emulation
Print KPDL
errors
Back
5
KPDL Error Printing
1
2
3
EPSON
LQ-850
KC-GL
Printer menu
-Emulation
PCL6
Line
Printer
IBM
Proprinter
Diablo 630
Press [Close] and returns to the Emulation screen.
The details of any error that occurs during printing in the KPDL emulation mode can be printed.
Access Emulation, refer to Emulation Mode Selection on page 2-13.
Select [KPDL] or [KPDL(AUTO)].
Press [Print KPDL errors].
Line
Printer
IBM
Proprinter
Diablo 630
EPSON
LQ-850
Network USB
Clos e
Print KPDL
errors
Select [On] or [Off].
4
Press [Close] and returns to the Emulation screen.
5
KC-GL Pen Thickness
If you have selected KC-GL emulation, you can set the thicknesses of the eight pens and the page
size.
Access Emulation, refer to Emulation Mode Selection on page 2-13.
1
Press [KC-GL].
2
2-14
Page 31

Press [Pen Adjust].
3
Press S or T to select Pen Adjust and
4
press [Change #].
Press [+] or [-] or use the numeric keys
5
to enter the desired pen width.
Line
Printer
IBM
Proprinter
Diablo 630
EPSON
LQ-850
Network USB
Pen Adjust
Def ault m e nu Setting mode
Pen(1)
Pen(2)
Pen(3)
Pen(4)
Pen(5)
Pen(6)
Pen(7)
Printer menu - Emulation
Pen(2) Adjust
Pen Width
(1 ~ 99)
Selecting the Printer Settings
dot(s)
dot(s)
dot(s)
dot(s)
dot(s)
dot(s)
dot(s)
dot(s)
1
Clos e
Page Set
Pen Adjust
Change #
Chan g e #
Back
Press [Close] twice and returns to the Emulation screen.
6
Press [Page Set].
7
Select the desired page size.
8
Printer menu - Emulation
Line
Printer
IBM
Proprinter
Diablo 630
EPSON
LQ-850
Network USB
Page Set
Printer m e nu
-Emulation
A2
A1
A0
B3
-KC-GL
Clos e
Page Set
Pen Adjust
Back
B1
B2
B0
SPSZ
Note SPSZ is the size specified with the PRESCRIBE SPSZ command. For details of the PRESCRIBE
commands, refer to the PRESCRIBE Command Reference guide.
Press [Close] and returns to the Emulation screen.
9
Press [Close] and returns to the Printer menu screen.
10
2-15
Page 32

Selecting the Printer Settings
Default Font
You can select the default font for the current interface. The default font can be one of the internal
fonts or a font that is downloaded to the machine memory or stored on memory card or hard disk.
The following settings are available:
• Selecting the Default Font
• Changing the Default Font Size
• Character Pitch for Courier/Letter Gothic
• Selecting Regular or Dark Courier/Letter Gothic
• Setting the Code Set
• Printing Lists of Fonts
Note You can set the font for each interface.
Selecting the Default Font
Press the [Printer] key. The machine enters the printer mode.
1
Press [Printer Menu].
2
Press [Font].
3
Press [Font selection].
4
5 Select the desired interface tab.
Select item.
Printer menu
Print St a tus Page
Interface
Emulation
Font
Font
selection
Printer me nu
Font
Font ID
Font
Page Set
Print Qua lity
I000
Paper
Handling
RAM DISK
Mode
Others
Back
Code Set
Code Set
Back
Courier
Internal
Dark
Detail
2-16
Press S or T to select font ID.
6
Parallel Network USB
Printer menu
-Font
Page 33

Characters displayed before font numbers indicate the following items. For internal font numbers,
refer to Printing Lists of Fonts on page 2-19.
Display Description
I Internal font
S Downloaded fonts
M Fonts in memory card
H Fonts in RAM disk or optional hard disk
O Fonts in optional ROM
Press [Close] and returns to the Font screen.
7
Press [Close] and returns to the Printer menu screen.
8
Changing the Default Font Size
If you have selected a proportional font as the default font, you can set the font size. If you have
selected the Courier font or the Letter Gothic font as the default font, only the Character Pitch
setting displays.
Access Font, refer to Selecting the Default Font on page 2-16.
1
Selecting the Printer Settings
Press [Font selection].
2
Press [Detail].
3
Press [+] or [-] or use the numeric keys
4
to enter the character size. The
character size can be set between 4 and
999.75 points, in 0.25-point increments.
Press [Close] and returns to the Font screen.
5
Character Pitch for Courier/Letter Gothic
Font
Font ID
Parallel Network USB
Printer m e nu
Printer m e nu - Font
-Font
Configuration
(4.00 ~ 999.75)
Size Point
Back
Courier
I000
Internal
Dark
Detail
Back
4.00
(0.25)
(0.25)
You can set the character pitch for fixed fonts when the default font is Courier or Letter Gothic.
Access Font, refer to Selecting the Default Font on page 2-16.
1
Press [Font selection].
2
2-17
Page 34

Selecting the Printer Settings
Press [Detail].
3
Press [+] or [-] or use the numeric keys
4
to enter the character pitch. The
character pitch can be set between 0.44
and 99.99 characters per inch, in 0.01
character-per-inch increments.
Press [Close] and returns to the Font screen.
5
Selecting Regular or Dark Courier/Letter Gothic
Font
Font ID
Parallel Network USB
Printer menu
Printer menu - Font
-Font
Configuration
(0.44 ~ 99.99)
Pitch CPI
Back
Courier
I000
Internal
Dark
Detail
Back
0.44
(0.01)
(0.01)
1
2
3
4
5
Setting the Code Set
1
Courier or Letter Gothic font thickness can be selected as Internal or Dark.
Access Font, refer to Selecting the Default Font on page 2-16.
Press [Font selection].
Press [Internal] or [Dark] under Courier
area.
t ID
Network USB
ont
Back
Courier
I000
Internal
Dark
Detail
Clos e
Letter Gothic
Internal
Dark
Press [Internal] or [Dark] under Letter Gothic area.
Press [Close] and returns to the Font screen.
You can change the character code set. Available character code sets vary depending on the
current font. (The default is IBM PC-8.)
Access Font, refer to Selecting the Default Font on page 2-16.
2-18
Page 35

Press [Code Set].
2
Select the desired interface ta b .
3
Press S or T to select the desired code set.
4
Press [Close] and returns to the Font screen.
5
Code Set
IBM PC-8
PC-855 Serbia
ISO Cyrillic
PC-863 Canada
PC-861 Ice la nd
PC-860 Portugal
Parallel
Printer menu - Font
Selecting the Printer Settings
Code Se t
Network USB
Option
font
CloseBack
Back
Code Set Printing list
Code Set Internal
Up
Next
Press [Close] and returns to the Printer menu screen.
6
Printing Lists of Fonts
To help you decide in selecting a font, you can printout lists of the internal fonts or the optional fonts
including downloaded fonts.
Access Font, refer to Selecting the Default Font on page 2-16.
1
Press [Internal].
2
Note Option Font is displayed only when there are optional fonts available, such as those contained in the
optional Memory Card.
Press [Printing].
The message Processing data appears
and the machine prints a list of fonts.
Sample lists of fonts are shown in the
following illustration.
Option
font
CloseBack
Stop
Code Set Printing list
Code Set Internal
A4
ont Network KC-GL
Printing
2-19
Page 36

Selecting the Printer Settings
After the list is printed, and returns to the Printer menu screen.
3
2-20
Page 37

Print Configuration
The following settings are available:
• Number of Copies
• Print Orientation
• Zoom
• Page Protect Mode
• Line Feed (LF) Action
• Carriage-Return (CR) Action
• Wide A4 Pitch
Note You can set the print configuration for each interface.
Number of Copies
Y ou can set the number of copies of each p age to be printed for the current interface. The number of
copies can be set between 1 and 9999.
Press the [Printer] key. The machine enters the printer mode.
1
Selecting the Printer Settings
Press [Printer Menu].
2
Press [Page Set].
3
Press S or T to select Copies and
4
press [Change #].
Press [+] or [-] or use the numeric keys
5
to enter the number of copies.
Select item.
Printer menu
Print Status Page
Interface
Emulation
Page Set
Copies
Orientation
Reduce
LF Action
CR Act ion
Printer menu
Copies
Default menu
Font
Page Set
Print Quality
(1 ~ 9999)
Paper
Handling
RAM DISK
Mode
Sett ing mode
0001
Drawer Drawer
AutoPage Protec t
OffWide A4
(with #key)
Set
1
Others
Change #
Back
Press [Close] and returns to the Page Set screen.
6
Press [Close] and returns to the Printer menu screen.
7
Printer m e nu - Page Set
2-21
Page 38

Selecting the Printer Settings
Print Orientation
You can select portrait (upright) or landscape (sideways) page orientation.
Access Page Set, refer to Number of Copies on page 2-21.
1
Press S or T to select Orientation and
2
press [Change #].
Page Set
Copies
Orientation
Reduce
LF Action
CR Ac tion
Printer menu
Def a ult menu
Landscape OrientationPortrait Orientation
ABCABC
Setting mode
0001
Drawer Drawer
AutoPage Protec t
OffWide A4
Cha nge #
Zoom
Select the desired interface tab.
3
Press [Portrait] or [Landscape].
4
Press [Close] and returns to the Page Set screen.
5
Press [Close] and returns to the Printer menu screen.
6
Orientation
Portrait
Landscape
Parallel Network USB
Printer menu - Page Set
If you specify the Paper Size (original size) and the Output Size, the machine reduces the image at
a preset magnification ratio to pri nt onto the specified Output Size paper.
Access Page Set, refer to Number of Copies on page 2-21.
1
Back
2-22
Page 39

Press S or T to select Reduce and
2
press [Change #].
Press S or T to select the desired page
3
size and print size.
The reduction ratio will automatically be
set and displayed.
Press [Close] and returns to the Page Set screen.
4
Press [Close] and returns to the Printer menu screen.
5
Page Set
Default menu
Copies
Orientation
Reduce
LF Action
CR Act ion
Printer m e nu
Zoom(Redu ce)
100 % Drawer
Zoom
Printer menu - Page Set
Page Size
Print Size
Drawer
Selecting the Printer Settings
Sett ing mode
0001
Drawer Drawer
AutoPage Protec t
OffWide A4
Change #
Back
Page Protect Mode
1
2
3
The Page Protect Menu does not normally appear, however, Page Protect will be forcibly set to On
if a print overrun error occurs because the print job is too complex. When this has happened, be
sure to reset Page Protect to Auto (default) in order to maintain the optimum use of machine
memory.
Access Page Set, refer to Number of Copies on page 2 - 21.
Press S or T to select Page Protect
and press [Change #].
Press [Auto].
Page Set
Copies
Orientation
Reduce
LF Action
CR Act ion
Printer m e nu
Page Protec t
Auto
On
Default menu
Sett ing mode
0001
Drawer Drawer
AutoPage Protec t
OffWide A4
Change #
Back
Press [Close] and returns to the Page Set screen.
4
Press [Close] and returns to the Printer menu screen.
5
Printer menu - Page Set
2-23
Page 40

Selecting the Printer Settings
Line Feed (LF) Action
This procedure instructs the machine what to do when it receives a linefeed code (0AH).
Access Page Set, refer to Number of Copies on page 2-21.
1
2 Press S or T to select LF Action and
Page Set
press [Change #].
Copies
Orientation
Reduce
LF Action
CR Ac tion
Printer menu
Select the desired interface tab.
3
Press the desired linefeed action.
4
LF Action
LF only
CR and L F
Ignore LF
Parallel Network USB
Printer menu - Page Set
LF only Linefeed is performed (Defaul t).
CR and LF A linefeed and carriage return are performed.
Ignore LF The linefeed is ignored.
Def a ult menu
Setting mode
0001
Drawer Drawer
AutoPage Protec t
OffWide A4
Cha nge #
Back
Press [Close] and returns to the Page Set screen.
5
Press [Close] and returns to the Printer menu screen.
6
Carriage-Return (CR) Action
This procedure instructs the machine what to do when it receives a carriage-return
(0DH).
Access Page Set, refer to Number of Copies on page 2-21.
1
Press S or T to select CF Action and
2
press [Change #].
Page Set
Copies
Orientation
Reduce
LF Action
CR Ac tion
Printer menu
Def a ult menu
Setting mode
0001
Drawer Drawer
AutoPage Protec t
OffWide A4
code
Cha nge #
2-24
Page 41

Selecting the Printer Settings
Wide A4 Pitch
3 Select the desired interface ta b .
Press the desired carriage-return action.
4
CR Ac tion
CR on ly
CR and LF
Ignore CR
Parallel Network USB
Printer menu - Page Set
CF only A carriage-return is performed (Default).
CR and LF A linefee d and carriag e return are performed.
Ignore CF The carriage-return is ignored.
Press [Close] and returns to the Page Set screen.
5
Press [Close] and returns to the Printer menu screen.
6
Turn this to On to increase the maximum number of characters that can be printed in a line for an A4
page (78 characters at 10 pitch) and Letter size page (80 characters at 10 pitch). This setting is only
effective in PCL6 emulation.
Back
Access Page Set, refer to Number of Copies on page 2 - 21.
1
Press S or T to select Wide A4 and
2
press [Change #].
Press [On] or [Off].
3
Press [Close] and returns to the Page Set screen.
4
Press [Close] and returns to the Printer menu screen.
5
Page Set
Copies
Orientation
Reduce
LF Action
CR Act ion
Printer m e nu
Default menu
Sett ing mode
0001
Drawer Drawer
AutoPage Protec t
OffWide A4
Change #
2-25
Page 42

Selecting the Printer Settings
Setting Print Quality
The following settings are available:
• KIR Mode
• EcoPrint
• Resolution
KIR Mode
Smoothing changes the print quality to 2400 dpi equivalent x 600 dpi.
With KIR Off With KIR On
Press the [Printer] key. The machine enters the printer mode.
1
Press [Printer Menu].
2
Press [Print Quality].
3
Press S or T to select KIR Mode and
4
press [Change #].
Select item.
Printer menu
Print St a tus Page
Interface
Emulation
Print Qua lity
KIR Mod e
Ecop rint Mode
Resolution
Printer menu
(default)
Font
Page Set
Print Qua lity
Def ault menu Setting m ode
Paper
Handling
RAM DISK
Mode
On
Off
Fast 1200 Mode
Others
Cha nge #
2-26
Press [On] or [Off].
5
Press [Close] and returns to the Print Quality screen.
6
Press [Close] and returns to the Printer menu screen.
7
Page 43

EcoPrint
Selecting the Printer Settings
EcoPrint mode allows printing with less toner consumption. Use this mode when high quality
printing is not necessary, for example, for draft printing.
Ecoprint setting is OnEcoprint setting is Off
(default).
Access Print Quality, refer to KIR Mode on page 2-26.
1
Press S or T to select Ecoprint Mode
2
and press [Change #].
Print Quality
Def ault m e nu Setting mode
KIR Mode
Ecop rint Mode
Resolution
On
Off
Fast 1200 Mode
Resolution
Printer menu
Press [On] or [Off].
3
Press [Close] and returns to the Print Quality screen.
4
Press [Close] and returns to the Printer menu screen.
5
With this machine, three types of resolution are available: 300 dpi, 600 dpi, and Fast 1200 Mode
Access Print Quality, refer to KIR Mode on page 2-26.
1
Press S or T to select Resolution and
2
press [Change #].
Print Quality
Def ault m e nu Setting mode
KIR Mode
Ecop rint Mode
Resolution
Printer menu
On
Off
Fast 1200 Mode
Change #
Change #
Select the the desired Printing
3
Resolution.
Resolution
Fast
1200 mode
600 dpi
300 dpi
Printer menu - Print Quality
Back
2-27
Page 44

Selecting the Printer Settings
Press [Close] and returns to the Print Quality screen.
4
Press [Close] and returns to the Printer menu screen.
5
2-28
Page 45

Paper Handling
The following settings are available:
• Selecting the Paper Feed Source
• Duplex Print Mode
• Output Destination
• Overriding Difference between A4 and Letter
Selecting the Paper Feed Source
Y ou can select the p aper source, from which the machine fe eds paper as the de fault. If an
optional paper feeder(s) is installed, it is also available for the
Press the [Printer] key. The machine enters the printer mode.
1
Press [Printer Menu].
2
Press [Paper Handling].
3
Select item.
Printer menu
Print Status Page
Interface
Emulation
Font
Page Set
Print Quality
Selecting the Printer Settings
default paper source.
Paper
Handling
RAM DISK
Mode
Others
4
5
6
7
Duplex Print Mode
Press S or T to select Feed Select and
press [Change #].
Select the desired paper feed source.
Paper Handling
Setting I tem V alue
Feed Select
Duplex Mode
Paper Output
Override A 4/LT Off
Printer menu
Feed Select
Printe r menu - Paper H a n dling
Press [Close] and returns to the Paper Handling screen.
Press [Close] and returns to the Printer menu screen.
1st paper
2nd paper
3rd paper
4th paper
1st paper
None
Left tray(F down)
MP tray
Change #
Back
Use to set the binding position on finished prints for duplex printing.
2-29
Page 46

Selecting the Printer Settings
Short Edge Bind Binding at a short edge
Long Edge Bind Binding at a long edge
Access Paper Handling, refer to Selecting the Paper Feed Source on page 2-29.
1
Press S or T to select Duplex Mode
2
and press [Change #].
Paper Handling
Setting Item Va lue
Feed Select
Duplex Mode
Paper Output
Override A 4/LT Off
1st paper
None
Left tray(F down)
3
4
5
Output Destination
1
Printer menu
Select [None], [Short edge bind], or
[Long edge bind].
Duplex Mode
None
Short edge
Long edge
Printe r menu - Paper H andling
Press [Close] and returns to the Paper Handling screen.
Press [Close] and returns to the Printer menu screen.
Use to set the paper Output Destination.
Access Paper Handling, refer to Selecting the Paper Feed Source on page 2-29.
Change #
Back
2-30
Page 47

Press S or T to select Paper Output
2
and press [Change #].
Select the desired output tray and select
3
[Face down] or [Face up].
Selecting the Printer Settings
Paper Handling
Setting I tem Value
Feed Select
Duplex Mode
Paper Output
Override A 4/LT Off
Printer menu
Output Output Side
1st paper
None
Left tray(F down)
Back
Change #
Clos e
Press [Close] and returns to the Paper Handling screen.
4
Press [Close] and returns to the Printer menu screen.
5
Overriding Difference between A4 and Letter
When the Override A4/LT is turned on using the operator panel, the machine ignores the difference
between A4 and Letter paper sizes. Printing is performed without an error message even if the
actual paper size in the current cassette differs from the paper size formatting the job. By default,
this feature is Off.
Access Paper Handling, refer to Selecting the Paper Feed Source on page 2-29.
1
Press S or T to select Override A4/LT
2
and press [Change #].
Tray A
Tray 1
Tray 2
per Handling
Paper Handling
Feed Select
Duplex Mode
Paper Output
Override A 4/LT Off
Tray 3
Tray 4
Tray 5
Setting I tem Value
1st paper
None
Left tray(F down)
Face down
Face up
Press [On] or [Off].
3
Press [Close] and returns to the Paper Handling screen.
4
Press [Close] and returns to the Printer menu screen.
5
Change #
Printer menu
2-31
Page 48

Selecting the Printer Settings
Operating the Storage Device
The machine supports three types of storage device; memory card, optional hard disk, RAM disk,
and optional ROM. The memory card and optional hard disk are installed into the dedicated slots of
the machine. The RAM disk is an allocated part of the printer’s memory. If the optional hard disk is
installed in the machine, the e-MPS function will be available.
The basic operations of each storage device are the same. This section mainly explains the
operation of the memory card.
Using the Memory Card
When the optional Memory Card is installed in this machine, Read, Write and Delete can be
performed for different types of data.
The following options are available:
• Formatting a Memory Card
• Writing Data
• Reading Data (Data, Program Data, Font Data, and Macro Data)
• Deleting Data (Data, Program Data, Font Data, Macro Data, and Option Language)
• Printing a List of Data Names (Partitions)
Inserting the Memory Card
Important! Be sure to turn the main switch off before inserting or removing the Memory Card.
Insert the Memory Card into the slot with the front of the card facing the rear of the machine.
Formatting a Memory Card
A new memory card must be formatted before it can be used in the machine. Formatting allows data
to be written to the memory card.
Important! Formatting will destroy any existing data on a storage device including a used memory card.
Formatting of the memory card must be executed from this machine.
Press the [Printer] key. The machine enters the printer mode.
1
Press [Printer Menu].
2
2-32
Page 49

Press [Memory Card].
3
Press [Format].
4
All data in the memory card will be
delete. Are you sure? is displayed.
Press [Yes].
5
Formatting of the memory card starts.
Select item.
Printer menu
Print Status Page
Interface
Emulation
Memory Car d
Printer menu
Format Memory Card
Font
Page Set
Print Quality
Write D ata
List of
Partitions
Format
Selecting the Printer Settings
Paper
Handling
Memory Card
RAM DISK
Mode
Read Delete
Data Program
Font M a cro
Others
Language
Data
Font
All data in the me mory c ard will be delete.
Are yo u sur e?
Formatting is finished, the display returns to the Printer menu screen.
6
Yes
No
Writing Data
Data can be written to a memory card until the card is full. When writing to a memory card, a name
is assigned to the file automatically. You can use the procedure explained in the section Printing a
List of Data Names (Partitions) on page 2-34 to print a list of data names for confirmation.
Access Memory Card, refer to Using the Memory Card on page 2-32.
1
2 Press [Write Data].
The display will returns to the Printer
Memory Car d
Read Delete
menu screen and the machine enter a
waiting for data state.
Transmit the data from PC.
3
Printer menu
Write D ata
List of
Partitions
Format
Data Program
Font M a cro
When data is received from a PC, the message Processing data appears for a second, followed by
Please wait. Once the operation is finished, Waiting is displayed.
Language
Data
Font
Press [GO].
4
Reading Data
Reads the selected data, program data, font data, and macro data from the memory card.
2-33
Page 50

Selecting the Printer Settings
Access Memory Card, refer to Using the Memory Card on page 2-32.
1
Select [Data], [Program], [Font], or
2
[Macro] under Read area.
Memory Card
Read Delete
Write Dat a
List of
Partitions
Format
Printer menu
Press S or T to select the data required
3
and press [Enter].
The message Processing data appears
and the reading of data from the memory
card starts.
After reading of data is finished, the display returns to the Printer menu screen.
4
Read Data
DataH001
DataH002
DataH003
DataH004
DataH005
DataH006
DataH007
Printer menu - Hard Disk
Data
Data Program
Font Macro
Up
Down
Deleting Data
Deletes the selected data, program data, font data, macro data, and option language from the
memory card.
Access Memory Card, refer to Using the Memory Card on page 2-32.
1
Press [Language], [Data], [Program],
2
[Font], or [Macro] under Delete area.
Read Delete
Language
Data
Font
Clos e
Write Dat a
List of
Partitions
Format
Press S or T to select the data required
3
and press [Delete].
Delete Data
The message Processing data appears
and the deleting of data from the
memory card starts.
After the deleting of data is finished, the display returns to the Printer menu screen.
4
DataH001
DataH002
DataH003
DataH004
DataH005
DataH006
DataH007
Printer menu - Hard Disk
Data Progra m
Font Macro
Data
Up
Down
Language
Data Program
Font Macro
Printing a List of Data Names (Partitions)
The machine prints a list of all data names (referred to as partitions) stored in a memory card for
reference. (Printing a list is also available for a font card.)
Access Memory Card, refer to Using the Memory Card on page 2-32.
1
2-34
Page 51

Press [List of Partitions].
2
Selecting the Printer Settings
Memory Car d
Read Delete
Press [Printing].
3
The message Processing data appears
and the list of partitions prints.
Write D ata
List of
Partitions
Format
Printer menu
A4
AM DISK Mode
PARTITION LIST
Device Information
Partition Information
Data Program
Font M a cro
KM-8030
Language
Data
Font
Stop
Printing
4
Using the RAM Disk
Note • The operations of the RAM disk are the same as those of the memory card. Refer to the
After the list of partitions is printed, the display returns to the Printer menu screen.
This machine is equipped with RAM disk functions. The RAM disk is a virtual disk unit that uses a
part of the memory. If you assign a certain size of the memory to the RAM disk, you can use it for
electronic sorting (for reduction of total print time) and storage and reading of data. Also you can
use the e-MPS function.
To activate RAM disk in the printer's memory, first you must set the RAM disk mode to On and set
the desired data size for the RAM disk as described in the following section. This allows you to
perform the following operations on the RAM disk.
• Writing data
• Printing a list of data names (partitions)
• Reading data (Data and Program Data)
• Deleting data (Data, Program Data, Font Data, and Macro Data)
relevant sections Using the Memory Card on page 2-32.
2-35
Page 52

Selecting the Printer Settings
Important! • The RAM disk can not be used when an optional hard disk is installed.
• The RAM disk stores data only temporarily. When the machine is reset or turned off, the stored
data will be erased.
• The RAM disk is allocated within the printer's memory available to users. If the size of the RAM
disk is set too large, the printing speed may decrease or the memory may become insufficient.
Activating the RAM Disk
By default, the RAM disk is not activated (Off). To confirm the RAM disk size or activate the RAM
disk, proceed as follows:
Press the [Printer] key. The machine enters the printer mode.
1
Press [Printer Menu].
2
Press [RAM DISK Mode].
3
Select item.
Printer menu
Print St a tus Page
Interface
Emulation
Font
Page Set
Print Qua lity
Paper
Handling
RAM DISK
Mode
Others
Press [On].
4
Press [Close].
5
R AM D I SK Mode
Off
On
Printer menu
Write Dat a
List of
Partitions
RAM DISK
Size
Read Delete
Do you want to restart immediately? is displayed.
Press [Yes].
6
The machine restarts and the RAM disk
To mak e ne w s etting eff e ct ive, it is
necessary to restart the printer system.
mode is enabled.
Do y ou want to res tart immediately?
Yes
No
Setting the RAM Disk Size
To use the RAM disk, activate and enter the desired size of the RAM disk in the manner described
below. The maximum RAM disk size can be calculated as follows:
Maximum RAM disk size = Total printer memory - 48MB
For example, if the total memory installed in your printer is 256MB, you can set 208MB of RAM disk.
If you attempt to set the RAM disk size beyond this restriction, the printer automatically round it
down so that the size is always 48MB less than the total printer memory.
Back
2-36
Page 53

Selecting the Printer Settings
Important! To activate RAM disk in the printer's memory, first you must set the RAM disk mode to On and set
the desired size for the RAM disk.
Access RAM DISK Mode, refer to Activating the RAM Disk on page 2-36.
1
Press [RAM DISK Size].
2
RAM DISK Mode
Read Delete
Back
Write D ata
List of
Partitions
RAM DISK
Size
16
MB
Press [+] or [-] or use the numeric keys
3
to enter the RAM disk size.
Press [Close].
4
Off
On
Printer menu
RAM DISK Size
The memory size t o us e as R AM disk can be set .
Printer m enu - RAM DISK Mode
When memory size is changed, Do you want to restart immediately? is displayed.
Press [Yes].
5
The machine restarts and the RAM disk
To mak e ne w s etting e ff e ct ive, it is
necessary to restart the printer system.
size is changed.
Do y o u wa nt to r estar t immediately?
Back
Using the Optional Hard Disk
Installing the optional hard disk into the printer allows you to use all of the e-MPS function. To use
the e-MPS function, refer to e-MPS Function on page 2-39. This allows you to perform the following
operations on the hard disk.
• Writing data
• Printing a list of data names (partitions)
• Reading data (Data and Program Data)
• Deleting data (Data, Program Data, Font Data, and Macro Data)
• Formatting a Hard Disk
Note The operations of the hard disk are the same as those of the memory card. Refer to the relevant
sections Using the Memory Card on page 2-32.
Yes
No
2-37
Page 54

Selecting the Printer Settings
Formatting a Hard Disk
When an optional hard disk is inserted into the printer for the first time, it must be formatted before
use.
Press the [Printer] key. The machine enters the printer mode.
1
Press [Printer Menu].
2
Press [Hard Disk].
3
Select item.
Printer menu
Print St a tus Page
Interface
Emulation
Font Hard Disk
Page Set
Print Qua lity
Paper
Handling
Others
4 Press [Format].
All data in the HDD will be deleted. Are
you sure? is displayed.
Press [Yes].
5
Formatting of the hard disk starts.
After the deleting of data is finished, the display returns to the Printer menu screen.
6
Using the Option ROM
The optional ROM is installed in this machine. The following options are available:
• Printing a list of data names (partitions)
• Reading data (Data only)
Hard Disk
Printer menu
Read Delete
Write Dat a
List of
Partitions
Format
All data in th e H DD will be deleted.
Are you s ure?
Yes No
2-38
Select item.
Printer menu
Print St a tus Page
Interface
Emulation
Font
Page Set
Print
Paper Others
RAM DISK
Mode
Option
ROM
Note The operations of the RAM disk are the same as those of the memory card. Refer to the relevant
sections Using the Memory Card on page 2-32.
Page 55

Selecting the Printer Settings
e-MPS Function
The e-MPS is an abbreviation for enhanced-Multiple Printing System which implements the
following functions that are available from the printer driver:
The following settings are available:
• Printing a Quick Copy
• Using Proof-and-Hold
• Printing a Private Print/S to re d Job
• Retrieving Jobs from Virtual Mailbox (VMB)
• Printing a List of Virtual Mailbox (VMB)
• Printing a List of Code Jobs
• Changing e-MPS Configuration
Important! • To use the e-MPS functions, the optional Hard Disk must be installed. For details on e-MPS,
refer to the Kyocera Extended Driver User Guide.
• If the RAM Disk is switched On, the e-MPS function can still be used for proof-and-hold jobs,
private print jobs, and printing a list of code jobs. Refer to Activating the RAM Disk on
page 2-36.
Printing a Quick Copy
This mode enables you to print the requested number of copies of a job, simultaneously storing the
job on the hard disk/RAM disk. When additional copies are required, you can reprint the required
number of copies from the printer operator panel.
The default number of print jobs that can be stored on the hard disk is 32. This value can be
increased to up to 50 from the configuration menu.
Important! • When the number of jobs reaches the limit, the oldest job will be overwritten by the new one.
• When the printer is turned off, all stored jobs will be deleted.
Press the [Printer] key. The machine enters the printer mode.
1
Press [e-MPS].
2
Press [Quick Copy Job].
3
Select item.
e-MPS
Quick Copy
Job
Private/
Stored
Print VMB
Data Tray
List of
Printing
List of
Code JO B
Configuration
Press S or T to select the user name
4
required and press [Next].
Select the user name.
DataH001
DataH002
DataH003
DataH004
DataH005
DataH006
DataH007
e-MPS
User
Up
Down
2-39
Page 56

Selecting the Printer Settings
Press S or T to select a job required
5
and press [Next].
Note If you want to delete a job, press S or T to select a job required and press [Delete].
Press [+] or [-] or use the numeric keys
6
to enter the number of copies and press
[Printing].
The message Processing data appears
and the printing starts.
After the printing is finished, and returns to the Printer menu screen.
7
Quick Copy
DataH001
DataH002
DataH003
DataH004
DataH005
DataH006
DataH007
e-MPS
Quick Copy
e-MPS
Job
Up
Down
(1 ~ 9999)
Set10 (with #key)
Using Proof-and-Hold
When you print multiple copies, this mode first prints one copy so that you can proof it before
continuing to print the remaining copies. Since you can proof the prin touts before printing the
remaining copies, wastage of paper can be reduced.
The printer prints one copy and, at the same time, saves the print job on the hard disk/RAM disk.
You can also change the number of copies when resuming printing from the operator panel.
When the printer is turned off, all stored jobs will be deleted.
Printing Remaining Copies of a Proof and Hold Job
Printing a Proof-and-Hold job on the operator panel is the same as printing a quick copy job. Refer
to the relevant sections Printing a Quick Copy on page 2-39.
Printing a Private Print/Stored Job
In private printing, you can specify that a job is not printed until you release the job from the operator
panel. When sending the job from the application software, specify a 4-digit access code in the
printer driver. The job is released for printing by entering the access code on the operator panel
ensuring confidentiality of the print job. The data is cleared after printing.
In the stored job mode, access codes are not mandatory. Then, the access code must be entered
on the operator panel to print a stored job. Print data will be stored in the h ard disk or RAM disk af ter
printing. Refer to Kyocera Extended Driver User Guide for the driver settings.
Press the [Printer] key. The machine enters the printer mode.
1
2-40
Press [e-MPS].
2
Page 57

Press [Private/Stored].
3
Selecting the Printer Settings
Select item.
e-MPS
Press S or T to select the user name
4
required and press [Next].
Press S or T to select a job required
5
and press [Next].
Quick Copy
Job
Private/
Stored
Print VMB
Data Tray
Select the user name.
DataH001
DataH002
DataH003
DataH004
DataH005
DataH006
DataH007
e-MPS
Private/Stored
DataH001
DataH002
DataH003
DataH004
DataH005
DataH006
DataH007
e-MPS
User
Job
List of
Printing
List of
Code JO B
Configuration
Up
Down
Up
Down
Note If you want to delete a job, press S or T to select a job required and press [Delete].
Press [+] or [-] or use the numeric keys
6
to enter the number of copies. and press
[Printing].
Press [Printing].
7
Enter ID-code is displayed.
Use the numeric keys to enter the
8
four-digit access code in the printer
driver and press [Enter].
The message Processing data appears
and the printing starts.
Private/Stored
e-MPS
Enter I D-code
Job name * ***
(1 ~ 9999)
ID
Set5(with #key)
(with #key)****
clear
After the printing is finished, and returns to the Printer menu screen.
9
2-41
Page 58

Selecting the Printer Settings
Retrieving Jobs from Virtual Mailbox (VMB)
Virtual mailbox is part of Job Storage, which stores print jobs on the hard disk without printing. It
enables you to retrieve jobs later from the operator panel. When the job is printed the data is deleted
from the mailbox. For information about the printer driver opti ons, refer to the Kyocera Extended
Driver User Guide.
Press the [Printer] key. The machine enters the printer mode.
1
Press [e-MPS].
2
Press [Print VMB Data Tray].
3
Select item.
e-MPS
Press S or T to select a job required
4
and press [Printing].
The message Processing data appears
and the printing starts.
After the printing is finished, and returns to the Printer menu screen.
5
Printing a List of Virtual Mailbox (VMB)
A list can be printed which shows the current virtual mailbox numbers, the data stored in a mailbox,
the size of data stored and other information.
Press the [Printer] key. The machine enters the printer mode.
1
Quick Copy
Job
Private/
Stored
Print VMB
Data Tray
Print VMB Data Tray
DataH001
DataH002
DataH003
DataH004
DataH005
DataH006
DataH007
e-MPS
Job
List of
Printing
List of
Code JO B
Configuration
Up
Down
2-42
Press [e-MPS].
2
Press [List of Printing].
3
Select item.
e-MPS
Quick Copy
Job
Private/
Stored
Print VMB
Data Tray
List of
Printing
List of
Code JO B
Configuration
Page 59

Press [Printing].
4
The message Processing data appears
and the printing starts.
ray
A4
VIRTUAL MAIL BOX LIST
Selecting the Printer Settings
Stop
Printing
KM-8030
After the printing is finished, and returns to the Printer menu screen.
5
Printing a List of Code Jobs
Permanent code jobs in the hard disk can be printed.
Press the [Printer] key. The machine enters the printer mode.
1
Press [e-MPS].
2
Press [List of Code JOB].
3
Press [Printing].
4
The message Processing data appears
and the printing starts.
Select item.
e-MPS
Quick Copy
Job
Private/
Stored
Print VMB
Data Tray
A4
List of
Printing
List of
Code JO B
Configuration
Stop
Printing
2-43
Page 60

Selecting the Printer Settings
After the printing is finished, and returns to the Printer menu screen.
5
Changing e-MPS Configuration
The e-MPS settings such as the maximum number of documents that can be stored on the hard
disk and the capacity assigned to each function, can be changed.
The following settings are available:
• Changing the Maximum Number of Quick Copy Jobs
KM-8030
PERMANENT CODE JOB LIST
• Maximum Space Assigned to Temporary Code Jobs
• Maximum Space Assigned to Permanent Code Jobs
• Maximum Space Assigned to Virtual Mailboxes (VMB)
Changing the Maximum Number of Quick Copy Jobs
This changes maximum number of quick copy jobs from 0 to 50. The default is 32.
Press the [Printer] key. The machine enters the printer mode.
1
Press [e-MPS].
2
3 Press [Configuration].
Press S or T to select Quick Copy and
4
press [Change #].
Select item.
e-MPS
Quick Copy
Job
Private/
Stored
Print VMB
Data Tray
Configuration
Def a ult menu
Quick Copy
List of
Printing
List of
Code JO B
Configuration
32
200MBTemporary Code JOB Siz e
100MBPerma n e nt Code JOB Size
100MBVMB Siz e
Setting mode
2-44
Cha nge #
e-MPS
Page 61

Selecting the Printer Settings
Press [+] or [-] or use the numeric keys
5
to enter the maximum number of jobs.
Press [Close] and returns to the Configuration screen.
6
Press [Close] and returns to the e-MPS screen.
7
Maximum Space Assigned to Temporary Code Jobs
This changes the hard disk space that holds temporary code jobs. You can change the maximum
space from 0 to 9999 (megabytes). The actual maximum size depends on the size of free hard disk
space.
Press the [Printer] key. The machine enters the printer mode.
1
Press [e-MPS].
2
Quick Copy
Able to adj ust Max registration # of quick copy j ob.
e-MPS - Configuration
(0 ~ 50)
32
Job
Back
Press [Configuration].
3
Press S or T to select T emporary Code
4
JOB Size and press [Change #].
Press [+] or [-] or use the numeric keys
5
to enter the maximum size.
Press [Close] and returns to the Configuration screen.
6
Press [Close] and returns to the e-MPS screen.
7
Configuration
Default menu
Quick Copy
e-MPS
Tempo. C ode J ob Size
Able to adjust Max HDD size of code job.
(0 ~ 9999)
e-MPS - C onfiguration
200
32
200MBTemporar y Co de JO B Size
100MBPerma n e nt Code JOB Size
100MBVMB Siz e
MB
Sett ing mode
Change #
Back
Maximum Space Assigned to Permanent Code Jobs
This changes the hard disk space that holds permanent code jobs. You can change the maximum
space from 0 to 9999 (megabytes). The actual maximum size depends on the size of free hard disk
space. The operations are the same as Maximum Space Assigned to Temporary Code Jobs.
Maximum Space Assigned to Virtual Mailboxes (VMB)
This changes the hard disk space for virtual mailboxes. You can change the maximum space from 0
to 9999 (megabytes). The actual maximum size depends on the size of free hard disk space. The
operations are the same as Maximum Space Assigned to Temporary Code Jobs.
2-45
Page 62

Selecting the Printer Settings
Other Modes
The following modes can be accessed in the Others submenu:
• Automatic Form Feed Timeout Setting
• Resource Protect Mode
• Auto Error Clear Setting
• Stapling Error Detection
• Printing the Service Status Page
• Restart
• Received Data Dump
Automatic Form Feed Timeout Setting
If this machine does not receive any information indicating the end of data after receiving the last
data, the machine waits for a certain time without printing the last page. When the preset time
elapses, the machine automatically performs a form feed. If you set the time to 0, the machine does
not perform a form feed until GO is manually selected.
Press the [Printer] key. The machine enters the printer mode.
1
Press [Printer Menu].
2
Press [Others].
3
Press S or T to select Form Feed Time
4
Out and press [Change #].
Press [+] or [-] or use the numeric keys
5
to enter the form feed time.
The timeout time can be between 0 and
495 seconds, in 5-second increments.
em.
Font
Page Set
Print Qua lity
Others
Setting Ite m Value
Form Feed Time Out
Resource Protect
Auto Continue
Finishing Error
Printer menu
Form Feed Time Out
Paper
Handling
RAM DISK
Mode
30
Permanent
Off
(0 ~ 495)
30
Sec.
Seconds
(5)
(5)
Cha n ge #
Clos e
Others
Service
Back
2-46
Press [Close] and returns to the Others screen.
6
Press [Close] and returns to the Printer menu screen.
7
Printer menu - Others
Page 63

Resource Protect Mode
The Resource Protect Mode protects the resource data such as downloaded fonts and macros and
memorizes the PCL resources even if the emulation mode is switched Off. If you select Permanent,
temporary resources are not protected. If you select Permanent/Temporary, temporary resources
are protected.
Access Others, refer to Automatic Form Feed Timeout Setting on page 2-46.
1
Press S or T to select Resource
2
Protect and press [Change #].
Press [Off], [Permanent], or
3
[Permanent/Temporary].
Others
Def ault m e nu Setting mode
Form Feed Time Out
Resource Protect
Auto Continue
Finishing Error
Printer menu
Resource Protect
Selecting the Printer Settings
30
Seconds
Permanent
Off
Cha nge #
Service
Back
Press [Close] and returns to the Others screen.
4
Press [Close] and returns to the Printer menu screen.
5
Auto Error Clear Setting
If an error that still allows you to continue printing occurs, the next received data is automatically
printed after a set period of time elapses. For example, if the printer is shared over a network as a
network printer and one person causes one of the above errors, after the set period of time elapses,
the data sent from the next person is pri nted. The default setting is Off (Auto Error Clear disabled).
The auto clear errors are:
• Print overrun Press GO.
• Memory overflow Press GO.
You can also set the time that elapses before Auto Continue is activated.
Access Others, refer to Automatic Form Feed Timeout Setting on page 2-46.
1
Press S or T to select Auto Continue
2
and press [Change #].
Off
Permanent
Permanent/
Temporary
Printer menu - Others
Others
Press [On] or [Off].
3
Def ault m e nu Setting mode
Form Feed Time Out
Resource Protect
Auto Continue
Finishing Error
Printer menu
30
Seconds
Permanent
Off
Cha nge #
Service
2-47
Page 64

Selecting the Printer Settings
When you have selected On, press [+]
4
or [-] or use the numeric keys to enter
the auto continue time.
The auto continue time can be between
0 and 495 seconds, in 5-second
increments.
Press [Close] and returns to the Others screen.
5
Press [Close] and returns to the Printer menu screen.
6
Stapling Error Detection
You can select whether or not to display Out of staples. Add Staples and Press GO when staples
have run out while stapling is performed.
Mode Description
On If you select GO, printing is performed without stapling. If you select CANCEL,
Off Printing is performed without stapling.
printing is canceled.
Auto continue
When error occurs , auto timing for processing can be set.
(0 ~ 495)
Seconds30
Off
On
Printer menu - Others
(5)
(5)
Back
Access Others, refer to Automatic Form Feed Timeout Setting on page 2-46.
1
Press S or T to select Finishing Error
2
and press [Change #].
Press S or T to select S tapl e Mode and
3
press [Change #].
Press [On] or [Off].
4
Press [Close] and returns to the Finishing Error screen.
5
Others
Default menu Set ting mode
Form Feed Time Out
Resource Protect
Auto Continue
Finishing Error
Printer menu
Finishing Error
Setting Item
Staple M o de
Printer menu - Oth e rs
Permanent
Off
30
Seconds
On
Cha n ge #
Value
Service
Change #
2-48
Press [Close] and returns to the Others screen.
6
Press [Close] and returns to the Printer menu screen.
7
Page 65

Printing the Service Status Page
The service status page contains printer settings information that is more detailed than the standard
status page and is therefore mostly for service purposes. However, there is a great deal of
information on the service status page that may be useful to you.
Access Others, refer to Automatic Form Feed Timeout Setting on page 2-46.
1
Press [Service].
2
Selecting the Printer Settings
Others
Press [Print Status Page].
3
Press [Printing].
4
The message Processing data appears
and the machine prints a service status
page.
Def ault m e nu Setting mode
Form Feed Time Out
Resource Protect
Auto Continue
Finishing Error
Printer menu
Service
Print Status Page
Paper Feed
Printer menu - Others
e
A4
Seconds
30
Permanent
Off
Cha nge #
Service
Stop
Printing
Restart
After the service status page is printed, the display returns to the Printer menu screen.
5
To reset only the Printer Board without the need to turn off to the machine, perform the following
procedure.
All of the printing data and waiting data are deleted when this machine is restarted.
Access Others, refer to Automatic Form Feed Timeout Setting on page 2-46.
1
Press [Printer Reset].
2
Only printer board is working without
turning off the main SW. Are you sure?
is displayed.
enu Setting mode
e Out
ct
30
Seconds
Permanent
Off
ServiceCha nge #
Clos e
Printer
Reset
Print
HEX-DUMP
2-49
Page 66

Selecting the Printer Settings
Press [Yes].
3
Restart is executed.
Received Data Dump
Only printer bo ard is work ing without turning off the
main SW. Are you sure?
Yes
No
Stop
Y ou can print dat a received by the printer as h exadecimal code for
files.
Access Others, refer to Automatic Form Feed Timeout Setting on page 2-46.
1
Press [Print HEX-DUMP].
2
Printing mode with dump Rx data. Are
you sure? is displayed.
enu Setting mode
e Out
ct
30
Seconds
Permanent
Off
3 Press [Yes].
The message Processing data appears
for a second, followed by Waiting.
Printing m ode wit h dump R x dat a .
Are you s ure?
Yes
debugging programs and
Clos e
Printer
Reset
ServiceCha nge #
No
Print
HEX-DUMP
Stop
While the message display is indicating Waiting send data to be hex-dumped to the printer. The
4
message display indicates Processing data while the data is being received.
Note You can cancel printing of any more dump data by pressing [GO] and then [CANCEL].
Once all data has been received, the message Waiting will appear. Press [GO] to finish hex-dump
5
printing.
2-50
Page 67

3 Troubleshooting
Basic troubleshooting chart
If you experience trouble while you are using this machine as a printer, refer to the table below to
perform minor adjustments. If trouble persists, contact your service representative or an authorized
service center.
Note For information in regard to general mechanical trouble with the machine, refer to the Operation
Guide for your copier.
Problem Check point Procedure
Nothing is printed out Is the power cord loose? Connect the power cord securely to a power
source.
Is the power on to the printer? Turn the main switch to the printer on.
Is the printer cable appropriate
and is it connected properly?
Did you connect the printer
cable after you turned the power
to the printer On?
Is the printer off-line? (Is the
Status indicator flashing
amber?)
Be sure to use a compliant printer cable and make
sure it is connected properly.
Connect the printer cable before you turn the power
to the printer on.
Perform the appropriate procedure to put the
printer on-line.
Press the [Printer] key to switch to the printer
mode.
Text is not printed correctly Is the printer cable appropriate
and is it connected properly?
Is the setting configuration in
your computer correct?
Print out is not correct Is the emulation protocol setting
correct?
Press [GO].
The Status indicator will go out.
Be sure to use a compliant printer cable and make
sure it is connected properly.
Confirm the settings in the printer driver as well as
in the software application in use.
Check the emulation protocol setting.
3-1
Page 68

Troubleshooting
Display message
If an error message appears on the operation panel, first check the following tables for cause of the
trouble and then perform the corresponding procedure. For more detailed information, refer to the
Operation Guide for your copier as well as the Operation Guide for any optional equipment that is
installed in your machine.
Display message Procedure
Add paper in drawer (cassette).
## size (###)
Use alternative? Press GO. Displayed after changing the drawer. Press [GO].
Set paper Press GO. This mode feeds a stack of multiple sheets one at a time. Every time you want to
Load paper. The cassette has run out of paper. Add paper.
Add staples. The finisher (option) has run out of staples. Refer to the Operation Guide for the
Call service. Trouble has occurred within the printer. Contact your service representative or an
Account ID mismatch. The account code you entered does not match the registered one. Check the
Exceeded print quantity limit. The amount of printing accomplished has exceeded the acceptable capacity as
Error has occurr. PLS change to printer
screen and check.
RAM Disk error Press GO.
Code: ##
Memory card error Press GO.
Code: ##
HARD DISK error Press GO.
Code: ##
KPDL error Press GO. The current print job cannot continue. A KPDL error report can be printed out from
The size or type of paper selected for printing does not match the size or type of
paper in the cassette. Replace the paper in the drawer with that of the correct size
and type.
If you want to switch to and print from a different cassette, select the desired
cassette on the touch panel and then press [GO].
The following commands will be displayed in the printer mode.
[GO]: Force-prints onto the current size or type of paper.
[Cancel]: Cancels the printing operation completely.
feed a sheet, press [GO].
finisher and replenish the staples.
authorized service center.
account code that is registered in the printer driver.
set under copy management. In order to print further, change the copy
management setting in the printer.
This message will appear when a printer error occurs and the machine is in a
mode other than the printer mode. Press the [Printer] key to switch to the print
mode screen and the corresponding error message will be displayed.
A RAM disk error has occurred. Look at the error code given in place of ## and
refer to RAM Disk Errors on page 3-4. To ignore the RAM disk error, press [GO].
A memory card error has occurred. Look at the error code given in place of ##
and refer to Memory Card Errors on page 3-4. To ignore the memory card error,
press [GO].
A hard disk error has occurred. Look at the error code given in place of ## and
refer to Hard Disk Errors on page 3-5. To ignore the hard disk error, press [GO].
the Printer Menu. Press [GO] prints out the data that has already been processed.
If auto recovery time has been set, printing will resume automatically when the set
time elapses.
For more information, refer to KPDL Error Printing on page 2-14 and Automatic
Form Feed Timeout Setting on page 2-46.
Memory Card error Insert again. The Memory Card (CompactFlash) was removed during operation under the
menu for printer-related settings. Reinsert the Memory Card.
Be sure to turn the main switch off before inserting the Memory Card.
3-2
Page 69

Troubleshooting
Display message Procedure
Insert the same memory card. The Memory Card (CompactFlash) could not be detected during an operation in
which the printer was reading data from that card. Reinsert the Memory Card.
Be sure to turn the main switch off before inserting the Memory Card.
Format error Memory card. Initialization of the Memory Card (CompactFlash) currently inserted is necessary.
Option interface error
Code: ##
File not found Press GO. File error. Press [GO].
Read fonts: Failed The printer failed to read the font data. Try to read the font data again.
Read macro: Failed The printer failed to read the macro. Try to read the macro again.
Warning low memory. There is not enough memory. You can check how much printer memory there is
Warning image adapt. Because there is not enough memory, printing cannot be performed at the set
Print overrun Press GO. A data overrun error has occurred due to insufficient memory.
The optional interface board is loaded in the wrong slot. Turn power Off and load
the board in the correct slot.
by printing out a status page. Delete any unnecessary font data and macros.
resolution. Either add more memory to the printer or change the resolution.
Press the [Printer] key to switch to the printer mode. Following commands will be
displayed.
[GO]: Continues printing.
[Cancel]: Cancels the printing operation completely.
If auto recovery time has been set, printing will resume automatically when the set
time elapses.
Once this error message is displayed, Page protect mode will be turned On
automatically.
Memory overflow Press GO. The current print job could not be completed due to insufficient memory in the
printer.
Press the [Printer] key to switch to the printer mode. Following commands will be
displayed.
[GO]: Continues printing. The data that has already been processed will be
printed out and the remaining portion of the print job will be printed onto the
following page.
[Cancel]: Cancels the printing operation completely.
If you are using a RAM disk, reduce the size of the RAM disk. If this error occurs
often, it is recommended that you install additional memory into the printer. For
more detailed information on adding memory, contact your service represent ative
or an authorized service center.
If auto recovery time has been set, printing will resume automatically when the set
time elapses.
Virtual mailbox full. There is not enough area in the virtual mailbox. Print out data in the virtual
mailbox.
Interface occupied. The selected interface is currently is use. Wait for a while and then attempt the
operation again.
Opt. ROM error Press GO. An error occurred when reading the optional ROM. Press the [Printer] key to
switch to the printer mode and then press [GO] to clear the error.
Format error Hard Disk. Initialize the hard disk.
Check the waste punch box. Eith er the punch waste box is not correctly installed or it is full. Reposition or
empty it as necessary.
3-3
Page 70

Troubleshooting
Storage Error Codes
RAM Disk Errors
Check the error code displayed in place of ## and refer to the following.
Code Meaning
01 Format error. Turn power off and on again.
02 The RAM disk mode is off. Turn it on.
03 A write error has occurred. Turn off write protection.
04 The RAM disk does not have enough area to stor e the data. Delete any
05 The selected file could not be found . Check the file name and whether it is on the
06 There is not enough system memory. Increase memory capacity.
98 Some of the data being collated was not read. Job data is corrupt.
Memory Card Errors
Check the error code displayed in place of ## and refer to the following.
unnecessary data to make more room.
RAM disk or not.
Code Meaning
01 Format error. Reformat the memory card.
02 Memory card load error. Correctly load the memory card.
03 A write error has occurred. Turn off write protection.
04 The memory card does not have enough area to store the data. Delete any
unnecessary data to make more room.
05 The selected file could not be found . Check the file name and whether it is on the
memory card or not.
3-4
Page 71

Troubleshooting
Hard Disk Errors
Check the error code displayed in place of ## and refer to the following.
Code Meaning
01 Format error. Reformat the hard disk.
02 Hard disk load error. Correctly load the hard disk.
03 A write error has occurred. Turn off write pro te cti o n.
04 The hard disk does not have enough area to store the data. Delete any
unnecessary data to make more room.
05 The selected file could not be found. Check the file name and whether it is on the
hard disk or not.
06 There is not enough system memory. Increase memory capacity.
20 The hard disk is loaded in the wrong slot. Load the hard disk in the correct slot.
85 An illegal name has been used for the virtual tray. Rename the tray correctly.
86 The wrong password was used for the virtua l mailbox. Input the correct password.
88 Some of the data in the virtual mailbox was not read. Job data is corrupt.
97 No more jobs can be saved. The limit has been reached. Increase the number of
storable jobs and available area.
98 Some of the data in the job was not read. Job data is corrupt.
3-5
Page 72

Troubleshooting
Pausing Printing
1
2
Toggle the printer’s on-line and off-line states. You can temporarily stop the print job by switching
the printer off-line, perform the following procedure.
Press the [Printer] key . The mac hine enters the printer
mode.
Press [GO]. The message Off line is
displayed and changes off-line.
o print.
Note In off-line state, the printer can receive data, but cannot print.
To resume processing of the prints,
3
press [GO] again. The message of Off
line goes out, returns to the on-line.
Ready to print.
Off line
e-MPS
Printer
Menu
Canc el
GO
Canc el
3-6
Page 73

Canceling Printing
To cancel printing and clear the data, perform the following procedure.
Press [cancel].
Troubleshooting
inting.
Count/Set
APS
A4 Plain
1 sided
In case that data is on processing, printing can be canceled on the printer screen.
Press the [Printer] key. The machine enters the printer
1
mode.
Press [Cancel].
2
user1
Orig. Page
16
A4
Output
Left tray
Cancel
Select the interface through which
3
printing to be canceled is performed.
Note To stop canceling printing, press [Stop].
Printing is canceled.
4
User nam e: user1 Job name:
Select interface to cancel the job.
Current
Job
NetworkParallel
Serial USB
Canceling data.
Off line
Orig. Page
16
A4
User nam e: user1 Job name:
Canc el
Stop
Canc el
3-7
Page 74

Troubleshooting
Restart
To reset only the Printer Board without the need to turn off to the machine, perform the following
procedure.
All of the printing data and waiting data are deleted when this machine is restarted.
Press the [Printer] key . The mac hine enters the printer
1
mode.
Press [Printer Menu].
2
Ready to print.
e-MPS
Press [Others].
3
Press [Printer Reset].
4
Only printer board is working without
turning off the main SW. Are you sure?
is displayed.
Press [Yes].
5
Restart is executed.
Printer
Menu
em.
Font
Page Set
Print Qua lity
enu Setting mode
e Out
ct
Seconds
30
Permanent
Off
Paper
Handling
RAM DISK
Mode
Canc el
Clos e
Others
Clos e
Printer
Reset
ServiceCha nge #
Print
HEX-DUMP
Stop
3-8
Only printer bo ard is work ing without turning off the
main SW. Are you sure?
Yes
No
Page 75

4 Options
This machine has the following options available to satisfy your printing requirements.
Additional Memory
To expand the printer memory for more complex pri nt jobs and faster print speed, you can plug in
optional memory modules (dual in line memory modules) in two memory slots provided on the
printer main controller board. You can select additional memory modules from 32, 64, 128, or
256MB. The maximum memory size is 512MB (256MB x 2).
Hard Disk (HD-10)
The hard disk is used for saving print data. This is advantageous when printing multiple sets of
copies, as high-speed printing is possible using the electronic sorting function. The hard disk is
further required in order to use the e-MPS function. You can use the KM-NET Printer Disk Manager
utility to keep track of the stored data. This software is included in the CD-ROM supplied with the
printer.
Memory Card
The printer is equipped with a slot for a memory card with the maximum size of 256MB. A memory
card is useful for storing fonts, macros, and overlays. You can use the IC Link for Windows utility to
download fonts, etc., to a flash memory card. This software is included in the CD-ROM supplied with
the printer.
Serial Interface (IB-11B)
Install the serial interface in this machine when the serial port is used for printer interface.
Network Interface Card (IB-20/IB-21E/IB-22)
Along with the standard for the network interface on the printer, the network interface card supports
TCP/IP, IPX/SPX, NetBEUI and EtherTalk protocols, so that the printer can be used on network
environments including Windows, Macintosh, UNIX, NetWare, etc.
The network interface card must be installed in the option interface slot.
Network interface card Network connections
IB-20 10BASE-T/100BASE-TX/10BASE-2
IB-21E 10BASE-T/100BASE-TX
IB-22 IEEE802.11b (Wireless)
4-1
Page 76

Options
4-2
Page 77

5 Specifications
Note Specifications are subject to change without notice.
Item Specification
Printing speed KM-6030: 60 pages/minute (A4/11 x 8 1/2")
Resolution Fast1200 mode, 600 dpi, 300 dpi
Controller Power PC 750FX 600 MHz
Main memory 64 MB, expandable up to 576 MB
Additional memory 32 MB, 64 MB, 128 MB, and 256 MB (2 slots)
Compatible Operating Systems Microsoft Windows 95/98/Me/2000/XP,
Interfaces
Parallel IEEE1284, 1 port
USB Hi-speed USB, 1 ports
Ethernet Protocol support: TCP/IP, IPX/SPX, NetBEUI, EtherTalk, 1 port
Option Serial interface(RS-232C) / Network interface card, 1 port
Memory card slot 1 slot (CompactFlash card, Type II)
Hard disk slot 1 slot
KM-8030: 80 pages/minute (A4/11 x 8 1/2")
Microsoft Windows NT4.0,
Apple Macintosh OS 7.6.1 or later
5-1
Page 78

A1
Page 79

©2005
is a trademark of Kyocera Corporation
Page 80

Revision 1.0 2005.3
 Loading...