

Page 1
Kyocera KI-G100 GSM Handset - Ver.
0.3 Preliminary Version - 01.1999
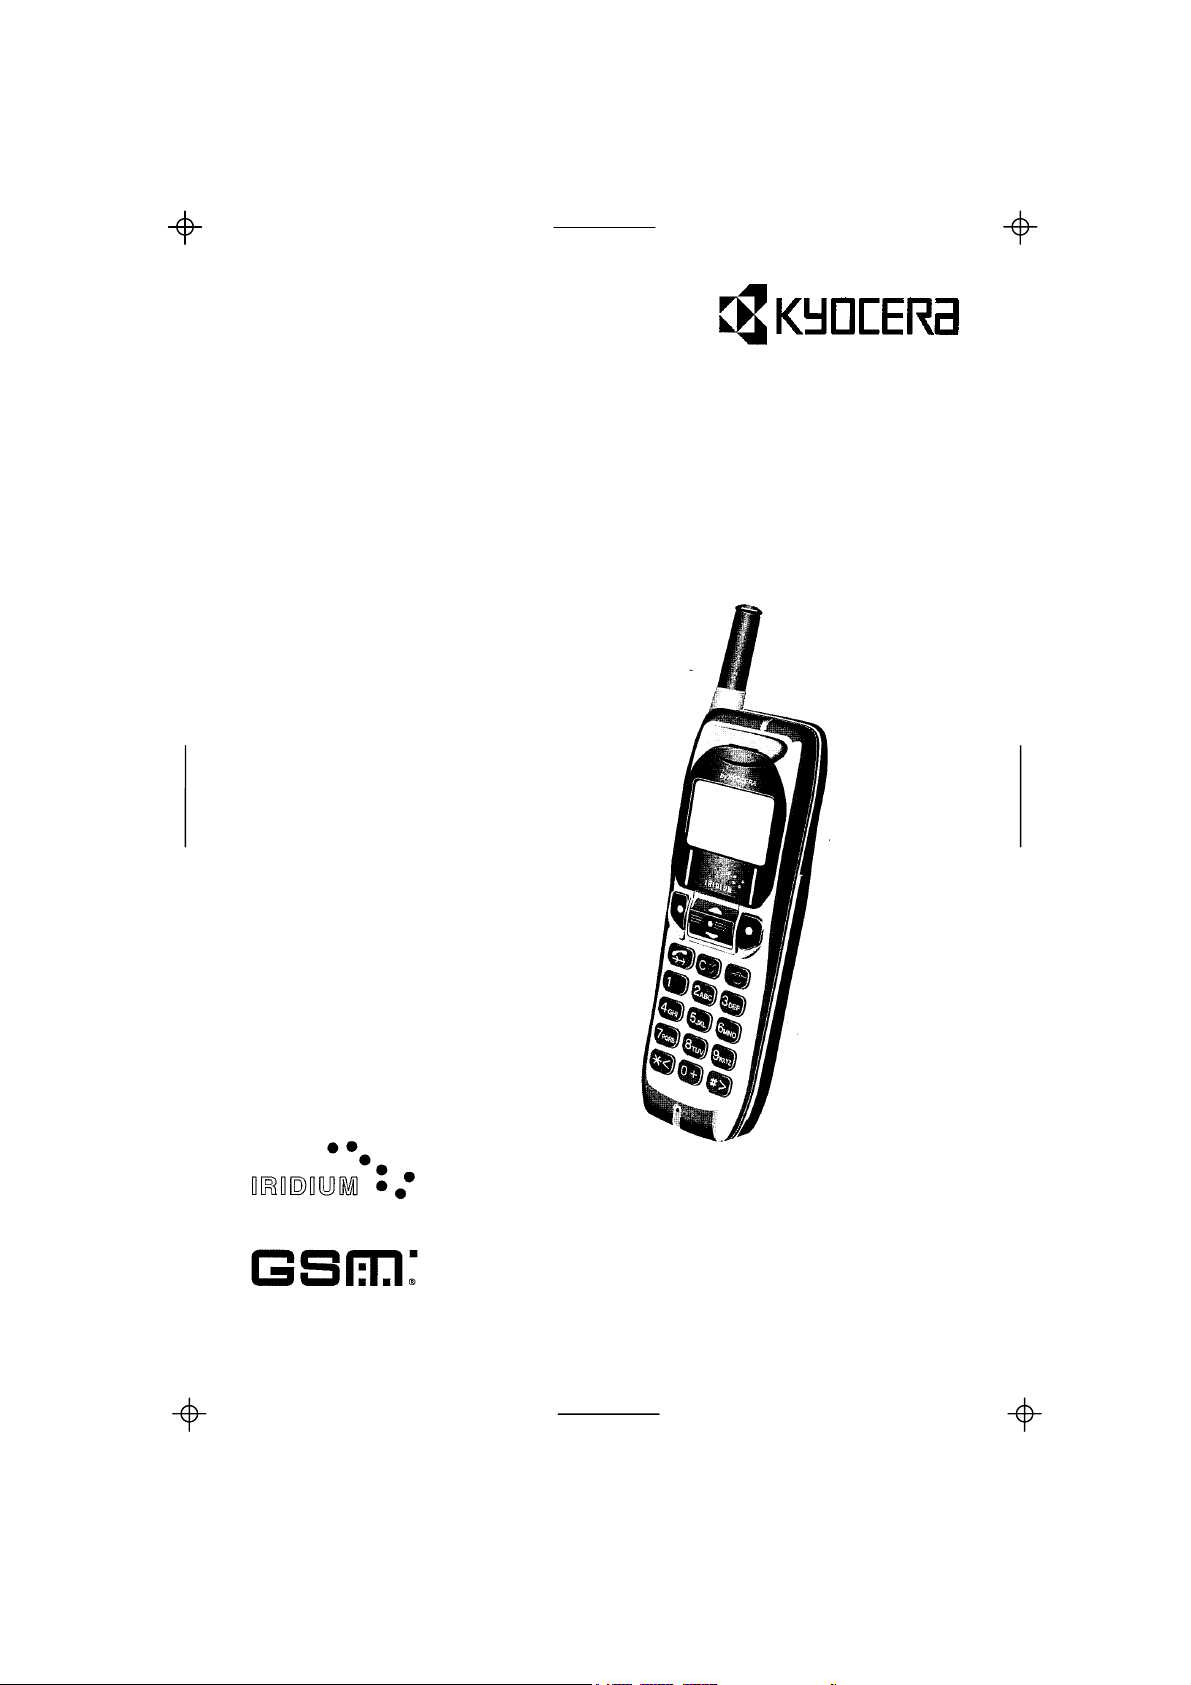
KI-G100 <Main Kit>
IRIDIUM Ready GSM Handset
User Guide
Page 2
Kyocera KI-G100 GSM Handset - Ver.
Safety Precautions
The following are regulations and instructions concerning the safety
of the phone user and of third parties. Please read these points
carefully before using the phone. The manufacturer will not be
responsible for any damage caused by non-observance of the User
Guide and/or safety precautions.
• Do not switch on or use the phone at petrol stations or other sites
with highly flammable fumes, as this could cause the gases to ignite
or result in device damage, faults or a fire.
• Never operate the phone in an aircraft. Always switch it off before
boarding. Its use may be hazardous to the aircraft’s normal operation
and may interfere with the airport’s mobile radio networks. Failure to
comply may result in prosecution.
• Do not use the phone in hospitals, as the antenna’s electromagnetic
radiation may cause disturbances to medical equipment’s normal
operation.
• If you wear devices such as a pacemaker or hearing aids, we
recommend that you keep a safe distance from the antenna. The
antenna’s radiation may cause disturbances to their normal
operation.
• Before making a call, fully extend the antenna. Do not touch or hold it
during a call.
• We recommend the installation in a vehicle of the Hands Free Kit,
which provides a safer alternative to holding and using the phone
while driving. The Kit includes a handset cradle which allows for
handsfree speech.
• Never expose the phone to high levels of moisture (e.g. rain, water
jets...).
• This phone is only intended for use with approved accessories. Use
of other such accessories may be dangerous and may invalidate any
warranty or liability claims.
• Mobile phones may interfere with other electronic equipment’s such
as TV-sets, radios, computers/PCs, when used in their immediate
surroundings.
0.3 Preliminary Version - 01.1999
Page 3

Kyocera KI-G100 GSM Handset - Ver.
0.3 Preliminary Version - 01.1999
Table of Contents
Safety Precautions............................................................................. front cover
Introduction .........................................................................................................1
What's in the box ...............................................................................................1
1. Getting Started ................................................................................................ 2
Insert your SIM Card .........................................................................................2
Attach the battery ..............................................................................................2
Charge your battery........................................................................................... 3
Carry strap.........................................................................................................3
Switch on your phone........................................................................................ 3
Your KI-G100 phone .........................................................................................4
Keypad and phone descriptions .................................................................... 4
Display description......................................................................................... 5
2. Your First Call..................................................................................................6
Pull up the antenna ...........................................................................................6
To make a call ...................................................................................................6
To receive a call ................................................................................................6
To adjust the volume .........................................................................................7
To mute the microphone ...................................................................................7
To end or refuse a call....................................................................................... 7
To redial............................................................................................................. 7
To switch off ......................................................................................................7
3. Extra Dialling Services ................................................................................... 8
Abbreviated Dialling ..........................................................................................8
Speed retrieval............................................................................................... 8
Direct access .................................................................................................8
Alphabetic access.......................................................................................... 8
Caller Log ..........................................................................................................9
Calling Line Identification ..................................................................................9
In-Call Menu ......................................................................................................9
Call Waiting, Call Hold and Multiparty Calls....................................................10
Active call(s) and waiting call....................................................................... 10
To put an active call on hold to make a second call .................................... 10
To swap between active and held call(s)..................................................... 11
To manage a “Multiparty” call ......................................................................11
Manner Mode ..................................................................................................11
Manner Talk Mode ..........................................................................................11
I
Page 4

Kyocera KI-G100 GSM Handset - Ver.
0.3 Preliminary Version - 01.1999
4. Menus.............................................................................................................12
How to use the menus..................................................................................... 12
Main Menu structure........................................................................................ 14
Memory Menu structure ..................................................................................15
Main Menu.......................................................................................................16
1 Settings ..................................................................................................... 16
2 Messages.................................................................................................. 16
3 Costs.........................................................................................................18
4 Services ....................................................................................................19
5 Network.....................................................................................................20
6 Security ..................................................................................................... 21
7 Accessory .................................................................................................22
8 IRIDIUM ....................................................................................................23
Memory Menu..................................................................................................24
1 Phonebook................................................................................................ 24
2 Dialled ....................................................................................................... 26
3 Received ................................................................................................... 26
4 Erase......................................................................................................... 26
5 Own Number............................................................................................. 26
5. IRIDIUM ..........................................................................................................27
6. Problem Solving / Helpful Hints ..................................................................28
In case of a problem........................................................................................ 28
Maintenance.................................................................................................... 29
Keypad letters allocation ................................................................................. 29
Technical data .................................................................................................30
Licensing .........................................................................................................30
7. Accessories................................................................................................... 31
GSM accessories ............................................................................................31
IRIDIUM accessories....................................................................................... 33
Index...................................................................................................................35
Emergency call.................................................................................... rear cover
II
Page 5

Kyocera KI-G100 GSM Handset - Ver.
0.3 Preliminary Version - 01.1999
Introduction
Welcome!
Congratulations on choosing the Kyocera KI-G100 GSM phone for use on the
GSM and IRIDIUM services. You have selected the unique digital phone
designed to use the features offered by both the GSM cellular and the IRIDIUM
satellite networks in a simple, friendly way.
Your KI-G100 phone has been designed to be easy to use - simply follow the
self explanatory instructions on the display. Once you have mastered the basic
concept of using the phone, you should only refer to this User Guide
occasionally.
WHAT’S IN THE BOX
In your KI-G100 box you will find:
- KI-G100 handset
- Rechargeable battery, to power the phone
- Rapid charger, for charging the battery directly on the phone
- Carry Strap
- User Guide, that you should read thoroughly and retain for future reference
- Quick Manual
- Warranty Booklet
Introduction
1
Page 6
Kyocera KI-G100 GSM Handset - Ver.
0.3 Preliminary Version - 01.1999
1. Getting Started
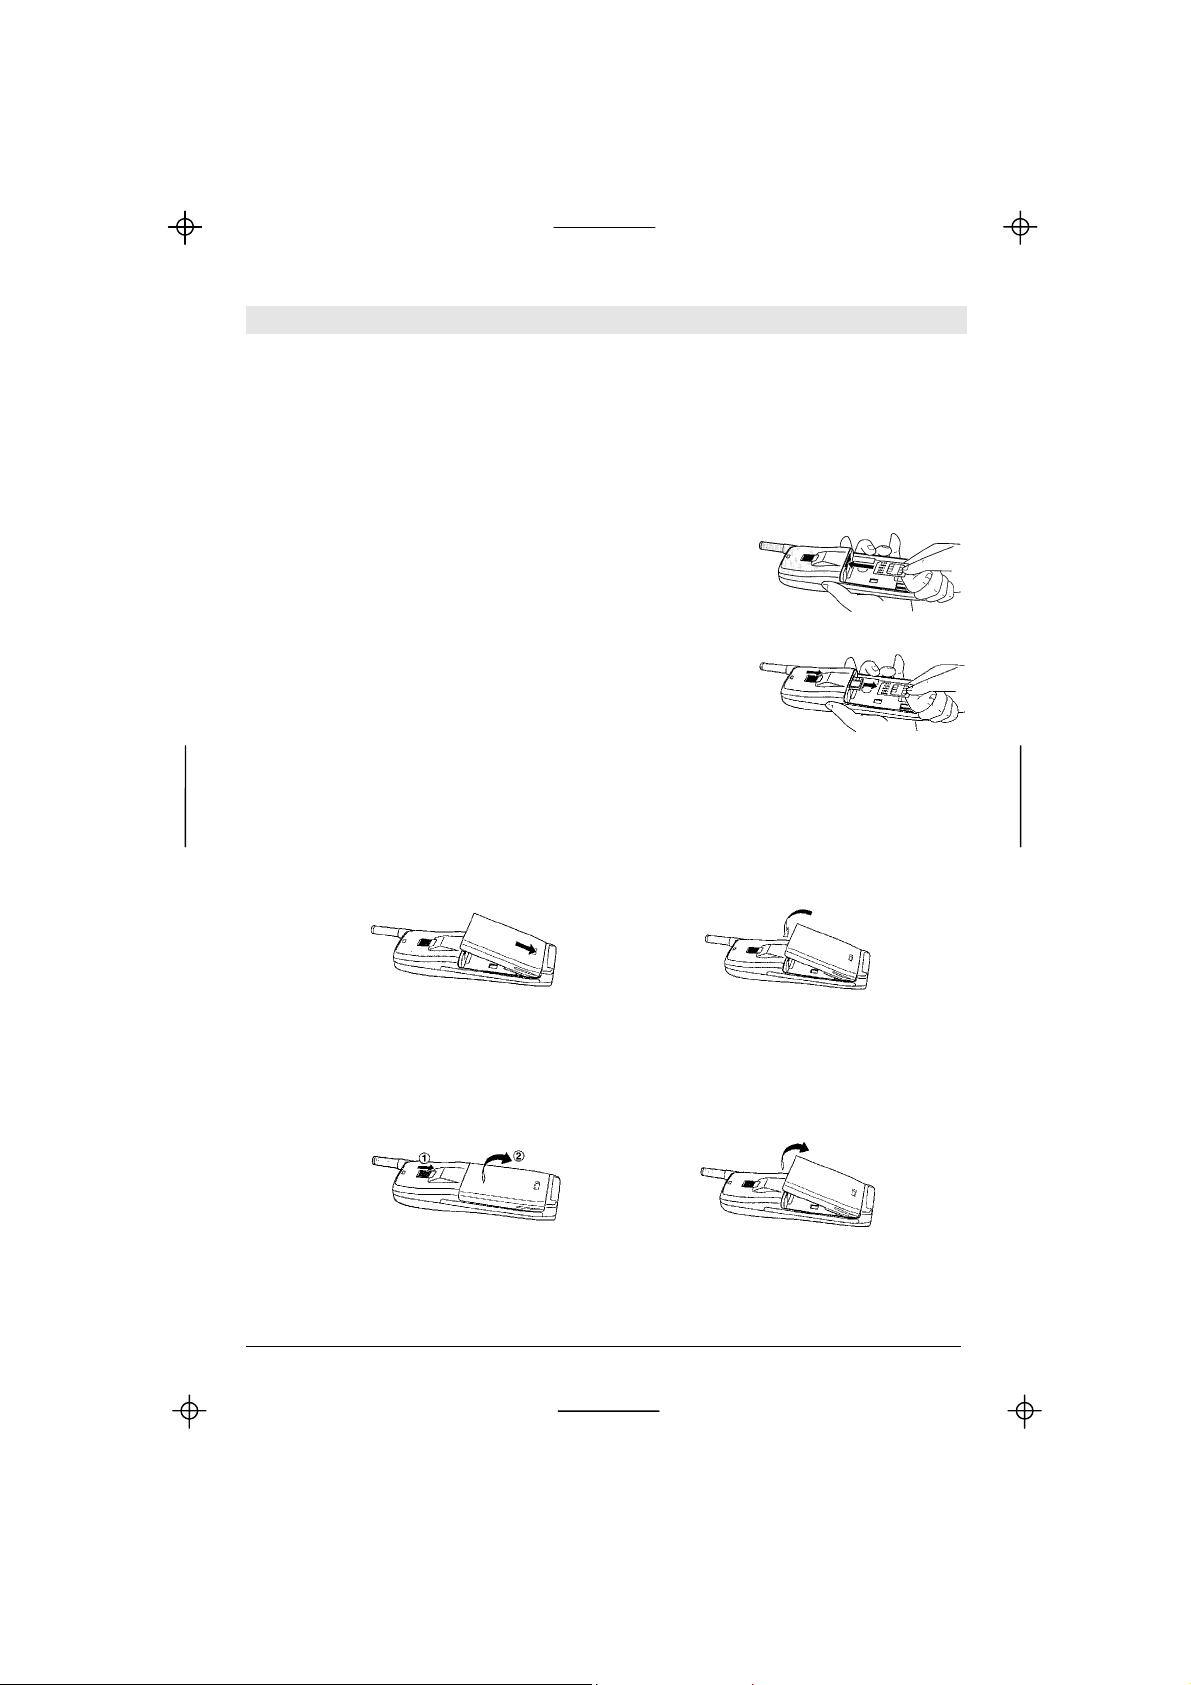
INSERT YOUR SIM CARD
The GSM SIM (Subscriber Identification Module) Card contains all the relevant
information concerning your subscription (card number, phone number...). This
card must be inserted in the phone prior to use.
Place the SIM Card (Plug-In size) in the phone as
shown beside. Ensure that the gold chip is facing
upwards and towards the bottom of the phone.
To remove the SIM Card:
• Press the release catch
• When the SIM Card pops up, pull it out
ATTACH THE BATTERY
a. Hook the battery onto the hinge at the bottom of the phone
b. Swing the battery down and click it into place
a:
b:
To remove the battery,
a. Press the release catch
b. Swing the battery up and then lift it off the phone
a:
b:
2
Getting Started
Page 7

Kyocera KI-G100 GSM Handset - Ver.
0.3 Preliminary Version - 01.1999
CHARGE YOUR BATTERY
Before using your phone for the first time or after a long period without use, it is
important to charge the battery for at least 24 hours.
Plug the connector into the socket in the base of the
phone, then plug the transformer unit into a mains
AC power socket. In normal operation, the battery is
fully charged when the bars in the battery symbol
stop moving.
Note: if the battery is completely discharged, the battery icon indicating the
charge status will only appear 2 or 3 minutes after you connect the charger.
We recommend to always discharge completely the battery before recharging.
CARRY STRAP
The Carry Strap included in the box can be fixed
and removed as shown beside.
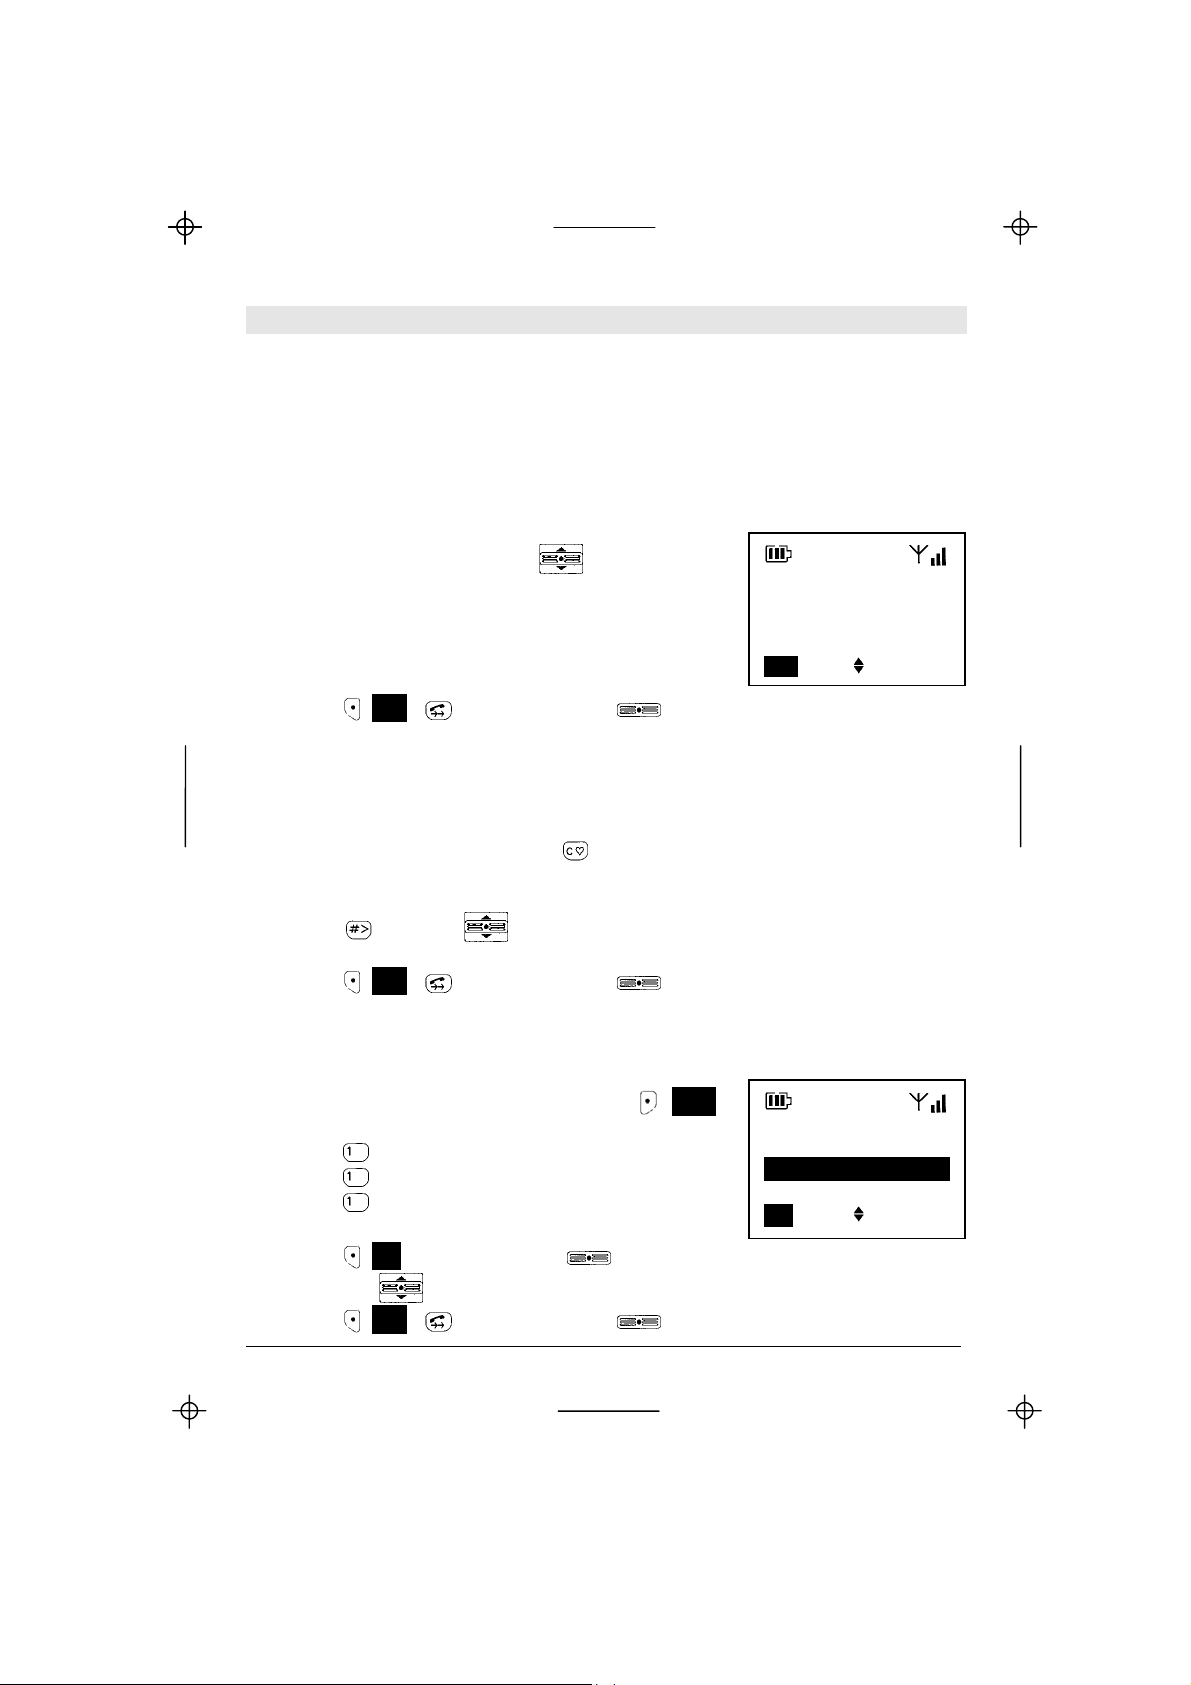
SWICH ON YOUR PHONE
• Press and hold the
key
• Enter the PIN code of your SIM Card
(code provided together with the SIM Card)
If you make a mistake, use the
- short press: clear the last digit
- long press: clear the complete entry
(Clear) key:
Enter
PIN
****
OK SOS
• Press (OK) to confirm
The phone is ready to be used when a network
name is displayed.
(Network Name)
Menu Mem
Note: if you enter a wrong PIN code 3 times in succession, your SIM
Card is blocked and you must enter the PUK code to unblock it (see
section 5. Problem Solving / Helpful Hints on page 28).
Getting Started
3
Page 8
Kyocera KI-G100 GSM Handset - Ver.
0.3 Preliminary Version - 01.1999
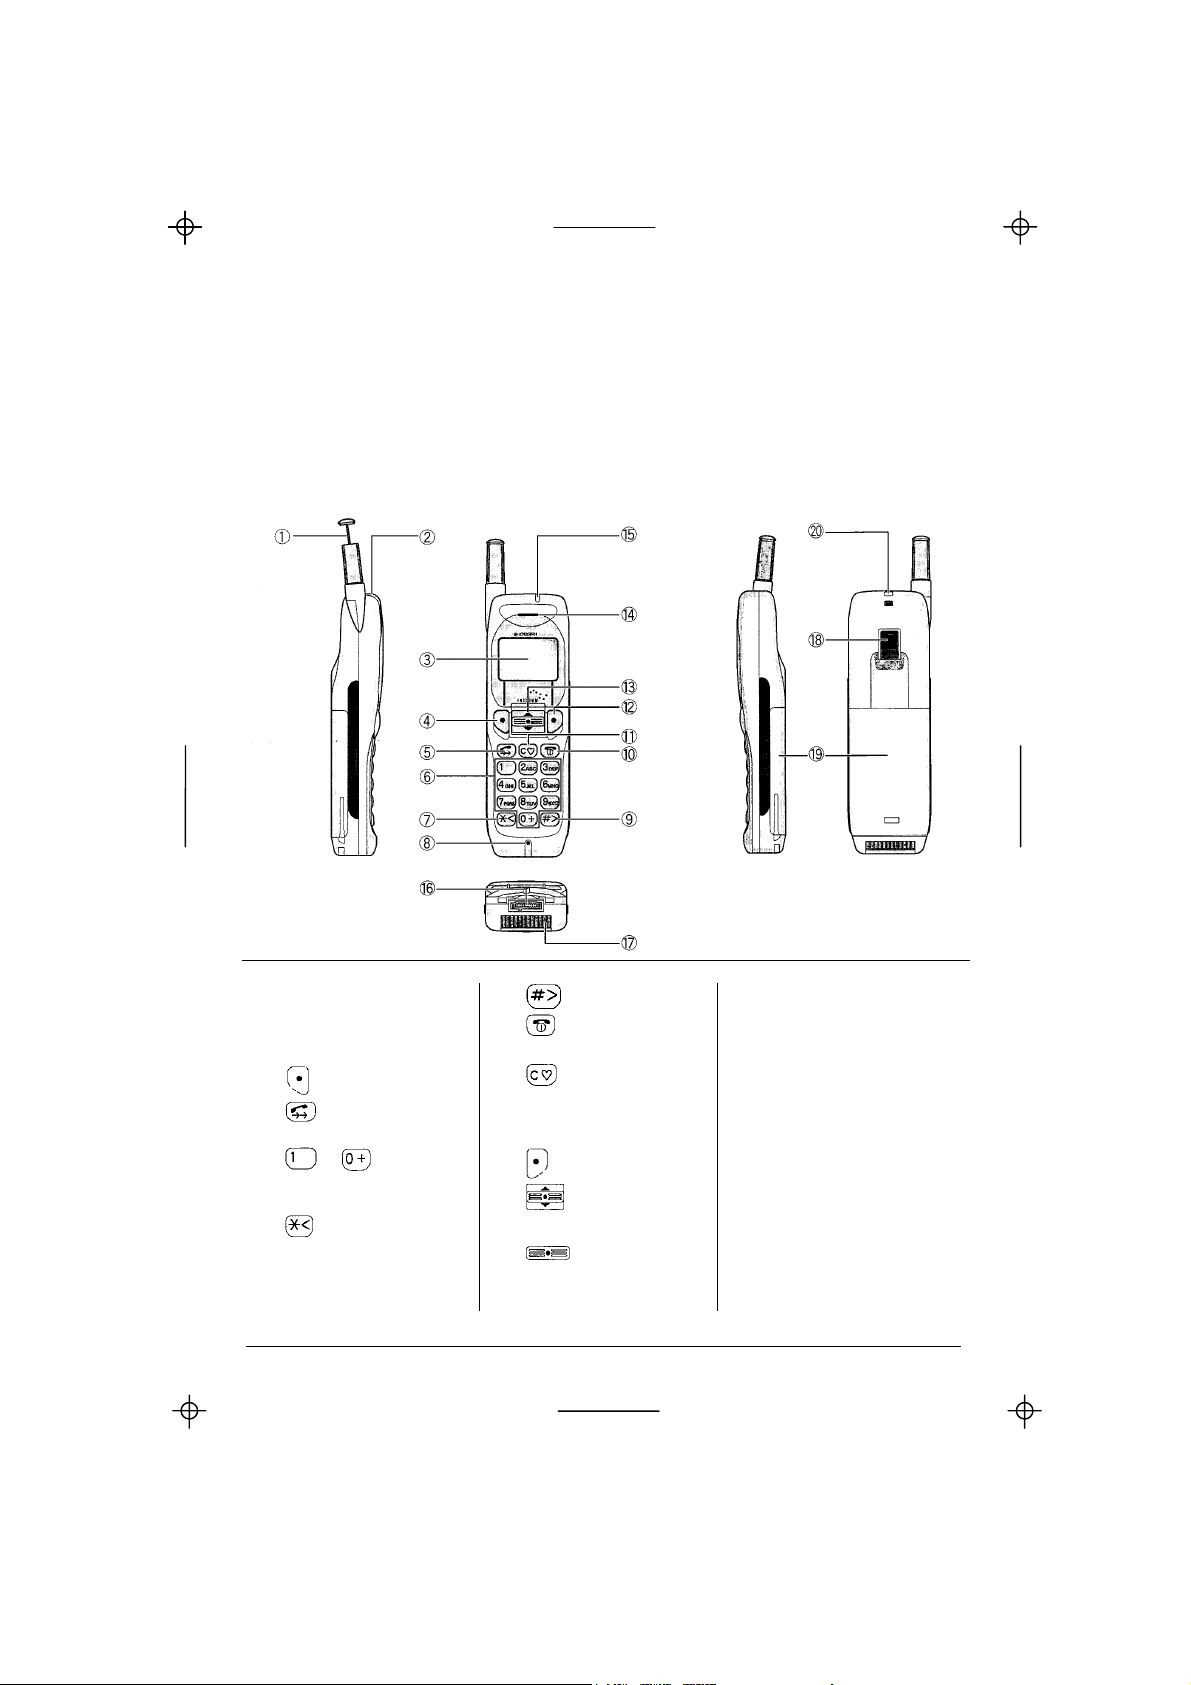
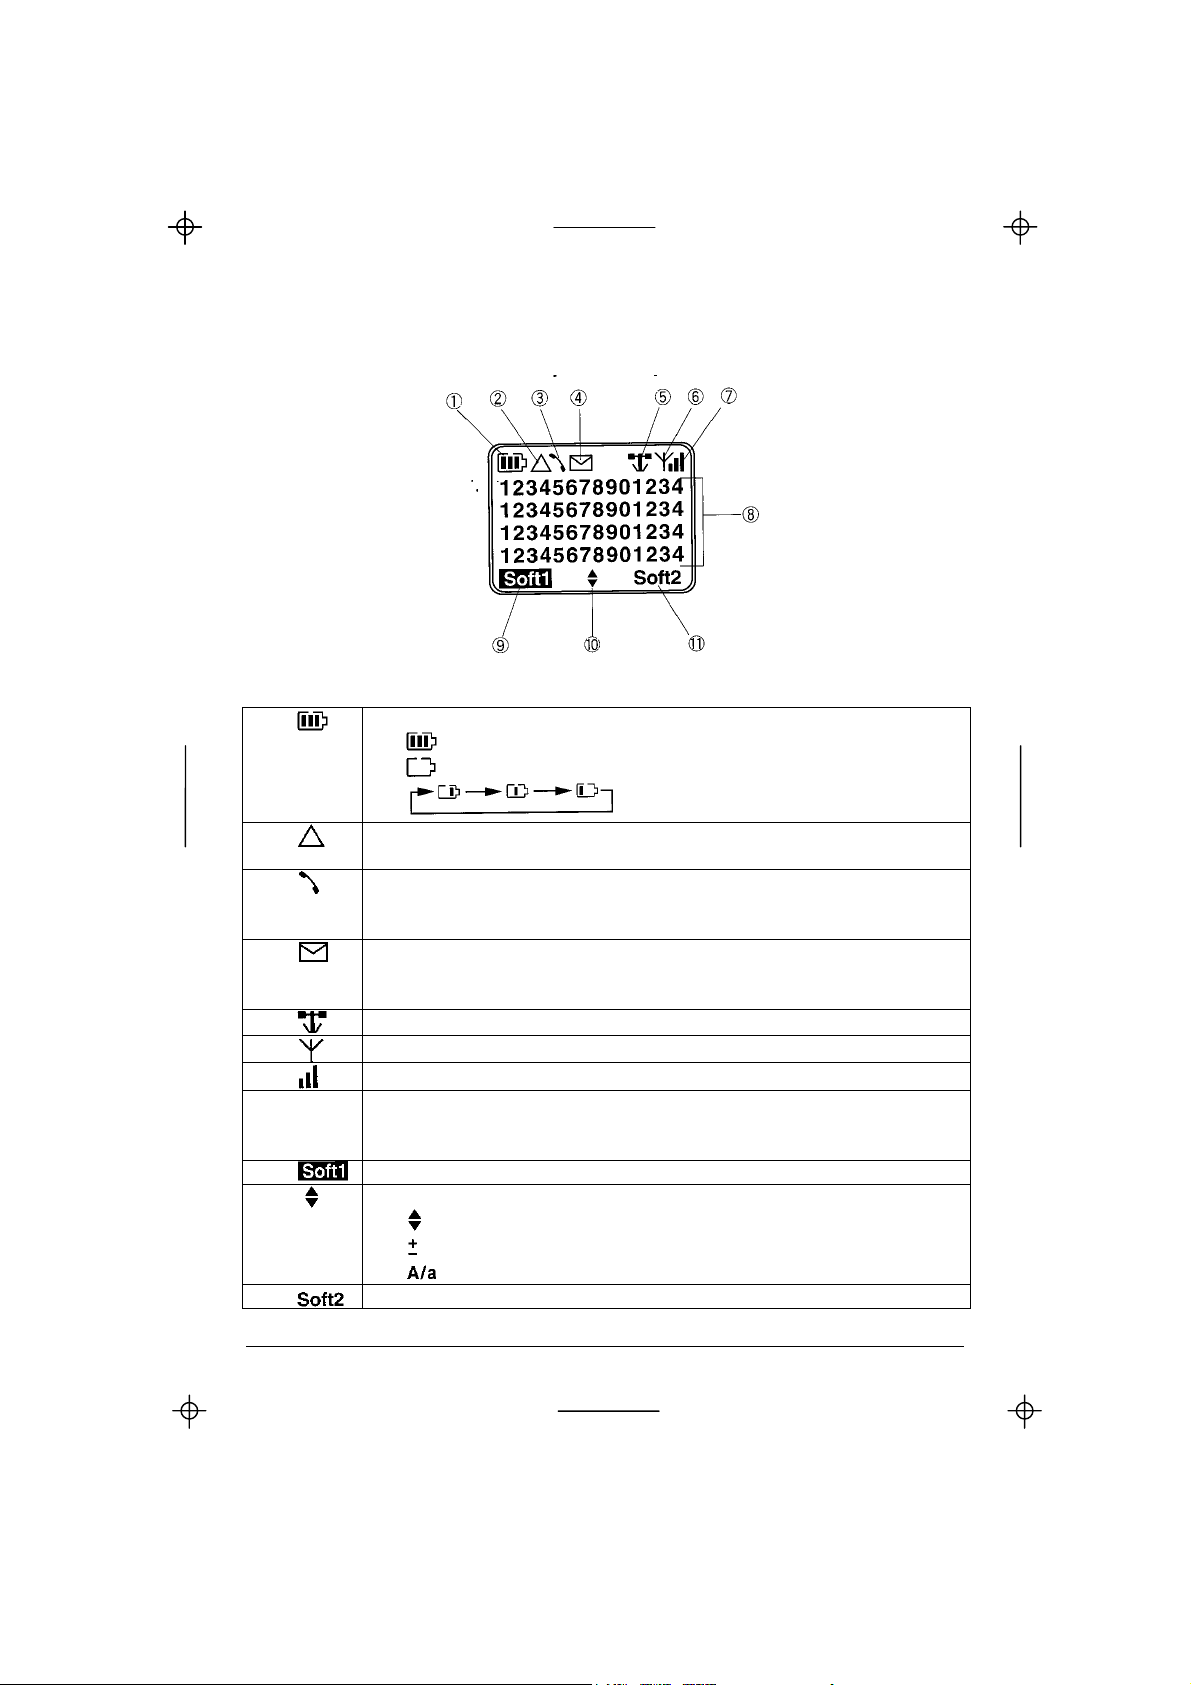
YOUR KI-G100 PHONE
The keypad and the display are your way of communicating with your KI-G100
phone. They light up when you turn the phone on or press any key. The
backlighting goes off automatically after 10 seconds, to conserve battery life.
Keypad and phone descriptions
1 Antenna 9
2 Alert speaker slots 10
#/Scroll right
Power/End/
14 Earpiece
15 Status LEDs
3 LCD panel Hang up 16 Data and charger
4
5
Soft key 1
Speak/Redial
11
Clear/Manner
connector
Mode toggle 17 IRIDIUM connector
6
~ Number/
/Symbol/Character 13
7
*/Scroll left/
P (pause) press and hold
12
Soft Key 2
Rocker Key:
18 Battery/SIM release
19 Battery
Scroll Up-Down, 20 Strap mount
to Select-Set
8 Microphone
4
Getting Started
Page 9
Kyocera KI-G100 GSM Handset - Ver.
Display description
0.3 Preliminary Version - 01.1999
1
Battery charge level:
Fully charged
Empty
2
3
4
5
6
7
Roaming
(receiving service on another network than your home network)
Calling status:
- Blinking: call setup
- On: call in progress
Short Message status:
- On: new message waiting
- Blinking: Short Message memory full
IRIDIUM system operation
GSM cellular operation
Incoming signal strength level
8 Number/text display area:
- Numbers/text: 4 lines of 14 characters
- On the lower right corner: “V” = vibration alert is on
9
10
Left Softkey function label
Rocker Key function:
Scroll Up/Down
Volume Increase/Decrease (during a call)
Switch between Uppercase/Lowercase (during text entry)
11
Right Softkey function label
Charging
Getting Started
5
Page 10

A
Kyocera KI-G100 GSM Handset - Ver.
0.3 Preliminary Version - 01.1999
2. Your First Call
PULL UP THE ANTENNA
Your KI-G100 phone is equipped with an extendable antenna. It is normally
possible to make or receive calls with the antenna in, but better quality is
obtained with the antenna extended.
Fully extend the antenna before making or receiving a call. Never hold or
touch it during the call.
Push the antenna in only after the call has ended.
TO MAKE A CALL
Before dialling a number, make sure that the coverage is sufficient, - a network
name is displayed and there are at least 2 bars on the signal strength indicator.
In case of poor coverage conditions, the reception quality may be improved by
changing location (e.g. in a building move near to a window).
• Dial a telephone number, including the full area
code, even if you are making a local call.
If you make a mistake, use the
- short press: clear the last digit
- long press: clear the complete number
(Clear) key:
• Press (Call) or to make the call
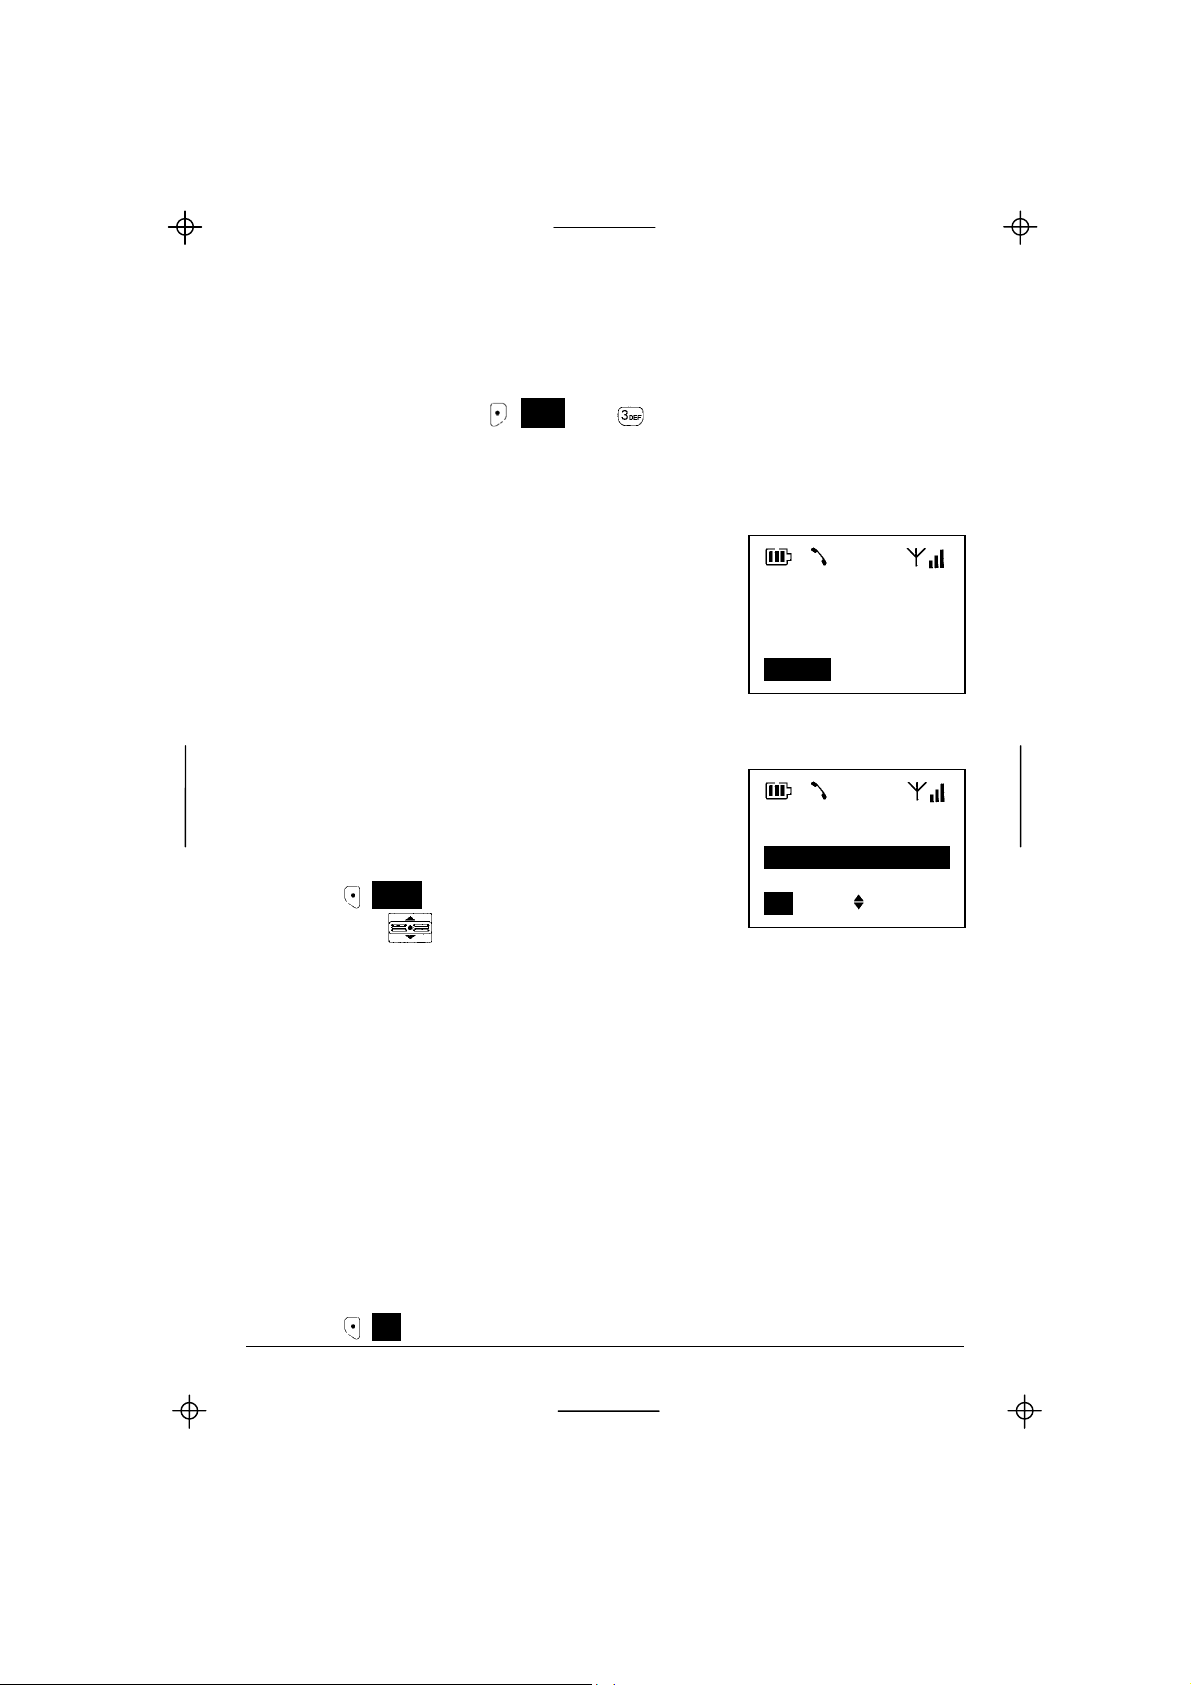
TO RECEIVE A CALL
The phone is ringing, the red light on top of the
phone is blinking and “Incoming Call” is displayed:
• Press (Answer), or hold down the
key to answer the call
021599183
96
Call Save
Incoming
Call
nswer
Note: while the phone is ringing, you can use the Rocker Key
(5 6) to
adjust the Ring volume.
6
Your First Call
Page 11

Kyocera KI-G100 GSM Handset - Ver.
TO ADJUST THE VOLUME
During a conversation, the volume can be adjusted
with the Rocker Key
After the call the volume returns to its original
setting (set in the Menu option “14 Ear Volume”).
TO MUTE THE MICROPHONE
During a call the microphone can be muted so that
your caller cannot hear you but you still can hear
them.
• Press (Menu)
• Scroll with
the In-Call Menu
• Press (OK) to confirm
• To reconnect the microphone,
press (Unmute) or hold down the key
TO END OR REFUSE A CALL
The
an incoming call.
TO REDIAL
In standby mode or during a call, the last 5 numbers
dialled can be recalled and redialled.
• Press
• Scroll
• Press
See also the Menu option “2 Dialled” page 26.
TO SWITCH OFF
• Press and hold
key is used to end a call you have made or received, and also to refuse
redial
(5 6) to the option “Mute” in
to recall the outgoing call log
(5 6) to the desired number to
to redial it
until “Powering Down...” is displayed.
0.3 Preliminary Version - 01.1999
(+ -).
Call
Active
02159918396
1m32 V
Menu Mem
In Call Menu
Tones Off
Mute
Quit
OK Quit
Calls
muted
Unmute
01:Dialled
021599183
96
Call Quit
Your First Call
7
Page 12
Kyocera KI-G100 GSM Handset - Ver.
0.3 Preliminary Version - 01.1999
3. Extra Dialling Services
ABBREVIATED DIALLING
There are different ways to recall and dial a phone number from the Phonebook:
Speed retrieval
• In standby mode, scroll with
(5 6) to the
desired number in the Phonebook.
Only the entries from the SIM Card’s memory
are listed here.
038 (SIM)
Richard
+492159918396
Call Quit
• Press (Call), , or hold down the key to call the selected number
Direct access
• In standby mode, enter a memory location number (of 1 to 3 digits)
If you make a mistake, use the
- short press: clear the last digit
- long press: clear the complete number
• Press
or scroll (5 6) from the desired location number in the
(Clear) key:
Phonebook
• Press (Call), , or hold down the key to call the selected number
Alphabetic access (see also page 24)
• In standby mode or during a call, press (Mem)
to recall the Memory Menu
• Press
• Press
• Press
to select the submenu “1 Phone Book”
to select the submenu “1 Find”
to select the option “1 Name”
• Enter the beginning of a name (see p. 24)
Memory Menu
0 Quit
1 Phone Book 4
2 Dialled
OK Quit
• Press (OK) or hold down the key to view the matching name (if any)
• scroll with
(5 6) from the desired name in the Phonebook
• Press (Call), , or hold down the key to call the selected number
8
Extra Dialling Services
Page 13
Kyocera KI-G100 GSM Handset - Ver.
0.3 Preliminary Version - 01.1999
CALLER LOG
Your KI-G100 is equipped with a caller log for identified calls (with telephone
number if Calling Line Identification is available) that have been received. To
recall this caller log, press (Mem) and . See also the Memory Menu option
“3 Received” page 26).
CALLING LINE IDENTIFICATION
The Calling Line Identification (CLI) service enables
your phone to display the phone number of your
caller. However, this will only occur if both parties
have this service activated (see Menu “44 Caller id”
p. 20).
Incoming
Call
+3222241810
Answer
IN-CALL MENU
During a call, you have access to a special “In-Call”
Menu (the availability of its options depend on the
call status, see next section).
• Press (Menu) to access the In-Call Menu
• Select with
Hold
or Retrieve
or Exclude
or Swap
End
or Drop
(Join All)
(Hold all)
(Private)
Tones Off
or Tones On
(Cost
or Total Cost)
Mute
Quit
(5 6):
to put the active call on hold (e.g. to make a second call)
to reactivate a held call
to select one of the parties to be put on hold
to put the active parties on hold and reactivate the held
ones
to hang up the active call
to select one of the parties to be hanged up
to reactivate all parties (if multiparty call, all parties held)
to put all parties on hold
to activate one party only and leave all others on hold
to switch off the DTMF tones
to switch on the DTMF tones
to display cost information (if available)
to display total cost information (if available)
to mute the microphone
to leave the In-Call Menu and return to the In-Call screen
• Press (OK) to confirm
Extra Dialling Services
In Call Menu
Quit
Hold
End
OK Quit
9
Page 14

Kyocera KI-G100 GSM Handset - Ver.
0.3 Preliminary Version - 01.1999
CALL WAITING, CALL HOLD AND MULTIPARTY CALLS
The GSM services “Call Waiting” and “Call Hold” allow you to put an active call
on hold to be able to answer a waiting call or initiate a new call. The “Call
Waiting” function can be activated in menu “43 Waiting”. If this function is
disabled, you will not be notified of a waiting call. A second caller will either hear
the busy tone or their call will be diverted according to the set diversion. If the
function is enabled, the caller will hear the ringing tone and you will be also
notified.
The “Multiparty” (Mtpy) service allows you to speak to up to 5 other parties on
the same call.
Active call(s) and waiting call
One or more calls are active and a new one is waiting (indicated by a signal tone
through the earpiece and red light on top of the phone blinking):
• Press
then
to accept the new call,
or
• Press
(Menu) to access the Call Waiting
Menu
• Select with
Answer
Replace
Reject
I am busy
Quit
to end all active and held calls and
(5 6):
to answer the waiting call, thus putting on hold the active ones
to hang up all active calls and accept the new one
to reject the waiting call. Their call will be dropped.
to let the waiting caller hear the busy tone or let their call
being diverted if the diversion When Busy has been set
to leave the Call Waiting Menu
Call 2/2
Waiting
+491795905001
1m32
Menu
Mem
• Press (OK) to confirm
To put an active call on hold to make a second call
• Press (Menu) to access the In-Call Menu
• Select with
(5 6) the option “Hold”
• Press (OK) to confirm
• Dial a number and make the second call
Call
Active
02159918396
1m54
Menu Mem
10
Extra Dialling Services
Page 15

Kyocera KI-G100 GSM Handset - Ver.
0.3 Preliminary Version - 01.1999
To swap between active and held call(s)
• Press (Menu) to access the In-Call Menu
• Select with
Retrieve
Swap
(5 6):
if there is only one held party and
one active call
if there are more held parties and
active calls
Call 1/2
Active
+491795905001
1m32
Menu Mem
• Press (OK) to confirm
To manage a “Multiparty” call
A multiparty call can be managed with the “Exclude”, “Drop”, Join All”, “Hold All”
and “Private” options of the In-Call Menu (see previous section).
MANNER TALK MODE
The Manner Talk Mode allows you to make a call in
noisy environment with a higher comfort. The
sensitivity of the microphone is increased and
surrounding noises are filtered so you don’t need to
speak louder, and the earpiece volume is
increased.
When the Manner Talk Mode is activated, “M” is
Call
Active
02114973185
1m32 M
Menu Mem
displayed above the right softkey’s label.
• During a call, a long press on
activates or deactivates the Manner Talk
mode.
Extra Dialling Services
11
Page 16

Kyocera KI-G100 GSM Handset - Ver.
0.3 Preliminary Version - 01.1999
4. Menus
Please read this introduction to get the most out of the menus and their features.
- Your KI-G100 features 2 principal menus: the Main Menu and the Memory
Menu.
- The menu structures are illustrated at the end of this introduction.
- In standby mode, the Main Menu can be accessed by pressing the left
Softkey (Menu) and the Memory Menu by pressing the right Softkey
(Mem) or holding down the Rocker Key .
- Scroll in a menu by using the Rocker Key (5 6) or access a menu
option directly by entering its menu access code.
- A menu or option is selected when it is highlighted.
- The 4 symbol beside a menu option indicates the presence of a submenu.
- The isymbol indicates the option which is currently set.
- A selected option can be confirmed by pressing (OK) or holding down the
key, then a sub-menu or a result screen is displayed.
- In a menu, pressing the End Key will move back to the previous menu
level.
- When a call is received while you are in the menu mode, the menu function
is automatically interrupted. Simply accept the call by pressing the Call Key
.
- During a call, only special In-Call menus are available.
HOW TO USE THE MENUS
You may access a menu option in 2 different ways:
Example: access to the function “Display the duration of the last call” of the Main
Menu.
(Standby mode)
(Network Name)
Menu Mem
12
Menus
Page 17

Kyocera KI-G100 GSM Handset - Ver.
0.3 Preliminary Version - 01.1999
A. Access the menu option by scrolling
• Press
(Menu) to access the Main Menu
Menu
0 Quit
1 Settings 4
2 Messages
OK Quit
• Scroll with
(5 6) to option “3 Costs”
Menu
2 Messages
3 Costs 4
4 Services
OK Quit
• Press (OK) to confirm and enter the
submenu “Costs”
Costs
0 Quit
1 Last Call 4
2 All Calls
OK Quit
• Press (OK) to confirm and enter the
submenu “Last Call” already selected
• Scroll with
(5 6) to option “2 Duration”
• Press (OK) to confirm and read the last call
duration
Last Call
1 Cost
2 Duration
0 Quit
OK Quit
B. Access the menu option directly by entering its access code
• Enter the sequence
(Menu)
to recall the function directly
(MENU 312).
In the following descriptions, we will simply label any menu or option with its
direct access code.
Menus
13
Page 18

Kyocera KI-G100 GSM Handset - Ver.
MAIN MENU STRUCTURE
0.3 Preliminary Version - 01.1999
14
(continued on next page)
Menus
Page 19

Kyocera KI-G100 GSM Handset - Ver.
0.3 Preliminary Version - 01.1999
(from previous page)
Note: Menu “8 IRIDIUM” is only
available when the KI-G100 is docked
on the Iridium Adapter SD-66K
(optional)
MEMORY MENU STRUCTURE
Mem
1 Phone Book
1 Find
2 New
3 Edit
4 Delete
2 Dialled
3 Received
4 Erase
5 Own Number
Menus
15
Page 20

Kyocera KI-G100 GSM Handset - Ver.
0.3 Preliminary Version - 01.1999
MAIN MENU
1 SETTINGS
This menu allows you to choose particular settings for your phone.
11 Language select one of 13 languages for the display screens
If you have selected another language and wish to
get back to English, enter the sequence:
(Menu)
12 Ringer 1 Ring Type select one among 6 different ringing tones 2 Ring Volume select a volume level or the stepped increasing volume
3 Ring/Vibrate select how an incoming call is notified. If Vibrator is
selected, “V” is displayed on the standby screen.
4 Eyes Call set how long the ringing tones will sound
13 Any Key Answer if set, any key except
14 Ear Volume set the default earpiece volume
15 Key Volume set the keypad tone volume
16 DTMF Tones switch on or off the generator of Dual Tone Multi
Frequency tones generator for the control of answering
machines, homebanking etc during a call
17 Display
1 Backlight switch on or off the automatic backlighting
2 Contrast set the LCD panel contrast
2 MESSAGES
Your KI-G100 phone is able to receive and send SMS (Short Message Service)
text messages. These are stored on the SIM Card, not in phone itself, and their
number depends on the Card’s storage capacity. As soon as a new message is
received, the
symbol is displayed and will only disappear when all new
messages are read. You can directly call (or transfer into the Phonebook) the
telephone number given in the message itself. A received message can be
edited and resent.
Broadcast messages such as traffic or whether information are sent from the
network to a group of users.
, scroll to “English” and confirm
will answer an incoming call
16
Menus
Page 21

Kyocera KI-G100 GSM Handset - Ver.
0.3 Preliminary Version - 01.1999
21 Text 1 Read new read all unread message(s) that have been received:
• Scroll in the message with
(5 6)
• Press (Menu) to access the Message Menu and select
1 Read Next (appears only if there is at least one other to read)
2 Edit to edit the message (see next section)
3 Reply to reply to the message’s sender (see next section)
5 Extract to extract the number included in the message
6 Erase to erase the message
7 Info to display additional information about this message
2 Read all read all messages: same procedure as above
3 Create write a new message:
• Enter a message (max. 160 characters)
- To enter a letter, press a key several times until the desired
letter appears (see keypad allocation page 29)
- Use (A/a) to toggle between upper- and lowercase
- If you make a mistake, use the (Clear) key:
- short press: clear the last character
- long press: clear the complete entry
• Press (OK) and enter a destination number
• to access the Create Message Menu and select:
1 Save to save the message first
2 Send to send the message first
4 Settings changing of message control settings:
1 Msg Centre tel no. of the network unit which routes the messages
2 Reply Path let the answer to your message be prepaid
3 Valid per set the validity duration for not transmitted message
22 Broadcast
1 Read new read unread message(s) sent by the network
• Scroll in the message with
(▲ ▼)
• Press (Menu) to access the Message Menu and follow the same
procedure as in previous section
2 Read all read all messages: same procedure as above
3 Configuration select the type and language of the messages to be
Menus
17
Page 22

Kyocera KI-G100 GSM Handset - Ver.
0.3 Preliminary Version - 01.1999
received from the net work
3 COSTS
An indication of the cost of a call and its duration can be displayed during the
call itself or after it. You can also see an indication of the cumulative cost of all
calls and their total duration since the last reset.
Since the currency factor and monetary unit for the cost indication is stored on
your SIM Card, the PIN2 code of the SIM Card is required to modify them
(contact your Service Provider to obtain the PIN2 code of the SIM Card).
Note: if you enter the wrong PIN2 code 3 times in succession, the PIN2
function of your SIM Card is blocked and you must enter the PUK2 code
to release it (contact your Service Provider).
A charge or duration limit can be set so that when elapsed, calling becomes
automatically impossible. The PIN2 code of your SIM Card is also required to
activate and manage this function.
31 Last Call
1 Cost display an indication of the cost of the last call
2 Duration display the duration of the last call
32 All Calls
1 Cost display an indication of the cumulative cost of all calls
2 Duration display the cumulative duration of all calls
3 Reset reset the cumulative cost and duration timers
33 Max cost
1 Read Limit display the set charge or duration limit (PIN2 required)
2 Change Limit change the charge or duration limit (PIN2 required)
34 Currency
1 Read display the set currency (PIN2 required)
2 Change change the charge or duration limit (PIN2 required)
18
Menus
Page 23

Kyocera KI-G100 GSM Handset - Ver.
0.3 Preliminary Version - 01.1999
4 SERVICES
41 Barring
This service must be included in your subscription package to be accessible.
Your Service Provider will then give you a Barring Password to set and clear
barrings.
• Select 1 Int. calls to inhibit outgoing international calls 2 Except home to inhibit outgoing calls except those to your home
network
3 Incoming to inhibit all incoming calls or only incoming calls when
you are roaming (receiving service other than from your
home network)
4 Outgoing to inhibit all outgoing calls
5 Cancel all to clear all barrings at the same time
6 Password to modify your Barring Password
• Confirm
• Eventually, select “All Calls” or “If Abroad” for the option “3 Incoming” and
confirm again
• Enter your Barring Password and confirm
42 Divert
You can choose to divert your incoming calls to another telephone anywhere (for
example to your office or a friend’s house) or to your Voicemail, so that you are
not disturbed, e.g. in a meeting or a restaurant. You can decide whether you
want to divert all calls or those if you are engaged, if you don’t wish to answer
and/or are unreachable.
• Select 1 All Calls to divert all incoming calls 2 When busy to divert incoming calls while you are engaged on a call 3 No answer to divert incoming calls if you don’t answer within a
certain time that you can set between 5 and 30 seconds
4 Not found to divert incoming calls if your phone is switched off or is
out of coverage
5 Cancel all to clear all diversions at the same time
Menus
19
Page 24

Kyocera KI-G100 GSM Handset - Ver.
0.3 Preliminary Version - 01.1999
• Confirm, enter a new or edit the current destination number, and confirm
• Eventually, select a duration for “Divert on No answer” and confirm
43 Waiting
With this menu you can switch the “Call Waiting” function on or off, or check the
function status within the network. If it is on, you will be notified that a caller is
waiting while you are already engaged (provided that there is no diversion set of
all calls, see previous section). If the function is off, you will not be informed that
a second call is waiting and the caller will hear the busy tone or their call will be
diverted if diversion When busy is set. See “Call Waiting, Call Hold and
Multyparty Calls” information on page 10.
44 Caller id
With this menu you can choose whether the telephone number of someone or a
party calling you will be displayed (provided the function is activated on their
side) and whether your telephone number will be transmitted to someone or a
party you are calling.
• Select and confirm 1 Far id to set the display of the number of someone calling you 2 Your id to set the display of your number to someone you are
calling
• Select and confirm 1 Presentation to enable the telephone number display 2 Restriction to inhibit the telephone number display
5 NETWORK
If your home network is not in range your phone tries to register onto another
available GSM 900 network, following the priority given in the network list stored
on your SIM Card. This menu allows you to edit this list.
If no network from the list has been found, the phone will then try to register on a
network listed in the phone’s network list.
20
Menus
Page 25

Kyocera KI-G100 GSM Handset - Ver.
0.3 Preliminary Version - 01.1999
6 SECURITY
Here you can lock the keypad, enable or disable the SIM Card’s PIN check,
change its PIN code, change its PIN2 code, enable or disable the Fixed Dialling
Memory (FDN) function.
61 Key Lock
The keypad can be locked in standby mode to avoid any undesired function (e.g.
accidental dialling). In that case, only the key
can be used to switch off the
phone.
• To unlock the keypad in standby mode, press and hold the left Softkey
.
During an incoming call, you will be prompted to
unlock the keypad to answer the call:
• Press (OK) and then to answer the call
Keylock Off?
OK
62 PIN
If this function is activated, your SIM Card is protected against unauthorised use
with a Personal Identification Number (PIN) of your choice, that will be requested
each time the phone is switched on.
63 New PIN
You can change here the PIN code of your SIM Card. It must contain a minimum
of 4 and a maximum of 8 digits.
Caution: if you enter the PIN code incorrectly 3 times, your SIM Card
will be blocked and you must enter the PUK code to unblock it (see
section “6. Problem Solving / Helpful Hints”).
64 New PIN2
The PIN2 code of your SIM Card allows you to access some special functions of
the SIM Card such as the setting of charge parameters (see Menu “3 Costs”) or
the Fixed Dialling Numbers function (see Menu “65 FDN”).
Menus
21
Page 26

Kyocera KI-G100 GSM Handset - Ver.
0.3 Preliminary Version - 01.1999
You can change here the PIN2 code of your SIM Card. It must contain a
minimum of 4 and a maximum of 8 digits.
Note: if you enter the wrong PIN2 code 3 times in succession, the PIN2
function of your SIM Card is blocked and you must enter the PUK2 code
to unblock it (contact your Service Provider).
65 FDN
The PIN2 code is required to enable or disable this function. If it is enabled, only
Fixed Dialling Numbers stored on the SIM Card, extensions of these numbers
and emergency numbers can be dialled. The access to the SIM memory is also
restricted. This can be used for example when you lend your phone to someone
else and wish them to be only able to call certain numbers, e.g. in your office.
This setting has no effect on the Short Messages function.
Note: switching FDN on or off may require dozens of seconds.
7 ACCESSORY
You can set some parameters for the use of your phone in a vehicle, with the
Hands Free Kit (see page 31).
71 Auto Answer
With this function activated, a call will be answered automatically after 2 rings.
This will only occur if the ignition is on.
72 Off Timer
You can set here the delay after the ignition key has been removed the phone
will be powered off. The Off Timer can be set within a range from 0 to 99
minutes.
22
Menus
Page 27

Kyocera KI-G100 GSM Handset - Ver.
0.3 Preliminary Version - 01.1999
8 IRIDIUM
This menu allows you to perform the settings related to the IRIDIUM satellite
operation. It is only shown when the IRIDIUM Adapter (accessory) is attached.
Please refer to the section “5. IRIDIUM” for more information.
81 Registration
This performs a manual registration request on the IRIDIUM satellite network.
82 DTMF Tones
You can choose here whether the DTMF tones will be transmitted during a call
for a fixed period of time when keys are pressed (setting “Short”) or as long as
the keys are being pressed (setting “Long”).
83 Services
The settings for Call Barring, Call Divert and Call Waiting on the IRIDIUM
network can be performed in a similar way as in Menu “4 Services” for the GSM
cellular operation.
Please notice, however, that Call Barring can only be set for all incoming and/or
all outgoing calls, and that Call Divert on No Answer is not available.
84 Modes
Should both a GSM cellular network and the IRIDIUM satellite network be in
range of your phone, your KI-G100 phone with its IRIDIUM attachment will
register on one of them according to the priority set in this menu. If a preferred
mode is stored in the SIM Card, this one will be adopted automatically.
• Select and confirm 1 GSM only to allow the phone to register always on a GSM cellular
network, never on the IRIDIUM satellite network
2 IRIDIUM only to allow the phone to register always on the IRIDIUM
satellite network, never on a GSM cellular network
3 Dual-1 to allow the phone to register on both, but with priority
on a GSM cellular network
4 Dual-2 to allow the phone to register on both, but with priority
on the IRIDIUM satellite network
Menus
23
Page 28

Kyocera KI-G100 GSM Handset - Ver.
0.3 Preliminary Version - 01.1999
MEMORY MENU
1 PHONEBOOK
Your Phonebook consists in 3 different memories for storing phone numbers:
• SIM Card Memory: memory locations 1 to 300
• Phone Memory: memory locations 301 to 600
• FDN (Fixed Dialling Numbers) SIM Memory: memory locations 601 to 999
The number of possible entries in the SIM and FDN Memories depends on the
capacity of your SIM Card.
11 Find search a Phonebook entry by name or location number
1 Name
• Enter the beginning of a name
- To enter a letter, press a key several times until the desired
letter appears (see keypad allocation page 29)
- Use (A/a) to toggle between uppercase and lowercase
- If you make a mistake, use the (Clear) key:
- short press: clear the last character
- long press: clear the complete entry
• Press (OK) to view the matching name (if any)
• Scroll
alphabetically
• Press (Call) or to call the selected number
2 Location
• Enter a location number (1 to 3 digits)
• Press
to view the matching name (if any)
• Scroll
location number
• Press (Call) or to call the selected number
24
(▲ ▼) from the desired name. Entries are sorted
(▲ ▼) from the desired name. Entries are sorted by
Menus
Page 29

Kyocera KI-G100 GSM Handset - Ver.
0.3 Preliminary Version - 01.1999
12 New create an entry in the Phonebook (SIM, Phone or FDN Memory
according to the location number)
• Enter a name
- To enter a letter, press a key several times until the desired
letter appears (see keypad allocation page 29)
- Use (A/a) to toggle between upper- and lowercase
- If you make a mistake, use the (Clear) key:
- short press: clear the last character
- long press: clear the complete entry
and confirm it
• Enter the telephone number (use
to insert a pause) and confirm
it
• Select the “Phone”, “SIM” or “FDN” Memory, and confirm
• Eventually, enter and confirm the PIN2 code to access the FDN
Memory
• Eventually, edit the suggested location number, and confirm
13 Edit change an entry in the phonebook (SIM, Phone or FDN Memory
according to the location number)
• Find the entry to edit (same procedure as in menu “11 Find”)
• Edit name and number, and confirm
• Select “Overwrite” to keep the same location number or “Other” to
change it, and confirm
• If “Other” has been chosen, select the “Phone”, “SIM” or “FDN”
Memory, and confirm,
• Eventually, enter and confirm the PIN2 code to access the FDN
Memory
• Eventually, edit the suggested new location number, and confirm
14 Edit delete an entry in the phonebook (SIM, Phone or FDN Memory
according to the location number)
• Find the entry to delete (same procedure as in menu “11 Find”)
• Eventually, enter and confirm the PIN2 code to access the FDN
Memory
• Confirm the deletion of the entry
Menus
25
Page 30

Kyocera KI-G100 GSM Handset - Ver.
0.3 Preliminary Version - 01.1999
2 DIALLED
This function allows you to display the 10 last dialled numbers. These are either
stored on the SIM Card (if the SIM supports this function) or in the phone. If you
dial the same number more than one time, this number will appear only once in
the list.
You can recall the dialled number list to call again or store in the phonebook a
particular number (option “Save”).
3 RECEIVED
Your KI-G100 phone is equipped with a caller log for identified calls (with
telephone number if Calling Line Identification is available) that have been
received. If you have been called by the same number more than one time, this
number will appear only once in the list.
You can recall the received number list to call back or store in the phonebook a
particular number (option “Save”).
4 ERASE
This function allows you to clear completely the SIM, Phone or FDN Memory.
The process may require dozens of seconds.
• Select the “Phone”, “SIM” or “FDN” Memory, and confirm
• Eventually, enter and confirm the PIN2 code to access the FDN
Memory
5 OWN NUMBER
The phone number of your SIM Card can be recalled, for example to give it to
someone. Should this number not be stored already on the SIM Card, you can
enter it here.
• Press the “Edit” softkey and enter your SIM Card telephone number
• Press the “Save” softkey to store it
26
Menus
Page 31

Kyocera KI-G100 GSM Handset - Ver.
0.3 Preliminary Version - 01.1999
5. IRIDIUM
By attaching the Kyocera IRIDIUM Adapter SD-66K (accessory) to your KI-G100
phone, you transform it into an IRIDIUM compatible handset capable of
communicating directly with the IRIDIUM satellite network.
The IRIDIUM network consists of 66 satellites covering 100% of the earth
surface, 100% of the time. This makes it possible for the IRIDIUM system to
offer communications anywhere, anytime, to anyone.
The network uses six polar orbital planes at an angle of 86.4 degrees to the
equator. Each orbital plane contains eleven operational satellites and a spare
one placed in a storage orbit below the eleven operational satellites. The
satellites orbit at a speed of approx. 28000 km/h and at an altitude of 780 km or
421.5 nautical miles making the IRIDIUM constellation a low earth orbit system.
The six satellite rings are slowly moving to the west due to the Earth’s rotation
from west to east. The satellites make their closest approach to one another
over the north and south pole, but never come closer to one another than 195
kilometres or 105 nautical miles. The satellites carry enough fuel on board to
remain in orbit for 8 years. The normal life expectancy of a single satellite is 5 to
8 years.
IRIDIUM
27
Page 32

Kyocera KI-G100 GSM Handset - Ver.
0.3 Preliminary Version - 01.1999
Each IRIDIUM satellite is communicating with the next one, so that a call is
routed within the constellation before it goes down to earth via a terrestrial
gateway. A single IRIDIUM satellite footprint has a diameter of approx. 4400 km.
As the user approaches the perimeter of the satellite’s footprint a second
satellite footprint appears. Once the user is within the coverage of the second
satellite footprint a hand off to the second satellite occurs. Satellite handoffs
continue to occur so every 9 minutes approximately as long as the IRIDIUM user
is on air.
With conventional terrestrial cellular systems, the cells are fixed and the user
moves from cell to cell causing handoffs to occur. In the IRIDIUM system the cell
pattern moves across the user’s location which causes handoffs to occur.
Although it uses a satellite network instead of a terrestrial one, IRIDIUM is also a
GSM operator, interconnecting in the same way with other GSM terrestrial
operators and using the same type of SIM Cards. Therefore, unless you use an
IRIDIUM SIM Card, you can “roam” on the IRIDIUM network as you would do so
on another GSM network provided you have the IRIDIUM Adapter attached to
your KI-G100 phone and your home Network Operator has a Roaming
Agreement with Iridium.
When using your KI-G100 phone with its IRIDIUM Adapter on the IRIDIUM
network, please make sure that you are located outside, in a free area, i.e. not
between tall buildings (“urban canyon”) or trees that would limit the satellite
visibility. Always dial a telephone number with its country code (e.g. +49 2159
918396).
28
IRIDIUM
Page 33

Kyocera KI-G100 GSM Handset - Ver.
0.3 Preliminary Version - 01.1999
6. Problem Solving / Helpful Hints
IN CASE OF A PROBLEM
Before contacting the Kyocera Helpline, please observe the following.
If the display shows “PIN is blocked”:
The PIN code has been entered incorrectly three times, you need the
If none of the
If the display doesn’t respond (or responds slowly) to key presses:
If your phone does not go to the standby mode:
PUK (PIN Unlocking Key) to release it.
• Decide on a new PIN
• Enter the following sequence:
[PUK] [new PIN] [new PIN] .
Caution: if you do not know your PUK, do not try to unblock your
SIM Card, as this will lead to it becoming permanently blocked, and
you will be charged by your Service Provider for a replacement SIM
Card. Contact your Service Provider who will give you the PUK and
help you to unblock your SIM Card.
, and symbols are showing:
The network connection is lost. Either you are in a radio shadow (in a
tunnel or between tall buildings) or you are outside of the network
coverage area. Try from another place.
The display responds more slowly at very low temperatures. This is
normal and does not affect the operation of the phone. Take the phone to
a warmer place and try again.
Switch off the phone, check that the SIM Card and battery are installed
correctly and switch on again.
Problem Solving / Helpful Hints
29
Page 34

Kyocera KI-G100 GSM Handset - Ver.
0.3 Preliminary Version - 01.1999
MAINTENANCE
The equipment i.e. phone and charger do require some care. Please observe
the following:
• Store it in a clean, dust-free space. Its moving parts can be damaged by
dust.
• Keep it away from hot locations. High temperatures can shorten the life of
the electronic components and batteries, and warp or melt certain plastics.
• Do not try do disassemble the phone. If it is not working properly, call the
Kyocera Helpline.
• Use only the recommended battery chargers.
• Treat the phone gently and avoid dropping, knocking or shaking it.
• Keep the equipment out of reach of small children.
• Keep the phone dry and do not use harsh chemicals (such as solvents or
detergents) to clean it. To clean the phone, wipe it with a soft cloth slightly
dampened with a mild solution of soap and water.
• Always let your battery discharge completely before recharging it.
KEYPAD LETTERS ALLOCATION
The table below shows how letters are allocated to the 10 number pad keys.
30
Problem Solving / Helpful Hints
Page 35

Kyocera KI-G100 GSM Handset - Ver.
0.3 Preliminary Version - 01.1999
TECHNICAL DATA
KI-G100 (main unit)
Max. output power: 2 Watt
Power supply: DC 3.6 V - 600 mAh Li-Ion battery
Standby time GSM*:
Talk time GSM*:
Standby time IRIDIUM*:
Talk time IRIDIUM*:
approx. 70 hours
approx. 120 minutes
approx. 24 hours
approx. 100 minutes
SIM Card size: Plug-In
Dimensions (excl. Antenna): approx. 130 x 41 x 22 mm (L x W x H)
Weight: 99 g
Operating temperature: -10°C ~ 55°C
Data speed: 9600 bps
* depending on network coverage and system parameters offered by the
network operator.
AC-G100 (AC Charger)
Dimensions: approx. 130 x 40 x 25 mm (L x W x H)
Weight: 60 g
Input: AC 90~240 V, 50/60 Hz, 4 VA
Output: DC 4.1 V, 600 mAh
Charging time: approx. 90 minutes
LICENSING
Your KI-G100 phone and its accessories detailed in the following section are
authorised for use on GSM 900 networks.
The phone complies with EU standards
... (tbc)
...
confirmed by the CE label.
Problem Solving / Helpful Hints
31
Page 36

Kyocera KI-G100 GSM Handset - Ver.
0.3 Preliminary Version - 01.1999
7. Accessories
The following Kyocera original accessories have been designed especially to
work with your KI-G100 phone. Additional accessories may be available and are
sold separately. Please contact your local Service Provider or retail outlet for
more information.
GSM ACCESSORIES
DC Charger GC
(Ref. DC-G100) Two Way Cable GC (Ref. TW-G100)
Desktop Charger GC
Data Cable GC
(Ref. DA-G100) Car Holder GC (Ref. CH-G100)
(Ref. DE-G100) Hands Free Kit GC (Ref. HF-G100)
32
Accessories
Page 37

Kyocera KI-G100 GSM Handset - Ver.
0.3 Preliminary Version - 01.1999
Soft Case GC
(Ref. SG-G100)
External Antenna GC
(Ref. OA-G100)
Personal Hands Free GC
(Ref. EM-G100)
Accessories
33
Page 38

Kyocera KI-G100 GSM Handset - Ver.
IRIDIUM ACCESSORIES
0.3 Preliminary Version - 01.1999
IRIDIUM Adapter (Ref. SD-66K)) IRIDIUM Hands Free Kit
(Ref. HF-S100)
IRIDIUM AC Charger
(Ref. AC-S100) IRIDIUM Car Holder (Ref. CH-S100)
IRIDIUM DC Charger
34
(Ref. DC-S100) IRIDIUM External Antenna
(Ref. OA-S100)
Accessories
Page 39

Kyocera KI-G100 GSM Handset - Ver.
0.3 Preliminary Version - 01.1999
IRIDIUM Solar Power Supply
(Ref. SP-S100)
Data Cable GC
(Ref. DA-G100) IRIDIUM Separate Vibrator
Personal Hands Free GC
(Ref. EM-G100)
(Ref. SV-S100)
IRIDIUM Two Way Cable
(Ref. TW-S100)
Accessories
35
Page 40

Kyocera KI-G100 GSM Handset - Ver.
0.3 Preliminary Version - 01.1999
(to be inserted in the final version)
Index
36
Index
Page 41

Kyocera KI-G100 GSM Handset - Ver.
Notes:
0.3 Preliminary Version - 01.1999
Page 42

Kyocera KI-G100 GSM Handset - Ver.
0.3 Preliminary Version - 01.1999
Emergency Call
TO MAKE AN EMERGENCY CALL:
• Press and hold to switch on the phone
• If required, enter the SIM Card’s PIN code and confirm with (OK)
• Enter
• Press to make the call
Give the following information to the emergency service:
- Your name
- The location of the accident
- What happened
- The number of injured persons (if any)
- When the accident occured
- If possible, give your phone number for callback. Remember to leave your
phone switched on for incoming calls.
(112 is the international GSM emergency call number)
Page 43

Kyocera KI-G100 GSM Handset - Ver.
0.3 Preliminary Version - 01.1999
Short User Guide (credit card size, printed on both sides)
Side 1:
Short User Guide
To switch on: press and hold
If required, enter the SIM Card’s PIN and confirm with (OK).
Your phone is ready to be used when a network name is
displayed.
To make a call: Telephone no.
To end or refuse a call:
To redial:
To receive a call (telephone ringing, light blinking):
To switch off: hold
until a message appears.
until “Powering Down...” is displayed.
KI-G100
Side 2:
Abbreviated dialling
a.
b. 1 to 3 digit location number
c. (Mem) Letter or name (OK)
Menu:
To access the menu:
To scroll/select an option:
To confirm: (OK)
To move back to the previous menu level:
To exit a menu:
(Men)
 Loading...