

Page 1
FS-C8500DN
Installation Guide
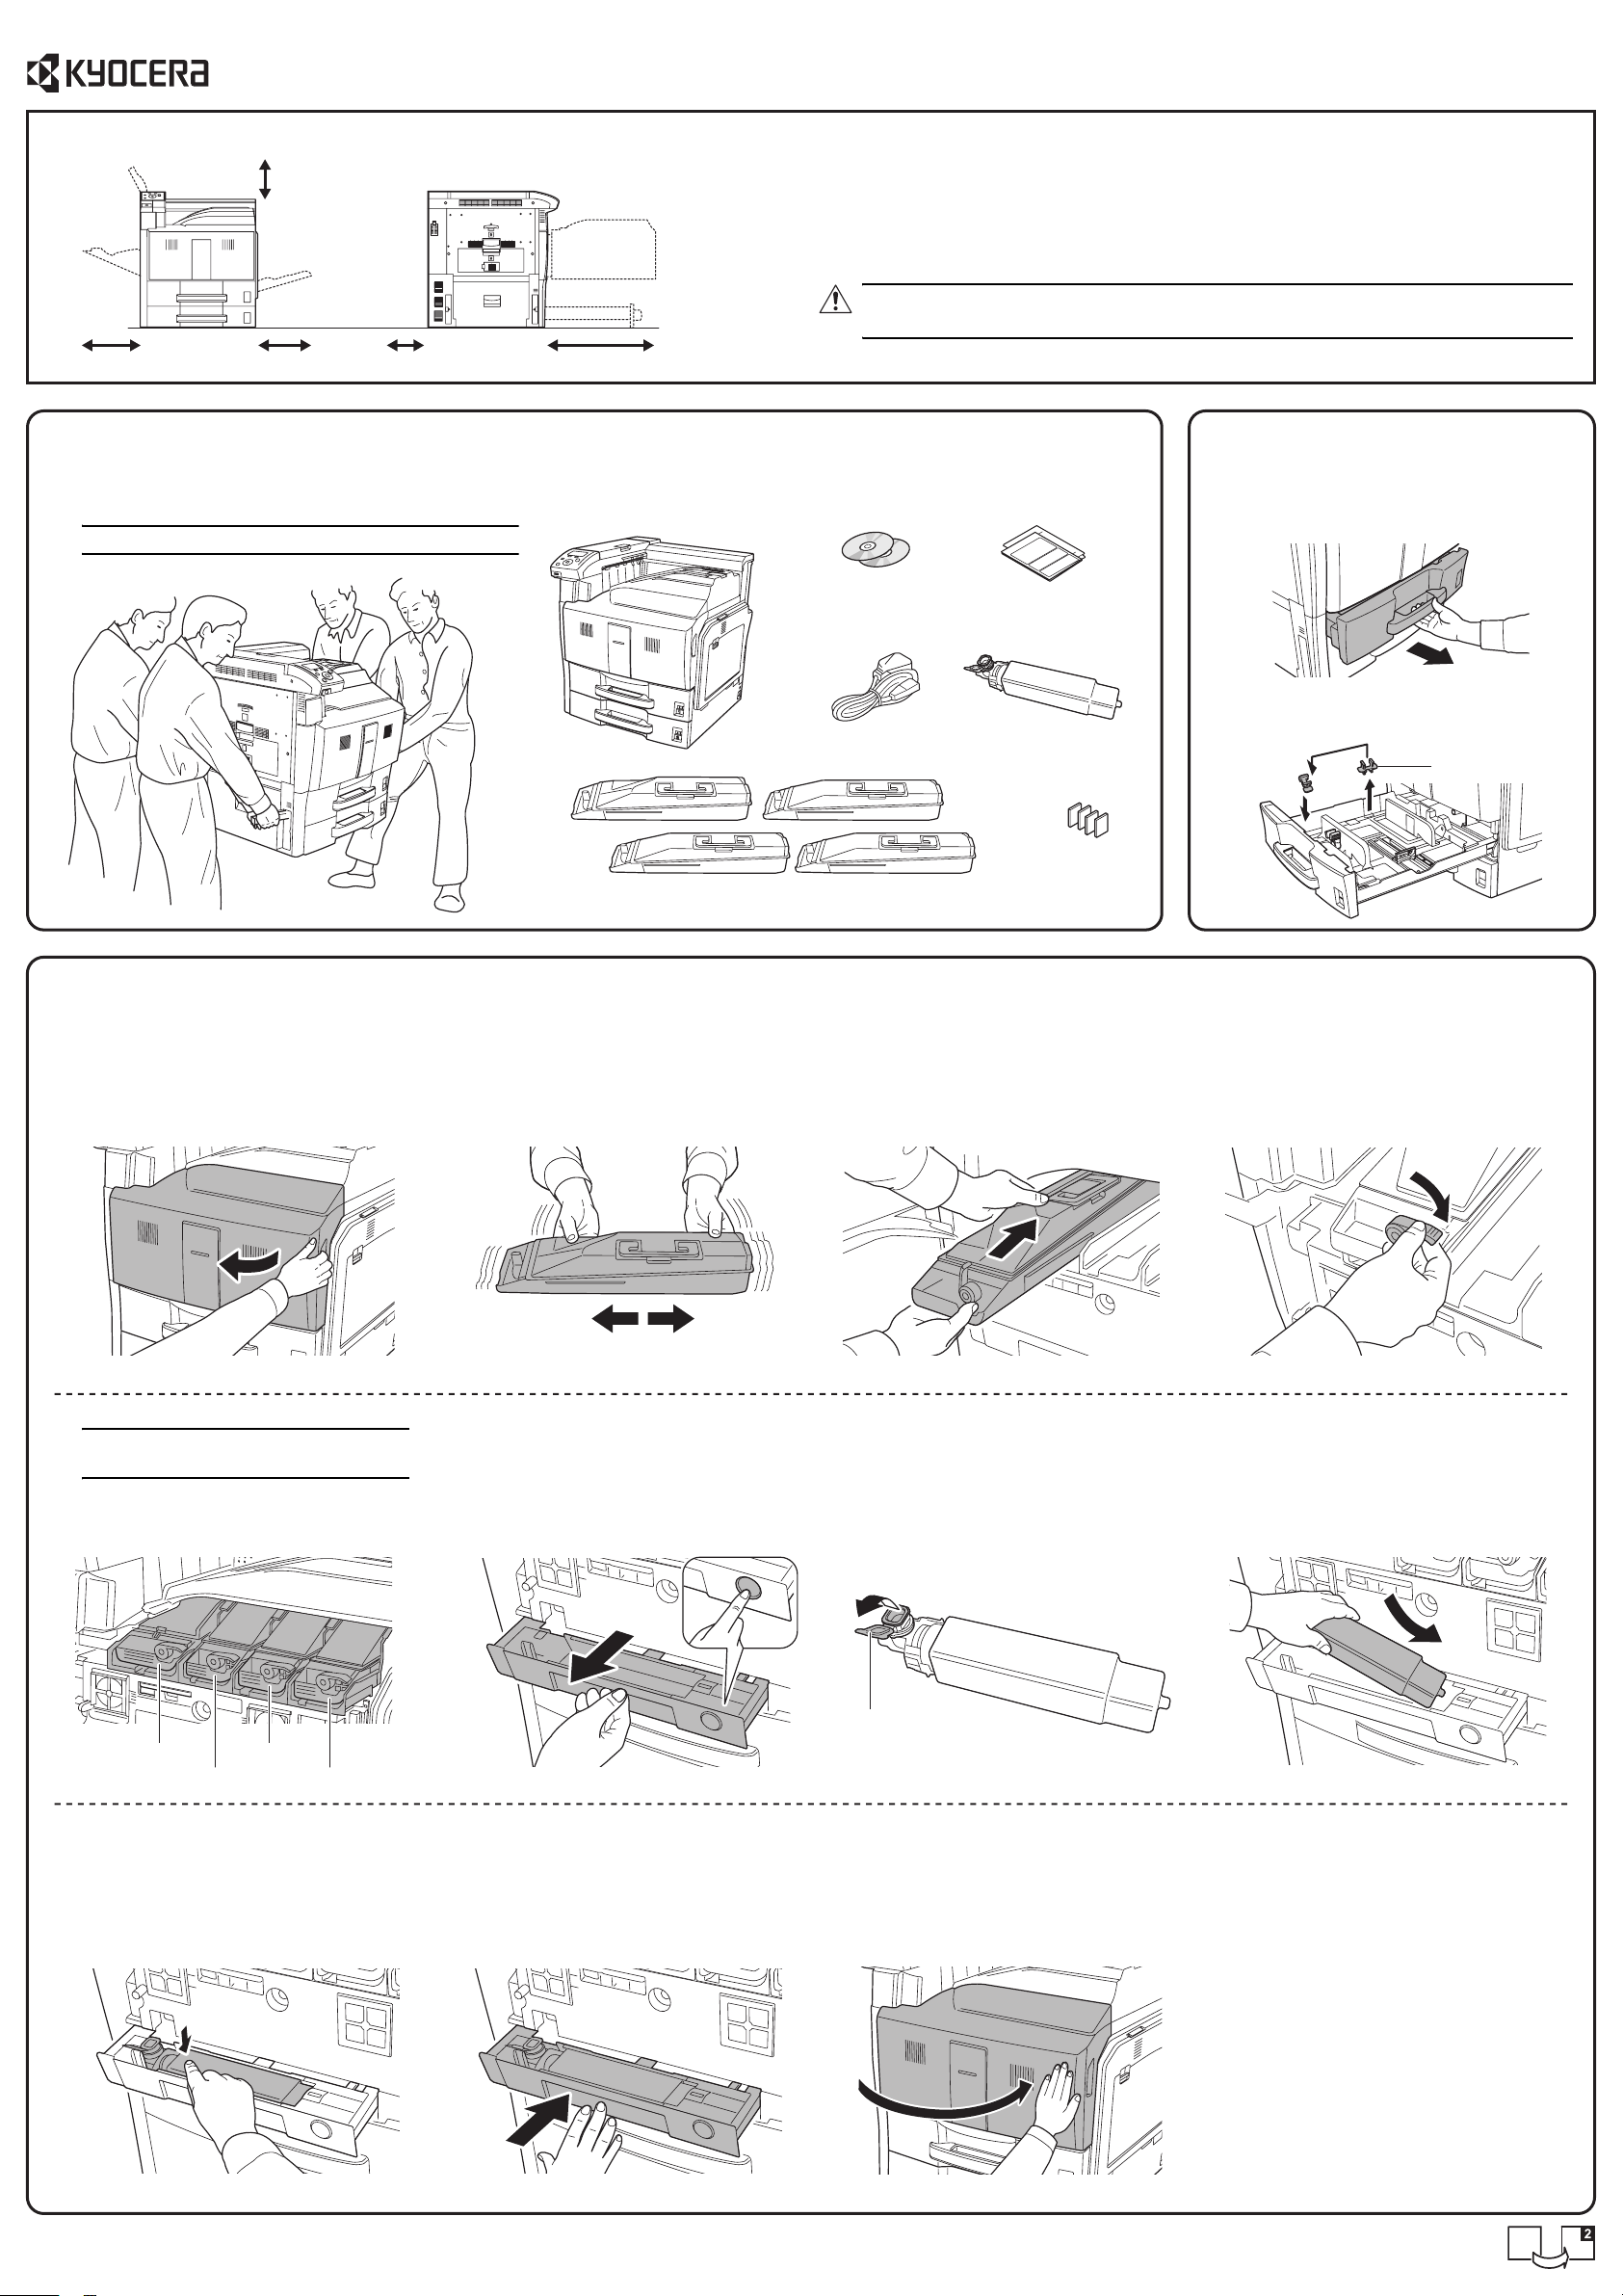
Clearance
400 mm
(15-3/4")
300 mm (11-13/16") 300 mm (11-13/16") 100 mm (3-15/16") 1,000 mm (39-3/8")
Unpacking
1
12
Unpack the printer and all its included components.
Important: The printer must be carried by four persons.
Check the parts and components.
Environment
• Temperature: 10 to 32.5 °C (50 to 90.5 °F) The humidity should be 70 % or less when the
temperature is 32.5 °C (90.5 °F)
• Humidity: 15 to 80 %RH The temperature should be 30 °C (86 °F) or less when the humidity
is 80 %
• Power Supply: 120 V AC, 60 Hz, 12 A / 220 to 240 V AC, 50/60 Hz, 7.2 A
CAUTION: Be sure to provide enough space around printer. Prolonged use
without sufficient clearance may cause overheating.
CD-ROMs Manuals and Other
Printed Materials
Removing the Lift Plate
2
Stoppers
1
Pull out the paper cassettes 1 and 2.
Printer
Installing the Toner Container and Waste Toner Box
3
1
Open the front cover.
2
Hold the toner container with both
hands and shake it from side to side
several times so that the toner is
uniformly distributed inside.
Power Cord
Toner Containers (4)
3
Hold the toner container with both
hands and gently push it in.
Waste Toner Box
Paper Size
Sheets (4)
2
Remove the lift plate stopper and
attach it to the storage location.
Lift Plate Stopper
4
Turn the toner container release lever
to the horizontal position.
Follow the procedure above to install
the other color toner containers.
Note: Ensure the toner container is in the
correct location for that color.
Black (K)
Yellow (Y)
Press on the left edge of the new waste
toner box to lock it.
Cyan (C)
Magenta (M)
567
the waste toner tray.
98
Press the specified position to set the
waste toner tray. When the tray
reaches the correct position, it locks
into place with a "click" sound.
Open the cap of the waste toner box.Press the release button and pull out
Cap
10
Close the front cover.
Install the waste toner box.
Page 2

Loading Paper
4
Pull the paper cassette out toward you
until it stops.
5
Align the paper against the left side of
the paper cassette.
2
Adjust the paper length guide to the
length of the paper.
When loading A4/Letter or smaller paper
into paper cassette 1, raise the paper
length guide. For B4/Legal or larger
paper, lower the paper length guide.
Paper Length Guide
Important: Ensure that the loaded paper
is not higher than the level indicator (see
illustration below).
31
Grasp the paper width adjustment
knob and adjust the paper width guides
to the width of the paper.
Paper Width Adjustment Knob
6
Insert the appropriate paper size card
in the slot to indicate the size of the
paper.
4
Fan the paper, then tap it on a level
surface to avoid media jams or skewed
printing.
7
Gently push the paper cassette back
in.
Level Indicator
Connecting Cables
5
132
Turn the power switch off (O). Connect the printer to the PC or your
network device. Use shielded interface
cables. These cables are sold
separately.
Network Interface
USB Interface
Connect the power cord to the printer
and the other end into a power outlet.
4
Turn the power switch on (|).
Important: When the printer is first
switched on after installation, the printer
will begin cleaning the LSU; this will take
approximately 70 seconds.
Refer to the Operation Guide to install the printer driver and to set network parameters.
© 2009 by KYOCERA MITA Corporation All rights reserved. 2-28, 1-Chome, Tamatsukuri, Chuo-ku, Osaka 540-8585, Japan Printed in China 302KA56030 First edition 2009.10
 Loading...