

Page 1
Clearing Paper Jams
The printer will stop when a paper jam occurs in the printer or if
paper is misfed. The printer will go offl ine and the attention
indicator ( ) will fast fl ash.
Follow the instructions provided here to clear the jam. If paper
jams occur frequently, try using a different type of paper, replace
the paper using a new ream, or turn the paper over. Also, look for
tiny pieces of paper which may have been left in the printer.
Indicators
There are four indicators located on the top right of the printer.
The indicators are used to identify the status of the printer at any
time. To identify the printer status, check the indicators on the
printer and then refer to the table below.
A MP Tray
➊
Remove the paper from the MP tray.
Note Do not try to remove paper that
has already been partially fed, proceed
to step 2.
D Printer
➊
Open the top cover and front cover.
FS-1030D
B Paper Cassette
➊
Pull out the cassette.
Remove any partially fed paper.
Check to see if paper is loaded correctly.
If not, reload the paper.
➋
Push the cassette back in securely.
Open and close the top cover to clear
the error. The printer warms up and
resumes printing.
C Duplexer
➊
Open the rear cover and remove the
jammed paper as shown in the figure.
➌
Open the duplexer’s rear cover and
remove any jammed paper.
➋
Pull the cassette all the way out of the
printer.
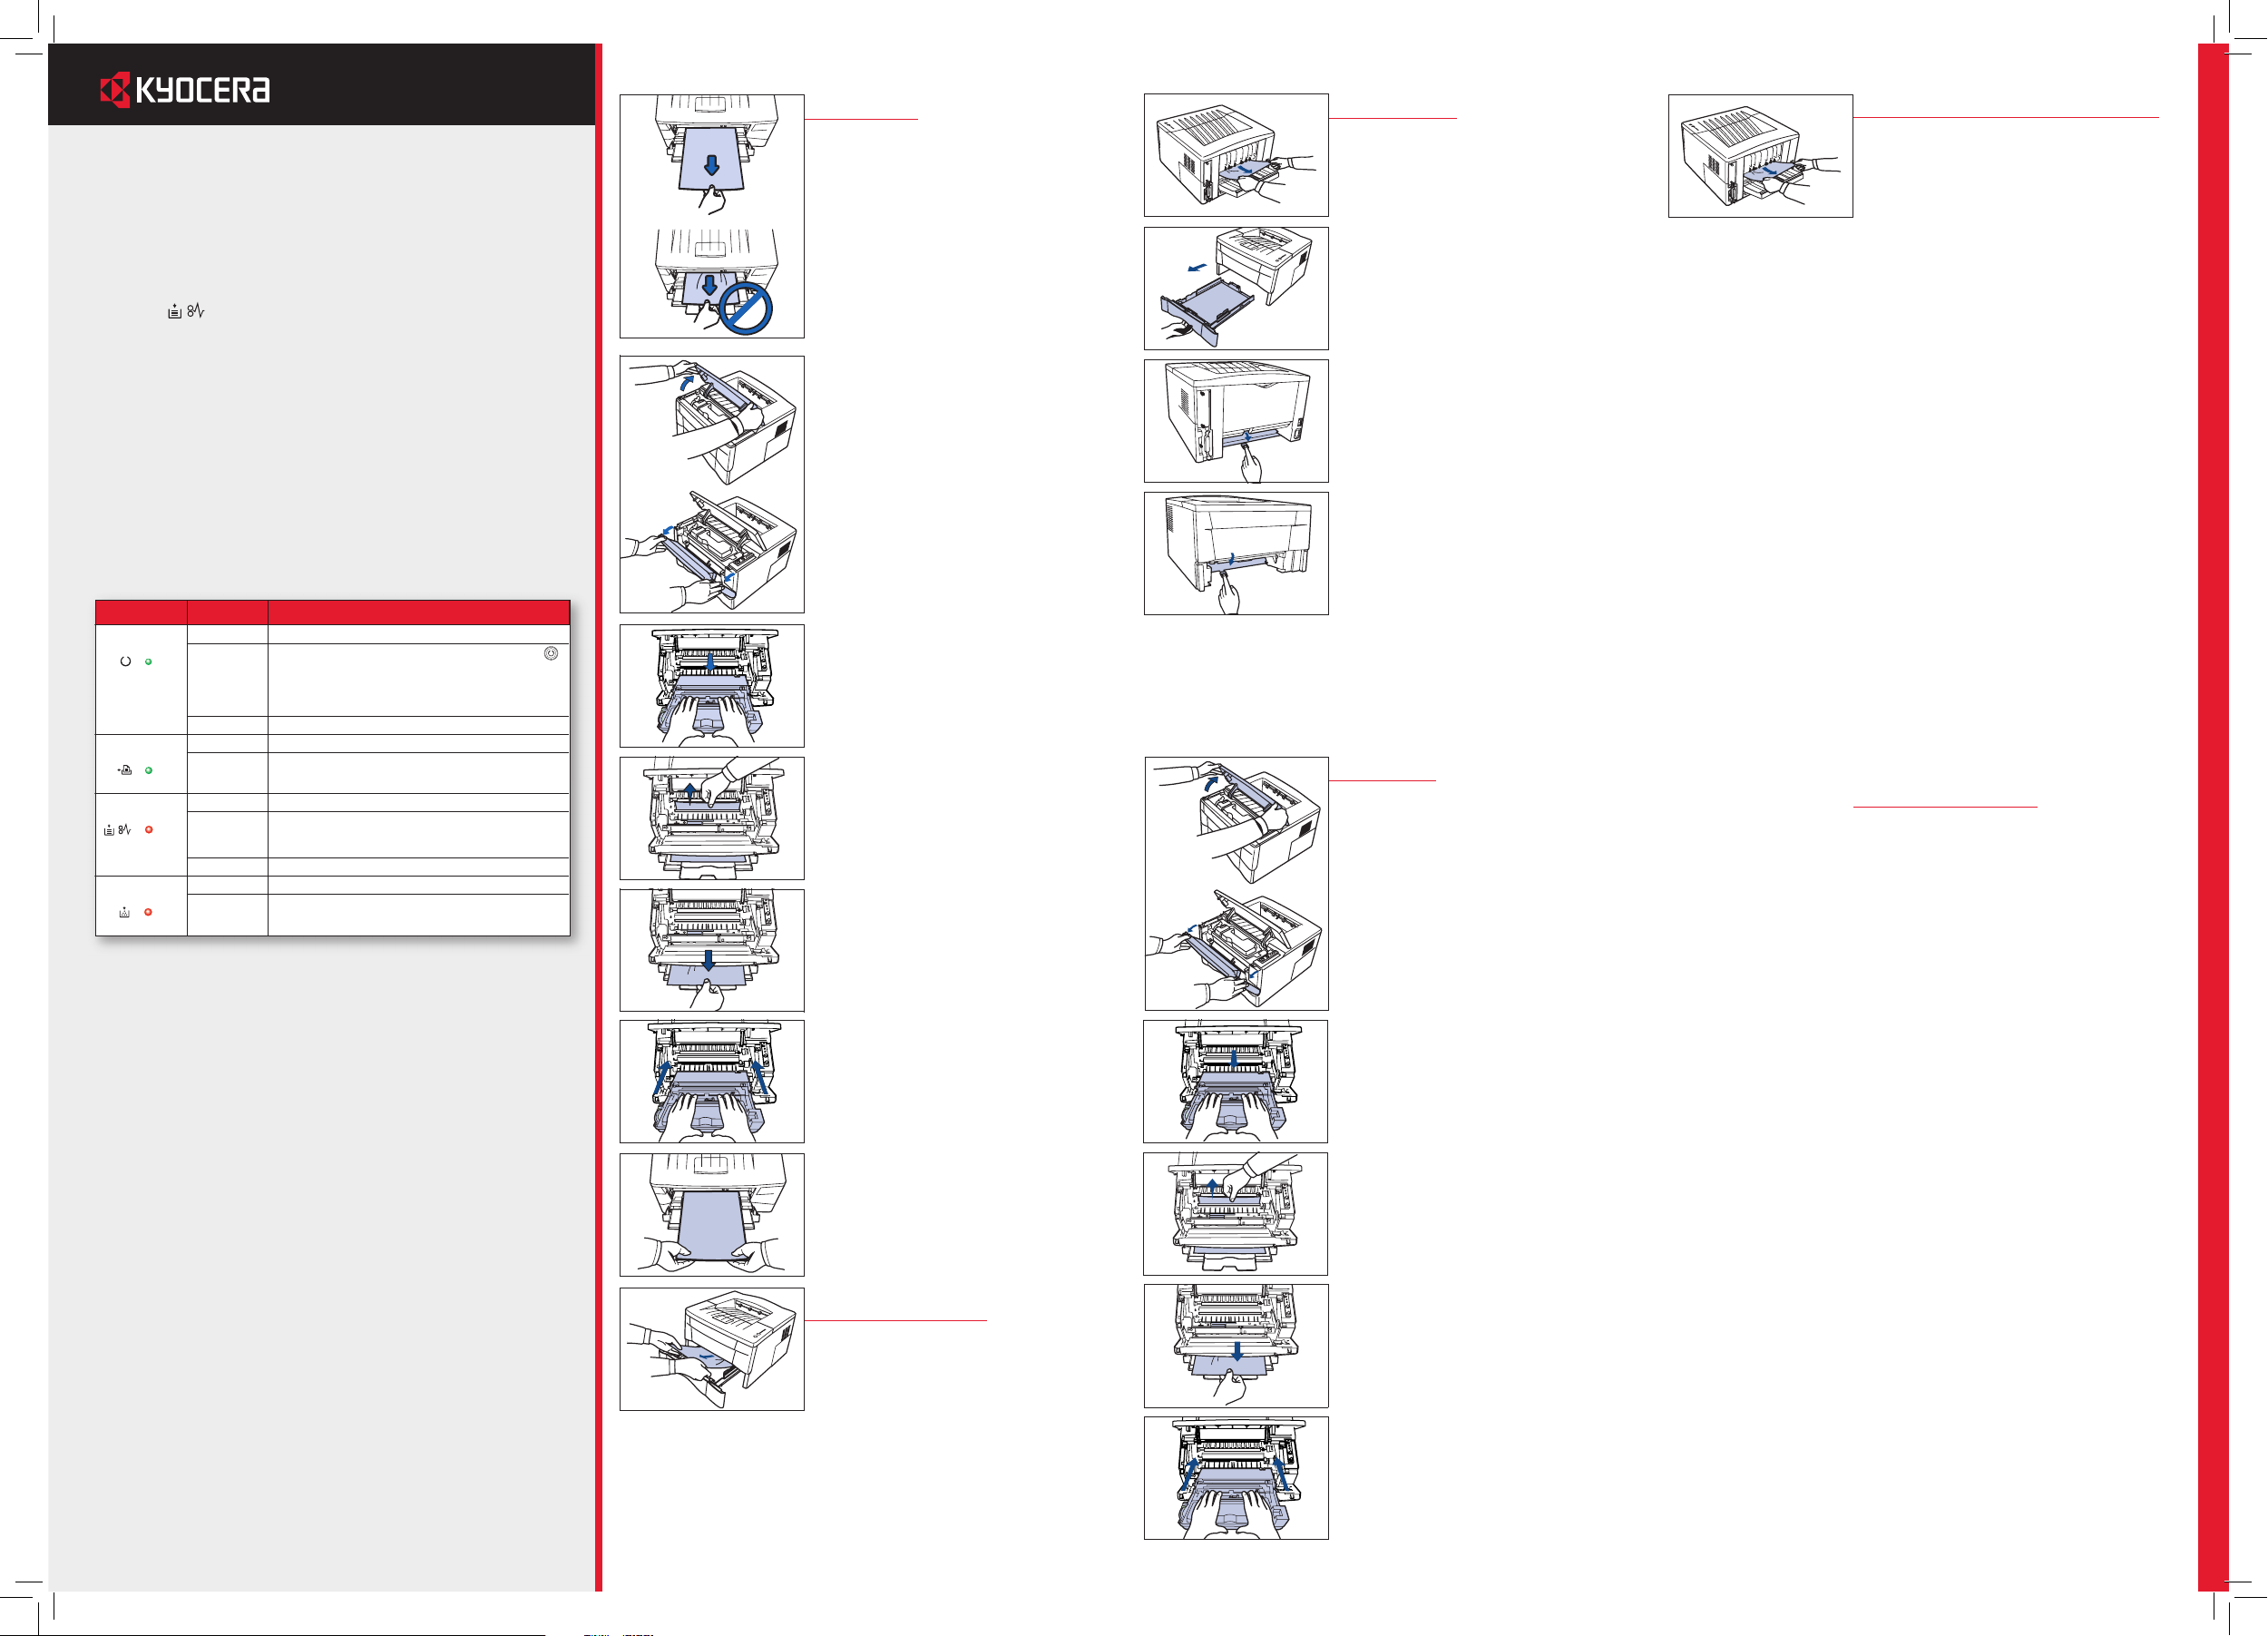
E Output Tray and Rear Cover
➊
If paper is not completely ejected into
the output tray, open the rear cover and
remove the jammed paper by pulling it
out.
➋
Lift the process unit together with the
toner container out of the printer.
Note The drum in process unit is sensitive
to light. Never expose the process unit to
light for more than five minutes.
➌
If the jammed paper appears to be
pinched by rollers, pull it along the normal running direction of the paper.
If it has not be fed as far as the metal
registration roller, remove the paper from
the MP tray side.
➋
Open and close the top cover to clear
the error. The printer warms up and
resumes printing.
General considerations
for clearing jams
CAUTION
When pulling the paper, pull
it gently so as not to tear it. Torn pieces
of paper are difficult to remove and may
be easily overlooked, deterring the jam
recovery.
•
If paper jams occur frequently, try using
a different type of paper, replace the
paper with paper from another ream, flip
the paper stack over, or rotate the paper
stack 180 degrees. The printer may have
problems if paper jams recur after the
paper was replaced.
•
Whether or not the jammed pages are
reproduced normally after printing is
resumed depends on the location of the
paper jam.
•
CAUTION Never use sharp tools like
knifes, screwdrivers or cutters to clear
paperjams. Be aware of rings or watches
as well.
•
CAUTION Do no store paperclips or
staples on any device.
Indicator Status Meaning
Read
y
(Green)
Lit Indicates online status (printing is possible).
Flashing An error has occurred, but printing resumes when the
key is pressed
.
Offline status. You cannot print, but the printer can receive
data
.
The printer is in sleep mode
.
Off Printing has stopped because an error has occurred
.
Data
(Green)
Lit The printer is processing data.
Flashing The printer is receiving data
.
Attentio
n
(Red)
Lit The printer cover is open.
Flashing A paper jam has occurred.
The cassette is not inserted properly or the paper has run
out.
Off The printer status is normal
.
Tone
r
(Red)
Lit The printer has stopped because the toner is exhausted.
Flashing The toner is running low.
➋
Open the top cover and front cover.
➌
Lift the process unit together with the
toner container out of the printer.
Note The drum in process unit is sensitive
to light. Never expose the process unit to
light for more than five minutes.
➍
If the jammed paper appears to be
pinched by rollers, pull it along the normal running direction of the paper.
If it has not be fed as far as the metal
registration roller, remove the paper from
the MP tray side.
➎
Insert the process unit together with the
toner container, back into the machine.
Close the front cover and top cover.
➍
Open the duplexer’s front cover and
remove any jammed paper.
➎
Insert the cassette into the slot in the
printer.
➏
Open and close the printer’s top cover
to clear the error. The printer then
automatically warms up and resumes
printing.
➏
Reload the MP tray.
The printer warms up and resumes
printing.
➍
Insert the process unit together with the
toner container, back machine.
Close the front cover and top cover. The
printer warms up and resumes printing.
 Loading...