

Page 1
11. CRANKCASE/CRANKSHAFT
11-0
FILLY LX 50
11
11
Page 2
11. CRANKCASE/CRANKSHAFT
11-1
FILLY LX 50
SERVICE INFORMATION
GENERAL INSTRUCTIONS
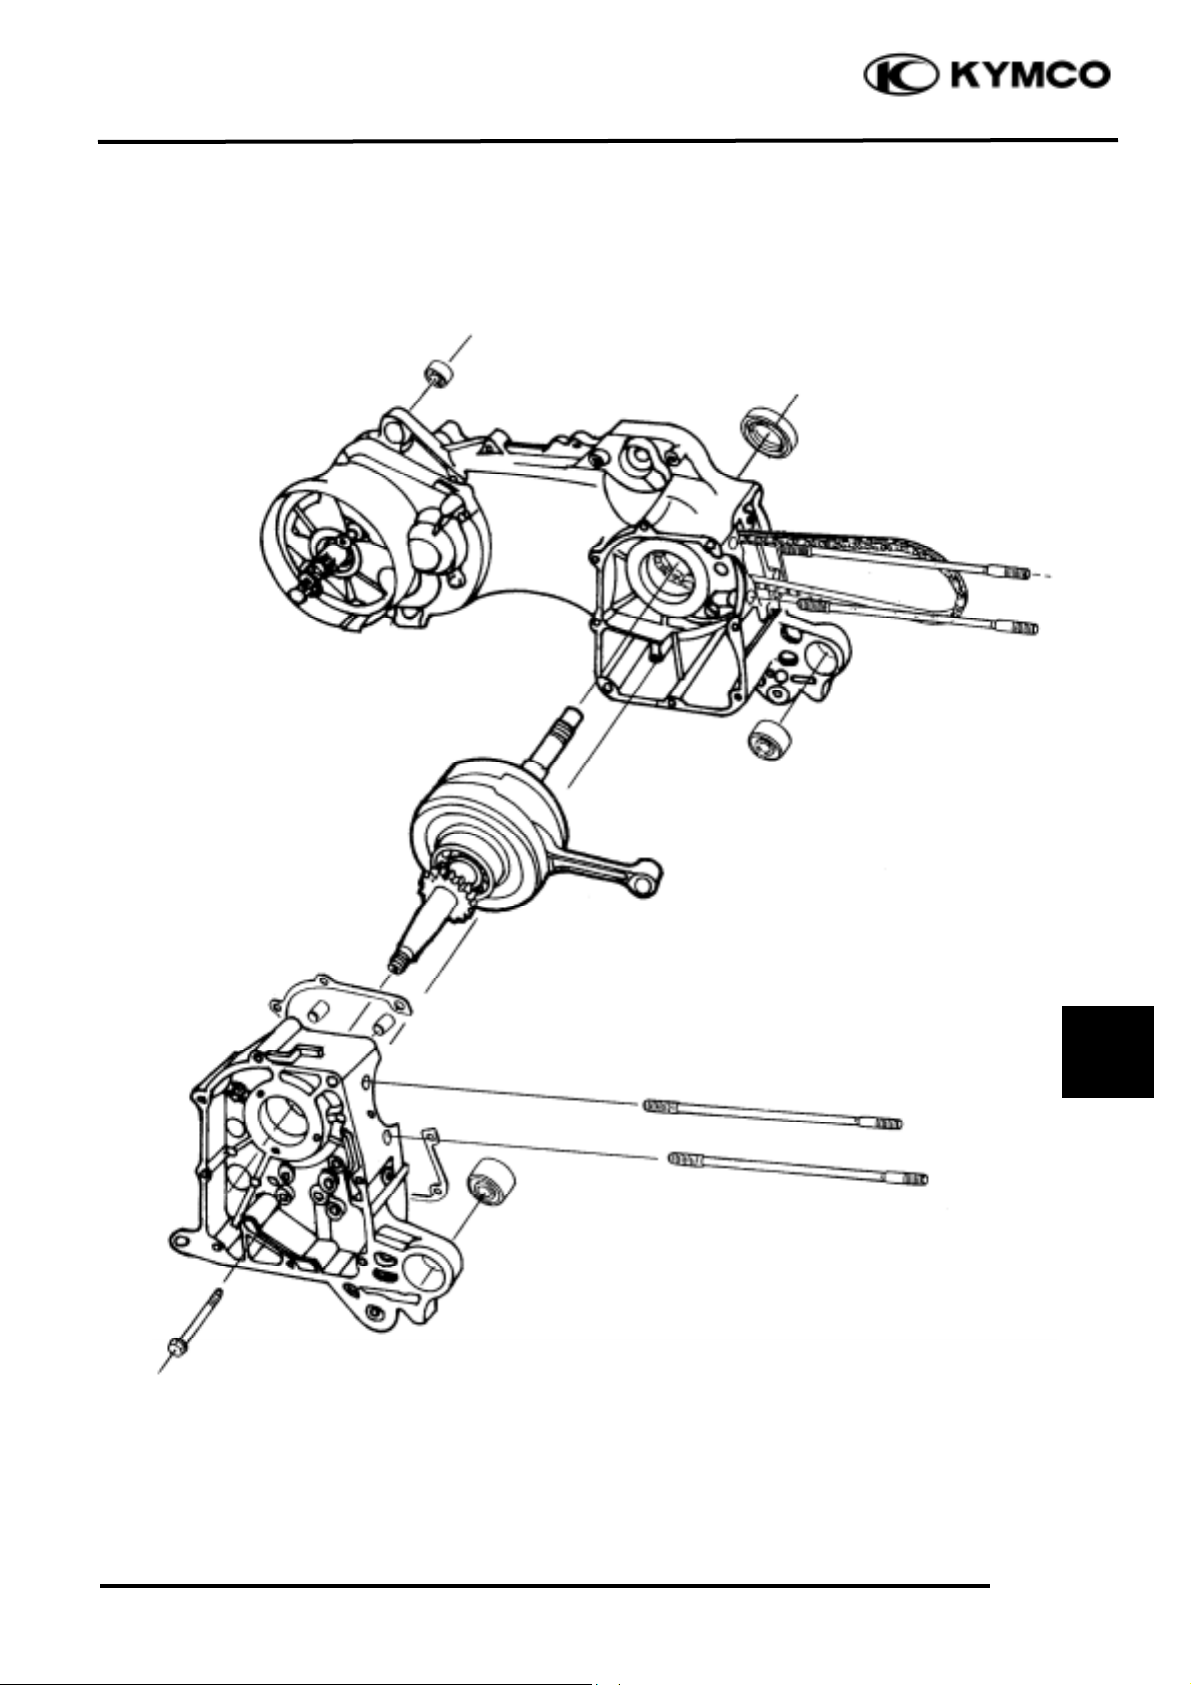
• This section covers crankcase separation to service the crankshaft. The engine must be removed
for this operation.
• The following parts must be removed before separating the crankcase.
-Cylinder head (!Section 7)
-Cylinder/piston (!Section 8)
-Drive and driven pulleys (!Section 9)
-A.C. generator (!Section 14)
-Carburetor/air cleaner (!Section 5)
-Rear wheel/rear shock absorber (!Section 13)
-Starter motor (!Section 16)
-Oil pump (!Section 4)
SPECIFICATIONS
Item
Standard (mm)
Service Limit (mm)
Connecting rod big end side clearance
0.10_ 0.35
0.55
Crankshaft
Connecting rod big end radial clearance
0-0.008
0.05
Runoutæ0.10
TORQUE VALUES
Crankcase bolt 0.8~1.2kgf-m
Cam chain tensioner slipper bolt 0.8~1.2kgf-m
TROUBLESHOOTING
Excessive engine noise
• Excessive bearing play
• Excessive crankpin bearing play
SERVICE INFORMATION
......................
11-1 CRANKSHAFT
......................................
11-3
TROUBLESHOOTING
.............................
11-1 CRANKCASE ASSEMBLY
...................
11-4
CRANKCASE SEPARATION
..................
11-2
Page 3
11. CRANKCASE/CRANKSHAFT
11-2
FILLY LX 50
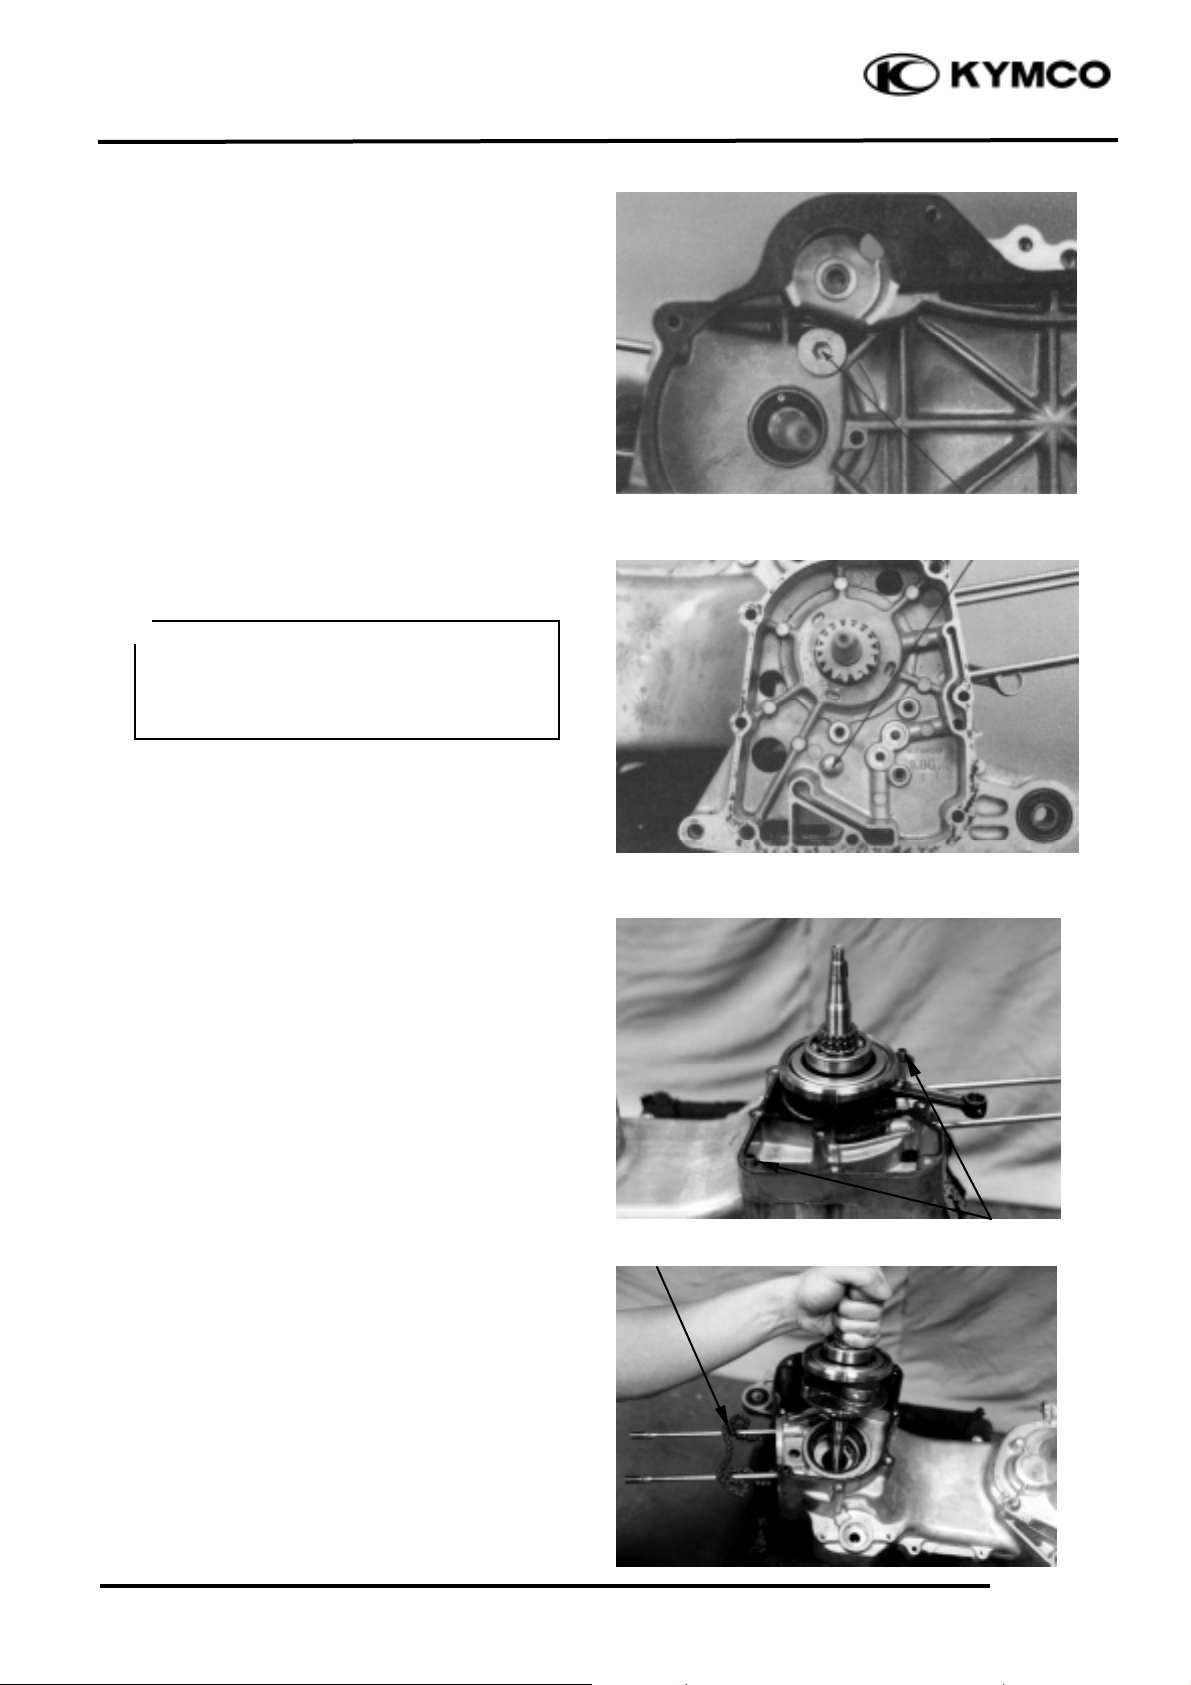
CRANKCASE SEPARATION
Remove the cam chain tensioner slipper bolt
and cam chain tensioner slipper.
Remove the crankcase attaching bolt.
Separate the left and right crankcase halves.
Remove the gasket and dowel pins.
Remove the crankshaft from the left
crankcase.
Remove the cam chain.
Cam Chain T ensioner Slipper Bolt
Cam Chain
• Do not damage the crankcase
gasket surface.
• Never use a driver to pry the
crankcase mating surfaces apart.
*
Dowel Pins
Crankcase Bolt
Page 4

11. CRANKCASE/CRANKSHAFT
11-3
FILLY LX 50
Clean off all gasket material from the
crankcase mating surfaces.
Remove the oil seal from the left crankcase.
Remove the oil seal from the right crankcase.
CRANKSHAFT
Measure the connecting rod big end side
clearance.
Service Limit: 0.55mm replace if over
Avoid damaging the crankcase mating
surfaces.
*
Oil Seal
Connecting Rod Big End
Oil Seal
Page 5

11. CRANKCASE/CRANKSHAFT
11-4
FILLY LX 50
Measure the connecting rod big end radial
clearance at two points at right angels to the
shaft.
Service Limit: 0.05mm replace if over
Measure the crankshaft runout.
Service Limit: 0.10mm replace if over
Turn the crankshaft bearings and check for
excessive play.
If they do not turn smoothly, quietly or if
they fit loosely in the crankshaft, replace the
crankshaft as a set.
CRANKCASE ASSEMBLY
Install new oil seals into the right and left
crankcase .
Measuring Location
Crankshaft Bearings
Driver Handle A
Outer Driver
Page 6

11. CRANKCASE/CRANKSHAFT
11-5
FILLY LX 50
Install the cam chain into the left crankcase.
Install the crankshaft into the left crankcase.
Install the dowel pins and a new gasket onto
the left crankcase.
Tighten the crankcase attaching bolt.
Torque: 0.8~1.2kgf-m
Cam Chain
Gasket
Crankcase Bolt
Dowel Pins
When installing the cam chain, be careful
not to damage the oil seal.
*
Place the right crankcase over the
crankshaft and onto the left crankcase.
*
Driver Handle A
Outer Driver
Page 7

11. CRANKCASE/CRANKSHAFT
11-6
FILLY LX 50
Install the cam chain tensioner slipper.
Install a new O-ring onto the cam chain
tensioner slipper bolt.
Apply engine oil to the O-ring and tighten the
bolt.
Torque: 0.8~1.2kgf-m
Cam Chain Tensioner Slipper Bolt
O-ring
Be sure to install the O-ring into the
groove.
*
 Loading...