

Page 1

Kurzweil V150/V110
Owner’s Guide
Second Edition, September 1, 2001
©2001 All rights reserved. Kurzweil is a product line of Young Chang Co.; Kurzweil, V150,
and V110 are trademarks of Young Chang Co. All other products and brand names are
trademarks or registered trademarks of their respective companies. Product features and
specifications are subject to change without notice.
Part Number: 910369 Rev. B
Page 2
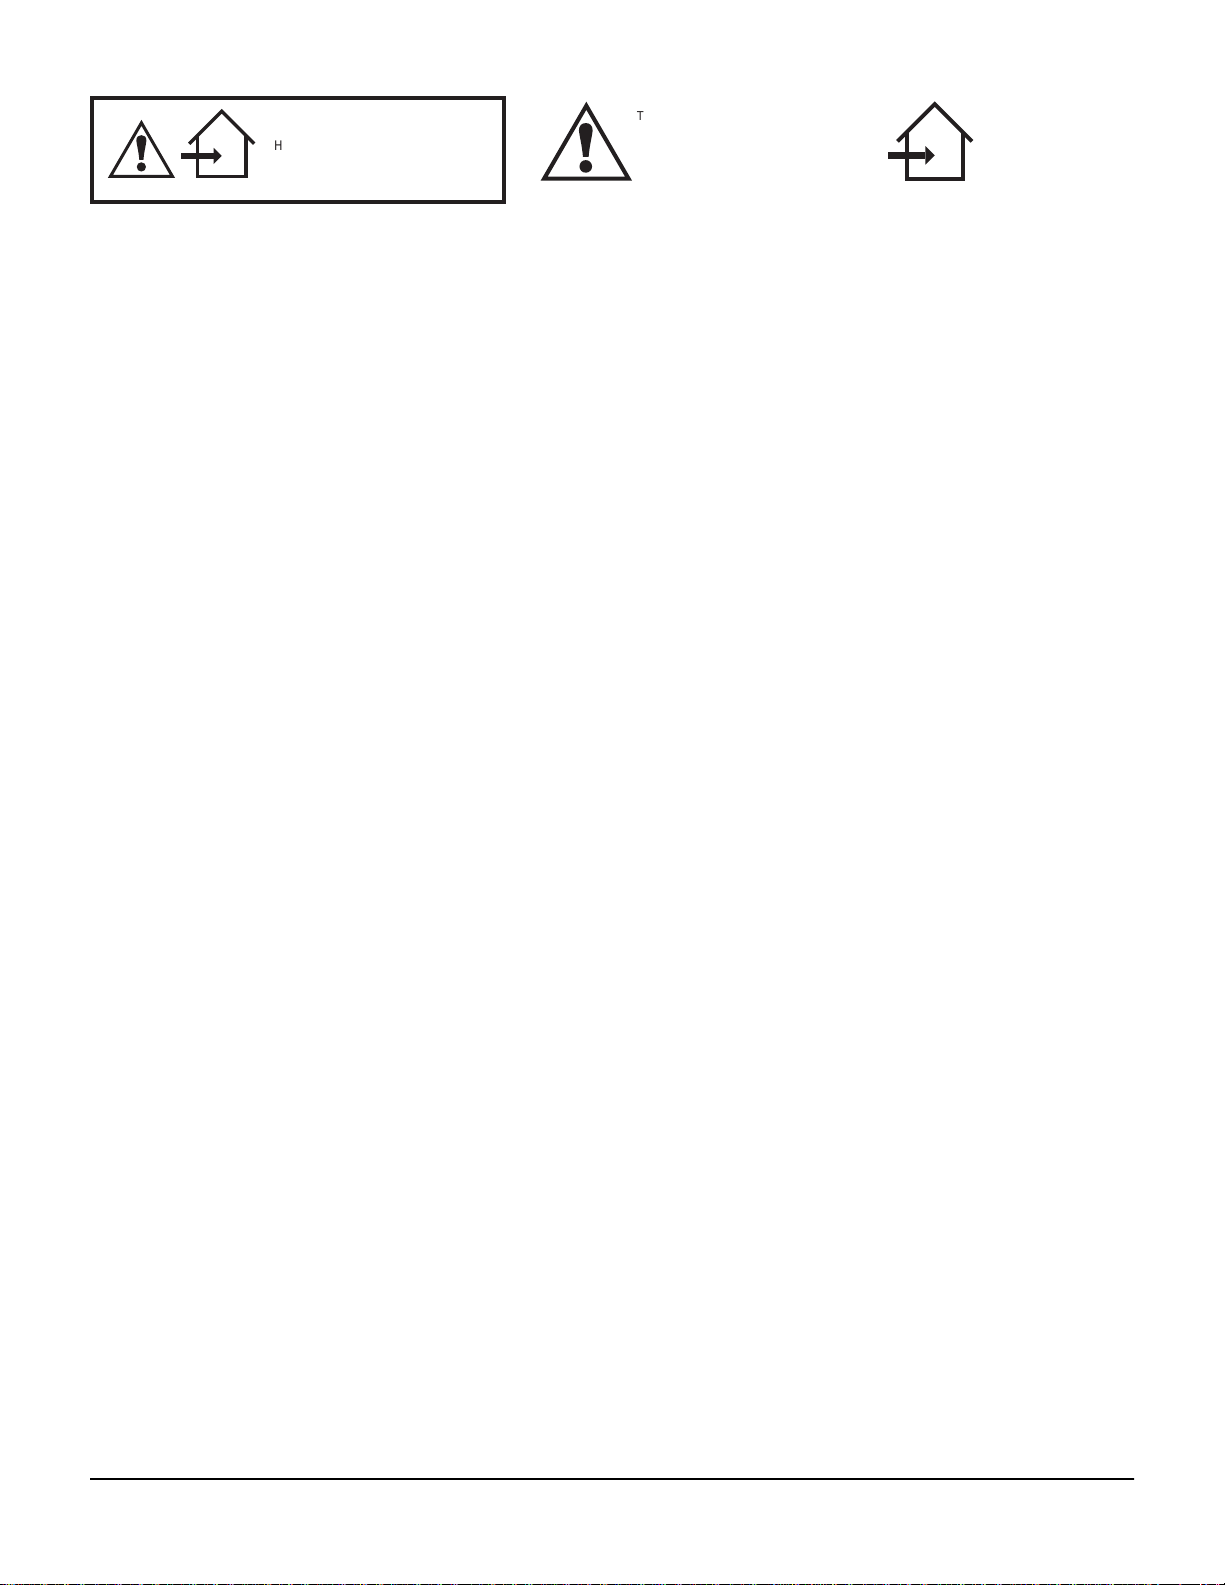
The exclamation point within an equilateral
triangle is intended to alert the user to the
presence of important operating and
maintenance (servicing) instructions in
the literature accompanying the product.
!
THIS PRODUCT IS INTENDED FOR
INDOOR USE ONLY.
!
IMPORTANT SAFETY & INSTALLATION INSTRUCTIONS
INSTRUCTIONS PERTAINING TO THE RISK OF FIRE, ELECTRIC SHOCK, OR INJURY TO PERSONS
WARNING: When using electric products, basic precautions should
always be followed, including the following:
1. Read all of the Safety and Installation Instructions and Explanation
of Graphic Symbols before using the product.
2. This product must be grounded. If it should malfunction or break
down, grounding provides a path of least resistance for electric
current to reduce the risk of electric shock. This product is equipped
with a power supply cord having an equipment-grounding
conductor and a grounding plug. The plug must be plugged into an
appropriate outlet which is properly installed and grounded in
accordance with all local codes and ordinances.
DANGER: Improper connection of the equipment-grounding
conductor can result in a risk of electric shock. Do not modify the
plug provided with the product - if it will not fit the outlet, have a
proper outlet installed by a qualified electrician. Do not use an
adaptor which defeats the function of the equipment-grounding
conductor. If you are in doubt as to whether the product is properly
grounded, check with a qualified serviceman or electrician.
3. WARNING: This product is equipped with an AC input voltage
selector. The voltage selector has been factory set for the mains
supply voltage in the country where this unit was sold. Changing
the voltage selector may require the use of a diff erent power supply
cord or attachment plug, or both. To reduce the risk of fire or electric
shock, refer servicing to qualified maintenance personnel.
4. Do not use this product near water - for example, near a bathtub,
washbowl, kitchen sink, in a wet basement, or near a swimming
pool, or the like.
5. This product should only be used with a stand or cart that is
recommended by the manufacturer.
6. This product, either alone or in combination with an amplifier and
speakers or headphones, may be capable of producing sound
levels that could cause permanent hearing loss. Do not operate for
a long period of time at a high volume level or at a level that is
uncomfortable. If you experience any hearing loss or ringing in the
ears, you should consult an audiologist.
7. The product should be located so that its location or position does
not interfere with its proper ventilation.
8. The product should be located away from heat sources such as
radiators, heat registers, or other products that produce heat.
9. The product should be connected to a power supply only of the type
described in the operating instructions or as marked on the product.
10. This product may be equipped with a polarized line plug (one blade
wider than the other). This is a safety feature. If you are unable to
insert the plug into the outlet, contact an electrician to replace your
obsolete outlet. Do not defeat the safety purpose of the plug.
11. The power supply cord of the product should be unplugged from the
outlet when left unused for a long period of time. When unplugging
the power supply cord, do not pull on the cord, but grasp it by the
plug.
12. Care should be taken so that objects do not fall and liquids are not
spilled into the enclosure through openings.
13. The product should be serviced by qualified service personnel
when:
A. The power supply cord or the plug has been damaged;
B. Objects have f allen, or liquid has been spilled into the product;
C. The product has been exposed to rain;
D. The product does not appear to be operating normally or
exhibits a marked change in performance;
E. The product has been dropped, or the enclosure damaged.
14. Do not attempt to service the product beyond that described in the
user maintenance instructions. All other servicing should be
referred to qualified service personnel.
15. WARNING: Do not place objects on the product’s power supply
cord, or place the product in a position where anyone could trip
over, walk on, or roll anything over cords of any type. Do not allow
the product to rest on or be installed over cords of any type.
Improper installations of this type create the possibility of a fire
hazard and/or personal injury.
The symbol of a house with
an arrow pointing inside
is intended to alert the user
that the product is to
be used indoors only.
RADIO AND TELEVISION INTERFERENCE
WARNING: Changes or modifications to this instrument not expressly
approved by Young Chang could void your authority to operate the
instrument.
IMPORTANT: When connecting this product to accessories and/or other
equipment use only high quality shielded cables.
NOTE: This instrument has been tested and found to comply with the
limits for a Class B digital device, pursuant to Part 15 of the FCC Rules.
These limits are designed to provide reasonable protection against
harmful interference in a residential installation. This instrument
generates, uses, and can radiate radio frequency energy and, if not
installed and used in accordance with the instructions, may cause
harmful interference to radio communications. However, there is no
guarantee that interference will not occur in a particular installation. If
this instrument does cause harmful interference to radio or television
reception, which can be determined by turning the instrument off and on,
the user is encouraged to try to correct the interference by one or more
of the following measures:
SA VE THESE INSTRUCTIONS
ii
• Reorient or relocate the receiving antenna.
• Increase the separation between the instrument and the receiver.
• Connect the instrument into an outlet on a circuit other than the one
to which the receiver is connected.
• If necessary consult your dealer or an experienced radio/television
technician for additional suggestions.
NOTICE
This apparatus does not exceed the Class B limits for radio noise
emissions from digital apparatus set out in the Radio Interference
Regulations of the Canadian Department of Communications.
AVIS
Le present appareil numerique n’emet pas de bruits radioelectriques
depassant les limites applicables aux appareils numeriques de la
class B prescrites dans le Reglement sur le brouillage radioelectrique
edicte par le ministere des Communications du Canada.
Page 3

Young Chang International Contacts
Contact the nearest Young Chang office listed below to locate your local Young Chang/ Kurzweil representative.
Young Chang America, Inc.
P.O. Box 99995
Lakewood, WA 98499-0995
Tel: 1-253-589-3200
Fax: 1-253-984-0245
Young Chang Co., Ltd.
178-55 Gajwa-Dong
Seo-Ku, Inchon, Korea 404-714
Tel: 011-82-32-570-1380
Fax: 011-82-32-570-1218
Young Chang America, Inc. (Canadian Division)
3650 Victoria Park Ave. Suite 105
Toronto, Ontario Canada M2H 3P7
Tel: 1-416-492-9899
Fax: 1-416-492-9299
W orld Wide Web Home Page
http://www.kurzweilmusicsystems.com
iii
Page 4

The V150/V110 Front Panel
1
2 3 4 5 6 7
1
Display contrast knob Page 1-4
2
Volume slider Page 1-3
3
Reverb and Effect controls Page 3-11
4
Sliders A – D Pages 1-3, 3-1, and 3-3
5
Slider mode selection buttons Page 3-1
6
Performance controls Chapter 3
7
Display and display buttons Page 1-4
iv
Page 5
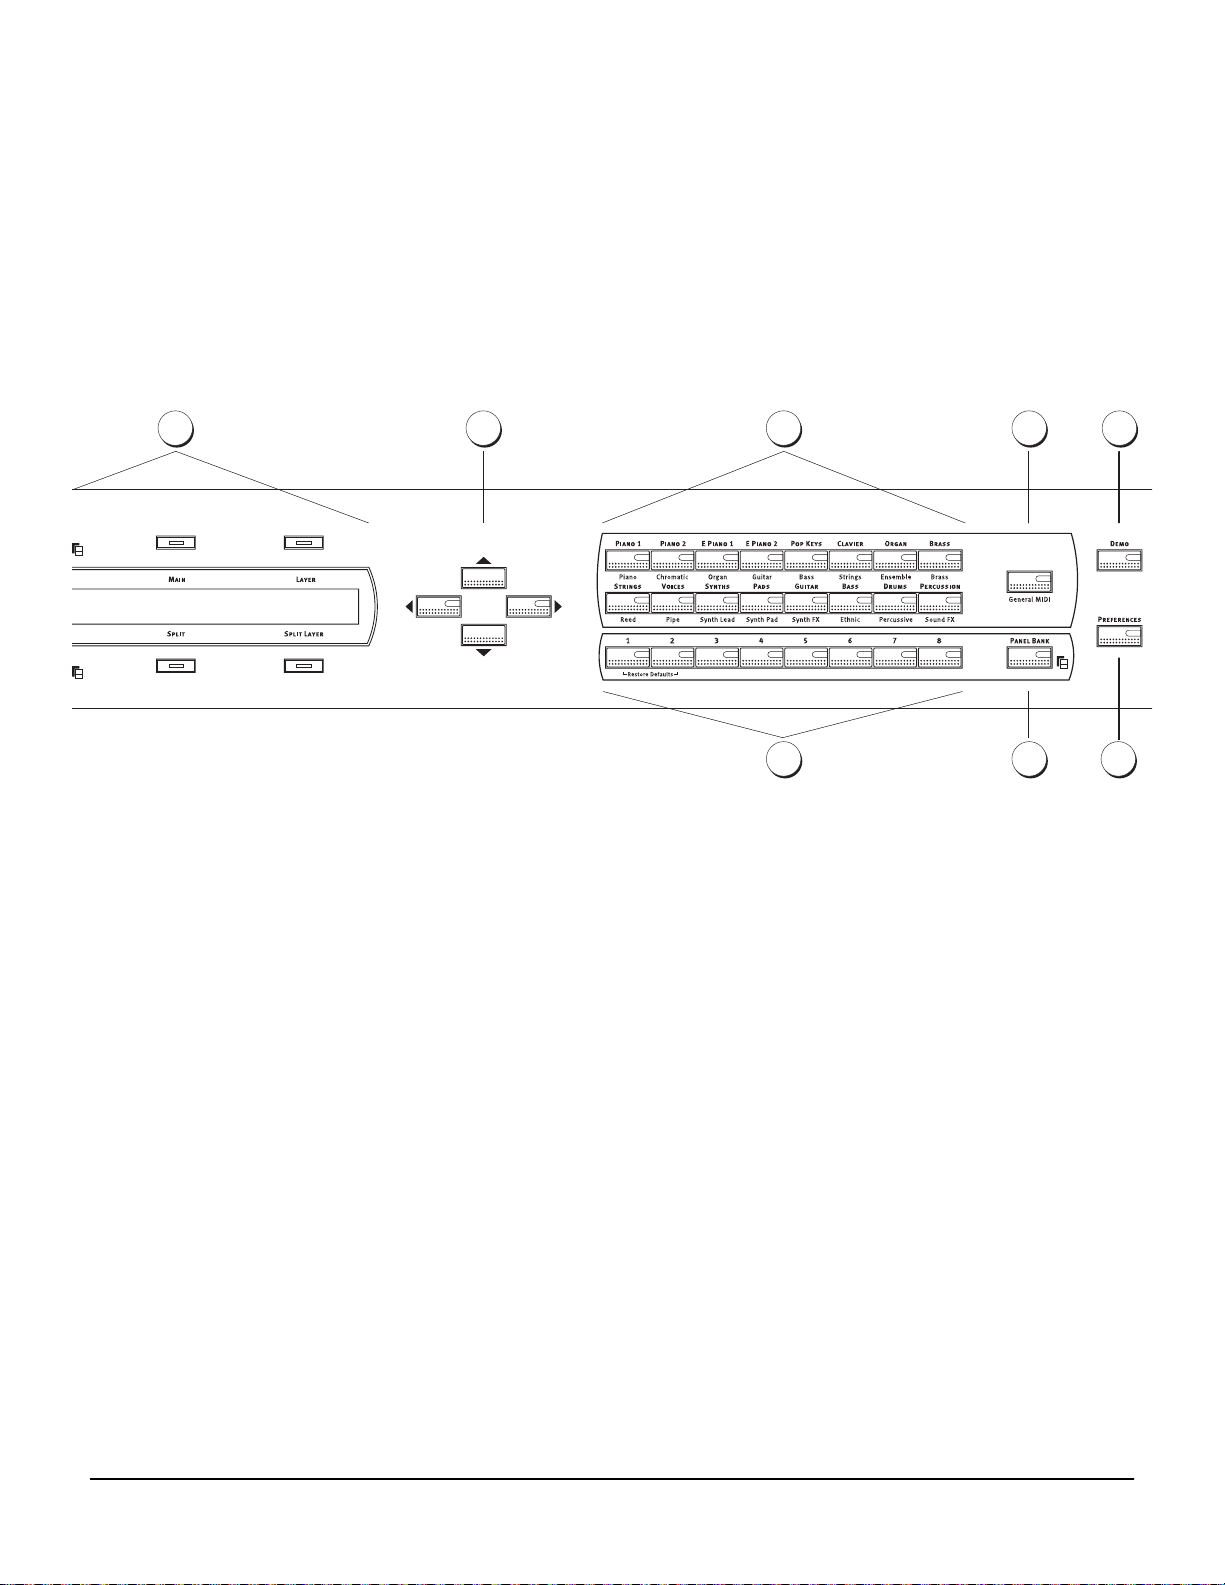
Up /
7 8
8
9
Down / Left / Right buttons page 1-4
Sound Category buttons page 3-1
9
10
11
12
13
14
10
11
12
13
14
Panel Memory buttons page 3-15
General MIDI button page 3-1
Panel Bank button page 3-16
Demo button page 1-5
Preferences button page 3-18
v
Page 6

Page 7

Contents
IMPORTANT SAFETY & INSTALLATION INSTRUCTIONS....................................................................................ii
Young Chang International Contacts .............................................................................................................................iii
The V150/V110 Front Panel............................................................................................................................................. iv
Chapter 1 Introduction
About This Manual ......................................................................................................................................................... 1-1
Setting Up the Instrument.............................................................................................................................................. 1-2
Battery............................................................................................................................................................................... 1-2
Care of Your Instrument................................................................................................................................................. 1-2
Getting Started................................................................................................................................................................. 1-2
Headphone Jacks...................................................................................................................................................... 1-2
Volume and Tone Controls ..................................................................................................................................... 1-3
The Keyboard ........................................................................................................................................................... 1-3
Sliders A–D ............................................................................................................................................................... 1-3
The Pitch Bender ...................................................................................................................................................... 1-3
The Pedals ................................................................................................................................................................. 1-4
The Display ............................................................................................................................................................... 1-4
Special Button Functions......................................................................................................................................... 1-5
Choosing Sounds............................................................................................................................................................. 1-5
Playing a Demo ............................................................................................................................................................... 1-5
Chapter 2 A Tutorial
Chapter 3 Using Your V150/V110
Playing Sounds................................................................................................................................................................ 3-1
Splits and Layering ......................................................................................................................................................... 3-2
Rhythm and Metronome................................................................................................................................................ 3-4
The Arpeggiator .............................................................................................................................................................. 3-5
KB3 Drawbar Organ Simulation................................................................................................................................. 3-10
Reverb and Effects..........................................................................................................................................................3-11
Assigning Pedals and Controllers............................................................................................................................... 3-13
Panel Memories ............................................................................................................................................................. 3-15
Preferences ..................................................................................................................................................................... 3-18
Resetting the instrument....................................................................................................................................... 3-21
Chapter 4 MIDI
Overview .......................................................................................................................................................................... 4-1
MIDI Connections ........................................................................................................................................................... 4-1
Adjusting MIDI Preferences .......................................................................................................................................... 4-5
MIDI Messages ................................................................................................................................................................ 4-6
System Exclusive Messages ........................................................................................................................................... 4-9
Other System Messages................................................................................................................................................ 4-10
About External Sequencers...........................................................................................................................................4-11
vii
Page 8

Kurzweil V150/V110 Musician’s Guide
Contents
Appendix A Maintenance and Upgrades
Replacing the Battery..................................................................................................................................................... A-1
Boot Block........................................................................................................................................................................ A-2
Appendix B General Reference
Specifications ...................................................................................................................................................................B-1
MIDI Controllers ............................................................................................................................................................. B-4
KB3 Controllers ...............................................................................................................................................................B-5
MIDI Implementation Chart.......................................................................................................................................... B-6
Appendix C Sound and Controller Information
V150/V110 Sounds (Organized by Sound Category) ................................................................................................C-2
V150/V110 Sounds (Organized by Sound ID)............................................................................................................C-5
Default Physical Controller Assignments....................................................................................................................C-9
Controller Assignments for Sounds in Bank 0..........................................................................................................C-10
Controller Assignments for Sounds in Bank 6..........................................................................................................C-20
Controller Assignments for Sounds in Bank 2..........................................................................................................C-30
Controller Assignments for Sounds in Bank 7..........................................................................................................C-32
Index
viii
Page 9

Chapter 1
Introduction
Thank you for purchasing the Kurzweil V-series home digital ensemble! The features of the
V150 and V110 instruments are essentially the same, with the exception of the cabinet and
speaker systems. All sounds and playing features are identical; therefore this manual covers
both instruments.
The V150 and V110 offer Kurzweil’s high-quality sound development, and state-of-the-art
sample playback, in attractive piano cabinets with built-in sound systems. Authentic digital
representations of musical instruments are the starting point of our technology. These are
enhanced with the latest in Digital Signal Processing techniques to present you with the ultimate
musical experience, whether playing or listening.
About This Manual
This manual is divided into three chapters and three appendices. Chapter 1 will help you set up
and start playing the V150/V110. Chapter 2 is a tutorial that walks you step by step through
many of the V150/V110’s features. Chapter 3, Using Your V150/V110 , is a more detailed
description of each of the V150/V110’s features. Chapter 4, MIDI describes how you can connect
your V150/V110 to other MIDI instruments or a personal computer. Appendix A contains
information about maintenance and software upgrades, Appendix B provides specifications and
technical information, and Appendix C lists the V150/V110’s sounds, as well as the controllers
you can use to modify them.
Typeface Conventions
We use three different type variations to indicate special meaning. The names of most buttons
appear in bold type ; so do the names of sliders and knobs.The names of the display buttons
appear in bold type when we’re discussing the normal operation of those buttons—that is, the
Transpose , Tempo , Main , Split , Layer , and SplitLayer display buttons.
Sometimes these buttons have special functions that change depending on what you’re doing.
In this case, the names of the buttons appear in the display itself, and the normal, permanent
labeling doesn’t apply. When we’re referring to these special functions, the names of the display
buttons appear in a typeface that resembles the characters in the display—for example, “the
display button labeled
We use italics for emphasis, and to indicate the names of sections of this manual. We also use
italics to indicate terms that might be new to you.
LOOP|DEMO
.”
1-1
Page 10
Introduction
Setting Up the Instrument
Setting Up the Instrument
The V150/V110 can be placed most anywhere in a room. Make sure that nothing underneath the
instrument blocks the speaker ports so that the full power of the sound system can be heard.
One end of the power cord plugs into the power socket of the instrument, and the other into a
nearby outlet. Please read the section called IMPORTANT SAFETY & INSTALLATION
INSTRUCTIONS on page ii of this manual for important information. Your V150/V110 has been
designed for the supply voltages used in your area. If you move to another country, or if you
have any doubts about power supply, please see your local Kurzweil dealer.
Because the V150/V110 is a digital instrument, there is a possibility that it may interfere with
other electronic equipment. See the section called RADIO AND TELEVISION INTERFERENCE
on page ii for information and suggestions for how to minimize any interference problems.
Battery
The V150/V110 has battery-backed memory that stores Panel Memories and user preferences
even when the power is turned off. The batteries are accessible through a small panel on the
instrument’s underside. The V150/V110 was shipped from the factory with fresh batteries
installed, but to preserve their charge during shipping a paper pulltab insulator was inserted
between the batteries and metal contacts. Before you play the instrument for the first time you
will need to remove this insulating paper. On page A-1 there’s a procedure for replacing the
batteries. Read the first few steps of this procedure to learn how to open the battery panel, then
remove the insulation, close the battery panel, and you’re ready to play.
Care of Your Instrument
Use a soft, dry cloth to dust the V150/V110 case. Do not use aerosol sprays on or near the
instrument. To clean the keyboard, use a soft, damp (not wet) cloth. If necessary, dampen the
cloth with a solution of dish soap and water. Never use solvents like alcohol or mineral spirits on
any surface of the instrument.
Getting Started
Turn on the power with the main power switch, located underneath the keyboard on the lefthand side. The instrument takes a few seconds to initialize and run a brief self-check, and then
it’s ready to play!
Once you’re up and running, look over the front panel illustration on pages iv and v. It’s a sort
of visual table of contents.
Warning : This instrument is capable of producing sound pressure levels in excess of 95dB,
which may cause permanent hearing damage. Please exercise caution when playing through the
internal speakers and especially when using headphones. Always start with the Volume slider
at the minimum position.
Headphone Jacks
The V150/V110 has two headphone jacks, located on the bottom panel near the power switch. If
you want to use the V150/V110 with headphones, just plug a headphone cable into either
headphone jack. This cuts off the sound from the V150/V110’s speakers, and plays the sound
through the headphones only. The sound returns when you remove the headphone cable(s)
from the jack(s).
1-2
Page 11

Volume and Tone Controls
The Volume slider is found on the left side of the front panel, and should be adjusted for
listening comfort. The V150/V110 sound system is quite powerful, so setting the volume at the
middle of its range is about right for most listening situations. If you have a sound source
connected to the Audio In jacks of the V150/V110, note that the Volume slider does not affect the
level of sound from the external source.
The tone of your V150/V110 can be affected by its surroundings, so you might want to adjust
the tonal quality to fit the environment. To do this, press the Tone Controls button which is near
the group of four sliders labeled A–D. This enables the three leftmost sliders to act as bass,
midrange, and treble adjustments. The display shows the increase or decrease in level for each
part of the sound spectrum. Move the sliders up to emphasize a range. You can also press the
display button underneath each range and adjust the tone with the Up and Down buttons. In
general, if a room is furnished with heavy carpets or drapes you may want to increase the high
frequencies (treble) and decrease lower ones (bass), whereas a bare room will sound better with
less treble. Press Tone Controls again to return to normal operation.
The Keyboard
The keyboard of the V150/V110 has eighty-eight weighted keys, with an action designed to
simulate the feel of an acoustic piano. The keyboard is velocity sensitive, which means that the
harder (or faster) you play a note, the louder and brighter the resulting sound is. This is what
makes the V150/V110 a truly expressive instrument. The degree of sensitivity can be adjusted to
match your touch (see page 3-19 for details).
Introduction
Getting Started
The V150/V110 keyboard also supports aftertouch. This special feature allows you to control the
sound being heard by pressing down on one or more keys as you hold them against the key bed.
Certain sounds in the instrument will change timbre, or add vibrato, or change volume, as you
apply pressure. This allows you to add expressiveness without having to move your hands off
the keyboard. See Appendix C for more details on which sounds respond to aftertouch.
Sliders A–D
There are four sliders to the left of the display. They’re labeled A–D, and they control several
different aspects of the sounds you’re playing. We’ve already seen how you can use the sliders
to adjust the tone control (treble, midrange, and bass). You can also use them for other functions.
For example, if you press the MIDI Controllers button, the sliders change the nature of the
sound, sometimes dramatically.
The Pitch Bender
To the left of the keyboard is a small pad. Pressing and running your finger along the pad will
change the pitch of sounds currently being played on the instrument, a process called pitch
bending. Touch the top part of the pad to raise the pitch, and the bottom part to lower it. This
effect can be used to simulate rock guitar or trombone effects, among others.
1-3
Page 12
Introduction
Getting Started
The Pedals
The Display
The V150/V110 has three pedals which correspond to the standard pedals found on a grand
piano. The function of these pedals, from left to right, is as follows:
Soft: Notes played while this pedal is pressed will sound softer
Sostenuto: Notes held when this pedal is pressed will sustain, but any note played after it is
pressed will not
Sustain: Notes held or played while this pedal is pressed will sustain their sound, even
after you lift your fingers from the keys
In addition to the usual piano pedals, the V150/V110 has a controller or expression pedal that
adjusts the instrument’s volume (this is similar to many organs). Pushing the pedal forward
with your toe will make the sound louder, while pushing it back with your heel will make it
softer. If you’re not using this pedal, you’ll probably want to leave it set to its loudest setting.
All of the pedals can be reprogrammed for other functions. See page 3-13 for details.
In the center of the front panel is a two-line forty-character liquid crystal display, which shows
important information about the state of the V150/V110. When you first turn the instrument on,
this display will show the Stereo Grand Piano sound name, which is always the default sound.
Many other kinds of information may also be displayed, as you’ll see.
The buttons around the display perform many functions. When you’re playing sounds, they
function according to the labels printed around the display: Main, Split, Layer, SplitLayer,
Transpose, and Tempo.
When you’re performing other tasks, like changing preferences, the buttons around the display
have varying uses, depending on what you’re doing. The words that appear in the display
above or below the buttons indicate what the buttons do when you press them.
We refer to these buttons a lot in this manual. In general, we call them the display buttons. To save
space, we’ll describe each button as (for example) “the display button labeled Enter.” We’ll use
a special typeface for the name of each button (like the word Enter).
When several items are displayed on the screen, one of the lights in the display button near an
item is often lit. This means that the item can have its value changed using the Up and Down
buttons (to the right of the display, and labeled with up and down arrows). Pressing the Left
and Right buttons (labeled with left and right arrows) moves among various “pages” of
information in the display. If there is information to be seen on other pages, one or both of the
Left and Right buttons is lit Press either button to see the next page in that direction.
You can adjust the display contrast with the contrast knob found at the left end of the front panel
(it’s labeled with a half circle, as shown at left; see Number 1 on page v). Turn the knob until the
display is most readable from where you usually sit.
1-4
Page 13

Special Button Functions
Many buttons are labeled with a small icon (as shown on the left). This icon means that the
button activates a menu related to the button. You can activate the menu by pressing and holding
the button until the menu appears.
Fallboard Lights (V150 only)
On the V150, there’s a string of lights along the fallboard, which enables you to see the keyboard
and front panel when the surrounding lights are low. The lights have a separate power switch;
it’s the slightly smaller switch near the main power switch.
Choosing Sounds
The easiest way to select sounds is to use the Sound Category buttons to the right of the display
(Number 10 in the diagram on page v). Press a Sound Category button, and it lights up to show
that it’s the current category. The name of the sound appears in the display. When you press a
Sound Category button, the first sound that gets selected is the one that was selected the last
time you used that category.
Introduction
Choosing Sounds
Notice that the Sound Category buttons have labeling of different colors. The colors indicate the
different sound categories available in different modes. The labeling above each button (in
all-capital letters) shows the categories for normal operation mode. The labeling below the
buttons (in mixed-case letters) shows the categories for General MIDI mode. To make it easier
for you to remember, the labeling for the GM sounds is the same color as the labeling of the
General MIDI button.
Use the Up/Down buttons to view the list of sounds. With this method, you can select all the
sounds within a particular category by pressing the Up or Down button repeatedly. For
example, if you’re in the Piano 1 category, you’ll scroll through all the pianos. If you start in a
different category, you’ll see all the sounds from that category. There’s a list of all the sounds,
arranged by category, in Appendix C (page C-2).
Playing a Demo
If you want to hear a demonstration of the range of music the V150/V110 can play, press the
Demo button. A series of buttons in the sound selection area will blink, each representing one
demonstration song. Press one of these buttons to hear a song. The display will show the name
of the song and offer a button to stop the demonstration. You can also press the display button
under the words LOOP|DEMO to hear all the songs in order. To leave the demonstration, press
the display button under the word EXIT, or press the Demo button.
1-5
Page 14

Page 15

Chapter 2
A T utorial
The purpose of this tutorial is to help familiarize you with many of the features found in the
V150/V110. To do this, we’ll push a few buttons and configure the V150/V110 to play four
different sounds. Then we’ll adjust a few more features, and save everything to what we call a
Panel Memory, which enables you to select that exact configuration at any time by pressing a
single button.
This tutorial assumes you are already familiar with the general operation of the front panel
navigation controls such as the display buttons (the ones surrounding the display), and the
Up/Down/Left/Right buttons. See page 1-4 if you need a reminder.
Starting Point
You’ll soon be adding sounds and placing them in different parts of the keyboard. You’ll
probably be doing a lot of this as you enjoy your V150/V110. But you’ll often want to start over
with just a single sound playing. There’s a quick and easy way to do this: press the first and
second Panel Memory buttons at the same time. This selects the Stereo Grand Piano sound,
without any other sounds (this is the default Panel Memory). Play a few notes to make sure
you’re hearing just the Stereo Grand Piano sound.
You can use this short cut at any time to return to the default Panel Memory. You can also turn
off sounds by pressing the corresponding display buttons (Split, Layer, and SplitLayer) twice—
once to select a part of the keyboard, then again to silence it. You can’t turn off the Main sound,
by the way.
Layering a Sound
We’re going to add a Layer sound now. Press the display button labeled Layer. Now press the
Voices sound category button. Use the Up/Down buttons to select the sound called The Croons.
Play the sounds and listen to the scat vocals layered with the piano. If the balance between the
two sounds isn’t to your liking, don’t worry—we’ll balance them out a bit later in this tutorial.
Adding a Split
We’re going to split the keyboard, and play a different sound with the left hand. Press the
display button labeled Split. Now press the Bass sound category button. Select the
Upright Bass 2 sound using the Up/Down buttons. Note how the piano and vocals are limited to
the right side of the keyboard, while the left side plays an acoustic bass.
Changing the Split Point
The default keyboard split point (the place where the left hand sound meets the right hand
sound) occurs at the F# below middle C, sometimes referred to as F# 3. Let’s change the split
point to be A# below middle C (A# 3). Press the Split Point button and then strike the A# 3 key
on the keyboard. Play to confirm the split point is correct.
2-1
Page 16

A T utorial
Adding a Layer to the Split Sound
Now for a bit more fancy left hand, add a layer to the Upright Bass 2 sound. Press the display
button labeled SplitLayer. Now select the Voices sound category. Use the Up/Down buttons to
and select the Scatman sound. Play the left hand to confirm that the Upright Bass 2 sound is
layered with the Scatman vocal sound.
Adjusting the Playable Ranges
Notice the playing range of the Stereo Grand Piano and The Croons sound is limited to B below
middle C and up. Also, the Upright Bass 2 and Scatman left-hand sounds are very low in pitch.
Press the Octave Shift button and the instrument intelligently brings the right hand piano and
vocal sound down one octave, while raising the left hand bass and vocal sounds one octave.
This makes more sense musically and allows a greater playable range for all sounds.
Adjusting the Sound Levels
Press the Sound Levels button. Now Sliders A–D (the four sliders to the left of the Sound
Levels button) can be used to change the separate levels of the individual sounds. The front
panel labels the Main, Layer, Split and SplitLayer parts. Adjust the levels until you like the
balance. Later, we’ll save those levels (among other things) to a Panel Memory so you can recall
all your settings at the touch of a button.
Assigning a Rhythm
The V150/V110 has a metronome that is very useful in developing a good sense of timing and
rhythm. In addition, some great-sounding rhythm patterns are provided. You can use these as a
fancy metronome, or to play a tune with a particular rhythmic feel. To select a rhythm, press and
hold the Metronome/Rhythm button. Press the display button labeled Rhythm|Style. Use the
Up/Down buttons to select the Latin 3 rhythm.
Next we’ll adjust the Tempo. Press the display button labeled Tempo, and use the Up/Down
buttons to set the Tempo to 128 beats per minute. We can also adjust the volume of the rhythm
track. Press the display button labeled Volume, then use the Up/Down buttons.
Using a Pedal for Rhythm Control
It would be very convenient to start and stop the rhythm from one of the pedals. Let’s use the
middle pedal. Press and hold the MIDI Controller button. The display will show the Controller
preferences screen. Press the display button under the words PEDAL|SETUP to enter the Pedal
assignment menus. The first menu allows you to adjust the Left Pedal assignment. Press the
Right button to select the Middle Pedal assignment menu. Now use the Up/Down buttons to
select Rhythm Start/Stop.
Press the MIDI Controller button twice to dismiss the menus.
Sustaining the Split Sounds
Play the left hand region of the keyboard and try stepping on the sustain pedal. Notice that
notes do not sustain when the sustain pedal is held down. To change this, press the Left Sustain
button. Its light comes on, indicating that the Sustain pedal now works for the left-side sounds.
2-2
Page 17

Adjusting the Reverb
Adjusting the amount of reverb on each part will finish this masterpiece off nicely. Press the
display button labeled Main and then turn the Reverb Level knob until you like the amount of
reverb you like for the piano sound. Be sure to play the right hand region of the keyboard to
hear the sound you are affecting. To adjust the reverb on the crooning vocals sound, press the
display button labeled Layer and turn the Reverb Level knob. To lower the reverb level on the
bass, press the display button labeled Split and turn the Reverb Level knob all the way to the
left. Finally, adjust the reverb on the scat vocal sound (play the left hand keyboard region to hear
the vocals). Press the display button labeled SplitLayer and turn the Reverb Level knob to the
desired amount.
Saving to a Panel Memory
Now we can save this configuration to a Panel Memory. This enables you to use other sounds,
rhythms, and settings, yet still return to the exact layout you’ve just created.
Press and hold the Panel Memory 1 button. The display shows that you’ve saved the
V150/V110’s current state in Panel Memory 1. You can now select Panel Memory 1 at any time
by pressing the Panel Memory 1 button. The V150/V110 remembers Panel Memory settings
even when you turn the instrument off.
A T utorial
2-3
Page 18

Page 19

Chapter 3
Using Y our V150/V110
Playing Sounds
The V150/V110 offers over 400 high-quality digitally sampled sounds. The instrument’s sound
engine is multi-timbral, which means that more than one sound can play simultaneously,
allowing you to create rich and complex aural textures, and emulate an orchestra or combo with
its separate parts.
The sounds are organized by instrumental category. Each category corresponds to one of the
sound selection buttons found on the right side of the panel. To choose a sound from one of the
categories, press the button with the appropriate name. The light in that button lights up to
indicate which category is playing, and the name of the individual sound appears in the display.
Choosing a Sound Within a Category
There are many sounds available in each sound category. Use the Up/Down buttons next to the
display to select among the various sounds in a category. As you change the sound, the name
will change in the display, and you can listen to the sound as you play on the keyboard.
The last sound chosen in each category will be remembered, so that if you choose another
category and return to an earlier one, the sound you were playing will be recalled. These sound
preferences will be remembered when the power is turned off if Remember Preferences is set to
Yes (see page 3-20). There’s a list of all the sounds, arranged by category, in Appendix C
(page C-2).
General MIDI Sounds
The V150/V110 is compatible with the General MIDI (GM) standard for sound playback. This
means that MIDI songs written to the GM specification will play correctly on the instrument if it
is in the General MIDI mode of operation. This mode is controlled by the General MIDI button
on the front panel, or by a special GM message which is usually contained in a GM song (see
page 4-9 for more information about MIDI control of GM mode). The light in the General MIDI
button is lit when GM mode is active, and the various sound selection buttons select only the
GM sounds associated with each button. The GM sound categories (which are different from the
V150/V110 categories) are listed underneath each button, in a different color.
Note: The KB3 organ sounds and the Metronome are unavailable when you’re in General MIDI
mode.
Using the Performance Sliders
Sliders A–D perform different functions, depending on which mode you set using the buttons to
the right of the sliders. Set the mode of the sliders by pressing one of the buttons (labeled MIDI
Controllers, Sound Levels, Tone Controls). You can move any of the sliders at any time while
you’re playing. The Sound Level and Tone Control modes are more general adjustments. See
page 1-3 for information about tone control, and page 3-3 for information about sound level
control. You’ll probably use the sliders most often in MIDI Controllers mode, where they can
3-1
Page 20

Using Y our V150/V110
Splits and Layering
affect any number of the features of the sound. You can get some amazing effects with many of
the sounds—try using the sliders with some of the sounds in the Synth and Pad categories. The
effect varies with each sound. Appendix C contains information about what each slider does for
each of the sounds.
Transposing the Keyboard
The transposition feature allows you to play in one key, and have the instrument play in
another. This can be useful when accompanying a vocalist who may find the written key of a
song too high or low, or when playing with a transposing instrument such as a clarinet or
saxophone.
To change the transposition, press the display button labeled Transpose. A zero appears to
indicate no transposition. Use the Up/Down buttons to change the transposition upward or
downward as desired; each press raises or lowers the sound by one half-step. To restore the
standard key, press both buttons simultaneously, and the display will again show no
transposition. If Remember Preferences is set to Yes, transposition is remembered when the
power is turned off. You can save transposition in a Panel Memory (see page 3-15 for details).
Tuning Adjustments
If you’re playing with other instruments, you may find that those instruments are not tuned to
the exact pitch of the V150/V110 (which never goes out of tune). Rather than tuning the other
instruments, you can quickly adjust the tuning of the V150/V110. Press and hold the display
button labeled Transpose. This selects the Tuning feature; you can adjust it using the Up/Down
buttons. Press the Preferences button to return to normal operation.
See page 3-19 for more information about tuning.
Splits and Layering
The V150/V110 offers much more than simple keyboard playing. The instrument allows you to
play two completely separate parts simultaneously, each one with two sounds combined. These
features are referred to as splitting and layering the keyboard, and allow you to create a wide
variety of instrumental textures and effectively play more than one part at the same time.
Splitting Sounds
To split the keyboard into separate sections, simply press the display button underneath the
word Split in the display. The left side of the keyboard will now play a separate sound from the
right side, and the name of the left side sound will be displayed above the word Split.
Note that the light in the display button goes on, indicating that the Split sound is being edited.
This means that any sound selection button pressed will change the Split sound (the left-hand
sound) instead of the Main sound (the right-hand sound). The Up/Down buttons will also
change the Split sound. You can select any sound for the Split sound.
If you want to change the Main sound instead, press the display button labeled Main. Its light
will light, indicating that that sound is now being edited.
To remove the keyboard split, simply press the display button labeled Split to edit the split
sound, and then press the same button again. The Split sound name will be erased, indicating
that no Split sound is active, and the Main sound will again be edited. The Main and Split sound
choices can be saved in a Panel Memory (see page 3-15 for details).
3-2
Page 21

Split Point
The key at which the left-hand and right-hand sounds meet is called the split point. This key is
the F# below middle C by default, but you can change it easily. Press the Split Point button. The
display will prompt you to press any key on the keyboard, which will then become the split
point. The split point is at the highest key of the Split (left-hand) sound. The split point will be
remembered when the power is turned off if Remember Preferences is set, and can also be saved
in a Panel Memory.
Layering Sounds
Two sounds can be layered, which means that both will play simultaneously when a key is
pressed. This feature allows you to build a custom sound by layering any two sounds together
to create a new aural experience. Press the display button labeled Layer. The button will light
up, indicating that the Layer sound is being edited, and the name of the Layer sound will be
displayed. This sound can be changed in the same way as the Main or Split sounds, using the
sound selection or Up/Down buttons. The split sound can also be layered, by pressing the
display button labeled SplitLayer.
A Layer sound is disabled the same way as the Split sound: press the associated display button
to edit the sound, and then press the button a second time to turn it off. The name will be erased
and the sound will no longer be heard. Layer sounds can be saved in a Panel Memory.
Using Y our V150/V110
Splits and Layering
Both layering functions can be activated using a shortcut. If the Main sound is edited, pressing a
sound selection button and holding it down while pressing a second sound selection button will
cause the second sound to become the Layer sound. The name of the first sound appears near
the display button labeled Main, and that of the second sound will appear near the display
button labeled Layer. This shortcut will also work if the Split sound is edited, creating a layer in
the split section of the keyboard.
Sound Level Editing
When you create a Split or Layer sound, you may wish to vary the volume levels of the various
sound components. We refer to the four sound components as zones, and their relative volumes
can be adjusted using the Sound Levels button. When this button is pressed, its light is lit
indicating that the four sliders to the left are active for balancing the levels of the sound
currently being played. Each slider is labeled underneath with the zone it controls. Slide the
sliders up and down and play notes to hear the variation in the component sound levels. To
leave the various zone levels at a fixed point, press the Sound Levels button to return the sliders
to their previous functions. The volume levels can be saved in a Panel Memory.
Octave Shift
When creating a multi-zone sound using splits and layers, it is often desirable to adjust the
range of the keyboard for each sound separately. Most instrumental sounds do not sound their
best at one extreme of the keyboard or the other. To make a more playable keyboard setup, press
the Octave Shift button. The right hand sounds will be adjusted downward by an octave, while
the left hand sounds will be adjusted upward by an octave.
Different sound arrangements may call for different shifts. To change the default shift values,
press and hold the Octave Shift button to see a menu of shift choices. The amount of shift for
each sound zone appears in the display, near the corresponding display button (Main, Split,
Layer, SplitLayer).
3-3
Page 22
Using Y our V150/V110
Rhythm and Metronome
To change the shift in a sound zone, press the display button for that sound zone. The light in
the button goes on, indicating that the Up/Down buttons are active to change the value. You can
listen to the way the sound plays while editing the various fields, finding the setting that works
best. Pressing Up and Down together sets the selected sound zone’s shift to zero. The zone shifts
can be saved in a Panel Memory.
Left Sustain
Sounds used on the left side of a split keyboard are often instruments that do not have a sustain
pedal, such as strings or percussion. For this reason, the sustain pedal does not cause sustain on
Split sounds, by default. If you choose to use a piano on the left side, you may wish to activate
the sustain pedal for the split. Press the Left Sustain button to do this. The light goes on to
indicate that the sustain pedal is active for left-hand (Split) sounds. The left sustain setting can
be saved in a Panel Memory.
Rhythm and Metronome
The V150/V110 can help you practice with a built-in metronome, or it can play a drum track that
lets you sound like a one-man band. This powerful feature is activated with the Metronome/
Rhythm button. Press this button to hear a steady metronome click. The button lights up to
indicate that the metronome is active, and the current tempo (in beats per minute) appears in the
upper left of the display.
Note: The Rhythm and Metronome features are unavailable when you’re in General MIDI
mode.
Changing T empo
To change the tempo, press the display button labeled Tempo. The button will light to indicate
the tempo is edited. Use the Up/Down buttons to change the tempo value. Tempo can be set
from 20 to 300 beats per minute. Pressing both Up and Down buttons together will set the
default tempo of 120 beats per minute.
You can set the tempo by feeling (rather than by numbers) using the tap tempo feature. Press and
hold the display button labeled Tempo. A menu will be displayed instructing you to press a key
repeatedly—any key will do. Play the same key repeatedly at the tempo rate you desire. Press
any button on the panel to dismiss the menu, and the new tempo will be set.
The tempo setting will be remembered when the power is turned off if Remember Preferences is
set, and can also be saved in a Panel Memory (see page 3-15 for details).
Metronome/Rhythm Volume
You can adjust the metronome volume by pressing and holding the Metronome/Rhythm
button, and simultaneously moving Slider D. The rhythm volume setting is remembered when
the power is turned off if Remember Preferences is set, and also in a Panel Memory.
Metronome/Rhythm Reverb
You can adjust the metronome reverb level by pressing and holding the Metronome/Rhythm
button, and simultaneously moving the Reverb Level knob.
3-4
Page 23

Drum T racks
The V150/V110 contains a large number of realistically programmed drum and percussion
sounds. To make it easier to use these in your playing, the metronome can be turned into a drum
machine playing a set of ready-to-perform drum loops in several different styles. To listen to
drum tracks, press and hold the Metronome/Rhythm button. A menu will be displayed which
allows you to alter the characteristics of the rhythm track. Press the display button under the
words Rhythm|Style label to edit the type of track. Use the Up/Down buttons to select
different drum patterns. Each pattern is a loop which means that it repeats after a short time,
usually two or four measures.
Customizing the Rhythm Player
The rhythm menu has several fields with parameters that can be changed as needed to alter the
way the metronome or drum tracks play. The parameters are:
Rhythm Style as described above, this allows you to choose among various drum
patterns or the standard metronome. (Default: Metronome)
Rhythm Volume this parameter can be set in the menu or using the slider as described
above. Its range is from 0% to 100%. (Default: 80%)
Rhythm Tempo the tempo at which rhythms are played, in beats per minute. This is
also shown on the main display, but is displayed here for easy access.
The default is based on which rhythm pattern is chosen, or 120 for the
metronome.
Rhythm Channel the MIDI channel used to play the rhythm track. This may need to be
changed if you are using the V150/100 in conjunction with other
MIDI devices. (Default: 16)
Rhythm Sound each rhythm track has a chosen drum sound, but you can override
that default with this parameter.
Metronome Note chooses the note that is played repeatedly for the metronome sound.
(Default: A 6)
Using Y our V150/V110
The Arpeggiator
To change one of these parameters, press the associated display button underneath the
parameter, and use the Up/Down buttons to adjust the value. Pressing Up and Down together
will reset a parameter to its default value. Rhythm parameters will be remembered when the
power is turned off if Remember Preferences is set, and can also be saved in a Panel Memory.
The Arpeggiator
An arpeggio is the notes of a chord played in sequence, rather than all at once. The term comes
from the Italian word for harp, and represents a style of playing that adds rhythmic interest to
many kinds of music. The V150/V110 contains a built-in arpeggiator which will automatically
play the notes on the keyboard in the form of arpeggios. Press the Arpeggiator button to enable
this feature.
As you play notes on the keyboard, the arpeggiator keeps track of what you’ve played, and
plays them back using its own methods. Holding the keys down will keep the notes latched in
the arpeggiator (see below for more details on this). When you release a key that note will no
longer sound, but others may continue. Play some notes and try it out!
3-5
Page 24

Using Y our V150/V110
The Arpeggiator
The tempo at which notes are arpeggiated is that used by the rhythm player. It can be changed
in the same way, using the main display or the tap tempo feature. The tempo rate represents a
quarter note (see the Clock Rate parameter below). Press the Arpeggiator button again to turn
off arpeggiation.
There are a multitude of ways to create arpeggios, and you can design your own using several
parameters. These can be fairly simple or rather complex, but it can be interesting to try various
combinations. Press and hold the Arpeggiator button to enter the arpeggiator parameter menu.
As with other menus, the parameters are changed by selecting the display button underneath
the parameter, and using the Up/Down buttons to vary the parameter value. All arpeggiator
parameters can be saved in a Panel Memory (see page 3-15 for details).
Playing Parameters
Play Order
This parameter sets the order in which arpeggiated notes are played. There are several options:
Played notes are played back in the order in which they were struck.
Upwards notes are played back in ascending order.
Downwards notes are played back in descending order.
Up and Down notes are played ascending and then descending. The notes at the top and
Up/Down Rpt notes are played ascending and then descending. The notes at the top and
Random notes are played randomly from those being arpeggiated.
Shuffle notes are played randomly from those being arpeggiated, but no notes are
Walking notes are played randomly from those being arpeggiated. Each note is either
bottom play only once per cycle.
bottom are repeated each time the direction changes.
repeated until all of the others have been played in a cycle.
the next-highest or the next-lowest from the one just played.
3-6
The default Play Order is Upwards.
Clock Rate
This sets the rate arpeggiated notes are played. This parameter is specified in note names, from
quarter notes (one note per tempo beat) to thirty-second note triplets (12 notes per tempo beat).
The default Clock Rate is 16th notes.
Note Duration
Determines how long the notes will play within the rhythm. This is expressed as a percentage of
the available time that an arpeggiated note will sound: 100% means that a note will sound until
the next one is played, 50% means that the note will sound only half the time, etc. The shortest
duration is 1%, which produces a staccato effect. The default Note Duration is 70%.
Page 25

Note Shift Parameters
The arpeggiator can create interesting patterns by changing what it plays each time it runs
through the cycle of latched notes. Note shifting is applied to all the notes in the arpeggio at the
end of the arpeggiated cycle. It is controlled by three parameters.
Note Shift
Sets the amount the arpeggiator transposes the notes each time it plays through them, in half
steps. The transposition is cumulative from one cycle to the next. For example, if you choose 2 as
the shift value after the initial cycle the arpeggiation will be raised a whole step, after the next
cycle it will be raised two whole steps, and so on. Shift values can run from –12 to +12. The
default Note Shift is 0 (no shift transposition).
Shift Limit
Determines how far up or down the arpeggiator will shift from the original note, in half steps.
The range is 0 to 88. What happens when the arpeggiator reaches the limit is determined by the
Limit Option parameter. The default Shift Limit is 24.
Limit Option
Determines what happens when the shift limit is reached. Options are:
Using Y our V150/V110
The Arpeggiator
Stop when the shifted notes reach the limit, the arpeggiation stops.
Reset when the shifted notes reach the limit, the arpeggiator returns to the original
pitch and starts over again, continuing to transpose as it plays.
Unipolar when the shifted notes reach the limit, the arpeggiator starts shifting notes in
the opposite direction, using the same interval. The shift reverses direction
again when the original note is reached. For example, if the original note is
C 4 and the Shift Limit is 24, the arpeggiator starts at C 4, shifts up to C 6,
shifts down to C 4, and repeats. Compare to Bipolar.
Bipolar similar to Unipolar, but after reversing direction the arpeggiator shifts past
the original note and continues until the limit is reached in the opposite
direction before reversing again. For example, if the original note is C 4 and
the Shift Limit is 24, the arpeggiator starts at C 4, shifts up to C 6, shifts down
to C 2, shifts up to C 6, and repeats. Compare to Unipolar.
Float Reset when the shifted notes reach the limit, the arpeggiator returns to a pitch
floating (varying) from the original pitch. The amount of the float is
determined by comparing the first note that would exceed the shift limit with
the limit itself. The interval between these notes is used to transpose the
original pitch.
Float Unipol similar to Float Reset, but instead of floating from the original pitch, these
modes float in the opposite direction from the limit at each end. Thus if the
first note which exceeds the limit is over by four half steps (a major third) the
new starting point will be four steps below the limit. The limits on each end
are as in unipolar or bipolar modes. Float Bipolr is the bipolar equivalent of
Float Unipol. See Bipolar earlier in this subsection for an explanation of
bipolar limit options.
The default value for the Limit Option parameter is Unipolar.
3-7
Page 26

Using Y our V150/V110
The Arpeggiator
Glissando
When set to On, this causes the arpeggiator to play a chromatic sequence between the various
latched notes. This is an alternative to the shift modes; if Glissando is On, the Note Shift, Shift
Limit, and Limit Option parameters are ignored. The default for Glissando is Off.
Latching Parameters
Latching describes the way that the arpeggiator reads the notes that you’ve played and uses
them in a repeating pattern. The most basic method is to hold the desired keys down, but there
are other modes which can be useful in performance. Note that any of the three pedals can be
assigned to be the Latch Pedal (see Assigning Pedals on page 3-13 for details).
Latch Mode
This determines how the arpeggiator latches notes for its usage. Options are:
Keys the arpeggiator latches notes held down on the keyboard. As you press keys,
Overplay the arpeggiator latches notes that are being held when the Latch Pedal is pressed.
Arpeg similar to Overplay in that any notes held when the Latch Pedal is pressed are
Add similar to Arpeg except that notes you play after the Latch Pedal is pressed will be
Auto the arpeggiator latches each note played, as long as at least one note continues to
Pedals the arpeggiator uses two pedals to control latching, in a way analogous to the
notes get added to the arpeggio, and as you release keys notes are removed.
These notes remain latched even after you release them on the keyboard, and are
removed when the Latch Pedal is released. Notes played after the Latch Pedal is
pressed sound normally and are not arpeggiated.
latched until the pedal is released. Notes played and held after the pedal is
pressed will also be latched, but only until you release them.
latched until the pedal is released. This allows you to build a complex arpeggio
without continuing to hold down many keys. When the Latch Pedal is released,
all notes are unlatched and the arpeggio stops.
be held down. Like Add mode, this allows you to continuously build an arpeggio,
but without the use of the pedals. If at any point no key is held down, all notes are
unlatched and the arpeggio stops.
Sustain and Sostenuto functions on a piano. Notes held down on the keyboard
will be latched, as well as keys held down when the Latch Pedal or Latch Pedal 2
is pressed. The Latch Pedal will work in Add mode, so that as long as it is held all
notes played will be latched. Latch Pedal 2, however, will work in Overplay
mode, and notes played after it is pressed will not be latched.
3-8
The default Latch Mode is Keys.
Low Key and High Key
These define the range of keys that can be latched by the arpeggiator. The range of keys is the
full range of MIDI notes, from C –1 to G 9. When either of these parameters is edited in the
menu, pressing a key on the keyboard will change the value to that key. The default Low Key is
C –1 and the default High Key is G 9.
Page 27

Zone Selection
You can set up the arpeggiator to send notes to selected zones. The top line of the display shows
Active|in. Use the display button labeled Active|in to select from the available values. The
choices are
All Zones All zones
Main Zone Main zone only
Layer Zone Layer zone only
Split Zone Split zone only
SpLayer Zone SplitLayer zone only
Both lyr zones Layer zone and SplitLayer zone
Arpeggiated V olume
Velocity Mode
Determines how the note velocity (loudness) of notes played by the arpeggiator is set. There are
several options:
Using Y our V150/V110
The Arpeggiator
Fixed All notes sound at the same volume set with the Fixed Value parameter.
Played Each note repeats at the velocity it was played on the keyboard.
Last All notes play at the velocity of the most-recently-played note.
Aftertouch The keyboard pressure Controller determines the velocity.
Ctrl 117 MIDI Controller 117 determines velocity. This Controller may be assigned to the
controller pedal or a front-panel slider (see page 3-13).
The default Velocity Mode is Played.
Fixed V alue
Determines the arpeggiated note velocity used when Velocity Mode is set to Fixed. The range is
1–127. The default Fixed Value is 100.
All of this may seem a little confusing, but if you spend some time with it you can get some very
musical results. Don’t be afraid to experiment!
3-9
Page 28
Using Y our V150/V110
KB3 Drawbar Organ Simulation
KB3 Drawbar Organ Simulation
The V150/V110 features a special simulation of the classic drawbar organ used in jazz, rock, and
gospel music. This simulation is referred to as KB3. Unlike other sounds in the instrument, the
KB3 sounds are not created with samples but instead with a complex series of digital signal
processing algorithms that accurately recreate the drawbar sound. The sound timbre is altered
with controllers known as drawbars, which refers back to the traditional electromechanical
organs.
Using KB3
To access the KB3 model, press the KB3 button on the front panel. The Main sound will be
replaced with a KB3 drawbar organ sound. In this mode, the four sliders are automatically
assigned to change drawbar values. Try them out! Note that unlike other values controlled by
the sliders, the drawbar sound will increase as you pull the sliders down and decrease as you
push them up. This simulates the traditional drawbar action.
To enable you to see the settings of all 9 drawbars, press the Right button next to the display. A
special drawbar edit page will be displayed, with graphical representation of the various
drawbars, along with their organ pipe-length designations. Note that the drawbar images move
as you slide the four sliders. You can also see the drawbar edit page by pressing and holding the
KB3 button.
Note: The KB3 organ sounds are unavailable when you’re in General MIDI mode.
Assigning Drawbar Controls
Since there are 9 drawbars in the organ model, but only 4 sliders on the V150/V110, it is
necessary to assign the sliders to particular drawbars. By default, the first four drawbars (16’,
5-2/3’, 8’ and 4’) are assigned to the sliders. Press the middle lower display button to shift to the
next four drawbars (2-2/3’, 2’, 1-3/5’, 1-1/3’), or the middle upper display button to shift to the
last four drawbars (2’, 1-3/5’, 1-1/3’, 1’). Press the left lower display button to return to the first
four drawbars.
You can assign specific drawbars to the sliders in the drawbar assignment editor. This is usually
determined by how you’re playing the organ in performance, and which timbre changes you’re
likely to make while playing.
When you’re on the drawbar edit page, press the Right button to enter the assignment menu.
The top line of the display shows the current assignments. Press the lower left button to choose
a slider to reassign; press the lower middle button to choose which drawbar that slider will
affect.
Note: If you choose one of the preset assignment configurations, you’ll lose some or even all of
the KB3 slider and drawbar assignments you’ve made. If you want to preserve custom slider
and drawbar assignments, you can save them in a Panel Memory (see page 3-17).
3-10
Page 29
Using Y our V150/V110
Reverb and Effects
Percussion, Chorus/Vibrato, and Rotary Speaker Effects
In the drawbar edit page, you can press the right-hand display buttons to turn on and off the
Percussion and Chorus/Vibrato features of the organ model. These features provide distinctive
variations to the organ sound.
Press the lower-right display button to turn the percussion effect on, and press it again to turn it
off. When Percussion is active, the six buttons just to the right of the sliders are reassigned to
vary the Percussion parameters listed below them. The three parameters are:
Percussion 2nd / 3rd Harmonic: varies the tone of the percussion sound
Percussion Normal / Soft: varies the volume of the percussion sound
Percussion Slow / Fast: varies the decay rate of the percussion sound
These buttons simulate the traditional rocker switches found on drawbar organs: either the left
or the right hand side is lit, indicating which way the virtual rocker switch is tilted. Turning off
the percussion effect will turn off all the lights in these buttons.
Note: While in KB3 mode, the buttons used by percussion don’t work for their primary
functions. For example, the Octave Shift button becomes the 3rd-Harmonic button for KB3
sounds.
Press the upper-right display button to turn the Chorus/Vibrato effect on, and press it again to
turn it off. When the Chorus/Vibrato is turned on, the name of the effect is listed in the display
field. The Up and Down buttons change the type of Chorus/Vibrato. The types available are V1,
V2, V3, C1, C2, and C3, corresponding to the sound of traditional drawbar organs.
Emulation of the rotary speaker often used with drawbar organs is done in the Effects section of
the V150/V110. The left pedal—usually assigned to the Soft function when playing a piano
sound—is assigned to switch the rotary sound from slow to fast.
Reverb and Effects
The V150/V110 utilizes state-of-the-art digital signal processing (DSP) to simulate a range of
sound ambiance, both natural and artificial. These DSP methods are referred to as reverb and
effects processing. Both the reverb and the effects have been carefully designed by Kurzweil to
enhance all of the sounds on the instrument, and you can simply enjoy them as is. However, if
you are using the V150/V110 to create songs, or to play with other instruments, you may wish to
alter the default settings.
What is Reverb?
Reverb is short for reverberation, which refers to the natural echoing effect of sound reflecting
off the walls of an enclosed space. These reflections blend together to produce a mix or “wash”
of sound that adds warmth and ambiance to music. The V150/V110 simulates a number of
different performance spaces, from small to large. These are grouped into general categories:
Room, Stage, Hall, and Space.
All the sounds in the V150/V110 use reverb as an enhancement. When you choose a sound
using the sound selection or Up/Down buttons, a reverb is chosen along with that sound. The
category of the reverb is shown in the Reverb lights directly above the Reverb button. You can
choose another type of reverb by pressing the Reverb button, which will cycle through the
3-11
Page 30

Using Y our V150/V110
Reverb and Effects
categories. After the last choice (Space), pressing the button again will turn the Reverb lights off,
indicating that no reverb is currently applied (this is referred to as a dry sound). Another press
selects a Room reverb.
What is an Effect?
The V150/V110 provides simulations of a number of popular electronic effects which are
commonly used in amplified music to add interest to sounds. These are often applied to electric
organ, guitar, and synthesizer sounds, and less frequently to acoustic instruments such as piano,
drums, or horns. The categories of effects are:
Chorus: a mixing effect simulating two identical instruments playing together
Rotary: a tremolo/vibrato effect simulating a rotating organ speaker
Echo: a repetition and fading of a sound
Special: other specialized electronic effects such as flanging
Effects are chosen the same way as reverb, by pressing the Effects button to change categories.
Many sounds have no effect associated with them, and no Effects light will be lit when choosing
such a sound. You can try out any of the effects by pressing the Effects button, and cycling
through the different types.
Both reverb and effects choices can be saved in a Panel Memory (see page 3-15 for details).
Reverb and Effects Activation in Zones
Both Reverb and Effect choices are determined by the sound chosen in the Main zone. This
means that the Reverb associated with sounds in the split or layer zones are not activated when
those sounds are chosen. Instead, the sounds from the other zones are routed through the reverb
associated with the Main sound. You can imagine this as all the group members of a combo
playing in the same room at one time.
Since an Effect is usually specific to a certain sound choice, it is handled differently. The Effect
associated with the Main sound is active, and the Effect associated with a Split or Layer sound is
not active. In addition, the other zones are not routed through the effects processing by default.
For example, if you choose an electric guitar sound in the Main zone which has an echo effect, a
bass playing in the Split zone will not have the echo applied to it. It is possible to reroute the
other zones through an effect using the menus described below.
Adjusting Reverb and Effect Levels
Both reverb and effects processing can be varied in intensity using the associated level knob.
Turn the Reverb Level knob clockwise to increase the mix level of the reverb simulation. You
can hear the increasing intensity of the reverb as the level increases, and the greater subtly
achieved when the knob is turned counter-clockwise. The Effect Level knob affects an active
effect simulation in a similar way.
Both level knobs are active in the zone which is selected for editing on the display. This allows
you to adjust the reverb levels for each zone separately if you wish. Reverb and effects levels can
be saved in a Panel Memory.
3-12
Page 31

Customizing Reverb and Effects
If you change the Main sound, the reverb and effect will switch to those assigned to that sound.
When you select a different category of reverb or effect using the Reverb or Effect button, you’ll
hear a typical effect of that type. There are many choices of reverbs and effects within each
category, which you can select with the following procedure.
First, press and hold the Reverb button. The display shows the category and name of the current
reverb. Use the Up/Down buttons to select a different reverb. The reverb category will change
as you scroll through the list.
Press Up and Down together to select the default reverb for whatever sound is currently the
Main sound. The display shows DEFAULT when you do this.
Press the Right button to view the current wet/dry mix levels. For each active zone, there’s a
routing/level value next to the label for that zone. If the routing/level value is
that that zone’s sound is not routed through the reverb processor at all. To activate the reverb for
a zone, press the corresponding display button, and the value of Off will change to a numerical
value indicating the amount of reverb—0% for none, 100% for full. Then use the Up/Down
buttons to change the value. Press the display button again to turn off the reverb routing.
The effects menu works in a similar way, and is activated by pressing and holding the Effects
button. All routing choices and mix levels—for both reverb and effects—can be saved in a Panel
Memory.
Using Y our V150/V110
Assigning Pedals and Controllers
Off, it means
Reverb and Effects for KB3 Sounds
KB3 sounds use special effects processing that simulates the vibrato/chorus and rotary speakers
of traditional drawbar organs. These simulations are complicated, and require quite a bit of
processing. Consequently, by default KB3 sounds bypass the reverb (which would require even
more processing). You’re not likely to notice this unless you layer or split another sound with the
KB3 sound. Those sounds won’t have any reverb either.
If you want to play a KB3 sound with Split or Layer sounds, but you want reverb for those
sounds, you’ll need to select a different effect for the KB3 sound. Use the Effects menu to select
an effect that isn’t the default KB3 rotary effect.
Assigning Pedals and Controllers
The V150/V110 offers four sliders, three switch pedals, and a variable controller pedal—all of
which can serve a variety of purposes. These controllers, as they are called in the world of MIDI,
send messages to the V150/V110 itself or to other instruments via a MIDI connection. The
assignment of messages to the controllers is programmable and can be set up to support a wide
variety of instrument setups and methods of playing. The following information can be used in
conjunction with the detailed MIDI specifications found on page B-6, and with the sound
controller lists in Appendix C.
Assigning Pedals
There are three switch pedals that correspond to the pedals of a grand piano. By default, these
emulate the standard pedals on a piano: Soft, Sostenuto, and Sustain (from left to right). We call
these pedals switch pedals because they control functions that can be turned on or off. In
addition, the V150/V110 comes with a variable control pedal that emulates the expression pedal
of an organ. This pedal sends a variable-value message, with the low value sent when the heel of
the pedal is down, and the high value when it is up. All of these pedals can be reassigned to
perform other functions specific to the V150/V110 or another MIDI instrument.
3-13
Page 32

Using Y our V150/V110
Assigning Pedals and Controllers
Pedal reassignment can be done in the Pedals menu. Press Preferences, and then press the
display button under the words CONTROL|PREFS, and then the display button under the words
PEDAL|SETUP. You can use the Right/Left buttons to view the current assignment of each
pedal. To change the assignment, use the Up/Down buttons to scroll through the possible
functions. The switch pedals can be assigned to perform these functions:
Soft The current sound on all four zones is reduced in volume while
Sostenuto A note held down at the time the pedal is pressed will be
Sustain All notes held down at the time the pedal is pressed, or played
Rhythm Start/Stop Performs the same function as the Metronome/Rhythm button
Controllers 9, 12, 13, 29 These Controllers do different things in different sounds. See
Arpeggiator On/Off Performs the same function as the Arpeggiator button on the
Arpeggiator Latch, Latch 2 These functions are specific to certain arpeggiator latching modes
the pedal is held down. For sounds using the Rotary Speaker
effect, this message causes the rotary emulation to speed up and
slow down.
sustained in sound until it is released. Notes played after the
pedal is pressed are unaffected.
afterwards, will be sustained until it is released.
on the front panel. This allows you to start and stop a drum track
without taking your hands off the keyboard.
Appendix C for specific information.
front panel. This allows you to activate or deactivate the
arpeggiator.
(see page 3-8).
The continuous controller pedal can be assigned to perform a much greater variety of functions.
By default it’s assigned to MIDI 11 (Expression). It can be assigned to any of a wide range of
MIDI channel Controllers (1–119) and Tempo. Many of the Controllers are displayed with a
name (like Expression) which corresponds to their usual meaning on MIDI instruments, but
most are simply called by their number. To change the Controller assignment, use the Up/Down
buttons to scroll through the full list.
Pedal assignments can be saved in a Panel Memory (see page 3-15 for details).
Assigning Sliders
The four sliders found on the V150/V110 front panel are more flexible than the pedals. These
sliders send MIDI messages which may have various meanings depending on the sound being
played. They are also very useful if you have other instruments connected to the V150/V110 via
MIDI, which you wish to control while sitting at the keyboard. Like the continuous controller
pedal, the sliders can be assigned to many MIDI Controllers (1–119) and Tempo.
See Chapter 4 for a more complete discussion of MIDI and how it works with this instrument.
Some MIDI Controllers are general, and apply to all instruments, and some are specific to a
given instrument. Appendix C will help you understand how the various Controller messages
work with the V150/V110’s sounds.
Slider reassignment can be done in the Sliders menu. Press Preferences, and then press the
display button under the words CONTROL|PREFS, and then the display button under the words
SLIDER|SETUP. You can use the Right/Left buttons to view the current assignment of each
slider.
3-14
Page 33

The default Controller assignments are:
Slider A: Controller 1 (Mod Wheel or Modulation)
Slider B: Controller 4 (Foot Controller)
Slider C: Controller 6 (Data MSB)
Slider D: Controller 13
Slider assignments can be saved in a Panel Memory, which is described below.
Pedal and Slider Zone Assignments
The Pedals and Sliders menus also allow you to define which sounds will be affected by a given
slider. The V150/V110 will send the Controller message on whichever zones are specified in this
menu. By default, all zones are active for each pedal and slider assignment, but depending on
how complex a sound you’ve built, you may wish to reassign the activity so it affects only a
certain zone. To do this, press the display button labeled
menu, and use the Up/Down buttons to scroll among the choices of individual zones.
Pedal and slider zone assignments can be saved in a Panel Memory (see page 3-15 for details).
Using Y our V150/V110
Panel Memories
Active|On in the Pedals or Sliders
Panel Memories
After you’ve set up the V150/V110 to play in the way you like, with certain sounds in the
various zones, or with certain rhythm or arpeggiator settings, you may wish to save the state of
the instrument for later use. Or perhaps you want to play a set of musical numbers in which
each uses a different configuration. The V150/V110 provides a way to do this easily, using what
is called a Panel Memory.
At any time when you have a setup that you like, press and hold one of the eight numbered
panel memory buttons located at the bottom of the sound selection area. The display will
indicate that you’ve saved the state. If there is already a memory stored in the location you’ve
selected, a prompt screen will be displayed giving the choice of overwriting the existing
memory or leaving it as is.
Once you’ve saved a Panel Memory, you can select it with the press of a single button. This
instantly reconfigures the V150/V110 to all of the Panel Memory’s settings. To select a Panel
Memory, press and release the corresponding Panel Memory button. The button lights up to
indicate the currently selected Panel Memory.
Panel memories are saved when the instrument is turned off, using the battery-backed memory.
See Appendix A for information about replacing the batteries.
3-15
Page 34

Using Y our V150/V110
Panel Memories
What’s in a Panel Memory?
The Panel Memory stores a number of items that determine the state of the instrument:
• Main Zone Sound, Volume, Channel
• Layer Zone Sound, Volume, Channel, and Active state
• Split Zone Sound, Volume, Channel, and Active state
• SplitLayer Zone Sound, Volume, Channel, and Active state
• General MIDI state
• Octave Shift On/Off and shift values
• Left Sustain On/Off
• Split Point
• KB3 drawbar assignments and settings
• KB3 percussion and chorus settings
• Reverb setting and zone routing and mix values
• Effect setting and zone routing and mix values
• Pedal assignments and controller pedal value
• Slider assignments and values
• Arpeggiator On/Off state
• Arpeggiator settings
• Rhythm On/Off state
• Rhythm Pattern, Volume, Sound choice, Reverb Level
• Tempo
• Transposition
Note that values are saved for the sliders and controller pedal. This means that you can set the
sliders to a desired position and then save the exact state in the Panel Memory. When the Panel
Memory is recalled, the value of the Controllers associated with the sliders and pedal will be
restored from the saved state, regardless of the current position of the sliders and pedal
themselves.
The Default Panel Memory
As you play your V150/V110, you may enjoy adding splits and layers for a combination sound.
But sometimes you want to get back to just a single sound. There’s a quick and easy way to do
this: press the first and second Panel Memory buttons at the same time. This selects the Stereo
Grand Piano sound, without any other sounds (this is the default Panel Memory).
Panel Memory Banks
If you have a large number of panel settings you’d like to save, don’t despair! The V150/V110
has eight memory slots called Panel Banks, each of which can store eight panel Memories. To
choose a Panel Bank, press the Panel Bank button. You will be prompted to press one of the
Panel Memory buttons, which will select the respective bank. Pressing any other button will
remove the prompt screen without changing the Panel Bank. Now any Panel Memory saved
will be in the bank you’ve selected, and Panel Memories restored will also be from that bank.
When the instrument is turned on, Panel Bank 1 is always active.
3-16
Page 35

To make it easier to keep track of Panel Banks you can give them names. Press and hold the
Panel Bank button to see the bank menu. Use the Up/Down buttons to select a bank. The bank’s
name appears in the display. Every Panel Memory button that lights up indicates a Panel
Memory that you’ve stored.
To rename a bank, press the middle display button underneath the bank’s name. The existing
name (or blank space, if the bank is unused) appears with a cursor under one of the characters.
Use the Right and Left buttons to move back and forth in the name, and the display button
labeled DELETE to remove characters.
Insert characters by pressing keys on the keyboard: white keys for letters, black keys for digits or
spaces. The lowest white key on the keyboard (A 0) corresponds to “A,” proceeding along the
white keys to “Z “at E 4. The next key (F 4) corresponds to “a” (lowercase “A”) and proceeds
to “z” at the high end of the keyboard. The digits are represented by the lowest black keys on the
keyboard, followed by punctuation marks and spaces. When you’ve chosen the name you like,
press the display button labeled
name unchanged.
Saving Panel Memories
You can save all of your panel memory banks on a computer disk using MIDI to send the data to
the computer. This is a good idea if you’ve set up elaborate or complex memories which would
take time to restore. The details of MIDI connections are specified in Chapter 4. You must also
have an appropriate computer-based sequencer running on the computer. Once this setup is in
place, press the display button underneath the words PANEL|MEM|SAVE in the panel bank
menu. The V150/V110 will display a screen prompting you to set up the MIDI connection and
sequencer. When everything is set up, press the display button labeled START|MIDI|SYSEX to
write the panel memory data to your computer via MIDI.
Using Y our V150/V110
Panel Memories
OK, or press the display button labeled CANCEL to leave the
Panel memory data saved in this manner are in the form of a Kurzweil-specific Sysex Data
Stream that can be loaded back into the V150/V110 using MIDI. Each panel memory is restored
to the position it was in (both number and bank) when it was saved. The details of how to do
this are dependent on the sequencer you have running on your computer, and are beyond the
scope of this manual. You should be aware, however, that loading panel memory data into the
V150/V110 may overwrite existing panel memories, so be careful to save any existing work on
the instrument before loading new data.
Pedal Stepping
If you are using the Panel Memory feature to assist in performance, you may wish to change the
setting while continuing to play. To make this “hands off” method possible, the V150/V110
supports Pedal Stepping of panel memories. In this mode of operation one of the pedals will
cause the selection of the next panel memory setting. The light associated with the new panel
memory will be lit to indicate which panel memory is active. When the last memory in a panel
bank is active and a step occurs, the next bank gets selected, and the first Panel Memory in the
new bank is selected.
You can enable pedal stepping from the panel bank menu. Press the display button labeled
Pedal|Step. Use the Up/Down buttons to choose a pedal to assign to panel memory stepping.
When pedal stepping is assigned to a pedal, any other assigned functions for that pedal are
ignored. When the instrument is powered up, pedal stepping is always inactive (assigned to
Off.)
3-17
Page 36

Using Y our V150/V110
Preferences
Preferences
There are quite a few user preferences that can be set on the V150/V110. Many of these have
already been discussed in previous chapters, along with the features they control. The
Preferences button gives you access to a set of menus that control these features as well as some
others that are general in nature.
Press the Preferences button to enter the preference menu system. The Left/Right buttons will
move among the various pages of menu choices. Pressing one of the display buttons will either
enter another set of menus, or activate a field which can then be edited with the Up/Down
buttons. Some menu pages which are entered using the display buttons have an up-arrow
character, which indicates that you can return to the previous menu from which you entered.
Press the associated display button to return to the previous menu. At any time, you can press
the Preferences button again to return to the main display.
The first page of menu choices is:
CONTROL|PREFS||||||||MIDI|PREFS|||||||||||||||RESET
Press Right to see the second page of menu choices:
Tuning |||||||Output|Mode
Press Right to see the third page of menu choices:
METRO/RHYTHM |||||OCTAVE|SHIFT|||||||||ARPEGGIATOR
Press Right to see the fourth page of menu choices:
REVERB|||||||||||||||||EFFECT
Press Right to see the last page, showing the instrument state and editing the Remember
Preferences feature.
3-18
Page 37

Control Preferences
Setting Keytouch
Choosing CONTROL|PREFS on the first menu page offers another menu of choices:
PEDAL|SETUP|||||SLIDER|SETUP|||||KEYTOUCH
We’ve already discussed pedal and slider setup on pages 3-13 and 3-14. The third option is
KEYTOUCH. Pressing the display button associated with this function displays a menu showing
the current velocity sensitivity of the instrument. There are seven levels ranging from Lightest
to Hardest. The names refer to the degree of force needed to produce a sound of a certain
volume and brightness when striking the keyboard. Lighter settings mean that a relatively light
touch is needed to make the instrument sound louder, while harder settings mean that a more
aggressive striking of the keys is necessary to achieve louder volumes.
Use the Up/Down buttons to adjust the sensitivity setting. You can try out the setting by playing
the keyboard while adjusting, until the touch you like best is reached. When the Keytouch menu
is on display, the right and middle pedals can be used to adjust the keytouch as well; this allows
you to play with both hands while adjusting the touch.
Using Y our V150/V110
Preferences
The keytouch setting is always remembered when the power is turned off, and is not saved as a
part of a Panel Memory. The default keytouch setting is Normal.
MIDI Preferences
The V150/V110 is compatible with the MIDI standard for digital musical instruments, and can
be customized to match your MIDI setup. Choosing MIDI|PREFS on the first menu page
displays a series of menu pages which allow you to program various MIDI parameters. See
page 4-5 for a description of the MIDI preferences.
Tuning
The V150/V110 is a digitally controlled instrument and will never go out of tune. However, you
may need to play with other instruments that are not in tune with the usual standard (A-440)
and thus wish to tune the V150/V110 up or down from that point. Press the display button
labeled Tuning, then use the Up/Down buttons to adjust the tuning. The unit of tuning is the
cent, which represents 1/100 of a half step. You can tune the V150/V110 up or down as much as
50 cents. The default tuning is 0 cents.
Press Up and Down together to return to standard tuning. The Tuning setting will be
remembered when the power is turned off if Remember Preferences is selected in the
Preferences menu.
You can also reach the tuning parameter by pressing and holding the display button labeled
Transpose. This allows you to adjust both transposition and tuning of the instrument in a
convenient fashion.
3-19
Page 38

Using Y our V150/V110
Preferences
Audio Output Mode
The V150/V110 produces sound in stereo, which is almost always desirable as it gives the
instrument a greater sense of depth and realism. If your instrument is connected to a PA system
with a single cable, however, it may be helpful to treat it as a monophonic sound source. Press
the display button labeled Output|Mode, then use the Up/Down buttons to choose between
Stereo and Mono (the default is Stereo). Output Mode setting will be remembered when the
power is turned off if Remember Preferences is selected in the Preferences menu.
Other Preferences
The third page of preferences controls the Metronome/Rhythm player (these preferences are
described beginning on page 3-4), Arpeggiator (described on page 3-5), and Octave Shift
(page 3-3). The fourth page contains preferences for Reverb and Effects (described on page 3-11).
Each of these menus is described in detail in the appropriate section. For your convenience,
these menus are also accessible with the Preferences button.
Remember Preferences
The last preferences menu page shows the state of the V150/V110, including version numbers of
the installed firmware and the amount of memory available. There is also an editable choice
called Remember Prefs which can be changed with the Up/Down buttons. Choosing Yes for
Remember Prefs will cause a number of user choices to be saved when the power is turned off,
using the battery-backed memory. Choosing No will cause the choices to be restored to the
factory default values when the instrument is powered on.
When the Remember Preferences feature is on, the following preferences are remembered even
when you turn off your V150/V110:
The most-recently-selected sound in each sound category
Transposition and tuning
Stereo/Mono output setting
Main, Layer, Split and SplitLayer sounds
Split point
Octave shift settings
Left sustain state
Metronome/Rhythm settings
Tempo
The keytouch setting and the tone controls (Bass, Midrange, and Treble) are always remembered,
even if the Remember Preferences feature is off. You can restore all preferences to their original
settings using the RESET menu, as described below.
3-20
Page 39

Resetting the instrument
Choosing RESET on the first menu page offers a menu of choices for resetting various
preferences that have been stored in the battery-backed memory of the V150/V110. The choices
for reset are:
CLR|PANELMEM Remove all stored Panel Memories, in all panel banks. The factory-
supplied Panel Memories are available in Bank 1.
CLR|PREFS Clear all preferences that are remembered with the Remember Prefs
setting. All default values are restored. Remember Prefs is set to No.
FACTORY|RESET Restore the instrument to its factory settings. No user-defined
preferences are preserved, including tuning, tone settings, and
keytouch.
Using Y our V150/V110
Preferences
3-21
Page 40

Page 41

Chapter 4
MIDI
Overview
MIDI, which stands for Musical Instrument Digital Interface, enables electronic musical
instruments to communicate in the numeric language of computers. You can connect your
V150/V110 to other MIDI instruments, or to a computer that has a MIDI interface (either a set
built-in MIDI connectors, called ports, or an external device with one or more MIDI ports and a
standard connection to the computer).
Connecting to other MIDI instruments enables you to control them from the V150/V110’s
keyboard—or to control the V150/V110 from their keyboards. Connecting to a personal
computer enables you to record the music you play into software that creates sequences, which
are computerized recordings of the music you’ve played.
A computer connection to your V150/V110 also enables you to update the internal software,
should a revision become available.
MIDI Information
MIDI isn’t exactly music—it’s a standardized language for representing musical data with
numbers. Information such as what notes you’re playing, how hard you’re playing them, and
whether they’re sustained—all gets translated as numbers and gets sent along a MIDI cable as a
series of electrical pulses that represent the numbers.
In practical terms, that means that you’ll think a little differently about the sounds you play
when you start using MIDI connections with other instruments. For example, suppose you’re
controlling a MIDI organ from your V150/V110. Playing a piano sound on the V150/V110
obviously can’t play a piano sound on an organ. Instead, you’ll hear whatever sound has the
same sound ID (also known as MIDI Program Change number) as the piano sound. If you’re
playing the Stereo Grand Piano sound (which has a sound ID of 0) on the V150/V110, you’ll
play whatever sound has ID 0 on the organ as well. This enables you to add even more layers of
sound to your music.
You can find the sound IDs for all of the V150/V110’s sounds, in Appendix C, in the tables that
list the sounds by banks.
MIDI Connections
On the bottom panel are three MIDI ports: In, Thru, and Out. You’ll connect MIDI cables
between one or more of these ports and similar ports on other MIDI instruments, including
MIDI-capable computers.
4-1
Page 42

MIDI
MIDI Connections
In Thru Out
Figure 4-1 MIDI ports
• In receives MIDI information from other MIDI instruments
• Thru sends whatever MIDI information is received at the In port out to other MIDI
instruments
• Out sends MIDI information generated by the V150/V110 to other MIDI instruments
The way you connect the cables determines how the instruments communicate. There are
several combinations, but there’s one simple rule: one end of the cable connects to an In port,
and the other end to either an Out port or a Thru port.
Basic Connection: Master/Slave
Many people connect a second instrument to their favorite keyboard—for example, you might
want to connect a Kurzweil PC2R or other sound module to your V150/V110 to increase the
number of sounds you can play. Connecting two instruments via MIDI enables you to play both
instruments together in what is known as a master/slave configuration, with the second
instrument (the slave) controlled from the keyboard of the first (the master). Figure 4-2 shows
the simplest MIDI connection, with the cable connecting the MIDI Out port of the master
keyboard with the MIDI In port of the slave (in this case a sound module).
MIDI In
PUSH
PWR
Performance
Zone 1 Zone 2 Zone 3 Zone 4
VOL
Main
Split Split LayerSolo
Layer
Rotary Fast / Slow Perc On / Off Volume Decay Pitch
Shift
ABCD
16'
5 1/3'2'8'
4'
2 2/3'
1 3/5'
1 1/3'
Chorus / Vib
Pre-AmpDrawbar Toggle 1' Chorus / Vib
On / Off
Depth
MIDI Out
Edit Modes
PC2R
Edit / Store Group / Menu Compare Copy
KB3
Internal Voices
Cancel Enter FX MIDI Receive Global
YesNo
MIDI Setups
Panic
Demo
4-2
Figure 4-2 Simple master/slave connection
The slave can be any MIDI instrument or device, including computers and effects processors. If
it’s a sound-generating instrument, you can plug its audio output into your sound system or
into the Audio In jacks on the V150/V110 bottom panel.
Page 43

Two-Way Connection
Another common type of connection enables either instrument to be master or slave. This is the
typical configuration used to connect an instrument to a computer for recording and playback.
Figure 4-3 shows a two-way connection between a MIDI instrument and a computer. The cables
connect the computer’s MIDI Out to the instrument’s MIDI In, and the instrument’s MIDI Out
to the computer’s MIDI In.
MIDI
MIDI Connections
MIDI In
MIDI Out
Figure 4-3 Two-way connection
MIDI Thru
If you have more than two MIDI instruments, you may want to connect them in a MIDI chain,
which enables you to control multiple slaves from a single master. A typical example of this is a
configuration with a computer controlling a first slave, which passes the MIDI information
through to a second slave—as shown in Figure 4-4. In this case, there’s a master/slave
connection between the first and second instruments, and a two-way connection between the
first instrument and the computer. This enables recording from the first instrument to the
computer, and playback on both instruments. During playback, the first instrument receives
MIDI information from the computer, and passes it via its Thru port to the second instrument.
MIDI Out
MIDI In
4-3
Page 44

MIDI
MIDI Connections
MIDI Out
MIDI In
MIDI Out
MIDI Thru
MIDI In
PWR
PUSH
Performance
Zone 1 Zone 2 Zone 3 Zone 4
VOL
Main
Rotary Fast / Slow Perc On / Off Volume Decay Pitch
Shift
ABCD
MIDI In
Layer
16'
5 1/3'2'8'
2 2/3'
Pre-AmpDrawbar Toggle 1' Chorus / Vib
Edit Modes
PC2R
Split Split LayerSolo
1 3/5'4'1 1/3'
Chorus / Vib
On / Off
Depth
Edit / Store Group / Menu Compare Copy
KB3
Internal Voices
Cancel Enter FX MIDI Receive Global
Panic
Demo
YesNo
MIDI Setups
Figure 4-4 MIDI Thru
If the second instrument also had a Thru port, you could chain a third instrument to the second.
We don’t recommend chains of more than three or four instruments—any longer and you may
have problems with delayed notes. If you have a large number of MIDI instruments, you may
want to use a multi-port MIDI interface connected to your computer, or a MIDI Thru box, which
provides multiple Out (technically Thru) ports from a single In port.
4-4
Page 45

Adjusting MIDI Preferences
If you’re using your V150/V110 with other MIDI instruments, you may want to adjust some of
the V150/V110’s MIDI settings. This includes things like which MIDI channels the V150/V110
uses, and how it responds to messages from other instruments.
To view and edit the MIDI preferences, press the Preferences button. The bottom line of the
display shows the available options:
CONTROL|PREFS||||||MIDI|PREFS||||||||RESET
Press the display button labeled MIDI|PREFS, and you’ll see the first preference: Main Channel.
Use the Left and Right buttons to move through the menu. Use the Up and Down buttons to
change the value of the currently visible preference.
When you’re in the MIDI Preferences menu, you’ll see a small arrow at the upper left or upper
right of the display. When you want to leave the MIDI Preferences menu, press the display
button above the arrow.
Zone Channels
The first four preferences determine which MIDI channel the V150/V110 uses for each part
(zone) of the keyboard. There’s a preference for each of the Main, Layer, Split, and SplitLayer
sounds. Usually you’ll want to keep each part on a different channel.
MIDI
Adjusting MIDI Preferences
Each part of the keyboard can be assigned to any of the 16 MIDI channels. By default, the Main
sound is on Channel 1, the Layer sound is on Channel 2, the Split sound is on Channel 3, and the
SplitLayer sound is on Channel 4.
Local Control
Local Control determines whether the V150/V110s keyboard controls its own internal sounds.
You can turn Local Control off, which causes the V150/V110’s keyboard to control only the
MIDI Out port (and hence other MIDI instruments). This can be useful if you’re using an
external sequencer to record your music.
For example, suppose you’re recording a track to an external sequencer using another MIDI
instrument that you’re controlling from the V150/V110 (on a different MIDI channel). If you
don’t want to record the V150/V110 itself, you can set Local Control to Off. In this case, the
V150/V110 won’t make any sound, and you’ll hear only the other instrument as you record.
By default, Local Control is set to On. Every time you turn on the V150/V110, Local Control
resets to On, even if it was disabled when you turned the V150/V110 off.
Ignore All Notes Off
The V150/V110 responds to MIDI All Notes Off messages. When the V150/V110 receives this
message, it stops all notes that are playing (on the MIDI channel where the All Notes Off
message occurred). The All Notes Off message is useful, because sometimes notes get “stuck”
while playing, and there’s no other quick way to silence them (stuck notes are rare; they may
occasionally occur if you have several MIDI instruments connected to each other).
4-5
Page 46

MIDI
MIDI Messages
External Sync
You can send an All Notes Off message and an All Controllers Off message to the V150/V110
and to all 16 MIDI channels by pressing the General MIDI and Demo buttons together. This
“Panic” feature is a quick way to silence every instrument in your MIDI system.
By default, the V150/V110 responds to All Notes Off messages. There’s one potential
disadvantage to this: some MIDI instruments and sequencers send an All Notes Off message
whenever there’s a pause in your playing and all the keys are up. If you’re controlling your
V150/V110 from one of these devices, you might find that the V150/V110’s notes sometimes
shut off abruptly when they shouldn’t. This is caused by the occasional All Notes Off message
sent by the instrument or sequencer (this is a non-standard use of the All Notes Off message, by
the way).
If you’re experiencing this problem, you can avoid this situation by making the V150/V110
ignore the All Notes Off message. Set the value of Ignore All Notes Off (in the Preferences menu)
to Ye s, and your notes won’t cut short.
This feature controls the synchronization of the V150/V110’s metronome and arpeggiator with
other MIDI instruments or sequencers (using MIDI clock signals). See page 4-11 for more about
synchronization.
If you want the metronome or arpeggiator to be driven by MIDI clock signals from an external
MIDI instrument, set the value of External Sync to On. Otherwise, leave it at its default value of
Off. In this case, the V150/V110 sends MIDI clock signals to its MIDI Out port whenever you’re
using the metronome or arpeggiator.
MIDI Channel Assignments
There are 16 more preferences, each corresponding to one of the MIDI channels. Each preference
indicates the sound assigned to that channel, as shown in the example below:
Channel||||||||||||||||||||||Sound||||||||
|||1|||||||||||||||||Stereo|Grand|Piano||||||||||0:0
Press the display button labeled Channel to indicate that you want to view or edit a different
MIDI channel. Use the Up and Down buttons to select a different MIDI channel.
Next, press the display button under the name of the sound assigned to that channel. This
indicates that you want to change the sound assigned to the current channel. Use the Up and
Down buttons to select a different sound. Notice that the name of the sound is followed by two
numbers separated by a colon. These numbers are the bank ID and the sound ID of the current
sound.
MIDI Messages
This section describes the many MIDI messages that the V150/V110 sends and receives. The
MIDI implementation chart on page B-6 gives more information.
Keep in mind that MIDI messages have an effect only on the channel on which they’re sent. A
message sent on Channel 1, for example, affects only the sounds on Channel 1.
The V150/V110 normally sends MIDI messages on one or more of five channels, corresponding
to the Main sound, the Layer sound, the Split sound, the SplitLayer sound, and the Metronome.
4-6
Page 47

Note On, Note Off
Note On messages control the start of each note you hear from the V150/V110. The message
contains information stating which MIDI channel the note is on, what note it is, and how hard
the key was struck (the attack velocity). When the V150/V110’s sound-producing components
receive this message (either from the V150/V110’s keyboard or from an external MIDI source),
the information gets translated into the note you hear. When you release a key, a similar Note
Off message is sent saying that a note has ended, on which channel, what note, and how fast the
key was released (the release velocity).
Aftertouch
Aftertouch is a Controller message that affects sounds that are already playing. Many V150/
V110 sounds respond to aftertouch in various ways (by changing timbre, for example).
To use aftertouch, play a note, then hold the key down and press on it. The V150/V110 uses
channel aftertouch, which means that pressing on just one key affects all the notes that are
playing on that MIDI channel.
Pitch Bender
Touching the Pitch Bend pad sends MIDI Pitch Bend messages that change the pitch of all the
notes that are currently playing.
MIDI
MIDI Messages
Program Change Messages
Whenever you select a sound, the V150/V110 sends a MIDI Program Change message. This
message is always preceded by a Bank Select message (described below). The V150/V110 also
can receive Program Change messages from external MIDI instruments. To change a sound on
the V150/V110 this way, you should send a Bank Select message, followed by a Program
Change message.
Control Change Messages
Control Change messages make up the largest category of MIDI messages. The V150/V110 can
send many different Control Change messages, making it easy for you to modify sounds—
whether you’re playing live or playing a prerecorded song (sequence).
Bank Select
By definition, MIDI offers exactly 128 values for the Program Change message. Since the V150/
V110 contains several hundred sounds, there aren’t enough Program Change values for you to
select all the sounds directly with MIDI Program Change messages. Consequently, there’s a
Bank Select message, which enables you to select several banks of 128 sounds (by sending a
Bank Select message followed by a Program Change message). The V150/V110 responds to
MIDI Controller 0 and Controller 32 messages as Bank Select messages (except when in General
MIDI mode).
To change banks, send MIDI Controller 32 message with a value corresponding to the bank you
want to select. See Appendix C to find the right combination of Bank Select and Program
Change messages to select the V150/V110’s sounds. These correspond to the bank number and
sound ID of the sounds in the various tables.
4-7
Page 48

MIDI
MIDI Messages
Mod Wheel (Modulation)
Volume
Pan
Expression
The V150/V110 recognizes Mod Wheel (MIDI Controller 1) messages, which affect different
sounds in different ways (by adding vibrato, for example). By default, Slider A sends Mod
Wheel messages to the V150/V110 for many sounds.
The V150/V110 recognizes MIDI Volume (Controller 7) messages. Moving the Sound Levels
sliders causes the V150/V110 to send Volume messages on each of the four MIDI channels
corresponding to the Main, Layer, Split, and SplitLayer zones.
The V150/V110 recognizes MIDI Pan (Controller 10) messages, which adjusts the location of the
sound within the stereo field (from left to right). A value of 0 is full left, 64 is centered, and 127 is
full right.
The V150/V110 sends and receives MIDI Expression (Controller 11) messages, which regulate
the volume of V150/V110 sounds. By default, this is controlled by the V150/V110’s Expression
pedal, which enables you to vary the volume from nothing up to the volume set by the MIDI
Volume level.
Sustain, Sostenuto, and Soft Pedals
These messages are named for the corresponding pedals on many acoustic pianos: Sustain
allows all notes to continue sounding until they fade out or the Sustain message ends; Sostenuto
is similar, but affects only the notes whose keys were held down when the Sostenuto message
began; Soft reduces the volume of all notes until the message ends.
By default, the V150/V110’s right foot pedal sends Sustain (MIDI Controller 64), the center
pedal sends Sostenuto (MIDI Controller 66), and the left pedal sends Soft (MIDI Controller 67).
Reverb and Effects
Adjusting the wet/dry mix of the Reverb with the Reverb Level knob sends a Controller 91
message to the V150/V110 (and to the MIDI Out port). The value of the message depends on the
percentage of the wet/dry mix: 0 for a fully dry signal (0% wet, no reverb); 127 for full effect
(100% wet).
Adjusting the wet/dry mix of the Effects with the Effects Level knob works the same way, using
Controller 93.
The V150/V110 also recognizes Controllers 91 and 93 if received from an external MIDI source
Controller 94 controls the effects routing. The values of this message select effects routing as
follows:
0–31 No Reverb or Effects
32–63 Effects on, reverb off
64–95 Reverb on, Effects off
96–127 Reverb and Effects on
4-8
Page 49

Other Controllers
There are several other MIDI messages that affect different the V150/V110 in different ways.
They are Controller 2 (Breath), Controller 4 (Foot), Controller 6 (Data), Controller 9,
Controller 12, Controller 13, and Controller 29. See Appendix C, for information about
Controller messages and their effects on V150/V110 sounds.
System Exclusive Messages
MIDI messages like Note On and Control Change affect the musical portion of a performance or
song. There’s another type of message, called System Exclusive (SysEx), that you can use
“behind the scenes” to control other V150/V110 features that aren’t directly part of the music—
for example, putting the V150/V110 in General MIDI mode, as described below.
All messages are shown in hexadecimal (base-16) notation, which is standard for SysEx
messages. Each two-character string represents a byte, or eight bits, of information.
Turning General MIDI On
The V150/V110 recognizes the General MIDI On message. To turn General MIDI on, send the
following six-byte message to the V150/V110’s MIDI In port, or include it in a song (typically
using an editor on your computer).
MIDI
System Exclusive Messages
F0 7E 00 09 01 F7
The third byte (00) is the device ID of the receiving instrument—in this case 00, which is the
device ID of the V150/V110. (To address other instruments, use a different value for the third
byte. It can be anything from 00 to 7F. A value of 7F means “Broadcast,” or send to all.)
Turning General MIDI Off
The V150/V110 recognizes the General MIDI Off message. To turn General MIDI off, send the
following six-byte message to the V150/V110’s MIDI In port, or include it in a song (typically
using an editor on your computer).
F0 7E 00 09 02 F7
The third byte (00) is the device ID of the receiving instrument—in this case 00, which is the
device ID of the V150/V110. (To address other instruments, use a different value for the third
byte. It can be anything from 00 to 7F. A value of 7F means “Broadcast,” or send to all.)
Device Inquiry
The V150/V110 recognizes the Device Inquiry message. If you’re not sure that your V150/V110
is receiving SysEx messages, use the Device Inquiry message to check (typically sent from a
computer connected to the V150/V110’s MIDI In port). If the V150/V110 receives the message, it
sends back a response.
4-9
Page 50

MIDI
Other System Messages
This is the Device Inquiry message:
F0 7E 00 06 01 F7
Any device that receives this message will respond. This is the V150/V110’s response message:
F0 7E 00 06 02 07 31 00 0B xx nn nn nn nn F7
The byte represented by xx distinguishes between the models in the V series. It will be 01 for the
V150 and 02 for the V110. The bytes represented by nn indicate the operating system version, as
shown in the following table:
F0 Beginning of SysEx message (SOX)
7E Universal non-real-time SysEx ID
00 Device ID of the receiving instrument (00 for V150/V110); can be from 00 to 7F
06 Sub ID 1 (general information)
02 Sub ID 2 (Device ID message)
07 Manufacturer ID (07 is Kurzweil)
31 00 Device family code (14 bits, LSB first)
0B xx Device family member code (14 bits, LSB first; xx = 01 for the V150, 02 for the V110)
nn nn nn nn Software revision: tens, ones, tenths, hundredths (00 01 00 00 = version 1.00)
F7 End of SysEx message (EOX)
Byte Description
Other System Messages
The V150/V110 also recognizes certain System Common, System Real Time, and Auxiliary
messages, as described below.
Local Control On/Off
Local Control determines whether the V150/V110’s keyboard controls its own internal sounds.
You can turn Local Control on and off by sending the V150/V110 a Local Control message from
an external MIDI source. See page 4-5 for more about the use of Local Control.
All Notes Off
The V150/V110 sends and responds to MIDI All Notes Off messages. When the V150/V110
receives this message, it stops all notes that are playing (on the MIDI channel where the All
Notes Off message occurred). See page 4-5 for more about the All Notes Off message.
Pressing the General MIDI and Demo buttons together stops all the V150/V110’s notes and
zeros its controllers; it also sends All Notes Off and All Controllers Off messages on all 16 MIDI
channels.
4-10
Page 51

MIDI Clock Messages
The V150/V110 can send or receive MIDI clock signals. These messages enable you to
synchronize recording or playback with other MIDI instruments (or a computer sequencer). The
External Sync parameter in the MIDI preferences menu determines how the V150/V110 handles
MIDI clock signals. See page 4-6 for details.
You can set the V150/V110 to either send these signals when you use the arpeggiator or
metronome, or to receive these signals from external MIDI instruments. When External Sync is
set to Off, the V150/V110 sends sync messages whenever you use the arpeggiator or
metronome. This makes the V150/V110 the “master” instrument. When External Sync is set to
On, the V150/V110 is a “slave”; the arpeggiator and metronome don’t do anything until they
receive sync signals from another MIDI instrument that’s acting as the master.
Note: When External Sync is off, the Metronome and Arpeggiator send MIDI clock signals, but
not Start, Stop, or Continue messages. Similarly, when External Sync is on, the Metronome and
Arpeggiator receive MIDI clock signals, but not Start, Stop, or Continue messages.
About External Sequencers
If you plan to use your V150/V110 with an external MIDI sequencer, this section will help you
work more effectively.
MIDI
About External Sequencers
Basic Recording
Generally you’ll want to record each part of a performance on a different MIDI channel. Some
sequencers “rechannelize” incoming MIDI information, so that every new track automatically
gets recorded on a different MIDI channel, regardless of the channel you were using when you
recorded the track.
If your sequencer doesn’t rechannelize, and you want each sound on a different MIDI channel,
change the Main Sound Channel (see Zone Channels on page 4-5) before you record each track.
Soft Thru
Depending on the sequencer you’re using, you may want to use its “soft thru” feature. This
enables you to create a MIDI “loop” that connects your sequencer’s MIDI Out port to the V150/
V110’s MIDI In port, and the V150/V110’s MIDI Out port to the sequencer’s MIDI In port. If
your sequencer’s soft thru feature is enabled, then while you’re recording, the V150/V110’s
notes get recorded into the sequencer, go through the sequencer and back to the V150/V110. It’s
like inserting the sequencer between the V150/V110’s keyboard and its sound components.
If you use your sequencer’s soft thru feature, you should set the V150/V110’s Local Control to
Off, to prevent notes from getting played twice while you’re recording.
Arpeggiator and External Sync
When you’re recording arpeggiated notes into a sequencer, you’ll need to make sure that the
sequencer receives the MIDI clock signals from the V150/V110. Therefore you should set the
V150/V110’s External Sync to Off, and the corresponding feature on the sequencer to On. (You
could also do it the other way around, with the V150/V110’s External Sync to On, and the
corresponding feature on the sequencer to Off. It doesn’t matter, as long as one is on and one is
off.
4-11
Page 52

MIDI
About External Sequencers
Multi Recording
Some sequencers offer a “multi record” feature, enabling you to record more than one MIDI
channel at a time (normally, each track represents an individual sound on an individual MIDI
channel, but multi record sequencers can simultaneously record from several MIDI channels at
once).
If your sequencer can multi record, then you can play layers and splits on the V150/V110, and
record all of the sounds at once (remember that each part of a layer or split uses a different MIDI
channel, so if your sequencer doesn’t multi record, you’ll be able to record only one part of a
layer or split at a time).
Keep in mind, however, that some sequencers multi record to multiple tracks simultaneously,
and some record all MIDI channels to a single track. Either way works, but if you record
multiple channels to a single track, it will be more difficult to edit that track using your
sequencer software.
If your sequencer multi records to a single track, and you don’t want to have multiple channels
recorded on your tracks, you can record layers and splits one part at a time using the basic
recording method. Set your sequencer to record a single track, then turn off all but the Main
sound, using the Split, Layer, and SplitLayer buttons. Record the first track. Then create a new
track on the sequencer. Select a new sound, then select a new Main Sound channel. Record
another track. Repeat this process until you’ve recorded all the parts of the layer or split.
Recording Program Change Messages
You can record Program Change messages as part of a sequence track. Recording Program
Change messages at the beginning of each track ensures that the sequence always uses the
correct sound.
The easiest way to get Program Change messages into your recording is to leave an unrecorded
measure or two at the beginning of the sequence. During this “countoff” period, select the sound
that you want to use for the track you’re recording. The Program Change message gets recorded
as an event in the countoff period.
Most sequencers enable you to insert Program Change messages manually, so you can probably
make changes in the sequence after recording as well.
4-12
Page 53

Appendix A
Maintenance and Upgrades
Replacing the Battery
When you turn off your V150/V110, changes that you’ve made to the settings are preserved by
three standard AA alkaline batteries that provide backup power to the V150/V110’s memory.
When it is time to replace your battery, the V150/V110 will display
Battery|voltage|is|low for a few seconds when you turn it on. If this happens, you
should replace the batteries as soon as possible (within a week). If the batteries fail, you’ll lose
your custom settings.
Changing the batteries is easy; you need three fresh AA alkaline batteries and a small Phillips
screwdriver. The first time you change batteries, you may also need a knife, scissors, or wire
cutters, since the original batteries may have been taped or tied to the battery holder for
protection during shipping.
Maintenance and Upgrades
Replacing the Battery
Caution: Make sure that you have fresh batteries to install before you start the installation. Once
you remove the old batteries, the memory lasts for only about 30 seconds. You’ll lose your Panel
Memories and other custom settings if you don’t get the fresh batteries installed quickly
enough.
1. Turn off the V150/V110 and disconnect the power cable.
2. Remove the screw that attaches the battery plate to the V150/V110’s rear panel. Keep the
screw handy for reinstallation.
3. Tilt back the top of the battery plate, then lift it a few inches away from the V150/V110.
The plate is connected by a short cable, so be careful not to pull too hard.
4. When you have the fresh batteries ready to insert, remove the old batteries. The old
batteries might be fastened into the holder with tape or a plastic tie; you’ll need to remove
these.
5. Within 30 seconds, insert the new batteries. Be sure to match the positive (+) and
negative (–) ends of the batteries with the markings on the battery holder.
6. Reattach the battery plate, making sure that the lip on the bottom of the plate goes inside
the V150/V110’s rear panel. Reinstall and tighten the screw.
Powering up
When you have finished, plug in the V150/V110 and turn the power on. You should see the
usual start up messages. If the Battery|voltage|is|low message still appears, review the
battery replacement steps to see if you missed something. If you have problems, call your
Kurzweil dealer or service center.
A-1
Page 54

Maintenance and Upgrades
Boot Block
Boot Block
Although the V150/V110 comes from the factory with an operating system (OS, also called
engine software) and factory sounds already installed, you may decide to upgrade the software
at a later time to add more features or sounds. The V150/V110 boot block lets you install new
software and factory sounds into Flash ROM. The boot block also provides hard reset and
diagnostic options.
Execution of any function in the boot block may cause or require a hard reset causing erasure of
the Panel Memories that you have created. To save them, back them up using a MIDI Sysex
dump as described in the section called Saving Panel Memories on page 3-17.
Starting the Boot Block
When you power up the V150/V110, it displays Waiting|for|scanner, then displays
Please|wait after a couple of seconds. When you see Please|wait, press and release the
Demo button.
After the boot block message banner and version number are displayed, the first of several
menu items appears on the screen. Pressing the Left/Right buttons selects different menu items.
Pressing the display button labeled Enter executes the selected menu item.
About Software Upgrades
You can get software upgrades for your V150/V110 from Kurzweil’s FTP website
(www.kurzweilmusicsystems.com/downloads.html) or from your Kurzweil dealer. A computer
(Mac or PC) with a MIDI interface and sequencer is necessary for transferring the software to
your V150/V110 using MIDI Sysex. A list of compatible software sequencers will accompany
your software upgrade kit. If you don’t have a computer, your V150/V110 can be upgraded by a
Kurzweil Service Center.
The software upgrades are encoded as one or more standard MIDI files. Filenames are in the
format V10XNNN.MID, where X is the block being updated (b for boot block, k for operating
system, s for sounds, and g for General MIDI sounds), and NNN is the version number (N.NN,
so 100 would be 1.00). Don’t attempt to install files with names that don’t conform to this format;
it won’t work.
Setting Up For a Software Upgrade
1. Connect a MIDI cable from the MIDI Out of the computer’s MIDI port or interface to the
MIDI In of the V150/V110.
2. Launch the sequencer application.
3. Open the first .MID file using the sequencer program.
4. Start the boot block on the V150/V110 using the directions above.
Installing an Operating System or Sounds
This procedure is for installing operating system software. See Installing a New Boot Block on
page A-3 if you want to install a new boot block.
A-2
Page 55

Maintenance and Upgrades
Boot Block
Caution: Installing an operating system or sounds involves doing a hard reset, which erases the
V150/V110’s user-defined memory (like your Panel Memories). If you want to save these, you
should do so before you begin to install the operating system or sounds. See page 3-17.
1. Select Install|engine by pressing the display button labeled Enter.
2. Select via|MIDI by pressing the display button labeled Enter.
3. Start playing the MIDI file from the sequencer. While loading, the bottom line of the
V150/V110’s display will show a message segment|X|of|Y where X starts at 1 and
counts up to the total number of segments, which is represented by Y. If the display
continues to show waiting|for|MIDI after starting the sequencer, stop and restart the
sequence.
4. Depending on the size of the file, it may take several minutes to load, at which point the
bottom line of the display will show
that file from the sequencer and start playing it.
5. After you have completed loading all of the MIDI files (except a boot block file), press the
display button labeled Cancel twice to get back to the main boot block menu, use the
Right or Left buttons to scroll to the HARD|RESET menu item, and select it by pressing the
display button labeled Enter. Press the display button labeled Yes; the V150/V110 will
restart with the new operating system.
done. Then, if you have another file to load, open
Installing a New Boot Block
If the file you are loading is a boot block file with the letter b as the fourth letter in the filename,
follow instructions in Setting Up For a Software Upgrade on page A-2, then continue:
1. Scroll to Update|boot|block and select by pressing the display button labeled Enter.
2. Select via|MIDI by pressing the display button labeled Enter.
3. Start playing the MIDI file from the sequencer. While loading, the bottom line of the
V150/V110’s display will show a message segment|1|of|1. If the display continues to
show waiting|for|MIDI after starting the sequencer, stop and restart the sequence.
4. After about a minute, the V150/V110 will reset and start running normally.
Resetting the V150/V110
If you select HARD|RESET by scrolling and pressing the display button labeled Enter, the
display will ask Erase|RAM|objects? which gives you an important opportunity to think
about what you are doing. This resets all of the V150/V110’s memory back to the initial factory
state. This is necessary if you are upgrading the software. If you’re not concerned about losing
all of your Panel Memories, or if you’ve saved them using a MIDI Sysex dump (see Saving Panel
Memories on page 3-17), then press the display button labeled Yes. The V150/V110 will execute
a hard reset and start running normally.
Running the Diagnostics
The Run|diags option executes the V150/V110’s internal diagnostic tests. Some diagnostic
tests will erase the V150/V110’s memory, which will cause a hard reset when the V150/V110 is
powered on again. Turn your V150/V110 off then on again to leave Diagnostics mode and
return to normal operation.
A-3
Page 56

Page 57

Appendix B
General Reference
This appendix contains the following information:
• Specifications. . . . . . . . . . . . . . . . . . . . . . . . . . . . . . . . . . . . . . . . . B-1
• MIDI Controllers . . . . . . . . . . . . . . . . . . . . . . . . . . . . . . . . . . . . .B-4
• KB3 Controllers. . . . . . . . . . . . . . . . . . . . . . . . . . . . . . . . . . . . . . . B-5
• MIDI Implementation Chart. . . . . . . . . . . . . . . . . . . . . . . . . . . .B-6
Specifications
Specifications are subject to change without notice.
Physical Specifications
V150
V110
Height 39.75 in 101.0 cm
Width 58.25 in 148.0 cm
Depth 59.00 in 150.0 cm
Weight 512.0 lb 233.0 kg
Height 34.8 in 88.5 cm
Width 56.7 in 144.0 cm
Depth 43.7 in 111.0 cm
Weight 233.7 lb 106.0 kg
B-1
Page 58

General Reference
Specifications
Electrical Specifications
Voltage and Frequency Ranges
Safe voltage range 100–125 Volts RMS 200–250 Volts RMS
Safe frequency range 48–65 Hz 48–65 Hz
Current Consumption (V150)
Voltage Level Idle Nominal Max
100–125 volts RMS 0.5 A 0.65 A 1.6 A
200–250 volts RMS 0.3 A 0.4 A 0.8 A
Current Consumption (V110)
120 VA C 230 VAC
Voltage Level Idle Nominal Max
100–125 volts RMS 0.5 A 0.6 A 1.5 A
200–250 volts RMS 0.35 A 0.45 A 0.8 A
Environmental Specifications
Minimum Maximum
Operating temperature 40 F 5 C 104 F 40 C
Storage temperature -13 F -25 C 185 F 85 C
Operating humidity 5% 95% (non-condensing)
Storage humidity 5% 95% (non-condensing)
B-2
Page 59

Audio Specifications
V150
200-Watt 4-way Amplification
7 Speakers
Audio Outputs
Audio Inputs
Headphone Outputs
General Reference
Specifications
Woofer: 1 x 80 Watts
Midrange: 2 x 20 Watts for down-facing speakers, 2 x 20 Watts for up-facing speakers
Tweeters: 2 x 20 Watts
Woofer: 1 x 12 in (30 cm), in ported enclosure
Midrange: 2 x 6.5 in (16.5 cm) facing down; 2 x 5 in (12.5 cm) facing up
Tweeters: 2 x 1 in (2.5 cm) dome tweeters
0.7 volts RMS for ff piano music with Volume slider at maximum and EQ sliders centered.
Maximum output level is 2v peak-to-peak. Output impedance is 500 ohms. Using these
outputs does not affect the volume of the speakers.
0.5 volts RMS produces a level equivalent to ff piano music Input impedance is 5K ohms.
Volume and EQ sliders do not affect the signal delivered through these inputs
Source impedance is 47 ohms; recommended headphone impedance is 50 ohms or greater.
Level is 0.5 volts RMS = 2.5 mW at 100 ohms for ff piano music with Volume slider at
maximum and EQ sliders centered; 5.7 volts RMS = 325 mW absolute maximum. Plugging
headphones into either jack switches off the speakers.
V110
130-Watt Biamplification
4 Speakers
Audio Outputs
Audio Inputs
Headphone Outputs
Warning: This instrument is capable of producing sound pressure levels in excess of 95dB,
which may cause permanent hearing damage. Please exercise caution when playing through the
internal speakers and especially when using headphones. Always start with the Volume slider
at the minimum position.
Woofer: 2 x 50 Watts
Tweeters: 2 x 15 Watts
Woofers: 2 x 6.5 in (16.5 cm), in ported enclosure
Tweeters: 2 x 1 in (2.5 cm) dome-type tweeters
0.7 volts RMS for ff piano music with Volume slider at maximum and EQ sliders centered.
Maximum output level is 2v peak-to-peak. Output impedance is 500 ohms. Using these
outputs does not affect the volume of the speakers.
0.5 volts RMS produces a level equivalent to ff piano music Input impedance is 5K ohms.
Volume and EQ sliders do not affect the signal delivered through these inputs
Source impedance is 47 ohms; recommended headphone impedance is 50 ohms or greater.
Level is 0.5 volts RMS = 2.5 mW at 100 ohms for ff piano music with Volume slider at
maximum and EQ sliders centered; 5.7 volts RMS = 325 mW absolute maximum. Plugging
headphones into either jack switches off the speakers.
B-3
Page 60

General Reference
MIDI Controllers
MIDI Controllers
0 Bank MSB 32 Bank LSB 64 Sustain 96 DataInc
1 Mod Wheel 33 Mod Wheel LSB 65 Port Switch 97 DataDec
2 Breath 34 66 Sostenuto 98 NRg LSB
3 35 67 Soft 99 NRg MSB
4 Foot Control 36 68 Legato 100 Rg LSB
5 Port Time 37 Port Time LSB 69 Hold2 101 Rg MSB
6 Data 38 Data LSB 70 SndCtl1 102
7 Volume 39 Volume LSB 71 SndCtl2 103
8 Balance 40 Balance LSB 72 SndCtl3 104
9 41 73 SndCtl4 105
10 Pan 42 Pan LSB 74 SndCtl5 106
11 Expression 43 Expression LSB 75 SndCtl6 107
12 EfxCt 1 44 76 SndCtl7 108
13 EfxCt 2 45 77 SndCtl8 109
14 46 78 SndCtl9 110
15 AuxBnd2 47 79 SndCt10 111
16 Gen 1 48 80 Gen 5 112
17 Gen 2 49 81 Gen 6 113
18 Gen 3 50 82 Gen 7 114
19 Gen 4 51 83 Gen 8 115
20 52 84 PortCtl 116 ArpOn
21 AuxBnd1 MSB 53 AuxBnd1 LSB 85 117 ArpVel
22 54 86 118 Latch2
23 55 87 119 Latch1
24 56 88 120
25 57 89 121
26 58 90 122
27 59 91 FXBWet (Reverb) 123
28 60 92 124
29 61 93 FXAWet (Effects) 125
30 62 94 FXRoute 126
31 63 95 Ef5 Depth 127
B-4
Page 61

KB3 Controllers
There’s a subset of the MIDI Controller numbers dedicated to controlling KB3 features. The first
column in the following table lists the KB3 features that send (and respond to) MIDI Controller
messages. The second column lists the Controller numbers corresponding to those features.
If you’re controlling another MIDI instrument from your V150/V110, using the features in the
first column (while you’re playing a KB3 sound) sends the corresponding MIDI message from
the second column.
If you’re controlling your V150/V110 from an external MIDI source, you can use the MIDI
controller numbers in either the second or third column to control the corresponding KB3
feature in the first column. For example, to control Drawbar 1, you can send either MIDI 6 or
MIDI 12. (The Controller numbers in the third column are the ones used by the Voce™ MIDI
Drawbar Controller, a common drawbar control device.)
General Reference
KB3 Controllers
KB3 Control Feature
MIDI Controller Number
V150/V110 Voce
Drawbar1 6 12
Drawbar2 22 13
Drawbar3 23 14
Drawbar4 24 15
Drawbar5 25 16
Drawbar6 26 17
Drawbar7 27 18
Drawbar8 28 19
Drawbar9 1 20
Expression Pedal 4 8
Percussion On/Off 73 N.A.
Percussion High/Low 72 72
Percussion Loud/Soft 71 71
Percussion Fast/Slow 70 70
Rotating Speaker Slow/Fast 68 68
Vibrato/Chorus On/Off 95 95
Vibrato/Chorus Selector 93 93
Key Click Level 89 89
Leakage Level 90 90
B-5
Page 62

General Reference
MIDI Implementation Chart
MIDI Implementation Chart
Model: Kurzweil V150/V110
Manufacturer: Date: 08/01/01
Young Chang Version 1.0
Digital Pianos
Function Transmitted Recognized Remarks
Basic Channel
Mode
Note Number
Velocity
After T ouch
Pitch Bender O O
Control Change**
Program Change
System Exclusive O O* GM 1 On/Off
System Common
System Real Time
Aux Messages
Notes
Mode 1: Omni On, Poly Mode 2: Omni On, Mono O = yes
Mode 3: Omni Off, Poly Mode 4: Omni Off, Mono X =no
Default 1 1
Changed 1 - 16 1 - 16
Default Multi* Multi* memorized
Messages X Modes 1 & 3 memorized
Altered X
0–127 0–127 key range
True Voice 1–128 1–128 C 0–C 8
Note ON O O
Note OFF O O
Keys X X
Channels O O
0, 32
1
4
6
7
10
11
64
66
67
91
93
94
96
97
98, 99
100, 101
116
117
118
119
120
121
O 0–127 O 0–127
True # 0–127 0–127
Song Pos. X X
Song Sel. X X
Tune X X
Clock O O
Messages X X
Local Control O O
All Notes Off O O
Active Sense X X
Reset X X
*Manufacturer’s ID = 07
Device ID: default = 0;
O
O
O
O
O
O
O
O
O
O
O
O
O
O
O
O
O
O
O
O
O
O
O
*Use Multi to assign different sounds to each MIDI channel
**The V150/V110 can send any control change
O
bank select
O
mod wheel
O
foot controller
O
data entry
O
volume
O
pan
O
expression
O
sustain pedal
O
sostenuto pedal
O
soft pedal
O
FXB wet dry
O
FXA wet dry
O
FX route
O
data increment
O
data decrement
O
non-registered param num
O
registered param num
O
arpeggiator on/off
O
arpeggiator velocity ctl
O
arpeggiator latch 2
O
arpeggiator latch 1
O
all sound off
O
reset all controllers
B-6
Page 63

Appendix C
Sound and Controller Information
This appendix contains the following information:
• V150/V110 Sounds (Organized by Sound Category) . . . . . . .C-2
• V150/V110 Sounds (Organized by Sound ID) . . . . . . . . . . . . .C-5
• Default Physical Controller Assignments. . . . . . . . . . . . . . . . .C-9
• Controller Assignments for Sounds in Bank 0. . . . . . . . . . . .C-10
• Controller Assignments for Sounds in Bank 6. . . . . . . . . . . .C-20
• Controller Assignments for Sounds in Bank 2. . . . . . . . . . . .C-30
• Controller Assignments for Sounds in Bank 7. . . . . . . . . . . .C-32
C-1
Page 64

Sound and Controller Information
V150/V110 Sounds (Organized by Sound Category)
V150/V110 Sounds (Organized by Sound Category)
PIANO 1
(Piano)
Stereo Grand Piano
Classic Grand
Dynamic Grand
Warm Grand Piano
Solo Grand Piano
Concert Grand
Mono Grand Piano
Combo Piano
Sweet Ivories
Nice Touch Grand
Piano Solitude
Piano Recital
Full Bloom Piano
Pianetta
Suite Piano
Dreamy Piano
Grand Piano
Bright Grand
Electric Grand
Honky Tonk Piano
Elec Piano 1
Elec Piano 2
GM Harpsichord
Clavinet
PIANO 2
(Chromatic)
Hard Rock Piano
Rock Grand Piano
Ensemble Piano
Mono Stage Piano
Dyn Stage Piano
Ragtime Piano
Tack Piano
Piano & Strings
Basement Upright
Chorused Piano
Way Back Piano
Dance Piano
Cloud Ride Piano
Organic Piano
Piano & Wash
Piano & Vox Pad
GM Celesta
Glockenspiel
Music Box
Vibraphone
Marimba
Xylophone
Tubular Bells
Dulcimer
E PIANO 1
(Organ)
Classic Elec Piano
Serious Classic EP
70's Elec Piano
Hard Elec Piano
Lounge Elec Piano
DynoMy Elec Piano
Soft Elec Piano
Hybrid Elec Piano
Mellow Elec Piano
Tines Square
Chorused Wurly
Classy Roadz
OD Elec Piano
Clean & Soft
Ballad Keys
Lotus Keys
Drawbar Organ
Percussion Organ
Rock Organ
Church Organ
Reed Organ
GM Accordion
Harmonica
Bandoneon
E PIANO 2
(Guitar)
My Old Wurly
Big Red Wurly
Super T's Wurly
Soft Wurly
Wurly Road
Pearly Keys
Digital Elec Piano
Ballad Elec Piano
Soft Ballad EP
70's FM Tines
90's FM Ballad
Chorus Rock Piano
Bright Pianotone
Family Portrait
Harpsi-Piano
Fantasy Keys
Nylon Guitar
Steel String Gtr
Jazz Guitar
Clean Elec Guitar
Muted Guitar
Overdrive Guitar
Distortion Guitar
Guitar Harmonics
POP KEYS
(Bass)
Electro Grand
Digital Elec Grand
Rock Elec Grand
Elite Elec Piano
Dulcimer Grand
Celestial Keys
Comp Time
Buzzy Synth
Janet's Comp
Mild Sheen
Scrape Glass
Air Society
Sharp Air Attack
Dronin'
Alien Salt Mine
Imperfect Storm
Acoustic Bass
Finger Bass
Picked Bass
Fretless Bass
Slap Bass 1
Slap Bass 2
Synth Bass 1
Synth Bass 2
CLAVIER
(Strings)
Clavinet Classic
Touch Clavinet
Dual Wah Clavinet
Real Harpsichord
Modern Harpsichord
Crystal Clavichord
Accordion
Celesta
Modern Clavier
Belly Celeste
Harpsichordion
Circus Keys
Cosmic Calliope
Calliope Keys
Chiff Attack
Spaced Harmonix
Violin
Viola
Cello
Contrabass
Tremolo Strings
Pizzicato Strings
Harp
Timpani
ORGAN
(Ensemble)
Reverend's B
Ballad Organ
Prog Rocker B
All Bars Out
Grungy Overdrive
Uptown Gospel
Solid State Organ
Electric Pipes
Background Organ
MelloTone Wheel
Piped Organ
Playful Piper
Peter's Pan
Imaginary Flute
Synth Winds
Bouncin' Bass
Cathedral Pipes
Church Pipes
Ensemble Strings
GM Slow Strings
Synth Strings 1
Synth Strings 2
Choir Aahs
Voice Oohs
Synth Vox
Orchestra Hit
C-2
Page 65

Sound and Controller Information
V150/V110 Sounds (Organized by Sound Category)
BRASS
(Brass)
Big Brass
Saxes/Trumpets
Split Section
Broadway Brass
Trombones
Bari/Tenor Section
Solo Tenor Sax
Soundtrack Brass
Octave Riff Sect
Fatso Sax
Big & Beefy Saxes
Goosed Unison
Analog Brass
Honk'n Dyn Sax
Saxy Lush
Classical Brass
Soft Trumpet
Solo French Horn
French Horn Sect
HarmonMute Trumpet
Brass & Horn
Soaring Brass
Dyn Hi Brass
Dyn Low Brass
Solo Flute
Double Reeds
Woodwind Section
Trumpet
Trombone
Tuba
Muted Trumpet
French Horn
Brass Section
Synth Brass 1
Synth Brass 2
STRINGS
(Reed)
Lyrical Strings
Slow Strings
Marcato Strings
Layer Strings
Fast Strings
Touch Strings
Velocity Strings
Phantom Strings
Fast Key Strings
Emotional String
Octave Strings
Emphatic Strings
Rosin Section
Resolute Section
Tender Strings
Flute & Strings
Stereo Pizzicato
Dry Pizzicato
Tremolo Strings 2
Mono Pizzicato
Mono Tremolo
Baroque Strings
Chamber Section
Dynamic Harp
Harp Glissando
Total Orchestra 1
Total Orchestra 2
Soprano Sax
Alto Sax
Tenor Sax
Baritone Sax
Oboe
English Horn
Bassoon
Clarinet
VOICES
(Pipe)
Ooh><Aah
Doo><Daa
Baa Bop
Doo Doop
Daa Dot
Scatman
The Croons
Cathedral Vox
Bright Voices
Crystal Voices
Vox & Organ
Big Ooh Voices
Big Voices
Bright Syn Vox
Theater Vox
SynthVox & Strings
K250 Choir
Cathedral Choir
Piccolo
Flute
Recorder
Pan Flute
Bottle Blow
Shakuhachi
Whistle
Ocarina
SYNTHS
(Synth Lead)
Solar Lead
Vox Lead
Lyrical Lead
Slow Wood Flute
Groove Bass
Pulse Bass
Sweeper Bass
Lowdown Bass
80's Poly Synth
Rez Bass/Poly
Technicolor
Elan Lead
Sun Spot Lead
80's Mono Lead
Resonant Sweeper
Reverse Feedback
Square Wave
Sawtooth Wave
Synth Calliope
Chiffer Lead
Charang
Solo Vox
5th Saw Wave
Bass & Lead
C-3
Page 66

Sound and Controller Information
V150/V110 Sounds (Organized by Sound Category)
PADS
(Synth Pad)
Rez Aah Pad
Ethereal Air
Meteor Strings
Orchestra Pad
Neptune
Analogy
Dream Catcher
Synth Orchestra
Poseidon
Analogica
Anti Rez
Synth Chorale
Ethereal Strings
Resonant Notch Vox
Ooh><Ahh Pad
Vocalicious
Fantasia
Warm Pad
Polysynth
Space Voice
Bowed Glass
Metal Pad
Halo Pad
Sweep Pad
GUITAR
(Synth FX)
Acoustic Guitar
Strummer 12 String
Rich 6 String
12 String Guitar
Chorus Elec Guitar
Elec 12 String
Jazzy Frets
Lead Rock Guitar
Titanium Guitar
Latin Lover
Roto 12 String
Electric 12
Twangy Guitar
Chr Elec & Mute
Cmp Chr Elec Gtr
Trashed Tubes
Classical Guitar
Ice Rain
Soundtrack
Crystal
Atmosphere
Brightness
Goblins
Echo Drops
Star Theme
BASS (Ethnic)
Round Wound
Punch Bass
Two Finger Bass
Dual-Tri Bass
Funk Slap Bass
Synth Fretless
Upright Bass 1
Upright Bass 2
V Finger Bass
Bright Elec Bass
Bright A Bass
Triangle Bass
Yow Bass
Mono Synth Bass
Power Fuzz Bass
Bass in Face
Sitar
Banjo
Shamisen
Koto
Kalimba
Bagpipe
Fiddle
Shanai
DRUMS
(Percussion)
Studio A Drums
Studio B Drums
Ambient Rock Kit
Coliseum Kit
Resonant Traps
Tripkit
Beat Box
Electro Kit
Radio Kings
Ripper Kit
LA Drums
Compact Kit
Tube Traps
Acoustric Kit
Dirt Kit
Sump Pump Kit
Jazz Drum Set
GM Std Kit
GM Room Kit
GM Power Kit
GM Elec Kit
GM Synth Kit
GM Jazz Kit
GM Brush Kit
GM Orchestra Kit
Tinkle Bell
Agogo
Steel Drums
Wood Block
Taiko
Melodic Tom
Synth Drum
Reverse Cymbal
PERCUSSION
(Sound FX)
Virtuoso Perc
Rhythm Maker
Woody Marimba
African Marimba
Vibes
New Fluid Vibes
Aborigine Jam
Drums & Bells
Marimba
Milky Way Vibes
Percussionist
Carnival Perc
Primitive Perc
Bunch of Perc
Percussion Party
Percussion Circle
Orchestra Perc
Guitar Fret Noise
Breath Noise
Seashore
Bird
Telephone
Helicopter
Applause
Gun Shot
KB3
All Out
Testify
Prog Rock Organ
Reverend Al's
Steve's B
Even Drawbars
Gospel Organ
Synth Rock Organ
Uncle Clark's
Loungin'
Live Drawbars
Keith's Revenge
Bars 1-3
Fine Overdrive
Odd Ones Out
Vox Organ Split
C-4
Page 67

Sound and Controller Information
V150/V110 Sounds (Organized by Sound ID)
V150/V110 Sounds (Organized by Sound ID)
The lists of sounds in this appendix are organized into memory banks. These aren’t the same as the
sound categories that you see labeled on the V150/V110’s front panel. The memory banks organize the
sounds by a numeric ID. The IDs in each bank range from 0 to 127. There are 128 sounds in Banks 0, 2,
and 6, and a smaller number of sounds in Banks 1, 4, and 7.
If you’re controlling your V150/V110 from an external MIDI instrument, you can change sounds on the
V150/V110 by sending Program Change messages from the MIDI instrument. The value of the Program
Change message should be the ID of the sound you want to select. To change banks from the MIDI
instrument, send a Bank Select message—a MIDI 0 message (with a value of 0) followed by a MIDI 32
message with a value corresponding to the bank you want to select. After the Bank Select message, send
a Program change message to select a sound within that bank.
Some MIDI instruments display sound IDs (Program Change numbers) in the range from 1–128, instead
of from 0–127, as the V150/V110 does. If your V150/V110 is connected to one of these instruments, you
may find that selecting sounds from the other MIDI instrument doesn’t work the way you expect. For
example, selecting sound ID 32 from the MIDI instrument might select Ballad Elec Piano on the
V150/V110 (which is sound ID 31).
Bank 0 Sounds
<=0>
PIANO 1
0 Stereo Grand Piano
1 Classic Grand
2 Dynamic Grand
3 Warm Grand Piano
4 Solo Grand Piano
5 Concert Grand
6 Mono Grand Piano
7 Combo Piano
PIANO 2
8 Hard Rock Piano
9 Rock Grand Piano
10 Ensemble Piano
11 Mono Stage Piano
12 Dyn Stage Piano
13 Ragtime Piano
14 Tack Piano
15 Piano & Strings
E PIANO 1
16 Classic Elec Piano
17 Serious Classic EP
18 70's Elec Piano
19 Hard Elec Piano
20 Lounge Elec Piano
21 DynoMy Elec Piano
22 Soft Elec Piano
23 Hybrid Elec Piano
E PIANO 2
24 My Old Wurly
25 Big Red Wurly
26 Super T's Wurly
27 Soft Wurly
28 Wurly Road
29 Pearly Keys
30 Digital Elec Piano
31 Ballad Elec Piano
POP KEYS
32 Electro Grand
33 Digital Elec Grand
34 Rock Elec Grand
35 Elite Elec Piano
36 Dulcimer Grand
37 Celestial Keys
38 Comp Time
39 Buzzy Synth
CLAVIER
40 Clavinet Classic
41 Touch Clavinet
42 Dual Wah Clavinet
43 Real Harpsichord
44 Modern Harpsichord
45 Crystal Clavichord
46 Accordion
47 Celesta
ORGAN
48 Reverend's B
49 Ballad Organ
50 Prog Rocker B
51 All Bars Out
52 Grungy Overdrive
53 Uptown Gospel
54 Solid State Organ
55 Electric Pipes
BRASS
56 Big Brass
57 Saxes/Trumpets
58 Split Section
59 Broadway Brass
60 Trombones
61 Bari/Tenor Section
62 Solo Tenor Sax
63 Soundtrack Brass
STRINGS
64 Lyrical Strings
65 Slow Strings
66 Marcato Strings
67 Layer Strings
68 Fast Strings
69 Touch Strings
70 Velocity Strings
71 Phantom Strings
VOICES
72 Ooh><Aah
73 Doo><Daa
74 Baa Bop
75 Doo Doop
76 Daa Dot
77 Scatman
78 The Croons
79 Cathedral Vox
SYNTHS
80 Solar Lead
81 Vox Lead
82 Lyrical Lead
83 Slow Wood Flute
84 Groove Bass
85 Pulse Bass
86 Sweeper Bass
87 Lowdown Bass
PADS
88 Rez Aah Pad
89 Ethereal Air
90 Meteor Strings
91 Orchestra Pad
92 Neptune
93 Analogy
94 Dream Catcher
95 Synth Orchestra
GUITAR
96 Acoustic Guitar
97 Strummer 12 String
98 Rich 6 String
99 12 String Guitar
100 Chorus Elec Guitar
101 Elec 12 String
102 Jazzy Frets
103 Lead Rock Guitar
BASS
104 Round Wound
105 Punch Bass
106 Two Finger Bass
107 Dual-Tri Bass
108 Funk Slap Bass
109 Synth Fretless
110 Upright Bass 1
111 Upright Bass 2
DRUMS
112 Studio A Drums
113 Studio B Drums
114 Ambient Rock Kit
115 Coliseum Kit
116 Resonant Traps
117 Tripkit
118 Beat Box
119 Electro Kit
PERCUSSION
120 Virtuoso Perc
121 Rhythm Maker
122 Woody Marimba
123 African Marimba
124 Vibes
125 New Fluid Vibes
126 Aborigine Jam
127 Drums & Bells
C-5
Page 68

Sound and Controller Information
V150/V110 Sounds (Organized by Sound ID)
Bank 6
Bank 6 contains another 128 sounds, organized into the same categories as the sounds in Bank 0.
Bank 6 Sounds
<=0>
PIANO 1
0 Sweet Ivories
1 Nice Touch Grand
2 Piano Solitude
3 Piano Recital
4 Full Bloom Piano
5 Pianetta
6 Suite Piano
7 Dreamy Piano
PIANO 2
8 Basement Upright
9 Chorused Piano
10 Way Back Piano
11 Dance Piano
12 Cloud Ride Piano
13 Organic Piano
14 Piano & Wash
15 Piano & Vox Pad
E PIANO 1
16 Mellow Elec Piano
17 Tines Square
18 Chorused Wurly
19 Classy Roadz
20 OD Elec Piano
21 Clean & Soft
22 Ballad Keys
23 Lotus Keys
E PIANO 2
24 Soft Ballad EP
25 70's FM Tines
26 90's FM Ballad
27 Chorus Rock Piano
28 Bright Pianotone
29 Family Portrait
30 Harpsi-Piano
31 Fantasy Keys
POP KEYS
32 Janet's Comp
33 Mild Sheen
34 Scrape Glass
35 Air Society
36 Sharp Air Attack
37 Dronin'
38 Alien Salt Mine
39 Imperfect Storm
CLAVIER
40 Modern Clavier
41 Belly Celeste
42 Harpsichordion
43 Circus Keys
44 Cosmic Calliope
45 Calliope Keys
46 Chiff Attack
47 Spaced Harmonix
ORGAN
48 Background Organ
49 MelloTone Wheel
50 Piped Organ
51 Playful Piper
52 Peter's Pan
53 Imaginary Flute
54 Synth Winds
55 Bouncin' Bass
BRASS
56 Octave Riff Sect
57 Fatso Sax
58 Big & Beefy Saxes
59 Goosed Unison
60 Analog Brass
61 Honk'n Dyn Sax
62 Saxy Lush
63 Classical Brass
STRINGS
64 Fast Key Strings
65 Emotional String
66 Octave Strings
67 Emphatic Strings
68 Rosin Section
69 Resolute Section
70 Tender Strings
71 Flute & Strings
VOICES
72 Bright Voices
73 Crystal Voices
74 Vox & Organ
75 Big Ooh Voices
76 Big Voices
77 Bright Syn Vox
78 Theater Vox
79 SynthVox & Strings
SYNTHS
80 80's Poly Synth
81 Rez Bass/Poly
82 Technicolor
83 Elan Lead
84 Sun Spot Lead
85 80's Mono Lead
86 Resonant Sweeper
87 Reverse Feedback
PADS
88 Poseidon
89 Analogica
90 Anti Rez
91 Synth Chorale
92 Ethereal Strings
93 Resonant Notch Vox
94 Ooh><Ahh Pad
95 Vocalicious
GUITAR
96 Titanium Guitar
97 Latin Lover
98 Roto 12 String
99 Electric 12
100 Twangy Guitar
101 Chr Elec & Mute
102 Cmp Chr Elec Gtr
103 Trashed Tubes
BASS
104 V Finger Bass
105 Bright Elec Bass
106 Bright A Bass
107 Triangle Bass
108 Yow Bass
109 Mono Synth Bass
110 Power Fuzz Bass
111 Bass in Face
DRUMS
112 Radio Kings
113 Ripper Kit
114 LA Drums
115 Compact Kit
116 Tube Traps
117 Acoustric Kit
118 Dirt Kit
119 Sump Pump Kit
PERCUSSION
120 Marimba
121 Milky Way Vibes
122 Percussionist
123 Carnival Perc
124 Primitive Perc
125 Bunch of Perc
126 Percussion Party
127 Percussion Circle
C-6
Page 69

Sound and Controller Information
V150/V110 Sounds (Organized by Sound ID)
Bank 2
Bank 2 contains 128 General MIDI programs. When your V150/V110 is not in GM mode, you can select
and play the Bank-2 sounds whatever your Main Sound MIDI channel is. If you’re in GM mode, you can
select and play these sounds on all MIDI channels except channel 10.
Sounds from the other banks are not available when you’re in GM mode.
Bank 2 Sounds
<=0>
Piano
0 Grand Piano
1 Bright Grand
2 Electric Grand
3 Honky Tonk Piano
4 Elec Piano 1
5 Elec Piano 2
6 GM Harpsichord
7 Clavinet
Chromatic
8 GM Celesta
9 Glockenspiel
10 Music Box
11 Vibraphone
12 Marimba
13 Xylophone
14 Tubular Bells
15 Dulcimer
Organ
16 Drawbar Organ
17 Percussion Organ
18 Rock Organ
19 Church Organ
20 Reed Organ
21 GM Accordion
22 Harmonica
23 Bandoneon
Guitar
24 Nylon Guitar
25 Steel String Gtr
26 Jazz Guitar
27 Clean Elec Guitar
28 Muted Guitar
29 Overdrive Guitar
30 Distortion Guitar
31 Guitar Harmonics
Bass
32 Acoustic Bass
33 Finger Bass
34 Picked Bass
35 Fretless Bass
36 Slap Bass 1
37 Slap Bass 2
38 Synth Bass 1
39 Synth Bass 2
Strings
40 Violin
41 Viola
42 Cello
43 Contrabass
44 Tremolo Strings
45 Pizzicato Strings
46 Harp
47 Timpani
Ensemble
48 Ensemble Strings
49 GM Slow Strings
50 Synth Strings 1
51 Synth Strings 2
52 Choir Aahs
53 Voice Oohs
54 Synth Vox
55 Orchestra Hit
Brass
56 Trumpet
57 Trombone
58 Tuba
59 Muted Trumpet
60 French Horn
61 Brass Section
62 Synth Brass 1
63 Synth Brass 2
Reed
64 Soprano Sax
65 Alto Sax
66 Tenor Sax
67 Baritone Sax
68 Oboe
69 English Horn
70 Bassoon
71 Clarinet
Pipe
72 Piccolo
73 Flute
74 Recorder
75 Pan Flute
76 Bottle Blow
77 Shakuhachi
78 Whistle
79 Ocarina
Synth Lead
80 Square Wave
81 Sawtooth Wave
82 Synth Calliope
83 Chiffer Lead
84 Charang
85 Solo Vox
86 5th Saw Wave
87 Bass & Lead
Synth Pad
88 Fantasia
89 Warm Pad
90 Polysynth
91 Space Voice
92 Bowed Glass
93 Metal Pad
94 Halo Pad
95 Sweep Pad
Synth FX
96 Ice Rain
97 Soundtrack
98 Crystal
99 Atmosphere
100 Brightness
101 Goblins
102 Echo Drops
103 Star Theme
Ethnic
104 Sitar
105 Banjo
106 Shamisen
107 Koto
108 Kalimba
109 Bagpipe
110 Fiddle
111 Shanai
Percussion
112 Tinkle Bell
113 Agogo
114 Steel Drums
115 Wood Block
116 Taiko
117 Melodic Tom
118 Synth Drum
119 Reverse Cymbal
Sound FX
120 Guitar Fret Noise
121 Breath Noise
122 Seashore
123 Bird
124 Telephone
125 Helicopter
126 Applause
127 Gun Shot
C-7
Page 70

Sound and Controller Information
V150/V110 Sounds (Organized by Sound ID)
Bank 1
Bank 1 contains General MIDI (GM) drum kits. When your V150/V110 is not in GM mode, you can
select and play the Bank-1 sounds whatever your Main Sound MIDI channel is. If you’re in GM mode,
you can select and play these sounds only on Channel 10, which is reserved for GM drums.
Sound 127 Sine V2.0 is a special sine wave that the V150/V110 uses for its internal diagnostic software.
Don’t select it as a performance sound, because it can get extremely loud.
Bank 4
Bank 4 contains the KB3 organ sounds. Notice how their Program Change numbers increase by eight
instead of by one.
Bank 7
Bank 7 contains standard sounds like those in Banks 0 and 6.
Bank 1 Sounds
<=0>
0 GM Std Kit
8 GM Room Kit
16 GM Power Kit
24 GM Elec Kit
25 GM Synth Kit
32 GM Jazz Kit
40 GM Brush Kit
48 GM Orchestra Kit
127 Sine V2.0
Bank 4 Sounds
<=0>
0 All Out
8 Testify
16 Prog Rock Organ
24 Reverend Al's
32 Steve's B
40 Even Drawbars
48 Gospel Organ
56 Synth Rock Organ
64 Uncle Clark's
72 Loungin'
80 Live Drawbars
88 Keith's Revenge
96 Bars 1-3
104 Fine Overdrive
112 Odd Ones Out
120 Vox Organ Split
Bank 7 Sounds
<=0>
STRINGS
0 Stereo Pizzicato
1 Dry Pizzicato
2 Tremolo Strings 2
3 Mono Pizzicato
4 Mono Tremolo
5 Baroque Strings
6 Chamber Section
7 Dynamic Harp
8 Harp Glissando
9 Total Orchestra 1
10 Total Orchestra 2
ORGAN
11 Cathedral Pipes
12 Church Pipes
GUITAR
13 Classical Guitar
VOICES
14 K250 Choir
15 Cathedral Choir
Bank 7 Sounds
<=0>
BRASS
16 Soft Trumpet
17 Solo French Horn
18 French Horn Sect
19 HarmonMute T rumpet
20 Brass & Horn
21 Soaring Brass
22 Dyn Hi Brass
23 Dyn Low Brass
24 Solo Flute
25 Double Reeds
26 Woodwind Section
PERCUSSION
27 Orchestra Perc
DRUMS
28 Jazz Drum Set
C-8
Page 71

Default Physical
Controller Assignments
The following table lists the V150/V110’s physical
controllers and the MIDI Controller messages they send
by default.
For any Panel Memory, you can change the message that
a physical controller sends. Keep in mind that doing so
may affect other features of the program or setup.
For example, if you assign Slider A to send MIDI 9
instead of MIDI 1, two things will happen: Slider A will
do something different (or nothing at all), and anything
that responds to MIDI 9 will respond to Slider A.
Slider A MIDI 1 Mod Wheel (Modulation)
Slider B MIDI 4 Foot Control
Slider C MIDI 6 Data
Slider D MIDI 13
CCPed MIDI 11 Expression
Right Pedal MIDI 64 Sustain
Middle Pedal MIDI 66 Sostenuto
Left Pedal MIDI 67 Soft
Sound and Controller Information
Default Physical Controller Assignments
C-9
Page 72

Sound and Controller Information
Controller Assignments for Sounds in Bank 0
Controller Assignments
for Sounds in Bank 0
The tables in this section list the physical controller
assignments for the sounds in Bank 0. The table titles
show sound IDs and names.
See page C-20 for lists of physical controller assignments
for the sounds in Bank 6.
0 Stereo Grand Piano
Slider A Vibrato Depth
Slider D Vibrato Rate
MIDI 29 Enable Vibrato
<=0>
1 Classic Grand
Slider D Vibrato Rate
MIDI 29 Enable Vibrato
2 Dynamic Grand
Slider A Vibrato Depth
Slider D Vibrato Rate
MIDI 29 Enable Vibrato
3 Warm Grand Piano
Slider A Vibrato Depth
Slider D Vibrato Rate
MIDI 29 Enable Vibrato
4 Solo Grand Piano
Slider A Vibrato Depth
Slider D Vibrato Rate
MIDI 29 Enable Vibrato
8 Hard Rock Piano
Slider A Vibrato Depth
Slider D Vibrato Rate
MIDI 29 Enable Vibrato
9 Rock Grand Piano
Slider A Vibrato Depth
Slider D Vibrato Rate
MIDI 29 Enable Vibrato
10 Ensemble Piano
Slider D Vibrato Rate
MIDI 29 Enable Vibrato
11 Mono Stage Piano
Slider D Vibrato Rate
MIDI 29 Enable Vibrato
12 Dyn Stage Piano
Slider D Vibrato Rate
MIDI 29 Enable Vibrato
13 Ragtime Piano
Slider A Vibrato Depth
Slider D Vibrato Rate
MIDI 29 Enable Vibrato
14 Tack Piano
Slider A Vibrato Depth
Slider C Tack Level
Slider D Vibrato Rate
MIDI 29 Enable Vibrato
5 Concert Grand
Slider A Vibrato Depth
Slider D Vibrato Rate
MIDI 29 Enable Vibrato
6 Mono Grand Piano
Slider A Vibrato Depth
Slider D Vibrato Rate
MIDI 29 Enable Vibrato
7 Combo Piano
Slider A Vibrato Depth
Slider D Vibrato Rate
MIDI 29 Enable Vibrato
C-10
15 Piano & Strings
Slider A Vibrato Depth
Slider C LoPass Freq
Slider D Strings Level
Left Pedal Soft Pedal: piano
MIDI 9 Enable Vibrato
MIDI 29 Lyr Disable (Strings)
16 Classic Elec Piano
Slider A Tremolo Depth
Slider B Bass Boost
Slider C Timbre
Slider D Tremolo Rate
MIDI 9 Sample Start
MIDI 29 Impact
Page 73

Sound and Controller Information
Controller Assignments for Sounds in Bank 0
17 Serious Classic EP
Slider A Tremolo Depth
Slider D Tremolo Rate
18 70's Elec Piano
Slider A Tremolo Depth
Slider B Timbre
Slider C Timbre
Slider D Tremolo Rate
MIDI 9 Enable Thump
MIDI 29 Impact
19 Hard Elec Piano
Slider A Tremolo Depth
Slider C Timbre
Slider D Tremolo Rate
MIDI 9 Enable Thump
MIDI 29 Impact
20 Lounge Elec Piano
Slider A Tremolo Depth
Slider B Timbre
Slider C Timbre
Slider D Tremolo Rate
MIDI 9 Disable release
MIDI 29 Disable Layer
21 DynoMy Elec Piano
Slider A Tremolo Depth
Slider B LoPass Freq Cut
Slider C Hi Freq Cut
Slider D Tremolo Rate
MIDI 9 Fast Decay
MIDI 29 Impact
22 Soft Elec Piano
Slider A Tremolo Depth
Slider B Timbre
Slider C LoPass Freq Cut
Slider D Tremolo Rate
MIDI 9 Layer Enable (Pad)
MIDI 29 Disable Chorus Layer
23 Hybrid Elec Piano
Slider A Tremolo Depth
Slider C Timbre
Slider D Tremolo Rate
MIDI 2 Timbre
MIDI 9 Disable Thump
MIDI 29 Impact
24 My Old Wurly
Slider A Tremolo Depth
Slider B Timbre
Slider C Timbre
Slider D Tremolo Rate
MIDI 9 Disable Thump
MIDI 29 Impact/Thump Lvl
25 Big Red Wurly
Slider A Tremolo Depth
Slider B Timbre
Slider C Timbre
Slider D Tremolo Rate
MIDI 9 Sample Start
MIDI 29 Enable Detuned Layer
26 Super T's Wurly
Slider A Tremolo Depth
Slider C Timbre
Slider D Tremolo Rate
MIDI 9 Sample Start
MIDI 12 Disable Detuned Layer
MIDI 29 Impact
27 Soft Wurly
Slider A Tremolo Depth
Slider B Timbre
Slider C Timbre
Slider D Tremolo Rate
MIDI 9 Sample Start
MIDI 29 Impact
28 Wurly Road
Slider A Tremolo Depth
Slider B Timbre
Slider C Timbre
Slider D Tremolo Rate
MIDI 9 Sample Start
MIDI 29 Impact
29 Pearly Keys
Slider A Tremolo Depth
Slider B Timbre
Slider C Timbre
Slider D Tremolo Rate
MIDI 9 Envelope Ctl
MIDI 29 Impact
C-11
Page 74

Sound and Controller Information
Controller Assignments for Sounds in Bank 0
30 Digital Elec Piano
Slider A Tremolo Depth
Slider B Timbre
Slider C Timbre
Slider D Tremolo Rate
MIDI 9 Sample Start
MIDI 29 Disable Layer
31 Ballad Elec Piano
Slider A Tremolo Depth
Slider B Timbre
Slider C Timbre
Slider D Tremolo Rate
MIDI 9 Envelope Ctl
MIDI 29 Disable Layer
32 Electro Grand
Slider A Tremolo Depth
Slider C Timbre
Slider D Tremolo Rate
MIDI 9 Sample Start
MIDI 29 Enable Layer
33 Digital Elec Grand
Slider A Tremolo Depth
Slider C Timbre
Slider D Tremolo Rate
MIDI 9 Attack Control
MIDI 29 Disable Layer
37 Celestial Keys
Slider A Tremolo Depth
Slider C Treble Cut
Slider D Trem/Vib Rate
MIDI 9 Release Control
MIDI 29 Switch Layers
38 Comp Time
Slider A Vibrato Rate, Depth
Slider C LoPass Freq
Slider D Resonance
MIDI 9 Octave Drop
MIDI 29 Impact
39 Buzzy Synth
Slider A Vibrato
Slider C LoPass Freq Cut
Slider D Tremolo+Rate
Aftertouch Vibrato
MIDI 9 Resonance Boost
MIDI 29 Decay Control
40 Clavinet Classic
Slider A HiPass LFO Depth
Slider B HiPass LFO Depth
Slider C Bass Level
Slider D HiPass LFO Rate
MIDI 9 Disable Release
MIDI 29 Layer Switch
34 Rock Elec Grand
Slider A Tremolo Depth
Slider C Timbre
Slider D Tremolo Rate
MIDI 9 Attack Control
MIDI 29 Disable Layer
35 Elite Elec Piano
Slider A Tremolo Depth
Slider C Timbre
Slider D Tremolo Rate
MIDI 9 Attack Control
MIDI 29 Disable Layer
36 Dulcimer Grand
Slider A Vibrato Rate
Slider C Timbre
Slider D Attack Ctrl
Aftertouch Vibrato Depth
MIDI 9 Release Control
MIDI 29 Switch Layers
C-12
41 Touch Clavinet
Slider A BandPass LFO Rate
Slider C Timbre
Slider D Impact
Aftertouch Timbre
MIDI 29 Layer Switch
42 Dual Wah Clavinet
Slider A Bandpass Freq(MIDI 29)
Slider C Bandpass Width
Slider D LFO2 Rate
MIDI 29 LFO => Slider A
43 Real Harpsichord
Slider A Decay Control
Slider C Timbre
Slider D Sample Start
Left Pedal Octave Switch
MIDI 9 Disable Release
MIDI 12 Disable V elocity
MIDI 29 Octave Switch
Page 75

Sound and Controller Information
Controller Assignments for Sounds in Bank 0
44 Modern Harpsichord
Slider A LoPass Freq, Layer Detune
Slider C Timbre
Slider D Decay Control
MIDI 29 Enable Release
45 Crystal Clavichord
Slider A Layer 1 Vibrato
Slider C Treble Cut
Slider D Sample Start
MIDI 9 Decay Control
MIDI 29 Layer Switch
46 Accordion
Slider A Swell
Slider C Timbre
Slider D Tremolo Rate
Aftertouch Swell
MIDI 9 Disable Layer
MIDI 29 Attack Control
47 Celesta
Slider A LoPass Freq
Slider C Timbre
Slider D Tremolo Rate
MIDI 9 Decay Control
MIDI 29 Impact
51 All Bars Out
Slider A FX/VAST Rotary Ramp Speed Ctl
Left Pedal FX/VAST Rotary Ramp Speed Ctl
MIDI 9 FX Vib/Chr On/Off
MIDI 29 VAST Rotary On/Off
52 Grungy Overdrive
Slider A FX/VAST Rotary Ramp Speed Ctl
Left Pedal FX/VAST Rotary Ramp Speed Ctl
MIDI 9 FX Vib/Chr On/Off
MIDI 12 VAST Chr/Vib On/Off
MIDI 29 VAST Rotary On/Off
53 Uptown Gospel
Slider A FX/VAST Rotary Ramp Speed Ctl
Slider C Para EQ Freq
Slider D Para EQ Cut
Left Pedal FX/VAST Rotary Ramp Speed Ctl
MIDI 9 FX Vib/Chr On/Off
MIDI 29 VAST Rotary On/Off
54 Solid State Organ
Slider A FX/VAST Rotary Ramp Speed Ctl
Slider C Xtra Hi Freq
Left Pedal FX/VAST Rotary Ramp Speed Ctl
MIDI 9 FX Vib/Chr On/Off
MIDI 12 VAST Chr/Vib On/Off
MIDI 29 VAST Rotary On/Off
48 Reverend's B
Slider A FX/VAST Rotary Ramp Speed Ctl
Slider C LoPass Freq
Slider D Layer XFade
Left Pedal FX/VAST Rotary Ramp Speed Ctl
MIDI 9 FX Vib/Chr On/Off
MIDI 29 VAST Rotary On/Off
49 Ballad Organ
Slider A FX/VAST Rotary Ramp Speed Ctl
Slider C Perc XFade
Slider D Bass Cut
Left Pedal FX/VAST Rotary Ramp Speed Ctl
MIDI 9 FX Vib/Chr On/Off
MIDI 12 VAST Chr/Vib On/Off
MIDI 29 VAST Rotary On/Off
50 Prog Rocker B
Slider A FX/VAST Rotary Ramp Speed Ctl
Slider C Perc XFade
Left Pedal FX/VAST Rotary Ramp Speed Ctl
MIDI 9 FX Vib/Chr On/Off
MIDI 29 VAST Rotary On/Off
55 Electric Pipes
Slider C Layer XFade
Slider D Layer XFade
56 Big Brass
Slider A Vibrato Depth
Slider B LoPass Freq
Slider C LoPass Freq
Slider D Attack Control
Aftertouch Swell Env & Pitch
MIDI 2 LoPass Freq
MIDI 9 Layer Switch
MIDI 29 Layer Switch
57 Saxes/Trumpets
Slider A Vibrato Depth
Slider B LoPass Freq
Slider C LoPass Freq
Slider D Attack Control
Aftertouch Swell Env & Pitch
MIDI 2 LoPass Freq
MIDI 9 Layer Switch
MIDI 12 Layer Switch
MIDI 29 Layer Switch
C-13
Page 76

Sound and Controller Information
Controller Assignments for Sounds in Bank 0
58 Split Section
Slider A Vibrato Depth
Slider B Timbre
Slider C LoPass Freq
Slider D Attack Control
Aftertouch Swell Env & Pitch
MIDI 2 Timbre
MIDI 9 Layer Switch
MIDI 29 Layer Switch
59 Broadway Brass
Slider A Vibrato Depth
Slider C LoPass Freq
Slider D Attack Control
Aftertouch Swell Env & Pitch
MIDI 2 LoPass Freq
MIDI 29 Layer Switch
60 Trombones
Slider A Vibrato Depth
Slider B LoPass Freq
Slider C Timbre
Slider D Attack Control
Aftertouch Swell Env & Pitch
MIDI 2 LoPass Freq
MIDI 29 Layer Switch
64 Lyrical Strings
Slider A Attack Switch
Slider C Brightness
MIDI 29 Envelope
65 Slow Strings
Slider A Slow Vibrato
Slider C Brightness (Cut)
Slider D Attack Control
MIDI 29 Layer Switch
66 Marcato Strings
Slider A Envelope Switch
Slider C Brightness (Cut)
Slider D Envelope Control
Left Pedal Envelope Switch
MIDI 9 Attack Control
MIDI 29 Envelope Control
67 Layer Strings
Slider A Attack Control
Slider C Brightness
Slider D Release Control
MIDI 9 Layer Switch(w/MIDI 29)
MIDI 12 Layer Switch(w/MIDI 29)
MIDI 29 Mono -> Stereo
61 Bari/Tenor Section
Slider A Vibrato Depth
Slider B LoPass Freq
Slider C LoPass Freq
Slider D Attack Control
Aftertouch Swell Env & Pitch
MIDI 2 LoPass Freq
MIDI 9 Layer Switch
MIDI 29 Layer Switch
62 Solo Tenor Sax
Slider A Vibrato Depth
Slider C LoPass Freq
Slider D Attack Control
Aftertouch Vibrato Depth
63 Soundtrack Brass
Slider A Vibrato Depth
Slider C LoPass Envelope
Aftertouch Swell Envelope
MIDI 9 Layer Switch
MIDI 12 Layer Switch
MIDI 29 Layer Switch
68 Fast Strings
Slider A Layer Switch
Slider C Timbre
Slider D Release Control
Left Pedal Layer Switch
69 Touch Strings
Slider A Tremolo
Slider C Timbre
Slider D Envelope Control
MIDI 29 Layer Switch
70 Velocity Strings
Slider A Layer Switch
Slider C Timbre
Left Pedal Layer Switch
C-14
Page 77

Sound and Controller Information
Controller Assignments for Sounds in Bank 0
71 Phantom Strings
Slider A Envelope Control
Slider C Timbre
Slider D Attack Control
Left Pedal Envelope Control
MIDI 9 Layer Switch
MIDI 12 Layer Switch
MIDI 29 Layer Switch
72 Ooh><Aah
Slider A Vibrato
Slider B Timbre
Slider C Timbre
Slider D Layer XFade
Aftertouch Layer XFade
MIDI 2 Timbre
MIDI 29 Layer Switch
73 Doo><Daa
Slider A Vibrato
Slider B Timbre
Slider C Timbre
Slider D Layer XFade
Aftertouch Layer XFade
MIDI 2 Timbre
MIDI 29 Layer Switch
77 Scatman
Slider A Vibrato
Slider B Timbre
Aftertouch Swell
MIDI 2 Swell
MIDI 29 Envelope Control
78 The Croons
Slider A Vibrato
Slider C Timbre
MIDI 29 Layer Switch
79 Cathedral Vox
Slider A Brightness (Cut)
Slider C Brightness (Cut)
Slider D Envelope Control
MIDI 29 Layer Enable
80 Solar Lead
Slider A Vibrato Rate, Depth
Slider C LoPass Freq
Slider D LoPass Resonance
Aftertouch Vibrato Rate, Depth
MIDI 29 Layer Switch
74 Baa Bop
Slider A Vibrato
Slider B Timbre
Slider D Envelope Control
Aftertouch Swell
MIDI 2 Swell
MIDI 29 Layer Switch
75 Doo Doop
Slider A Vibrato
Slider B Timbre
Slider D Envelope Control
Aftertouch Swell
MIDI 2 Swell
MIDI 29 Layer Switch
76 Daa Dot
Slider A Vibrato
Slider B Timbre
Slider D Envelope Control
Aftertouch Swell
MIDI 2 Swell
MIDI 29 Layer Switch
81 Vox Lead
Slider A Vibrato Rate, Depth
Slider C LoPass Freq
Slider D LoPass Resonance
Aftertouch Vibrato Rate, Depth
MIDI 9 Rel. Layer off
MIDI 12 Octave Jump w/MIDI 29
MIDI 29 Layer Enable
82 Lyrical Lead
Slider A Vibrato Rate, Depth
Slider C LoPass Envelope
Slider D LoPass Resonance
Aftertouch Vibrato Rate, Depth
MIDI 29 Layer Transpose (5ths)
83 Slow Wood Flute
Slider A Tremolo Depth (Cut)
Slider C Breath Noise
Slider D Chiff Noise
MIDI 29 Layer Enable (ooh)
C-15
Page 78

Sound and Controller Information
Controller Assignments for Sounds in Bank 0
84 Groove Bass
Slider A Vibrato Depth
Slider C LowPass Freq
Slider D LoPass Resonance
Aftertouch Vibrato Rate
MIDI 9 Release Control
MIDI 12 Layer Delay
MIDI 29 Octave Layer Enable
85 Pulse Bass
Slider A Vibrato Rate, Depth
Slider C LowPass Freq
Slider D LoPass Resonance
MIDI 9 Release Control
MIDI 12 Impact
MIDI 29 Octave Layer Enable
86 Sweeper Bass
Slider A Vibrato Depth
Slider C LowPass Freq
Slider D LoPass Resonance
Aftertouch Vibrato Depth
MIDI 9 Release Control
MIDI 12 Octave Layer Enable
MIDI 29 Stereo Layer Enable
90 Meteor Strings
Slider A Vibrato, Trem Depth
Slider C LoPass Freq
Slider D LoPass Resonance
Aftertouch Brightness
MIDI 2 LoPass Freq
MIDI 9 Release Control
MIDI 12 Attack Control
MIDI 29 Vibrato Rate Env
91 Orchestra Pad
Slider A Vibrato
Slider C Filter Freq
Slider D Filter LFO Rate
Aftertouch Horn Layer Swell
MIDI 2 Horn Layer Swell
MIDI 9 Release Control
MIDI 12 Layer Switch
MIDI 29 Attack Control
92 Neptune
Slider A Tremolo Depth
Slider C Chiff Level
Slider D Env Control
MIDI 29 Layer Disable
87 Lowdown Bass
Slider A Vibrato Rate, Depth
Slider C LowPass Freq
Slider D LoPass Resonance
Aftertouch Vibrato Rate, Depth
MIDI 9 Release Control
MIDI 12 Impact
MIDI 29 Octave Divide
88 Rez Aah Pad
Slider A Vibrato
Slider C LoPass Freq
Slider D LoPass LFO Rate
Aftertouch Swell (Layer 3)
MIDI 2 Swell (Layer 3)
MIDI 9 Release Control
MIDI 29 Timbre (Envelope)
89 Ethereal Air
Slider A Vibr, Pan/Fltr LFO
Slider C Timbre
Slider D Timbre
Aftertouch Vibr, Pan/Fltr LFO
MIDI 2 Pan LFO Depth
MIDI 9 Release Control
MIDI 29 Vibrato Rate Env
93 Analogy
Slider A Vibrato Rate, Depth
Slider C LoPass Freq
Slider D LP Res & Release
Aftertouch Swell
MIDI 9 Attack Control
MIDI 29 Layer Enable
94 Dream Catcher
Slider A Filter LFO Depth
Slider C LoPass Freq
Slider D LoPass Resonance
Aftertouch Swell
MIDI 2 Swell
MIDI 9 Release Control
MIDI 29 Attack Control
95 Synth Orchestra
Slider A Vibrato/Trem
Slider C LoPass Freq
Slider D LoPass Resonance
Aftertouch Vibrato/Trem
MIDI 9 Release Control
MIDI 12 Layer Switch
MIDI 29 Attack Control
C-16
Page 79

Sound and Controller Information
Controller Assignments for Sounds in Bank 0
96 Acoustic Guitar
Slider A Vibrato
Slider C EQ Ctr Freq
Slider D EQ Cut/Boost
Aftertouch Vibrato Rate
MIDI 2 Vibrato
MIDI 9 Envelope Control
MIDI 29 Sample Start
97 Strummer 12 String
Slider A Vibrato
Slider C Brightness
Slider D Vibrato Rate
MIDI 2 Vibrato
MIDI 9 Envelope Control
MIDI 29 Layer Detune
98 Rich 6 String
Slider A Vibrato
Slider C Timbre
Slider D Vibrato Rate
MIDI 2 Vibrato
MIDI 9 Envelope Control
MIDI 29 Stereo Image
99 12 String Guitar
Slider A Vibrato
Slider C EQ Ctr Freq
Slider D EQ Cut/Boost
Aftertouch Vibrato Rate
MIDI 2 Vibrato
MIDI 9 Envelope Control
MIDI 29 Layer Detune
102 Jazzy Frets
Slider A Vibrato
Slider C Attack Control
Slider D Decay Control
Left Pedal Envelope Control
MIDI 2 Vibrato
MIDI 9 Filter Env Control
MIDI 12 Layer Switch
MIDI 29 Enable Slide Layer
103 Lead Rock Guitar
Slider A Vibrato
Slider C Timbre (Dist)
Slider D Timbre (Tone)
Left Pedal Release Control
Aftertouch Feedback Amount
MIDI 9 Disable FB Layer
MIDI 29 Feedback in 5ths
104 Round Wound
Slider A Vibrato
Slider C LoPass Freq (Cut)
Slider D Attack Control
Aftertouch Vibrato
MIDI 9 Impact
MIDI 29 Layer Enable(Ride)
105 Punch Bass
Slider A Vibrato
Slider C LoPass Freq
Slider D Attack Control
Aftertouch Vibrato
MIDI 9 Layer Disable
MIDI 29 LoPass Res, Freq
100 Chorus Elec Guitar
Slider A Tremolo Depth
Slider C Timbre
Slider D Tremolo Rate
MIDI 2 LFO2 Depth
MIDI 9 Envelope Control
MIDI 29 Disable Layer Detune
101 Elec 12 String
Slider A Leslie Rate Switch
Slider C Timbre
Slider D Envelope Control
MIDI 2 Tremolo
MIDI 9 FX Vib/Chor On/Off
MIDI 12 Layer Disable
MIDI 29 Enable Leslie
106 Two Finger Bass
Slider A Vibrato
Slider C LoPass Freq (Cut)
Aftertouch Vibrato
MIDI 9 Impact
MIDI 29 Impact
107 Dual-Tri Bass
Slider A Vibrato
Slider C Timbre
Aftertouch Vibrato
MIDI 9 Layer Enable
MIDI 29 Layer Enable(Ride)
C-17
Page 80

Sound and Controller Information
Controller Assignments for Sounds in Bank 0
108 Funk Slap Bass
Slider A Vibrato
Slider C Timbre
Aftertouch Vibrato
MIDI 9 Layer Disable
109 Synth Fretless
Slider A Vibrato
Slider C Timbre
Aftertouch Vibrato
MIDI 9 Layer Disable
MIDI 29 Timbre
110 Upright Bass 1
Slider A Ride Cymbal Volume
Slider C Timbre
Slider D Timbre (Cymbal)
Aftertouch Vibrato
MIDI 29 Layer Enable(Ride)
111 Upright Bass 2
Slider A Ride Cymbal Volume
Slider C Timbre
Slider D Timbre (Cymbal)
Aftertouch Vibrato
MIDI 9 Layer Disable
MIDI 29 Layer Enable(Ride)
112 Studio A Drums
Slider C Timbre
Slider D Pitch Control
MIDI 9 Decay Control
MIDI 12 Layer Switch
MIDI 29 Sample Start
113 Studio B Drums
Slider C Timbre
Slider D Pitch Control
MIDI 9 Decay Control
MIDI 12 Layer Switch
MIDI 29 Sample Start
114 Ambient Rock Kit
Slider C Timbre
Slider D Pitch Control
MIDI 9 Decay Control
MIDI 12 Layer Switch
MIDI 29 Sample Start
115 Coliseum Kit
Slider C Timbre
Slider D Pitch Control
MIDI 9 Decay Control
MIDI 12 Pitch Drop
MIDI 29 Sample Start
116 Resonant Traps
Slider C Timbre
Slider D Pitch Control
MIDI 9 Envelope Control
MIDI 12 Pitch Up
MIDI 29 Sample Start
117 Tripkit
Slider C Timbre
Slider D Pitch Control
MIDI 9 Envelope Control
MIDI 12 Layer Switch
MIDI 29 Sample Start
118 Beat Box
Slider A Env/Lyr, Ptch LFO
Slider C Timbre
Slider D Pitch Control
Left Pedal Lyr Enable/Pitch LFO
MIDI 9 Decay Control
MIDI 12 Layer Switch
MIDI 29 Sample Start
119 Electro Kit
Slider A Layer Enable
Slider C Timbre
Slider D Pitch Control
Left Pedal Layer Enable
MIDI 9 Decay Control
MIDI 12 Layer Switch
MIDI 29 Attack Control
120 Virtuoso Perc
Slider A Muting
Slider C Pitch Control
Slider D Shaker Rate (F1-C2)
Left Pedal Sample Start
Aftertouch Moose Pitch/Mute
C-18
Page 81

121 Rhythm Maker
Slider A Sample Start
Slider C Pitch Control
Slider D PitchCtrl Via Aftertouch
Right Pedal Off
Middle Pedal Off
Left Pedal Sample Start
Aftertouch PtchCtl (MIDI 9/SosPed)
MIDI 9 Layer Disables
MIDI 12 Layer Disable
MIDI 29 Layer Disable
122 Woody Marimba
Slider C Sample Start
Right Pedal Layr Sw to Round Marimba
Middle Pedal Off
Left Pedal Sample Start
MIDI 9 Layer Switch
123 African Marimba
Slider D Lyr Enable (Shaker)
Sound and Controller Information
Controller Assignments for Sounds in Bank 0
124 Vibes
Slider A Tremolo
Slider C Tremolo Rate
Slider D Layer Switch
Left Pedal Sample Start
MIDI 9 Envelope Control
MIDI 29 Layer Enable (Sine)
125 New Fluid Vibes
Slider A Tremolo
Slider C Tremolo Rate
Left Pedal Sample Start
MIDI 9 Stereo Spread
MIDI 29 Sample Start
126 Aborigine Jam
Left Pedal Sample Start
127 Drums & Bells
Slider D PitchCtrl via Aftertouch
Left Pedal Sample Start
Aftertouch PtchCtl (MIDI 9/SosPed)
MIDI 29 Sample Start
C-19
Page 82

Sound and Controller Information
Controller Assignments for Sounds in Bank 6
Controller Assignments
for Sounds in Bank 6
The tables in this section list the physical controller
assignments for the sounds in Bank 6. The table titles
show both sound names and their corresponding MIDI
Program Change numbers.
0 Sweet Ivories
Slider A Vibrato (when MIDI 29 is on)
Slider D Vibrato rate
MIDI 29 Activates Slider A vibrato
1 Nice Touch Grand
Slider A Vibrato (when MIDI 29 is on)
Slider D Vibrato rate
MIDI 29 Activates Slider A vibrato
2 Piano Solitude
Slider A Vibrato (when MIDI 29 is on)
Slider D Vibrato rate
MIDI 29 Activates Slider A vibrato
3 Piano Recital
Slider A Vibrato (when MIDI 29 is on)
Slider D Vibrato rate
MIDI 29 Activates Slider A vibrato
4 Full Bloom Piano
Slider A Vibrato (when MIDI 29 is on)
Slider D Vibrato rate
MIDI 29 Activates Slider A vibrato
5 Pianetta
Slider A Vibrato (when MIDI 29 is on)
Slider D Vibrato rate
Right Pedal Enable ringy layer
MIDI 29 Activates Slider A vibrato
6 Suite Piano
Slider A Vibrato (when MIDI 29 is on)
Slider D Vibrato rate
MIDI 29 Activates Slider A vibrato
8 Basement Upright
Slider A Vibrato (when MIDI 29 is on)
Slider D Vibrato rate
MIDI 29 Activates Slider A vibrato
9 Chorused Piano
Slider A Vibrato (when MIDI 29 is on)
Slider C Tone control: Notch
Slider D Vibrato rate
MIDI 12 More detune
MIDI 29 Activates Slider A vibrato
10 Way Back Piano
Slider A Vibrato (when MIDI 29 is on)
Slider C Envelope: decay rate
Slider D Vibrato rate
MIDI 29 Activates Slider A vibrato
11 Dance Piano
Slider A Vibrato (when MIDI 29 is on)
Slider C Highpass filter
Slider D Envelope: decay rate
Left Pedal Disables piano layer
MIDI 9 More treble boost
MIDI 12 Vibrato rate
MIDI 29 Activates Slider A vibrato
12 Cloud Ride Piano
Slider A Vibrato (when MIDI 29 is on)
Slider C Pad layer decay
Slider D Vibrato rate
MIDI 29 Activates Slider A vibrato
13 Organic Piano
Slider C Duller Vox
Left Pedal Disables piano layer
MIDI 9 Enables unison Vox
MIDI 29 Disables octave Vox layer
14 Piano & Wash
Slider A Increases volume of pad layer
Slider C Cutoff, pad layer
Slider D Resonance, pad layer
MIDI 9 Slower attack, pad layer
MIDI 12 Faster release, pad layer
MIDI 29 Different pad layer
7 Dreamy Piano
Slider A Vibrato (when MIDI 29 is on)
Slider D Vibrato rate
MIDI 29 Activates Slider A vibrato
C-20
Page 83

Sound and Controller Information
Controller Assignments for Sounds in Bank 6
15 Piano & Vox Pad
Slider A Fade volume of Vox layer
Slider C Cutoff, Vox layer
Slider D Attack Time: Vox layer
MIDI 29 Duller piano
16 Mellow Elec Piano
Slider A Tremolo depth
Slider C Timbre: cutoff
Slider D Tremolo rate
MIDI 9 Alternative attack
MIDI 12 Detunes layers
MIDI 29 Impact
17 Tines Square
Slider A Tremolo depth
Slider C Timbre
Slider D Tremolo rate
MIDI 9 Alternative attack
MIDI 29 Impact
18 Chorused Wurly
Slider A Tremolo depth
Slider C Timbre: cutoff
Slider D Tremolo rate
MIDI 9 Alternative attack
MIDI 12 Detunes layers
MIDI 29 Impact
22 Ballad Keys
Slider A Tremolo depth
Slider C Tremolo rate
Slider D Envelope control
MIDI 9 Alternative attack
MIDI 29 Disables E Piano layer
23 Lotus Keys
Slider A Tremolo depth
Slider C Tremolo rate
Slider D Envelope control
MIDI 9 Alternative attack
MIDI 29 Disables E Piano layer
24 Soft Ballad EP
Slider A Tremolo depth
Slider C Tremolo rate
Slider D Envelope control
MIDI 9 Alternative attack
MIDI 29 Disables E Piano layer
25 70's FM Tines
Slider A Tremolo depth
Slider C Cutoff & Resonance
Slider D Tremolo rate; envelope: release
MIDI 9 Alternative attack
MIDI 29 Impact
19 Classy Roadz
Slider A Tremolo depth
Slider C Cutoff & Resonance
Slider D Tremolo rate
MIDI 9 Alternative attack
MIDI 29 Impact
20 OD Elec Piano
Slider A Tremolo depth
Slider C Cutoff & Resonance
Slider D Tremolo rate
MIDI 9 Alternative attack
MIDI 12 Detunes layers
MIDI 29 Impact
21 Clean & Soft
Slider A Treble control: : duller
Slider C Cutoff
Slider D Vibrato rate
MIDI 9 Envelope: decay
MIDI 29 Impact
26 90's FM Ballad
Slider A Vibrato depth
Slider C Para EQ freq
Slider D Para EQ amp
Aftertouch Vibrato rate
MIDI 9 Alternative attack
MIDI 29 Timbre & envelope control
27 Chorus Rock Piano
Slider A Vibrato (when MIDI 29 is on)
Slider C
Slider D Vibrato rate
MIDI 29 Activates Slider A vibrato
28 Bright Pianotone
Slider A Tremolo depth
Slider C Timbre: duller
Slider D Tremolo rate
MIDI 9 Decay rate
MIDI 29 Impact
C-21
Page 84

Sound and Controller Information
Controller Assignments for Sounds in Bank 6
29 Family Portrait
Slider A Tremolo depth
Slider C
Slider D Tremolo rate, vibrato rate
Aftertouch Filter cutoff
MIDI 9 Slow Vibrato off/on
MIDI 12 Release rate
MIDI 29 Impact
Bandpass width, Lopass
resonance,Treble amp cut
30 Harpsi-Piano
Slider A Vibrato/tremolo depth
Slider C Timbre control
Slider D Vibrato/tremolo rate
MIDI 9 Alternative attack
MIDI 29 Detune
31 Fantasy Keys
Slider A Vibrato depth
Slider C Timbre/Amp control
Slider D Paramid Boost
MIDI 9 Envelope control
MIDI 29 Alternative attack
32 Janet's Comp
Slider A Vibrato depth
Slider C Timbre/Amp control
Slider D Paramid boost
MIDI 9 Envelope control
MIDI 29 Disables layer
33 Mild Sheen
Slider A Vibrato/tremolo depth
Slider C Timbre control
Slider D Vibrato/tremolo rate
MIDI 9 Envelope control
MIDI 29 Impact/alternative start
34 Scrape Glass
Slider A Vibrato depth
Slider C Cutoff
Slider D Resonance
MIDI 9 Transposes one voice -12ST
MIDI 12 Vibrato rate
MIDI 29 Layer swap
35 Air Society
Slider A Vibrato/tremolo depth
Slider C Timbre control
Slider D Vibrato/tremolo rate
MIDI 9 Envelope control
36 Sharp Air Attack
Slider A Filter LFO depth/rate
Slider C Timbre control
Slider D Tremolo control
MIDI 9 Envelope control
MIDI 29 Timbre control
37 Dronin'
Slider A Bandpass width
Slider C Bandpass frequency
Slider D LFO rate
MIDI 29 Adds Vox pad layer
38 Alien Salt Mine
Slider A Vibrato depth
Slider C Notch frequency
Slider D Notch width
MIDI 9 Envelope control: attack
MIDI 12 Envelope control: release
MIDI 29 Switch to Cymbal Layer
39 Imperfect Storm
Slider A Resonance
Slider C Cutoff frequency Layer 1
Slider D LFO rate Layer 2
MIDI 9 Mutes Layer 2
MIDI 12 Mutes Layer 3
MIDI 29 Pitch shift: up
40 Modern Clavier
Slider A Timbre: fade bright layer
Slider C Timbre: Para EQ amp
Slider D Envelope: decay rate
MIDI 9 Alternative attack
MIDI 29 Enable release layer
41 Belly Celeste
Slider A Tremolo depth
Slider C Tremolo rate
Slider D Envelope control
MIDI 9 Alternative attack
MIDI 29 Disables Celesta layer
42 Harpsichordion
Slider A Vibrato depth
Slider C Timbre: Para EQ frequency
Slider D Timbre: Para EQ amp
MIDI 9 Timbre & envelope control
MIDI 29 Alternative attack
C-22
Page 85

Sound and Controller Information
Controller Assignments for Sounds in Bank 6
43 Circus Keys
Slider A Vibrato/tremolo depth
Slider C LFO rate control
Slider D Envelope control
44 Cosmic Calliope
Slider A Tremolo/vibrato
Slider C LFO rate
Slider D Envelope: attack rate
MIDI 9 Resets tuning
45 Calliope Keys
Slider A Tremolo; vibrato
Slider C LFO rate
Slider D Envelope: attack rate
MIDI 9 reset tuning
46 Chiff Attack
Slider A Vibrato depth
Slider C Timbre: Para EQ frequency
Slider D Timbre: Para EQ Amp
MIDI 9 Alternative attack
MIDI 29 Timbre & envelope control
47 Spaced Harmonix
Slider A Vibrato depth
Slider C Timbre: Amp control
Slider D Para mid boost
MIDI 9 Envelope control
MIDI 29 Alternative control
48 Background Organ
Slider A Vibrato/tremolo depth
Slider C LFO rate control
Slider D Envelope control
MIDI 9 Alternative attack
49 MelloTone Wheel
Slider A Vibrato/tremolo depth
Slider C LFO rate control
Slider D Envelope control
MIDI 9 Alternative attack
50 Piped Organ
Slider A Vibrato depth
Slider C Vibrato rate
Slider D Envelope: attack rate
Aftertouch Pitch bend
MIDI 9 Disables layer
MIDI 29 Disables Chiff layer
51 Playful Piper
Slider A Delayed vibrato
Slider C More breath
Slider D Chiffier attack
Aftertouch Pitch bend
MIDI 9 Envelope: release rate
MIDI 29 Disables Chiff layer
52 Peter's Pan
Slider A Vibrato depth
Slider C Timbre (air)
Slider D Envelope: attack control; vibrato rate
MIDI 9 Enables chorused layer
MIDI 29 Impact
53 Imaginary Flute
Slider A Delayed vibrato
Slider D Chiffier attack
Aftertouch Pitch bend
54 Synth Winds
Slider A Vibrato depth
Slider C Timbre
Slider D Envelope: attack control; vibrato rate
MIDI 9 Enables chorused layer
MIDI 29 Alternative control
55 Bouncin' Bass
Slider A Vibrato/tremolo depth
Slider C LFO rate control
Slider D Envelope: decay rate
MIDI 9 Alternative attack
MIDI 29 Disables layer
56 Octave Riff Sect
Slider C
Aftertouch Pitch bend
MIDI 29 Disables Tsax octave layer
57 Fatso Sax
Slider A Delayed vibrato
Slider B Swell
Slider C Layer 3 Amplitude
Aftertouch Pitch bend
MIDI 2 Swell
MIDI 29 Disables Wav eform layer
C-23
Page 86

Sound and Controller Information
Controller Assignments for Sounds in Bank 6
58 Big & Beefy Saxes
Slider A Vibrato depth
Slider C Envelope: decay rate
Slider D Envelope: attack rate
MIDI 29 Enables layer
59 Goosed Unison
Slider B Swell
Aftertouch Pitch bend
MIDI 2 Swell
60 Analog Brass
Slider A Vibrato depth
Slider C Timbre control
Slider D Amp/envelope control
MIDI 9 Disables layer
MIDI 29 Impact
61 Honk'n Dyn Sax
Slider A Vibrato depth
Slider B Swell
MIDI 2 Swell
MIDI 29 Switches sounds
66 Octave Strings
Slider A Disables lower-pitched layer
Slider C Timbre: duller
Left Pedal Disables lower-pitched layer
67 Emphatic Strings
Slider A Switches layers
Slider C Timbre: duller
Left Pedal Switches layers
68 Rosin Section
Slider A Switches layers
Slider C Timbre: duller
Left Pedal Switches layers
69 Resolute Section
Slider A Switches layers
Left Pedal Switches layers
70 Tender Strings
Slider A Switches layers
Slider C Timbre: duller
Left Pedal Switches layers
62 Saxy Lush
Slider A Vibrato depth
Slider B Swell
Aftertouch Vibrato
MIDI 2 Swell
MIDI 12 Disables Strings layer
MIDI 29 Disables Strings layer
63 Classical Brass
Slider A Vibrato depth
Slider C Envelope control
Slider D Envelope: release rate
Aftertouch Envelope control
64 Fast Key Strings
Slider C Timbre: duller
Slider D Envelope: attack rate
65 Emotional String
Slider A Switches layers
Slider C Timbre: duller
Left Pedal Switches layers
71 Flute & Strings
Slider A Modulation sweep
Slider C Resonance, brightness
Slider D Envelope control: Strings
MIDI 9 Disables Flute layer
MIDI 29 Disables Chiffy layer
72 Bright Voices
Slider A Vibrato depth
Slider C Timbre
Slider D Envelope: attack control; vibrato rate
MIDI 9 Enables chorused layer
73 Crystal Voices
Slider A Vibrato/tremolo depth
Slider C LFO rate control
MIDI 29 Disables oayer
74 Vox & Organ
Slider D Envelope: release rate
MIDI 9
MIDI 12 Disables Vox layer
MIDI 29 Disables organ layer
Transposes organ layer down an
octave
C-24
Page 87

Sound and Controller Information
Controller Assignments for Sounds in Bank 6
75 Big Ooh Voices
Slider A Vibrato depth
Slider D Vibrato rate
MIDI 29 Disables octave layer
76 Big Voices
Slider A Vibrato depth
Slider D Vibrato rate, tremolo rate
MIDI 29 Disables octave layer
77 Bright Syn Vox
Slider A Vibrato depth
Slider C Timbre
Slider D Envelope: attack control; vibrato rate
MIDI 9 Enables chorused layer
MIDI 29 Tranposes up an octave
78 Theater Vox
Slider A Vibrato depth
Slider C Timbre control
Slider D EQ gain
MIDI 9 Envelope control: adds decay
MIDI 29 Alternative attack
82 Technicolor
Slider A Vibrato depth
Slider C Filter cutoff
Slider D
MIDI 9 ASR trigger: resonance
MIDI 29 Swaps layers
Transposes one layer down five
octaves
83 Elan Lead
Slider A Vibrato depth
Slider C Filter cutoff
Slider D Resonance
Aftertouch Vibrato
MIDI 9 Transposes one layer down an octave
MIDI 12 Envelope: release rate
MIDI 29 Swaps layers
84 Sun Spot Lead
Slider A Vibrato depth
Slider C Filter cutoff
Slider D Resonance
Aftertouch Vibrato
MIDI 9 Transposes one layer down an octave
MIDI 12 Envelope: release rate
MIDI 29 Swaps layers
79 SynthVox & Strings
Slider A Vibrato depth
Slider C Vibrato rate
Slider D Envelope: attack rate
Left Pedal Envelope: attack rate
MIDI 29 Disables Strings layer
80 80's Poly Synth
Slider A Vibrato depth
Slider C Filter cutoff
Slider D
MIDI 9 Detunes
MIDI 12 Sample and Hold
MIDI 29 Disables resonance
LFO rate, tremolo depth, envelope
control, Lopass resonance
81 Rez Bass/Poly
Slider A Vibrato depth
Slider C Filter cutoff
Slider D Resonance
MIDI 9 Transposes one layer down an octave
MIDI 12 Envelope: release rate
MIDI 29 Impact
85 80's Mono Lead
Slider A Vibrato depth
Slider C Filter cutoff/resonance
Slider D Crossfade
Aftertouch Vibrato
MIDI 12 Envelope: release rate
MIDI 29 Disables layers
86 Resonant Sweeper
Slider A Vox pitch bend
Slider C Filter sweep range
Slider D Bandpass width
MIDI 9 Transposes one layer down an octave
MIDI 12 Envelope: release rate
MIDI 29 Disables V ox layer
87 Reverse Feedback
Slider A Vibrato depth
Slider C Filter cutoff
Slider D Resonance
MIDI 9 Transposes one layer down an octave
MIDI 12 Envelope: release rate
MIDI 29 Tremolo
C-25
Page 88

Sound and Controller Information
Controller Assignments for Sounds in Bank 6
88 Poseidon
Slider A Tremolo depth
Slider C Filter cutoff, treble boost
Slider D Envelope control
Aftertouch Vibrato
MIDI 9 With MIDI 29, octave transpose
MIDI 29 Enables layer
89 Analogica
Slider A Vibrato depth
Slider C Filter cutoff
Slider D Resonance
Aftertouch Filter cutoff
MIDI 9 Envelope: attack rate
MIDI 12 Envelope: release rate
MIDI 29 Alternative attack, enables layer
90 Anti Rez
Slider A Vibrato depth/rate
Slider C Filter cutoff
Slider D Resonance
MIDI 9 Envelope: attack rate
MIDI 12 Envelope: release rate
MIDI 29 Adds 4th layer, detunes
91 Synth Chorale
Slider A Filter sweep
Slider C Filter cutoff
Slider D Resonance
Left Pedal Crossfade
Aftertouch Volume
MIDI 9 Envelope: release rate
MIDI 29 Envelope: attack rate
92 Ethereal Strings
Slider A Bandpass width & frequency
Slider C Filter cutoff in Layer 2
Slider D Envelope control
MIDI 29 Switches To Meteor Str 2
94 Ooh><Ahh Pad
Slider A Vibrato depth
Slider C Resonance
Slider D Filter cutoff, layer crossfade
Aftertouch Filter cutoff, layer crossfade
MIDI 9 Envelope: attack rate
MIDI 12 Envelope: release rate
MIDI 29 Filter cutoff, layer crossfade
95 Vocalicious
Slider A Different envelope
Slider C Timbre: duller
Slider D Different envelope
Left Pedal Different envelope
MIDI 29 Disables layer
96 Titanium Guitar
Slider A Muted Guitar
Slider C More body
Slider D Fret snap
Left Pedal Muted Guitar
MIDI 9 Finger snap
MIDI 29 Chorus effect
97 Latin Lover
Slider A Muted Guitar
Slider C
Left Pedal Muted Guitar
MIDI 9 Alternative attack
MIDI 29 Disables Knock layer
98 Roto 12 String
Slider A Rotary Fast/Slow
Slider C Filter cutoff
Slider D Envelope control
MIDI 9 Vibrato chorus
MIDI 12 Swaps layers
MIDI 29 Rotary in/out
93 Resonant Notch Vox
Slider A Crossfade, layer detune
Slider C Filter cutoff
Slider D Envelope control, LFO rate
Aftertouch Treble boost
MIDI 2 Treble Boost
MIDI 9 Envelope control: release
MIDI 29 Enables layer
C-26
99 Electric 12
Slider C Filter cutoff
Slider D Envelope: decay
Left Pedal Alternative attack
MIDI 12 Enables layer
MIDI 29 Impact off
100 Twangy Guitar
Slider A Vibrato depth
Slider C Filter cutoff
Slider D EQ gain
MIDI 9 Envelope: decay
MIDI 29 Alternative attack
Page 89

Sound and Controller Information
Controller Assignments for Sounds in Bank 6
101 Chr Elec & Mute
Slider A Vibrato depth
Slider C Filter cutoff
Slider D Impact
MIDI 9 Envelope: decay
MIDI 12
MIDI 29 Adds Mute layers
Alternative attack; disables thump
layer
102 Cmp Chr Elec Gtr
Slider A Vibrato depth
Slider C Filter cutoff
Slider D Impact
MIDI 9 Muted Guitar (envelope: decay)
MIDI 12 Alternative attack
103 Trashed Tubes
Slider A Vibrato depth
Slider C Distortion amount
Slider D Filter cutoff
Aftertouch Fade-in feedback
104 V Finger Bass
Slider A Vibrato depth
Slider C Filter cutoff
Slider D Envelope: attack rate
Aftertouch Vibrato depth
MIDI 9 Impact
MIDI 12 Filter Cymbal layer
MIDI 29 Adds Ride Cymbal
105 Bright Elec Bass
Slider A Vibrato depth
Slider C Timbre: more low end
Slider D Vibrato rate
Aftertouch Pitch bend
MIDI 9 Alternative attack
106 Bright A Bass
Slider A Vibrato depth
Slider C Less Body, more tacky
Slider D Vibrato rate
Aftertouch Pitch bend
MIDI 29 Enable Vtrig Percussion layer
107 Triangle Bass
Slider A Vibrato depth
Slider C Cutoff frequency: deeper
Slider D Vibrato rate
Aftertouch Vibrato
MIDI 9 Envelope: release rate
MIDI 12 Impact
MIDI 29 Adds octave layer
108 Yow Bass
Slider A Vibrato depth
Slider C Filter cutoff
Slider D Resonance
Aftertouch Vibrato depth/rate
MIDI 9 Envelope: release rate
MIDI 12 Disables impact
MIDI 29 Adds octave layer
109 Mono Synth Bass
Slider A Vibrato depth
Slider C Filter cutoff
Slider D Resonance
Aftertouch Vibrato depth/rate
MIDI 9 Envelope: release rate
MIDI 12 Disables impact
MIDI 29 Adds octave layer
110 Power Fuzz Bass
Slider A Vibrato depth
Slider C Filter cutoff
Slider D Resonance
Aftertouch Vibrato depth
MIDI 9 Transpose one layer down an octave
MIDI 12 Impact
MIDI 29 Mutes layer
111 Bass in Face
Slider A Vibrato depth
Slider C Filter cutoff
Slider D Resonance
Aftertouch Vibrato depth
MIDI 9 Layer 1 in 5ths
MIDI 12 Transpose Layer 1 down an octave
MIDI 29 Transpose Layer 3 down an octave
112 Radio Kings
Slider C Timbre
Slider D Pitch control
MIDI 9 Envelope control
MIDI 12 2nd Kit Enable
MIDI 29 Alternative attack
113 Ripper Kit
Slider C Shaper; timbre
Slider D Pitch control
MIDI 9 Envelope control
MIDI 12 2nd Kit Enable
MIDI 29 Alternative attack
C-27
Page 90

Sound and Controller Information
Controller Assignments for Sounds in Bank 6
114 LA Drums
Slider C Timbre
Slider D Pitch control
MIDI 9 Envelope control
MIDI 12 2nd Kit Enable
MIDI 29 Alternative attack
115 Compact Kit
Slider C Shaper; timbre
Slider D Pitch control
MIDI 9 Envelope control
MIDI 12 2nd Kit Enable
MIDI 29 Alternative attack
116 Tube Traps
Slider C Shaper; timbre
Slider D Pitch control
MIDI 9 Envelope control
MIDI 12 Enables 2nd Kit
MIDI 29 Alternative attack
117 Acoustric Kit
Slider C Shaper; timbre
Slider D Pitch control
MIDI 9 Envelope control
MIDI 12 Enables 2nd Kit
MIDI 29 Alternative attack
121 Milky Way Vibes
Slider A Tremolo depth
Slider C Tremolo rate
Left Pedal Alternative attack
MIDI 9 Switches layers
MIDI 29 Alternative attack
122 Percussionist
Slider A Alternative attack
Slider C Timbre
Left Pedal Alternative attack
MIDI 9 Disables layer
MIDI 29 Damps, disables layer
123 Carnival Perc
Slider A Alternative attack
Slider C Timbre
Slider D Muted, faster decay
Left Pedal Alternative attack
MIDI 9 Octave transpose: 2 Layers
MIDI 29 Disables layer
124 Primitive Perc
Slider A Alternative attack
Slider C Different attack for some instruments
Left Pedal Alternative attack
MIDI 9 Disables layer
MIDI 29 Disables layer
118 Dirt Kit
Slider C Timbre
Slider D Pitch control
MIDI 9 Envelope control
MIDI 12 Enables 2nd Kit
MIDI 29 Alternative attack
119 Sump Pump Kit
Slider A Drone layer
Slider C Timbre
Slider D Pitch control
Left Pedal Real Kit layer
Aftertouch Drone layer
MIDI 9 Envelope control
MIDI 12 Ghost layer
MIDI 29 Alternative attack
120 Marimba
Slider A Alternative attack
Slider C Timbre: duller
Slider D Vol Adjust for attack layer
Left Pedal Alternative attack
MIDI 29 Enables attack layer
125 Bunch of Perc
Slider A Alternative attack
Slider C Pitch change
Slider D Enables Aftertouch pitch bend
Middle Pedal Enables Aftertouch pitch bend
Left Pedal Alternative attack
Aftertouch Pitch bend with Middle Pedal or Slider D
MIDI 9 Disables layer
MIDI 29 Damps, disables layer
126 Percussion Party
Slider A Alternative attack
Slider C Transpose 2 Layers; timbre
Slider D Enables Aftertouch pitch bend
Middle Pedal Enables Aftertouch pitch bend
Left Pedal Alternative attack
Aftertouch Pitch bend with Middle Pedal or Slider D
MIDI 9 Disables layer
MIDI 29 Decreases Volume on 1 layer
C-28
Page 91

127 Percussion Circle
Slider A Alternative attack
Slider C Pitch Change in 1 layer
Slider D Enables Aftertouch pitch bend
Middle Pedal Enables Aftertouch pitch bend
Left Pedal Alternative attack
Aftertouch Pitch bend with Middle Pedal or Slider D
MIDI 9 Disables layer C0-G#3
MIDI 29 Disables layer
Sound and Controller Information
Controller Assignments for Sounds in Bank 6
C-29
Page 92

Sound and Controller Information
Controller Assignments for Sounds in Bank 2
Controller Assignments for Sounds in Bank 2
ID Sound Name
0 Grand Piano
1 Bright Grand
2 Electric Grand Tremolo
3 Honky Tonk Piano
4 Elec Piano 1 (Rhodes) Tremolo
5 Elec Piano 2 (FM)
6 GM Harpsichord
7 Clavinet Tremolo
8 GM Celesta
9 Glockenkspiel
10 Music Box Vibrato
11 Vibraphone Tremolo
12 Marimba
13 Xylophone
14 Tubular Bells
15 Dulcimer
16 Drawbar Organ Rotary Speed
17 Percussion Organ Rotary Speed
18 Rock organ Rotary Speed
19 Church Organ Vibrato
20 Reed Organ Tremolo
21 GM Accordion Vibrato
22 Harmonica Vibrato
23 Bandoneon Tremolo
24 Nylon Guitar Vibrato
25 Steel String Gtr Vibrato
26 Jazz Guitar Vibrato
27 Clean Elec Guitar Vibrato
28 Muted Guitar Vibrato
29 Overdrive Guitar Vibrato
30 Distorted Guitar Vibrato
31 Guitar Harmonics Vibrato
Slider A
(MIDI 1)
Other Controllers
ID Sound Name
32 Acoustic Bass Vibrato
33 Finger Bass Vibrato
34 Picked Bass Vibrato
35 Fretless Bass Vibrato
36 Slap Bass 1 Vibrato
37 Slap Bass 2 Vibrato
38 Synth Bass 1 Vibrato
39 Synth Bass 2 Vibrato
40 Violin Vibrato
41 Viola Vibrato
42 Cello Vibrato
43 Contrabass Vibrato
44 Tremolo Strings
45 Pizzicato Strings
46 Harp Vibrato
47 Timpani
48 Ensemble Strings Vibrato
49 GM Slow Strings Vibrato
50 Synth Strings 1 Vibrato
51 Synth Strings 2 Vibrato
52 Choir Aahs Vibrato
53 Voice Oohs Vibrato
54 Synth Vox Vibrato
55 Orchestra Hit
56 Trumpet Vibrato
57 Trombone Vibrato
58 Tuba Vibrato
59 Muted Trumpet Vibrato
60 French Horn Vibrato
61 Brass Section Vibrato
62 Synth Brass1 Vibrato
63 Synth Brass 2 Vibrato
Slider A
(MIDI 1)
Other Controllers
C-30
Page 93

Sound and Controller Information
Controller Assignments for Sounds in Bank 2
ID Sound Name
64 Soprano Sax Vibrato
65 Alto Sax Vibrato
66 Tenor Sax Vibrato
67 Baritone Sax Vibrato
68 Oboe Vibrato
69 English Horn Vibrato
70 Bassoon Vibrato
71 Clarinet Vibrato
72 Piccolo Vibrato
73 Flute Vibrato
74 Recorder Vibrato
75 Pan Flute Vibrato
76 Blown Bottle Vibrato
77 Shakuhachi Vibrato
78 Whistle Vibrato
79 Ocarina Vibrato
80 Square Wave Vibrato
81 Saw Wave Vibrato
82 Synth Calliope Vibrato
83 Chiff lead Vibrato
84 Charang Vibrato
85 Solo Vox Vibrato
86 5ths Saw wave Vibrato
87 Bass & Lead Synth Vibrato
88 Fantasia Pad Vibrato Slider C: Layer 3 Volume
89 Warm Pad Vibrato
90 Poly Synth Pad Vibrato
91 Space Voice Pad Vibrato
92 Bowed Pad Vibrato
93 Metallic Pad Vibrato
94 Halo Pad Vibrato
95 Sweep Pad Vibrato
Slider A
(MIDI 1)
Other Controllers
ID Sound Name
96 Ice Rain Vibrato Slider C: “Rain” Volume
97 Soundtrack Vibrato
98 Crystal Bell Vibrato
99 Atmosphere Vibrato
100 Brightness Vibrato
101 Goblins Vibrato Slider C: “Goblins” Vol
102 Echo Drops Vibrato
103 SciFi Pad Vibrato
104 Sitar Vibrato
105 Banjo Vibrato
106 Shamisen Vibrato
107 Koto Vibrato
108 Kalimba Vibrato
109 Bagpipe Vibrato Slider C, MIDI 9: Tone
110 Fiddle Vibrato
111 Shanai Vibrato
112 Tinkle Bell Vibrato
113 Agogo Vibrato Slider C: Random Pitches
114 Steel Drums Vibrato
115 Woodblock Vibrato Slider C: Random Pitches
116 Taiko Drum Vibrato
117 Melodic Toms Vibrato
118 Synth Drums Vibrato
119 Reverse Cymbal Vibrato
120 Gtr fret noise Vibrato
121 Breath Noise Vibrato
122 Seashore Vibrato
123 Birds Vibrato
124 Telephone Vibrato Slider C: Switch Phones
125 Helicopter Vibrato
126 Applause Vibrato Slider C: Bravo!
127 Gun Shot Vibrato
Slider A
(MIDI 1)
Other Controllers
C-31
Page 94

Sound and Controller Information
Controller Assignments for Sounds in Bank 7
Controller Assignments
for Sounds in Bank 7
0 Stereo Pizzicato
Slider C Timbre
1 Dry Pizzicato
Slider C Timbre
Slider D Env decay
2 Tremolo Strings 2
Slider A Alt Attack
Slider C Timbre
Slider D Volume
3 Mono Pizzicato
Slider C Timbre
4 Mono Tremolo
Slider A Alt Attack
Slider C Timbre
Slider D Volume
10 Total Orchestra 2
Slider A Defeat Vibrato
Slider C Layer gain
Slider D Envelope shaping
Aftertouch balance
11 Cathedral Pipes
Slider C Timbre
Slider D Release Rate
12 Church Pipes
Slider C Timbre
Slider D Release Rate
13 Classical Guitar
Slider A Vibrato
Slider B No Release Layer
Slider C Timbre
Slider D Envelope
14 K250 Choir
Slider C Timbre
Slider D Envelope
Aftertouch Volume
5 Baroque Strngs
Slider C Timbre
Slider D Envelope shaping
Aftertouch Volume
6 Chamber Section
Slider C Timbre
Slider D Envelope shaping
Aftertouch Volume
7 Dynamic Harp
Slider C Timbre
Slider D Release Rate
8 Harp Glissando
Slider C Timbre
9 Total Orchestra 1
Slider A Defeat Vibrato
Slider C Layer gain
Slider D Envelope shaping
Aftertouch balance
15 CathedralChoir
Slider C Timbre
Slider D Envelope
Left Pedal soft ped-pno
Aftertouch Volume
16 Soft Trumpet
Slider A Vibrato
Slider C Timbre
Slider D Envelope
Aftertouch Vibrato
17 Solo French Horn
Slider A Timbre/Swell
Slider C Timbre
Aftertouch Vibrato
18 French Horn Section
Slider C Timbre
Slider D Envelope
C-32
Page 95

19 Harmon Mute Trumpet
Slider A Vibrato
Slider C Timbre
Aftertouch Vibrato
Slider A Vibrato
20 Brass & Horn
Slider C Timbre
Slider D Envelope
Aftertouch Swell
21 Soaring Brass
Slider C Timbre
Slider D Envelope
Aftertouch Swell
22 Dyn Hi Brass
Slider C Timbre
Slider D Envelope
Aftertouch Swell
Sound and Controller Information
Controller Assignments for Sounds in Bank 7
23 Dyn Lo Brass
Slider C Timbre
Slider D Envelope
Aftertouch Swell
24 Solo Flute
Slider C Timbre
Slider D Envelope
25 Double Reeds
Slider A Vibrato
Slider C Timbre
Slider D Envelope
Aftertouch Vibrato
26 Woodwind Section
Slider A Vibrato
Slider C Timbre
Slider D Envelope
Aftertouch Vibrato
27 Orchestra Perc
28 Jazz Drum Set
C-33
Page 96

Page 97

Index
A
activating reverb and effects in zones 3-12
adjusting display contrast 1-4
adjusting keyboard sensitivity 3-19
adjusting playing range 2-2
adjusting reverb 2-3
adjusting reverb and effect levels 3-12
adjusting sound levels 2-2, 3-3
adjusting tempo 3-4
adjusting the reverb level of the metronome 3-4
adjusting the tuning 3-2
adjusting the volume of the metronome 3-4
adjusting tone 1-3
adjusting volume 1-3
aftertouch 1-3, 4-7
All Notes Off messages 4-10
All Notes Off messages, ignoring 4-5
arpeggiator 3-5–3-9, 4-6, 4-11
latching parameters 3-8
note shift parameters 3-7
playing parameters 3-6
volume 3-9
assigning pedals and controllers 3-13
audio output mode 3-20
audio specifications B-3
Kurzweil V150/V110 Musician’s Guide
Index
customizing the rhythm player 3-5
D
default Panel Memory 3-16
default physical controller assignments C-9
default settings 3-21
demo 1-5
diagnostics A-3
diagram of front panel iv
display 1-4
display buttons 1-4
display contrast 1-4
display pages 1-4
drawbar controls (KB3 sounds) 3-10
drawbar organs 3-10
drum tracks 3-5
dusting the V150/V110 1-2
E
effects 3-11
effects (KB3 sounds) 3-13
effects, activation in zones 3-12
effects, customizing 3-13
electrical specifications B-2
environmental specifications B-2
expression pedal 1-4
external sequencers 4-11
external sync 4-6
B
Bank Select messages 4-7
banks of Panel Memories 3-16
bass 1-3
battery 1-2
battery, replacing A-1
bending the pitch 1-3, 4-7
boot block A-2
boot block, installing A-3
C
categories of sounds 3-1
changing the split point 2-1
channel aftertouch 1-3, 4-7
channel assignments for sounds 4-6
channels for each zone 4-5
choosing sounds 1-5
chorus/vibrato (KB3 sounds) 3-11
cleaning the V150/V110 1-2
clearing Panel Memories and preferences 3-21
computers 4-3, 4-4
connecting MIDI cables 4-1
contrast (display) 1-4
Control Change messages 4-7
controllers
KB3 B-5
MIDI (list) B-4
controlling drawbars (KB3 sounds) 3-10
controlling other MIDI instruments 4-5
customizing reverb and effects 3-13
F
factory defaults 3-21
fallboard lights (V150 only) 1-5
foot pedals 1-4
frequency ranges B-2
front panel iv
G
General MIDI 4-9
General MIDI sounds 3-1
getting started 1-2
H
hard reset A-3
headphones 1-2
I
ignoring All Notes Off messages 4-5
implementation chart, MIDI B-6
installation information ii
installing a boot block A-3
installing a new battery A-1
installing operating system or sounds A-2
interference ii
I-1
Page 98

Kurzweil V150/V110 Musician’s Guide
Index
K
KB3 controllers B-5
KB3 sounds 3-10
reverb and effects 3-13
keyboard 1-3
keyboard lights (V150 only) 1-5
keyboard sensitivity 3-19
keyboard transposition 3-2
keytouch 3-19
Kurzweil website iii
L
layering and splitting sounds 2-1
layering sounds 3-3
left sustain 3-4
levels, reverb and effects 3-12
lights (V150 only) 1-5
list of programs C-6
list of sounds (by category) C-2
list of sounds (by sound ID) C-5
local control 4-5, 4-10
M
maintenance A-1
master (MIDI) 4-2
memory protection 1-2, A-1
menus, selecting 1-5
metronome 2-2, 3-4, 4-6
metronome reverb level 3-4
metronome volume 3-4
MIDI 4-1
Controllers, list of B-4
implementation chart B-6
master and slave 4-2
MIDI channels and sounds 4-6
MIDI channels for each zone 4-5
MIDI clock messages 4-11
MIDI Controllers 1-3
MIDI messages 4-6
MIDI preferences 3-19, 4-5
MIDI Thru 4-3
midrange 1-3
mono and stereo 3-20
N
Note On and Note Off messages 4-6, 4-7
O
octave shift 2-2, 3-3
operating system, installing A-2
organs with drawbars 3-10
P
pages (in display) 1-4
Panel Memories 2-3, 3-15
clearing 3-21
saving 3-17
Panel Memory banks 3-16
pedal, starting rhythm with 2-2
pedals 1-4
pedals, assigning 3-13
pedals, using the left for sustain 3-4
pedals, zone assignments 3-15
percussion effects (KB3 sounds) 3-11
performance sliders 3-1
physical controller assignments C-9
physical specifications B-1
pitch bender 1-3, 4-7
playing in a different key 3-2
playing in tune with other instruments 3-2
playing the demo 1-5
power consumption B-2
preferences 3-18
preferences, clearing 3-21
preferences, MIDI 3-19, 4-5
preferences, remembering 3-20
prerecorded drum tracks 3-5
preserving Panel Memories 1-2
press-and-hold buttons 1-5
Program Change messages 4-7
programs, list of C-6
protecting the V150/V110’s memory A-1
R
radio interference ii
RAM A-1
remembering preferences 3-20
replacing the battery A-1
resetting the V150/V110 3-21, A-3
reverb 2-3, 3-11
reverb (KB3 sounds) 3-13
reverb and effect levels 3-12
reverb level of metronome 3-4
reverb, activation in zones 3-12
reverb, customizing 3-13
rhythm 2-2, 3-4, 3-5
rhythm start/stop 3-14
rotary speaker effect (KB3 sounds) 3-11
running diagnostics A-3
S
safety information ii
saving Panel Memories 2-3, 3-17
selecting menus 1-5
selecting sounds 1-5, 3-1
sensitivity of keyboard 3-19
sequencers 4-11
setting up 1-2
shifting sounds by an octave 2-2
slave (MIDI) 4-2
sliders 1-3
Sliders A–D 3-1
sliders, assigning 3-14
sliders, zone assignments 3-15
soft pedal 1-4, 3-14
soft thru 4-11
software upgrades A-2
sostenuto 1-4, 3-14
I-2
Page 99

Kurzweil V150/V110 Musician’s Guide
Index
sound categories 1-5, 3-1
sound levels 2-2, 3-3
soundlist (by category) C-2
soundlist (by sound ID) C-5
sounds, channel assignments 4-6
sounds, choosing 1-5
sounds, General MIDi 3-1
sounds, layering 3-3
sounds, layering and splitting 2-1
sounds, selecting 3-1
sounds, splitting 3-2
special button functions 1-5
specifications B-1
split point 2-1, 3-3
Split sounds 3-2
Split sounds, sustaining 2-2
starting the metronome with a pedal 2-2
stereo and mono 3-20
sustain 1-4, 3-14
sustain (for Split sounds) 2-2
sustaining with the left pedal 3-4
synchronizing with other MIDI instruments 4-6, 4-11
System Exclusive (MIDI) messages 4-9
T
television interference ii
tempo 3-4
tone control 1-3
transposing 3-2
treble 1-3
tuning 3-2, 3-19
turning General MIDI on and off 4-9
turning on the V150/V110 A-1
tutorial 2-1
zone channels 4-5
zones and reverb/effects 3-12
U
upgrades A-1, A-2
using headphones 1-2
using the metronome 2-2
V
V150/V110 front panel iv
V150/V110 specifications B-1
volatile memory A-1
voltage ranges B-2
volume control 1-3, 1-4
volume of metronome 3-4
W
website iii
Y
Young Chang International Contacts iii
Z
zone assignments for pedals and sliders 3-15
I-3
Page 100

 Loading...