

Page 1

INTRODUCTION TO THE
MicroPiano
TM
TM
Page 2

INSTRUCTIONS PERTAINING TO A RISK OF FIRE, ELECTRIC SHOCK, OR INJURY TO PERSONS
IMPORTANT SAFETY AND INSTALLATION INSTRUCTIONS
WARNING - When using electronic products, basic precautions should always be followed. Read all
of the Safety and Installation Instructions before using the product.
Do not use this product near water, such as near a bathtub, sink, in a wet basement, near
a swimming pool, or the like.
This product, in combination with an ampliÞer and speakers or headphones, may be capable of
producing sound levels that could cause permanent hearing loss. Do not operate for a long period of
time at a high volume level or at a level that is uncomfortable. If you experience any hearing loss or
ringing in the ears, you should consult an audiologist.
The product should be located away from heat sources such as radiators, heat registers, or other
products that produce heat.
The product should be connected to a power supply only of the type described in the operating
instructions or as marked on the product.
This product is equipped with a polarized line plug (one blade wider than the other). This is a
safety feature. If you are unable to insert the plug into the outlet, contact an electrician to replace your
obsolete outlet. Do not defeat the safety purpose of the plug.
The product should be serviced by qualiÞed service personnel when:
A. The plug has been damaged; or
B. Objects have fallen upon, or liquid has been spilled into the product; or
C. The product has been exposed to rain; or
D. The product does not appear to be operating normally or exhibits a marked change
in performance; or
E. The product has been dropped, or the enclosure damaged.
Do not attempt to service the product. All servicing should be referred to qualiÞed
service personnel.
WARNING - Do not place the power cord, or the product in a position where anyone could trip over,
walk on, or roll equipment over them. Do not allow the product to rest on or be installed over cords of
any type. Do not place the power module where it cannot receive cooling air, such as under a rug.
Improper installations of this type may create the possibility of a Þre hazard and/or personal injury.
RADIO AND TELEVISION INTERFERENCE
Warning: Changes or modiÞcations to this instrument not expressly approved by Young Chang could
void your authority to operate the instrument.
Important: When connecting this product to accessories and/or other equipment use only high quality
shielded cables.
Note: This instrument has been tested and found to comply with the limits for a Class B digital
device, pursuant to Part 15 of the FCC Rules. These limits are designed to provide reasonable protection
against harmful interference in a residential installation. This instrument generates, uses, and can radiate radio frequency energy and, if not installed and used in accordance with the instructions, may cause
harmful interference to radio communications. However, there is no guarantee that interference will not
occur in a particular installation. If this instrument does cause harmful interference to radio or television
reception, which can be determined by turning the instrument off and on, the user is encouraged to try
to correct the interference by one or more of the following measures:
¥ Reorient or relocate the receiving antenna.
¥ Increase the separation between the instrument and the receiver.
¥ Connect the instrument into an outlet on a circuit other than the one to which
the receiver is connected.
¥ If necessary consult your dealer or an experienced radio/television technician for
additional suggestions.
NOTICE
This apparatus does not exceed the Class B limits for radio noise emissions from digital apparatus set
out in the Radio Interference Regulations of the Canadian Department of Communications.
AVIS
Le present appareil numerique nÕemet pas de bruits radioelectriques depassant les limites applicables
aux appareils numeriques de la class B prescrites dans le Reglement sur le brouillage radioelectrique
edicte par le ministere des Communications du Canada.
SAVE THESE INSTRUCTIONS
Page 3

TABLE OF CONTENTS
Page
Introduction and Overview................................................... 1
Setting Up and Caring for Your MicroPiano .................2
Mounting Your MicroPiano
to a Half-Rack Adapter ................................................. 2
Connecting Your MicroPiano ................................ 3
Playing Your MicroPiano ..................................................4
Turning on Your MicroPiano ..................................4
MIDI Indicator ............................................................... 5
The DEMO Sequence.................................................... 5
Program............................................................................ 6
Effects............................................................................... 7
Channel............................................................................ 8
Transpose .........................................................................8
Tuning...............................................................................8
ConÞguring Your MicroPiano ..........................................9
Link Mode ConÞguration ...........................................10
Program Change/Enable..............................................10
Velocity Response Curves...........................................11
MIDI .........................................................................................11
MIDI Implementation Chart ......................................13
In Case of DifÞculty...............................................................14
Product SpeciÞcations ...........................................................16
Pull-out Chart of Programs...................................................17
Pull-out Chart of Effects........................................................18
List of Distributors.................................................................19
©1993 All rights reserved. Kurzweil is a product line of Young Chang Co.; Kurzweil
and MicroPiano are trademarks of Young Chang Co.
All other products and brand names are trademarks or registered trademarks of their
respective companies.
Product features and speciÞcations are subject to change without notice.
Part Number: 910228 Rev.D
Page 4

Page 5
OVERVIEW
The MicroPiano is a 32-voice MIDI sound module.
Designed in a single space, half-rack unit, the
MicroPiano is very easy to use. Basically, you select
a sound by pressing the Program button, then turning the Data knob at the far right of the module.
You can also select the desired EFFECTS, CHANNEL, TRANSPOSE, and TUNING modes by pressing one of their respective buttons on the front
panel, and you select the values in each mode with
the Data knob. The value you select for each mode
is retained until you change it, or turn the power
off.
The default setting for the Program mode is
Ò1Ó (Classical Piano). The default setting for
EFFECTS is (ÒPrgÓ). ÒPrgÓ designates that each
program selected in Program mode has its own
default effect associated with it. See the PROGRAM
and EFFECTS sections for more details about how
programs and effects interact.
The default setting for the CHANNEL mode
is Ò1.Ó The default settings for TRANSPOSE and
TUNING modes are Ò0Ó when you turn on the
MicroPiano.
Each of these modes is discussed in greater
detail in the section entitled, ÒPLAYING YOUR
MICROPIANO.Ó
1
INTRODUCTION
Welcome to the Kurzweil MicroPiano!ª You now
have a simple and effective way to enhance your
music with KurzweilÕs superior piano sound technology. As with our other Kurzweil products, we
think youÕll Þnd the sounds to be very realistic.
This manual will serve to walk you though hooking up your MicroPiano safely and using it to its
greatest capacity. Save this manual as a reference.
Now is a good time to Þll out and return the
postage-paid registration card which comes with
your MicroPiano. If we know who you are, we
will be able to keep you informed of the latest
developments and new products from Kurzweil.
Thanks.
Page 6

2
SETTING UP AND CARING
FOR YOUR
MicroPiano
See the ÒImportant Safety and Installation
InstructionsÓ on the inside front cover for
important information as you set up and
turn on your MicroPiano.
Never take apart your MicroPiano. There
are no user-serviceable parts inside.
Clean your MicroPiano with a soft, dry cloth.
Do not use aerosol sprays on or near the
MicroPiano.
Mounting Your
MicroPiano
to a Half-Rack Adapter
The MicroPiano is a single-space, half-rack
module designed to Þt securely into any standard
19" equipment rack. For safety, do not turn on the
power source for other devices in your MIDI
system until the MicroPiano is connected.
If you desire to mount the MicroPiano in
your current equipment rack, Kurzweil recommends you purchase a standard half-rack adapter
from your local dealer.
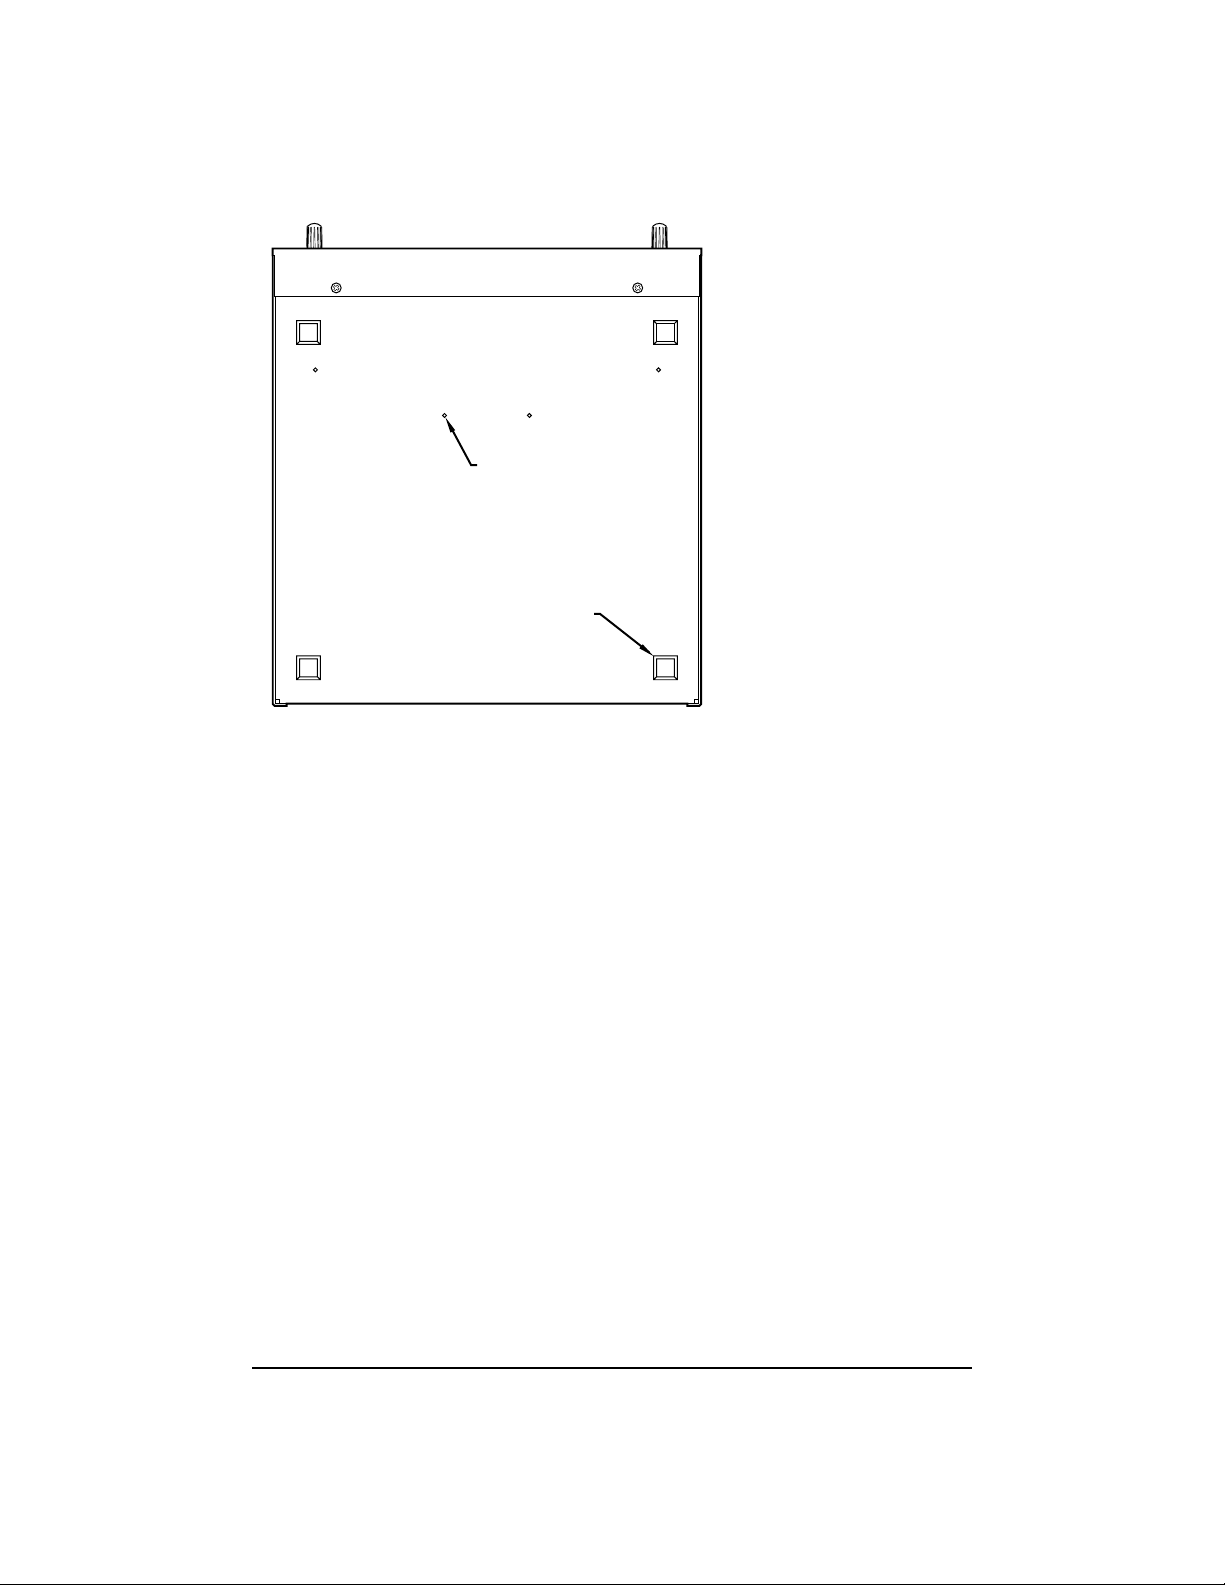
Enclosed with the MicroPiano are four screws
and four small adhesive-backed rubber feet for
mounting the unit to any half-rack adapter. Attach
the rubber feet as shown in the diagram on the
next page. The feet are required to be attached to
the MicroPiano, whether you mount it in a halfrack adapter or sit it on a table.
To mount the MicroPiano to a half-rack
adapter, you must use the screws supplied. The
four holes in the bottom of the MicroPiano are
positioned such that they should line up with at
least two mounting holes in most standard
adapters.
See the illustration on the next page for more
mounting information.
Be sure to USE THE
SCREWS THAT COME
WITH THE UNIT.
They are 3/8 " in length
and intended for use in
conjunction with the
rubber feet. If these
screws are misplaced,
do not substitute with
screws that are longer than
3/8" in length. If the screws
are longer than that, they
will hit electronic components within the
MicroPiano and very
likely damage it.
Page 7
3
MicroPiano Mounting Diagram
Be sure to USE THE SCREWS THAT COME
WITH THE UNIT. They are
3/8" in length and
intended for use in conjunction with the rubber
feet. If these screws are misplaced, do not substi-
tute with screws that are longer than
3/8" in length.
If the screws are longer than that, they will hit
electronic components within the MicroPiano
and very likely damage it.
Connecting Your MicroPiano
Turn the Volume knob on the MicroPiano
counter-clockwise until it clicks before plugging
in the MicroPiano or other MIDI equipment, to
ensure the unit is OFF.
Better yet, make sure that your audio system
is OFF before hooking anything up.
Apply a rubber foot in each
corner approximately as
shown.
Holes for mounting unit
to a standard half-rack
adapter.
Page 8
4
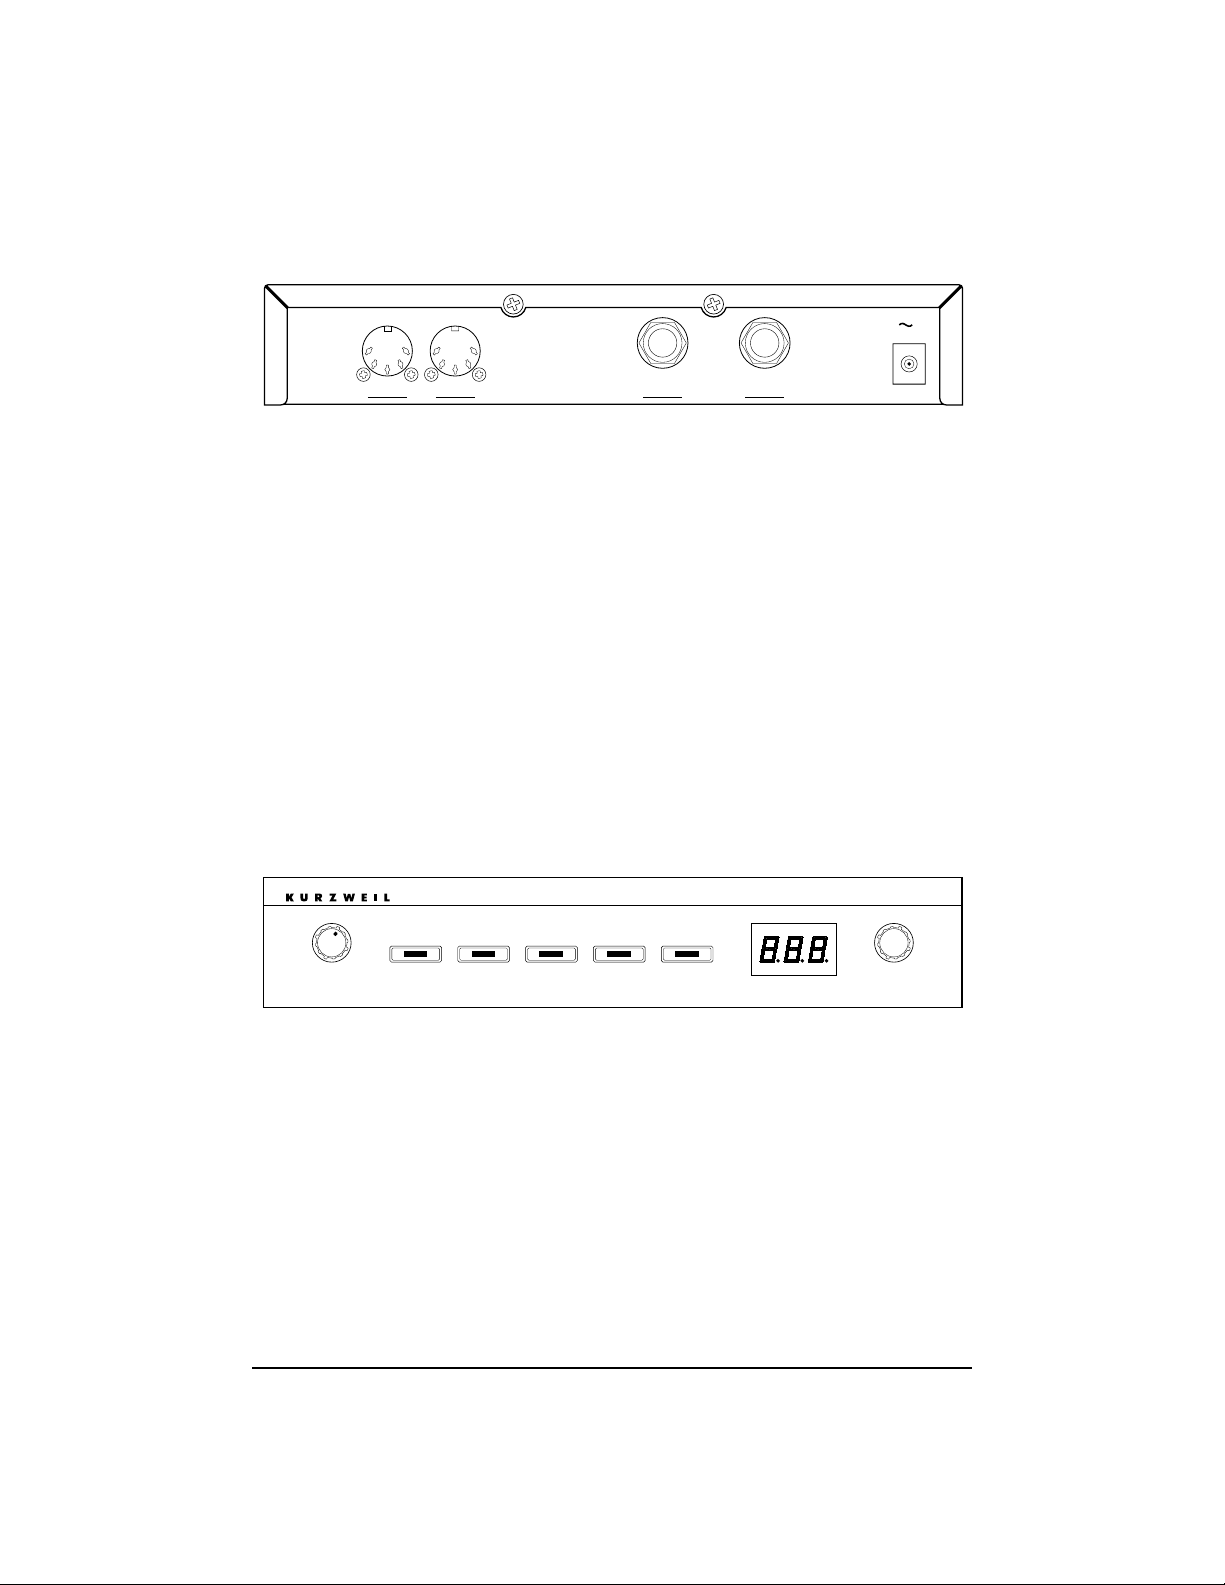
Look at the back of the MicroPiano. It looks like
this:
MicroPiano Rear Panel
The MIDI IN and MIDI THRU ports work as
follows: Plug the MIDI OUT from your keyboard
into the MIDI IN port on the MicroPiano, using
any standard MIDI cable. If necessary, you can
connect the MIDI THRU on the MicroPiano to the
MIDI IN port of another device in your MIDI system Ñ effects processors or sound modules, etc.
Audio Out Left (MONO) and Right connec-
tions allow you to hook up the MicroPiano to your
ampliÞer or mixer. To get the full signal in mono,
plug a cable into the left jack only.
PLAYING YOUR MicroPiano
The front of the MicroPiano looks like this:
MicroPiano Front Panel
Turning On Your MicroPiano
The knob furthest to the left controls the
MicroPianoÕs ON/OFF function and its volume.
Be sure this Volume knob is turned counter-clock-
wise whenever you turn on your audio system.
1.0A
9V AC
(MONO) RIGHT
AUDIO OUT
LEFT
MIDI
IN THRU
Power/Volume Data
MicroPiano
ProgramEffectsChannelTransposeTuning
Page 9

5
After connecting the power, audio, and MIDI
cables, turn the MicroPiano on by rotating the
Power/Volume knob slightly clockwise until it
clicks. Within one second, all of the front panel
LEDs and all of the display segments will light
brießy. The LEDs then turn off, and the display
changes to show the software version number.
Finally, the Program LED will turn on and the
display will show a Ò1,Ó indicating that the
MicroPiano is in PROGRAM mode and is
operating normally.
Be sure your controller keyboard is
transmitting on MIDI Channel 1.
You may now begin to send MIDI signals
to the MicroPiano and adjust the Volume knob
and your audio system to a comfortable listening
level.
If the MicroPiano fails to operate as just
described, refer to the ÒIN CASE OF DIFFI-
CULTYÓ section on page 14.
MIDI Indicator
When you are sending MIDI signals on the same
channel on which the MicroPiano is set to receive,
the leftmost decimal point on the LED display
will ßash, indicating that you are receiving MIDI
messages.
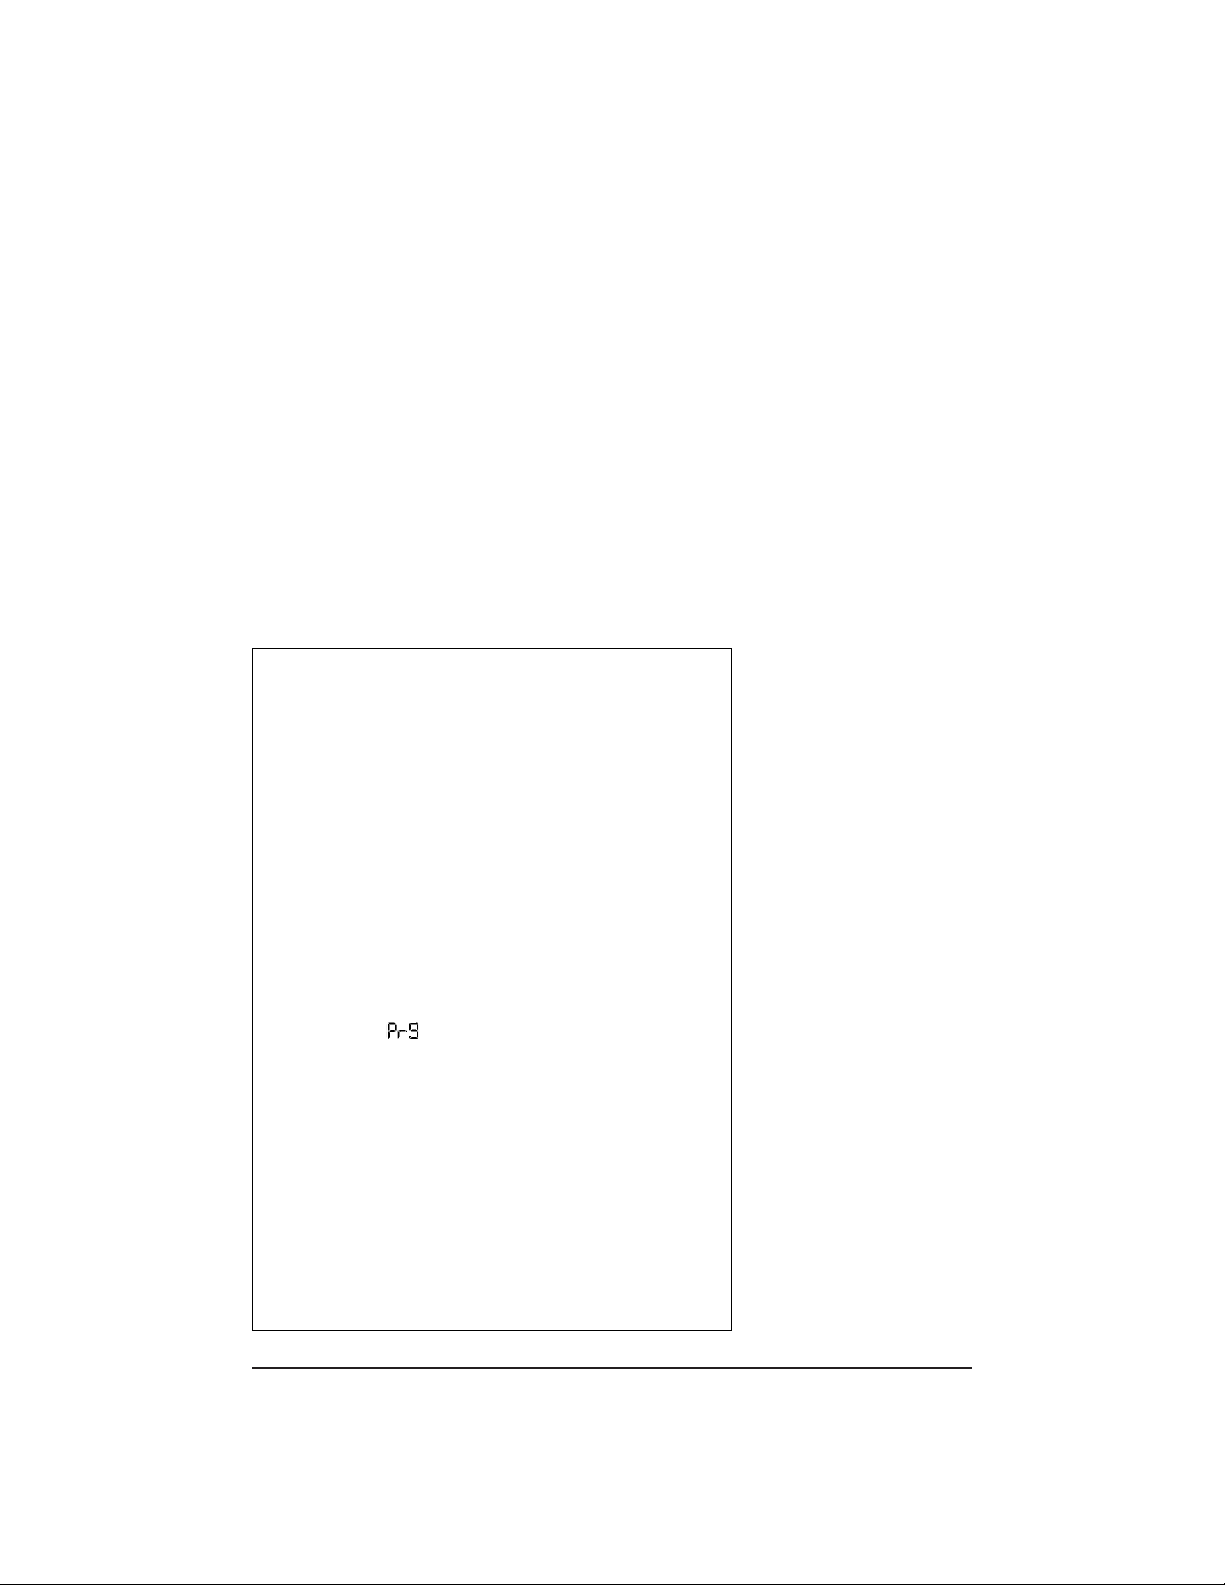
The DEMO Sequence
To hear some of the capabilities of the MicroPiano,
try listening to the DEMO sequence. This can be
done by selecting CHANNEL mode and turning
the Data knob past 16. The display will look like
this:
and the DEMO sequence will play.
Page 10

6
Program
Press the Program button then dial up the desired
sound with the Data knob. Pick one and try it out!
The default setting for the PROGRAM mode is
Ó1,Ó which corresponds to Classical Piano.
You can select from the following sounds:
MicroPiano Programs
Program Program
Number Name
1 Classical Piano, solo tuning (beat-tuned)
2 Stage Piano, solo tuning (beat-tuned)
3 Classical Piano, ensemble tuning (440-tuned)
4 Stage Piano, ensemble tuning (440-tuned)
5 Bright Piano
6 Sustain Piano
7 Stage Piano & Strings
8 Piano & String Pad
9 Tack Piano
10 Bright Electric Grand
11 Tight Electric Grand
12 Warm Electric Grand
13 Digital Electric Grand
14 Classic Electric Piano
15 Digital Electric Piano
16 Dyno-Electric Piano
17 Hard Dyno-Electric Piano
18 Stereo Hard Electric Piano
19 Stereo Tremolo Digital
Electric Piano
20 Digital Electric Piano &
String Pad
21 Rock Organ 1
22 Rock Organ 2
23 Percussion Organ
24 Ballad Organ 1
25 Ballad Organ 2
26 Organ & Piano
27 Fast Strings 1
28 Fast Strings 2
29 Touch Strings
30 Stereo Slow Strings
31 Stereo Slow String Pad
32 Slow Digital Pad
Page 11

Effects
Press the Effects button then turn the Data knob
to access the following effects:
You may select different effects with the Data
knob, if you wish to change the pre-selected effect.
Select Ò0Ó for No Effect.
Any effect you choose other than ÒPrgÓ will
remain active when you change programs.
Choose ÒPrgÓ to return to a programÕs default
effect.
You can also select an effect by sending the
MicroPiano a MIDI controller 83 message with one
of the values shown in the above chart. Note that
any value greater than 16 selects ÒPrgÓ mode.
The effects provided with the MicroPiano
consist of several types of reverb with and
without chorus, as well as the Deep Space
effectÑa unique combination of reverb and
echo. Try them out.
7
MicroPiano Effects
MIDI #83 Name
Value
0 No Effect
1 Room
2 Bright Room
3 Stage
4 Bright Stage
5 Hall
6 Bright Hall
7 Large Hall
8 Large Bright Hall
9 Chorus
1
0 Room + Chorus
11 Bright Room + Chorus
12 Stage + Chorus
13 Bright Stage + Chorus
14 Hall + Chorus
15 Bright Hall + Chorus
16 Deep Space
17-127 Prg (default effect for program)
Page 12

8
The default setting for the EFFECTS mode
when the MicroPiano is turned on is ÒPrg.Ó
Remember, each program has its own predetermined effect, so changing a program when
in the PROGRAM mode will change the effect.
See pages 6 and 7 or the pull-out charts on pages
17 and 18, for a listing of the MicroPianoÕs programs and effects.
The Wet/Dry Mix of reverb can be adjusted
from your master controller by sending MIDI controller 91 messages. Values 0-127 change the mix
from dry to wet.
The Wet/Dry Mix of chorus can be adjusted
from your master controller by sending MIDI controller 93 messages. Values 0-127 change the mix
from dry to wet.
When you change the EFFECTS mode (either
through the front panel or through MIDI), the
Wet/Dry Mix is reset to the new effectÕs default.
Similarly, when you change the PROGRAM mode
while the EFFECTS mode is set to ÒPrg,Ó the
Wet/Dry Mix is reset to the new effectÕs default.
Channel
Press the Channel button then turn the Data knob
to select the MIDI channel to which your
MicroPiano will respond (1 - 16).
The default setting for the MIDI Channel is
Ò1Ó when the MicroPiano is turned on. The
MicroPiano responds to one channel at a time.
Note: will also appear in this display when
you turn the data knob past 16. See
page 5 for an explanation of the DEMO sequence.
Transpose
The MicroPiano can be transposed up or down
within a range of 24 semitones (± 2 octaves) by
using the Transpose button and then the Data
knob. Press the Transpose button and then
move the Data knob to the left or the right to
control the transposition.
Effect Wet/Dry Mix
Page 13

9
The default setting for TRANSPOSE is Ò0Ó
when the MicroPiano is turned on. Note: If the
MicroPianoÕs transpositions are extreme, certain
notes on an 88-key controller (the highest and
lowest ones) may be out of range for the
MicroPiano and will not sound.
Tuning
The Tuning button allows you to tune the unit
plus or minus 50 cents (one quarter step) in 1 cent
increments. This allows you to easily tune with
other instruments in your ensemble.
Press the Tuning button, then turn the Data
knob to select the desired tuning. Turning the
Data knob to the left tunes the MicroPiano ßat,
while turning the Data knob to the right tunes the
MicroPiano sharp Ñ within a range of ± 50 cents.
The default setting for TUNING is Ò0Ó when
the MicroPiano is turned on. Note: The Þrst two
piano programs are ÒbeatÓ tuned, like an acoustic
piano. Since the higher harmonics of a stretched
string tend to be sharper than those of the real harmonic series, beat tuning ensures that the piano
remains in tune with itself harmonically. For this
reason, beat tuning is sometimes referred to as
ÒsoloÓ tuning. The second two programs offer
straight tuning, where the fundamental of each
note is tuned to A440. This allows for better mixing with other acoustic and electronic instruments.
This type of tuning, therefore, is sometimes
known as Òensemble tuning.Ó
CONFIGURING YOUR MicroPiano
¥ To enter CONFIGURATION mode, press
and hold the Tuning button while you turn
on your MicroPiano. You will note that the
Tuning LED is blinking. You are now in
CONFIGURATION mode.
¥ To exit CONFIGURATION mode, press
the Transpose button.
Page 14

10
Link Mode Configuration
The MicroPiano can be set to respond to certain
MIDI note numbers. This is done by pressing the
Channel button and turning the Data knob while
in CONFIGURATION mode.
If the LED reads , the MicroPiano will
respond to ALL notes sent to it. If the unit is set to
the unit will only respond to EVEN MIDI
note numbers; will only respond to ODD
notes. By chaining two MicroPianos together with
MIDI THRU and setting one to ODD and the
other to EVN, you can have 64-voice polyphony!
Note: For reference, Middle C on the
MicroPiano is number 60, and notes go up or
down from there.
The default setting for LINK mode is ÒALLÓ
when the MicroPiano is turned on.
Program Change/Enable
You can also enable or disable whether the
MicroPiano will respond to MIDI program
changes. Press Program while in the CONFIGURATION mode, and select either ON or OFF,
by turning the Data knob.
ON means the MicroPiano will allow program
(patch) changes, OFF will not allow program
changes. This is useful when there is more than
one MIDI device sharing the same MIDI channel
and you want to send program changes to other
devices, without affecting the MicroPiano, or if
your sequencer is sending program changes that
you wish to ignore with the MicroPiano.
The default setting for PROGRAM
CHANGE/ENABLE is ÒONÓ when the
MicroPiano is turned on.
¥ After you have conÞgured the MicroPiano,
press the Transpose button to return to
normal operation.
Page 15

11
Velocity Response Curves
Many programs in the MicroPiano are designed
for a full range of velocity sensitivity. The touch
response and MIDI velocity transmission vary
with each controller keyboard. With this feature,
you can adjust how the MicroPiano responds to
different velocity curves sent from particular
controllers.
To select a curve in CONFIGURATION mode,
press the Effects button, then turn the Data knob
to choose a curve. You will notice the Effects LED
blinking. Several curves are offered for the
MicroPiano. Curve 1 is the default setting. The
best way to choose the right curve for your controller is to play repeated notes from soft to loud,
and listen to the timbre and volume differences as
you select different curves.
The MicroPiano lets you choose from the following velocity response curves:
MIDI
The MicroPiano uses MIDI (Musical Instrument
Digital Interface) to receive input from a keyboard controller and to send messages to other
musical instruments. Standard MIDI cables provide the connection between the MIDI ports of
one piece of equipment and those of another. To
keep things simple, there are only two valid MIDI
connections: OUT to IN and THRU to IN. (See the
illustration on the next page.)
MicroPiano Velocity Response Curves
No. Name Description
1 <no mapping> for controllers that send the full range of
velocities on a linear curve
2 Easier for Òlight-velocityÓ keyboards such as the
Yamaha¨ SY77
3 Harder for slightly Òhot velocityÓ keyboards such as the
Roland¨ JV1000
4 Hardest for Òhot-velocityÓ keyboards such as the
Korg¨ 01/W
Page 16

12
echnologyTynthesisSrchitectureAVariable
Link
C4
SETUP
QUICK ACCESS
EFFECTS DISK
SONG
MASTER
PROGRAM MIDI
EDIT
CHAN / BANK
CONTROLLERVOLUME
Layer/Zone
Mute 3
FX Bypass Compare
Jump
Mark
Prev Pg
Mute 2
Mute 1
EXIT
12
3
6
5
4
7
89
CLR
0
ENTERCANCEL
Space
0 - 9UPPER / lower
Y ZV W XS T U
P Q RM N OJ K L
G H ID E FA B C
Gain +
Gain -
Samp/Sec
Zoom +
Zoom -
K2000S
Sampler
Tuning Transpose Channel Effects Program
MicroPiano
DataPower/Volume Power/Volume Data
MicroPiano
ProgramEffectsChannelTransposeTuning
MIDI
OUT
IN
MIDI
MIDI
IN
MIDI
THRU
THRU
MIDI
MIDI
IN
MODULE
MIDI
MIDI IN receives MIDI
information from other
MIDI equipment.
MIDI THRU duplicates
the information received
by IN and passes it to
other equipment.
A typical MIDI system, utilizing two MicroPianos
for 64-note polyphony.
The MicroPiano is capable of receiving the
following MIDI messages:
¥ Note On Messages with attack velocity Ñ
Your sound is touch-sensitive in most
MicroPiano programs.
¥ Note Off Messages
¥ Program Change Messages Ñ Response to
program change messages can be disabled
in CONFIGURATION mode.
¥ Sustain Messages (MIDI 64)
¥ Sostenuto Messages (MIDI 66)
¥ Soft Pedal Messages (MIDI 67)
¥ Volume Messages (MIDI 7)
¥ Effect Select Messages (MIDI 83)
¥ Modulation Messages (MIDI 01),
in some programs.
¥ Effects Depth (Reverb) Messages (MIDI 91)
¥ Effects Depth (Chorus) Messages (MIDI 93)
Page 17

MIDI IMPLEMENTATION CHART
Manufacturer: Date: Nov. 1993
Young Chang
Model: Kurzweil MicroPiano
Sound Module
Function Transmitted Recognized Remarks
Basic Channel Default X 1
Changed X 1-16
Mode Default X X always in Mode 3
Messages X X
Altered X X
Note Number X 0-127 key range:
True Voice X 12-108 C0-C8
Velocity Note ON X O
Note OFF X X
After Touch Keys X X
Channel X X
Pitch Bender XX
Control Change MIDI 1 X O
1
modulation
MIDI 7 X O volume
MIDI 64 X O sustain pedal
MIDI 66 X O sostenuto pedal
MIDI 67 X O soft pedal
MIDI 83 X O
2
effect select
MIDI 91 X O reverb depth
MIDI 93 X O chorus depth
Program Change XO
3
0-32
4
True # 1-32
System Exclusive XX
System Song Pos X X
Common Song Sel X X
Tune X X
System Clock X X
Real Time Messages X X
Aux Messages
Local Control X X
All Notes Off X O
Active Sense X X
Reset X X
Notes 1. for some programs
2. see effects chart for values
3. can be disabled
4. true voice program 1 can be selected
by MIDI program change 0
or
1
Mode 1: OMNI ON, POLY Mode 2: OMNI ON, MONO
Mode 3: OMNI OFF, POLY Mode 4: OMNI OFF, MONO
13
O = yes
X = no
Page 18

14
IN CASE OF DIFFICULTY:
Below is a list of the most commonly encountered
problems and diagnoses for each. If, after trying a
solution the problem persists, please contact your
Kurzweil dealer or refer to the listing on the inside
back cover.
POSSIBLE REASONS/SOLUTIONS:
¥ Power module not plugged securely in
wall outlet.
¥ Cord from power module not fully plugged
in to MicroPiano.
¥ Input voltage rating of power module does
not match your power system.
¥ Incorrect or defective power module.
¥ Dead wall outlet, power strip, or extension
cord.
¥ Incorrect or defective power module.
¥ Input voltage rating of power module does
not match your power system.
¥ Power system voltage abnormally low.
Try a different, unused outlet.
Note: When diagnosing audio problems, set the
MicroPiano to play its DEMO song.
¥ MicroPiano volume control turned down.
¥ Volume control on audio system or mixer
turned down.
¥ Signal source selection on audio system or
mixer is incorrect.
¥ Audio cables not securely plugged in at both
ends.
¥ Incorrect type of audio cable.
PROBLEM:
LEDs on the
MicroPiano will
not turn on
MicroPiano turns
on but LED pattern
frozen or flashes
constantly
No sound from
audio system
When diagnosing
audio problems, set
the MicroPiano to
play its DEMO song.
Page 19

15
¥ MIDI cable not securely plugged in at
both ends.
¥ MIDI source not sending data.
¥ MIDI source sending data on wrong
channel (MicroPiano default is Channel 1).
¥ MicroPiano volume control not turned
completely up.
¥ A received MIDI volume message has
speciÞed a low volume.
¥ Audio cables not securely plugged in at
both ends.
¥ Input to audio system is set for low
impedance instead of high impedance.
¥ Input trim to audio system or mixer is
set too low.
¥ Incorrect power module (a DC output
power module will not work).
¥ The MicroPiano is not a General MIDI
compatible device.
¥ Program change numbers not compatible
with MicroPiano program list.
¥ Effects setting messages not compatible with
MicroPiano (see page 18).
¥ The MicroPiano does not respond to
Pitchbend messages.
¥ InsufÞcient ventilation.
¥ Incorrect power module.
¥ Input voltage rating of power module does
not match your power system.
DEMO song plays
but MicroPiano
does not respond
to MIDI
Sound level from
MicroPiano is too
low or is distorted
Pre-recorded or
“General MIDI”
sequences do not
play correctly
Power module
or MicroPiano
overheats
Page 20

16
MicroPiano
PRODUCT SPECIFICATIONS
Audio
Output
Connection: 2 x 1/4" Mono Phone Plug
Impedance: 2K Ohms
Output Level: 3.5 Volts RMS Max
1 Volt RMS Nominal
Dynamic Range: >103 dB ÒAÓ Weighted
Electrical
Requirements
Input Voltage: 9 Volts AC
Power
Consumption: 1 Amp
Environment
Operating
Temperature: 5¡C to 40¡C (40¡F to 105¡F)
Relative
Humidity: 5% to 95% non-condensing
Storage
Temperature: -20¡C to 70¡C (-4¡F to 158¡F)
Relative
Humidity: 5% to 95% non-condensing
Physical
Dimensions: Weight: 3.5 lbs.
Height: 1.6" 40.2 mm
Width: 8.5" 216.2 mm
Depth: 9.6" 243.0 mm
Page 21

17
PULL OUT LIST OF PROGRAMS
Program Program
Number Name
1 Classical Piano, solo tuning (beat-tuned)
2 Stage Piano, solo tuning (beat-tuned)
3 Classical Piano, ensemble tuning (440-tuned)
4 Stage Piano, ensemble tuning (440-tuned)
5 Bright Piano
6 Sustain Piano
7 Stage Piano & Strings
8 Piano & String Pad
9 Tack Piano
10 Bright Electric Grand
11 Tight Electric Grand
12 Warm Electric Grand
13 Digital Electric Grand
14 Classic Electric Piano
15 Digital Electric Piano
16 Dyno-Electric Piano
17 Hard Dyno-Electric Piano
18 Stereo Hard Electric Piano
19 Stereo Tremolo Digital Electric Piano
20 Digital Electric Piano & String Pad
21 Rock Organ 1
22 Rock Organ 2
23 Percussion Organ
24 Ballad Organ 1
25 Ballad Organ 2
26 Organ & Piano
27 Fast Strings 1
28 Fast Strings 2
29 Touch Strings
30 Stereo Slow Strings
31 Stereo Slow String Pad
32 Slow Digital Pad
Page 22

PULL OUT LIST OF EFFECTS
MIDI #83 Name
Value
0 No Effect
1 Room
2 Bright Room
3 Stage
4 Bright Stage
5 Hall
6 Bright Hall
7 Large Hall
8 Large Bright Hall
9 Chorus
10 Room + Chorus
11 Bright Room + Chorus
12 Stage + Chorus
13 Bright Stage + Chorus
14 Hall + Chorus
15 Bright Hall + Chorus
16 Deep Space
17-127 Prg (default effect for program)
18
Page 23

YOUNG CHANG DISTRIBUTORS
Contact the nearest Young Chang ofÞce listed
below to locate your local Young Chang/Kurzweil
representative. For technical support in the
United States, call (562) 926-3200.
Young Chang America, Inc.
13336 Alondra Blvd.
Cerritos, CA 90703-2245
Tel: (562) 926-3200
Fax: (562) 404-0748
Young Chang Co., Ltd.
Kang Nam P.O. Box 998
Seoul Korea
Tel: 011-82-2-3451-3500
Fax: 011-82-2-3451-3599
Young Chang Co., Ltd., Europe
Industriering 45
D-41751 Viersen
Germany
Tel: 011-49-2162-4491
Fax: 011-49-2162-41744
Young Chang Canada Corp.
250 Shields Court, Unit 11
Markham, Ontario L3R 9W7
Tel: (905) 948-8052
Fax: (905) 948-8172
Page 24

Kurzweil is a product line of Young Chang Akki Company, Ltd.
Part Number: 910228
 Loading...