How it Works
Log In / Sign Up
Buy Points
How it Works
FAQ
Contact Us
Questions and Suggestions
Users
KORG
Loading...
M
M50
9
M50-61
MA1
MA1BL
MA-2 BKRD
MA-2 BLBK
MA-30
3
Magnetune
MAR1
Maxi800 DV
2
MAXI-K3 800-DV
MDE-X
MEX-8000
2
MG1
MICRO
3
MICROARRANGER
3
microkey
2
microKEY 2 25 Air
MICROKEY2-37
2
MICROKEY2-37AIR
2
MICROKEY2-49
2
MICROKEY2-49AIR
2
microKEY 25
2
MICROKEY2-61
2
MICROKEY2-61AIR
microKEY 37 - Gen. 2
2
microKEY 49 - Gen. 2
2
MICROKEY61
microKEY 61 - Gen. 2
2
microKEY Air
microKEY AIR 25
2
microKEY Air 37
2
microKEY Air 49
2
microKEY Air 61
2
MICROKONTROL
5
microKORG
14
MICROKorg MK1
microKORG S
6
microKORG XL
7
MICROMETRO
MICROPIANO
MICROSAMPLER
6
microS MK-1S
MICROSTATION
9
microX
4
microXL
3
microXL+ Classic
MICROXLPLUS
MICROX X50
2
MIKU STOMP
Mini700s
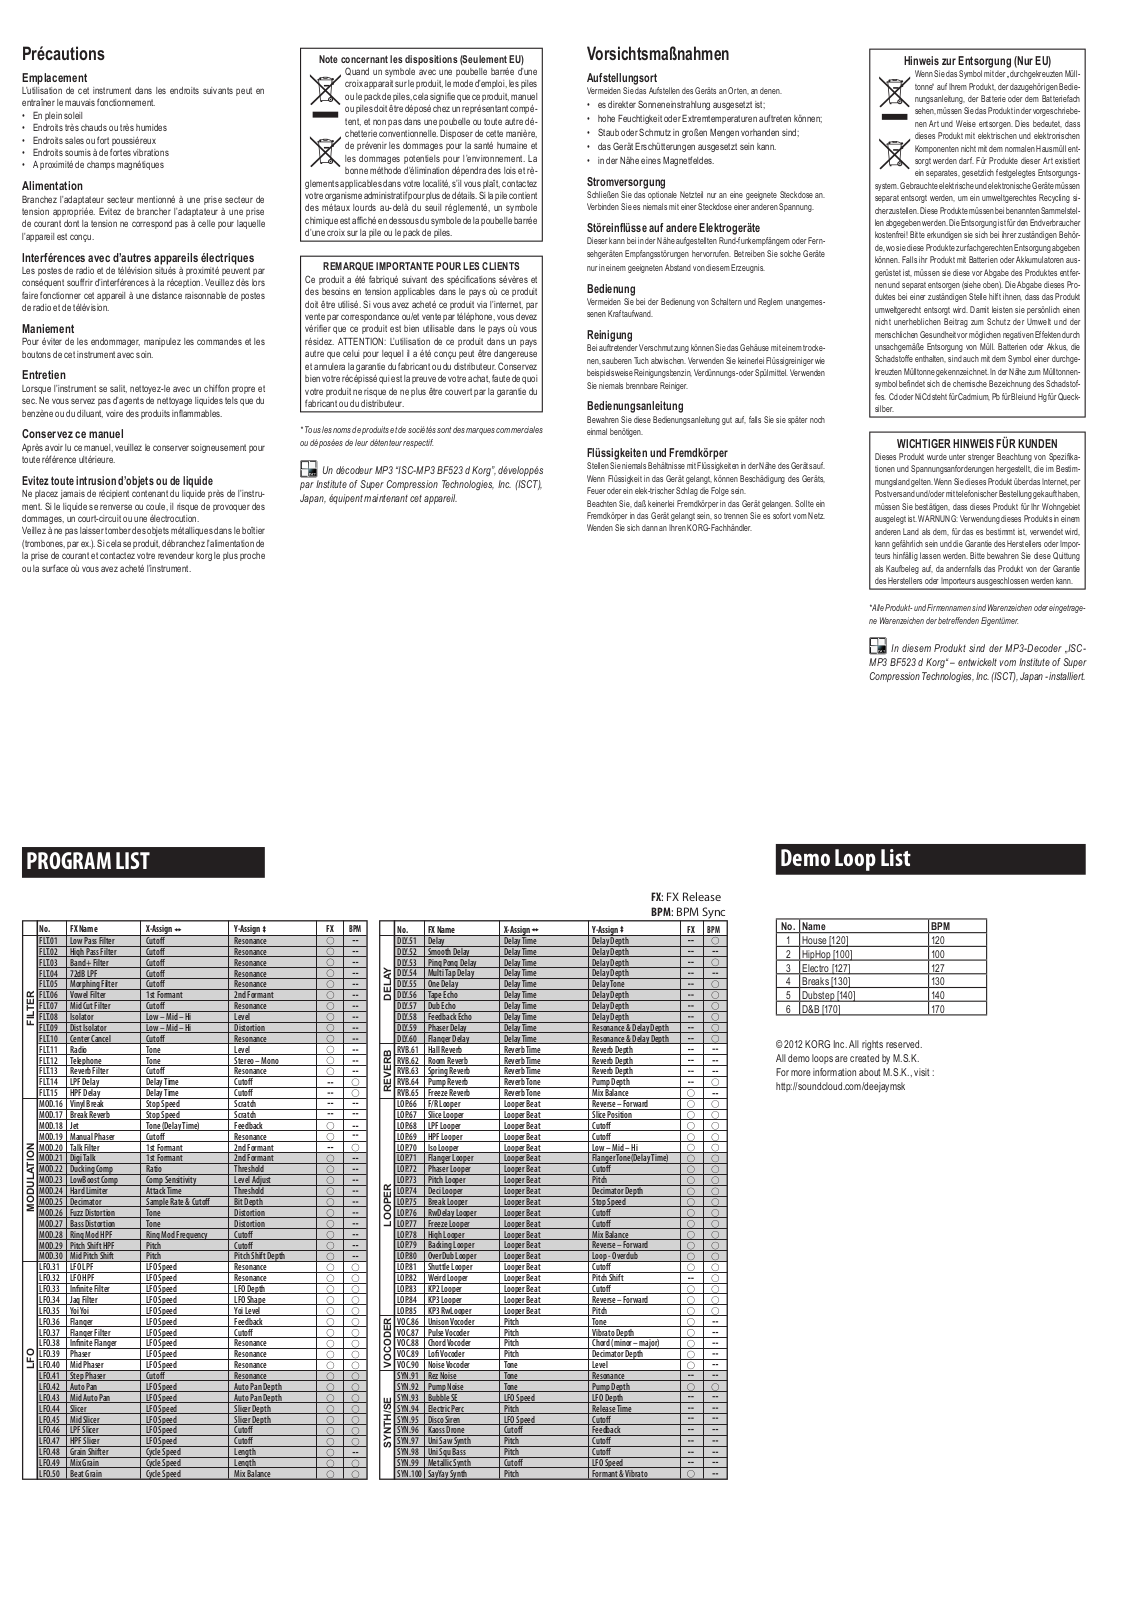
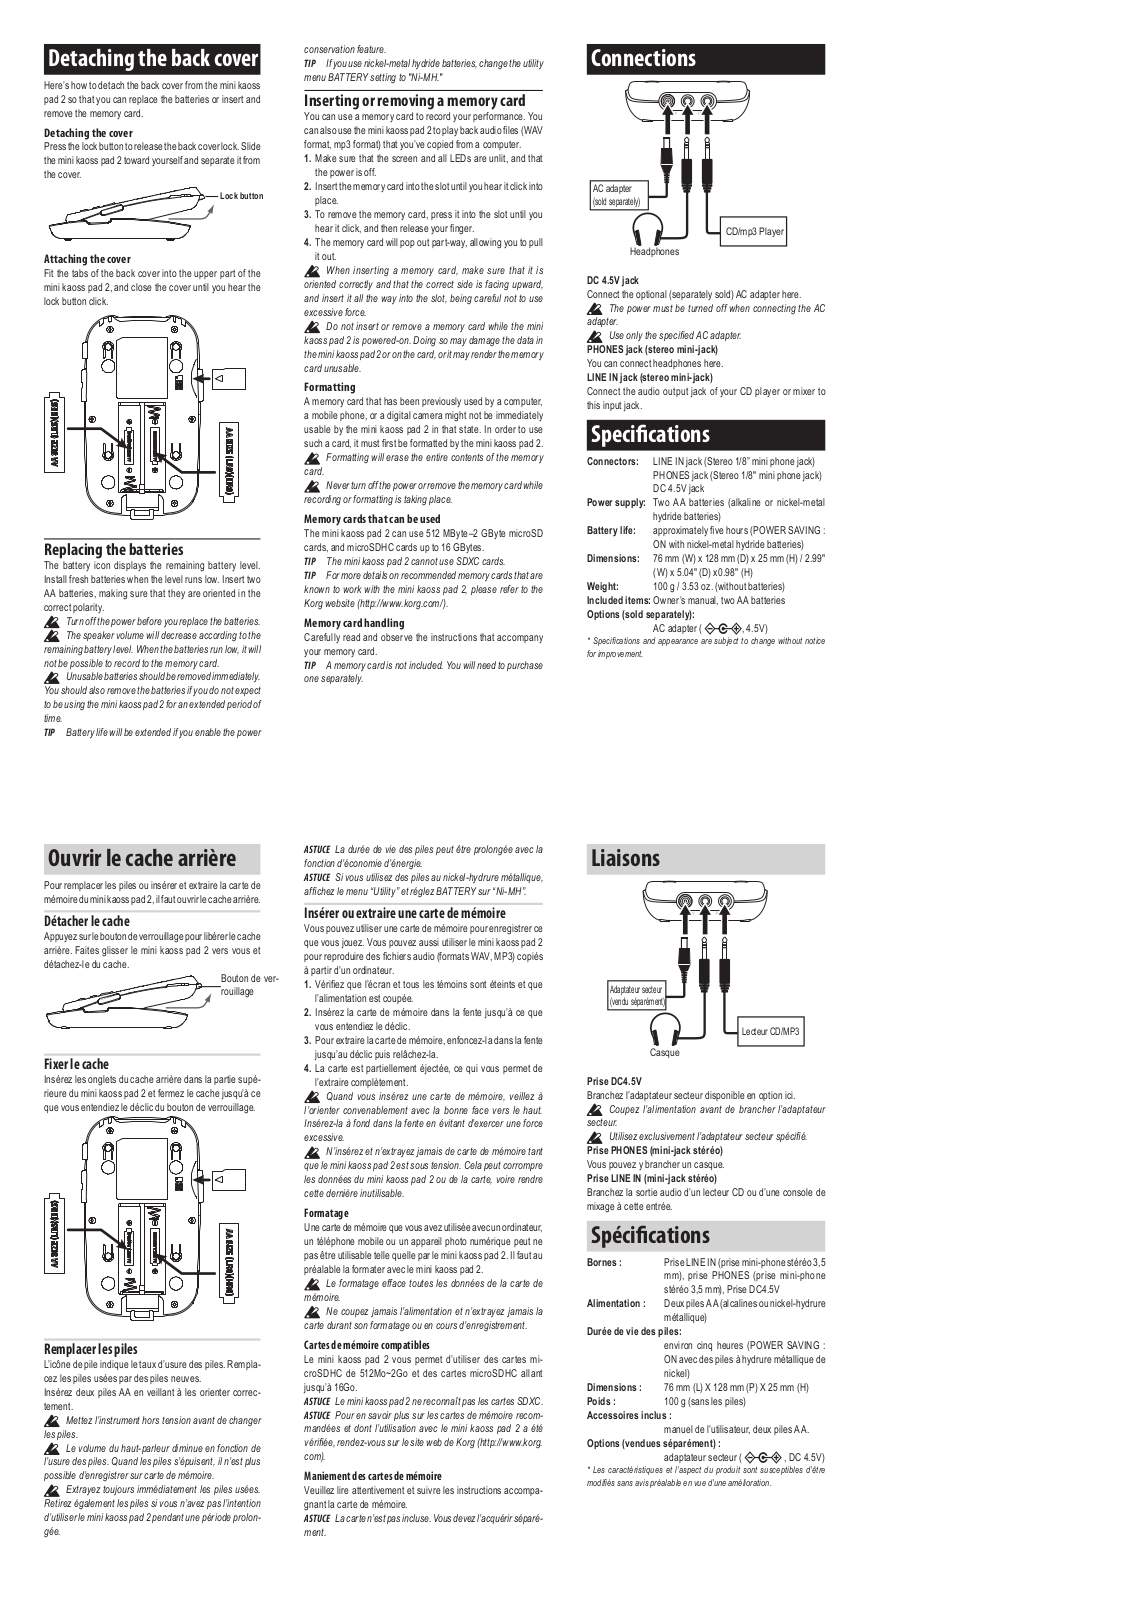
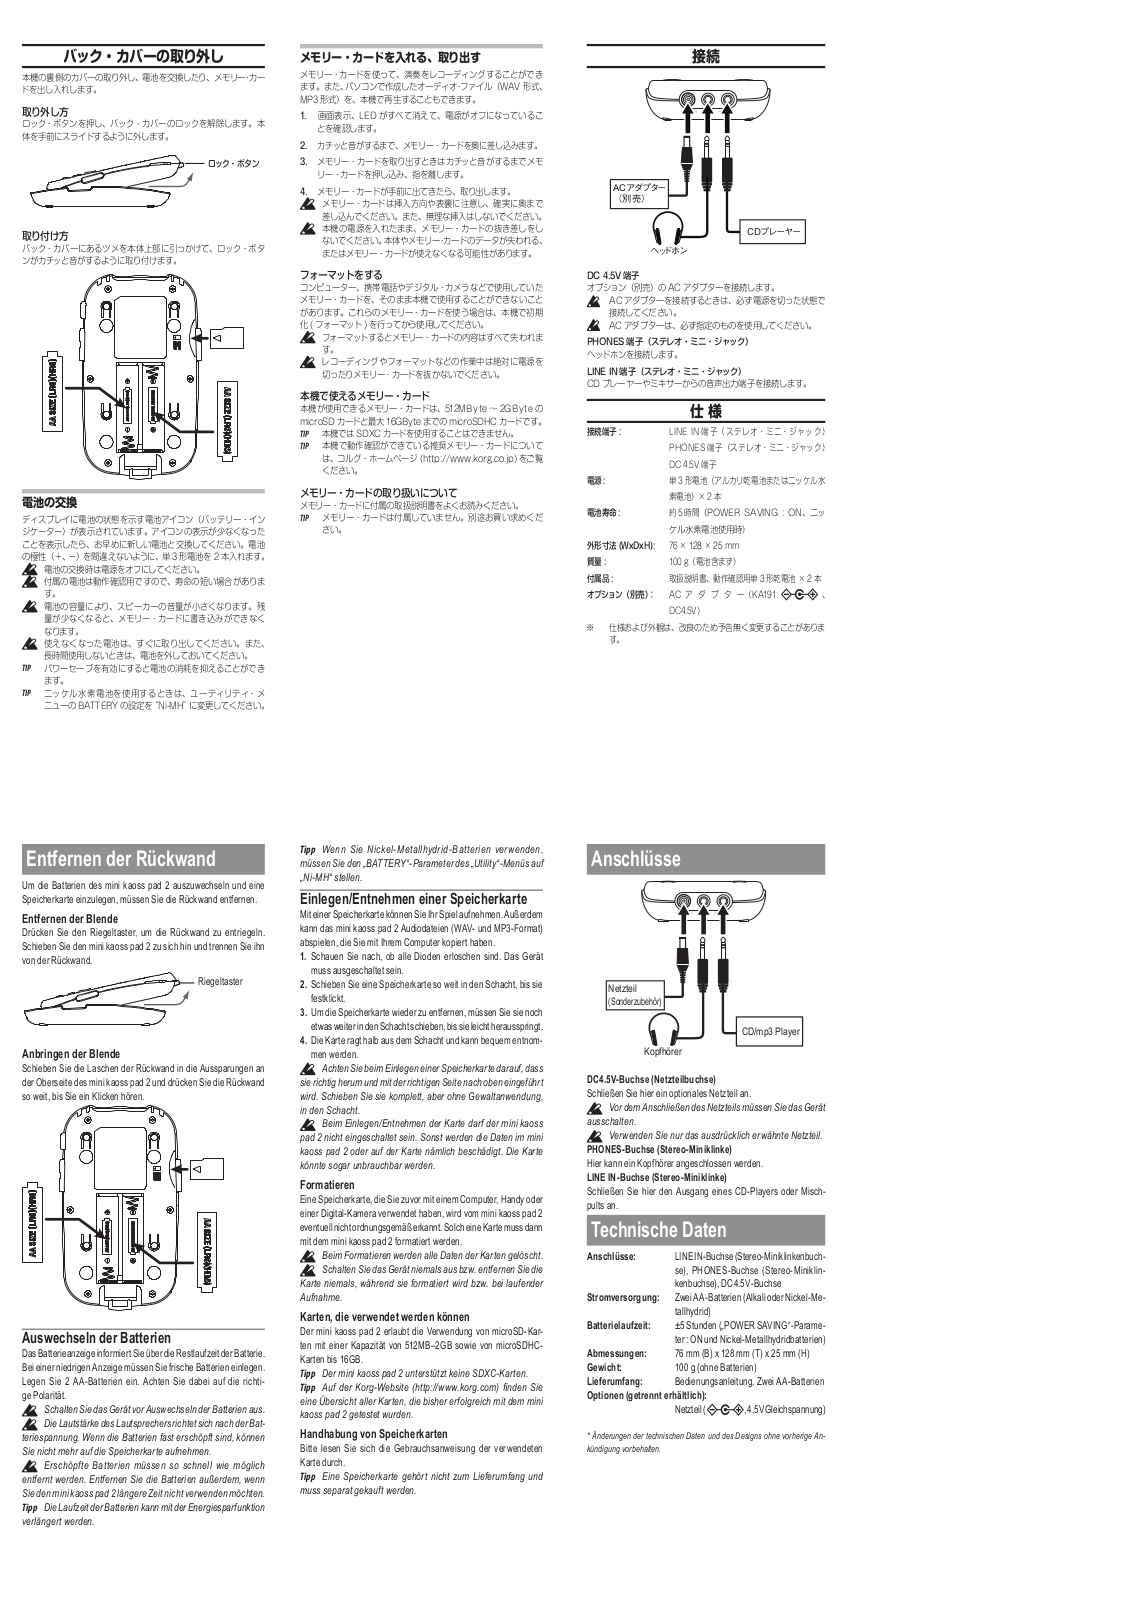
MINI KAOSS PAD 2
2
mini Kaoss Pad 2s
MINIKORG-700FS
mini-KORG-700S
3
miniKP
2
Mini-KP KAOSS PAD
Minilogue
7
Minilogue XD
6
Minilogue XD Module
5
MiniPitch
mini pops 120
2
MM-1
2
MM-2
MMA130
2
Modwave
4
Monologue
5
Mono/Poly
3
MONOTRIBE
3
monotron
7
Monotron Delay
5
Monotron DUO
5
Moss-TRI
MP10PRO
5
MPS-10
5
MR1
5
MR1000
7
MR-16
MR-2
3
MR-2000S
3
MS-01
Ms-02
MS-03
Ms-10
5
MS-20
17
MS2000
7
MS2000B
MS2000BR
MS2000R
6
MS-20FS
MS-20ic
MS-20 Kit
MS-20 Mini
3
MS-20 Mini - black
3
MS-50
4
MSS20-FX
MT 1200
MW-1608
2
MW-2408
2
N
N1
5
Loading...
Loading...
Nothing found
MINI KAOSS PAD 2
User Manual
8 pgs
2.43 Mb
0
User Manual
2 pgs
122.39 Kb
0
Table of contents
Loading...
KORG MINI KAOSS PAD 2 User Manual
...
KORG User Manual
Download
Specifications and Main Features
Frequently Asked Questions
User Manual
Download
Page 1
Page 2
Page 3
Page 4
Page 5
Page 6
Page 7
Page 8
Loading...
+
hidden pages
Unhide
You need points to download manuals.
1 point = 1 manual.
You can buy points or you can get point for every manual you upload.
Buy points
Upload your manuals
 Loading...