

Page 1
KORG DIGITAL PIANO
GENERAL
Owner’s Manual
Please read this manual first
INSTRUMENT
AI2 Synthesis System
2E
Page 2
Introduction
IMPORTANT SAFETY INSTRUCTIONS
WARNING — When using electric products, basic precautions should always be followed, including the following.
1. Read all the instructions before using the product.
2. Do not use this product near water — for example,
near a bathtub, washbowl, kitchen sink, in a wet
basement, or near a swimming pool, or the like.
3. This product should be used only with a cart or
stand that is recommended by the manufacturer.
4. This product, either alone or in combination with
an amplifier and headphones or speakers, may be
capable of producing sound levels that could
cause permanent hearing loss. Do not operate for
a long period of time at high volume level or at a
level that is uncomfortable. If you experience any
hearing loss or ringing in the ears, you should consult an audiologist.
5. The product should be located so that its location
or position does not interfere with its proper ventilation.
6. The product should be located away from heat
sources such as radiators, heat registers, or other
products that produce heat.
7. The product should be connected to a power supply only of the type described in the operating
instructions or as marked on the product.
8. This product may be equipped with a polarized
line plug (one blade wider than the other). This is a
safety feature. If you are unable to insert the plug
into the outlet, contact an electrician to replace
your obsolete outlet. Do not defeat the safety purpose of the plug.
9. The power-supply cord of the product should be
unplugged from the outlet when left unused for a
long period of time.
10.Care should be taken so that objects do not fall
and liquids are not spilled onto the enclosure
through openings.
11.The product should be serviced by qualified service personnel when:
A. The power-supply cord or the plug has been
damaged; or
B. Objects have fallen, or liquid has been spilled
into the product; or
C. The product has been exposed to rain; or
D. The product does not appear to operate nor-
mally or exhibits a marked change in perfor-
mance; or
E. The product has been dropped, or the enclo-
sure damaged.
12.Do not attempt to service the product beyond that
described in the user-maintenance instructions. All
other servicing should be referred to qualified service personnel.
SAVE THESE INSTRUCTIONS
CAUTION
TO PREVENT ELECTRIC SHOCK, MATCH WIDE BLADE OF PLUG TO WIDE SLOT,
FULLY INSERT.
ATENTION – POUR ÉVITER LES CHOCS ÉLECTRIQUES, INTRODUIRE LA LAME LA
PLUS LARGE DE LA FICHE DANS LA BORNE CORRESPONDANTE DE LA PRISE ET
POUSSER JUSQU’ AU FOND.
i
The lightning flash with arrowhead symbol, within an equilateral triangle, is intended to alert the user to the presence of
uninsulated “dangerous voltage”
sure that may be of sufficient magnitude to constitute a risk
of electric shock.
xclamation point within an equilateral triangle is
The e
intended to alert the user to the presence of important operating and maintenance (ser
ture accompanying the product.
within the product’s enclo-
vicing) instructions in the litera-
Page 3
CE mark for European Harmonized Standards
CE mark which is attached to our company’s products of AC mains operated apparatus until December 31, 1996 means it conforms
to EMC Directive (89/336/EEC) and CE mark Directive (93/68/EEC).
And, CE mark which is attached after January 1, 1997 means it conforms to EMC Directive (89/336/EEC), CE mark Directive (93/68/
EEC) and Low Voltage Directive (73/23/EEC).
Also, CE mark which is attached to our company’s products of Battery operated apparatus means it conforms to EMC Directive (89/
336/EEC) and CE mark Directive (93/68/EEC).
IMPORTANT NOTICE FOR THE UNITED KINGDOM
As the colours of the wores in the mains lead of this apparatus may not correspond with the coloured markings identifying the terminals in your plug, proceed as follows:
• the wire which is coloured blue must be connected to the terminal which is marked with the letter N or coloured black.
• the wire which is coloured brown must be connected to the terminal which is marked with the letter L or coloured red.
• Do not connect the wire to earth terminal of a three-pin plug.
THE FCC REGULATION WARNING
This equipment has been tested and found to comply with the limits for a Class B digital device, pursuant to Part 15 of the FCC Rules.
These limits are designed to provide reasonable protection against harmful interference in a residential installation. This equipment
generates, uses, and can radiate radio frequency energy and, if not installed and used in accordance with the instructions, may cause
harmful interference to radio communications. However, there is no guarantee that interference will not occur in a particular installation. If this equipment does cause harmful interference to radio or television reception, which can be determined by turning the equipment off and on, the user is encouraged to try to correct the interference by one or more of the following measures:
• Reorient or relocate the receiving antenna.
• Increase the separation between the equipment and receiver.
• Connect the equipment into an outlet on a circuit different from that to which the receiver is connected.
• Consult the dealer or an experienced radio/TV technician for help.
Unauthorized changes or modification to this system can void the user’s authority to operate this equipment.
Back-up Battery
The C-900 uses a back-up battery to prevent memory loss when the power is turned off. If the display
shows “Lo”, the battery should be replaced. Consult the nearest Korg Service Center or dealer.
Data handling
Unforeseen malfunctions can result in the loss of memory contents. Please be sure to save important
data on an external data filer (storage device). Korg can accept no responsibility for any loss or damage which you may incur as a result of data loss.
ii
Page 4

Table of Contents
Table of Contents
Introduction . . . . . . . . . . . . . . . . . . . . . . . . . . . . . . . . . . . . . . . . . . v
1. Controls and basic operation . . . . . . . . . . . . . . . . . . . . . . . . . . . 1
Front panel. . . . . . . . . . . . . . . . . . . . . . . . . . . . . . . . . . . . . . . . . . . . . . . . . . . . . . . . . . . . . 1
Operating panel . . . . . . . . . . . . . . . . . . . . . . . . . . . . . . . . . . . . . . . . . . . . . . . . . . . . . . . . 2
Rear panel . . . . . . . . . . . . . . . . . . . . . . . . . . . . . . . . . . . . . . . . . . . . . . . . . . . . . . . . . . . . .
Before you use the C-900
Preparations. . . . . . . . . . . . . . . . . . . . . . . . . . . . . . . . . . . . . . . . . . . . . . . . . . . . . . . . . 5
2. Floppy disks . . . . . . . . . . . . . . . . . . . . . . . . . . . . . . . . . . . . . . .9
Floppy disk types and formats . . . . . . . . . . . . . . . . . . . . . . . . . . . . . . . . . . . . . . . . . 9
Floppy disk handling . . . . . . . . . . . . . . . . . . . . . . . . . . . . . . . . . . . . . . . . . . . . . . . . . 9
Floppy disk write protect slider . . . . . . . . . . . . . . . . . . . . . . . . . . . . . . . . . . . . . . . 10
Inserting floppy disks . . . . . . . . . . . . . . . . . . . . . . . . . . . . . . . . . . . . . . . . . . . . . . . 10
Removing floppy disks . . . . . . . . . . . . . . . . . . . . . . . . . . . . . . . . . . . . . . . . . . . . . . 10
Cleaning the disk drive heads. . . . . . . . . . . . . . . . . . . . . . . . . . . . . . . . . . . . . . . . . 10
3. Getting acquainted with the C-900 . . . . . . . . . . . . . . . . . . . . . .11
1. Play the keyboard of the C-900. . . . . . . . . . . . . . . . . . . . . . . . . . . . . . . . . . . . . . . . 12
Selecting a different sound . . . . . . . . . . . . . . . . . . . . . . . . . . . . . . . . . . . . . . . . . . . 13
Splitting the keyboard in two . . . . . . . . . . . . . . . . . . . . . . . . . . . . . . . . . . . . . . . . . 14
Making it easier to play or sing . . . . . . . . . . . . . . . . . . . . . . . . . . . . . . . . . . . . . . . 15
2. Listening to the C-900’s automatic playback . . . . . . . . . . . . . . . . . . . . . . . . . . . . 18
Demo. . . . . . . . . . . . . . . . . . . . . . . . . . . . . . . . . . . . . . . . . . . . . . . . . . . . . . . . . . . . . . 18
Song Play . . . . . . . . . . . . . . . . . . . . . . . . . . . . . . . . . . . . . . . . . . . . . . . . . . . . . . . . . . 19
Connect a mic and sing . . . . . . . . . . . . . . . . . . . . . . . . . . . . . . . . . . . . . . . . . . . . . . 20
3. Playing while adding automatic accompaniment . . . . . . . . . . . . . . . . . . . . . . . . 22
Synchro start . . . . . . . . . . . . . . . . . . . . . . . . . . . . . . . . . . . . . . . . . . . . . . . . . . . . . . . 24
Synchro stop . . . . . . . . . . . . . . . . . . . . . . . . . . . . . . . . . . . . . . . . . . . . . . . . . . . . . . . 24
Tap tempo . . . . . . . . . . . . . . . . . . . . . . . . . . . . . . . . . . . . . . . . . . . . . . . . . . . . . . . . . 24
Keyboard lock . . . . . . . . . . . . . . . . . . . . . . . . . . . . . . . . . . . . . . . . . . . . . . . . . . . . . . 25
4. Recording your own playing on the C-900. . . . . . . . . . . . . . . . . . . . . . . . . . . . . . 26
Saving your recorded performance . . . . . . . . . . . . . . . . . . . . . . . . . . . . . . . . . . . . 27
5. Editing your performances . . . . . . . . . . . . . . . . . . . . . . . . . . . . . . . . . . . . . . . . . . . 28
6. You can input notes one by one to create musical data . . . . . . . . . . . . . . . . . . . 29
7. Playing a melody and letting the C-900 automatically add an
accompaniment . . . . . . . . . . . . . . . . . . . . . . . . . . . . . . . . . . . . . . . . . . . . . . . . . . . . . 31
. . . . . . . . . . . . . . . . . . . . . . . . . . . . . . . . . . . . . . . . . . . . . . . . . 5
4
4. Basic concepts of the C-900 . . . . . . . . . . . . . . . . . . . . . . . . . . . 33
1. Modes and pages . . . . . . . . . . . . . . . . . . . . . . . . . . . . . . . . . . . . . . . . . . . . . . . . . . . 33
What is a Mode? . . . . . . . . . . . . . . . . . . . . . . . . . . . . . . . . . . . . . . . . . . . . . . . . . . . . 33
What is a Page? . . . . . . . . . . . . . . . . . . . . . . . . . . . . . . . . . . . . . . . . . . . . . . . . . . . . . 34
2. Styles/Arrangements/Programs . . . . . . . . . . . . . . . . . . . . . . . . . . . . . . . . . . . . . . 36
What is an Arrangement? . . . . . . . . . . . . . . . . . . . . . . . . . . . . . . . . . . . . . . . . . . . . 36
What is a Program?. . . . . . . . . . . . . . . . . . . . . . . . . . . . . . . . . . . . . . . . . . . . . . . . . . 36
5. Operating the C-900 while looking at the display . . . . . . . . . . .37
1. Moving the cursor. . . . . . . . . . . . . . . . . . . . . . . . . . . . . . . . . . . . . . . . . . . . . . . . . . . 37
2. Adjusting “loudness” or “speed”. . . . . . . . . . . . . . . . . . . . . . . . . . . . . . . . . . . . . . 38
6. Interactive composition. . . . . . . . . . . . . . . . . . . . . . . . . . . . . . .39
1. Settings for the Interactive Composition function. . . . . . . . . . . . . . . . . . . . . . . . 40
2. Adding chords to the melody that you play. . . . . . . . . . . . . . . . . . . . . . . . . . . . . 41
7. Functions, operations and terminology . . . . . . . . . . . . . . . . . . .47
iii
Page 5

Table of Contents
8. MIDI Applications . . . . . . . . . . . . . . . . . . . . . . . . . . . . . . . . . . .61
Using the C-900 with an external sequencer . . . . . . . . . . . . . . . . . . . . . . . . . . . . .61
Using the C-900 to control other MIDI instruments . . . . . . . . . . . . . . . . . . . . . . .62
What is General MIDI? . . . . . . . . . . . . . . . . . . . . . . . . . . . . . . . . . . . . . . . . . . . . . . .62
About Standard MIDI Files. . . . . . . . . . . . . . . . . . . . . . . . . . . . . . . . . . . . . . . . . . . .62
9. Connections with a computer . . . . . . . . . . . . . . . . . . . . . . . . . .63
Connection to an IBM PC (compatible) via the AG-001B. . . . . . . . . . . . . . . . . . .63
Connection to an Apple Macintosh via the AG-002B . . . . . . . . . . . . . . . . . . . . . .63
Korg MIDI Driver installation and setup . . . . . . . . . . . . . . . . . . . . . . . . . . . . . . . .64
1. Installing the Korg MIDI Driver into Windows 95 . . . . . . . . . . . . . . . . . . . . .64
2. Installing the Korg MIDI Driver into Windows 3.1 . . . . . . . . . . . . . . . . . . . .66
3. Installing the Korg MIDI Driver into a Macintosh . . . . . . . . . . . . . . . . . . . . .67
10. Specifications and options. . . . . . . . . . . . . . . . . . . . . . . . . . . .69
iv
Page 6

Introduction
Introduction
Thank you for purchasing the Korg C-900.
C-900 is a versatile piano that goes far beyond previous automatic accompani-
The
ment electronic instruments. It provides high-quality stereo-sampled piano sounds
and many other instrument sounds (a total of 327 programs), 16 dr
of automatic accompaniment data, and two stereo digital multi-effect processors with
48 types of effects.
In addition to a Piano mode that allows the
ventional electronic piano, the
lets you automatically add a sophisticated musical accompaniment simply by specifying easily fingered chords. It also provides a Backing Sequence function with recording and editing capabilities, an SMF Song Play function for playing back commercially
available Standard MIDI File format music software, an Interactive Composition function that automatically adds chor
interface that lets you connect the
tures a full complement of easily accessed functions that enhance your composition
and performance, such as a karaoke function that lets you connect a microphone to
sing along with your music.
In order to enjoy long and tr
C-900 also provides an Arrangement Play function that
d progressions to the melody that you play and an
C-900 to your computer. In addition, the C-900 fea-
ouble-free use, please read this manual.
C-900 to be used in the same way as a con-
um kits, 192 types
Owner’s Manual
This owner’s manual begins with explanations of each section of the C-900. It also
contains chapters which discuss basic procedures and concepts, and explains how to
connect the
C-900 to external devices for even more possibilities.
Reference Guide
The Reference Guide explains the various functions and settings of the C-900 organized by the displays that appear in the front panel LCD. Lists of the sounds and
accompaniment data are also included at the end.
* In the documentation for the
ment numbers and names, parameters and values shown in these LCDs are given only as examples. Please be
aware that improvements in the specifications and voice programs may mean that the example displays printed in
the documentation do not match the displays that actually appear on the C-900.
C-900, the explanations often include diagrams of the LCD. The program or arrange-
v
Page 7
1. Controls and basic operation
1. Controls and basic operation
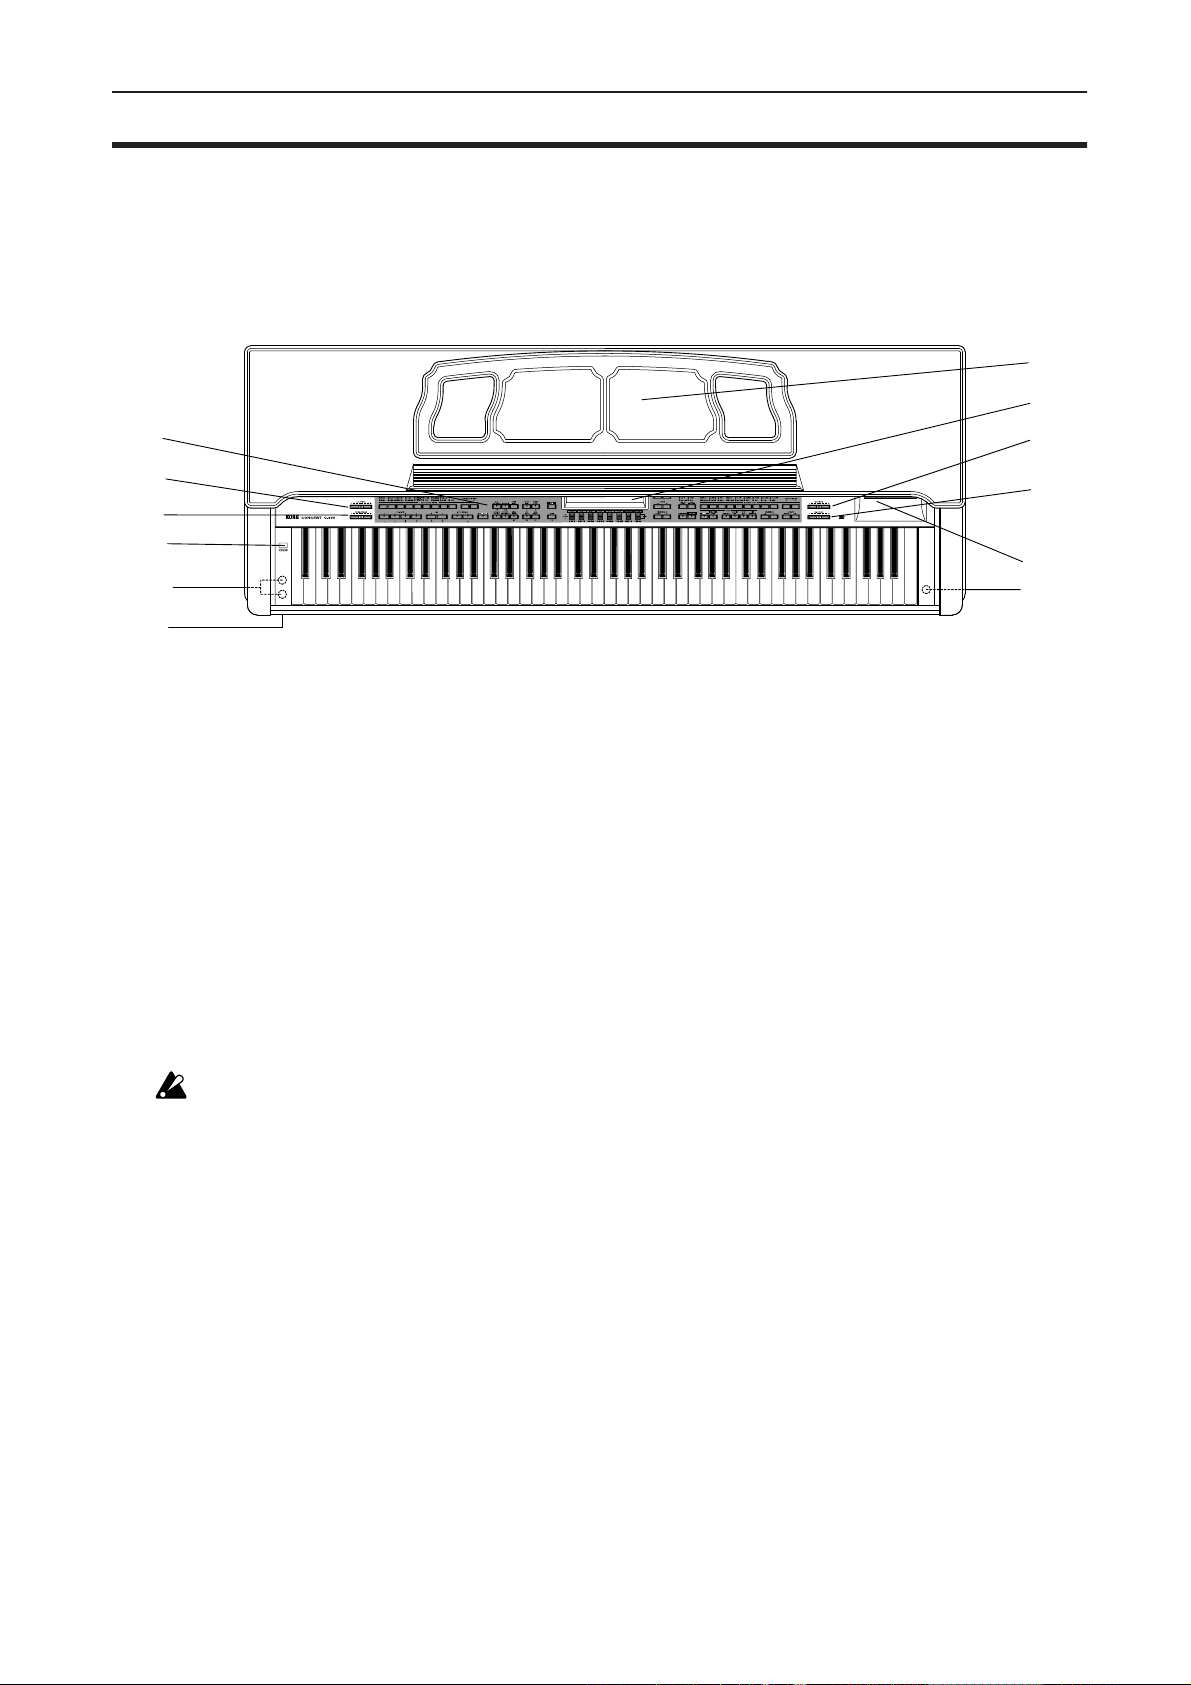
Front panel
1
7
8
9
2
3
4
5
6
1. Operating panel
The operating panel of the C-900 contains numerous key switches which access a variety of functions. Some keys have two or more different
functions.
For the names and general functions of each key,
refer to “Operating panel” on the following page.
Details on the function of each key are given in
“Functions, operations and terminology” beginning on p.47.
2. ACC VOLUME (Accompaniment Volume)
In Arrangement Play mode, this adjusts the backing volume of tracks other than the keyboard
track. When the selected part is muted in Song
Play mode, the
ume of the other parts.
The volume when muted will be the “10”
setting regar
position. When you subsequently move
VOLUME, the setting will change to reflect
the actual position of the contr
ACC VOLUME will adjust the vol-
dless of the ACC VOLUME
ACC
ol.
3. MASTER VOLUME
This adjusts the overall volume of the entire C-900
(speakers, headphones, and outputs).
4. POWER switch ☞p.8
This switch turns the power of the C-900 on and
off.
5. Headphone jack (located on the bottom of
the instrument)
By connecting a pair of stereo headphones to this
jack, you can play and listen to the
being heard by others. Up to two pairs of headphones can be connected simultaneously. If you use
commercially available headphones, select a set of
stereo headphones with a phone plug connector
C-900 without
10
11
12
6. POWER indicator
This will light when the C-900 power is on.
It will go out when the power is turned off.
7. Music stand ☞p.8
8. LCD
This displays various messages which indicate the
status of the C-900, and indicates the current settings.
Details on the displayed contents are given in the
ence Guide.
Refer
9. ECHO LEVEL
When a mic is connected to the mic input jack, this
slider adjusts the amount of echo that is applied to
the microphone’s signal.
10. MIC VOLUME
When a mic is connected to the mic input jack, this
slider adjusts the mic volume.
11. Floppy disk drive
A 3.5 inch double sided double density (2DD) or
double sided high density (2HD) floppy disk can
be inserted here.
For details on floppy disk handling, refer to
“Floppy disks” beginning on p.9.
12. Mic input jack (located on the bottom of the
instrument)
A microphone or a Korg Interactive Harmony “ih”
unit can be connected here. If you are using an
“ih,” please also refer to the “ih” manual.
.
1
Page 8
1. Controls and basic operation
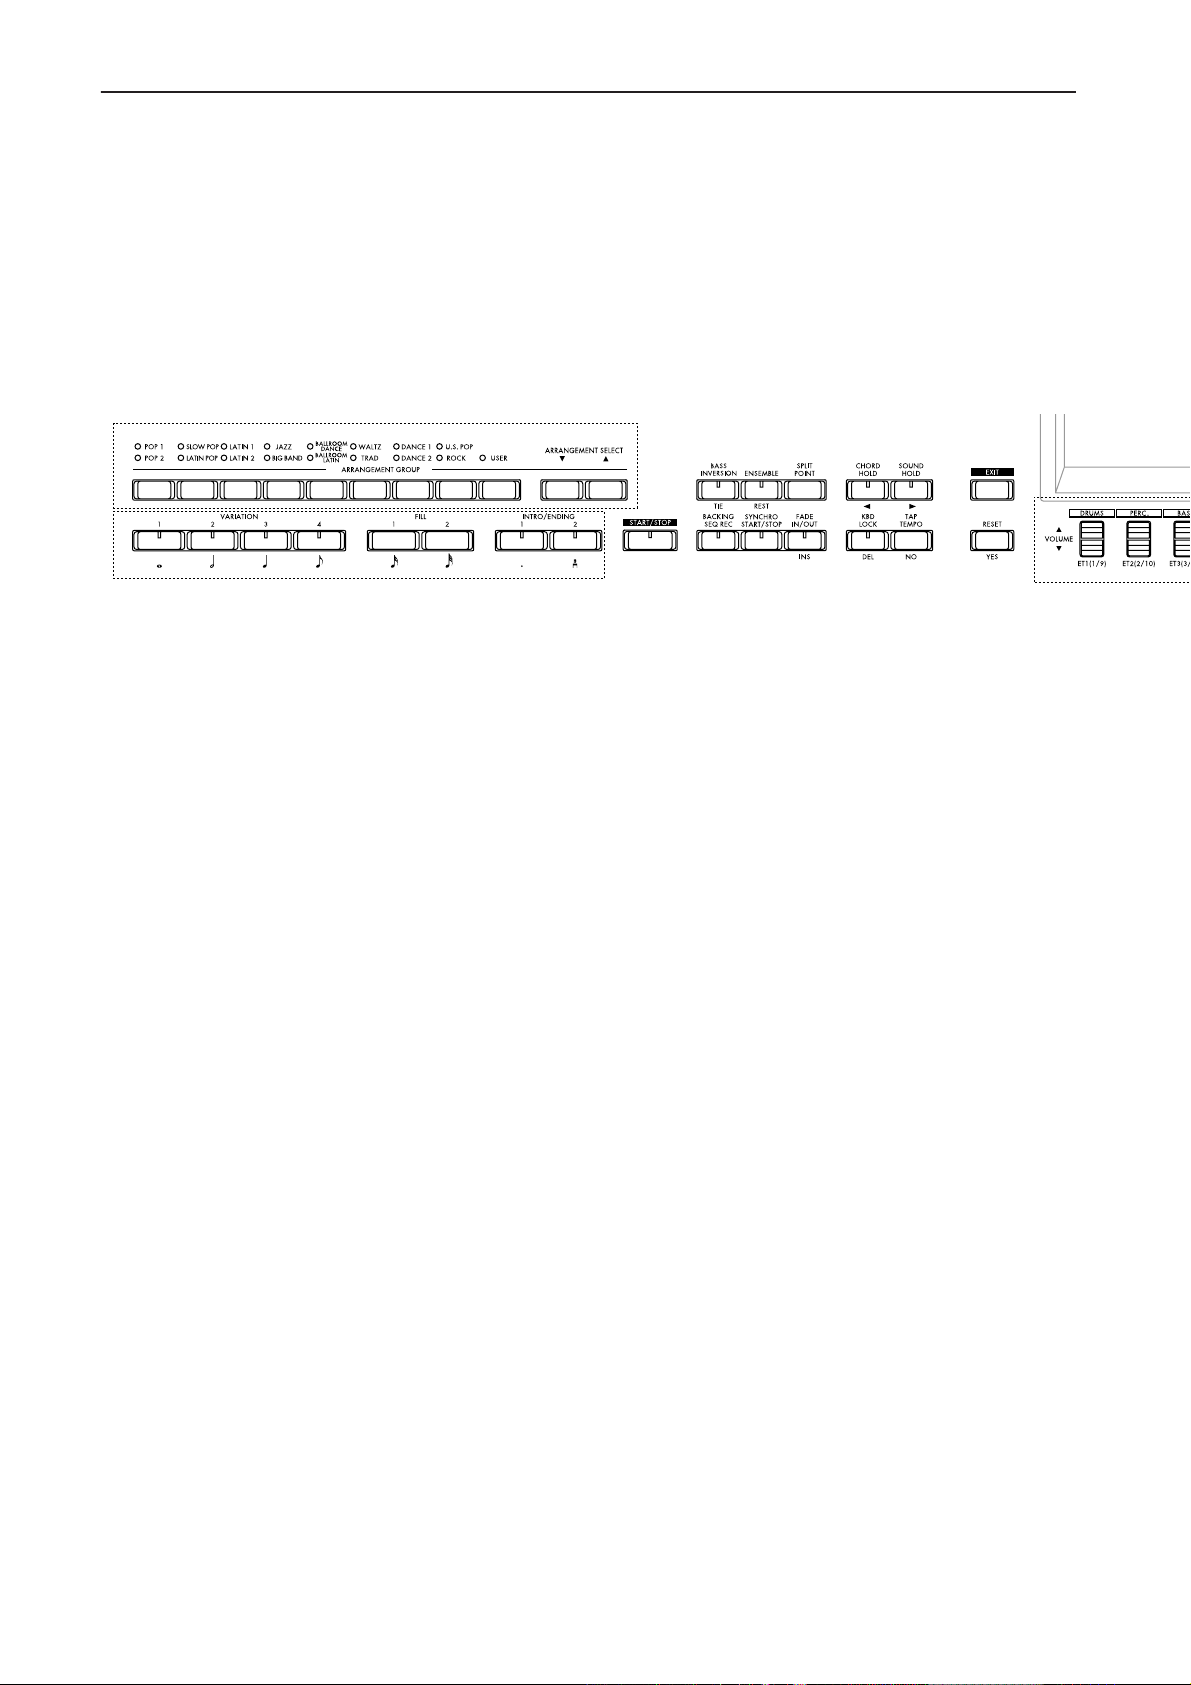
Operating panel
The number of stars following the name of each key switch indicates the level of familiarity with the C-900 required for its use.
★ These keys are used for basic operations. In order to use the C-900 as a conventional electronic piano, it is necessary to understand how
these keys work.
★★ You will use these keys after you become more familiar with using the C-900 as a conventional electronic piano, and wish to take advantage
of the automatic accompaniment functions and to record your own playing.
★★★ These keys are used to add various adjustments to automatic accompaniment, or to make detailed settings for recording and other func-
tions interactively with the display.
Many of the key switches perform functions in addition to those listed on this page. For details of the function and
operation of each key, refer to “Functions, operations and terminology” beginning on p.47.
1
654
1110
14
2
1. ARRANGEMENT GROUP/ARRANGEMENT
SELECT
Use these to select the type of automatic accompaniment.
★★
2. Style element ★★★
(Variation 1–4, Fill 1&2, Intro/Ending 1&2) During automatic accompaniment, these keys let you
add variety to your song by inserting introductions, fill-ins, and endings. In step recor
key switches are used to specify the length of the
note to be entered. Refer to the explanations of
each key beginning in chapter 7.
ding, these
3. START/STOP ★
This key starts or stops the automatic accompaniment and recording.
4. BASS INVERSION/TIE ★★★
When the Chord Scanning function is in use, you
can press this key to specify a bass note other than
the root of the chord.
This key is also used in step recording to tie two
notes together.
☞p.49
☞p.57
5. ENSEMBLE/REST ★★
When the Chord Scanning function is in use, this
lets you add harmony to the note being played, as
determined by the detected chord.
This key is also used in step recording to input a
rest.
☞p.57
☞p.51
6. SPLIT POINT ★★
When the Chord Scanning function or Keyboard
Assign has been used to split the keyboard into
left and right zones, this key lets you specify the
point at which the keyboard will be divided.
☞p.57
7. BACKING SEQ REC ★★
This is used for making various settings in the
preparation of recording your own performance.
3
789
12 13
15
8. SYNCHRO START/STOP ★★
This allows automatic accompaniment to start the
moment you touch a note on the keyboard. The
accompaniment will be halted during the time
that your hand is taken off the keyboard.
9. FADE IN/OUT/INS ★★
When you are playing with automatic accompaniment, this causes the sound to become gradually
louder when the song begins, and to become gradually softer when the song ends.
In event editing, this is also used to insert an
☞p.51
event.
10. CHORD HOLD/√√√√ ★★
This key causes the automatic accompaniment
chords to be held even after you release your hand
from the keyboard. Since you only need to press
the keyboard when the chord changes, this makes
performance easier.
This key is also used in step recording to move
thr
ough steps, and when modifying the name of
an arrangement or backing sequence.
☞p.49
11. SOUND HOLD/®®®® ★★★
This key causes the sound played in the left hand
to be held after you have released your hand from
the keyboard, or lets you add a bass note. This will
function differently depending on the Disk/Global mode settings.
☞Reference Guide p.65
This key is also used in step recording to move
through steps, and when modifying the name of
an arrangement or backing sequence.
☞p.56
12. KEYBOARD LOCK/DEL ★★
This key lets you lock the keyboard so that the
sound being played by the keyboard and the playback tempo will not change even if you change the
arrangement (type of accompaniment).
16
2
Page 9
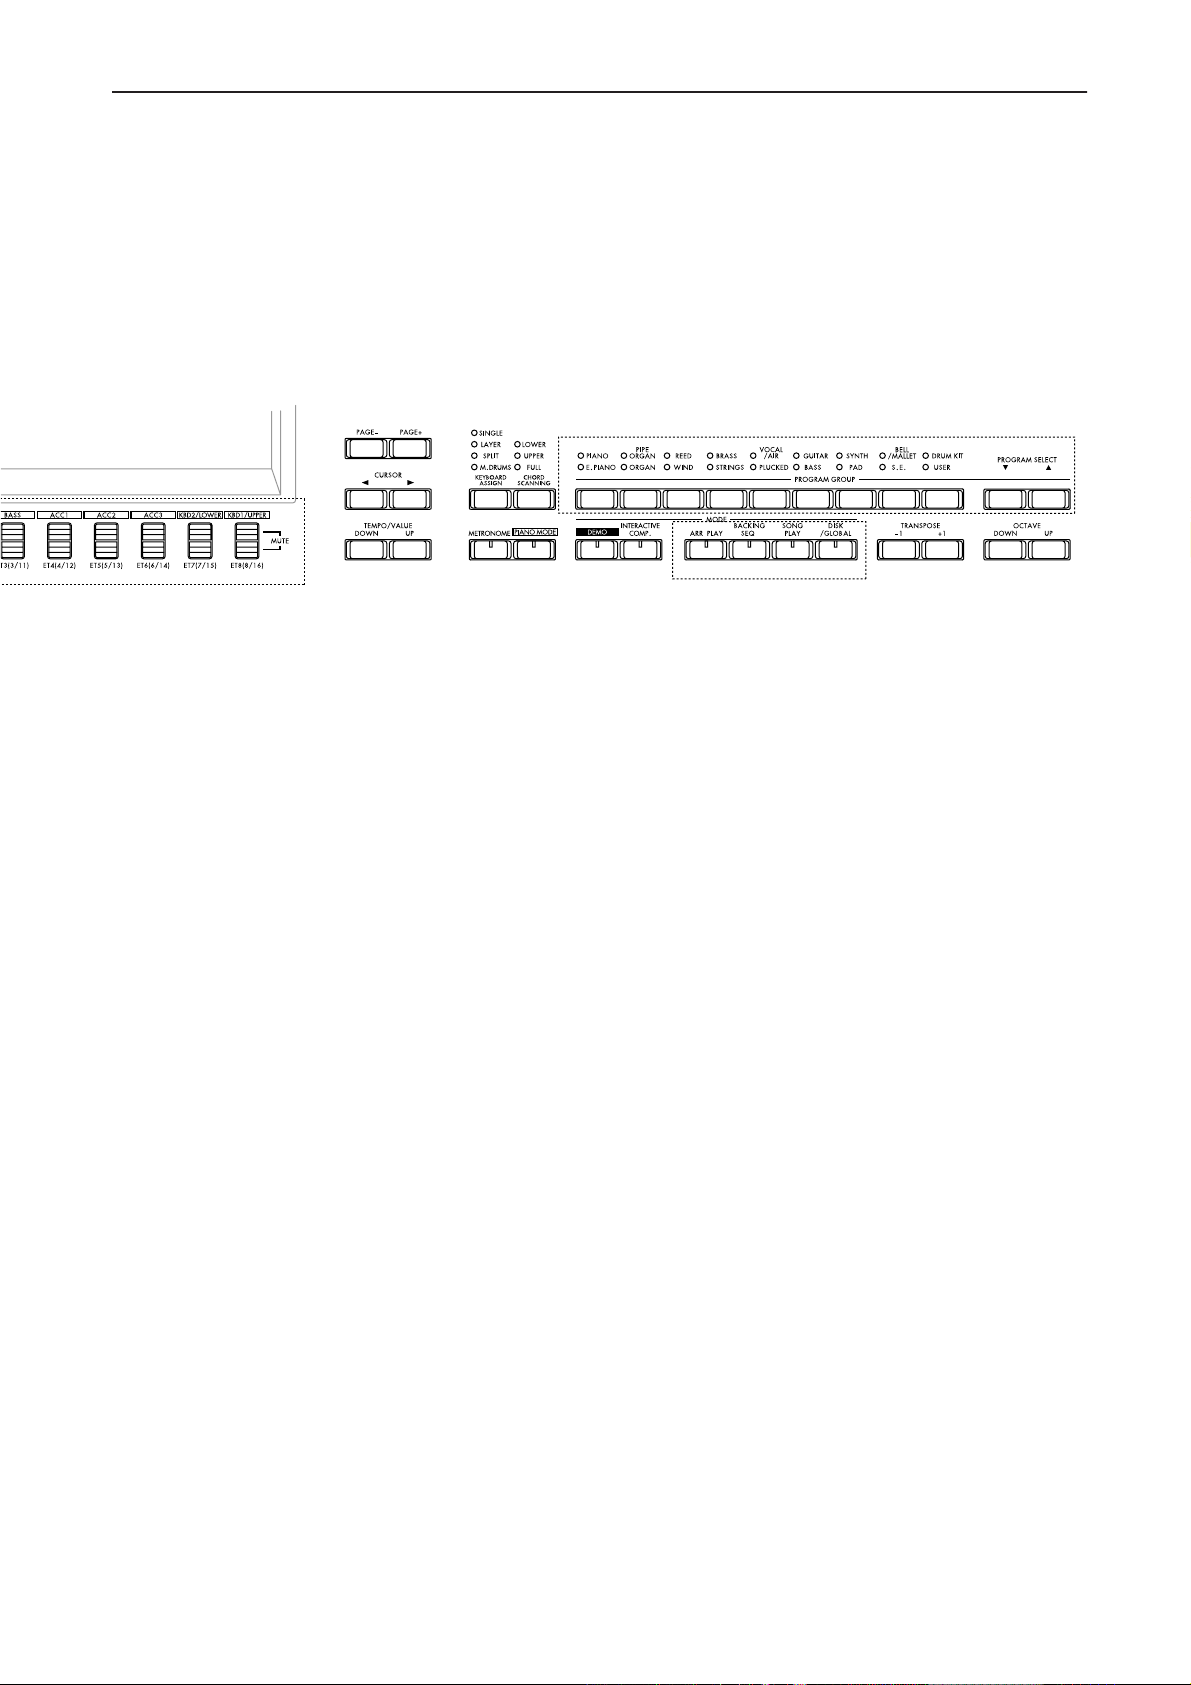
1. Controls and basic operation
In event editing, this is used to delete an event.
☞p.51
13. TAP TEMPO/NO ★
This lets you adjust the tempo of the metronome,
automatic accompaniment, or automatic playback
by repeatedly tapping the key.
When a confirmation display appears, this key can
also be used to cancel the operation.
17
18
☞p.58
☞p.54
20 21
19
16. VOLUME/MUTE/TRACK/CHANNEL ★★
These keys are used to adjust the volume of the
instrument for each part of the keyboard, automatic
accompaniment, or automatic playback. The Mute
key temporarily mutes the sound. These keys are
also used to specify the track whose settings you
wish to modify, or a MIDI channel of 1–16.
17. PAGE ★★
These keys are used to select “pages” (display
screens in which the functions of each mode are
grouped) in the LCD.
18. CURSOR ★
Use these keys to select the desired item from the
choices that appear in the LCD.
24
14. EXIT ★
Use this to return to the first page of the display.
15. RESET/YES ★
This key returns various settings to their original
state.
☞p.55
When a confirmation display appears, this key can
also be used to execute the operation.
27
25
2622 23
28 29
24. PROGRAM GROUP/PROGRAM SELECT ★
Use these to select the sound that you wish to play.
25. DEMO ★
By pressing this key switch, you can hear a demonstration of the
C-900. ☞p.18
26. INTERACTIVE COMP. ★★★
This key activates the Interactive Composition
function. A melody that you are playing or had previously recorded is automatically analyzed by the
C-900, and accompaniment chords appropriate for
that melody are added. The chords which are
added can be used for automatic accompaniment,
and many different types of chords can be assigned
to match the style of the song.
☞p.39
☞p.59
19. TEMPO/VALUE ★
Use these keys to modify the speed (tempo) of the
metronome, automatic accompaniment, or automatic playback. These are also used to increase/
decrease numerical values, or to select alternatives.
20. KEYBOARD ASSIGN ★★
This lets you select different keyboard assign
modes such as layering sounds, playing split
sounds, or playing different percussive instruments from each note, etc.
☞p.53
21. CHORD SCANNING ★★
This lets you select the area of the keyboard in
which the Chord Scanning function will be active,
allowing you to use simple fingering to play complex chords.
☞p.49
22. METRONOME ★
A metronome sound can be generated based on
the tempo shown in the LCD.
23. PIANO MODE ★
Turn this key switch on when you wish to use the
C-900 as a conventional electronic piano.
27. MODE keys ★★
These keys are used to switch between the four
major operating modes of the
playing or automatic accompaniment, use
Arrangement Play mode (
own playing or to create automatic accompaniment data, use Backing Sequence mode (
To playback Standard MIDI File format data from a
floppy disk, use Song Play mode (
settings for other functions such as MIDI applications and floppy disk management, use Disk/Global mode (
LED located at the left of the key will light, indicating the mode the
☞p.50). When you press a mode key, the
C-900 is currently in.
C-900. For piano
☞p.48). To record your
☞p.56). To make
28. TRANSPOSE ★
Use these keys when you wish to transpose the
pitch of the keyboard or the automatic accompaniment.
29. OCTAVE ★
These keys let you shift the pitch of the keyboard
or the automatic accompaniment up or down in
units of an octave.
☞p.49).
3
Page 10
1. Controls and basic operation
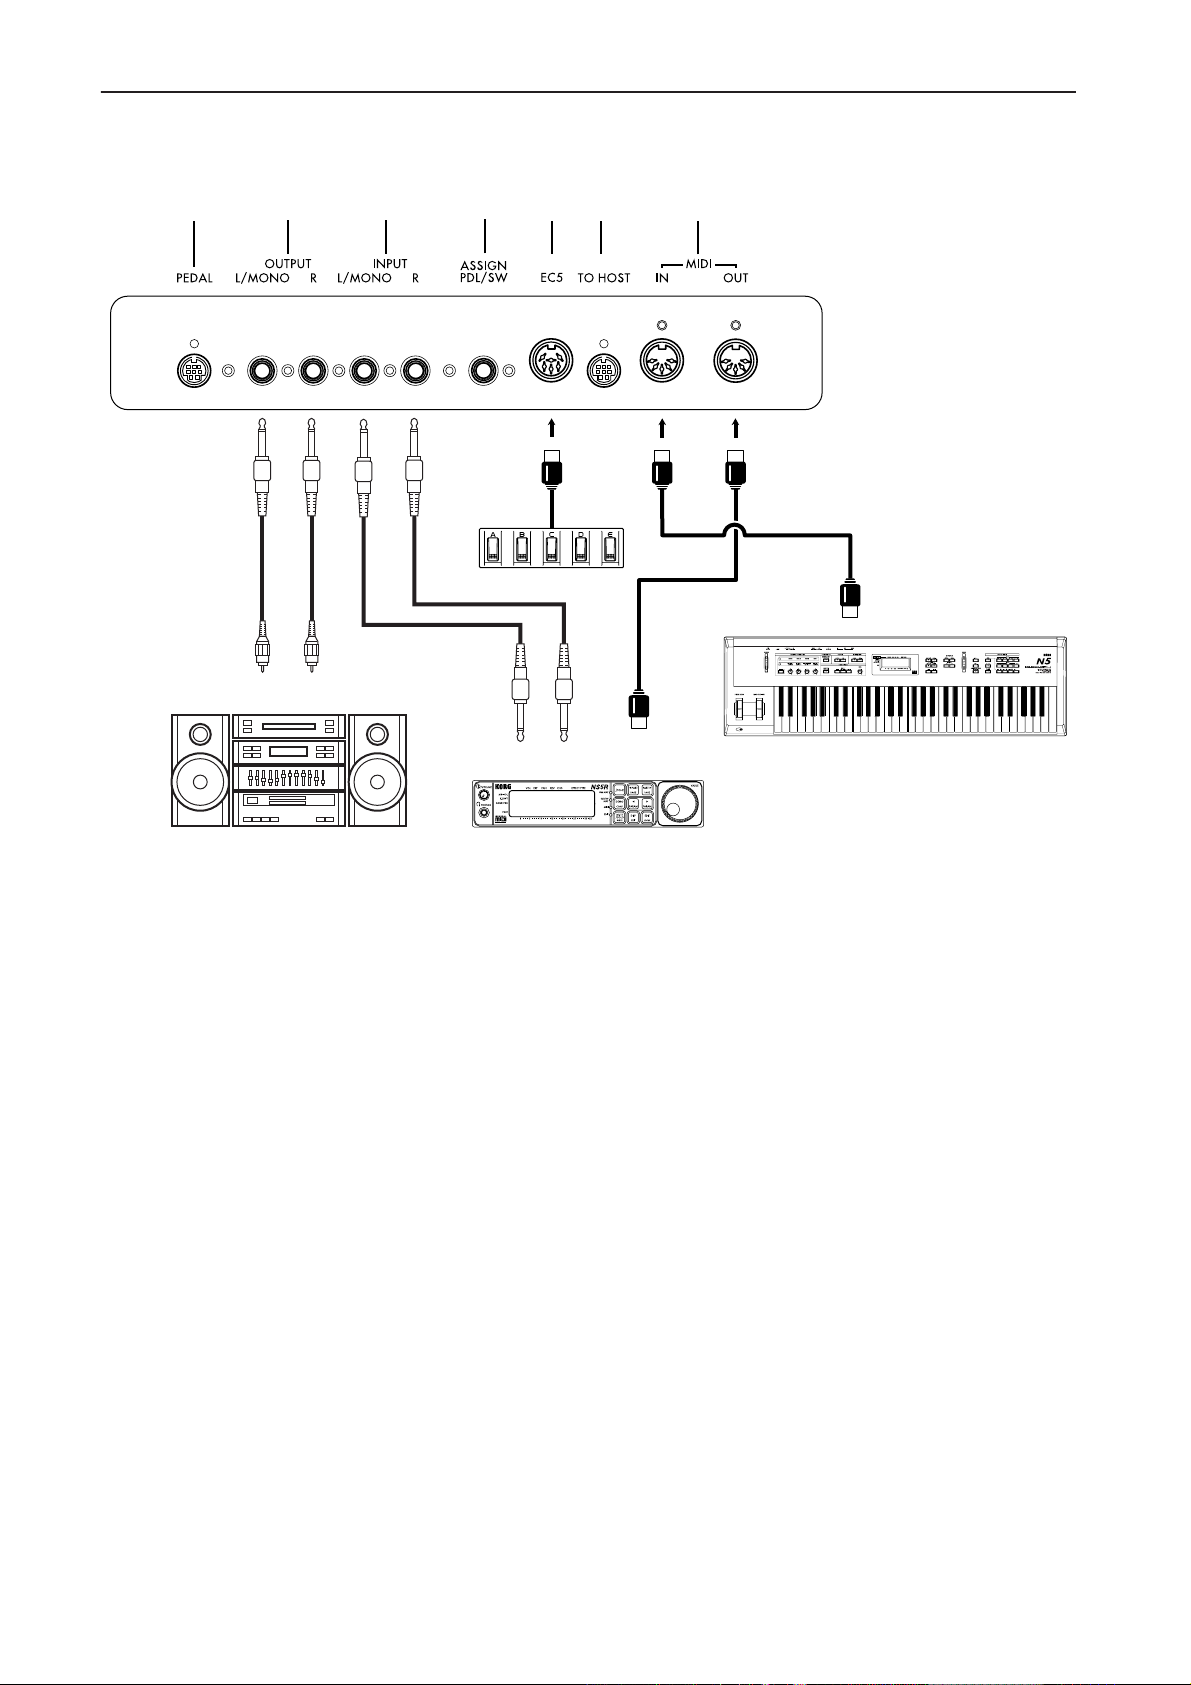
Rear panel
5642 317
MIDI cable
EC5
MIDI OUT
AUX IN
L R
Audio equipment
1. OUTPUT
External equipment such as your stereo or keyboard mixer can be connected here to listen to the
sound of the
C-900 through these devices.
For stereo connections, the left and right signals
will be output from the L/MONO jack and the R
jack. For mono connections, use the L/MONO jack.
Use the master volume to adjust the level.
2. INPUT
Signals from an external device such as a tone generator module, cassette recorder, or CD player can
be input to the
C-900’s built-in speakers, headphones, or an audio
system connected to the external outputs.
For stereo connections, use the L/MONO and R
jacks. For mono connections, use the L/MONO
jack.
The volume of the external device connected to
the INPUT jacks can be adjusted by the volume
contr
ol of the external device.
C-900, and heard through the
OUTPUT
L R
MIDI tone generator module
(synthesizer)
MIDI IN
4. EC5
A separately sold Korg EC5 external controller can
be connected here. In Disk/Global mode, you can
assign a different function to each of the five
switches of the EC5.
5. MIDI
These connectors are used to exchange data with
other MIDI devices such as keyboards and computers. In order to make these connections, you
will need separately sold MIDI cables. MIDI IN
receives MIDI messages fr
OUT transmits MIDI messages to other devices.
☞ p.61 “8. MIDI Applications”
6. TO HOST
This interface connector allows the C-900 to be
directly connected to a computer which does not
have a MIDI interface. To make this connection,
you will need a separately sold connection cable
that is compatible with your computer.
Connections with a computer”
MIDI keyboard
☞Reference Guide p.64
om other devices. MIDI
☞p.63 “9.
3. ASSIGN PDL/SW (Assign pedal/switch)
A separately sold Korg XVP-10 or EXP-2 pedal
controller or PS-1 foot switch can be connected
here. The function of these pedals can be specified
by settings in Disk/Global mode.
☞Reference Guide p.63
4
7. PEDAL
Insert the pedal connector of the ST-900 stand
here.
Page 11
1. Controls and basic operation
Before you use the C-900
Please carefully read the sections “Safety,” “Preventing fire, shock, and personal
harm,” “Precautions,” and “Warnings” located in the beginning of this manual.
Preparations
Check the included items
Make sure that you have each of the following items included with the C-900.
• “Owner’s Manual” (this book)
• “Reference Guide”
• Floppy disk CFD-01P......................................... This contains sounds and five types of
automatic accompaniment data for the
C-900.
• (Separate carton) stand
ST-900 ........................ This stand is specially designed for the
C-900. Please refer to the assembly
instructions for proper use.
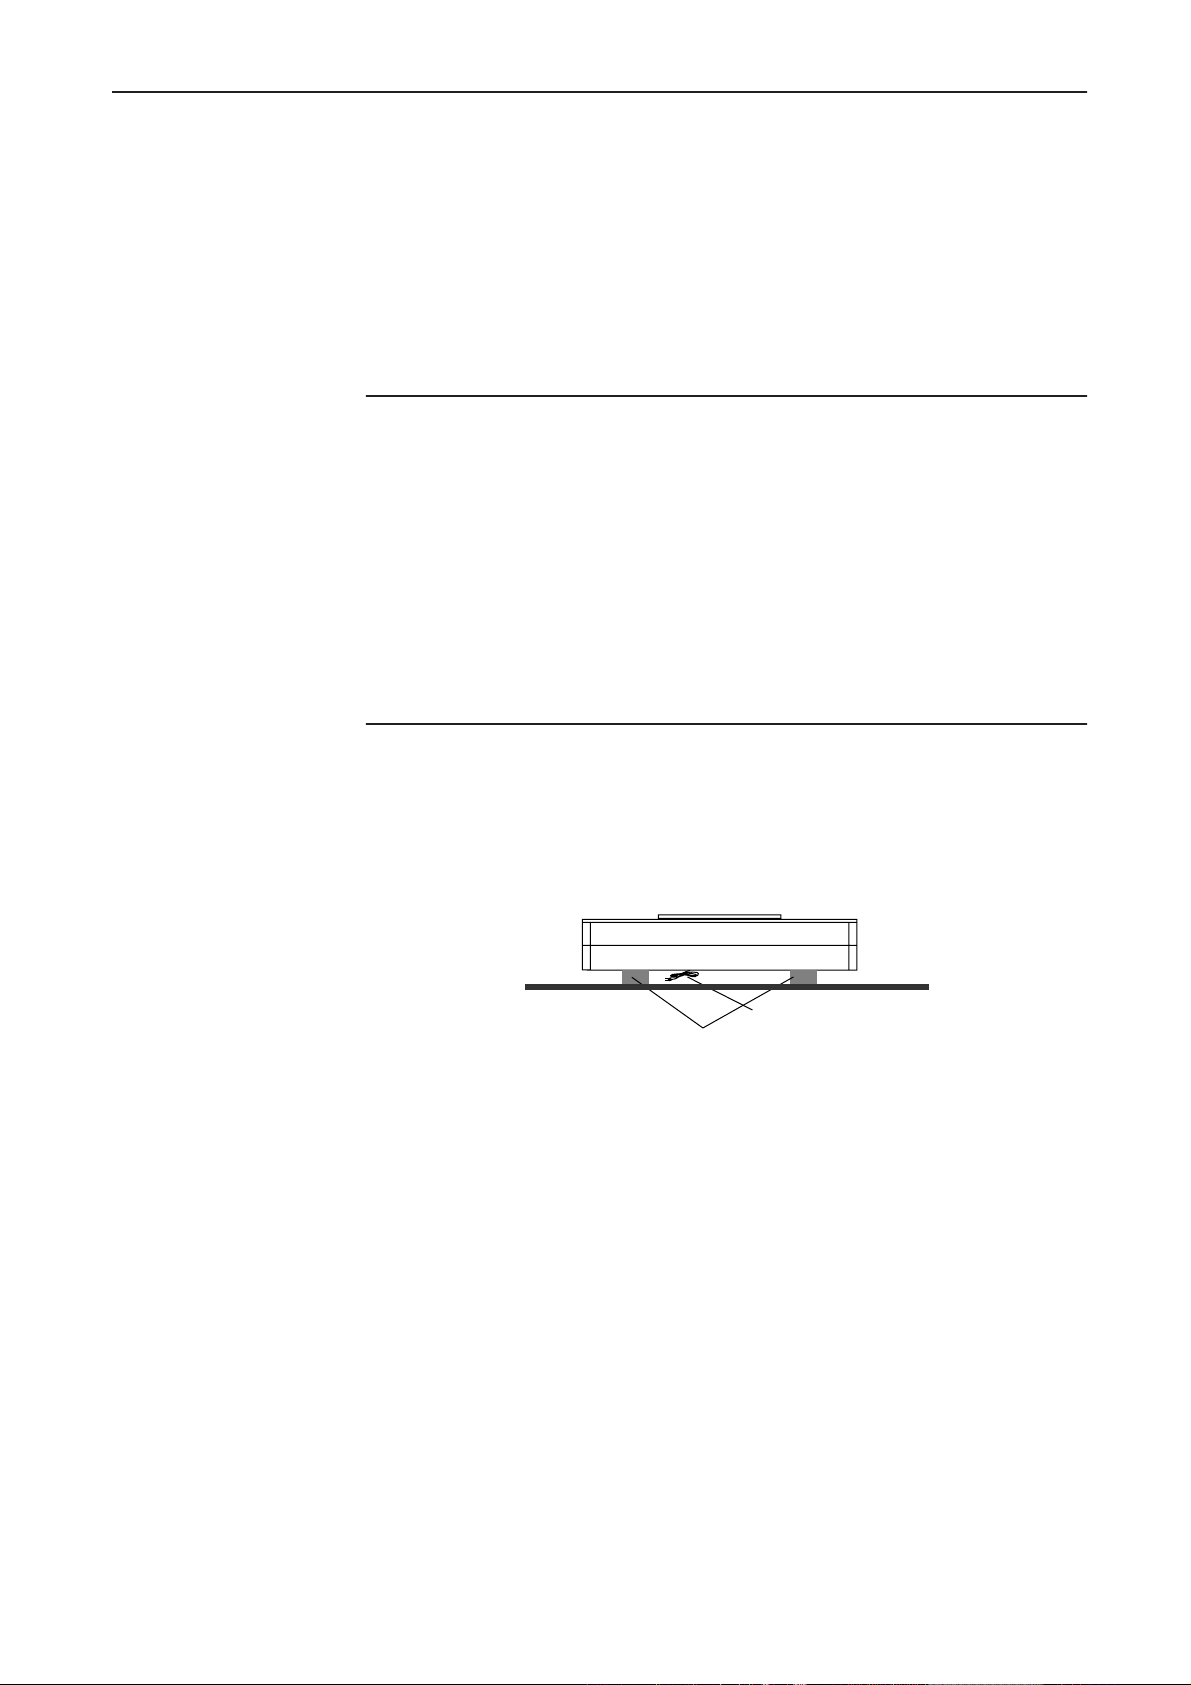
Removing the instrument
Remove the two styrofoam packing blocks from the carton, and place the instrument
on the blocks.
Place the styrofoam blocks so as to protect the power cable located on the bottom of
the instrument.
Leave it in this position until you are r
eady to attach it to the stand.
Power cable
Styrofoam blocks
5
Page 12
1. Controls and basic operation
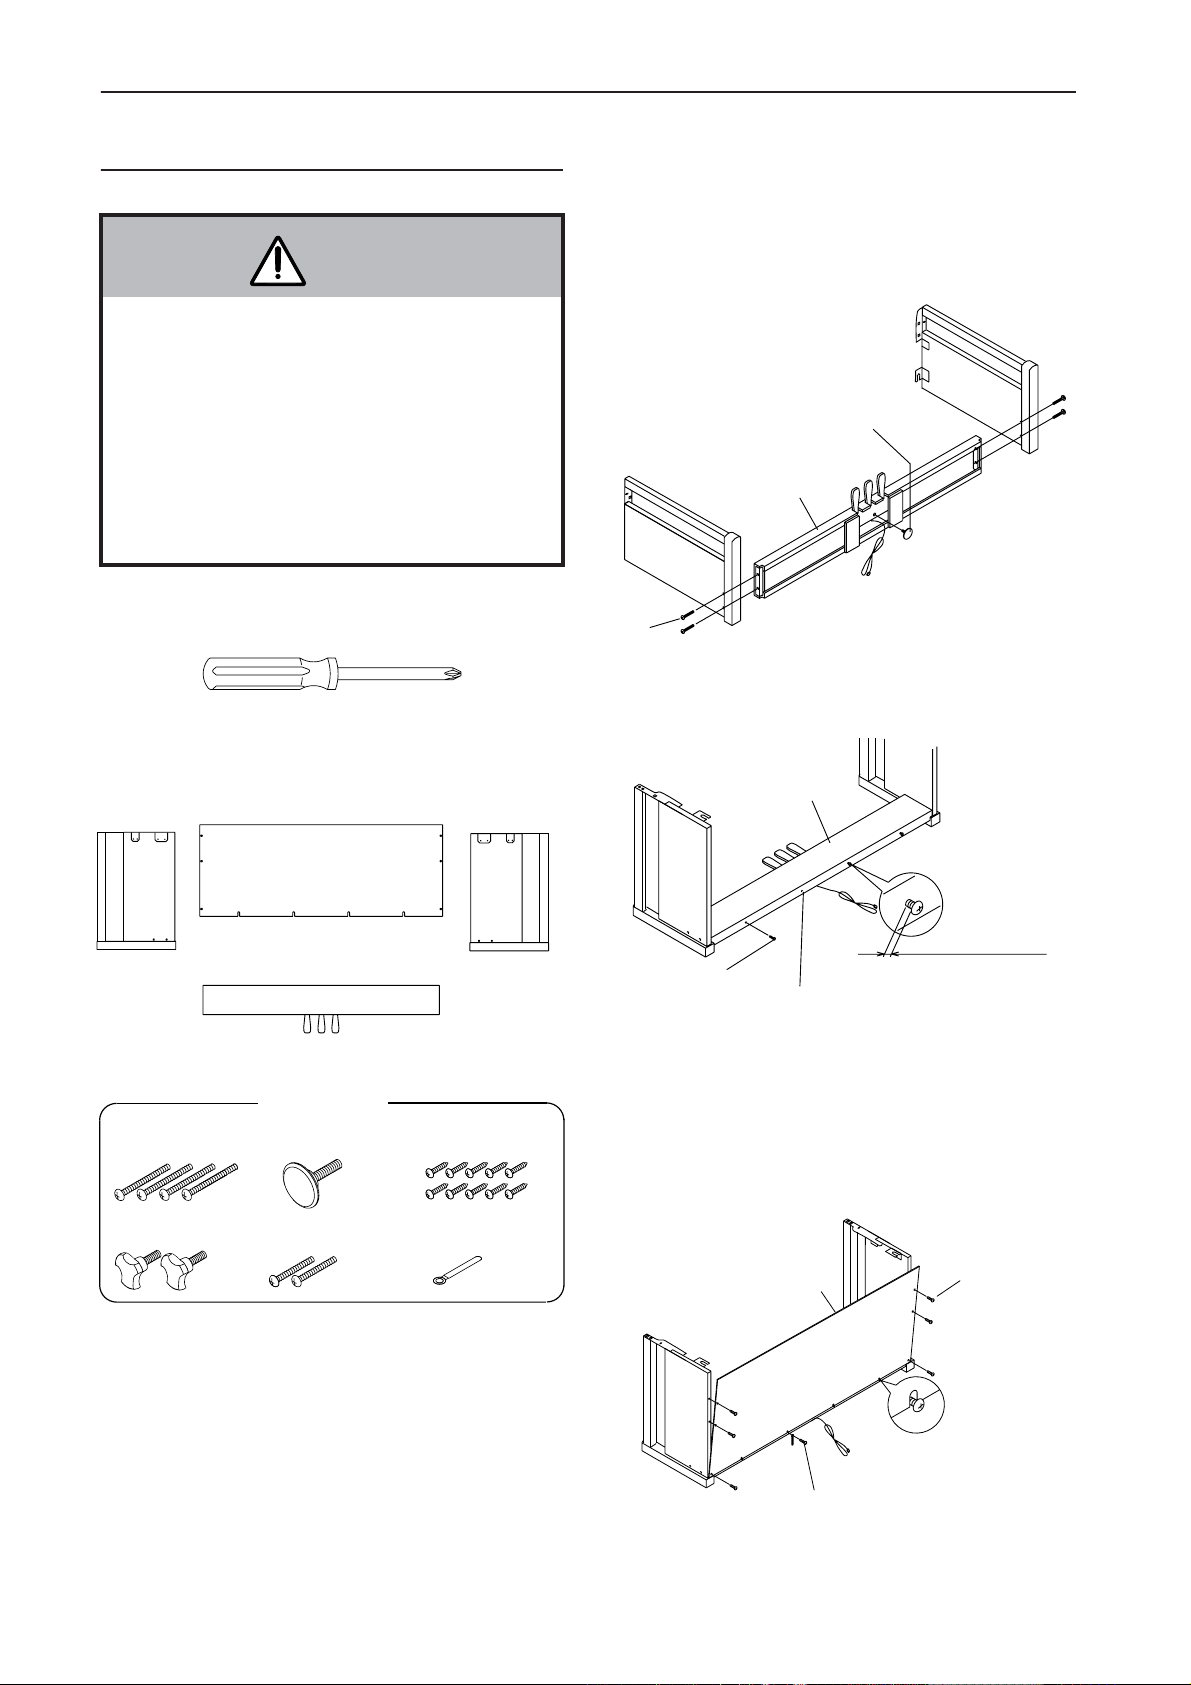
Assembling the stand
Caution
Two or more persons are required in order to
assemble the instrument.
When placing the instrument on its stand, be careful
not to pinch your hand.
Carefully follow the assembly procedure, being
careful to place the correct part in the correct orientation.
Be aware that if you apply excessive pressure to the
front of the instrument before tightening the screws,
the instrument may fall over.
1. You will need a Phillips (+) screwdriver (not
included).
2. Make sure that you have all the parts.
3. During assembly, be sure to place the back
of the stand on a flat floor surface etc. as
shown in the following diagram.
Align the left side panel 1 and the right side panel 2
to the pedal box 3 , and use the four long screws 5 to
fasten them together.
2
• Screw the adjuster 6 all the way
into the pedal box 3.
3
1
• Pull out the pedal cable.
5
4. Partially screw three of the short screws 7
into the pedal box 3 .
• Sidepanel
(left)1
• Long screws ✕4 5
(M6 x 75)
• Adjustable bolts ✕2 8
• Backpanel4
• Pedalbox3
• In the plastic bag
• Adjuster 6
• Medium screws ✕2 9
(M6 x 20)
• Sidepanel
(right)2
• Short screws ✕10 7
(3.5 x 20)
• Cable holder 0
3
• Approximately 8 mm
7
• Do not tighten the screws all the way.
• Do not put a screw here.
5. Attach the back panel 4 .
Slide the slots of the back panel 4 onto the screws 7
that were partially inserted. Use six more short screws
7 to fasten the back panel 4 using the pilot holes that
are drilled in the side panels. Completely tighten the
three short screws
the last short screw
• Finished surface toward the front
7 which were left untightened. Use
7 to attach the cable holder 0 .
7
4
• Fit back panel 4 onto screws
• Fasten the cable holder 0 together with the
back panel
6
Page 13
1. Controls and basic operation
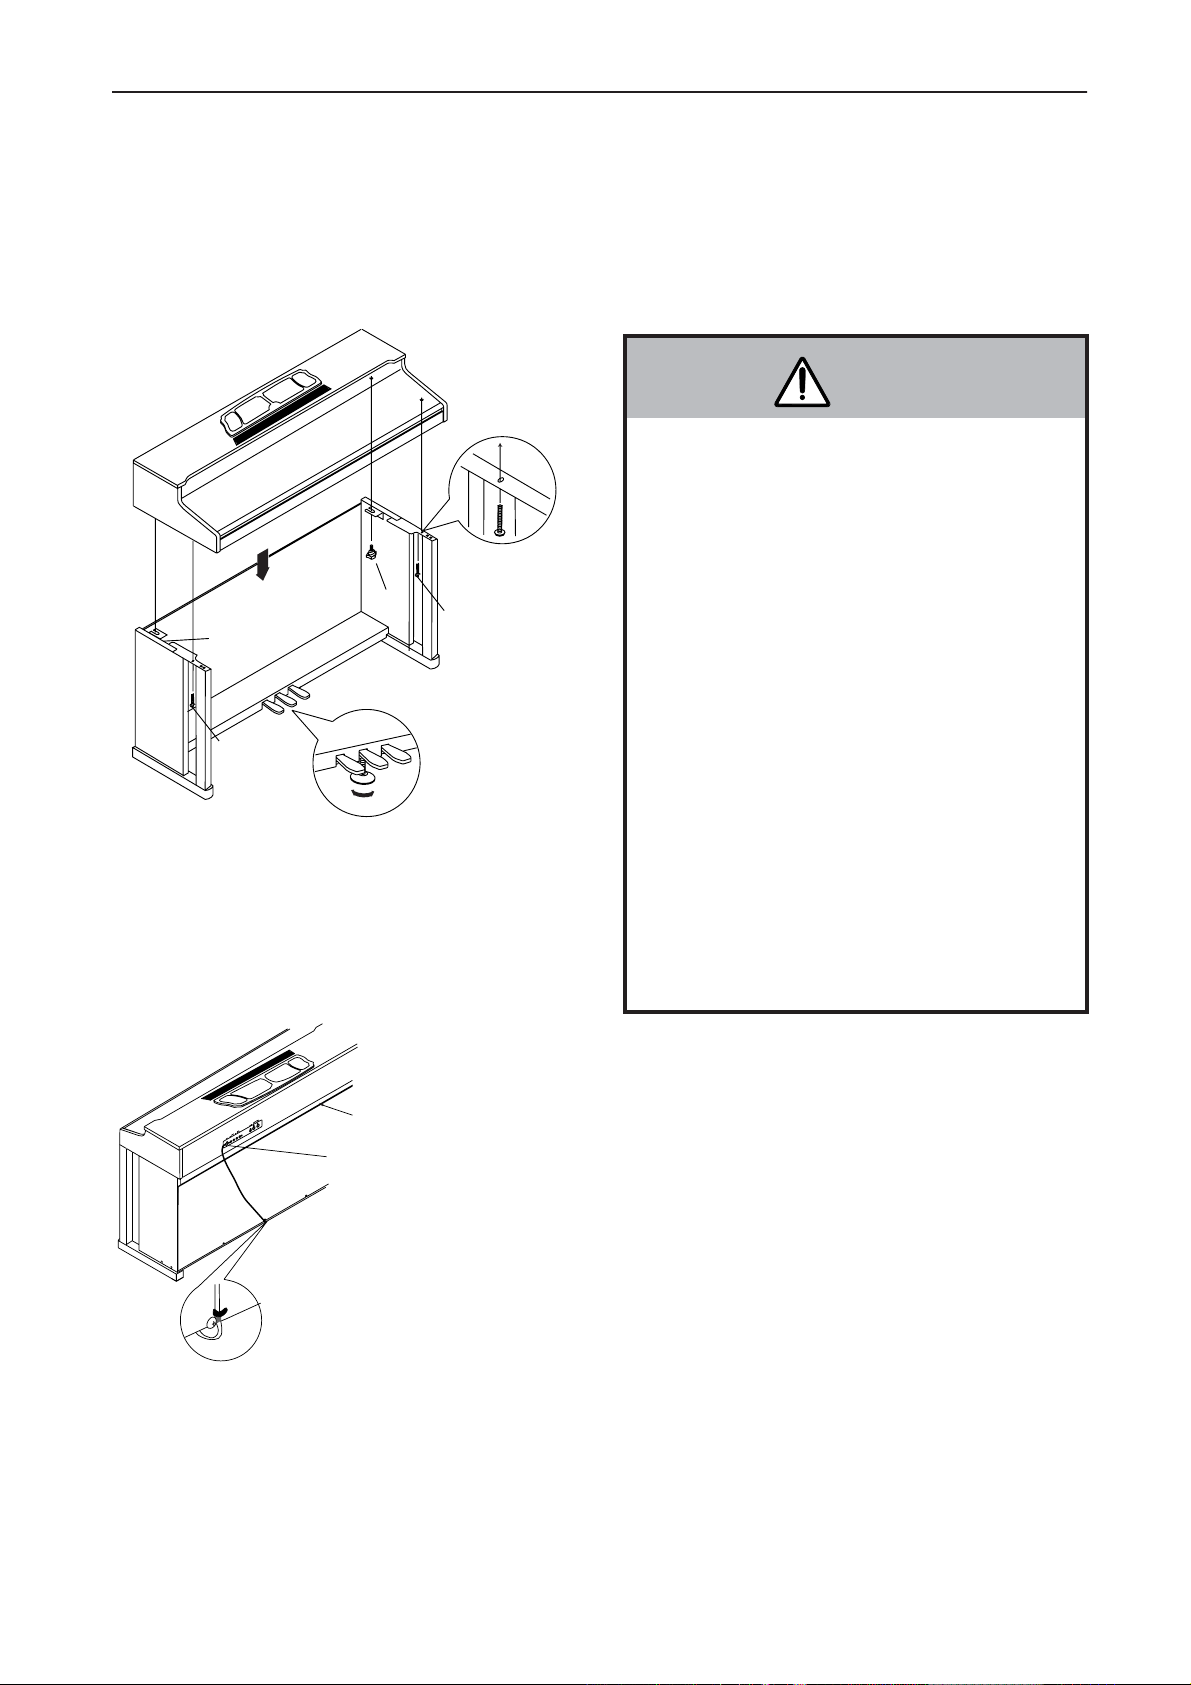
6. Attach the keyboard unit.
Place the keyboard unit so that the screw holes on the
bottom of the keyboard unit are aligned with the screw
holes on the stand.
Use the two adjustable bolts
8 and the two medium
screws 9 to fasten the keyboard unit from the underside.
8
9
8
9
• Rotate the adjuster so that the bottom of the
adjuster is firmly in contact with the floor.
Unless the adjuster is firmly in contact with the
floor, the pedal may become unsteady, or rattling
may appear in the sound.
7. Connect and fasten the pedal cable.
Check after assembly
Are any parts left over?
If any parts are left over, refer to the diagrams to
see where they should go.
Check that all screws are tightened correctly.
Caution
Cautions when moving the instrument
When moving the instrument, remove the keyboard
unit from the stand and move them separatel
placing the instrument in its new location, refer to
the above assembly instructions and re-assemble
the instrument. Also, please take note of the following points when moving the instrument.
• Bundle the power cable. If the cable is left unbundled, it may catch on an object, which could produce broken connections, short circuits or other
malfunctions.
• Be careful that the pedal cable does not catch on a
doorknob or other object.
If the screws loosen
As you continue using the piano for an extended
period of time
, the scre
ws in various parts of the
stand may gradually loosen, causing the stand to
sway. If this occurs, re-tighten the screws.
Disassembly
To disassemble the instrument, re
verse the procedure for attaching the keyboard unit and assembling
the stand. Then keep all screws and other parts in a
safe place.
y. After
•Thereisasmallgapinthe
•Usethecableholderto
fastenthepedalcable.
upperpartofthebackpanel.
• Withthearrowonthepedalcableconnector
pointingupward,plugitintothePEDALjack
locatedontherearofthekeyboardunit.
7
Page 14
1. Controls and basic operation
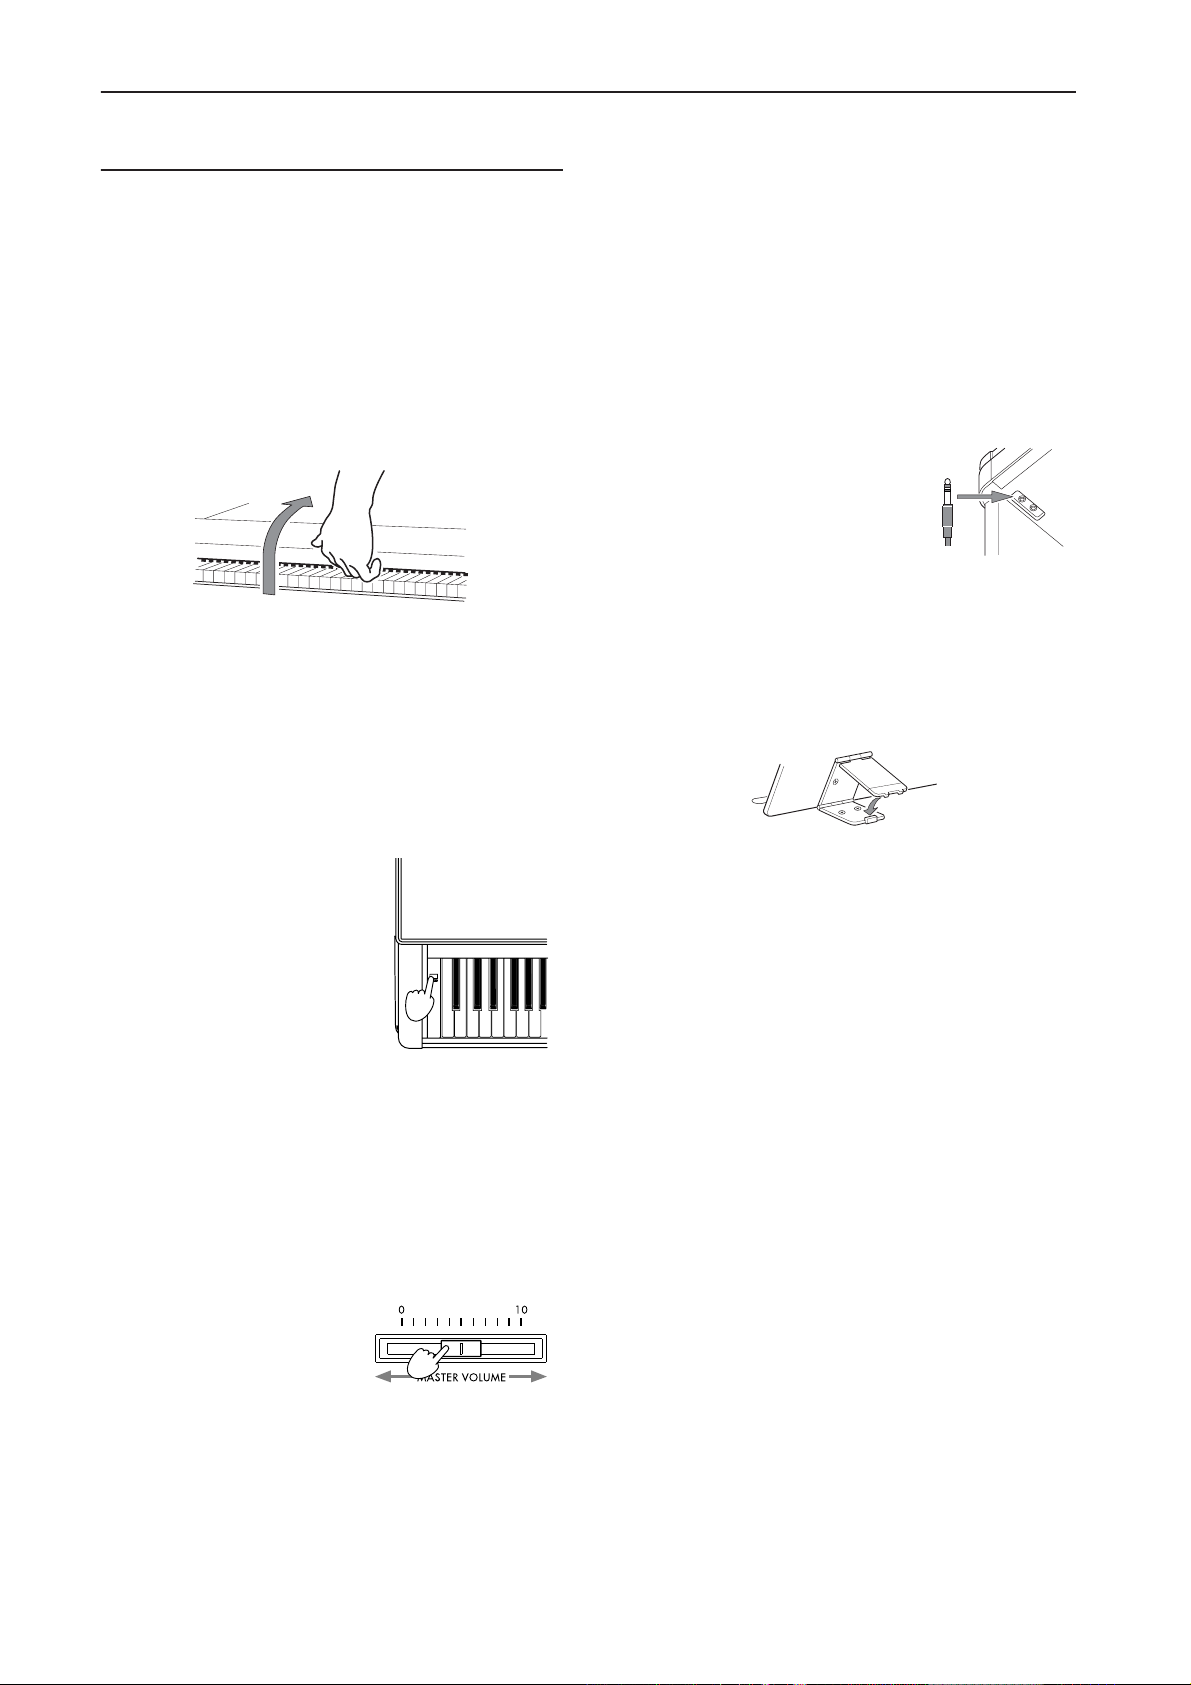
Preparing for play
1. Plug in the power cable.
Plug the power cable into an AC outlet.
Be sure to use an AC outlet of the correct voltage for
your instrument.
2. Open the key cover.
Carefully lift the center of the front edge, and slide it
gently away from you.
To close the key cover
and slide it toward you.
When opening or closing the key cover, be careful not
to pinch your hands or fi
The cover may be damaged by excessive force, or if it is
opened or closed roughly.
Do not open or close the key cover of the
floppy disk is protruding part way from the disk drive.
, lift the center of the front edge
ngers.
C-900 when a
■ When using headphones
When headphones are connected, no sound will be
heard from the internal speakers.
You can use headphones when you do not wish to be
heard by other people, such as when practicing at
night.
Since there ar
listen to the instr
Connect the plug (phone plug) of the headphones to
the headphone jack located under the instrument on
the left side.
If you use headphones with a
miniplug
sure to grasp the base of the adapter
plug when connecting or disconnecting the headphones.
When using headphones, protect
your hearing by avoiding extended periods of listening
at high volumes.
e two headphone jacks, two people can
ument.
→phone plug adapter, be
■ Using the music stand
Place the music stand upright, and use the two stoppers on the back of the stand to keep it from falling
back down.
3. Turn on the power.
1. Press the POWER switch to turn on the power.
When the power is turned on, the
POWER indicator located on the
left fr
ont of the instrument will
light.
At this time, the pedals will be
initialized, so do not press the
pedals until a display appears in
the LCD.
2. To turn the power of
once again.
When the power is turned of
located at the left front of the instrument will go dark.
f, press the POWER switch
f, the POWER indicator
4. Adjust the volume.
Raise the MASTER VOLUME slider to approximately
the center position. Moving the slider toward the right
will increase the volume, and moving it toward the left
will decrease the volume.
At the “0” position there will
be no sound. While you play
the keyboar
ume to an appropriate level.
The MASTER VOLUME slider
contr
phone jacks, and the rear panel OUTPUT jacks.
d, adjust the vol-
soft loud
ols the volume of the internal speakers, the head-
8
Page 15

2. Floppy disks
2. Floppy disks
The disk CFD-01P contains automatic accompaniment data and voice program data.
The information on these disks can be read by the floppy disk drive of the
You can also use commercially available blank disks to store your own performances
(including the automatic accompaniment) as data.
In addition, data that you r
cially available music disk can be loaded into the
When using floppy disks, please observe the cautions given below. Incorrect disk handling may result in loss of the recorded data.
ecorded or Standard MIDI File format data from a commer-
C-900 and played back.
Floppy disk types and formats
The C-900 can use two types of 3.5 inch floppy disk: 2DD or 2HD.
A new disk or one that has been used by a different device cannot be used by the
C-900. Such disks must first be “formatted” before they can be used by the C-900.
For the formatting procedure, refer to the topic “FORMAT (Format Disk)” on p.58 of
the Reference Guide.
C-900.
Floppy disk handling
• Do not open the disk shutter or touch the magnetic surface inside the floppy disk. If
the magnetic disk becomes soiled or scratched, it will be impossible to read or write
data.
• Never transport the
Vibration may cause the disk drive heads to scratch the floppy disk, making it unusable.
• Do not put floppy disks near a magnetic field, such as televisions, computers, computer displays, speakers, or power transformers. Doing so may erase the data
ded on the disk.
recor
• Avoid using or storing floppy disks in locations of high temperature or humidity
locations with excessive dust or dirt.
• Do not place objects on top of a floppy disk.
• Floppy disks should be stored in an appropriate case.
• While the floppy disk drive is operating, do not move the piano.
C-900 with a floppy disk inserted in the floppy disk drive.
, or
9
Page 16
2. Floppy disks
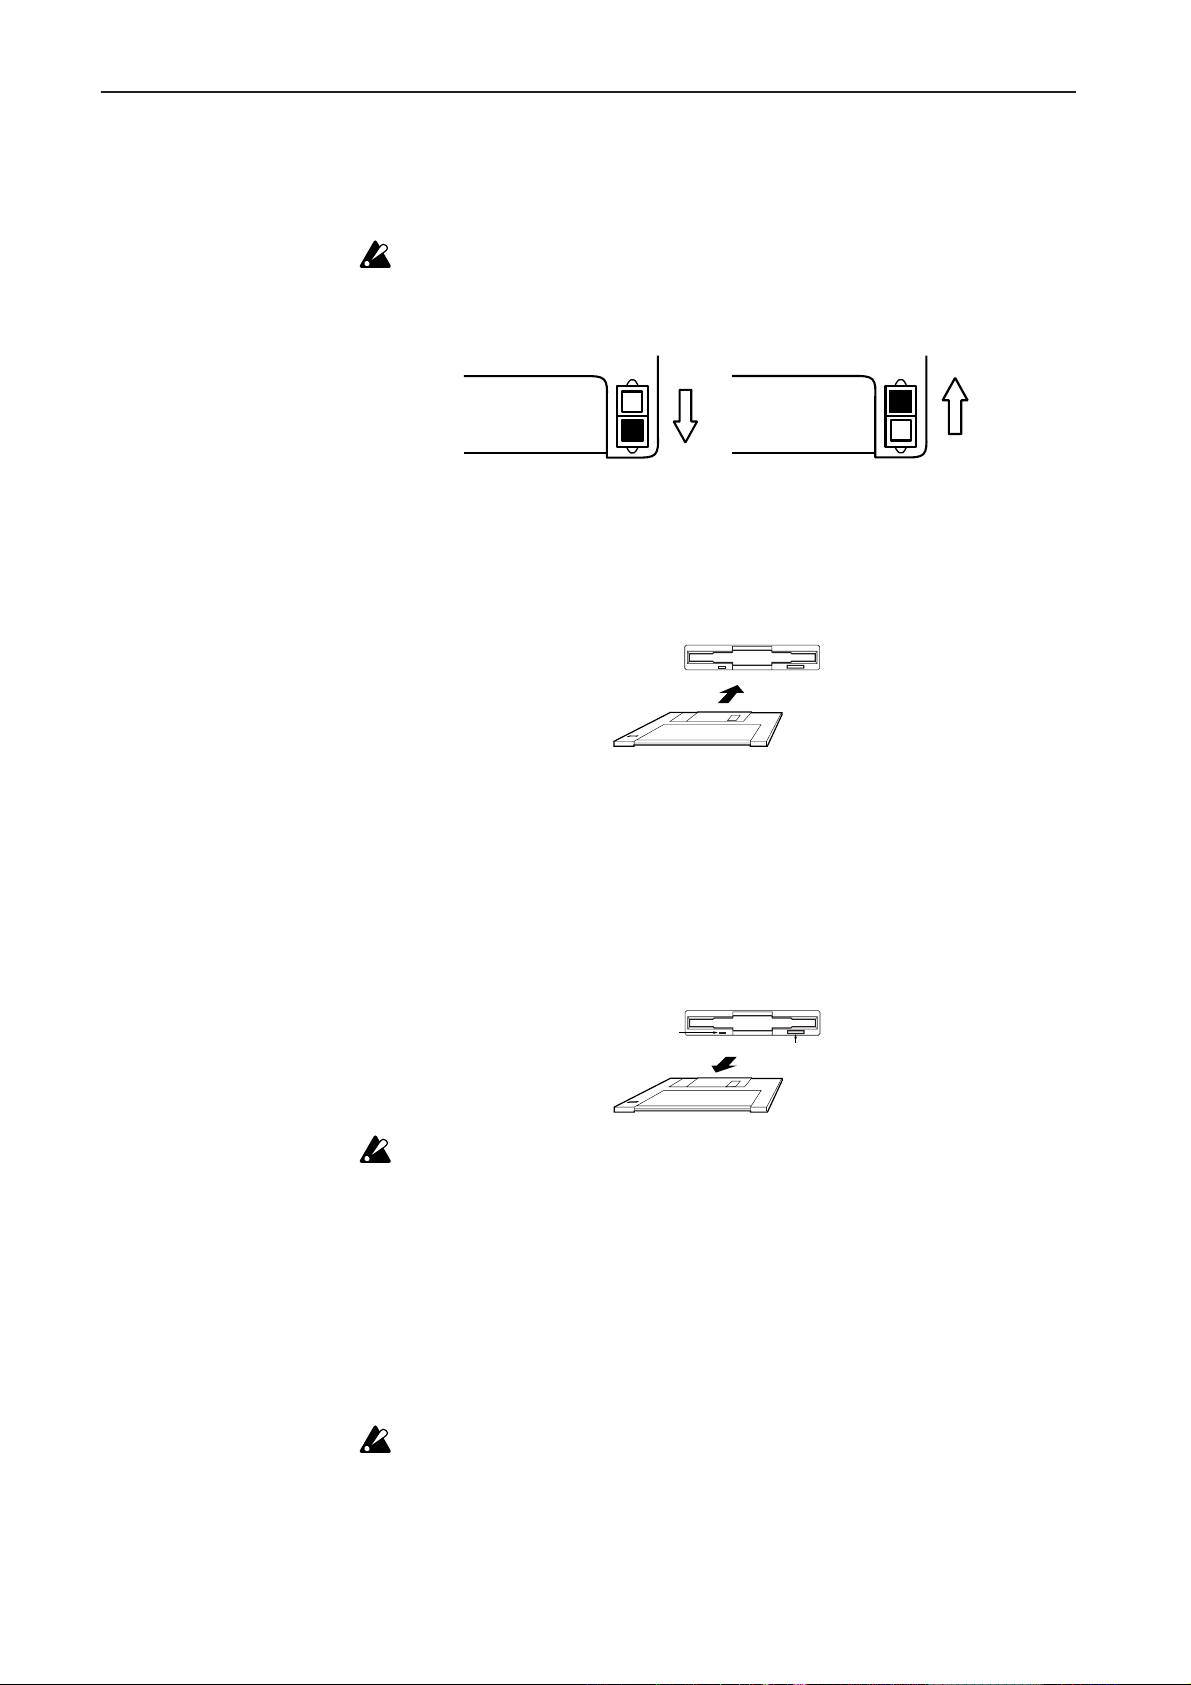
Floppy disk write protect slider
Floppy disks have a small window called a “write protect hole,” which helps prevent
accidental erasure or rewriting of the data.
In order to prevent erasure of the data on a disk, move the tab downward after
saving, to the “write prohibit” position.
Write prohibit: Lower the tab
so that the write protect hole
is open
Write permit: Raise the tab
so that the write protect hole
is covered
Inserting floppy disks
Insert a floppy disk into the disk drive with the label facing up. Push it all the way into
the drive until it clicks into place. Forcing a disk in will cause malfunction. Disks must
be inserted gently, and straight in.
Removing floppy disks
To remove a floppy disk from the disk drive, first check to make sure that the drive is
not operating (i.e., that the LED of DISK/GLOBAL key is not blinking, and that no
message such as “Loading” or “Saving” is displayed). Then press the eject button to
remove the disk.
If the disk does not come out when you press this button, do not attempt to remove
the disk by for
Never r
BAL key is blink. Otherwise, the disk drive or data on the floppy disk may be
destroyed.
ce. Contact your dealer.
When the power is turned on,
this LED will light.
emove a floppy disk from the disk drive when the LED of DISK/GLO-
Eject button
Cleaning the disk drive heads
If the heads of the disk drive are dirty, errors may occur when saving or loading. It is
important to regularly clean the heads. To do so, use a commercially available wettype 3.5 inch dual-sided head cleaning disk. Using a single-sided cleaning disk will
damage the drive.
For the cleaning procedure, refer to the manual for your cleaning disk.
Continuing the cleaning process for an extended period of time will damage the
disk drive.
10
Page 17

Don’t worry if the displays are
different
If things don’t work as you
expect
3. Getting acquainted with the C-900
3. Getting acquainted with
the C-900
For those who are playing the C-900 for the first time, this chapter provides a step by
step introduction to its basic functionality.
Place this manual beside the
step.
Numbers and program names etc. that appear in the LCD of your
be somewhat different than those printed in this manual. There is no need to worry
about this. The actual displays will depend on what you did in the previous step.
If you get lost in the displays and the
EXIT key located to the immediate left of the LCD. Or, you can press the START/STOP
key to make the START/ST
depend on where you were, and this will let you continue working.
C-900, and operate the controls to actually perform each
C-900 will probably
C-900 does not work as you expect, press the
OP LED is dark. The status to which you will return will
11
Page 18
3. Getting acquainted with the C-900
1. Play the keyboard of the C-900
Using the C-900 as a conventional electronic piano
Although the C-900 provides a wide variety of features, such as automatic playback
and assisting you to compose, you can also enjoy it simply by playing the keyboard
like a conventional electronic piano.
Take time to fully enjoy the sounds of the
C-900 before proceeding to the next step.
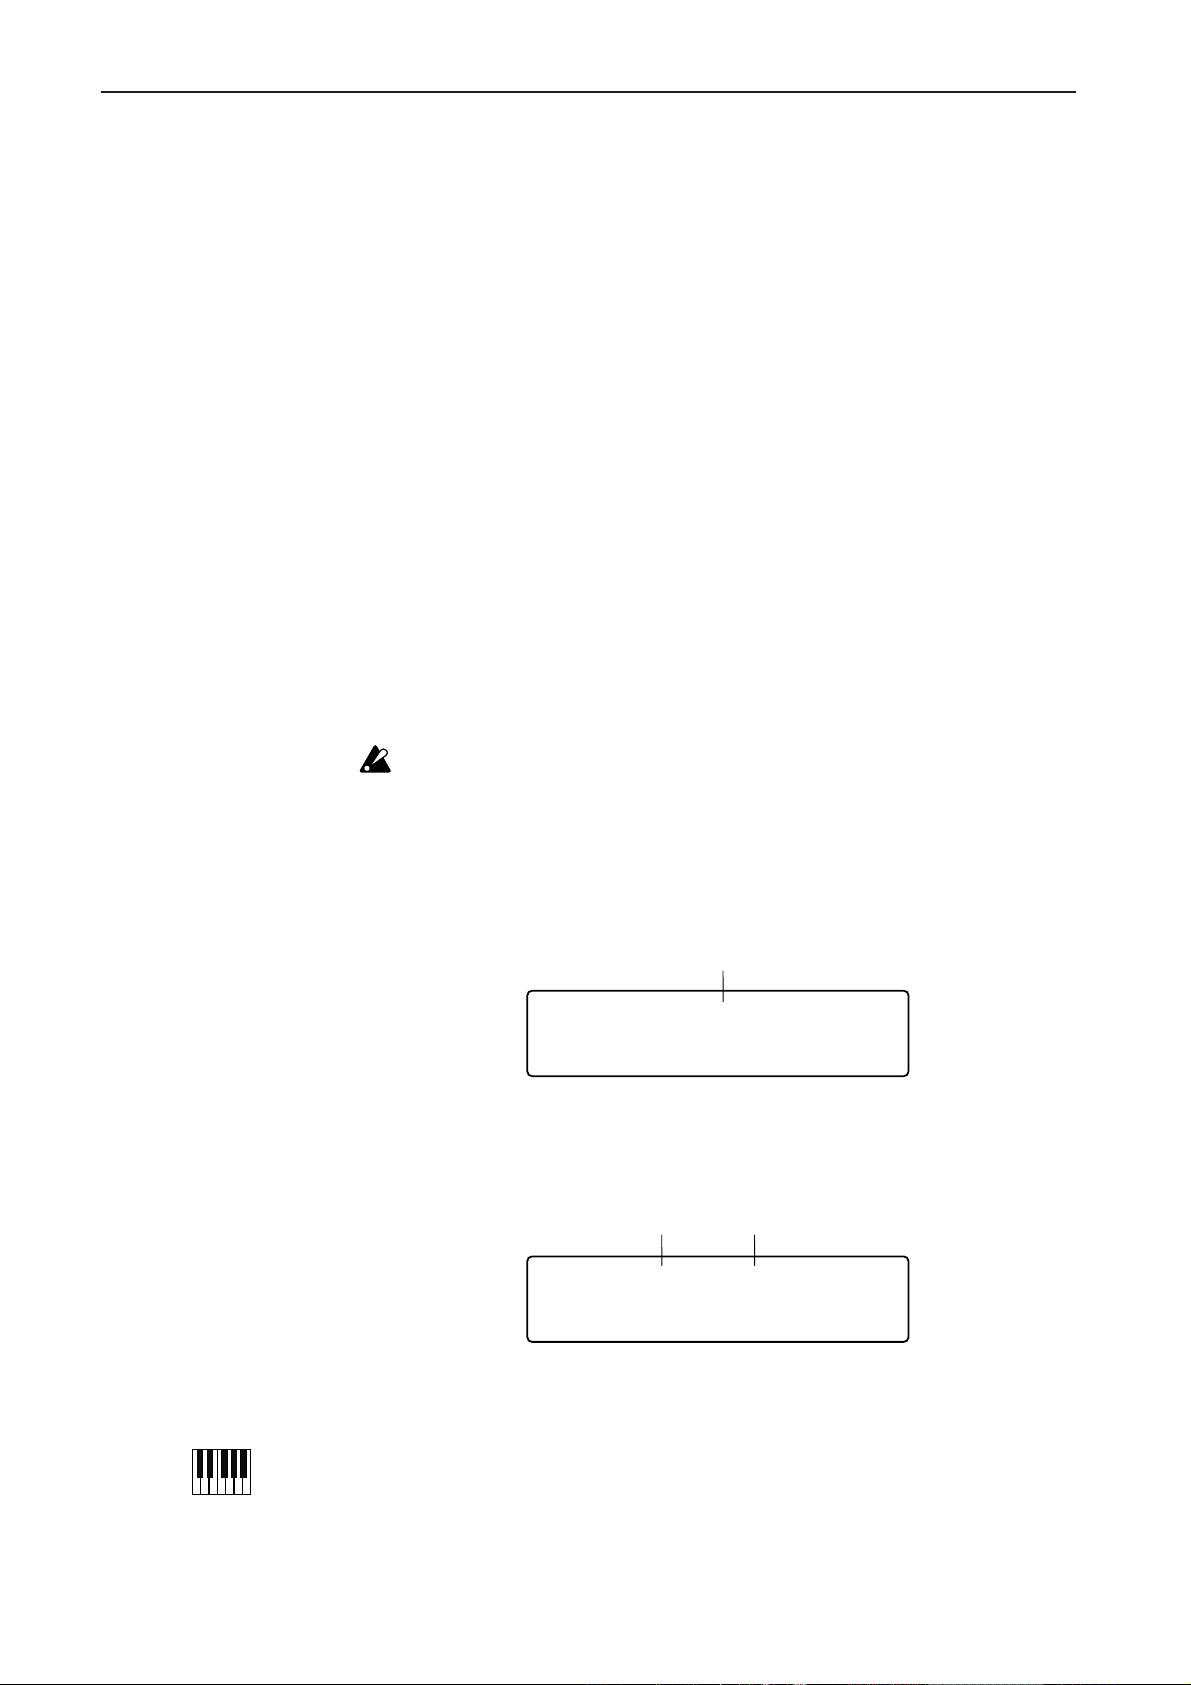
1. Enter Piano mode
Enter Arrangement mode If the ARR PLAY LED is red, the C-900 is in Arrangement Play mode.
Enter Piano mode Once you are in Arrangement Play mode, you can use the C-900 as a conven-
tional electronic piano when the PIANO MODE LED is also red. This status is
called Piano mode.
In Piano mode,
• Selecting a program will automatically select the most suitable effect for that sound.
Also, the Pedal Simulation (
• Muting will be canceled for the right (KB1) and left (KB2) areas of the keyboard, so
that both halves of the keyboard will produce sound.
• Keyboar
• The upper line of the display will show the number of the sound program within
the group, and the name of the sound. The lower line will show the metronome’s
tempo, time signatur
When you turn the
If you are not in Arrangement Play mode, press the ARR PLAY key located in
the right on the operating panel.
→1. The ARR PLAY LED and the PIANO MODE LED will light.
→2. The following display will appear.
d Assign will be set to SINGLE.
C-900 power on, it will automatically be in Piano mode.
If a disk containing a Standard MIDI File (SMF) or other file that can be played in
Song Play mode is already inserted when the power is turned on, the instrument
will automatically be in Song Play mode.
☞Reference Guide p.51) will be turned on.
e and volume.
Piano mode display
Arrangement Play mode display
Group, number and name of the sound currently in use
KB1: Pf00 GrandPiano
=120 METRO 4/4 L99
When this type of display appears, the C-900 is in Piano mode.
If you are in Arrangement Play mode and are not in Piano mode, the following display will appear.
Number and name of the arrangement currently in use
Number
Name
ARR: 0 8 Beat 1
=120
In this case, press the PIANO MODE key located in the right side of the operating
panel.
→1. The PIANO MODE LED will light.
→2. The KBD LOCK LED will light.
→3. The Piano mode display will appear.
12
2. Once you are in Piano mode, play the keyboard.
You will hear the sound (program) that is currently displayed in the screen.
Page 19

3. Getting acquainted with the C-900
Changing the sound program
Selecting a different sound
Here’s how to temporarily change the sound (program) that is produced when you
play the keyboard.
1. Press one of the PROGRAM GROUP keys and one of the PROGRAM
SELECT keys, which are located on the right side of the operating panel.
→ The following display will appear. (The group, number and name of the sound
will depend on the keys that you pressed, or the number of times that the keys
were pressed.)
Group, number and name of the selected sound program
NumberGroup
KB1: Be01 Glocken
=120 METRO 4/4 L99
The sounds of the
SELECT keys select sounds from within each group.
2. Play the keyboard once again.
You will hear a different sound.
C-900 are organized into 18 program groups. The PROGRAM
Name
13
Page 20
3. Getting acquainted with the C-900
Splitting the keyboard in two
The C-900 lets you split the keyboard at any note, so that the low range (left hand) and
high range (right hand) can be used separately. This lets you play different sounds in
the left and right hands. The location of the split can be set freely.
Let’s try it out.
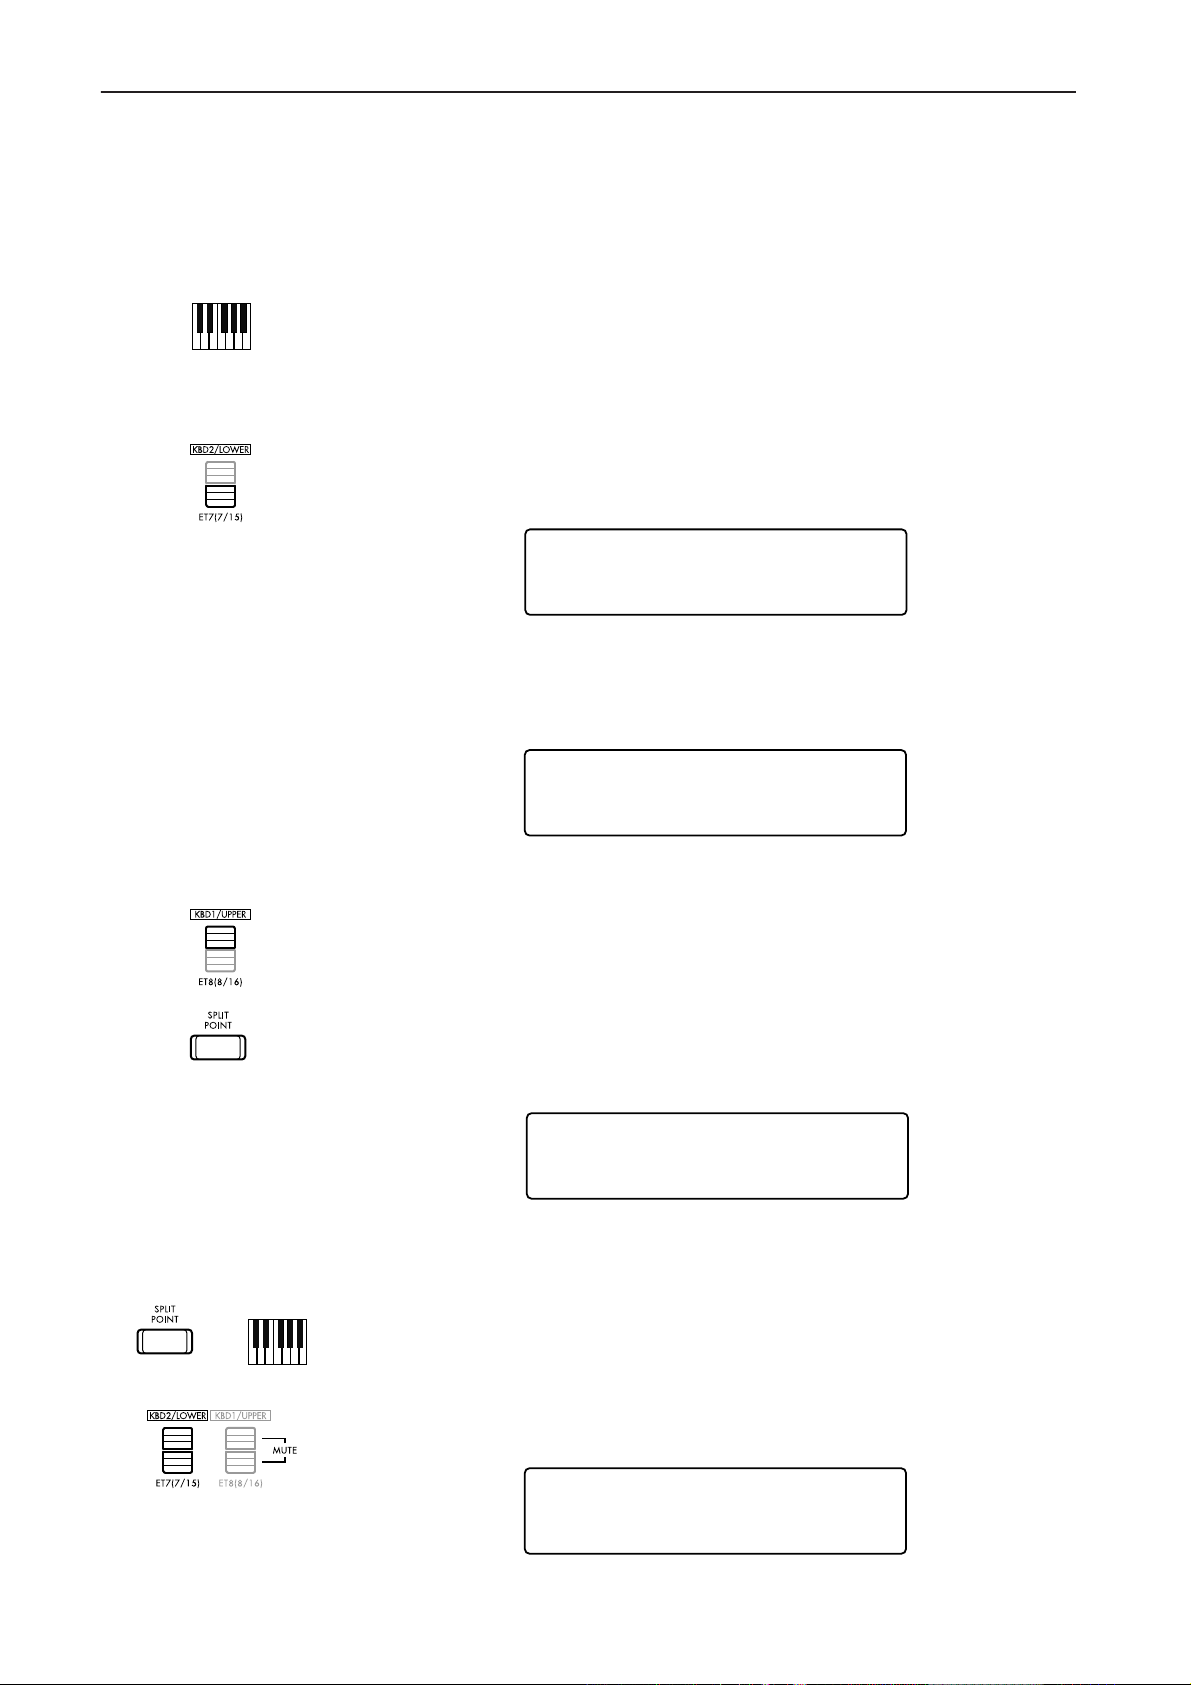
1. Set KEYBOARD ASSIGN to SPLIT.
In the right side of the operating panel, press the KEYBOARD ASSIGN switch until
the LED indicates SPLIT.
2. Change the sound of the left keyboard area.
Below the LCD, press the lower switch located under KBD2/LOWER once.
The following display will appear.
Next, press the PROGRAM GROUP key GUITAR/BASS twice.
If the LED at the left of BASS is not lit, press it again.
The following display will appear.
KB2: Pf00 GrandPiano
=120 METRO 4/4 L99
Split Point display
+
KB2: Ba00 WoodBass
=120 METRO 4/4 L99
An acoustic bass sound will now be played by the keyboard to the left of middle C4.
The right half of the keyboard will play a piano sound.
To change the sound in the right half of the keyboard, press KBD1/UPPER, make sur
that the LCD has changed from KB2 to KB1, and select a sound in the same way as you
did for the left half of the keyboard.
3. Press and hold the SPLIT POINT key located to the left of the operating
panel.
→ As long as you continue pressing the key, the following display will appear.
SPLIT:C4 XPOSE:0
LOWER UPPER
While this display appears, you can press any note on the keyboard and then release
the SPLIT POINT key. This will cause the KB2 sound to be played by notes to the left
of the note you pressed, and the KB1 sound by notes to the right.
After you try this, hold down the SPLIT POINT key and press the C4 note to restore
the original setting.
e
14
Muting
Simultaneously press the two keys located below KBD2/LOWER. The following display will appear. (The normal display will reappear after approximately 7 seconds.)
KB2: Ba00 WoodBass
Volume=127 ----- 0
Page 21
3. Getting acquainted with the C-900
Notice that the keyboard area to the left of the split point now makes no sound.
Repeat the operation, and the sound will reappear.
When Piano mode is turned off, the left keyboard area will be muted. (There may be
sound in some cases, depending on the arrangement that is selected.) This is so that
during automatic accompaniment, the notes you play to input chords are not
sounded.
Making it easier to play or sing
You can modify the pitch of the C-900 in steps of semitones or octaves.
When you wish to play a song that is too high or too low for a vocalist’s range or other
instruments, you can simply change the pitch of the
ent key using the same fingering.
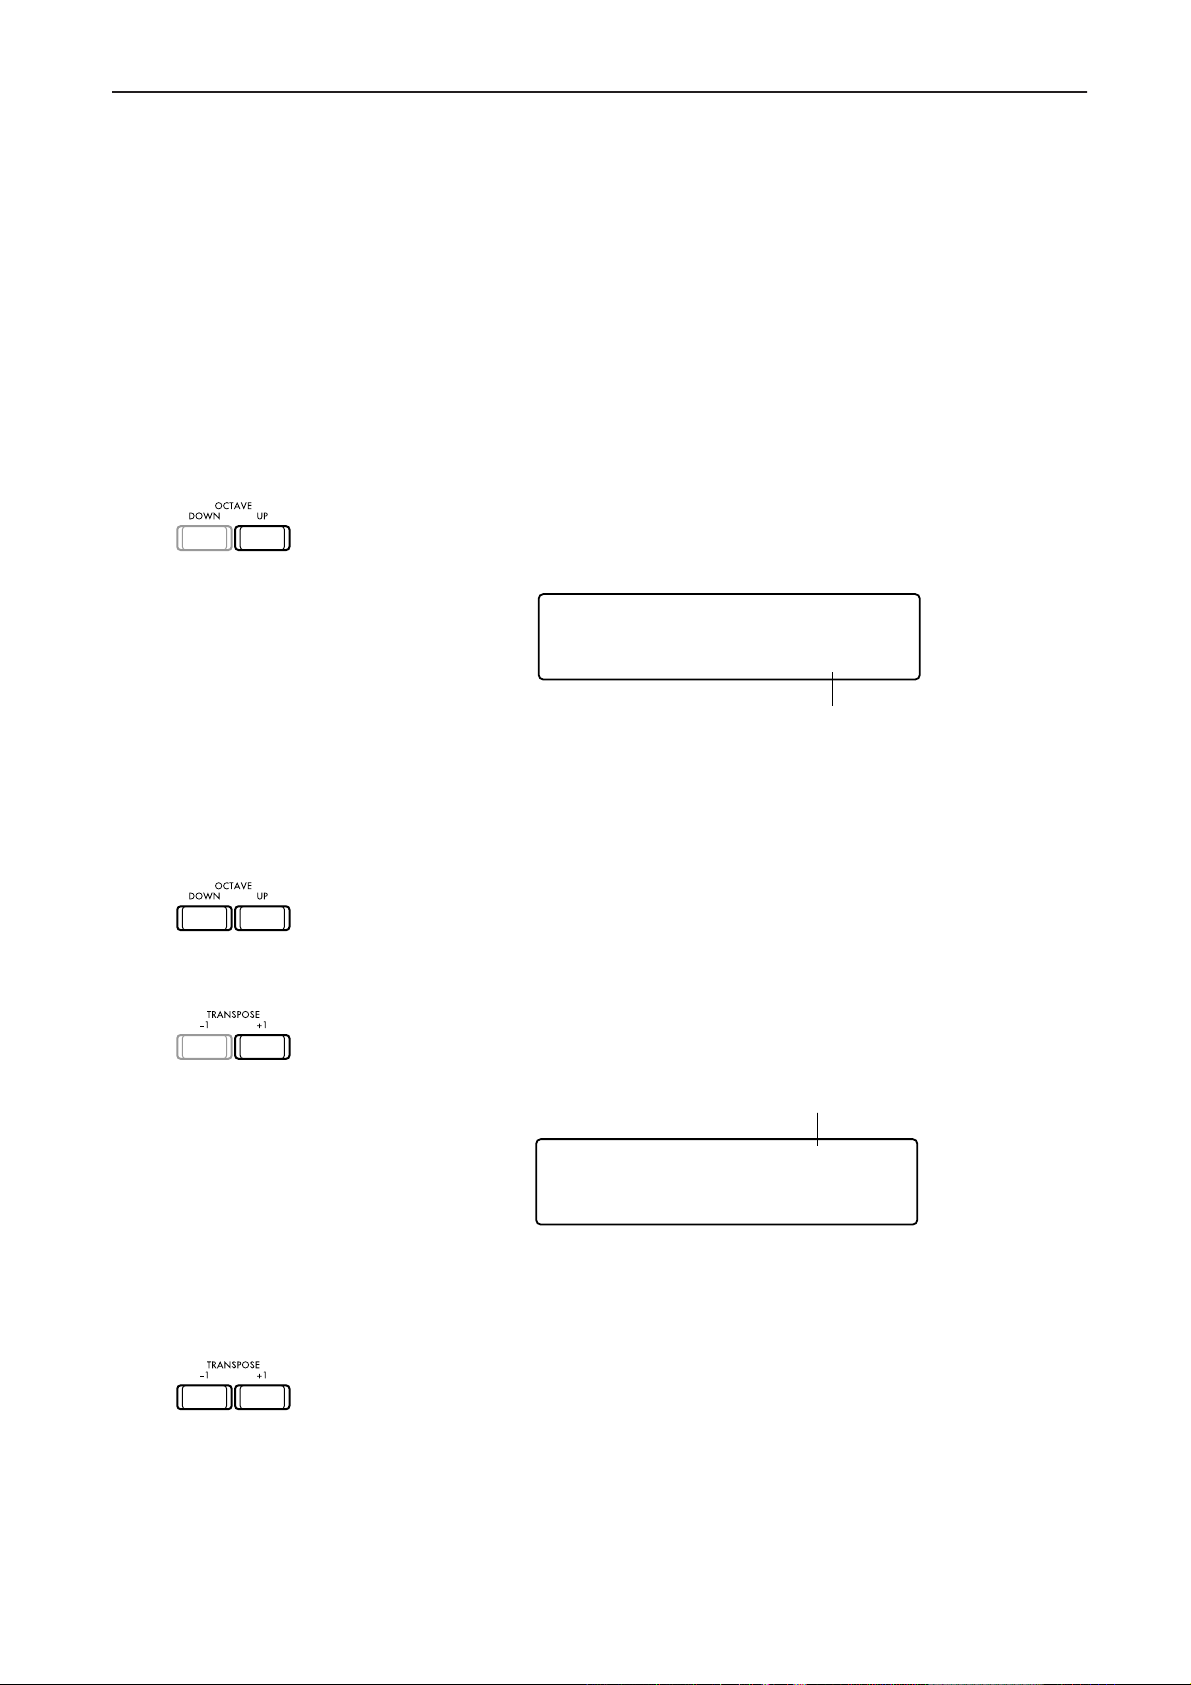
1. Press the OCTAVE UP key.
→1. The following display will appear
C-900 to play the song in a differ-
Changing the octave
Transpose
KB1:Pf00 GrandPiano
Volume=103 UPPER+1
Octave setting
→2. The pitch produced by the C-900 keyboard will be one octave higher.
The OCTAVE UP and OCTAVE DOWN keys allow you to adjust the octave over a
range of –2 to +2 octaves.
If no other keys are pressed, the previous LCD will reappear after approximately 7
seconds.
In the above display, if you press the OCTAVE UP or OCTAVE DOWN keys again, the
octave setting will increase or decrease through the values
+2 / +1 / 0 / -1 /-2
and the pitch of the keyboard will change correspondingly.
2. Press the TRANSPOSE +1 key.
→1. The following display will appear.
Transpose setting
SPLIT:C4 XPOSE:+1
LOWER UPPER
→2. The pitch of the C-900 will raise one semitone.
The –1/+1 keys allow you to adjust the transposition over a range of –11 to +11.
If no other keys are pressed, the previous LCD will reappear after approximately 7
seconds.
If you press the TRANSPOSE +1 or TRANSPOSE –1 keys again, the transpose value
will change in semitone steps
XPOSE: +1 / XPOSE 0 / XPOSE -1 -----
and the pitch of the keyboard will change correspondingly.
15
Page 22
3. Getting acquainted with the C-900
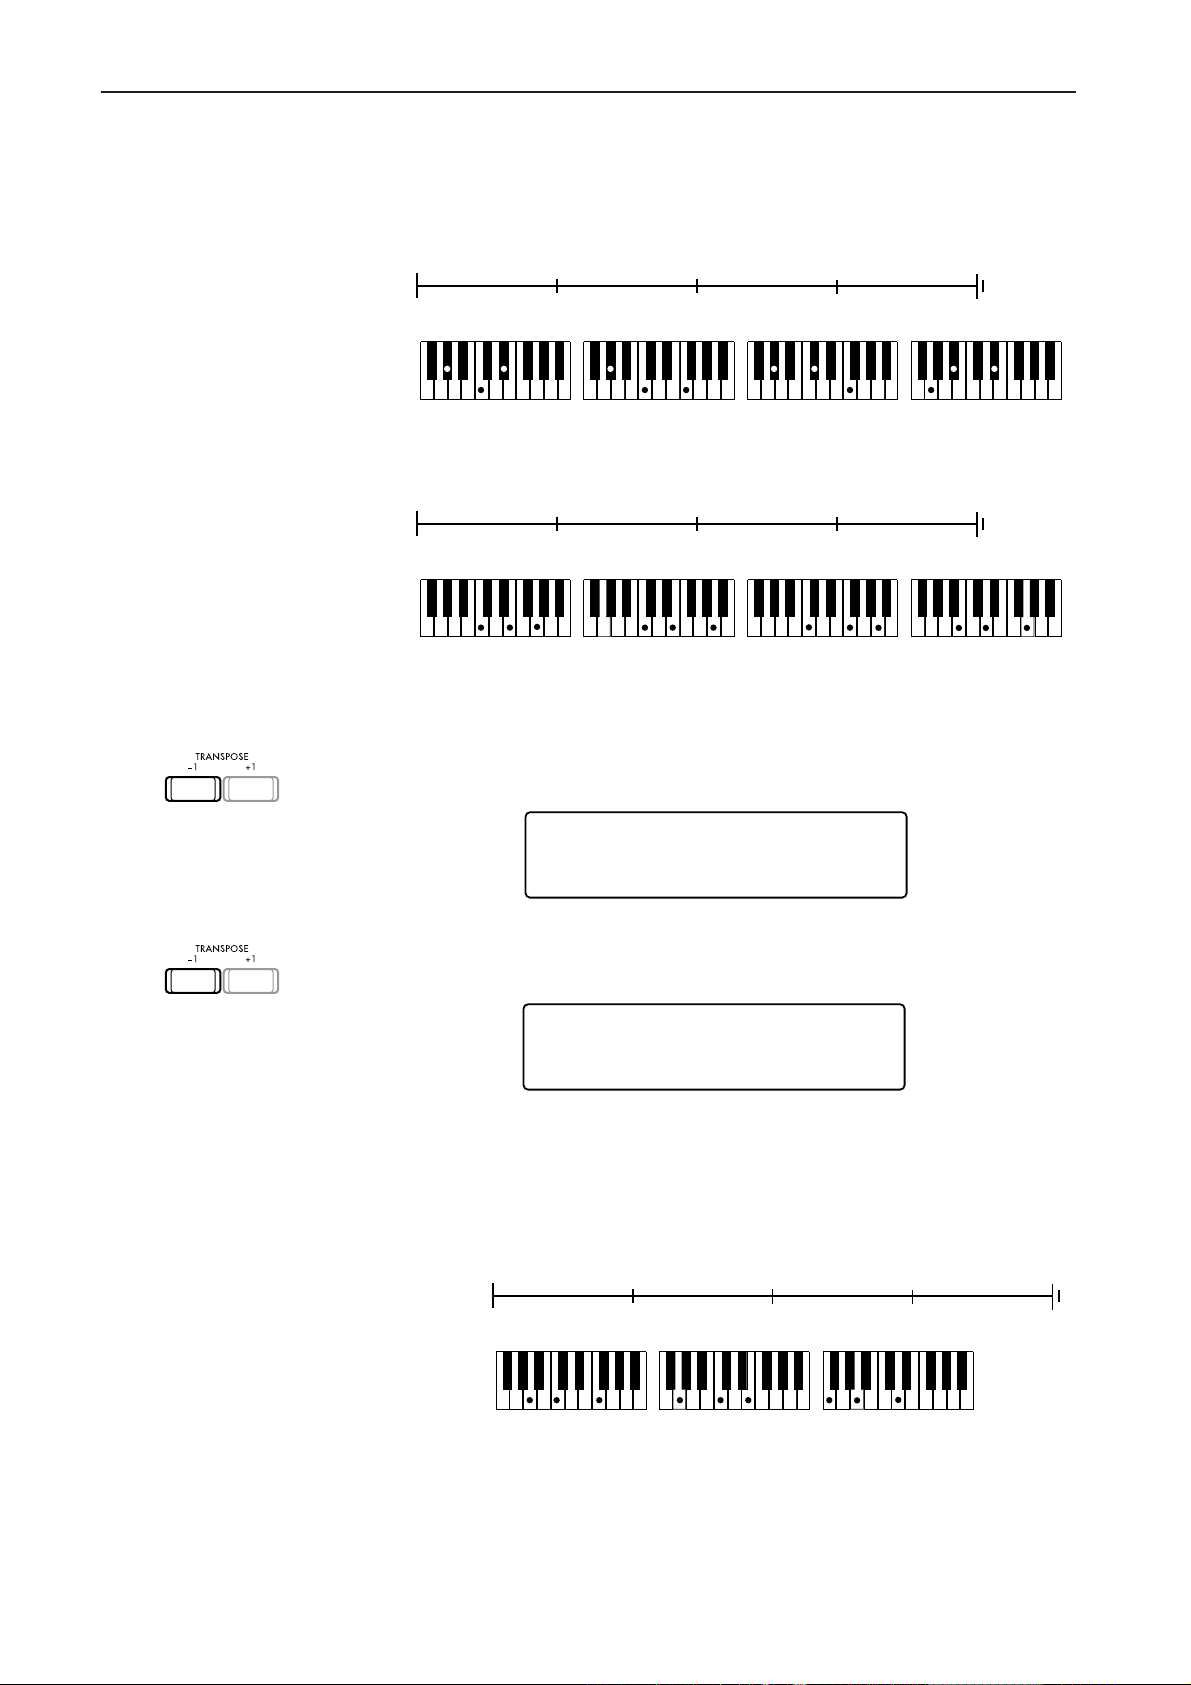
Example 1) Suppose that you wanted to play a song that contained the following
chord progression. As you can see, all these chords use many black
notes. The transpose function lets you play this song in a key that is easier to play.
G#
( i )
G#
If the entire song were four semitones higher, the chord progression would be as follows.
C
( ii )
C
This is much easier to play, but of course the pitch would be four semitones higher
than it should be.
In this case, you simply need to lower the pitch of the piano by four semitones.
Fm
Am
Fm
Am
C#C#D#
F
G
F
G#
D#
C
G
1. Press the TRANSPOSE –1 key once.
SPLIT:C4 XPOSE:-1
----- UPPER
2. Press the TRANSPOSE –1 key three more times.
SPLIT:C4 XPOSE:-4
----- UPPER
The pitch of the C-900 is now four semitones lower.
Now you can use the chords of figure (ii) to produce the pitches of figure (i).
Example 2) Suppose that this song is too low to sing comfortably, and you would
like to sing it at a pitch three semitones higher.
( iii )
F
F
C
C
DmDmC
F
16
Page 23
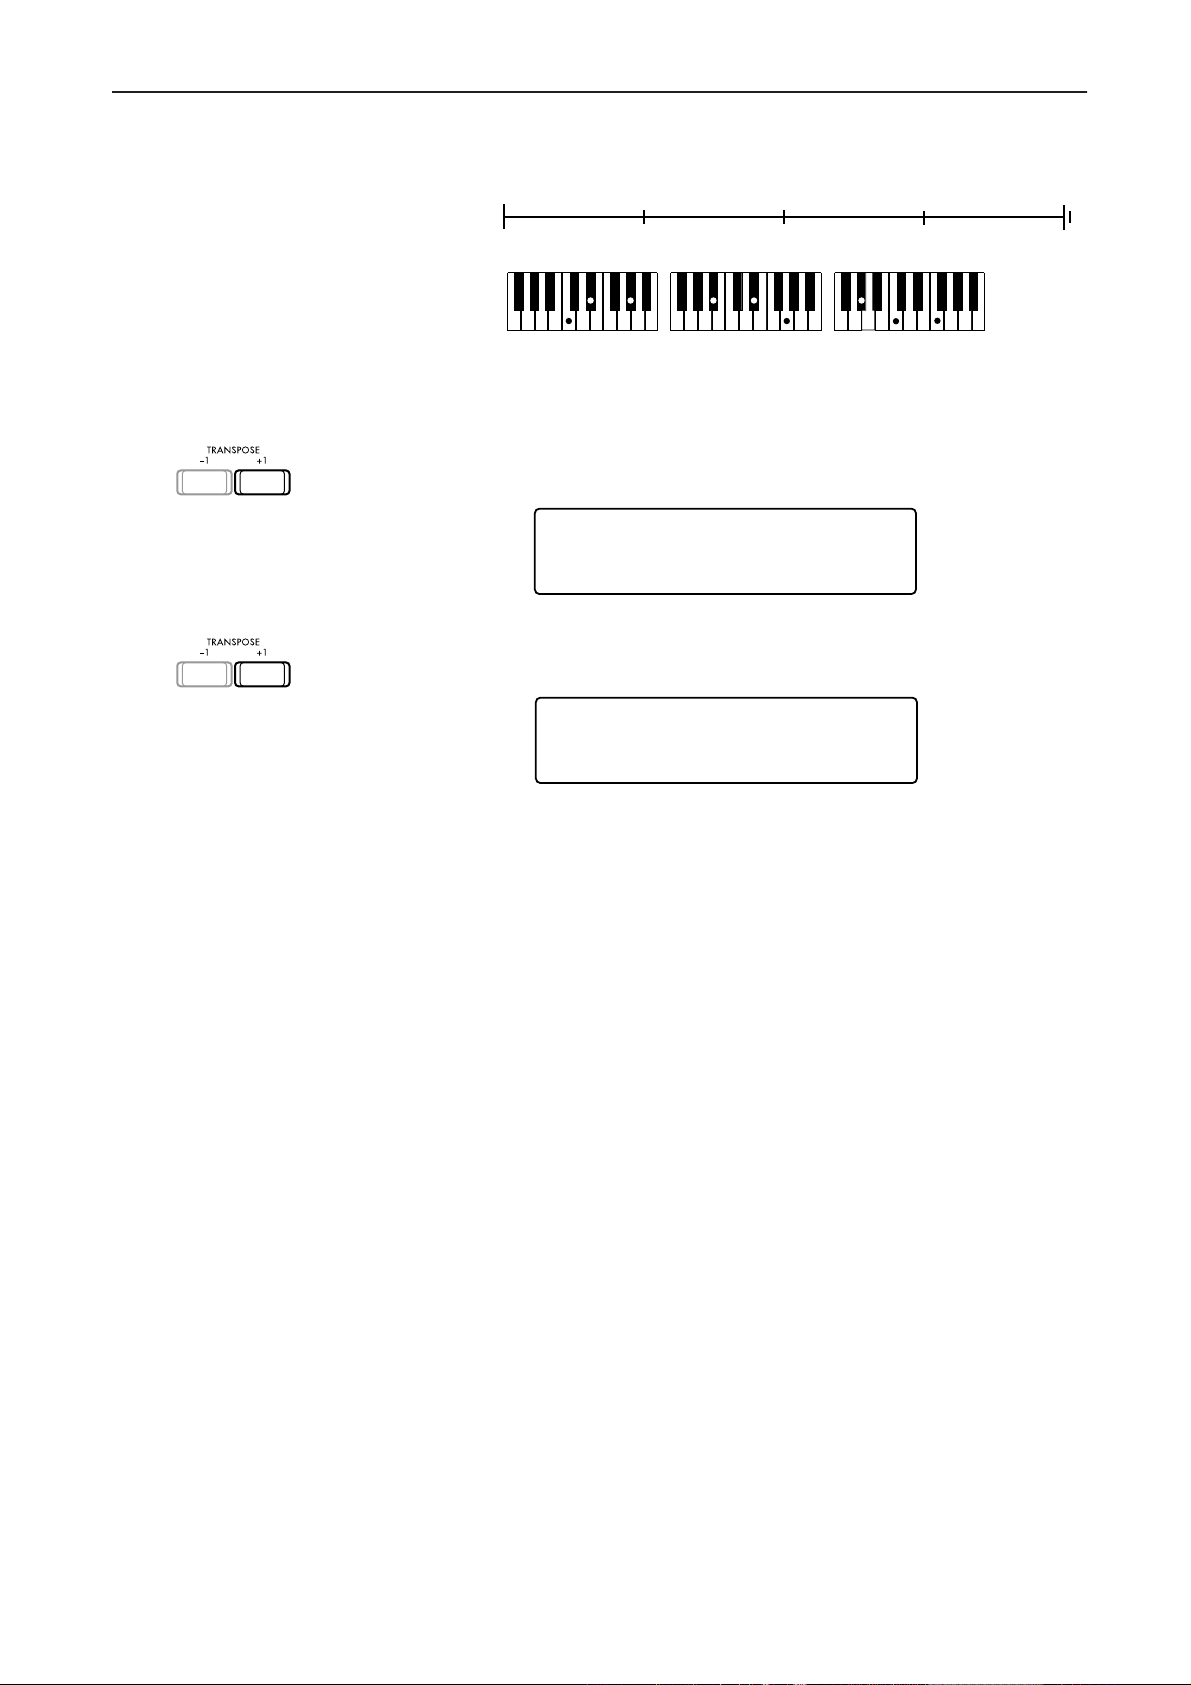
3. Getting acquainted with the C-900
SPLIT:C4 XPOSE:+1
----- UPPER
SPLIT:C4 XPOSE:+3
----- UPPER
If the song were raised three semitones, the chords would be as follows.
( iv )
These chords are a bit difficult to play.
In this case, you can use the transpose function to simply raise the pitch of the piano
ee semitones.
by thr
G#
G#
D#
FmFmD#
D#
G#
1. Press the TRANSPOSE +1 key once.
2. Press the TRANSPOSE +1 key two more times.
The pitch of the C-900 is now three semitones higher.
Now you can use the chords of figure (iii) to produce the pitches of figure (iv).
17
Page 24
3. Getting acquainted with the C-900
2. Listening to the C-900’s automatic
Demo
The demonstration can be heard when in any mode.
Initially, the master volume should be set at about 1 or 2.
When playback begins, adjust the volume to a comfortable level.
playback
Start demo playback
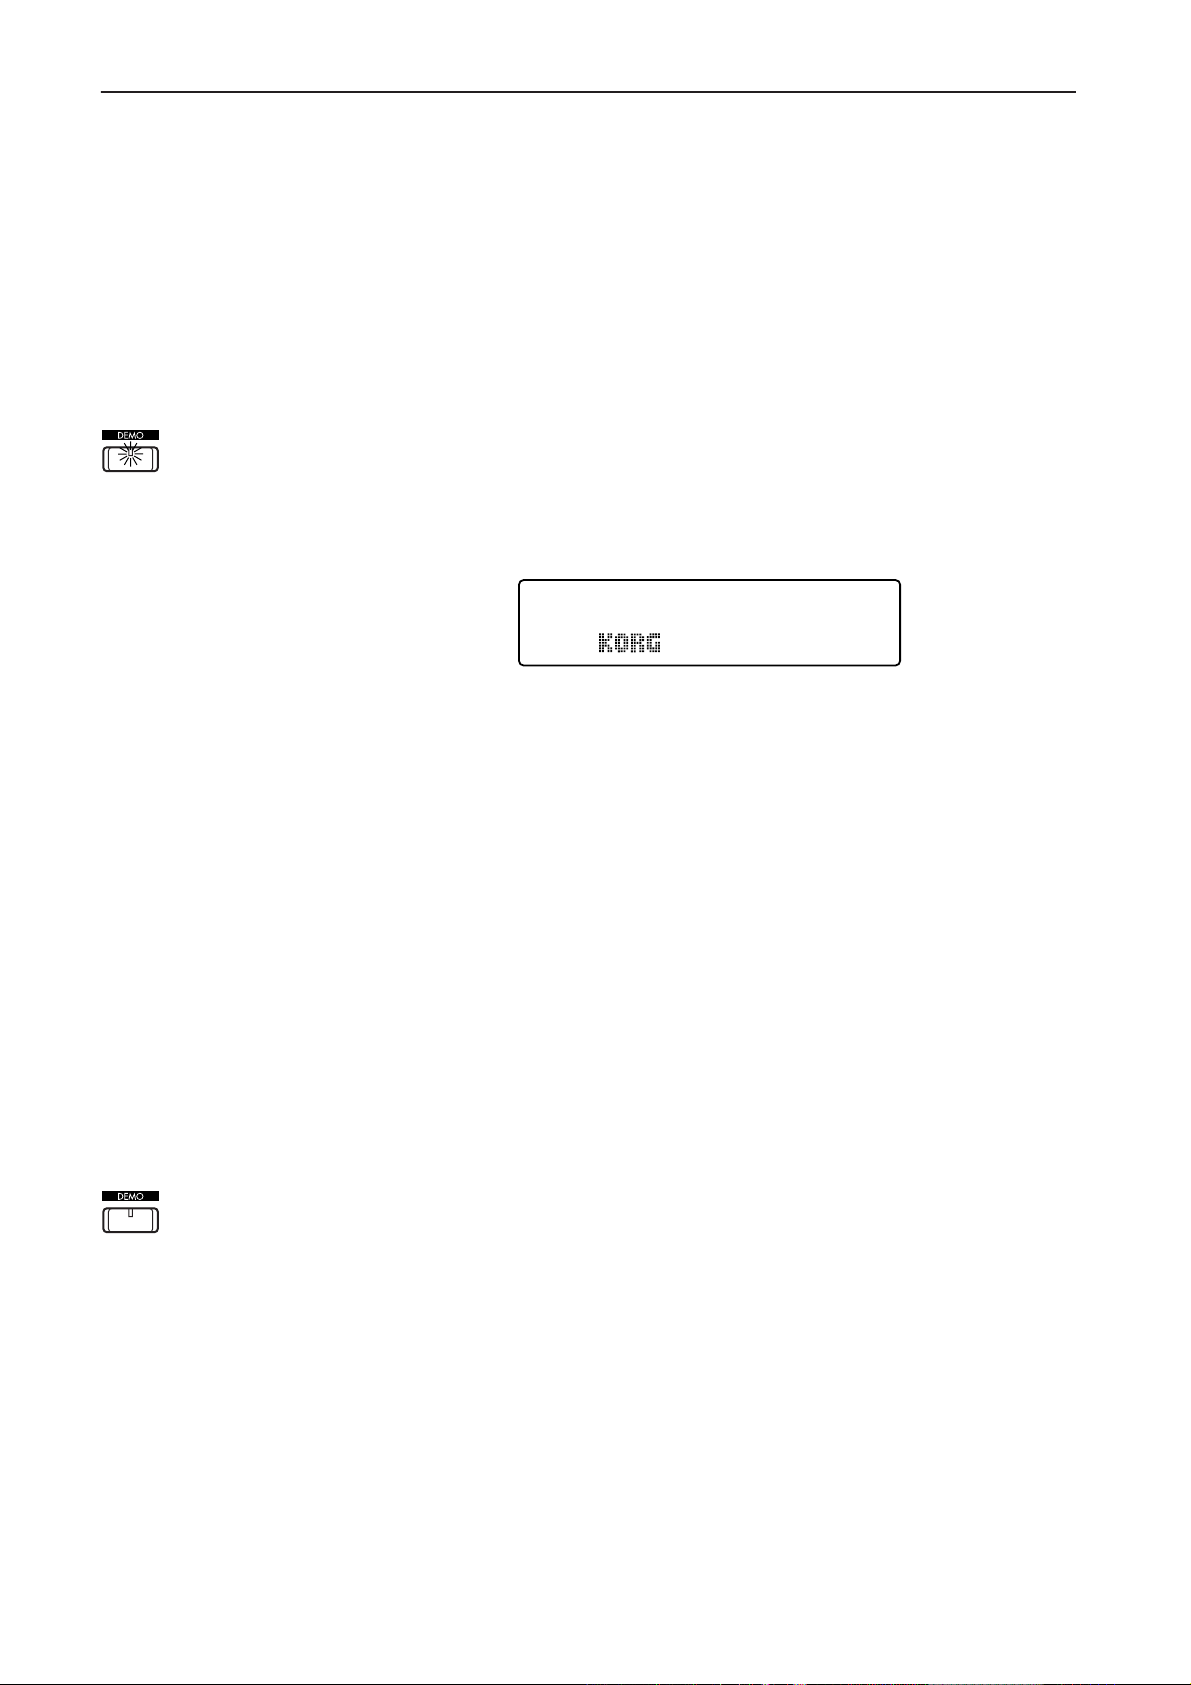
1. Press the DEMO key located at the right side of the operating panel.
→1. The DEMO LED will light, and the LED’s of the ARRANGEMENT GROUP
keys and the PROGRAM GROUP keys will light sequentially.
→2. The following display will appear.
D E M O
KORG C-900
→3. Press one of the ARRANGEMENT GROUP keys, the PROGRAM GROUP
keys, or the START/STOP key. The
and the START/STOP LED will blink. For details on the demo songs, refer to
p.101 of the Reference Guide.
If you pressed one of the ARRANGEMENT GROUP keys, demo songs using Styles
will playback consecutively. Two demo songs are assigned to each key. Pressing a key
once will playback the song assigned to the upper arrangement group, and pressing
the key twice will playback the song assigned to the lower arrangement group.
If you pressed one of the PROGRAM GROUP keys, classical demo songs will playback consecutively. Two demo songs are assigned to each key. Pressing a key once will
playback the song assigned to the upper pr
will playback the song assigned to the lower program group.
If you press the START/STOP key, demo songs will be played back consecutively,
fr
om the demo songs which use Styles, to the classical demo songs.
C-900 will begin playing a demo song,
ogram group, and pr
essing the key twice
18
Stop demo playback
2. To stop automatic playback during the song, press the blinking
ARRANGEMENT GROUP key or PROGRAM GROUP key.
You can also stop demo playback by pressing the START/STOP key. If you press a
group key which is not lit, the demo song selected by that key will playback.
3. To exit Demo mode, press the DEMO key once again.
Alternatively, you can press any other mode key to move to that mode.
Page 25
3. Getting acquainted with the C-900
Song Play
The C-900 is able to load Standard MIDI File (SMF) format song data directly from a
floppy disk and play it back conveniently.
1. Enter Song Play mode.
If the SONG PLAY LED is lit, the C-900 is in Song Play mode.
When a floppy disk is inserted in Arrangement Play mode, or when the power is
turned on with a floppy disk already inserted, the
Play mode.
If the floppy disk is removed, the
mode.
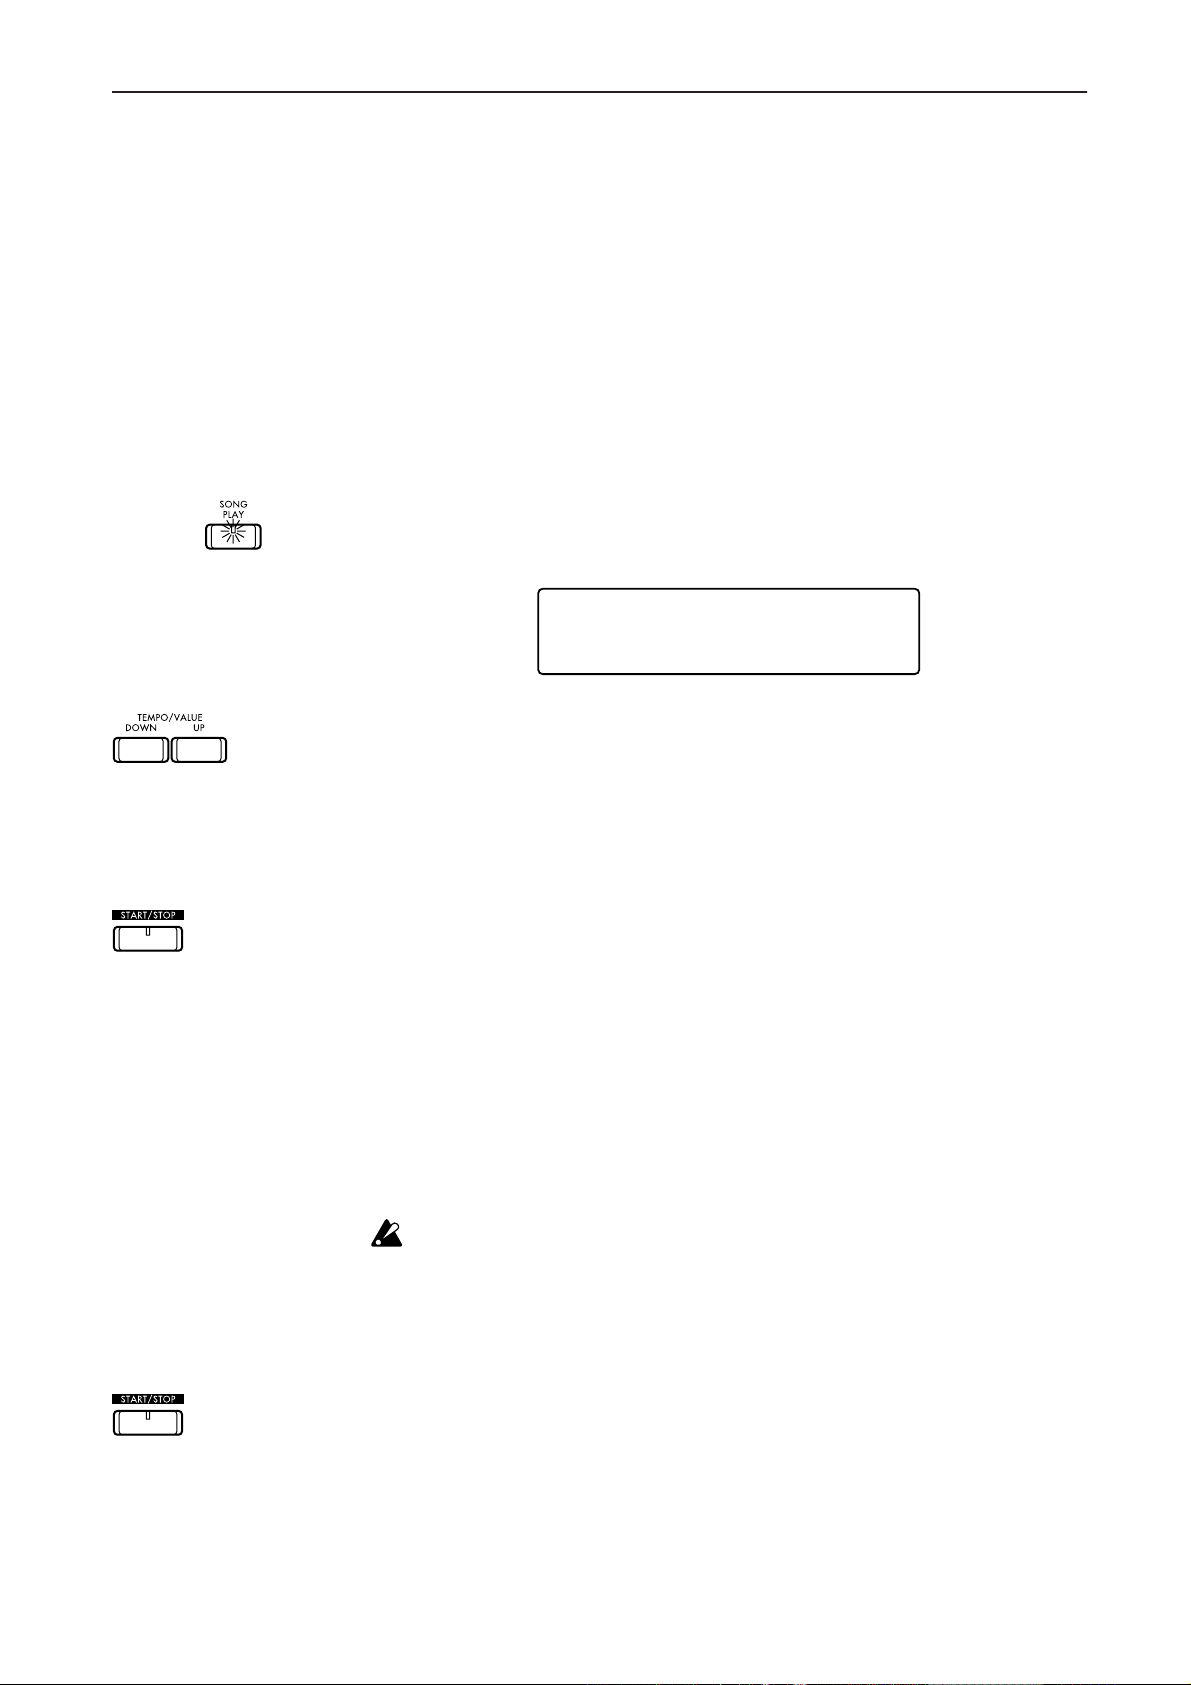
If it is not in Song Play mode, press the SONG PLAY key located on the right on the
operating panel.
→1. The SONG PLAY LED will light.
→2. The following display will appear.
C-900 will automatically enter Arrangement Play
SONG PLAY
-------- =120 M001
C-900 will automatically enter Song
Select a song
Begin automatic
playback
2. Press either UP or DOWN of the TEMPO/VALUE keys located to the right
on the display.
→1. The names of the data on disk will be read by the C-900.
→2. When the names have been read, the names (file names) of the songs on the
disk will appear in the LCD.
The song names will be displayed successively each time you press the UP key.
3. When the song that you wish to playback appears in the display, press
the START/STOP key located in the left of the operating panel.
(For SMF format 0)
Playback will begin immediately when you press the START/STOP key.
(For SMF format 1)
• When you press the START/STOP key, the START/STOP LED will rapidly blink
red, and data will be read from the disk. At this time, the backing sequence data will
be erased. If you don’t want to lose the backing sequence data, you should save it to
a different disk beforehand. (
• When the data has been read, playback will begin.
While data is being read from the floppy disk, the START/STOP LED will rapidly blink red. During this time, never attempt to remove the floppy disk. If you
remove the fl
will be damaged.
ou can modify the tempo.
Y
You can adjust the volume of each instrument.
oppy disk while it is being read, the floppy disk or the disk drive
☞Reference Guide p.57)
☞p.58 “Tap tempo,” “Tempo/Value”
☞p.59 “VOLUME/MUTE”
Stop automatic
playback
4. To stop automatic playback during the song, press the START/STOP key.
19
Page 26
3. Getting acquainted with the C-900
Connect a mic and sing
By connecting a mic to the C-900 you can add vocals to the music. Try singing along
with songs from the separately sold Korg SMF/GM library, or commercially available
SMF/GM data.
1. Lower the MIC VOLUME slider located at the right of the piano to “0.”
2. Connect the mic to the mic input jack located under the piano at the right
side.
(If your mic has an on/off switch, turn it on.)
3. Use the MIC VOLUME slider to adjust the mic level.
4. Use the ECHO LEVEL slider to adjust the amount of echo.
5. Insert a floppy disk containing an SMF song file into the
C-900’s disk
drive.
6. If you are not in Song Play mode, press the SONG PLAY key.
The SONG PLAY key LED will light.
7. Press the TEMPO/VALUE UP or DOWN key once.
The disk will be checked, and the names of the song files on the disk will be displayed.
8. Press the UP or DOWN key to select the desired song title.
The data of the separately sold Korg SMF/GM library disks is in format 0. Most
commercially available SMF/GM data is also in format 0. Thus, we will assume
that you are playing back a format 0 song file. If you ar
song file, refer to p.19.
e playing back a format 1
9. Mute (silence) the vocal (melody) part.
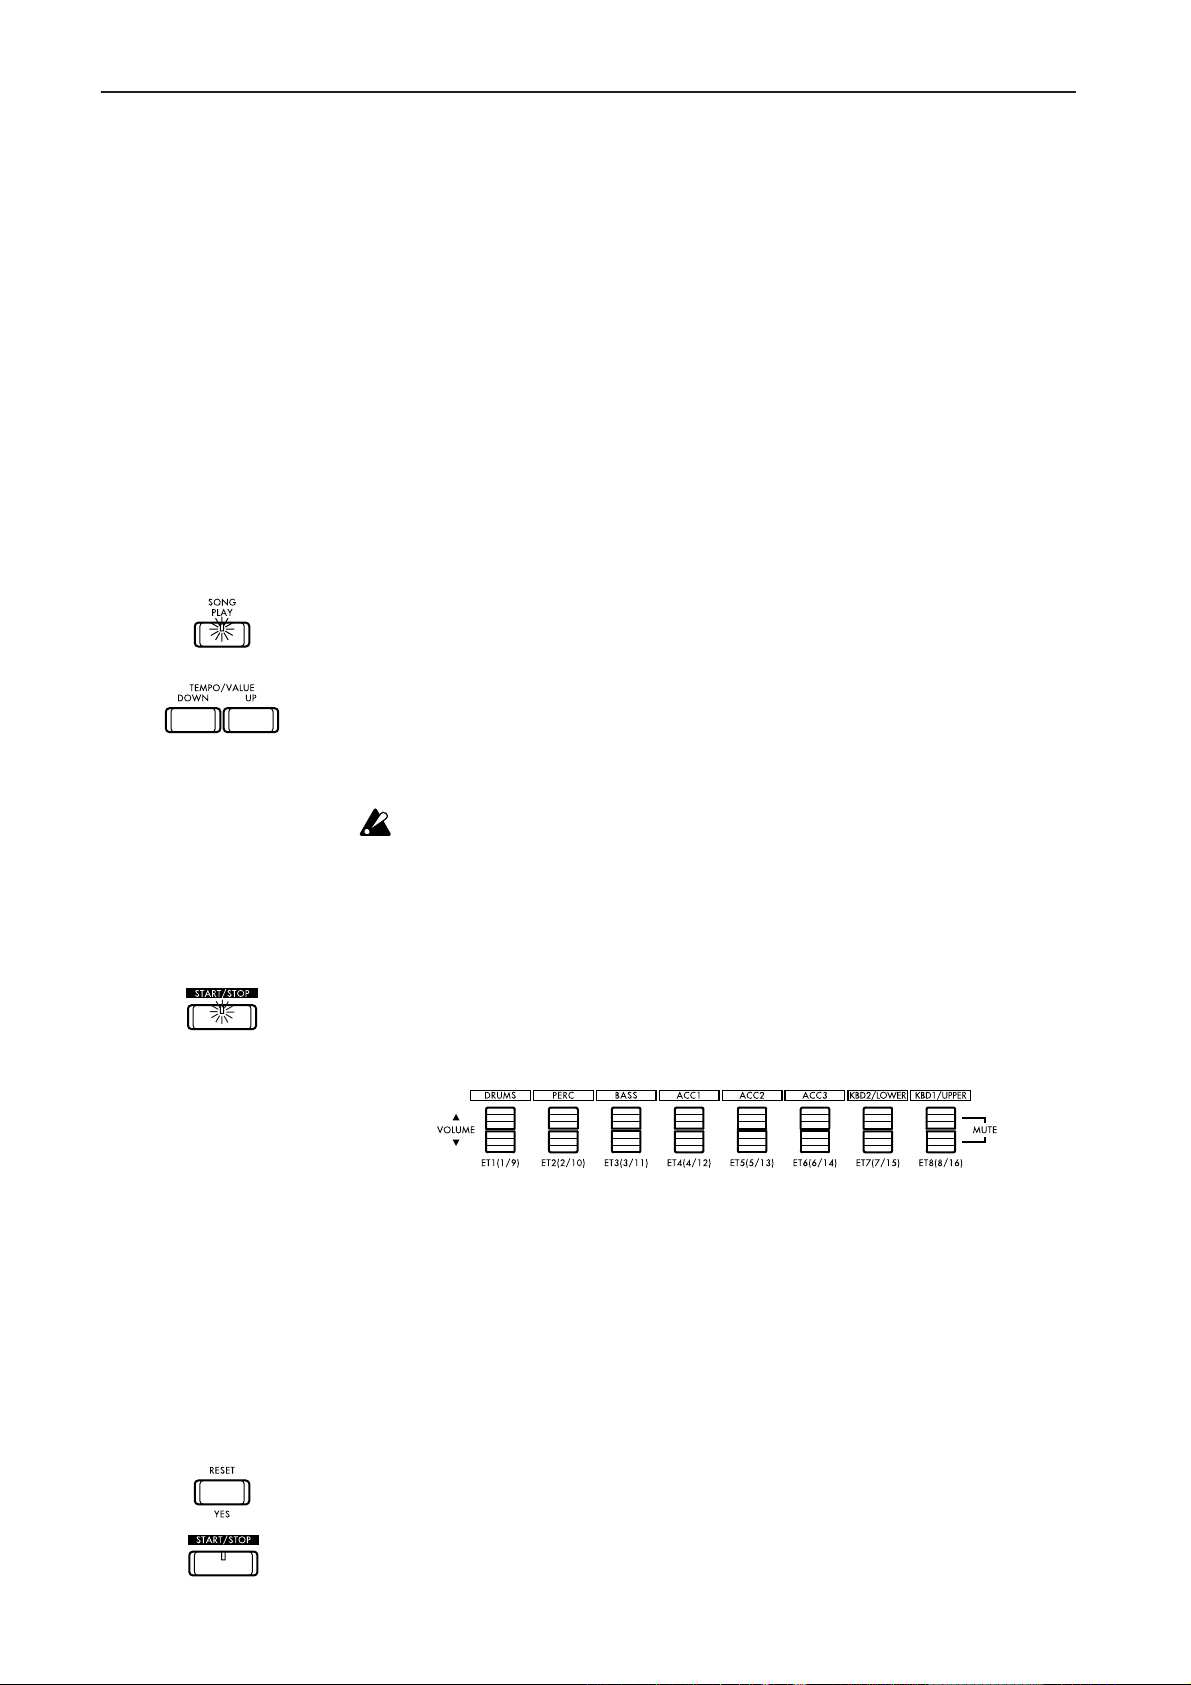
If you don’t know which is the vocal part, use the following procedure.
1 Press the START/STOP key to begin playback.
2 Press any of the VOLUME/MUTE keys located in the center of the operating panel
to select the channel of a part.
20
3 Simultaneously press the ▲ and ▼ keys of the selected channel to mute the part of
that channel (refer to p.14). Was the vocal part silenced? If not, simultaneously
press the
4 Press a VOLUME/MUTE key to select the part of a different channel, and try mut-
ing it. Check each part in this way and mute the vocal part.
5 If you do not find the vocal part among channels 1–8, press the SONG PLAY key
once again. The LED of the SONG PLAY key will blink, and now you can select the
parts of channels 9–16. Use the same procedure to check each track, and mute the
vocal part.
6 Press the START/STOP key to stop playback.
▲ and ▼ keys to un-mute that part.
10.Press the RESET/YES key to return to the first measure.
11.Press the START/STOP key, and sing along with the playback.
The LED of the START/STOP key will blink in time with the tempo.
Page 27
3. Getting acquainted with the C-900
12.If the pitch is inappropriate, press the TRANSPOSE key to adjust the key.
The pitch will decrease by one semitone each time you press the –1 key, and increase
by one semitone each time you press the +1 key.
13.When the song finishes playing back, press the START/STOP key.
If you are not using this function, lower the MIC VOLUME slider and the ECHO
LEVEL slider to “0,” and unplug the mic from the MIC INPUT jack.
The volume of the device connected to the MIC INPUT jack is affected only by
the MIC VOLUME slider. The MASTER VOLUME slider does not affect the volume of the INPUT jack.
The MIC INPUT jack is monaural. If you wish to connect a stereo output device
such as a synthesizer to the
use the INPUT (L/MONO, R) jacks located on the rear panel.
The following conditions may cause
appropriate adjustments.
The characteristics of the mic. / The mic is aimed at the
close to the
C-900. / The mic volume or echo level is too high.
C-900 and listen to it through the built-in speakers,
feedback (a squeal or whine). Make the
C-900. / The mic is too
Playing along with song data (Minus-one Play)
1. Insert the floppy disk which contains the SMF song file into the disk drive
of the
When a floppy disk is inserted in Arrangement Play mode, or when the power is
turned on with a floppy disk already inserted, the
Play mode.
C-900.
C-900 will automatically enter Song
2. If you are not already in Song Play mode, press the SONG PLAY key.
The SONG PLAY key LED will light.
3. Press the TEMPO/VALUE UP key or DOWN key once.
The disk will be detected, and the LCD will show the names of the song files on the
floppy disk.
4. Press the UP or DOWN key to select the song file that you wish to playback.
Songs of the optional Korg SMF/GM library are saved in format 0. If you wish to
playback a song file in format 1, refer to p.19.
5. Mute (silence) the part that you wish to play by yourself.
For the muting procedure, refer to p.20 “9. Mute (silence) the vocal (melody) part.”
6. Press the START/STOP key, and then play along with the song on the
keyboard.
The LED of the START/STOP switch will blink in time with the tempo.
Use the ACC volume to adjust the volume of the parts which were not muted.
7. When playback finishes, press the START/STOP key.
21
Page 28
3. Getting acquainted with the C-900
3. Playing while adding automatic
Adding an accompaniment is actually quite simple.
While listening to the automatic accompaniment (arrangement play) produced by the
C-900, you can also play sounds from the keyboard at the same time.
You can also make changes to the arrangement to suit your playing.
accompaniment
Enter Arrangement Play mode
Turn off Piano mode
1. Enter Arrangement Play mode.
If the ARR PLAY LED is lit, the C-900 is in Arrangement Play mode.
If you are not in Arrangement Play mode, press the ARR PLAY key located to the right
side on the operating panel.
2. Turn off Piano mode.
In order to play with automatic accompaniment, you must first turn off Piano mode.
If the PIANO MODE LED is lit, the
If you are in Piano mode, press the PIANO MODE key located in the right side of the
operating panel.
→1. The PIANO MODE LED will go out.
→2. The following display will appear.
Number and name of the arrangement currently in use
C-900 is in Piano mode.
Number
Name
ARR: 0 8 Beat 1
=120
3. First select an arrangement.
Press one of the ARRANGEMENT GROUP and ARRANGEMENT SELECT keys
located in the left side of the panel.
→ The following display will appear. (The number and name of the displayed
arrangement will depend on the keys that you pressed and the number of
times that they were pressed.)
22
Number and name of the currently selected arrangement
ARR: 1 Foxtrot 2
=137
Tempo of the currently selected arrangement (playback speed)
The arrangements of the C-900 are organized into 17 arrangement groups. Within each
group, use the ARRANGEMENT SELECT keys to select arrangements.
Page 29
Using the left hand to control
the accompaniment
3. Getting acquainted with the C-900
4. Press one of the notes in the lower (left-hand) range of the keyboard.
→1. A chord name will appear in the display.
ARR: 1 Foxtrot 2
=134 C
Chord name
The above display is an example of a C major chord being detected. ☞p.49 “Chord
Scanning”
The chord you play in the left hand can be abbreviated; simply press one note to indicate a major chord, or two notes simultaneously to indicate a minor chord or a sus4
d. There is no need for all the notes of the chor
chor
A complete list of how the
notes is given in the appendix of the Reference Guide, “List of detected chords.”
Please refer to this list.
☞Reference Guide “Appendix C”
C-900 will detect chords from various combinations of
d to be pressed.
Start
5. Press the START/STOP key located in the left of the panel.
→1. The rhythm, bass, and accompaniment will begin playing.
→2. The START/STOP LED will continue blinking at the time signature of the
style, red on the first beat and green on other beats.
You can modify the tempo. ☞p.58 “Tap Tempo,” “Tempo/Value”
The bass and accompaniment that started when you pressed a note(s) in the left hand
are being played automatically. The
mine the chord, and produces an automatic accompaniment for that chord based on
the current arrangement.
Even if you take your hand away from the keyboar
tinue to play until the next note is pressed.
☞p.49 “Chord Hold”
C-900 analyzes the note(s) you played to deter-
d, that chord and bass will con-
6. While pressing various chords, play a melody in the upper (right hand)
range of the keyboard.
You can change the sound of the instrument. ☞p.55 “Program Group,” p.55 “Program
Select”
You can adjust the volume of each instr
You can use the ACC volume to adjust the overall volume of the entire accompaniment.
How does it sound? This example shows you how the
accompaniment to your playing.
ument.
☞p.59 “Volume/Mute”
C-900 can add an automatic
Stop
7. To stop the accompaniment, press the START/STOP key once again.
23
Page 30
3. Getting acquainted with the C-900
Synchro start
Instead of pressing the START/STOP key before you begin playing, this setting will
make the arrangement begin playing at the moment that you touch the keyboard.
1. With arrangement play stopped, press the SYNCHRO START/STOP key
located in the left side of the panel.
→ The SYNCHRO START/STOP LED will light.
2. Play a chord in the lower the lower hand range.
→1. Arrangement play will begin at the instant that you touch the keyboard.
→2. When play begins, the SYNCHRO START/STOP LED will go out.
Synchro stop
This setting will make the arrangement stop playing at the moment that you release
the keyboard.
1. While arrangement play continues, press the SYNCHRO START/STOP
key.
Automatic play at the speed
you tap
→ The SYNCHRO START/STOP LED will light, and play will stop.
2. While the SYNCHRO START/STOP LED is lit, play a chord in the lower
hand keyboard range.
→ Arrangement play will begin according to the chord that you played.
3. Take your hand off the lower hand keyboard range.
→1. Play will stop immediately.
→2. The SYNCHRO START/STOP LED will stay lit.
In this situation, if you play a note in the left hand keyboard range, arrangement play
will begin again (Synchro Start). When you take your hand off the keyboard area, play
will stop immediately (Synchro Stop).
4. To turn off Synchro Stop, press the SYNCHRO START/STOP key once
again.
→ The SYNCHRO START/STOP LED will go out.
Now you can use the START/STOP key to start/stop arrangement play as before.
Tap tempo
☞p.58
The tempo of arrangement play can be adjusted using the TEMPO/VALUE UP and
DOWN keys located in the right side of the LCD. However, a more musical way to set
the tempo is to press the TAP
It is also possible to set the tempo by pressing a separately sold assignable pedal/
switch or an EC5 external controller, instead of the TAP TEMPO key.
☞Reference Guide p.63 “Pedal Parameters”
TEMPO key at the desired tempo.
24
Page 31

Prevent the tempo or sound
from changing
3. Getting acquainted with the C-900
Keyboard lock
☞p.53
The instrumental sounds and tempo used in arrangement play are set to the most
appropriate settings for each arrangement. This means that if you switch to a different
arrangement while playing, the tempo and the sounds being played by the keyboar
will also change to match the newly selected arrangement.
If you wish to select various arrangements without changing the tempo or the sound
of the keyboard, pr
make the KBD LOCK LED light.
ess the KBD LOCK key located at the left on the operating panel to
d
25
Page 32
3. Getting acquainted with the C-900
4. Recording your own playing on the
C-900
Record your playing with tape
recorder-like operation
Select an arrangement
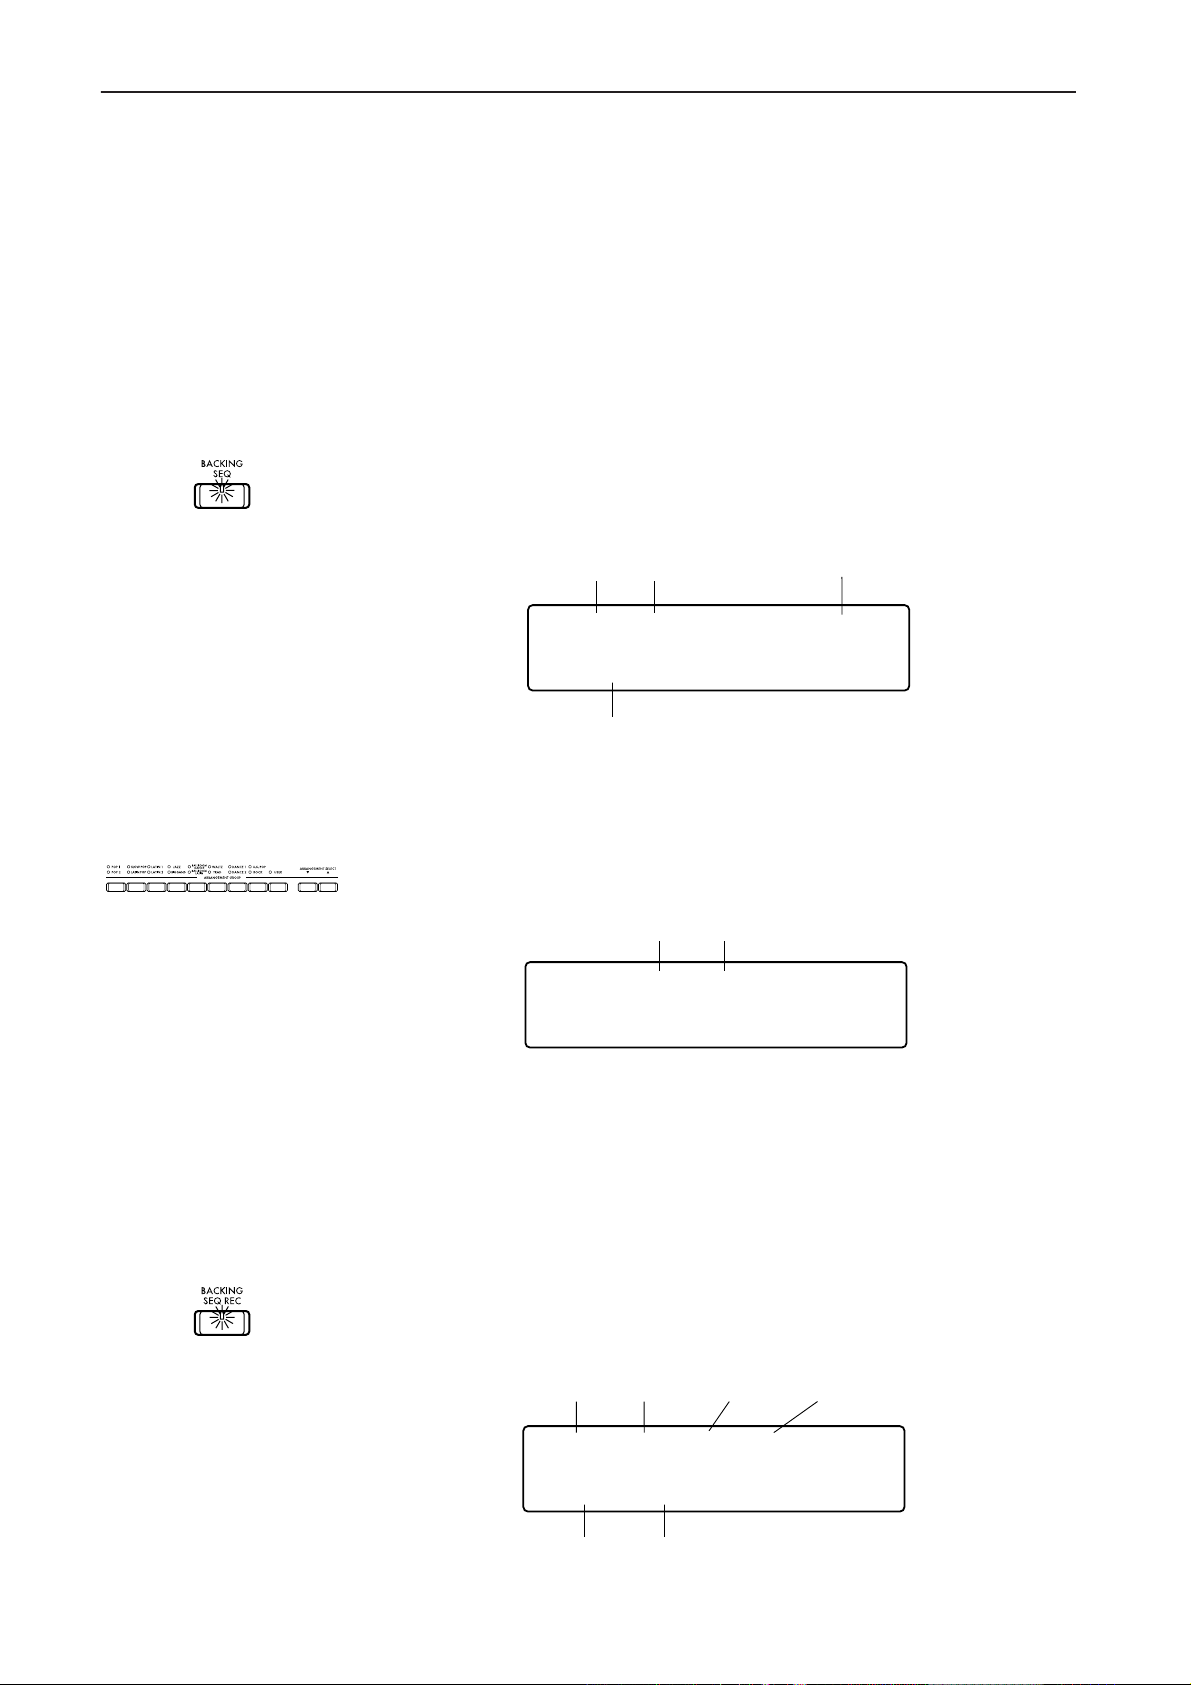
The C-900 can record your playing (including the accompaniment) in a way similar to
using a tape recorder. Using the following procedure, try recording and playing back
your own performance.
1. Enter BACKING SEQ (backing sequence) mode.
If the BACKING SEQ LED is lit, the C-900 is in Backing Sequence mode.
If you are not in Backing Sequence mode, press the BACKING SEQ key located to the
right on the operating panel.
→1. The BACKING SEQ LED will light.
→2. The following display will appear.
Backing Sequence number and name
Number
Name
Measure number
BSQ0:BSequence0 M001
=120
Tempo
2. Use the ARRANGEMENT GROUP keys and ARRANGEMENT SELECT keys
located to the left on the operating panel to select the arrangement you
wish to use.
→ The arrangement display will appear.
Prepare for recording
Arrangement number and name
Number
Name
ARR: 0 8 Beat 1
=120
< To record without automatic accompaniment >
If at this point you press the PIANO MODE key, you will be able to record your own
playing without automatic accompaniment. In this case, the PIANO MODE LED will
blink, and the ARR GROUP LED will go out. (The previous setting will reappear if
you press the PIANO MODE key once again.) The display will show an arrangement
name of “Acc Mute.” To cancel this status, select another variation.
3. Press the BACKING SEQ REC key located on the left of the panel.
→ The BACKING SEQ REC LED will light.
→ The following display will appear.
Track select
Keyboard
track
Chord
track
Control
track
Atr REC REC REC
26
=120 Q:HI
Tempo Quantize
Page 33
3. Getting acquainted with the C-900
Recording begin
End recording
Playback
Blinking green
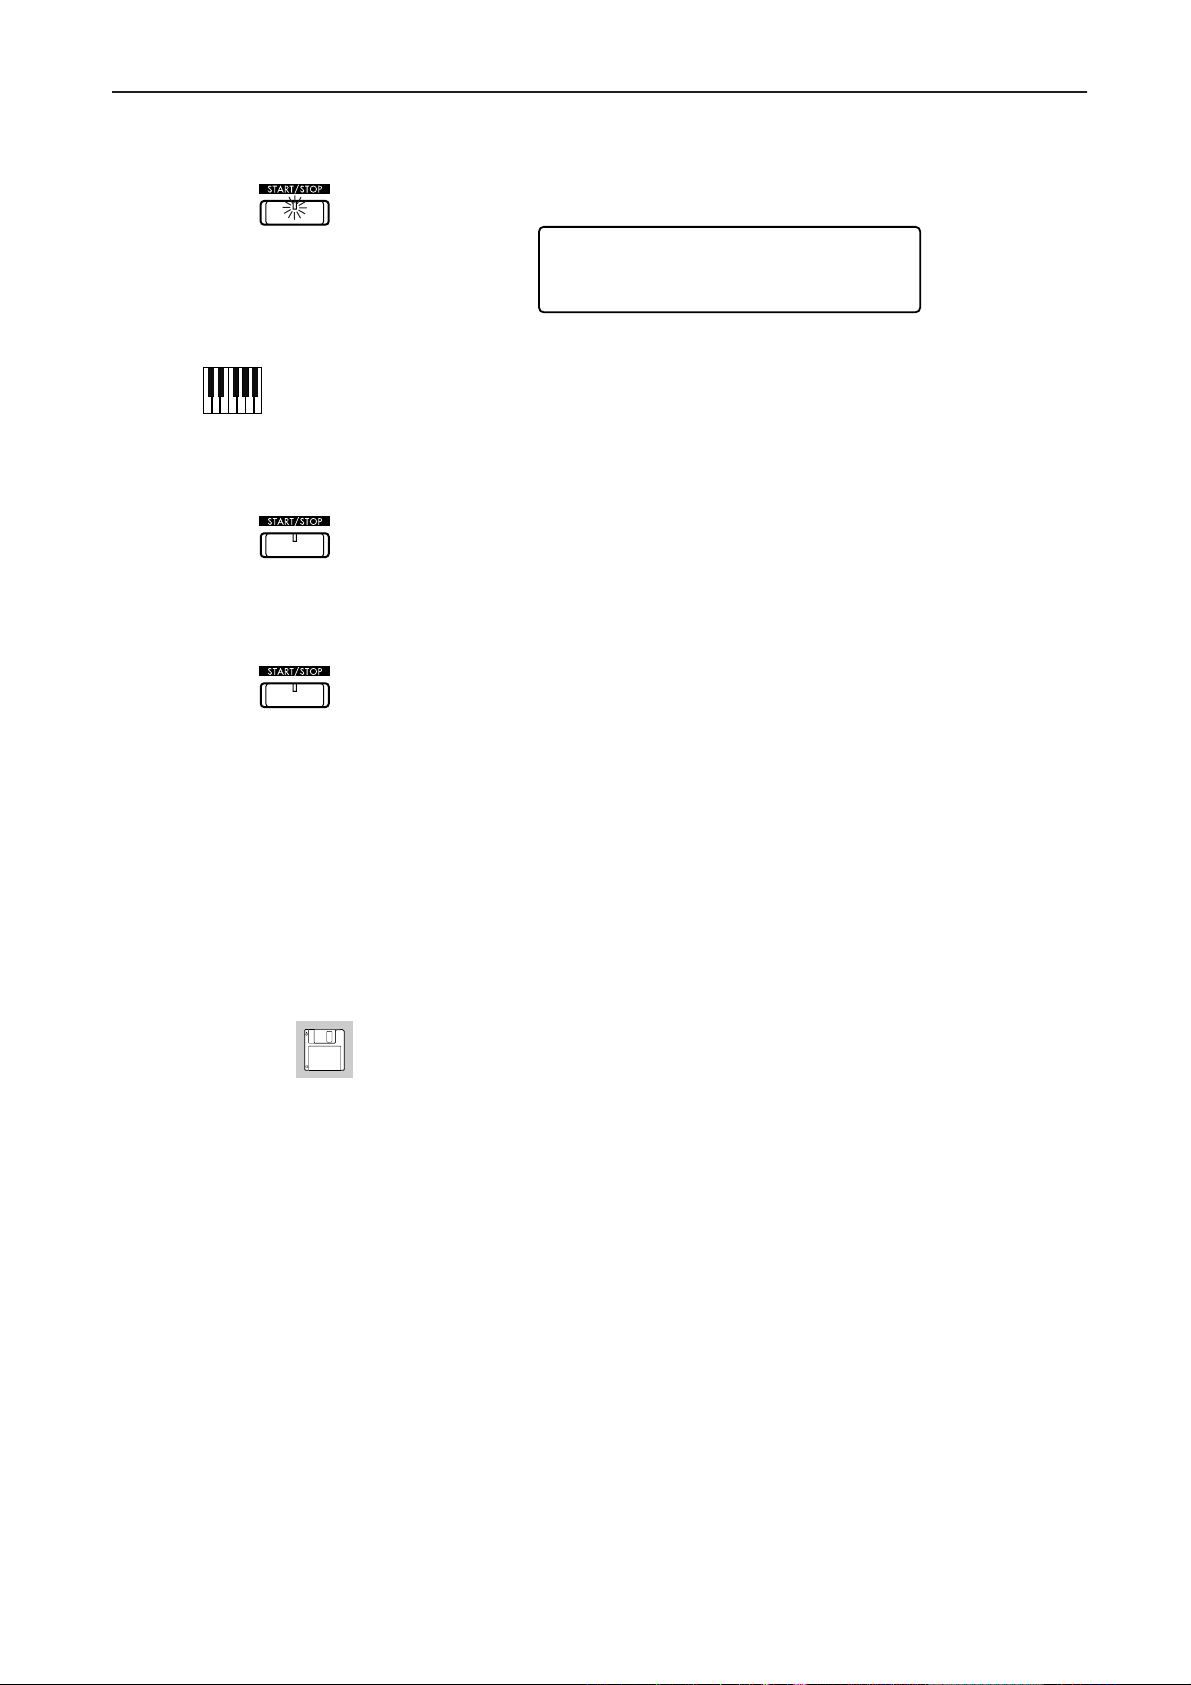
4. Now we are ready to begin recording. Press the START/STOP key.
→1. The following display will appear.
BSQ0:BSequence0 M-2
=120
→2. After a two-measure metronome count, the arrangement will start.
When you begin playing, your performance will be recorded just as you hear it. If
automatic accompaniment is being added, the automatic accompaniment will also be
recorded.
→ The START/STOP LED will blink in synchronization with the time signature
of the arrangement: red on the first beat, and green on other beats.
5. To stop recording, press the START/STOP key once again.
→ The BACKING SEQ REC LED will go out.
→ The measure number will return to 001.
6. Now let’s playback the performance that you just recorded.
Simply press the START/STOP key once again, and the recorded performance will be
played back from the beginning.
When playback reaches the end, it will automatically stop, and you will return to measure 001.
7. If you wish to redo the recording, press the BACKING SEQ REC key to
return to the beginning of the recording procedures.
Simply repeat the procedure from step 4 to re-record as many times as you wish.
Saving your recorded performance
If you now turn off the power of the C-900, the performance you just recorded in Backing Sequence mode will be lost.
If you wish to keep your recorded performance, you will need to save the musical
data to floppy disk.
☞Reference Guide p.57 “Page 1–2 Save”
27
Page 34
3. Getting acquainted with the C-900
5. Editing your performances
Very detailed editing is possible
Looking at data events
Musical data can be edited as many times as you wish after it has been recorded into
C-900.
the
This means that if necessary, you can even make very fine adjustments to the pitch or
timing of individual notes without having to re-recor
These functions can be used to edit your performance data to perfection.
It may be difficult to take full advantage of these complex functions in the beginning.
So first, let’s take a look at how the individual notes you played are kept in memory.
d anything.
1. In Backing Sequence mode, record a performance into the C-900. ☞p.26
Of course, if the data you recorded in “4. Record your own playing on the C-900” is
still in memory, you may use that performance.
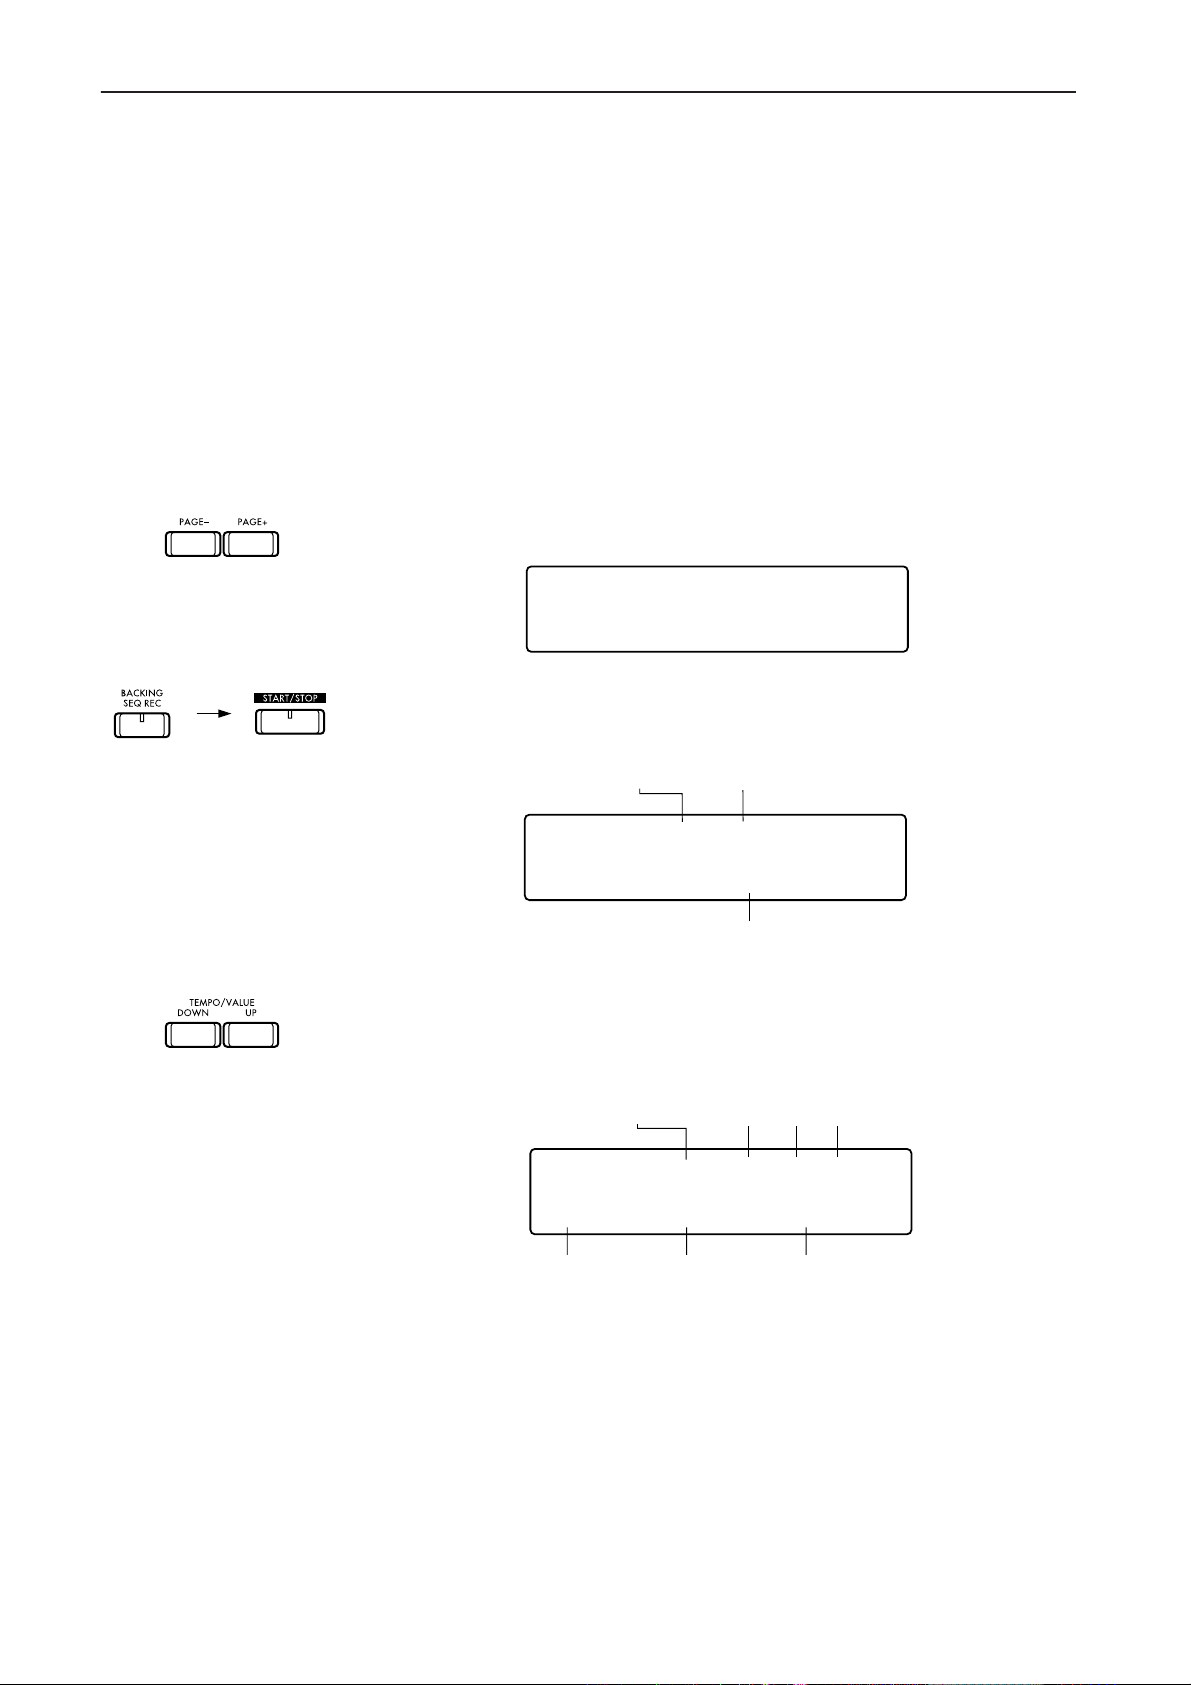
2. Use the PAGE + or – key to get to the following display.
EVENT EDIT
KBTr (REC+S/S)
3. Press the BACKING SEQ REC key, and then press the START/STOP key.
→ The following display will appear.
Measure number Event number
EVENT M001#00
== BAR 1 4/4==
Time signature
BAR 1 is a marker indicating that this is where measure 1 begins.
4. Move the cursor to the measure number, and press the TEMPO/VALUE UP
key once.
→ The following display will appear.
Measure number
Event number
Beat
Event location
EVENT M001#01 1:02
F5 V068 0:12
Pitch
This is the data for the first note in the musical performance that you recorded. Even if
notes were played simultaneously, such as for chords, they are stored as individual
notes as shown here. By modifying the various numbers that appear in this display
you can adjust individual notes, change their pitch, note length or strength, and correct minute inaccuracies in timing.
For details on modifying data, refer to the Event Edit page in the Reference Guide.
☞Reference Guide p.32 “Page 8 Event Edit”
Strength (velocity)
Note length
28
Page 35
3. Getting acquainted with the C-900
6. You can input notes one by one to create musical data
Input notes one by one
Select the arrangement
Access the Step Recording
page
This section explains step recording: the process by which you can enter individual
notes, specifying the pitch, length, and force of each one without recording from the
keyboard.
Of course, this is more time-consuming than dir
way in which people unfamiliar with the keyboard can enter musical data accurately
without having to worry about inaccuracies in timing or wrong notes.
ectly playing the keyboard, but it is a
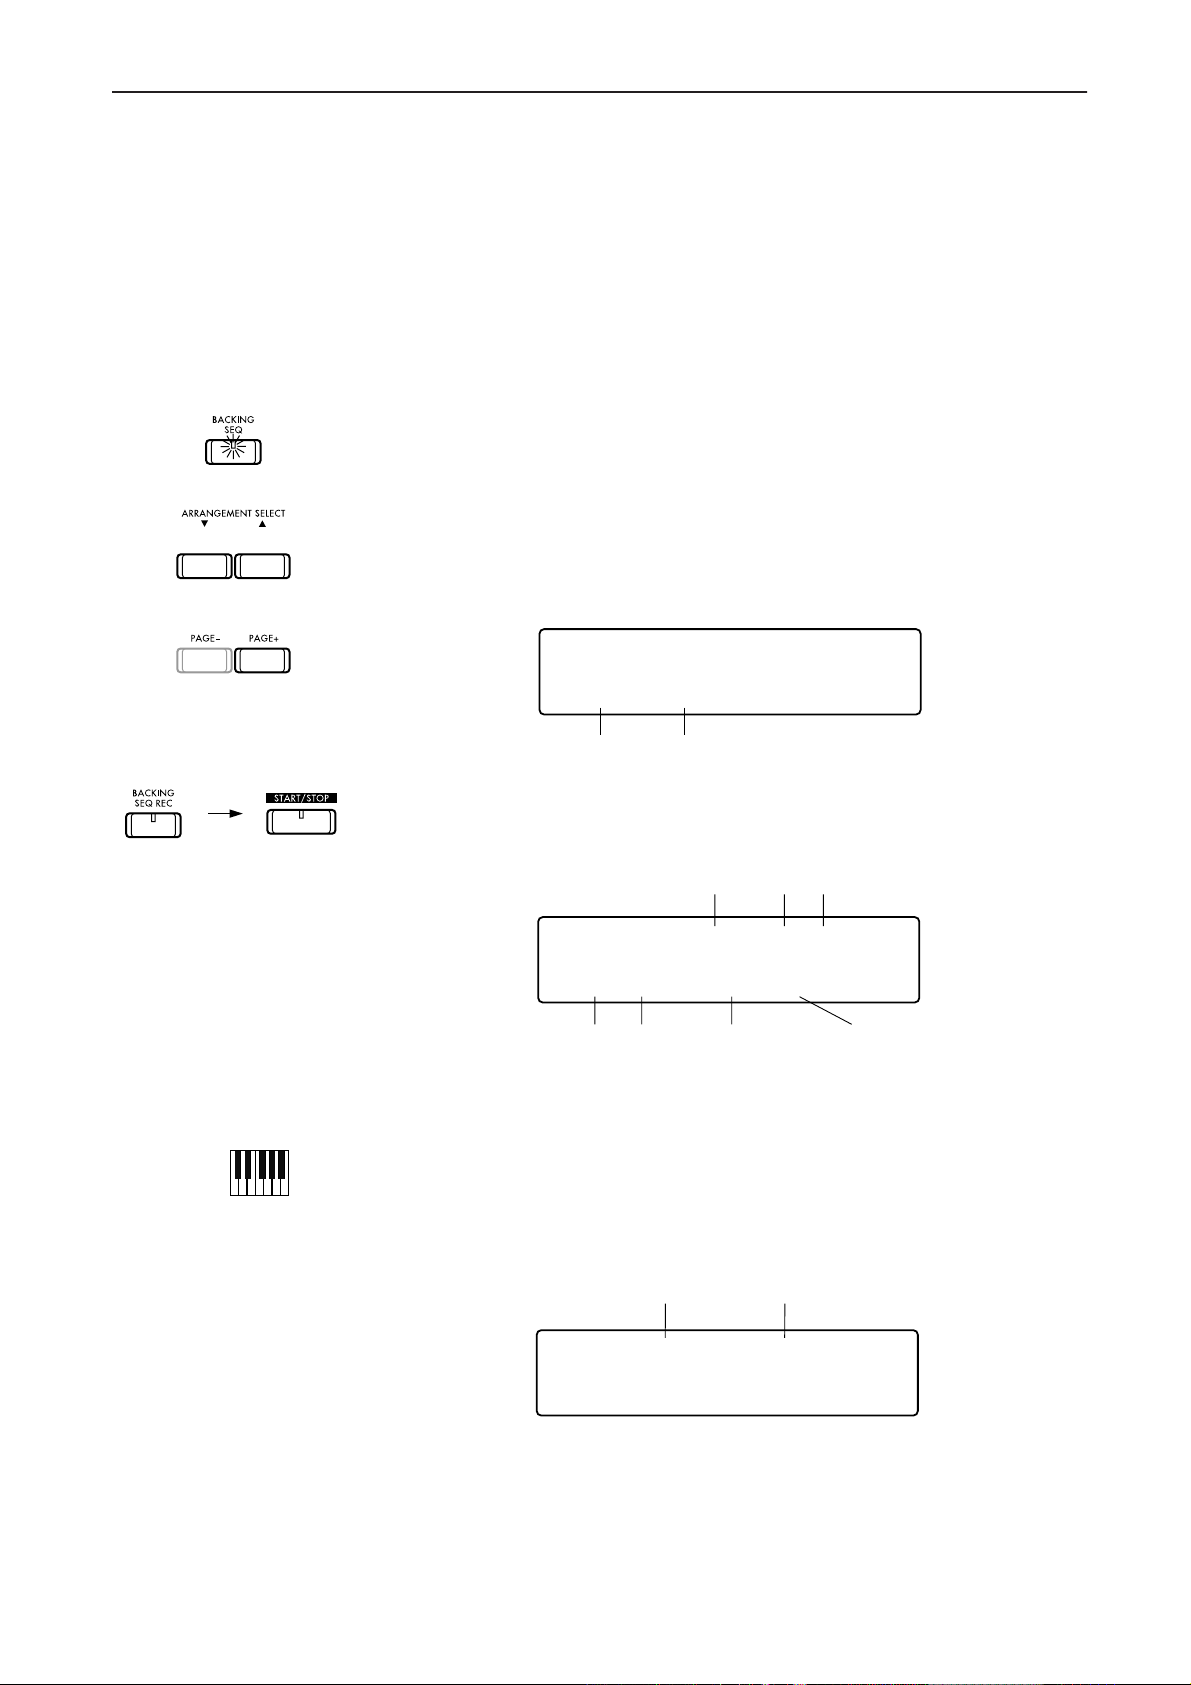
1. Enter Backing Sequence mode.
2. Use the Arrangement Group and Arrangement Select keys located to the
left on the panel to select the arrangement that you wish to use.
3. Use the PAGE + keys to access the Step Recording page.
→ The following display will appear.
STEP RECORDING
KBTr M001(REC+S/S)
Track Measure number
4. Press the BACKING SEQ REC key, and then press the START/STOP key.
Begin input
→ The following display will appear.
Measure number Beat
Note location
STEP M001 1:00
4/4 - V090 085%
Time
Note length
signature
This LCD is telling you that a quarter note with a velocity of 90 and a length of 85% of
a quarter note can now be entered at the beginning of the first beat of measure 1.
Note strength
(velocity)
5. Now input a note into the first beat.
Play the keyboard once. You may play either a single note or a chord.
→ When you release your hand from the keyboard, the following display will
appear.
Note Data (the name of the note)
Length of sound
Beat
STEP G4 M001 2:00
4/4 - V090 085%
The display shows the note you just played. (If you played a chord, one note in that
chord.)
In the above display, a G4 note was played.
You will notice that at the same time, the beat has advanced by one. This means that
you ar
e now ready to enter the next note at the second beat.
29
Page 36
3. Getting acquainted with the C-900
6. Continue playing notes.
Notice that each time you press and release the keyboard, the beat number advances
by one.
Although this will depend on the time signature of the arrangement that you selected,
the time signature in this example is 4/4, meaning that each measure consists of four
beats. This means that when you have input the fourth beat, the measur
then advance by one, taking you to the first beat of the next measure.
e number will
Finish input
Playback
You can input more complex
melodies
7. When you have input enough notes, press the START/STOP key.
8. Now let’s hear what you have input so far.
Press the EXIT key.
→ The following display will reappear.
BSQ0:BSequence0 M001
=120
Press the START/STOP key once more to playback from the beginning.
When playback is complete, it will automatically stop, and the measure number will
return to 001.
In this example, all of the notes that you input were quarter notes, and the velocity
and note length were all input with the same value.
Obviously, it would be possible to modify these settings for note length and velocity
etc. each time that you enter a note. Inputting notes in this way would allow you to
create more complex r
Also, using the same simple procedure as in Arrangement Play, you can input chords
into the chord track to determine the bass and accompaniment.
For details on these procedur
Guide.
☞Reference Guide p.21 “Page 2 Step Recording”
hythms and dynamics.
es, refer to the Step Recording page in the Reference
30
Page 37
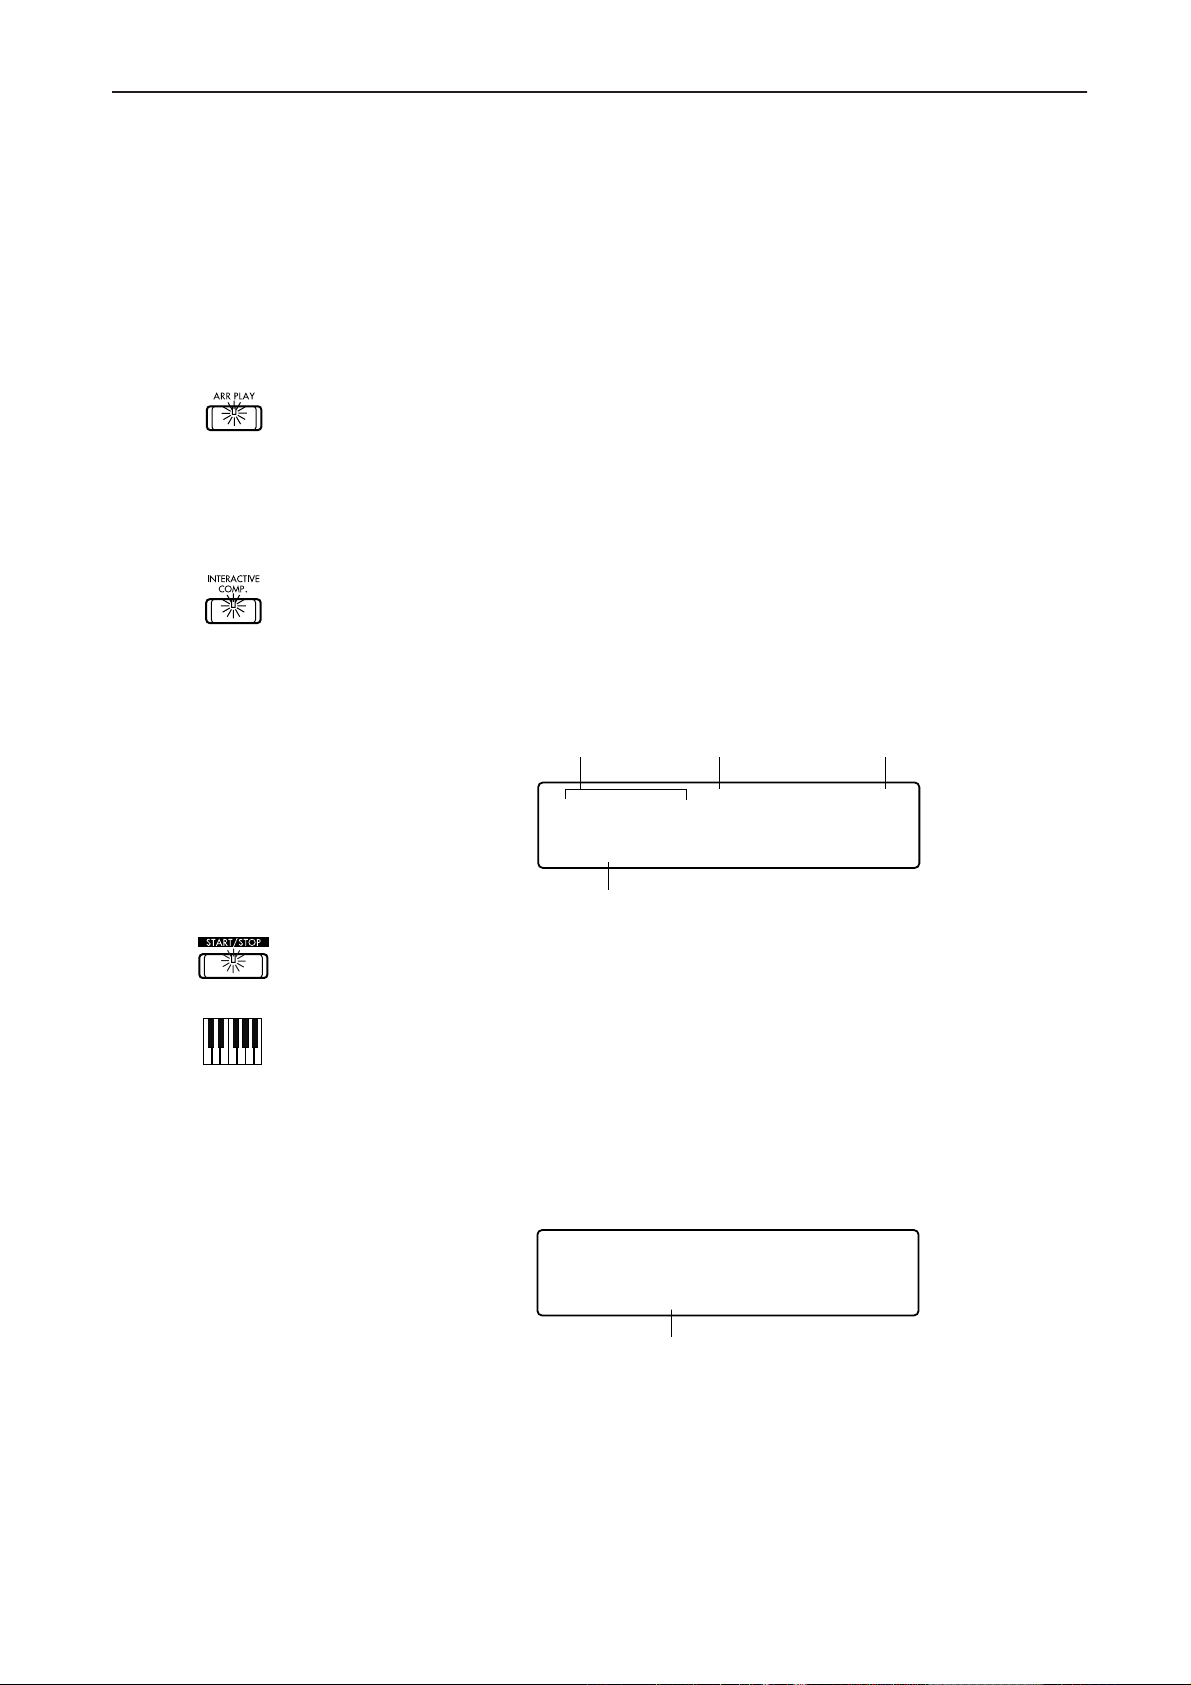
3. Getting acquainted with the C-900
Interactive composition
Just play the melody and an
accompaniment will be added
automatically
Select an arrangement
7. Playing a melody and letting the
C-900 automatically add an accompaniment
The Interactive Composition function allows you to play any melody, and the C-900
will analyze the melody, automatically determine the chords, and play the appropriate
bass and accompaniment.
1. Enter ARR PLAY (Arrangement Play) mode.
If you are in Piano mode, you will need to turn Piano mode off.
If you are in Piano mode, press the PIANO MODE key to make the indicator go dark.
2. Before you begin playing, select an arrangement. Set the tempo to a
speed that is comfortable for you to play.
3. Press the INTERACTIVE COMP. key located to the right on the operating
panel.
→ The INTERACTIVE COMP. LED will light.
→ The following display will appear.
Key setting
Select the chord
analysis mode
Frequency of
chord changes
Start
C/A Maj Easy1 S
=120
Tempo
4. Press the START/STOP key located in the left of the operating panel.
→ Arrangement play will begin.
5. Play a melody in the right hand range of the keyboard.
For now, play only the white keys.
The secret to helping the
→ Chords will automatically be assigned to the melody, and an automatic accom-
paniment will play.
→ The display will show the chords assigned by the Interactive Composition
function.
C-900 analyze your melody is to play short, precise notes.
C/A Maj Easy1 S
=120 F
Automatically assigned chord
By specifying the mood or key of the song, you can modify the way in which chords
are assigned.
You can select the type of chords from among several dif
☞p.40 “IC Type”
You can specify the frequency at which chords will change during the song.
☞p.40 “Chord Follow”
By first recording the melody into the
you can help the
☞p.42 “Backing Sequence IC”
☞p.40 “Key,” “Major/Minor”
ferent patterns.
C-900 and performing the melody analysis later,
C-900 to assign more appropriate chords.
31
Page 38

3. Getting acquainted with the C-900
32
Page 39

4. Basic concepts of the C-900
4. Basic concepts of the
C-900
1. Modes and pages
What is a Mode? What is a Mode?
You have probably noticed that the word “mode” appears throughout our explanations of the
Look up the word “mode” in the dictionary, and it will tell you that it means “style” or
“method.”
In the context of the
performed” or “a condition in which certain functions are active.” To simplify further,
you might just think of a mode as a “condition.”
For example, Arrangement Play mode is the “condition” in which you can use the
C-900’s keyboard to play melody and chords. Backing Sequence mode is the “condition” in which functions determining the sound, pitch, and note length etc. are active
so that you can construct your own song or arrangement.
When refer
modes selected by pressing the mode keys:
Sequence mode
appears in Arrangement Play, where a condition especially suited to piano playing is
called
When you are in a certain mode, the LED of that mode key will light, indicating that
the
C-900 is now in that mode (condition).
Entering a mode The act of pressing a mode key to select a mode is referred to as “entering” the mode.
The act of moving from a mode to another condition (perhaps by pressing a different
mode key) is referred to as “leaving” the mode.
C-900.
C-900, a mode is “a condition in which certain operations can be
ence is made simply to the
, Disk/Global mode, and Song Play mode. Another use of the word
Piano mode.
C-900’s modes, this is talking about the four
Arrangement Play mode, Backing
33
Page 40
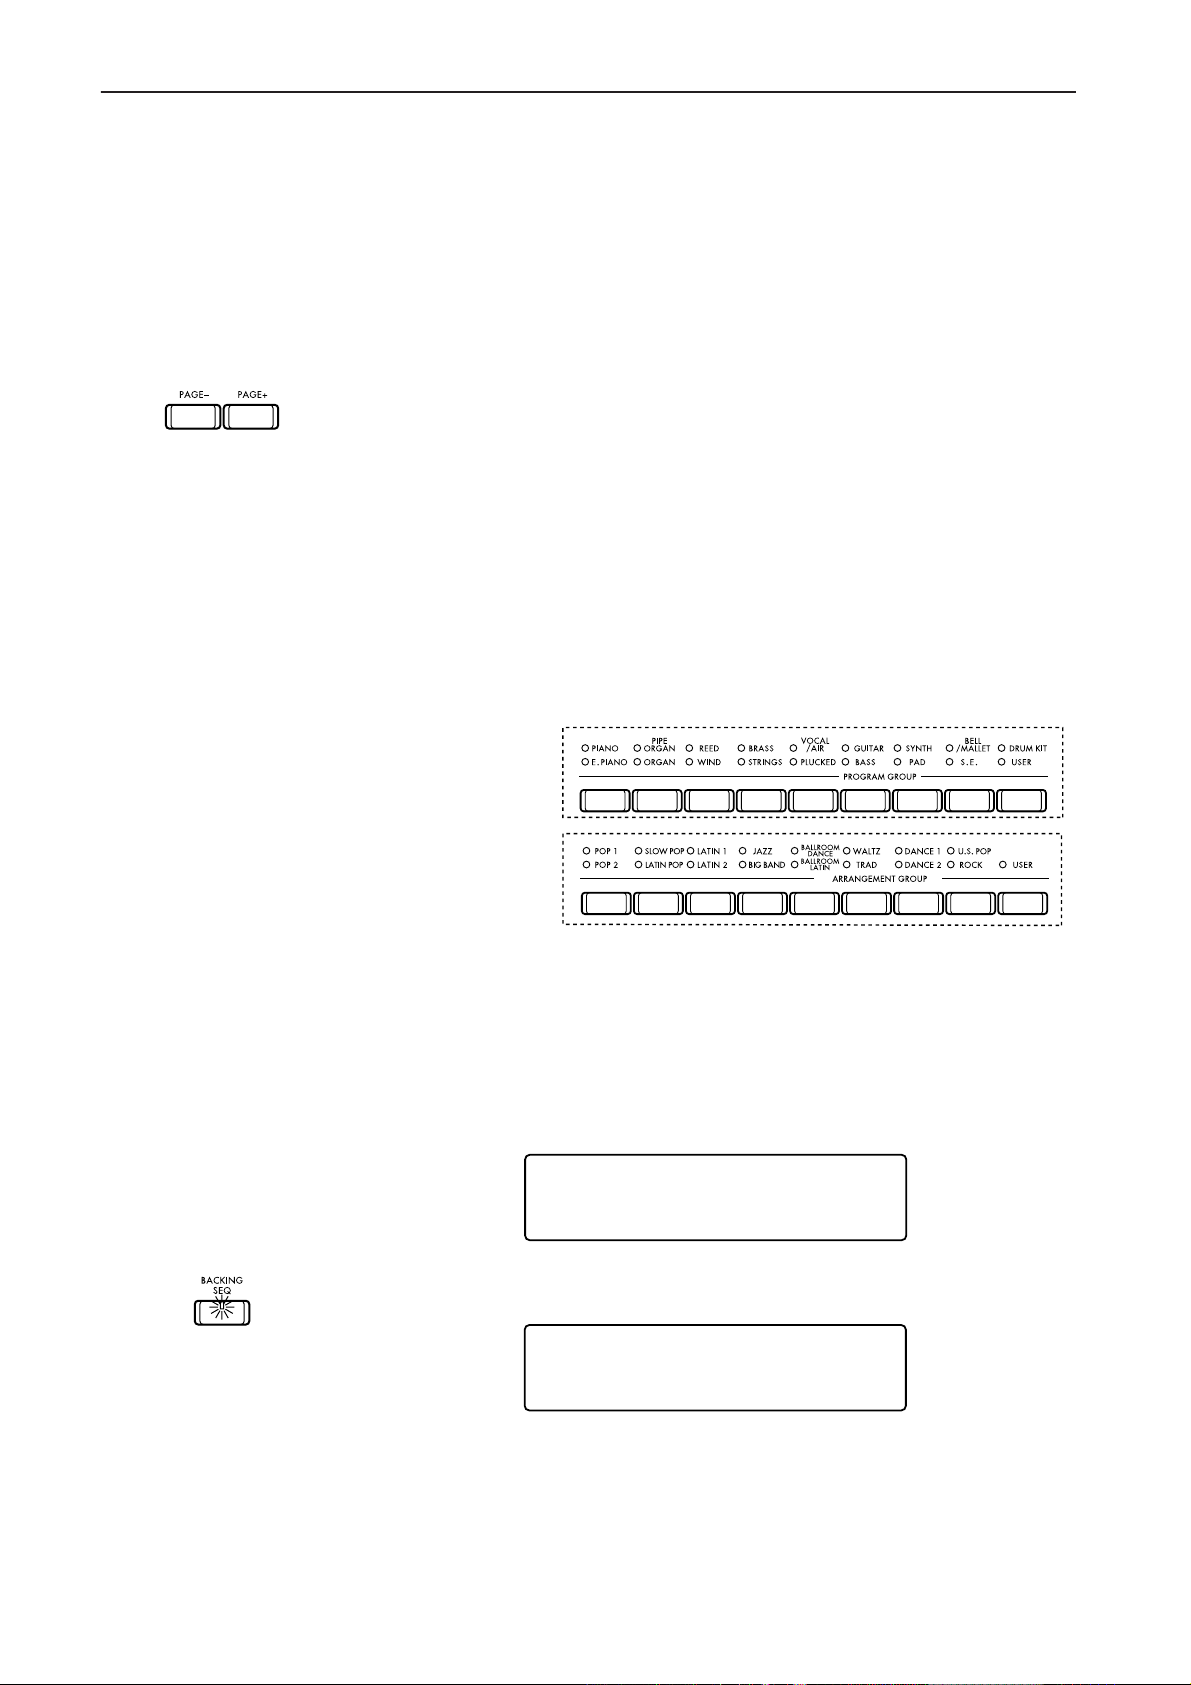
4. Basic concepts of the C-900
What is a Page?
Each of the C-900’s modes (Arrangement Play, Backing Sequence, Song Play, Global)
contain many functions.
The functions in each mode are organized into a number of display screens which
appear in the LCD.
What is a Page? Within each mode, each display screen for a function is called a “display page.”
Using the PAGE keys to flip pages When you want to use a specific function that is found in a certain mode, you must
first select the page within that mode that displays the desired function.
1. Each time you press the PAGE + (plus) or – (minus) keys located at the
lower right of the LCD, you will step sequentially through the display
pages.
Continue using the PAGE keys until you reach the page that contains the desired function.
Directly specifying the page number If you press the key of the currently selected mode, the display will indicate the num-
ber of the page that is currently accessed.
2. If you already know which page of the mode is the one you want, you
can specify the page number and jump directly to that page.
The eight PROGRAM GROUP keys correspond to page numbers 1, 2, 3, ... 8.
The eight ARRANGEMENT GROUP keys correspond to page numbers 9, 10, 11, ... 16.
PROGRAMGROUP
PAGE1〜8
ARRANGEMENTGROUP
PAGE9〜16
To display the desir
ARRANGEMENT GROUP
page number.
“Opening” a page To display a page in this way is referred to as “opening” the page.
When you move to another mode * The number of the page last selected in a mode is remembered for each mode as
long as the
For example, suppose that from page 7 of Arrangement Play mode,
ed page, simultaneously press the key for that mode, and the
key or PROGRAM GROUP key that corresponds to that
C-900’s power remains on.
28:Exciter 58
01:Hall FX
34
you press the BACKING SEQ key to move to Backing Sequence mode.
BSQ0:BSequence0 M001
=160
Page 41
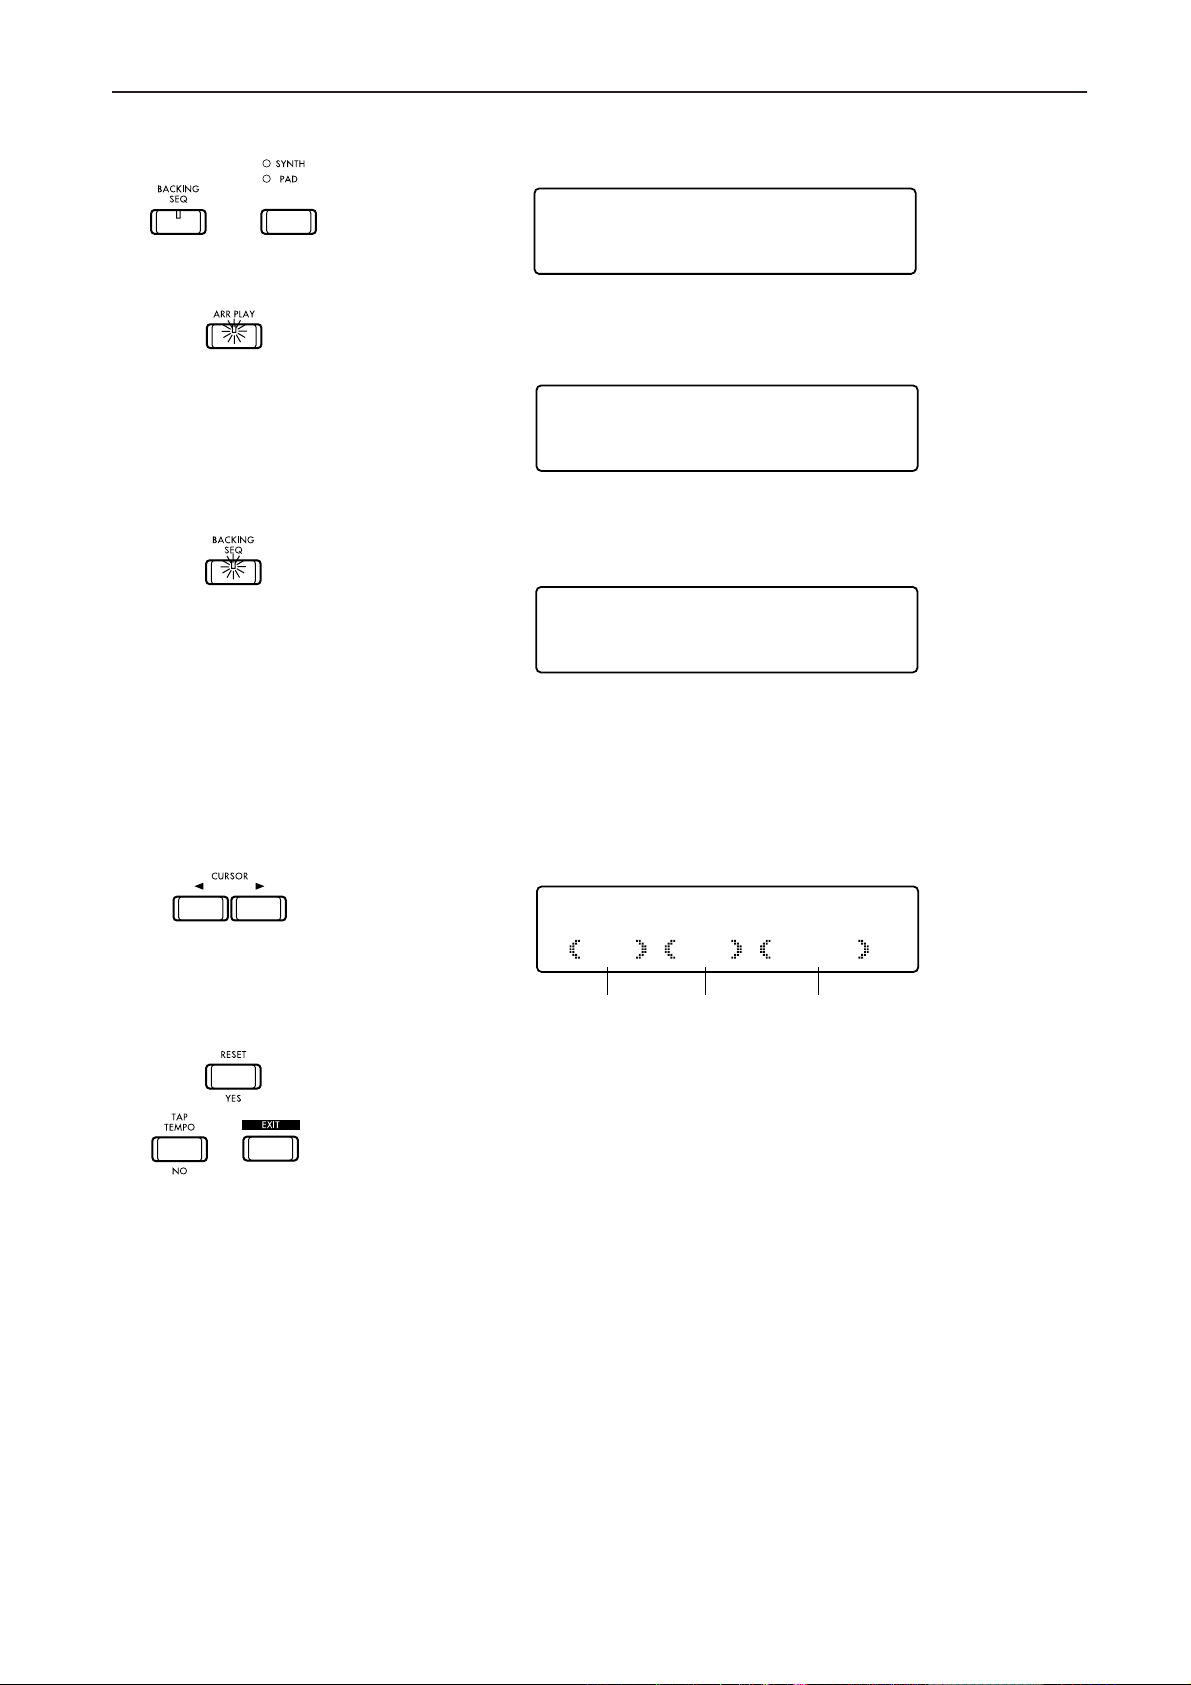
Open page 7 of Backing Sequence mode,
4. Basic concepts of the C-900
+
SHIFT NOTE
KBTr 001 001 Sh=+00
and then press ARR PLAY key to return to Arrangement Play mode. Notice which
page appears.
28:Exciter 58
01:Hall FX
Just as it was before moving to Backing Sequence mode, page 7 is still selected.
If you now return to Backing Sequence mode,
SHIFT NOTE
KBTr 001 001 Sh=+00
you will see that page 7 is still selected here as well. The page number for each mode is
maintained even if you move to a different mode.
Returning immediately to the
first page
Sub pages In some cases, a page will allow you to select additional displays within that page.
* In any page of any mode, you can pr
to jump instantly to the first page of that mode.
Such pages are called “sub pages.”
ess the EXIT key located at the left of the LCD
☞p.51 “Exit”
EDIT 1 (Press Yes)
(DEL) (INS) (ERASE)
Delete measure
In the above display, the characters in parentheses indicate sub pages. You can open
these sub pages by moving the cursor to the corresponding area and pressing RESET/
YES. To return fr
TEMPO/NO key.
om a sub page to the original page, press the EXIT key or the TAP
Insert measure
Erase measure
35
Page 42

4. Basic concepts of the C-900
2. Styles/Arrangements/Programs
What is an Arrangement?
Arrangement The combination of a Style and two keyboard timbre settings (single, layer, split etc.) is
referred to as an Arrangement.
The
C-900 has 128 preset arrangements organized in 16 groups, and 64 arrangements
contained in 1 user group.
Each arrangement contains a variety of settings, such as program (instrumental
sound), volume, pan, effect, tempo, and mute.
The 64 arrangements in the user group can hold modifi
they can be loaded with completely new data from a separately sold sound/song
library floppy disk (XIP series, IFD series).
Style On the C-900, a “style” refers to musical source material from which a song or accom-
paniment is created.
A style is a collection of standar
and pop or ethnic music, ancient and modern, eastern and western.
Each style contains four variations, two intros (introductions), two endings, and two
fill-ins.
In other words, a style is not simply a fragment of an accompaniment pattern or a
rhythm pattern — selecting a style will provide you with all the ingredients you need
to put together an entir
In addition, styles have the flexibility of receiving chord information from the keyboard of the
the chord at any given moment.
Style elements The ingredients such as variations, intros, fill-ins, and endings that make up a style are
referred to as “style elements.”
Styles consist of a total of six musical tracks: drums (the standard drum set widely
used in popular music), percussion (all percussion instr
bass (the lowest instrument), accompaniment 1 (a standard accompaniment instrument), accompaniment 2, and accompaniment 3.
Backing tracks These musical tracks are referred to as backing tracks, since they provide the accompa-
niment.
C-900, and changing their accompaniment pattern to be most suitable for
e song.
d patterns from a wide variety of musics such as r
ed versions of these settings, or
ock
uments other than drums),
What is a Program?
Program Each of the instrumental sounds that can be played on the C-900 is referred to as a pro-
gram.
C-900 contains 407 programs, organized into 18 groups (including 1 user group).
The
Of these, program data from separately sold disks can be loaded into the 64 programs
of the user group and into Dr 19 and Dr 20.
36
Page 43
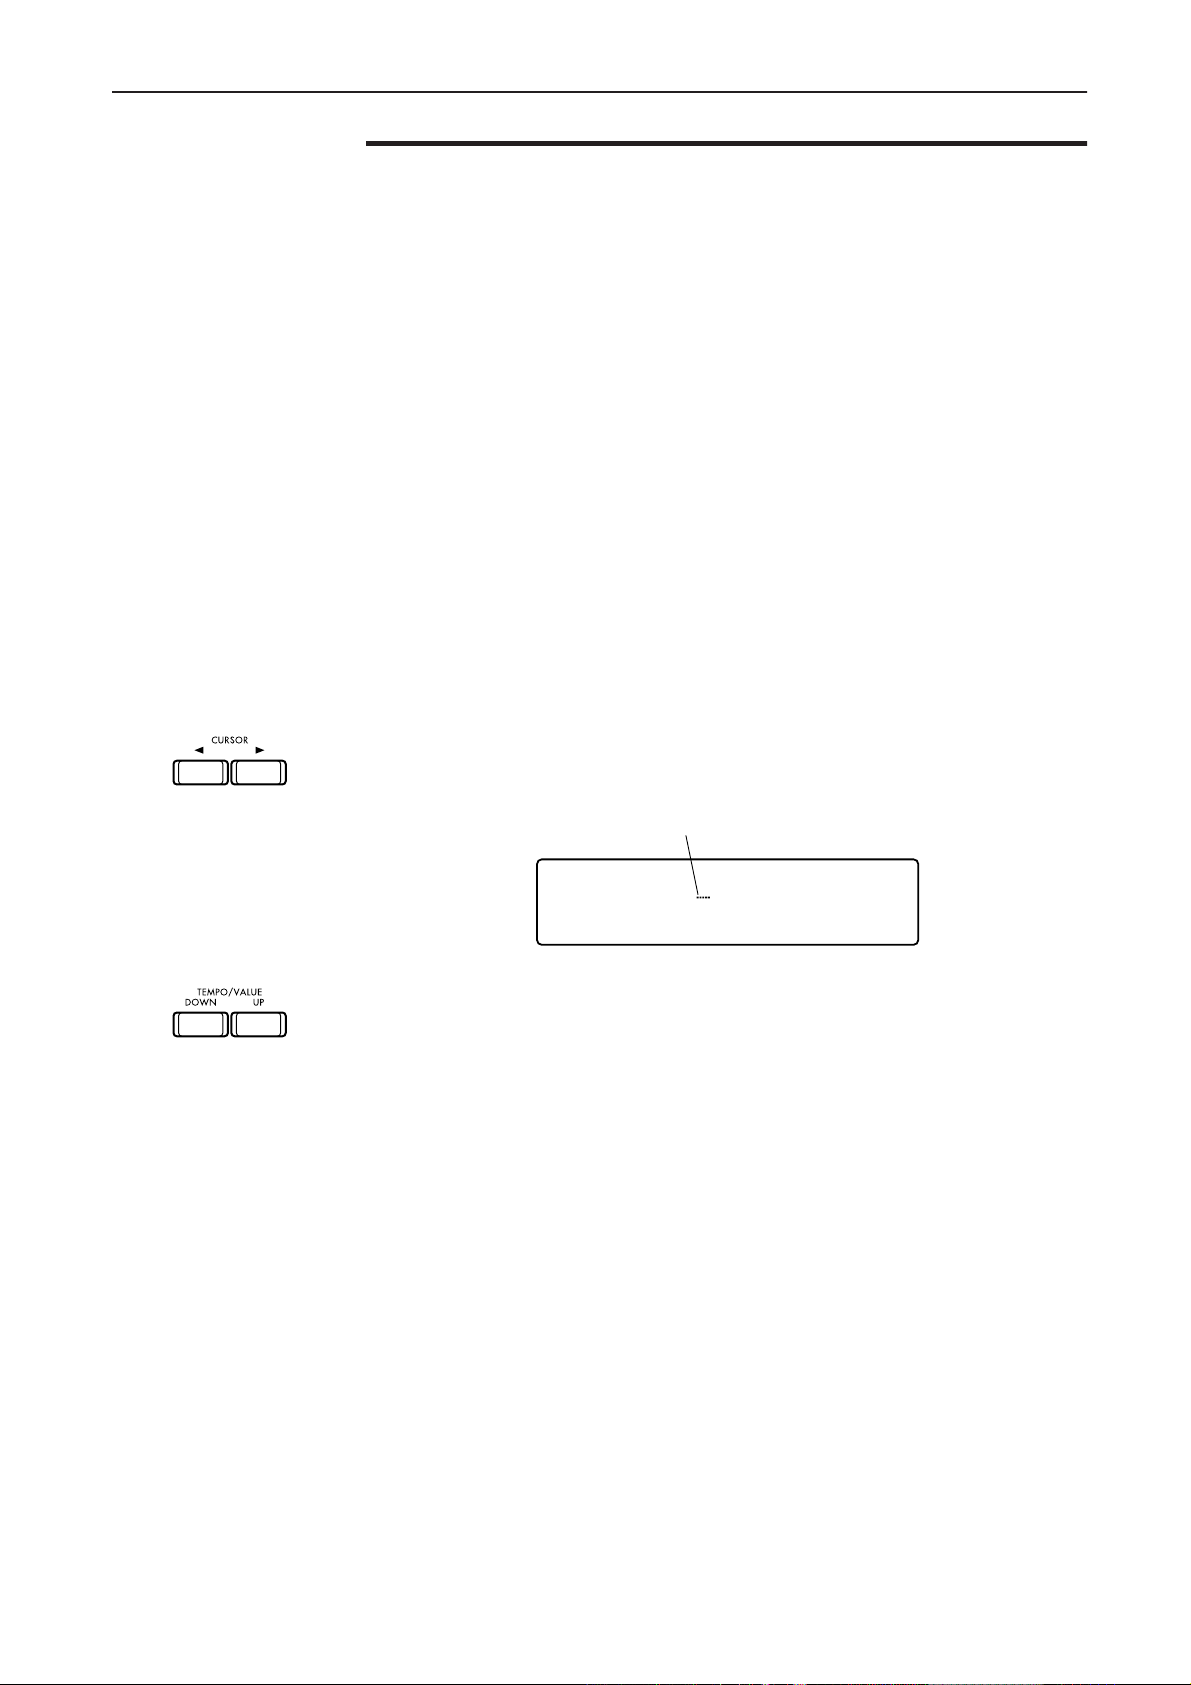
5. Operating the C-900 while looking at the display
5. Operating the C-900 while
looking at the display
As you have seen, the C-900 has a variety of keys arrayed across its operating panel
that let you add various effects and modifications as you play. But in addition to the
functions directly controlled by these keys, many more functions can be utilized by
adjusting the various settings that appear in the LCD.
This chapter explains how to set and select items that appear in the LCD.
1. Moving the cursor
What the cursor does A single screen in the LCD will contain settings for two or more numerical or on/off
items.
In such cases, you will notice that a small horizontal line (the cursor) will appear
below one of the displayed items.
The item indicated by the cursor is the setting that can be adjusted at the present time.
Moving the cursor If you press the CURSOR keys located in the right side of the LCD, the cursor will step
through the different settings.
Pressing CURSOR key
Pressing CURSOR key
®®®® moves the cursor from left to right.
√√√√ moves the cursor from right to left.
Cursor
EVENT M001#01 1:14
D5 V094 0:80
When the cursor has moved to the item that you wish to adjust, press the TEMPO/
VALUE UP
one of these keys, the setting of the item selected by the cursor will step through its
possible settings.
For some items, settings can be made by using keys other than the TEMPO/VALUE
keys, or by using the keyboard. For details, refer to the explanations for the mode and
display of each item.
By using the cursor to specify an item that appears in the display
many dif
In other words,
adjusted using the TEMPO/VALUE keys
key or DOWN key located to the right of the LCD. Each time you press
☞p.38 “2. Adjusting “loudness” or “speed””
, you can modify
ferent settings that contr
any item in the display to which the cursor can be moved can be
ol the
C-900’s functionality.
.
37
Page 44
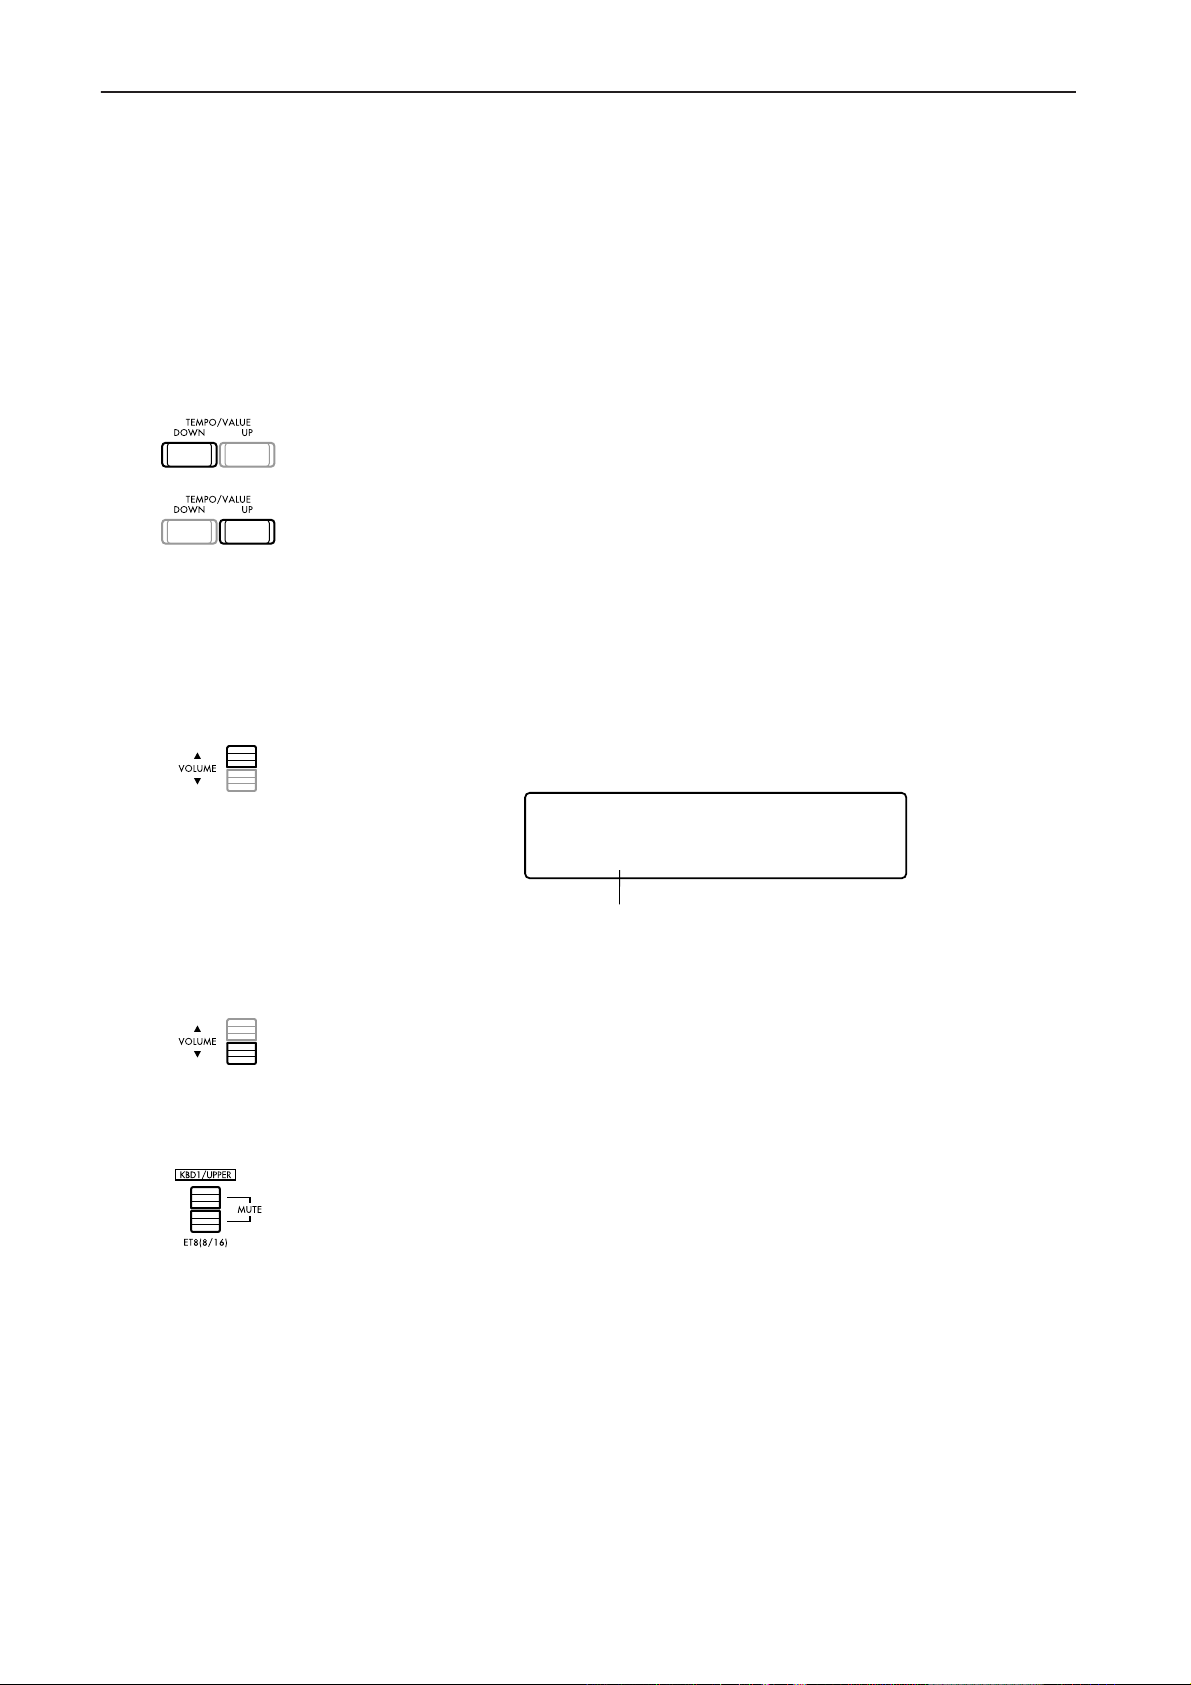
5. Operating the C-900 while looking at the display
2. Adjusting “loudness” or “speed”
Selecting/setting values or items There will be times that you want to make adjustments to the numerical values that
appear in the display, for example to make the drums a bit louder or to slow down the
tempo of the automatic playback.
Or, there will be times when you want to select one of several possible settings, for
example to select an ef
recording page.
The TEMPO/VALUE keys are used to modify the values of the various settings that
ar
e selected by the cursor in the display, such as arrangement playback tempo.
Each time you pr
If you continue pressing the DOWN key, the value of the selected item will continue to
decrease.
Each time you press the UP
continue pressing the UP key, the value of the selected item will continue to increase.
If you simultaneously press both the DOWN key and the UP key together, the selected
item will be r
(Some items, such as the backing sequence tempo, will not be reset.)
Keys that adjust the volume When playing an arrangement, a backing sequence, or SMF song data, you may want
to adjust the volume of each track or channel. You can do so by using the eight pairs of
VOLUME/MUTE keys. These keys raise or lower the volume of the corresponding
track or channel, and function essentially in the same way as the TEMPO/VALUE
keys.
For example when you press the KB1
eset to the original value (i.e., when the cursor was moved to that item).
fect in the effect select page, or specify the r
ess the DOWN key, the value of the selected item will decrease by 1.
key, the value of the selected item will increase by 1. If you
▲ key, the following display will appear.
ecording track in the
KB1:Br00 Trumpet
Volume=108 UPPER -1
Volume
If you continue pressing the
ume of KB1 will also increase.
The same display will appear when you press the ▼ key.
If you continue pressing the
ume of KB1 will also decrease.
The operation of the VOLUME/MUTE keys differs from that of the TEMPO/VALUE
keys in what happens when you press both up and down keys simultaneously. When
the TEMPO/V
when the VOLUME/MUTE keys are pressed simultaneously, the corresponding track
(channel) will be muted or un-muted.
The TEMPO/VALUE keys and VOLUME/MUTE keys are not the only way to adjust
or modify settings. For example in step r
use the style element keys and the keyboar
chords or notes. For details on these operations, refer to the explanations for each key
or for each mode in the Reference Guide.
ALUE keys are pr
▲ key, the value of Volume= will increase, and the vol-
▼ key, the value of Volume= will decrease, and the vol-
essed simultaneously, the value is reset. However
ecording of Backing Sequence mode, you can
d to more efficiently specify the type of
38
Page 45

6. Interactive composition
6. Interactive composition
What does it mean to “assign
chords”?
If you have no particular knowledge of chords, how do you go about adding appropriate chords to a melody that you’ve created?
There is actually a close relationship between chords and melody. However there is no
d and fast rule that things must be done in a certain way
har
It is true that in each musical style or genre, there are many rules and forms that direct
how chords will be assigned to a given melody, or how chor
not all music is created in this way.
And now we come to the
a melody, this function will:
1. Analyze that melody, and according to a previously-selected style and various
patterns, determine “appropriate” chords for that melody.
2. According to the chords that were determined, the
play an accompaniment to that melody.
This accompaniment can be played at the same time that you are playing the melody
on the keyboard. It is also possible to record the melody into the
Sequence mode and add the accompaniment during playback.
Generating the accompaniment while the melody is being played (
result in different chords than when the accompaniment is generated from a previously-recorded melody (
More appropriate chords will be generated if the melody is previously recorded.
We have been speaking about determining chor
ody, but the
chords by analyzing the melody based on generally-known harmonization and chord
progressions. However, not all music is created in this nature.
This means that the chords that the
be the “right” chords for your melody.
You should think of the
vide a choice for the chord progression when you are creating a song.
C-900’s Interactive Composition function determines the “appropriate”
C-900’s Interactive Composition function. When you play
Backing Sequence IC).
ds that are “appr
C-900 has determined to be “appropriate” may not
C-900’s Interactive Composition function as a means to pro-
.
ds follow each other. But
C-900 will automatically
C-900 in Backing
Realtime IC) may
opriate” for the mel-
39
Page 46
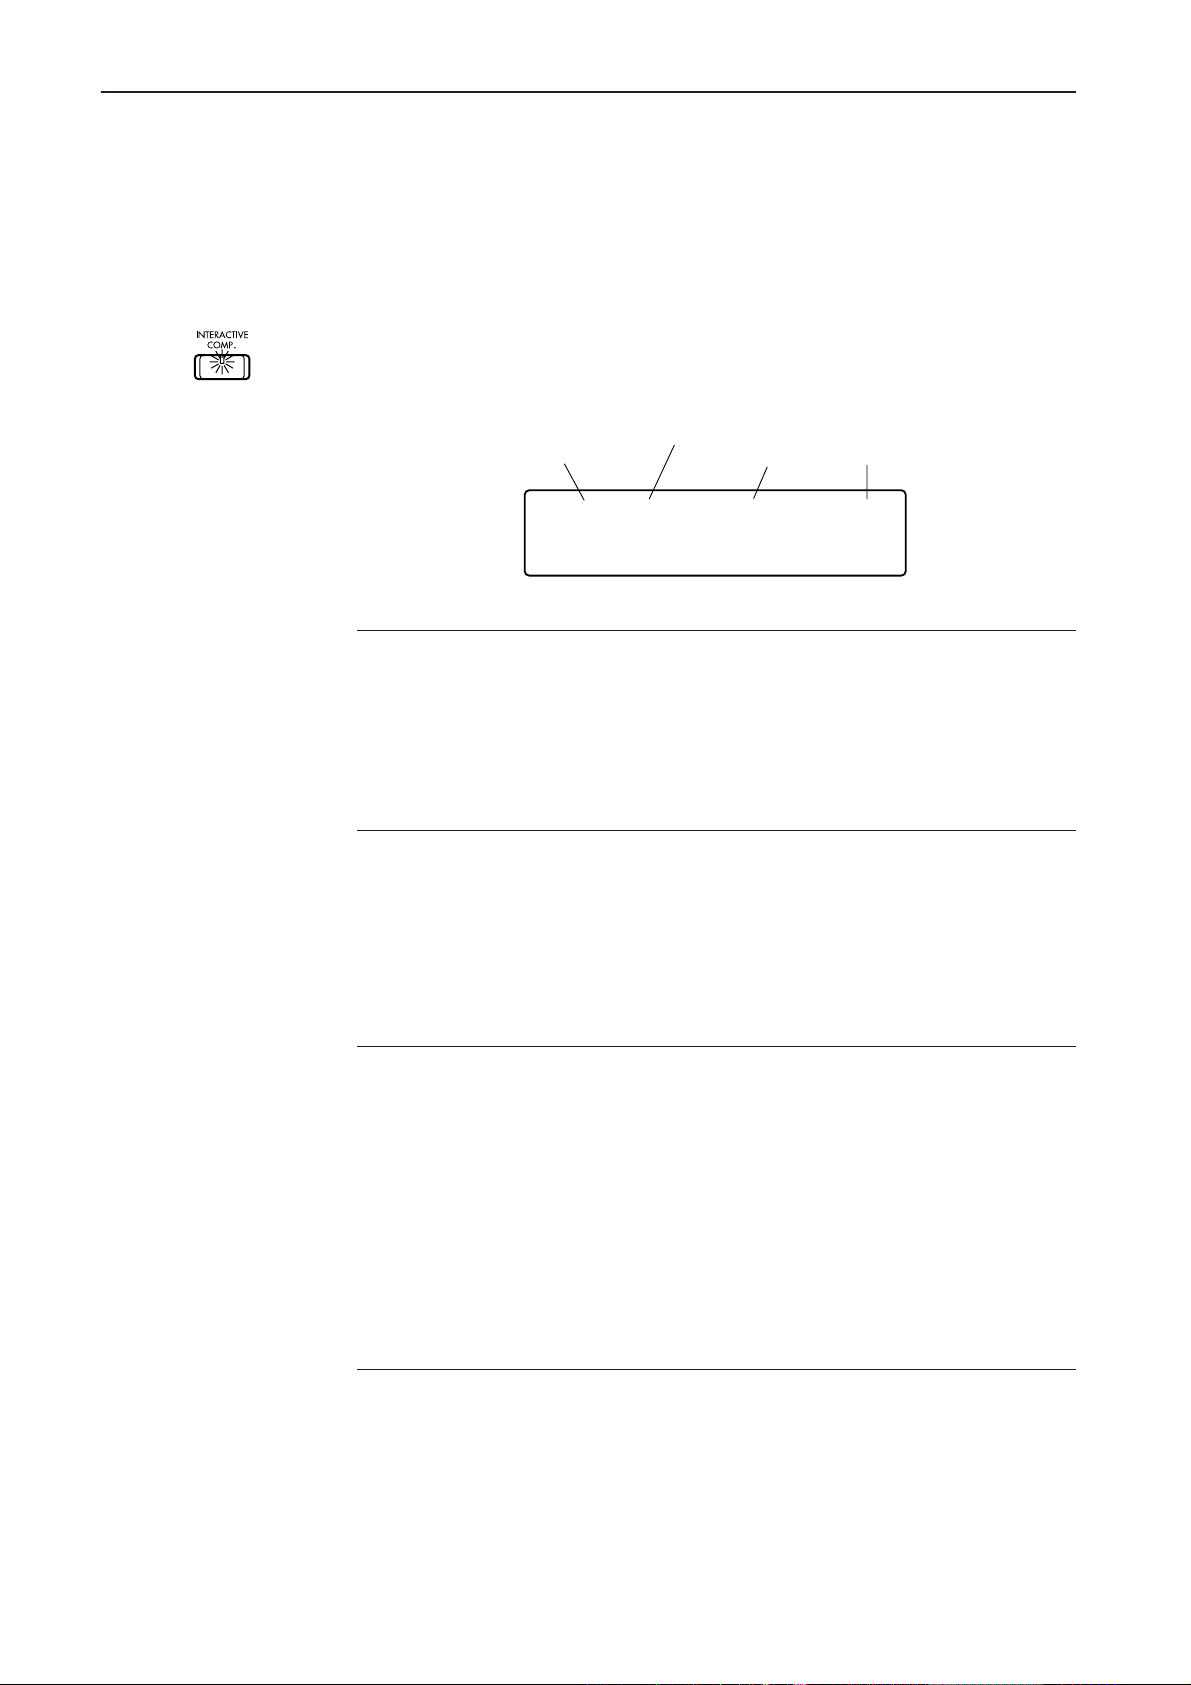
6. Interactive composition
IC settings.
1. Settings for the Interactive Composition function
First let’s look at the settings for using Interactive Composition.
In Arrangement Play mode, press the INTERACTIVE COMP. key located at the right
on the operating panel.
→1. The INTERACTIVE COMP. LED will light.
→2. If you are in the first page, the following display will appear.
Key / key candidate
(for automatic
key detection)
C/A Maj Easy1 S
=108
Key [ANL, C/A, C#/A#, D/B, ... B/G#]
Specify the key of the song you wish to play.
The tonic of the major key is shown to the left of the slash, and that of the minor key to
the right.
If this is set to AUTO, the
setting if you are not sure of the key.
C-900 will automatically determine the key. You can use this
Major / Minor
☞p.41 “Automatic key detection”
Type
Chord Follow
Major/Minor [Maj, Mm, min, mM]
Specify whether the song you wish to play is in a major or minor key.
Maj.............. The song is in a major key. Chords will be mostly major.
Mm............. The song is in a major key. Some minor chords will appear.
min ............. The song is in a minor key. Chords will be mostly minor.
mM............. The song is in a minor key. Some major chords will appear.
IC type [Easy 1–2, General 1–4, Special 1–2]
Specify the types of chords that will be assigned by the Interactive Composition function.
Easy............ The most common and safe chords will be assigned. 2 will tend to assign
somewhat mor
General
Special........ Distinctive chords will be assigned. 1 and 2 will tend to assign chords dif-
...... Common chords will be assigned. The settings from 1 to 4 will assign
chords with slightly differ
suitable for your song.
ferently depending on the major/minor setting. Try them out, and use the
one most suitable for your song.
e complex chords than 1.
ent types. Try them out, and use the one most
Chord follow [S, F]
40
Specify how frequently the chords assigned to the melody by the Interactive Composition function are switched.
Normally there will be no problem leaving this at “S.” If you are playing a song with
many notes at a slow tempo, try the “F” setting.
A chor
S ..................
F .................. A chor
d will be assigned at the beginning of each measure; i.e., one type
of chord will be assigned for each measure.
d will be assigned at the beginning and in the middle of each mea-
sure; i.e., up to two types of chords will be assigned for each measure.
Page 47
6. Interactive composition
Adding chords while you play
the melody
2. Adding chords to the melody that you play
Now let’s use the Interactive Composition function to add chords to a melody that
you play.
● Realtime IC
i) First, in Arrangement Play mode, select any desired arrangement.
Select an arrangement. Use the ARRANGEMENT GROUP keys and the ARRANGEMENT SELECT keys to
select an arrangement that you think would match the melody you are about to play.
ii) With the first display page showing in the LCD, press the INTERACTIVE COMP.
key located at the right of the operating panel.
→ The INTERACTIVE COMP. LED will light.
→ The following display will appear.
C/A Maj Easy1 S
=106
iii) Referring to the explanations in the preceding section 1, make settings for the
key, major/minor, IC type, and chord follow parameters in the display.
Start
iv) Press the START/STOP key located at the left on the panel.
→ Arrangement play will begin.
v) Play a melody in the right hand range of the keyboard.
→ Chords will automatically be assigned to the melody, and will be played as an
accompaniment and bass.
→ The display will show the chords that have been assigned by the Interactive
Composition function.
When using Realtime IC, the secret to helping the C-900 analyze your melody is
to play short, clean notes.
Start
● The keyboard range used by Interactive Composition
The range of the keyboard used to play the analyzed melody will depend on the chord
scanning setting.
With a setting of OFF or FULL.................The melody will be analyzed over the entir
keyboard.
With a setting of LOWER or UPPER .......The melody will be analyzed in the range
above (to the right of) the split point.
e
● Automatic key detection
If you select AUTO as the key setting, automatic key detection will operate.
If you are not sure of the key of the song you are playing, you can use automatic key
detection to determine the key.
i) In Arrangement Play mode, select the desired arrangement.
ii) Press the INTERACTIVE COMP. key located in the right of the operating panel.
iii) In the display, set the key parameter to AUTO.
For the remaining parameters (major/minor, IC type, and chord follow), refer to the
explanation on
iv) Press the START/STOP key.
→ Play will begin. However, only the rhythm will playback automatically.
☞p.40 and make appropriate settings.
41
Page 48
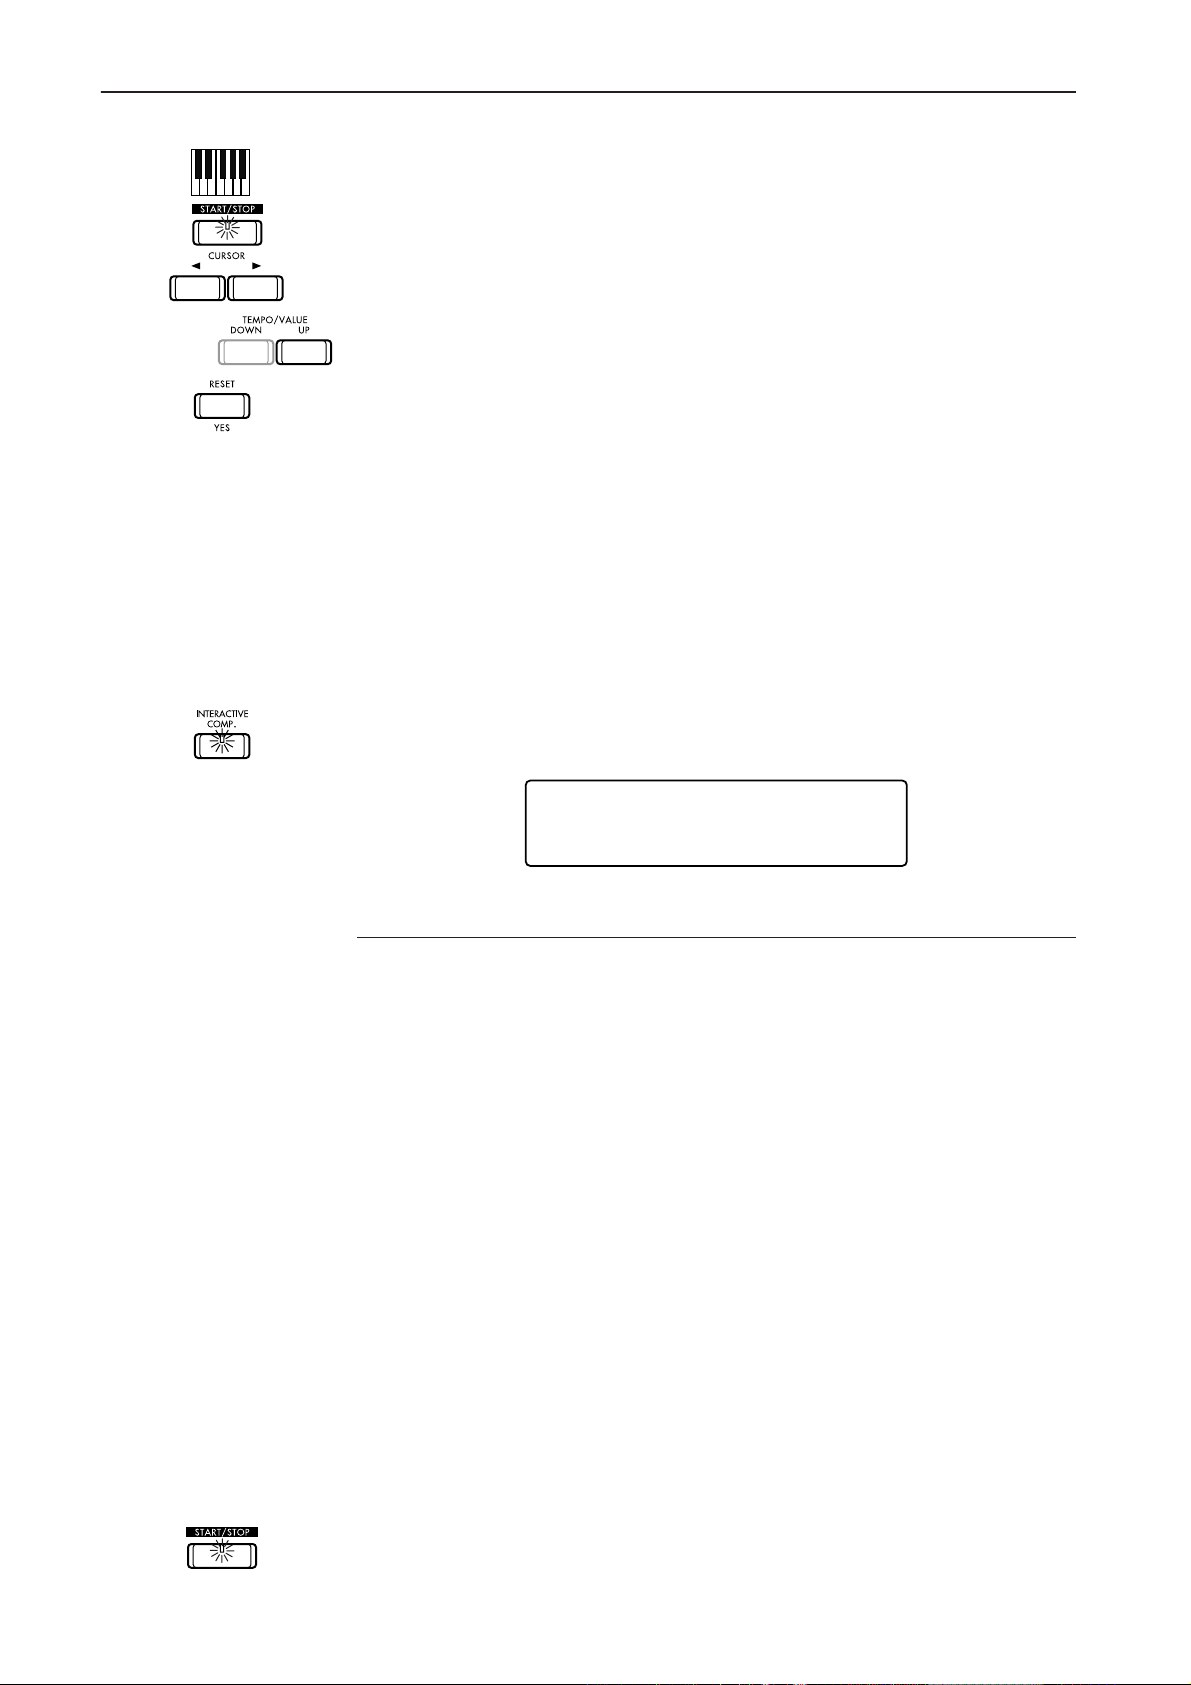
6. Interactive composition
Stop
key detection
v) Play a melody in the right hand area of the keyboard.
At this time, Chord Scanning and Interactive Composition will not operate.
vi) When you finish playing, press the START/STOP key once again.
vii) Use the CURSOR √√√√ or ®®®® key to move the cursor in the display to the Key
parameter.
viii)Press the TEMPO/VALUE UP key.
→ Each time you press the UP key, the possible choices for the key of the melody
you just played will appear in the order of their probability.
If while playback is stopped you press the RESET/YES key, the order of the detected
choices will be canceled.
ix) When you have decided on the key, begin playback once again.
Press the START/STOP key.
→ Playback will begin. If you now play the melody, accompaniment and bass
will be played using the chords for the determined key.
● Backing sequence IC
Assigning chords to a recorded
melody
Specify the arrangement
Start
i) In Backing Sequence mode, select any desired arrangement.
Use the ARRANGEMENT GROUP keys and the ARRANGEMENT SELECT keys to
select an arrangement that you think would match the melody you are about to play.
ii) Press the INTERACTIVE COMP. key.
→ The INTERACTIVE COMP. LED will light.
→ The following display will appear.
C/A Maj Easy1 1S
=106
Replay type (only for Backing Sequence IC) [1, 2, 3, 4]
This setting determines how the melody will be analyzed and processed when the
interactive composition function assigns chords to the melody you recorded in Backing Sequence mode.
This parameter is not used when chords are assigned at the time that the melody is
played (Arrangement Play mode).
1 ..................This is basically the same processing as
curacies in timing will be corrected before analysis. This means that chord
processing can be carried out more accurately than in r
timing of the performance was somewhat inaccurate.
2 ..................
3 ..................Chords will be assigned in basically the same way as method 2. However,
4 ..................Chords will be assigned in basically the same way as method 2. However
Note: In the case of these settings, the chord may change twice within a single mea-
★
Chords will be assigned after the melody has been analyzed for the entir
measure. This method produces more natural chord assignments than the
realtime method, where it is only possible to analyze the melody that was
played up to the point of the chord.
for some melodies it is possible that uncommon chords may appear.
the way in which chords change (the chord progression) will be analyzed
further, producing a richer and more natural chord progression.
sure even if the Chord Follow setting is set to “S.”
iii) In the display, make appropriate settings for the key, major/minor, IC type, and
chord follow parameters, referring to the explanation on p.40.
iv) Press the BACKING SEQ REC key, and then press the START/STOP key.
→ Play will begin.
Arrangement Play mode, but inac-
ealtime, even if the
★
★
☞p.40 “Chord Follow”
e
42
Page 49
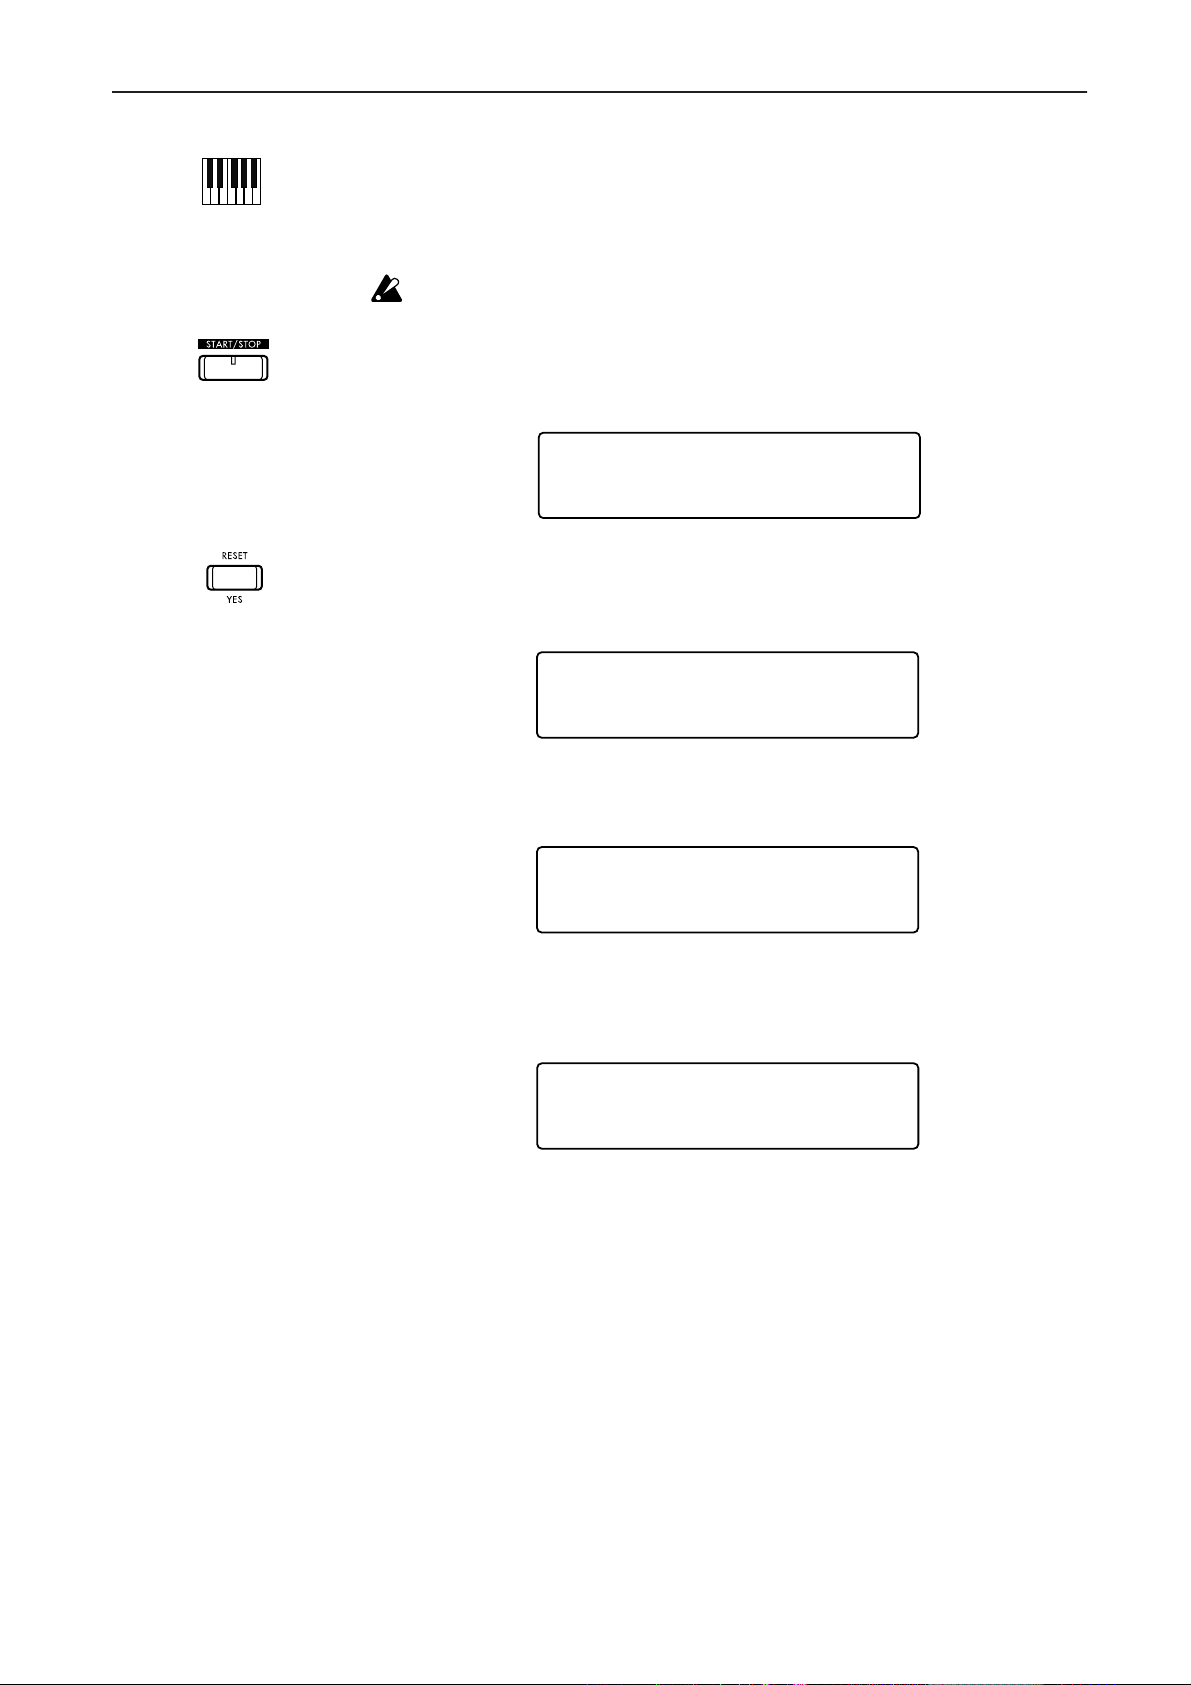
Stop
C/A Maj Easy1 1S
Replay (Yes/No)?
C/A Maj Easy1 1S
=106
C/A Maj Easy1 1S
=106
G/E Mm Generall 3S
Replay (Yes/No)?
6. Interactive composition
v) Play a melody in the right hand range of the keyboard.
→ Chords will be automatically assigned to the melody, and will be played as
accompaniment and bass.
→ The chords assigned by the interactive composition function will be shown at
the right of the tempo in the display.
When Backing Sequence IC is used, playing very quick notes may cause the
C-900 to think that these notes were pressed accidentally, which will result in the
melody not being analyzed correctly.
vi) When you finish playing, press the START/STOP key once again.
→ The following display will appear.
vii) If you wish to listen to your performance with the assigned chords, press RESET/
YES key.
Pressing TAP TEMPO/NO will stop playback.
viii)You can modify the settings for key, major/minor, IC type, replay type, and
chord follow.
Use the CURSOR √√√√ and ®®®® keys to select the item you wish to change, and use the
TEMPO/VALUE UP and DOWN keys to modify the settings of the item.
When you finish making changes, press the START/STOP key.
If you now press the RESET/YES key, playback will begin with the chords re-assigned
according to the new settings that you have made. However, be awar
press RESET/YES key, the chord progression that was recorded will be lost.
Pressing the TAP TEMPO/NO key in the above display will stop playback, and the
settings in the display will r
emain as you set them.
e that when you
43
Page 50
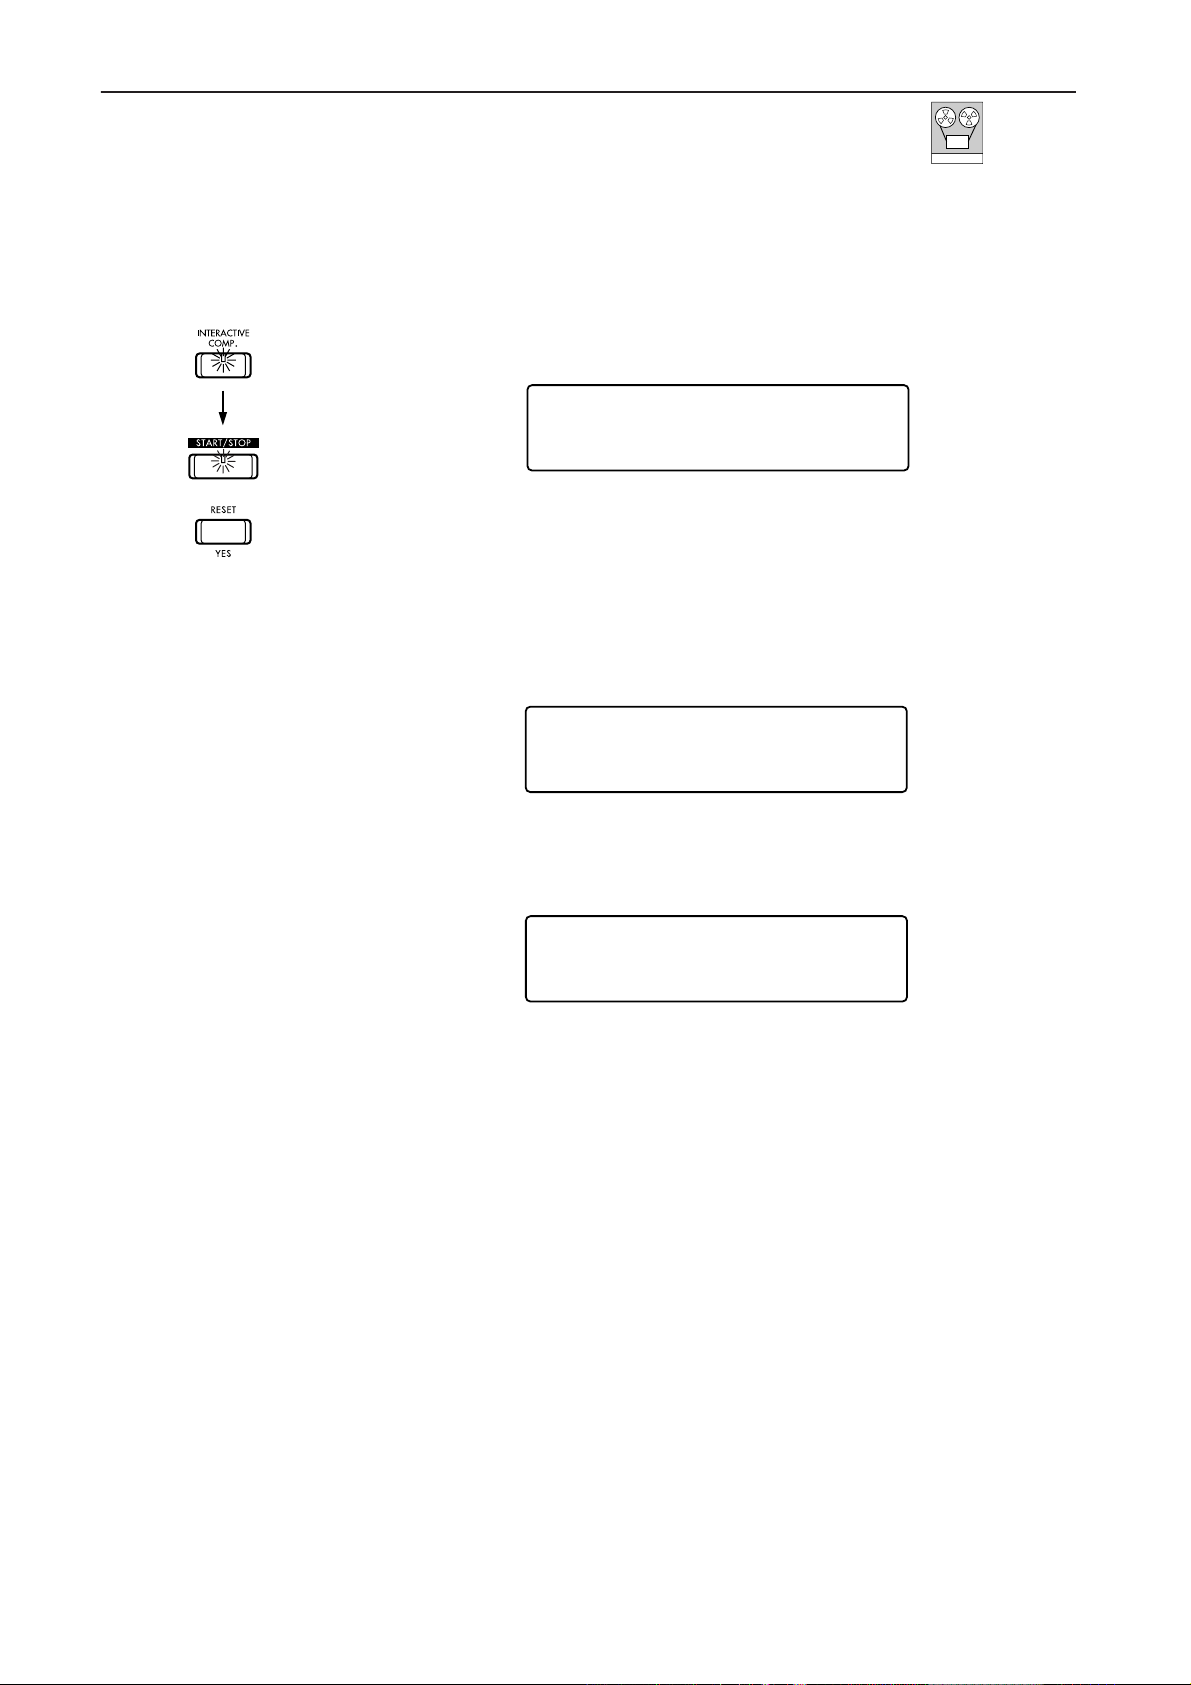
6. Interactive composition
● Assigning chords to a previously recorded performance
The Interactive Composition function can be used to assign chords to a musical performance that was previously recorded in Backing Sequence mode.
BACK.SEQ
i) In Backing Sequence mode, record a musical performance into the C-900.
ii) Press the INTERACTIVE COMP. key located at the right on the operating panel,
and then press the START/STOP key.
→ The INTERACTIVE COMP. LED will light.
→ The following display will appear.
C/A Maj Easy1 1S
Replay (Yes/No)?
iii) If you wish to hear the performance with the assigned chords, press the RESET/
YES key.
→ Playback will begin in accordance to the chords assigned by the Interactive
Composition function.
In the above display, pressing the TAP TEMPO/NO key will stop playback without
any further operation.
iv) You can modify the settings of key, major/minor, IC type, and chord follow.
Automatic key detection in
Backing Sequence mode
Comparing chord assignments
C/A Maj Easy1 1S
=106
Use the CURSOR √√√√ and ®®®® keys to select the item you wish to modify, and use the
TEMPO/VALUE UP and DOWN keys to modify the value of each item.
When you have finished making changes, press the START/STOP key.
G/E Mm Generall 3S
Replay (Yes/No)?
If you press the RESET/YES key, chords will be re-assigned to the musical performance data in accordance with the modified settings.
If you press the TAP TEMPO/NO key in the above display, the modified settings will
remain.
If the key setting is set to AUTO, key detection of the musical data will be performed
as on p.41. In this case, chords will not be re-assigned.
If you wish to use automatic key detection in Backing Sequence mode, record the melody to be analyzed on the keyboard track. Automatic key detection cannot be executed if the melody is recorded on an extra track (the display will indicate Keyboard
Track Empty). If you have alr
Copy Measure function (Reference Guide p.30) or the Bounce function (Reference
Guide p.31) to transfer the data to the keyboard track before executing automatic key
detection.
There may be times when you would like to try out several different ways of assigning
chords to a given melody, and later compare the results.
By saving the backing sequence each time you modify the settings and change the
d assignments, you can later switch between backing sequences and compare
chor
them.
In such cases, use the backing sequence Copy function.
By copying the backing sequence with the assigned chor
sequence and then repeatedly re-assigning chor
tive chord assignments.
eady recor
☞Reference Guide p.27 “Copy Backing Sequence”
ded the melody on an extra track, use the
ds to a different backing
ds, you can create a number of alterna-
44
Page 51

6. Interactive composition
In the pages that follow, we will be introducing several songs as examples that will help you understand
how Interactive Composition works. Each song is a simple one, but you will see the way in which chords
are assigned. The way that the
release the keys. Examples of parameter settings are given for each song, and you can try out various
ways of playing with various settings, at tempo speeds that are comfortable for you. Once you get the feeling of the appropriate playing technique, you will be able to take advantage of the Interactive Composition
function.
C-900 analyses the melody will change depending on when you press and
45
Page 52
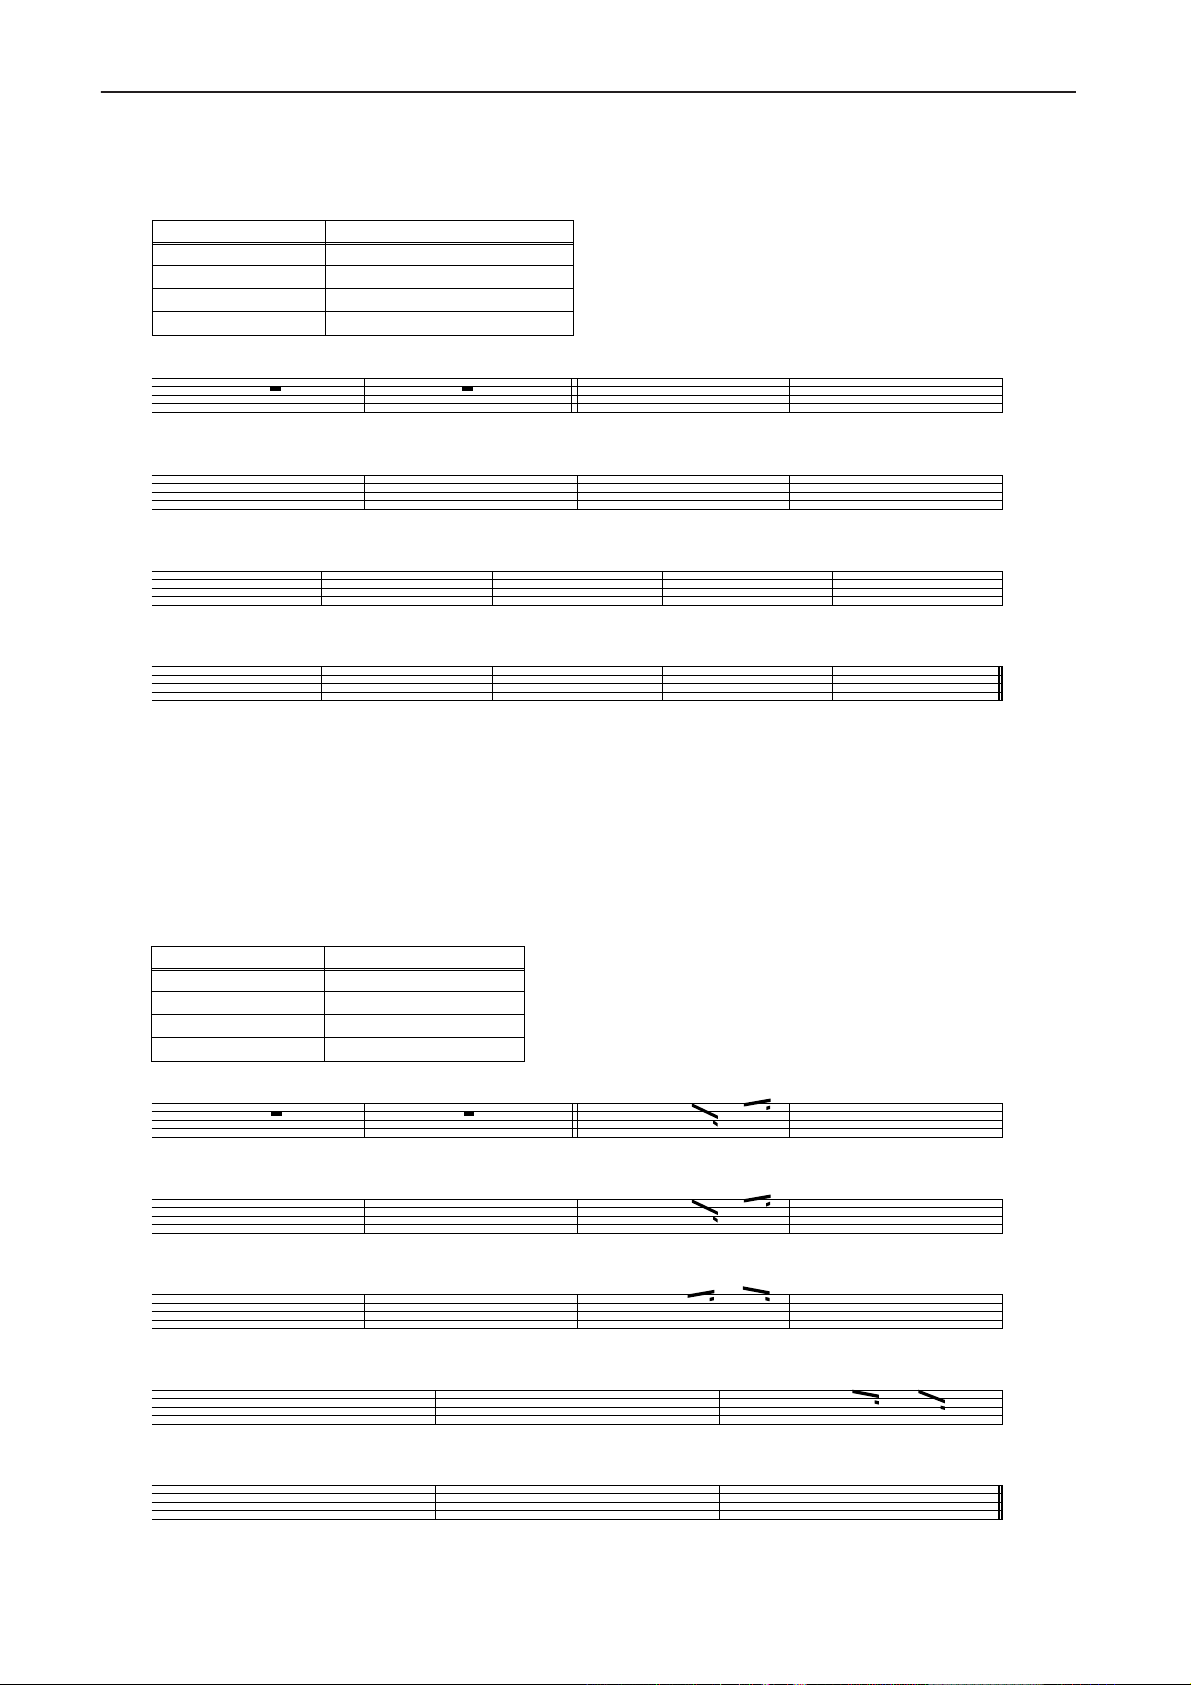
6. Interactive composition
Little Brown Jug
Arrangement
Key
Major/Minor
Chord Follow
IC Type
G7
C
Traditional
BALLROOM DANCE 1 Foxtrot 2
C/A
Maj
S
General 1, 2, 3
CF
CF G7C
FG7CC
CFG7 C
Arrangement
Key
Major/Minor
Chord Follow
IC Type
I’ve Been Working
Traditional
POP 2 1 Motown
F/D
Maj
S
Easy 1, 2 General 1, 2, 3
FF
FB
FFFB
CFCC7
B
46
FF F
Page 53
7. Functions, operations and terminology
7. Functions, operations and
terminology
The pages that follow contain alphabetically arranged explanations of the functions and
basic terms that you will need to understand to take full advantage of the C-900. Each of
the keys on the
• Headings in boldface indicate explanations of basic terms or concepts.
Example) ARRANGEMENT
• Boxed headings indicate explanations of the function of an operating panel key.
Example) ARRANGEMENT GROUP
A function effective in Arrangement Play mode
C-900’s operating panel is also explained in detail.
ARR.PLAY
BACK.SEQ
SONGPLAY
A function effective in Backing Sequence mode
A function effective in Song Play mode
A function effective in Disk/Global mode
The status of this key is indicated by an LED. In most cases, the LED will alternate between lit and dark each
time the switch is pressed, and the function of that key is in effect when the LED is lit. For some keys, the LED
will sometimes b
link to indicate a special status.
47
Page 54
7. Functions, operations and terminology
A
ACCOMPANIMENT
The word “accompaniment” means something that
is “played along with” a musical part.
On the
mental sounds other than drums, percussion and
bass, and to the tracks used by these sounds.
ARRANGEMENT
The combination of a style and two keyboard timbre settings (single, layer, split etc.) is referred to as
an arrangement.
The
ments organized into 16 groups, and 64 user
arrangements.
Each arrangement contains a variety of settings
such as program (instrumental sound), volume,
pan, ef
the settings of the 64 user arrangements can be
freely modified, or replaced by completely new settings that are loaded from a separately sold sound/
song library fl
ARRANGEMENT GROUP
1. These keys are used to select the arrangement
group.
Arrangements are or
16 preset arrangement groups and 1 user arrangement gr
upper of the two LEDs will light, indicating that the
upper gr
If you press the same key again, the upper and
lower LEDs will light alternately, switching
between the upper and lower groups.
2. These keys ar
By holding down a mode key and pressing one of
these keys, you can jump directly to the page (9–16)
within that mode corresponding to the key that you
pr
C-900, accompaniment refers to the instru-
C-900 provides a total of 128 preset arrange-
fect, tempo, and mute. Of the arrangements,
oppy disk.
ARR.PLAY BACK.SEQ SONGPLAY
ganized by musical genre into
oup. When you press one of these keys, the
oup is selected.
e used to select page displays.
essed.
ARR. PLAY (arrangement
play)
When this key is pressed, you will enter Arrangement Play mode.
Select this mode when you wish to play the
keyboard by itself, or to add automatic accompaniment while you play.
ARRANGEMENT PLAY MODE
This is the most basic mode of the C-900, used
when you wish to play the keyboard by itself or to
add automatic accompaniment while you play.
This is also the mode in which you can temporarily
modify arrangement settings, or stor
arrangement in the user bank.
e a modified
ARRANGEMENT SELECT
ARR.PLAY BACK.SEQ
Use these keys to select an arrangement from the
gr
oup that you selected using the arrangement
group keys.
ess the up/down keys to select the desired
Pr
arrangement fr
contains 8 arrangements.
The arrangements contained in each arrangement
gr
oup are listed in appendix D at the end of the Refence Guide.
er
om the selected group. Each gr
ARRANGEMENT TRACK
The six tracks for accompaniment together with the
two keyboard tracks for performance (KBD1/
UPPER, KBD2/LOWER) are collectively referred to
as the arrangement tracks.
☞ Keyboard tracks
☞ Backing tracks
B
BACKING SEQ (backing
sequence)
ARR.PLAY
C-900’s
oup
BACK.SEQ
48
10 11 12
9
13
14
15
16
1. When this key is pressed you will enter Backing
Sequence mode.
Select this mode when you want a performance you
play on the
accompaniment, or when you want to modify or
create new musical data.
2.
By pressing this key in Backing Sequence mode,
you can switch the LED between lit and blinking.
This allows you to select the tracks whose volume
C-900 to be recorded together with the
Page 55
7. Functions, operations and terminology
will be set by the VOLUME/MUTE keys: either the
arrangement tracks (KBD, ACC, PERC, DRUMS,
etc.), or the extra tracks (ETr1–ETr8).
The LEDs will blink to indicate that the volume of
the extra tracks can now be set.
However, volume or mute settings can be made
only when the r
first page) is open.
ealtime recor
d/playback page (the
BACKING SEQUENCE MODE
In this mode, a performance you play on the C-900
can be recorded together with the accompaniment,
and you can modify the data in various ways or create completely new musical data.
This mode is also where the data you create can be
converted into Standard MIDI File format.
BACKING SEQ REC
(backing sequence
BACK.SEQ SONGPLAY
recording)
1. When this key is pressed, the
record. Use the key in the same way for either realtime recording or step recording.
2. If this key is pressed when a user bank is selected in
Arrangement mode, data will be written to the
selected arrangement.
ARR__?” will appear, so if you wish to write the
data, press the RESET/YES key.
C-900 will be ready to
A message of “W
rite to
BACKING TRACK
The six tracks that make up a style (three accompaniment tracks, and the three tracks for bass, percussion and drums) are collectively referred to as
backing tracks, since they pr
the melody.
ovide the backing for
BASS INVERSION
ARR.PLAY BACK.SEQ
When this key has been pr
the lowest note that you press on the keyboard as
the bass note, and will detect this separately from
the chord form. This allows you to specify chords
such as Am7/G or F/C, in which the bass note is
independent.
If you take your finger off the bass note when
Chor
d Scanning is set to FULL, the previous bass
note will r
specified.
emain in effect until the next bass note is
essed, the
C-900 will use
C
CHORD
Chords (chord names) are one way of indicating a
group of harmonically related notes.
In the context of the
usual sense unless otherwise specified.
CHORD HOLD/√√√√
1. Chord hold
When playing an arrangement, you can press this
key so that when you release your left hand from
the keyboar
tinue to sound until you press the keyboard again.
Since this lets you avoid having to rapidly change
your fingering to play the next chor
nient for those who may not be accustomed to playing the keyboard.
√√
2. √√
Each time you pr
Sequence step r
step being edited) will move backwar
tion.
In the Arrangement Play mode function Rename
Arrangement (
ing Sequence mode function Rename Backing
Sequence (
the cursor which specifies the character to be
changed.
d, the current chord and bass will con-
☞Reference Guide p.24
☞Reference Guide p.37), this key moves
CHORD SCANNING
Chord scanning is the function that monitors the
keyboard (the entire keyboard or part of it), and
detects a chord from the notes that are being
pressed.
You can select one of thr
scanning: Upper Chor
range to the right of the split point, Lower Chord
Scanning in the range to the left of the split point,
and Full Chord Scanning over the entire keyboard.
CHORD SCANNING
This key determines the area in which chord scanning (the function that detects chords from the
notes you pr
Each time you press the key, the mode will step
through the choices: LOWER/UPPER/FULL/off
(chords will not be detected from the keyboard).
ess) will be active.
C-900, the word is used in this
ARR.PLAY BACK.SEQ
d, it is conve-
ARR.PLAY BACK.SEQ
ess this key when in Backing
ecording, the displayed step (the
ds one posi-
☞Reference Guide p.9) and the Back-
ee possibilities for chord
d Scanning detects in the
ARR.PLAY BACK.SEQ
49
Page 56
7. Functions, operations and terminology
Upper Chord Scanning detects in the range to the
right of the split point, Lower Chord Scanning in
the range to the left of the split point, and Full
Chord Scanning over the entire keyboard.
If Upper Chord Scanning or Full Chord Scanning
ar
e selected, chords will detected when you simul-
taneously pr
Chords played in the left hand (Lower Chord Scanning) may be abbreviated, with one finger indicating a major chord and two fingers indicating a
minor or sus4 chor
the component notes of the chord.
For details on which chord will be detected from
each combination of notes, r
the end of the Reference Guide, “List of detected
ds.”
chor
ess 3 or more notes.
ou do not need to press all
d. Y
efer to appendix C at
CURSOR
The cursor is the blinking horizontal line that
appears below the item in the LCD that is selected
for modification.
The CURSOR keys located immediately right of the
LCD can be used to move the cursor to left/right or
up/down.
The setting of the item indicated by the cursor can
be modified using the TEMPO/V
ALUE keys.
CURSOR (√√√√, ®®®®)
p.37), pressing this key will delete the character
where the cursor is located in the arrangement
name, backing sequence name, or fi
lename.
DEMO
When this key is pressed, a demonstration of the
C-900’s automatic playback will begin. You may listen to the demonstration from any mode.
DISK/GLOBAL
When this key is pressed you will enter Disk/Disk/
Global mode.
Press this key when you wish to save and load the
C-900 musical data to and from floppy disk, to
specify the pitch or scale of the entire
settings for various basic functions, set the function
of external foot switches or pedals, or make MIDI
settings.
C-900, make
DISK/GLOBAL MODE
This is the mode in which you can make various
settings that affect the entire C-900. Data management operations related to the floppy disk or MIDI
are also performed here.
ARR.PLAY BACK.SEQ SONGPLAY
Use these keys to move the cursor to select the item
in the display that you wish to set.
When you press these keys, the cursor will cycle
through the settable items in the display.
Pressing the
right.
Pressing the
to left.
If you press the
item in that display, the cursor will then “wrap
around” to the first item.
®®®® key will move the cursor from left to
√√√√ key will move the cursor from right
®®®® key to move the cursor to the last
D
DEL (delete)
ARR.PLAY BACK.SEQ
In Backing Sequence event editing, press this key to
delete the currently displayed step.
☞Reference Guide p.32 “Event Edit”
During the procedures for Rename Arrangement
(
☞Reference Guide p.9), Rename Backing Sequence
☞Reference Guide p.37), Save (☞Reference Guide
(
p.57), and Convert to SMF (
☞Reference Guide
E
EDIT
The word “edit” is probably most familiar to you in
the meaning of making changes to a piece of writing. On the
functions in Backing Sequence mode to change or
transform musical data is referred to as editing.
☞ Event edit
EFFECT
C-900 has two independent “effect systems”
The
which can add “effects” such as reverb or echo to
the sound, adding richness and finish to your
music.
The type of effect can be selected in the effect pages
of
Arrangement Play mode, Backing Sequence
mode, and Sequence Play mode.
C-900, the process of using various
ARR.PLAY BACK.SEQ SONGPLAY
50
Page 57
ENDING
ARR.PLAY BACK.SEQ
This refers to the last part of a song. On the C-900,
each style has two endings; ENDING 1 and ENDING 2.
ENDING1 is an ending with a chord progression.
ENDING2 is an ending without a chord progression. Thus, this ending can be used when you wish
to change chords yourself during the ending.
The two operating panel keys INTRO/ENDING 1
and 2 let you add an ending to your song.
During arrangement play, pr
key will cause an ending to be played, and then
play will stop automatically
essing an ENDING
.
7. Functions, operations and terminology
during a sequence of key operations to cancel that
function.
If you press this key in the first page of Backing
Sequence mode, the curr
will be displayed. After appr
the previous display will reappear.
☞Reference Guide p.15
ently selected arrangement
oximately 7 seconds
EXTENSION
The extension (filename extension) is the period
and three characters which are added to the end of
a filename in order to distinguish between different
types of data, such as
grams, and backing sequences.
☞File
☞Reference Guide p.54 “Data saved on disk”
C-900 arrangements, pro-
ENSEMBLE
ARR.PLAY BACK.SEQ
If this key has been pressed, a harmony as determined by the curr
to the melody that you play on the keyboar
ent chord scanning will be added
d.
EVENT EDIT
Musical data recorded in Backing Sequence mode
consists of a large number of instructions which are
used to control the
be to play a particular note at beat number ‘x’ of
measure ‘y’ and hold it for so long, or to switch to
another program at measure ‘z.’ Each of the instructions is referred to as an event.
In Backing Sequence mode you can perform very
detailed editing by modifying individual events,
adding new events, or deleting existing events.
The process of editing these events is referred to as
event editing.
C-900. Such instructions might
EXIT
ARR.PLAY BACK.SEQ SONGPLAY
1. In all modes, when any page is open, pressing this
key will r
2. When you ar
mode (a page related to an editing operation), or a
sub-page of Disk/Global mode (a disk-related
page), pr
est page.
3. In display screens (pop-up displays) such as the
Octave or Transpose settings which appear only for
a specific interval of time, or in a display which
allows you to select a program (a bank or number
selection display), pr
ately return you to the previous display.
In addition to these cases, you can press this key
eturn you to the first page.
e in a sub-page of Backing Sequence
essing this key will return you to the high-
☞p.35
essing this key will immedi-
F
FADE IN/OUT
ARR.PLAY BACK.SEQ SONGPLAY
If you begin play by pressing this key instead of the
START/STOP key, the playback volume will start
from silence and gradually grow louder.
If you end play by pressing this key instead of the
ST
ART/ST
ally diminish and finally disappear.
FILE
Data used by the C-900 such as programs, arrangements, and backing sequences can be assigned a
name and saved on floppy disk for convenient
management.
In the context of computers, a collection of data
which has been assigned a name in this way is
called a “file.”
FILL (fill-in)
A fill-in is a short phrase that is added (often improvised) between melodic sections to “spice up” the
song.
The
FILL 2. The FILL 1 and 2 keys on the operating
panel let you insert fill-ins into your playing.
For some styles, a fill-in can also be used in place of
an intr
The Arrangement Play mode’s Fill setting can be set
so that when a fill-in is inserted into the playback of
a variation, a differ
cally selected after the fill-in finishes playing.
OP key, the playback volume will gradu-
C-900 has two fill-ins for each style: FILL 1 and
o.
ent variation will be automati-
51
Page 58
7. Functions, operations and terminology
FILL (1, 2)
1. Fill-in
By pressing one of these keys during arrangement
play, you can insert two types of fill-in.
When a fill is inserted, the LED of the variation that
had been playing will blink.
For some styles, a fill-in can also be used in place of
an intr
o.
ARR.PLAY BACK.SEQ
2. Step input
In Backing Sequence mode Step Recording, these
keys let you directly specify the step (note value).
☞Reference Guide p.21 “Page 2 Step Recording”
FILL 1 = (16th note)
FILL 2 = (32nd note)
G
BACK.SEQ
INTERACTIVE COMPOSITION
This is the function that automatically analyses the
melody you play on the keyboard, and adds appropriate chords or chord progressions.
INTERACTIVE COMP.
(interactive composition)
When this key is pressed, the
melody you play on the keyboard, automatically
determine chords, and play an automatic bass and
accompaniment according to these chords.
There are two ways to use this function: one is in
Arrangement Play mode, wher
ment will be added simultaneously as you play, and
the other is in Backing Sequence mode, where you
will first recor
paniment added to it. These two methods may
assign chor
☞p.31, p.39 “Interactive Composition”
d a melody and then have the accom-
ds differ
ently, even to the same melody.
C-900 will analyze the
ARR.PLAY BACK.SEQ
e the accompani-
INTRO
GM (General MIDI)
General MIDI (GM) is a standard specification that
defines a common set of instrumental sounds (programs) and ways to control the sound (volume settings etc.). Musical data that was created for a GMcompatible MIDI instrument can be played back on
any GM device to produce essentially the same
musical r
☞p.62 “What is General MIDI?”
esult.
I
INS (insert)
ARR.PLAY BACK.SEQ
During event editing, you can press this key to
insert a new note or event after the currently-displayed step.
☞Reference Guide p.32 “Event Edit”
During the Rename Arrangement (
Guide p.9), Rename Backing Sequence (
Guide p.37), Save (
Convert to SMF (
tions, pressing this key will insert a character into
the arrangement name, backing sequence name, or
filename at the location of the cursor
☞Reference Guide p.57) and
☞Reference Guide p.37) opera-
☞Reference
☞Reference
.
This refers to the introduction of a song. The C-900
provides two intros, INTRO 1 and INTRO 2, for
each style.
INTRO1 contains a chord progression.
INTRO2 does not contain a chord progression.
The two INTRO/ENDING 1 and 2 keys located on
the operating panel of the
an intro to your playing.
By pressing an INTRO key before you begin
arrangement play, you can specify whether or not
an intro will be played befor
C-900 allow you to add
e variation play begins.
INTRO/ENDING (1, 2)
1. Intro/Ending
1. By pressing one of these keys before you begin
arrangement play
an intro will be played befor
The LED of the selected intro will light while the
intr
o is playing, and will go out when variation
play begins. Each style has two intros.
If you pr
being played, that intr
This will be canceled when you pr
INTRO key, VARIATION key or a FILL key.
2. If you press one of these keys during arrangement
play
matically. Each style has two endings.
The LED of the selected ending will continue blinking until play switches to that ending. Once the
ending begins, the LED will stay lit until play ends.
ess the same INTRO key while the intro is
, the ending will begin, and play will stop auto-
, you can specify whether or not
e variation play begins.
o will continue repeating.
ARR.PLAY BACK.SEQ
ess another
52
Page 59
7. Functions, operations and terminology
2. Step input
BACK.SEQ
In Backing Sequence mode Step Recording, you can
press this key to directly specify the step (note
value).
☞Reference Guide p.21 “Page 2 Step Recording”
INTRO/ENDING 1 = dotted …the specified note
value will be multiplied by 1.5
INTRO/ENDING 2 = triplet…the specified note
value will be cut to 2/3
K
Key
1. In this manual, the switch buttons on the operating
panel of the C-900 are referred to as keys; e.g., “the
START/STOP key” or “a PROGRAM NUMBER
key.”
2. In the context of musical theory, key refers to the
key signatur
Keys can be classified as major or minor
Depending on the position of the tonic, there are 12
major keys (C major, C# major, D major etc.) and 12
minor keys (C minor
If the key of a song is too low or too high for you to
sing or for another instr
C-900 provides a Transpose function that lets you
raise or lower the key in semitone steps.
“Transpose”
Also, when you need to specify the key for the
Interactive Composition function, you can use the
automatic key detection function if you are not sure
of the key
KEYBOARD
e.
.
☞p.41
.
, C# minor, D minor, etc.).
ument to accompany, the
☞p.58
KEYBOARD ASSIGN
Use this key to specify how the two keyboard timbres of the
Single mode assigns the same sound to the entire
keyboard. Split mode lets you assign differ
bres to the right hand (upper) and left hand (lower)
ranges of the keyboard, bounded by the split point.
Layer mode lets you assign two timbres to each
note of the keyboar
play a different percussion instrument sound from
each note of the keyboard.
Each time you press this key, the mode will cycle
thr
ough the choices: SINGLE, LAYER, SPLIT
M.DRUMS (manual drums).
C-900 will be assigned to the keyboard.
ent tim-
d. Manual Drum mode lets you
KBD LOCK (keyboard lock)
By pressing this key, you can keep the tempo and
keyboar
when you switch to a dif
When this key is pressed, the tempo, program,
octave, keyboar
inversion, keyboard assign, split point, transpose,
chor
ters will all be locked.
☞p.25
d sound of the current arrangement even
ferent arrangement.
d track mute/unmute status, bass
d scan, volume, pan, send, and effect parame-
KEYBOARD TIMBRE
The basic components of the sound that is heard
when you play the keyboard are called keyboard
timbres. Keyboard timbres produce various sounds
according to the programs that are selected.
The
C-900 has two keyboard timbres, and these two
can be sounded in combination. The way in which
these are combined is determined by the KEYBOARD ASSIGN key.
, and
ARR.PLAY
In general, this refers to the set of black and white
notes on a keyboard instrument, or to the instrument itself. In the context of the
refers to the black and white notes.
C-900, “keyboard”
KEYBOARD ASSIGN
ARR.PLAY BACK.SEQ
Keyboard Assign is the function which lets you
specify how the two keyboard timbres of the
will be assigned to the keyboard. Split mode lets
you assign different timbres to the right hand
(upper) and left hand (lower) ranges of the keyboard (bounded by the split point), and Layer mode
lets you assign two timbr
board.
es to each note of the key-
C-900
Keyboard tracks
The areas of the C-900 sequence which record melodies you play on the keyboard are referred to as
keyboard tracks. In addition to these tracks, there is
also a chor
control track which records operations of the panel
switches.
d track which records chord data, and a
L
LAYER (Layer mode)
The C-900 can be set to produce two different
sounds simultaneously when you press a single
note. The two sounds are normally determined by
the arrangement, but you may change them if you
wish.
53
Page 60
7. Functions, operations and terminology
When Keyboard Assign is set to LAYER, two
sounds will be layered in this way. This condition is
referred to as Layer mode.
☞ Keyboard assign
LOAD
The process of copying C-900 arrangement, program, backing sequence, or other data from a
floppy disk into the
“loading” data from a floppy disk.
The loading procedure is performed in the Data
Load page of Disk/Global mode. (
Guide p.55)
☞ Disk/Global mode
C-900 memory is referred to as
☞Reference
M
M.DRUMS (manual drums)
The C-900 lets you play different percussion instruments from each note of the keyboard, just as if you
were playing a set of percussion instr
drum kit).
When Keyboard Assign is set to M.DRUMS, you
can play a dr
This condition is referred to as Manual Drum mode.
Chord scanning is not performed in Manual Drum
Mode.
☞p.53 “Keyboard assign”
um kit from the keyboar
uments (a
d in this way.
N
NO
ARR.PLAY BACK.SEQ SONGPLAY
Press this key when you wish to select “no” in
response to a confirmation display asking you
whether or not to execute an operation or continue
a process.
When a sub-page is open, pressing this key will
return to the pr
☞p.35
evious display.
O
OCTAVE (DOWN/UP)
ARR.PLAY BACK.SEQ
By pressing these keys, you can raise or lower the
pitch range of the
tracks (Bass, Acc1, Acc2, Acc3) of the automatic
accompaniment, in one-octave steps over a range of
±2 octaves.
The octave setting can be viewed in the LCD.
When you press the UP or DOWN key, the following display will appear.
The normal display will reappear approximately 7
seconds after you take your hand off the key.
C-900’s keyboard and the backing
METRO (metronome)
ARR.PLAY BACK.SEQ
When this key is pressed the metronome will
sound.
However, Song Play mode and Disk/Global mode
are exceptions.
MODE
On the C-900, “mode” generally refers to the four
conditions which are selected by pressing one of the
mode keys: Arrangement Play, Backing Sequence,
Disk/Global, and Song Play. Each of these conditions or “modes” provides a different set of procedures or functions.
In addition to these modes, mention is also made of
“Piano mode,” and the various Keyboar
modes. For details on these, r
tions of each item.
☞p.55 “Piano mode”
☞p.53 “Keyboard Assign”
efer to the explana-
d Assign
Keyboard timbre 1 setting
KB1:Pf04 BritePiano
Volume=103 UPPER +1
Volume
Each time you pr
octave setting will rise or fall by 1.
If you press the UP and DOWN keys simultaneously, the octave setting will immediately be reset
to 0.
ess the UP or DOWN key, the
Octave setting
P
PAGE
The functions within each of the four modes of the
C-900 (Arrangement Play, Backing Sequence, Song
Play, and Disk/Global) are organized into display
screens called “pages.”
If you wish to use a certain function within a mode,
you must first select the page of that mode that contains the desired function.
54
Page 61
7. Functions, operations and terminology
PAGE (–, +)
ARR.PLAY BACK.SEQ SONGPLAY
In any mode, use these keys to select the desired
page.
Each time you press the + key, the next page will
appear
.
Each time you press the – key
will appear.
By simultaneously pressing the key of the curr
mode together with one of the ARRANGEMENT
GROUP keys or PROGRAM GROUP
jump directly to a specific page of that mode. Refer
to the explanation of “Selecting pages ” found on
the first page of the explanation of the various
modes in the Reference Guide.
, the previous page
ent
keys, you can
☞p.34
PIANO MODE
ARR.PLAY BACK.SEQ
Press this key when you wish to play the
ply as a conventional electronic piano without
using functions such as automatic accompaniment.
1. In Arrangement Play mode,
pressing this key will ...
• Automatically assign the effect most suitable for that
sound when you select a program. Pedal Simulation
(
☞Reference Guide p.51) will also be set.
• Cancel muting for the areas to the right (KB1) and
left (KB2) of the center of the keyboard, so that playing the keyboard will pr
• Keyboard Assign will set to SINGLE.
• Display the sound program group number and
sound name in the upper line of the LCD, and the
tempo and metronome time signature and volume
in the lower line of the display
2. In Backing Sequence mode ...
Press this key when you wish to record without
automatic accompaniment.
An arrangement “Acc Mute” will be selected, and
you can record without automatic accompaniment.
The entire keyboard will produce sound.
oduce sound.
.
C-900 sim-
PROGRAM
The instrumental sounds that you can play on the
C-900 are referred to as “programs.”
The programs provided by the
total of 327 instrumental sounds organized into 16
groups, and 16 types of drum kit.
Of these programs, program data from separately
sold disks (Kor
64 user programs and two dr
tents of the data can be modified.
g IFD series) can be loaded into the
C-900 consist of a
um kits, and the con-
PROGRAM GROUP
ARR.PLAY BACK.SEQ SONGPLAY
1. Use these keys to select the program group.
Programs are organized into 17 preset program
groups (including 1 drum pr
program group. When you press one of these keys,
the upper of the two LEDs above the key will light,
indicating that the upper group has been selected.
If you then press the same key again, the lower and
upper LEDs will light alternately
between the upper and lower groups.
2. Use these keys to select page displays.
By holding down a mode key and pr
these keys, you can jump directly to the corresponding page display 1–8.
1
2
To jump to page displays 9–16, use the ARRANGEMENT GROUP keys.
4
3
ogram), and 1 user
6
5
☞p.47
, letting you switch
essing one of
7
8
PROGRAM SELECT
ARR.PLAY BACK.SEQ SONGPLAY
Use these keys to choose programs from within the
group selected by the program gr
By pressing the up/down keys, you can choose the
desired program fr
A list of the programs in each program group is
given in appendix D at the end of the Reference
Guide.
The number of programs included in each program
gr
oup differs by the gr
om the selected program group.
oup.
oup keys.
R
RESET
ARR.PLAY BACK.SEQ SONGPLAY
By pressing this key, you can
1. Reset a sound selection that was modified in
Arrangement Play to its original setting.
2. Return immediately to the first measure of a backing sequence.
3. Return to a condition in which a chord has not been
specified (the condition in which notes ar
being played in the chord scanning ar
board).
In addition to these, you can also use this key to
turn off any “stuck notes” that may occur due to
MIDI connections.
e not
ea of the key-
55
Page 62
7. Functions, operations and terminology
REST
performance that you wish to switch between.
When step recording a backing sequence, press this
key to insert a rest for the currently displayed step.
☞Reference Guide p.21
S
SAVE
The process of writing C-900 data for an arrangement, program, or backing sequence etc. to a floppy
disk is referred to as “saving” the data.
The save pr
page of Disk/Global mode.
☞Disk/Global mode
☞Reference Guide p.57
Unlike other types of data, backing sequence data is
erased from the
turned off. This means that if you create backing
sequence data on the
save the data to disk. It is also a good idea to make a
habit of periodically saving data to disk as you are
creating the data.
ocedure is performed in the Data Save
C-900 memory when the power is
C-900, you should be sure to
BACK.SEQ
SONG PLAY
ARR.PLAY BACK.SEQ
When this key is pressed you will enter Song Play
mode.
Press this key when you wish to load and play Standard MIDI File (SMF) format song data directly
fr
om disk.
Each time you press this key in Song Play mode,
you will alternate between selecting channels 1–8 or
channels 9–16 as the channels whose volume or
mute settings will be contr
MUTE keys.
When the volume/mute settings for channels 9–16
are available, the LED will blink.
olled by the VOLUME/
SONG PLAY MODE
The C-900 is able to directly load and playback
Standard MIDI File (SMF) format data from a
floppy disk.
If you have a SMF format data disk, you can insert
it into the
back.
C-900 and easily enjoy automatic play-
SCALE
In general, the sequence of notes C-D-E-F-G-A-B-C
is referred to as the scale, but on the C-900, you can
set the Disk/Global mode parameter Scale to use
not only the conventional equal tempered scale, but
also scales of ancient music or ethnic music. In
addition, you can adjust the pitch of each of the 12
notes in the octave over a range of ±50 cents.
erence Guide p.67 “Page 12 User Scale”
SEQUENCER
A sequencer is a device (or a function within a
device) that stores the performance of a MIDI
instrument as a sequence of data indicating the
pitch, length, and velocity of notes, and plays back
this data on demand.
Sequencers perform a function somewhat similar to
a tape r
“sound,” they digitally record the “performance.”
This makes it possible to make very detailed
changes that would be difficult or impossible on a
tape recorder, such as modifying the pitch or timing
of an individual note, or re-recording or cutting and
replacing a specific portion of the data.
In Backing Sequence mode, the
only tracks to record your performance, but also a
chord track to record and playback the chords of the
accompaniment, a control track that records panel
operations, an arrangement track, and 8 extra tracks
that can be used to temporarily hold portions of a
ecorder
, but instead of recording the
C-900 provides not
☞Ref-
SOUND HOLD/ ®®®®
1. Sound hold
If this key and the Chord Hold have both been
essed, the note (or chord) and bass note you pr
pr
in the left hand will continue to sound until the next
time the keyboard is pressed.
This differs from the case in which Chord Hold is
used alone in that the left hand sound and bass note
will sound even when arrangement play is stopped.
This can be very ef
intro without r
When arrangement play starts, the bass note will be
replaced by the automatic playback of the accompaniment track, but the left hand notes will continue
to sound. This is a useful way to add richness to
arrangement play
The Disk/Global mode parameter Sound Hold
allows you to specify whether the keyboard notes
that you pr
note, whether the notes you pr
chord-scanned and play the chord sound, or
whether the notes you press will play only the bass
sound.
☞Reference Guide p.65
When using this function, ...
1. Set Chord Scanning to LOWER.
2. If KBD2/LOWER is muted, simultaneously press
▲ and ▼ keys to cancel muting.
the
hythm before starting the song.
ess will sound together with the bass
ARR.PLAY BACK.SEQ
fective when you wish to play an
.
ess will also be
ess
56
Page 63
7. Functions, operations and terminology
3. Since the chord changes are fixed for INTRO 1 and
ENDING 1, this function cannot be used.
®®
2. ®®
ARR.PLAY BACK.SEQ
In Backing Sequence step recording, pressing this
key will advance the displayed step (the step that
can be edited).
In the Arrangement Play mode function Rename
Arrangement (
ing Sequence mode function Rename Backing
Sequence (
to move the cursor to specify the character you
wish to change.
☞Reference Guide p.21
☞Reference Guide p.9) and the Back-
☞Reference Guide p.37), this key is used
SPLIT (Split mode)
The C-900 allows you to divide the 88 notes of the
keyboard into right hand (higher) and left hand
(lower) ranges, and play different sounds in each
hand. The sounds of the left and right hands are
normally determined for each arrangement, but
you can change these later if you wish.
If Keyboard Assign is set to SPLIT, the keyboard
will be split between the left and right hands. This
condition is r
☞p.53 “Keyboard Assign”
eferred to as Split mode.
Standard MIDI File (SMF)
Standard MIDI File format (SMF) is a data format
for sequencer (recorder) music data, which allows
data to be exchanged via floppy disk between any
device, regardless of its manufacturer or model.
Standard MIDI Files include three types of formats.
Of these, the
Commercially available data disks can be insert into
the
C-900 and played if they are in either format 0
or format 1. Also, backing sequence data that you
create on the
Standard MIDI File.
C-900 can use format 0 and format 1.
C-900 can also be saved to disk as a
START/STOP
ARR.PLAY BACK.SEQ SONGPLAY
This key is used to start or stop playback of an
arrangement or SMF song, or recording or playback
of a backing sequence. Demonstration playback can
also be stopped by this key
When playback or recording begins, the LED will
blink in the time signatur
first beat and gr
Also, this LED will rapidly blink red while format 1
SMF data is being loaded fr
een on other beats.
.
e of the data, red on the
om floppy disk.
STEP RECORDING
SPLIT POINT
When the keyboard assign mode is set to Split or
Chord Scanning, the division between high and low
ranges is referred to as the Split Point.
The Split Point is indicated as the lowest note of the
right half of the divided keyboar
d.
SPLIT POINT
ARR.PLAY BACK.SEQ
If you hold down this key and press a note on the
C-900’s keyboard, that note will become the Split
Point.
Use this key to divide the two keyboard timbres of
the
C-900 to left and right in Split mode, or to specify the range in which chord scanning will take
place.
The Split Point setting can be viewed in the LCD.
While you continue to press this key, the following
display will appear
In the above example, the upper range is the C4
note and notes to the right (higher), and the lower
range is the B3 note and notes to the left (lower).
.
This is one of the methods of recording musical
data into the
entered by specifying the pitch, length, and velocity
etc. of each note. This allows you to create accurate
data even if you are unfamiliar with the keyboard.
In contrast to this, the method in which your playing on the keyboard is recorded just as you play it is
referr
ed to as Realtime Recording.
C-900, in which individual notes are
STYLE
Styles refer to collections of standard patterns of a
variety of types of music, which are the basic ingredients for constructing a song or accompaniment on
the
C-900.
☞p.48 “Arrangement”
Style element
Each element included in a style, such as variation,
intro, fill-in, and ending, is referred to as a Style Element.
57
Page 64
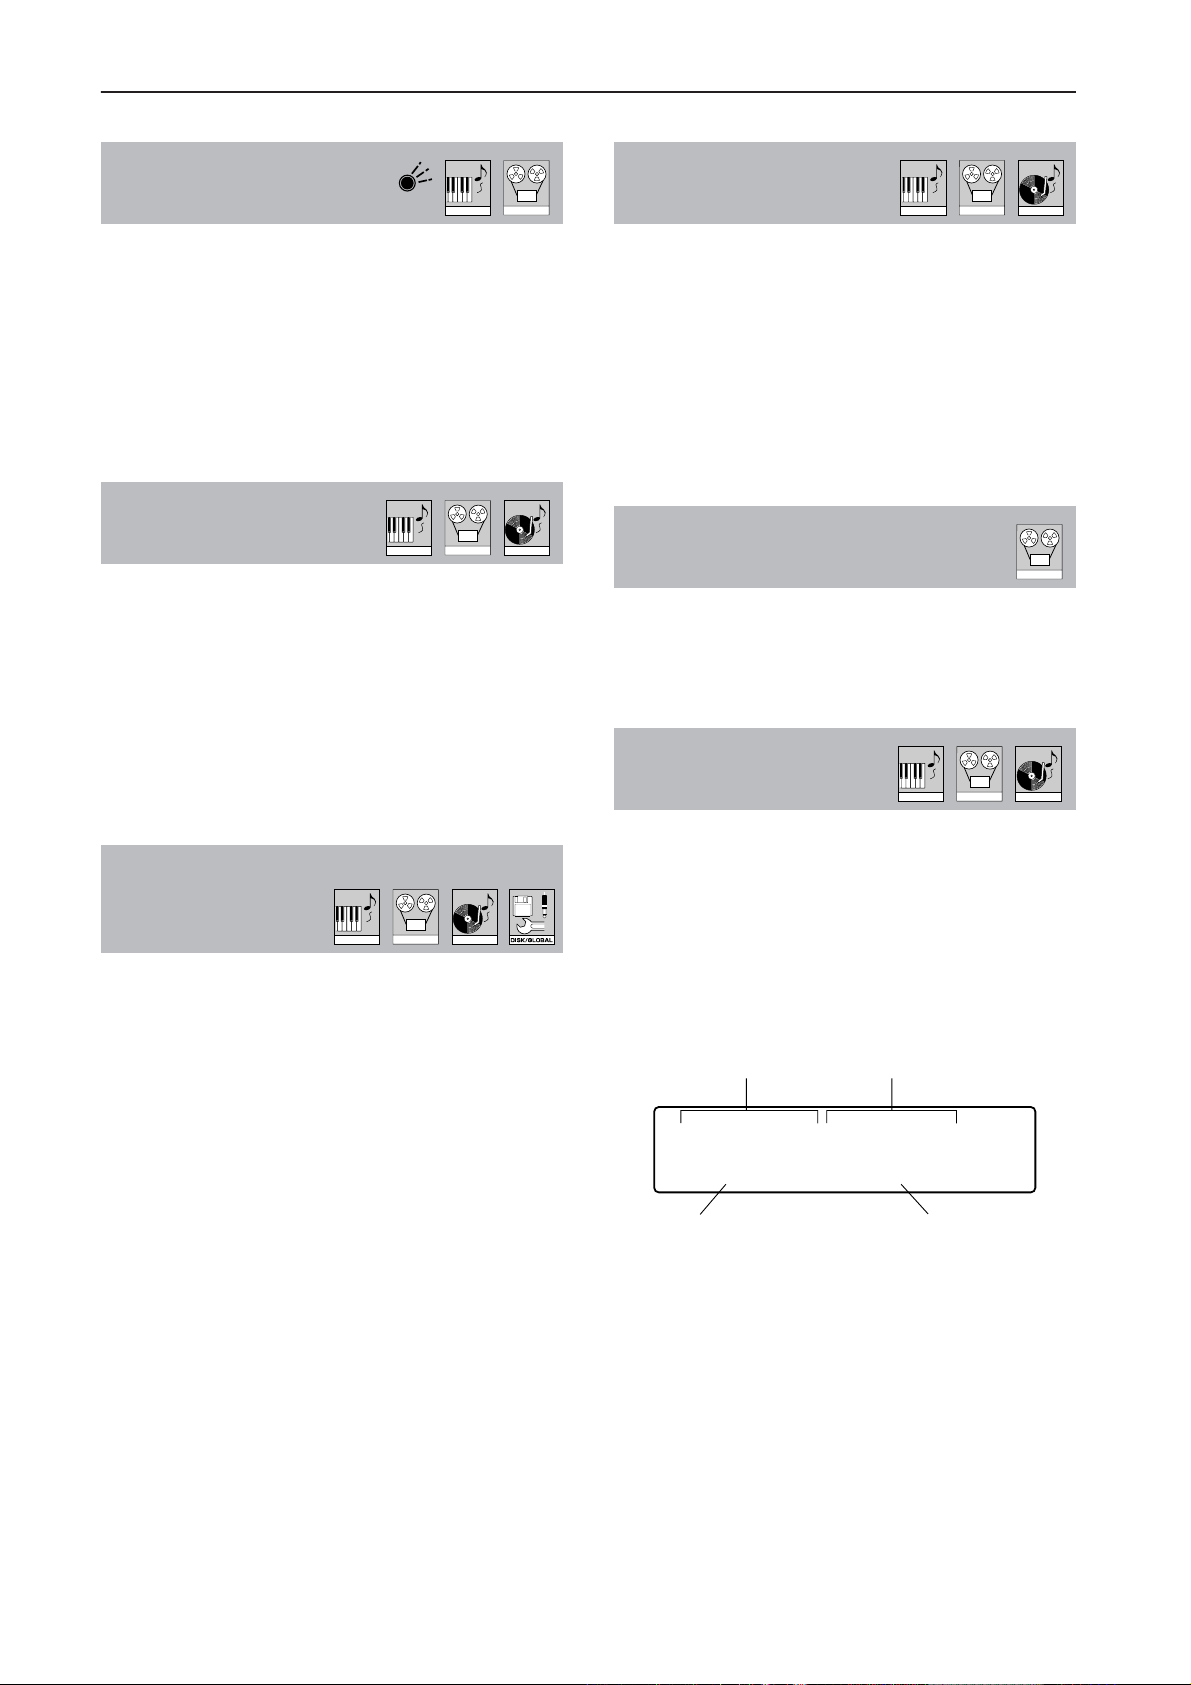
7. Functions, operations and terminology
SYNCHRO START/STOP
ARR.PLAY BACK.SEQ
If you begin playback by pressing this key instead
of the START/STOP key, arrangement play will
begin the instant you play the keyboard, and
arrangement play will stop when you take your
hand off the keyboard.
☞p.24
T
TAP TEMPO
ARR.PLAY BACK.SEQ SONGPLAY
By tapping this key at the desired tempo, you can
set the playback tempo in the range of 40–240.
When you successively tap the TAP TEMPO key
several times, the playback tempo will be automatically set to the timing of your taps. At the same
time, that tempo will be shown in the LCD.
The TAP TEMPO can be used to specify the tempo
during playback or when playback is stopped.
☞p.24
TRACK/CHANNEL
ARR.PLAY BACK.SEQ SONGPLAY
Use these keys to specify the track or channel when
you ar
e making settings such as volume, instru-
mental sound, damper pedal operation, ster
eo position, octave etc. for the part that you wish to play
from the keyboard or a part (track or channel) such
as bass, per
cussion, or drums.
For volume settings, refer to “Volume/Mute”
(p.59). For other settings, refer to the explanations
for “Track settings” of Arrangement Play mode or
Backing Sequence mode in the Refer
ence Guide.
TIE
BACK.SEQ
During backing sequence step recor
ding, pressing
this key will connect (tie) the currently-displayed
step to the previous step (even acr
oss a bar line).
☞Reference Guide p.21
TRANSPOSE (–1/+1)
ARR.PLAY BACK.SEQ SONGPLAY
TEMPO/VALUE (DOWN, UP)
ARR.PLAY BACK.SEQ SONGPLAY
1. During playback in each mode, use these keys to
temporarily modify the tempo.
Pressing the DOWN key will slow down the tempo,
and pressing the UP key will speed up the tempo.
If you simultaneously pr
UP keys, the tempo will be set to AUT if a backing
sequence is being played back, or to REC if you ar
recording.
☞Reference Guide p.20
* By using the KBD LOCK function, you can con-
tinue playing at the same tempo even when a different arrangement is selected.
LOCK”
2. Use these keys to increase or decrease the value of
the setting selected by the cursor, or to select possible settings.
Pressing the DOWN key will decrease the value, or
move backward through the list of possible settings.
essing the UP key will increase the value, or
Pr
move forward through the list of possible settings.
If you simultaneously pr
UP keys, the selected item will be reset to the value
it had when you selected it (when the cursor was
moved to that item).
ess both the DOWN and
☞p.53 “KBD
ess both the DOWN and
By pressing these keys, you can shift the pitch of the
C-900’s keyboard or automatic playback in semitone steps over a range of 11 semitones.
The transpose settings can be viewed in the LCD.
When you press the –1 or +1 key, the following display will appear.
The normal display will reappear approximately 7
seconds after you r
Split point Transpose setting
e
SPLIT:C4 XPOSE:-1
elease this key.
---- UPPER
Muted/unmuted status
of lower timbre
If you simultaneously press both the –1 and +1
keys, the transpose setting will be immediately
reset to 0.
Muted/unmuted status
of upper timbre
58
Page 65
7. Functions, operations and terminology
V
VARIATION (1, 2, 3, 4)
1. Variation
These keys let you select 4 variations to the styles of
the C-900.
While an arrangement is playing, pressing one of
these keys to select a different variation will switch
playback to the selected variation either immedi-
, or from the next beat (depending on the type
ately
of variation).
By setting the Fill parameter of Arrangement Play
mode, you can add variety to the development of
the song by causing a dif
selected automatically after a Fill has been played.
☞Reference Guide p.8 “Variation Change”
The LED of the selected variation will continue
blinking until playback switches to that variation.
ferent variation to be
2. Step input
In step recording of Backing Sequence mode, you
can press these keys to directly specify the step
(note value).
Recording”
VARIA
VARIATION 2 = (half note)
VARIATION 3 = (quarter note)
VARIATION 4 = (eighth note)
☞Reference Guide p.21 “Page 2 Step
TION 1 = (whole note)
ARR.PLAY BACK.SEQ
BACK.SEQ
When either a
display will appear.
Track Sound program name
▲ or ▼ key is pressed, the following
Program group
and number
KB1: Pf00 GrandPiano
Volume=127 UPPER 0
Volume value Play/mute Octave
The upper line of the display shows the arrangement track or extra track (for backing sequence
mode) corr
and the sound pr
track. However in Song Play mode, not the track,
but the MIDI channel and the sound program
assigned to that MIDI channel will be displayed.
The left side of the lower line shows the volume of
the channel as a number fr
127 (maximum) and as a small bar graph.
The right side of the lower line shows whether that
track can be played (PLA
number indicating the octave setting. However if a
KBD1/UPPER or KBD2/LOWER key was pressed,
this ar
(UPPER) or the left hand range (LOWER) can be
played (instead of an indication of PLAY).
If no other keys are pressed, this display will return
to the normal display after appr
onds.
esponding to the key that you pressed,
ea will indicate whether the right hand range
Volume
(bar graph)
ogram that is assigned to that
om 000 (minimum) to
Y) or is muted (----), and a
oximately 7 sec-
Y
VOLUME/MUTE
ARR.PLAY BACK.SEQ SONGPLAY
Use these keys to adjust the volume or muting for
the program selected for each track (or channel, in
the case of Song Play mode). However in Backing
Sequence mode, volume and mute settings can be
made only if the Realtime Recording/Playback
page (the first page) is open.
For any track or channel, pressing the
raise the volume of the program, and pressing the
▼ key will lower the volume of the program. If you
continue to hold these keys, the value will change
continuously.
In addition, by simultaneously pressing both the
and
▼ keys, you can toggle between muting and
unmuting the sound.
Change in the volume and play/muted status are
indicated in the LCD as numerical values and bar
graphs.
▲ key will
▲
YES
ARR.PLAY BACK.SEQ SONGPLAY
Press this key to reply Yes to a confirmation message in the LCD that asks you whether to execute
an operation or continue a process. In Backing
Sequence mode step recor
pressed to finalize a chord you have input.
In displays that allow you to select a sub-page, you
can pr
ess this key to open the sub-page indicated by
the cursor.
☞p.35
ding, this key can be
59
Page 66

7. Functions, operations and terminology
60
Page 67
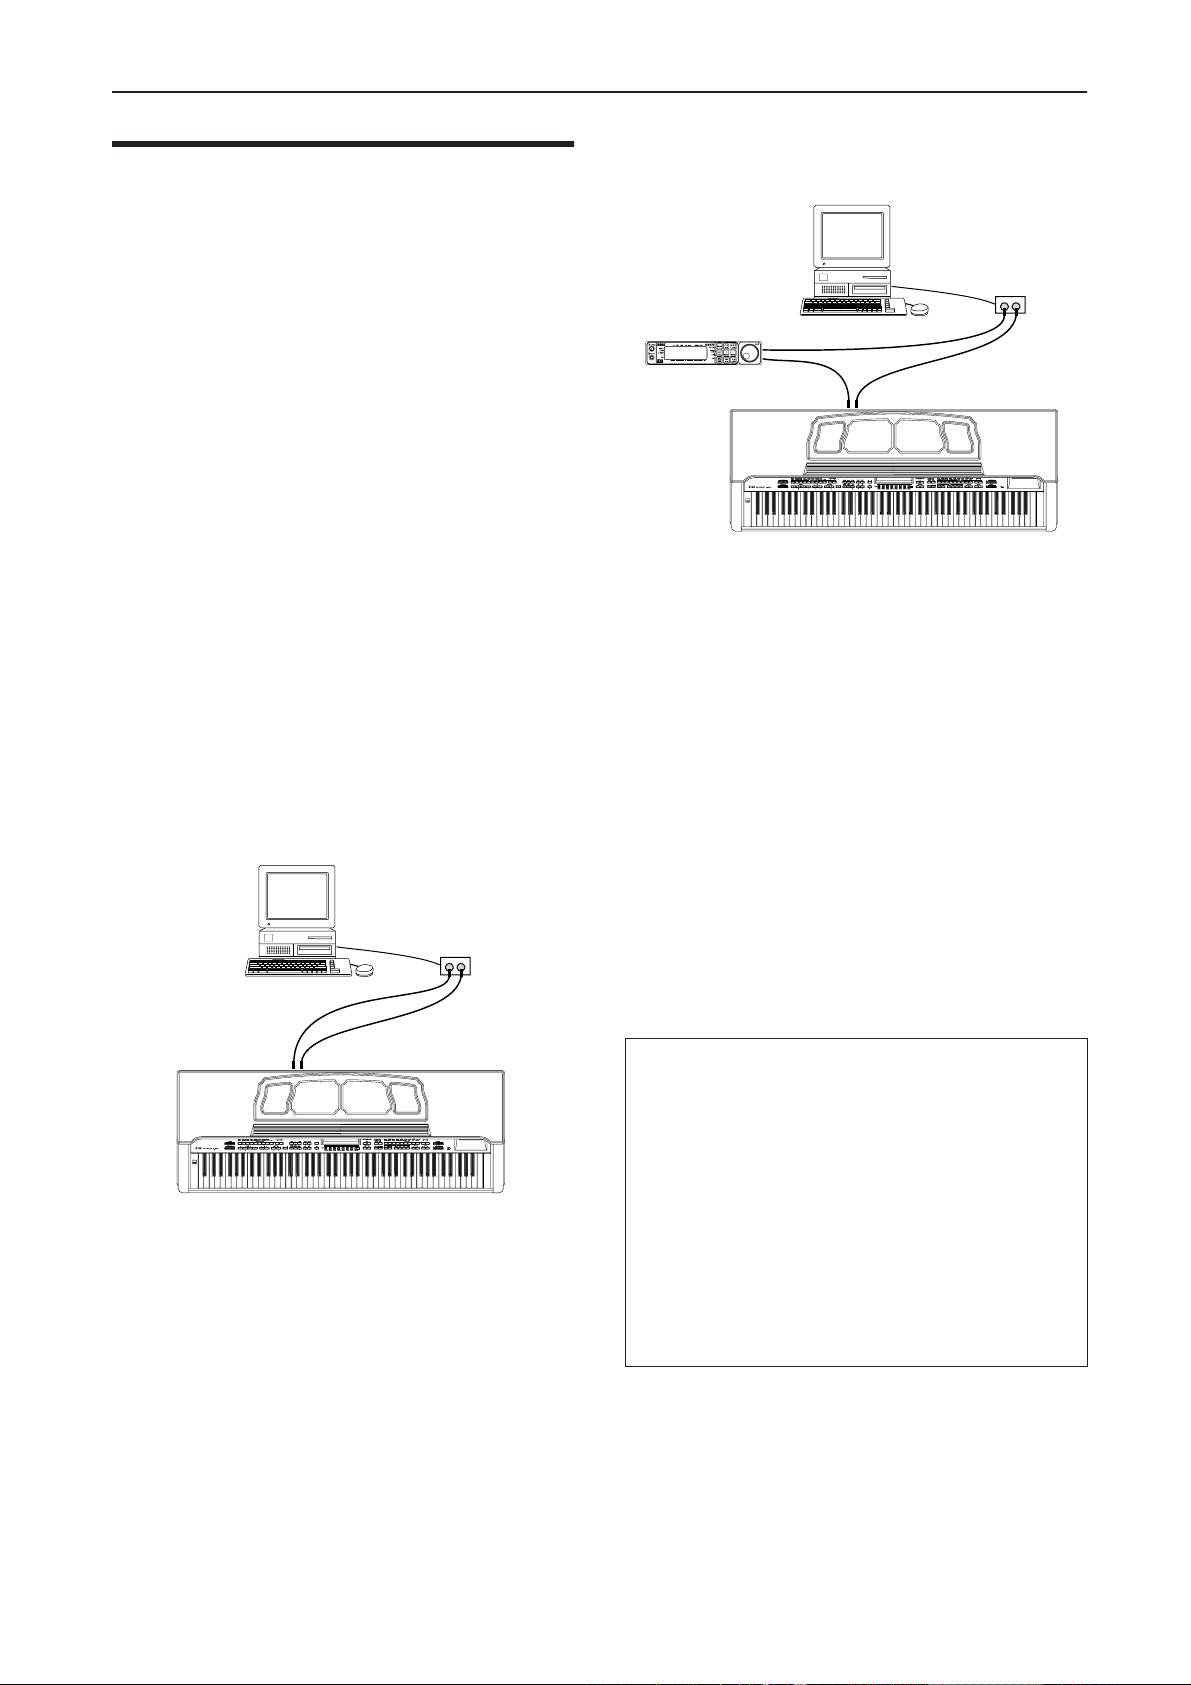
8. MIDI
8. MIDI Applications
If you want to use additional keyboards or sound modules:
Computer
Applications
MIDI (Musical Instrument Digital Interface) is the standard interface used to link electronic musical instruments together.
This chapter deals with possible applications of MIDI
and the
MIDI, there are many well-written books available on
the subject.
Using the C-900 with an external sequencer
As you know, you can use the C-900 Backing Sequence
mode for recording sequences, and the Song Play mode
to play back Standard MIDI File sequences. However,
you may want to use a computer software sequencer to
record your compositions. Usually, these sequencers
offer advanced editing capabilities, but no interactive
functions.
If you will be using the
data into the computer sequencer, make the following
connections:
C-900. For those interested in the details of
C-900 keyboard to enter note
Computer
MIDI Interface
MIDI OUT
MIDI IN
MIDI Interface
MIDI OUT MIDI IN
MIDI IN
MIDI THRU
MIDI IN MIDI OUT
In this setup, data from the
from the
C-900 MIDI OUT jack, and is received by the
C-900 keyboard is sent
MIDI IN jack of the computer’s MIDI interface. When
playing back sequences, MIDI data from the computer
is sent via the MIDI interface’s MIDI OUT jack, and is
received by the sound module’s MIDI IN jack. This
data is then passed on from the sound module’s MIDI
THRU jack to the
C-900 MIDI IN jack.
The Global channel for Backing Sequence mode and
the MIDI channels for each track can be set in Disk/
Global mode. When r
nal device to play the
figuration of the
eceiving SMF data from an exter-
C-900, set the MIDI channel con-
C-900 in Song Play mode. You can
specify initial program, volume, panpot, and effect
send values in the song itself, or you can send these
messages from the computer via MIDI.
For a list of the
C-900’s programs and the MIDI bank
number and MIDI program number that corresponds
to each program, refer to the “Program list” in appendix D of the Reference Guide.
MIDI IN MIDI OUT
In this setup, data from the
from the
C-900 MIDI OUT jack, and is received by the
C-900 keyboard is sent
MIDI IN jack of the computer’s MIDI interface. When
playing back sequences, MIDI data from the computer
is sent via the MIDI interface’s MIDI OUT jack, and is
received by the
C-900 MIDI IN jack.
When using the above setup, it is recommended to set the C-900
Local Control parameter to OFF. (This parameter can be found in
Disk/Global mode.) Set the computer sequencer to echo the data it
receives from the MIDI IN jack, back to the MIDI OUT jack. The
parameter that controls this function has a different name depending on the software you use. Some common names are echo back,
patch thru, echo on, etc.
By turning Local Control off
C-900 keyboard and its tone generator. This way, the C-900 acts as
a separate MIDI keyboard and independent tone generator. The
sequencer’s echoing function allows you to play the
generator, as well as the MIDI sound module’s tone generator, from
C-900 keyboard. If the sequencer’s echoing function is turned
the
on, and the
notes will be played by the
sent out from its keyboard.
C-900 Local Control parameter is also set to ON, two
, you break the connection between the
C-900 tone
C-900 tone generator for every one note
61
Page 68

8. MIDI Applications
Using the C-900 to control other MIDI instruments
You can use other MIDI instruments to play the C-900
arrangements and backing sequences. Just make sure
to match the MIDI channels to the correct tracks. Also,
use the Track Status parameter of each mode to determine whether the
addition to those of the other MIDI device.
You can find the Track Status parameter on Page 4 of
Arrangement Play mode.
When this parameter is set to OFF, the corr
track will not play at all. When set to INT, only internal
C-900 sounds will be played. When set to EXT, signals
will be sent to external MIDI instruments only. When
set to BOTH, both internal
instrument sounds will play.
Be aware that playback results will vary depending on
the MIDI instruments used. For example, the
drum mapping feature may not produce the sounds
you expect if the external MIDI instrument does not
have the same drum kit layout.
C-900 will play its own sounds in
esponding
C-900 and external MIDI
C-900
What is General MIDI?
About Standard MIDI Files
Refer to “Functions, operations and terminology” p.57.
Standard MIDI files can be played back in Song Play
mode.
☞Reference Guide p.39 “Song Play Mode”
Use the Song Play mode to play a standard MIDI file.
Use the Convert to SMF function to convert and save a
backing sequence into a format 0 Standar
☞Reference Guide p.37 “Page 14 Converting to a Standard MIDI File”
d MIDI File.
The C-900 is compatible with the GM system.
GM (General MIDI System Level 1) is a world-wide
standard which standardizes the sound map of tone
generators etc. to ensur
beyond individual manufacturers and specific models.
MIDI tone generators and song data which are compatible with GM will carry the “GM” logo. Song data carrying this logo can be played back on any tone
generator which carries the “GM” logo to produce
essentially the same musical result.
On the
(GM Kit) correspond to these sounds.
On the
patible sounds. (MIDI bank numbers 1, 3, and 4 contain
C-900 original programs, and bank number 2 contains
drum kits.) For a list of these sounds, refer to “Program
list” in appendix D.
★ Playing GM sequence data
You can use Song Play mode to play GM sequences
directly from the
sequences have been saved as format 0 Standard MIDI
Files.
You can also use the
sequence data from an external sequencer.
C-900, the 128 GM sounds and DRUM KIT “01”
C-900, MIDI bank number 0 contains GM com-
e basic consistency that goes
C-900 disk drive, as long as the
C-900 Song Play mode to play GM
62
Page 69
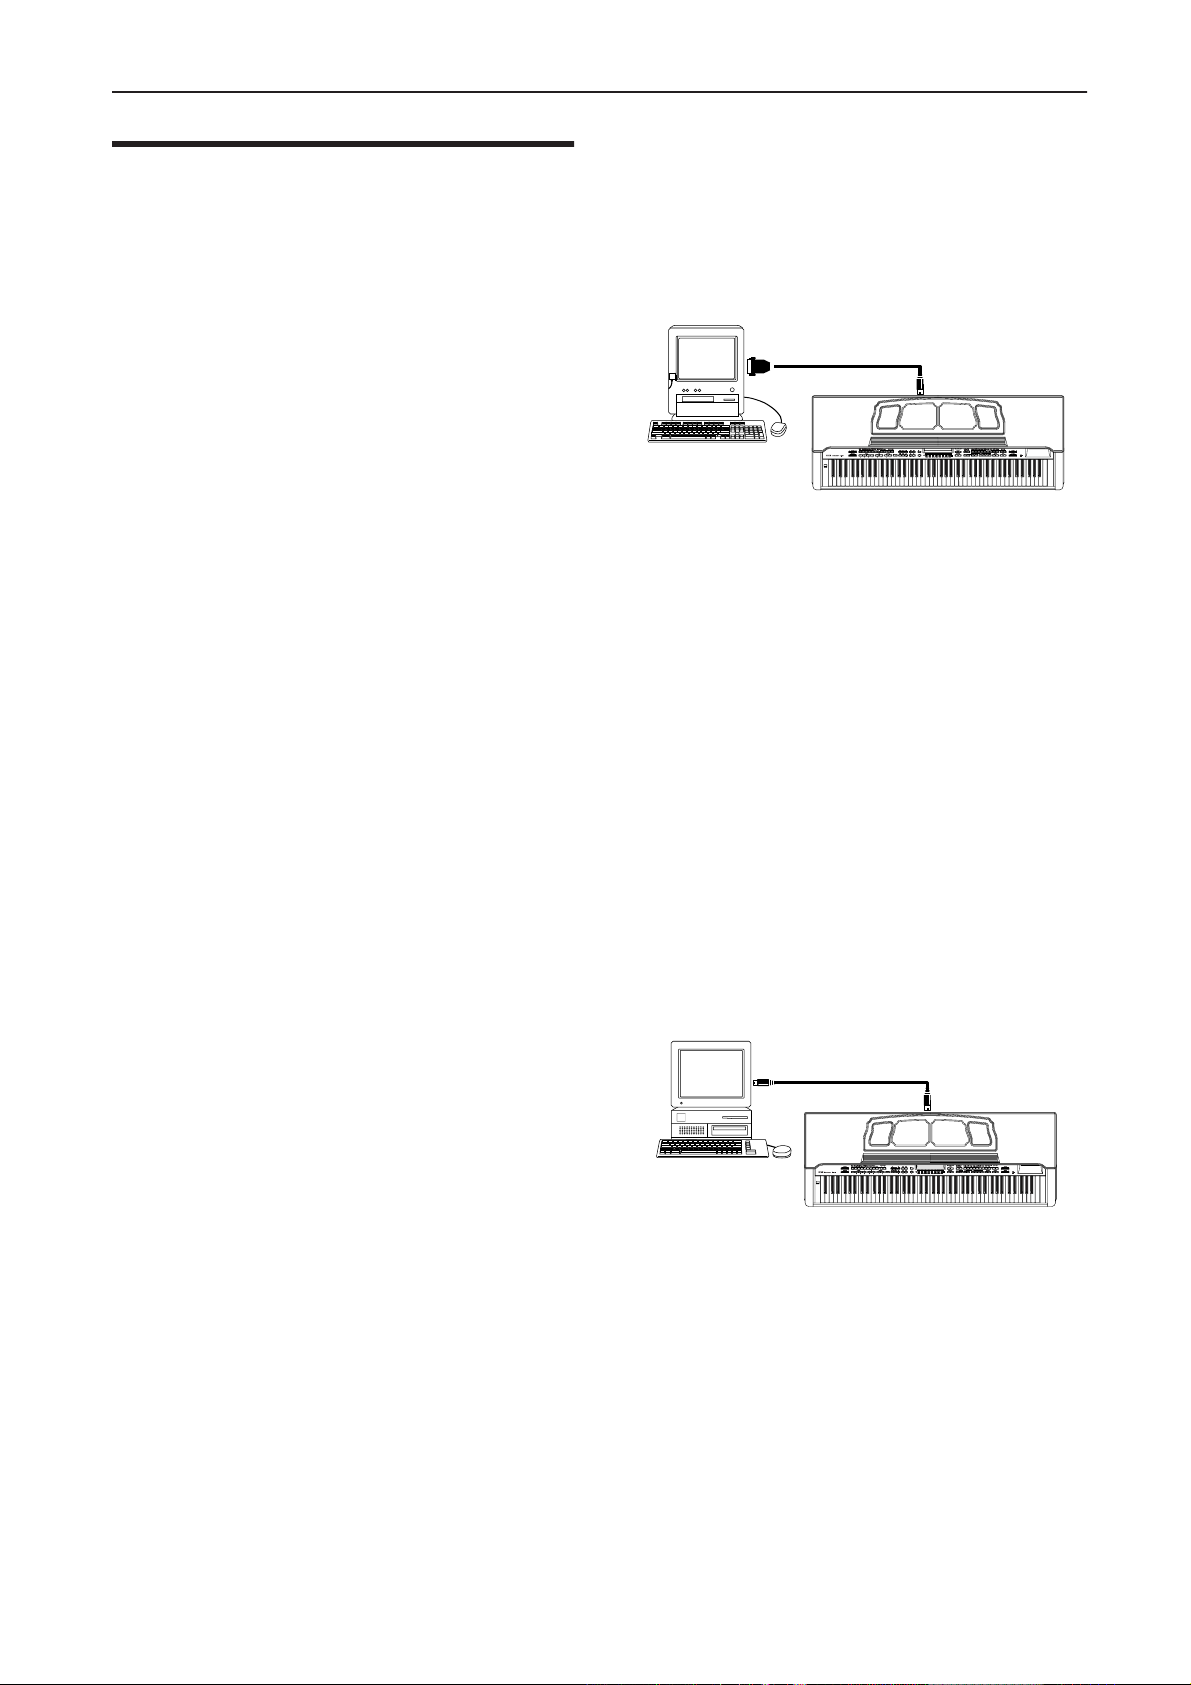
9. Connections with a computer
Connection to an IBM PC (com-
9. Connections with
a computer
If a special cable is used to connect the C-900 to a computer, you can play the
record keyboard playing from the
puter.
IBM PC (compatible):
Connection kit AG-001B (connection cable and
“Korg MIDI Driver” driver software)
Apple Macintosh series:
Connection kit AG-002B (connection cable and
“Korg MIDI Driver” driver software)
* Depending on the type of computer and the applica-
tion software, such use may not be possible.
* Do not connect both the MIDI OUT and the TO
HOST connectors of the
device. Be sure to connect only one or the other.
C-900 from the computer or
C-900 into the com-
C-900 to the same external
patible) via the AG-001B
Use the special connection cable (AG-001B) to connect
the serial port (COM port) of the IBM PC (compatible)
to the TO HOST connector of the
IBM PC (Compatible)
COM
Dedicated connection cable
(AG-001B)
* Be aware that such use may not be possible, depend-
ing on the type of computer or application
(sequencer). Applications which are not compatible
with W
connection.
* If the serial port of your computer has a 25 pin con-
nector, you will need to use a 9 pin–25 pin adapter.
When connecting the
set the Disk/Global mode Host BR parameter to
“38.4 k” (
If you are using Windows, you will need to install the
Korg MIDI Driver. For the installation pr
to p.64.
indows cannot be used with this method of
C-900 to an IBM PC (compatible),
☞Reference Guide p.60).
C-900.
TO HOST
ocedure, refer
Connection to an Apple Macintosh via the AG-002B
Use the special cable (AG-002B) to connect the modem
port or printer port of the Apple Macintosh to the TO
HOST connector of the
Apple Macintosh
Modem port or
printer port
When connecting the
the Disk/Global mode Host BR parameter to “31.25 k”
(
☞Reference Guide p.60).
C-900.
Dedicated connection cable
(AG-002B)
C-900 to an Apple Macintosh, set
TO HOST
63
Page 70
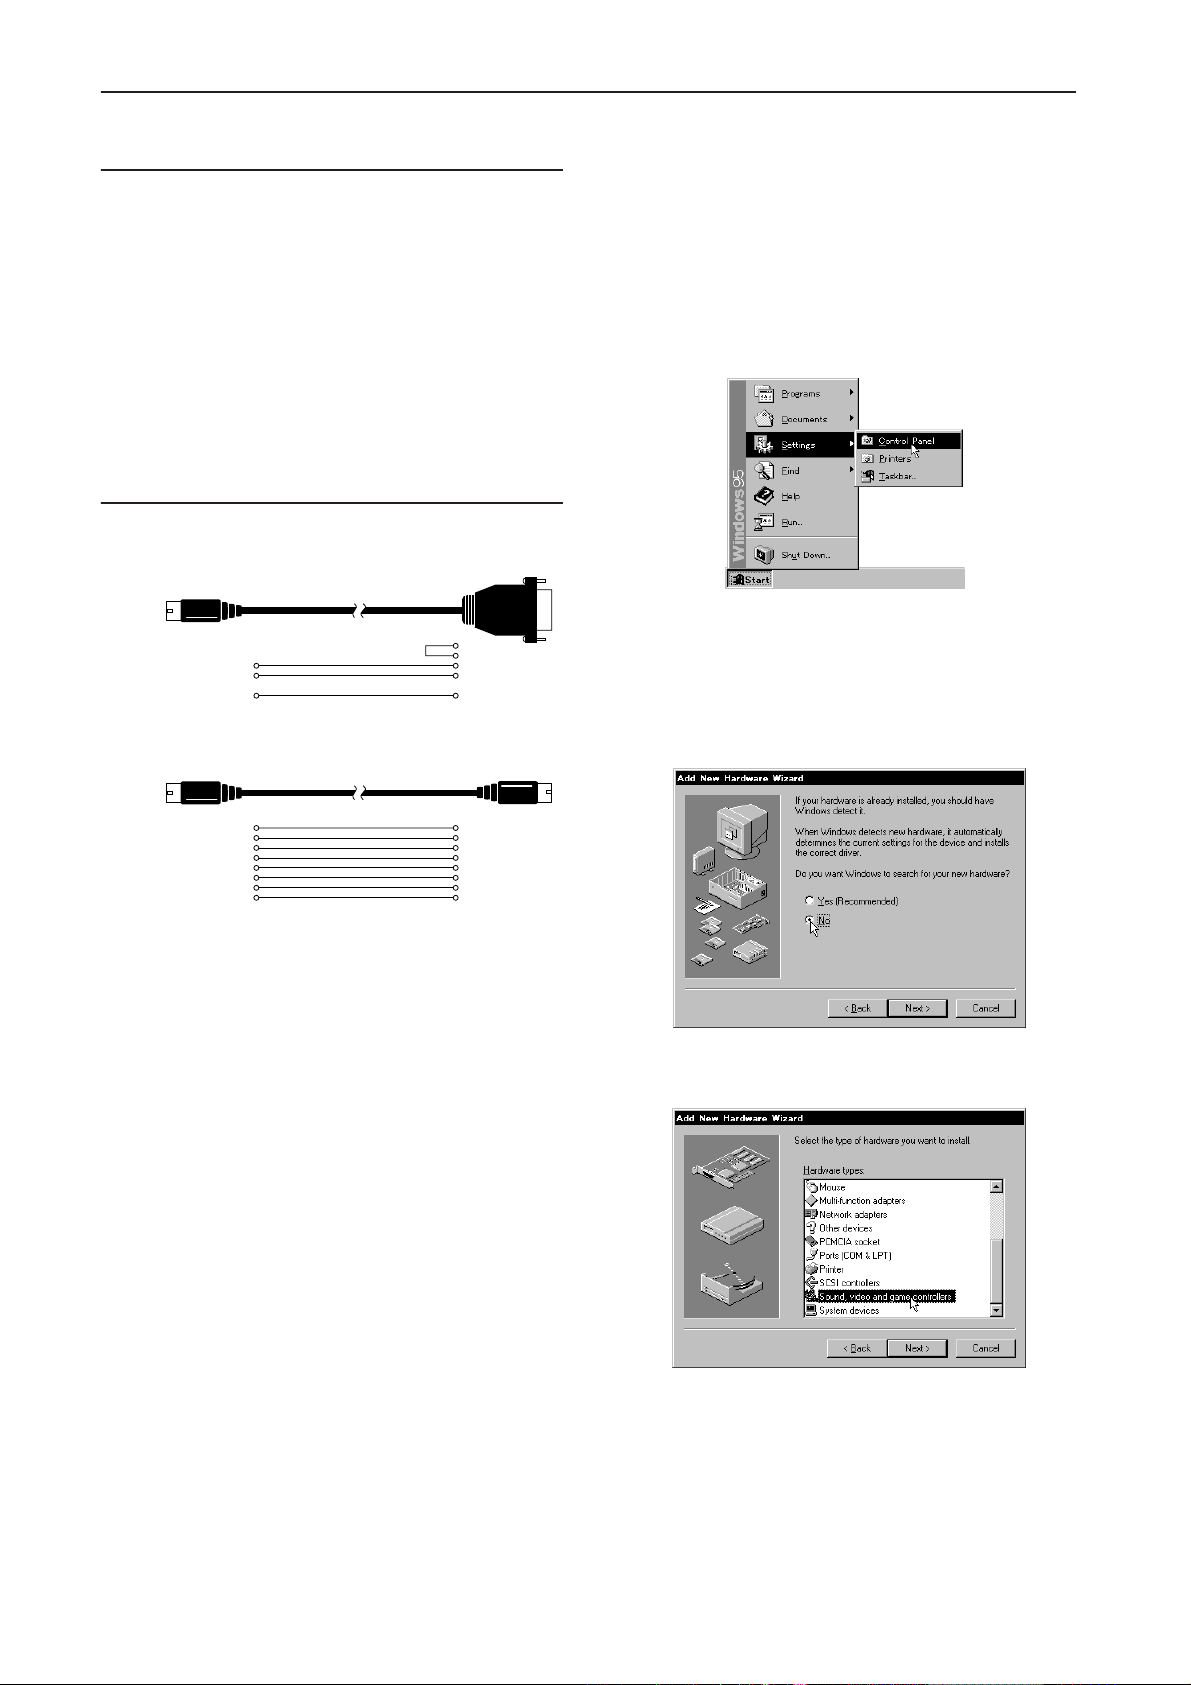
9. Connections with a computer
HOST BR settings
1. Press the DISK/GLOBAL key to enter Disk/Global
mode.
2. Use the PAGE +/– keys to access the Local/Clock/
Host BR display.
3. Use the CURSOR
√√√√/®®®® keys to select Host BR.
4. Use the VALUE UP/DOWN keys to set the value.
31.25k: Connection to an Apple Macintosh
38.4k: Connection to an IBM PC (compatible)
Wiring diagrams for special connection
cables
(1) AG-001B (for IBM PC or Compatible)
Mini DIN 8-pin
3
4
5
(2) AG-002B (for Macintosh)
Mini DIN 8-pin
D-SUB 9-pin
8
7
2
5
3
Mini DIN 8-pin
Korg MIDI Driver installation and setup
1. Installing the Korg MIDI Driver into
Windows 95
1 Click the [Start] button in the taskbar, and in [Set-
tings], click [Control Panel].
2 In the control panel, double-click the [Hardware]
icon to start up the hardware wizard, and then click
[Next>].
3 In response to the question “Automatically detect
new hardware?” be sure to reply “No,” and then
click the [Next>] button.
1
2
3
4
5
6
7
8
2
1
5
4
3
8
7
6
4 Select [Sound, video and game controllers], and
click the [Next>] button.
64
Page 71
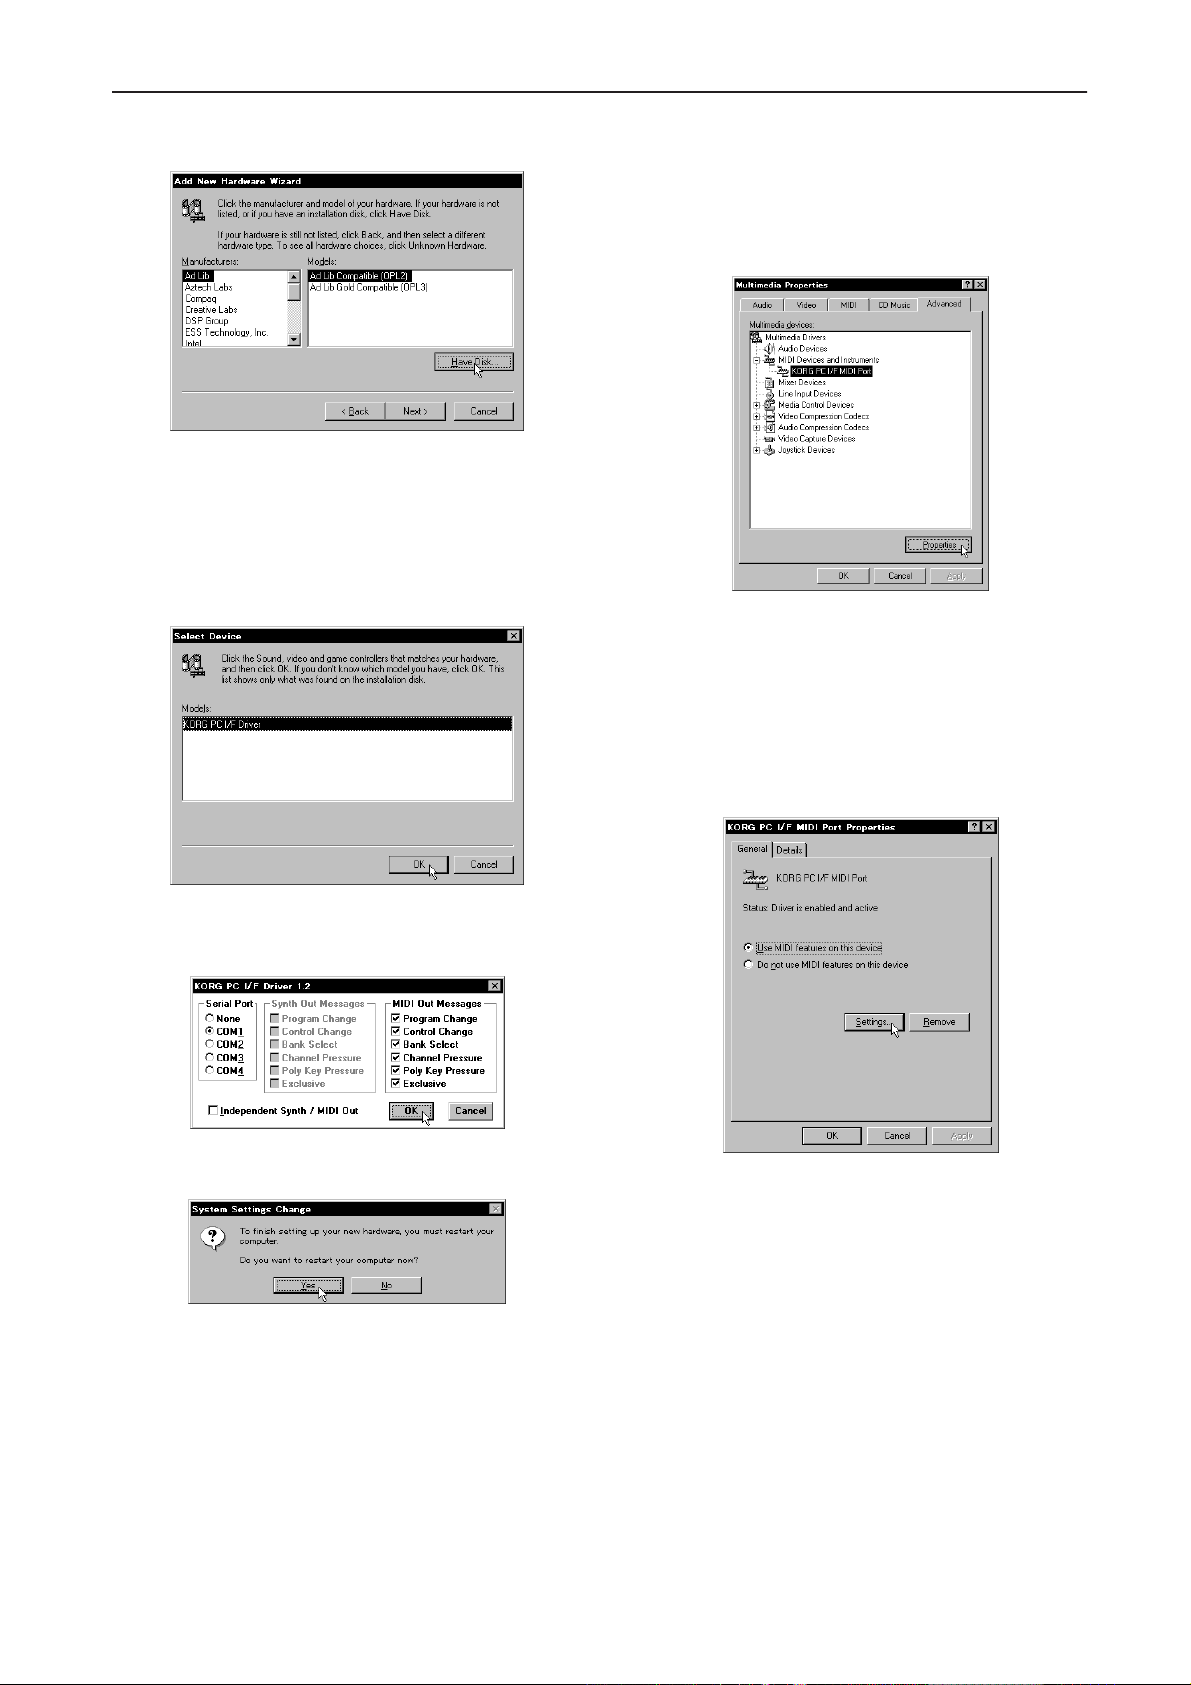
9. Connections with a computer
5 Click [Have Disk].
A dialog box will appear, allowing you to specify
the drive and directory.
6 Insert the disk included with the AG-001B into the
disk drive of the computer. If the disk was inserted
into drive A, type “A:\” (or if drive B, type “B:\”)
and click the [OK] button.
7 Click the [OK] button and click [OK].
Modifying the Korg MIDI Driver setup for Windows 95
1 In the control panel, double-click the [Multimedia]
icon, and the multimedia properties dialog box will
appear.
2 Click the [Advanced] tab located at the upper right.
3 Click the [+] for [MIDI Devices] (the display will
change to [–]), and click [KORG PC I/F MIDI Port].
4 Click the [Properties] button.
The KORG PC I/F MIDI Port properties will be displayed.
5 Click the [Settings] button.
8 Perform the setup as directed in “Setting up the
Korg MIDI Driver (Windows)” (refer to p.66) and
click the [OK] button.
9 Be sure to restart your computer so that the driver
will take effect.
Perform the setup as directed in “Setting up the
Korg MIDI Driver (Windows),” and click the [OK]
button.
If you have modified the settings, you must re-start
Windows.
65
Page 72
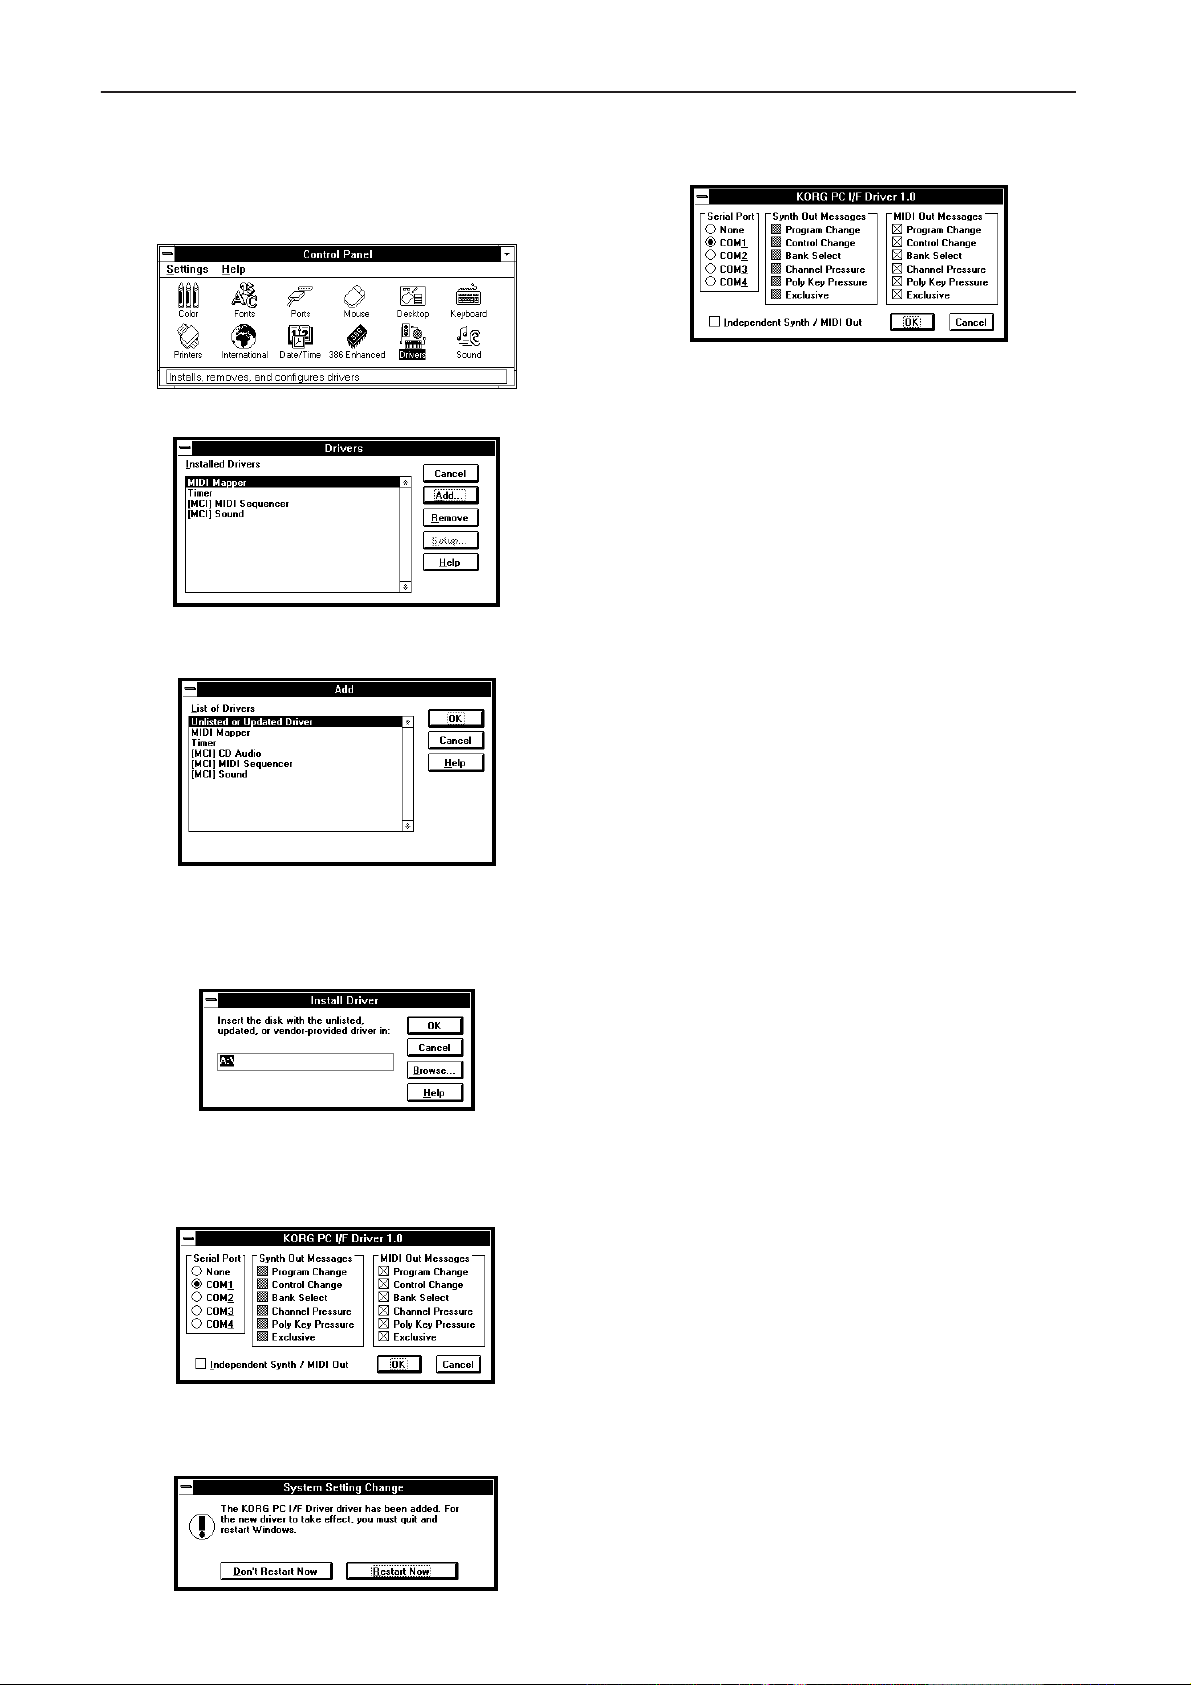
9. Connections with a computer
2. Installing the Korg MIDI Driver into Windows 3.1
1 In the control panel, double-click the Driver icon.
2 Click the [Add...] button.
3 In the driver list, select [Unlisted or updated driver]
and click the [OK] button.
Setting up the Korg MIDI Driver (Windows)
1 For the Serial Port setting, select the serial port to
which the C-900 is connected ([COM1]–[COM4]).
If you wish to use the serial port for another purpose after installing the Korg MIDI Driver, select
[None] to disable the driver
2 If [Independent Synth/MIDI Out] box is checked,
uncheck it.
If this box is checked, malfunctions will occur.
3 [MIDI Out Messages] allows you to select the types
of message that will be transmitted to the C-900.
4 When you finish making settings, click the [OK]
button. If you wish to cancel your settings, click
[Cancel].
.
4 Insert the disk included with the AG-001B into the
disk drive of the computer. If you inserted the disk
into drive A, type “A:\” (for drive B, type “B:\”),
and click the [OK] button.
5 Select Korg PC I/F Driver, and click the [OK] but-
ton. The setup window will appear. Follow the
directions in “Setting up the Korg MIDI Driver
indows)” to perform the setup.
(W
6 After setup is complete, remove the disk and select
[Restart] to make the newly installed driver available.
66
Page 73
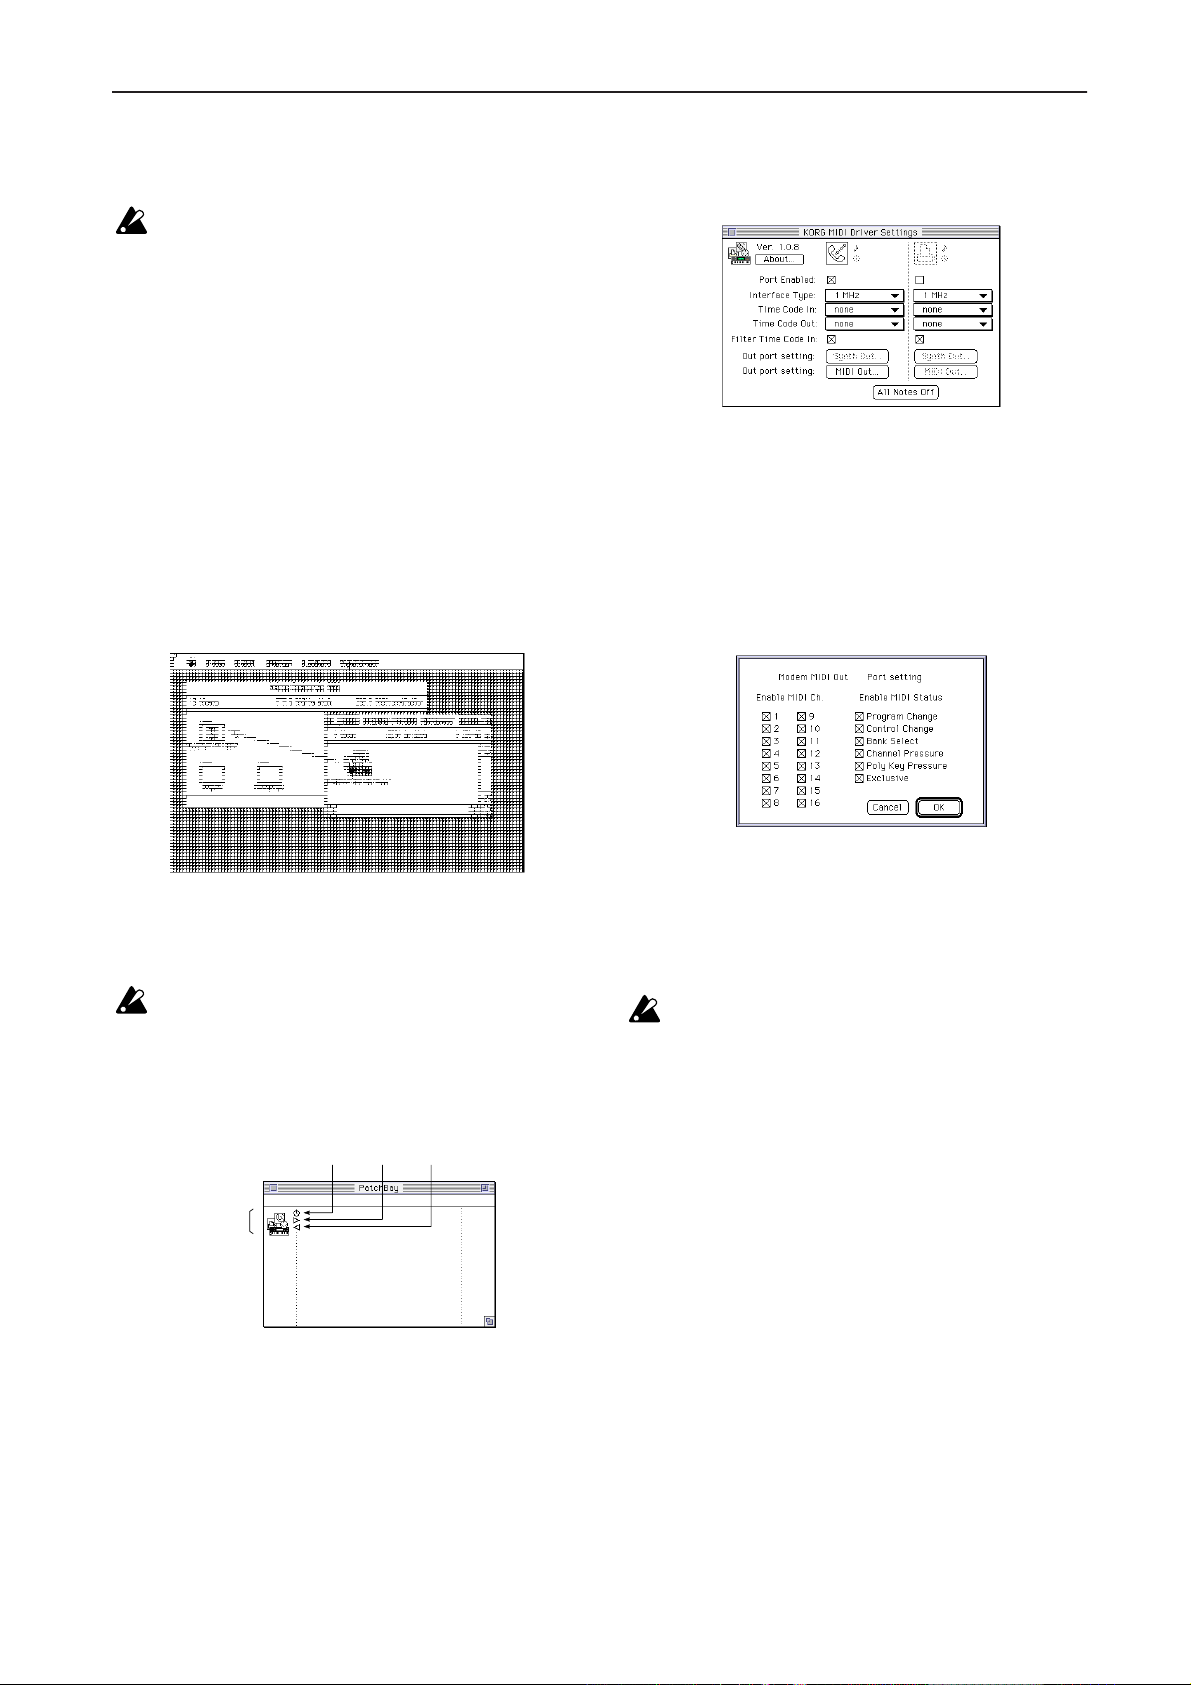
9. Connections with a computer
3. Installing the Korg MIDI Driver into a Macintosh
In order to use the Korg MIDI Driver, the Apple
MIDI Manager and PatchBay must already be
installed. Use the versions of Apple MIDI Manager and PatchBay that are included with your
MIDI application. They ar
AG-002B.
When the Korg MIDI Driver is used, the “Modem
MIDI Out/Port setting” dialog box will allow you
to specify the MIDI channels and types of messages which will be transmitted to the
you do not need this functionality, you can simply use the Apple MIDI Driver without the Korg
MIDI Driver. When using the Apple MIDI Driver
or when using a MIDI application (sequencer)
which does not use the Apple MIDI Manager.
1 Copy the Korg MIDI Driver from the disk included
with the AG-002B into the system folder of your
startup disk.
e not included with the
C-900. If
2 In PatchBay, double-click the KORG MIDI Driver
icon.
The setup dialog box will appear.
3 Check the Port Enable box for the port to which the
C-900 is connected, and specify [1 MHz] .
,
not select [KORG PCIF].
Since the
C-900 does not contain a KORG PC IF, do
4 Press the [Out Port Setting] button.
The following dialog box will appear. Here you can
select the MIDI channels/messages which will be
output to each port. Only those channels/messages
whose box is checked will be output.
2 If there is a copy of Apple MIDI Driver in your sys-
tem folder, either delete it, or move it to another
folder. Be careful not to delete or move the
Apple
MIDI Manager.
The Korg MIDI Driver includes the functionality
of the Apple MIDI Driver.
3 From the Special menu, select “Restart.”
Setting up the Korg MIDI Driver (Macintosh)
1 Start up PatchBay.
Time Port MIDI In Port
Connected Port
Modem Port
Printer Port
If installation has been performed correctly, the
KORG MIDI Driver icon shown above will appear
in the PatchBay window when PatchBay is started
up. (The modem and printer ports will be displayed
dif
ferently depending on the setup condition.)
MIDI Out Port
5 When you have finished making settings, click the
[OK] button.
6 Start up your MIDI application (sequencer), and
drag the mouse from the “w“ of the your MIDI
application’s Out Port to connect it to the MIDI Out
of the MIDI Driver.
For details on using PatchBay, refer to “About
PatchBay...” etc. in the Apple menu.
To use the Apple MIDI Driver, you must first
delete or move the Korg MIDI Driver if it exists in
your system folder. Then start up PatchBay, double-click the Apple MIDI Driver icon that
appears, check Enabled for the Port to which the
C-900 is connected, set Interface Type to [1 MHz],
and close the dialog box. In PatchBay, drag the
mouse from the OutPort “
w“ of the MIDI appli-
cation (sequencer) to connect it to MIDI Out.
If you are using a MIDI application (sequencer)
which does not use Apple MIDI Manager,
select the Port to which the
C-900 is connected,
and set the Clock setting to [1 MHz].
67
Page 74
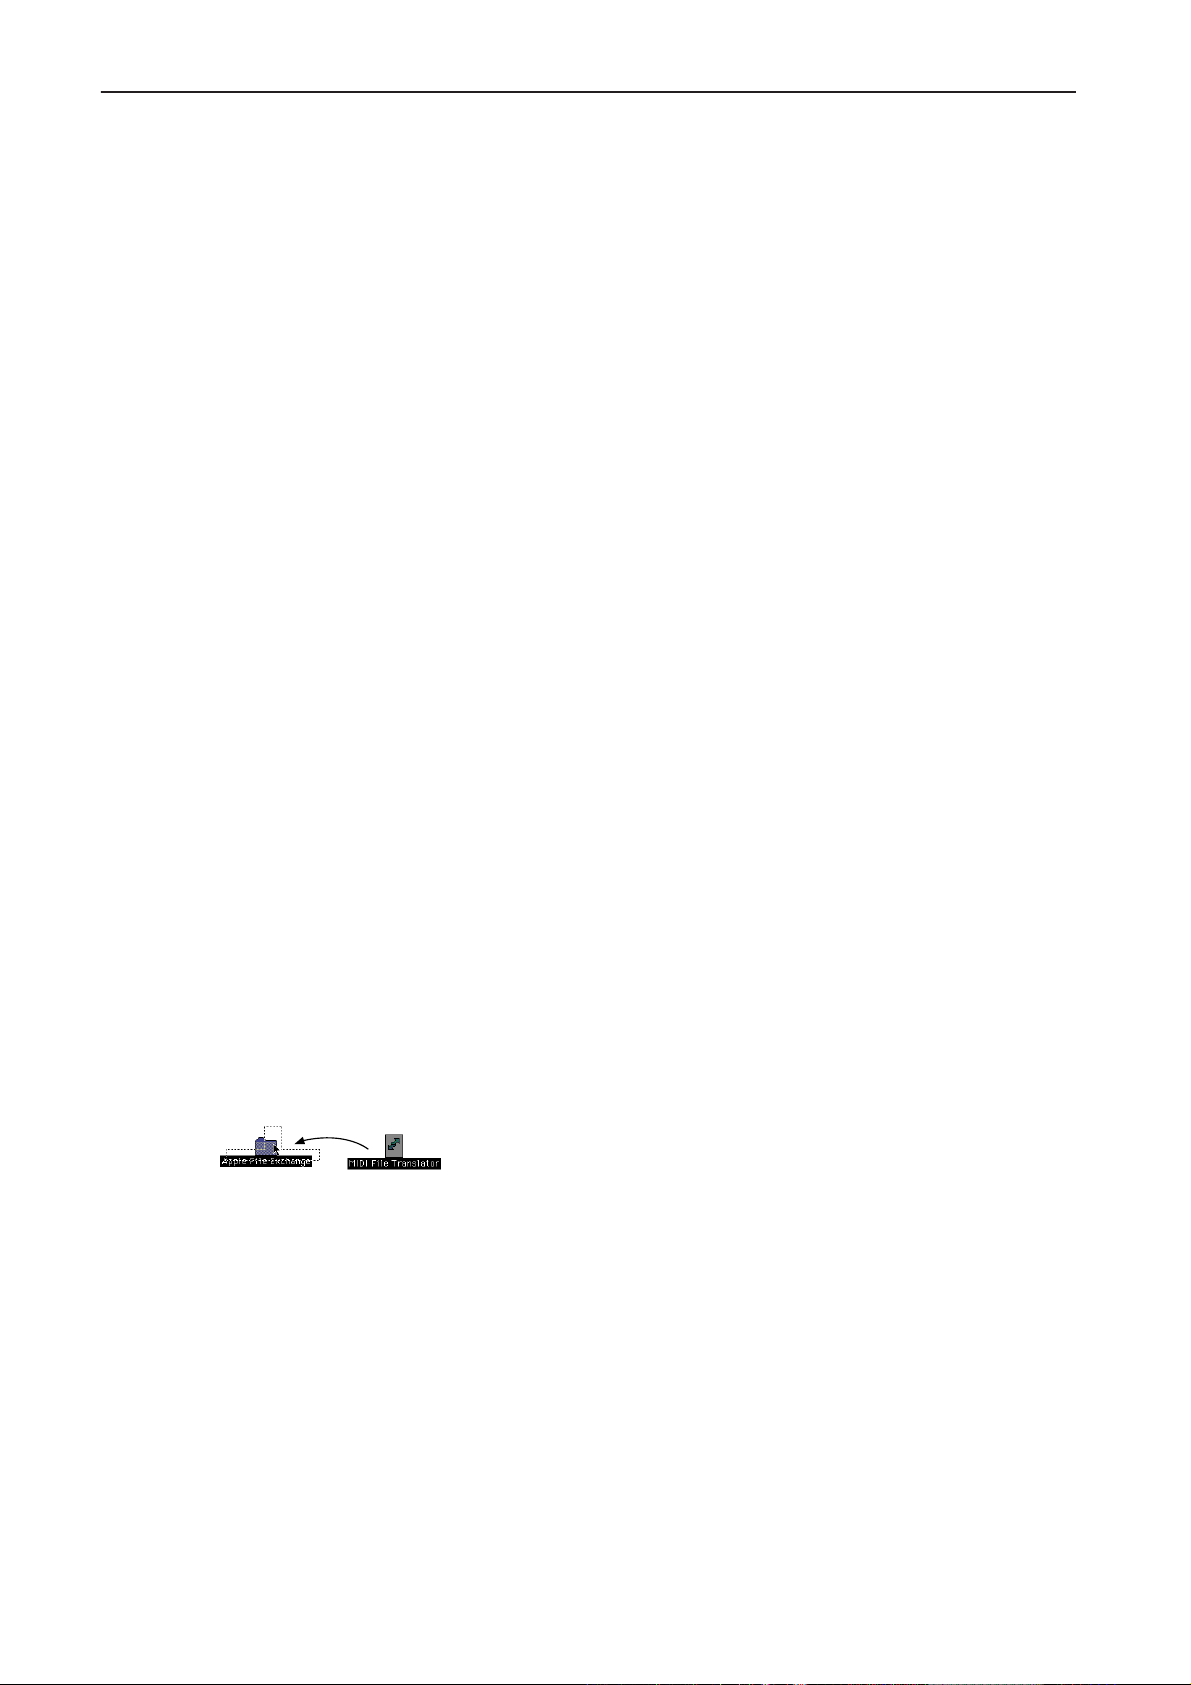
9. Connections with a computer
Using PC Exchange to convert SMF data
Most commercially available Standard MIDI File
(SMF) song data is saved in MS-DOS format.
You can use PC Exchange to make MS-DOS format
SMF song files recognizable by the Macintosh.
1 In the control panel, open PC Exchange.
The PC Exchange control panel will appear.
2 Press the [Add...] button.
The [Specify application associated with DOS
extension] window will appear.
3 Input “.MID” into the DOS extension field.
In order to distinguish different types of file, MSDOS adds an extension consisting of a period and
thr
ee characters to the end of the filename. It is customary for SMF data to have an extension of
“.MID”
4 From the list that appears in the lower part of the
dialog box, select your SMF-compatible MIDI application (sequencer).
The selected icon will appear in the Application
field.
5 From the [Document type] popup menu, choose
[Midi], and click the [OK] button.
The item which was added to the PC Exchange
window will appear, and has now been register
Now when an MS-DOS SMF disk is inserted into
the disk drive, it can be used immediately.
For details refer to the documentation for “Macintosh PC Exchange.”
ed.
About the MIDI File Translator included with the
AG-002B
If the Macintosh you are using does not have PC
Exchange but does have Apple File Exchange, you
can use the MIDI File Translator included with the
AG-002B to convert MS-DOS SMF data.
1 Put the MIDI File Translator into the same folder as
Apple File Exchange.
2 Double-click Apple File Exchange to start it up.
3 Insert the MS-DOS disk that you wish to convert
into the disk drive.
Be sure to insert the MS-DOS format disk into the
disk drive only after Apple File Exchange has
already started up.
4 Select the song file that you wish to convert.
5 Press the “<<Convert<<” (or “>>Convert>>”) but-
ton located in the center.
Conversion will begin. When the bar graph reaches
100%, conversion is complete. The converted fi
will appear in the left-hand box.
6 Exit Apple File Exchange.
le
68
Page 75

10. Specifications and options
10. Specifications and
options
Tone generation method AI2 synthesis (full digital processing)
Tone generator 32 voice, 32 oscillator (single mode)
16 voice, 32 oscillator (double mode)
Keyboard 88 note (velocity sensitive)
Waveform memory 14 Mbytes of PCM ROM
Effects Two stereo digital multi-effect systems, 48 effect types
Programs 128 GM programs and 1 GM drum program built into
ROM
199 programs and 13 drum programs in ROM
64 user programs and 2 user drum programs in RAM
Arrangements 128 types in ROM
64 user arrangements in RAM
Backing sequences 10 sequences in RAM
Backing sequence capacity 40,000 events
Song data 16 channels, 16 timbres (dynamic voice allocation)
Controllers Assignable pedal/switch, EC5
Audio output OUTPUT (L/MONO, R) *1, Headphones × 2
Audio input INPUT (L/MONO, R), MIC INPUT
MIDI IN, OUT
PC interface TO HOST
Floppy disk drive 3.5 inch 2DD/3.5 inch 2HD (IBM PC 1.44 MB)
LCD Backlit LCD, 20 characters × 2 lines
Main amp 40 W × 2
Speakers 20 cm × 2, 5 cm × 2
Power supply 117 V 220~240 V
Power consumption 100 W 95 W
Included items Preloaded program data disk CFD-01P, Special stand
Dimensions 1,412 (width) × 528 (depth) × 906 (height) mm
Weight 62.0 kg (including stand)
Optional items EC5 external controller, DS-1H damper pedal, PS-1
pedal switch, EXP-2 expression pedal, XVP-10 expression pedal
*1
*1
*1
: Phone plug
Specifications are subject to change without notice.
69
Page 76
NOTICE
KORG products are manuf actured under strict specif ications and v oltages required by
each
country . These products are w arranted by the K ORG distrib utor only in each
country . Any
number disqualif ies the
and liability . This requirement is for your o wn protection and safety .
KORG product not sold with a w arranty card or carrying a serial
product sold from the manuf acturer’ s/distrib utor’ s warranty
KORG INC.
15 - 12, Shimotakaido 1 - chome, Suginami-ku, Tokyo, Japan.
©1998 KORG INC.
1002 GH Printed in Japan
 Loading...