


 Loading...
C-520
User’s Manual
E F G I 1

English
User’s Manual
Français
Mode d’emploi
Deutsch
Bedienungseinleitung
Italiano
Manuale di istruzioni
DIGITAL PIANO
 User’s Manual

PRECAUTIONS
Location
Using the unit in the following locations can result in a malfunction.
•In direct sunlight
•Locations of extreme temperature or humidity
•Excessively dusty or dirty locations
•Locations of excessive vibration
Power supply
Please connect the designated AC adapter to an AC outlet of the correct voltage. Do not connect it to an AC outlet of voltage other than that for which your unit is intended.
Interference with other electrical devices
This product contains a microcomputer. Radios and televisions placed nearby may experience reception interference. Operate this unit at a suitable distance from radios and televisions.
Handling
To avoid breakage, do not apply excessive force to the switches or controls.
Care
If the exterior becomes dirty, wipe it with a clean, dry cloth. Do not use liquid cleaners such as benzene or thinner, or cleaning compounds or flammable polishes.
Keep this manual
After reading this manual, please keep it for later reference.
Keeping foreign matter out of your equipment
•Never set any container with liquid in it near this equipment. if liquid gets into the equipment, it could cause a breakdown, fire, or electrical shock.
•Be careful not to let metal objects get into the equipment. If something does slip into the equipment, unplug the AC adapter from the wall outlet. Then contact your nearest Korg dealer or the store where the equipment was purchased.
DISCLAIMER
The information contained in this manual has been carefully revised and checked through. Due to our constant efforts to improve our products, the specifications might differ to those in the manual. Korg is not responsible for any eventual differences found between the specifications and the contents of the instruction manual - the specifications being subject to change without prior notice
WARRANTY
KORG products are manufactured according to the strictest electrical and mechanical regulations that exist in various countries of the world. These products are warranted by the KORG distributor only in each country. Any KORG product that is not sold with the manufacturer’s or distributor’s warranty, or without a serial number, cannot benefit from servicing under the warranty. This regulation is for the consumer’s own protection.
DATA RESET
CE MARK FOR EUROPEAN HARMONIZED STANDARDS
The CE mark that is attached to our company’s products of AC mains operated apparatus until December 31, 1996 means it conforms to the EMC Directive (89/336/EEC) and to the CE mark Directive (93/68/EEC).
The CE mark that is attached after January 1, 1997 means it conforms to the EMC Directive (89/336/EEC), to the CE mark Directive (93/68/EEC) and to the Low Voltage Directive (73/23/EEC).
In addition, the CE mark that is attached to our company’s products of Battery operated apparatus means it conforms to the EMC Directive (89/336/ EEC) and to the CE mark Directive (93/68/EEC).
THE FCC REGULATION WARNING (FOR THE U.S.A. ONLY)
This equipment has been tested and found to comply with the limits for a Class B digital device, pursuant to Part 15 of the FCC Rules. These limits are designed to provide reasonable protection against harmful interference in a residential installation. This equipment generates, uses, and can radiate radio frequency energy and, if not installed and used in accordance with the instructions, may cause harmful interference to radio communications. However, there is no guarantee that interference will not occur in a particular installation. If this equipment does cause harmful interference to radio or television reception, which can be determined by turning the equipment off and on, the user is encouraged to try to correct the interference by one or more of the following measures:
•Reorient or relocate the receiving antenna.
•Increase the separation between the equipment and receiver.
•Connect the equipment into an outlet on a circuit different from that to which the receiver is connected.
•Consult the dealer or an experienced radio/TV technician for help.
Unauthorized changes or modification to this system can void the user’s authority to operate this equipment.
UPDATING THE SOFTWARE
The system software of your C-520 can be updated. From time to time, Korg might release new versions including bug fixes and new features. Please check our website for more information.
ASSISTANCE AND SERVICE FOR MUSICIANS
For repairs, contact your nearest Authorized KORG Service Center. For more information on KORG products, and to find software and accessories for your piano, please contact your local Authorized KORG distributor.
KORG ON THE INTERNET
Korg Inc.: www.korg.co.jp
Korg USA: www.korg.com
Korg UK: www.korg.co.uk
Korg Canada: www.korgcanada.com
Korg Italy: www.korgpa.com
When the instrument is turned off, any unsaved parameters or songs are |
|
reset. |
© 2006 Korg Inc. Printed in Japan. |

Contents
Introduction . . . . . . . . . . . . . . . . . . . . . . . . . . . . . . . . . . . . . . . . 6
Main features . . . . . . . . . . . . . . . . . . . . . . . . . . . . . . . . . . . . . . . . . . . . . . 6
Control panel . . . . . . . . . . . . . . . . . . . . . . . . . . . . . . . . . . . . . . . 8 Connections . . . . . . . . . . . . . . . . . . . . . . . . . . . . . . . . . . . . . . . 11
Connecting to external audio devices . . . . . . . . . . . . . . . . . . . . . . . . . 11
Before you begin . . . . . . . . . . . . . . . . . . . . . . . . . . . . . . . . . . . 12
Open the key cover . . . . . . . . . . . . . . . . . . . . . . . . . . . . . . . . . . . . . . . . 12 Turning the instrument on . . . . . . . . . . . . . . . . . . . . . . . . . . . . . . . . . . 12 Using the music stand . . . . . . . . . . . . . . . . . . . . . . . . . . . . . . . . . . . . . . 12 Adjusting the volume . . . . . . . . . . . . . . . . . . . . . . . . . . . . . . . . . . . . . . 13 Using the headphones . . . . . . . . . . . . . . . . . . . . . . . . . . . . . . . . . . . . . . 13 Listening to the Demo . . . . . . . . . . . . . . . . . . . . . . . . . . . . . . . . . . . . . . 13
Basic functions . . . . . . . . . . . . . . . . . . . . . . . . . . . . . . . . . . . . . 15
Playing a single sound (Single mode) . . . . . . . . . . . . . . . . . . . . . . . . . 15 Playing two sounds at the same time (Layer mode) . . . . . . . . . . . . . . 16 Playing different sounds with the left and right hand (Split mode) . 17 Using the pedals . . . . . . . . . . . . . . . . . . . . . . . . . . . . . . . . . . . . . . . . . . . 18 Transposing . . . . . . . . . . . . . . . . . . . . . . . . . . . . . . . . . . . . . . . . . . . . . . 18 Changing the brilliance . . . . . . . . . . . . . . . . . . . . . . . . . . . . . . . . . . . . . 19 Turning the effects on/off . . . . . . . . . . . . . . . . . . . . . . . . . . . . . . . . . . . 19
Using performances . . . . . . . . . . . . . . . . . . . . . . . . . . . . . . . . . 20
Choosing performances . . . . . . . . . . . . . . . . . . . . . . . . . . . . . . . . . . . . 20 Changing the sounds assigned to a performance . . . . . . . . . . . . . . . . 21 Editing a performance . . . . . . . . . . . . . . . . . . . . . . . . . . . . . . . . . . . . . . 21
The metronome . . . . . . . . . . . . . . . . . . . . . . . . . . . . . . . . . . . . 22
Starting and stopping the metronome, adjusting the tempo . . . . . . . 22 Tempo and time signature display . . . . . . . . . . . . . . . . . . . . . . . . . . . . 22 Adjusting the tempo . . . . . . . . . . . . . . . . . . . . . . . . . . . . . . . . . . . . . . . 22 Choosing a time signature . . . . . . . . . . . . . . . . . . . . . . . . . . . . . . . . . . 23 Drum patterns . . . . . . . . . . . . . . . . . . . . . . . . . . . . . . . . . . . . . . . . . . . . 23 Adjusting the metronome level . . . . . . . . . . . . . . . . . . . . . . . . . . . . . . 24 Adjusting the drum pattern’s reverb . . . . . . . . . . . . . . . . . . . . . . . . . . 24 Selecting the accent . . . . . . . . . . . . . . . . . . . . . . . . . . . . . . . . . . . . . . . . 25 Saving the metronome settings . . . . . . . . . . . . . . . . . . . . . . . . . . . . . . 25
Playing back a song . . . . . . . . . . . . . . . . . . . . . . . . . . . . . . . . . 26
Accessing the Song Play mode . . . . . . . . . . . . . . . . . . . . . . . . . . . . . . . 26 How to select a song . . . . . . . . . . . . . . . . . . . . . . . . . . . . . . . . . . . . . . . 26 How to start playback . . . . . . . . . . . . . . . . . . . . . . . . . . . . . . . . . . . . . . 27 Starting from a different measure . . . . . . . . . . . . . . . . . . . . . . . . . . . . 27 Muting/unmuting a recorder’s part . . . . . . . . . . . . . . . . . . . . . . . . . . . 28 Changing the song’s tempo . . . . . . . . . . . . . . . . . . . . . . . . . . . . . . . . . 28 Play along with the song . . . . . . . . . . . . . . . . . . . . . . . . . . . . . . . . . . . . 28 Cycle Play . . . . . . . . . . . . . . . . . . . . . . . . . . . . . . . . . . . . . . . . . . . . . . . . 29
Recording a song . . . . . . . . . . . . . . . . . . . . . . . . . . . . . . . . . . . 30
Quick recording procedure . . . . . . . . . . . . . . . . . . . . . . . . . . . . . . . . . 30 Step 1: Entering the Record mode . . . . . . . . . . . . . . . . . . . . . . . . . . . . 30 Step 2: Selecting sounds . . . . . . . . . . . . . . . . . . . . . . . . . . . . . . . . . . . . 31 Step 3: Setting the record options . . . . . . . . . . . . . . . . . . . . . . . . . . . . 32 Step 4: Setting the time signature and tempo . . . . . . . . . . . . . . . . . . . 33 Step 5: Recording . . . . . . . . . . . . . . . . . . . . . . . . . . . . . . . . . . . . . . . . . . 33 Step 6: Second-pass recording . . . . . . . . . . . . . . . . . . . . . . . . . . . . . . . 34 Changing sounds to a recorded song . . . . . . . . . . . . . . . . . . . . . . . . . . 34 Changing tempo to a recorded song . . . . . . . . . . . . . . . . . . . . . . . . . . 35 Pedal Punch recording . . . . . . . . . . . . . . . . . . . . . . . . . . . . . . . . . . . . . 35 Auto Punch recording . . . . . . . . . . . . . . . . . . . . . . . . . . . . . . . . . . . . . . 35 Saving the song . . . . . . . . . . . . . . . . . . . . . . . . . . . . . . . . . . . . . . . . . . . 36
Editing a song . . . . . . . . . . . . . . . . . . . . . . . . . . . . . . . . . . . . . 37
Setting Cycle Play . . . . . . . . . . . . . . . . . . . . . . . . . . . . . . . . . . . . . . . . . . 37 Erasing a track . . . . . . . . . . . . . . . . . . . . . . . . . . . . . . . . . . . . . . . . . . . . 37 Cutting measures at the end of the song . . . . . . . . . . . . . . . . . . . . . . . 38 Quantizing the song . . . . . . . . . . . . . . . . . . . . . . . . . . . . . . . . . . . . . . . 38 Transposing the song . . . . . . . . . . . . . . . . . . . . . . . . . . . . . . . . . . . . . . 39 Deleting the song . . . . . . . . . . . . . . . . . . . . . . . . . . . . . . . . . . . . . . . . . . 39 Saving the song after editing . . . . . . . . . . . . . . . . . . . . . . . . . . . . . . . . . 39
>
Editing sounds and performances . . . . . . . . . . . . . . . . . . . . . |
41 |
Accessing the Sound edit mode . . . . . . . . . . . . . . . . . . . . . . . . . . . . . |
41 |
Exit from the Sound edit mode . . . . . . . . . . . . . . . . . . . . . . . . . . . . . . |
41 |
Saving a sound . . . . . . . . . . . . . . . . . . . . . . . . . . . . . . . . . . . . . . . . . . . |
41 |
Saving a performance . . . . . . . . . . . . . . . . . . . . . . . . . . . . . . . . . . . . . . |
42 |
Setting the volume . . . . . . . . . . . . . . . . . . . . . . . . . . . . . . . . . . . . . . . . |
43 |
Adjusting the panning . . . . . . . . . . . . . . . . . . . . . . . . . . . . . . . . . . . . . |
43 |
Adjusting the effects . . . . . . . . . . . . . . . . . . . . . . . . . . . . . . . . . . . . . . . |
44 |
Setting the reverb effect . . . . . . . . . . . . . . . . . . . . . . . . . . . . . . . . . . . . |
44 |
Setting the chorus or modulation effect . . . . . . . . . . . . . . . . . . . . . . . |
45 |
Setting the insert effects . . . . . . . . . . . . . . . . . . . . . . . . . . . . . . . . . . . . |
45 |
Setting the octave transposition . . . . . . . . . . . . . . . . . . . . . . . . . . . . . |
46 |
Adjusting the fine tune . . . . . . . . . . . . . . . . . . . . . . . . . . . . . . . . . . . . |
47 |
Programming the pedals . . . . . . . . . . . . . . . . . . . . . . . . . . . . . . . . . . . |
47 |
Selecting a scale . . . . . . . . . . . . . . . . . . . . . . . . . . . . . . . . . . . . . . . . . . . |
48 |
Resetting the current sound and performance . . . . . . . . . . . . . . . . . |
49 |
Global settings . . . . . . . . . . . . . . . . . . . . . . . . . . . . . . . . . . . . . 50
Touch settings . . . . . . . . . . . . . . . . . . . . . . . . . . . . . . . . . . . . . . . . . . . . |
50 |
Turning the internal speakers on or off . . . . . . . . . . . . . . . . . . . . . . . |
50 |
Master tuning . . . . . . . . . . . . . . . . . . . . . . . . . . . . . . . . . . . . . . . . . . . . |
51 |
Brilliance . . . . . . . . . . . . . . . . . . . . . . . . . . . . . . . . . . . . . . . . . . . . . . . . |
51 |
Default split point . . . . . . . . . . . . . . . . . . . . . . . . . . . . . . . . . . . . . . . . |
51 |
Assigning functions to the pedals . . . . . . . . . . . . . . . . . . . . . . . . . . . . |
52 |
Quarter Tone (SubScale realtime programming) . . . . . . . . . . . . . . . |
53 |
Fast Play . . . . . . . . . . . . . . . . . . . . . . . . . . . . . . . . . . . . . . . . . . . . . . . . |
53 |
Mute Level . . . . . . . . . . . . . . . . . . . . . . . . . . . . . . . . . . . . . . . . . . . . . . . |
53 |
Turning the keyboard on or off (Local Control) . . . . . . . . . . . . . . . . |
54 |
MIDI Clock . . . . . . . . . . . . . . . . . . . . . . . . . . . . . . . . . . . . . . . . . . . . . . |
54 |
MIDI IN Channels . . . . . . . . . . . . . . . . . . . . . . . . . . . . . . . . . . . . . . . . |
54 |
MIDI OUT Channels . . . . . . . . . . . . . . . . . . . . . . . . . . . . . . . . . . . . . . |
55 |
MIDI Filters . . . . . . . . . . . . . . . . . . . . . . . . . . . . . . . . . . . . . . . . . . . . . |
56 |
Data transfer via the USB port . . . . . . . . . . . . . . . . . . . . . . . . . . . . . . |
56 |
Erasing songs from the User Song album . . . . . . . . . . . . . . . . . . . . . |
57 |
General Reset . . . . . . . . . . . . . . . . . . . . . . . . . . . . . . . . . . . . . . . . . . . . |
58 |
System version number . . . . . . . . . . . . . . . . . . . . . . . . . . . . . . . . . . . . |
58 |
MIDI . . . . . . . . . . . . . . . . . . . . . . . . . . . . . . . . . . . . . . . . . . . . . 59
What is MIDI? . . . . . . . . . . . . . . . . . . . . . . . . . . . . . . . . . . . . . . . . . . . 59 What is MIDI Over USB? . . . . . . . . . . . . . . . . . . . . . . . . . . . . . . . . . . 59 What can you do with MIDI? . . . . . . . . . . . . . . . . . . . . . . . . . . . . . . . 59 MIDI connections . . . . . . . . . . . . . . . . . . . . . . . . . . . . . . . . . . . . . . . . 59 Standard MIDI settings . . . . . . . . . . . . . . . . . . . . . . . . . . . . . . . . . . . . 60 Using the C-520 as a multitimbral tone generator . . . . . . . . . . . . . . 60 Program Change . . . . . . . . . . . . . . . . . . . . . . . . . . . . . . . . . . . . . . . . . . 60 Control Change . . . . . . . . . . . . . . . . . . . . . . . . . . . . . . . . . . . . . . . . . . 61
Installing the Korg USB MIDI Driver . . . . . . . . . . . . . . . . . . . . 62
Connecting the C-520 to a personal computer . . . . . . . . . . . . . . . . . 62 KORG USB-MIDI Driver system requirements . . . . . . . . . . . . . . . . 62 Please note before use . . . . . . . . . . . . . . . . . . . . . . . . . . . . . . . . . . . . . 62 Windows: Installing the KORG USB-MIDI Driver . . . . . . . . . . . . . 63 Mac OS X: Installing KORG USB-MIDI Driver . . . . . . . . . . . . . . . . 63
Assembling the stand . . . . . . . . . . . . . . . . . . . . . . . . . . . . . . . 64
Cautions for assembly . . . . . . . . . . . . . . . . . . . . . . . . . . . . . . . . . . . . . 64 Assembling procedure . . . . . . . . . . . . . . . . . . . . . . . . . . . . . . . . . . . . . 64 Check after assembly . . . . . . . . . . . . . . . . . . . . . . . . . . . . . . . . . . . . . . 66 Caution . . . . . . . . . . . . . . . . . . . . . . . . . . . . . . . . . . . . . . . . . . . . . . . . . 66
Error messages . . . . . . . . . . . . . . . . . . . . . . . . . . . . . . . . . . . . . 67 Troubleshooting . . . . . . . . . . . . . . . . . . . . . . . . . . . . . . . . . . . 68 Polyphony . . . . . . . . . . . . . . . . . . . . . . . . . . . . . . . . . . . . . . . . . 68 Technical specifications . . . . . . . . . . . . . . . . . . . . . . . . . . . . . . 69 Appendix / Appendice / Anhang / Appendice . . . . . . . . . . . 277
Sounds / Timbres / Klänge / Suoni . . . . . . . . . . . . . . . . . . . . . . . . . . 277 Performances / ‘Performance’-Speicher . . . . . . . . . . . . . . . . . . . . . 283 Effects / Effets / Effekte / Effetti . . . . . . . . . . . . . . . . . . . . . . . . . . . . . 285 Songs / Morceaux / Songs / Brani musicali . . . . . . . . . . . . . . . . . . . 286
MIDI Implementation Chart . . . . . . . . . . . . . . . . . . . . . . . . . 288
English
5

Introduction > Main features
Introduction
Main features
Wide range of sounds
Forty different and expressive high-quality sounds, including a Stereo Concert Grand Piano. You can use the Layer and Split functions to simultaneously play a combination of two sounds. Sounds and sound combinations can be freely modified.
Performances
Sound combination can also be saved into performances, giving you an additional set of 30 timbres (3 banks of 10 performances). Performances also store a custom split point, for custom combinations of sounds over the keyboard.
Four zones keyboard
The new high-quality, realistic Korg RH3 keyboard features four zones with different weights. This gives you the same realism and feeling as a grand piano keyboard.
Touch control
You can choose from nine different settings to adjust how the sound will respond to your keyboard playing dynamics.
Pedal effects
The C-520 provides the same three pedals as a grand piano, controlling the soft, sostenuto, and damper functions respectively. The damper pedal simulates the natural string resonances and noises of an acoustic piano, by means of the innovative Korg EPx (Piano eXperience) technology. Both the damper and soft pedals let you vary the amount of the effect by how far you press down on them (“half-pedal” function). In addition, pedals can be freely assigned to other functions, like starting the recorder or changing the speed of the rotary speaker.
Piano eXperience
While existing piano sampling techniques have resembled an audio snapshot, our new “Piano eXperience” technology is more of a hologram, accurately reproducing every dimensional detail of the sound. All piano sampling for the C-520 is done in stereo to preserve the natural imaging of the sound. Different dynamic levels are captured to extend the instrument's expressive vocabulary.
Going even further, the C-520 uses the sound of the key being released and the hammer returning, as well as the sympathetic damper resonance of the strings to create all of the subtle shadings that create a superior instrument sound. This attention to detail defines the sound of the new C-520, providing an instrument that can interpret every nuance of touch into a meaningful musical gesture.
Piano eXperience (or EPx) effects are particularly evident in sounds like GrandPiano, BriteGrand and MelloPiano.
One-hundred eighty-five songs
The C-520 includes a huge library of songs, based on famous pieces and lesson books. These songs are perfectly suitable for piano lessons, being recorded into two separate parts (left hand on Part 1, right hand on Part 2) that you can easily turn off and play on the keyboard. In addition, you can change the metronome’s tempo and let a defined passage play in cycle.
SongBook included
The SongBook album is also included as a printed music book
– a great resource for practicing and playing along with your preferred tunes.
Onboard recorder
A multi-track, easy-to-use onboard recorder, lets you record your own songs, or read Standard MIDI Files that you can transfer via the integrated USB port from an external computer.
Metronome
The built-in metronome allows you to select the time signature, tempo, and volume, and use a bell sound as the accent. It can even give you a drum accompaniment in a musical style of your choice (drum patterns).
Data transfer via USB
When connected to a personal computer via the USB port, the C-520’s internal memory can be seen as a USB disk. This way, you can backup your data, or transfer files between the C-520 and the personal computer.
MIDI capabilities
The C-520 supports the MIDI protocol, the standard that allows music data to be transferred between musical instruments and computers. MIDI allows two or more devices to control or be controlled by each other, and also allows you to use the C-520 as a 16-part multitimbral tone generator.
MIDI over USB
The USB port also carries MIDI data, so that you can connect the C-520 directly to your personal computer with a single cable and without the need of a dedicated MIDI interface. A dedicated KORG USB MIDI Driver is freely available for full use of the C-520’s MIDI features.
6

Temperaments
In addition to the Equal temperament, the C-520 allows you to select nine alternative temperaments, for historically accurate performance of classical music, or experimenting. When selecting an acoustic piano sound, the typical Stretched Tuning is automatically selected.
Adjustable pitch
The Transpose function lets you change the pitch of the piano, and the Master Tuning function allows you to make fine tune adjustments.
Effects
The C-520 provides built-in digital effects that can simulate the natural ambience of a concert hall (reverb) and add rich-
Introduction > Main features
ness to the sound (chorus). In addition, each sound includes an insert effect (delay, phaser, equalizer, rotary speaker, etc…), that is specially suited to each particular sound.
Powerful integrated amplification
The C-520 includes a powerful, 2 × 35 Watt amplifier, with four speakers in bass reflex box. This gives the most authentic sound reproduction, together with enough volume deliver the full power of an acoustic piano.
Two sets of headphones
You can connect two stereo headphones, to play with your teacher or another musician. Connecting a headphone set automatically disconnects the speakers, so there is no risk to disturb others when practicing by night.
English
7
Control panel >
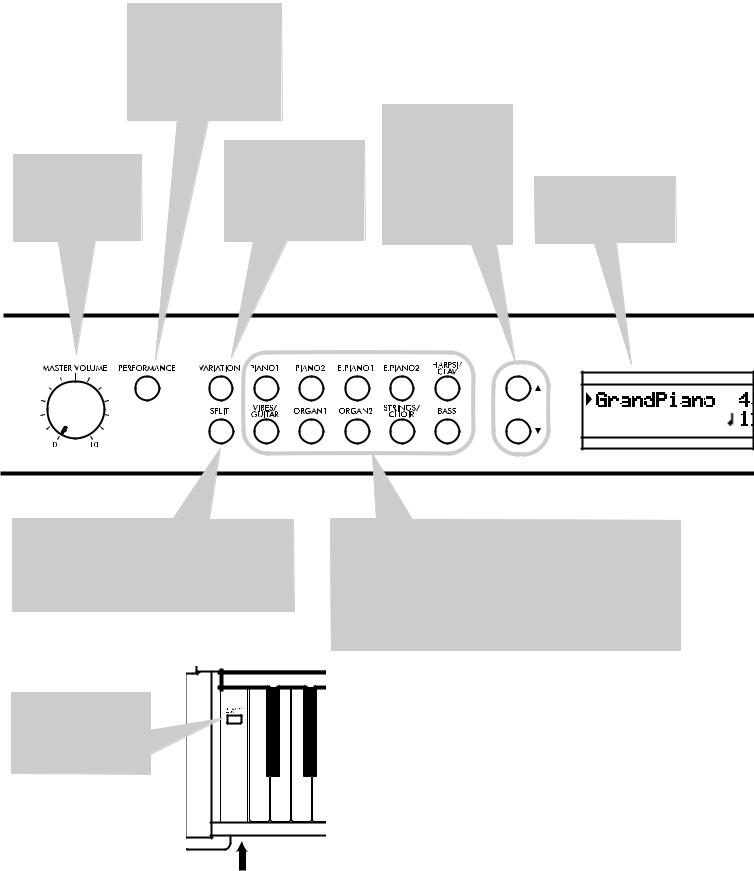
Control panel
PERFORMANCE button:
Enters/exits Performance mode. While in this mode, the sound selection buttons are used to choose performances instead of single sounds. See page 20.
|
|
VARIATION |
button: |
MASTER |
VOLUME |
Selects one of the avail- |
|
knob: Adjusts the vol- |
able variations of the cur- |
||
ume for the speakers, |
rently selected sound, or |
||
the Output |
and the |
one of the three perfor- |
|
Phones connectors |
mance banks. |
|
|
/ (Scroll) buttons: Move the cursor in the display, from one parameter to the following or the previous one. The cursor is indicated by a pointing arrow ( ) next to a parameter’s name.
Display: Shows the various sound names and parameters.
SPLIT button: Turns Split mode on or off. When in Split mode, a sound is assigned to your right hand, and a different one to the left hand. Keep it pressed and play a note on the keyboard to choose a different split point. See page 17.
POWER switch: On/Off switch. When in the Standbay position, the piano is turned off.
SOUND SELECTION buttons: Press a button to select a sound (Single mode). You can press two buttons at the same time, to play two sounds at the same time on the keyboard (Layer mode). Press SPLIT to play a sound with your right hand, and a different one with your left hand (Split mode). See page 15.
When the PERFORMANCE indicator is turned on (Performance mode), these buttons allow for selection of performances. See page 20.
Power LED
8
Control panel >
|
+/YES / -/NO (Value) but- |
|
|
|
|
|
|
|
|
|
|
|
|
|
|
|
|
|
|
|
|
|
|
|
|
|
|
|
|
|||||||||
|
tons: Change the value of |
|
|
|
|
|
|
|
|
|
|
|
|
|
|
|
|
|
|
|
|
|
|
|
|
|
|
|
|
|||||||||
|
the parameters appearing |
EDIT button: Press it |
|
|
|
|
|
|
|
|
|
|
|
|
|
|
|
|
|
|
|
|
||||||||||||||||
|
in the display. The editable |
to |
access |
|
|
the |
Edit |
|
|
|
|
|
|
|
|
|
|
|
|
|
|
|
|
|
|
|
|
|||||||||||
|
parameter is shown by the |
mode relevant to the |
|
|
|
|
|
|
|
|
|
|
|
|
|
|
|
|
|
|
|
|
||||||||||||||||
|
cursor ( ) placed on its |
current type of data |
|
|
|
|
|
|
|
|
|
|
|
|
|
|
|
|
|
|
|
|
||||||||||||||||
|
left, or (when editing text) |
selected in the dis- |
|
|
|
|
|
|
|
|
|
|
|
|
|
|
|
|
|
|
|
|
||||||||||||||||
|
with the character/cipher in |
play. Four Edit modes |
|
|
|
|
|
|
|
|
|
|
|
|
|
|
|
|
|
|
|
|
||||||||||||||||
|
edit flashing. By |
keeping |
are |
available: Sound |
|
REVERB |
button: |
CHORUS |
button: |
|
|
|
|
|
|
|||||||||||||||||||||||
|
them |
pressed, |
the values |
(see page 41), Perfor- |
|
|
|
|
|
|
|
|||||||||||||||||||||||||||
|
start |
changing |
automati- |
mance (see page 41), |
|
Turns the reverb |
Turns |
the |
|
chorus |
|
|
|
|
|
|
||||||||||||||||||||||
|
cally, |
first |
slowly, |
then |
Song (see |
|
page 37) |
|
on/off. This adds |
on/off. This makes |
|
|
|
|
|
|
||||||||||||||||||||||
|
slightly |
faster. By |
pressing |
and |
Global |
(see |
|
ambience to the |
the sound |
richer. |
METRONOME |
|
button: |
|||||||||||||||||||||||||
|
them together, the param- |
page 50). Global edit |
|
sound. |
Keep |
it |
Keep |
it |
pressed |
Turns the metronome click |
||||||||||||||||||||||||||||
|
eter is reset to its default |
mode |
can |
be |
|
pressed for more |
for |
more |
than |
on/off. The |
tempo |
and |
||||||||||||||||||||||||||
|
value. |
|
|
|
|
|
|
|
accessed by keeping |
|
than one second |
one |
second to |
time signature depend on |
||||||||||||||||||||||||
|
While in the Main page, |
the |
EDIT |
|
button |
|
to access |
the |
access the Chorus |
the chosen values, or the |
||||||||||||||||||||||||||||
|
these buttons can be used |
pressed |
for |
more |
|
Reverb edit page |
edit |
page |
(see |
selected |
song |
|
(see |
|||||||||||||||||||||||||
|
to select a different varia- |
than one second). |
|
(see page 19). |
|
page 19). |
|
|
|
|
page 22). |
|
|
|
|
|||||||||||||||||||||||
|
tion of the current sound. |
|
|
|
|
|
|
|
|
|
|
|
|
|
|
|
|
|
|
|
|
|
|
|
|
|
|
|
|
|||||||||
|
|
|
|
|
|
|
|
|
|
|
|
|
|
|
|
|
|
|
|
|
|
|
|
|
|
|
|
|
|
|
|
|
|
TEMPO/MET.SET |
but- |
|||
|
|
|
|
|
|
|
|
|
|
|
|
|
|
|
|
|
|
|
|
|
|
|
|
|
|
|
|
|
|
|
|
|
|
tons: Adjust the met- |
||||
|
|
|
|
|
|
|
|
|
|
|
|
|
|
|
|
|
|
|
|
|
|
|
|
|
|
|
|
|
|
|
|
|
|
ronome tempo. The + |
||||
|
|
|
|
|
|
|
|
|
|
|
|
|
|
|
|
|
|
|
|
|
|
|
|
|
|
|
|
|
|
|
|
|
|
button |
|
makes |
it |
|
|
|
|
|
|
|
|
|
|
|
|
|
|
|
|
|
|
|
|
|
|
|
|
|
|
|
|
|
|
|
|
|
|
|
|
||||
|
|
|
|
|
|
|
|
|
|
|
|
|
|
|
|
|
|
|
|
|
|
|
|
|
|
|
|
|
|
|
|
|
|
faster, |
while |
the – |
||
|
|
|
|
|
|
|
|
|
|
|
|
|
|
|
|
|
|
|
|
|
|
|
|
|
|
|
|
|
|
|
|
|
|
button |
|
makes |
it |
|
|
|
|
|
|
|
|
|
|
|
|
|
|
|
|
|
|
|
|
|
|
|
|
|
|
|
|
|
|
|
|
|
|
|
slower. |
|
|
Pressed |
|
|
|
|
|
|
|
|
|
|
|
|
|
|
|
|
|
|
|
|
|
|
|
|
|
|
|
|
|
|
|
|
|
|
|
together, |
they |
give |
||
|
|
|
|
|
|
|
|
|
|
|
|
|
|
|
|
|
|
|
|
|
|
|
|
|
|
|
|
|
|
|
|
|
||||||
|
|
|
|
|
|
|
|
|
|
|
|
|
|
|
|
|
|
|
|
|
|
|
|
|
|
|
|
|
|
|
|
|
|
access to metronome |
||||
|
|
|
|
|
|
|
|
|
|
|
|
|
|
|
|
|
|
|
|
|
|
|
|
|
|
|
|
|
|
|
|
|
|
|||||
|
|
|
|
|
|
|
|
|
|
|
|
|
|
|
|
|
|
|
|
|
|
|
|
|
|
|
|
|
|
|
|
|
|
editing. See page 22. |
||||
|
|
|
|
|
|
|
|
|
|
|
|
|
|
|
|
|
|
|
|
|
|
|
|
|
|
|
|
|
|
|
|
|
|
RECORDER |
|
but- |
||
|
|
|
|
|
|
|
|
|
|
|
|
|
|
|
|
|
|
|
|
|
|
|
|
|
|
|
|
|
|
|
|
|
|
|
||||
|
|
|
|
|
|
|
|
|
|
|
|
|
|
|
|
|
|
|
|
|
|
|
|
|
|
|
|
|
|
|
|
|
|
|
||||
|
|
|
|
|
|
|
|
|
|
|
|
|
|
|
|
|
|
|
|
|
|
|
|
|
|
|
|
|
|
|
|
|
|
|
||||
|
|
|
|
|
|
|
|
|
|
|
|
|
|
|
|
|
|
|
|
|
|
|
|
|
|
|
|
|
|
|
|
|
|
|||||
|
|
|
|
|
|
|
|
|
|
|
|
|
|
|
|
|
|
|
|
|
|
|
|
|
|
|
|
|
|
|
|
|
|
tons: Control |
the |
|||
|
|
|
|
|
|
|
|
|
|
|
|
|
|
|
|
|
|
|
|
|
|
|
|
|
|
|
|
|
|
|
|
|
|
playback or record- |
||||
|
|
|
|
|
|
|
|
|
|
|
|
|
|
|
|
|
|
|
|
|
|
|
|
|
|
|
|
|
|
|
|
|
|
ing |
of |
the |
songs. |
|
|
|
|
|
|
|
|
|
|
|
|
|
|
|
|
|
|
|
|
|
|
|
|
|
|
|
|
|
|
|
|
|
|
|
|||||
|
|
|
|
|
|
|
|
|
|
|
|
|
|
|
|
|
|
|
|
|
|
|
|
|
|
|
|
|
|
|
|
|
|
|||||
|
|
|
|
|
|
|
|
|
|
|
|
|
|
|
|
|
|
|
|
|
|
|
|
|
|
|
|
|
|
|
|
|
|
See |
|
page 26, |
||
|
|
|
|
|
|
|
|
|
|
|
|
|
|
|
|
|
|
|
|
|
|
|
|
|
|
|
|
|
|
|
|
|
|
page 30. |
|
|
||
|
EXIT button: Press it to |
|
TRANSPOSE |
button: |
|
BRILLIANCE |
button: |
|
|
|
DEMO |
button: |
Turns |
|
|
|||||||||||||||||||||||
|
exit Edit mode, or to |
|
Press |
this |
button |
to |
|
Press |
this |
button |
to |
|
|
|
the Demo mode on/off, |
|
|
|||||||||||||||||||||
|
return to the Main page |
|
open |
|
the |
Transpose |
|
open |
the |
Brilliance |
|
|
|
to listen to the demo |
|
|
||||||||||||||||||||||
|
from other pages. When |
|
page |
and change |
the |
|
page |
and |
change |
the |
|
|
|
songs. Select the songs |
|
|
||||||||||||||||||||||
|
exiting |
from |
the |
Edit |
|
master transpose value. |
|
brilliance value. When |
|
|
|
with the sound selec- |
|
|
||||||||||||||||||||||||
|
mode, the Save proce- |
|
When |
the |
indicator is |
|
the |
indicator is turned |
|
|
|
tion |
buttons |
(see |
|
|
||||||||||||||||||||||
|
dure |
will |
be |
recalled. |
|
turned |
|
on, |
transposi- |
|
on, a brilliance varia- |
|
|
|
page 13). You can play |
|
|
|||||||||||||||||||||
|
When a drum pattern is |
|
tion is |
active. Changes |
|
tion |
is active. Changes |
|
|
|
together with the demo |
|
|
|||||||||||||||||||||||||
|
assigned to the Metro- |
|
made after pressing this |
|
made after pressing this |
|
|
|
songs. |
|
|
|
|
|
|
|||||||||||||||||||||||
|
nome, and it is running, |
|
button are not saved to |
|
button are not saved to |
|
|
|
|
|
|
|
|
|
|
|||||||||||||||||||||||
|
this button doubles as a |
|
memory, and are reset |
|
memory, and are reset |
|
|
|
|
|
|
|
|
|
|
|||||||||||||||||||||||
|
Fill |
|
In |
control |
(see |
|
when |
|
|
turning |
the |
|
when |
turning |
the |
|
|
|
|
|
|
|
|
|
|
|||||||||||||
|
page 23, page 33). |
|
|
instrument |
off. |
See |
|
instrument |
off. |
See |
|
|
|
|
|
|
|
|
|
|
||||||||||||||||||
|
|
|
|
|
|
|
|
|
|
|
|
page 18. |
|
|
|
page 19. |
|
|
|
|
|
|
|
|
|
|
|
|
|
|||||||||
English
9
Control panel >
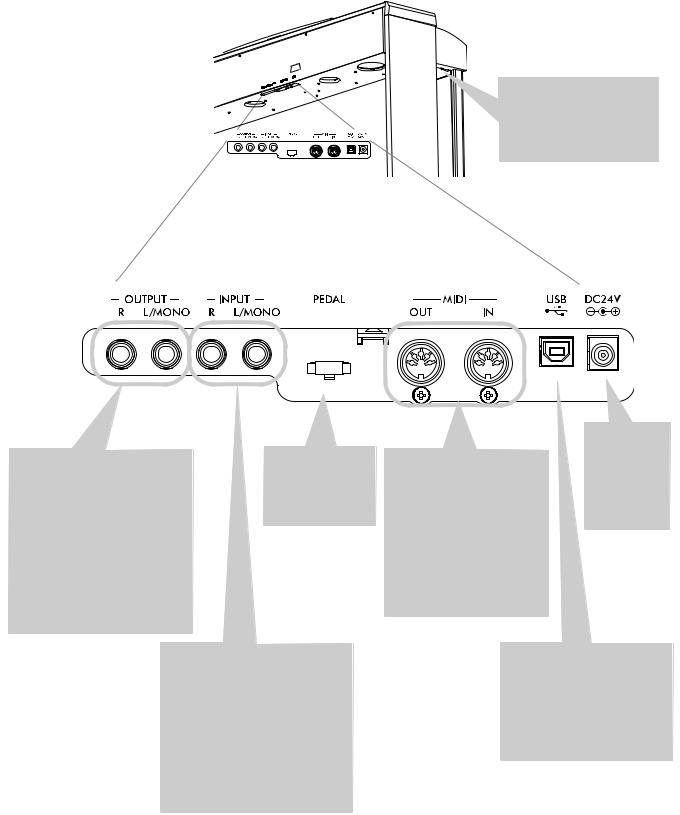
PHONES connector: Connect one or two pairs of headphones to these jacks. The integrated speakers will turn off.
OUTPUT (L/MONO, R) connectors: Audio outputs. Connect these connectors to an external amplifying system. (With a hi-fi system use the LINE, AUX, CD or TAPE connectors, not the PHONO connector). To amplify the C-520 in mono, connect the single L/MONO connector. Use the MASTER VOLUME knob to set the output volume.
Pedals connector: Connect the supplied pedals to this connector.
INPUT (L/MONO, R) connectors:
Line audio inputs. Connect to these connectors an external audio source, such as a CD, MP3 or tape player, or another keyboard. To connect a microphone, you need an external microphone preamplifier or a mixer.
Warning: Avoid connecting the output of a power amplifier to these inputs!
MIDI (IN, OUT) connectors:
Connectors that are used to connect other MIDI devices (sequencer, keyboards, etc.). OUT: Data output (to be connected to the MIDI IN connector of another MIDI device). IN: Data input (to be connected to the MIDI OUT connector of another MIDI device).
AC ADAPTER connector:
Connect the supplied AC/ DC adapter to this connector.
USB connector: Type B (slave), USB 1.1-compliant, standard connector. Connects to a personal computer (PC or Mac). Can be used for data transfer (see page 56), or USB Over MIDI use (see page 59).
10
Connections > Connecting to external audio devices
Connections
Connecting to external audio devices
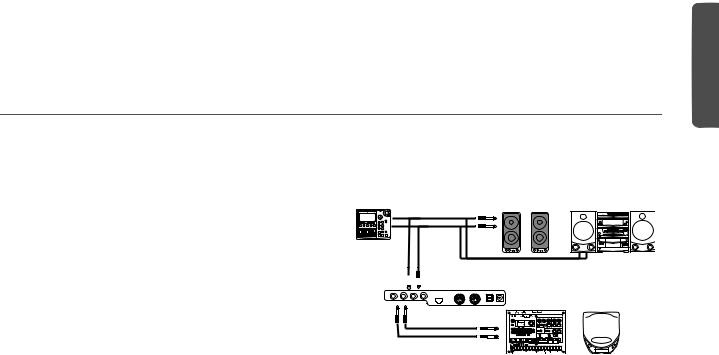
Connecting to an external amplification system
Use the OUTPUT connectors, if you like to connect your C- 520 to a high-quality mixer, stereo hi-fi, or a couple of active monitors. When using a stereo hi-fi, connect the OUTPUTs to the LINE, AUX, CD or TAPE inputs (never use the PHONO inputs). For mono amplification, connect only the L/MONO output.
Connecting other audio devices to the C-520
Use the INPUT connectors, to connect a computer, mixer, drum machine, synthesizer, MP3 or tape player, to your C- 520, and hear their sound run through its speakers. For mono
amplification, connect only the L/MONO output. Do not connect the output of a power amplifier!
L/MONO
R
AUX IN

 OUTPUT
INPUT
English
11
Before you begin > Open the key cover
Before you begin
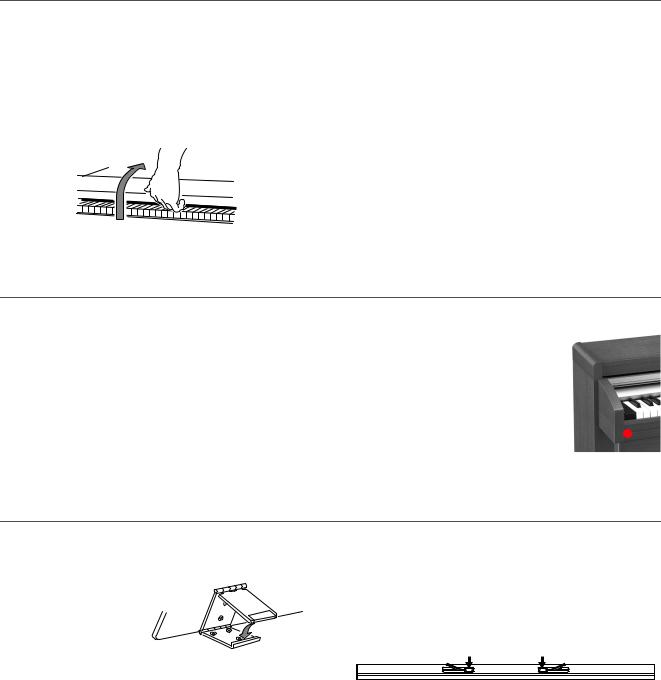
Open the key cover
Gently lift the center of the sliding key cover by the indented portion, and support it while you slide it carefully and fully into the C-520. Before you open the key cover, make sure that no foreign objects such as papers or coins are on the top of the key cover itself, otherwise, these objects may fall into the instrument.
To close the key cover, gently lift the center by the indented portion, and slide it forward.
Note: Be careful not to pinch your fingers or hand while opening or closing the key cover.
Note: The key cover may be damaged if you use excessive force when opening or closing it.
Turning the instrument on
Insert the DC plug of the supplied AC adapter into the DC inlet of the C-520, then connect the AC plug to a wall socket.
After having connected the power cable, press the POWER switch. When the instrument is turned on, the buttons on the control panel and the display will light up. Also, an LED on the front of the instrument, also visible when the key cover is closed, will light up.
To turn the instrument off, press the POWER switch again.
Power LED 
Using the music stand
Opening and closing the music stand
Tilt the music stand upright, and use the two stoppers located on the rear to hold the music stand in place.
To lower the music stand,
release the stoppers and rest the music stand on the flat top.
Using the score holders
To keep a music book open, use the two score holders in front of the music stand. Push on the shorter side to make them slide up. Push on the longer side to make them slide down. Do not apply excessive strength or weight to the holders, or you will risk to break them.
12
|
Before you begin > Adjusting the volume |
|
Adjusting the volume |
|
|
|
|
|
Rotate the MASTER VOLUME knob towards the right to in- |
It does not control the volume of an audio device connected to |
|
crease the volume; towards the left to decrease the volume. The |
the INPUT connectors. Use the audio device’s own controls to |
|
maximum value is “10”; the minimum (silence) is “0”. This |
set its volume. |
|
control adjusts the output level of the headphones, the internal |
It is always better to start with a low volume and then increase |
|
speakers and of the OUTPUTs. |
||
gradually. |
||
|
||
Using the headphones |
|
|
|
|
|
For playing or practicing during night hours, or when you |
have a mini-jack adapter, grasp the adapter when plugging in |
|
don’t want to be heard by others in the same room, connect |
or out the headphones. |
|
one or two pairs of high-quality headphones (32Ω impedance |
Warning: When using headphones, protect your hearing by |
|
suggested) to the appropriate PHONES connectors. These |
avoiding extended listening at high volumes. |
|
connectors are standard 1/4” phone jacks. If your headphones |
|
|
Listening to the Demo |
|
|
|
|
The C-520 contains 20 pre-recorded demo songs. Listen to them to experience the rich sound and expressive potential of this instrument. Here is a list of the available demo songs:
Button |
Bank 1 (1-10) |
Bank 2 (11-20) |
|
|
|
|
|
PIANO 1 |
GrandPiano1 |
GrandPiano2 |
|
|
|
|
|
PIANO 2 |
Honky-Tonk |
Piano Pad |
|
|
|
|
|
E.PIANO 1 |
El. Piano 1 |
El. Piano 2 |
|
|
|
|
|
E.PIANO 2 |
Digi Piano |
Vintage EP |
|
|
|
|
|
HARPSI/CLAV |
Harpsichord |
Clav. |
|
|
|
|
|
VIBES/GUITAR |
Vibes |
Ac. Guitar |
|
|
|
|
|
ORGAN 1 |
Jazz Organ1 |
Jazz Organ2 |
|
|
|
|
|
ORGAN 2 |
Full Pipe |
Pipe Flute |
|
|
|
|
|
STRING/CHOIR |
Strings |
Choir |
|
|
|
|
|
BASS |
Ac. Bass |
El. Bass |
|
|
|
|
During the demo playback you can’t use any other buttons. However, you can still play the keyboard to play along with the demo songs.
Listen to all songs at once
You can listen to all demo songs with a single command.
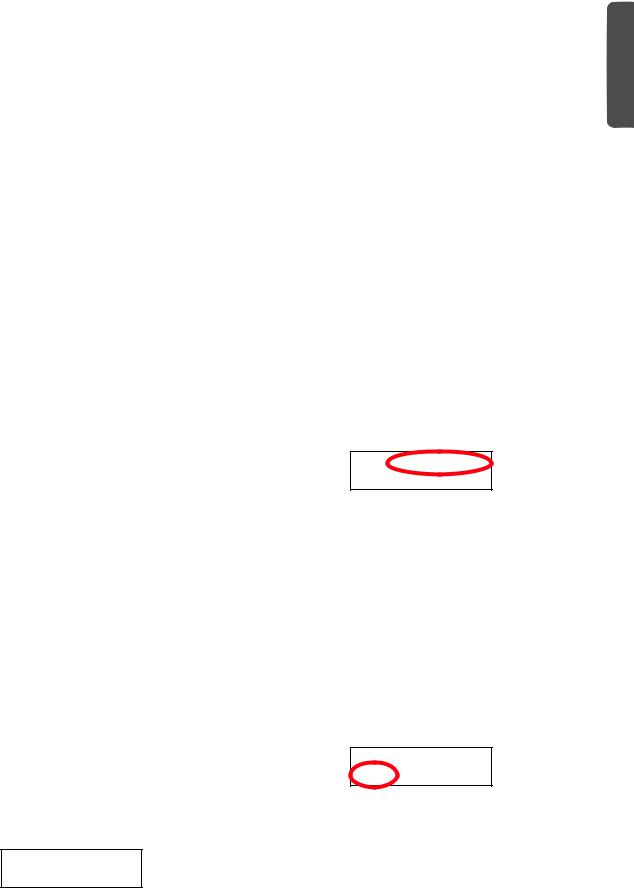
1.Press the DEMO button. The sound selection indicators will blink sequentially from left to right. The Demo page will appear in the display:
DEMO:-----------
Bk1 Press Sound
2.Wait some seconds, without pressing any button. The first demo song will begin to play. The indicator corresponding
to the demo song currently in play will turn on. The name of the song will be shown in the display:
DEMO:GrandPiano1
Bk1 Press Sound
All demo songs will be played back one after the other. After the last song, the playback will begin again from the first song.
3.To pause the current song, press the PLAY/PAUSE button. Press it again to restart playback from the same position.
4.To stop the playback and exit the demo mode, press the DEMO or the EXIT button.
Listen to a specified song
You can select just one demo song to be played back.
1. First of all, you must select one of the demo song banks.
•To select the first bank (Bk1, songs 1-10), press the DEMO button once. The indicators will blink sequentially, from left to right. The Demo page will appear in the display:
DEMO:-----------
Bk1 Press Sound
•To select the second bank (Bk2, songs 11-20), press the +/ YES button.
•To return to the first bank, press the -/NO button.
2.Press one of the sound selection buttons to select the corresponding demo song in the selected bank. The demo is based on the sound associated with the button. The indicator on the selected demo button will stay on, while the other indicators will turn off.
English
13
Before you begin > Listening to the Demo
3.After the end of the selected song, all the songs will be played back in cycle.
4.If you want to select a different song, press one of the sound selection buttons.
5.To pause the current song, press the PLAY/PAUSE button. Press it again to restart playback from the same position.
6.To stop the current song without exiting from the Demo mode, press STOP. Choose a different song and wait for it to start playing back.
7.To stop the playback and exit the demo mode, press the DEMO or EXIT button.
14
Basic functions > Playing a single sound (Single mode)
Basic functions
Playing a single sound (Single mode)
When you turn the instrument on, it is in Single mode.


 Main
Main


The single Grand Piano sound is selected, and plays over the full keyboard. Its name is shown in the display:
Main sound
GrandPiano 4/4  120
120
You can replace it with any of the 40 sounds supplied with the instrument. See the list of sounds in the following table (more details on each sound are on page 277):
|
|
|
Sound |
|
|
|
|
Button |
|
|
|
|
|
|
|
Var. 1 |
Var. 2 |
Var. 3 |
|
Var. 4 |
Var. 5 |
Var. 6 |
|
|
|
||||||
|
|
|
|
|
|
|
|
PIANO 1 |
GrandPiano* |
BriteGrand* |
Rock Piano |
|
Piano&Str. |
|
|
|
|
|
|
|
|
|
|
PIANO 2 |
Honky-Tonk |
MelloGrand* |
Piano&Pad |
|
Elec.Grand |
M1 Piano |
|
|
|
|
|
|
|
|
|
E.PIANO 1 |
Tine EP 1 |
SuitTineEP |
DynoTineEP |
|
Tine EP 2 |
|
|
|
|
|
|
|
|
|
|
E.PIANO 2 |
Dig. EP 1 |
Dig. EP 2 |
Reed EP |
|
TremReedEP |
|
|
|
|
|
|
|
|
|
|
HARPSI/CLAV |
Harpsi 8' |
Harpsi 16' |
Clav |
|
Synth Clav |
|
|
|
|
|
|
|
|
|
|
VIBES/GUITAR |
Vibes 1 |
Vibes 2 |
Nylon Gtr. |
|
|
|
|
|
|
|
|
|
|
|
|
ORGAN1 |
Jazz Organ |
Perc.Org.1 |
Perc.Org.2 |
|
|
|
|
|
|
|
|
|
|
|
|
ORGAN2 |
Church Org |
Pipe Flute |
Pipe Tutti |
|
|
|
|
|
|
|
|
|
|
|
|
STRINGS/CHOIR |
Strings |
Slow Str. |
String Pad |
|
Choir |
ScatVoices |
Vocal Pad |
|
|
|
|
|
|
|
|
BASS |
Ac. Bass |
El. Bass |
Fretless B |
|
Bass&Ride |
|
|
|
|
|
|
|
|
|
|
* Note: The EPx effects are not available when you are in Layer mode.
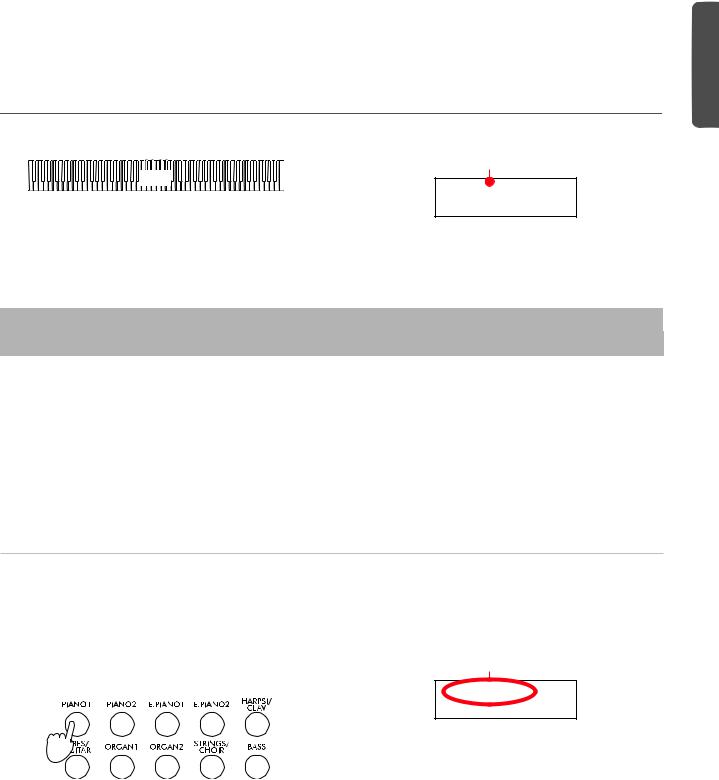
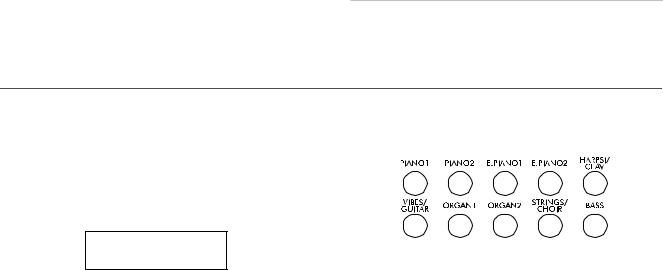
Selecting a sound
You can use the sound selection buttons to select a different sound.
1.Press one of the sound selection buttons in order to select a sound type.
1 |
2 |
3 |
4 |
5 |
6 |
7 |
8 |
9 |
10 |
The indicator on the button you pressed will light. The name of the selected sound will appear in the display:
Sound name
GrandPiano 4/4  120
120
2.Use the VARIATION button to select one of the available variations of the base sound (see table above). When the last variation has been selected, press it again to select the base sound again.
As an alternative, use the +/YES button to scroll the sound variation list forward; the -/NO button to scroll it backwards.
English
15
Basic functions > Playing two sounds at the same time (Layer mode)
Playing two sounds at the same time (Layer mode)
You can play two sounds at the same time on the keyboard. It is like having two “overlapping” sounds. This is called the Layer mode.
Main 


Layer
Keep in mind that, when in Layer mode, the total number of voices that you can play at the same time is reduced, depending on the total number of oscillators used by the selected sounds.
Entering the Layer mode
To access Layer mode from any other mode, press together two sound selection buttons. The lowest-numbered sound in the following diagram will be the Main sound, while the high- est-numbered sound will be the Layer sound:
1 |
2 |
3 |
4 |
5 |
6 |
7 |
8 |
|
10 |
The name of the two sounds will appear in the display:
Main sound
GrandPiano 4/4 Strings  120
120
Layer sound
Exit from the Layer mode
To exit Layer mode, press a single sound selection button, or the SPLIT button. You will return to the Single mode, with a single sound playing on the keyboard, or to the Split mode, with a sound on the left and one on the right of the split point.
Selecting a different pair of sounds
To select different sounds, press a different pair of sound selection buttons. The last selected variation of the sounds corresponding to the new buttons will be selected.
Selecting a variation of the Main sound
You can select a variation of the current Main sound.
1.Be sure the cursor is in the first line of the display. If it isn’t, use the SCROLL button to move it there:
Cursor GrandPiano 4/4
Strings  120
120
2.Use the VARIATION button to select a different sound variation. As an alternative, use the +/YES and -/NO buttons to choose a different sound variation.
Selecting a variation of the Layer sound
You can select a variation of the current Layer sound.
1.Use the SCROLL button to move the cursor to the Layer sound.
GrandPiano 4/4 Strings  120
120
Scroll
 GrandPiano 4/4
Strings  120
120
2.Use the VARIATION button to select a different sound variation. As an alternative, use the +/YES and -/NO buttons to choose a different sound variation.
3.If you desire so, use the SCROLL buttons to move the cursor back to the Main sound.
Balancing layered sounds
You can adjust the sound’s volume balance.
•Keep the Main sound button pressed, to increase its volume and (after the maximum value has been reached) decrease the volume of the Layer sound. Release the button when done.
•Keep the Layer sound button pressed, to increase its volume and (after the maximum value has been reached) decrease the volume of the Main sound. Release the button when done.
While the volume is changing, a meter is shown in the display:
Main sound’s volume
M:90 
L:127
Layer sound’s volume
16
Basic functions > Playing different sounds with your left and right hand (Split mode)
Playing different sounds with your left and right hand (Split mode)
You can play a sound with your right hand (the Main sound), and a different one with the left hand (the Left sound). This is called the Split mode.
Split Point


 Main
Main 


 Left
Left 


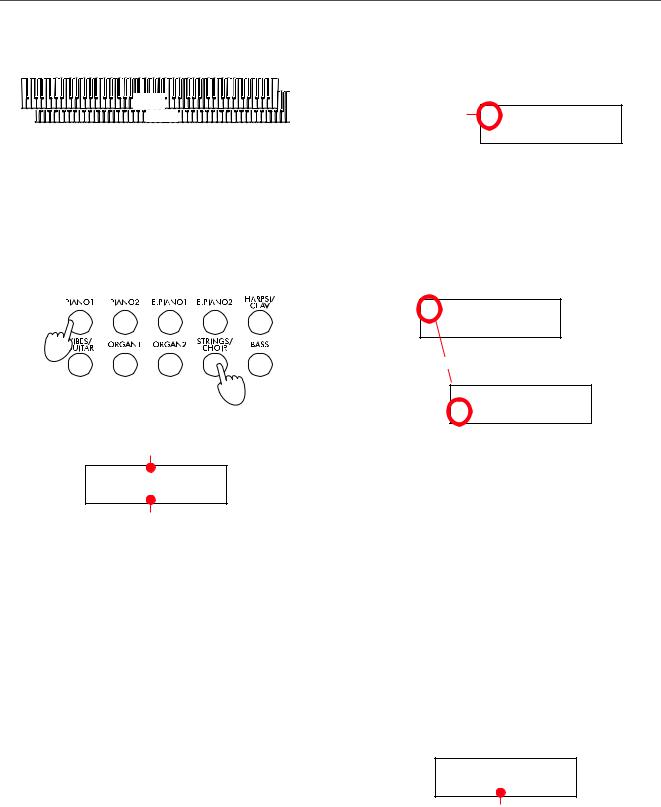
Entering the Split mode
To access Split mode from any other mode, press the SPLIT button. The Main sound of the Single or Layer mode will be assigned to the right half of the keyboard (Main area, shown in the first line of the display), and a Bass sound will be assigned to the left half of the keyboard (Left area, shown in the second line of the display).
Main sound
GrandPiano 4/4 Ac.Bass  120
120
Left sound
While the Ac.Bass sound will be chosen as the Left sound the first time you enter Split mode, the last selected sound will be assigned if you return to Split mode later.
Exit from the Split mode
To exit Split mode, press the SPLIT button again to return to the Single mode, or press two sound selection buttons together to enter Layer mode.
Choosing a different split point
If the selected split point is too high or too low, you can choose a different one. Please note that you can set a default split point, to have it ready each time you turn the instrument on (see “Default split point” on page 51).
1.Keep the SPLIT button pressed. The current split point is shown in the display while you keep the button pressed.
SplitPoint: F#3
2.Play a note to set a different split point.
3.Release the SPLIT button.
Selecting a different Main sound
You can select a different Main sound after accessing the Split mode. Use the sound selection buttons as you would do to select a sound in Single mode.
Selecting a variation of the Main sound
You can select a variation of the Main sound after accessing the Split mode.
1.Be sure the cursor is in the first line of the display. If it isn’t, use the SCROLL button to move it there:
Cursor GrandPiano 4/4
Ac.Bass  120
120
2.Use the VARIATION button to select a different sound variation. As an alternative, use the +/YES and -/NO buttons to choose a different sound variation.
Selecting a different Left sound
You can select a different Left sound after accessing the Split mode.
1.Keep the SPLIT button pressed. The indicator of the Left sound lights up.
2.Use the sound selection buttons to select a different sound.
3.Release the SPLIT button.
As an alternative, use the display controls:
1.Use the SCROLL buttons to move the cursor to the Left sound.
GrandPiano 4/4 Ac.Bass  120
120
Scroll
 GrandPiano 4/4
Ac.Bass  12
12
2.Use the sound selection buttons as you would do to select a sound in Single mode.
3.Use the buttons to move the cursor back to the Main sound.
Selecting a variation of the Left sound
You can select a variation of the Left sound after accessing the Split mode.
1.Keep the SPLIT button pressed. The indicator of the Left sound lights up.
2.Use the VARIATION button to select a different sound variation.
3.Release the SPLIT button.
English
17
Basic functions > Using the pedals
As an alternative, use the display controls:
1.Use the SCROLL buttons to move the cursor to the Left sound.
GrandPiano 4/4 Ac.Bass  120
120
Scroll
 GrandPiano 4/4
Ac.Bass  12
12
2.Use the VARIATION button to select a different sound variation. As an alternative, use the +/YES and -/NO buttons to choose a different sound variation.
3.If you want, use the SCROLL buttons to move the cursor back to the Main sound.
Balancing sounds in Split mode
You can adjust the sound’s volume balance.
•Keep the Main sound button (the one whose indicator is turned on) pressed, to increase its volume and (after the maximum value has been reached) decrease the volume of the Left sound. Release the button when done.
•Keep the SPLIT button pressed, or press the SCROLL button to move the cursor to the second line of the display. The indicator of the Left sound lights up. Then, keep the Left sound button pressed, to increase its volume and (after the maximum value has been reached) decrease the volume of the Main sound. Release the button when done.
While the volume is changing, a meter is shown in the display:
Main sound’s volume
M:108 |
|
L:127 |
|
|
|
Left sound’s volume
Using the pedals
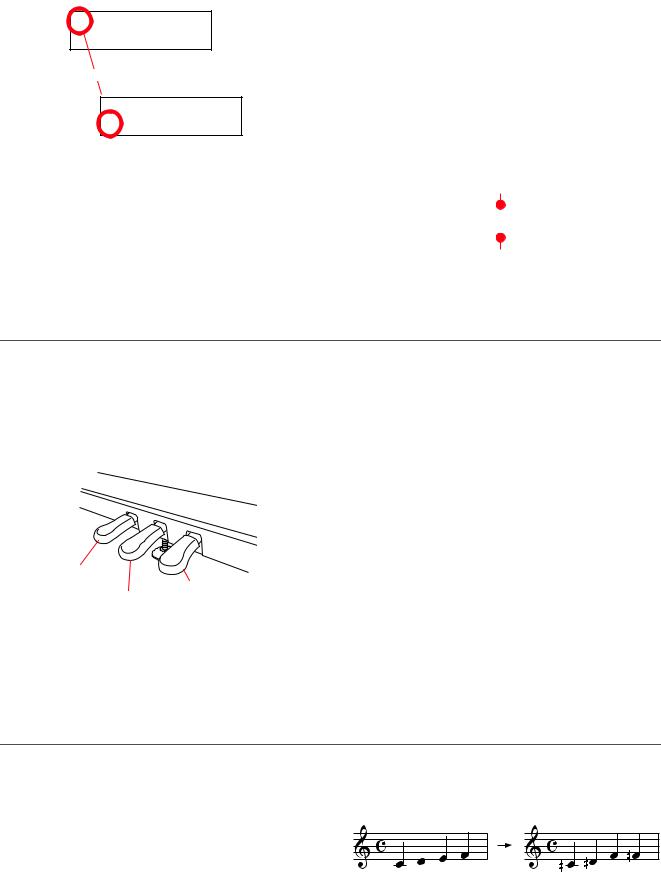
The C-520 has three assignable pedals, usually acting as damper, sostenuto, and soft. However, you can assign the pedals different functions (see page 47 for sound-level assignment, or page 52 for global programming).
With the default settings, you can use these pedals to add expression to your playing, as on a traditional piano.
3 2 1
Soft
Damper
Sostenuto
(1) Damper pedal
The damper pedal simulates the natural string resonances of an acoustic piano. Pressing this pedal will sustain the sound,
producing a richly resonant decay. You can control the damper’s depth by how far down you press on the pedal (“half-ped- aling”).
Sounds like GrandPiano, BriteGrand and MelloGrand also trigger EPx effects while in Single and Split mode. However, these effects are not available when you are in Layer mode.
(2) Sostenuto pedal
Pressing this pedal will apply the damper effect only to the notes that are already being held down on the keyboard, and will sustain only those notes. The damper effect will not be applied to any additional notes that you play while holding down the Sostenuto pedal (apart for the notes already held).
(3) Soft pedal
Pressing this pedal will make the tone softer. You can control the soft effect depth by how far down you press on the pedal (“half-pedaling”)
Transposing
In some cases, a song may be written in a difficult key (e.g., many black keys), or you may wish to shift the pitch to match another instrument or vocalist. In such cases, you can transpose (shift the pitch) so that you can use an easier fingering, or use the same familiar fingering to play at a different pitch. This is called the Transpose function.
For example if you transpose upward by one semitone, playing the notes shown at the lower left will produce the pitches shown at the right.
18
Note: When the instrument is turned on, transposing is reset.
1.Press the TRANSPOSE button to show the Transpose display:
Transpose+02 semitones
Transpose value
If you do no changes, just wait some seconds for the page to automatically disappear. Otherwise, you can exit from this page by pressing the EXIT button.
Basic functions > Changing the brilliance
2.Use the +/YES and -/NO buttons to change the transpose value in steps of one semitone, within a range of ±11 semitones. When a transposition is active, the indicator turns on.
3.Press the EXIT button to exit from this page.
4.Press the TRANSPOSE button again to turn transposition off. The indicator will turn off.
5.Press the TRANSPOSE button if you want to turn transposition on again, with the last value selected. The indicator will turn on again. Wait some seconds for the page to disappear, or press the EXIT button to exit immediately.
Changing the brilliance
Brilliance is the sound’s brightness, that may be affected by the sound of the room the piano is placed into. For example, a heavy carpeted room sounds duller than a room containing less carpeting or furniture. You can set an overall increase or decrease of brilliance for all sounds.
This is the same parameter you can change in the Brilliance page of the Global mode (see page 51). However, contrary to the changes you can make in the Global mode, the changes made with this button cannot be memorized, and are reset when turning the instrument off.
Note: When the instrument is turned on, brilliance set in this page is reset. (Brilliance may have permanently been set in Global mode, see page 51).
1.Press the BRILLIANCE button to show the Brilliance display:
BrillianceBright
If you do no changes, just wait some seconds for the page to automatically disappear. Otherwise, you can exit from this page by pressing the EXIT button.
2.Use the +/YES and -/NO buttons to change the brilliance value. When a brilliance change is active, the indicator turns on.
3.Press the EXIT button to exit from this page.
4.Press the BRILLIANCE button again to turn brilliance changes off. The indicator will turn off.
5.Press the BRILLIANCE button if you want to turn brilliance on again, with the last value selected. The indicator will turn on again. Wait some seconds for the page to disappear, or press the EXIT button to exit immediately.
Brilliance setting
Turning the effects on/off
The C-520 has two global effects (reverb and chorus), in addition to an insert effect for each sound (see diagram on page 44). The reverb simulates the sound reverberation in a room, while the chorus simulates a modulating effect that makes the sounds richer.
The insert effect is part of the sound itself, and should remain on to avoid a dramatic change in timbre. On the contrary, you
can turn the reverb and chorus on/off as you like, by using the REVERB and CHORUS buttons on the control panel.
However, selecting a different sound will reset the status of the buttons, since it is saved with the sound itself. To permanently change the effect’s status, edit the sound by keeping one of these buttons pressed for a couple seconds. See page 44 for more details.
English
19
Using performances > Choosing performances
Using performances
Performances are registrations of sound combinations. Instead of selecting single sounds, or a combination of sounds, you simply select a performance. A performance then recalls one or two sounds, each one with their own settings, plus the memorized split point (if the sounds are in Split mode).
There are 30 performances (10 groups × 3 banks each). Each group corresponds to one of the numbered sound select buttons (1 ~ 10). You can then choose one of the three banks inside the selected group by using the VARIATION button (more details are on page 283).
|
|
|
Performance |
|
|
Button |
|
|
|
||
Bank 1 |
Bank 2 |
Bank 3 |
|||
|
|
||||
|
|
|
|
|
|
1 |
(PIANO 1) |
Split&Layr |
Digital EP* |
Baroque* |
|
|
|
|
|
|
|
2 |
(PIANO 2) |
Grand&Ride |
PaddedTine* |
Harpsi-Ch* |
|
|
|
|
|
|
|
3 |
(E.PIANO 1) |
Grand&Ebas |
R&B EPno* |
Harpsi-Org* |
|
|
|
|
|
|
|
4 |
(E.PIANO 2) |
PnoStrings* |
EP Choir* |
Church Mix* |
|
|
|
|
|
|
|
|
|
|
Performance |
|
|
Button |
|
|
|
||
Bank 1 |
Bank 2 |
Bank 3 |
|||
|
|
||||
|
|
|
|
|
|
5 |
(HARPSI/CLAV) |
EGrand Pad* |
EP&NoFret |
Guitar Pad* |
|
|
|
|
|
|
|
6 |
(VIBES/GUITAR) |
Piano Pad* |
Scat&Bass |
GrandPiano |
|
|
|
|
|
|
|
7 |
(ORGAN1) |
Pno Choirs* |
Vibes&Bass |
BriteGrand |
|
|
|
|
|
|
|
8 |
(ORGAN2) |
Pno Guitar* |
Bass&Guitr |
MelloGrand |
|
|
|
|
|
|
|
9 |
(STRINGS/CHOIR) |
Piano BX3* |
Org&Bass 1 |
2 Pianists |
|
|
|
|
|
||
10 (BASS) |
DualManual |
Org&Bass 2 |
PnoEXp- |
||
|
|
|
|
DEMO** |
|
|
|
|
|
|
|
*Note: These performances, with sounds set in Layer mode, do not use EPx effects.
**Note: Performance 30 (PnoExpDEMO) is designed to demonstrate our “Piano eXperience” technology, by exaggerating the amount of key-off/hammer return portion of the Grand Piano sound; it is not intended to be a play-able timbre. Normally, these additional Piano eXperience sounds are not perceived as separate elements, but together with the other sample layers, they are a vital part of the realism and the authentic piano tone.
Choosing performances
Here is how to choose a performance.
Note: While in Performance mode, you cannot switch between Single, Layer and Split modes. However, if you select a performance with two sounds in Split, the SPLIT indicator will turn on.
1.Press the PERFORMANCE button to enter Performance mode. The indicator turns on, and the latest selected performance is recalled.
Perf.01 4/4
Split&Layr  120
120
2.Use the sound selection buttons to select a different group of performance.
1 |
2 |
3 |
4 |
5 |
6 |
7 |
8 |
9 |
10 |
3.If needed, use the VARIATION button to select a different performance inside the same group. There are three performances for each group of performances.
As an alternative, use the +/YES and -/NO buttons to choose a different performance inside the selected group.
4.Press the PERFORMANCE button again to exit Performance mode. The previous sound or combination of sounds will be recalled. The indicator will turn off.
20
Using performances > Changing the sounds assigned to a performance
Changing the sounds assigned to a performance
You can change the sound or sounds assigned to the current performance, without the need of accessing the Edit mode.
Note: You cannot change performance sounds while in Performance Edit mode.
Note: The EPx effects are not available when you are in Layer mode.
1.While you are in the Main page of the Performance mode, press both SCROLL / buttons together. The sound (or sounds) assigned to the performance are shown in the display:
Main sound
Piano&Str. Ac. Bass
2.If there are two sounds, use the SCROLL / buttons to move the cursor to the sound you want to change.
3.Use the +/YES and -/NO button to choose a different sound.
4.Press the EXIT button to exit from the above page. If you chose a different performance, changes are lost.
5.To save the changes use one of the save procedures explained in “Saving a performance” on page 42.
Layer/Left sound
Editing a performance
You can edit any performance according to your taste. You can also save any combination of sounds over an existing performance. See “Editing sounds and performances” on page 41.
English
21
The metronome > Starting and stopping the metronome, adjusting the tempo
The metronome
The C-520 incorporates a metronome, with which you can beat the tempo during practice or song recording. The metronome can beat ordinary times, or drum patterns.
Starting and stopping the metronome, adjusting the tempo
Use the METRONOME button to start and stop the metronome.
1.Press the METRONOME button to make the metronome start (the indicator on the button turns on).
2.Press the METRONOME button again to stop it (the indicator turns off).
Tempo and time signature display
The metronome’s tempo and time signature are always shown in the Main page:
Metronome’s time signature
GrandPiano 4/4 Strings  120
120
Metronome’s tempo
The metronome’s tempo and time signature also appear in Performance mode:
Metronome’s time signature
Perf 01 |
4/4 |
Split&Layr |
120 |
Metronome’s tempo
When a drum pattern is selected as the time signature, the separator between the fraction’s numerator and denominator is a
hyphen (–) (see page 23 for information o how to select drum patterns):
4/4 drum pattern selected
GrandPiano 4-4 Strings  120
120
When listening to a song, the tempo and time signature are those of the current song. You can use the TEMPO buttons to adjust the tempo while the song plays. On the contrary, the time signature cannot be modified after recording:
Song’s time signature
01-Prelude 1
M:1 4/4  120
120
Song’s tempo
(Please remember you can exit from the Song Play page and return to the Main page by pressing the EXIT button.)
Adjusting the tempo
When turning the metronome on for the first time, while in the Main page, the default tempo of 120 BPM (beats per minute) is chosen. You can adjust it by using the TEMPO buttons.
When turning it on from the Song Play (page 26) or Record page (see page 30), the tempo is that of the current song. You can adjust it by using the TEMPO buttons.
The last change is preserved, until you don’t choose a different song and start playing it back.
22
The metronome > Choosing a time signature
Choosing a time signature
When turning the metronome on from the Main page, the default time signature of 4/4 is chosen, but you can adjust it by accessing the Metronome page (as shown below).
Note: If the PLAY/PAUSE button is flashing, you cannot change the time signature.
Note: If you enter editing later, you might see a different edit page instead of the first one. Use the SCROLL button to reach it.
2.Use the +/YES and -/NO buttons to select a time signature. Ordinary times are at the beginning, while drum patterns are at the end. You can quick jump from the one to the other by pressing the +/YES and -/NO button together.
Ordinary times
1/2 ~ 16/2 |
1/4 ~ 16/4 |
1/8 ~ 16/8 |
|
|
|
1. Press the TEMPO + and TEMPO – (or MET.SET) buttons
together. The first Metronome page, Metro TS/Tempo, 3. Press the EXIT button to return to the Main page. will appear, with the Time Signature parameter selected:
Metro TS/Tempo 14/4  120
120
Drum patterns
Instead of an ordinary time signature (4/4, 3/4, etc…), a drum pattern can be assigned to the metronome. This will give you the sense you are playing together with a real drum player. You can also record a drum pattern into a song.
Note: Contrary to ordinary metronome “clicks”, drum pattern notes can also be recorded by the internal recorder. They can also be transmitted via MIDI, so you can record them on an external sequencer, or make them play with an external instrument (see “MIDI” on page 59).
Drum patterns
16 Beat 3 |
Rock |
Mambo |
Foxtrot |
|
|
|
|
Ballad 1 |
Rock 6/8 |
Tango |
March |
|
|
|
|
Ballad 2 |
Dance |
Rhumba |
|
|
|
|
|
Ballad 3 |
Beguine |
Gospel |
|
|
|
|
|
Ballroom 1 |
Unplugged |
Swing 1 |
|
|
Latin |
|
|
|
|
|
|
Drum patterns are in the second half of the time signature list. While the list is selected, either scroll to it, or press both the +/ YES and -/NO buttons together, to quick jump to the drum patterns. Press these buttons together again to quick jump to the ordinary time signatures (4/4 selected).
Drum patterns
8 Beat 1 |
Ballroom 2 |
Bossa 1 |
Swing 2 |
|
|
|
|
8 Beat 2 |
Ballroom 3 |
Bossa 2 |
Swing 3 |
|
|
|
|
8 Beat 3 |
Slow 6/8 |
Samba |
Slow Waltz 1 |
|
|
|
|
16 Beat 1 |
Funk 1 |
Cha Cha |
Slow Waltz 2 |
|
|
|
|
16 Beat 2 |
Funk 2 |
Salsa |
Waltz |
|
|
|
|
Here is how to use the drum patterns:
1.While in the Main page, press the METRONOME button to start the metronome. A Count In is heard, then the drum pattern begins.
2.While in the Main page (either with a sound or a performance selected), or in the Record page, press EXIT (or a pedal with the Fill In function assigned, see page 52). A Fill In is played, then a variation of the base drum pattern start playing.
3.Press EXIT (or the pedal) again. A second Fill In is played, then the base drum pattern returns playing.
4.Press the METRONOME button to stop the metronome.
English
23
The metronome > Adjusting the metronome level
Adjusting the metronome level
You can adjust the metronome’s level, in relation to the overall instrument’s volume.
1.Press the TEMPO/MET.SET buttons together. The first Metronome page should appear.
2.Press the SCROLL button to go to the second Metronome page, Metro Lev/Rev. The Lv (Level) parameter will be selected:
Metro Lev/Rev 2
Lv:100 Rv:64
3.Use the +/YES and -/NO buttons to change the metronome’s volume.
4.Press the EXIT button to return to the Main page.
Adjusting the drum pattern’s reverb
You can add a reverb effect to the drum patterns.
Note: Reverb does not apply to the metronome click (i.e., when an ordinary time signatures is chosen).
1. Press the TEMPO/MET.SET buttons together.
2.If you are not there, use the SCROLL / buttons to select the Rv (Reverb) parameter:
Metro Lev/Rev 2
Lv:100 Rv:64
3.Use the +/YES and -/NO buttons to change the metronome’s reverb.
4.Press the EXIT button to return to the Main page.
24
The metronome > Selecting the accent
Selecting the accent
The accented beat of the ordinary times signatures can be changed to a marcato or bell sound.
Note: The accent does not apply to drum patterns.
1.Press the TEMPO/MET.SET buttons together.
2.If you are not there, use the SCROLL / buttons to go to the Metro Accent page:
Metro Accent 3Bell
3.Use the +/YES and -/NO buttons to turn the bell on or off, and choose one of the available accent options.
Option |
Meaning |
|
|
Off |
No accent |
|
|
Marcato |
The first beat is played louder |
|
|
Bell |
The first beat is played by a bell sound |
|
|
4. Press the EXIT button to return to the Main page.
Saving the metronome settings
Metronome settings can be saved, so that they are not reset to the default values when turning the instrument off. This procedure saves time signature, volume setting, reverb setting, accent. On the contrary, tempo settings are always reset.
1.Press the TEMPO/MET.SET buttons together. The first Metronome page appears.
2.Press the SCROLL button four times, to go to the fourth Metronome page. The Metro Settings Save parameter will be selected:
Metro Settings 4Save? (Yes/No)
3.Press +/YES to confirm saving, or -/NO to cancel saving. You are automatically kept back to the Main page.
English
25
Playing back a song > Accessing the Song Play mode
Playing back a song
The C-520 incorporates a multitrack recorder, with which you can record and play back songs. Since you can turn off a single part (say, the left hand), and leave another part playing (say, the right hand), this can be very useful for practicing.
Together with the C-520 come a huge number of classical songs (185), with which you can play along for practicing or for enjoying your preferred tunes. Songs are organized in “albums”, that include famous lesson books (Beyer, Burgmüller),
a collection of famous songs, and all the pieces included in the supplied SongBook.
The recorder can also read 16-track songs in the Standard MIDI Files (SMF) format, that can be created on a computer or easily found on the market or in the public domain. Please note that, while the C-520 complies with General MIDI (GM) sound mapping, it does not include all GM sounds. For a detailed list of sounds, see page 277.
Accessing the Song Play mode
After you press the SONG button, the Song Play page appears:
Song name
01-Prelude 1
M:--- 4/4  120
120 Tempo
Tempo
To return to the Main page, just press one of the sound selection buttons to select a sound, or press the EXIT button. The selected song will still be active, but you will no longer see its name in the display, until you press the SONG button again.
Current measure |
Time signature |
How to select a song
To play a song, you must first select it from an album. Songs are contained into a permanent memory, and are preserved when turning the instrument off.
1.If you are in the Main page, press the SONG button twice. If you are already in Song Play mode, press the SONG button once to access the Song Selection page:
Album:SongBook  Album
Album
01-Prelude 1 |
Song |
2.Use the +/YES and -/NO buttons to select one of the available songs inside the selected album. If the name is longer than the display, it will scroll up to the end, then returns to the beginning.
3.To select a different album, use the SCROLL button to move the cursor to the first line of the display:
Album:SongBook01-Prelude 1
Scroll
Album:SongBook 01-Prelude 1
As an alternative, you can use the first six sound select buttons to choose an album. See table on the next page.
4.Use the +/YES and -/NO buttons to select one of the available albums. Various song albums are available (see page 286 for a detailed list of the included songs):
|
|
Correspondin |
||
|
|
|||
Album |
Content |
g sound |
||
|
|
button |
||
|
|
|
|
|
UserSong |
Songs created using the internal |
(1) |
PIANO 1 |
|
|
recorder, or created with an exter- |
|
|
|
|
nal sequencer and then trans- |
|
|
|
|
ferred to the C-520 via a USB |
|
|
|
|
connection (see page 56) |
|
|
|
|
|
|
|
|
SongBook |
All the songs of the supplied |
(2) |
PIANO 2 |
|
|
SongBook |
|
|
|
|
|
|
|
|
Classics |
A collection of famous classical |
(3) |
E.PIANO 1 |
|
|
pieces |
|
|
|
|
|
|
|
|
Beyer A |
The “Preparatory School, Op. 101” |
(4) |
E.PIANO 2 |
|
|
lesson book by Ferdinand Beyer, |
|
|
|
Beyer B |
(5) |
HARPSI/ |
||
splitted in two separate parts (A |
||||
|
CLAV |
|||
|
and B) |
|||
|
|
|
||
|
|
|
|
|
Burgmlr |
Burgmüller’s “25 Easy and Pro- |
(6) |
VIBES/ |
|
|
gressive Studies, Op. 100” lesson |
GUITAR |
||
|
book |
|
|
|
|
|
|
|
|
26
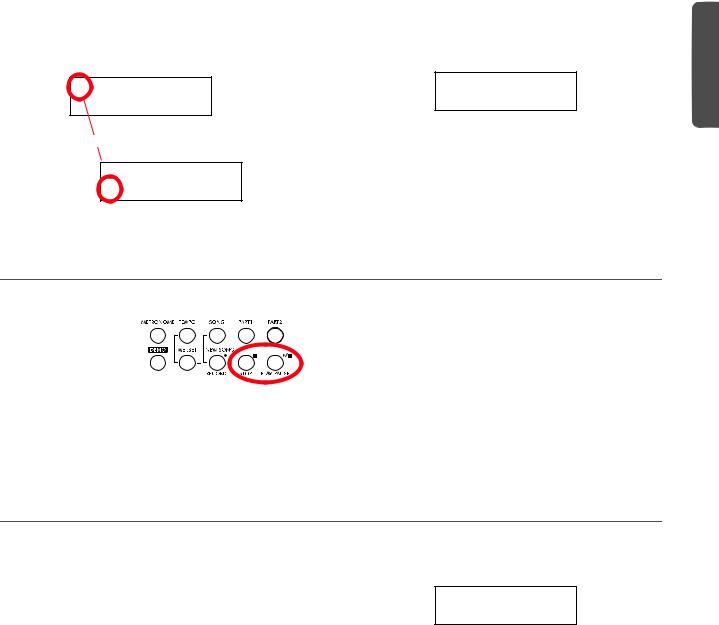
5.After having selected an album, use the SCROLL button to move the cursor to the song name again, then choose a different song:
Album:SongBook 01-Prelude 1
Scroll
 Album:SongBook
01-Prelude 1
Playing back a song > How to start playback
6.Press the PLAY/PAUSE button to start playback and return to the Song Play page, or the EXIT button to just return to the Song Play page, without starting the song.
01-Prelude 1M:--- 4/4  120
120
How to start playback
After having selected a song, you can play it back.
Note: During playback,
song parts can be sent out via MIDI. Song parts are
the following: Part 1, Part 2, and Drum (this latter is active only if a drum patterns is playing).
1.Press PLAY/PAUSE to start playing the song. The indicator on the button turns on.
2.Press PLAY/PAUSE again to stop the song at the current position. The indicator on the button starts flashing.
3.Press PLAY/PAUSE again to resume playback. The indicator on the button stays on steadily.
4.Press STOP to stop the song. The indicator on the PLAY/ PAUSE button turns off. The song returns to the beginning (measure “---”).
Starting from a different measure
You can start playback from a measure different than the first one.
Note: When releasing the +YES or -/NO button, you may hear the EPx effects, due to Damper data recorded in the song.
1.While in the Song Play page, the M (Measure) parameter is selected. Use the +/YES and -/NO buttons to choose a
different measure (+/YES is sometimes called Fast Forward, while -/NO is called Rewind):
01-Prelude 1M:--- 4/4  120
120
2.Press the PLAY/PAUSE button to start playback from the selected measure.
English
27

Playing back a song > Muting/unmuting a recorder’s part
Muting/unmuting a recorder’s part
During playback, you can mute or unmute a recorder’s part. Muting is useful to play a part on the keyboard, while letting the recorder to continue playing the other.
Depending on the settings made in Global mode (see “Mute Level” on page 53), muting may completely silence the part, or just attenuate it. Attenuation is very useful for practicing, since it lets you play over a part that you can still hear at a very soft level.
Note: The part’s status is automatically restored when you choose a different song (it is turned on if there are notes, or turned off if the part is empty).
1. Press the PART 1 or
PART 2 button, depending on the part
you want to mute (usually, Part 1 = left hand, Part 2 = right
hand. This may be different with songs imported via USB). The muted part’s indicator turns off.
At this point, you can play the muted part on the keyboard.
2.Press the same button again, to unmute the part and let its indicator turn on again.
Changing the song’s tempo
Each song contains its own tempo. You can, however, change it during playback, for example to make it easier playing along with the song.
1.Use the TEMPO + button to increase the tempo and make the song play faster.
2.Use the TEMPO - button to decrease the tempo and make the song play slower.
3.Press both the +/YES and -/NO buttons at the same time to recall the original tempo of the song.
Play along with the song
During playback, you can play along with the song. The latest selected sounds are still active on the keyboard. You can select different sounds, as seen before. When you press a sound selection button, the Main page appears. Press the SONG button to return to the Song Play page.
When selecting different sounds, their effects are also recalled. Be careful, since this can dramatically affect the song’s overall sound. When selecting a different song, the song’s effects are selected again.
28
Loading...