

Page 1

SEH Baseline 650 Print Server Network Installation Notes Print Server Network Installation Notes
Windows XP/2000
If you are installing the SEH Baseline 650 Print Server on a PC running Windows XP/2000, you do
not need the instructions contained in this document. All of the necessary instructions are in
"SEH Baseline 650 Print Server Installation and Use."
Windows Me/98/95
If you are installing the SEH Baseline 650 Print Server on a PC running Windows Me/98/95, refer
first to the instructions in "SEH Baseline 650 Print Server Installation and Use." Then return to this
document when instructed to do so.
1-5. Refer to the instructions in "SEH Baseline 650 Print Server Installation and Use."
6. Step 6 can be found on the next page of this document.
- 1 -
Page 2
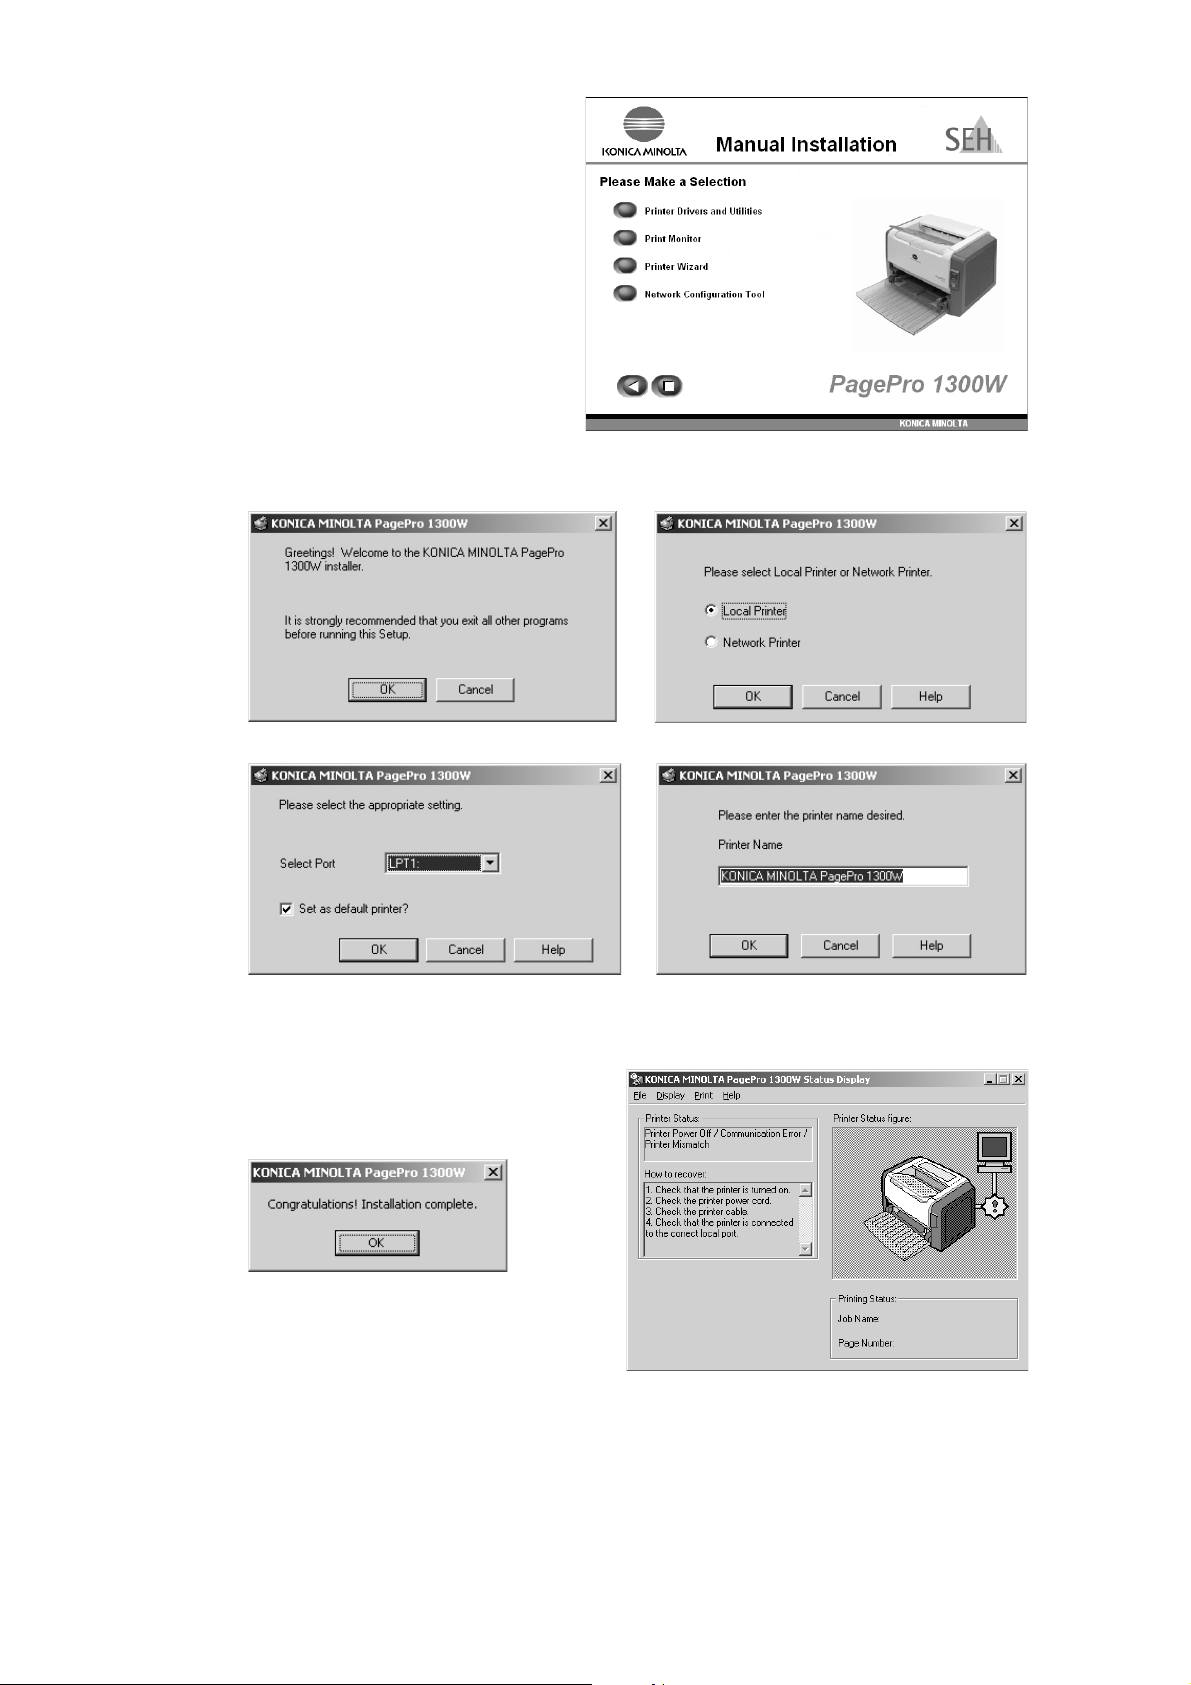
6. In the Manual Installation screen,
select Printer Drivers and Utilities.
7. During this installation, select all options by default, as shown below.
8. Once the installation is completed, click on
OK, then exit the Status Display utility.
When instructed to do so, restart your computer, restart the CD-ROM Installer, go back to the
Manual Installation screen then continue with the next installation step.
- 2 -
Page 3

9. Once back in the Manual
Installation screen, select Print
Monitor.
10. Wait until the installation is
completed, then click on Finish.
When instructed to do so, restart
your computer, restart the CD-ROM
Installer, go back to the Manual
Installation screen, then continue
with the next installation step.
11. Once back in the Manual Installation screen, select Printer Wizard, then click on Next.
- 3 -
Page 4

12. In the following screens, select the print server from the list, then click on Next.
If your printer server cannot be located in this list, it means that it might not have been able
to automatically obtain a valid address from your network. If this is the case, please contact
your Network Administrator or go back to the Manual Installation screen, select the
Network Configuration Tool installation, then use this utility to configure a valid address
for your print server on your network.
13. Select the printer driver you installed during
step 7 then click on Next.
14. Leave the proposed name as default, then
click on Next.
- 4 -
Page 5

15. Once installation is completed, click on Finish, then exit the Status Display utility.
16. Open the Printer folder with the Windows Start menu -> Settings -> Printers.
You will find two drivers installed for your printer:
• Konica Minolta xx: Can safely be deleted
• Konica Minolta xx (Copy 1): Can be renamed as needed
17. Restart the Status Display utility from the
Windows Start menu -> Programs ->
Konica Minolta xx Utilities -> Konica
Minolta xx Display. After a few seconds,
it will find the newly installed printer.
18. Installation is completed, you can now use your printer on the network.
1760666-002A
- 5 -
 Loading...