

Konica Minolta bizhub PRESS C6000, IC-601, bizhub PRESS C70hc, bizhub PRESS C8000, IC-601 Job Centro User Manual

IC-601
Job Centro

IC-601 Contents-1
Contents
1 Introduction
1.1 Welcome .......................................................................................................................................... 1-2
1.1.1 Composition of User's Guide............................................................................................................. 1-2
1.1.2 User's Guide ...................................................................................................................................... 1-2
1.2 Conventions used in this manual .................................................................................................. 1-3
1.2.1 Symbols used in this manual ............................................................................................................. 1-3
Safety Information.............................................................................................................................. 1-3
Procedural instruction........................................................................................................................ 1-3
Key symbols....................................................................................................................................... 1-4
1.2.2 Original and paper indications ........................................................................................................... 1-4
Paper size .......................................................................................................................................... 1-4
Paper indication ................................................................................................................................. 1-4
2 Overview of the Job Centro
2.1 Job Centro ....................................................................................................................................... 2-2
2.1.1 Roles of Job Centro........................................................................................................................... 2-2
2.2 Control Panel................................................................................................................................... 2-3
2.3 Operating environment................................................................................................................... 2-5
2.3.1 Connectable computers and operating system................................................................................. 2-5
Windows ............................................................................................................................................ 2-5
2.3.2 Interfaces used for connection .......................................................................................................... 2-6
Connection diagram........................................................................................................................... 2-6
2.4 Setup procedure ............................................................................................................................. 2-7
3 Precautions for Installation
3.1 Introduction ..................................................................................................................................... 3-2
3.2 Installer ............................................................................................................................................ 3-2
3.2.1 Operating environment of the installer............................................................................................... 3-2
3.2.2 Settings of the image controller......................................................................................................... 3-3
TCP/IP Setting ................................................................................................................................... 3-3
JSP Setting ........................................................................................................................................ 3-3
4 Installation of Job Centro
4.1 Introduction ..................................................................................................................................... 4-2
4.2 Installing Job Centro ...................................................................................................................... 4-2
5 Basic Information
5.1 Launch Job Centro ......................................................................................................................... 5-2
5.1.1 General Login..................................................................................................................................... 5-2
5.1.2 User Authentication/Account Track................................................................................................... 5-3
5.2 Screens of Job Centro.................................................................................................................... 5-4
5.2.1 [Printer]............................................................................................................................................... 5-4
5.2.2 [Device Status] ................................................................................................................................... 5-5
5.2.3 [Consumables] ................................................................................................................................... 5-5
5.2.4 [Paper Tray]........................................................................................................................................ 5-6
5.2.5 [Device Information] ........................................................................................................................... 5-6
5.2.6 [JOB LIST].......................................................................................................................................... 5-6
[Active Job] screen............................................................................................................................. 5-7
[Image Controller Hold]...................................................................................................................... 5-7
[Main Body Hold/HDD] screen........................................................................................................... 5-7
[Job History] screen ........................................................................................................................... 5-7

IC-601 Contents-2
5.2.7 [Close] ................................................................................................................................................ 5-7
5.3 Layout Settings ............................................................................................................................... 5-8
5.3.1 How to display [Layout Settings] screen ........................................................................................... 5-8
5.3.2 Settings of the default tab.................................................................................................................. 5-8
5.3.3 Settings of the list items..................................................................................................................... 5-9
5.3.4 Settings of the date style ................................................................................................................... 5-9
5.3.5 Settings of the time style ................................................................................................................. 5-10
5.3.6 Reset of the layout........................................................................................................................... 5-10
5.4 Exit from Job Centro..................................................................................................................... 5-11
6 How to Manage Job with Job Centro
6.1 Job Management of the Printing System ..................................................................................... 6-2
6.1.1 Overview of the Job Management by Job Centro............................................................................. 6-2
6.1.2 Function of [JOB LIST]....................................................................................................................... 6-3
Job Management of Each Screen ..................................................................................................... 6-3
Available Menu of Each Screen ......................................................................................................... 6-3
Other Functions of Each Screen........................................................................................................ 6-4
6.2 Management................................................................................................................................... 6-5
[Active Job] screen............................................................................................................................. 6-5
Status of Active Job........................................................................................................................... 6-6
6.2.1 Change the Active Job Priority .......................................................................................................... 6-6
[Increase Priority] ............................................................................................................................... 6-6
[Change Priority] ................................................................................................................................ 6-7
6.2.2 Delete Active Job............................................................................................................................... 6-8
6.3 Job Operation in the Image Controller (Image Controller Hold) ................................................ 6-9
[Image Controller Hold] screen .......................................................................................................... 6-9
Sorting of list.................................................................................................................................... 6-10
6.3.1 Search of Job in the Image Controller............................................................................................. 6-10
Search by File Name........................................................................................................................ 6-10
Search by Condition ........................................................................................................................ 6-11
Clearing Search Conditions ............................................................................................................. 6-12
6.3.2 Print Job in the Hold Queue of the Image Controller and Copy it to the Hold Queue of the Main Body
6-12
Print Job........................................................................................................................................... 6-12
Copy Job to the Hold Queue of the Main Body............................................................................... 6-13
6.3.3 Copy/Delete Job in/from the Image Controller................................................................................ 6-13
Copy Job.......................................................................................................................................... 6-13
Delete Job........................................................................................................................................ 6-14
6.3.4 Operate Job File............................................................................................................................... 6-14
Rename File Name........................................................................................................................... 6-14
Import Job........................................................................................................................................ 6-15
Backup Job...................................................................................................................................... 6-17
Restore Job...................................................................................................................................... 6-18
6.3.5 Edit Job in the Image Controller ...................................................................................................... 6-19
Configuration of The Print Setting Screen ....................................................................................... 6-19
[Tray Settings] screen ...................................................................................................................... 6-20
[Basic Setting] screen ...................................................................................................................... 6-21
[Custom Size Settings] screen......................................................................................................... 6-23
[Layout] screen................................................................................................................................. 6-24
[Finishing] screen ............................................................................................................................. 6-25
[Cover Sheet/Insert Sheet] screen ................................................................................................... 6-26
[Per Page Setting] screen ................................................................................................................ 6-27
[Crop Mark] screen .......................................................................................................................... 6-28
[Stamp] screen................................................................................................................................. 6-29
[Image Quality] screen ..................................................................................................................... 6-30
[Color Management] screen............................................................................................................. 6-31
Favorite Setting................................................................................................................................ 6-32
6.3.6 Edit Page of the Job in the Image Controller................................................................................... 6-33
Edit Page Screen ............................................................................................................................. 6-33
Move Page ....................................................................................................................................... 6-34

IC-601 Contents-3
Copy Page ....................................................................................................................................... 6-34
Copy Page from Other Job.............................................................................................................. 6-34
Delete Page...................................................................................................................................... 6-35
Rotate Page ..................................................................................................................................... 6-35
Insert Blank Page............................................................................................................................. 6-35
Insert Tab Paper............................................................................................................................... 6-36
Insert Separator ............................................................................................................................... 6-36
6.4 Job Operation in the Main Body (Main Body Hold/HDD) .......................................................... 6-37
[Main Body Hold/HDD] screen......................................................................................................... 6-37
Sorting of list.................................................................................................................................... 6-38
6.4.1 Print Job in the Hold Queue of the Main Body and Copy/Delete it to/from HDD of the Main Body ... 638
Reprint Job ...................................................................................................................................... 6-39
Copy Job to the HDD of the Main Body.......................................................................................... 6-39
Delete Job........................................................................................................................................ 6-40
Unlock the Secure Print Job ........................................................................................................... 6-41
6.4.2 Print Job in HDD of the Main Body and Copy/Delete it to/from the Hold Queue of the Main Body ... 641
Reprint Job ...................................................................................................................................... 6-42
Copy Job to the Hold Queue of the Main Body............................................................................... 6-43
Delete Job........................................................................................................................................ 6-43
Unlock the Secure Print Job ........................................................................................................... 6-44
6.4.3 Create/Delete Folder in/from HDD of the Main Body ...................................................................... 6-44
Create New Folder........................................................................................................................... 6-44
Delete Folder.................................................................................................................................... 6-45
6.5 Job Confirmation (Job History).................................................................................................... 6-46
[Job History] screen ......................................................................................................................... 6-46
Sorting of list.................................................................................................................................... 6-46
Result ............................................................................................................................................... 6-47
6.5.1 Export Job History ........................................................................................................................... 6-47
7 How to Use Utilities
7.1 Launch Color Centro ...................................................................................................................... 7-2
7.2 Launch PageScope Web Connection .......................................................................................... 7-3
8 Troubleshooting
8.1 Cannot start Job Centro................................................................................................................. 8-2
9 Appendix
9.1 Glossary ........................................................................................................................................... 9-2
9.2 Index................................................................................................................................................. 9-6

1
Introduction

IC-601 1-2
1.1 Welcome
1
1 Introduction
1.1 Welcome
Thank you for purchasing this machine.
This User's Guide describes the functions, operating instructions, precautions for correct operation, and simple troubleshooting guidelines of this machine. In order to obtain maximum performance from this product
and use it effectively, please read this User's Guide as necessary.
1.1.1 Composition of User's Guide
Refer to the "User's Guide Printer (IC-601)" for more detailed information on "Composition of User's Guide".
1.1.2 User's Guide
This User's Guide is intended for users ranging from those using this machine for the first time to administrators.
It describes basic operations, functions that enable more convenient operations, maintenance procedures,
simple troubleshooting operations, and various setting methods of this machine.
Note that basic technical knowledge about the product is required to enable users to perform maintenance
work or troubleshooting operations. Limit your maintenance and troubleshooting operations to the areas explained in this manual.
Should you experience any problems, please contact our service representative.
IC-601 1-3
1.2 Conventions used in this manual
1
1.2 Conventions used in this manual
1.2.1 Symbols used in this manual
Symbols are used in this manual to express various types of information.
The following describes each symbol related to correct and safe usage of this machine.
Safety Information
7 WARNING
- This symbol indicates that a failure to heed the instructions may lead to death or serious injury.
7 CAUTION
- This symbol indicates that negligence of the instructions may lead to mishandling that may cause injury
or property damage.
NOTICE
This symbol indicates a risk that may result in damage to this machine or originals.
Follow the instructions to avoid property damage.
Procedural instruction
0 This check symbol indicates that it is a precondition for steps or information that you should be noted
before performing the steps.
1 This format number "1" represents the first step.
2 This format number represents the order of serial steps.
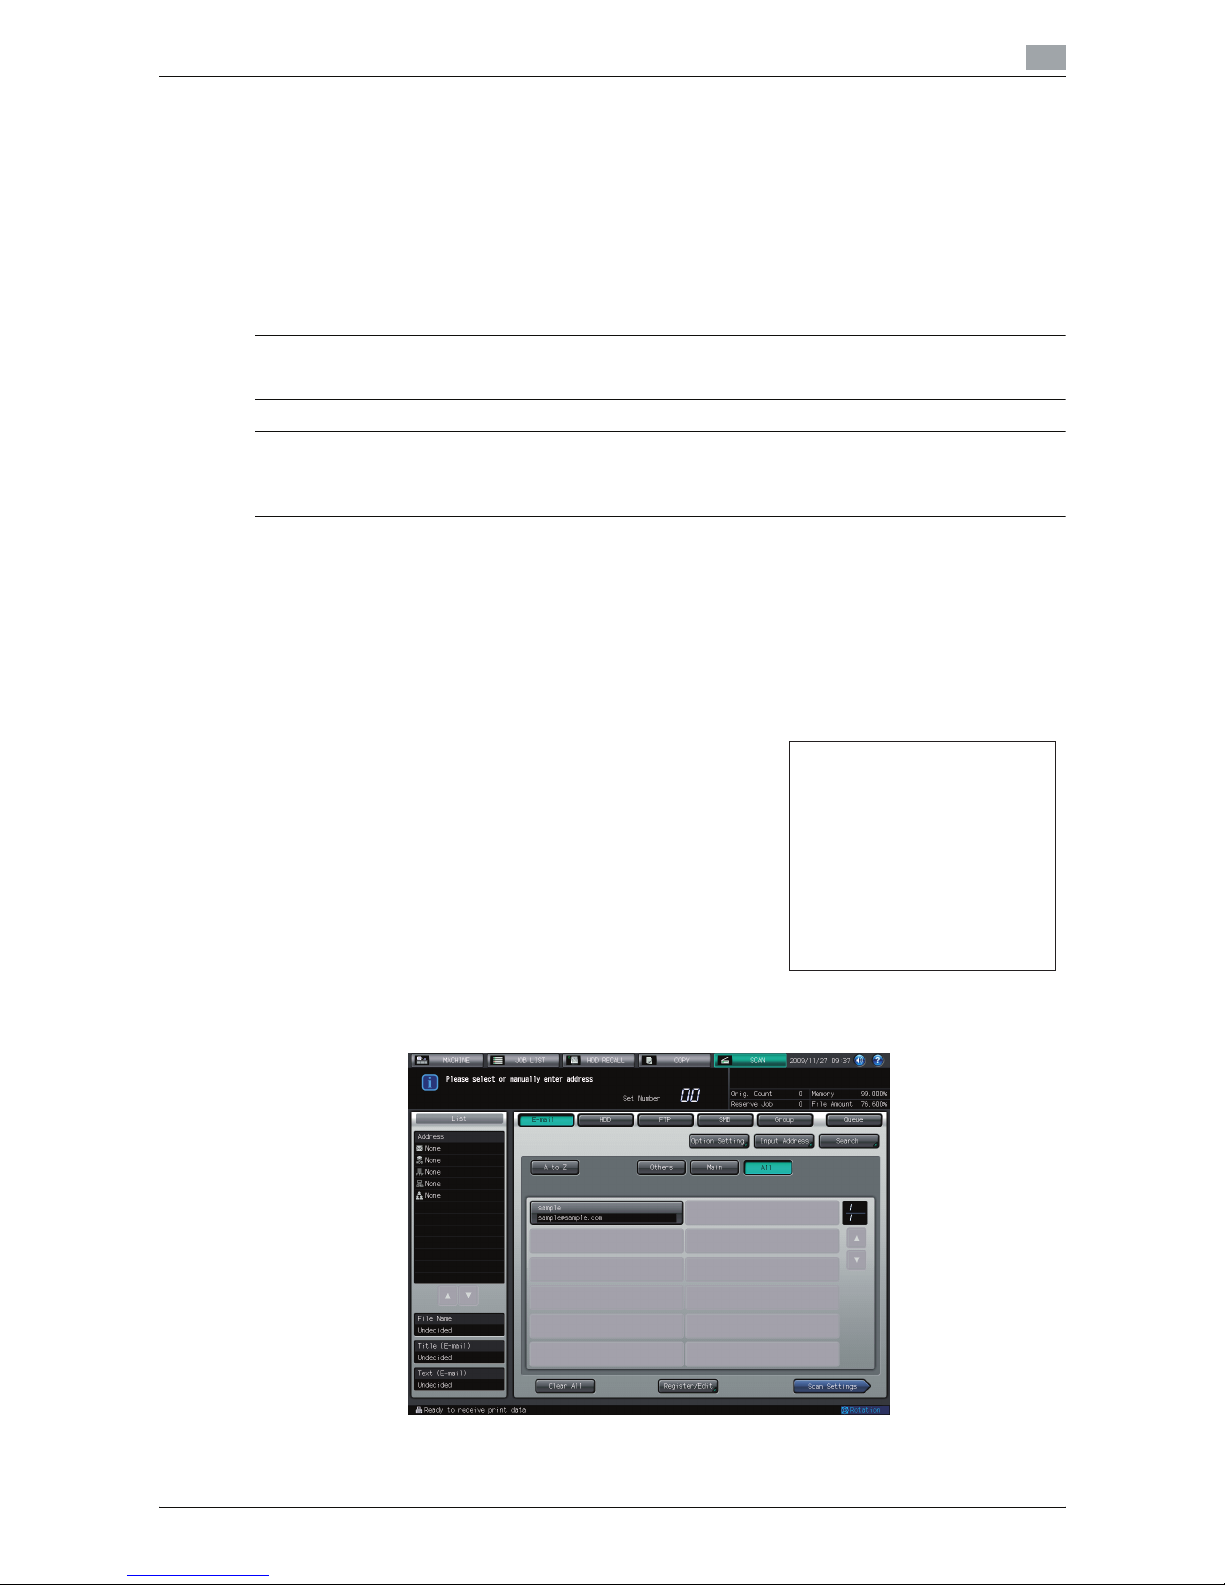
% This symbol indicates a supplementary explanation of a
procedural instruction.
% This symbol indicates transition of the control panel to access a desired menu item.
The relevant image is shown.
The operation
procedures
are described
using instruction.
IC-601 1-4
1.2 Conventions used in this manual
1
d Reference
This symbol indicates a reference.
View the reference as required.
Key symbols
[ ]
Key names on the touch panel or computer screen, or a name of user's guide are indicated by these brackets.
Bold text
Key names on the control panel, part names, product names and option names are indicated in bold text.
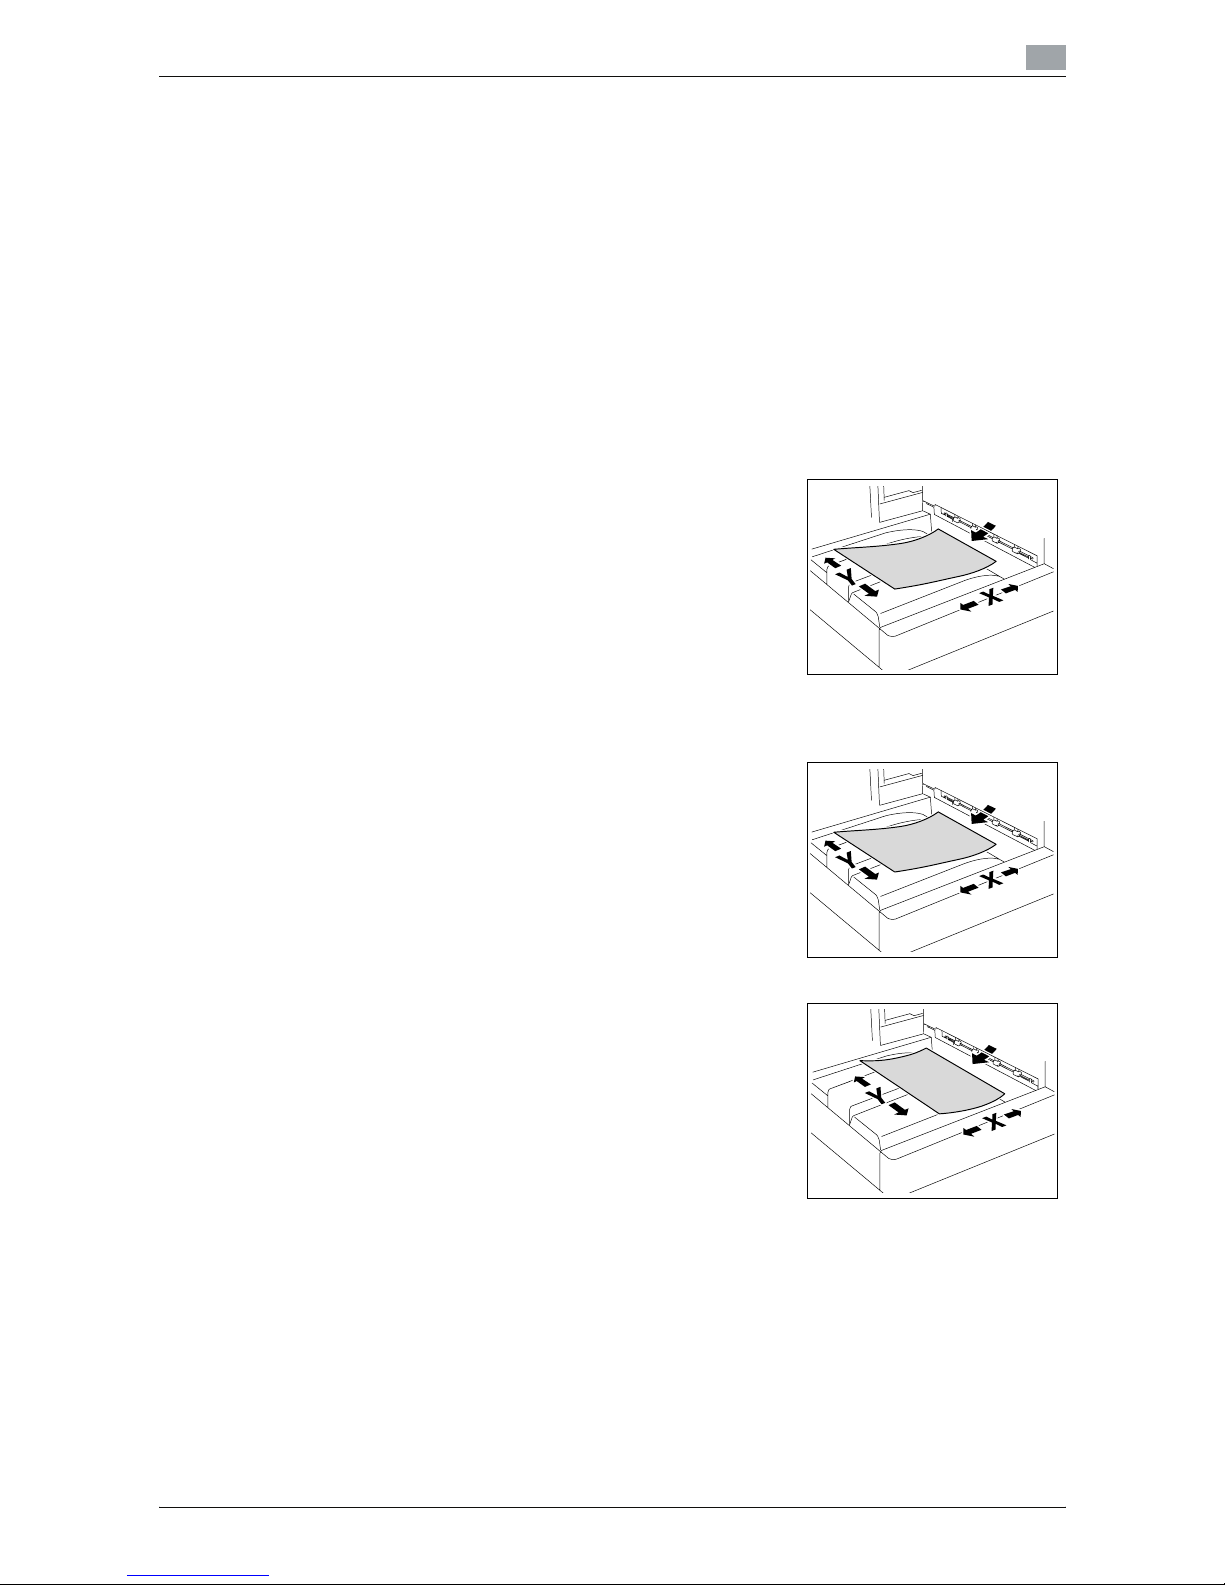
1.2.2 Original and paper indications
Paper size
The following explains the indication for originals and paper described
in this manual.
When indicating the original or paper size, the Y side represents the
width and the X side the length.
Paper indication
w indicates the paper size with the length (X) being longer than the
width (Y).
v indicates the paper size with the length (X) being shorter than the
width (Y).

2
Overview of the Job Centro

IC-601 2-2
2.1 Job Centro
2
2 Overview of the Job Centro
This chapter describes the overview and connection environment of "Job Centro" that is an attached utility
to the image controller to provide the printer function of the main body.
2.1 Job Centro
Job Centro is the application to manage the printing job of the printing system that is composed with the
main body and the image controller. For details of the image controller, refer to "User's Guide - Printer (IC-
601)".
2.1.1 Roles of Job Centro
Job Centro has two chief functions.
One of the chief functions is to acquire the device information such as the printer status, the consumables,
and the tray information. From this information, you can confirm the status of the main body easily on your
computer
The other one is to display and manage jobs. Through [JOB LIST] of Job Centro, you can monitor the sending
job of the printer driver and operate the printing job. This function has the important role in the workflow of
the main body. Because this function can manage the printing job being in the image controller which can
not be managed from the control panel.
The monitoring range of Job Centro is so wide that you can monitor from receiving of job data in the image
controller to outputting of job and also you can check both of the printing queue and HDD. Using Job Centro,
you can also operate these jobs being within the range mentioned above. In addition to that, you can invoke
the job edit utility and the page edit utility from Job Centro to edit job being in the image controller.
Before transmitting of job to the main body, you can operate job and edit job and page without slowing down
the engine speed of the main body by using Job Centro.
For detailed information on the available operations of job, refer to page 6-2
Job Centro
Image Controller Main Body
JOB
Hold/
HDD
Hold
Rippping Printing
Output
Rip
Waiting
IC-601 2-3
2.2 Control Panel
2
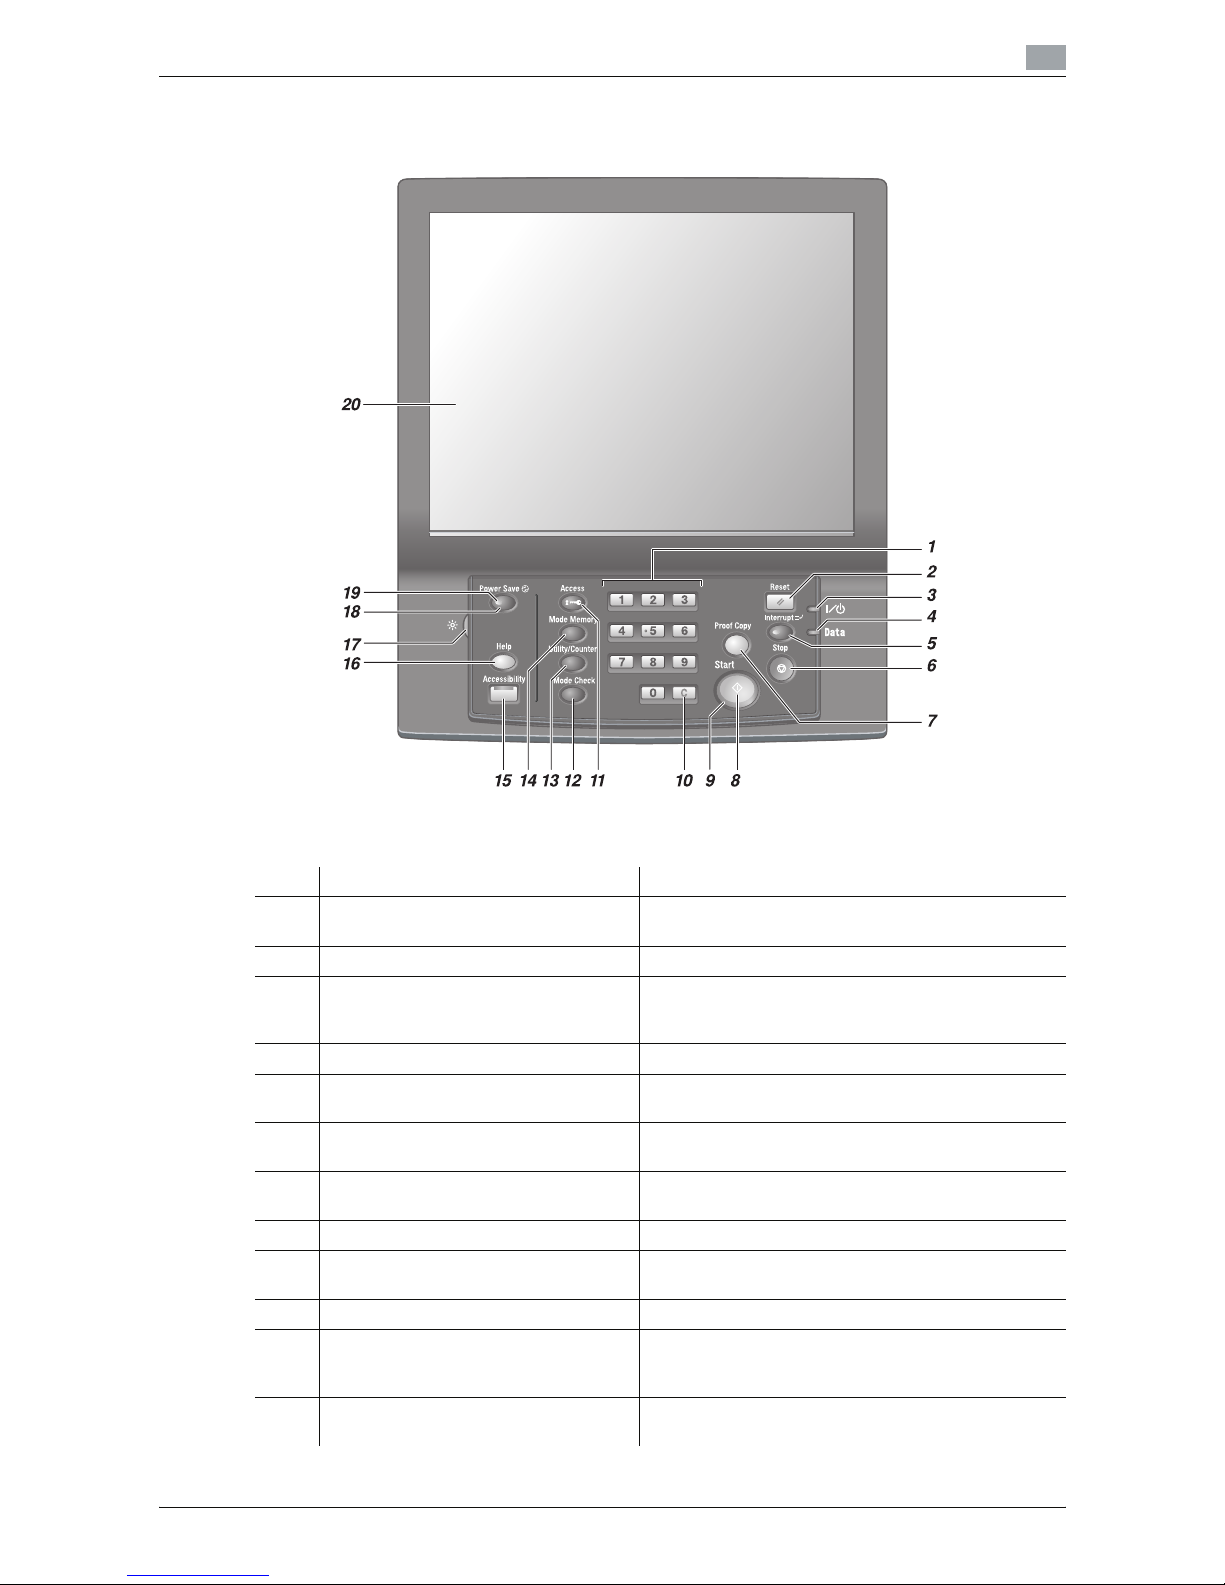
2.2 Control Panel
No. Item Description
1 Keypad Enters values for various settings, including print
quantity and password.
2 Reset Restores machine to the initial settings.
3 Power LED Lights up in red when the main power switch is
turned on, then turns green when the sub power
switch is turned on.
4 Data LED Flashes while receiving print data.
5 Interrupt Stops copying/printing/scanning in progress to allow
a simple copying job.
6 Stop Ceases the machine operation; deletes the stored
memory.
7 Proof Copy Used to check the adjustments made on the Quality
Adjustment Screen.
8 Start Activates various machine operations.
9 Start LED Lights in blue when machine operation is available.
It turns orange if any operation cannot be started.
10 C (Clear) Allows change in entered numeric value.
11 Access Sets the machine to allow the operation only when a
user/account name and password are entered, if user
authentication or account track function is activated.
12 Mode Check Used to check settings of the print job in progress or
those currently made.

IC-601 2-4
2.2 Control Panel
2
7 CAUTION
Do not press hard or pointed objects against the touch panel on the control panel.
- Otherwise, the glass may be scrached or break and you may be injured. Use fingers to operate the
touch panel.
7 CAUTION
Stop the operation immediately when the Service Call Screen is displayed and copying cannot be continued
any more.
- Otherwise, an unexpected trouble may be caused. Write down the report code as stated on the second
line of the message, turn off the sub power switch and main power switch in this order, then disconnect
from the power socket. Contact your service representative and inform them of the report code.
NOTICE
Be sure not to turn off the main power switch in usual operation.
Be sure not to turn off the main power switch before turning off the sub power switch.
Be sure not to turn off the main power switch while the following messages are displayed after turning off
the sub power switch.
[Cooling in progress / Power will be off when completed]
[Power off in progress / Please do not turn the main power switch off]
Turning off the main power switch with these messages displayed may cause serious machine trouble such
as toner fixation.
d Reference
Refer to User's Guide (POD Administrator's Reference) for how to turn off the power.
13 Utility/Counter Displays the Utility Menu Screen and various
counters.
14 Mode Memory Registers/Recalls the desired copy settings. Also re-
calls previous job settings.
15 Accessibility Adjusts the response time in touch panel and control
panel key operation.
16 Help Displays the Help Screen that provides information on
how to operate the screen currently displayed on the
touch panel.
Also provides information on various supplies and
disposals when pressed with the Machine Screen displayed.
17 Brightness adjustment dial Turned to adjust the brightness of the touch panel.
18 Power Save Enables temporary use of the machine when the
Power Save LED is lit. Also, activates power-saving
mode when pressed while the machine is inactive.
19 Power Save LED Lights when any power-saving mode is activated, or
machine power is off due to the timer function.
20 Touch panel Displays various screens to allow the function setting.
No. Item Description

IC-601 2-5
2.3 Operating environment
2
2.3 Operating environment
This section describes the system requirements for using Job Centro and the interfaces used for connection.
2.3.1 Connectable computers and operating system
Make sure that the computer to be connected meets the following conditions.
Windows
Operating system Windows 2000/XP/Server 2003/Vista/Server 2008/7 (including 64 bit version)
CPU Any processor of the same or higher specifications as recommended for your
operating system
Memory Memory capacity as recommended for your operating system
Sufficient memory resource is required for your operating system and the applications to be used.
HDD Any HDD of the same or higher specifications as recommended for your operat-
ing system
Drive CD-ROM drive
Network Interface 1000Base-T/100Base-TX/10Base-T (1000Base-T recommended)
IC-601 2-6
2.3 Operating environment
2
2.3.2 Interfaces used for connection
To connect Job Centro to the image controller, use the Ethernet via a network connection.
It supports 1000Base-T, 100Base-TX, and 10Base-T standards.
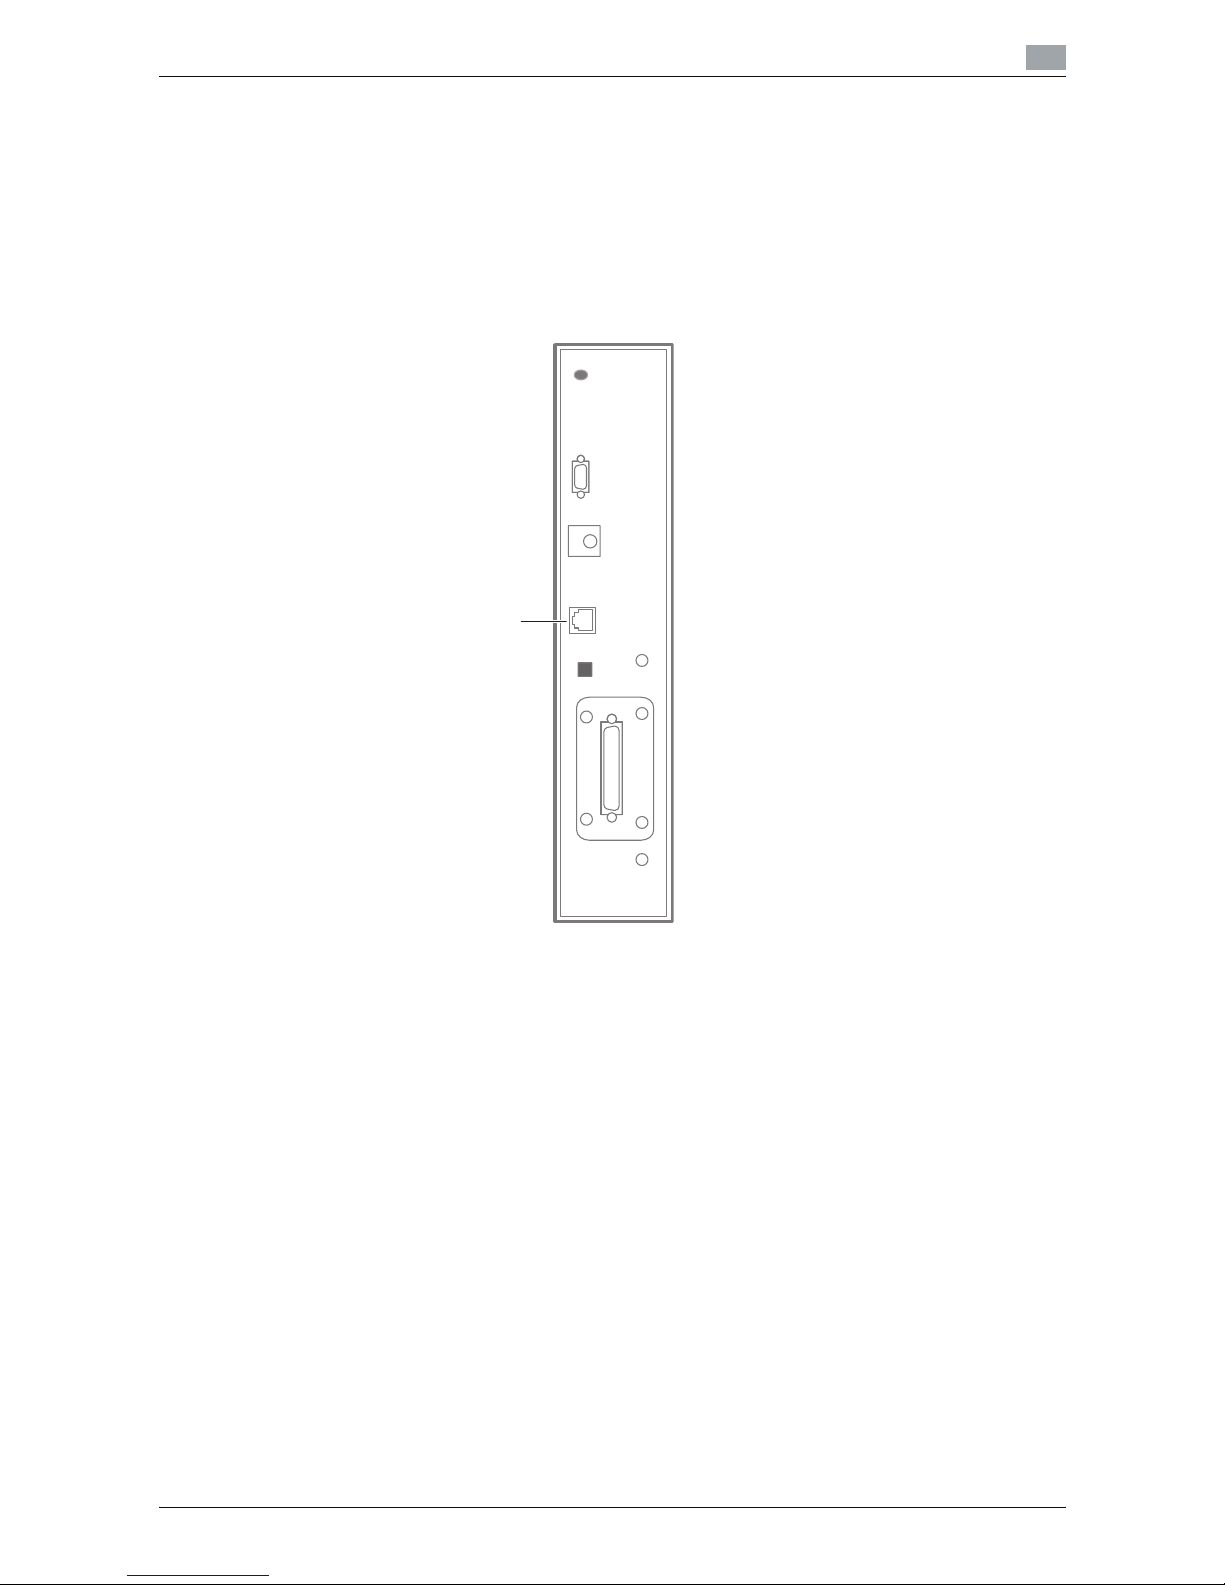
Connection diagram
The network cable is connected to the network port of the image controller
Lateral side of the image controller
1. Ethernet port (1000Base-T/100Base-TX/10Base-T)
1

IC-601 2-7
2.4 Setup procedure
2
2.4 Setup procedure
To use Job Centro, you must complete the setup in advance.
The setup refers to a series of procedures for connecting the image controller and the computer to the network and installing Job Centro to the computer.
Perform the setup using the following procedures.
1 Connect the image controller and the computer to the network.
2 Check that the computer to be used is connected to the network.
3 Confirm the IP address and the port number of the JSP settings of the image controller.
4 Install Job Centro.
d Reference
For details on the connectable interfaces, refer to page 2-6
For details of the image controller, refer to "User's Guide - POD Administrator's Reference".

3
Precautions for Installation

IC-601 3-2
3.1 Introduction
3
3 Precautions for Installation
The following describes the information necessary to install Job Centro.
3.1 Introduction
This chapter describes the information you should keep in mind before installing Job Centro.
Before the procedure for installing Color Centro, confirm the operating system of your computer and the network environment.
3.2 Installer
You can install Job Centro and confirm the Microsoft .Net Framework 2.0, which is necessary for the start of
Color Centro, by using this installer. When the Microsoft .Net Framework 2.0 is not installed, the installation
screen of the Microsoft .Net Framework 2.0 is displayed at the installation of Job Centro. In this case, install
the Microsoft .Net Framework 2.0 following the instruction on the screen.
Reference
- The Microsoft .Net Framework 2.0 is installed in the Microsoft operating system since Windows
2000/XP by default.
3.2.1 Operating environment of the installer
Reference
- Installing the driver to Windows 2000/XP/Server 2003/Vista/Server 2008/7-based computers requires
the administrator authority.
- The installer supports installation in both IPv4/IPv6 environments of Windows Vista/Server 2008//7 on-
ly.
Operating system Windows 2000 Professional (Service Pack 4 or later)
Windows XP Professional (Service Pack 3 or later)
Windows Server 2003, Standard Edition (Service Pack 2 or later)
Windows Server 2003, Enterprise Edition (Service Pack 2 or later)
Windows Server 2003 R2, Standard Edition (Service Pack 2 or later)
Windows Server 2003 R2, Enterprise Edition (Service Pack 2 or later)
Windows XP Professional e64 Edition (Service Pack 2 or later)
Windows Server 2003, Standard e64 Edition (Service Pack 2 or later)
Windows Server 2003, Enterprise e64 Edition (Service Pack 2 or later)
Windows Server 2003 R2, Standard e64 Edition (Service Pack 2 or later)
Windows Server 2003 R2, Enterprise e64 Edition (Service Pack 2 or later)
Windows Vista Business (Service Pack 2 or later) *
Windows Vista Enterprise (Service Pack 2 or later)
*
Windows Vista Ultimate (Service Pack 2 or later)
*
Windows Server 2008 Standard (Service Pack 2 or later)
*
Windows Server 2008 Enterprise (Service Pack 2 or later)
*
Windows Server 2008 Standard without Hyper-V (Service Pack 2 or later)
*
Windows Server 2008 Enterprise without Hyper-V(Service Pack 2 or later)
*
Windows 7 Professional
*
Windows 7 Enterprise
*
Windows 7 Ultimate
*
•* Supports 32-bit (e86)/64-bit (e64) environment.
CPU Any processor of the same or higher specifications as recommended for
your operating system
Memory Memory capacity as recommended for your operating system
Sufficient memory resource is required for your operating system and the
applications to be used.

IC-601 3-3
3.2 Installer
3
3.2.2 Settings of the image controller
The network setting of the image controller is necessary beforehand.
TCP/IP Setting
Specify the IP address in [Administrator Setting] - [Controller Setting] - [Controller NIC Setting] - [TCP/IP Setting] of this machine.
JSP Setting
Specify the port number in [Administrator Setting] - [Controller Setting] - [Controller NIC Setting] - [JSP Setting] of this machine.
- The default value is "30081". Usually, the amendment is unnecessary.
- When [JSP Setting] is [Enable] and [Authentication Setting] is [Disable], you can use Job Centro.
d Reference
For details of the settings for the image controller, refer to "User's Guide - POD Administrator's Reference".

4
Installation of Job Centro
IC-601 4-2
4.1 Introduction
4
4 Installation of Job Centro
This chapter describes the procedure for installing Job Centro using the installer.
4.1 Introduction
Before installing Color Centro, confirm the description of page 3-2.
4.2 Installing Job Centro
1
Insert the installation CD-ROM into the CD-ROM drive of the computer.
% Make sure that the installer starts, and then go to Step 2.
% If the installer does not start, double-click [AutoRun.exe] on the CD-ROM, and then go to Step 2.
2 Click [Administration Tool] - [Job Centro] - [Install].
% When installing the driver on a Windows Vista/Server 2008/7-based computer, click [Allow] or [Con-
tinue] if the [User Account Control] window appears.
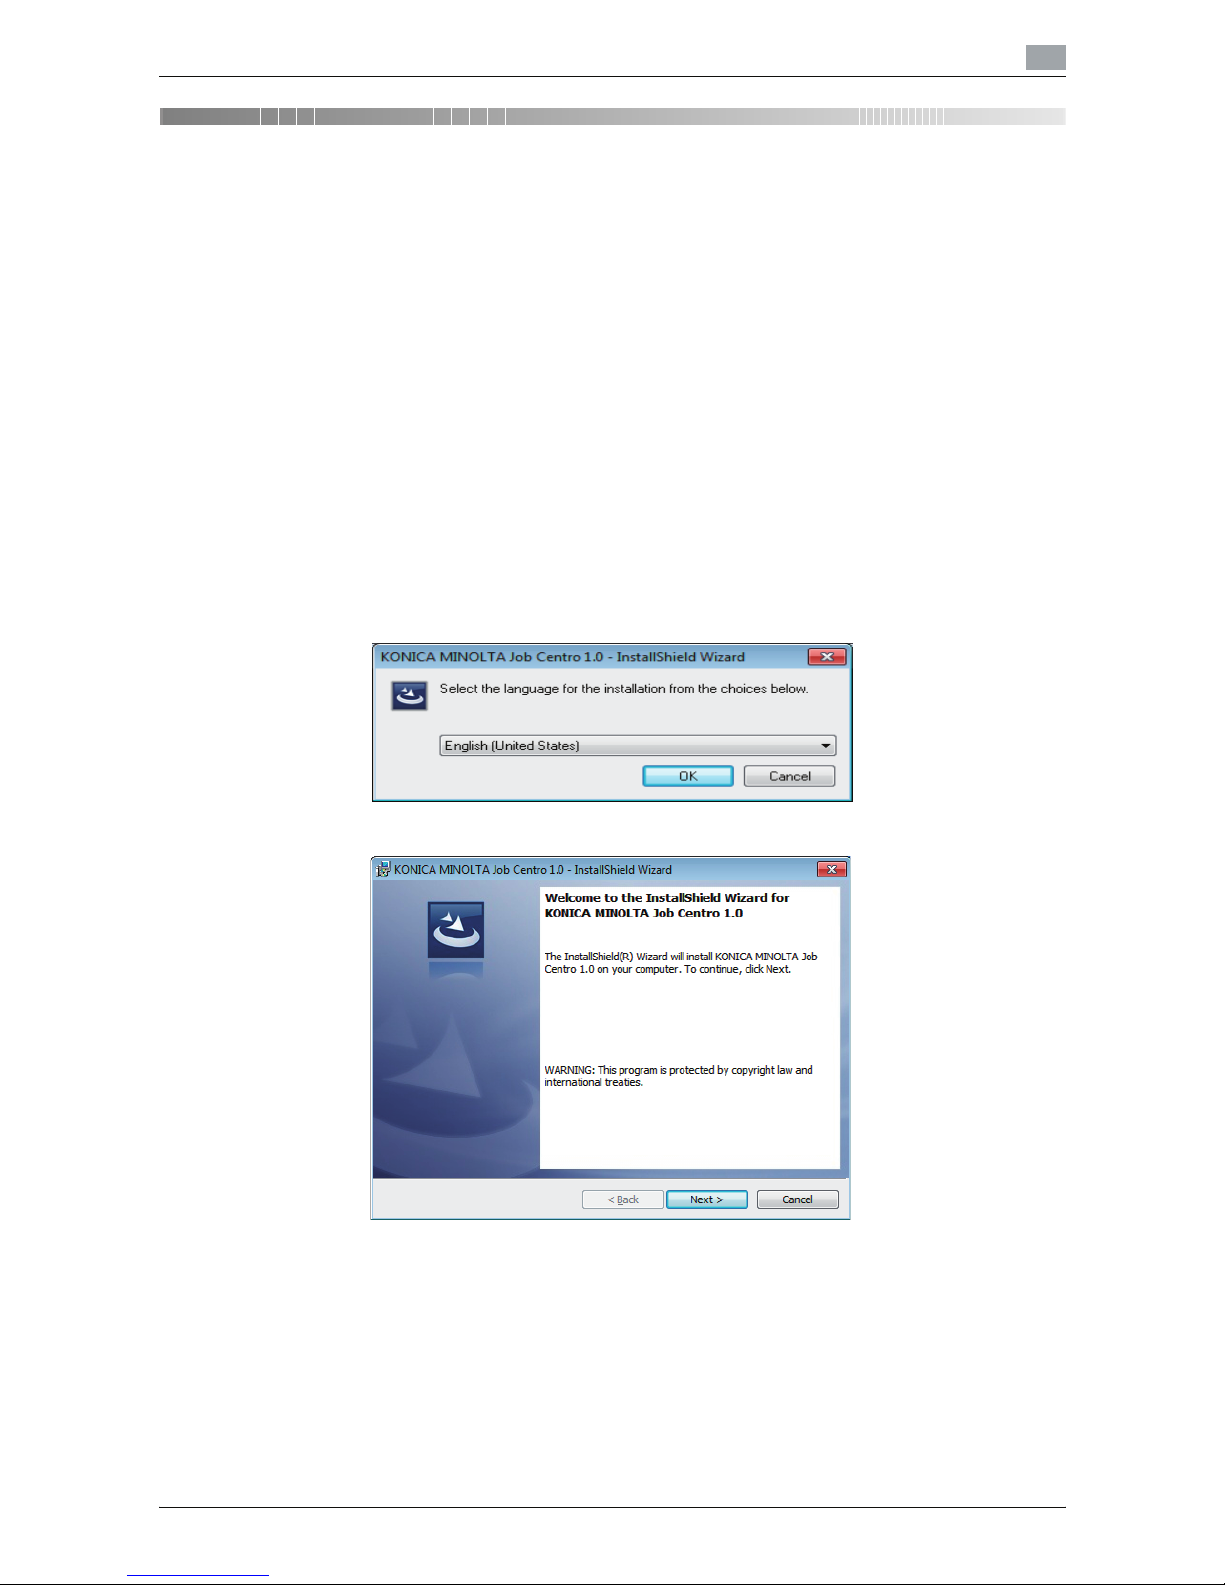
3 Select a language, and then click [OK].
4 Click [Next].
[License Agreement] screen appears.
IC-601 4-3
4.2 Installing Job Centro
4
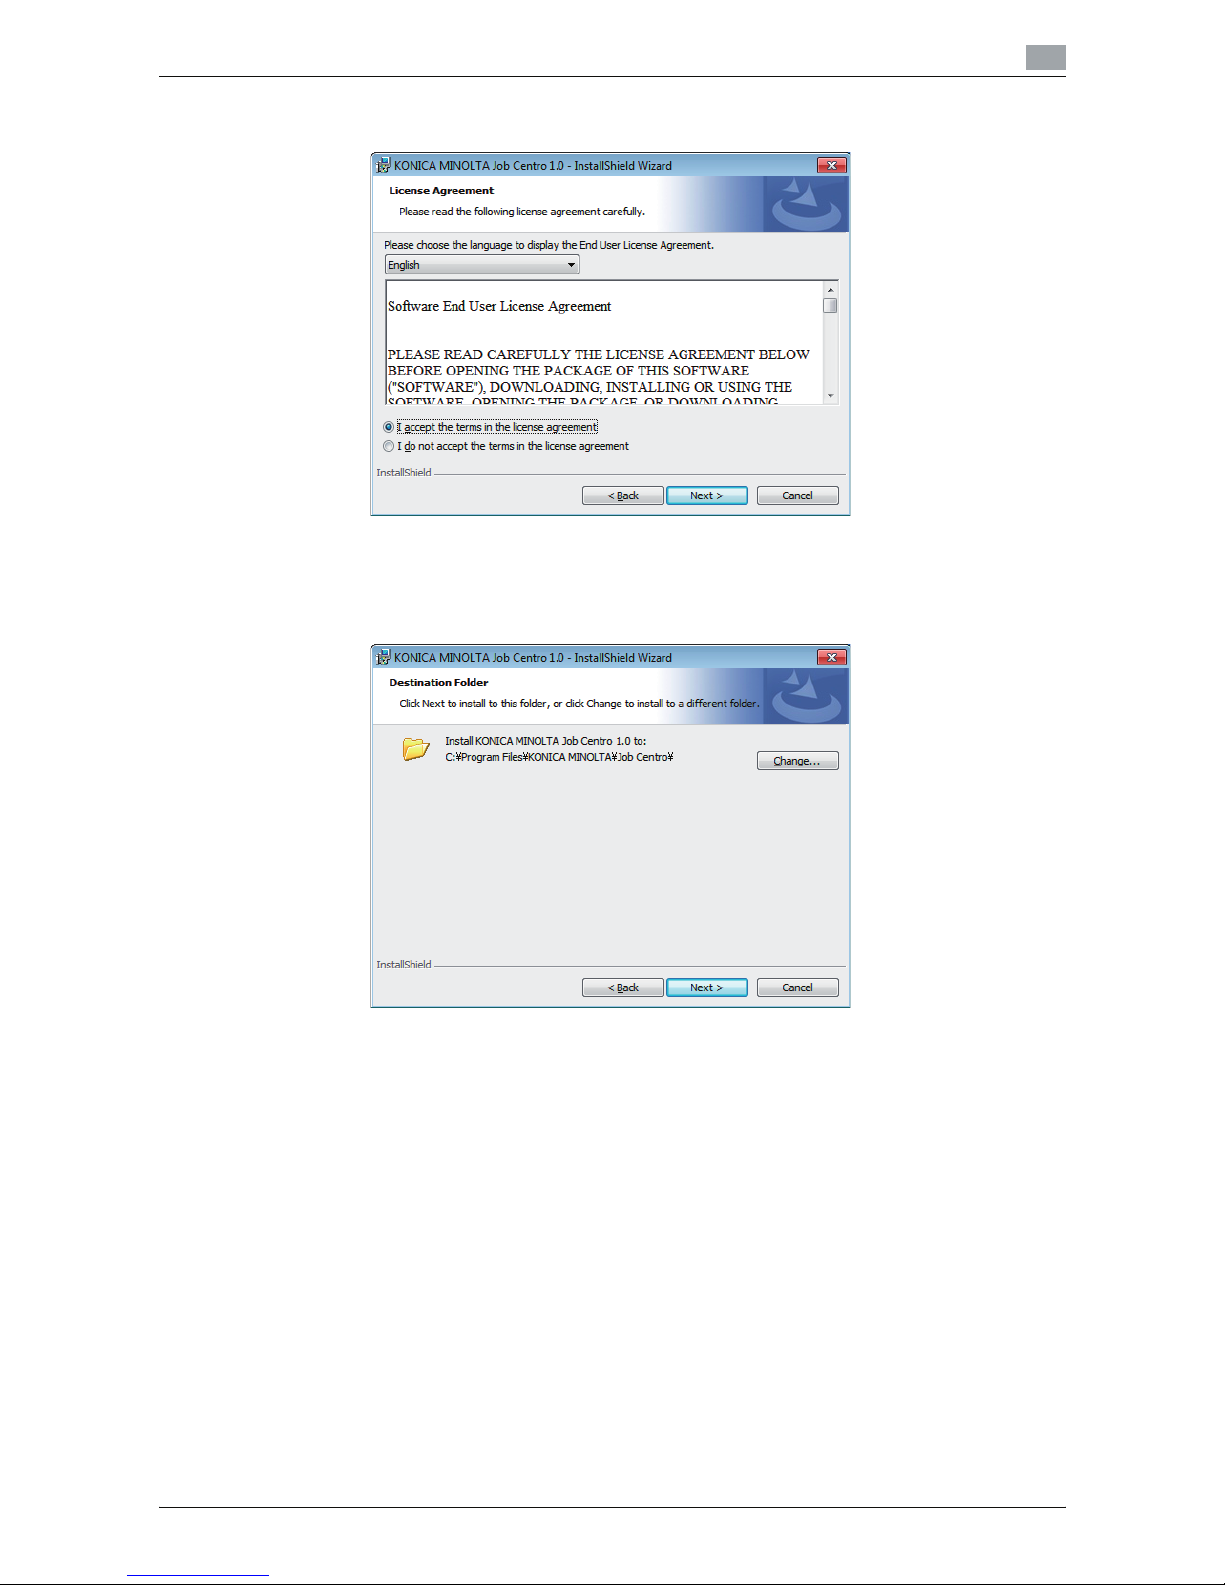
5 Confirm the content. When you agree all the terms, click [I accept the terms in the license agreement]
and click [Next].
% If you disagree, you will not be able to install the driver.
% In the language display box, you can change the language used with the license agreement as re-
quired.
6 Select the destination folder and click [Next].
% By default, Color Centro is installed to C:\Program Files\KONICA MINOLTA\Job Centro.
% If you want to change the destination folder, click [Change] and select the desired location on the
displayed screen and click [OK].
IC-601 4-4
4.2 Installing Job Centro
4
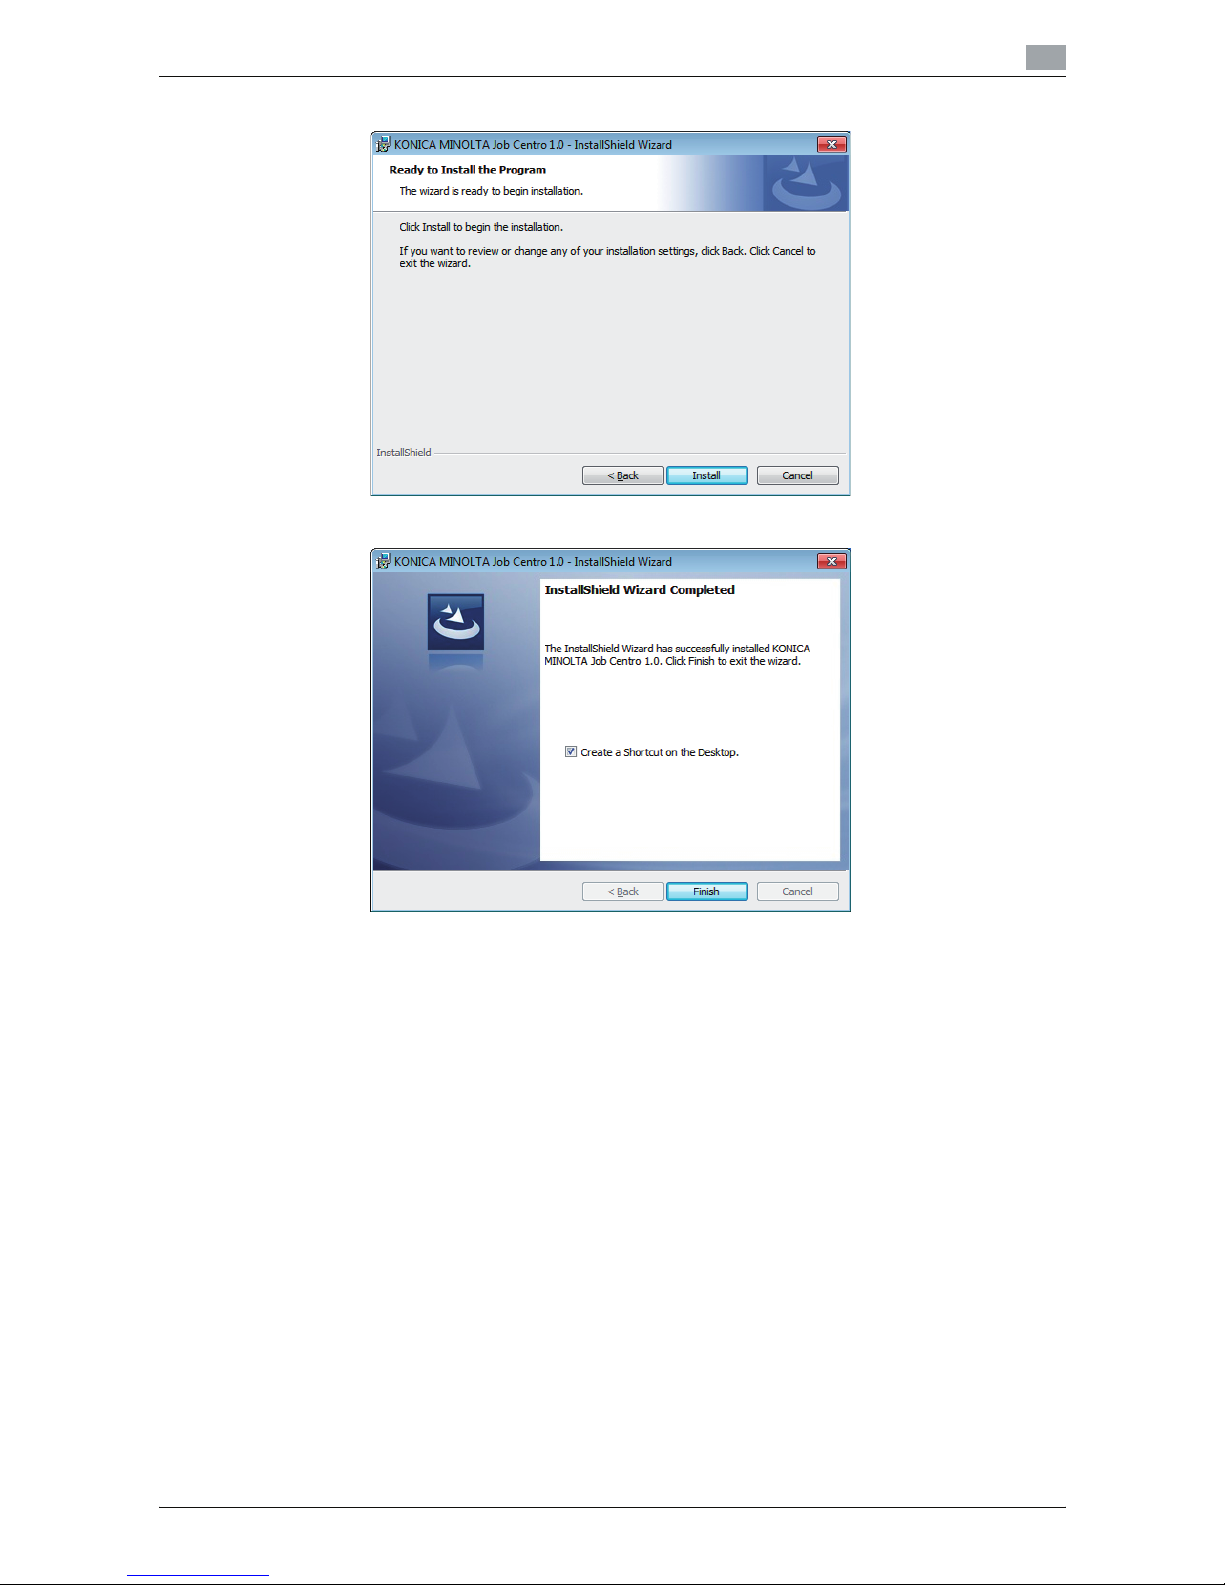
7 Click [Install].
8 Click [Finish].
% To create the short cut icon on the Desktop, check [Create a shortcut on the Desktop.] check box.
The installation is complete.

5
Basic Information
IC-601 5-2
5.1 Launch Job Centro
5
5 Basic Information
This chapter describes launch procedure, exit procedure, and screens of Job Centro.
5.1 Launch Job Centro
This section describes how to launch Job Centro.
To use Job Centro, it is necessary to connect to the image controller. You can not launch Job Centro without
connecting to the image controllers.
By connecting to the image controller, Job Centro can acquire the information of the main body. You can
switch the connection when there are two or more image controllers.
In this section, "Login" and "User Authentication/Account Track" are explained separately. "Login" is necessary operation for all users. "User Authentication/Account Track" is necessary operation when the user authentication or account track function is set in the main body.
5.1.1 General Login
To launch Job Centro, login procedure is necessary first.
0 To login, the IP address and the port number of the image controller are necessary. When the port
number is unknown, confirm the JSP settings of the image controller. (default: 30081)
0 Confirm that the image controller can communicate.
0 Job Centro is the Java Application. When the Java application is blocked by the firewall, [Windows Se-
curity Alert] screen is displayed. In this case, select the option corresponding to your network environment, and click [Allow access] to allow the communication by Java application on your network.
1 Select [Start] ->[All Programs] ->[KONICA MINOLTA] ->[Job Centro] ->[KONICA MINOLTA Job Centro].
% Or double-click the short cut icon on the Desktop screen.
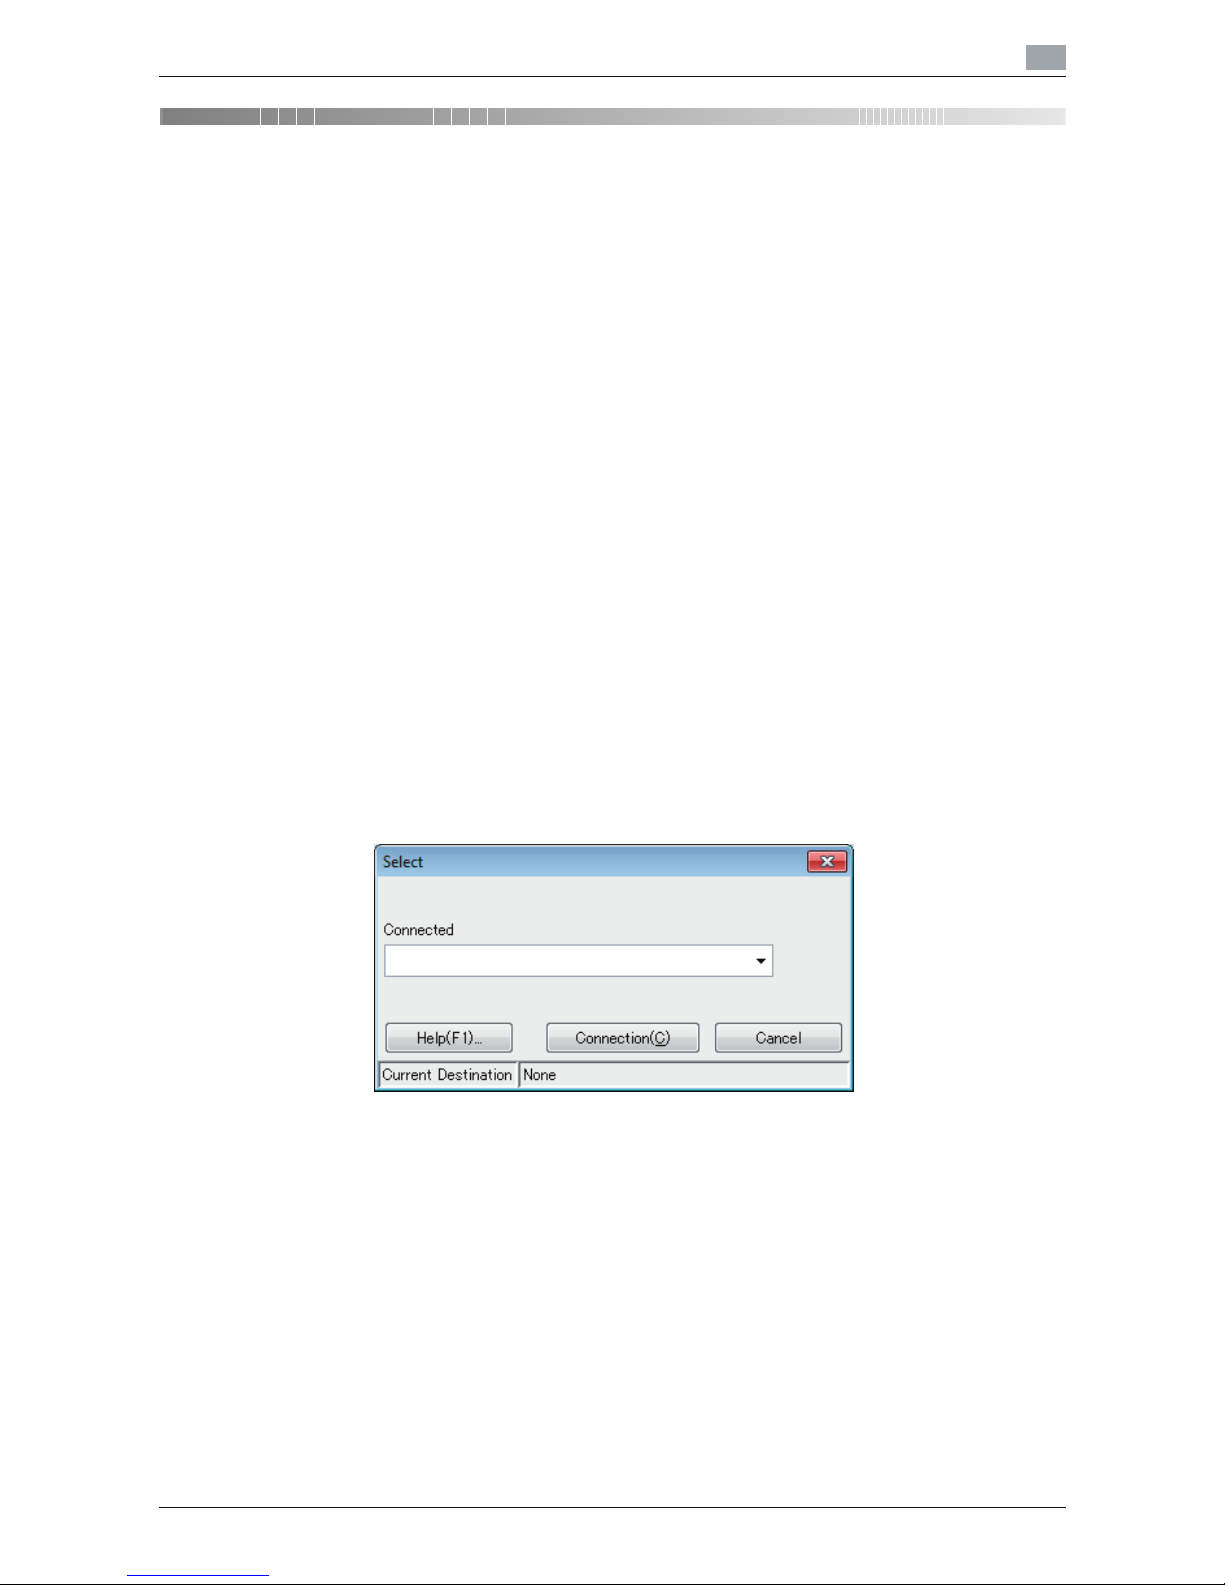
[Select] screen appears.
2 Enter the IP address and the port number (30081 - 30090) of the image controller to which you want to
connect Job Centro into [Connected] of [Select] screen, and click [OK].
% If the IP address is 192.168.0.1 and the port number is 30081, separate the IP address and the port
number with a colon, and enter "192.168.0.1:30081".
% You can select the IP address and the port number which were used before, from [Current Destina-
tion]. The input number is kept even after exiting Job Centro.
% When you have connected to the image controller already, the IP address and the port number of
the image controller you connected are displayed on [Current Destination].
% When you click [Cancel], the login process is canceled and you can't start Job Centro.
% When you click [Help], the [Help] screen appears.
Job Centro launches and [Job Centro] screen appears.

IC-601 5-3
5.1 Launch Job Centro
5
5.1.2 User Authentication/Account Track
The user authentication/account track is necessary to display [Main Body Hold/HDD] screen when either or
both of the user authentication and account track function are set to the main body that the image controller
connects.
1 Click [Main Body Hold/HDD] tab of the Job Centro Screen.
2 On [User Auth/Account Track] screen, select [Public User] or [Registered User].
% According to the settings of the main body, you can not occasionally select [Public User].
When you select [Public User], go to Step 4.
3 When [User Name] and [User Password] are available, enter the user name and the user password.
% Specify the user name to [User Name] within 64 one-byte alpha-numerical characters.
% Specify the user password to [User Password] within 64 one-byte alpha-numerical characters.
4 When [Account Name] and [Account Password] are available, enter the account name and the account
password.
% Specify the account name and the account password to [Account Name][Account Password] within
8 one-byte alpha-numerical When there is no account name, leave it blank.
% When the user authentication synchronizes with the account track, [Account Name]/[Account Pass-
word] are set automatically with values of [User Name]/[User Password]. In this case, it is not necessary to enter to [Account Name] and [Account Password].
5 Click [OK].
% When you click [Cancel], this process is canceled.
[Main Body Hold/HDD] screen appears.
IC-601 5-4
5.2 Screens of Job Centro
5
5.2 Screens of Job Centro
This section describes the screens of Job Centro.
5.2.1 [Printer]
Displays the IP address of the printing system that is composed with the main body and the image controller
currently connected.
When you click [Select], [Select] screen appears. You can switch the connection on [Select] screen to connect to the other image controllers.
d Reference
For details of [Select] screen, refer to page 5-2.
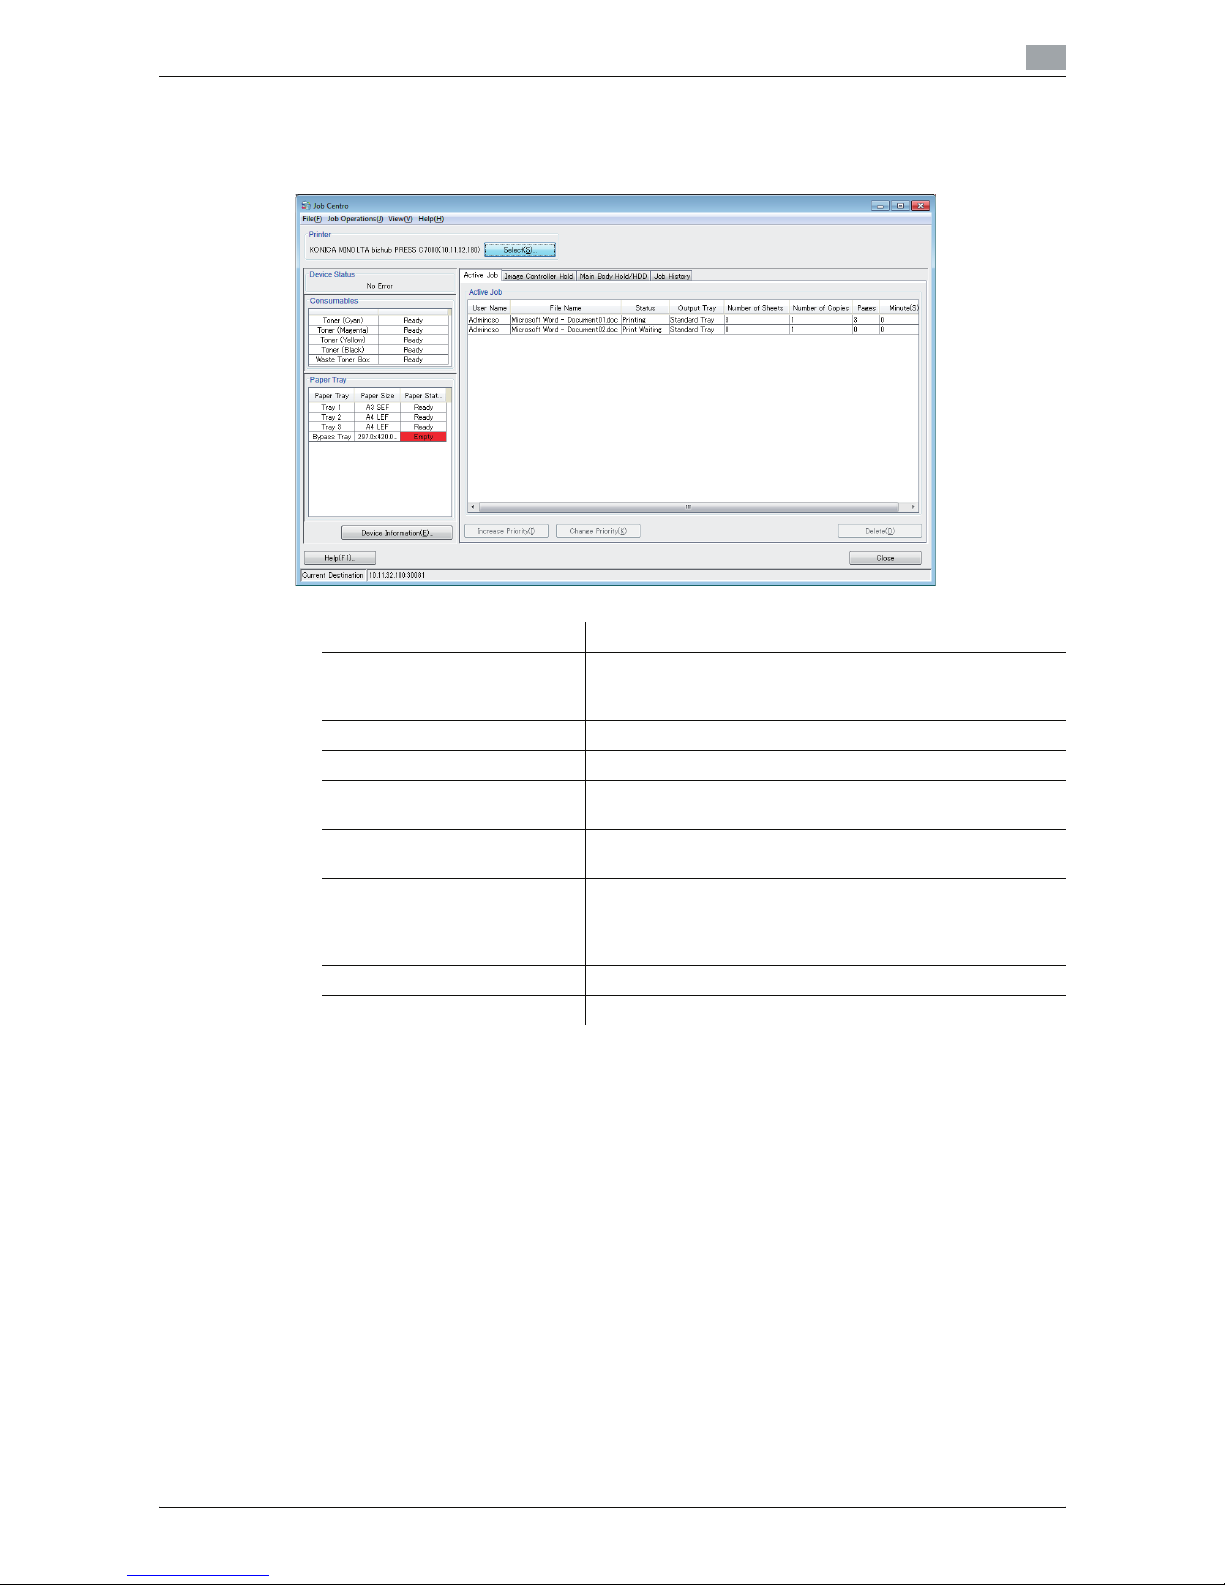
Item Description
[Printer] Displays the IP address of the printing system that is com-
posed with the main body and the image controller currently
connected.
[Device Status] Displays the status of the main body.
[Consumables] Displays the status of each toner and the waste toner box.
[Paper Tray] Displays the paper information and the paper level for each
paper tray.
[Device Information] Displays the detailed information of the configuration of op-
tions installed to this main body, the toner level, etc.
[JOB LIST] Displays [Active Job] screen, [Image Controller Hold] screen,
[Main Body Hold/HDD] screen, [Job History] screen and buttons that are used on each screen. For detailed information
of each screen, refer to page 6-2.
[Close] Exits Job Centro and closes the Job Centro screen.
[Help] Displays the Help screen.

IC-601 5-5
5.2 Screens of Job Centro
5
5.2.2 [Device Status]
Displays the status of the main body via the image controller currently connected.
The following statuses of the main body are displayed.
5.2.3 [Consumables]
Displays the status of each toner and the toner recovery box.
The following statuses of the toner are displayed.
The following statuses of the waste toner box are displayed.
Display Description
No Error Shows that the main body has no error.
Low Power Shows that the main body is in the low power mode.
Sleep Shows that the main body is in the sleep mode.
Warming Up Shows that the main body and the perfect binding option are
warming up.
Calibrating Shows that the printer engine is calibrating.
Low Paper Shows that the paper level of either of paper trays is low.
No Paper Shows that either of paper trays is empty or it is necessary to load
the paper for the current printing job.
Low Toner Shows that the toner level of either of toner bottles is low.
Toner Empty Shows that the toner level of either of toner bottles is empty.
Cover Open Shows that the door of the main body opens.
Paper Jam Shows that the paper jam occurs in the main body. Remove the
jammed paper following the instructions displayed on the control
panel.
Service Call Shows that the service call failure occurs at the main body or the
image controller.
Paper Remaining on the
Output Tray
Shows that either of output trays is full.
Waste Toner Full Shows that the waste toner box is full.
Punch Dust Full Shows that the punch-hole scraps box is full.
Waste Paper Full Shows that the trim scrap box is full.
Staple Empty Shows that the staple cartridge is empty.
Life Limit Shows that the paste hopper for the perfect binding is empty and
it is necessary to exchange the SD trimmer receiver.
Near Life Limit Shows that the life limit of the SD trimmer receiver is near.
Maintenance Required Shows that the life limit of the consumables are over.
In Menu (Service Mode) Shows that the main body is in the service mode.
Color Status
None Ready
Yellow Near Empty
Red Toner Empty
Color Status
None Ready
Yellow Near Full
Red Full
IC-601 5-6
5.2 Screens of Job Centro
5
5.2.4 [Paper Tray]
Displays the paper information and the paper level for each paper tray.
The following paper levels are displayed.
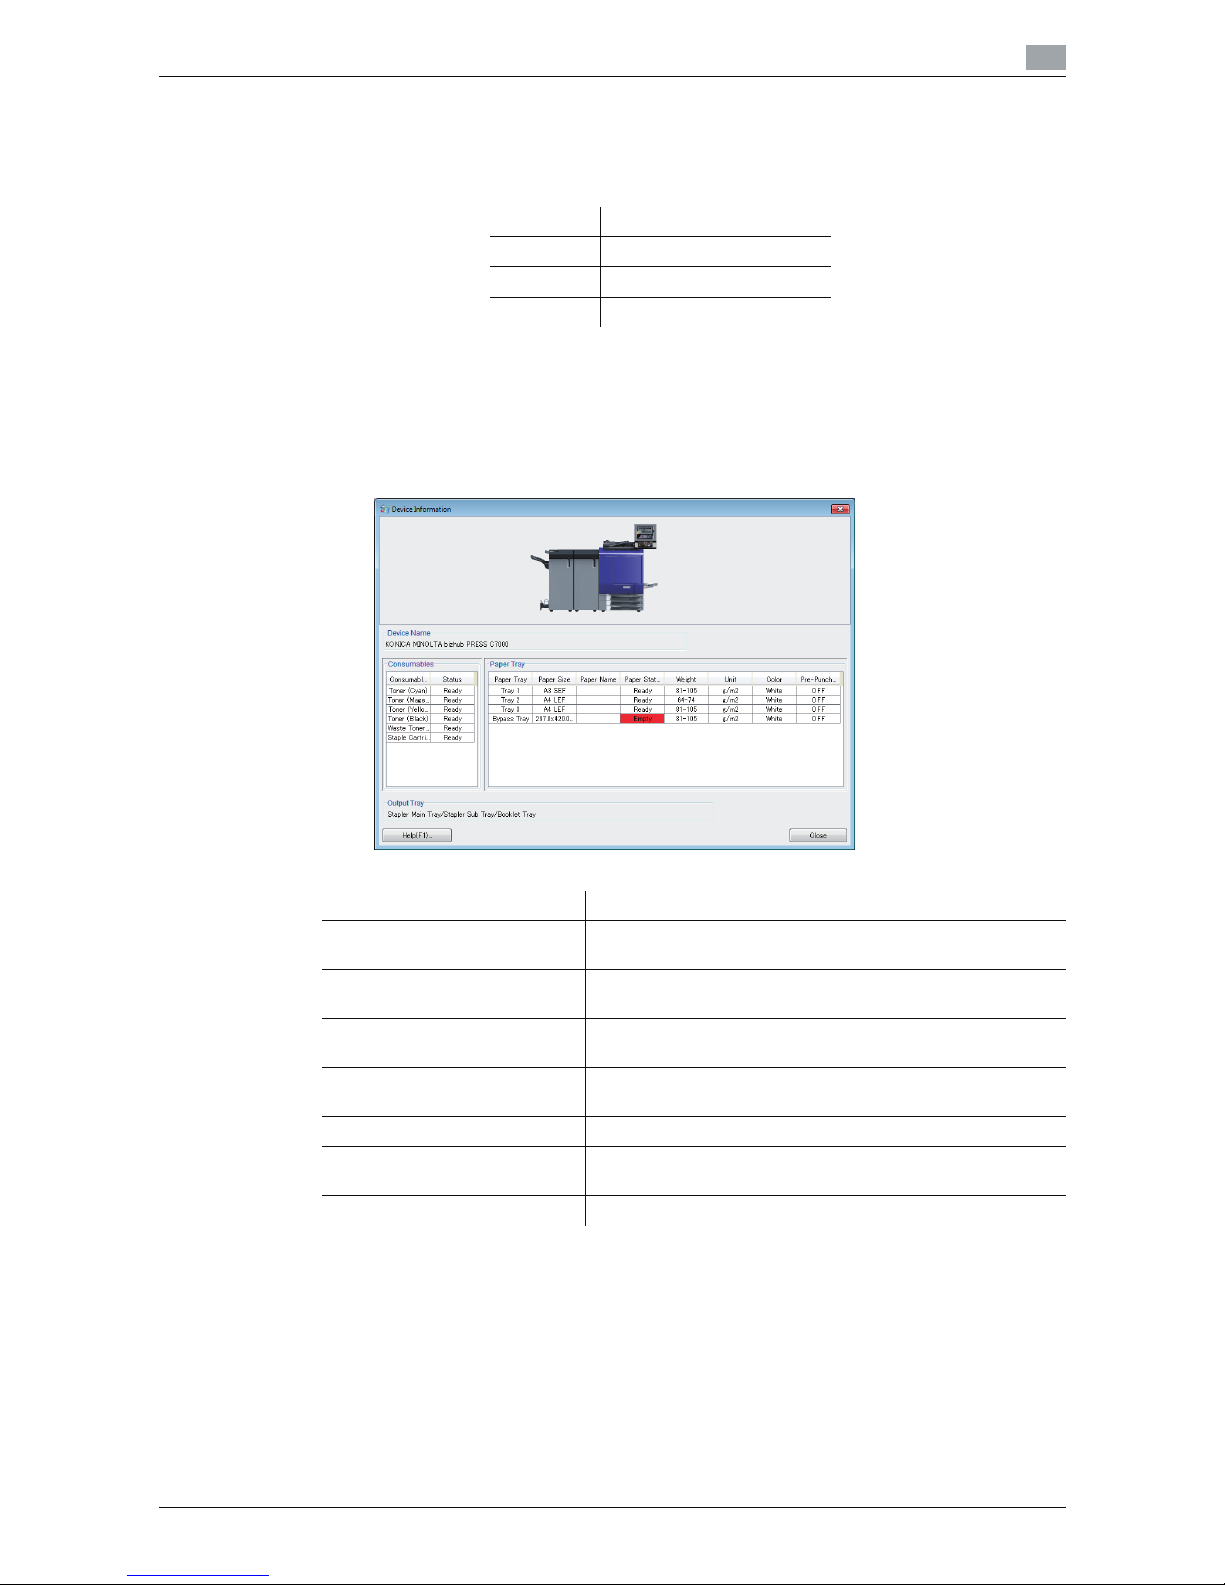
5.2.5 [Device Information]
When you click [Device Information], [Device Information] screen appears. [Device Information] screen displays the detailed information of the configuration of options installed to this main body, the toner level, etc.
The illustration on the screen may be different depending on the connected model.
5.2.6 [JOB LIST]
Displays [Active Job] screen, [Image Controller Hold] screen, [Main Body Hold/HDD] screen, [Job History]
screen and buttons that are used on each screen.
Each screen can be displayed by clicking [Active Job] tab, [Image Controller Hold] tab, [Main Body Hold/HDD]
tab or [Job History] tab.
Color Status
None Ready
Yellow Near Empty
Red Empty
Item Description
Configuration of options Displays the configuration of options installed to this main
body.
[Device Name] Displays the name of this main body. For detailed informa-
tion, refer to page 5-4.
[Consumables] Displays the status of each toner and the waste toner box.
For detailed information, refer to page 5-5.
[Paper Tray] Displays the paper information and the paper level for each
paper tray. For detailed information, refer to page 5-6.
[Output Tray] Displays each output tray of the printer currently connected
[Close] Exits [Device Information] screen and returns to the Job Cen-
tro screen.
[Help] Displays the Help screen.
 Loading...