

Kohler K-76395 Installation Manual

Installation Guide
Wall-Hung Toilet with Cleansing Seat
K-76395
Français, page “Français-1”
Español, página “Español-1”
1247364-2-A
Before You Begin
NOTE: This product is designed for installation with the electrical
and water supplies located through the wall.
WARNING: When using electrical products, basic
precautions should always be followed, including the
following:
WARNING: Risk of electric shock. Grounding this product
improperly can result in a risk of electric shock.
DANGER: Risk of electrocution. Disconnect the electricity
to the working area at the main breaker panel before
performing the installation steps for hardwiring.
WARNING: Risk of electric shock. Connect only to a circuit
protected by a Ground-Fault Circuit-Interrupter (GFCI)*
WARNING: Risk of electric shock. Grounding is required. A
qualified electrician should make all electrical connections.
WARNING: Risk of electric shock. Disconnect power before
servicing.
WARNING: Risk of injury or property damage. Please read
all instructions thoroughly before beginning installation,
including the following requirements.
If repair or replacement of the power cord becomes necessary, do
not connect the grounding wire to either of the other terminals.
Check with a qualified electrician or service personnel if the
grounding instructions are not completely understood, or if in
doubt as to whether the product is properly grounded.
NOTE: When lifting the bowl into place, the process is more
efficient when performed by two people.
Observe all local plumbing and building codes.
*Outside North America, this device may be known as a Residual
Current Device (RCD).
Grounding Instructions
This product should be connected to a grounded, metallic,
permanent wiring system, or an equipment-grounding conductor
should be run with the circuit conductors and connected to the
equipment grounding terminal or lead on the product.
1247364-2-A 2 Kohler Co.
Before You Begin (cont.)
This product is intended for hardwire installation. Make sure
electrical power can be provided to the installation area.
The installation must have a Class A Ground-Fault
Circuit-Interrupter (GFCI). The GFCI protects against
line-to-ground shock hazard. Use a 100 VAC - 240 VAC, 50 Hz 60 Hz supply.
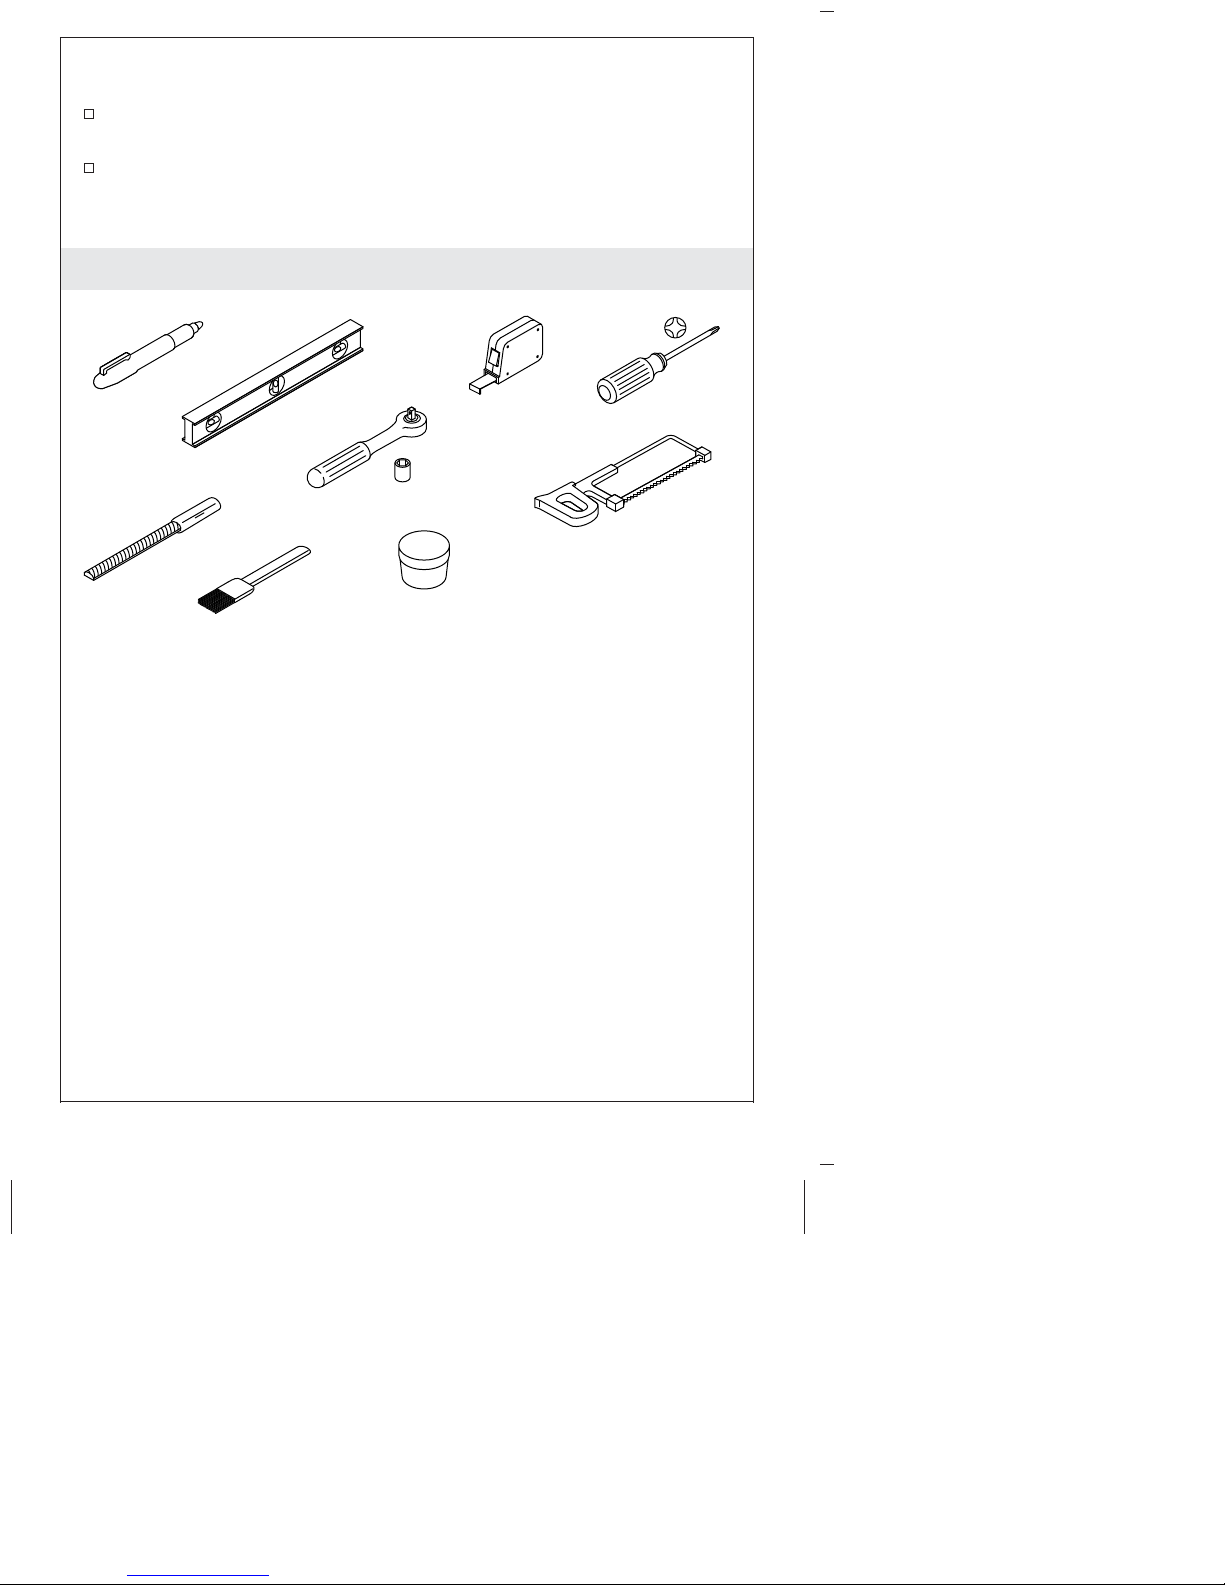
Tools and Materials
3/4"
Plus:
Plumbers
Silicone Grease
• Rug or Protective
Material
Kohler Co. 3 1247364-2-A
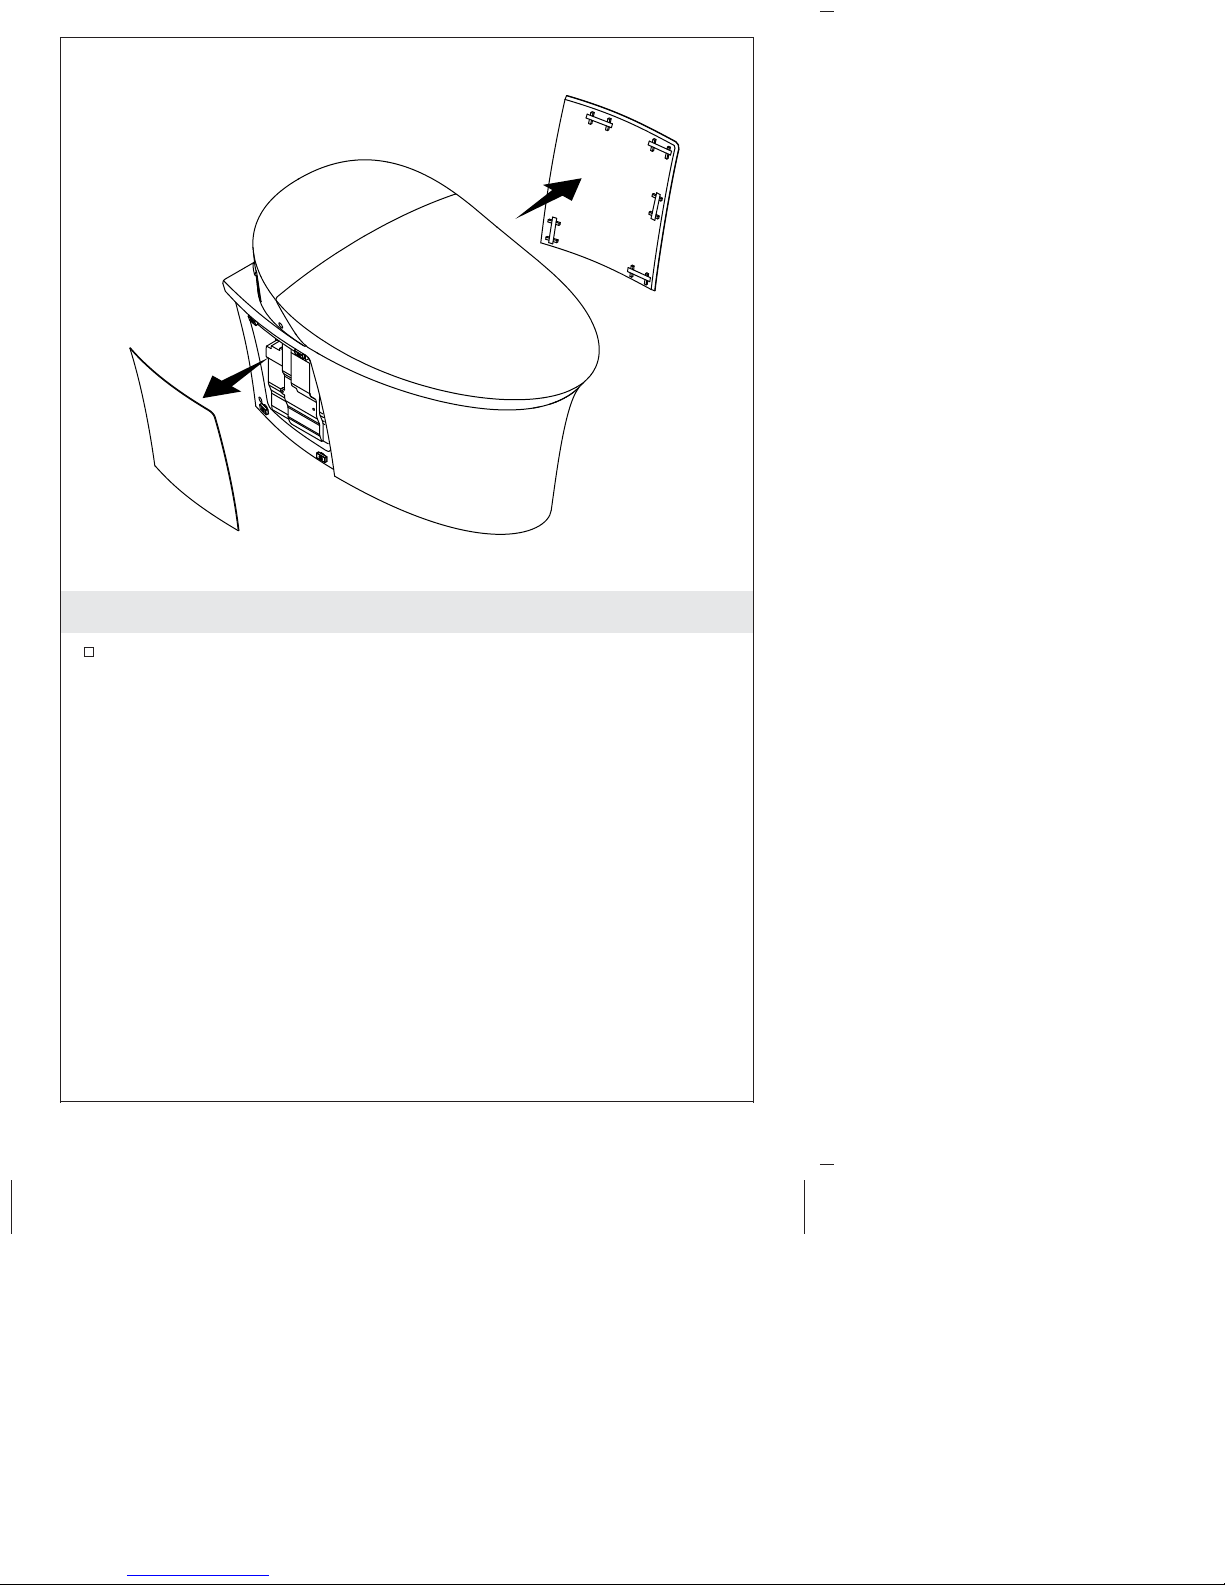
1. Remove the Side Panels
Remove and set aside the side panels from the bowl.
1247364-2-A 4 Kohler Co.

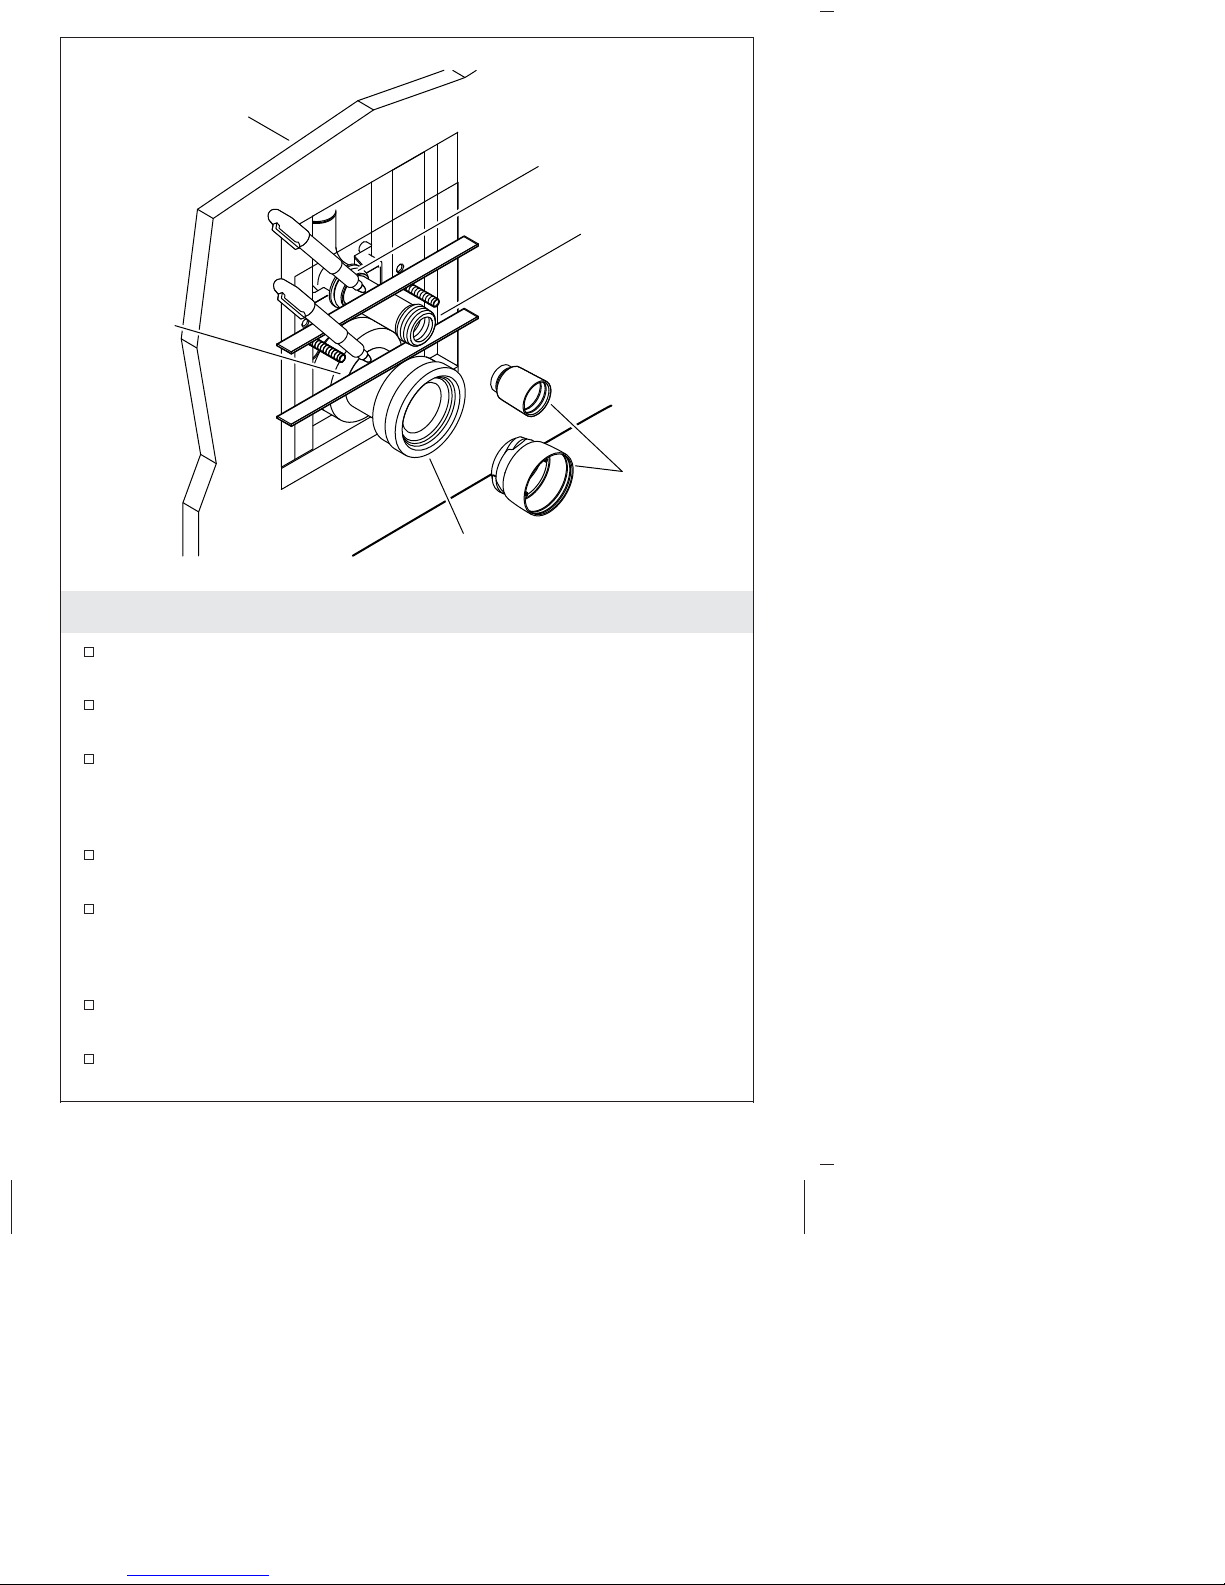
Inlet
Pipe
Straight Edge
or Level
Gasket
Silicone
Plumbers
Grease
Outlet
Pipe
Outlet
Silicone
Pipe
Plumbers
Grease
Inlet Pipe
Gasket
2. Mark the Pipes - Bowl Side
IMPORTANT! If silicone plumbers grease is not applied to the
gaskets, they will bind during fitting, which will result in the pipes
being cut to incorrect lengths.
NOTE: This step is easier with the bowl upside down.
Install the gasket on the ribbed end of the inlet pipe.
NOTE: The outlet pipe gasket comes positioned on the thin portion
of the outlet pipe. Remove the gasket and reinstall it as shown.
Install the outlet pipe gasket on the flared end of the outlet pipe.
Apply silicone plumbers grease to the outlet pipe gasket.
Firmly fit the outlet pipe and gasket over the bowl outlet,
pushing until it contacts the bowl.
Position a level or other straight edge across the back of the bowl.
Mark the outlet pipe at the back edge of the bowl using the level
as a guide.
Apply silicone plumbers grease to the outside of the inlet pipe
gasket.
Kohler Co. 5 1247364-2-A
Mark the Pipes - Bowl Side (cont.)
Firmly insert the gasket end of the inlet pipe into the water inlet,
pushing until it contacts the bowl.
Position a level or other straight edge across the back of the bowl.
Mark the inlet pipe at the back edge of the bowl using the level
as a guide.
Remove the inlet and outlet pipes.
1247364-2-A 6 Kohler Co.
Finished Wall
Inlet Hole
Inlet Pipe
Outlet Hole
Outlet Pipe
3. Mark the Pipes - Wall Side
Remove and discard the plaster guards from the inlet and outlet
holes.
Apply plumbers grease to the gasket in the opening of the inlet
and outlet holes.
Firmly insert the inlet pipe completely into the inlet hole.
Plaster
Guard
NOTE: If the finished wall aligns with any portion of the gasket
section of the inlet pipe, no mark or cut is needed.
Use a level or other straight edge to mark the inlet pipe even
with the front edge of the finished wall.
Firmly insert the outlet pipe completely into the outlet hole.
NOTE: If the finished wall aligns with the wide part of the outlet
pipe, no mark or cut is needed.
Use a level or other straight edge to mark the outlet pipe even
with the front edge of the finished wall.
Remove the inlet and outlet pipes.
Kohler Co. 7 1247364-2-A
Inlet Pipe
X
X
Outlet Pipe
Y
Y
4. Cut the Pipes
Measure the distance between the two marks on the inlet pipe to
determine ″X.″
Measure and mark ″X″ from the end opposite the gasket on the
inlet pipe.
Cut the inlet pipe at this location.
Measure the distance between the two marks on the outlet pipe
to determine ″Y.″
Measure and mark ″Y″ from the end of the side opposite the
gasket on the outlet pipe.
Cut the outlet pipe at this location.
Use a file to remove all rough areas on the cut end of each pipe.
1247364-2-A 8 Kohler Co.
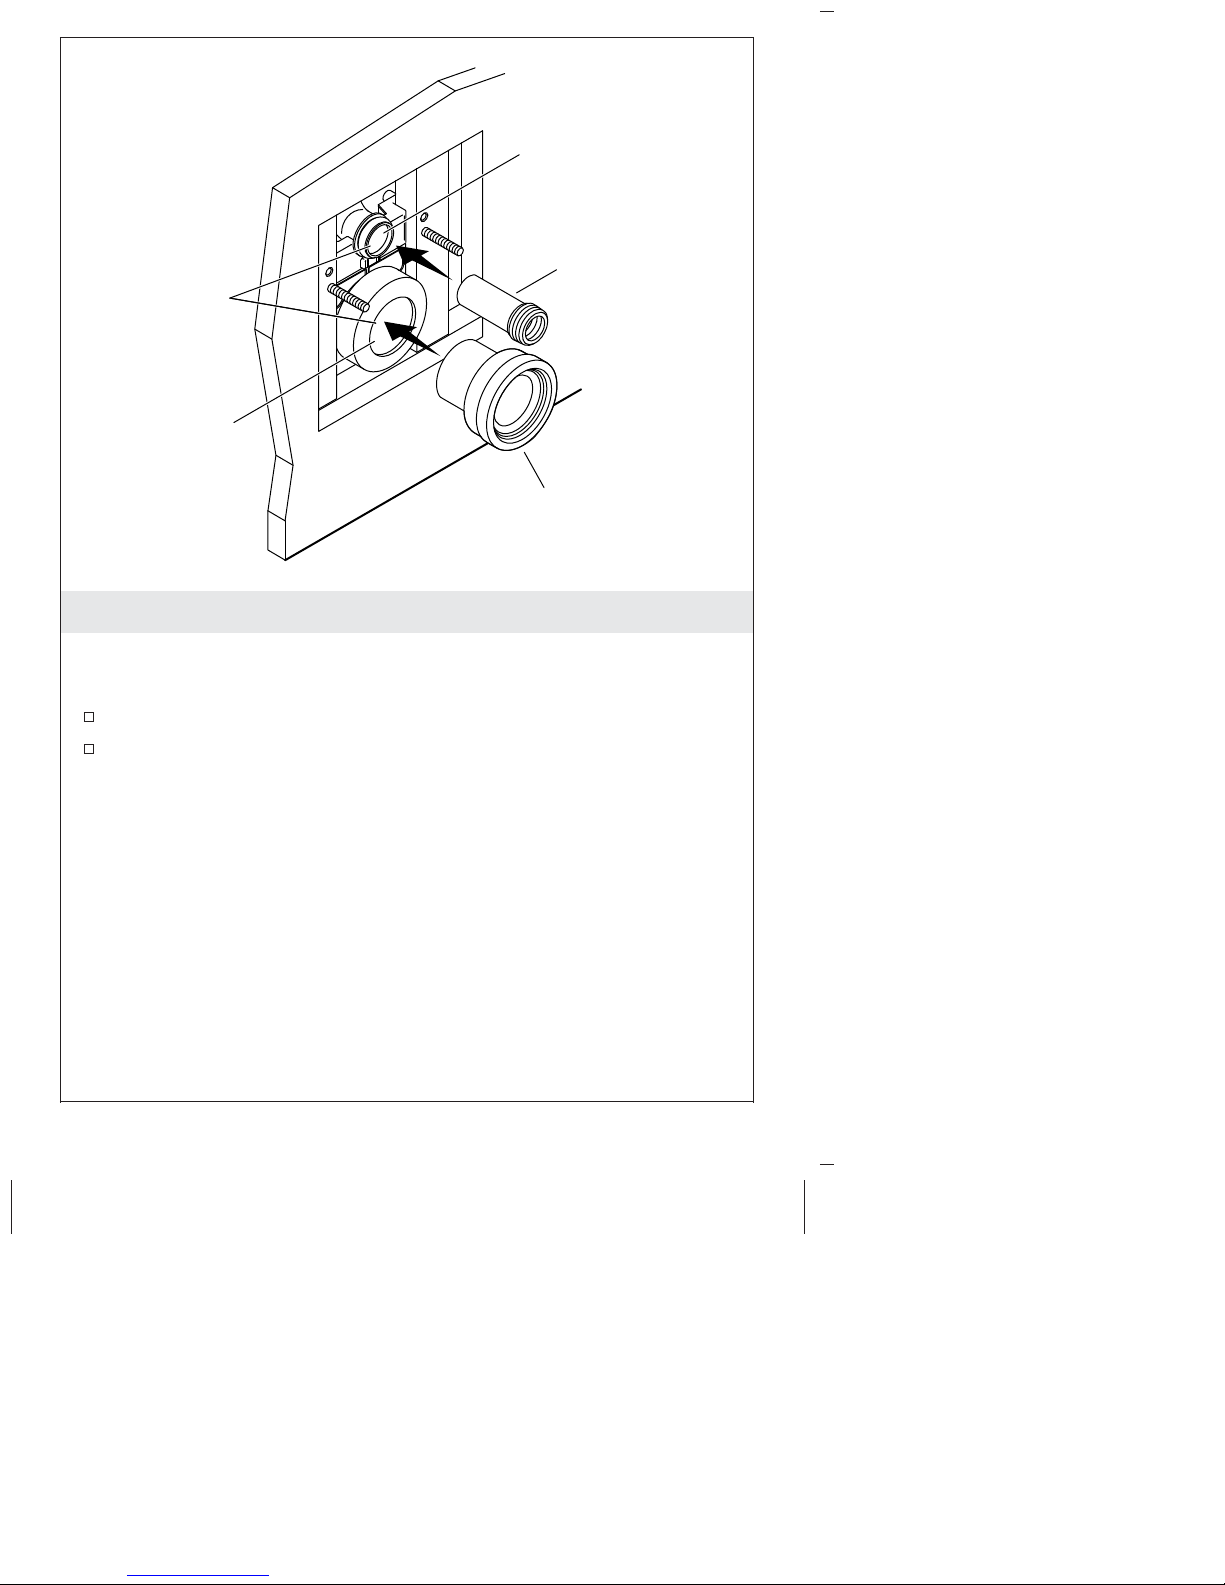
Inlet Hole
Inlet Pipe
Apply plumber's
grease.
Outlet Hole
Outlet Pipe
5. Install the Pipes
NOTE: Be sure that the gaskets on the inlet and outlet holes are still
well lubricated with plumbers grease. Apply more plumbers grease
if necessary.
Insert the inlet pipe into the inlet hole
Insert the outlet pipe into the outlet hole
Kohler Co. 9 1247364-2-A
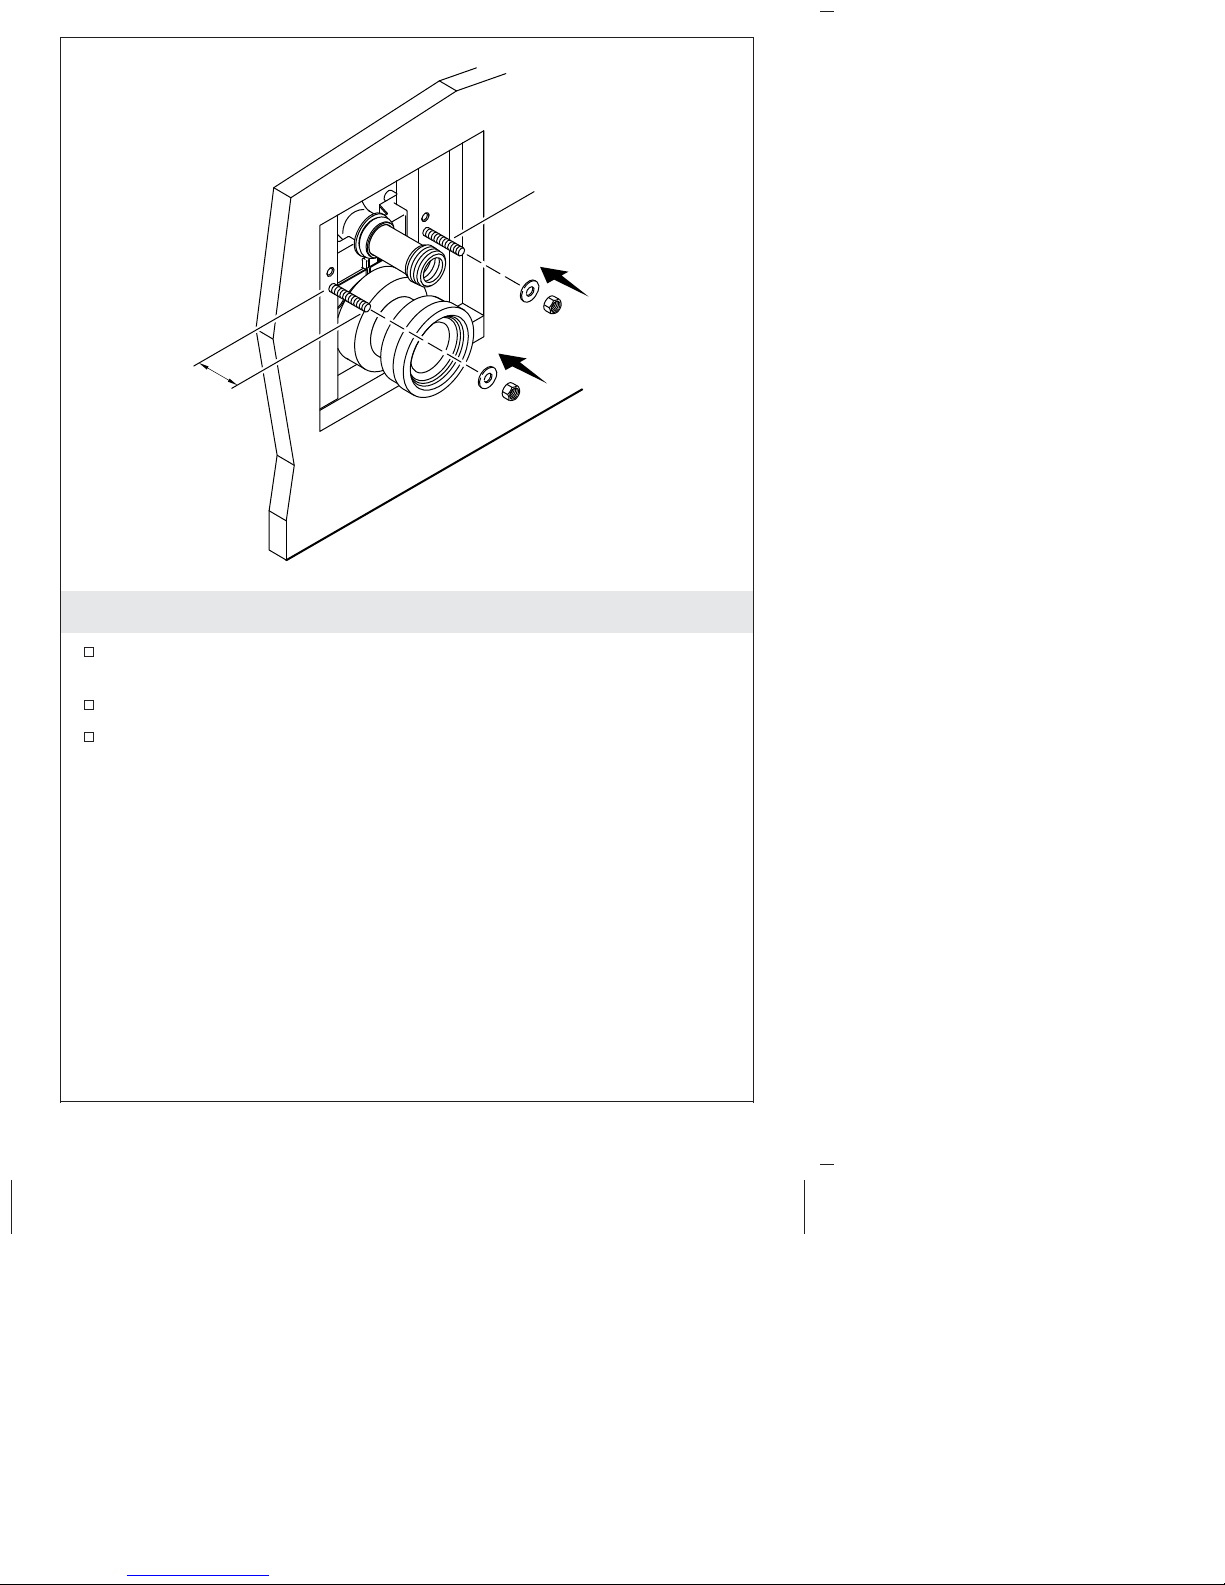
Threaded Rod
3"
(76 mm)
6. Adjust the Threaded Rods
Adjust the threaded rods until they each extend 3″ (76 mm) from
the finished wall.
Place a washer onto each threaded rod.
Thread one of the jam nuts over each threaded rod and tighten
down to lock the rods in position.
1247364-2-A 10 Kohler Co.
Plastic Washer
Steel Washer
Nut
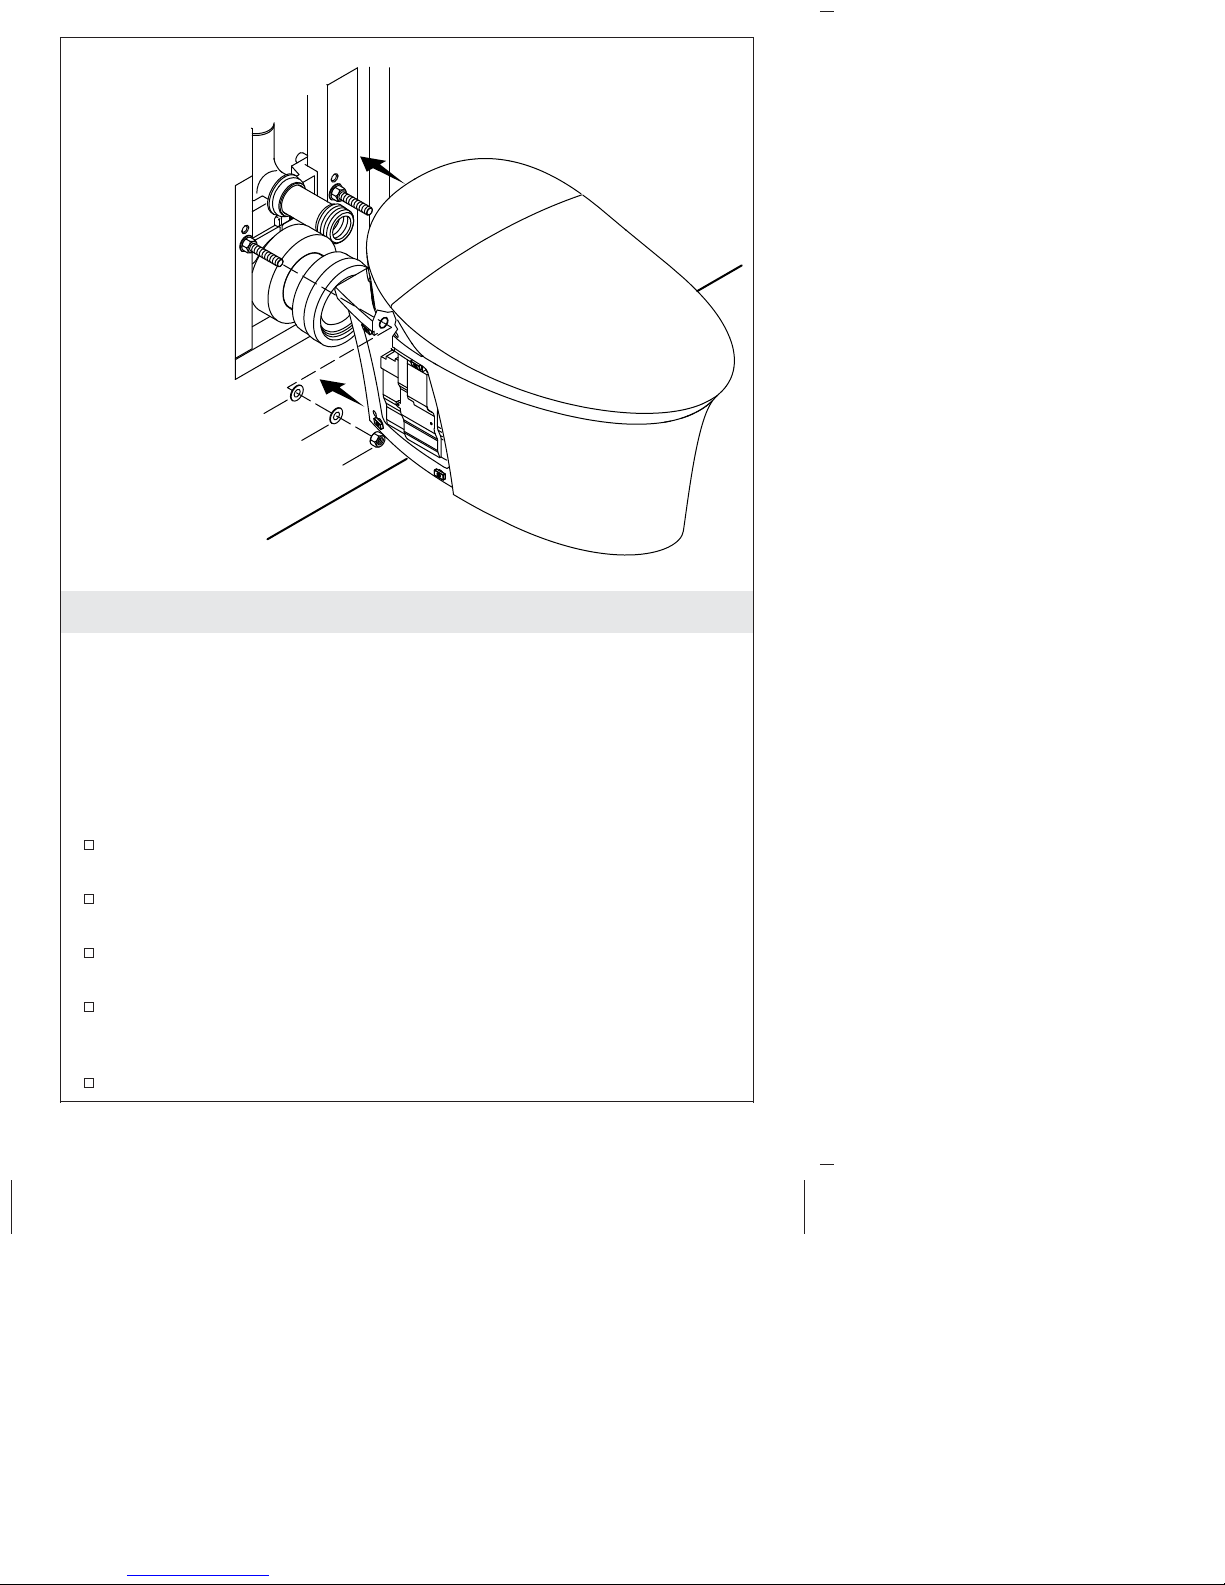
7. Install the Bowl
NOTE: This step is easier when performed by two people.
NOTE: When mounting the bowl to the carrier be sure any
necessary water and electrical lines are accessible. Run the lines
through the vitreous on the right side of the bowl so that they can
be easily connected in the next steps.
NOTE: Be sure all gaskets are well lubricated with plumbers grease.
Reapply plumbers grease if necessary.
Confirm the gasket on the inside of the inlet elbow has correctly
engaged with the inlet pipe.
Confirm the gasket on the inside of the outlet elbow has correctly
engaged with the outlet pipe.
Carefully lift the bowl up and align the threaded rods and pipes
with the corresponding holes.
Slide the bowl onto the threaded rods, inlet pipe and outlet pipe.
Make sure the bowl fully engages the gaskets on the inlet and
outlet pipes.
Slide the bowl back until it makes contact with the wall.
Kohler Co. 11 1247364-2-A

Install the Bowl (cont.)
Install the plastic washers, steel washers, and nuts over the
threaded rods.
Tighten the nuts with a socket wrench and 3/4″ socket.
1247364-2-A 12 Kohler Co.
L
N
Ground
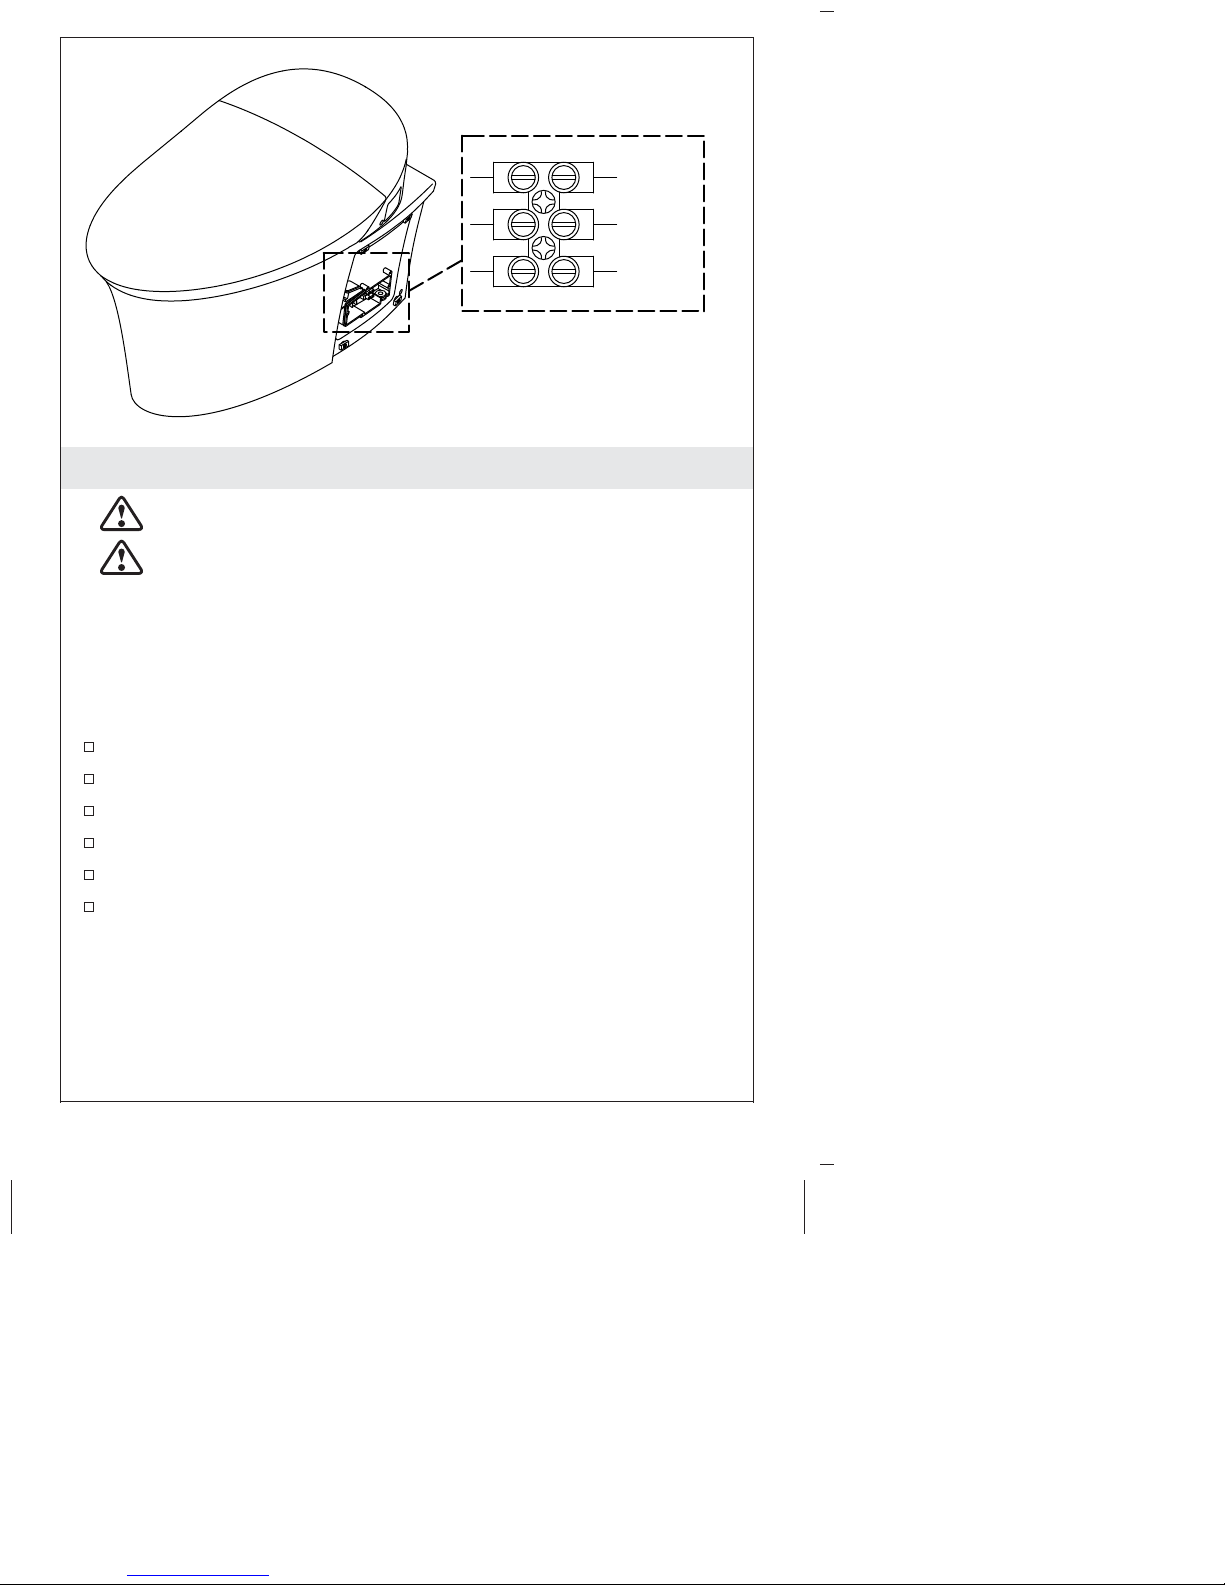
8. Connect the Electrical Supply
WARNING: Risk of electric shock. Disconnect the power
before performing the following procedures.
WARNING: Risk of electric shock. Connect only to a
properly grounded Ground-Fault Circuit-interrupter (GFCI)
or Residual Current Device (RCD) for protection against
line-to-ground shock hazard.
IMPORTANT! If you are unsure how to correctly connect the
power to the bowl consult a qualified electrician or service
technician. Improper power supply connection will lead to product
damage.
Remove the cover from the junction box on the toilet.
Connect the electrical wires.
The port labeled ″L″ is live.
The port labeled ″N″ is natural.
The bottom port is the ground.
Reinstall the cover.
Kohler Co. 13 1247364-2-A
Hose
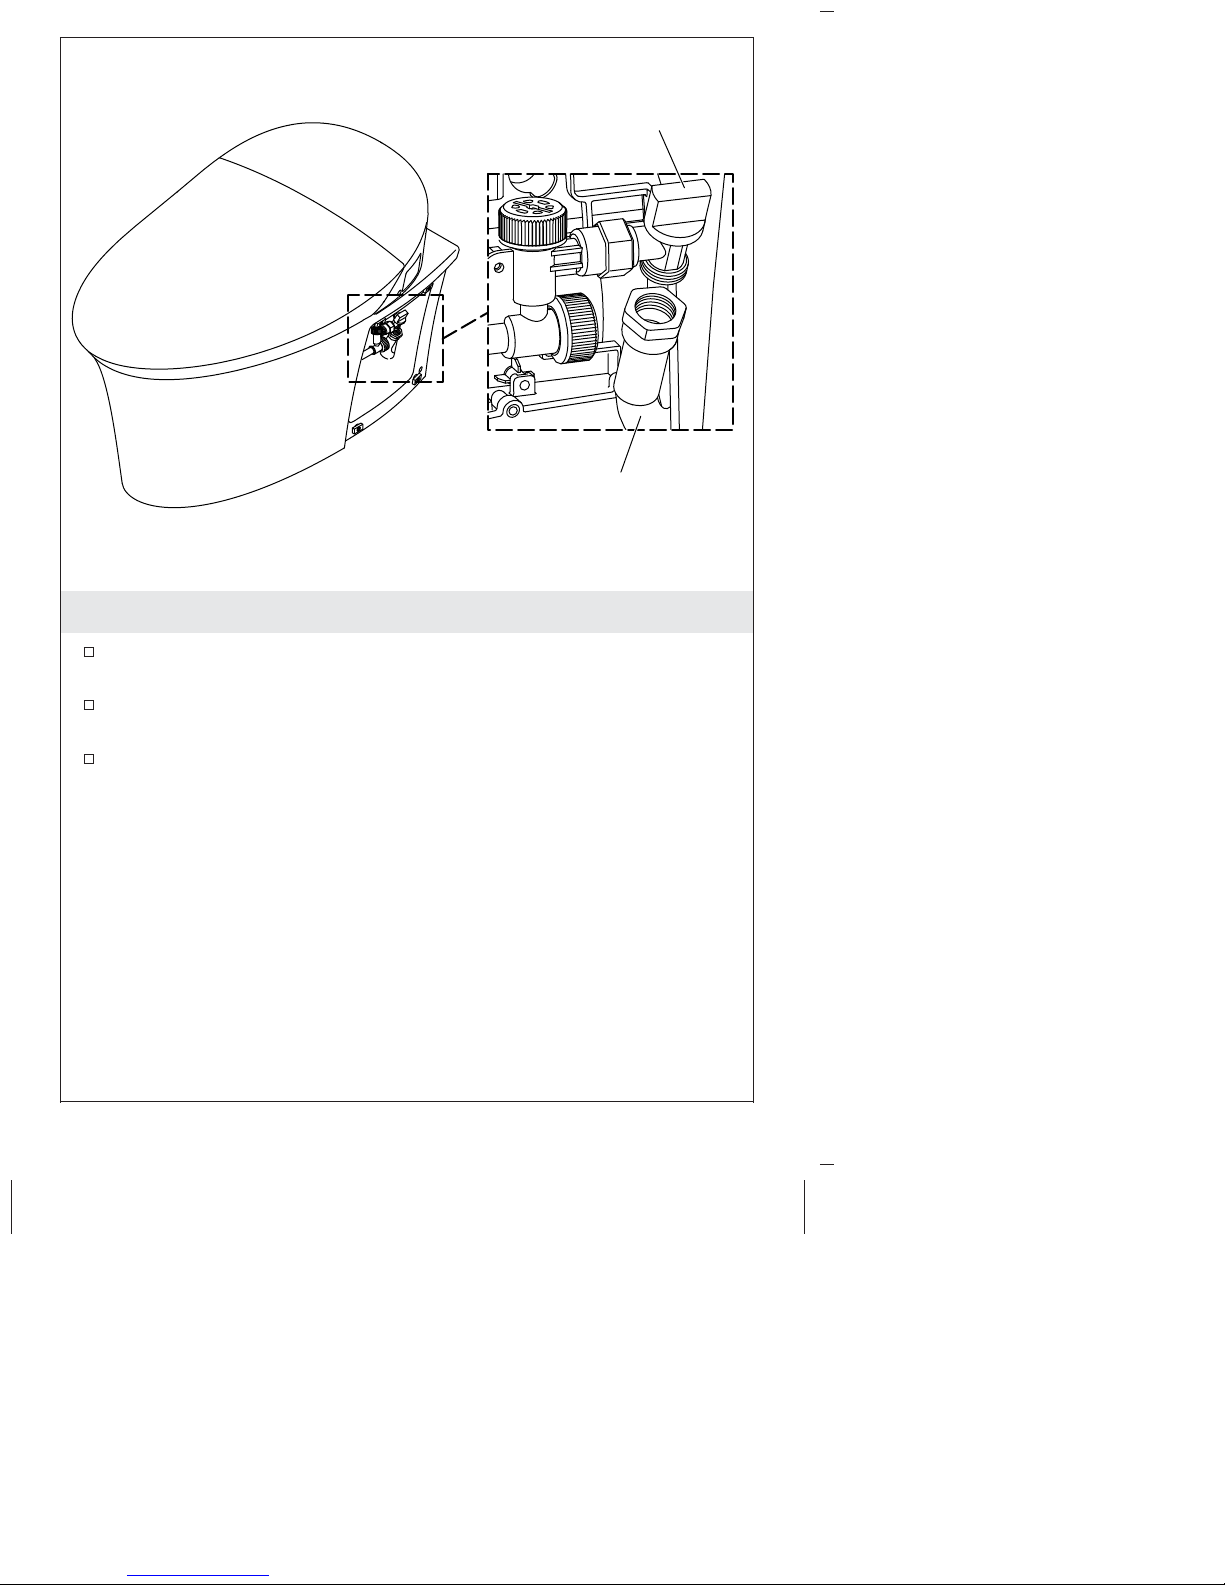
9. Install and Connect the Cleansing Seat
Connect the black control cord from the carrier to the black
control cord from the cleansing seat.
Connect the cleansing seat water supply hose to the supply
shut-off.
Confirm the supply shut-off handle operates correctly.
Handle
1247364-2-A 14 Kohler Co.

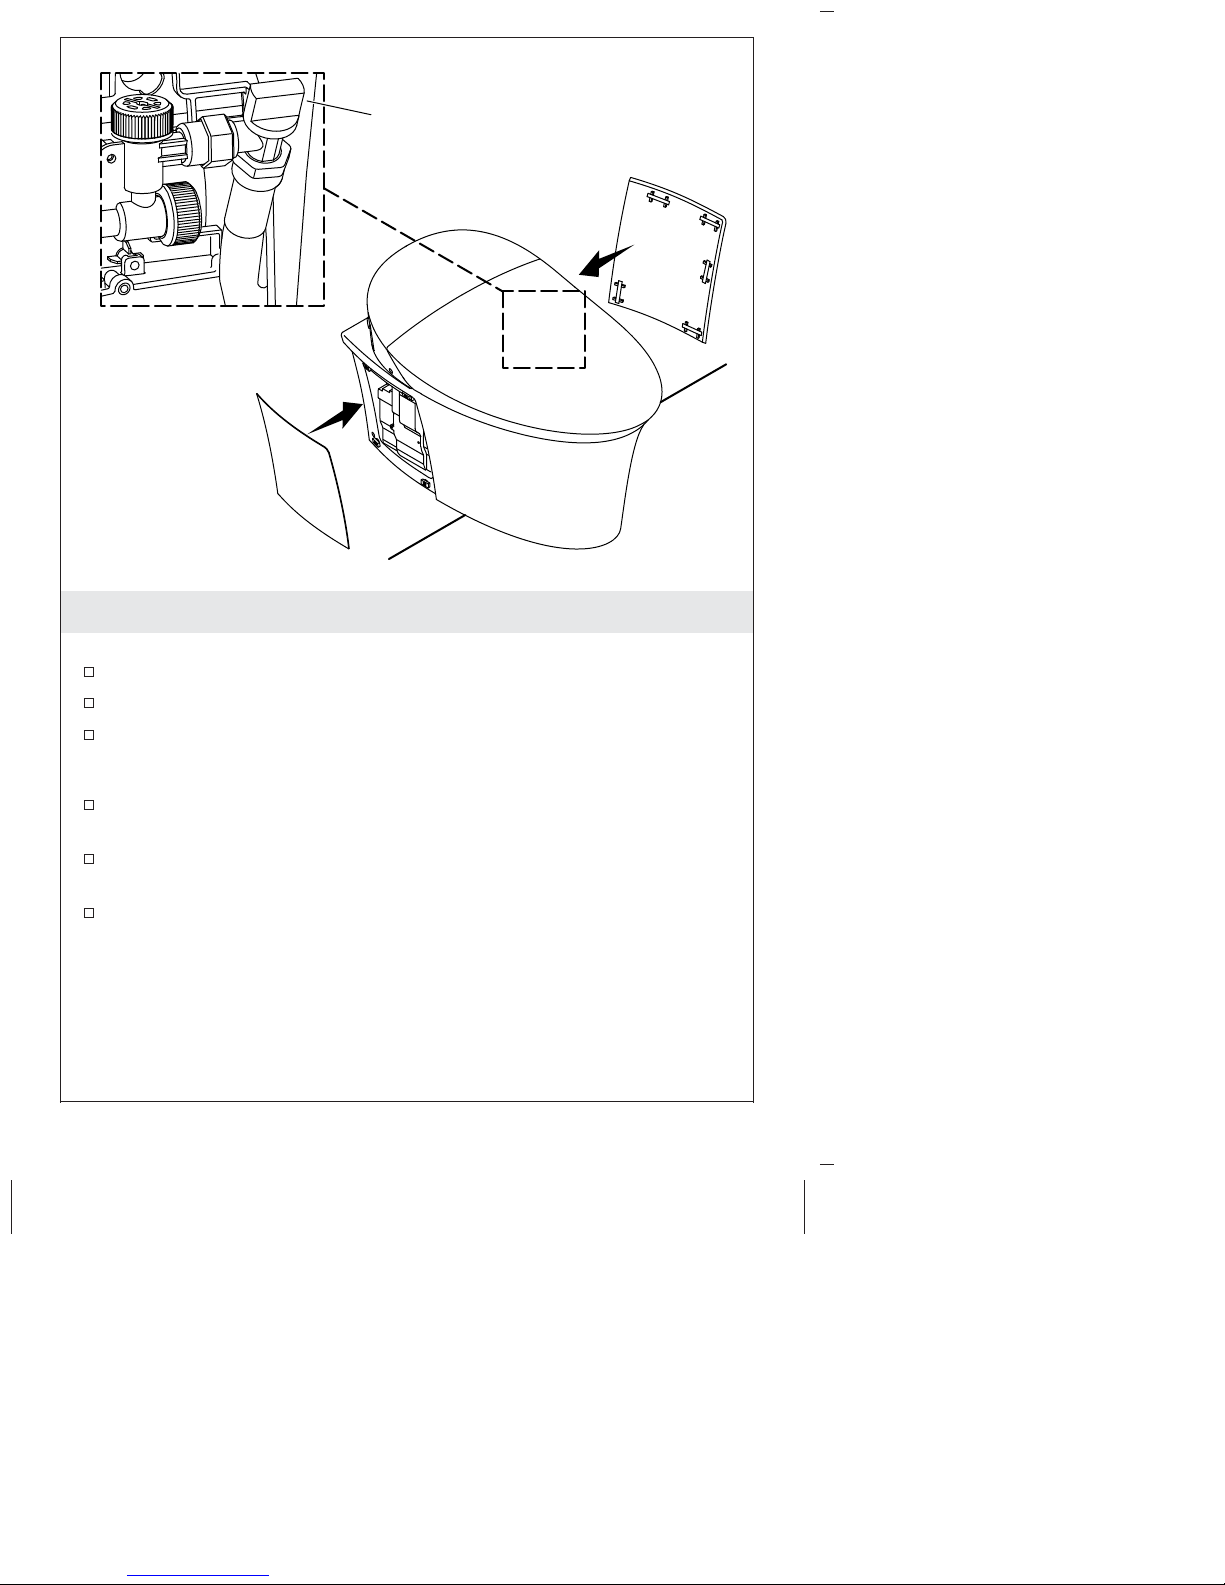
10. Install the Faceplate
Connect the control cords from the faceplate to their
corresponding cords on the tank.
Position the faceplate over the rods and press into place.
Kohler Co. 15 1247364-2-A
Handle
11. Complete the Installation
Check for Leaks
Turn on the water supply to the tank.
Turn the cleansing seat water supply handle to the ″ON″ position.
Check for leaks.
Confirm Correct Operation
Press the left side of the faceplate to confirm the full flush is
operating correctly.
Press the right side of the faceplate to confirm the eco-flush is
working correctly.
Confirm the cleansing seat is functioning correctly. Refer to the
Homeowners Guide.
Install the Side Panels
NOTE: There is a left and right side panel. They are not
interchangeable.
1247364-2-A 16 Kohler Co.
 Loading...