

Page 1

Installation and Setup Guide Part No. 1H9613
KODAK Network Interface Card
KODAK XLS 8400 PS Printer
KODAK XLS 8600/8600 PS Printer
KODAK DIGITAL SCIENCE
KODAK DIGITAL SCIENCE
M
8650/8650 PS Color Printer
M
Desktop Color Proofer 9000
Page 2

Table of Contents
Table of Contents
About this Guide.................................................................................................. vii
1 Feature Overview.............................................................................................. 1-1
Network Interface Card Features............................................................... 1-1
Features of the Network Interface Card with Novell NetWare......... 1-2
Features of the Network Interface Card with AppleTalk.................. 1-2
Features of the Network Interface Card with TCP/IP ...................... 1-3
Network Interface Card/Printer Installation Overview................................ 1-4
2 Installing the Hardware..................................................................................... 2-1
Package Contents ..................................................................................... 2-1
Requirements ............................................................................................ 2-1
Getting Ready to Install the Network Interface Card ................................. 2-2
Making the Jumper Selections................................................................... 2-5
LINK Jumper Selection (Non-10BaseT) .................................................... 2-6
Installing the Network Interface Card......................................................... 2-7
Finishing up ............................................................................................... 2-9
3 Installing Software for the Network Interface Card............................................ 3-1
Installing Software for the Network Interface Card with Novell IPX........... 3-1
Installing Software for the Network Interface Card with AppleTalk.......... 3-1
Installing Software to Configure the Network Interface Card for TCP/IP... 3-2
Windows NT.................................................................................... 3-2
UNIX................................................................................................ 3-2
System V UNIX ............................................................................... 3-2
4 Network Printer Parameters.............................................................................. 4-1
Modifying Printer Parameters .................................................................... 4-1
Printer Parameters - Factory Default......................................................... 4-1
Part No. 1H9613 June 1997 i
Page 3

Table of Contents
Printer Parameters - General..................................................................... 4-2
Ethernet Address............................................................................. 4-2
Mode ............................................................................................... 4-3
Printer Parameters - IPX (Novell Netware)................................................ 4-3
FrameType...................................................................................... 4-3
Primary/Preferred Server ................................................................ 4-4
Printer Parameters - AppleTalk ................................................................. 4-6
AppleTalk Name.............................................................................. 4-6
AppleTalk Zone ............................................................................... 4-7
Changing the Printer’s Zone............................................................ 4-7
AppleTalk Phase ............................................................................. 4-9
Printer Parameters - TCP/IP.................................................................... 4-10
IP Address..................................................................................... 4-10
5 Installing the Software for Kodak Printers ......................................................... 5-1
Printing in PostScript and Raster Modes................................................... 5-1
Configuring Printer Software on Print Servers........................................... 5-1
Configuring Printer Software on Workstations........................................... 5-1
Printing in Raster Mode............................................................................. 5-2
6 Novell NetWare ................................................................................................. 6-1
Novell NetWare - Overview ....................................................................... 6-1
Novell NetWare IPX - Overview ...................................................... 6-2
Novell NetWare AppleTalk - Overview............................................ 6-2
Novell NetWare - IPX - 3.x/4.x Servers ..................................................... 6-3
Novell NetWare IPX - Printer Parameters....................................... 6-3
Creating and Editing the IPX KSETUP Configuration File .............. 6-3
Creating Novell NetWare Print Servers and Queues ...................... 6-5
Printing from Multiple Servers ......................................................... 6-9
Setting up Notify Lists...................................................................... 6-9
ii Part N o.1H9613 June 1997
Page 4

Table of Contents
Novell NetWare - AppleTalk .................................................................... 6-10
Novell NetWare - AppleTalk - Printer Parameters......................... 6-10
7 Windows 3.x Workstations ................................................................................ 7-1
Printer Setup for Selecting a Network Queue............................................ 7-1
Setting up Windows 3.x Workstations to use TCP/IP from PC-NFS ......... 7-2
8 Windows 95 Workstations................................................................................. 8-1
Initial Configuration Steps.......................................................................... 8-2
Setting the Printer Properties................................................................... 8-10
TCP/IP from PC-NFS............................................................................... 8-12
9 Windows NT 3.51Workstations and Servers..................................................... 9-1
Network Service and Protocol Installation................................................. 9-1
Network Services/Protocols ............................................................ 9-2
Raster Mode Considerations..................................................................... 9-3
Windows NT Servers and Workstations.......................................... 9-3
Direct Printing.................................................................................. 9-3
Indirect Printing (Printing through a Server).................................... 9-4
NT Server Queues .......................................................................... 9-4
Configuring for Workstations and Servers................................................. 9-5
Direct Printing............................................................................................ 9-8
LPR Port (TCP/IP) Configuration .................................................... 9-8
AppleTalk Configuration.................................................................. 9-9
Indirect Printing - Creating a Print Queue................................................ 9-11
Indirect Printing - Selecting a Print Queue............................................... 9-11
10 Windows NT 4.0 Workstations and Servers.................................................... 10-1
NT Workstations and Servers.................................................................. 10-2
Network Services/Protocols .......................................................... 10-2
Raster Mode Considerations................................................................... 10-3
Windows NT Servers and Workstations........................................ 10-3
Part No. 1H9613 June 1997 iii
Page 5

Table of Contents
Direct Printing................................................................................ 10-3
Indirect Printing (Printing through a Server).................................. 10-4
NT Server Queues ........................................................................ 10-4
Configuring Workstations and Servers.................................................... 10-5
Start/Settings/Printers Menus........................................................ 10-5
Configuring Your Printer for an LPR Port (TCP/IP)....................... 10-6
Configuring Your Printer for AppleTalk.......................................... 10-8
Installing the Kodak Printer Driver........................................................ 10-10
Kodak Driver - Copying Files/ Files Needed......................................... 10-14
Creating a Print Queue for Indirect Printing........................................... 10-15
Selecting a Print Queue for Indirect Printing.......................................... 10-16
Printer Properties and Document Defaults............................................ 10-17
11 Macintosh Workstations .................................................................................. 11-1
AppleTalk Network Printing Setup........................................................... 11-2
AppleTalk Printer Selection ..................................................................... 11-2
Macintosh - Printing................................................................................. 11-2
12 UNIX Workstations and Servers...................................................................... 12-1
UNIX BSD Systems................................................................................. 12-1
Direct Printing/Spooling................................................................. 12-2
Indirect Printing/Spooling .............................................................. 12-2
Printer Installation/Configuration.............................................................. 12-3
Automatic Installation .................................................................... 12-3
Manual Installation ........................................................................ 12-4
Printcap File Entries ...................................................................... 12-5
Printer Status................................................................................. 12-6
Multiple Queues ............................................................................ 12-7
iv Part N o.1H9613 June 1997
Page 6

Table of Contents
SGI Systems............................................................................................ 12-7
System V Systems Systems.................................................................... 12-8
SUN Solaris Systems.................................................................... 12-8
Using the admintool....................................................................... 12-9
HP/UX Systems............................................................................. 12-9
13 Printing ............................................................................................................ 13-1
Printing Modes - PostScript and Raster................................................... 13-1
Changing between PostScript and Raster Printing Modes...................... 13-2
PostScript Mode Printing......................................................................... 13-3
Printing from Microsoft Windows................................................... 13-3
Windows 3.x Systems ....................................................................13-3
Windows 95 and Windows NT 3.51Systems................................. 13-3
Printing from DOS ......................................................................... 13-4
Printing form Macintosh Systems.................................................. 13-4
Printing from BSD UNIX Systems ................................................. 13-5
Printing from UNIX System V Systems ......................................... 13-5
Printing from VMS Systems .......................................................... 13-6
Raster Mode Printing............................................................................... 13-7
Windows and Macintosh Platforms ............................................... 13-7
UNIX Platforms.............................................................................. 13-7
14 Troubleshooting............................................................................................... 14-1
Verifying Standalone Printer Functions ................................................... 14-1
Verify Network Connectivity..................................................................... 14-2
Verify Printer/Network Parameters .......................................................... 14-2
Verify Application and Printer Parameters............................................... 14-3
Novell NetWare Installations.................................................................... 14-3
NT Installations........................................................................................ 14-5
AppleTalk Installations............................................................................. 14-6
Part No. 1H9613 June 1997 v
Page 7

Table of Contents
TCP/IP installations ................................................................................. 14-7
Telnet....................................................................................................... 14-9
Getting Help........................................................................................... 14-11
Index
vi Part N o.1H9613 June 1997
Page 8

About this Guide
This guide provides information about installing and configuring the
KODAK Network Interface Card (Network Interface Card) with the
following printers:
• KODAK XLS 8400 PS Printer
• KODAK XLS 8600/8600 PS Printer
Kodak Digital Science
•
•
Kodak Digital Science
NOTE:
This guide is intended for system administrators or others responsible for
configuring, maintaining, and troubleshooting computers and peripherals
in networked environments. It assumes an understanding of networking
and experience working with Macintosh, Windows and/or UNIX platforms.
About this Guide
TM
8650/8650 PS Color Printer
TM
Desktop Color Proofer 9000
TM
The Kodak Digital Science
Desktop Color Proofer 9000 is
shipped with its own user’s guide. Refer to the user’s guide for the
proofer for details on hardware configuration, illustrations of the
proofer, and instructions for using the operator control panel. This
generic guide should suffice, however, for jumper settings and
functional configuration details for the proofer.
This guide does not describe how to operate the printer or proofer. For
this information, refer to the appropriate user’s guide.
Using this Guide
This guide is structured to walk a system administrator through networked
printer installation procedures using one or more IPX, AppleTalk or TCP/
IP protocols. The various sections take the administrator through installing
hardware and software, installing printer driver/export software for
PostScript and Raster modes of operation, and the specifics that are
relevant to each workstation platform. There are additional sections for
general printing information as well as troubleshooting techniques.
Part No. 1H9613 June 1997 vii
Page 9

Page 10

1 Feature Overview
Network Interface Card Features
The Network Interface Card connects printers directly to
Ethernet™ networks utilizing IPX, AppleTalk, and TCP/IP
protocols in support of Novell® NetWare® 3.x, Netware® 4.x,
MS-DOS, Windows 3.x, Windows 95, Windows NT 3.51,
Windows NT 4.0, UNIX BSD and UNIX System V environments.
Connectivity is accommodated by 10BaseT or 10Base2 Ethernet
cabling.
After you install the Network Interface Card, you can print using
the print utilities or drivers standard to your network type along
with Kodak supplied PostScript printer drivers for PostScript
mode printing and/or Adobe Photoshop Export Module drivers for
Raster mode printing. For other possible solutions, refer to
“Getting Help.”
The Network Interface Card has the following features:
• Connects printers directly to Ethernet networks.
Feature Overview
• Uses 10BaseT (RJ-45/twisted pair) or 10Base2 (BNC/coax/
ThinNet) Ethernet cabling for network connectivity.
• Simultaneously supports NetWare IPX, TCP/IP, and AppleTalk
protocols.
• Prints directly to the networked printer from Macintosh,
Windows NT 3.51, Windows NT 4.0, UNIX BSD, and UNIX
System V platforms.
• Prints indirectly to the networked printer from Macintosh, MS-
DOS, Windows 3.x, Windows 95, Windo ws NT 3.51, Windows
NT 4.0, UNIX BSD, UNIX System V and VMS platforms with
the assistance of Novell NetWare, 3.x, Novell Netware 4.x,
Windows NT 3.51, Windows NT 4.0, UNIX BSD, and/or UNIX
System V servers.
Part No. 1H9613 June 1997 1-1
Page 11

Feature Overview
Features of the Network Interface Card with Novell
NetWare
• Is defined as a standard NetWare interface and is accessed
with NetWare print utilities.
• Configures servers and queues using PCONSOLE.
• Uses standard NetWare print utilities
• Services up to 16 queues on 16 NetWare file servers
Features of the Network Interface Card with
AppleTalk
AppleTalk protocol may be used by Macintosh, Novell, and
Windows NT systems.
NOTE: Printing in raster mode using AppleTalk is possible from a
Macintosh only.
• From the Macintosh, the Network Interface Card operates as
an AppleTalk node on Ethernet. The printer emulates a
LaserWriter. In PostScript mode, select the printer from the
Chooser, and print to it as if printing to a LaserWriter. In
Raster mode, select the printer from the export module, and
print to it.
• For non-Macintosh systems using AppleTalk, only PostScript
printing is supported. Raster mode printing can only be
accomplished with IPX or TCP/IP print queues.
The following are features of the Network Interface Card when it
is used with AppleTalk:
• Operates as an AppleTalk node on Ethernet.
• Emulates a LaserWriter in PostScript mode. Advertises itself
as a Kodak_Raster device in Raster mode.
• Supports both EtherTalk Phase 1 and Phase 2.
• Operates in multizone networks.
1-2 Part No. 1H9613 June 1997
Page 12

Feature Overview
• Supports printing indirectly for AppleTalk networks connected
with routers to Ethernet networks.
• Supports printing indirectly for AppleTalk networks connected
with routers to Ethernet networks.
• Supports Apple’s LaserWriter drivers versions 7.1 and above
as well as the Adobe drivers.
• Supports the standard AppleNamer utility.
• Plug and play installation if you use the default settings.
Features of the Network Interface Card with TCP/IP
• The Network Interface Card was designed as a direct network
interface for printers in TCP/IP en vironments with systems that
support the line printer daemon (lpd). The card works with
UNIX systems, Windows NT, Windows PC/TCP compatible
TM
software such as PC/TCP FTP, and VMS
support lpd.
• Systems that support TCP/IP and lpd can print to the card
using lpr/lp commands. Systems can be configured using an
LPR port, an IP address, and a queue named ps.
systems that
• The Network Interface Card supports both PostScript and
Raster Mode printing with TCP/IP.
• Kodak does not develop PostScript drivers or export modules
for UNIX platforms. However, other vendors do provide
solutions in support of Kodak printers which support various
UNIX, Windows, and Macintosh platforms and interfaces. For
more information, refer to the Kodak web site at http://
www.kodak.com. Look for information under Product
Information/Technical Information/System & Software
Solutions, and search by product category.
Part No. 1H9613 June 1997 1-3
Page 13

Feature Overview
Network Interface Card/Printer Installation Overview
Section 1:
communicating to the Network Interface Card/printer, the
workstation platform(s) that will be used for creating and sending
print jobs to the printer, and any servers that will be used to spool
and manage jobs sent to corresponding printer queues.
Section 2:
the Kodak printer.
Section 3:
NOTE: It is not necessary to install any software for the Network
Section 4:
Some are programmable from the printer’s front display/control
panel, and others are programmable by downloading PostScript
language command files.
NOTE: We recommend that you use the default parameters
Section 5:
or Raster) to be used based on the model of printer that was
purchased. Install corresponding PostScript and/or Raster mode
software. Refer to appropriate platform specific sections based on
their anticipated use as print servers and/or user workstations.
Determine the network protocol(s) to be used for
Install the hardware for the Network Interface Card in
Install the software for the Network Interface Card.
Interface Card for AppleTalk.
Configure network printer parameters if necessary.
initially until the printer functions on your network.
Determine printer modes of operation (PostScript and
For print servers (indirect printing), configure the printer on a
pertinent server platform using the desired protocol.
For user workstations, configure the printer to use a server’ s print
queue (indirect printing), or to print directly (direct printing) if
possible to the printer using the desired protocol.
1-4 Part No. 1H9613 June 1997
Page 14

2 Installing the Hardware
You may choose to have Kodak Service install the Network
Interface Card in the printer for a fee. This fee covers hardware
installation only; network setup tasks are still your responsibility.
If you want to install the Network Interface Card yourself,
instructions are provided in this section. You are responsible,
however, for any damage that occurs if you install the Network
Interface Card yourself.
Installing the Hardware
NOTE:
The Kodak Digital Science
9000 is shipped with its own user’ s guide for the Network
Interface Card. Refer to that guide for hardware
configuration details, illustrations of the proofer, and
instructions for using the operator control panel.
Package Contents
The following items are included in the package for the Network
Interface Card. This package does not include Macintosh or
Windows PostScript drivers or Raster export modules. This
software is included with the purchase of each printer.
• Network Interface Card
• 3.5 inch diskette - Utilities for Novell NetWare
• 3.5 inch diskette UNIX TCP/IP Utilities.
NOTE: This UNIX tar formatted disk cannot be read on a PC
platform.
• antistatic strap
• User’s Guide
• 2 labels with the Ethernet hardware address
TM
Desktop Color Proofer
Requirements
To install the Network Interface Card, you need the following:
• appropriate Ethernet cabling
• Phillips-head screwdriver
Part No. 1H9613 June 1997 2-1
Page 15
Installing the Hardware
Getting Ready to Install the Network Interface Card
Before you install the Network Interface Card, do the following
steps:
1. Write the Ethernet address needed for the installation in the
space provided below. It is located on the underside of the
Network Interface Card, on the front of the bracket, and on
the box the card is shipped in.
Keep this guide handy in case you need to reconfigure or add
more printers to your system.
00 40 C8 __ __ __ __ __ __
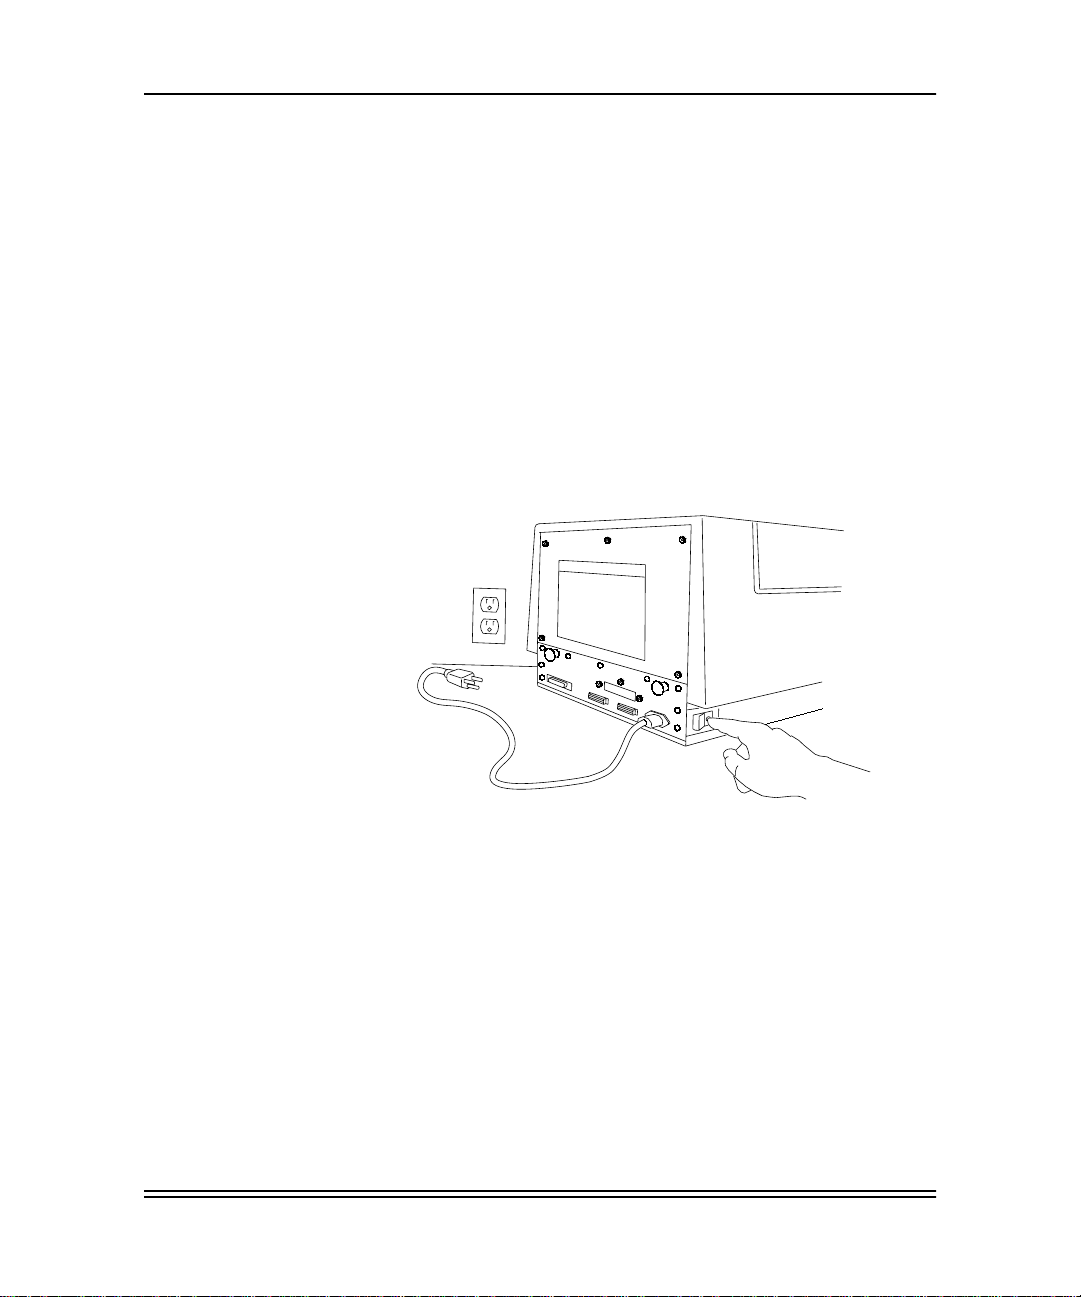
2. Turn off and unplug the printer.
2-2 Part No. 1H9613 June 1997
Page 16

Installing the Hardware
3. Attach the wrist portion of the antistatic strap to your wrist.
Attach the other end of the strap to the metal plate on the
back of the printer.
CAUTION: Wear the antistatic strap when you open the
back of the printer, remove the Network
Interface Card from the antistatic bag, and
install the card in the printer. Wearing the
antistatic strap helps to prevent damage to
the printer and the Network Interface Card.
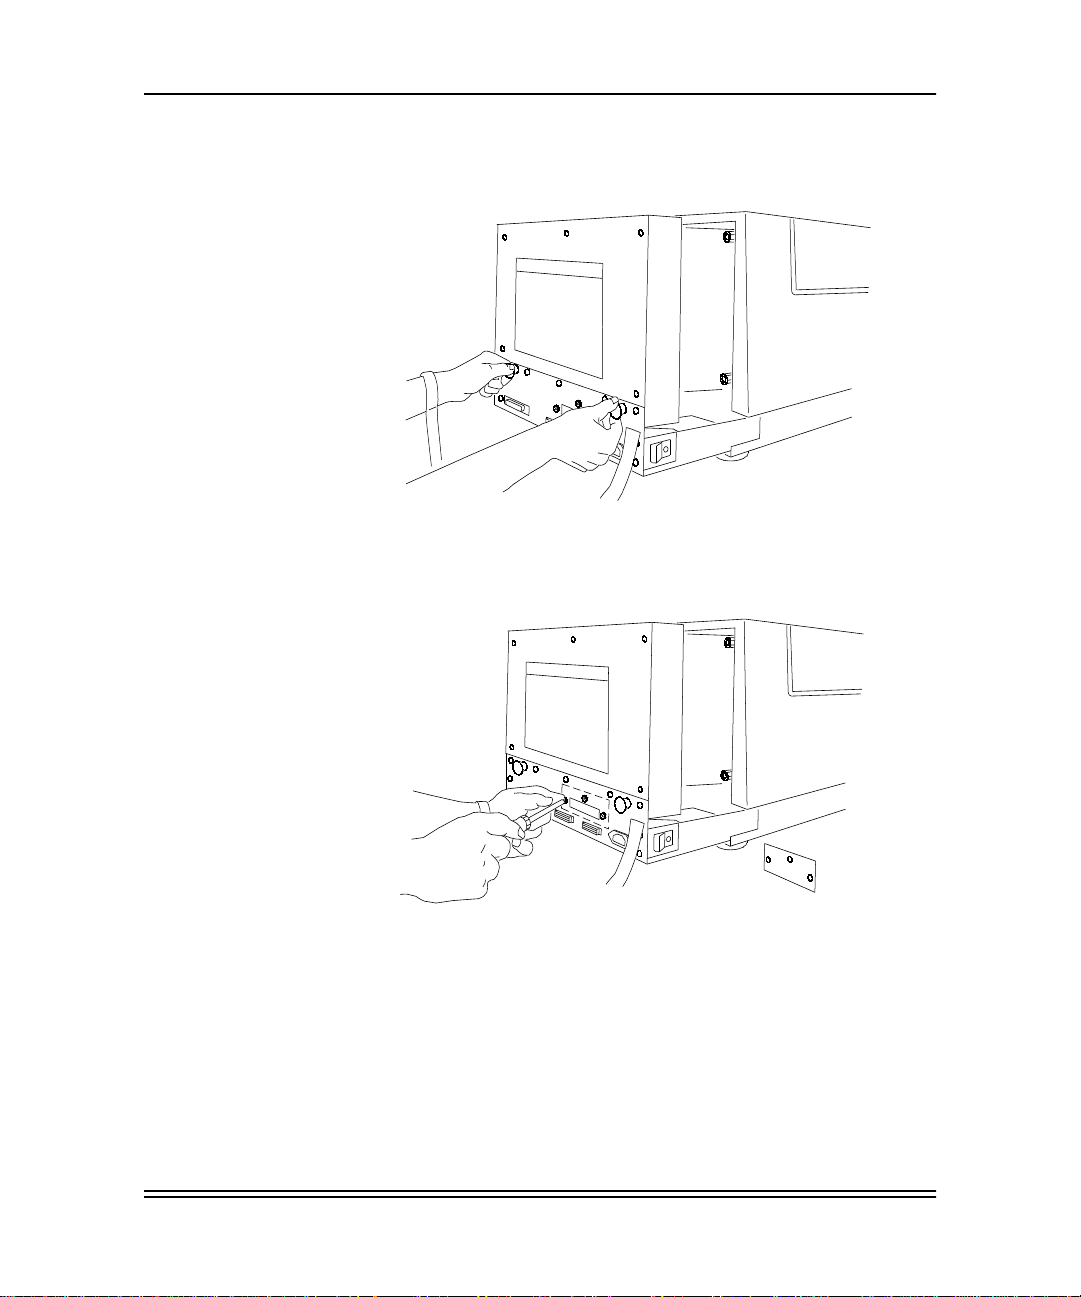
4. Using the Phillips-head screwdriver, remove the five screws
on the back of the printer.
Part No. 1H9613 June 1997 2-3
Page 17
Installing the Hardware
A
5. Grasp the two black handles on the metal plate. Slowly pull
the drawer out about six inches.
6. Using the Phillips-head screwdriver , remov e the three scre ws
which hold the slot cover for the Network Interface Card in
place. Remove the slot cover and set it aside.
7. Remove the Network Interface Card from the antistatic bag.
2-4 Part No. 1H9613 June 1997
Page 18

Making the Jumper Selections
JP1/JP2 Factory Settings (Both Jumpers On)
JP1 and JP2 are two small black jumpers near the right side in
the middle of the Network Interface Card. When the card is
shipped, each jumper is positioned across both sets of pins (ON).
This allows for both remote Telnet diagnostic monitoring and
normal operation/printing with 10BaseT.
Cable Autodetection (Both Jumpers Off)
The connection autosensing feature automatically senses the
presence of a 10BaseT connection. If no 10BaseT connection is
sensed, a 10Base2 (BNC) connection is assumed. However,
Telnet capability is disabled.
JP1/JP2 - selection of cable connection manually
Telnet and cable autodetection modes are the recommended use
of the JP1/JP2 jumpers.
However, the cable type can also be selected manually. The
jumpers are positioned to match the locations of the two ports. If
you look at the Network Interface Card ports on the back of the
printer, the right port is for twisted pair, 10BaseT (RJ45) cabling.
The right jumper corresponds to that connector and is labeled
JP1. The left port is for ThinNet, 10Base2 (BNC) cabling. The left
jumper corresponds to that connector, and is labeled JP2.
Installing the Hardware
• For manual selection, lift the jumper for the appropriate
cable connector up and off the pin and then push it back
down over both pins . This specifies the particular connector
that will be in use.
NOTE: Move only the jumper for the cable connector type that
will be used. The other jumper must remain on one pin.
Part No. 1H9613 June 1997 2-5
Page 19

Installing the Hardware
LINK Jumper Selection (Non-10BaseT)
The enlarged view in the illustration shows the jumper labeling as
viewed from behind the printer looking toward the front.
NOTE: Complete these steps only if link test integrity needs to
be enabled and your cabling is non-10BaseT.
If you have non-10BaseT twisted pair cabling, such as AT&T or
HP STARLAN, you may need to enable the link test integrity
function from the 10BaseT transceiver by changing the LINK
jumper on the Network Interface Card.
1. Find the small black jumper labeled “LINK” near the right front
side of the Network Interface Card.
This is the LINK jumper. When the Network Interface Card is
shipped, this jumper is positioned on only one of the two pins.
This specifies that the link test integrity is disabled.
2. Lift the black jumper up and off the pin and then push it back
down over both pins.
2-6 Part No. 1H9613 June 1997
Page 20
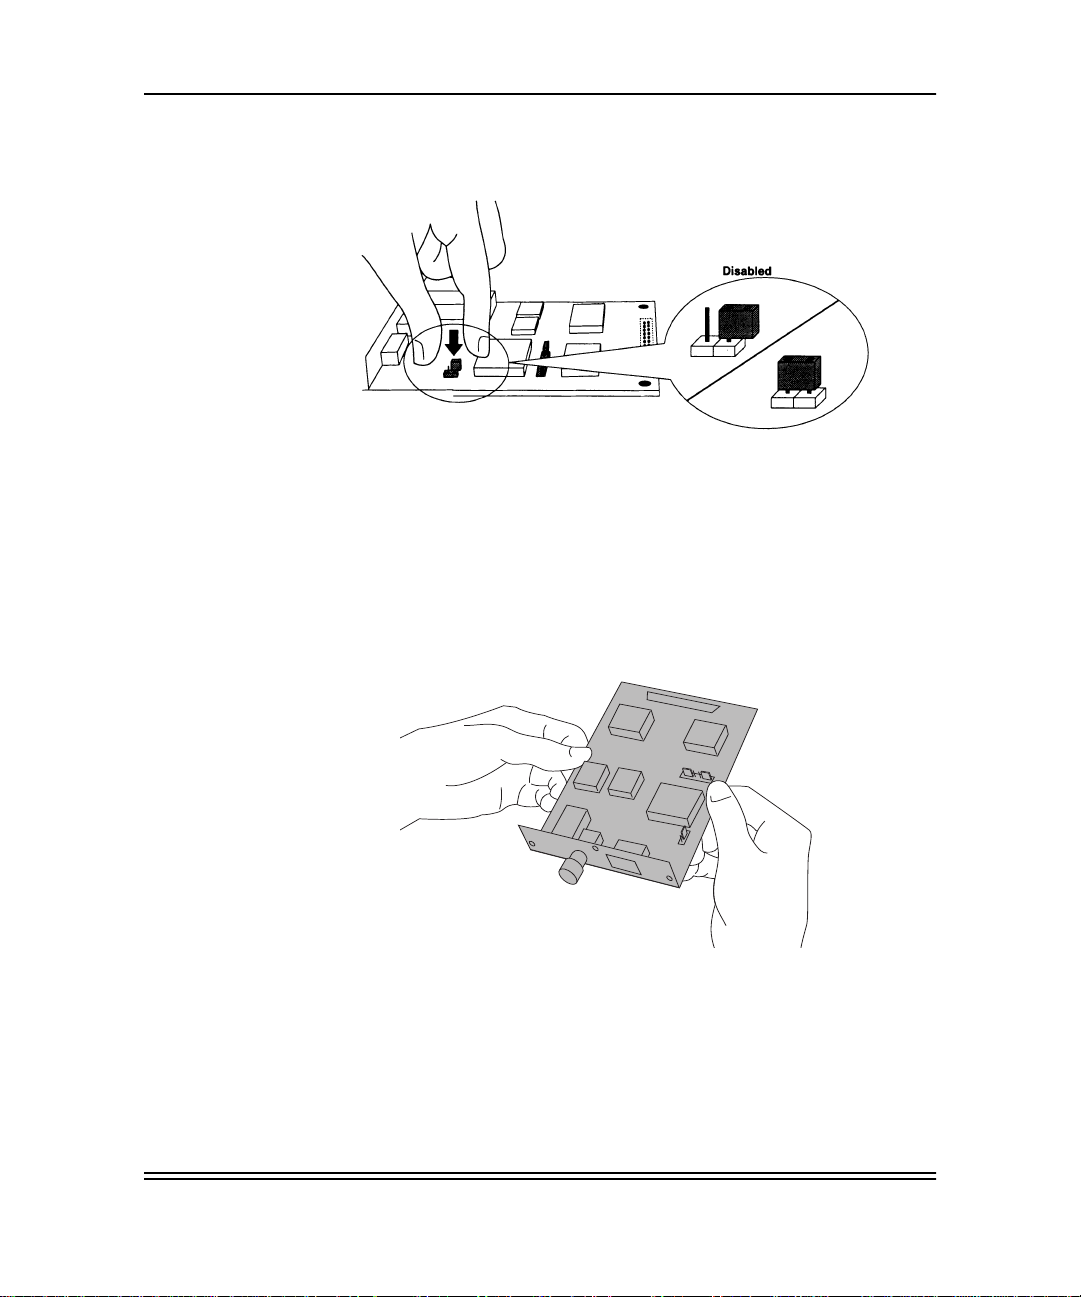
See the illustration below for LINK jumper enabled/disabled
positions.
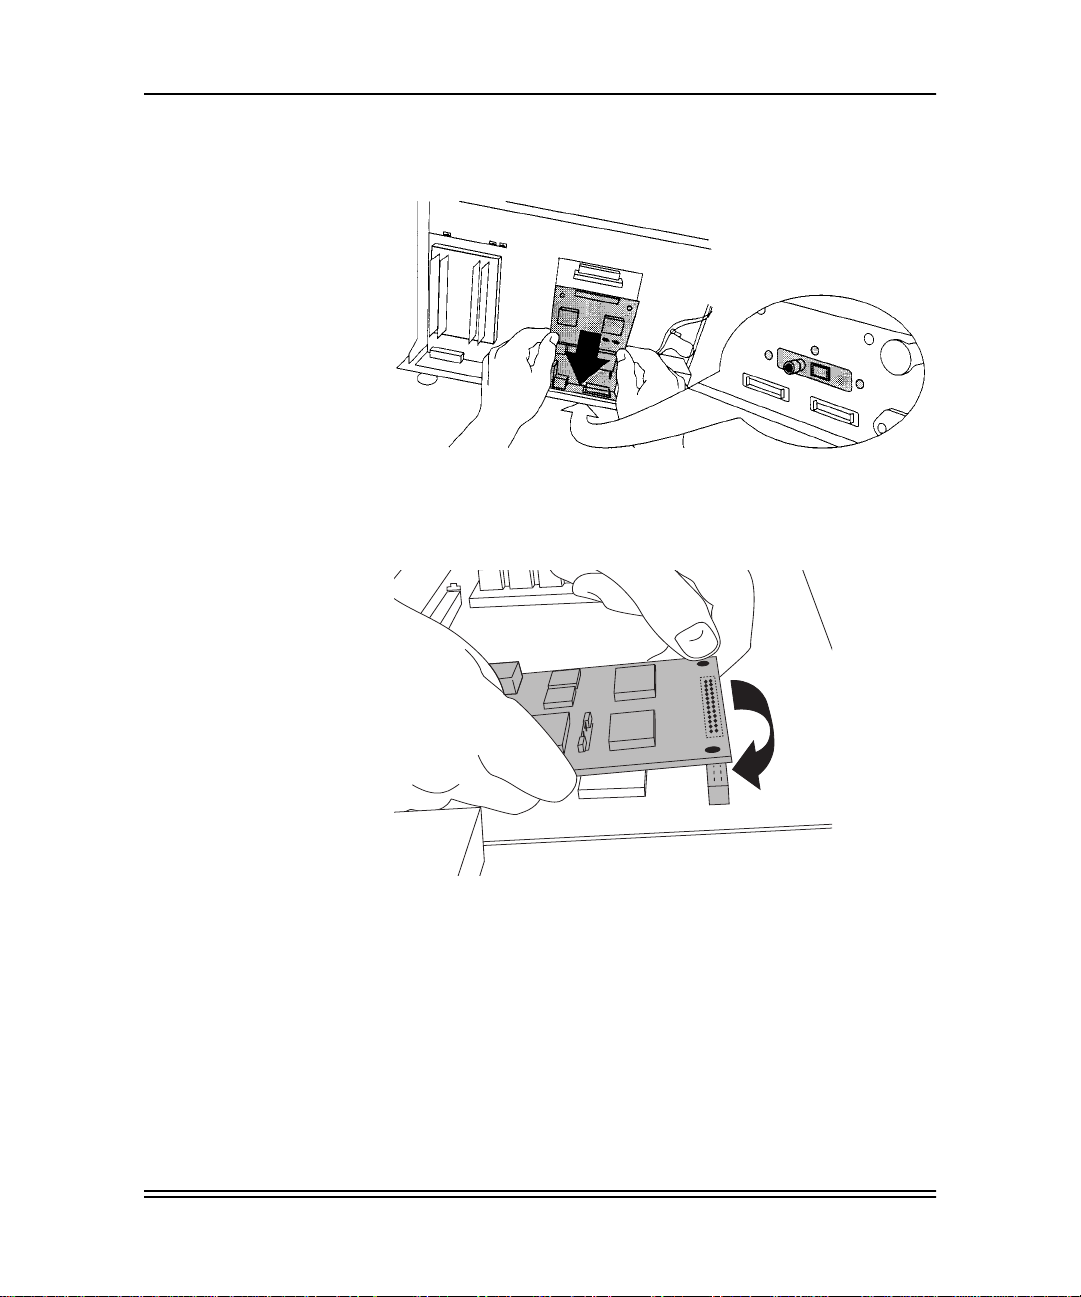
Installing the Network Interface Card
Do the following steps to install and seat the Network Interface
Card:
1. Hold the card so that the connector is on the bottom and the
cable receptacles are toward you.
Installing the Hardware
2. Tilt the card at about a 30-degree angle, and slide the front
into the slot you opened.
Part No. 1H9613 June 1997 2-7
Page 21
Installing the Hardware
The cable receptacles should extend through the front of the
slot.
3. Seat the card by positioning the connector on the bottom of
the card against the receptacle on the mother board. Press
it gently into place.
4. Secure the card connector plate to the printer connector plate
by replacing the three screws you removed from the slot
cover.
2-8 Part No. 1H9613 June 1997
Page 22
Finishing up
Finish up the installation by closing the printer:
1. Grasp the black handles on the back of the printer and slide
the back of the printer in.
2. Using the Phillips-head screwdriver, replace the five screws
you removed.
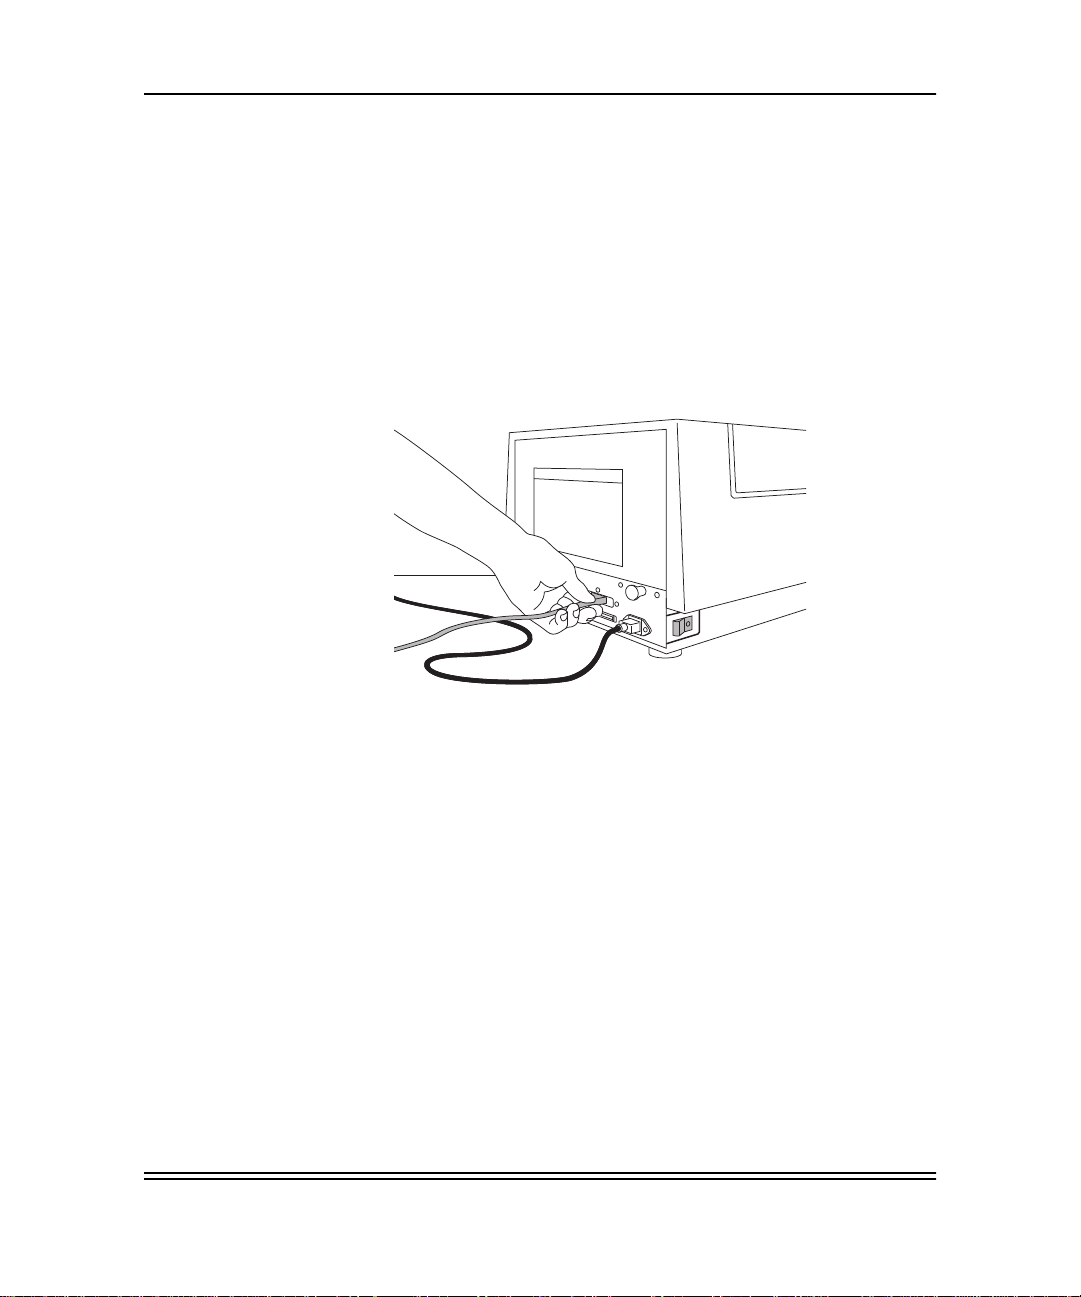
3. Attach the Ethernet cable to the appropriate connector on the
Network Interface Card.
Installing the Hardware
4. Plug in the printer, and turn it on. Make sure the power light
illuminates on the display panel.
5. When the printer completes initialization and the front display/
control panel displays the message “READY ,” check the LEDs
for the Network Interface Card for the following indications.
The LEDs are located on the back of the printer.
• The yellow LED should be on and stable indicating correct
10BaseT connectivity between the printer and the Network
Interface Card and the network hub switch.
NOTE: Check the condition of the yellow light only if you are
using 10BaseT. It has no validity for ThinNet
connections.
If the yellow light does not illuminate or is unstable, check
for proper 10BaseT connectivity.
Part No. 1H9613 June 1997 2-9
Page 23

Installing the Hardware
If the connectivity is correct and the yellow light blinks or
does not illuminate, the Network Interface Card may be
defective.
NOTE: The condition of the green LED is relevant for both
10BaseT and 10Base2 connectivity.
• Check that the green LED blinks intermittently as a
detection of network traffic. If the green light does not blink
intermittently, the Network Interface Card could be
defective.
2-10 Part No. 1H9613 June 1997
Page 24

Installing Software for the Network Interface
3 Installing Software for the Network Interface Card
Two diskettes are included in the kit for the Network Interface
Card. One is Utilities for Novell NetWare and the other is Utilities
for UNIX TCP/IP.
Installing Software for the Network Interface Card with
Novell IPX
The following files are provided on the Utilities f or No vell NetWare
diskette:
• KSETUP.EXE for creating a Novell Configuration file.
NOTE: Refer to “Novell NetWare” for specific instructions on
creating and editing the IPX KSETUP configuration file.
• README instructions for defining a primary server. Refer to
”Printer Parameters” for specific details regarding the primary/
preferred server.
• PSSERVER.PS for defining a primary server by editing a
PostScript file (<filename>.ps) that can be downloaded to the
printer in PostScript mode.
• RSSERVER.EXE for defining a primary server and creating a
Raster file (RSSERVER.RS) that can be downloaded to the
printer in Raster mode.
• CNTL_D file must be appended to the PSSERVER.PS/
RSSERVER.EXE file that is downloaded through the parallel
printer port.
Installing Software for the Network Interface Card with
AppleTalk
It is not necessary to install software to use the Network Interface
Card with AppleTalk. Utilities are provided with Macintosh-Kodak
printer software, however, that allow you to replace default
AppleTalk related parameters with custom names. To minimize
problems, we recommend that a printer be brought up on the
network utilizing its default parameters before you define custom
parameters.
Part No. 1H9613 June 1997 3-1
Page 25

Installing Software for the Network Interface Card
Installing Software to Configure the Network Interface
Card for TCP/IP
Windows NT
It is not necessary to install software to use the Network Interface
Card with Windows NT systems. Configuring printers on specific
NT platforms using TCP/IP is discussed in platform specific
sections of this manual.
UNIX
A diskette is provided with UNIX TCP/IP Utilities. This UNIX tar
formatted disk cannot be read on a PC platform.
The contents of the diskette include:
• INSTALL.SH for installing a printer on a UNIX workstation.
• INTERFACES folder with INSTALL.SH resources.
NOTE: On UNIX systems, run the INSTALL.SH script (as “root/
admin”) to install the printer.
System V UNIX
The INSTALL.SH script should accommodate most System V
systems. If you encounter problems, consult the documentation
provided with specific System V UNIX platforms for the use of
AdminTool and lpadmin utilities/syntax for accessing a remote
print server queue by the name of “ps.”
3-2 Part No. 1H9613 June 1997
Page 26

4 Network Printer Parameters
This section discusses parameters within the printer related to
IPX, AppleTalk and TCP/IP network protocols and methods for
modifying parameters from both Macintosh and PC platforms.
We recommend that you use the default parameters where
applicable and especially when troubleshooting configuration
problems.
Modifying Printer Parameters
You can change some parameters from the printer’s front display/
control panel and others by downloading PostScript command
jobs to the printer. Y ou can download PostScript command files by
doing the following:
• From a Macintosh over a Network or by using LocalTalk—You
can download the pertinent control <filename>.ps using the
LaserWriter Font Utility.
• From Windows through a network port—With DOS
commands, you can map a network queue to an LPT port by
using Capture with Windows 3.x or Netlink with Windows NT
\SERVER\ QUEUE LPT# and then download the pertinent
control <filename>.ps using COPY <filename>.ps LPT#.
Network Printer Parameters
This method is suggested assuming that a network
connection to the printer already exists and that you are using
a PC that supports network port mapping to an LPT port.
• From Windows through a parallel port—With DOS commands,
you can download the pertinent control <filename>.ps using
COPY <filename>.ps LPT#.
Printer Parameters - Factory Default
If some parameters have been changed from the defaults and
you find it necessary to return to factory default parameters, you
can reset the printer to factory defaults using the printer’s front
display/control panel by using the f ollowing procedure. This resets
all changeable parameters such as AppleTalk name,
AppleTalkZone, IP address, and preferred server name. Refer to
the appropriate sections of this manual for more information.
Part No. 1H9613 June 1997 4-1
Page 27
Network Printer Parameters
NOTE: If you are setting up a
Kodak Digital Science
Color Proofer 9000, refer to the user’s guide for the
Network Interface Card shipped with the proofer for
specific instructions on using the operator control panel.
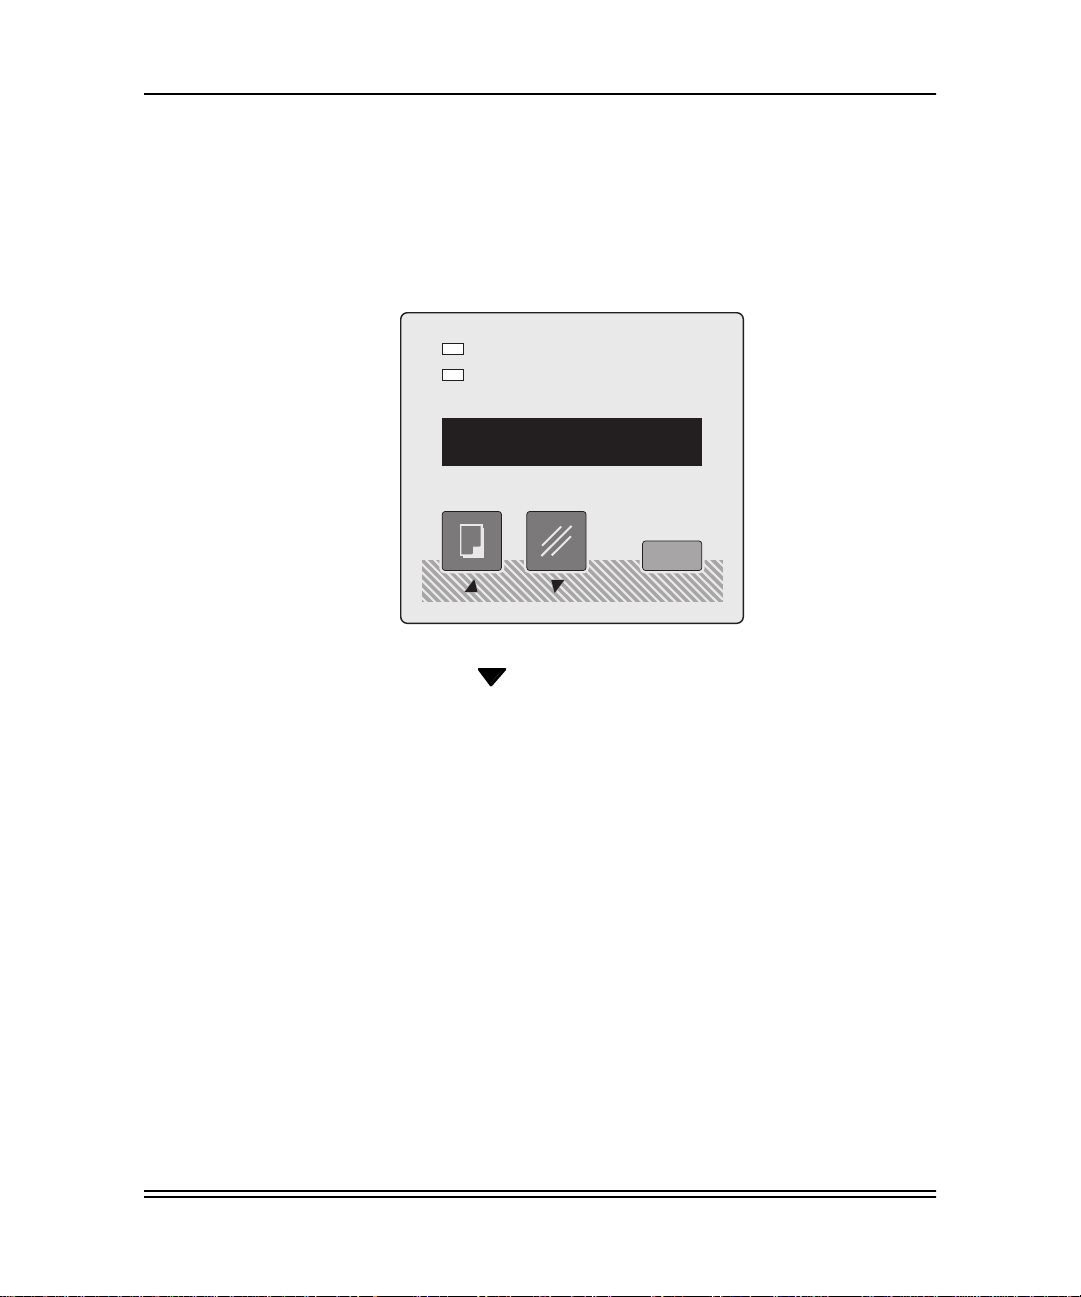
1. Press
Setup/Select
on the display panel when “READY”
appears in the panel.
Power
Error
Print
2. Press until SETUP: DEFAULTS appears.
3. Press
Setup/Select
Cancel
Setup/Selectscroll
”“
to select “SETUP: DEFAULTS.”
TM
Desktop
4. Press
5. Press
Setup/Select
Setup/Select
to select “DEFAULTS: FACTORY.”
to select “FACTORY: RESET.”
Wait for reset/initialization to finish before you attempt other
operations.
Printer Parameters - General
Ethernet Address
Default: Factory Programmed in the form of 00:40:C8:xx:xx:xx
The Ethernet hardware address is programmed into the Network
Interface Card at the factory and cannot be modified by users.
This address is necessary for properly naming the kxxxxxx setup
file.
4-2 Part No. 1H9613 June 1997
Page 28
Network Printer Parameters
Mode
Default: PrintServer(ps)
The mode is always PrintServer, and it cannot be modified by
users.
Printer Parameters - IPX (Novell Netware)
FrameType
Default: AutoSelect
In AutoSelect mode, the printer tries the various frametypes
available until it receives a response from an IPX server. From
that point, the printer only uses the frametype that was
successful.
Use the following procedure to select a specific printer IPX
frametype from the printer’s front display/control panel. If your
network has multiple file servers that use different frame types,
you may want to select the frametype that the primary server will
use. Selectable frametypes are:
• AutoSelect 802.2
• AutoSelect 802.3
• Ethernet 2
• SNAP
NOTE: If you are setting up a
Color Proofer 9000, refer to the user’s guide for the
Network Interface Card shipped with the proofer for
specific instructions on using the display/control panel.
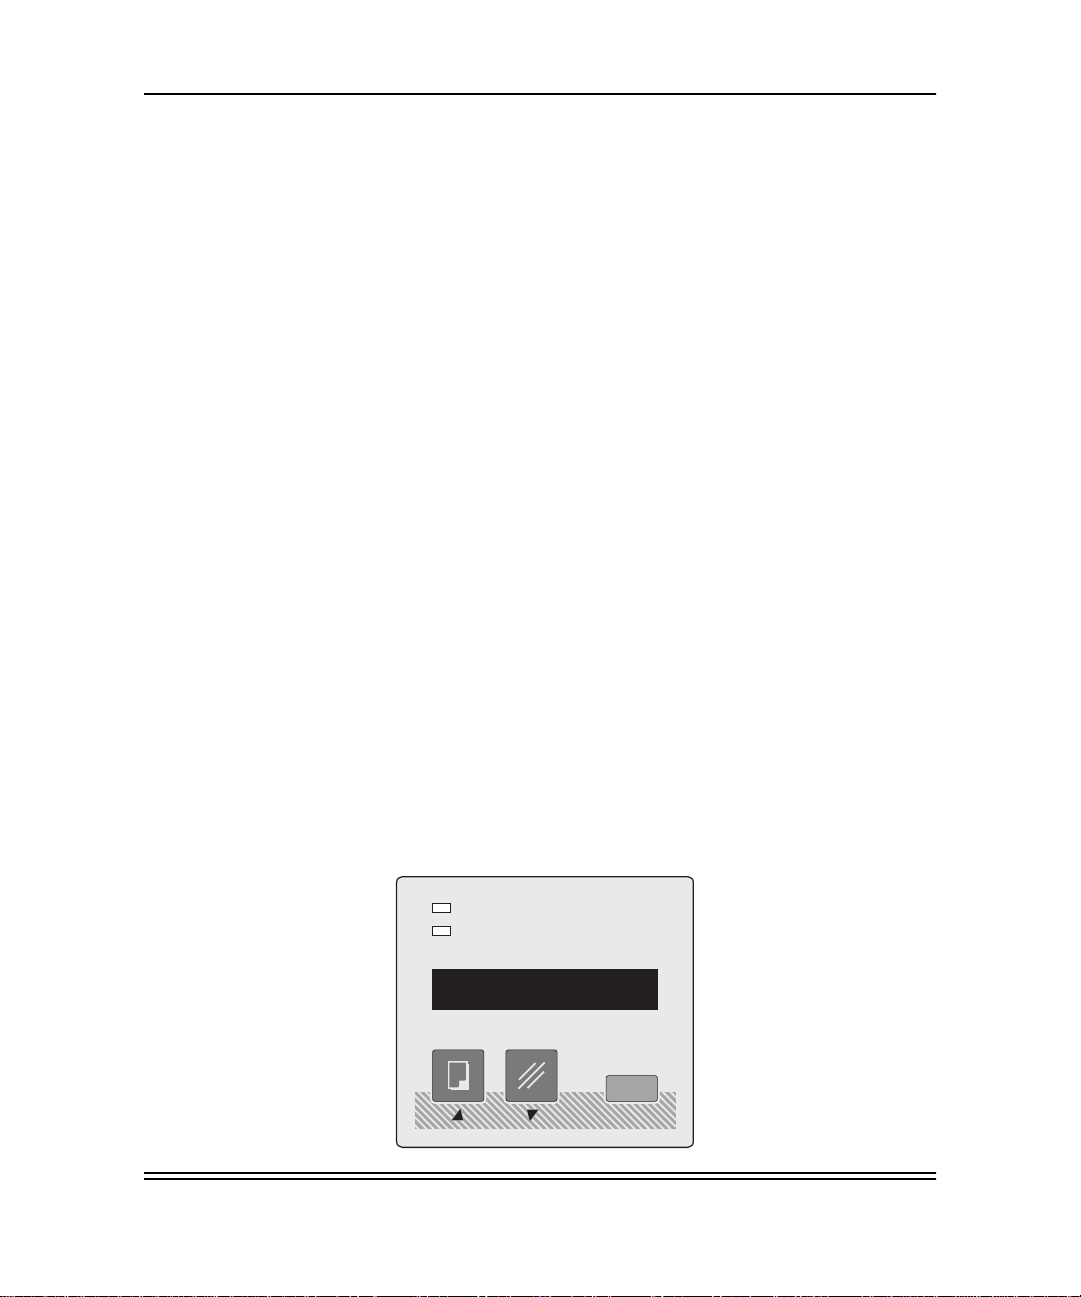
1. Press
Setup/Select
“READY” appears in the panel.
Kodak Digital Science
on the display/control panel when
TM
Desktop
Power
Error
Print
Cancel
Setup/Selectscroll
Part No. 1H9613 June 1997 4-3
Page 29
Network Printer Parameters
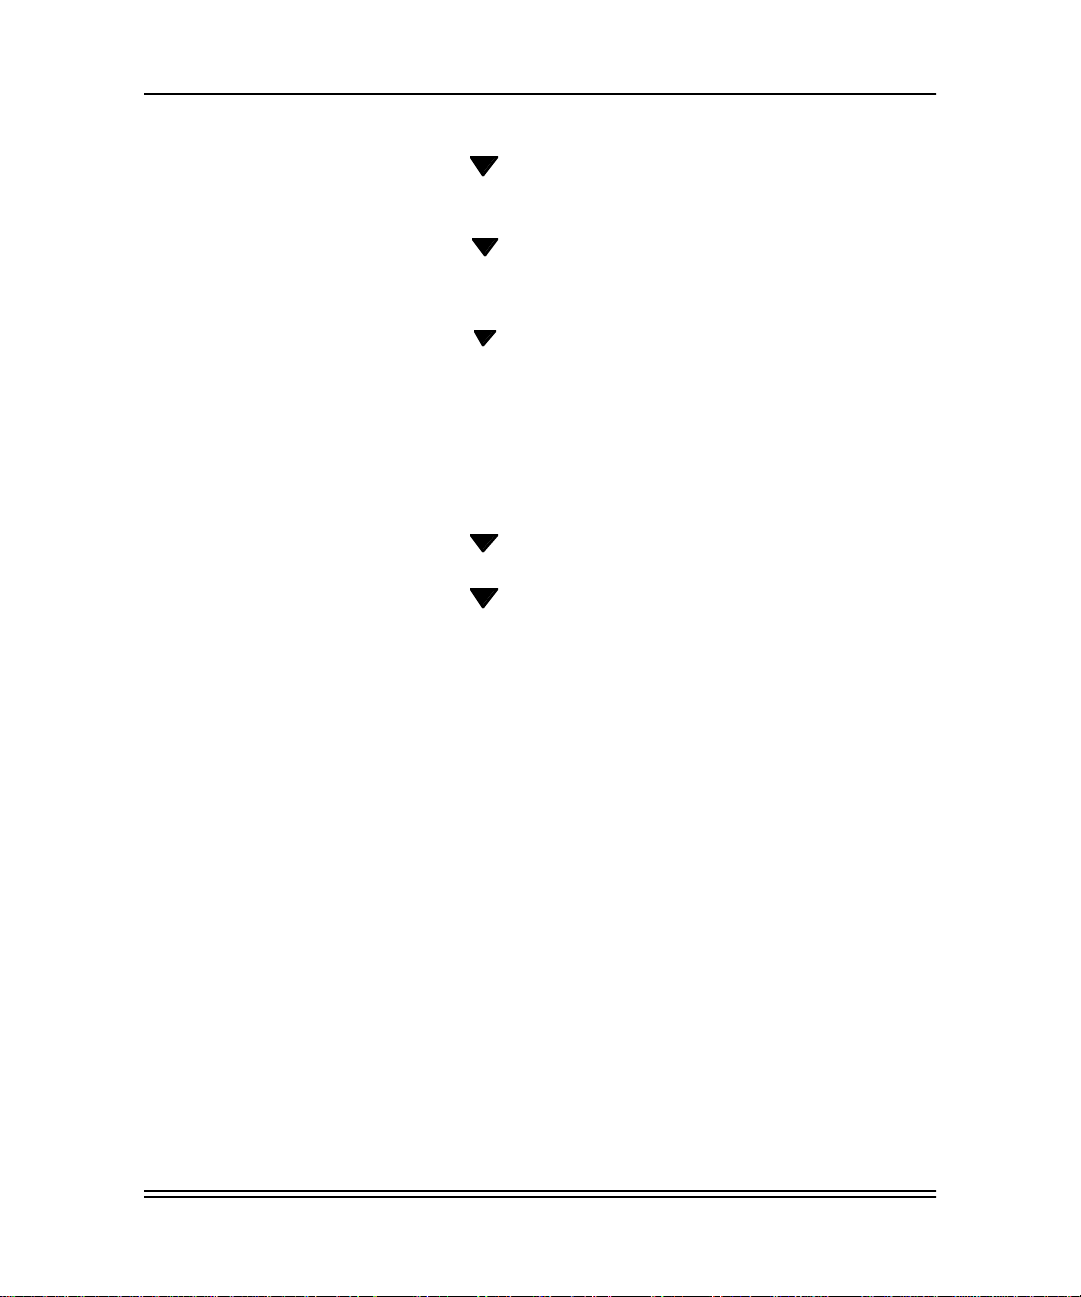
2. Press until SETUP: PORTS appears.
3. Press
4. Press until PORTS: IPX appears.
5. Press
6. Press until the appropriate frametype appears.
”“
Setup/Select
”“
Setup/Select
”“
to access the SETUP: PORTS submenu.
to access the list of frametypes.
The current setting is identified by an asterisk (*).
The available choices are 802.2, 802.3, SNAP, Ethernet II,
and AutoSelect.
7. Press
8. Press until IPX: EXIT appears.
9. Press until SETUP: EXIT appears.
10. Press
Setup/Select
”“
”“
Setup/Select
to choose the frame type.
.
Primary/Preferred Server
The primary or preferred server is the name of the file server that
contains the KSETUP configuration file for Novell environments.
In most environments it may not be necessary to define a
preferred server (factory default setting). If you have any
problems, you should define the preferred server as a
troubleshooting precaution.
NOTE: In environments with hundreds of servers, the printer
logs in to the preferred server instantly (seconds) instead
of potentially searching through hundreds of servers
(minutes) to find the KSETUP file. In an en vironment with
only one server, you may find it necessary to define that
server as the preferred server.
The following utilities are provided with your Novell Utilities
diskette for downloading a primary server name to your printer:
• PSSERVER.PS for defining a primary server with the printer
in PostScript mode.
4-4 Part No. 1H9613 June 1997
Page 30

Network Printer Parameters
• RSSERVER.EXE f or defining a primary server with the printer
in Raster mode.
• CNTL_D file must be appended to the configuration files that
are downloaded through the parallel printer port.
If a Macintosh system is availab le on the network, these Windows
utility files could be transferred to the Macintosh and then
downloaded to the printer over the network using the LaserWriter
Downloader Utility. This method avoids the additional necessity
for a parallel I/F to the printer from a PC.
Primary Server For PostScript Printers
To define the primary NetWare server for a PostScript printer in
PostScript mode, do the following steps:
1. Edit the PSSERVER.PS file from the Utilities for Novell
diskette.
2. In the third line of the file, replace the phrase “PUT YOUR
SERVER NAME HERE” with the name of the primary
NetWare server where the KSETUP configuration file
resides.
Make sure that the ( ) in (PUTYOURSERVERNAMEHERE)
are not removed.
NOTE: The primary server name is case sensitive.
3. Save and exit the file.
4. Send the file to the printer through a port such as the parallel
port. The following command is an example of sending the
file to the printer using the parallel port. The CNTL_D file is
found on the Utilities for No vell disk ette and is only necessary
if the file is downloaded using the parallel port.
COPY PSSERVER.PS + CNTL_D LPT1:
5. Once the file has been sent to the printer, power cycle the
printer to allow the change to take effect.
Primary Server for Raster Printers
To define the primary NetWare server for a Raster printer, do the
following steps:
1. Execute the RSSERVER program from the Utilities for Novell
diskette by typing RSSERVER at the command line.
Part No. 1H9613 June 1997 4-5
Page 31

Network Printer Parameters
2. Respond to the prompts from the program.
3. Send the file to the printer through a port such as the parallel
4. When the file has been sent to the printer, power cycle the
Printer Parameters - AppleTalk
AppleTalk Name
Default AppleTalk names are the equivalent of specific printer
product names.
Defaults:
An output file named RSSERVER.RS is created.
port. The following command is one example of sending the
file to the printer when using the parallel port. The CNTL_D
file is found on the Utilities for Novell diskette and is only
necessary if the file is downloaded using the parallel port.
COPY RSSERVER.RS + CNTL_D LPT1:
printer to allow the change to take effect.
‘Kodak XLS 8400 PS’
‘Kodak XLS 8600’ or ‘Kodak XLS 8600 PS’
‘Kodak DS 8650’ or ‘Kodak DS 8650 PS’
‘Kodak DS DCP 9000’
Utilities For Printers in PostScript Mode
• The Namer— Macintosh utility used to rename the printer in
PostScript mode. This is the printer name as it appears as a
PostScript printer in the Chooser or similar PC/AppleTalk
Zone-Name window.
• Set_Printer_Name.ps—utility which renames the printer in
PostScript mode. This is the printer name as it appears as a
PostScript printer in the Chooser or similar PC/AppleTalk
Zone-Name window. Edit the file to modify the name
parameter, save the file, and download the file to the printer.
4-6 Part No. 1H9613 June 1997
Page 32

Network Printer Parameters
Utilities For Printers in Raster Mode
Kodak Raster Printer Utility— Macintosh utility used to rename
the printer in Raster mode. This is the printer name as it appears
when using the specific printer’s export module in conjunction
with Adobe Photoshop.
AppleTalk Zone
Default: * (Physical Zone assigned to cable segment)
We recommend that you use the default zone. The only time you
would use a different zone name is if the default physical zone
were subdivided into logical zones.
If there are routers on your network, the printer is assigned to the
default zone named by the router.
Each time the printer initializes, it attempts to acquire the zone
name that is defined in the printer's nonvolatile RAM. If it cannot
find it, the printer is placed in a default zone. If there are routers
on your network, the printer acquires its zone name from the
router.
The printer must be operating in PostScript mode when you
change the zone. Once the procedure is complete, the zone is
applicable for both PostScript and Raster modes.
Set_EtherTalk_Zone.PS—Utility which renames the printer zone
in PostScript mode. This is the zone that the printer appears in as
a PostScript printer in the Chooser or similar PC/AppleTalk ZoneName window. Edit the file to modify the zone parameter, save
the file, and download the file to the printer.
Edit the file so that your zone name is substituted for
“YourZoneNameGoesHere.” No other parts of the file should be
altered. Be careful not to insert any nonprinting characters in this
file, or errors will occur during the download. If there are syntax
errors in the file, the printer returns an error message through the
LaserWriter Font Utility and the zone name are not changed.
Changing the Printer’s Zone
1. Make sure the printer is in PostScript mode.
2. Open the Set_EtherTalk_Zone.PS file on the Macintosh
Printer Driver installation disk.
Part No. 1H9613 June 1997 4-7
Page 33

Network Printer Parameters
3. Replace “YourZoneNameGoesHere” in the following line with
NOTE: Do not remove the parentheses from the command.
4. Save the file, and quit.
5. Select the LaserWriter 7.x icon in the Chooser.
NOTE: LaserWriter 7.x is included with Kodak software.
6. Open the LaserWriter Font Utility.
7. Select “Download PostScript File” from the Utilities menu.
8. Double-click on the Set_EtherTalk_Zone.PS file.
The new zone name remains in the printer’s nonvolatile memory.
To verify that the printer is located in the new zone, open the
Chooser and click on the appropriate zone. If the download was
successful, the printer appears in that zone’s list of printers.
The file opens in TeachText.
the name of your zone.
(%EtherTalk_NV)<</EtherTalkZone (YourZoneNameGoesHere)>> setdevparams
Get_EtherTalk_Zone.PS - Retrieves the currently defi ned z one . It
is only useful with the Macintosh’s LaserWriter Font Utility that
saves the information returned in a PostScript.log file.
4-8 Part No. 1H9613 June 1997
Page 34

Network Printer Parameters
AppleTalk Phase
Default AppleTalk names are the equivalent of specific printer
product names:
Default: Phase 2
Optional: Phase 1
Changing the Phase
NOTE: If you are setting up a
Kodak Digital Science
Color Proofer 9000, refer to the User’s Guide for the
Network Interface Card shipped with the proofer for
specific instructions on using the operator control panel.
The default phase setting is EtherTalk Phase 2. To change the
phase, do the following steps:
1. Press Setup/Select on the display panel when “READY”
appears in the panel.
Power
Error
TM
Desktop
Print
2. Press until “SETUP:PORTS” appears.
3. Press
Setup/Select
Cancel
Setup/Selectscroll
”“
to access the “SETUP:PORTS”
submenu.
4. Press until “PORTS:ETHERTALK” appears.
5. Press
”“
Setup/Select
to access the “PORTS:ETHERTALK”
submenu.
Part No. 1H9613 June 1997 4-9
Page 35

Network Printer Parameters
6. Press until “ETHERTALK:VERSION” appears.
7. Press
8. Press until the version you want appears (VER:1 or
”“
Setup/Select.
”“
VER:2).
The currently selected version is indicated by an asterisk (*).
9. Press
10. Press until “VER:EXIT” appears.
11. Press
12. Press until “ETHERTALK:EXIT” appears.
13. Press until “SETUP:EXIT” appears.
14. Press
Setup/Select
”“
Setup/Select
”“
”“
Setup/Select
.
.
.
Printer Parameters - TCP/IP
IP Address
Default: 000.000.000.000
If you are on an isolated, nonconformant IP network with no intent
to connect to the internet, you can make up IP addresses. If you
were to choose 100.100.100.001 for the printer/Network Interface
Card IP address, any other devices on y our IP subnet should also
start with 100.100.100; for example, 100.100.100.002 or
100.100.100.003.
The IP Address is programmed from the printer’s front control/
display panel. It may be necessary to turn the printer off and on
after you set up the address for the Network Interface Card to
register it.
4-10 Part No. 1H9613 June 1997
Page 36

Network Printer Parameters
Assigning the Internet address
Do the steps below to enter the Internet (IP) address for the card:
1. Press
Setup/Select
on the display panel when “READY”
appears on the panel.
Power
Error
Print
2. Press until “SETUP:PORTS” appears.
3. Press
4. Press until “PORTS:TCP/IP” appears.
5. Press
Cancel
”“
Setup/Select
”“
Setup/Select
Setup/Selectscroll
.
to access the” PORTS:TCP/IP”
submenu.
6. Press
Setup/Select
to access a screen that allows you to
enter the address.
The address is represented as four groups of three digits,
each separated by periods; for example, nnn.nnn.nnn.nnn.
The cursor is positioned in the left most digit.
7. Enter the address as follows:
Press to increment the number in that position by
”“
one.
Press to move the cursor to the next digit to the right.
8. When you finish entering the address, press
”“
Setup/Select
.
Part No. 1H9613 June 1997 4-11
Page 37

Network Printer Parameters
9. Press until “TCP/IP:EXIT” appears.
10. Press until “SETUP:EXIT” appears.
11. Press
NOTE: If you are setting up a
”“
”“
Setup/Select.
Kodak Digital Science
Color Proofer 9000, refer to the User’s Guide for the
Network Interface Card that came with the proofer for
instructions on using the display/control panel.
TM
Desktop
4-12 Part No. 1H9613 June 1997
Page 38

Installing the Software for Kodak Printers
5 Installing the Software for Kodak Printers
The software referred to here is the software that comes with
every printer and not the software that comes with the Network
Interface Card. Refer to the specific sections for instructions on
installing software for the Network Interface Card.
Printing in PostScript and Raster Modes
For PostScript and Raster printer models such as the
Digital Science
PostScript Driver and the Export Module for Adobe Photoshop.
Installation procedures vary for different platforms. It may be
necessary to run Kodak-provided install/setup scripts, move PPD
or PDF files or export modules to appropriate application folders,
or install software as part of an Add/Create Printer procedure.
Refer to the README files included with specific Kodak printers
for information on installing printer drivers and export modules.
Also, ref er to the platform specific sections listed at the end of this
section for more information on installing printer drivers and
configuring printers on print servers and/or user workstations.
8650 PS Color Printer, install the Kodak
Configuring Printer Software on Print Servers
Novel NetWare 3.x, 4.x Servers Refer to Section 6
Windows NT 3.5, 4.0 Servers Refer to Sections 9, 10
UNIX Servers Refer to Section 12
Configuring Printer Software on Workstations
Windows 3.x Refer to Section 7
Windows 95 Refer to Section 8
Kodak
Windows NT 3.51 and NT 4.0 Refer to Sections 9, 10
Macintosh Refer to Section 11
UNIX Refer to Section 12
Part No. 1H9613 June 1997 5-1
Page 39

Installing the Software for Kodak Printers
Printing in Raster Mode
For printers that only print in Raster mode such as the
Digital Science
Export Module for Adobe Photoshop.
8650 Color Printer, you need only install the
Kodak
5-2 Part No. 1H9613 June 1997
Page 40

6 Novell NetWare
Network Interface Card/Printer Installation Overview
Section 1: Determine the network protocol(s) to be used for
communicating to the Network Interface Card/printer, the
workstation platform to be used for creating and sending print
jobs to the printer, and any servers to be used to spool and
manage jobs sent to corresponding printer queues.
Section 2: Install the hardware for the Network Interface Card in
the Kodak printer.
Section 3: Install the software for the Network Interface Card.
NOTE: It is not necessary to install software to use the Network
Section 4: Configure the network printer parameters, if
necessary. Some are programmable from the printer’s front
display/control panel, and others are programmable by
downloading PostScript command files.
NOTE: We recommend that default parameters be used initially
Novell NetWare
Interface Card with AppleTalk.
until the printer is functional on your network.
Section 5: Determine printer modes of operation, PostScript and/
or Raster, to be used based on the model of printer. Install the
corresponding PostScript and/or Raster mode software. Refer to
appropriate platform specific sections based on their anticipated
use as print servers and/or user workstations.
For print servers (indirect printing), configure the printer on a
pertinent server platform using the desired protocol.
For user workstations, configure the printer to use a Novell
server’s print queue (indirect printing).
Novell NetWare - Overview
You should be familiar with the system administrative tasks for
your system including the PCONSOLE utility. You may configure
the printer for use with Novell NetWare using Novell’s standard
IPX protocol or with Novell NetWare using AppleTalk protocol.
Refer to the “AppleTalk-Novell” section for more information.
Part No. 1H9613 June 1997 6-1
Page 41

Novell NetWare
With NetWare, the printer operates as a print server and reads
requests from NetWare servers. The printer can service 16
queues on 16 file servers and poll successive queues every
second.
You can print to the printer with standard Novell print utilities such
as NPRINT or from Microsoft Windows applications.
Novell NetWare IPX - Overview
To use Novell IPX, you must create a configuration file using the
KSETUP.EXE utility included on the Novell utilities diskette.
If you have more than 20 servers, we recommend that you
specify a primary server (server with KSETUP file) so that the
Network Interface Card can do a more efficient search for the
server/KSETUP file.
The default frametype setting is AUTOSELECT. You may have to
specify a specific IPX FrameType from the printer’s front control/
display panel if you have servers using different frametypes.
Complete the remaining server and queue configuration steps
using the Novell PCONSOLE utility.
When using Novell IPX, one user license is required because the
printer/Network Interface Card logs into the server being
serviced.
Novell NetWare AppleTalk - Overview
To use Novell’s AppleTalk Print Services (ATPS), an ATPS.CFG
file must be edited appropriately to define an AppleTalk printer
name and corresponding zone.
Novell AppleTalk Advantages over Novell IPX
The use of Novell ATPS does not require configuration steps
using PCONSOLE, steps to specify a primary server, or steps to
specify a frametype. ATPS does not require a user license, and
performance differences between the use of IPX and AppleTalk
are negligible. Refer to the documentation for AppleTalk, Novell
NetWare for more information.
The disadvantage of using Novell AppleTalk over Novell IPX is
that you cannot print in Raster mode using ATPS over the Novell
server. Only Macintosh systems can printer in Raster mode using
AppleTalk.
6-2 Part No. 1H9613 June 1997
Page 42

NOTE: Novell AppleTalk only recognizes the printer when it is in
PostScript mode. Raster mode printing cannot be
accommodated. You must set up an IPX queue to
support both PostScript and Raster mode printing.
Novell NetWare - IPX - 3.x/4.x Servers
Novell NetWare IPX - Printer Parameters
You may set up or modify network printing parameters over Novell
NetWare IPX for frametype and preferred server. Frametype is
set up from the printer’s front display/control panel and by
downloading a PostScript command file to set up a preferred
server.
It should not be necessary to modify these parameters from
factory defaults of Frametype = AutoSelect and Preferred Server
= Undefined. This function is provided for efficiency in varying
customer environments.
Refer to “Network Printer Parameters” for information on setting
up all printer parameters for the various protocols.
Novell NetWare
Creating and Editing the IPX KSETUP Configuration File
Some procedures in this section vary, depending on whether you
are running Novell NetWare 3.x or 4.x. Complete the procedures
appropriate for your site.
You must create a configuration file using the KSETUP.EXE
program from the Novell Utilities diskette. This configuration file
should reside on only one file server. You can modify the file as
necessary to change the queues or servers that the printer
services.
Upon startup, the printer tries to read a configuration file from the
available servers. If a primary server is defined, it will start with
that server. It looks in the \login\kodak directory for a file named
kxxxxxx, where xxxxxx are the last six digits of the Network
Interface Card’s Ethernet address.
NOTE: For printers in PostScript mode, make a test print; and
make a note of the hardware address of the installed
Network Interface Card.
Part No. 1H9613 June 1997 6-3
Page 43

Novell NetWare
Do the following steps to create the KSETUP configuration file:
1. Log in to the file server as ADMIN in the main context.
2. Change to the \login directory on the file server.
3. Create a Kodak directory by entering the command:
md kodak
4. Change to the new directory by entering the command:
cd kodak
5. Insert the Utilities for Novell setup disk into the A drive. Copy
the Utilities for Nov ell setup disk into the directory by entering
the command
copy a:*.*
6. Run the KSETUP program using the command syntax below:
KSETUP /e=<NICaddress> /s=<server> /q=<queue> /
p=<printserver>
where
<NICaddress> is the last six digits of the printer's Ethernet
Network Interface Card’s hardware address.
<server> -is the name of the file server.
<queue> -is the name of the print queue the printer will
service.
<printserver> -is the name of the printer/Network Interface
Card.
NetWare 3.X: <printserver>
<printserver> can be anything you want to call the printer.
6-4 Part No. 1H9613 June 1997
Page 44

Novell NetWare
NetWare 4.X: <printserver>
<printserver> is defined by combining the letter K with the
last six digits in the printer’s Ethernet Network Interface Card
address.
For example , if your printer’ s Network Interface Card Ethernet
address is 00:40:C8:02:EE:44, the file server is FSERVER,
the print queue is PTRQ, and the print server name is
K02EE44, you would enter the following
KSETUP /e=02EE44 /s=FSERVER /q=PTRQ /p=k02EE44
This command would add the following line to the
configuration file called K02EE44:
FSERVER:PTRQ:K02EE44:::
7. If more than one file server sends files to the printer or if more
than one queue is set up on a file server, use a text editor to
modify the configuration file and add a line similar to the one
below for each server and/or queue.
<File Server Name>: <Queue Name>: <Print Server
Name>:::
Additional KSETUP file lines might look like:
FSERVER:PTRQ2:K02EE44:::
FSERVER2:PTRQ:K02EE44:::
Creating Novell NetWare Print Servers and Queues
The Network Interface Card logs in to NetWare file servers and
attaches to NetWare print queues. It then prints the jobs that it
can read from the server.
To print with the Network Interface Card, you must define the card
as a print server. You can create new queues or pick existing
queues and then enable the print server, the Network Interface
Card, to service the queues.
Part No. 1H9613 June 1997 6-5
Page 45

Novell NetWare
The following example creates a print server: ps1 (K123458 for
NetWare 4.x) and a queue: lp1 on the server: raisa. You could
create subsequent queues on raisa that use the same print
server, ps1. The printer can serve multiple queues on any server.
Defining the Network Interface Card as a Print Server
Do the following steps to define the Network Interf ace Card in the
printer as a print server. You only need to do this once on each file
server that will access the printer.
1. Log in to the file server as SUPERVISOR/ADMIN in the main
context, then run the NetWare PCONSOLE utility.
2. For NetWare 3.X, go to Step 3.
For NetWare 4.X:
F4
At the PCONSOLE main menu, press
mode.
If a message tells you that you cannot switch to Bindery
mode, you may not be logged in as ADMIN or do not ha v e the
Bindery Context set up on the server.
to switch to bindery
To verify and/or set up Bindery Context, check for or add the
following line to the SYS: \SYSTEM\AUTOEXEC.NCF file on
the 4.x server:
Set Bindery Context = O = <Organizational Unit>
where <Organizational Unit> is specific for your site.
3. For NetWare 3.X, select Print Server Information from the
main menu.
For NetWare 4.X, select Print Servers from the main menu.
Available Options
Change Current File Server
Print Queue Information
Print Server Information
6-6 Part No. 1H9613 June 1997
Page 46

Novell NetWare
Insert
4. Click on
5. Enter the name for the print server.
The name must be the same one you used as <printserver>
when running KSETUP to set up the configuration file.
For NetWare 3.X,you might enter something like PS1.
For NetWare 4.X, you MUST enter something like K123456.
(The letter K followed by the last six digits of the printer's
Ethernet Network Interface Card address.)
to create a print server.
6. Press
Defining Novell NetWare Print Queues
Do the following steps to define queues you want the printer to
serve.
1. For NetWare 3.X, select “Print Queue Information” from the
2. Click on
Esc
to return to the PCONSOLE main menu.
main menu.
For NetWare 4.X, select “Print Jobs” from the main menu.
Available Options
Change Current File Server
Print Queue Information
Print Server Information
Insert
to insert a new queue, and enter the new
queue name.
Whether you are creating a new queue or changing an
existing queue, the print queue name must be the same as
the name you used for <queue> when running the KSETUP
program.
NOTE: You can select an existing queue or enter a new name;
for example,
3. For NetWare 3.X, press
Part No. 1H9613 June 1997 6-7
lp1
.
Enter
to view Print Queue details.
Page 47

Novell NetWare
For NetWare 4.X, select “Print Queue” from the Print Jobs
menu.
4. For NetWare 3.X, select “Queue Servers”.
For NetWare 4.X, select “Status” and “Print Server.”
Insert
5. Press
6. Select the server you want to serve the queue, and press
Enter
.
to display the Queue Server Candidates.
7. Press
NOTE: When using PCONSOLE, you must specify the same
8. Turn the printer off and then on.
9. After approximately 5 minutes, verify that the printer has
Esc
to exit PCONSOLE.
Repeat this procedure for each queue you w ant the printer to
serve.
queue name and printer name that was used with
KSETUP.
logged into the correct server by entering the following
commands on the appropriate server:
For NetWare 3.X, enter USERLIST /A.
For NetWare 4.X, enter NLISTUSER /A /B.
You should see the print server name logged into the network
as it is defined in the KSETUP file.
6-8 Part No. 1H9613 June 1997
Page 48

Novell NetWare
Printing from Multiple Servers
Do the following steps to print from more than one file server:
1. Use the Change Current File Server menu option in
PCONSOLE to change to another server.
File Server
RAISA SUPERVISOR
NETSERVER1 SUPERVISOR
2. Define the printer as a print server (as described previously).
3. Define any queues you want the printer to serve.
Repeat this process for any additional file servers.
User Name
Setting up Notify Lists
The printer supports a wide range of ribbon, paper, and
transparency materials. When you send jobs requesting media
not currently loaded in the printer, a mismatch occurs; and the
printer waits until action is taken. When errors occur and notify
lists are in place, messages are sent to all of the users specified
in the notify list. Printer error messages are sent once every five
minutes until the problem is corrected.
Refer to your Novell NetWare documentation or contact your
system administrator if you need help setting up notify lists on the
file server.
Part No. 1H9613 June 1997 6-9
Page 49

Novell NetWare
Novell NetWare - AppleTalk
If Novell’s AppleTalk Print Services (ATPS) is not already in use,
consult the Novell CD-ROM on-line documentation for setup and
use of ATPS. To use ATPS for the Kodak printer, an ATPS.CFG
file must be edited appropriately to define an AppleTalk printer
name and corresponding zone.
Novell AppleTalk Advantages over Novell IPX
The use of Novell ATPS does not require configuration steps
using PCONSOLE, steps to specify a primary server, or steps to
specify a frametype. ATPS does not require a user license, and
performance differences between the use of IPX and AppleTalk
are negligible.
The disadvantage of using Novell AppleTalk over Novell IPX is
that you cannot print in Raster mode using ATPS over the Novell
server. Only Macintosh systems can print in Raster mode using
AppleTalk.
NOTE: Novell AppleTalk only recognizes the printer when it is in
PostScript mode. Raster mode printing cannot be
accommodated. You must set up an IPX queue to
support both PostScript and Raster mode printing.
Novell NetWare - AppleTalk - Printer Parameters
You can set up and modify the Phase Type, AppleTalkZone, and
AppleTalkName parameters for network printing over Novell
NetWare AppleTalk. Set up the Phase Type from the printer’s
front display/control panel, and download PostScript command
files to set up the AppleTalkZone and AppleTalkName. It should
not be necessary to modify these parameters from the factory
defaults, Phase Type = Phase II, AppleTalk Zone = *. The
AppleTalk Name is the printer name; such as, Kodak DS 8650
PS.
Refer to “Network Printer Parameters” for information on setting
up all printer parameters for the various protocols.
To use Novell ATPS, an atps.cfg file must be edited appropriately
to define an AppleTalk printer name and corresponding zone.
NOTE: You cannot print in Raster mode using ATPS.
6-10 Part No. 1H9613 June 1997
Page 50

Novell NetWare
Do the following procedure to configure Novell ATPS to service
the printer and the queue. In this example, the printer is a Kodak
printer with a default name of Kodak DS 8650 PS.
1. Make a test print to obtain or verify the printer’s name.
2. On the server, back up the sys:\system\atps.cfg file.
NOTE: Make sure you include the beginning and end quotes in
the following commands.
Edit the atps.cfg file, and add a line with the Kodak printer
AppleTalk Name and its associated AppleTalk Zone to the list
of printers in the following format:
<Appletalk Printer Name>:<Appletalk Zone>
For example, enter the following command:
“Kodak DS 8650 PS:No_Trespassing_Zone”
NOTE: Make sure you include the quotation marks in the
command.
If no queue is stated, a NetWare queue associated with the
AppleTalk Printer Name, NW_Kodak_DS_8650_PS, is
created. You can verify this using PCONSOLE.
To create a different queue name, enter the following
command:
<Appletalk Name>:<Appletalk Zone> -o <queuename>
For example, enter:
“Kodak Printer:No_Smoking_Zone” -o Color_Printer_q
NOTE: Refer to the “Troubleshooting/AppleTalk” Section for
details on defining and assigning AppleTalk Zones.
Part No. 1H9613 June 1997 6-11
Page 51

Novell NetWare
3. Save the atps.cfg file.
4. Load atps -s -v
Use the -v [verbose] option to view the atps activity and to
verify that the contents are executed properly.
Your server can now use the same print services that Macintosh
computers use to access a Kodak printer.
6-12 Part No. 1H9613 June 1997
Page 52

7 Windows 3.x Workstations
Section 1: Determine the network protocol(s) to be used for
communicating to the Network Interface Card/printer, the
workstation platform(s) that will be used for creating and sending
jobs to the printer and any servers that will be used to spool and
manage jobs sent to corresponding printer queues.
Section 2: Install the Network Interf ace Card in the Kodak printer.
Section 3: Install the software for the Network Interface Card.
NOTE: For Windows 3.x a network server queue must be
selected so the only relevant software for the Network
Interface Card is Novell utilities for setting up a Novell
server (IPX)or UNIX utilities for setting up a UNIX server
(TCP/IP). No software is necessary for setting up the
Network Interface Card with NT server queues.
Section 4: Configure the network printer parameters, if
necessary. Some are programmable from the printer’s front
display/control panel, and others are programmable by
downloading PostScript command files.
Windows 3.x Workstations
NOTE: We recommend that you use the def ault par ameters until
the printer is functional on your network.
Section 5: Determine printer modes of operation, either
PostScript and/or Raster, to be used based on the model of
printer purchased. Install the corresponding PostScript and/or
Raster mode software. Refer to the appropriate platform-specific
sections based on their anticipated use as print servers and/or
user workstations for more information.
Printer Setup for Selecting a Network Queue
For 3.x W orkstations, any user ma y configure a printer and select
a server print queue to use for printing.
For the first time installation, use the following generic
procedures. However, if you encounter any problems or
confusion, refer to the README files that came with the
installation software for your particular printer. After you install the
software, select the printer/port/queue you wish to use.
1. Find the drive or directory where the Kodak PostScript driver
Part No. 1H9613 June 1997 7-1
Page 53

Windows 3.x Workstations
2. Select “Connect.” From the Connect window, select an
3. Select “Network.” From the Network Printer Connections
Select “LPT SETTINGS” and make sure that the Enable Banner
feature is not selected if you w ant to eliminate e xtr aneous banner
(USER ID) pages. Finish the installation by clicking on
closing windows where appropriate.
Refer to “Printing” for more information on how to print from DOS
and Windows applications.
NOTE: To print in Raster mode, you may need to capture a
is installed, and execute the SETUP.EXE file.
The Kodak printer should now appear in the Installed Print-
ers: menu.
appropriate LPT port to use for the printer from the Ports
menu.
window, click on
from the list. Log in to the server, if necessary. Select the
“Printers” icon and then an appropriate print queue from the
list.
network server such as a Novell, NT, or UNIX queue to
an LPT port and select the corresponding LPT port from
the export module.
Servers
and select an appropriate server
OK
and
Setting up Windows 3.x Workstations to use TCP/IP from
PC-NFS
The Network Interface Card was designed as a direct network
interface for printers in UNIX environments that support the line
printer daemon (lpd). However, it also works with PC/TCPcompatible software, such as PC/TCP FTP, and with VMS™
systems that support (lpd).
PC-NFS enables DOS users sharing printers attached to hosts or
to PCs. PC-NFS users can access the printer through their UNIX
PC-NFS server and print jobs at the rated speed of the printer.
Do the following steps to set up a shared printer:
1. Install PC-NFS on your PC. See your PC-NFS installation
guide for instructions.
7-2 Part No. 1H9613 June 1997
Page 54

Windows 3.x Workstations
2. Set up a PC-NFS server as described in the PC-NFS
installation guide. Make sure that the server runs the PC-NFS
daemon rpc.pcnfsd.
3. Set up a printer on the PC-NFS server as described in the
sections in this guide on UNIX systems.
4. Edit the server’s /etc/exports file and add the print spool
directory to the list of directories being exported to the PCs
running PC-NFS.
Make sure that the PCs have read and write access to this
directory. If the spool directory is not exported, PC-NFS will
not mount the printer.
5. Update the list of exported directories using the command:
exportfs -a
6. Mount this printer using either the nfsconf program or the
following command:
NOTE: Enter the command on one line without returns.
net use <print device>: <host>:<printer name> [/option [/
option]...]
NOTE: The print device can be either lpt1, lpt2, or lpt3. The host
is the server name, and the printername is the name
assigned to the printer.
7. Use the net printers command to see a list of printers:
attached to the server.
net printers <servername>
8. Select raw mode of data transfer while mounting a printer in
PC-NFS for printing PostScript files.
Eliminating Extra/Error Pages
Refer to “Printing” for more information on how to print from DOS
and Windows applications. This section also discusses
elimination of extra/error pages that may occur when printing
from TCP/IP.
Part No. 1H9613 June 1997 7-3
Page 55

Page 56

8 Windows 95 Workstations
Network Interface Card/Printer Installation Overview
Section 1: Determine the network protocol(s) to be used for
communicating to the Network Interface Card and the printer , the
workstation platform(s) that will be used for creating and sending
jobs to the printer, and any servers that will be used to spool and
manage jobs sent to corresponding printer queues.
Section 2: Install the hardware for the Network Interface Card in
the Kodak printer.
Section 3: Install the software for the Network Interface Card.
NOTE: For Windows 95 a network server queue must be
selected so the only relevant software for the Network
Interface Card is Novell utilities for setting up a Novell
server (IPX)or UNIX utilities for setting up a UNIX server
(TCP/IP). No software is necessary for setting up the
Network Interface Card with NT server queues.
Section 4: Configure network printer parameters, if necessary.
Some are programmable from the printer’s front display/control
panel, and others are programmable by downloading PostScript
command files.
Windows 95 Workstations
NOTE: We recommend that you use the default parameters
initially until the printer is functional on your network.
Section 5: Determine the printer modes of operation (PostScript
and/or Raster) to be used based on the model of printer that was
purchased. Install corresponding PostScript and/or Raster mode
software. Refer to appropriate platform-specific sections based
on their anticipated use as print servers and/or user workstations.
Part No. 1H9613 June 1997 8-1
Page 57

Windows 95 Workstations
Initial Configuration Steps
On a Windows 95 workstation, any user may configure a printer
and select a server print queue to use for printing.
Do the following steps to configure your printer. If you encounter
any problems or confusion, refer to the README files that came
with the installation software for your particular printer.
1. From the Start icon, select “Settings” and then “Printers.”
The Printers window opens.
2. Click on
The Add Printer Wizard opens.
3. Click on
Add Printer
Next
.
.
8-2 Part No. 1H9613 June 1997
Page 58

Windows 95 Workstations
The Add Printer Wizard window to select a printer opens.
4. Click on
The following window which allows you to select a network
opens.
5. Browse the network for an appropriate printer queue name
configured on a file server, and then click on
Network Printer
and then on
Next
.
Next
.
Part No. 1H9613 June 1997 8-3
Page 59

Windows 95 Workstations
6. To install the Kodak PostScript Driver, select “Hav e Disk,” and
NOTE: Printer drivers provided by Microsoft appear in the Add
The following window which allows you to select your printer
model opens.
then click on
Printer Wizard window as Kodak printer drivers. These
drivers have not been tested or certified by Kodak. If you
are not sure if a Kodak driver has been installed, install
the Kodak driver supplied with the printer.
Next
.
A dialog box opens which allows you to install the softw are for
the driver or locate the printer driver on your system.
7. If you are installing the printer driver from a diskette or a CD-
OK
ROM, install it. Click on
8-4 Part No. 1H9613 June 1997
.
Page 60

Windows 95 Workstations
If the software is already installed on your system, click on
Browse
correct directory opens in the “Copy manufacturer’s files
from,” box, click on OK.
NOTE: Printer driver software is also available for downloading
A window similar to the one below opens. This example
shows the location of installation software that was
downloaded from the Kodak web site.
to locate the directory where it resides. When the
from the Kodak web site.
8. Locate the drive or directory where the printer driver
installation diskette or CD-ROM is located. Click on
Part No. 1H9613 June 1997 8-5
OK
.
Page 61

Windows 95 Workstations
9. Select the correct printer and its corresponding ribbon type.
A window opens which asks you to select the printer and the
ribbon that is installed in the printer.
Click on
Next
.
8-6 Part No. 1H9613 June 1997
Page 62

Windows 95 Workstations
If a printer driver is already installed on your system, a
window opens where you can choose to keep the existing
driver or install the new driver.
10. If the current driver:
• operates correctly, click on
Keep e xisting driver
and then on
Next.
• does not operate correctly, click on
and then on
Next.
Replace existing driver
Part No. 1H9613 June 1997 8-7
Page 63

Windows 95 Workstations
11. Enter a preferred name, or use the def ault printer name. Click
The following window which allows you to name your printer
opens.
Yes
on
Next
or No to use the printer as the default printer. Click on
.
The following window opens and asks you if you want to
make a test page.
8-8 Part No. 1H9613 June 1997
Page 64

Windows 95 Workstations
Yes
12. Click on
correct. Click on
NOTE: If an error occurs when you print a test page, check the
Printer Properties menus for the correct printer
parameter settings. Refer to the Printer Property
windows at the end of this section.
If you are not installing the printer driver, go to “Setting
the Printer Properties” on page 8-10.
A copy progress bar opens indicating that the driver is
installing
to print a test page to verify that the setup is
Finish
.
The installation may stop, and the following window opens
asking you to insert your Windows 95 CD-ROM.
13. Install the CD-ROM if this is the first time you are installing a
PostScript printer driver. Click on
Part No. 1H9613 June 1997 8-9
OK
.
Page 65

Windows 95 Workstations
A window opens asking you to select the drive that contains
the CD-ROM.
14. Click on
OK
NOTE: We recommend that you install all the files. If you have
15. Click on OK in the Open window to load the files onto your
system.
The icon for the Kodak printer should now appear in the
Printers window.
Browse
.
the option to skip a file, do so only if you are sure the file
is a generic PostScript system file and is already installed
on you system. Check the C:\WINDOWS\SYSTEM
directory for previously installed files.
if you need to locate the directory. Click on
Setting the Printer Properties
1. Select the newly-created Kodak printer in the Printers:
window. Select “File>Properties” from the
Printers>File.pulldown menu.
8-10 Part No. 1H9613 June 1997
Page 66

Windows 95 Workstations
The Printer Properties window opens.
2. From the Properties window, select:
• “PostScript>Advanced” and make sure that all Ctrl Ds
before and/or after job are disabled. This pre v ents y ou from
receiving extra pages and a blank PostScript error page
with nothing for an offending command because the Ctrl D
is a nonprintable character.
Refer to “Printing” for further details on eliminating extra/
error pages that may occur when printing from TCP/IP.
• “Capture Settings” and make sure that the Enable Banner
feature is not selected if you want to eliminate extraneous
banner (USER ID) pages.
Part No. 1H9613 June 1997 8-11
Page 67

Windows 95 Workstations
NOTE: Refer to “Printing” for further details on how to print from
TCP/IP from PC-NFS
Windows 95 workstations can also print from TCP/IP PC-NFS
software. PC-NFS enables DOS users to share printers attached
to hosts or to PCs. PC-NFS users can access the printer through
their UNIX PC-NFS server and print jobs at the rated speed of the
printer.
To set up a shared printer, follow the same installation procedure
outlined for Windows 3.x, TCP/IP from PC-NFS.
Check all other tabs and set up all corresponding options to
match the media, ribbon, and type/size of materials in the
printer as well as the printing features such as Ultracolor you
intend to use to avoid printing errors.
DOS or Windows applications.
8-12 Part No. 1H9613 June 1997
Page 68

Windows NT 3.51Workstations and Servers
9 Windows NT 3.51Workstations and Servers
Network Interface Card/Printer Installation Overview
Section 1: Determine the network protocol(s) to be used for
communicating to the Network Interface Card, the printer, the
workstation platform(s) that will be used for creating and sending
jobs to the printer, and any servers used to spool and manage
jobs sent to corresponding printer queues.
Section 2: Install the Network Interf ace Card in the Kodak printer.
Section3: Install the software for the Network Interface Card.
NOTE: It is not necessary to install Network Interface Card
software on Windows NT systems.
Section 4: Configure the network printer if necessary. Some
printers are programed from the printer’s front display panel, and
others are programed by downloading PostScript command files.
NOTE: We recommend that you use the def ault par ameters until
the printer is functional on your network.
Section 5: Determine printer modes of operation to be used
based on the model of printer that was purchased. Install the
corresponding PostScript and/or Raster mode software. For print
servers (indirect printing), configure the printer on a pertinent
server platform using the desired protocol.
For user workstations, configure the printer to use a server’ s print
queue (indirect printing), or to print (direct printing) directly to the
printer using the desired protocol.
Network Service and Protocol Installation
Windows NT supports network printing utilizing TCP/IP, AppleT alk
and/or Novel Netware IPX protocols. Using the network control
panel, the appropriate services (TCP/IP) and/or protocol
(AppleTalk) support must be installed prior to configuring printers.
Part No. 1H9613 June 1997 9-1
Page 69

Windows NT 3.51Workstations and Servers
NT Workstations and Servers:
Service/Protocol
TCP//IP Microsoft TCP/
AppleTalk AppleTalk
IPX (Novell) Netware
System Support
Module
IP Printing
Support
Protocol
Services/
Support
Printer Support
PostScript or
Raster
PostScript only
PostScript or
Raster
Network Services/Protocols
To verify or install the proper network service/protocol, select
“NETWORK CONTROL PANEL” and then either “SERVICES” or
“PROTOCOLS” from the Network menu. Select “SERVICES” for
TCP/IP or PROTOCOLS for AppleTalk.
For TCP/IP, select “SERVICES” from the network window menu.
If it is necessary to add/install Microsoft TCP/IP Printing, select
“ADD” from the Network Services menu. If you have an NT
installation CD-ROM in a drive, select the desired service from
the subsequent menu by double-clicking on that service for
automatic installation. If you select HAVE DISK, you may have to
enter an appropriate search path such as D:\i386\.
For AppleTalk, select “PROTOCOLS” from the network window
menu. If it is necessary to add/install AppleTalk Protocols, select
“ADD” from the Network Protocols menu. If you have an NT
installation CD-ROM in a drive, select the desired service from
the subsequent menu by double-clicking on that service for
automatic installation. If you select ”HAVE DISK,” you may have
to enter an appropriate search path such as D:\i386\.
9-2 Part No. 1H9613 June 1997
Page 70

Windows NT 3.51Workstations and Servers
Raster Mode Considerations
NOTE: The export module for NT only supports Raster mode
printing using TCP/IP or IPX (Novell) queues. NT
AppleTalk printing will not recognize the printer in Raster
mode because the printer advertises itself as a
Kodak_Raster device instead of a LaserWriter device.
Therefore, AppleTalk printing will limit the use of the
printer to PostScript mode printing only.
A workstation can be configured as a pseudo-server when using
TCP/IP to service a printer by also sharing the printer and
assigning a queue name. The same workstation can then select
itself as a server and the shared queue for either PostScript or
Raster mode printing.
Windows NT Servers and Workstations
Some systems such as Windows NT come with Kodak drivers
provided by Microsoft. If you use these drivers, you may
encounter problems. Be sure to install drivers provided by K odak.
When in doubt, refer to the K odak web site for availability and the
latest versions of drivers. Refer to “Getting Help” for information
on how to access the Kodak web site.
We recommend that you install the printer driver and/or the
export module on each server and workstation on your network.
When you set up the servers for sharing, install only the software
relevant to the operating system for the server.
Direct Printing
We recommended that an NT server be configured to service
printers with TCP/IP since both PostScript and Raster mode
printing is supported by TCP/IP server/queues. An AppleTalk
server/queue only supports PostScript mode printing.
We recommend that workstations print indirectly using a server
queue.
A printer is configured on an NT server in the same manner as
configuring a printer on an NT workstation except that on an NT
server, the printer is shared and assigned a queue name.
Part No. 1H9613 June 1997 9-3
Page 71

Windows NT 3.51Workstations and Servers
When a printer is shared on a server, do not select other
Windows systems that will use the queue. Drivers should be
installed locally on all systems serviced by a server. You may
encounter problems when trying to download copies of a driver
from the server to a workstation.
Indirect Printing (Printing through a Server)
From the workstation, browse the netw ork and selects a pertinent
server and queue.
Even though workstations may be configured to print directly to a
printer using TCP/IP or AppleTalk, we recommend that
workstations print indirectly by selecting a TCP/IP server queue
for optimal resource utilization.
NT Server Queues
On NT servers, you may encounter corruption of data when
printing files over 5 Mbytes which have been exhibited by the
occurrences of color bands across the printed image. This
condition can be corrected by setting up server properties to
accept the entire print job before passing the file on to the printer.
“Job Prints While Spooling” must be deselected.
9-4 Part No. 1H9613 June 1997
Page 72

Windows NT 3.51Workstations and Servers
Configuring for Workstations and Servers
With Windows NT 3.51 Workstation and Server, an administrator
must configure the printer and select a mechanism to use for
printing.If necessary, refer to README files that come with
installation software for your particular printer.
1. From the Program Manager window, select “Main” and then
“Printers.”
The Print Manager window opens.
2. Select “Create Printer.”
Part No. 1H9613 June 1997 9-5
Page 73

Windows NT 3.51Workstations and Servers
The following windows open:
3. In the Create Printer window, enter the following:
Printer name: Enter a name that you wish to appear on the
resulting printer icon in the Print Manager screen.
Driver: The Kodak driver is a PostScript driver that makes use
of NT system PostScript (PSCRIPT.*) components which
reside on the NT system CD-ROM. These components may
already reside in C:\windows\system if a PostScript printer
driver was previously installed.
9-6 Part No. 1H9613 June 1997
Page 74

Windows NT 3.51Workstations and Servers
Select “Other,” and install the appropriate Kodak printer driver
(PPD) provided by Kodak. If a Windows NT driver is not yet
available for the specific Kodak printer, another Kodak or
generic PostScript driver could be used but might not provide
full access/control of a different Kodak printer’s features. You
may have problems if you use the Kodak 8600 v2014 driver
that Microsoft provides with NT systems.
The example below shows the installation of printer software
that was downloaded from the K odak web site to the directory
C:ekptrs\8650\nt351v105.
Description: Enter a description of the printer if desired.
NOTE: If messages such as “Can’t find File: PSCRIPT.*” or
Unable to Open File PSCRIPT.*” appear, insert the NT
CD-ROM. If a PostScript driver was installed previously,
either browse to a directory such as C:\windows\system
or click on “Ignore”.
Part No. 1H9613 June 1997 9-7
Page 75

Windows NT 3.51Workstations and Servers
Direct Printing
LPR Port (TCP/IP) Configuration
Do the procedure on Page 10-2 to install the software for the
Network Interface Card.
Do the following steps to set up a system to print directly to a
printer using TCP/IP:
1. From the Create a Printer window, select “Other” from the
Print to drop-down list box.
The Print Destinations window opens.
2. Select “LPR Port.” If LPR Port is not in the menu, select
“Other” again; and install Microsoft TCP/IP Printing Services.
The Add LPR compatible printer dialog box opens.
3. In the Add LPR Compatible Printer dialog box, enter the
following information:
• Name or Address of host providing LPD—Enter the IP
Address that has been assigned to the Kodak printer.
NOTE: An IP address entered as 123.123.012.012 from the
printer’s front control/display panel MUST be entered in
this menu as 123.123.12.12 Refer to “Network Printer
Parameters” for more information.
9-8 Part No. 1H9613 June 1997
Page 76

Windows NT 3.51Workstations and Servers
• Name of Printer on that Machine (ps).
NOTE: This entry MUST be ‘ps’ corresponding to the
internal ‘PS’ (Print Server) queue name on the
printer’s Network Interface Card.
OK
4. Click on
The newly-configured printer now appears in the Print Man-
ager window.
in the remaining Create Printer screens.
AppleTalk Configuration
NOTE: NT AppleTalk supports printing in PostScript mode only.
Use TCP/IP queues to support both PostScript and
Raster mode printing.
The following steps describe how to set up a system to print
directly to a printer using AppleTalk:
1. From the Create a Printer window, select “Other” from the
Print to drop-down list box.
OK
2. Select “AppleTalk Printing Devices.” Click on
.
NOTE: If AppleTalk Printing Devices Port is not in the menu,
select “Other” again and install AppleTalk Protocol.
Part No. 1H9613 June 1997 9-9
Page 77

Windows NT 3.51Workstations and Servers
The following window opens
3. Double-click on the pertinent AppleTalk Zone to view the list
of available AppleTalk devices and then select the Kodak
printer by its AppleTalk Name.
IMPORTANT: If you CAPTURE this printer as an AppleTalk
device (as is typically done on Windows
workstations for LPT ports), NT Workstation and/or
Server will send an NBP packet to the printer
renaming the printer type to something other than
a generic LaserWriter device. Now users that
previously were able to select the printer on the
network over AppleTalk will no longer be able to
select and use it.
In an exclusive Windows environment, if it is desired that
users only print to a queue that has been configured and not
print directly to the printer as an AppleT alk De vice , it might be
appropriate to CAPTURE the printer. Note , ho w e ver, that in a
mixed environment, Macintosh users will no longer see the
printer in the Chooser.
4. Click on OK in the remaining Create Printer screens. The
newly-configured printer will appear in the Print Manager
window.
9-10 Part No. 1H9613 June 1997
Page 78

Windows NT 3.51Workstations and Servers
Indirect Printing - Creating a Print Queue
Use the Create Printer dialog box to set up a shared printer on a
network.
1. Click on the “Share this Printer on the Network” check box.
2. Enter the printer queue name as you wish it to appear to
users.
3. Enter the name of the NT server that the printer is configured
for .
NOTE: In the example abov e, Location = NALA and Share name
= DS8650 results in a \\ NALA \ DS8650 server/queue
that is available for users to select from the ADD
PRINTER mechanism or by using PRINTER>CONNECT
TO PRINTER from the PRINT MANAGER menu.
OK
4. Click on
printer now appears in the Print Manager window.
Indirect Printing - Selecting a Print Queue
The following steps describe how to select a print queue for
indirect printing.
NOTE: Use the Create Printer dialog box to select an
appropriate print queue.
1. For an existing server print queue, select an appropriate print
queue. You may have to select “Other” and Browse the
Part No. 1H9613 June 1997 9-11
in the remaining Create Printer screens. The
Page 79

Windows NT 3.51Workstations and Servers
network to find and select an appropriate queue.
2. Click on
The newly-configured printer appears in the Print Manager
window.
OK
in the Create Printer dialog box.
9-12 Part No. 1H9613 June 1997
Page 80

Windows NT 4.0 Workstations and Servers
10 Windows NT 4.0 Workstations and Servers
Network Interface Card /Printer Installation Overview
Section 1: Determine the network protocol(s) to be used for
communicating to the Network Interface Card/printer, the
workstation platform(s) that will be used for creating and sending
jobs to the printer, and any servers that will be used to spool and
manage jobs sent to corresponding printer queues.
Section 2: Install the hardware for the Network Interface Card in
the Kodak printer.
Chapter 3: Install the software for the Network Interface Card.
NOTE:It is not necessary to install software to use the
Network Interface Card.
Section 4: Configure network printer parameters, if necessary.
Some are programmable from the printer’s front display/control
panel, and others are programmable by downloading PostScript
command files.
NOTE:We recommend that you use the default parameters
initially until the printer is functional on your network.
Section 5: Determine the printer modes of operation (PostScript
and/or Raster) to be used based on the model of printer. Install
the corresponding PostScript and/or Raster mode software. For
print servers (indirect printing), configure the printer on a
pertinent server platform using the desired protocol.
For user workstations, configure the printer to use a server’ s print
queue (indirect printing) or to print directly to the printer (direct
printing) using the desired protocol.
Network Service and Protocol Installation
With Windows NT 3.51 Workstation and Server, an administrator
must configure the printer and select a mechanism to use for
printing.
Windows NT supports network printing utilizing TCP/IP, AppleT alk
and/or Novel Netware IPX protocols. Using the Network Control
Panel, the appropriate Services (TCP/IP) and/ or Protocol
(AppleTalk) support must be installed prior to configuring printers.
Part No. 1H9613 June 1997 10-1
Page 81

Windows NT 4.0 Workstations and Servers
NT Workstations and Servers
Service/Protocol
TCP/IP Microsoft TCP/
AppleTalk AppleTalk
IPX (Novell) Netware
System Support
Module
IP Printing
Support
Protocol
Services/
Support
Printer Support
PostScript or
Raster
PostScript only
PostScript or
Raster
Network Services/Protocols
To verify or install the proper network service/protocol, select
“NETWORK CONTROL PANEL” and then either “SERVICES” or
“PROTOCOLS” from the Network menu. Select “SERVICES” for
TCP/IP or PROTOCOLS for AppleTalk.
For TCP/IP, select “SERVICES” from the network window menu.
If it is necessary to add/install Microsoft TCP/IP Printing, select
“ADD” from the Network Services menu. If you have an NT
installation CD-ROM in a drive, select the desired service from
the subsequent menu by double-clicking on that service for
automatic installation. If you select “HAVE DISK,” you may need
to enter an appropriate search path such as D:\i386\.
For AppleTalk, select “PROTOCOLS” from the network window
menu. If it is necessary to add/install AppleTalk Protocol, select
“ADD” from the Network Protocols menu. If you have an NT
installation CD-ROM in a drive, select the desired service from
the subsequent menu by double-clicking on that service for
automatic installation. If you select ”HAVE DISK,” you may need
to enter an appropriate search path such as D:\i386\.
10-2 Part No. 1H9613 June 1997
Page 82

Windows NT 4.0 Workstations and Servers
Raster Mode Considerations
A workstation can be configured as a pseudo-server when using
TCP/IP to service a printer by also sharing the printer and
assigning a queue name. The same workstation can then select
itself as a server and the shared queue for either PostScript or
Raster mode printing.
NOTE:The export module for NT only supports Raster mode
printing using TCP/IP or IPX (Novell) queues. NT
AppleTalk printing does not recognize the printer in
Raster mode because the printer advertises it self as
a Kodak_Raster device instead of a LaserWriter
device. Therefore, NT AppleTalk printing will limit the
use of the printer to PostScript mode printing only.
Windows NT Servers and Workstations
Some systems such as Windows NT come with Kodak drivers
provided by Microsoft. If you use these drivers, you may
encounter problems. Be sure to install drivers provided by K odak.
When in doubt, refer to the K odak web site for availability and the
latest versions of drivers. Refer to “Getting Help” for information
on how to access the Kodak web site.
You may encounter problems if you install drivers on remote
workstations by downloading them from an NT server.
We recommend that you install the printer driver and/or the
export module on each server and workstation on your network.
When you set up the servers for sharing, install only the software
relevant to the operating system for the server.
Direct Printing
We recommend that an NT server be configured to service
printers with TCP/IP since both PostScript and Raster mode
printing is supported by TCP/IP Server/ Queues. An AppleTalk
server/ queue only supports PostScript mode printing.
A printer is configured on an NT server in the same manner as
configuring a printer on an NT workstation, except that on an NT
server the printer is shared and assigned a queue name.
Part No. 1H9613 June 1997 10-3
Page 83

Windows NT 4.0 Workstations and Servers
When a printer is shared on a server, do not select other
Windows systems that will use the queue. Drivers should be
installed locally on all systems serviced by a server. You may
encounter problems when trying to download copies of a driver
from the server to a workstation.
Indirect Printing (Printing through a Server)
From the workstation, browse the network and select a pertinent
server and queue.
Even though a workstation may be configured to print directly to a
printer using TCP/IP or AppleTalk, we recommend that
workstations print indirectly by selecting a TCP/IP server queue
for optimal resource utilization.
NT Server Queues
On NT servers, you may encounter corruption of data when
printing files over 5 Mbytes. Color bands appear across the
printed image. This condition can be corrected by setting up
server properties to accept the entire print job before passing the
file on to the printer. “Start Printing After Last Page Spooled” must
be selected.
10-4 Part No. 1H9613 June 1997
Page 84

Windows NT 4.0 Workstations and Servers
Configuring Workstations and Servers
For Windows NT workstations or servers, an administrator must
configure the printer and select a mechanism for printing. If
necessary, refer to the README files that come with the
installation software for your printer.
Start/Settings/Printers Menus
1. From the Start icon, select “Settings” and then “Printers.”
The Printers window opens.
2. Click on
The Add Printer Wizard window opens.
3. Select “My Computer.” Click on
The Add Printer Wizard window opens.
Part No. 1H9613 June 1997 10-5
“Add Printer
.”
Next.
Page 85

Windows NT 4.0 Workstations and Servers
Configuring Your Printer for an LPR Port (TCP/IP)
NOTE:To configure your server or workstation to print
directly to the printer from AppleTalk, go to Step 9.
4. From the “Add Printer Wizard” screen:
Click on
station to print directly to the printer from an LPR port
OR
Click on
station to print indirectly to the printer from a predefined
server print queue. Go to “Installing the Kodak Printer
Driver” on page 10-11.
The Available Printer Ports window opens.
5. Select “LPR Port.”
Add Port
LPT1
if you are configuring your server or work-
and then
Next
if you are configuring your work-
10-6 Part No. 1H9613 June 1997
Page 86

Windows NT 4.0 Workstations and Servers
NOTE:If “LPR Port” is not in the menu, install Microsoft TCP/
IP Printing Services. If necessary, refer to “Network
Service and Protocol Installation.”
The Add LPR compatible printer window opens.
6. Enter the IP Address that has been assigned to the Kodak
printer.
NOTE:An IP address entered as 123.123.012.012 from the
printer’s front control/display panel MUST be entered
in this menu as 123.123.12.12. Refer to “Network
Printer Parameters” for more information.
7. Enter the name of the printer.
NOTE:This entry MUST be ‘ps’ corresponding to the internal
‘ps’ (Print Server) queue name on the printer’s
network interface card. No other entry will work.
8. Click on
9. From the Add Printer Wizard (Add Port) window, click on
Next
Go to page 10-11, and do the procedure to install the
Kodak printer driver.
Part No. 1H9613 June 1997 10-7
OK.
.
Page 87

Windows NT 4.0 Workstations and Servers
Configuring Your Printer for AppleTalk
NOTE:NT AppleTalk supports printing in PostScript mode
only. Use TCP/IP queues to support both PostScript
and Raster mode printing.
10. Click on
The Printer Ports window opens.
Add Port
in the Add Printer Wizard window.
11. Select “AppleTalk Printing Devices”.
NOTE: If AppleTalk Printing Devices is not in the menu,
install AppleTalk Protocol. If necessary, refer to
“Network Service and Protocol installation.”
The Available AppleTalk Printing Devices window opens.
10-8 Part No. 1H9613 June 1997
Page 88

Windows NT 4.0 Workstations and Servers
12. Double-click on your AppleTalk Zone to view the list of
available AppleTalk devices.
13. Select the Kodak printer by its AppleTalk Name. Click on
You are returned to the Add Printer Wizard window.
OK
.
Part No. 1H9613 June 1997 10-9
Page 89

Windows NT 4.0 Workstations and Servers
Installing the Kodak Printer Driver
Do the following steps to install the Kodak printer driver.
From the Add Printer Wizard window:
1. Select “Kodak” from the list of Manufacturers. Click on
Disk
.
NOTE:Printer drivers provided by Microsoft appear in the
Add Printer Wizard window as Kodak printer drivers.
These drivers have not been tested or certified by
Kodak. If you are not sure if a Kodak driver is installed,
install the Kodak driver supplied with the printer.
2. Install the Kodak printer driver diskette in the disk drive. The
following window opens.
3. Click on
Browse
to locate the printer driver file. Click on OK.
Have
10-10 Part No. 1H9613 June 1997
Page 90

Windows NT 4.0 Workstations and Servers
The Locate File window opens.
Open
4. Locate an NTPrint file. Click on
The Add Printer Wizard window opens with your printer
selected.
.
5. Click on
Part No. 1H9613 June 1997 10-11
Next
.
Page 91

Windows NT 4.0 Workstations and Servers
If a printer driver is already installed on your system, a
window opens asking if you wish to keep or replace the
existing driver.
6. If the current driver:
• operates correctly, click on
Next
.
• does not operate correctly, click on
Click on
The Add Printer Wizard window opens.
10-12 Part No. 1H9613 June 1997
Next
.
Keep existing driver
Replace existing driver
. Click on
.
Page 92

Windows NT 4.0 Workstations and Servers
7. Enter the printer name as you wish it to appear in the Print
Manager. Select “Yes” or ”No” for default printer. Click on
Next
.
The following window opens.
8. Do one of the following:
• To set up a printer (direct printing from your workstation),
click on
• To set up a server printer queue (indirect printing from your
workstation), click on
queue. Click on
NOTE:Do not select any other operating systems for
Part No. 1H9613 June 1997 10-13
Not Shared
installation of equivalent printer drivers. Drivers for
other operating systems must be installed locally on
those systems.
and then on
Shared
Next
.
Next
.
. Enter the name of the printer
Page 93

Windows NT 4.0 Workstations and Servers
The Add Printer Wizard window to print a test page opens.
Yes
9. Click on
NOTE:If errors are encountered at the printer display panel
and then on
(load paper, ribbon) when a test page is generated,
check the Printer Properties menus for correct/
consistent printer parameter settings.
Finish
.
Kodak Driver - Copying Files/ Files Needed
The Kodak driver is a PostScript driver that uses NT system
PostScript (PSCRIPT.*) components which reside on the NT
system CD-ROM. These components may already reside in
C:\windows\system if any PostScript printer driver has been
previously installed.
If messages such as “Can’t find File: PSCRIPT.*” or “Unable to
Open File PSCRIPT.*”, insert the NT CD-ROM. If any PostScript
driver has been installed previously, either browse to a directory
such as C:\windows\system and select “OK” or select “Skip.”
10-14 Part No. 1H9613 June 1997
Page 94

Windows NT 4.0 Workstations and Servers
Upon installation of the driver software, the newly-configured
printer appears in the Print Manager window.
Creating a Print Queue for Indirect Printing
To configure a server to provide a print queue for indirect printing
from a workstation, select “Shared” in Step 8 of “Installing the
Kodak Driver.”
OR
If the printer has already been configured as “Not Shared,” do the
following steps:
1. Select “Printer Properties.”
2. Select “Share the printer.”
3. Assign a Share Name.
4. Click on OK.
Part No. 1H9613 June 1997 10-15
Page 95

Windows NT 4.0 Workstations and Servers
Selecting a Print Queue for Indirect Printing
Follow the steps in “Creating a Print Queue for Indirect Printing”
to configure a workstation to print from LPT1. This procedure
installs the driver locally on a workstation. Do not share the
printer. When you finish with the “Add Printer” installation
process, do the following:
1. Select the new printer icon.
2. Select “Properties” from the File menu.
3. Select:
• “Ports” tab
• “Add Port”
• “Local Port” from the “Printer Ports screen
4. Click on
5. Enter a port name that corresponds to an existing server.
For example , Server/ W orkstation = NALA and Share name =
DS8650 would result in a \\ NALA \ DS8650 server/queue
that will be available for users.
6. Click on
7. Check the new printer’s properties for consistency with the
media currently in the printer to avoid errors.
New Port
OK.
.
10-16 Part No. 1H9613 June 1997
Page 96

Windows NT 4.0 Workstations and Servers
Printer Properties and Document Defaults
To avoid printing errors, set up the appropriate printer
characteristics by doing the following:
1. From the Printer’s window, select the Kodak printer you
configured.
2. Select “Properties” from the file menu.
The following window opens.
3. Select the properties you wish to set up for your printer.
Part No. 1H9613 June 1997 10-17
Page 97

Windows NT 4.0 Workstations and Servers
To set up properties for the output from your printer, do the
following steps:
1. From the Printer’s window, select the Kodak printer you
configured.
2. Select “Document Defaults” from the File menu.
The following window opens.
3. Select the properties you wish to set up for the output from
your printer.
10-18 Part No. 1H9613 June 1997
Page 98

11 Macintosh Workstations
Network Interface Card/Printer Installation Overview
Section 1: Determine the network protocol(s) to be used for
communicating to the Network Interface Card, printer , workstation
platform(s) that will be used for creating and sending jobs to the
printer, and any servers that will be used to spool and manage
jobs sent to corresponding printer queues.
You should use AppleTalk for Macintosh systems.
Section 2: Install the hardware in the Kodak printer.
Section 3: Install the software.
Note: There is no software installation necessary for using
the Network Interface Card with AppleTalk. However,
there may be some utilities provided with the printer
for changing the AppleTalk Name and the AppleTalk
Zone. Refer to “Network Printer Parameters” for more
information.
Section 4: Configure network printer parameters, if necessary.
Some parameters are programmable from the printer’s front
display/control panel and others by downloading PostScript
command files.
Macintosh Workstations
Note: We recommend that you use the default parameters
until the printer is functional on your network.
Section 5: Determine the printer modes of operation (PostScript
and/ or Raster) to be used based on the model of printer
purchased. Install the corresponding PostScript and/or Raster
mode software. Use the installation programs provided with the
PostScript driver and export module diskettes.
Refer to the README files included with specific Kodak printers
for installation instructions for the driver and the export module. It
may be necessary to move PPD and/or PDF files to appropriate
application folders.
Part No. 1H9613 June 1997 11-1
Page 99

Macintosh Workstations
AppleTalk Network Printing Setup
AppleTalk Printer Selection
Macintosh operating systems use either the network control
panel or the AppleTalk control panel to select EtherTalk.
• To use the network control panel, pull down the Apple menu
and select “Control Panel>Network>EtherTalk.”
• To use the AppleTalk control panel, pull down the Apple menu
and select “Control Panels” and then “AppleTalk.“Select:
“Edit”
“User Mode”
“Administrator”
“Change Connect via”
“Ethernet”
To select the printer in PostScript mode, open the Chooser from
the Apple menu. When using the Chooser, a Kodak printer in
PostScript mode should appear by its default or reassigned
AppleTalk name when the Kodak printer icon (or any PostScript/
LaserWriter icon) is selected in the left half of the Chooser
window.
Apple Menu Icon > Chooser. Select:
“Active” for AppleTalk
“AppleTalk Zone”
Appropriate Printer Icon
Appropriate Printer
To select the printer in Raster mode, use “Export” within
Adobe Photoshop, and select the printer.
Macintosh - Printing
Refer to “Printing” for details on how to print from Macintosh
applications in PostScript and Raster printer modes.
11-2 Part No. 1H9613 June 1997
Page 100

12 UNIX Workstations and Servers
Network Interface Card/Printer Installation Overview
Section 1: Determine the network protocol(s) to be used for
communicating to the Network Interface Card and the printer , the
workstation platform(s) that will be used for creating and sending
jobs to the printer, and any servers that will be used to spool and
manage jobs sent to corresponding printer queues.
You must use TCP/IP for UNIX systems.
Section 2: Install the hardware in the Kodak printer.
Section 3: Install the software for the Network Interface Card.
NOTE: Use the UNIX TCP/IP Utilities install.sh script for UNIX.
Section 4: Configure the parameters for the network printer, if
necessary. Some parameters are programmable from the
printer’s front display/control panel and others by downloading
PostScript command files.
The only pertinent parameter for UNIX is the IP Address.
Section 5: Determine printer modes of operation (P ostScript and/
or Raster) to be used based on the model of the printer
purchased.
UNIX Workstations and Servers
NOTE: Kodak does not produce drivers and export modules for
UNIX platforms. However, PostScript output files can be
sent to the printer using the line printer daemon (lpd). For
solutions from other vendors, refer to “Getting Help” at the
end of this guide.
UNIX BSD Systems
Access to printers in BSD systems is controlled by the lpd
normally located in the /usr/lib directory. This is started at boot
time through the file rc. The common print programs like lpr and lp
take the file to be printed and put it in a spooling queue where lpd
finds and prints it.
Part No. 1H9613 June 1997 12-1
 Loading...